Project IIc: The road to 350 rwhp
 11-25-14, 08:47 PM
#26
I wish I was driving!
No one puts a turbo rotary in and leaves it there forever.
 01-10-15, 11:13 AM
#27
Full Member
Thread Starter
iTrader: (3)
Join Date: Mar 2013
Location: Minnesota
Posts: 54
Likes: 0
Received 0 Likes
on
0 Posts
Dash removal
It has been a few weeks since the last update. I've been pretty busy with work and family visits during the Holiday season. Anyway, I have managed to tear down the interior including: Carpet, dash, HVAC, and the wiring harness.
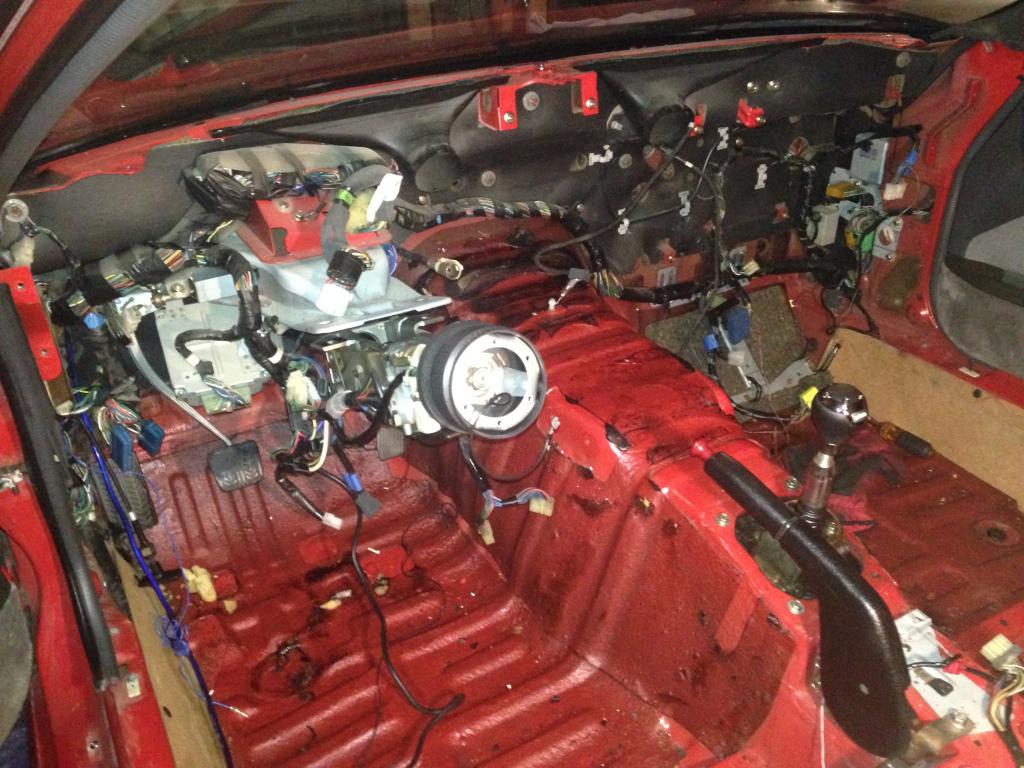
Let's start with the carpet. As shown in the previous pics, the front carpet is tainted with rust, oil and grease stains. I'm debating if I should just buy a new set or have it cleaned professionally. Has anyone tried getting it cleaned? Any recommendations?
Also, under the driver side carpet, there was some oil residue which I have no idea where it came from. I mentioned previously that the issue with the car when I bought it was a "small" oil leak. That small oil leak must've been going on for some time since half the engine bay, the underside of the car and the driver kick panel are covered with it.
Now to the dash... Upon removing it I found several broken pieces that wasn't my doing but damage that was done previously. I'm still uncertain about how much that bothers me. I may end up finding one in a better shape from a forum member.
I decided to remove the HVAC system since I won't be needing it in the future. I've already decided to remove the AC system and since I'll be driving the car only during summer, I definitely won't need the heating system. Also, the thing is 25 year old technology that if I decide to replace, I would rather do with something from the 21st century, something more compact and efficient.
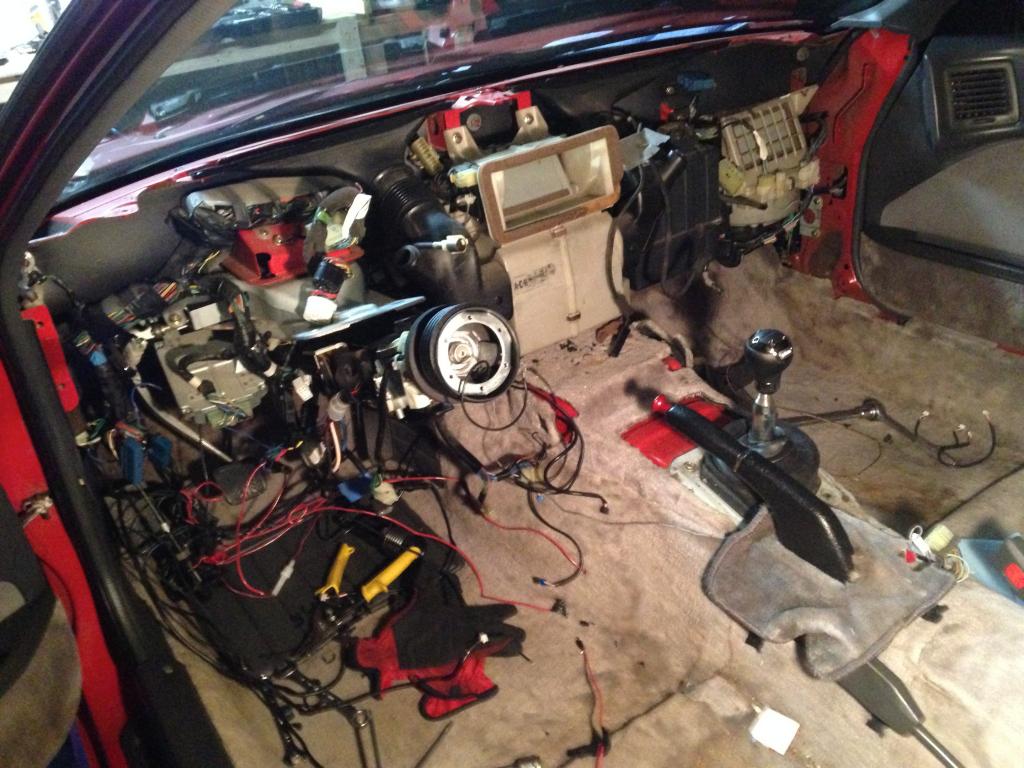
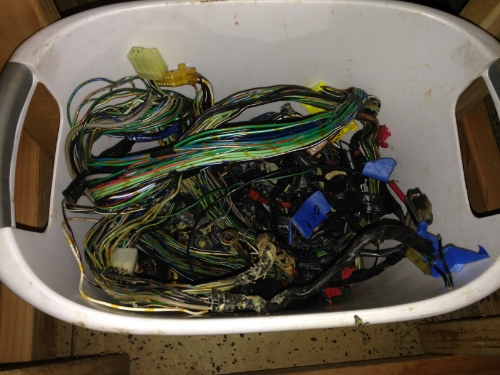
Now to the wiring harness. The more I removed, the more I was surprised that the engine didn't blow while I was driving it. Enjoy the pics:
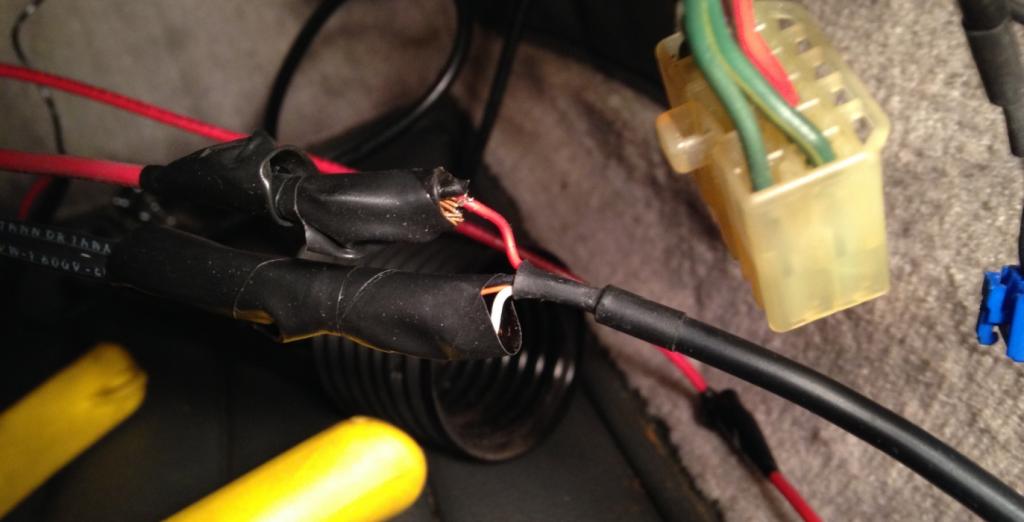
These are the EGI harness grounds that have worn down to the bare wire. Arguably the most important ground connections in the car.
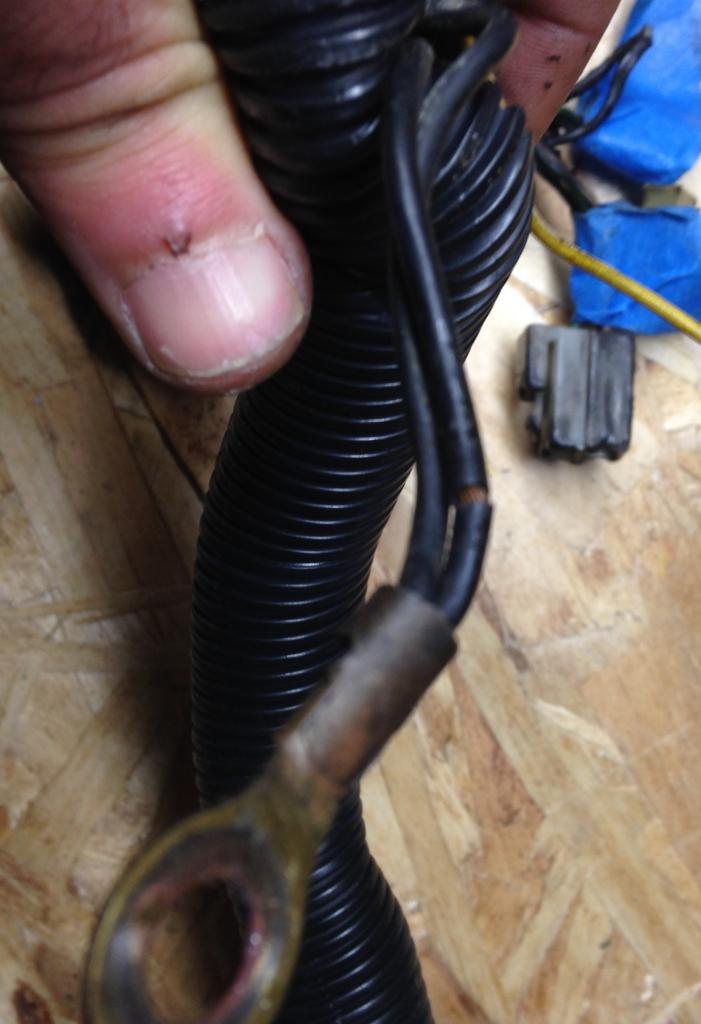
The O2 sensor was literally stripped to one or two strands of wiring...
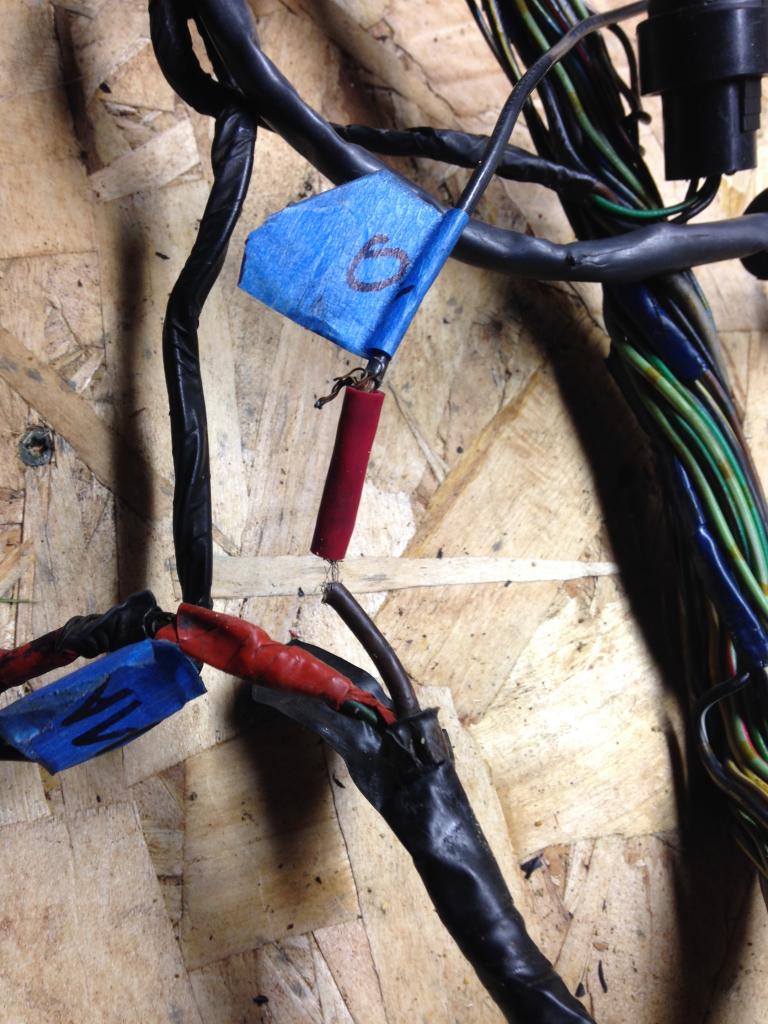
Other notable important connections that were damaged:
TPS
Injectors with broken and brittle clips
It's not a big deal now since I will be running brand new automotive wires when I MegaSquirt the car; but It still surprises me that the car was running just fine. I still needed some wires on the old harness. Using Aaron Cake's guide, I stripped the EGI harness to wires needed for wiper motor and the water temp sensor.
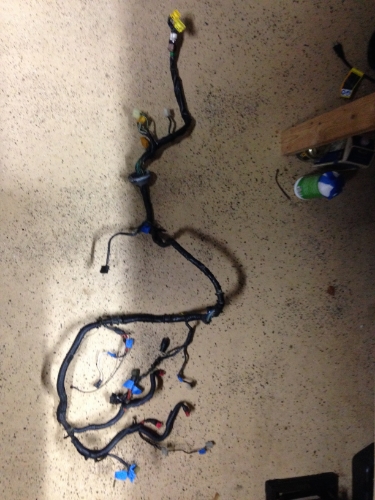

Good riddance to 20+ years of brittle and stripped wiring harness.
I thought about doing the same clean-up to the front harness since half of the those connections are no longer used. But that seems like such a formidable task right now. Maybe in the future when I repaint the engine bay and the car. There is a nice write up about this and re-routing it to the underside of the driver wheel well. http://www.norotors.com/index.php?topic=2874.0
Let's start with the carpet. As shown in the previous pics, the front carpet is tainted with rust, oil and grease stains. I'm debating if I should just buy a new set or have it cleaned professionally. Has anyone tried getting it cleaned? Any recommendations?
Also, under the driver side carpet, there was some oil residue which I have no idea where it came from. I mentioned previously that the issue with the car when I bought it was a "small" oil leak. That small oil leak must've been going on for some time since half the engine bay, the underside of the car and the driver kick panel are covered with it.
Now to the dash... Upon removing it I found several broken pieces that wasn't my doing but damage that was done previously. I'm still uncertain about how much that bothers me. I may end up finding one in a better shape from a forum member.
I decided to remove the HVAC system since I won't be needing it in the future. I've already decided to remove the AC system and since I'll be driving the car only during summer, I definitely won't need the heating system. Also, the thing is 25 year old technology that if I decide to replace, I would rather do with something from the 21st century, something more compact and efficient.
Now to the wiring harness. The more I removed, the more I was surprised that the engine didn't blow while I was driving it. Enjoy the pics:
These are the EGI harness grounds that have worn down to the bare wire. Arguably the most important ground connections in the car.
The O2 sensor was literally stripped to one or two strands of wiring...
Other notable important connections that were damaged:
TPS
Injectors with broken and brittle clips
It's not a big deal now since I will be running brand new automotive wires when I MegaSquirt the car; but It still surprises me that the car was running just fine. I still needed some wires on the old harness. Using Aaron Cake's guide, I stripped the EGI harness to wires needed for wiper motor and the water temp sensor.
Good riddance to 20+ years of brittle and stripped wiring harness.
I thought about doing the same clean-up to the front harness since half of the those connections are no longer used. But that seems like such a formidable task right now. Maybe in the future when I repaint the engine bay and the car. There is a nice write up about this and re-routing it to the underside of the driver wheel well. http://www.norotors.com/index.php?topic=2874.0
01-10-15, 11:14 AM
#28
Full Member
Thread Starter
iTrader: (3)
Join Date: Mar 2013
Location: Minnesota
Posts: 54
Likes: 0
Received 0 Likes
on
0 Posts
Dash removal con't
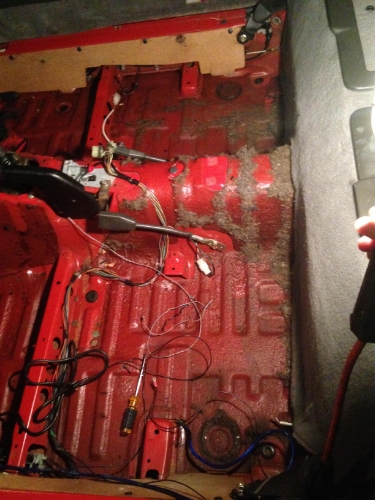
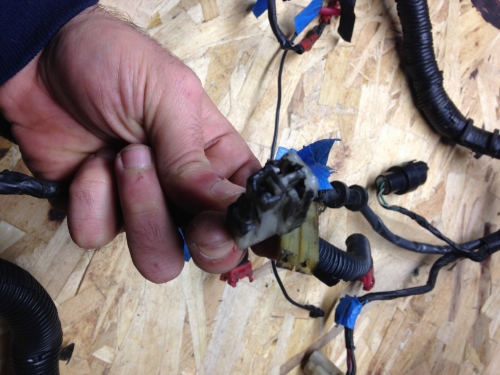
Then I turned my attention to the wiring that was done by the PO to the inside of the car. This was even WORSE!! When I first bought the car, I noticed a tenuous wiring connection to the gauges. Every time I bumped the bundle of wires hanging down under the steering wheel, the gauges would restart, turn on and off and malfunction. Well, here is the reason...
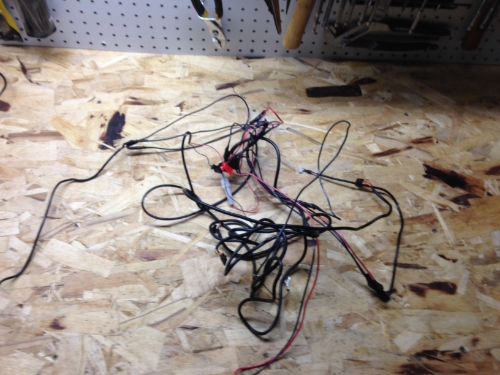
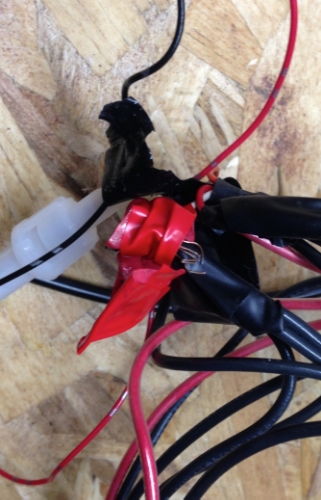
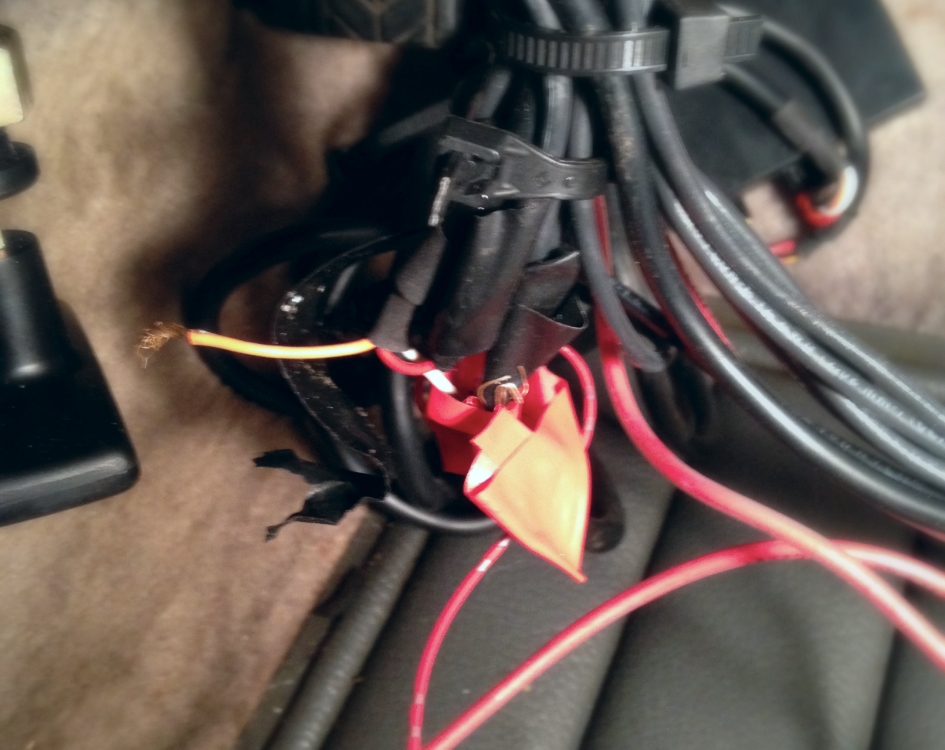
This is the speed sensor wire from the HKS turbo timer into the cruise control speed wire.
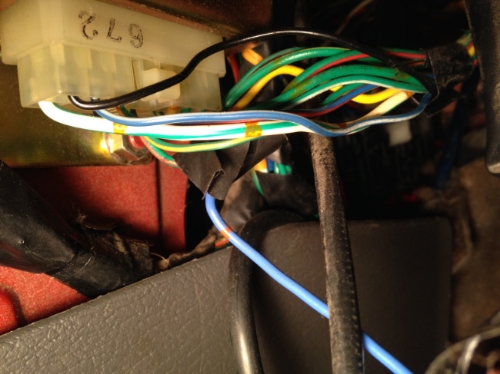
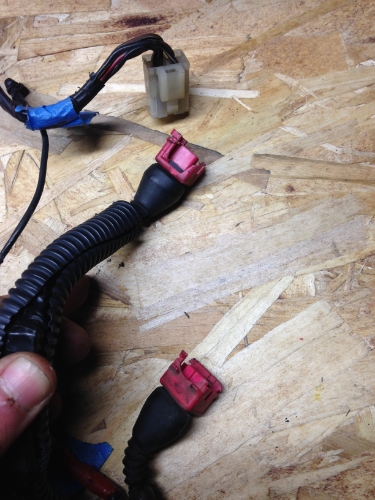
That's what most of the wiring for the gauges looked like, twisted wires with electric tape. When I redo the wiring, I will use terminal strips, solder the joints and use heat shrink tubing to make the connections. This is what I have done so far. I know it's a slow process but that's all I have the time for right now. Also, there are several items that I won't be needing and put up on the sales sections. Things such as EVC-S boost controller, Prosport Wide-band (It doesn't have the output that I need to connect to MS3 pro) and some other items.
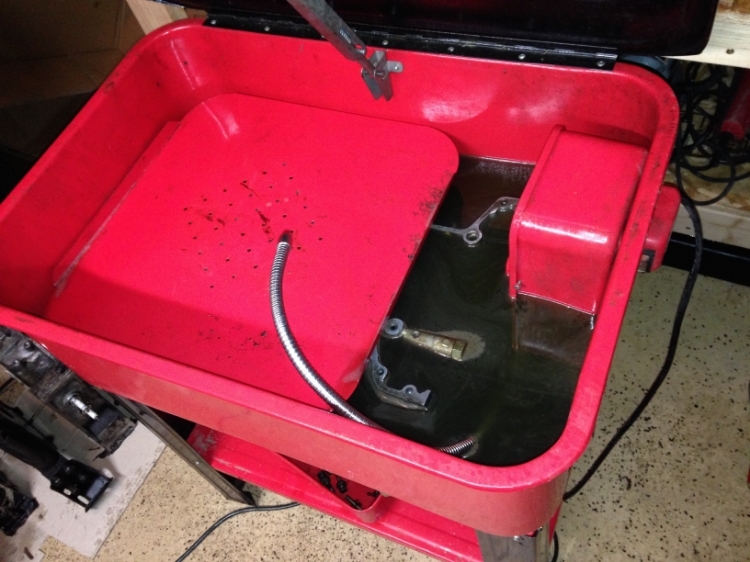
The next step for me is to remove the engine and begin the break down, clean up and rebuild. Before I can do that, I need to make some room in the my garage to set up my parts washer and engine stand. By the way I found a automotive rental shop near my place that I can rent an engine crane for $30.
This is the speed sensor wire from the HKS turbo timer into the cruise control speed wire.
That's what most of the wiring for the gauges looked like, twisted wires with electric tape. When I redo the wiring, I will use terminal strips, solder the joints and use heat shrink tubing to make the connections. This is what I have done so far. I know it's a slow process but that's all I have the time for right now. Also, there are several items that I won't be needing and put up on the sales sections. Things such as EVC-S boost controller, Prosport Wide-band (It doesn't have the output that I need to connect to MS3 pro) and some other items.
The next step for me is to remove the engine and begin the break down, clean up and rebuild. Before I can do that, I need to make some room in the my garage to set up my parts washer and engine stand. By the way I found a automotive rental shop near my place that I can rent an engine crane for $30.
01-10-15, 11:32 AM
#29
Rotary Enthusiast
iTrader: (1)

Join Date: Nov 2012
Location: bloomington, mn
Posts: 1,100
Likes: 0
Received 0 Likes
on
0 Posts
The engine wiring in its defense, was not "that bad", the 02 on s4 does... hardly what you would suspect on typical OBD equipped vehicle. Our chassis does not run OBD. The grounds, while cracked shielding... is still a ground, and on stock power levels, not a crisis. While it is good you found them and are addressing them. Getting power back is easier then making more, and typically cheaper.
The TPS sensor being a tad melted would of been my only concern really. Now that interior harness.... OH MY TAKAI. Glad you found that and saved this thing from a car-b-que.
EDIT:
I'd take that harness or rather the clips with like a foot of pigtail on each if you still have it?
The TPS sensor being a tad melted would of been my only concern really. Now that interior harness.... OH MY TAKAI. Glad you found that and saved this thing from a car-b-que.
EDIT:
I'd take that harness or rather the clips with like a foot of pigtail on each if you still have it?
02-08-15, 04:34 PM
#32
Full Member
Thread Starter
iTrader: (3)
Join Date: Mar 2013
Location: Minnesota
Posts: 54
Likes: 0
Received 0 Likes
on
0 Posts
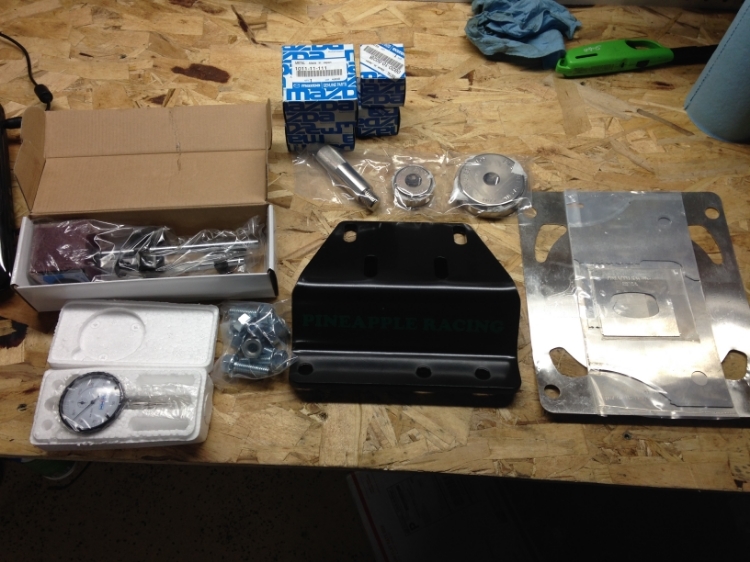
I put some of the parts the car came with for sale and they sold really fast. I used that money to buy some goodies from Banzai racing and Pineapple racing. Overall, I'm very pleased with both companies.
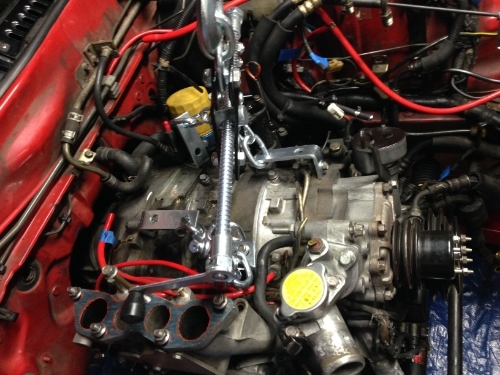
I borrowed an engine crane and began unbolting the underside to remove the engine. The bay I had previously worked slowly to release most things. There were a bunch of wires attached to the transmission that I labeled since most were covered with grease and dirt.
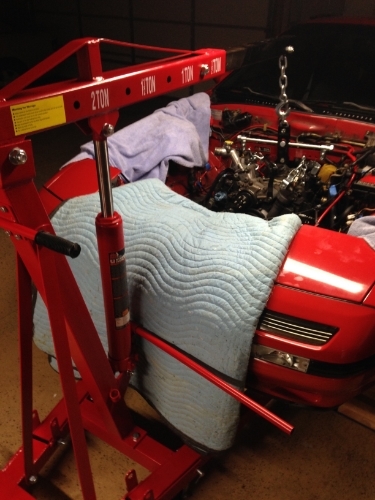
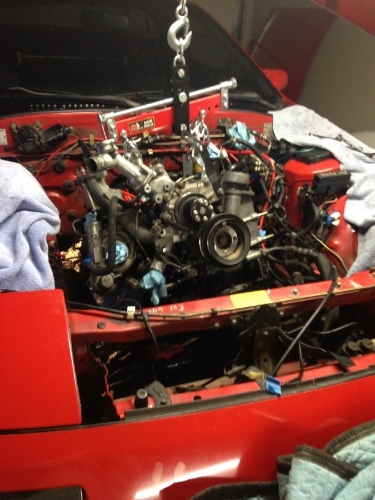
I used these bolts to mount the leveler. Having a leveler definitely helped.
Here she comes:
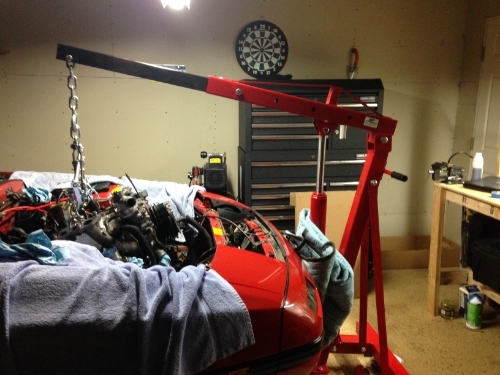
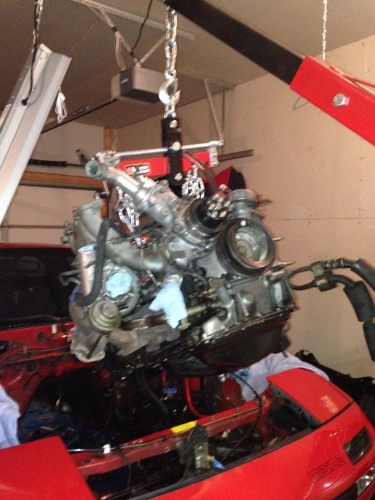
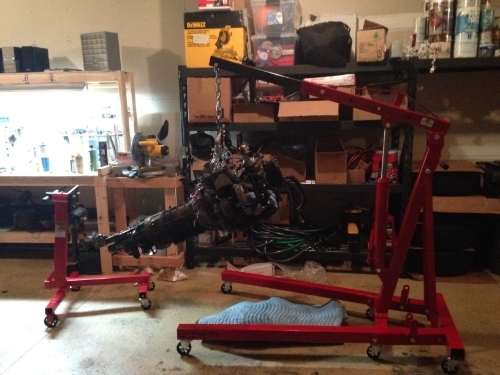
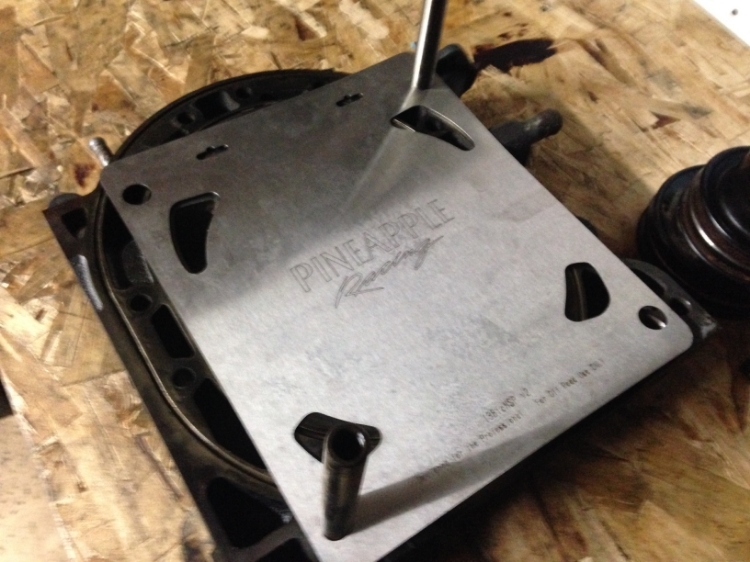
I bought an engine stand from HF and used the Pineapple racing adaptor to hook it up. It's a nice adaptor and comes with all the bolts and nuts necessary. I used a bolt from the PS/AC bracket just for extra security, but the adaptor only really needs the two bottom holes in the front iron.
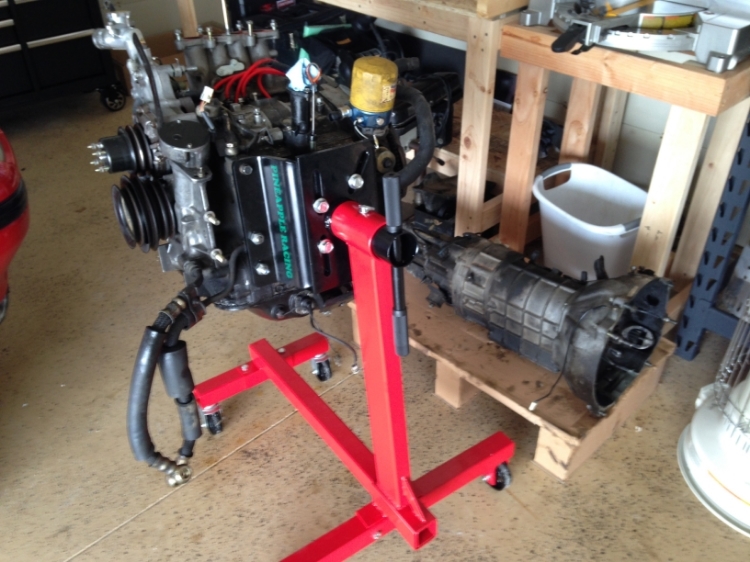
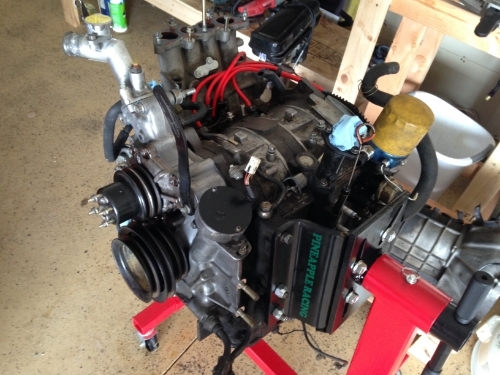
Next I'm gonna start tearing it down to bare short block and get into the engine. CAN'T WAIT.
I borrowed an engine crane and began unbolting the underside to remove the engine. The bay I had previously worked slowly to release most things. There were a bunch of wires attached to the transmission that I labeled since most were covered with grease and dirt.
I used these bolts to mount the leveler. Having a leveler definitely helped.
Here she comes:
I bought an engine stand from HF and used the Pineapple racing adaptor to hook it up. It's a nice adaptor and comes with all the bolts and nuts necessary. I used a bolt from the PS/AC bracket just for extra security, but the adaptor only really needs the two bottom holes in the front iron.
Next I'm gonna start tearing it down to bare short block and get into the engine. CAN'T WAIT.
02-22-15, 09:32 PM
#33
Full Member
Thread Starter
iTrader: (3)
Join Date: Mar 2013
Location: Minnesota
Posts: 54
Likes: 0
Received 0 Likes
on
0 Posts
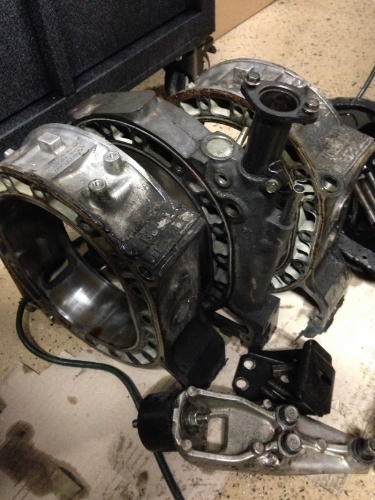
Engine Tear Down
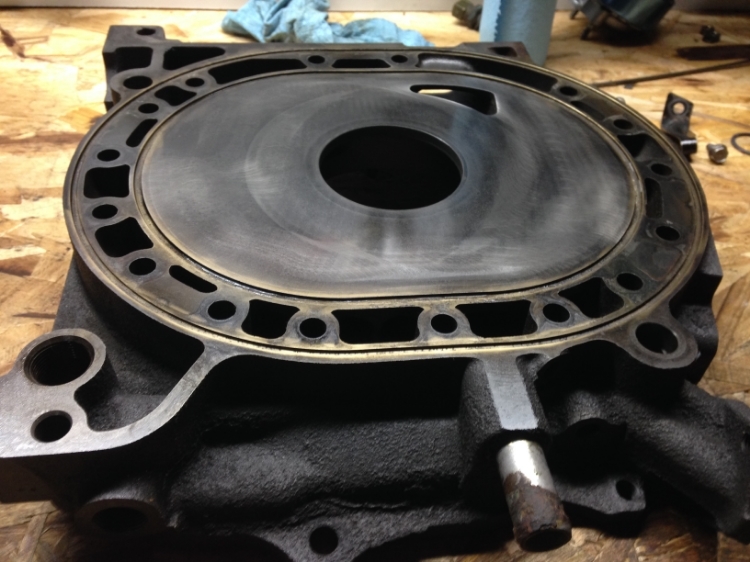
It's been a slow process. The frigid cold weather is certainly not helping the situation. I bought a Kerosene heater to warm up the garage, but the poor devil doesn't even stand a chance against this weather. My toes become numb after an hour of working in the garage which forces me to come inside. Anyways, I was able to open up a rotary engine for the first time which was a tremendous amount of joy. Just looking at the ingenuity that created a machine that appears so simple on the inside yet has such an intricate engineering design is amazing. Felix Wankel was a genius and this engine is gorgeous.
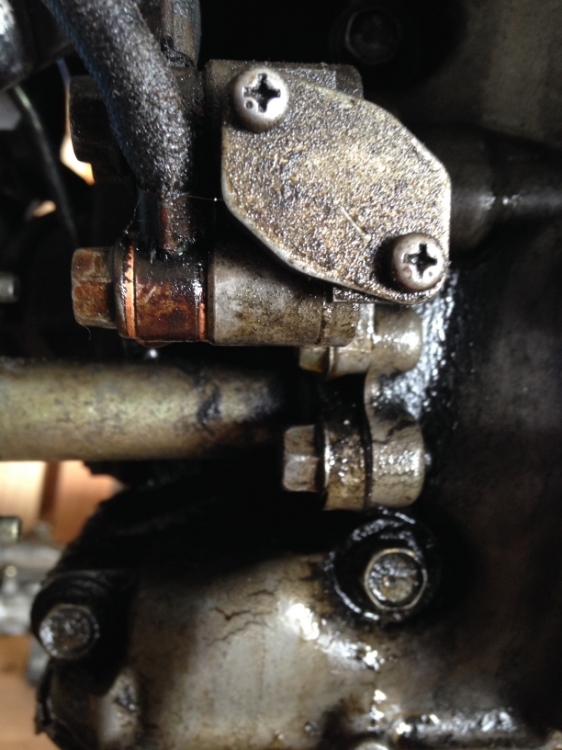
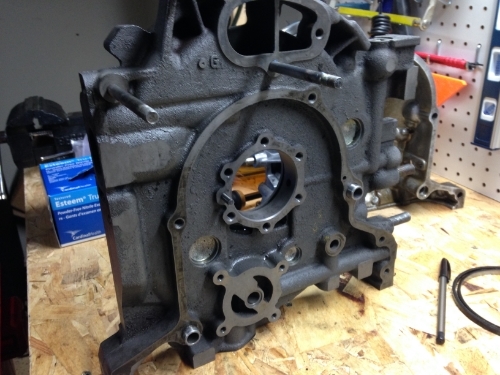
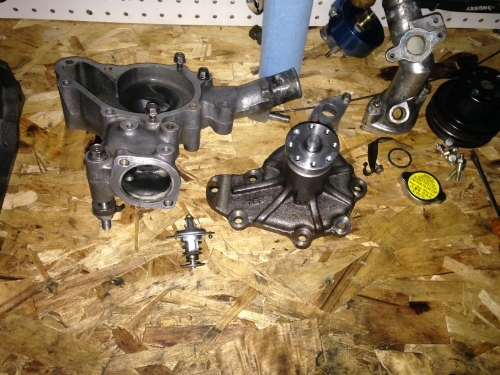
On first glance, I think the oil leak was coming from the OMP. It has the most amount sludge and dirt surrounding it.
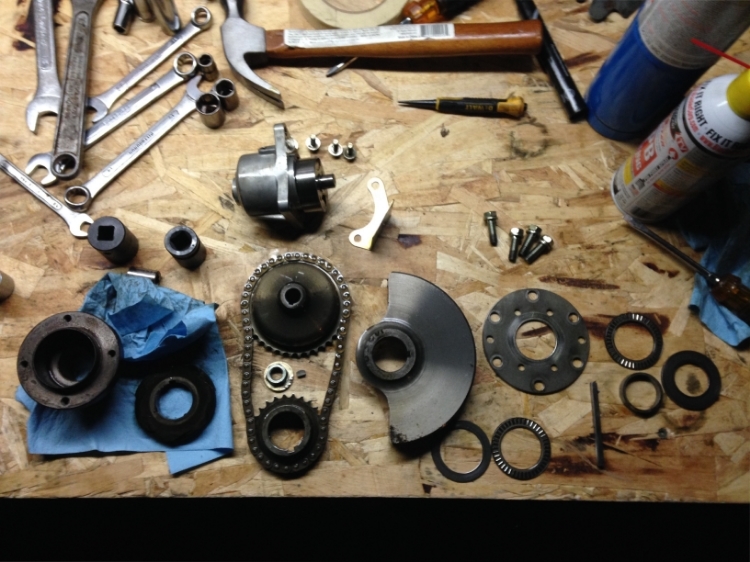
The front cover parts. I'm not sure if it's going to be an issue later, but I didn't scribe any marks on the main pulley like the Hayne's Manual suggested. I guess I'll figure it out when I put the engine back together.
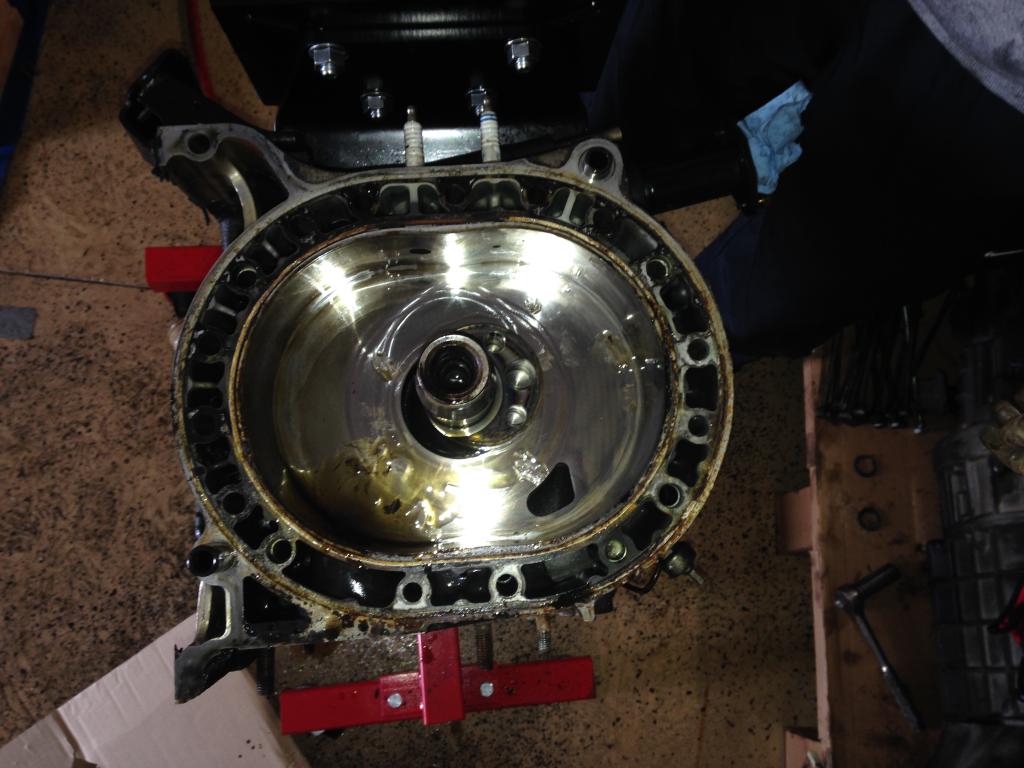
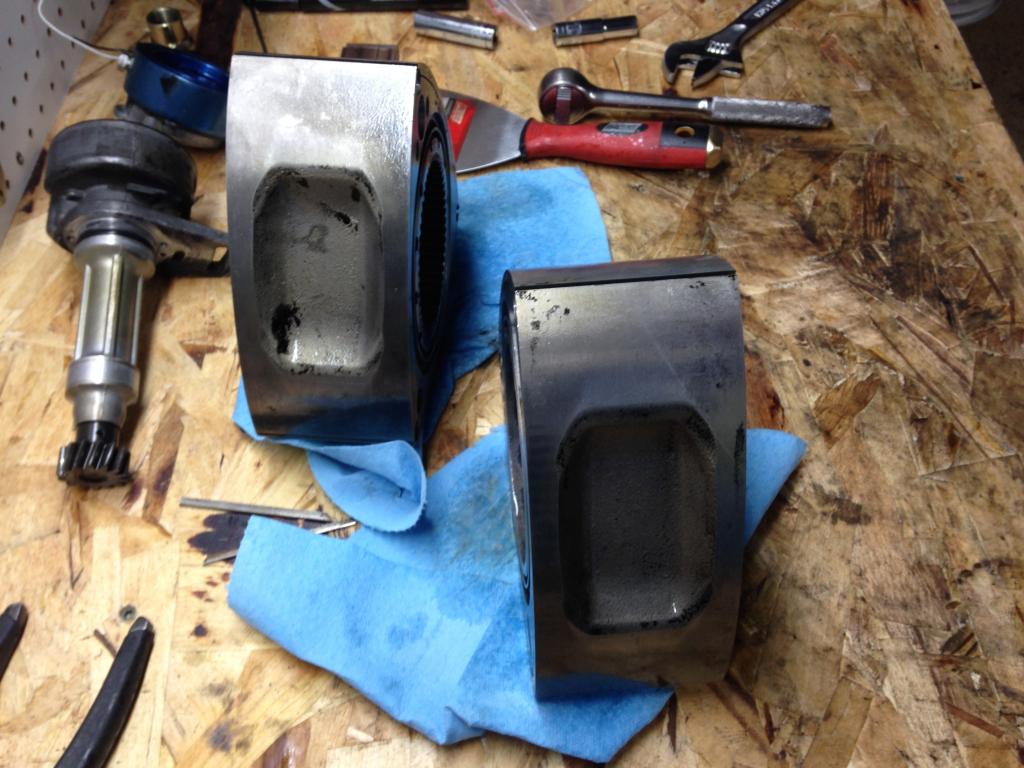
I was scared to see what the inside of a rotary with 110k miles looked like. Not that bad I suppose, I bet the oil must've been changed regularly:
Even the oil pan was pretty clean:
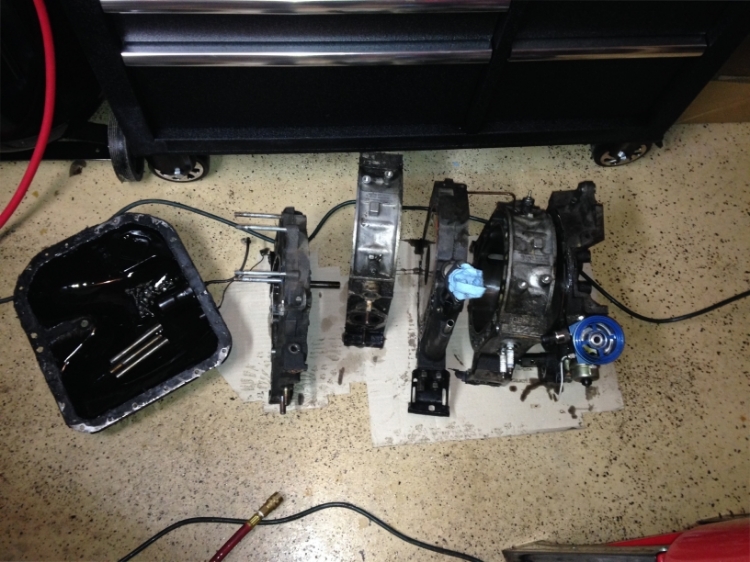
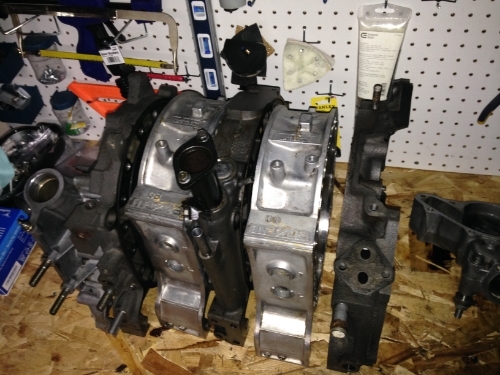
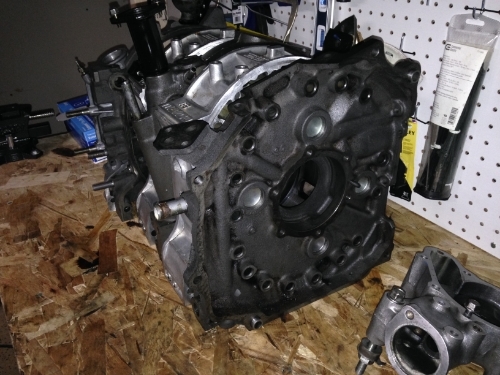
It took about a week to clean the front cover, front and rear irons, and the rotors. There was quite a bit of dirt and sludge on the outside of the irons. I used Simple Green diluted 1:3 with water. I soaked the parts, scrubbed, then soaked again and repeat until most of the carbon and dirt came off. The front cover was a pain since the gaskets were literally baked on there and I had to scrape them off with a razor:
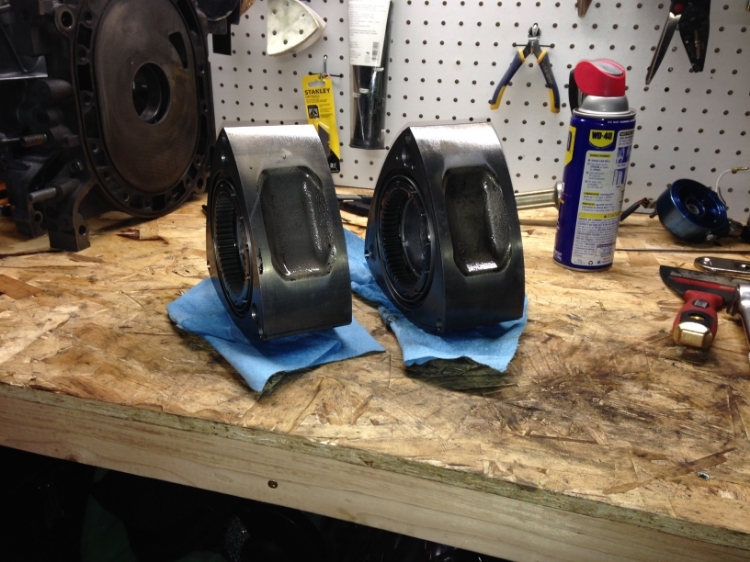
Just the housings and the center iron left. For now it's cold enough that the parts washer fluid is frozen; which means to be continued. Upon quick inspection, the parts seem reusable. I'll perform a detailed inspection later. I can tell that it's highly unlikely for this engine to have been rebuilt since it still has the 3 piece apex seals.
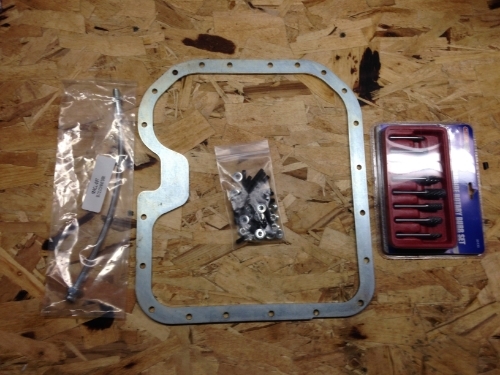
My plan after cleaning all the parts is to carefully do a full inspection, sand blast them and paint with POR-15 engine enamel. I'll be using the Atkins "Master Rebuild" kit with OEM apex and corner seals. It seems that the OEM seals are not as abrasive on the internal parts as the aftermarket stuff is. And for the build I'm planning, they seem like a suitable choice.
On first glance, I think the oil leak was coming from the OMP. It has the most amount sludge and dirt surrounding it.
The front cover parts. I'm not sure if it's going to be an issue later, but I didn't scribe any marks on the main pulley like the Hayne's Manual suggested. I guess I'll figure it out when I put the engine back together.
I was scared to see what the inside of a rotary with 110k miles looked like. Not that bad I suppose, I bet the oil must've been changed regularly:
Even the oil pan was pretty clean:
It took about a week to clean the front cover, front and rear irons, and the rotors. There was quite a bit of dirt and sludge on the outside of the irons. I used Simple Green diluted 1:3 with water. I soaked the parts, scrubbed, then soaked again and repeat until most of the carbon and dirt came off. The front cover was a pain since the gaskets were literally baked on there and I had to scrape them off with a razor:
Just the housings and the center iron left. For now it's cold enough that the parts washer fluid is frozen; which means to be continued. Upon quick inspection, the parts seem reusable. I'll perform a detailed inspection later. I can tell that it's highly unlikely for this engine to have been rebuilt since it still has the 3 piece apex seals.
My plan after cleaning all the parts is to carefully do a full inspection, sand blast them and paint with POR-15 engine enamel. I'll be using the Atkins "Master Rebuild" kit with OEM apex and corner seals. It seems that the OEM seals are not as abrasive on the internal parts as the aftermarket stuff is. And for the build I'm planning, they seem like a suitable choice.
02-25-15, 09:20 AM
#38
Are you planning on separating with the left side engine harness? It is the one that ECU Plug #1 is attached to and runs under the dash and through the left side of the firewall, then wraps around the engine.
Just curious, archaphil sent me here because I have a WTB ad up right now for that wiring harness.
And I would have so taken that used harness off of your hands for scrap plugs and wires, I reuse those all the time.
Good luck with the build, looking good so far!
Just curious, archaphil sent me here because I have a WTB ad up right now for that wiring harness.
And I would have so taken that used harness off of your hands for scrap plugs and wires, I reuse those all the time.
Good luck with the build, looking good so far!
 02-26-15, 07:58 PM
#40
Full Member
Thread Starter
iTrader: (3)
Join Date: Mar 2013
Location: Minnesota
Posts: 54
Likes: 0
Received 0 Likes
on
0 Posts
Are you planning on separating with the left side engine harness? It is the one that ECU Plug #1 is attached to and runs under the dash and through the left side of the firewall, then wraps around the engine.
Just curious, archaphil sent me here because I have a WTB ad up right now for that wiring harness.
And I would have so taken that used harness off of your hands for scrap plugs and wires, I reuse those all the time.
Good luck with the build, looking good so far!
Just curious, archaphil sent me here because I have a WTB ad up right now for that wiring harness.
And I would have so taken that used harness off of your hands for scrap plugs and wires, I reuse those all the time.
Good luck with the build, looking good so far!
 03-04-15, 03:20 AM
#42
Full Member
Thread Starter
iTrader: (3)
Join Date: Mar 2013
Location: Minnesota
Posts: 54
Likes: 0
Received 0 Likes
on
0 Posts
And I have the EVC-s available if you're interested.
03-05-15, 08:40 PM
#43
I'd love to pick up the EVC-s but I'll have to wait a while until I can sell off some more parts, too many irons in the fire
 03-17-15, 09:40 PM
#44
Full Member
Thread Starter
iTrader: (3)
Join Date: Mar 2013
Location: Minnesota
Posts: 54
Likes: 0
Received 0 Likes
on
0 Posts
Engine Cleaning and Porting
This winter has been way too cold for me to finish cleaning the engine parts. However, last week the weather showed us a little light at the end of the tunnel; average of 55 degrees. When my parts washer fluid thawed... I got back to cleaning the rest of the engine parts including: center iron, housings, oil pan, dowel pins and engine studs.
This was a huge pain the butt to clean. The "small" oil leak must've been going on for a while since there was so much gunk baked on the engine. It took several hours of scrubbing to get it all off. The worst of all wasn't that, it was the freaking GASKET's. I literally had to scrape them with a razor blade for several hours. Also, thank God for Aaron Cake. Using the Scotch Brite Roloc pads saved me a ton of time of cleaning the housing and iron mating surfaces. It's not perfect but ALL DONE!
Once all of that was done. I was planning on doing a full inspection of all of the parts. The first thing I noticed was the vertical grooves at 3 o'clock position in the irons due to years of scraping by the side seal against that surface. I thought about lapping the irons but I've read mixed reviews. I finally decided to bite the bullet and just go ahead with the rebuilt. Relatively speaking, all of the parts are in pretty good shape. The most important hint during the engine break down was the surprisingly clean oil pan, meaning that the car was maintained well. On top of that, I'll be using OEM seals for my rebuilt which are not as abrasive on the surfaces. Overall, I'm planning on getting 40-50k miles out of the rebuild and I think I can achieve that with the current condition of the parts. I'll be using brand new stationary gear and rotor bearings and a "master rebuild" kit from Atkins to do the rebuild (With OEM apex and corner seals). The housings have some chrome wear on the edges but nothing too major (I'll post the pics later).
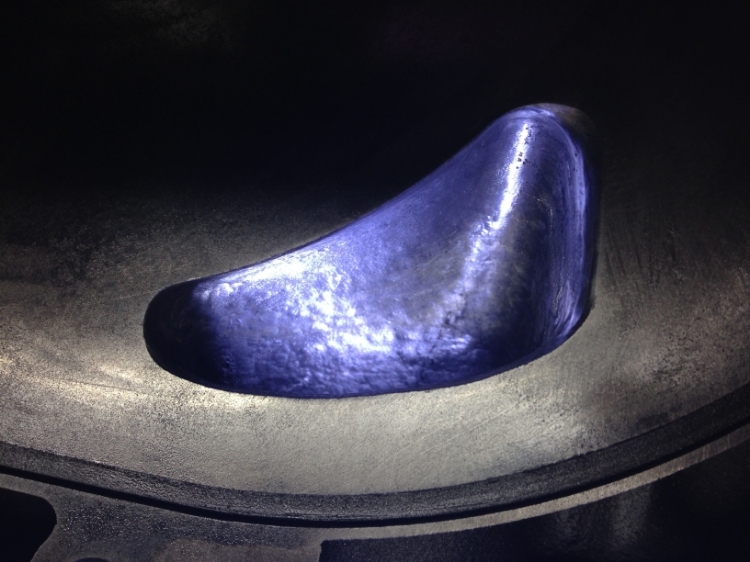
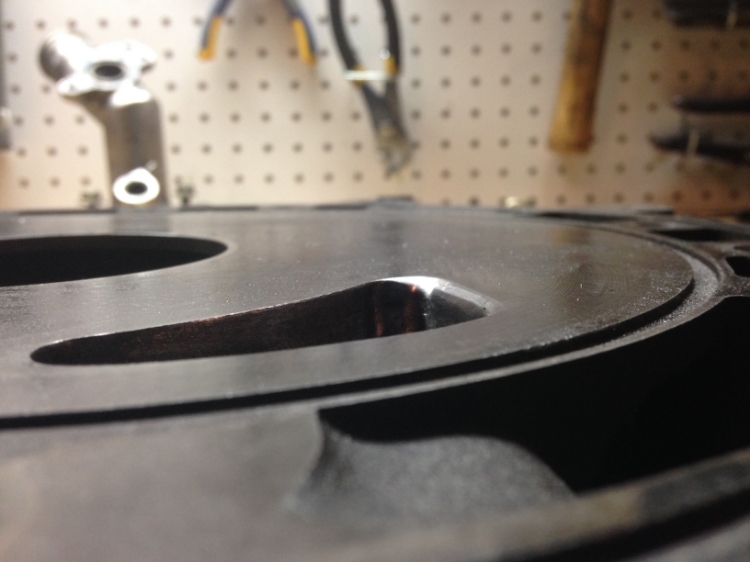
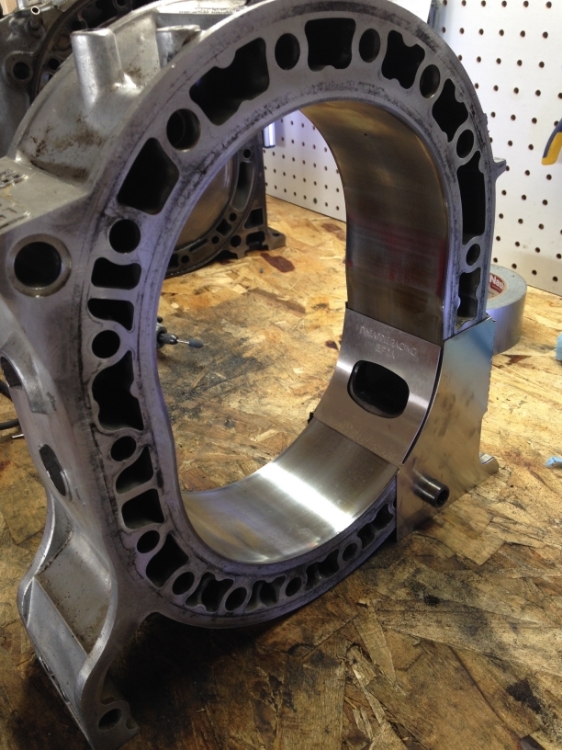
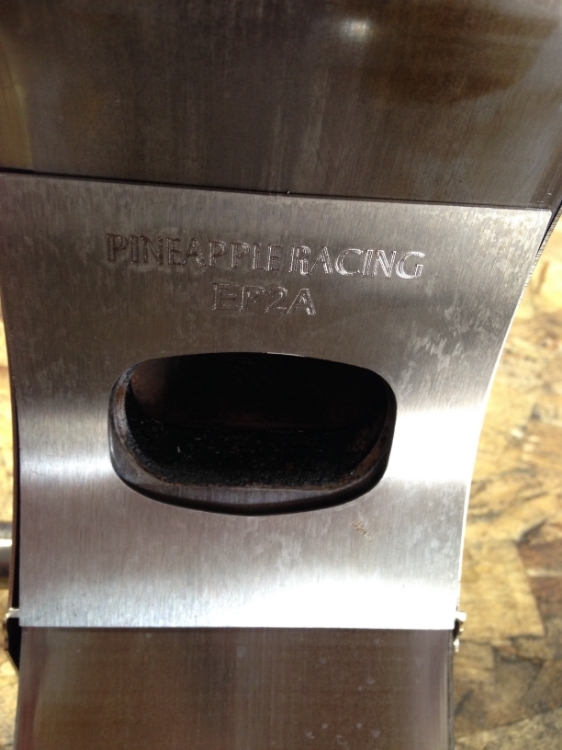
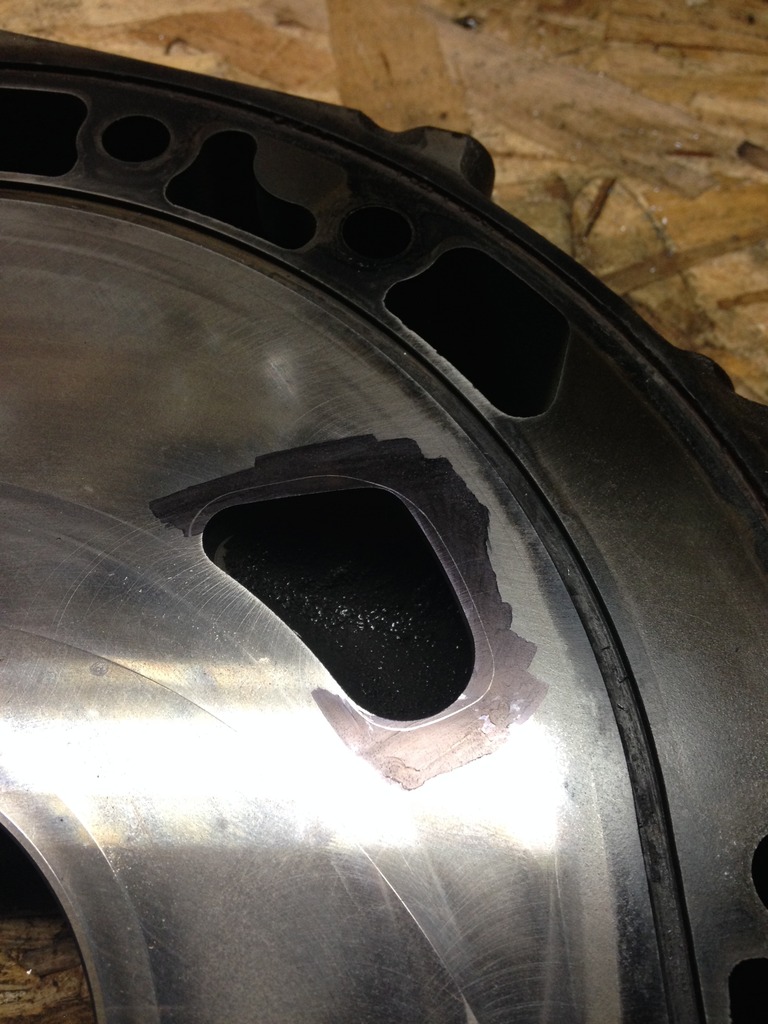
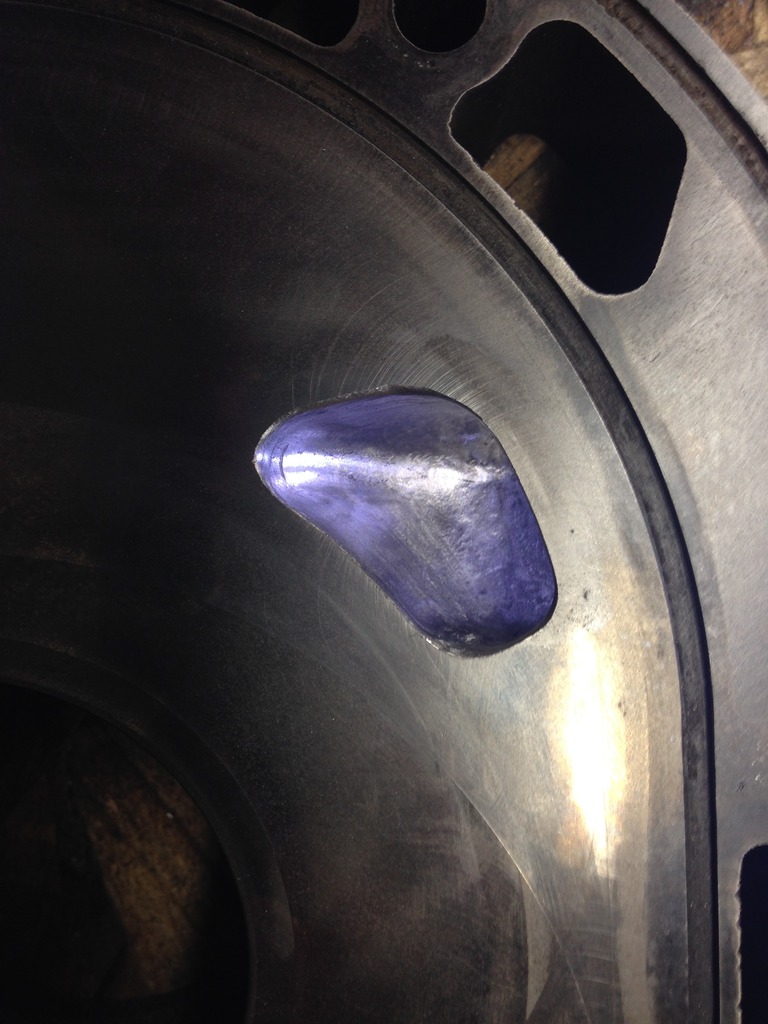
Let's get to the porting job. This is my first porting and I wanted to use the Pineapple Mild street port with the 2A exhaust combination. I used carbide bits on the die grinder for the initial large chunk grinding and then switched to an electric grinder with stones. Finally I finished off with a polishing stone. Please give me some feed back on the port job.
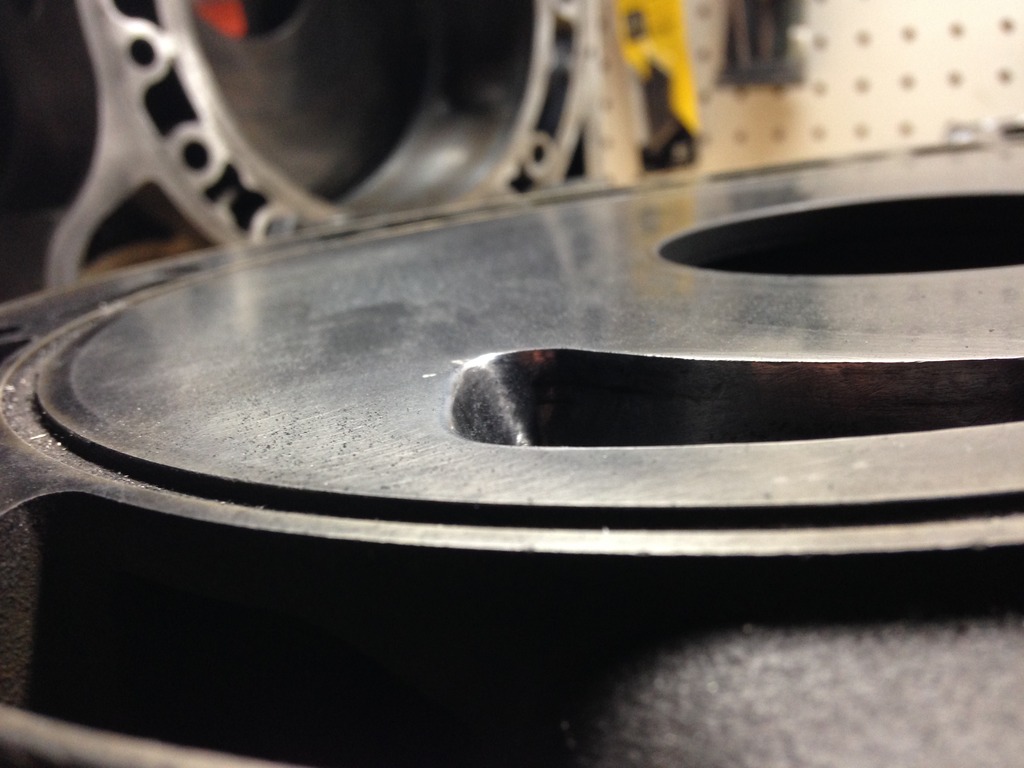
BEFORE:

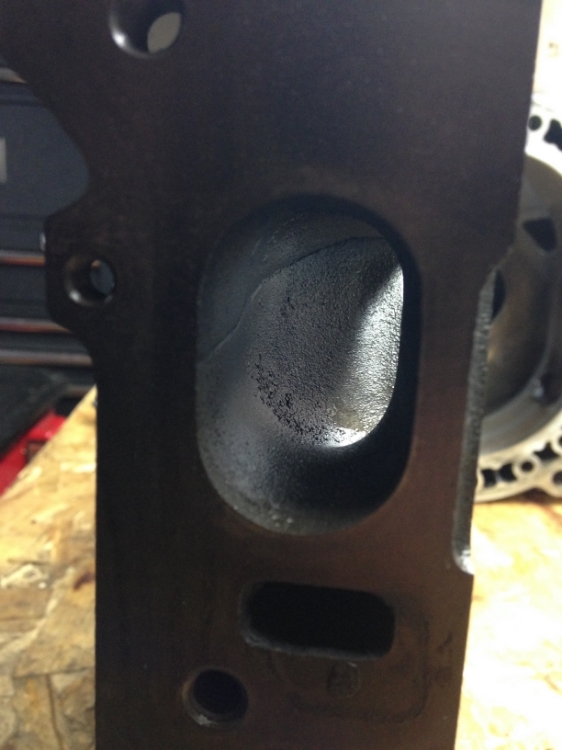
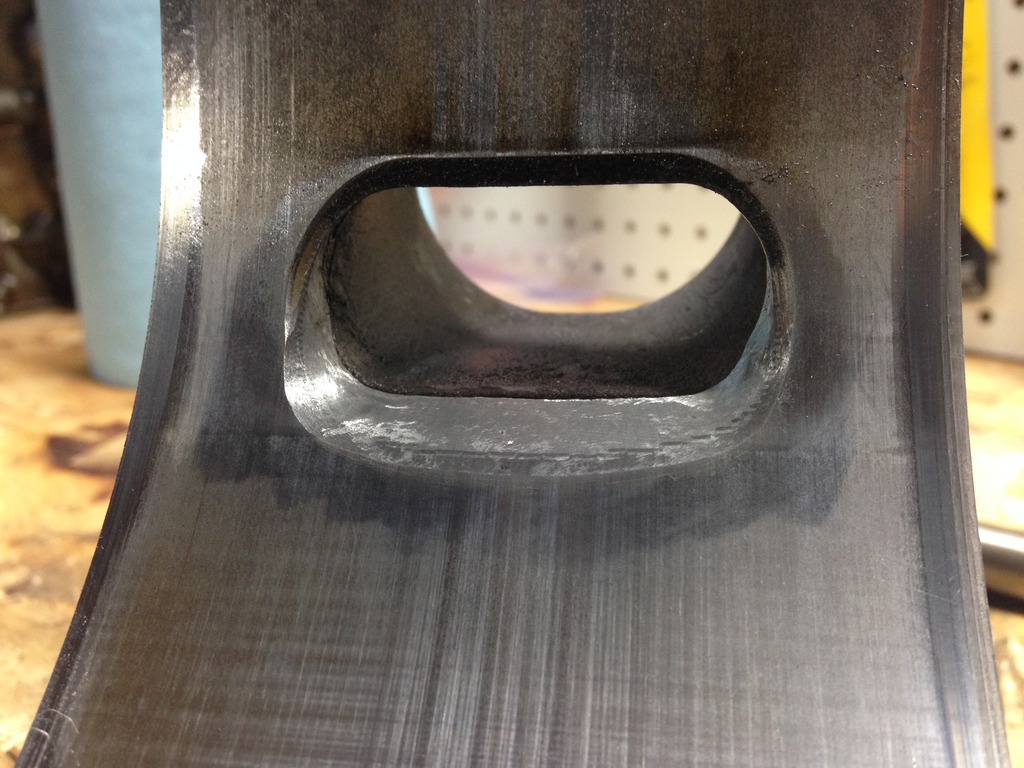
AFTER:
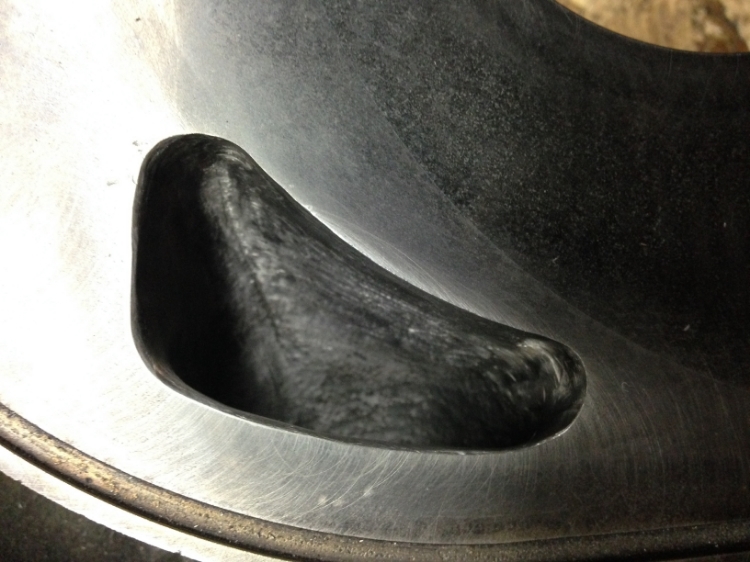
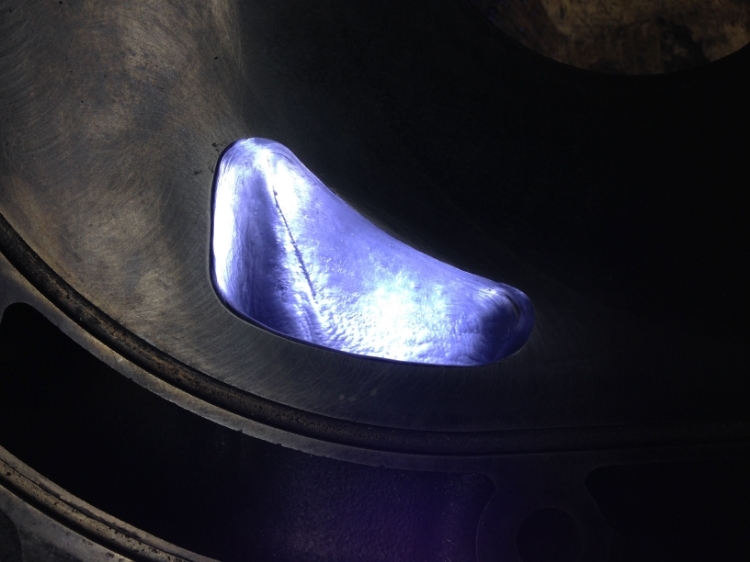
The only thing I'm worried about is the side seal scraping against the "elbow" of the port. According to the FC3S website, there should be a nice smooth transition to avoid the side seal from banging against the edge of the port. However, I think that is more relevant to the larger street ports. Again, I'm looking for some feedback before I move forward with the rest of the ports.
Here is a link to their website: FC3S Pro v2.0:  Tips 'N Tricks - Judge Ito Side Seal Clearancing
This was a huge pain the butt to clean. The "small" oil leak must've been going on for a while since there was so much gunk baked on the engine. It took several hours of scrubbing to get it all off. The worst of all wasn't that, it was the freaking GASKET's. I literally had to scrape them with a razor blade for several hours. Also, thank God for Aaron Cake. Using the Scotch Brite Roloc pads saved me a ton of time of cleaning the housing and iron mating surfaces. It's not perfect but ALL DONE!
Once all of that was done. I was planning on doing a full inspection of all of the parts. The first thing I noticed was the vertical grooves at 3 o'clock position in the irons due to years of scraping by the side seal against that surface. I thought about lapping the irons but I've read mixed reviews. I finally decided to bite the bullet and just go ahead with the rebuilt. Relatively speaking, all of the parts are in pretty good shape. The most important hint during the engine break down was the surprisingly clean oil pan, meaning that the car was maintained well. On top of that, I'll be using OEM seals for my rebuilt which are not as abrasive on the surfaces. Overall, I'm planning on getting 40-50k miles out of the rebuild and I think I can achieve that with the current condition of the parts. I'll be using brand new stationary gear and rotor bearings and a "master rebuild" kit from Atkins to do the rebuild (With OEM apex and corner seals). The housings have some chrome wear on the edges but nothing too major (I'll post the pics later).
Let's get to the porting job. This is my first porting and I wanted to use the Pineapple Mild street port with the 2A exhaust combination. I used carbide bits on the die grinder for the initial large chunk grinding and then switched to an electric grinder with stones. Finally I finished off with a polishing stone. Please give me some feed back on the port job.
BEFORE:
AFTER:
The only thing I'm worried about is the side seal scraping against the "elbow" of the port. According to the FC3S website, there should be a nice smooth transition to avoid the side seal from banging against the edge of the port. However, I think that is more relevant to the larger street ports. Again, I'm looking for some feedback before I move forward with the rest of the ports.
Here is a link to their website: FC3S Pro v2.0:  Tips 'N Tricks - Judge Ito Side Seal Clearancing
03-18-15, 02:23 PM
#45
NA-BOOSTIN
Your ports are pretty smooth from some of the people I've seen on here . I just got done finishing my ruff cut on my motor . Could you take a pic of the stone bits you got . And how you were able to chamfer the edge like you did already . One last thing do you know if your suppose to port to the template edge and then chamfer the edge of factor that into the port
My first port job also
My first port job also
03-23-15, 08:54 PM
#47
Full Member
Thread Starter
iTrader: (3)
Join Date: Mar 2013
Location: Minnesota
Posts: 54
Likes: 0
Received 0 Likes
on
0 Posts
Finishing up the porting
Your ports are pretty smooth from some of the people I've seen on here . I just got done finishing my ruff cut on my motor . Could you take a pic of the stone bits you got . And how you were able to chamfer the edge like you did already . One last thing do you know if your suppose to port to the template edge and then chamfer the edge of factor that into the port
My first port job also
My first port job also
Thanks! By looking at your threads, I can tell how detail-oriented and organized you are and I think you'll do just fine. Again I'll be more than happy to help.
UPDATE:
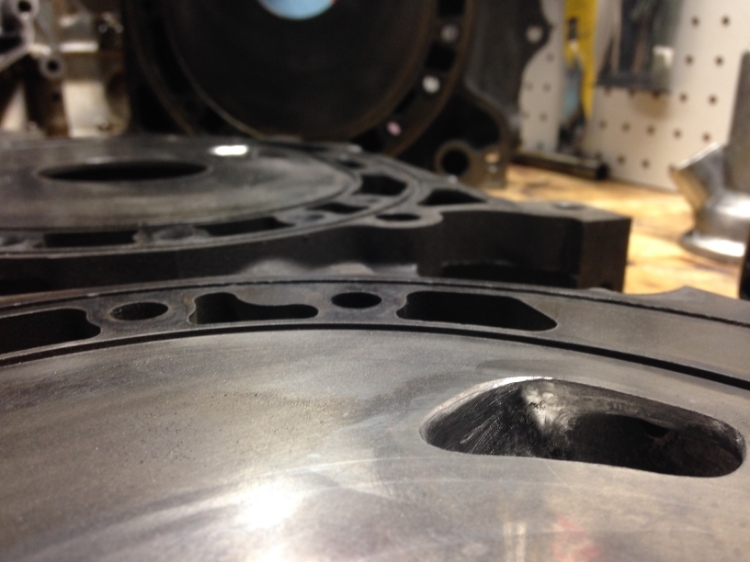
I finished up all the porting. I'm surprisingly impressed with the exhaust ports; they were significantly easier than the intake ports. I'm more pleased with the second secondary port; I took my time and changed what I thought were mistakes on the first port. The primary ports weren't too bad. I didn't chamfer them as aggressively but may go back and chamfer a little more. I wasn't sure how much the side seal rides on the edge of the primary ports. I guess time will tell once I start the engine. I may do a test when I assemble the engine by turning the rotor on the housing around the e-shaft and checking the position of the side seal on the intake port through the runner. Enjoy the pics.
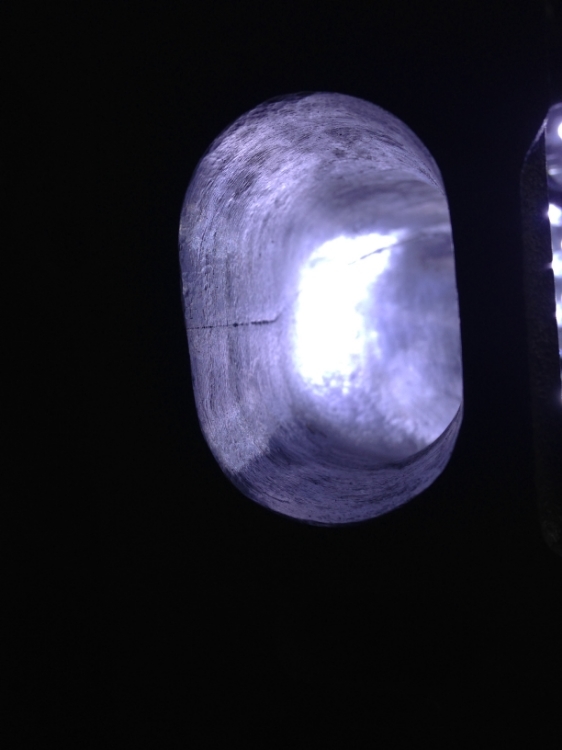
Other Secondary port:
Exhaust port:
Primary ports:
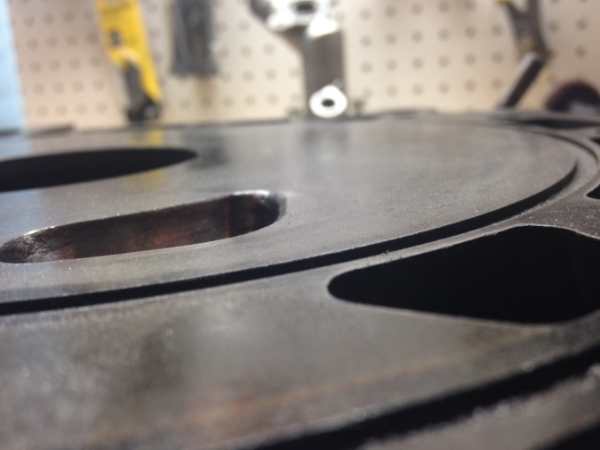
For some reason the light makes the edge of the closing side of the primary port appear as though it's not straight; but in fact it is.
Next step is to clean all the engine parts again and put it back together.
03-23-15, 08:59 PM
#48
Rotary Enthusiast
iTrader: (1)
Join Date: Nov 2012
Location: bloomington, mn
Posts: 1,100
Likes: 0
Received 0 Likes
on
0 Posts
Thanks for the kind words. Those turned out great. If I attempted porting I would do it on a trashed set of NA irons first. I give you serious credit and large testi for just going at it on your production set.
Spring is coming, never mind the random 6 inches yesterday. lol
Spring is coming, never mind the random 6 inches yesterday. lol
03-24-15, 05:43 AM
#49
Looks pretty good! I usually also start out using a carbide bit (using a die grinder, 6mm shaft bits), and switch to a dremel and stones after that. After the stones I like to use those sandpaper rolls to smoothen everything out more. Mask the iron wearing surface with a few layers of tape though, since the sandpaper rolls can explode and leave a mark, but the same goes for the stones.
03-26-15, 06:42 PM
#50
Full Member
Thread Starter
iTrader: (3)
Join Date: Mar 2013
Location: Minnesota
Posts: 54
Likes: 0
Received 0 Likes
on
0 Posts
Slight change of plans
Looks pretty good! I usually also start out using a carbide bit (using a die grinder, 6mm shaft bits), and switch to a dremel and stones after that. After the stones I like to use those sandpaper rolls to smoothen everything out more. Mask the iron wearing surface with a few layers of tape though, since the sandpaper rolls can explode and leave a mark, but the same goes for the stones.
I've been thinking a bit more about my build goals. Ultimately the plan hasn't changed and I want to achieve a clean weekend car with some nice power behind it. But I don't think I can endure another winter without putting the wheels on the road. My schedule at work will be a little bit lighter; however, money is still tight. I'd like to get the car in driving shape before next winter hits. I have $2500 saved and here is my plan:
1. Complete the engine rebuild (Atkins rebuild kit with OEM seals $1500)
2. Put the engine and transmission back in which requires a new clutch kit and flywheel ($~600)
3. Wire up the standalone; I'm going with Adaptronics E420D since Elliot at Turblown is about an hour away ($1000)
4. Upgrade the fuel injectors; I'd like to go with Injector Dynamics 725 primary and 1300 secondary (~400)
These are the ESSENTIALS. The must have's before I can get the car back in running conditions. For the rest of the parts, I can use the old ones to get the car running and then upgrade little by little during next winter. Unfortunately my total is more expensive than my budget... and I have to figure out where I can get the extra cash. My hope is to get the car running and just put enough miles on it to break in the engine and get a base map tune for the ECU. Then next summer, I'd be able to start boosting it and get it tuned by Elliot.
Last edited by Thepersian; 03-26-15 at 06:45 PM.