
Mefarri's 1995 FD LS3 turbo build

Hptuners if you want to use the stock ECU, Holley if you want a standalone. I'll be using Holley most likely. If not, probably Haltech. Go to norotors.com and start reading.

i cant wait to see this finished. I have been contemplating turbo setup on my ls fd but deff want to retain ac. Ill be curious to see it all put together. Also to find out if you have any heat issues with the car. Very nice work.. Wish i had the patients and the talent to do the same type of work. Nice to see someone doing it right the first time.
Absolutely stunning fab work. hoping for an LS build for my 95 sometime as well, so your build has given me inspiration, and a look at things to come for sure. Can't wait for more!
 ! Any updates!?
Ladies and germs, I wasn’t bullshitting about an update.
I’ve been trying to make this update for a while now. I was poised to finish up what I wanted to a few weeks back, but then my company decided to make some layoffs and me and 100 other people got laid off. (yay) So it kind of put a damper on things and I spent a while running around trying to figure out what my future career path should be. Still haven’t figured that out, but in the mean time I finished up what I wanted to. Being laid off will end up being a good thing honestly. I don’t jive with the whole corporate environment, so this situation makes me evaluate what I should be doing instead of what’s comfortable. Needless to say, the spending on the car will have to wait a bit. I still have other things I can do without spending much $, which you’ll see in a second. So now that I’ve killed the mood- onto the pics!
I’m SUPER happy with how everything came out. It’s exactly how I pictured it in my head months ( Years? Hey. **** you buddy) ago. I wouldn’t change a thing. It’s been a while since some of this was finished so I’ll let the pics do most of the talking.
Starting from where we last left our regularly scheduled program-
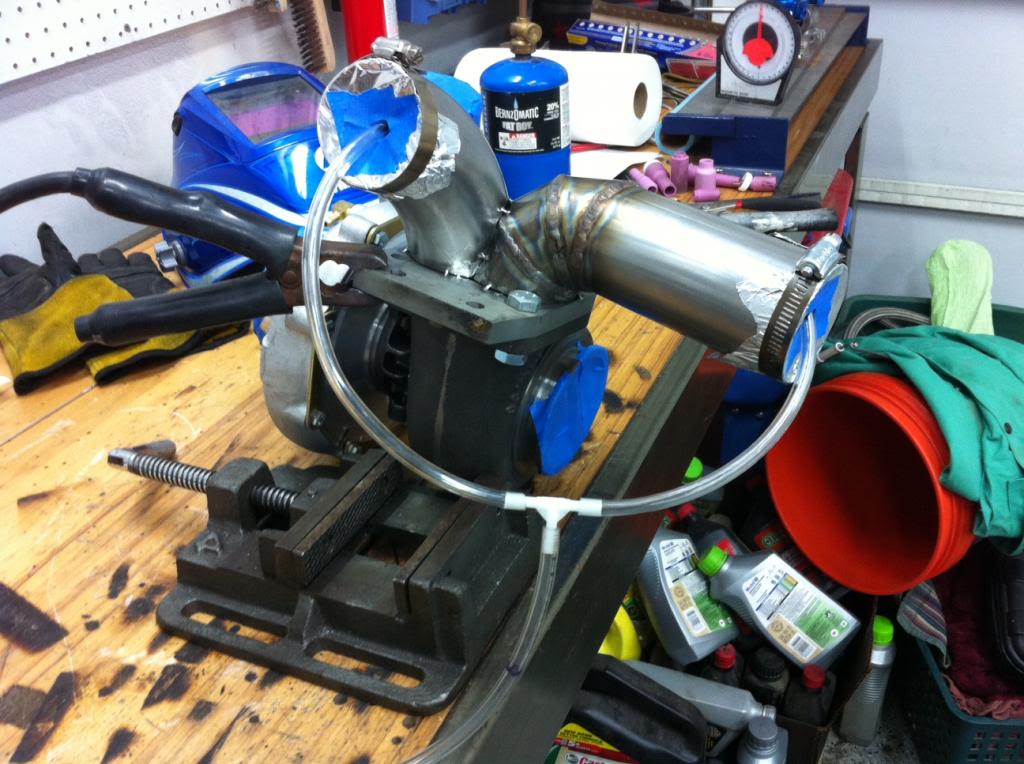
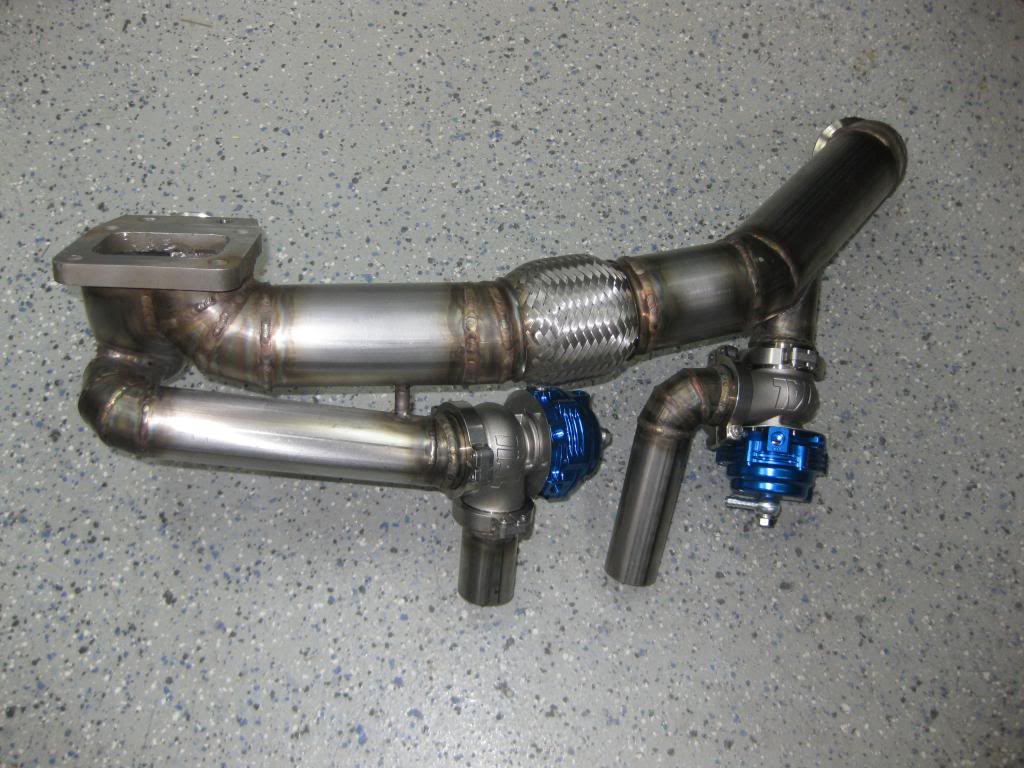
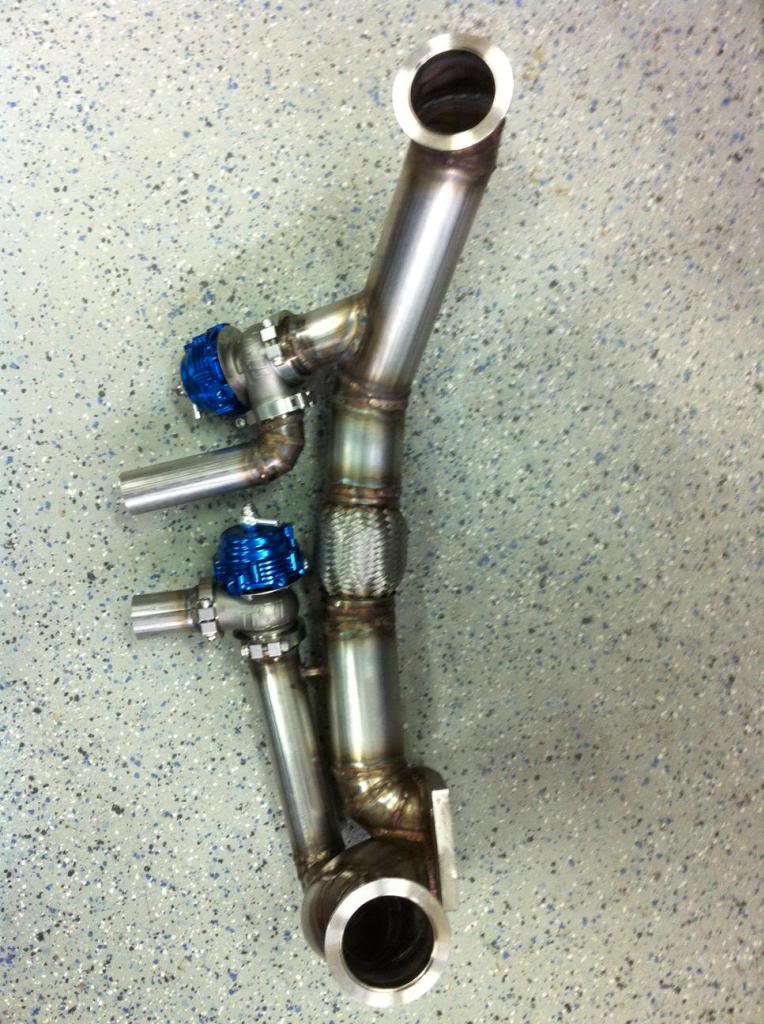
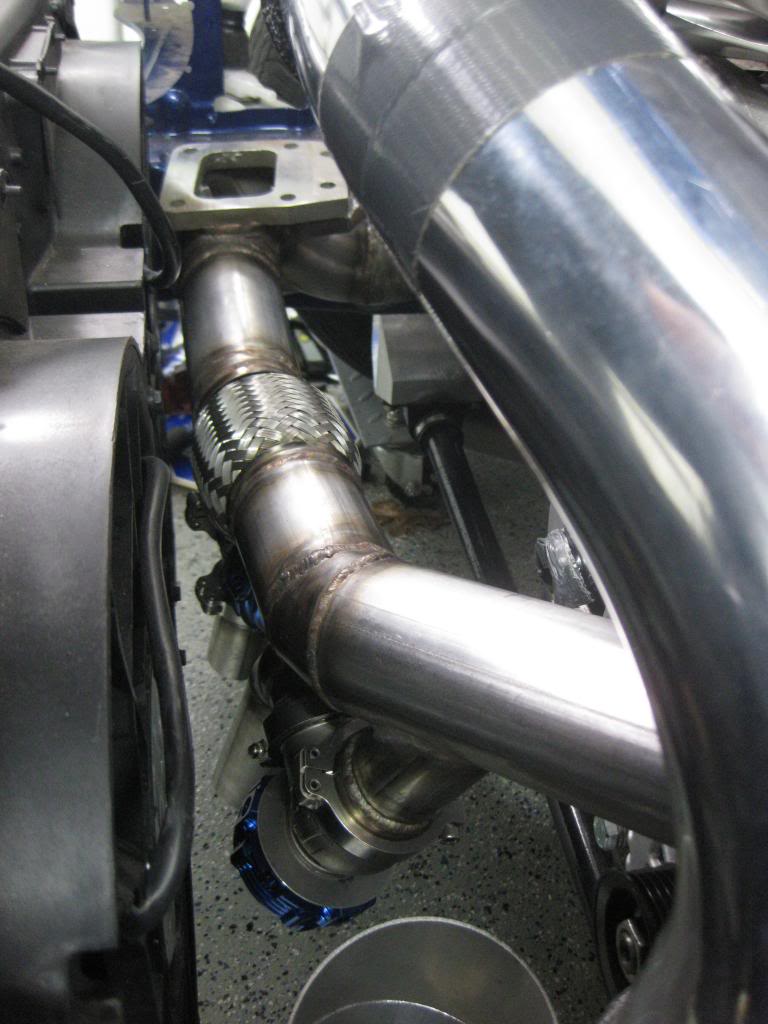
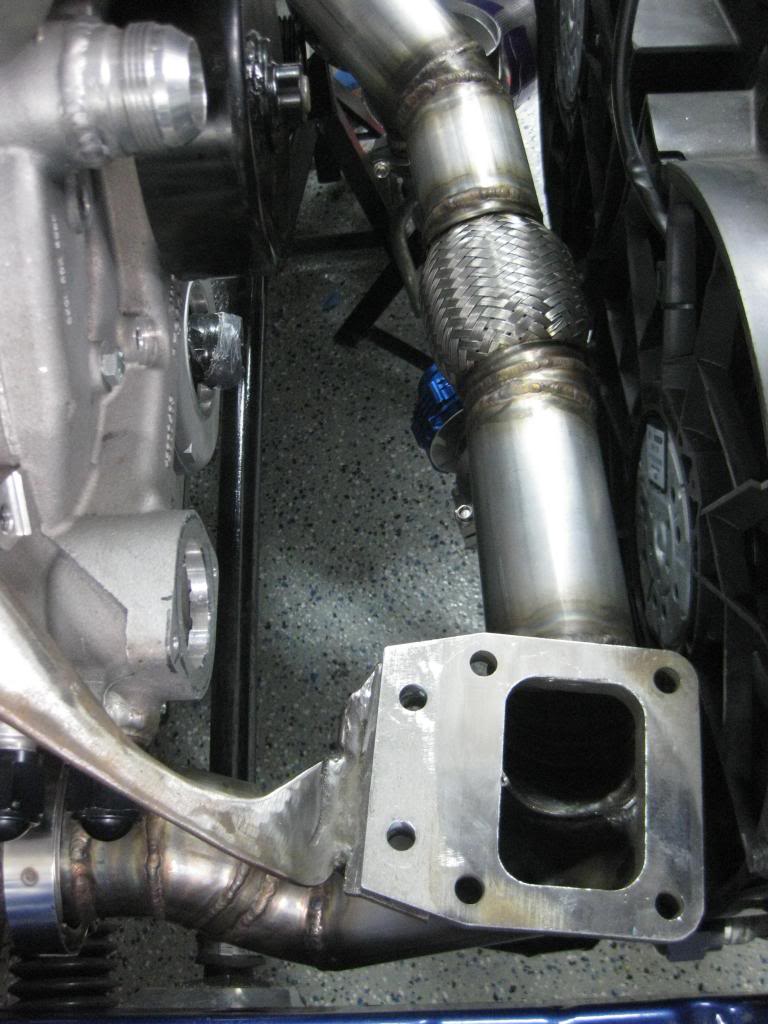
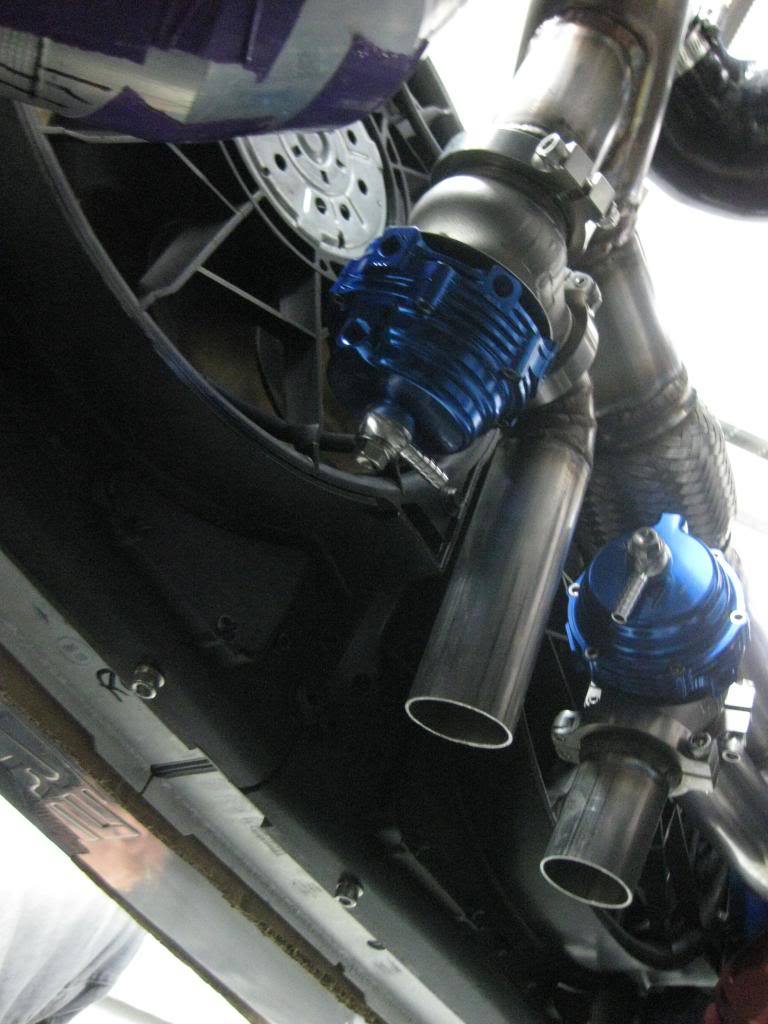
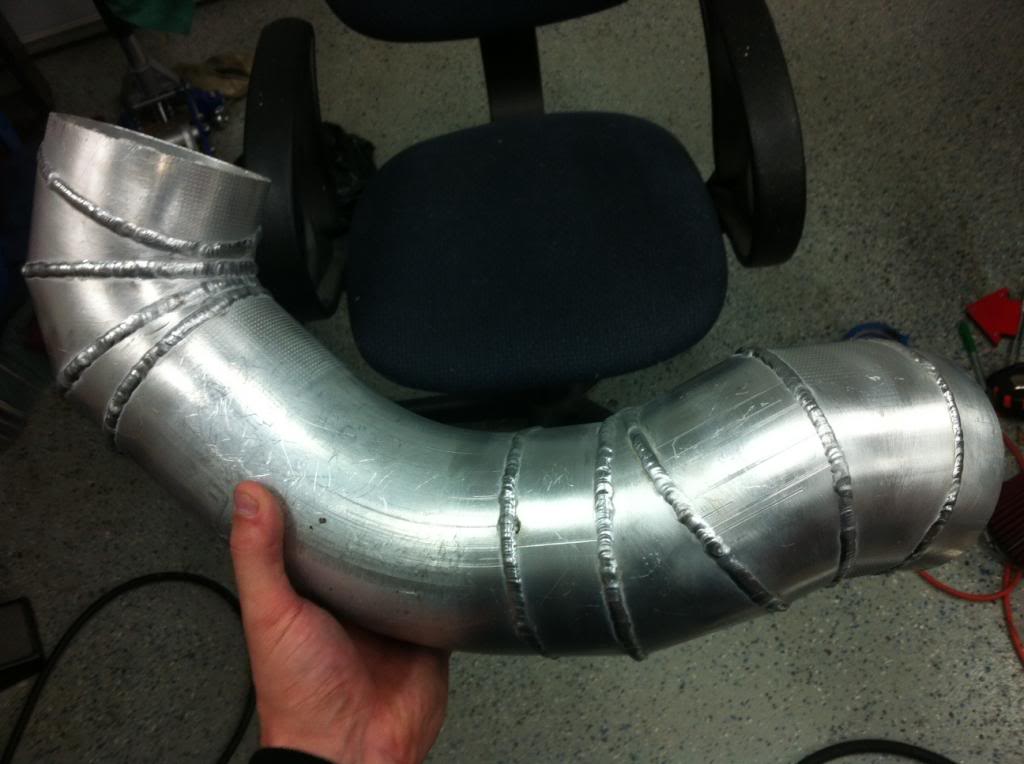
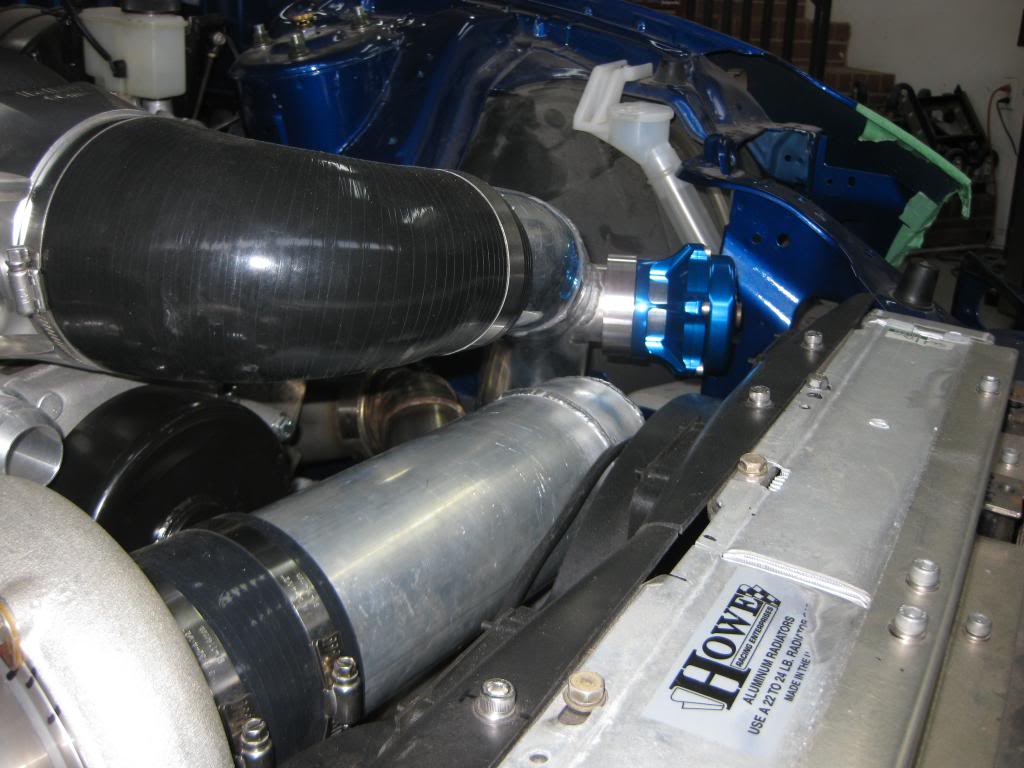
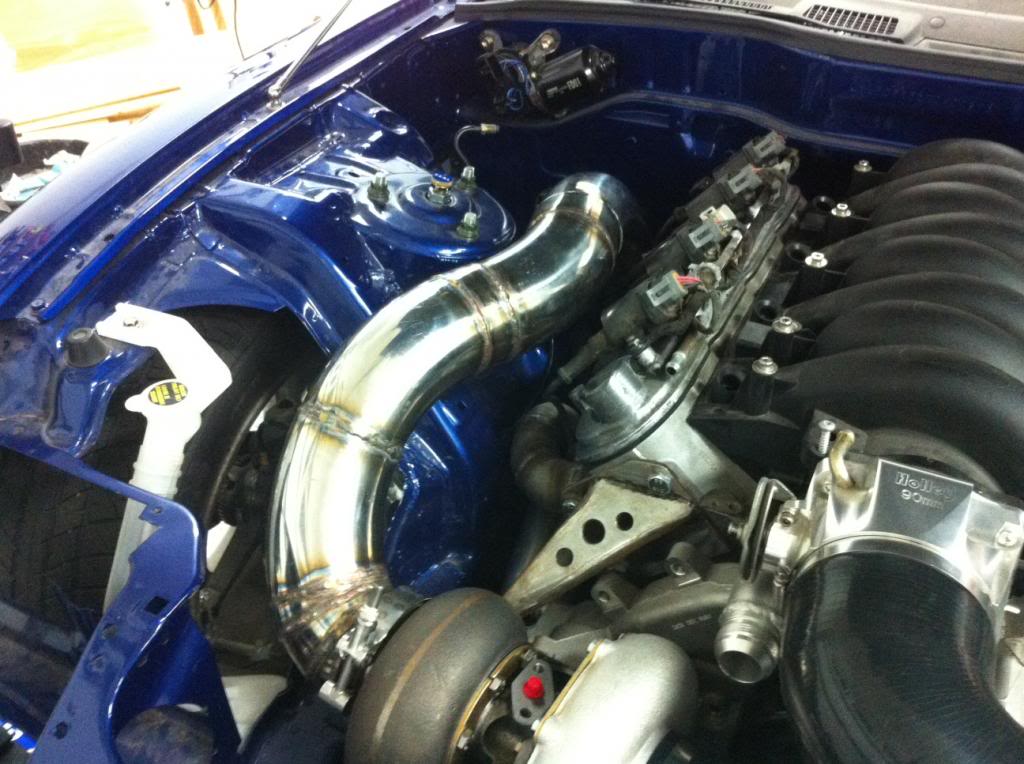
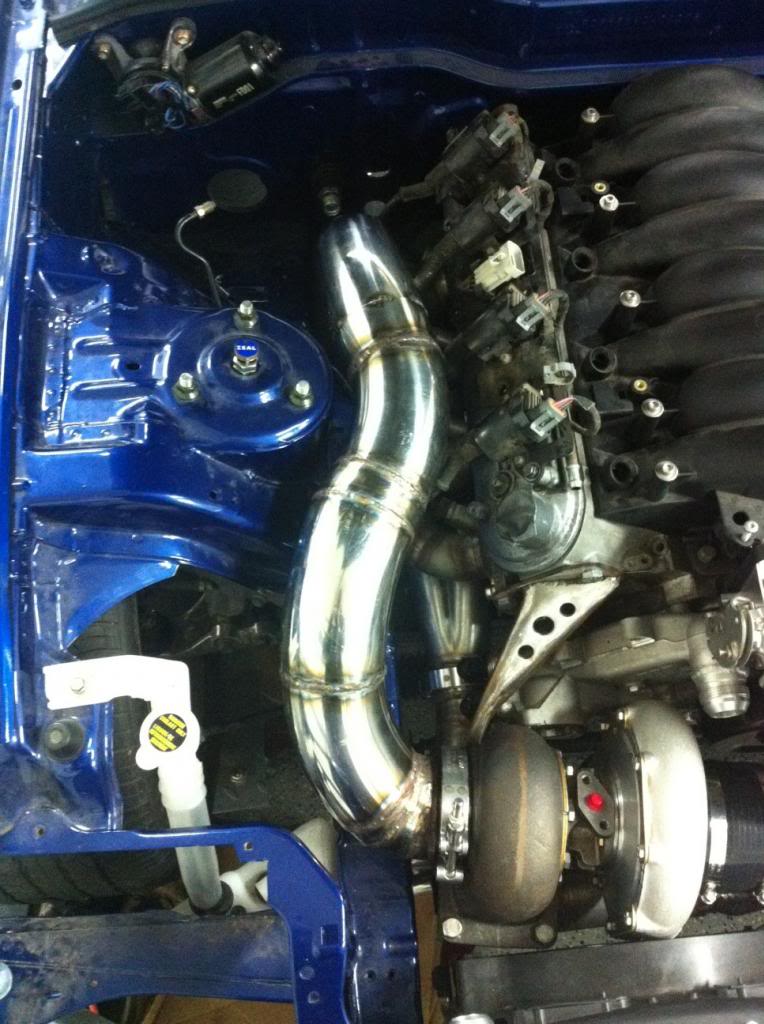
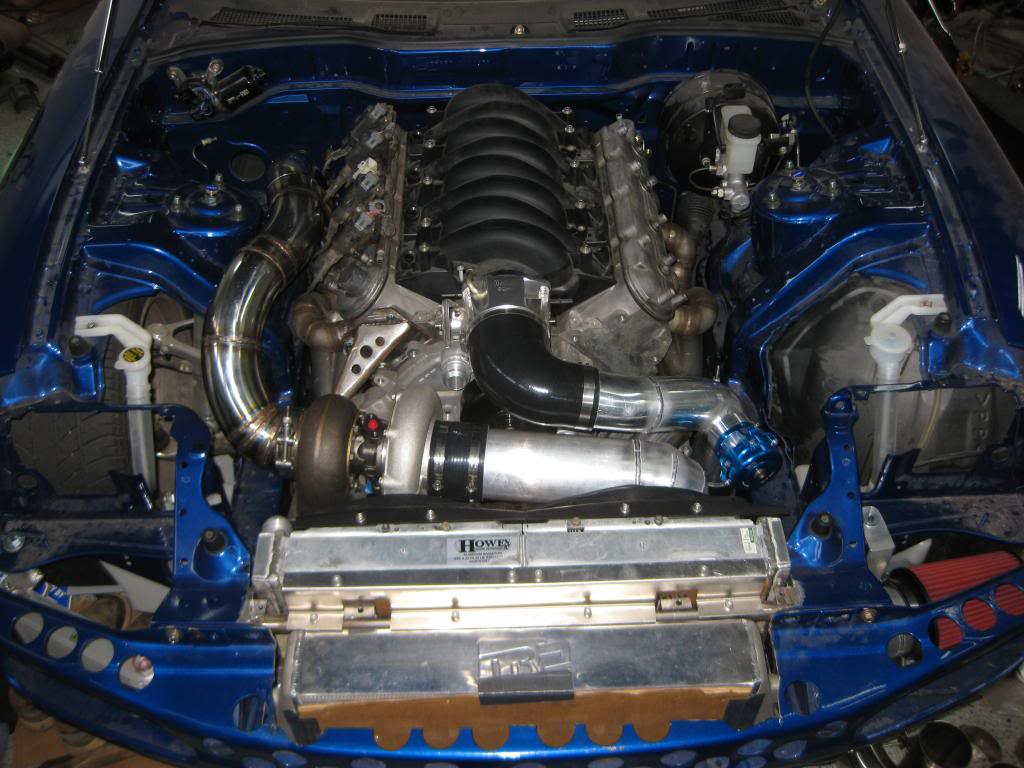
I first finished the crossovers. All stainless 2.5” piping with 1.75” piping for the Tial MVS wastegates and an interlocking lined flex section. As with everything on this car, clearance is tight and everything had to be planned in advance. Everything turned out perfect though. Both wastegates have really good priority which was a requirement. If I decide to use compressed air for boost control like Zac, I want the ability to run with 0 boost and priority is what allows that to happen. As you can see from the passenger side interior pic, it’s pretty much a straight shot to the wastegate. The passenger side was a creative solution to the space issue but I think it worked out well. Great priority and it puts both wastegates next to each other in the middle of the bay so when they’re open, they’ll be some big flames. The space issue was compounded on that side because I also had to pay attention to the lower radiator hose and turbo oil drain. You can see how the radiator hose will route with my mock hose pic.
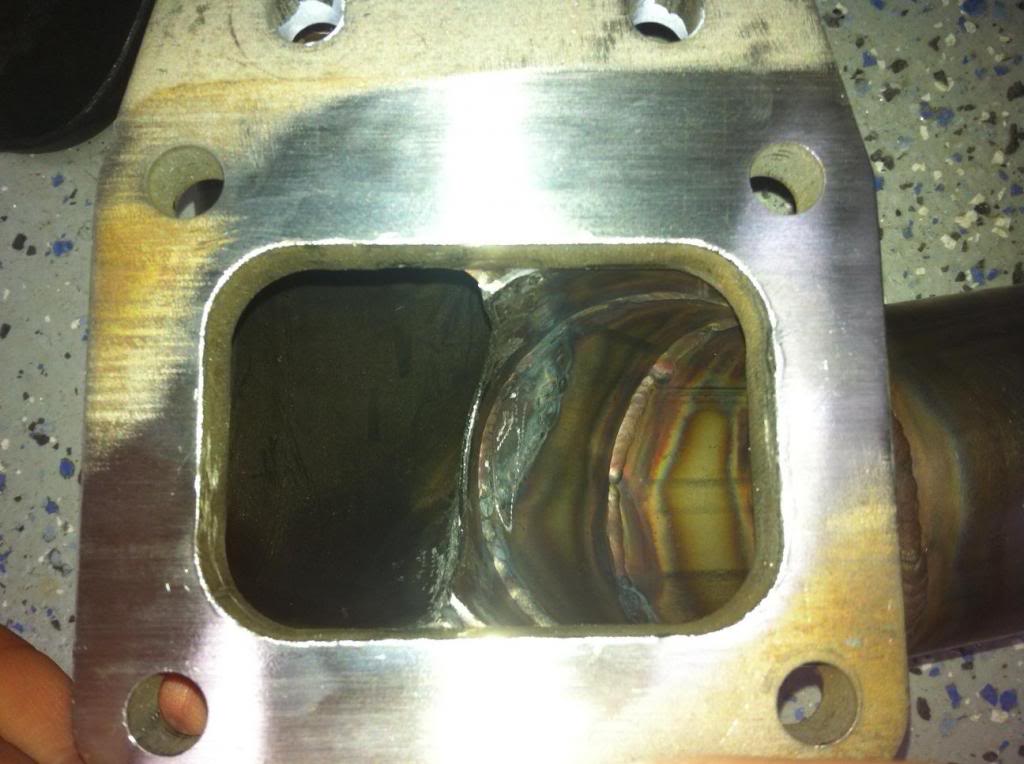
Everything pre turbo was argon back purged so no sugar beads will be falling off and going through my turbo and it’s as strong as it can be. I posted a pic of backpurging the collector section. I used vibrant v bands and they’re awesome. They have the interlocking feature so the flanges mate up perfect and they have this nice quick release function which I LOVE. It allows you to just loosen the clamp enough to spin it and then you can just pop it off so you don’t have to take the nut all the way on and off. Saves so much time during fab work.


I’ve been trying to make this update for a while now. I was poised to finish up what I wanted to a few weeks back, but then my company decided to make some layoffs and me and 100 other people got laid off. (yay) So it kind of put a damper on things and I spent a while running around trying to figure out what my future career path should be. Still haven’t figured that out, but in the mean time I finished up what I wanted to. Being laid off will end up being a good thing honestly. I don’t jive with the whole corporate environment, so this situation makes me evaluate what I should be doing instead of what’s comfortable. Needless to say, the spending on the car will have to wait a bit. I still have other things I can do without spending much $, which you’ll see in a second. So now that I’ve killed the mood- onto the pics!
I’m SUPER happy with how everything came out. It’s exactly how I pictured it in my head months ( Years? Hey. **** you buddy) ago. I wouldn’t change a thing. It’s been a while since some of this was finished so I’ll let the pics do most of the talking.
Starting from where we last left our regularly scheduled program-
I first finished the crossovers. All stainless 2.5” piping with 1.75” piping for the Tial MVS wastegates and an interlocking lined flex section. As with everything on this car, clearance is tight and everything had to be planned in advance. Everything turned out perfect though. Both wastegates have really good priority which was a requirement. If I decide to use compressed air for boost control like Zac, I want the ability to run with 0 boost and priority is what allows that to happen. As you can see from the passenger side interior pic, it’s pretty much a straight shot to the wastegate. The passenger side was a creative solution to the space issue but I think it worked out well. Great priority and it puts both wastegates next to each other in the middle of the bay so when they’re open, they’ll be some big flames. The space issue was compounded on that side because I also had to pay attention to the lower radiator hose and turbo oil drain. You can see how the radiator hose will route with my mock hose pic.
Everything pre turbo was argon back purged so no sugar beads will be falling off and going through my turbo and it’s as strong as it can be. I posted a pic of backpurging the collector section. I used vibrant v bands and they’re awesome. They have the interlocking feature so the flanges mate up perfect and they have this nice quick release function which I LOVE. It allows you to just loosen the clamp enough to spin it and then you can just pop it off so you don’t have to take the nut all the way on and off. Saves so much time during fab work.

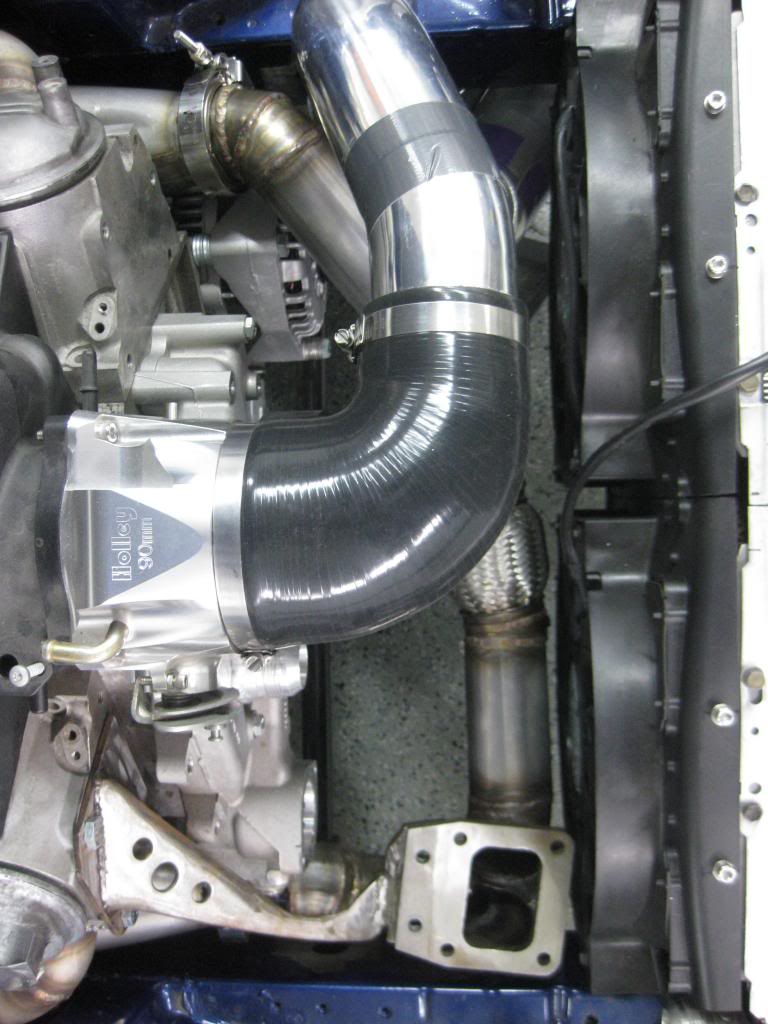
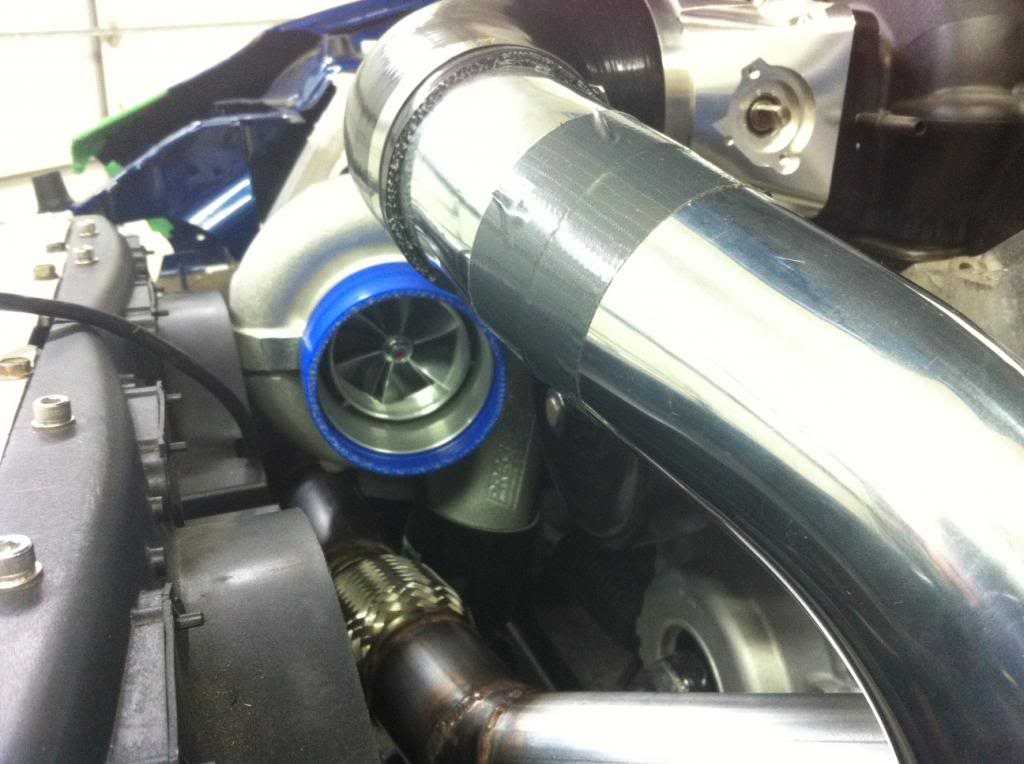


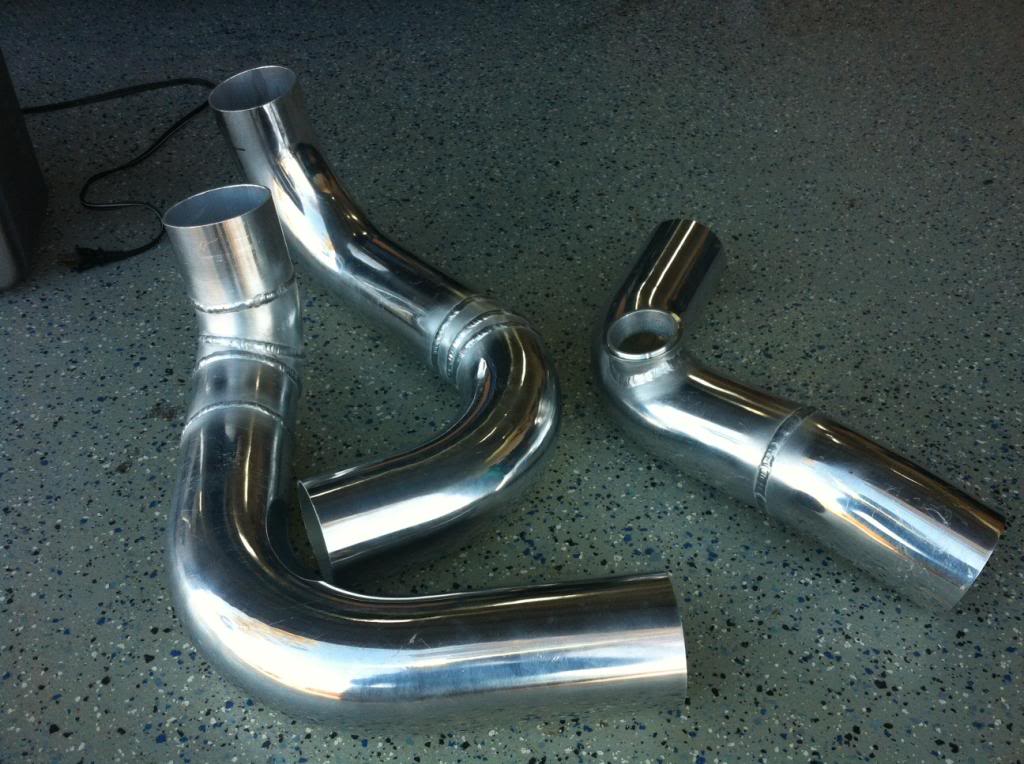
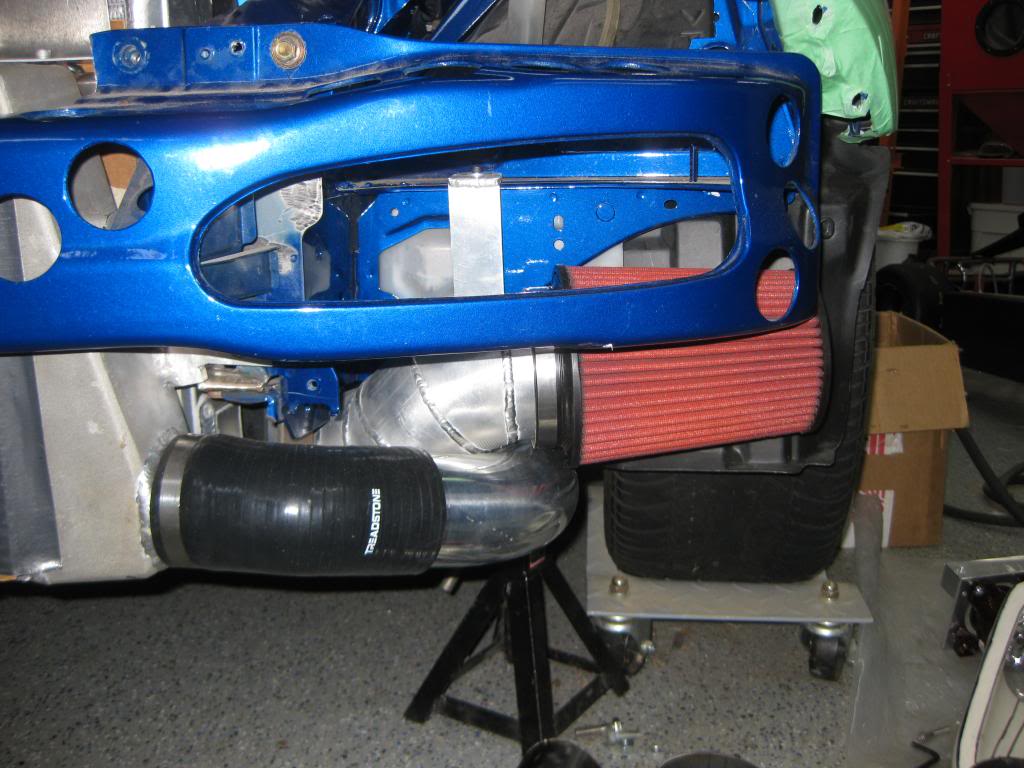
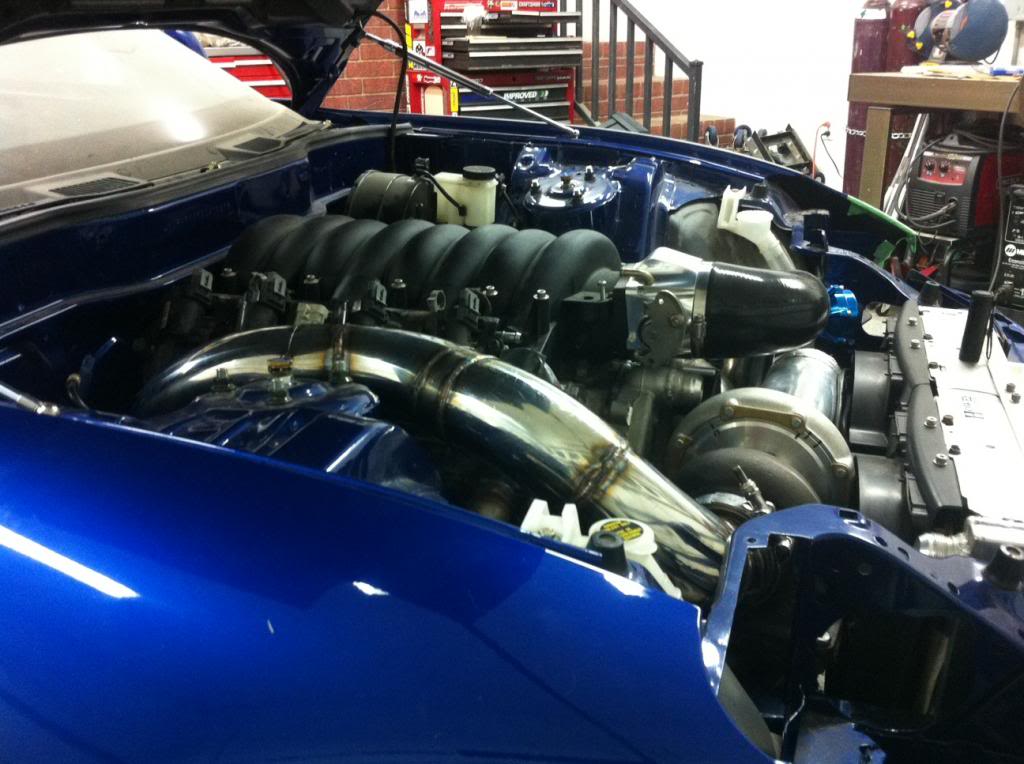
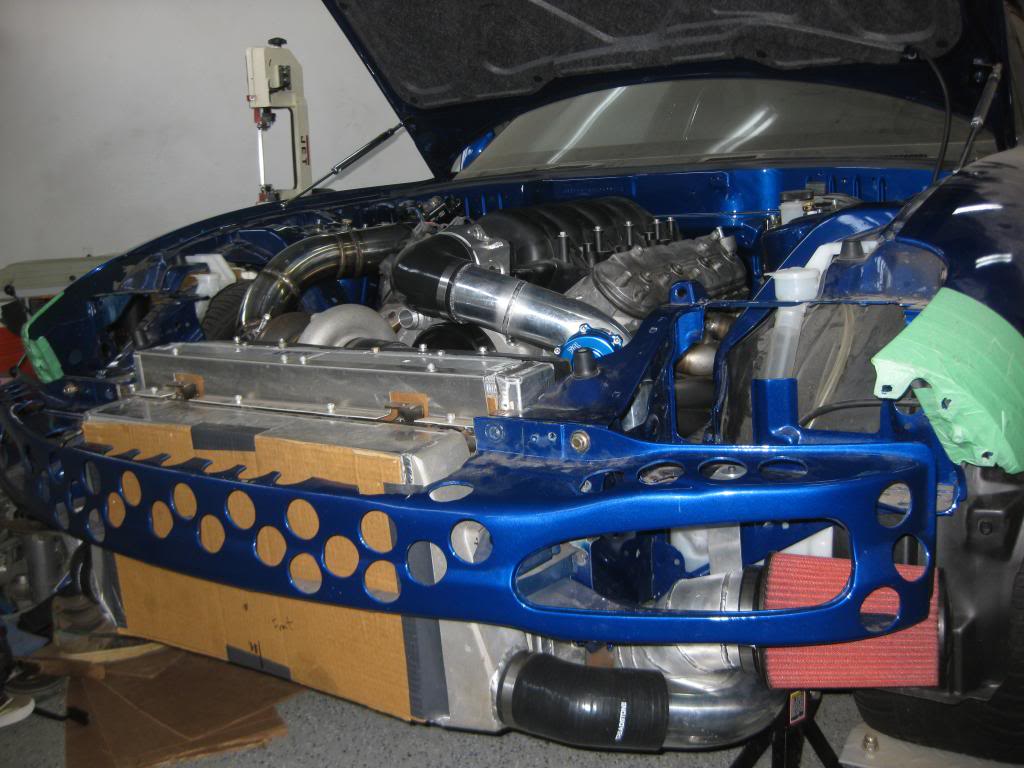
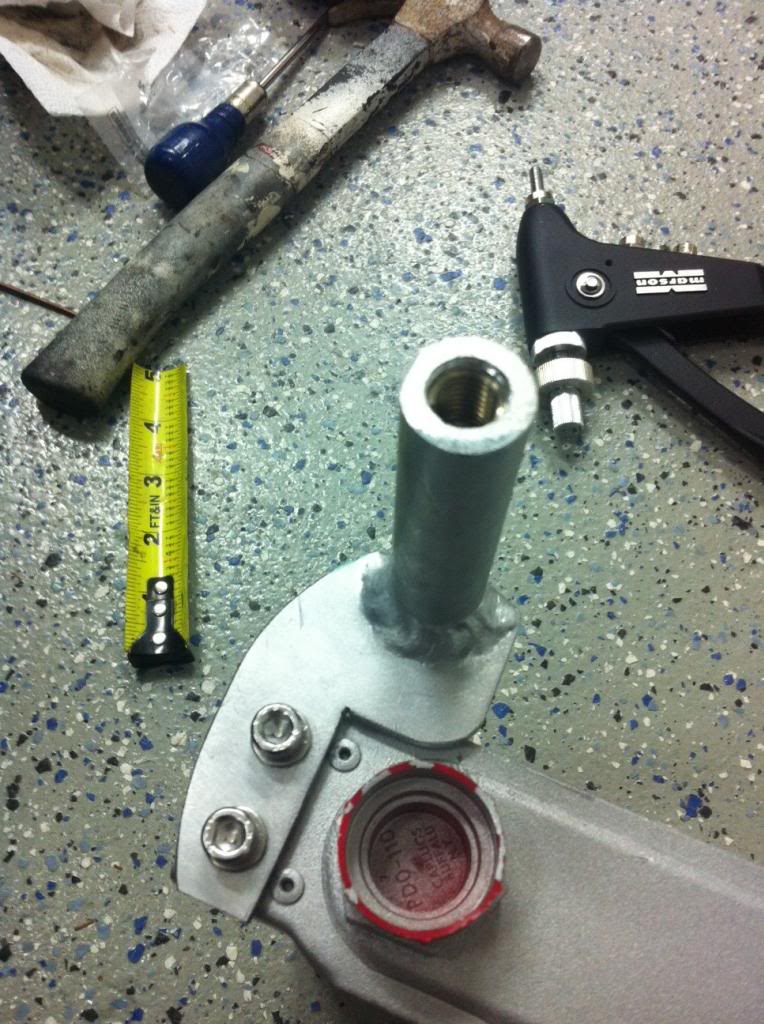
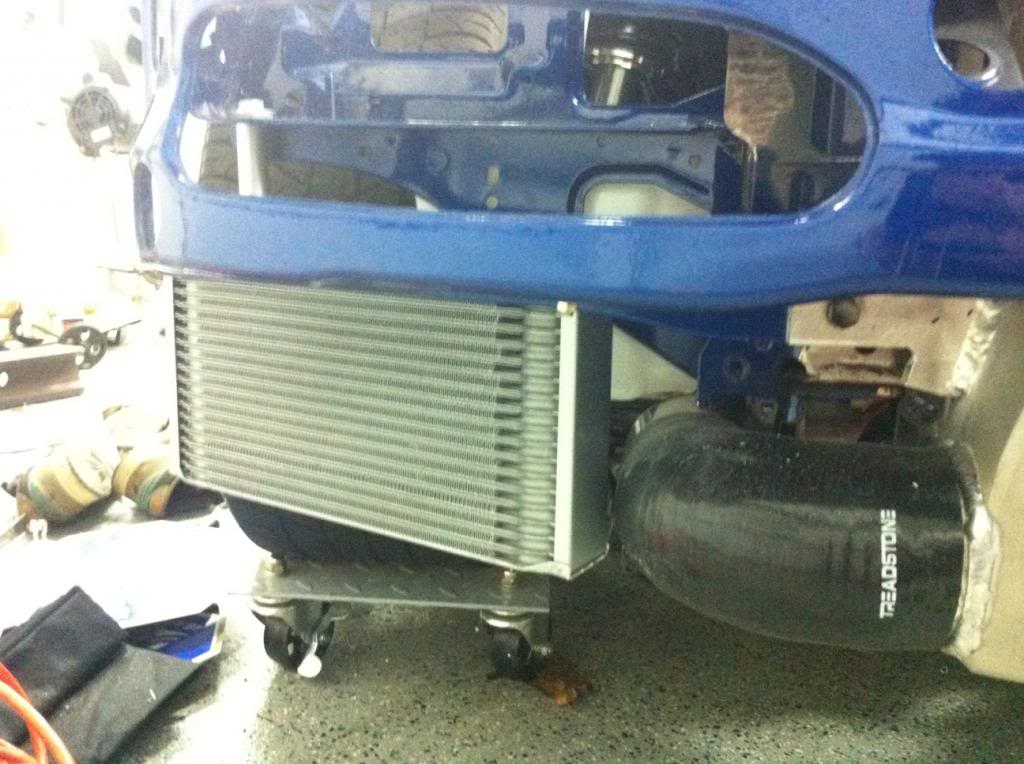
Then I got to work on all the aluminum piping. I had planned how it would all flow when doing the crossovers so it was a matter of making a **** load of cuts and making it all fit. The intake piping is all 4” and the intercooler piping is 3”. I used the least amount of couplers necessary while still making everything serviceable. Serviceability is a key component of this car. So the hot side piping only has 2 couplers and the cold side has 3. The intake has one in the middle as well because there’s no way you’re fitting that long as piece in there as 1 piece. I really wanted to get the filter out of the engine bay so that required making one long *** intake pipe. But I love the way it looks and how it came out. Had to use a bunch of gradually radiused cuts to get it to fit but it still maintains nice, smooth bend radiuses. I used the biggest AEM dryflow filter I could. It fits with about �” clearance to the front bumper on the outside. I used my now indispensable rivnut tool to add a mounting boss for the hanger.
The intercooler pipes came out just as I wanted them and everything is nice and tucked up which has also been a driving ideal when building everything. I wanted better than factory ground clearance, and I got it.
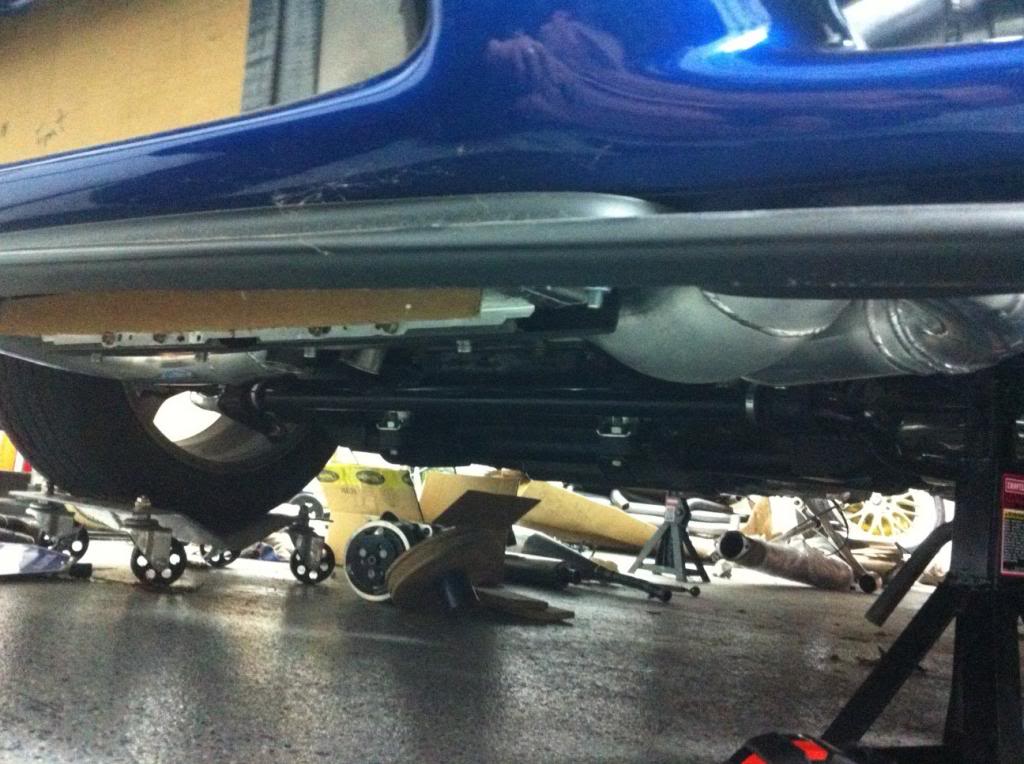
Everything sits at or �” above the center of the sway bar height, and 2- 2.5” higher than the lowest point on the subframe (steering rack mounts.) And by everything, I mean everything. Radiator, fans, all the intercooler and intake piping and the wastegate dumps. You can see by the pic, it’s all nice and stuffed up in there. I’m really proud of how everything fits. All the piping butts up straight on to its mating piping so there’s no weird coupler articulation or anything. I will say the siliconeintakes.com throttle body coupler grabs the piping TIGHT AS HELL. It became kind of a PITA to rotate it honestly. The BOV is a Tial Q and looks great. I’ll also be making a lower panel to finish the full shrouding of the radiator.

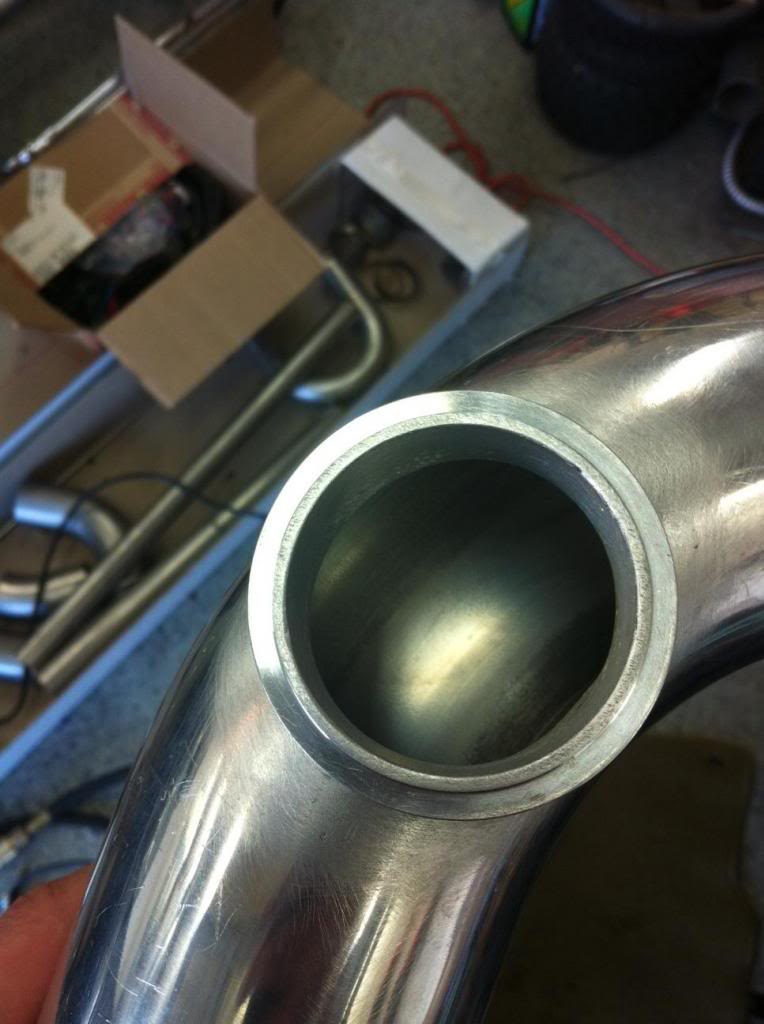


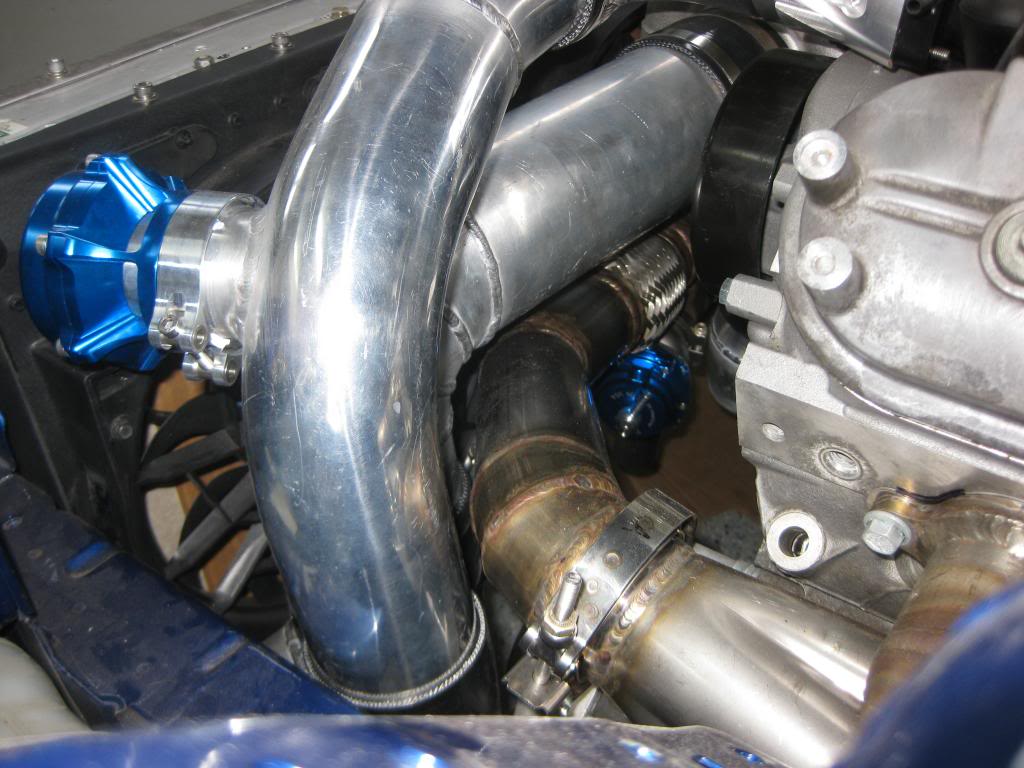
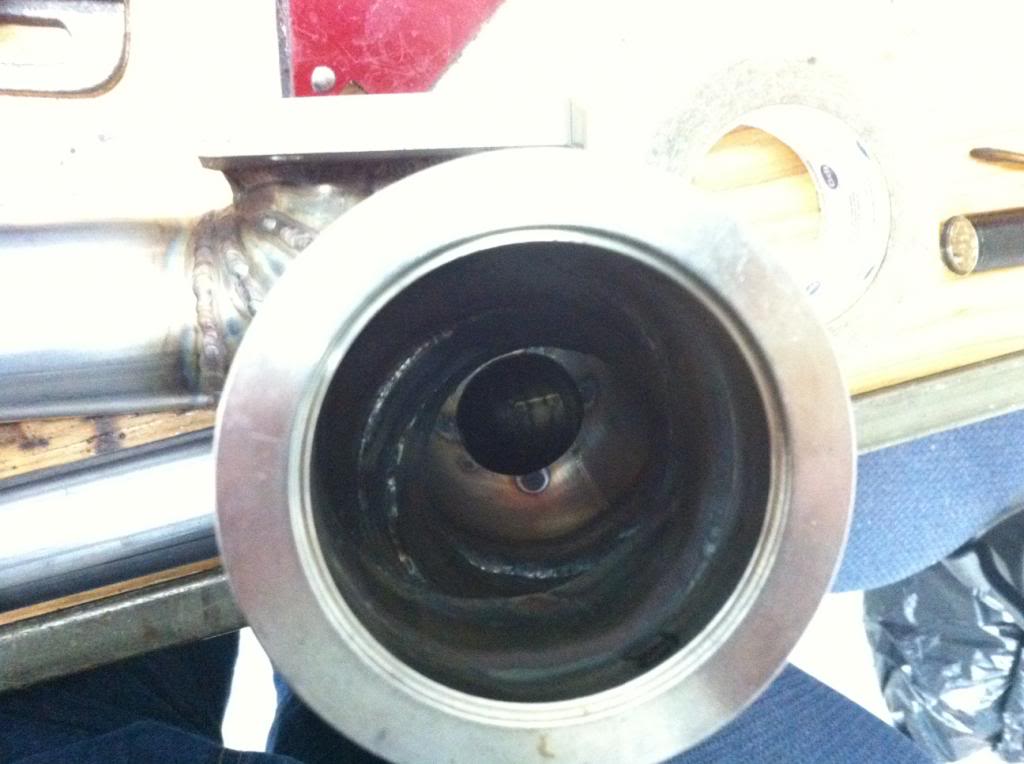
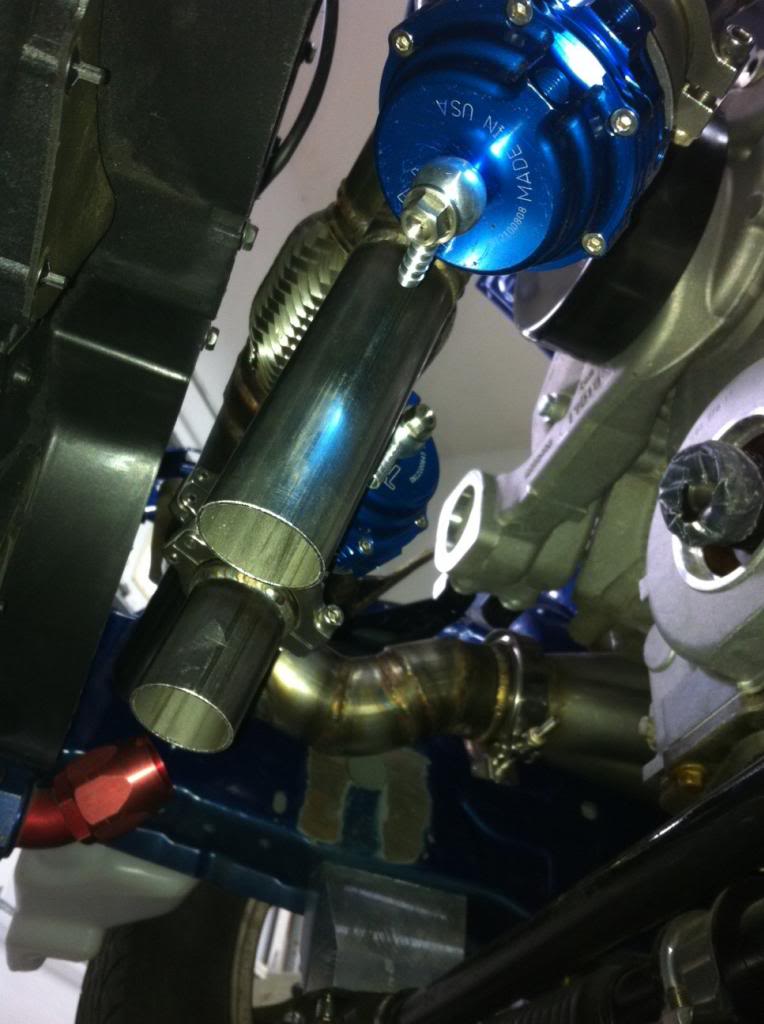
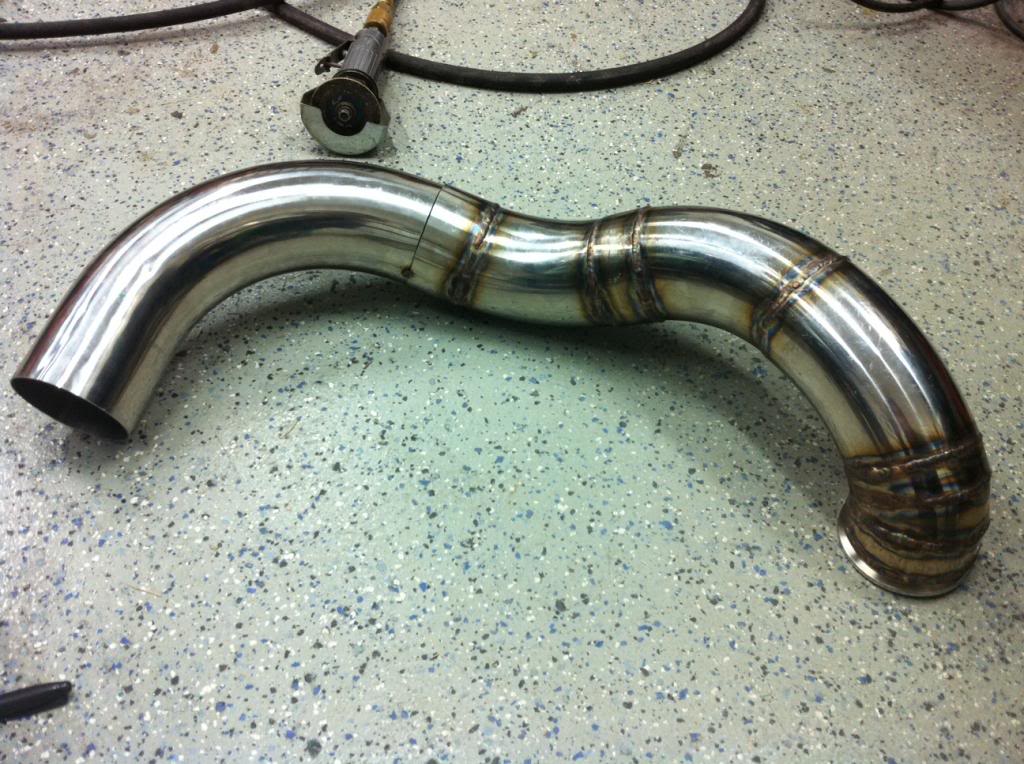
Then, the last part of turbo fab work in the bay is the downpipe. I just finished that a day or so ago which was what was holding up this update. I really wanted to finish it before posting. The turbo’s discharge size is 3 5/8” so 3.5” piping seemed like a no brainer, so that’s what I did. I had planned on running it into the tunnel down by the firewall but the last plug made that impossible so I decided to just notch the frame rail a bit and run down next to the 2nd to last exhaust primary. It will work perfect and now I don’t have to relocate my heater core lines from the firewall. It came out perfectly and has good clearance everywhere. It’ll be wrapped and potentially double wrapped with the DEI titanium wrap. At its closest point, it comes about 1” away from the inner hood carpet thing and then just gets more clearance from there, so it should be fine, but the wrap will just help it not be an issue. Plus I’m really focusing on keeping engine bay heat down so the crossovers and downpipe will be wrapped for that reason as well. Plus it looks cool. I left the last joint just tacked for now until I get the frame notched in case I need to slightly tweak the angle or something. Notching the frame is the next thing on my list.


And with that, all the hard engine bay fab work is pretty much done. Just need to get past the frame rail, and then build an AC compressor mount and then it’s just a bunch of fluid & vac lines, electrical stuff, and some bracketry. Can’t say I haven’t looked forward to this point. I’m so tired of worrying about clearances.
I’m sure I’m forgetting something so just ask if you see something.
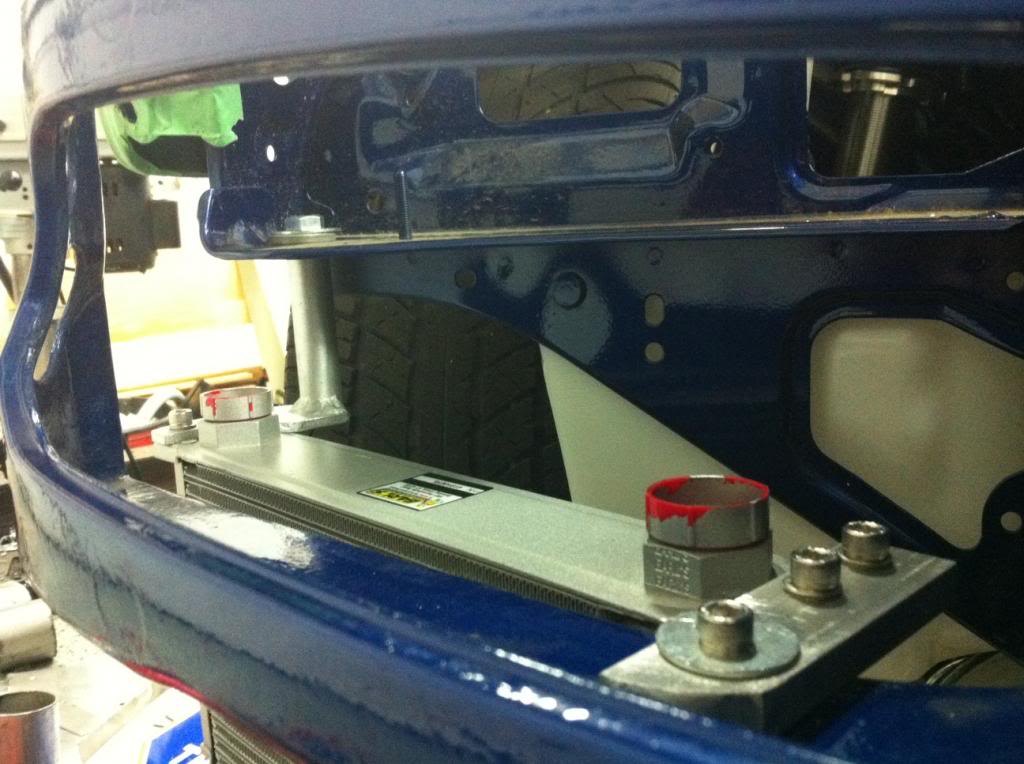
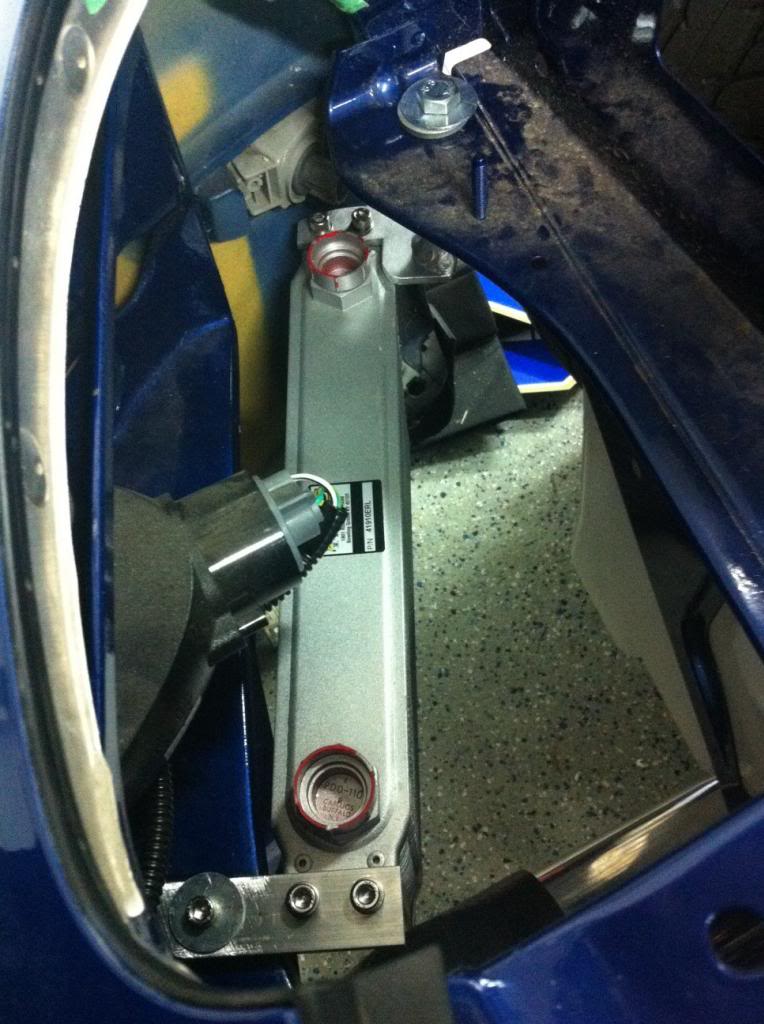
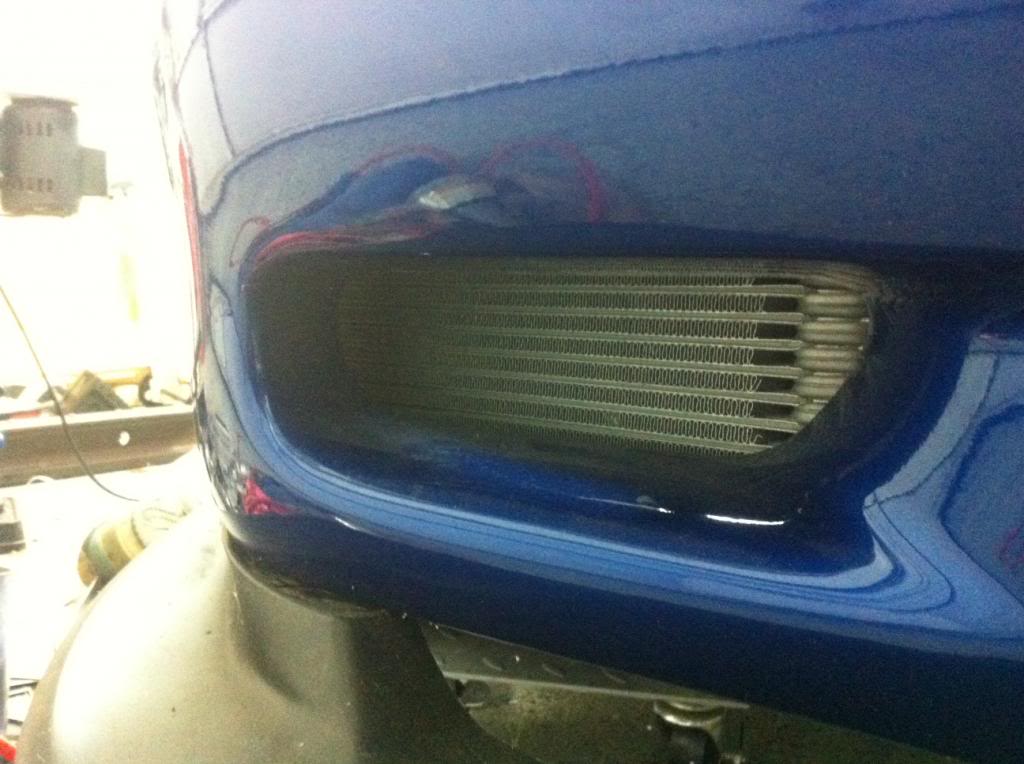
I’ve also made some progress in some other areas, I got my oil cooler mounted as well. Using another rivnut in the front bumper support and then making a little bracket with a helicoil, it worked out perfect. Again, keeping above average ground clearance while having the entire air duct covered for great flow. Zac thinks it’s overkill but I figure what the hell.
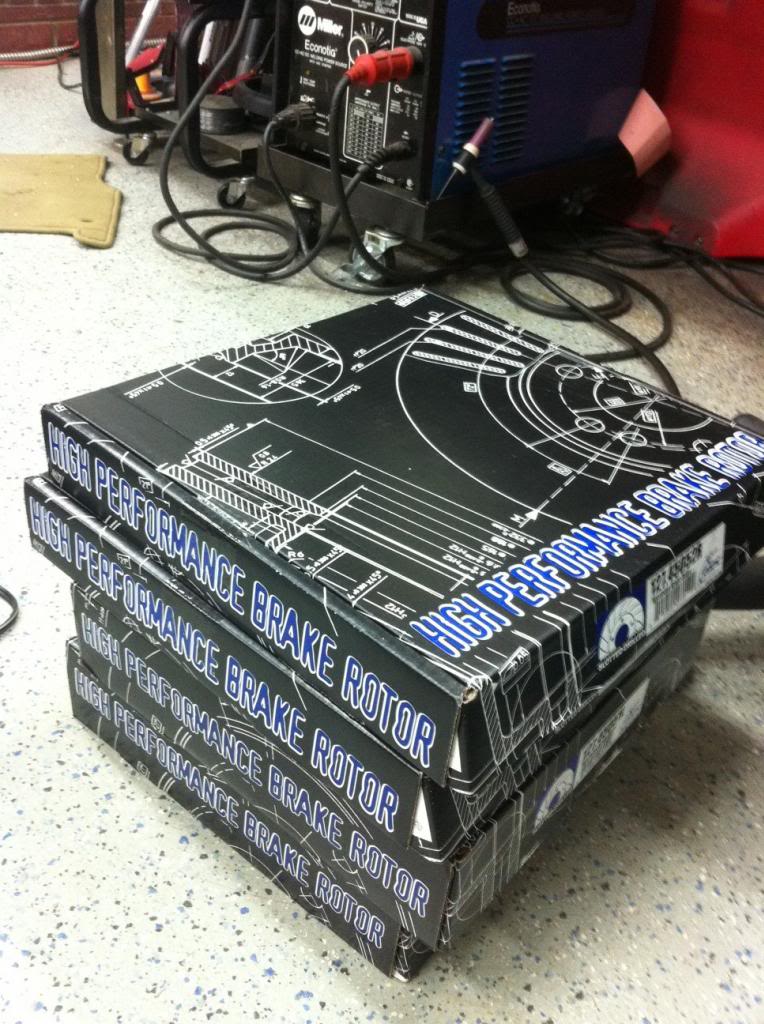
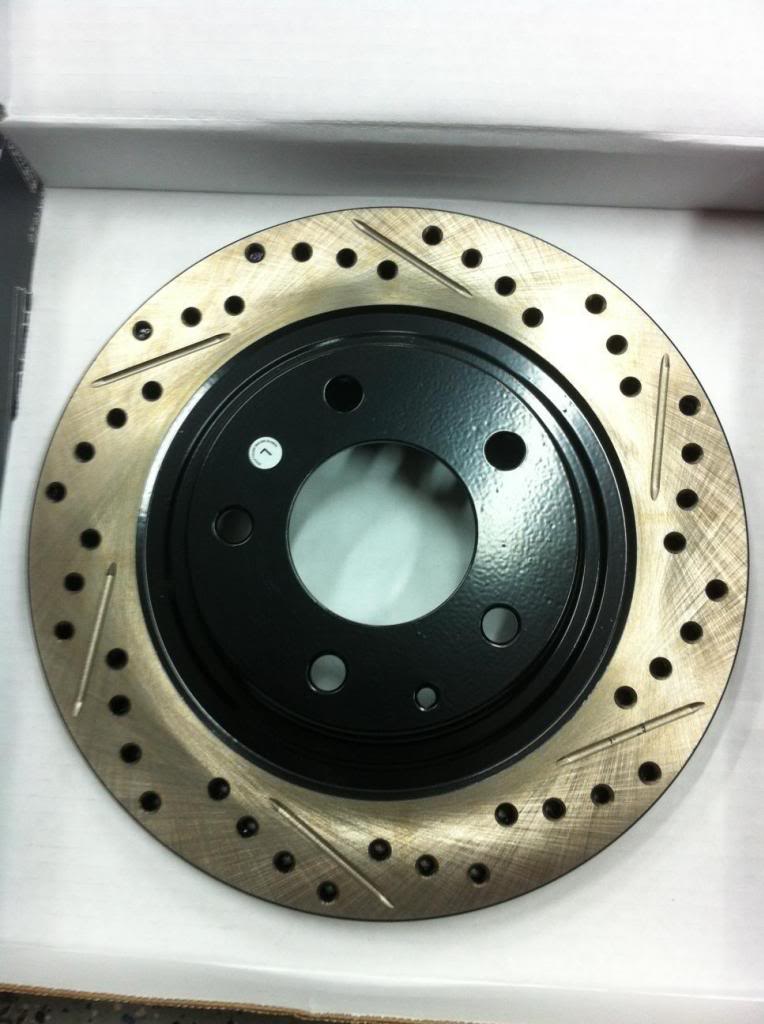
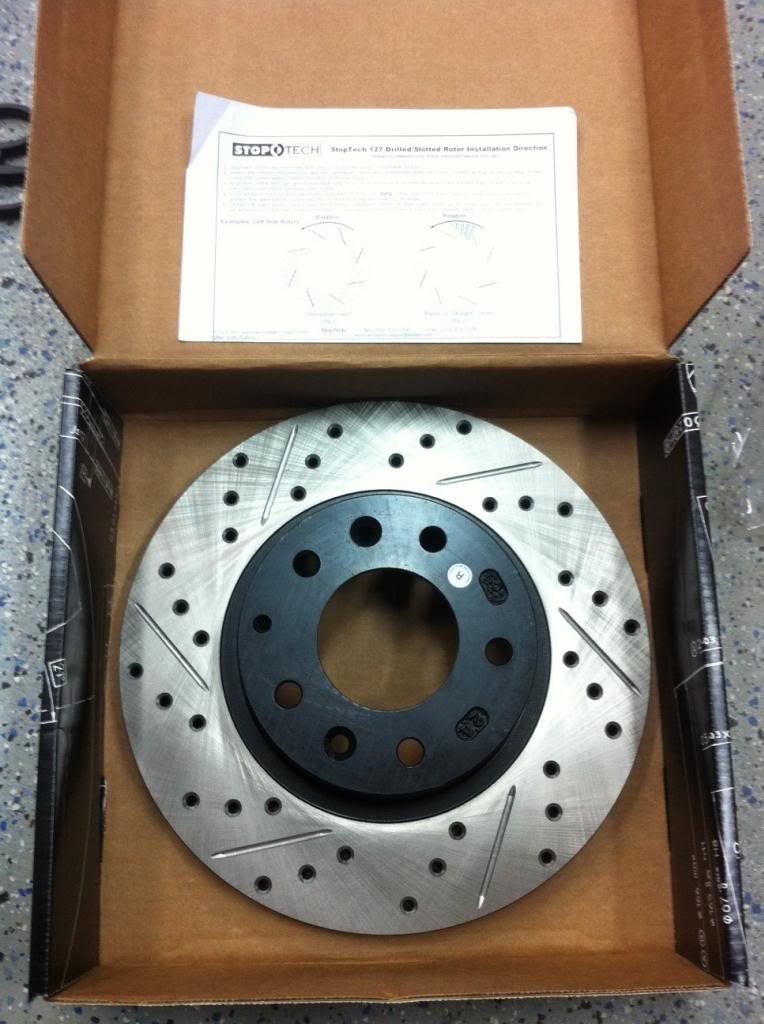
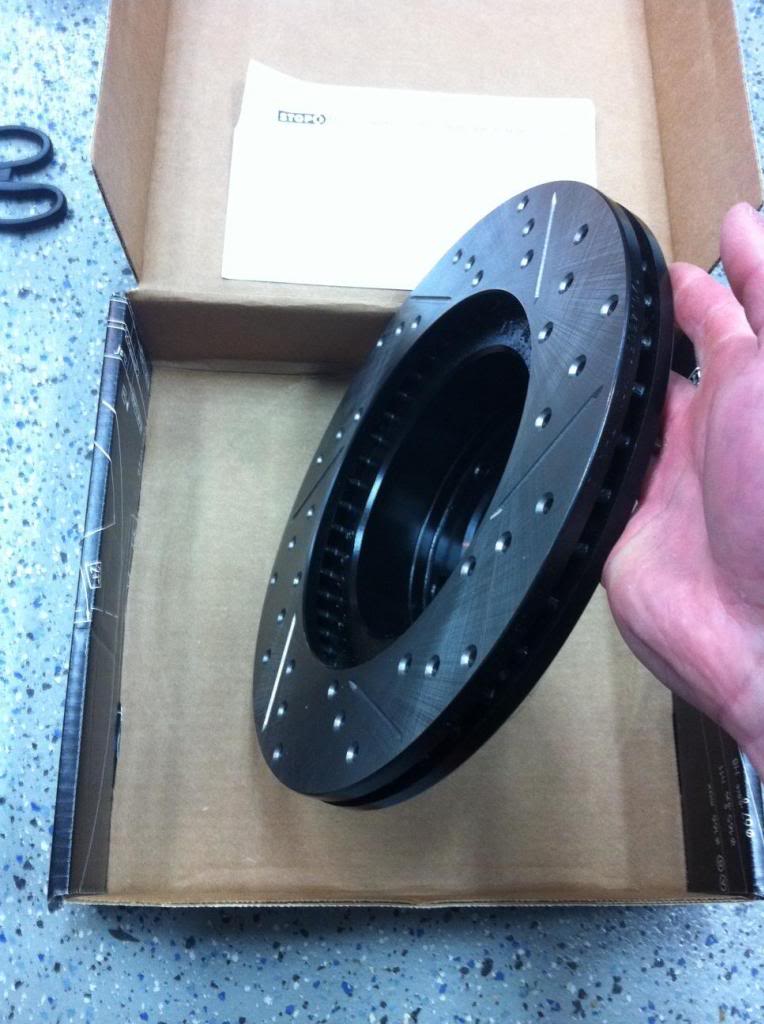
Also ordered my brake rotors. They’re Stoptech factory sized rotors that are cross drilled and slotted, because it looks awesome. They’re also e-coated everywhere that’s not the pad surface so it won’t rust which was a big selling point for me. They just look awesome as well.
I’m sure I’m forgetting something so just ask if you see something.
I’ve also made some progress in some other areas, I got my oil cooler mounted as well. Using another rivnut in the front bumper support and then making a little bracket with a helicoil, it worked out perfect. Again, keeping above average ground clearance while having the entire air duct covered for great flow. Zac thinks it’s overkill but I figure what the hell.
Also ordered my brake rotors. They’re Stoptech factory sized rotors that are cross drilled and slotted, because it looks awesome. They’re also e-coated everywhere that’s not the pad surface so it won’t rust which was a big selling point for me. They just look awesome as well.
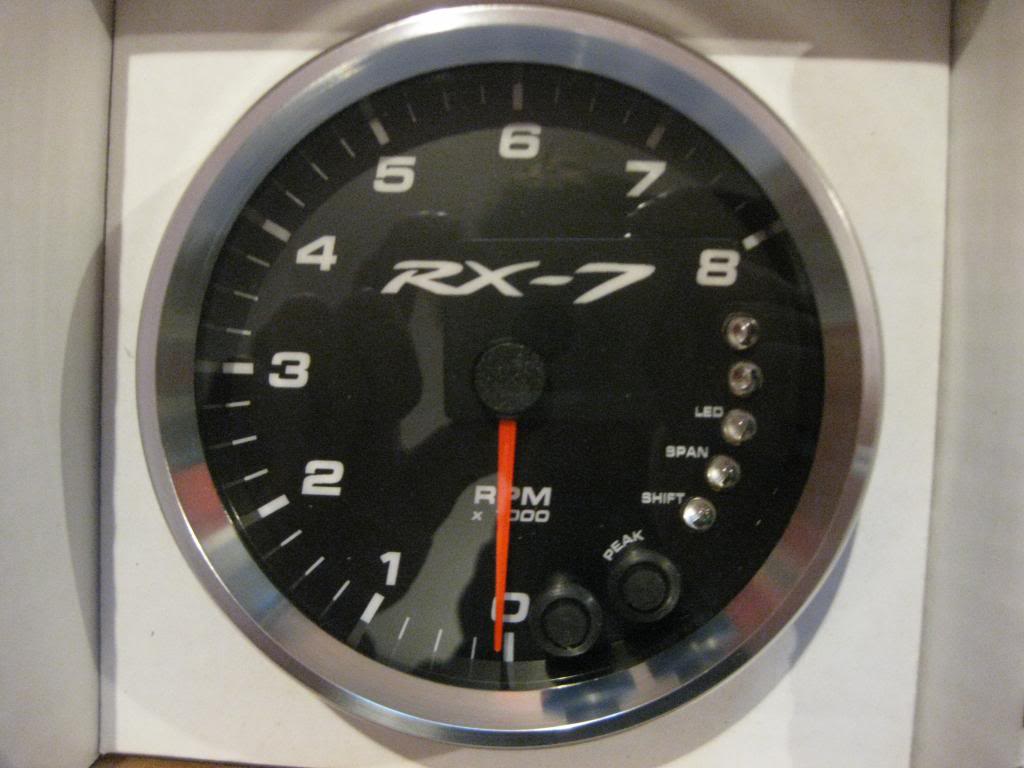
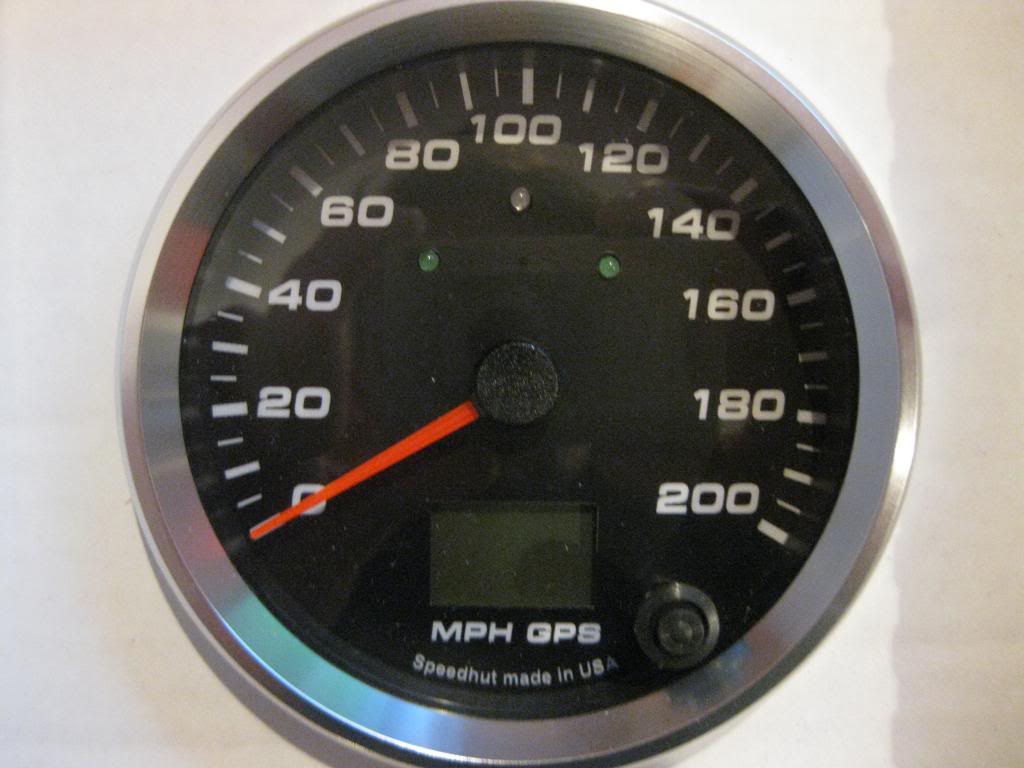
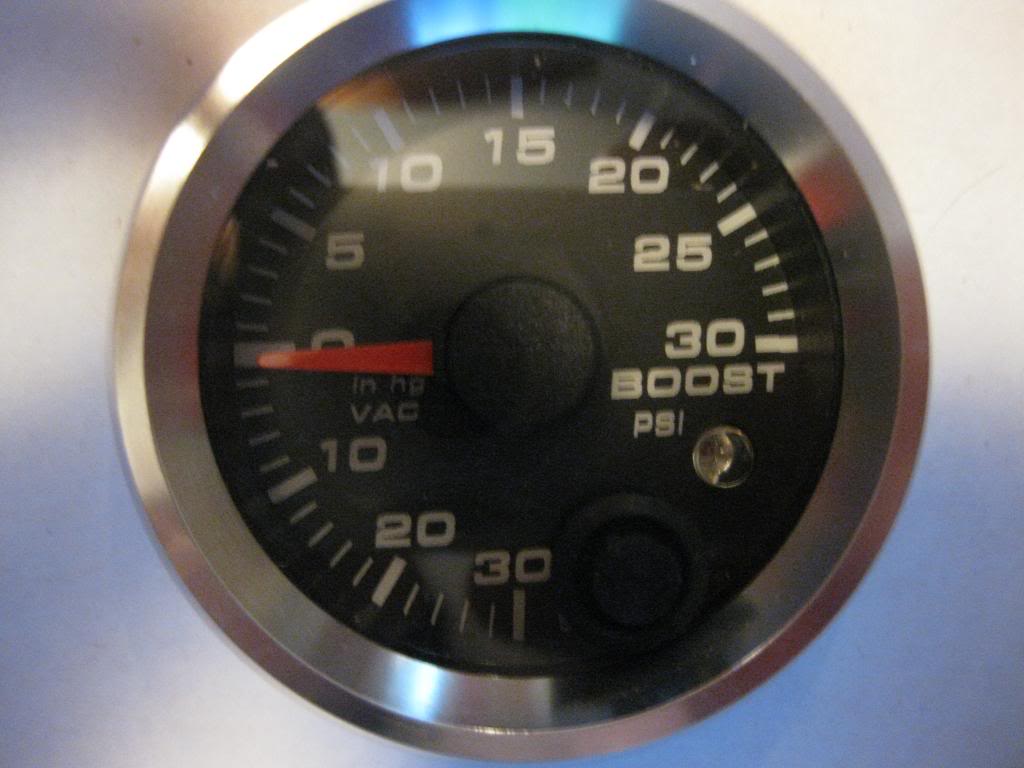
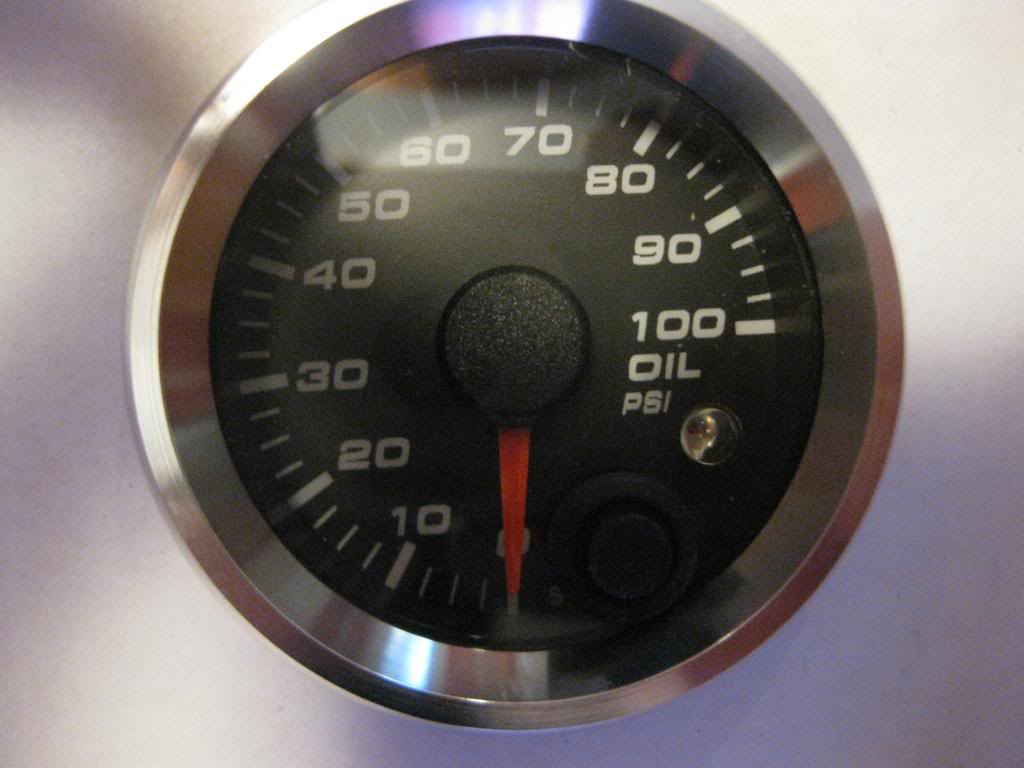
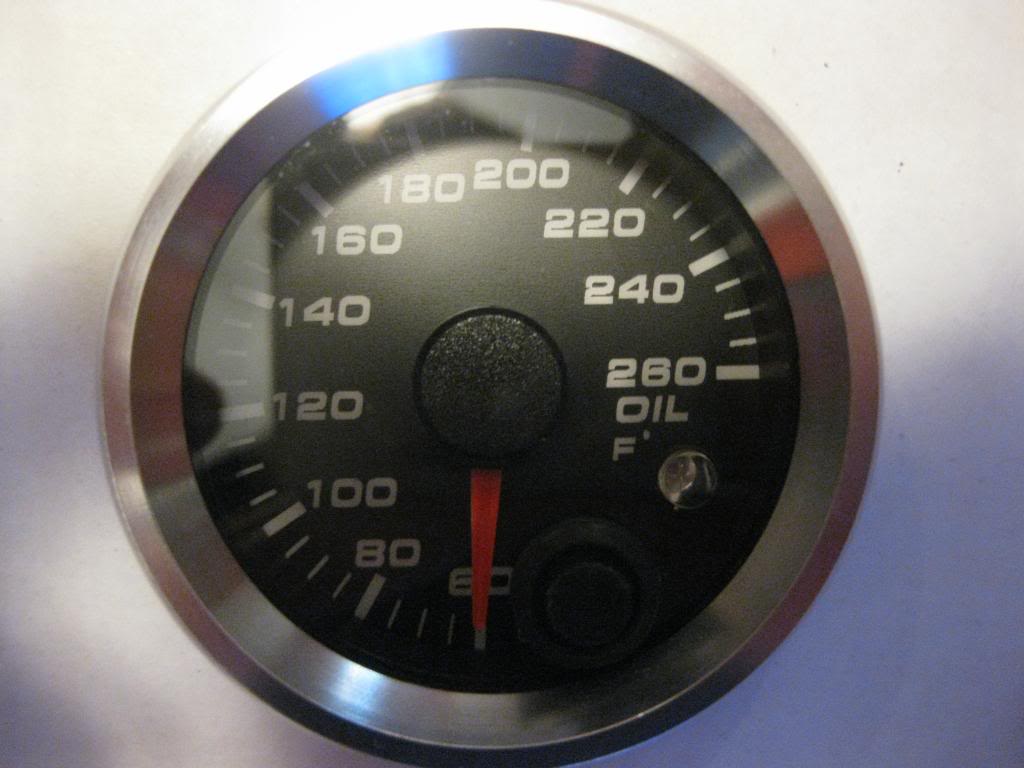
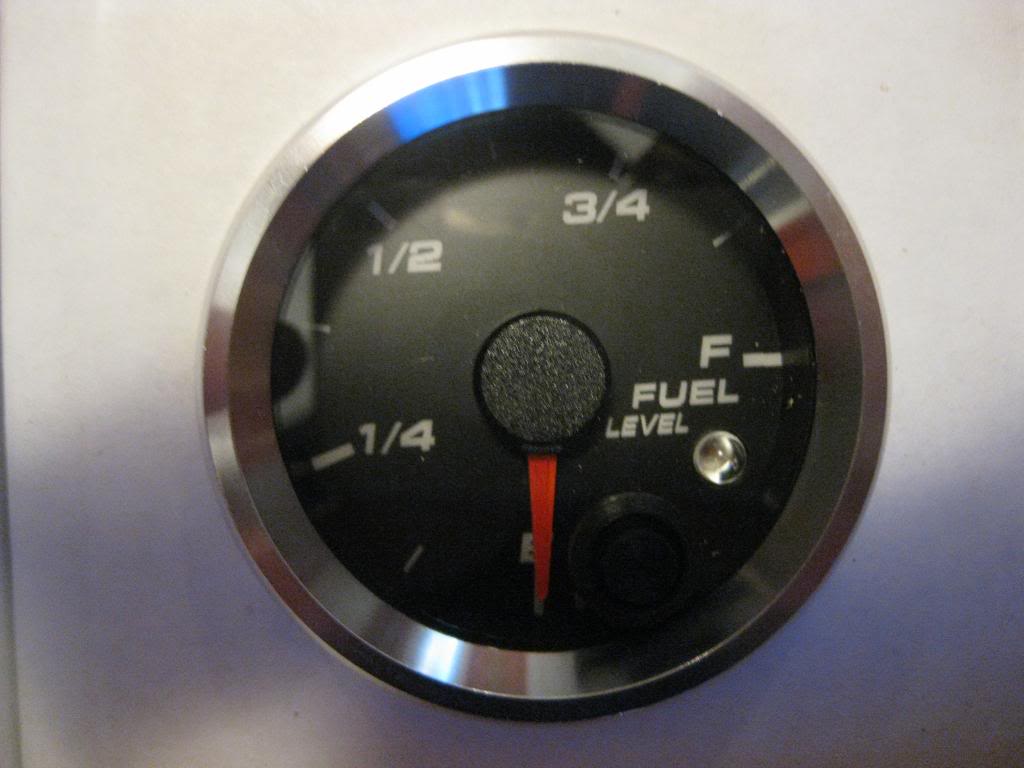
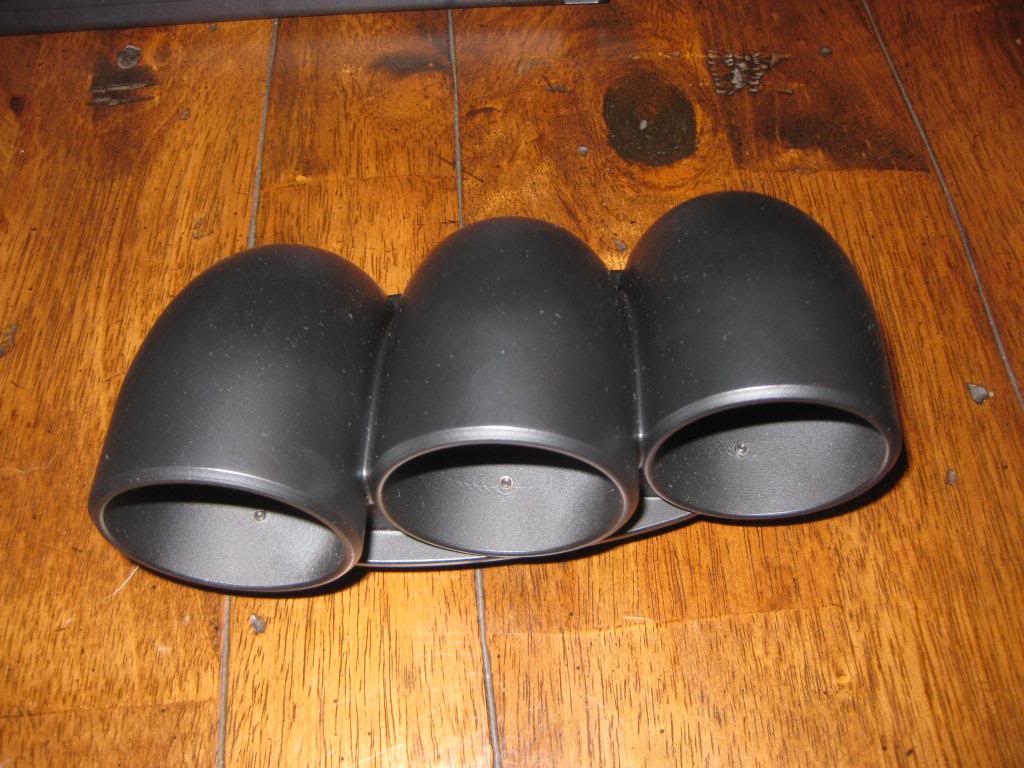
I also got all my speedhut gauges and flyrx7 triple gauge pod in. I’m copying Lane on the styling of the gauges because it looks fantastic. So the backlighting is blue with red pointers. I went ahead and added the updated RX7 logo to the tach because that will be the badging I have on the rear (Jim didn’t fill in the holes on the rear bumper.) I think they look ******* slick. They’re all the Revolution series with the programmable high/low warning LED’s and peak/low recall functions. The Speedo is GPS with the turn signal and high beam LED’s which I’ll most likely use for indicators for something else, boost levels perhaps, and the Tach has the shift lights, recall etc. The flyrx7 pod is the best center speaker pod for the FD and looks dead nuts factory.


So. There you go. A **** load of progress crammed into one post. Like I said before, I couldn’t be happier with the outcome. The only compromise I’ve made this entire time is deleting the ABS and not having the wastegates reroute to the downpipe. Neither of which could have been done, and the latter I’ve come to like anyway. It’ll reduce exhaust backpressure and make flames- works for me. And the ABS is something I naturally don’t rely on anyway.
I’ve been able to fit a huge radiator, serious fans, AC and everything else I wanted to, inside the factory front bumper and bay, while keeping full serviceability and ground clearance. Can you tell I’m happy with it?
Since I can’t spend money on it for a while, I’ll be fittings the gauges into the factory cluster, doing the lower radiator panel, notching the frame and probably sumping the gas tank. None of that requires serious money outlay and it should keep me busy until I figure out where my money is going to come from.
Big ups to Zac for keeping me motivated and all his help.
So, whadya think?


Great update vato loco! Nice work on all of it!
Holley HP EFI will get the job done. I just bought the Davis Technologies Traction Control for my setup with it. You are going to need that one for sure to put the power down.
Holley HP EFI will get the job done. I just bought the Davis Technologies Traction Control for my setup with it. You are going to need that one for sure to put the power down.
Yea Mike texted me this morning saying he had done the same. I'm interested in hearing how ya'll like it.

Maybe not in a rotary, but LS motors aren't loud as **** by nature. I guarantee this will be as civil as any car on here. Thus the attention to sound deadening etc. I'm going to be using a Mcleod Twin Disk clutch that has stock like pedal feel. Again, a non issue.
My goal is to be done in less than 6 months.
My goal is to be done in less than 6 months.

I want to see this car on the dyno.
Last edited by RENESISFD; Mar 25, 2013 at 10:47 AM.

Zoom-ing Goon.
Joined: Oct 2003
Posts: 262
Likes: 0
From: Cape Cod, MA
Awesome build. When it's completed, I'm curious to know what the under hood temps will be with the 'down pipe' that high. Funny calling it a down pipe when it goes up first! lol).
Are you still planning on the accusump system for oiling or have your plans changed on that?
Jose
Are you still planning on the accusump system for oiling or have your plans changed on that?
Jose
Heat won't be an issue. I'm wrapping all the hotside and downpipe, and probably double on the downpipe. I also plan on coating the manifolds to help as well.
And yea, there's no room for an accusump. I could put it inside, but I won't be tracking the car on the road course so I won't need it.
And yea, there's no room for an accusump. I could put it inside, but I won't be tracking the car on the road course so I won't need it.

Junior Member
Joined: Apr 2013
Posts: 18
Likes: 0
From: CA


