When you click on links to various merchants on this site and make a purchase, this can result in this site earning a commission. Affiliate programs and affiliations include, but are not limited to, the eBay Partner Network.
Did you ever grab a photos of the finished product? I had my housings media blasted and found 2 spots on the same face similar to yours that need to be touched up. Other than that I measured all my housing widths last night (don't have a micrometer so settled with my Vernier caliper) and they are looking perfectly fine. Ordering my rebuild kit and all new rotor seals and springs from REC today as well.
I have not gotten any pictures of the after product but I will get some and update here once I'm back in town. The surface was extremely smooth I was very happy with the repair. Let the rebuild race begin!
Did you ever grab a photos of the finished product? I had my housings media blasted and found 2 spots on the same face similar to yours that need to be touched up. Other than that I measured all my housing widths last night (don't have a micrometer so settled with my Vernier caliper) and they are looking perfectly fine. Ordering my rebuild kit and all new rotor seals and springs from REC today as well.
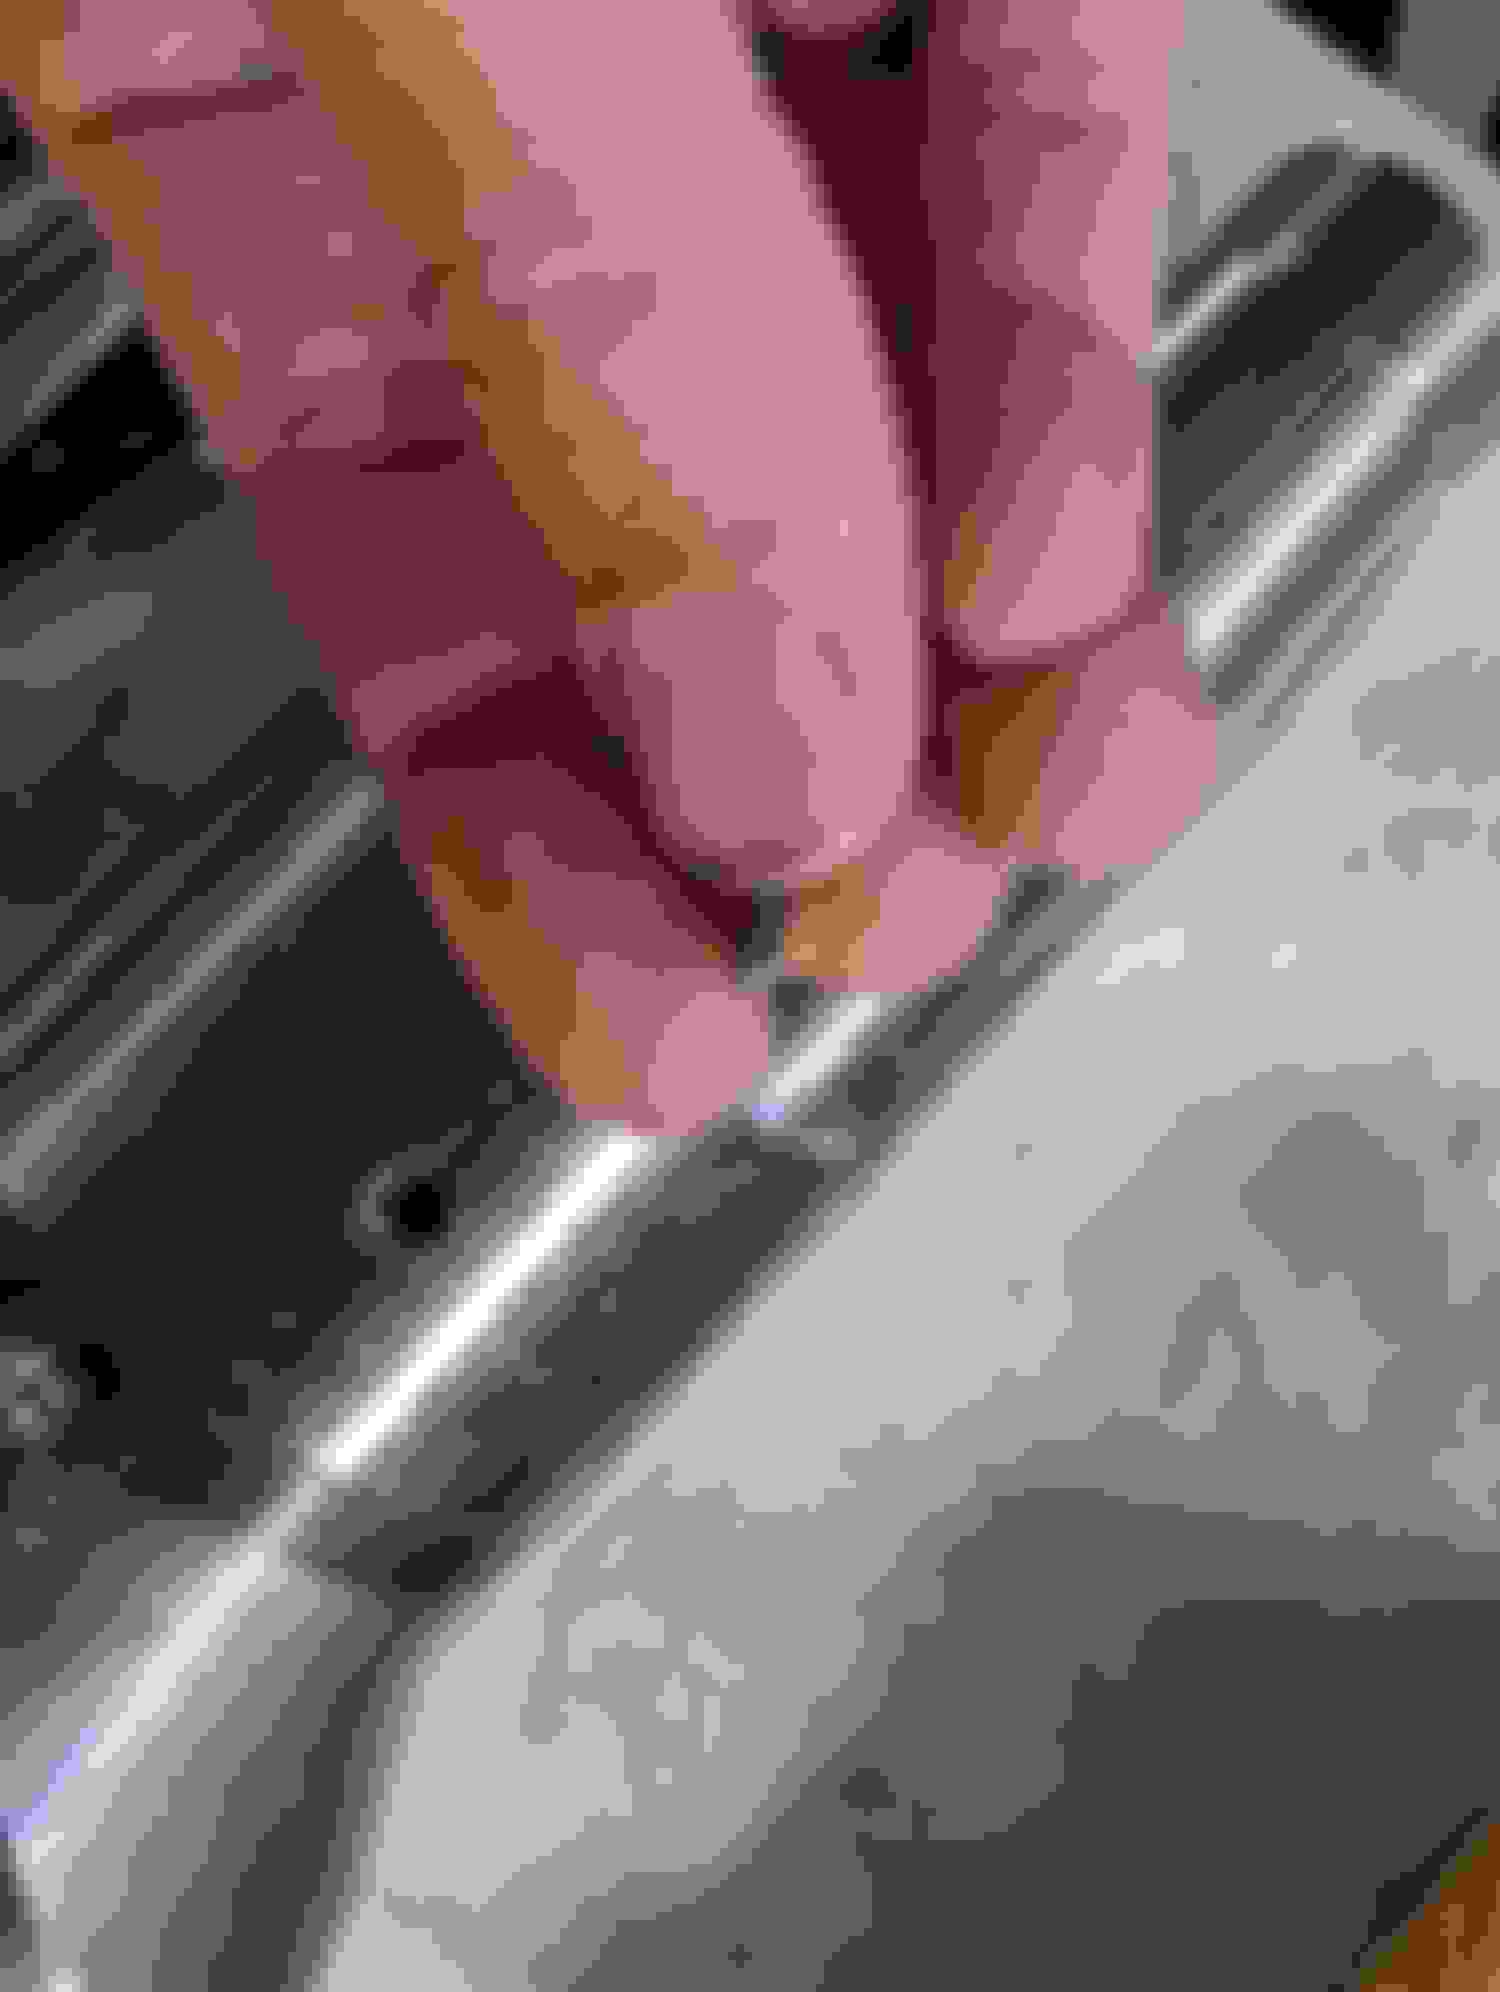
Here is a picture of the, was, crater. I used the razor blade method and did 2 separate coats one as a base and the second built it all the way up. It is indistinguishable by hand it is so smooth I am very happy with the repair even though I scratched the housing a bit with the razor blade.
I was looking at the I-rotary Apex seals and they recommend a 2-2.5oz premix level....interesting
Note, that 2.5oz figure is for an alcohol burning racecar with no OMP. I got directly from Dr. Ianetti that you can run less. I'm running 1.5oz/gallon on a gas burning car with an OMP and WI. No smoke at this level with Klotz Techniplate.
Yesterday was a very busy day. I started by measuring all of the apex-rotor and side seal clearances
Then I began preparing the rotors. I grabbed my new Mazda oem oil control rings and my new oil control ring cages and pressed them in with the spring in place and pop, out the o-ring and cage goes. They will not stay in! I tried lots of lube, little lube, no lube. Nothing kept the OEM rings in place they kept popping out. I then grabbed one of the 5 packs of Atkins Viton rings I had lying around and installed one. It was a bitch to get in but once it was in there it did not come out. It still had travel but it did not pop out of the seat! I then went through all 5 sets of rings and selected only the smoothest rings with the least amount of extra extrusion/roughness on the seam. I was disappointed by the lack of consistency of the Atkins rings but I was able to select what I thought were the best ones.
Now that oil control rings are in I moved on to installing the solid ridgeless Atkins corner seals and FD springs. No issues there.
Next issue came from the side seal springs. The pack I had ordered were all flat and some were bent awry. I noticed that the seals were sitting oddly low in the groove which spurred me to inspect them. Luckily I have several packs of FD springs and I was able to get another good one out to verify. I then checked each individual spring to make sure there was no air gap in the peaks and valleys vs my good spring. Airgap = flat. See pictures below.
I was then able to measure all of the side seals to a .0035 gap. Seals moved freely.
Finally the rotors are packed and ready. Lets begin the assembly.
Only issue I ran into during assembly was the apex seal corner pieces all popped off even after being super glued. One of them dropped down into the tension bolt hole but I was able to get it out with some tweezers. I was able to place each piece back and had it located properly on the spring. In the past I have never had my corner assist pieces break off so it was a little bit of a challenge. I do not believe any of them have been pinched as the plates all seated properly with no weird gaps and the motor requires less than 15flb of torque to spin over.
I gave it the proverbial chuga chuga test and all 6 pulses sounded normal. I am a little anxious about the corner assist pieces is there any thing I can do to reassure myself that I didn't bork them up besides fully disassembling?
Note, that 2.5oz figure is for an alcohol burning racecar with no OMP. I got directly from Dr. Ianetti that you can run less. I'm running 1.5oz/gallon on a gas burning car with an OMP and WI. No smoke at this level with Klotz Techniplate.
Thank you for your input. I am not running an OMP and have W/M injection. I am planning on moving to redline premix as it is compatible with alcohol. I also am going to try an experiment putting some premix in a sample of snow performance boost juice and see how it mixes/settles.
I'm wondering if I saw accelerated wear due to the Methanol washing the oil off of the surfaces as I had it ramping in hard at 1psi
Here is a picture of the, was, crater. I used the razor blade method and did 2 separate coats one as a base and the second built it all the way up. It is indistinguishable by hand it is so smooth I am very happy with the repair even though I scratched the housing a bit with the razor blade.
Thanks! I went ahead and did mine over the weekend as well. I also did the razor blade method and found that after the first coat I also needed to do a second as after the first application there was still a bit of an indent where the epoxy wasn't perfectly level with the housing surface.
Thanks! I went ahead and did mine over the weekend as well. I also did the razor blade method and found that after the first coat I also needed to do a second as after the first application there was still a bit of an indent where the epoxy wasn't perfectly level with the housing surface.
I would recommend scraping off that extra epoxy around the indentation itself, you don't want to create a large raised section where coolant might try to escape! Looking good!
I'll likely try and spend a bit more time smoothing that out. Since it's been dry I've even taken a new razor blade to it and it isn't getting any more material off so it's quite smooth already, but while I have the time with the engine apart I'm going to make sure it's perfect.
Glad to hear you have your short block all back together now.... it's only a matter of time before you have it back up and runnning!
She should be up and running soon but ill be out of town all next week. I have a Glowshift dual 2200f egt gauge that just arrived and my new Turblown equal length short runner manifold with dual 40mm turbosmart wastegates should be coming this week as well. No more back pressure issues for me . I also have a set of ID 1700XDS on their way for the secondary rail to accommodate for the lack of fueling.
Next update will be in a few weeks. Hopefully when its warmer
looks like degradation on the outer ring too. better get the JB Weld and a razor out. again
Yeah you think that's worthy of being filled too? I was curious about it but figured they are likely small enough not to be of any concern. I guess no harm spending some time filling them.
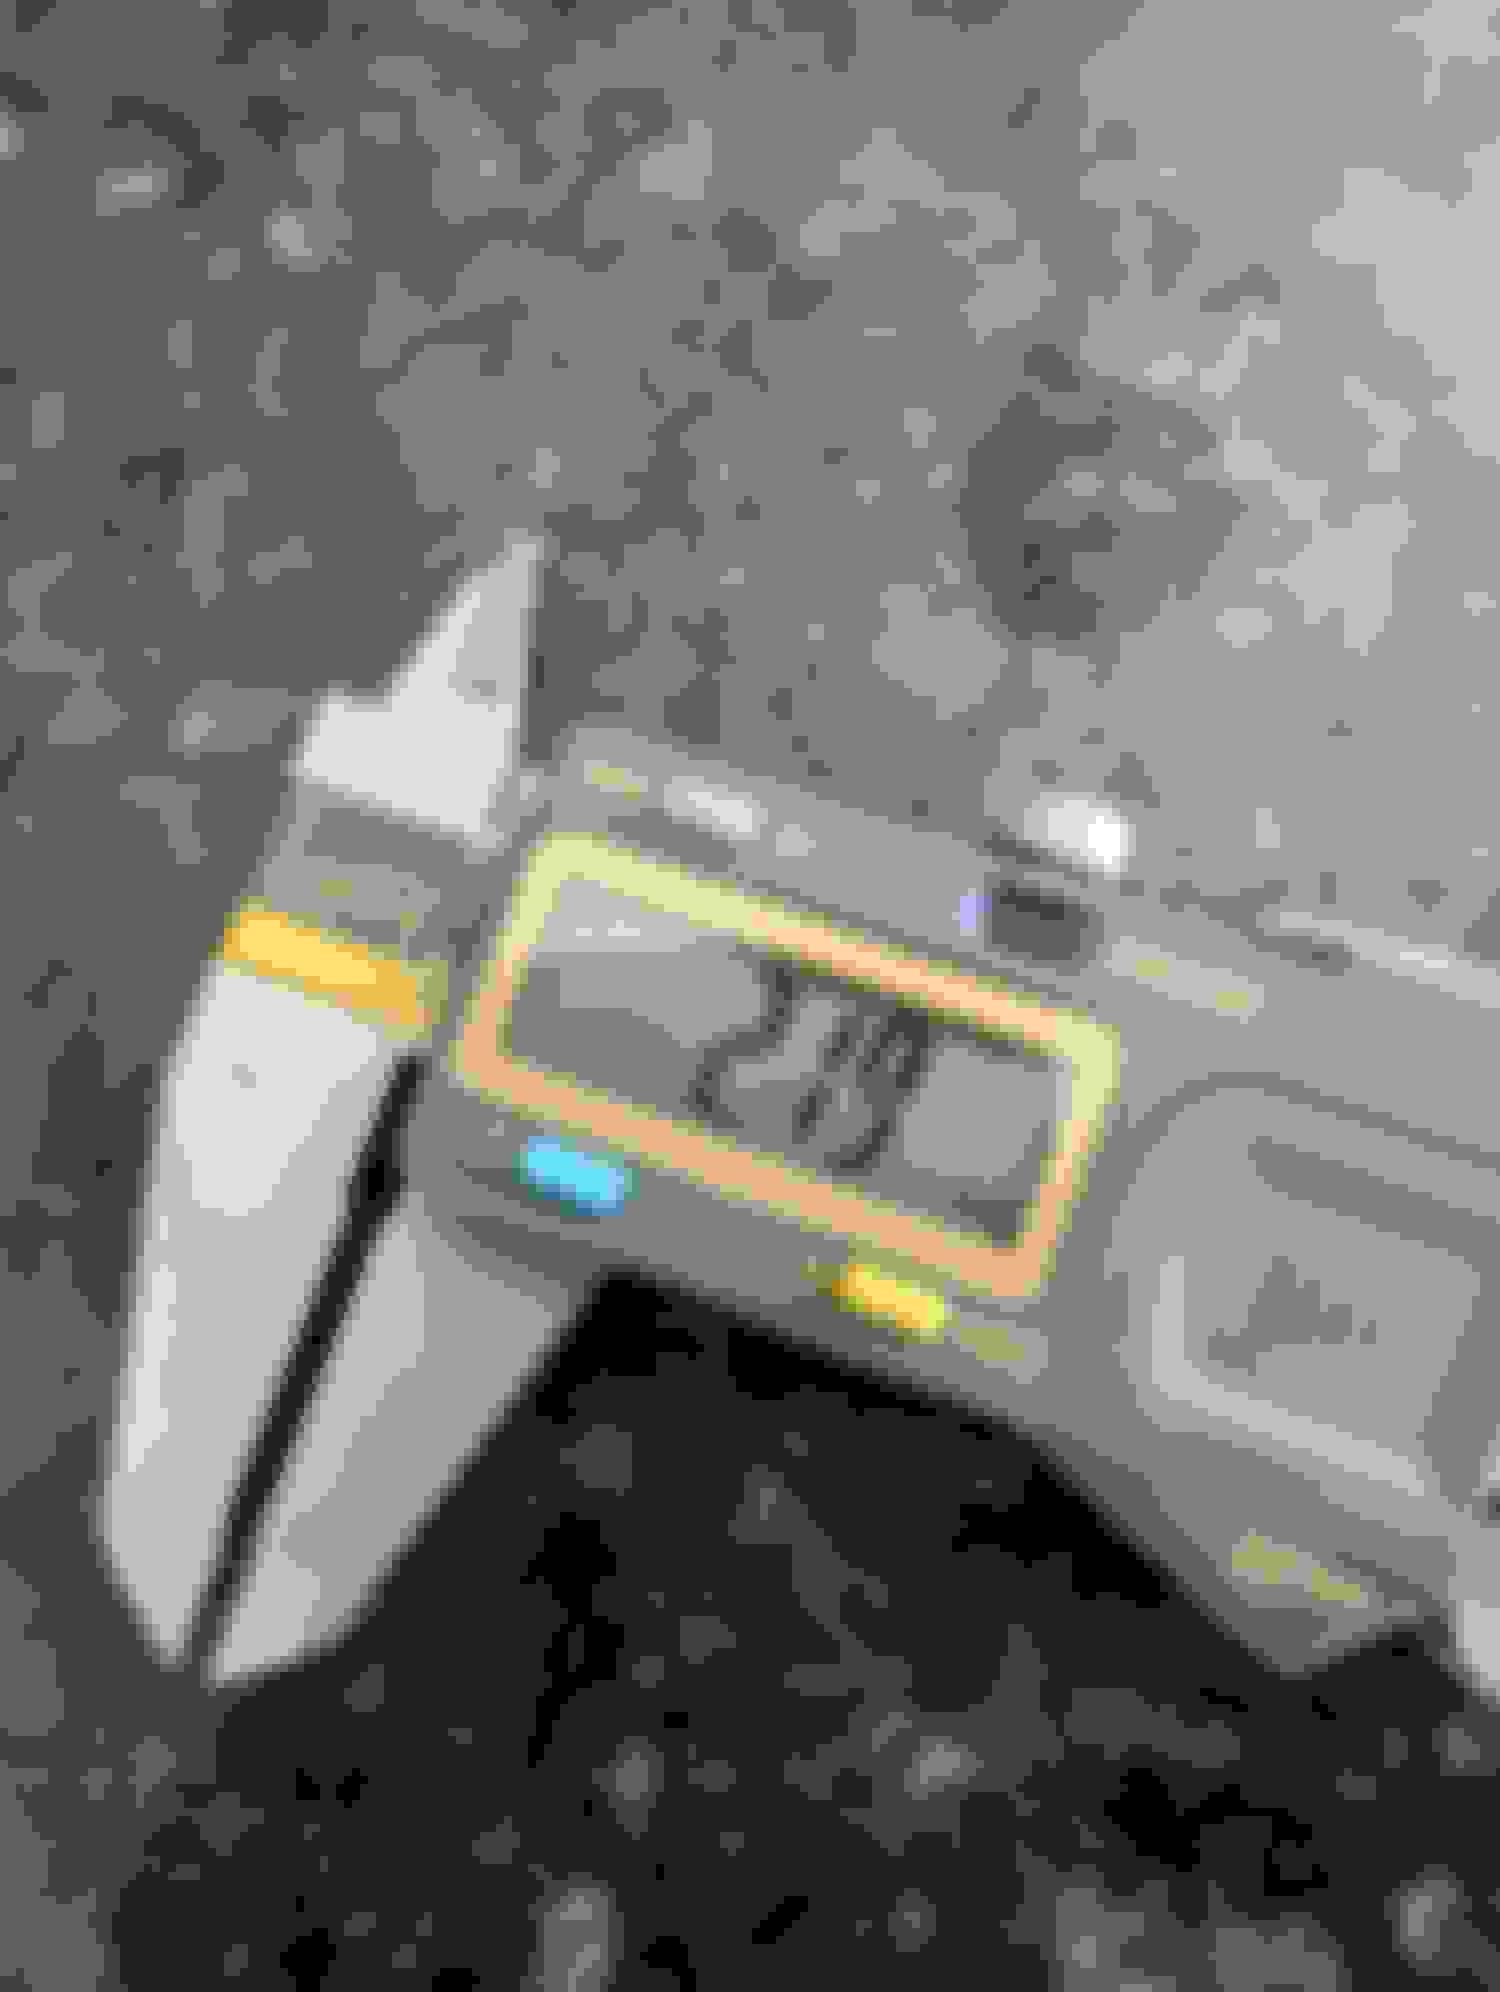
I disassembled the motor this evening due to resistance when turning by hand. I also noticed that I could not spring the apex seal up and down. Upon disassembly it looks like the corner assist pieces popped out of place and placed a large amount of force on the apex seal itself. rotaryrx this is similar I believe to what happened to you. In the pictures you can see where the assist piece has worn at an odd angle. 2 of them are bad 1 is good.
Will be getting fresh orings, coolant seals, apex seals(now to decide again lol), and OEM springs because I don't trust the Atkins spring. Better to catch it now than after however many miles it lasts... small setback but at least i don't need to do the side seals again.
All of the parts came in today. The New manifold and wastegates as well as the OEM oring kit and ID1700xds injectors.
The coolant jackets i had previously received were definitely not OEM. See pictures below. The OEM ones are the pack of 4 and are of a different class of manufacturing quality.
Needless to say I feel ripped off by Atkins not only for the coolant seal problems and misrepresentation as OEM. Josh gave me a dodgy answer on email and did not directly answer my questions as to weather or not they were oem. In addition the apex seal springs are not the same length as OEM springs and is what i believe to be the cause of the corner seal issues in this assembly. All OEM parts are here for now. Pictures of Spring length difference:
All of the parts came in today. The New manifold and wastegates as well as the OEM oring kit and ID1700xds injectors.
The coolant jackets i had previously received were definitely not OEM. See pictures below. The OEM ones are the pack of 4 and are of a different class of manufacturing quality.
Can confirm, I received my rebuild parts on Friday and my gas seals look identical to these.
Interesting catch with the Apex seal spring lengths, makes me want to compare the new ones I got to what was existing in my motor before and see how they compare.
Yesterday evening I successfully reassembled the motor after receiving a fresh set of RA classic apex seals. I had no issues whatsoever installing the seals and OEM springs, none of the corner assist pieces popped off. When in doubt always OEM springs. The OEM coolant seals also were installed with confidence. Flywheel, end play, and front cover are done. She spins over with ease now and I have successfully tested each apex seal for movement.
One note, as I was checking the rotors prior to install for corner seal movement I noticed that one of them was stuck flat. I popped out the corner seal to find the spring cut in one section and crushed into the rotor groove. This probably happened when the corner piece popped out and then the spring rotated. I replaced it with another FD spring and was sure to check all of the other springs.
Working on getting a new hot side for the turbo that is twin scroll as my prior one was undivided. Once I figure that out I'll drop it in and compression test/prime with my fingers crossed.
Don't compression test it till it has run. Compression testing it with lube will give you false numbers
Note, that 2.5oz figure is for an alcohol burning racecar with no OMP. I got directly from Dr. Ianetti that you can run less. I'm running 1.5oz/gallon on a gas burning car with an OMP and WI. No smoke at this level with Klotz Techniplate.
What if you have an OMP but also get a ton of blowby? Hehehe...


 . I also have a set of ID 1700XDS on their way for the secondary rail to accommodate for the lack of fueling.