
DIY Lexan install

Thread Starter
Joined: Nov 2006
Posts: 4,148
Likes: 4
From: California
DIY Lexan install
Hi all, I couldn't find very many threads regarding lexan installations so I am going to start a thread of doing my own lexan windows in my duece. Since my car is a sedan I have 6 windows! Feel free to add any info or tips from your own experience.
First thing you want to do is take out all the windows. I chose to make my car as light as possible so I took out the window regulators, linkage, handles, you name it. I even cut out the support bar. Since my car is over 30 years old the original front and rear windshield was a bitch to get out because the glue was old and as hard as a rock. This is what worked best for me. I got my windshield removal/cutting tool and while I started to cut I used a heat gun and heated around the area I was cutting. This allowed the glue to soften up and was alot easier to cut. It still was a bitch. Take your time. It's easy to crack the glass!
I'm going to skip the front and rear windshield install and move towards the side windows because that's what I have finished so far. I will come back to the front and rear later, but it is basically the same steps and principles.
Side windows- I chose to mount my lexan on the outside window frame because on the rx2 there is a nice metal frame all the way around. Depending on your model/car you may have to make some metal frames to mount your lexan onto.
1. Get some tracing paper and lay it around the frame of the window you are doing. Trace the outer edge with a pencil. Cut this out and make necessary trims to fit properly. Next get some thin cardboard at a craftstore and trace the tracing paper onto the cardboard and cut that out. Now lay this template on your frame and make any final cuts/trims of your window frame.
2.Once the template is perfect. Lay the template on your lexan and trace the pattern onto the lexan. Now cut the lexan window out. I searched the internet and asked some friends and it looks like the easiest and most cost effective way to cut it is with a jigsaw. I used my dads old *** skill saw with a craftsman finishing blade. Do not use a blade with fine teeth and don't use high speed. A fine tooth blade will not shed the plastic fast enough when cutting and will melt the lexan while you cut. Choose a blade that will clear the plastic and use a medium speed on your jigsaw. There are special plastic blades you can buy from home depot or your nearest hardware store. Do not use air/cutoff wheels, it will melt the plastic and make a mess. Also, make sure to leave both sides of the protective covering on the lexan and leave on until your ready to mount it.
One trick I did was take some felt tape and put it on the bottom of my jigsaw so that it will not scratch the lexan when cutting . Even with the protective covering it is pretty easy to poke through it and scratch the lexan.
3. Now that your window is cut out, you want lay it on your cars window frame and make any final adjustements with a block sander, etc. Once your satisified with the fit it's time to decide how many screws/rivets your going to use. A good rule of thumb is one rivet for every 5-6 inches. If you have a tight bend then you will want to use about one every 3-4inches. I chose 5"'s and put a small piece of tape every 5" and it spread the rivets out nice and evenly for my window. You may have to play around with the spacing a little. You don't want to have one rivet every 5"'s and then at the end have one at 2". Play around with the spacing and make it nice an even all the way around the frame. It's better to have a few more screws/rivets than not enough.
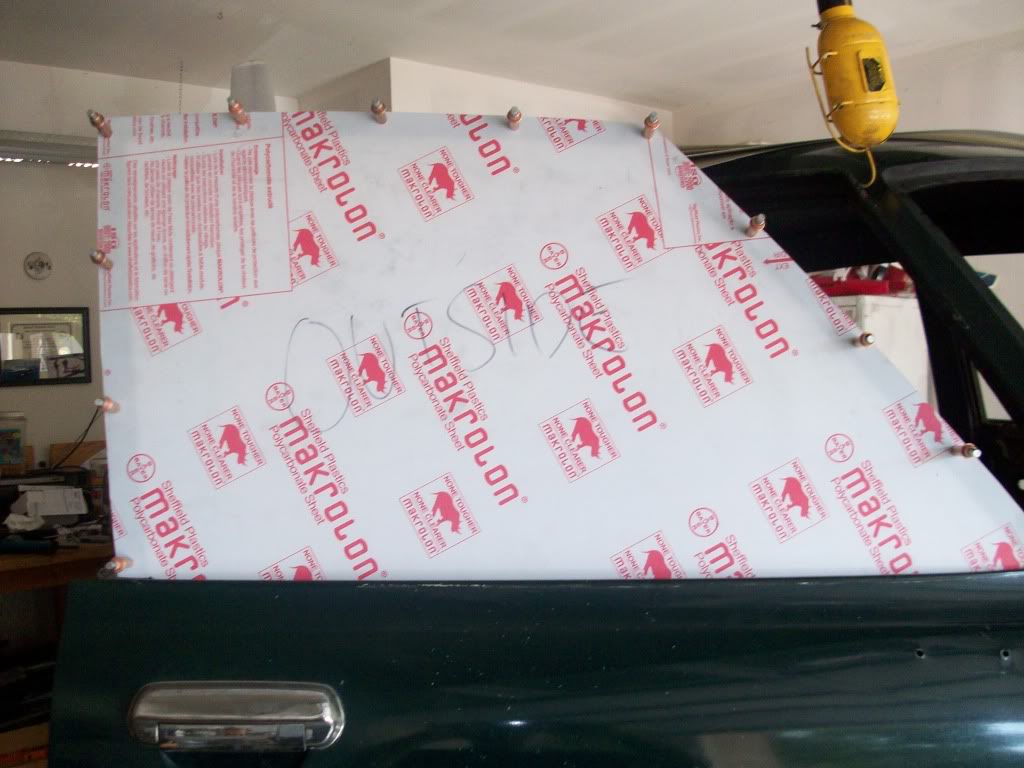
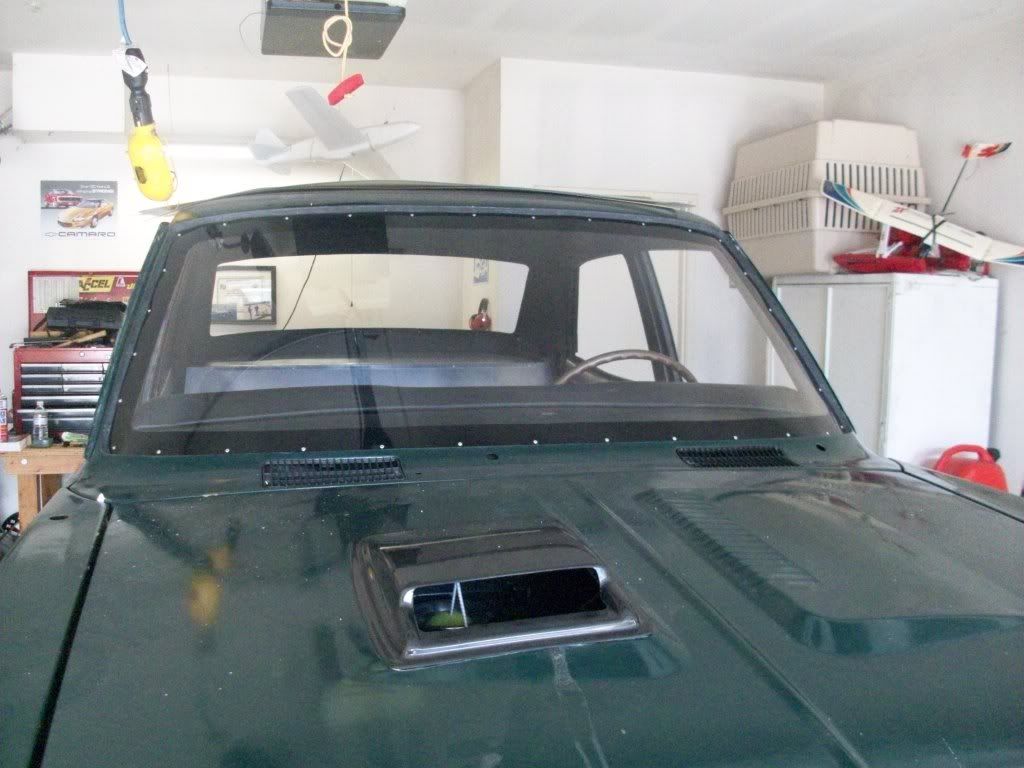
4. Mark your holes on the lexan and drill them out with the window off the car on a flat bench/etc. Note: Make sure you don't drill to close to the edge of the lexan. If you drill too close you risk cracking the lexan because there is not enough meat and it will crack from vibration and expansion. You want a minimum of a rivet head size distance from the edge which is about 3/8"+. After all the holes are drilled I mounted the window back on the car and positioned with plastic quick clamps. I then drilled through the window frame using the holes from the lexan as a guide. I drilled the top center one first and then put a cleco to hold in place. I then went around the complete frame and drilled and put a cleco until I was all done. Heres a pic of the drilling complet with the cleco's in place.- The cleco's are a must when doing this by yourself. You can get a set of pliers and clecos for about 25 bucks at Summit racing.
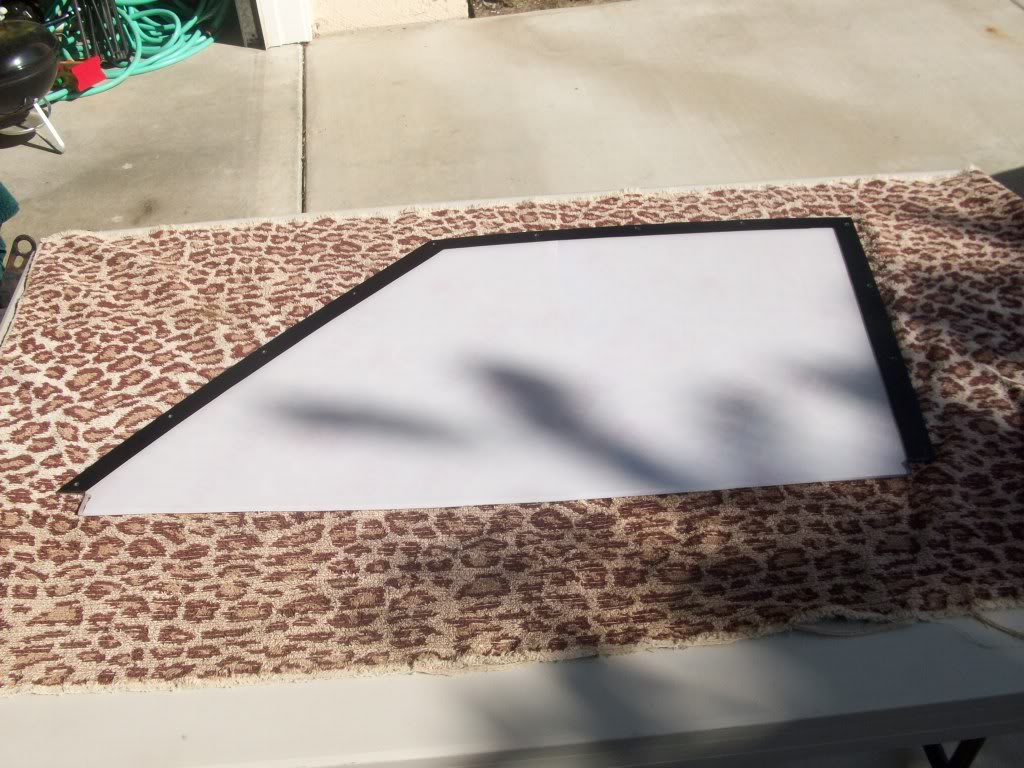
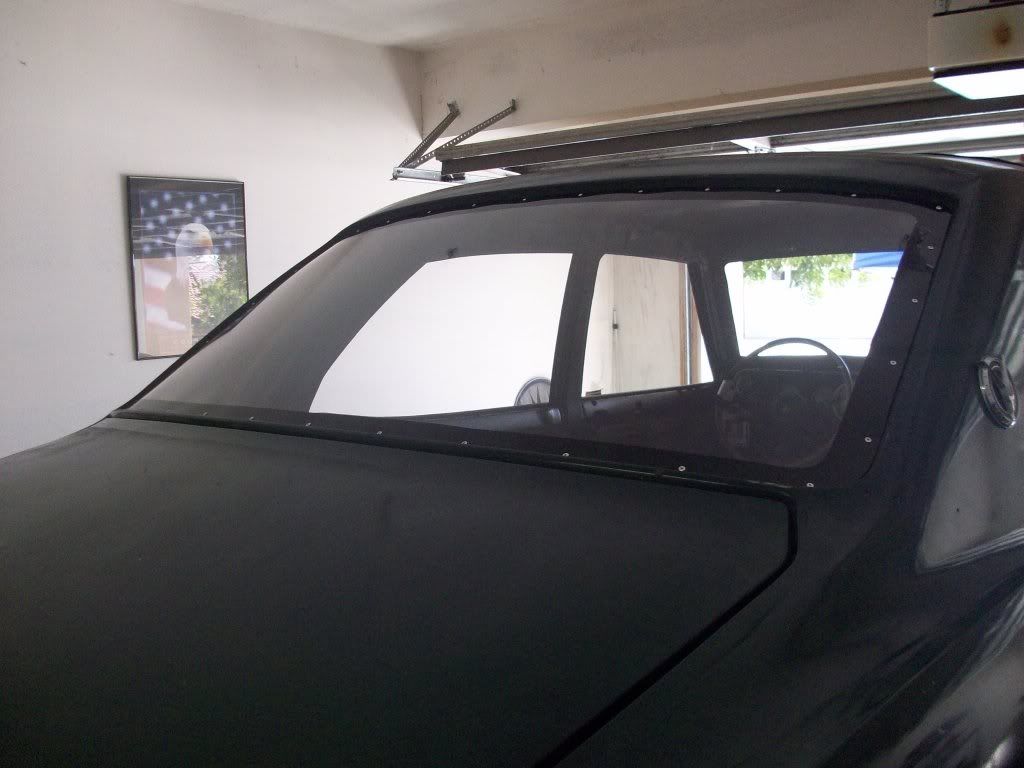
5. Remove the clecos and lexan window. Now if you want a nice black border around the window this is how you do it. On the inside side of the lexan window- the side facing the inside of the car, draw out a nice boarder around the window edge. You can chose whatever demension you want. I just traced the same thickness of the stock frame which was about 2". Once you traced a nice boarder on the inside part of the lexan covering, take an exacto blade or razer blade and very lightly cut out the boarder you just traced. YOu don't need a lot of pressure just a light pressure and follow the line you just made. After cutting, remove the protecive tape you just cut off of the lexan. Now use a piece of scotch brite and lightly scuff up the clear area/boarder you just exposed. Now paint this area all the way around with Krylon indoor/outdoor flat black. Put about 3-4 coats on. The krylon works great because it dries in 10 minutes and you can coat every 1 minute. Here's a pic of the boarder I did.
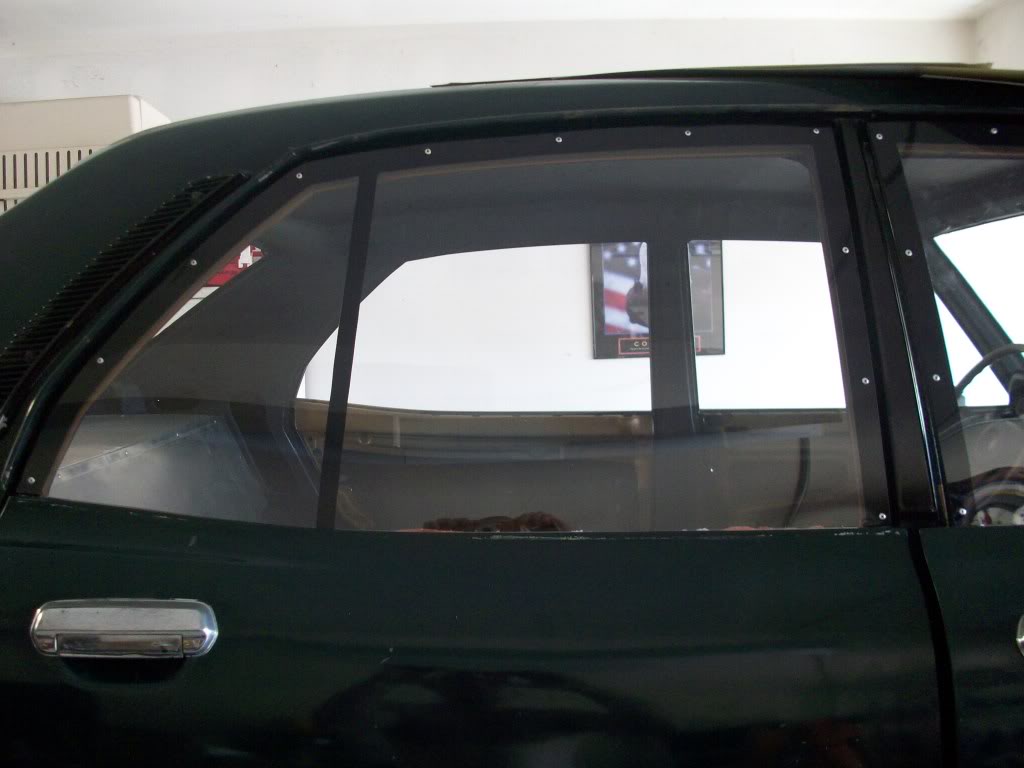
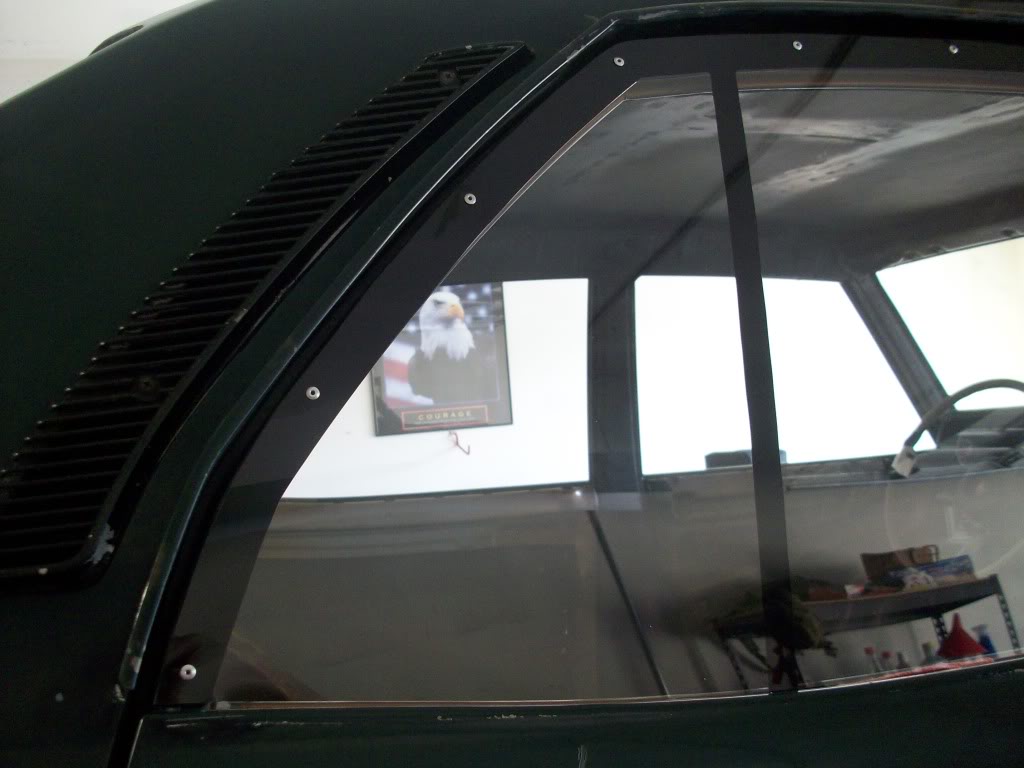
6. Once the paint has dried carefully, I'll say it again, CAREFULLY, remove the rest of the protecive covering on both sides of the lexan window. Be very carefull because lexan scratches very very very easily. Hold the window up in the sun and look through the outside to make sure your black boarder you just painted doesn't have any pinholes that you missed. Once satisfied, Put the window on your cars window frame and put a couple of clecos to hold in place. Now install your pop rivets one at a time. Voila, your done!
Tips on cleaning lexan. Do not use any type of cleaner. Use warm water with a little dish soap and a soft sponge. Dry the water off with a chamois.
Stay tuned for the front and rear window install. It is pretty much the same but there are bends to deal with.....
First thing you want to do is take out all the windows. I chose to make my car as light as possible so I took out the window regulators, linkage, handles, you name it. I even cut out the support bar. Since my car is over 30 years old the original front and rear windshield was a bitch to get out because the glue was old and as hard as a rock. This is what worked best for me. I got my windshield removal/cutting tool and while I started to cut I used a heat gun and heated around the area I was cutting. This allowed the glue to soften up and was alot easier to cut. It still was a bitch. Take your time. It's easy to crack the glass!
I'm going to skip the front and rear windshield install and move towards the side windows because that's what I have finished so far. I will come back to the front and rear later, but it is basically the same steps and principles.
Side windows- I chose to mount my lexan on the outside window frame because on the rx2 there is a nice metal frame all the way around. Depending on your model/car you may have to make some metal frames to mount your lexan onto.
1. Get some tracing paper and lay it around the frame of the window you are doing. Trace the outer edge with a pencil. Cut this out and make necessary trims to fit properly. Next get some thin cardboard at a craftstore and trace the tracing paper onto the cardboard and cut that out. Now lay this template on your frame and make any final cuts/trims of your window frame.
2.Once the template is perfect. Lay the template on your lexan and trace the pattern onto the lexan. Now cut the lexan window out. I searched the internet and asked some friends and it looks like the easiest and most cost effective way to cut it is with a jigsaw. I used my dads old *** skill saw with a craftsman finishing blade. Do not use a blade with fine teeth and don't use high speed. A fine tooth blade will not shed the plastic fast enough when cutting and will melt the lexan while you cut. Choose a blade that will clear the plastic and use a medium speed on your jigsaw. There are special plastic blades you can buy from home depot or your nearest hardware store. Do not use air/cutoff wheels, it will melt the plastic and make a mess. Also, make sure to leave both sides of the protective covering on the lexan and leave on until your ready to mount it.
One trick I did was take some felt tape and put it on the bottom of my jigsaw so that it will not scratch the lexan when cutting . Even with the protective covering it is pretty easy to poke through it and scratch the lexan.
3. Now that your window is cut out, you want lay it on your cars window frame and make any final adjustements with a block sander, etc. Once your satisified with the fit it's time to decide how many screws/rivets your going to use. A good rule of thumb is one rivet for every 5-6 inches. If you have a tight bend then you will want to use about one every 3-4inches. I chose 5"'s and put a small piece of tape every 5" and it spread the rivets out nice and evenly for my window. You may have to play around with the spacing a little. You don't want to have one rivet every 5"'s and then at the end have one at 2". Play around with the spacing and make it nice an even all the way around the frame. It's better to have a few more screws/rivets than not enough.
4. Mark your holes on the lexan and drill them out with the window off the car on a flat bench/etc. Note: Make sure you don't drill to close to the edge of the lexan. If you drill too close you risk cracking the lexan because there is not enough meat and it will crack from vibration and expansion. You want a minimum of a rivet head size distance from the edge which is about 3/8"+. After all the holes are drilled I mounted the window back on the car and positioned with plastic quick clamps. I then drilled through the window frame using the holes from the lexan as a guide. I drilled the top center one first and then put a cleco to hold in place. I then went around the complete frame and drilled and put a cleco until I was all done. Heres a pic of the drilling complet with the cleco's in place.- The cleco's are a must when doing this by yourself. You can get a set of pliers and clecos for about 25 bucks at Summit racing.
5. Remove the clecos and lexan window. Now if you want a nice black border around the window this is how you do it. On the inside side of the lexan window- the side facing the inside of the car, draw out a nice boarder around the window edge. You can chose whatever demension you want. I just traced the same thickness of the stock frame which was about 2". Once you traced a nice boarder on the inside part of the lexan covering, take an exacto blade or razer blade and very lightly cut out the boarder you just traced. YOu don't need a lot of pressure just a light pressure and follow the line you just made. After cutting, remove the protecive tape you just cut off of the lexan. Now use a piece of scotch brite and lightly scuff up the clear area/boarder you just exposed. Now paint this area all the way around with Krylon indoor/outdoor flat black. Put about 3-4 coats on. The krylon works great because it dries in 10 minutes and you can coat every 1 minute. Here's a pic of the boarder I did.
6. Once the paint has dried carefully, I'll say it again, CAREFULLY, remove the rest of the protecive covering on both sides of the lexan window. Be very carefull because lexan scratches very very very easily. Hold the window up in the sun and look through the outside to make sure your black boarder you just painted doesn't have any pinholes that you missed. Once satisfied, Put the window on your cars window frame and put a couple of clecos to hold in place. Now install your pop rivets one at a time. Voila, your done!
Tips on cleaning lexan. Do not use any type of cleaner. Use warm water with a little dish soap and a soft sponge. Dry the water off with a chamois.
Stay tuned for the front and rear window install. It is pretty much the same but there are bends to deal with.....
Thread Starter
Joined: Nov 2006
Posts: 4,148
Likes: 4
From: California

Thread Starter
Joined: Nov 2006
Posts: 4,148
Likes: 4
From: California
Thanks Chris. I already finished the rear window. Front window will be done in a couple of days. I'll post some pics of the rear window tomorrow. I got a deal from a window/glass guy from my work. I paid 175 bucks for a 8'x4' sheet that is 1/8". Let me know when you are ready to do yours and I'll help you out and if you can't find anything cheaper I can get you a sheet from my source. You should be able to do all your windows with an 8x4sheet since yours is a coupe.
Trending Topics
Thread Starter
Joined: Nov 2006
Posts: 4,148
Likes: 4
From: California
Thank you. Did you pick up the fuel tank from Albert yet?
No prob., you got my number. :Ps- your cutting it close to the IDRC event. Are you still going to go?
No prob., you got my number. :Ps- your cutting it close to the IDRC event. Are you still going to go?
Will work for horsepower
Joined: Mar 2006
Posts: 1,865
Likes: 1
From: Springfield, MO
Until you have built your own sec gen back hatch glass you have not lived!
Lexan mr10 coating does scratch prety easy the soapy water is best. There is a product called speed glass that is 10 times more scratch resistant and sold by Percys.
You did a good job it looks nice!
Lexan mr10 coating does scratch prety easy the soapy water is best. There is a product called speed glass that is 10 times more scratch resistant and sold by Percys.
You did a good job it looks nice!
Full Member
Joined: Jan 2009
Posts: 219
Likes: 0
From: riverside ca
idrc
hell yes i am going to the idrc.even when my car was running like $hit i was still there.now that i found my ignition problem and the car is running a little better it will not be so embarrassing.just got to make the scrap pile go 9's
No prob., you got my number. :Ps- your cutting it close to the IDRC event. Are you still going to go?[/QUOTE]
No prob., you got my number. :Ps- your cutting it close to the IDRC event. Are you still going to go?[/QUOTE]
Thread Starter
Joined: Nov 2006
Posts: 4,148
Likes: 4
From: California
Until you have built your own sec gen back hatch glass you have not lived!
Lexan mr10 coating does scratch prety easy the soapy water is best. There is a product called speed glass that is 10 times more scratch resistant and sold by Percys.
You did a good job it looks nice!
Lexan mr10 coating does scratch prety easy the soapy water is best. There is a product called speed glass that is 10 times more scratch resistant and sold by Percys.
You did a good job it looks nice!
[QUOTE=mazda rx2 rotary;9382073]hell yes i am going to the idrc.even when my car was running like $hit i was still there.now that i found my ignition problem and the car is running a little better it will not be so embarrassing.just got to make the scrap pile go 9's
Right on and you have nothing to be embarrased about. Your car is bad *** and unlike most people who pay someone else to tune their cars, your actually learning and doing it yourself and that right there deserves respect.
[QUOTE=rotorholic;9382181]Damn, I keep trying to call Albert and he hasn't returned by phone calls. Must be really busy. I hope he can have his car ready in time.


Will work for horsepower
Joined: Mar 2006
Posts: 1,865
Likes: 1
From: Springfield, MO
Ill get some picts in a few days and explain how i did mine.
But i would recomend percys speedglass it is molded and does not scratch as easy as mr10 lexan.
All i will say for now is i had to lay on the lexan and use 2 1/2 inch screws to pull it into place untill i could get it pop riveted!
Thread Starter
Joined: Nov 2006
Posts: 4,148
Likes: 4
From: California
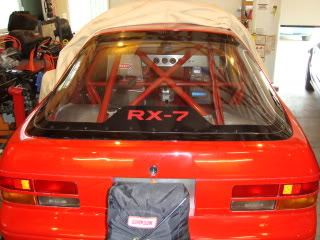
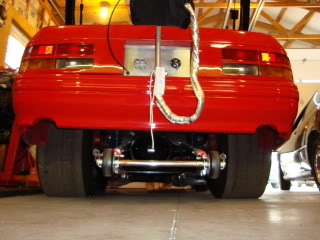
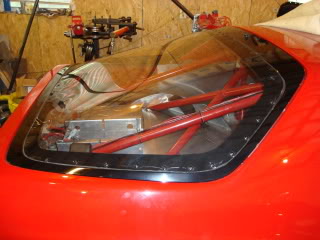
I would think the thinner the lexan the easier it would be to bend. I used 1/8" and I think that would work ok for the second gen rear hatch. Just start off in the middle and work your way towards the end. It will bend to shape. It is easier with two or three people to help hold the bend down while you mark the holes and drill and rivet. This is where the clecos are a must. I had my dad and friend help me on my front windshield as the ends have a pretty good curve to them. It came out nice and I'm pleased. Here are pics of the front and rear done.


Will work for horsepower
Joined: Mar 2006
Posts: 1,865
Likes: 1
From: Springfield, MO
I would think the thinner the lexan the easier it would be to bend. I used 1/8" and I think that would work ok for the second gen rear hatch. Just start off in the middle and work your way towards the end. It will bend to shape. It is easier with two or three people to help hold the bend down while you mark the holes and drill and rivet. This is where the clecos are a must. I had my dad and friend help me on my front windshield as the ends have a pretty good curve to them. It came out nice and I'm pleased. Here are pics of the front and rear done.
Im posting a way to get ahol of percys if you want to see what they have, i provided the glass to them to make all the rx7 speedglass and there very nice. They would even do group discounts.
http://www.percyshp.com/Speedglass.html
Let me know if i can help. Ps your back window looks good in 1/8''.
Thread Starter
Joined: Nov 2006
Posts: 4,148
Likes: 4
From: California
I would agree with you but there is a compound curve in the lower corners that make them want to wave. I just stated that i found it better but i could be wrong.
Im posting a way to get ahol of percys if you want to see what they have, i provided the glass to them to make all the rx7 speedglass and there very nice. They would even do group discounts.
http://www.percyshp.com/Speedglass.html
Let me know if i can help. Ps your back window looks good in 1/8''.
Im posting a way to get ahol of percys if you want to see what they have, i provided the glass to them to make all the rx7 speedglass and there very nice. They would even do group discounts.
http://www.percyshp.com/Speedglass.html
Let me know if i can help. Ps your back window looks good in 1/8''.
I haven't tried it but I'm sure if you're careful you can use a heat gun to help with those compound curves.
Will work for horsepower
Joined: Mar 2006
Posts: 1,865
Likes: 1
From: Springfield, MO
I tried the heat gun but it will melt the coating if it gets too hot and it still had a bad memory. But i think your right if i had help it would have been alot easier.
I used the 2 1/2 screws every other hole to pull it into place and then pop rivet everyother hole and went back and popedthe screws.
And your right start in the middle and work left and right.
I used the 2 1/2 screws every other hole to pull it into place and then pop rivet everyother hole and went back and popedthe screws.
And your right start in the middle and work left and right.
Thread Starter
Joined: Nov 2006
Posts: 4,148
Likes: 4
From: California
Thank you.
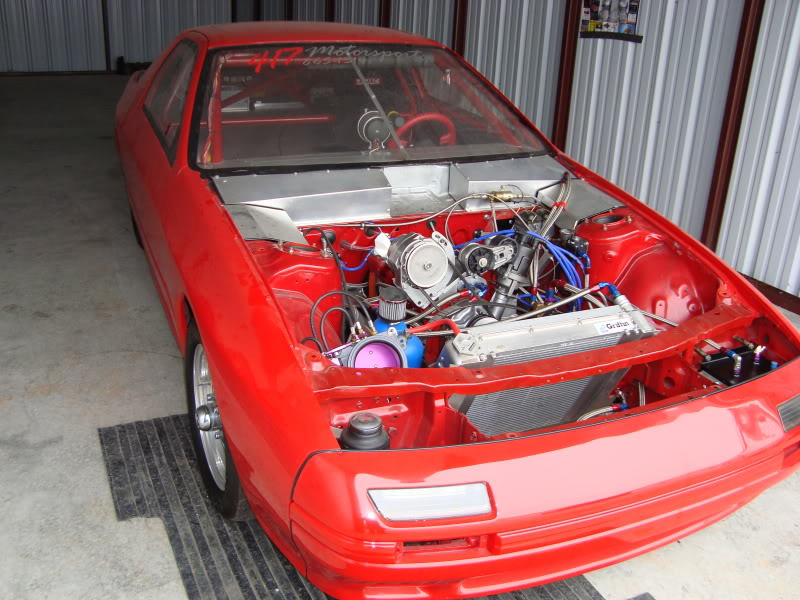
Well, I finished all the windows today. I'm glad I didn't have to pay someone to do this. It would have cost me an arm and a leg. Alot of work, but it is worth it in the end. Going racing at Irwindale 1/8th mile this thursday to see how much this diet helped out. I havent' changed anything but remove the weight so we'll see what happens. Here's a pic of the completed car.
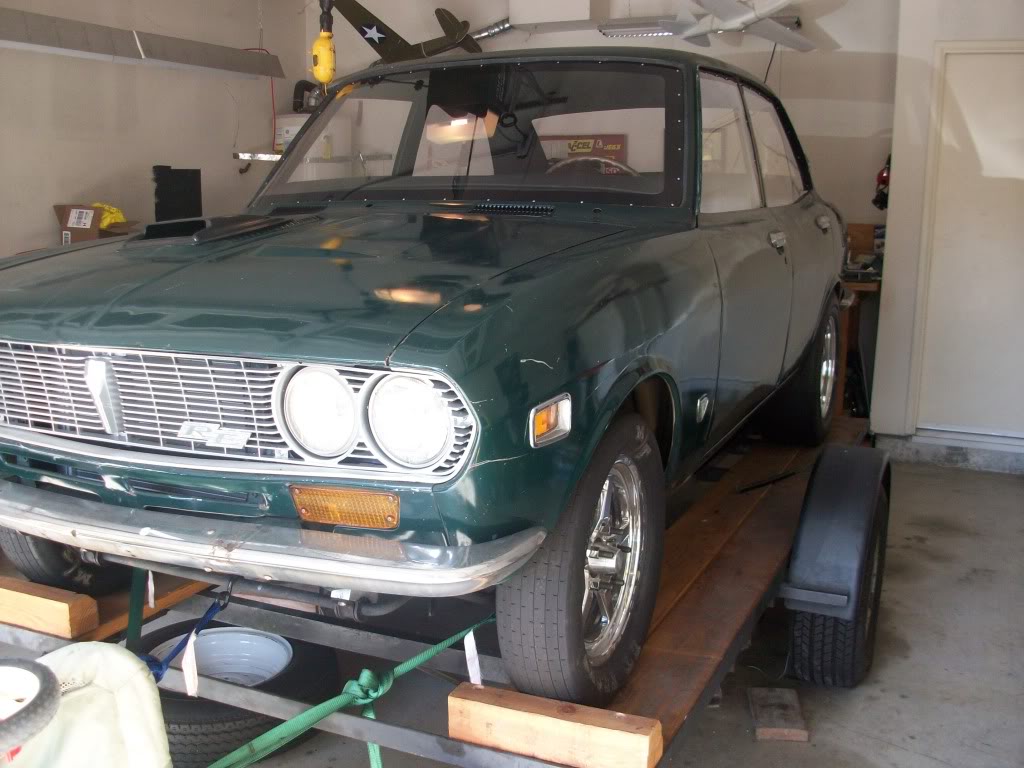
Well, I finished all the windows today. I'm glad I didn't have to pay someone to do this. It would have cost me an arm and a leg. Alot of work, but it is worth it in the end. Going racing at Irwindale 1/8th mile this thursday to see how much this diet helped out. I havent' changed anything but remove the weight so we'll see what happens. Here's a pic of the completed car.
Will work for horsepower
Joined: Mar 2006
Posts: 1,865
Likes: 1
From: Springfield, MO
Thanks Mike it needs a turbo setup with fuel inj and stadalone.
It has a new motor with a jatco auto but the stall is to low and i need to do something different.
In other words i dont know which way to go now.
It has a new motor with a jatco auto but the stall is to low and i need to do something different.
In other words i dont know which way to go now.