
Advice on this bridge port i have done


Rotary Enthusiast
Joined: Dec 2001
Posts: 1,271
Likes: 0
From: UK
Why don't you Cut the Street port then take the plate to an Engineering shop and get them to cut the Bridge slot with a Miller.
Just tell them you want a Slot cutting Parralell to the Edge of the Port that starts at X point and finishes at Y?
At least then all you have to worrie about is the Extended Port section.
Just tell them you want a Slot cutting Parralell to the Edge of the Port that starts at X point and finishes at Y?
At least then all you have to worrie about is the Extended Port section.
Rotary Enthusiast
Joined: Dec 2001
Posts: 1,271
Likes: 0
From: UK
Originally Posted by BuckyFD3
Both are rough cuts, the bottom one I rough cut on a miller. Wish I had a CNC miller to do it but have to do it by hand and its hard getting a curve right.
The thing is you have gone Parallel to the Old port and unless its a trick of the light you're going to have a thin bridge at one end and dangrously close to the Water seal groove at the other?
Trending Topics


To get an idea on what's safe. Mount your front iron with stationary gear on your stand with the housing and dowels. Put you e-shaft in and a rotor. Spin it slowly and watch where the seals are as they pass the ports. Doing this and simply checking with a scale is how I came up with the 4.5-5mm out from the rotor housing I said to you in another thread.
Pay close attention to the leading edge of the trailing side seal as well as the corner and apex seal.
Another big help is to use plexiglass, with dowel holes machined in it, to trace thier path. Then place this directly on the iron (using the dowels) to see if it's OK. Make several blanks at the same time by stacking them. Sureshot has nice threads on this including using a plexi "rotor" with seal tracings to get a visual.
It's hard to do but on a half-bridge install the two piece apex seal backwards on the rear rotor to keep the small triangular piace from having to cross over the bridge. I think I read this in a post by Rotary God.
Rotary Enthusiast
Joined: Dec 2001
Posts: 1,271
Likes: 0
From: UK
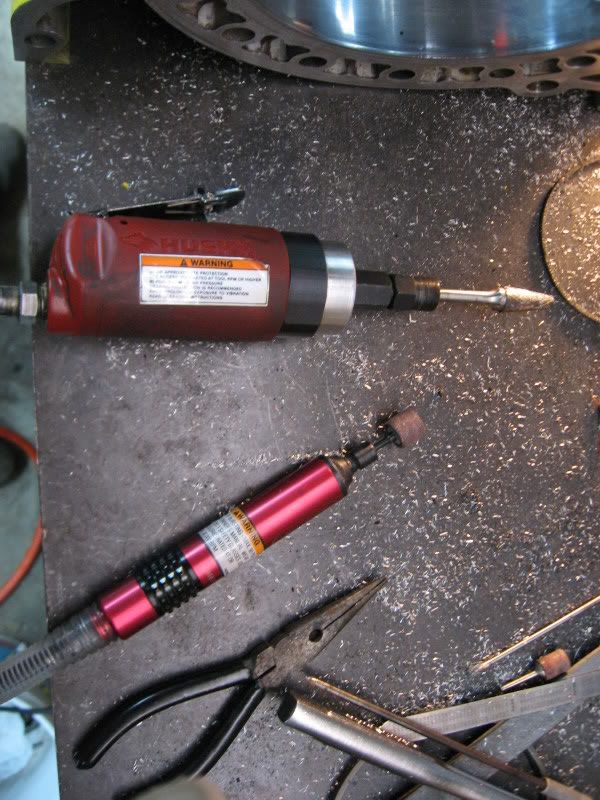
I had a go at cutting a Bridge that way, it does work realy well but you have to take your time marking it all out, i found the secret is to use a Piller drill it does'nt wander to much.
The problem i found though was becouse of the size of the Die grinder bur it was very hard to get a neat line (looked a bit Pissed)
Thats why i got mine Milled (ment i did'nt have to do it )
)
The problem i found though was becouse of the size of the Die grinder bur it was very hard to get a neat line (looked a bit Pissed)
Thats why i got mine Milled (ment i did'nt have to do it
)
multipersonality disorder
Joined: Feb 2002
Posts: 5,656
Likes: 0
From: so. cal
dremel with an 1/8" single cut, carbide burr is awesome. work at 45 degree angles.
go over one way, then flip it around and go over the other way. don't go straight up and down or the line will be sloppy, but if you follow the above, it'll come out clean
go over one way, then flip it around and go over the other way. don't go straight up and down or the line will be sloppy, but if you follow the above, it'll come out clean
Thread Starter
GT4088R
Joined: Jan 2006
Posts: 467
Likes: 0
From: UK
I sorted it out on the milling machine and done the other side too.
The bridge supports the middle of the corner seal so I very much doubt it is going to fall out into the port.
I beveled the housing where the bridge is aswell.
The bridge supports the middle of the corner seal so I very much doubt it is going to fall out into the port.
I beveled the housing where the bridge is aswell.
Originally Posted by GUITARJUNKIE28
don't bother with the mill. use a drill to pop holes in, then a dremel, or very small carbide bit on a die grinder for the shaping.
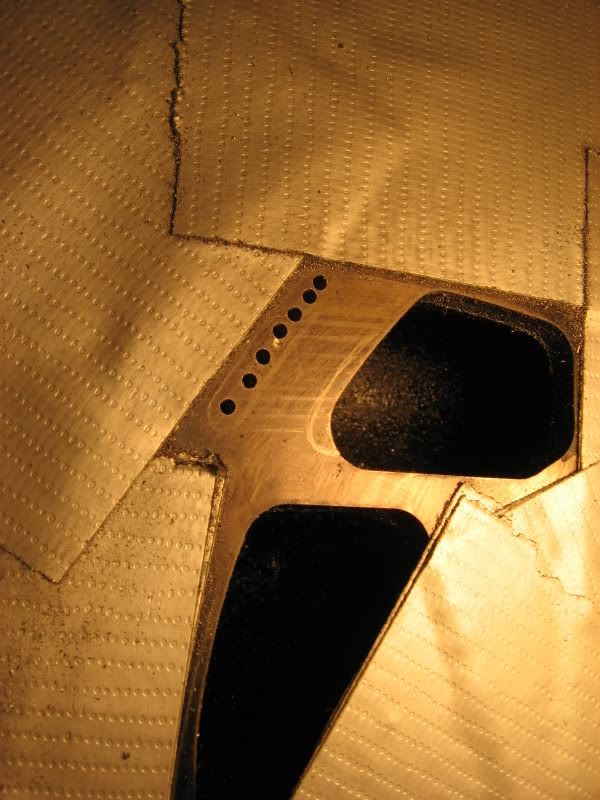
Thats what i did on my practice housing. Drilled 3 pilot holes and used a pencil style air grinder to connect them and shape the port. It still came out pretty rough, but not
that rough. Wouldnt you have to notch the rotor housing to go out that far anyway?
Rotary Freak
Joined: Dec 2001
Posts: 2,402
Likes: 0
From: chandler, AZ
i cringed pretty bad when i saw those pics, but I guess everybody's got to start somewhere. I did what guitarjunkie already stated for mine.. Definitely get some spare housings and get some practice in.


Rotary Enthusiast
Joined: Dec 2001
Posts: 1,271
Likes: 0
From: UK
You cut that by hand with a die grinder!! thats a nice job.
if you had'nt put the pics of the Holes you drilled i'd have said that was done by a machine, all i can say is you must have a steady hand
if you had'nt put the pics of the Holes you drilled i'd have said that was done by a machine, all i can say is you must have a steady hand
Well i did the major ruff stuff with the big one, then i have very small bits for the small one so smooth everything out. Then like you see i have sanding stuff for the small one also.
Here is a pic of my personal motor that i am porting right now.

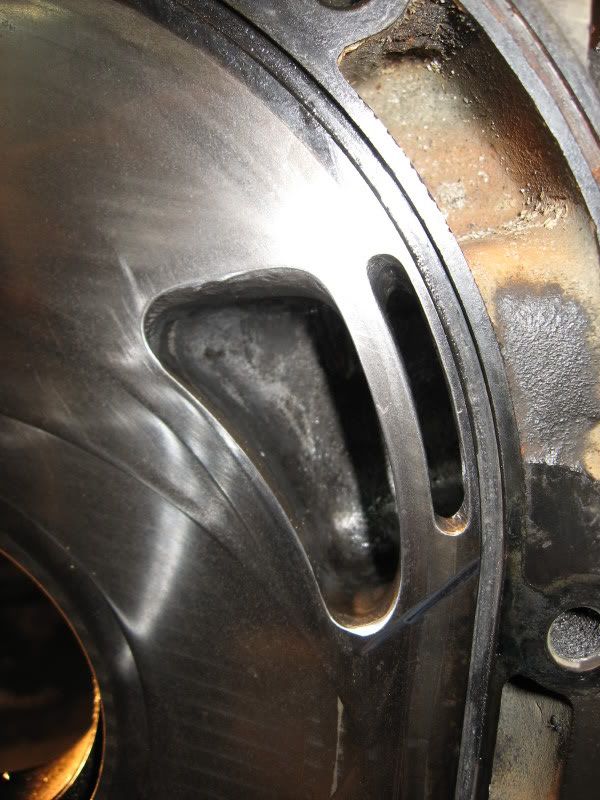
I have one small BOBO on this port, but it is very very very small and i have used oil + 1000 grit sand paper to smooth it back out.
Here is a pic of my personal motor that i am porting right now.
I have one small BOBO on this port, but it is very very very small and i have used oil + 1000 grit sand paper to smooth it back out.
Originally Posted by GUITARJUNKIE28
dremel with an 1/8" single cut, carbide burr is awesome. work at 45 degree angles.
go over one way, then flip it around and go over the other way. don't go straight up and down or the line will be sloppy, but if you follow the above, it'll come out clean
go over one way, then flip it around and go over the other way. don't go straight up and down or the line will be sloppy, but if you follow the above, it'll come out clean


