Removing sound dampening material (?)
 06-08-07, 01:58 PM
#1
Removing sound dampening material (?)
I know this may seem odd in the Race section, but I figured many of you have done this before. Anyway... what is the best way to completely remove the sound dampening material underneath the carpet and rubber. I try to scrape it off and it just seems to goo up and smear.
I was thinking a heat gun might help... what have you guys tried to do this as clean as possible?
I was thinking a heat gun might help... what have you guys tried to do this as clean as possible?
 06-08-07, 02:36 PM
#2
Senior Member
iTrader: (1)
Join Date: Mar 2006
Location: CA
Posts: 660
Likes: 0
Received 0 Likes
on
0 Posts
I did this about 7 months ago. My friend is currently using a heatgun in his Porsche. It seems like it makes it a tiny bit messy. However, the benefit of using one is that you can scrape out a bit at time if you don't have hours of time to dedicate to it.
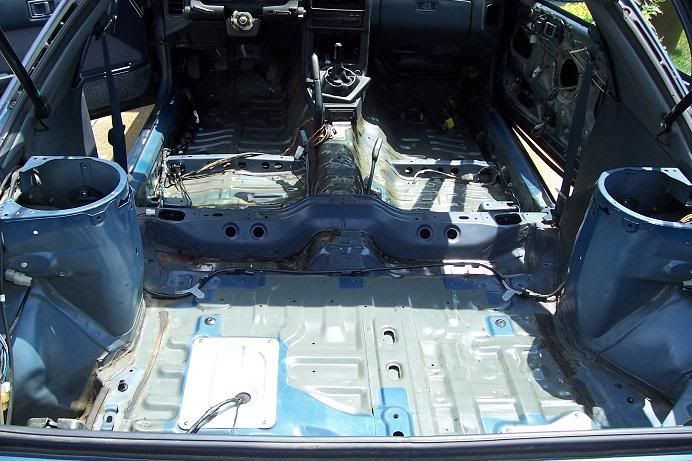
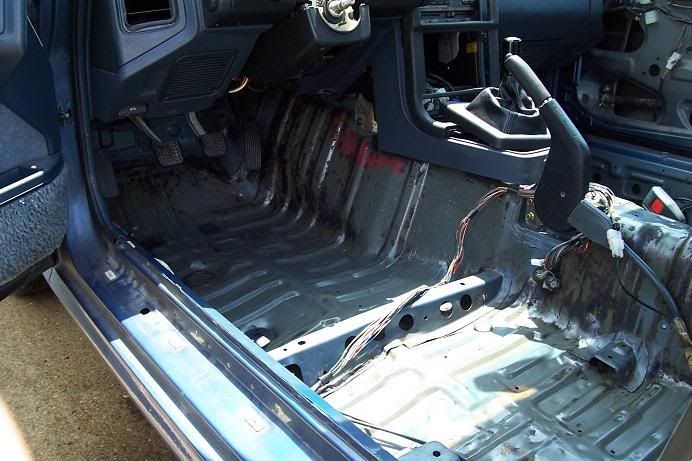
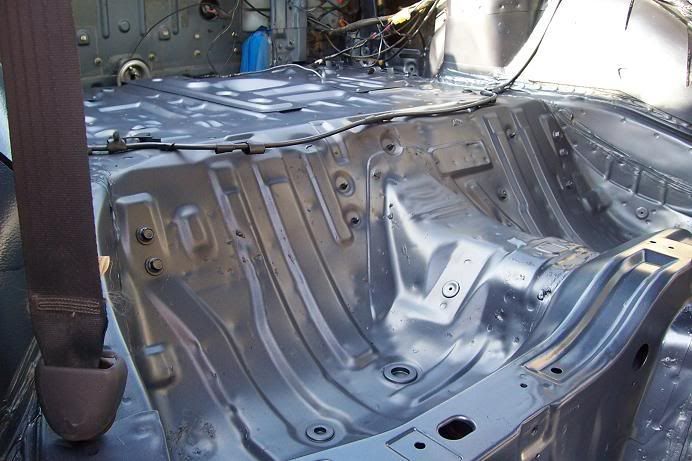
However, the easiest way is to use dry ice. Go to your local supermarket and buy about 15 pounds of dry ice. If you can't get them in pellets, get the blocks and break them up with a hammer. Transport the ice in paper bags, if you can't find a cooler. Now break it up and dump the pieces onto the sound deadening material. You may need to hold it on the material (wear gloves). You should hear the sound deadening creak and crack. After a while, clear away the dry ice (it can be reused as long as it hasn't evaporated into the air), and pound the sound deadening with a hammer. It should come away cleanly in sheets.
here's what mine looked like:
06-08-07, 03:26 PM
#3
Senior Member
iTrader: (1)

Join Date: Oct 2006
Location: wisconsin
Posts: 519
Likes: 0
Received 0 Likes
on
0 Posts
i wish i would have known about the dry ice.....sigh. I used a propane torch, two days, a sore back, and a enough time huffing that crap to last a lifetime. If it works, go with the dry ice, without a doubt.
06-08-07, 03:54 PM
#4
Yea, I've used a scraper and a torch to this point, however that won't work on these panels I'm talking about. I'll definitely try the dry ice on those... I never knew you could buy dry ice at a supermarket!
I'm pretty sure I'll still have a bit of crud on the floor of the car from all the glue and stuff. I'll probably hit it with a filling primer to get it nice and smooth, then paint it.
I'm pretty sure I'll still have a bit of crud on the floor of the car from all the glue and stuff. I'll probably hit it with a filling primer to get it nice and smooth, then paint it.
06-08-07, 04:31 PM
#5
Cone? What cone?
Join Date: Sep 2004
Location: Birmingham, Alabama
Posts: 65
Likes: 0
Received 0 Likes
on
0 Posts
06-08-07, 04:47 PM
#6
+1 for the dry ice method. I used to wait until winter when I lived in Ohio, just leave the car out on a cold night and the stuff pops off with a tap from a ballpeen hammer. Whatever doesn't come up in big sheets can be hit with a wire wheel and it comes off easy. Then whatever residue is left can be wiped off with mineral spirits.

Trending Topics
06-08-07, 05:51 PM
#8
Senior Member
iTrader: (1)
Join Date: Mar 2006
Location: CA
Posts: 660
Likes: 0
Received 0 Likes
on
0 Posts
Honestly, the parts i took off (pretty much everywhere in the interior) weighed around 24lb according to my scale. It's not that much, but combined with my other weight reduction efforts, my car is in the mid 2700s with a bit over a half tank of gas.
06-09-07, 07:50 AM
#10
SCCAEP
iTrader: (3)
Join Date: Dec 2006
Location: Dallas
Posts: 1,080
Likes: 0
Received 0 Likes
on
0 Posts
Air hammer with chisel. I've had 2 different race shops tell me this is the best way. A week ago I saw them doing a couple of Pro MX-5 Cup cars and the stuff was coming right off. When I get my car back this week I'll be chiseling next weekend 
 06-09-07, 07:32 PM
#13
Just a couple notes on doing the dry ice method.
1) It takes a while. I spent about 4 hours on it earlier and got the passenger floor and underseat 95% complete.
2) It doesn't work so well on the vertical surfaces (like the bellhousing hump) because you have to lean the dry ice up against the hump. Also, certain areas will have more "glue" than others... it doesn't work real great on those areas.
3) It helps if you take a piece of newspaper and cover the dry ice while it's freezing the material. I guess it helps trap the cool air and keeps sunlight out.
4) Keep a vacuum handy to vacuum or brush handy to clean up your mess as you go. This will help you see what areas you've busted with your hammer and it will keep the pieces you've already busted from readhering to the floor.
Overall, hey, this is a great idea! It's definitely better than chiseling by hand. I'll probably consider the air chisel on the vertical and hard to reach surfaces mentioned above.
06-09-07, 08:47 PM
#15
Be careful with the air hammer/chisel method, or you might dent/ nick/cut the floor. If it isn't a big deal to you, that's cool, but why go to all this work, and not have a nice looking car inside and out.
The dry ice is still the easiest. On the vertical surfaces such as the sides of the transmission tunnel, break up the dry ice and put it in a ziplock baggie. tape the baggie to the tunnel such that it hangs next to the sound deadoning you are trying to remove. It will work like that also. DO NOT fill the baggie up with dry ice. Leave plenty of room in the baggie for the evaporation/expansion that will occur.
The dry ice is still the easiest. On the vertical surfaces such as the sides of the transmission tunnel, break up the dry ice and put it in a ziplock baggie. tape the baggie to the tunnel such that it hangs next to the sound deadoning you are trying to remove. It will work like that also. DO NOT fill the baggie up with dry ice. Leave plenty of room in the baggie for the evaporation/expansion that will occur.
 06-09-07, 09:47 PM
#18
Be careful with the air hammer/chisel method, or you might dent/ nick/cut the floor. If it isn't a big deal to you, that's cool, but why go to all this work, and not have a nice looking car inside and out.
The dry ice is still the easiest. On the vertical surfaces such as the sides of the transmission tunnel, break up the dry ice and put it in a ziplock baggie. tape the baggie to the tunnel such that it hangs next to the sound deadoning you are trying to remove. It will work like that also. DO NOT fill the baggie up with dry ice. Leave plenty of room in the baggie for the evaporation/expansion that will occur.
The dry ice is still the easiest. On the vertical surfaces such as the sides of the transmission tunnel, break up the dry ice and put it in a ziplock baggie. tape the baggie to the tunnel such that it hangs next to the sound deadoning you are trying to remove. It will work like that also. DO NOT fill the baggie up with dry ice. Leave plenty of room in the baggie for the evaporation/expansion that will occur.
06-10-07, 08:22 AM
#19
Safety Guy
iTrader: (3)
Join Date: Jan 2002
Location: Apple Valley area in MN
Posts: 1,433
Likes: 0
Received 0 Likes
on
0 Posts
With the dry ice method - make sure you use gloves that are rated for cryo otherwise you will receive a burn.
When I did mine with dry ice; made sure it was a really hot summer day and applied it by holding it directly in contact with the sound dampening (using cryo gloves). Also make sure you leave the hatch open and doors so you don't asphyxiate from the CO2 displacing the oxygen in the car!
You can purchase dry ice from any welding shop - it's very cheap.
Would not recommend using a hammer/chisel method as you will dent/pierce the skin of the car unless very careful.
06-10-07, 09:43 AM
#20
Full Member

Join Date: Dec 2006
Location: jersey uk channel islands
Posts: 57
Likes: 0
Received 0 Likes
on
0 Posts
after using the hammer chisel method i got feed up after hours of work. i then tried a small batery kango with a flat chisel bit the vibration with the masonary chisel edge and gentle presure seemed to make it fly off in lare pieses and left a surprisingly clean finish, i cleand up the residue with some tar remover and a rag and stone guarded the floor made a great finish. must be very carfull not to dig tith the cango and only use a little one. but worked great.
06-10-07, 11:25 PM
#21
Senior Member
iTrader: (1)
Join Date: Oct 2006
Location: wisconsin
Posts: 519
Likes: 0
Received 0 Likes
on
0 Posts
mine was around 35-40 lbs if i remember right. And that is everyting in the car in terms of sound deadening material. Enough to fill two black garbage bags and tear a whole in them when I lifted it up...so I got to clean it up twice.
06-13-07, 08:17 AM
#23
Airflow is my life
Be careful with the air hammer/chisel method, or you might dent/ nick/cut the floor. If it isn't a big deal to you, that's cool, but why go to all this work, and not have a nice looking car inside and out.
The dry ice is still the easiest. On the vertical surfaces such as the sides of the transmission tunnel, break up the dry ice and put it in a ziplock baggie. tape the baggie to the tunnel such that it hangs next to the sound deadoning you are trying to remove. It will work like that also. DO NOT fill the baggie up with dry ice. Leave plenty of room in the baggie for the evaporation/expansion that will occur.
The dry ice is still the easiest. On the vertical surfaces such as the sides of the transmission tunnel, break up the dry ice and put it in a ziplock baggie. tape the baggie to the tunnel such that it hangs next to the sound deadoning you are trying to remove. It will work like that also. DO NOT fill the baggie up with dry ice. Leave plenty of room in the baggie for the evaporation/expansion that will occur.

Next 2 cars I used dry ice. Far and away better, plus you get time to drink beer while you wait for the ice to freeze the section your working on.


Oh and mine weighed about 30 lbs. Thats ALL the deadening material, even the cowl area, firewall etc.
06-25-07, 11:15 PM
#24
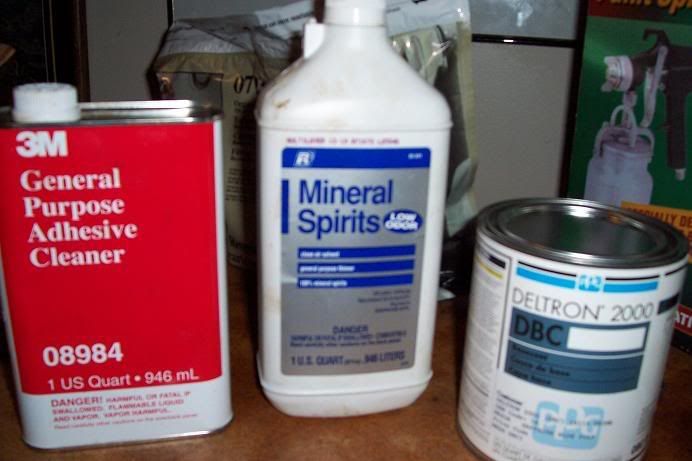
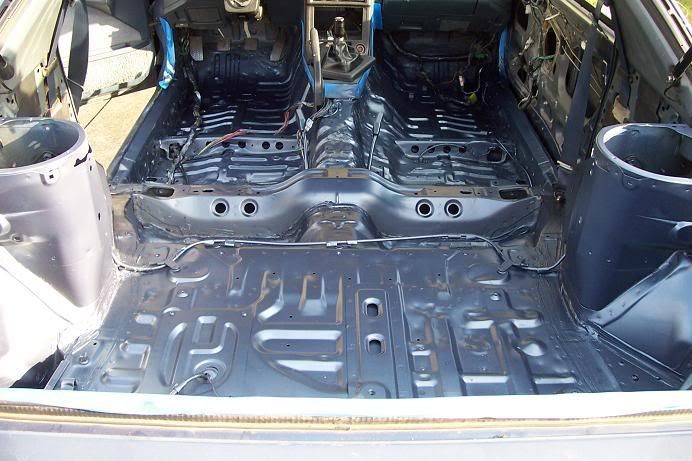
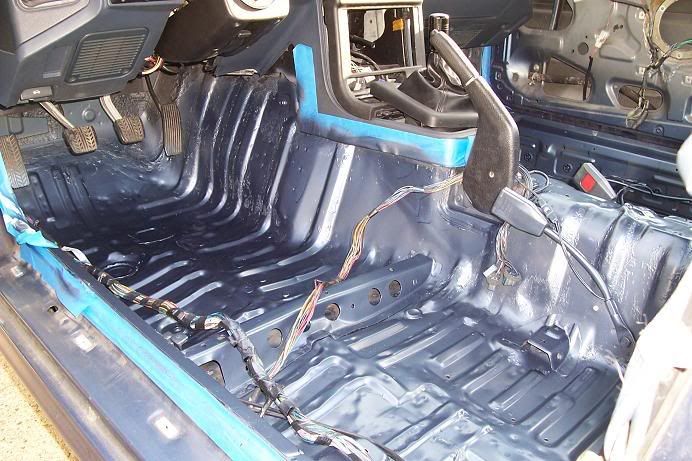
Here's how my sound dampening removal turned out. I used the dry ice/elbow grease method. I have painted pictures too! The solvents pictured will help you remove the remaining tar... as you can see, it's a pain in the butt and required more patience and elbow grease than I could muster. 


10-21-07, 03:18 PM
#25
dena furoa
Join Date: Jul 2007
Location: Kitchener
Posts: 46
Likes: 0
Received 0 Likes
on
0 Posts
I'll try that!
Wow. I'm definitely going to buy some dry ice - tomorrow!
I started out with just a scraper and some elbow grease. Fuuuuuuuuh.
The heat gun was working quite well, or so I thought. I would heat it up a bit and let it cool and it would kind of flake off in chunks. But, there's still plenty of residue to get off.
I haven't worked on it since August because I lost the motivation.
I'm back!
I'll post pics when I get some progress.

