
SR20 FC build

SR20 FC build
hey everyone, i thought it was about time to post a build thread here. I got the motor dropped in finally and can't wait to get it on the road!!
Original posts are dated, its been about 2 months total.
Thought I would make a build thread since Im starting work on the car soon. Maybe it will keep me motivated at least, Ive found that even one small thing a day keeps a project moving along.
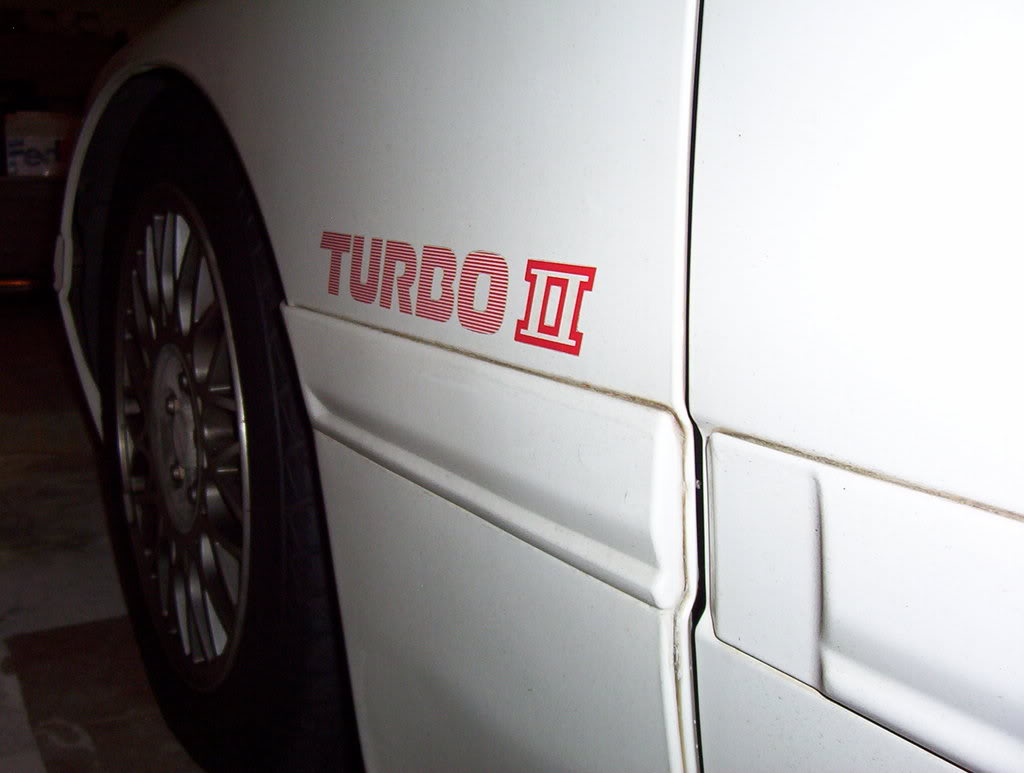
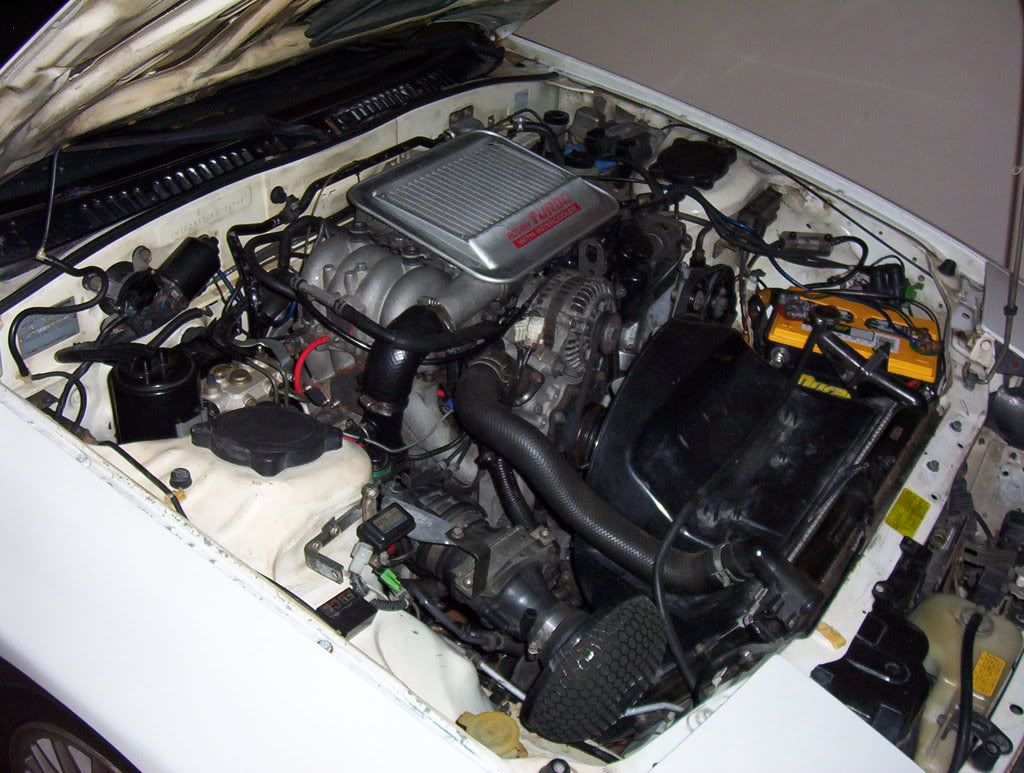
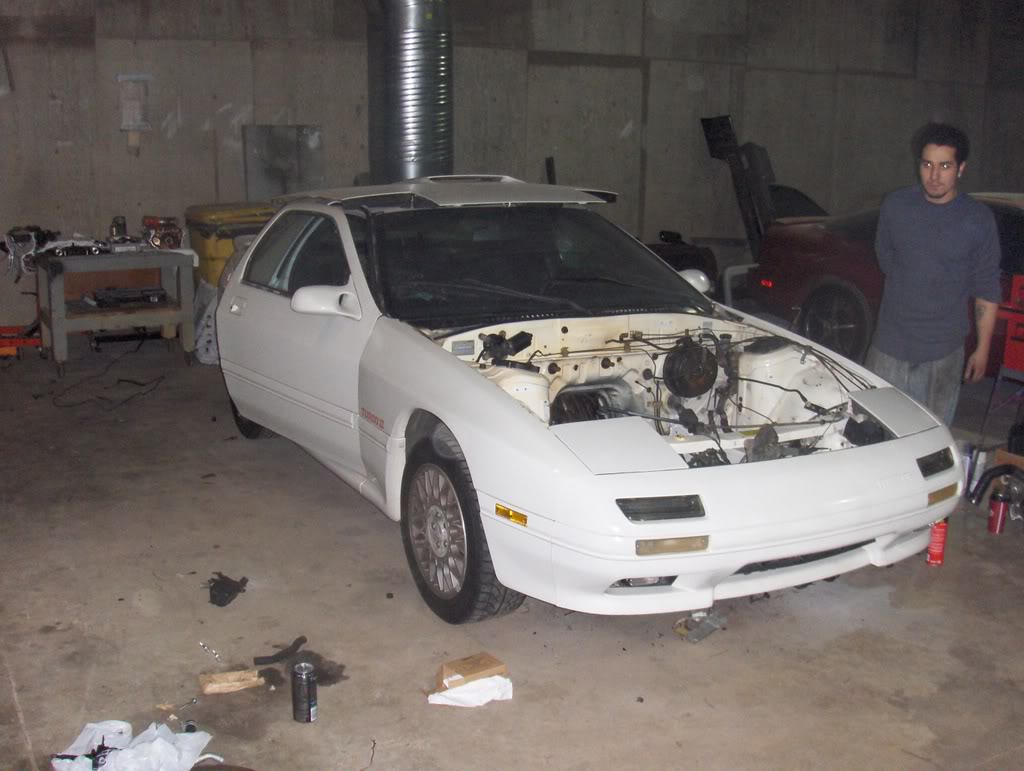
Its an '89 Turbo II. I bought this car in April or May of this year with a JDM S5 swap done by a friend of mine in Augusta. Unfortunately the motor was weak and I managed to blow the rear rotor within 2 weeks of owning it
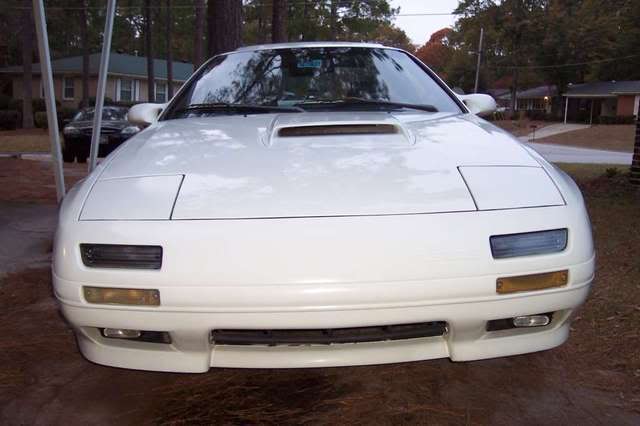
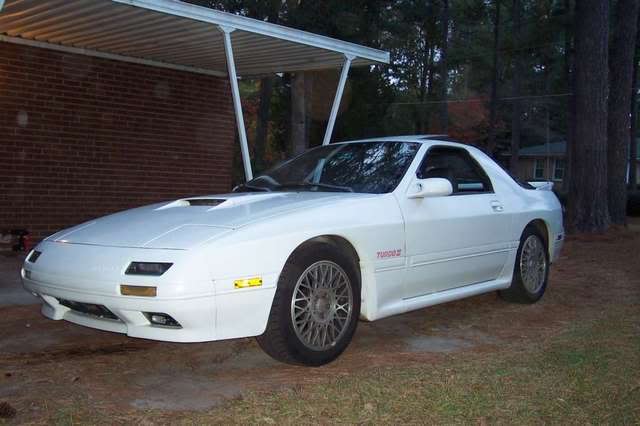
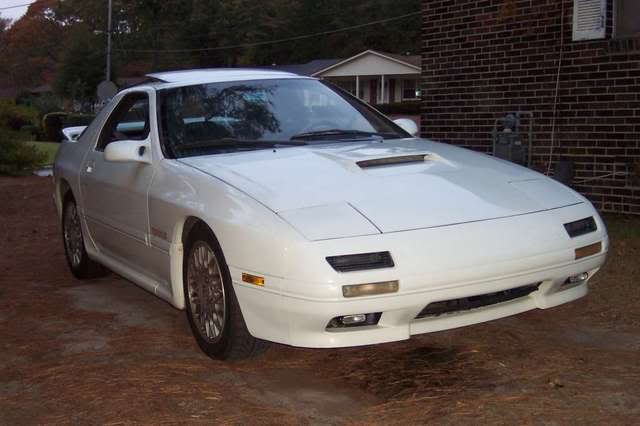
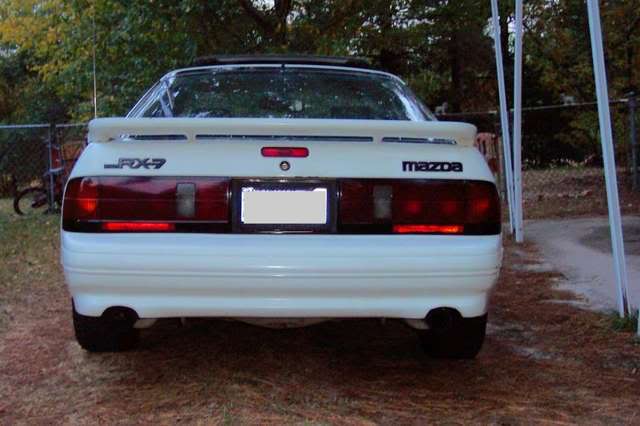
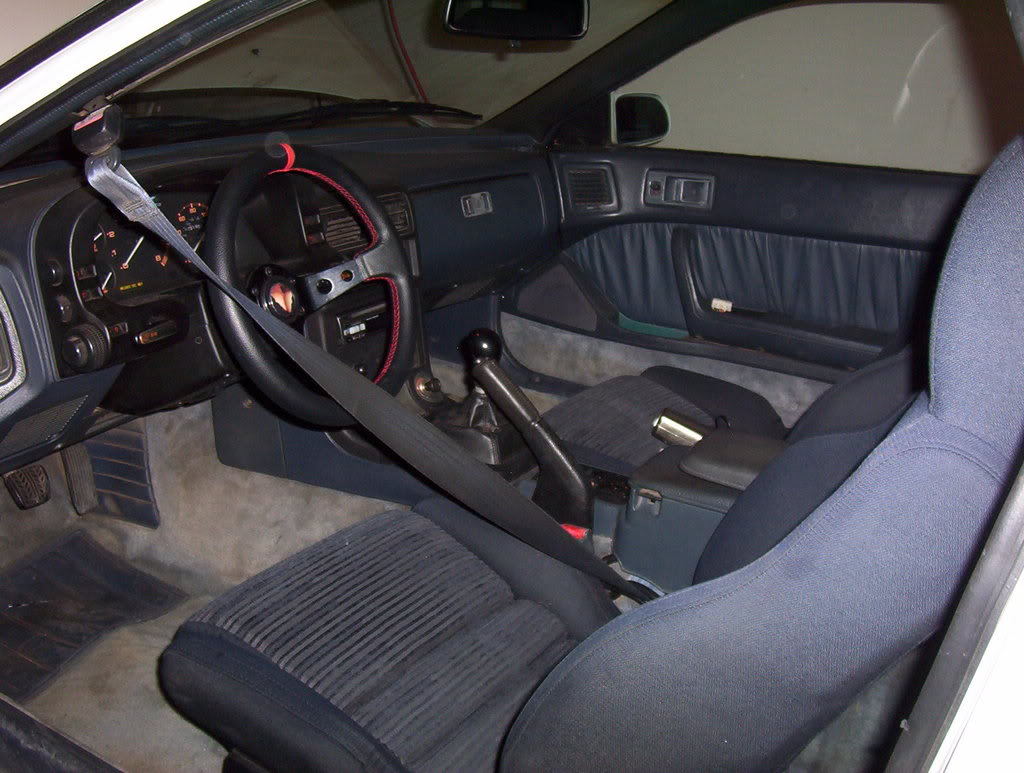
Repainted in 1994 by a mazda dealership, has one small door ding on the passenger side and thats about it. Aside from that, new Tokico HP and S-techs, new rotors and Hawk pads, and a bumpin system
I let it sit in solitary confinement for 4-5 months as punishment for breaking my heart and then decided it was time to get it back on the road. A friend of mine in Orlando got me in contact with a dude down there selling most of the stuff necessary to do an SR swap and I decided to buy it all.
Original posts are dated, its been about 2 months total.
Thought I would make a build thread since Im starting work on the car soon. Maybe it will keep me motivated at least, Ive found that even one small thing a day keeps a project moving along.
Its an '89 Turbo II. I bought this car in April or May of this year with a JDM S5 swap done by a friend of mine in Augusta. Unfortunately the motor was weak and I managed to blow the rear rotor within 2 weeks of owning it
Repainted in 1994 by a mazda dealership, has one small door ding on the passenger side and thats about it. Aside from that, new Tokico HP and S-techs, new rotors and Hawk pads, and a bumpin system
I let it sit in solitary confinement for 4-5 months as punishment for breaking my heart and then decided it was time to get it back on the road. A friend of mine in Orlando got me in contact with a dude down there selling most of the stuff necessary to do an SR swap and I decided to buy it all.
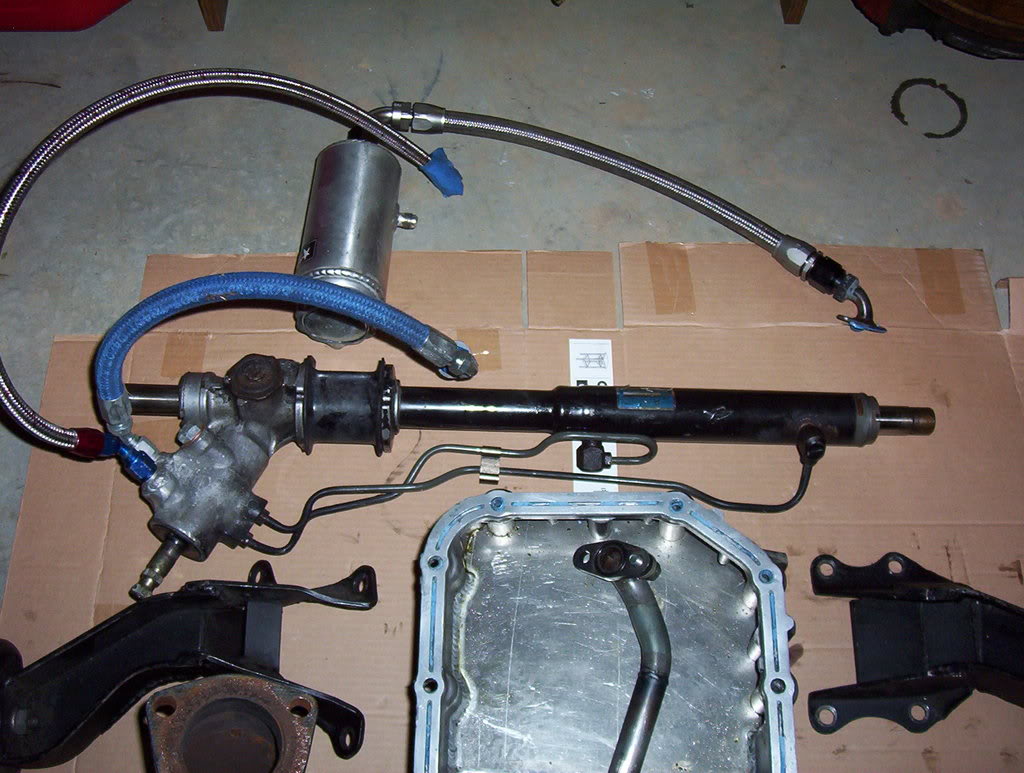
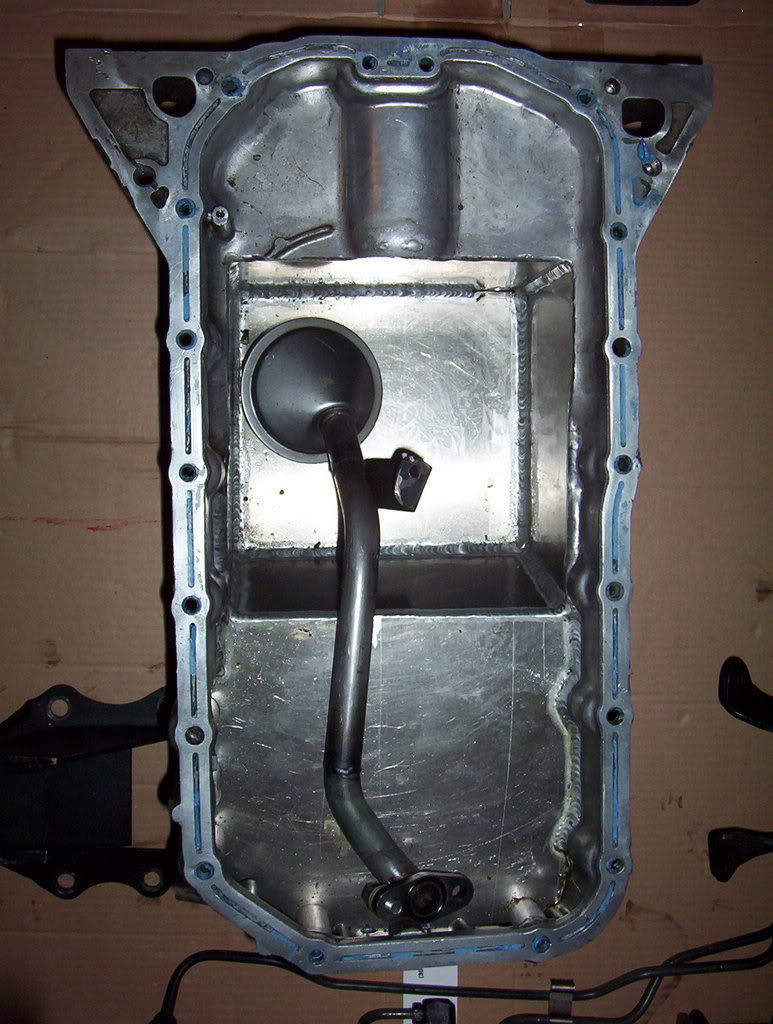
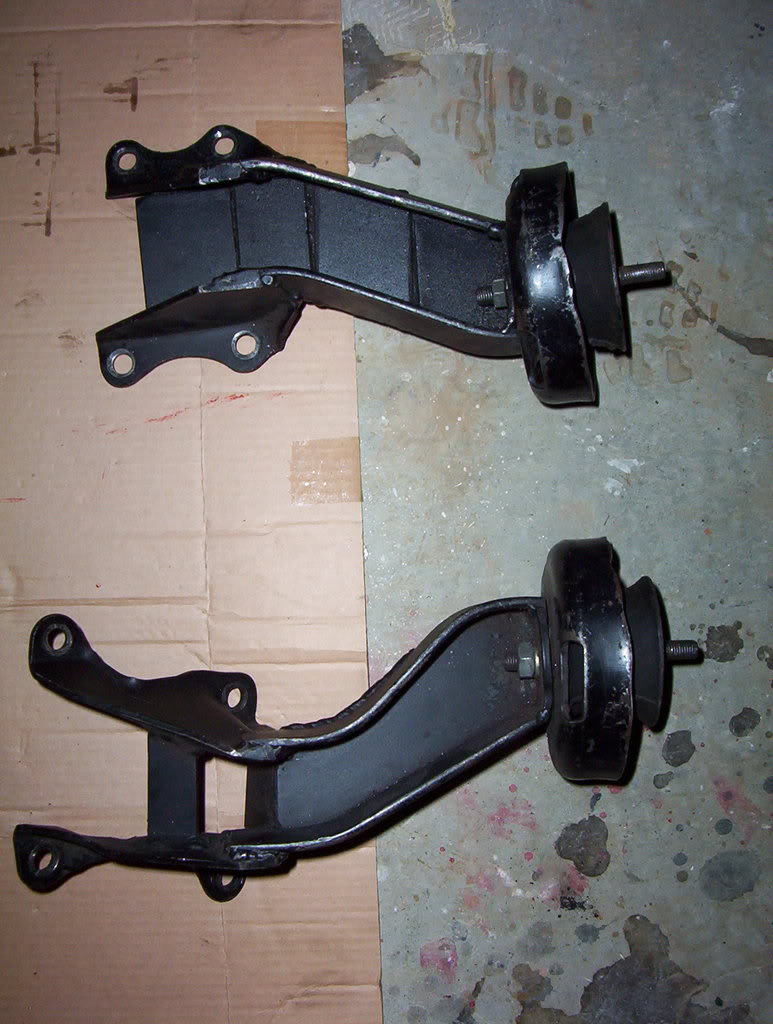
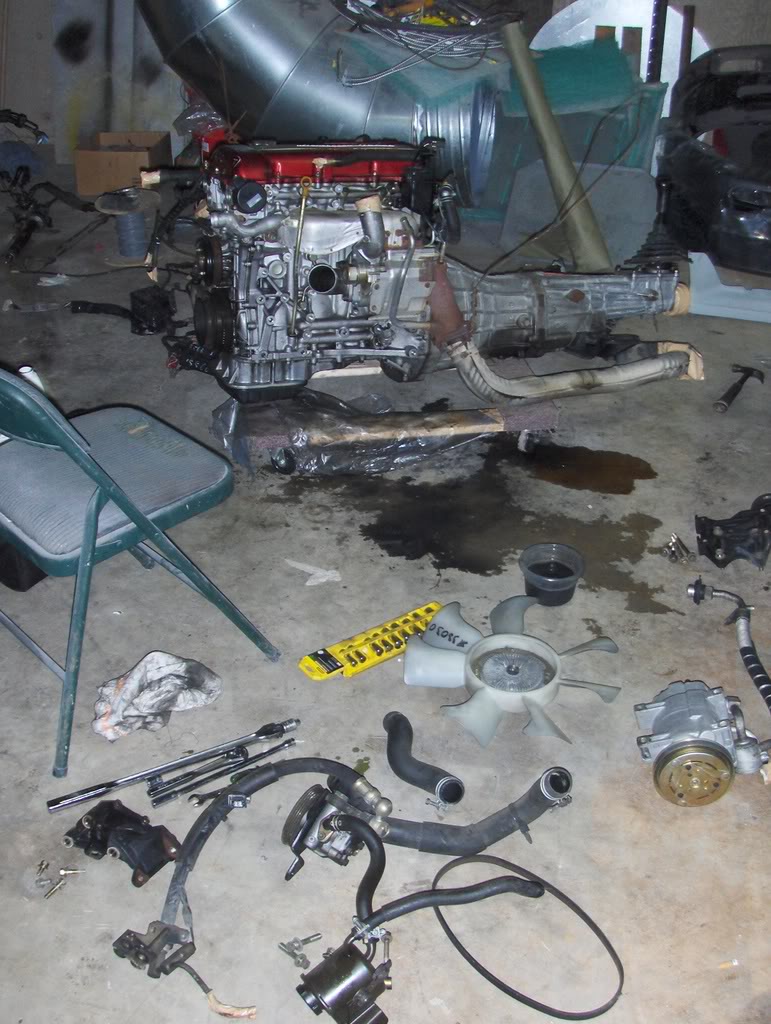
Rear sump oil pan and pickup, engine and tranny mounts, driveshaft, full 3" exhaust, and lines/fittings/rack to run the FC power steering off the SR pump.
Everything but the PS stuff was originally built by Chris Forsberg and Tony Angelo, and later ran by Lindsay Ross. Youve probably seen the whored out FC that got passed around in Drift Alliance for the last 5 years or so. The guy I bought it from got it from Lindsay.
Thats pretty much how it sits now. I am waiting on funds for a motor and will be doing a lot of the small stuff needed for the swap in the mean time.
10/11 -
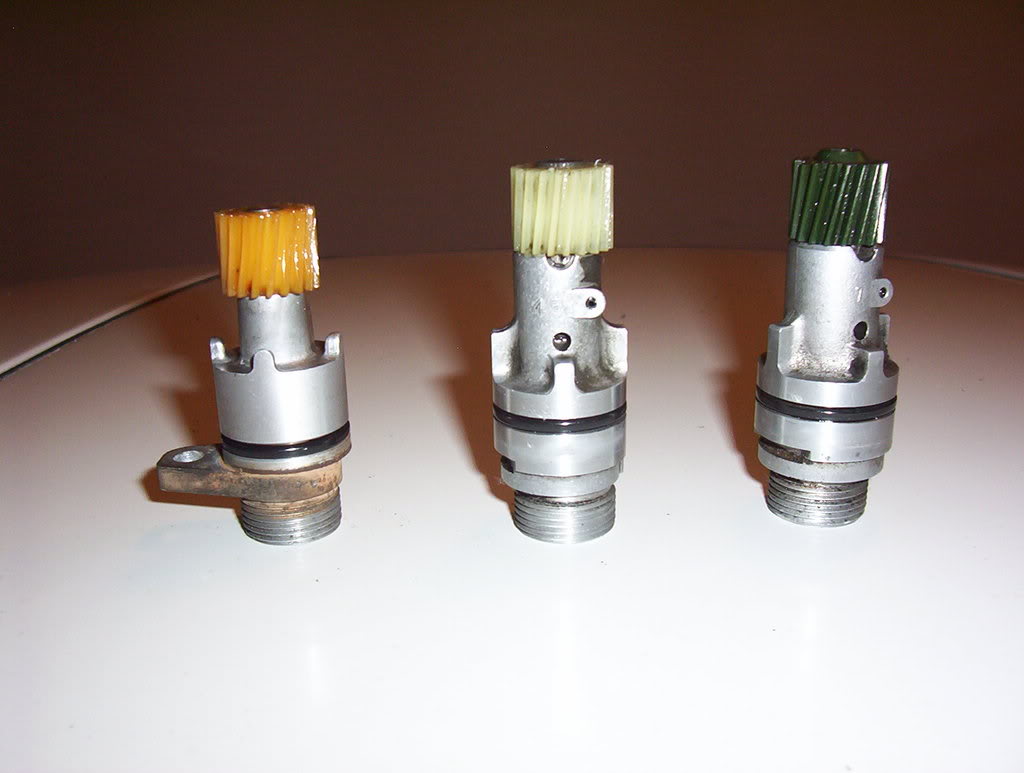
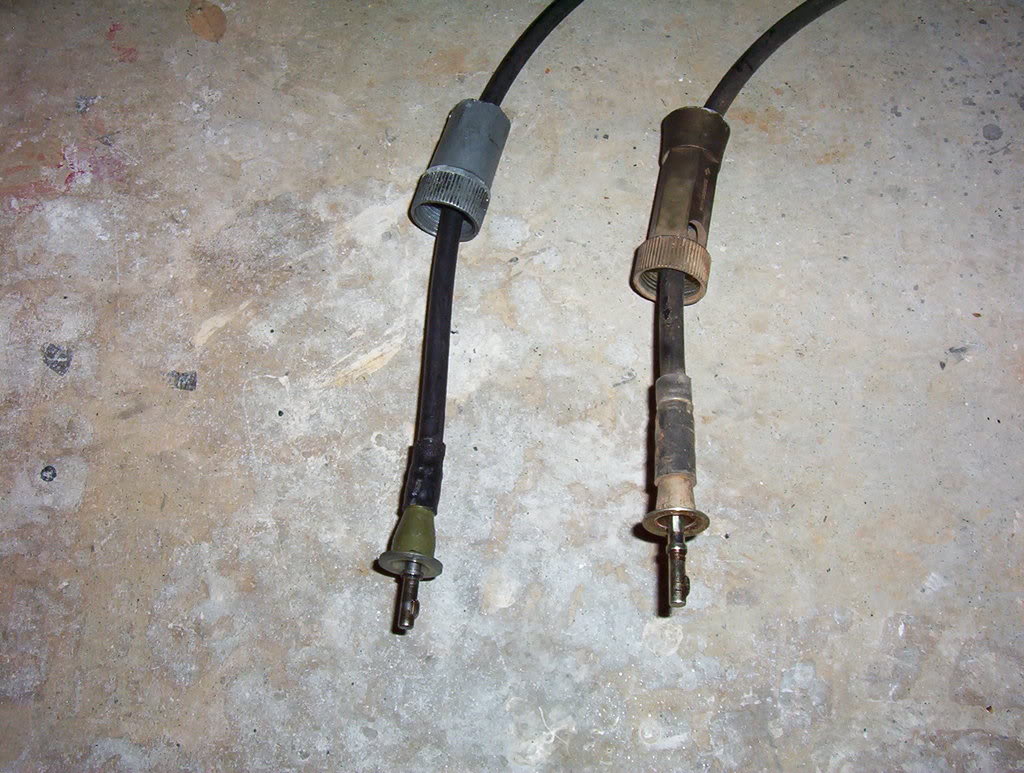
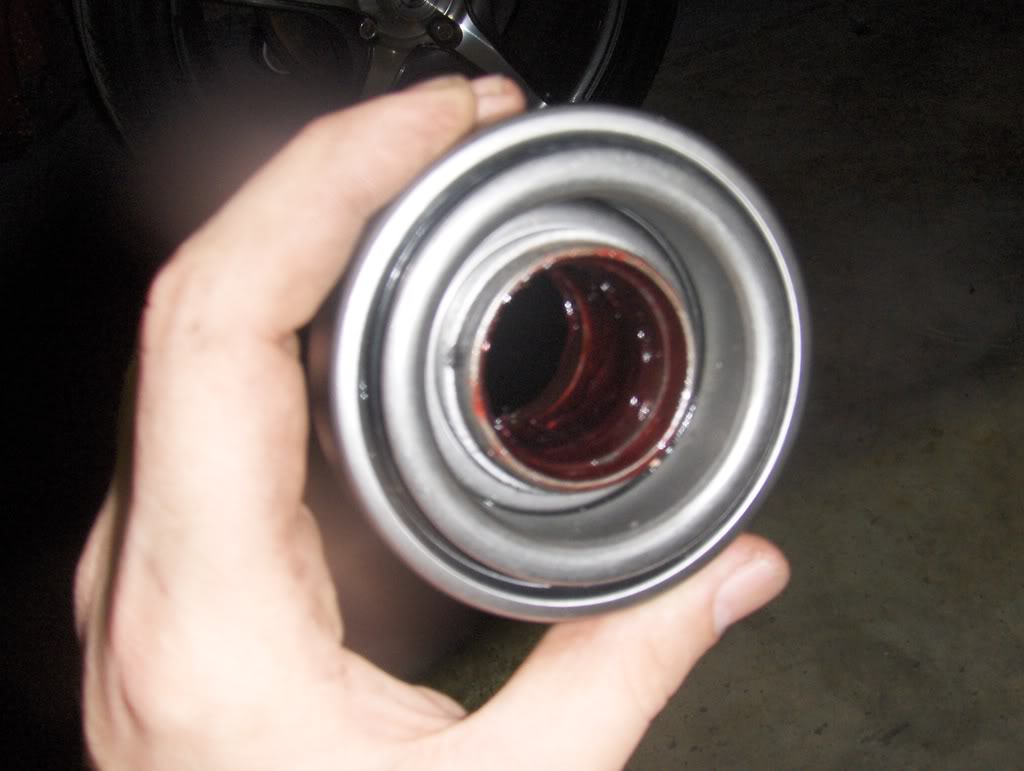
One small problem I'll have with the swap is the speedometer, which is cable-driven on the FC. Since the SR uses an electronic speedo sensor I needed to get a mechanical sensor and cable that would work with the SR tranny.
I remembered my old RB20 tranny came with a mechanical speed sensor and thought that was as good a place to start as any. After looking at some pics online I went to Pull A Part and nabbed a speed sensor and cable from a VG30 S12, as well as a Mazda 929 speedo cable. The Mazda cable screws right on the Nissan sensor and they use the same design, so if I can make the 929 cable work with the cluster I will be set. The 13BT tranny has the sensor on the driver' but I may be able to stretch it over to the passenger side for the SR tranny. If not, I should be able to make the 929 cable work.
The sensors, Mazda on the left, Nissan on the right (x2)
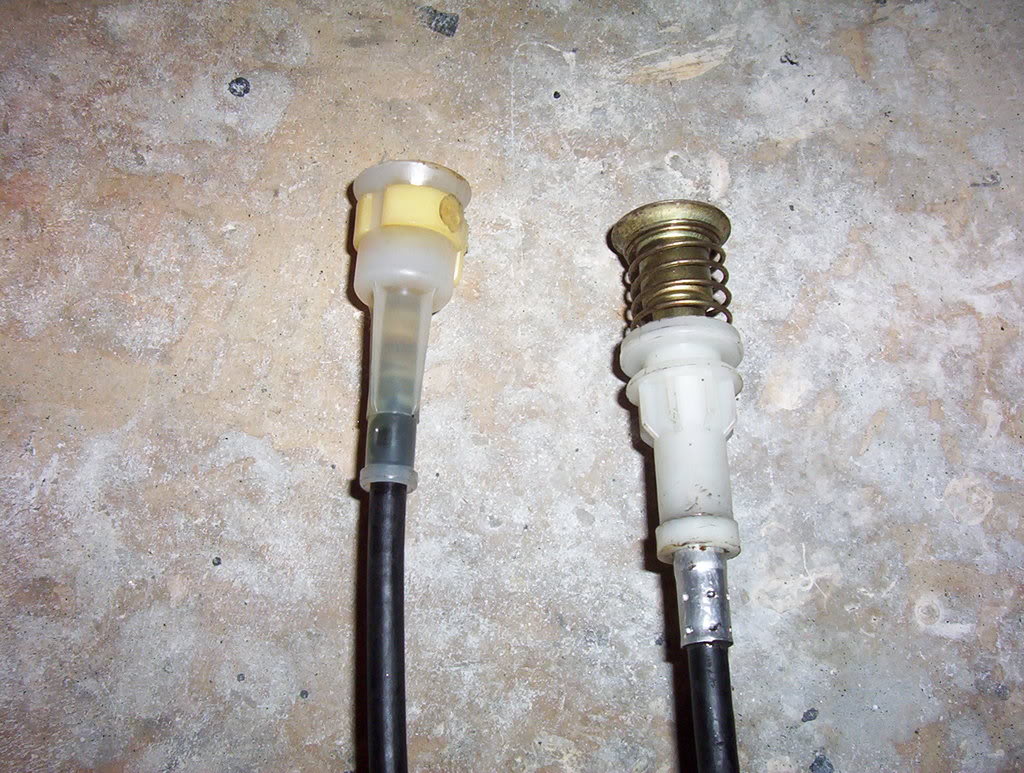
Transmission side of the cables, Nissan on the left, Mazda on the right
Cluster side, Mazda L, Nissan R
12/10
Not a whole lot of updating to do, been shopping around for a motor for a few weeks now but nothing has worked out yet. Having a hard time finding a low mileage motor that I want to work with, so the search continues... Also will probably have my car under the knife shortly, get the 13B out and start getting down to business, Im stoked.
Aside from that, I figured out my wiring for the most part. The FC charging and EFI systems are setup differently than the SR/S13 so its going to get tricky:
- The FC chassis has the fuse boxes separate from the relay set, with the relays in the driver's kick panel and the fuses in the engine bay, in front of the driver's side strut tower. This runs through the front (headlight) harness and is also tied in with the charging system harness and tranny wiring (the FC equivalent of the S13 lower harness). This is all on the wrong side
I am probably going to move the fuse box back to behind the strut tower to clean up the bay some, then route just the main power and ground over to the passenger side where I will tie it in to the SR lower harness via a junction box, breaker, and battery relocation hardware. This leaves me with the fuses and relays all OEM, and the charging system converted to the passenger side for the SR.
- The main 13BT engine harness runs from the passenger kick panel to the engine, and is combined with wiring for the wipers, cruise control, and some other stuff. Imma remove most of this harness as it sits and replace it (and the ECU) with the SR stuff.
The connections for the EFI system will be done under the dash on the passenger side to keep less wiring in the bay. The FC chassis routes power from the fuses to the relays in the driver's kick panel, then over to the passenger side kick panel where there are connectors for the FC ECU. This should make it easy to wire the basic stuff (constant, switched, fuel pump ground, etc).
- I am using the OEM FC oil pressure sensor and coolant temp sensor (for the dash), so those wires need to be yanked from the FC harnesses and joined to my SR harness somehow. Not too big of a deal. Also need to locate and rewire the reverse light sensor for the SR tranny, easy peasy.
- Fuel lines on the FC enter the engine bay on the driver's side so that is yet another thing i have to swap over. Im debating whether to mount the lines/filter sideways on the firewall, go with hard lines and do it cleaner, or switch the lines under the car somewhere to make it even more unnoticeable. They are going to be real close to the exhaust and turbo regardless so its actually a big concern, will have to figure it out with safety in mind.
12/15
Still on the hunt for a motor.....
Listed a bunch of stuff for sale on RX7Club and things are going out the door quick. Also have someone coming this week interested in the whole swap so that would be awesome too. Two more motors to look at by this weekend, hopefully one of them is a winner.
12/18
STILL looking for a suitable power plant
Good news is I have a buyer for my blown 13BT, and I will be pulling it out this Saturday. Probably going to do a partial trade for GC black interior and cash on top. going to have the car towed to KSP that evening and the fun begins!
12/28
Lots of progress it seems, but a long way to go too. BIG thanks to Tyler and Decker at Killswitch for letting me work on my car at the shop, should make things easy
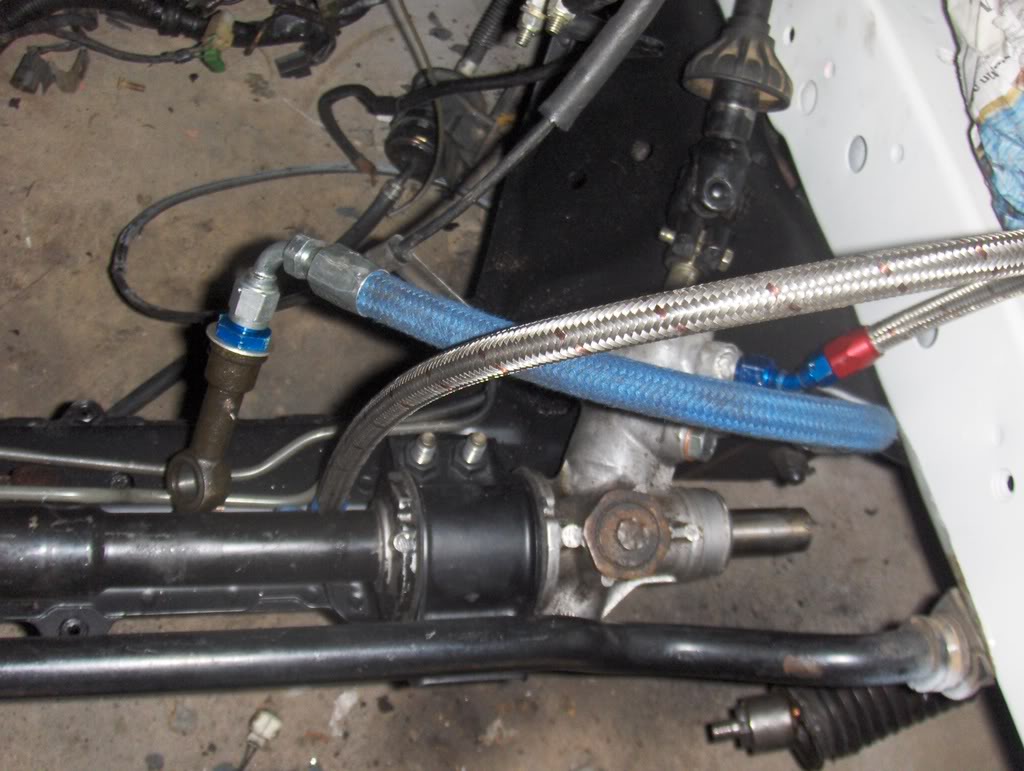
Pulled the motor out last weekend and got the car down to Killswitch. Yesterday at install day I made quick work of the OEM steering rack and lines, and got the new rack set in the bay. Would have had it 100% done but I forgot my new rack bushings and wanted to space my tie rods out, so I stopped half way. That should be ready to rock next weekend at the latest, and Ill be ready to clean the **** out of the bay. I need to repaint the frame rails on both sides due to a leaky BMC and ABS pump (of course) so thats up this week also.
If I could find a ******* motor thats worth a **** I would be way further along, but its whatevs. At least I know I will have a good runner when I finally drop the dough. JHot this week for sure
I also have a line up on another FC shell that has a lot of good parts I want so I will probably be picking that up this weekend. Non-ABS lines and brand new BMC, rear hubs with DTSS eliminators, black interior, and battery relocation goods should more than make up for the parts cost and labor I will save by buying the shell, plus it has a title and is in fairly good shape, win-win.
12/30
Stackin' parts like whoa.
Everything but the PS stuff was originally built by Chris Forsberg and Tony Angelo, and later ran by Lindsay Ross. Youve probably seen the whored out FC that got passed around in Drift Alliance for the last 5 years or so. The guy I bought it from got it from Lindsay.
Thats pretty much how it sits now. I am waiting on funds for a motor and will be doing a lot of the small stuff needed for the swap in the mean time.
10/11 -
One small problem I'll have with the swap is the speedometer, which is cable-driven on the FC. Since the SR uses an electronic speedo sensor I needed to get a mechanical sensor and cable that would work with the SR tranny.
I remembered my old RB20 tranny came with a mechanical speed sensor and thought that was as good a place to start as any. After looking at some pics online I went to Pull A Part and nabbed a speed sensor and cable from a VG30 S12, as well as a Mazda 929 speedo cable. The Mazda cable screws right on the Nissan sensor and they use the same design, so if I can make the 929 cable work with the cluster I will be set. The 13BT tranny has the sensor on the driver' but I may be able to stretch it over to the passenger side for the SR tranny. If not, I should be able to make the 929 cable work.
The sensors, Mazda on the left, Nissan on the right (x2)
Transmission side of the cables, Nissan on the left, Mazda on the right
Cluster side, Mazda L, Nissan R
12/10
Not a whole lot of updating to do, been shopping around for a motor for a few weeks now but nothing has worked out yet. Having a hard time finding a low mileage motor that I want to work with, so the search continues... Also will probably have my car under the knife shortly, get the 13B out and start getting down to business, Im stoked.
Aside from that, I figured out my wiring for the most part. The FC charging and EFI systems are setup differently than the SR/S13 so its going to get tricky:
- The FC chassis has the fuse boxes separate from the relay set, with the relays in the driver's kick panel and the fuses in the engine bay, in front of the driver's side strut tower. This runs through the front (headlight) harness and is also tied in with the charging system harness and tranny wiring (the FC equivalent of the S13 lower harness). This is all on the wrong side
I am probably going to move the fuse box back to behind the strut tower to clean up the bay some, then route just the main power and ground over to the passenger side where I will tie it in to the SR lower harness via a junction box, breaker, and battery relocation hardware. This leaves me with the fuses and relays all OEM, and the charging system converted to the passenger side for the SR.
- The main 13BT engine harness runs from the passenger kick panel to the engine, and is combined with wiring for the wipers, cruise control, and some other stuff. Imma remove most of this harness as it sits and replace it (and the ECU) with the SR stuff.
The connections for the EFI system will be done under the dash on the passenger side to keep less wiring in the bay. The FC chassis routes power from the fuses to the relays in the driver's kick panel, then over to the passenger side kick panel where there are connectors for the FC ECU. This should make it easy to wire the basic stuff (constant, switched, fuel pump ground, etc).
- I am using the OEM FC oil pressure sensor and coolant temp sensor (for the dash), so those wires need to be yanked from the FC harnesses and joined to my SR harness somehow. Not too big of a deal. Also need to locate and rewire the reverse light sensor for the SR tranny, easy peasy.
- Fuel lines on the FC enter the engine bay on the driver's side so that is yet another thing i have to swap over. Im debating whether to mount the lines/filter sideways on the firewall, go with hard lines and do it cleaner, or switch the lines under the car somewhere to make it even more unnoticeable. They are going to be real close to the exhaust and turbo regardless so its actually a big concern, will have to figure it out with safety in mind.
12/15
Still on the hunt for a motor.....
Listed a bunch of stuff for sale on RX7Club and things are going out the door quick. Also have someone coming this week interested in the whole swap so that would be awesome too. Two more motors to look at by this weekend, hopefully one of them is a winner.
12/18
STILL looking for a suitable power plant
Good news is I have a buyer for my blown 13BT, and I will be pulling it out this Saturday. Probably going to do a partial trade for GC black interior and cash on top. going to have the car towed to KSP that evening and the fun begins!
12/28
Lots of progress it seems, but a long way to go too. BIG thanks to Tyler and Decker at Killswitch for letting me work on my car at the shop, should make things easy
Pulled the motor out last weekend and got the car down to Killswitch. Yesterday at install day I made quick work of the OEM steering rack and lines, and got the new rack set in the bay. Would have had it 100% done but I forgot my new rack bushings and wanted to space my tie rods out, so I stopped half way. That should be ready to rock next weekend at the latest, and Ill be ready to clean the **** out of the bay. I need to repaint the frame rails on both sides due to a leaky BMC and ABS pump (of course) so thats up this week also.
If I could find a ******* motor thats worth a **** I would be way further along, but its whatevs. At least I know I will have a good runner when I finally drop the dough. JHot this week for sure
I also have a line up on another FC shell that has a lot of good parts I want so I will probably be picking that up this weekend. Non-ABS lines and brand new BMC, rear hubs with DTSS eliminators, black interior, and battery relocation goods should more than make up for the parts cost and labor I will save by buying the shell, plus it has a title and is in fairly good shape, win-win.
12/30
Stackin' parts like whoa.
1/3
2009 baby!
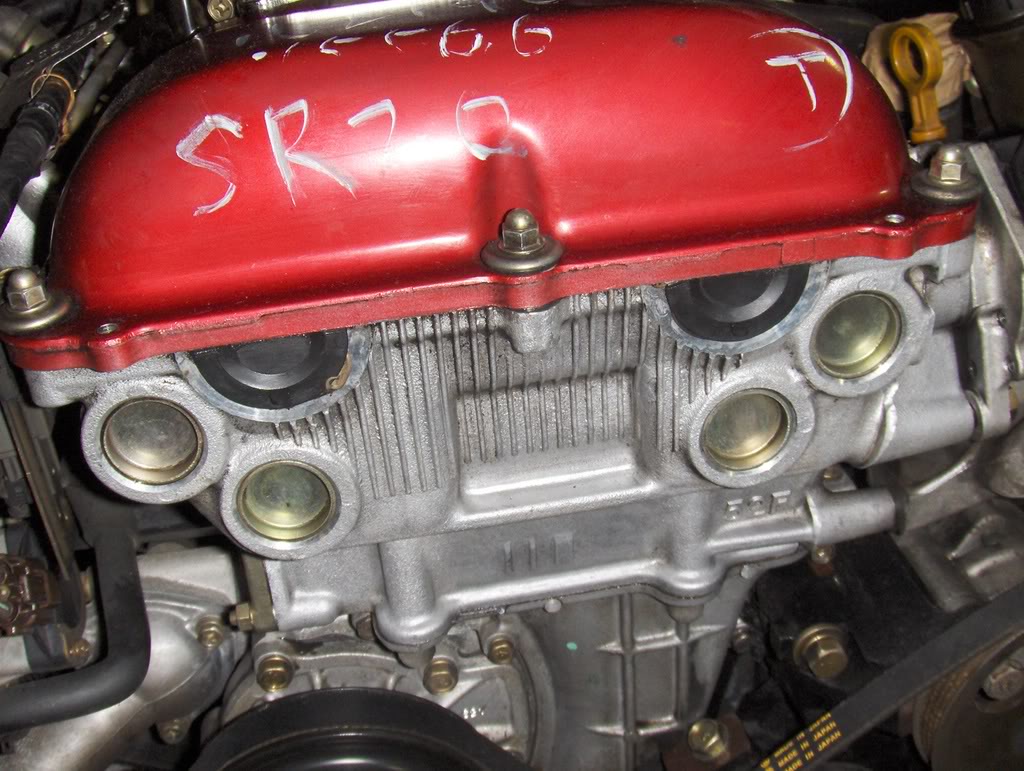
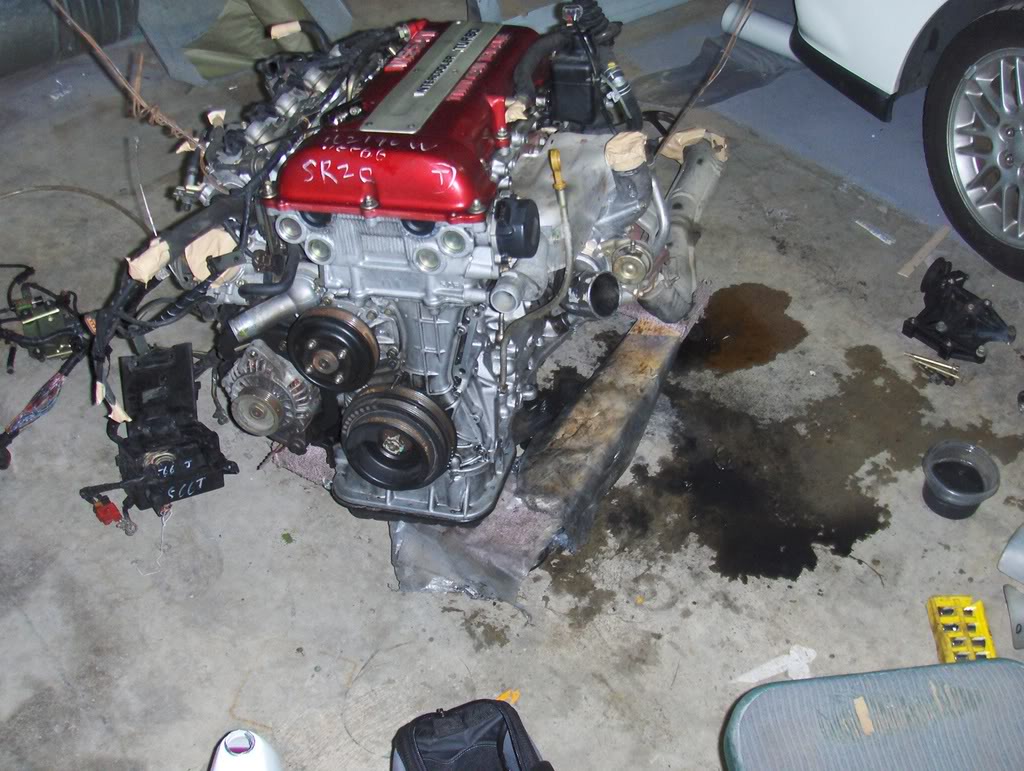
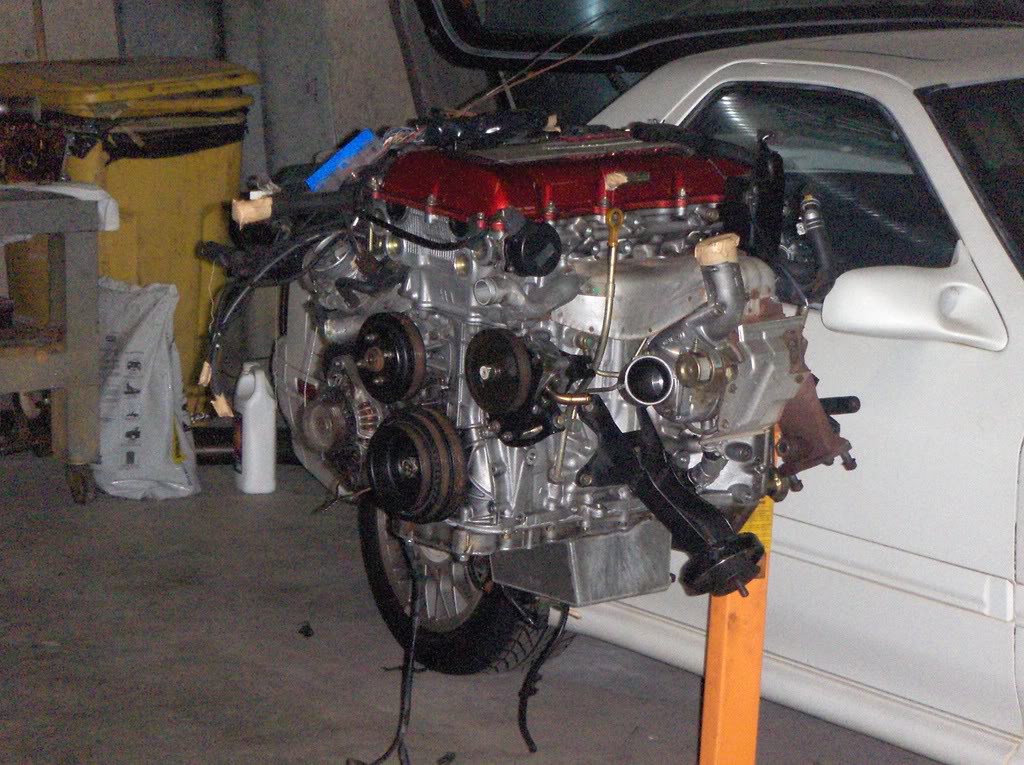
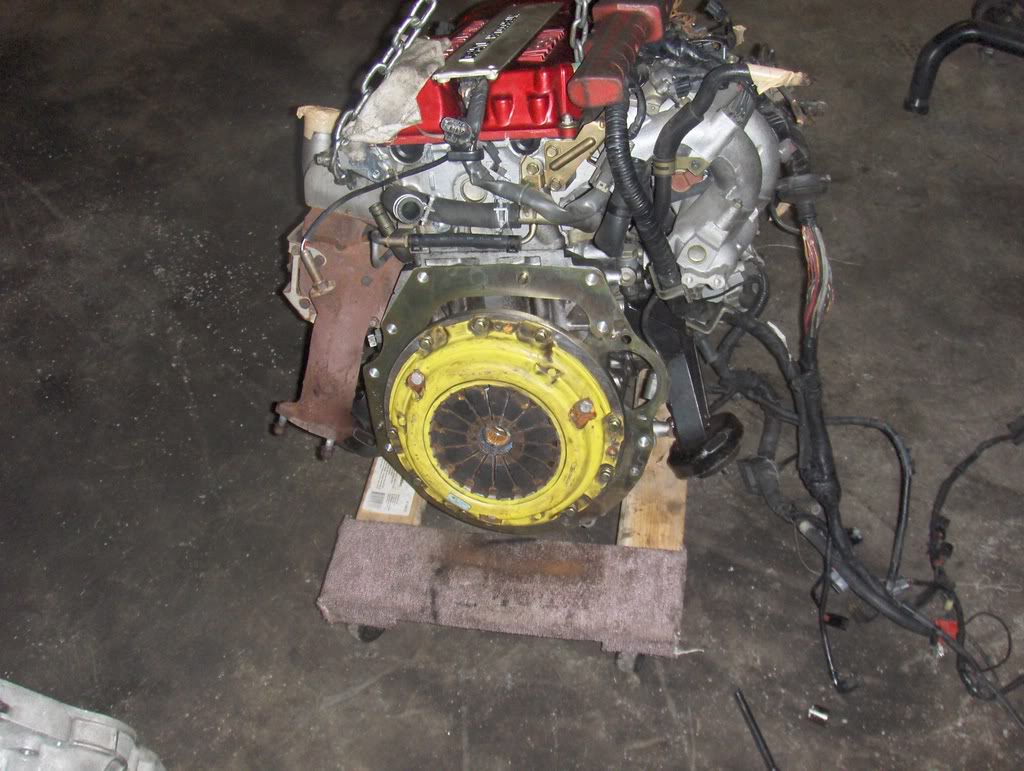
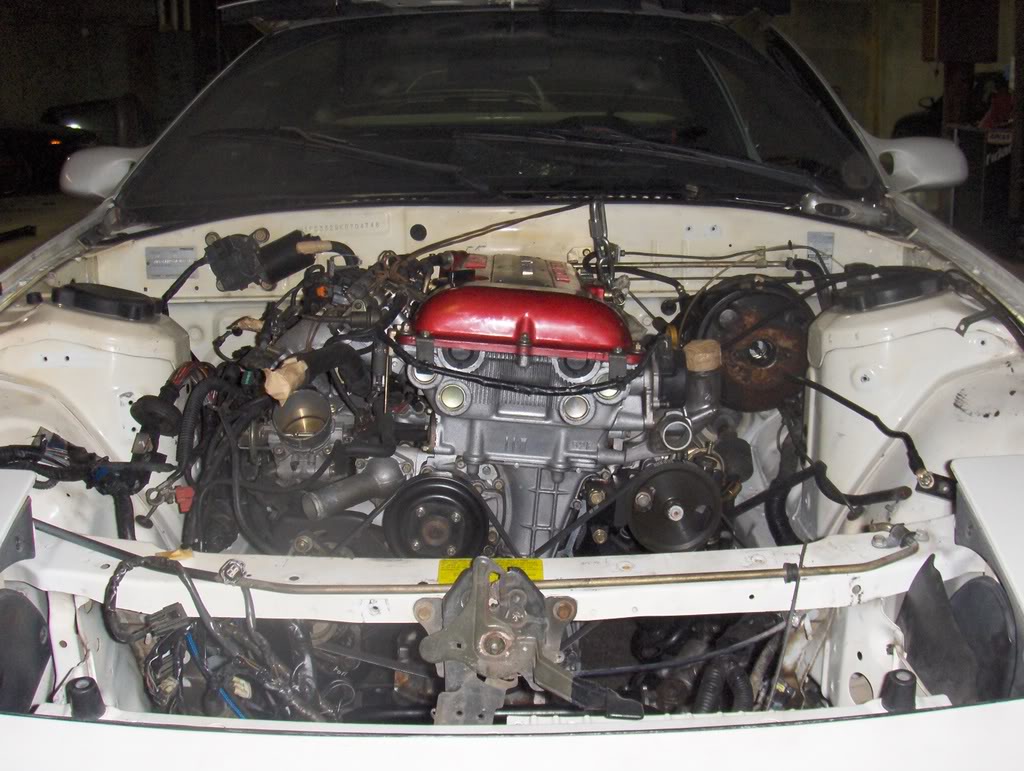
Picked up the motorset yesterday from JHot and I couldnt be happier. Late model red top with 68k, one of the cleanest sets Ive ever seen (srsly). I rented a truck and drove out there in the AM, got back around 7:45, all in all not too bad.
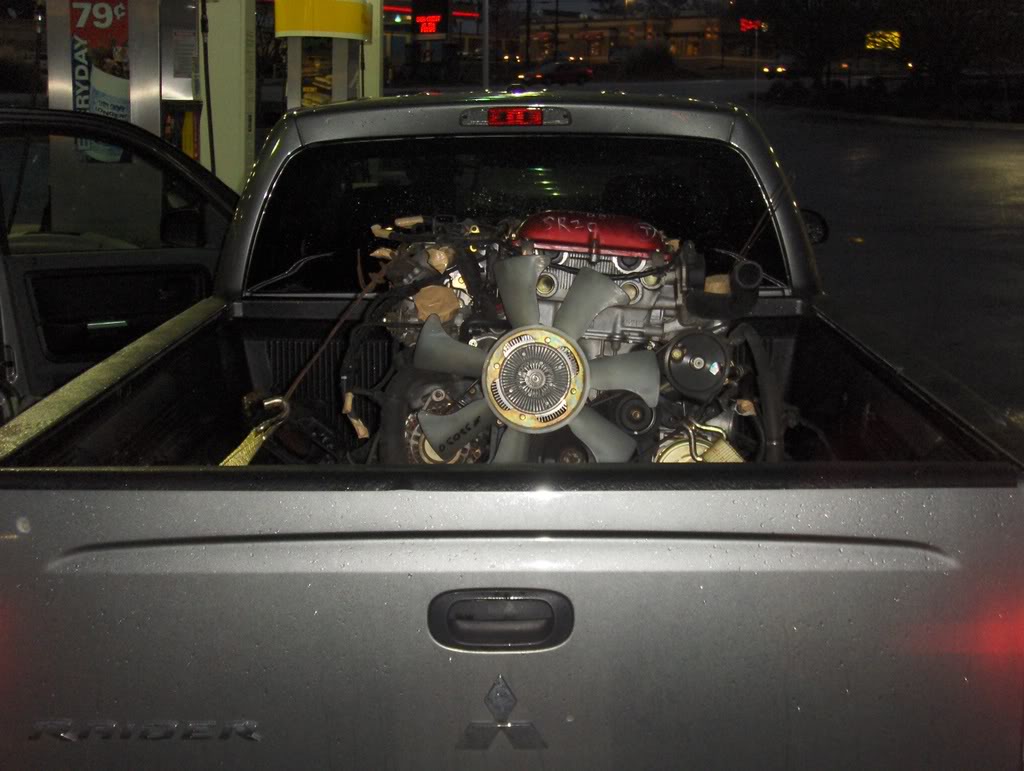
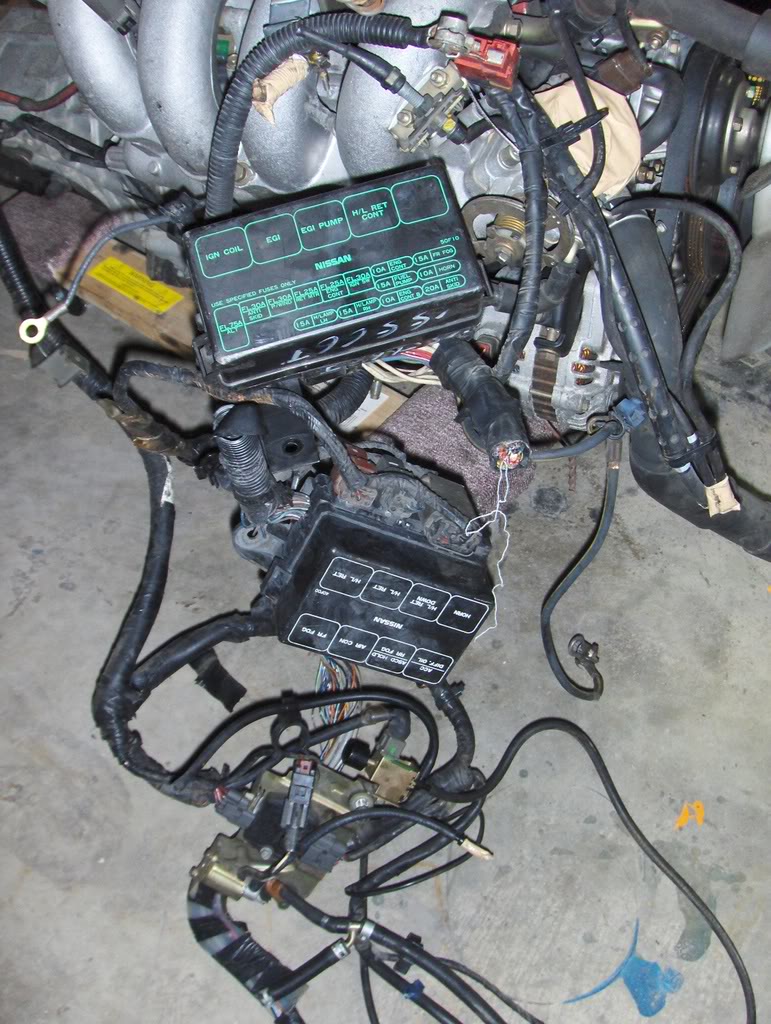
Here is how it looked straight from JHot, really clean but I thought I would rub it down with a diaper for a few hours anyway Note that the fuse boxes and all OEM harness that Ill ever need was included, exactly what I like to see.
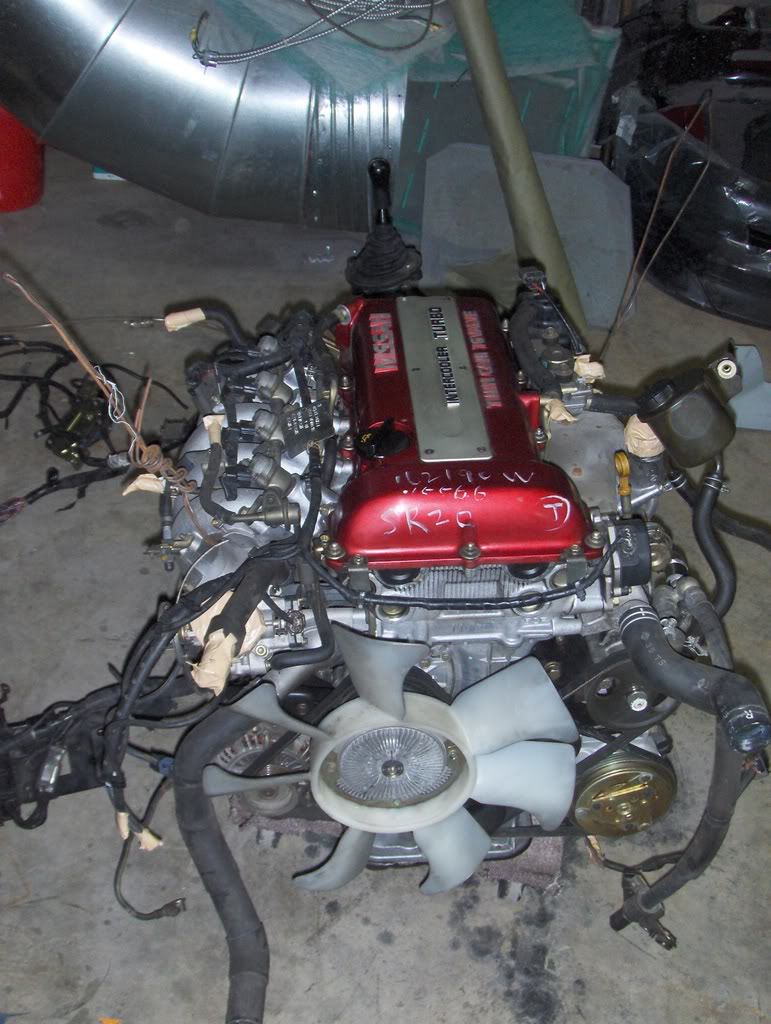
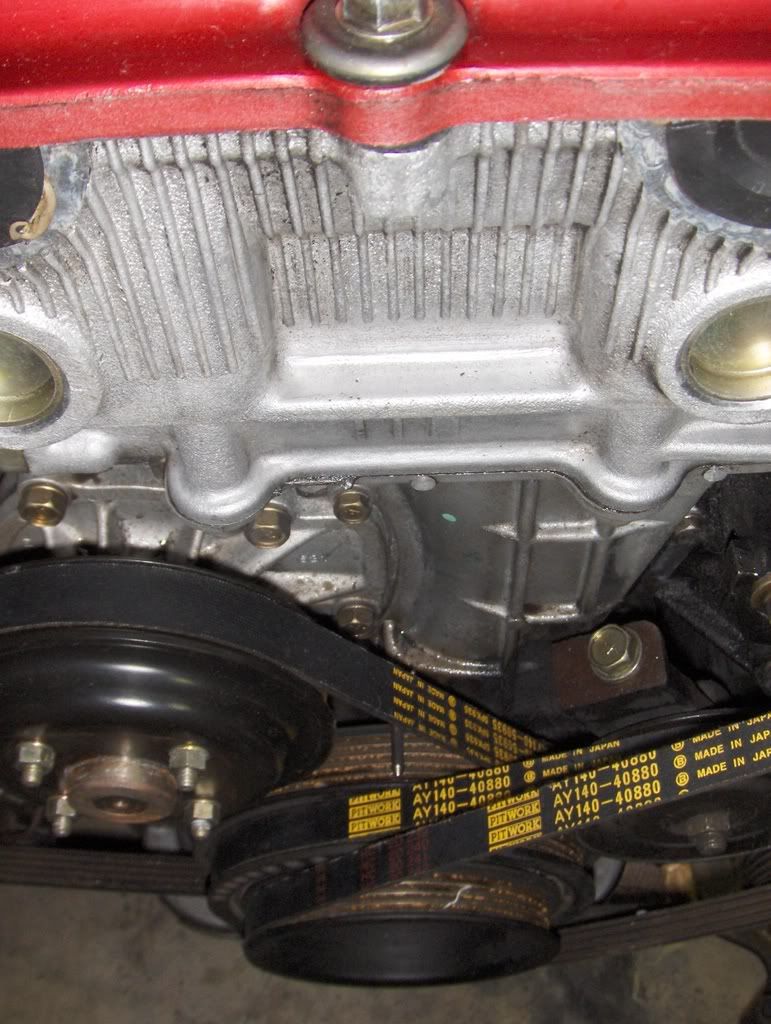
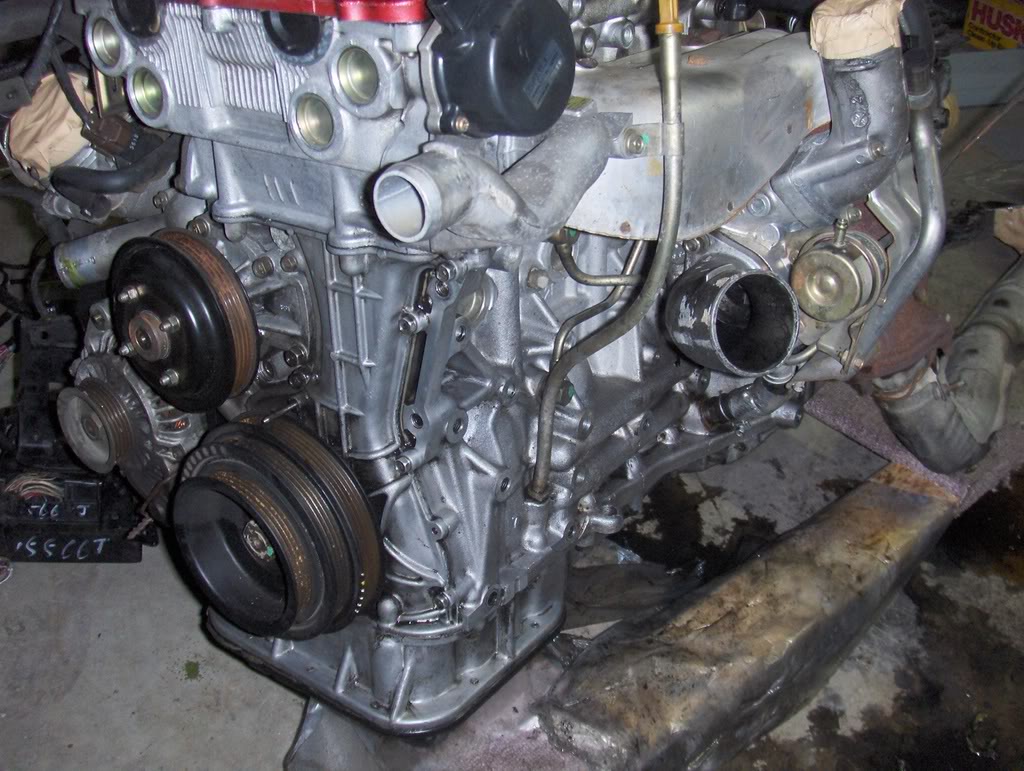
Round one, got the accessory belts off and pulled the PS pump and AC compressor off. AC compressor is brand new. Everything else got purple powered.
Pitwork belts, wut?!
2009 baby!
Picked up the motorset yesterday from JHot and I couldnt be happier. Late model red top with 68k, one of the cleanest sets Ive ever seen (srsly). I rented a truck and drove out there in the AM, got back around 7:45, all in all not too bad.
Here is how it looked straight from JHot, really clean but I thought I would rub it down with a diaper for a few hours anyway
Note that the fuse boxes and all OEM harness that Ill ever need was included, exactly what I like to see.Round one, got the accessory belts off and pulled the PS pump and AC compressor off. AC compressor is brand new. Everything else got purple powered.
Pitwork belts, wut?!
Round two, FIGHT!
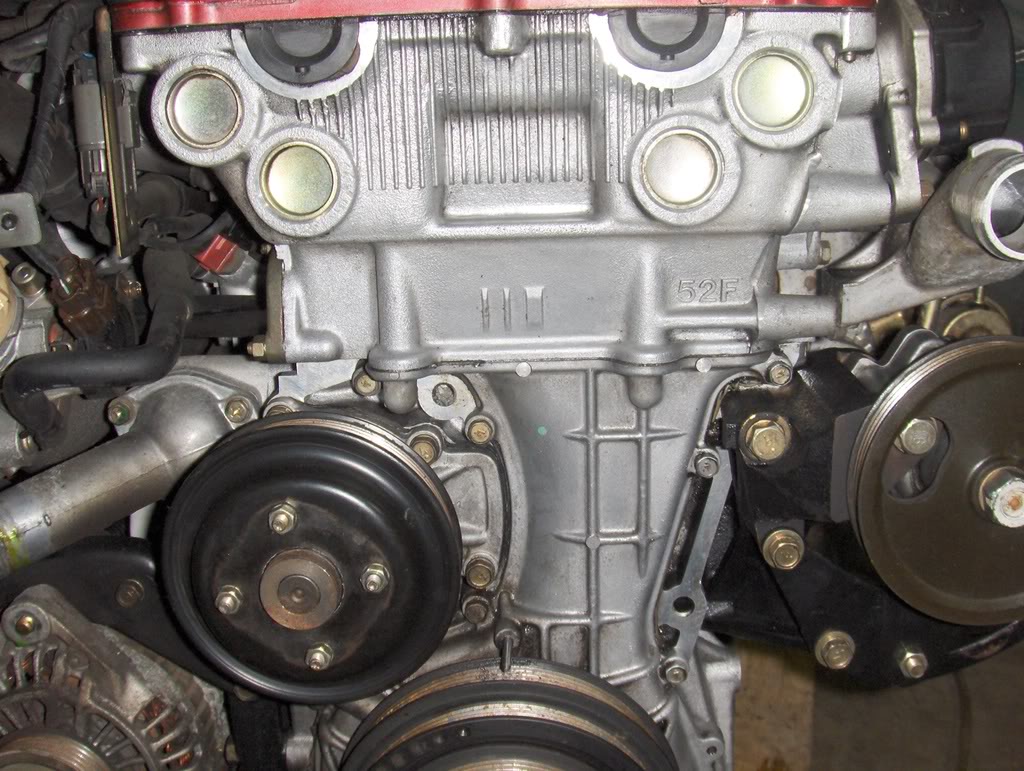
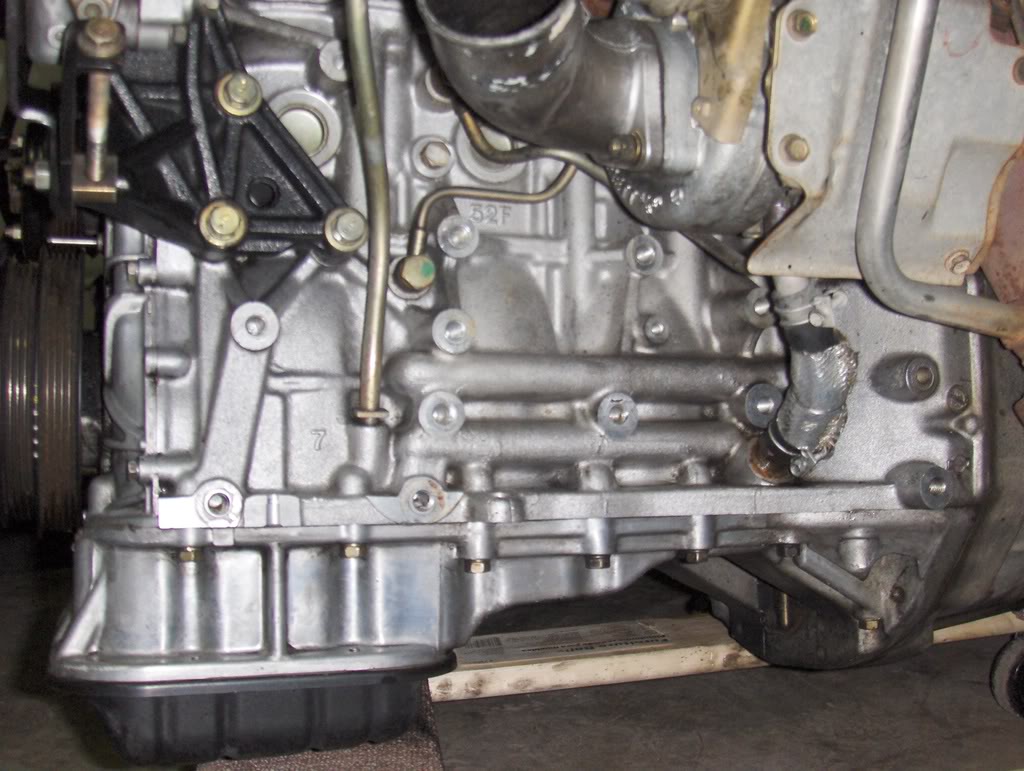
I see some dirt in the pics that I didnt when i was cleaning so I guess round three is coming up I want to take the crank pulley off to get to all that **** behind it, might do that next weekend. Also next weekend is the intake side of the motor and the tranny, should be really fresh when Im through.
I see some dirt in the pics that I didnt when i was cleaning so I guess round three is coming up
I want to take the crank pulley off to get to all that **** behind it, might do that next weekend. Also next weekend is the intake side of the motor and the tranny, should be really fresh when Im through.
1/11
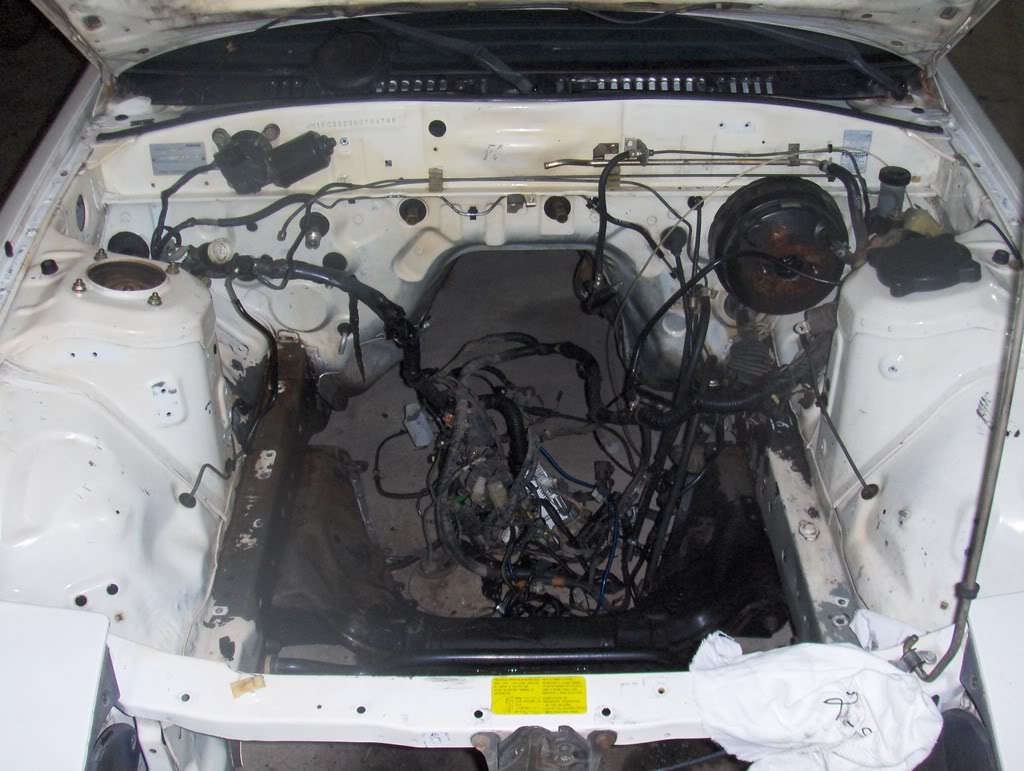
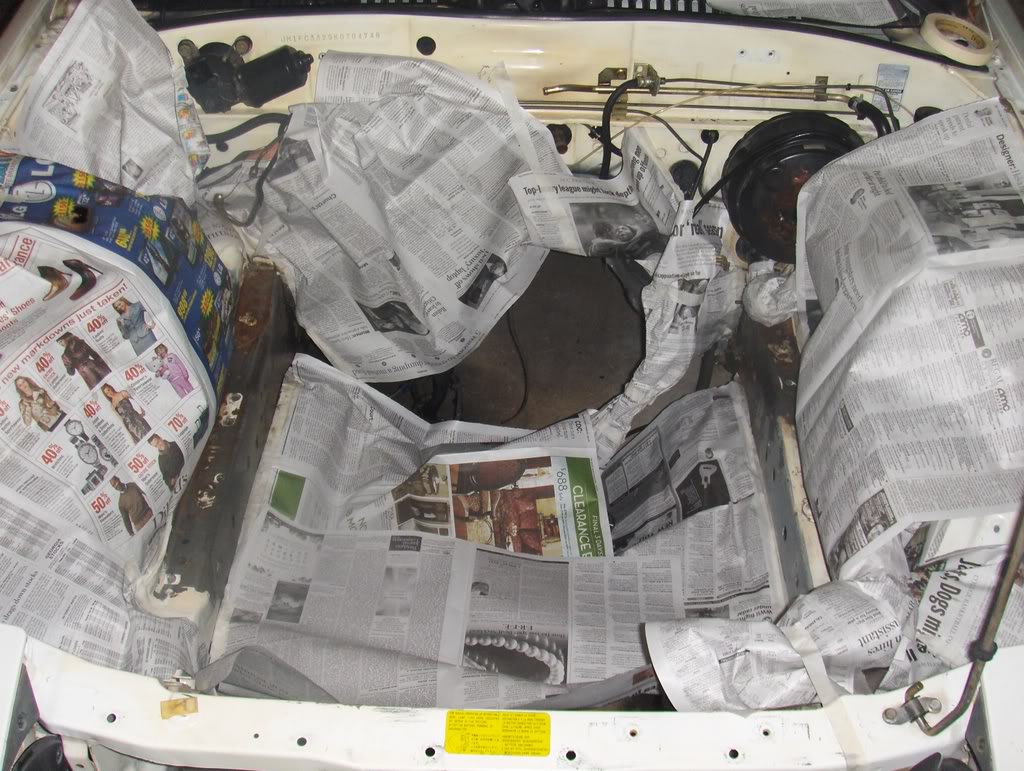
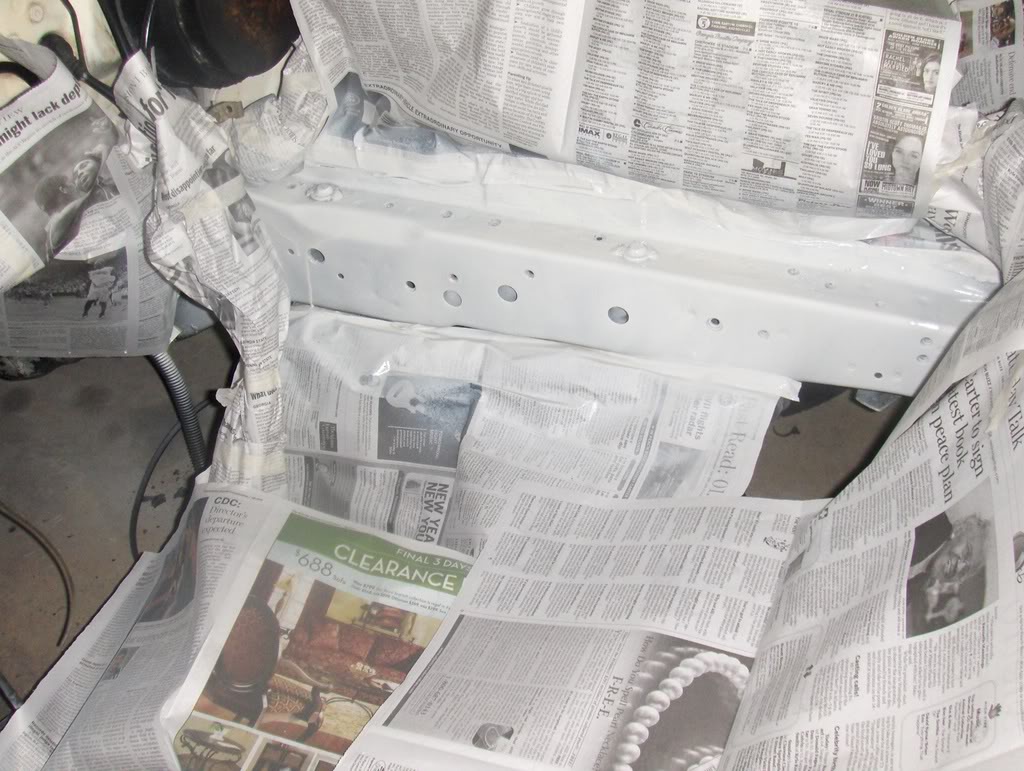
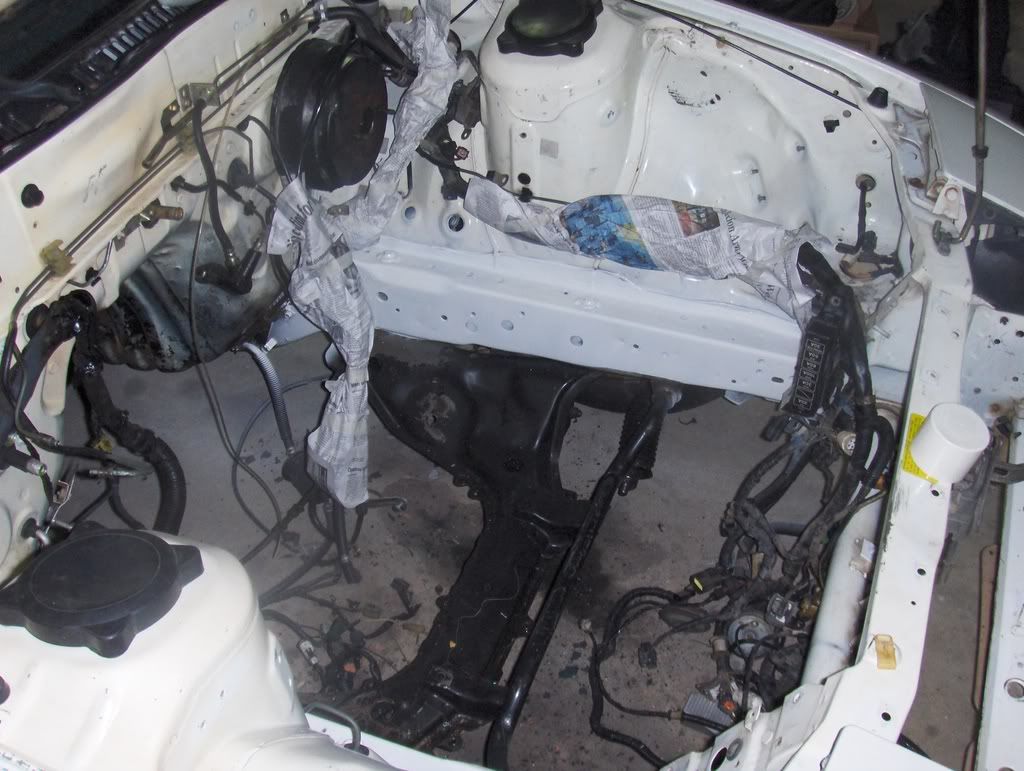
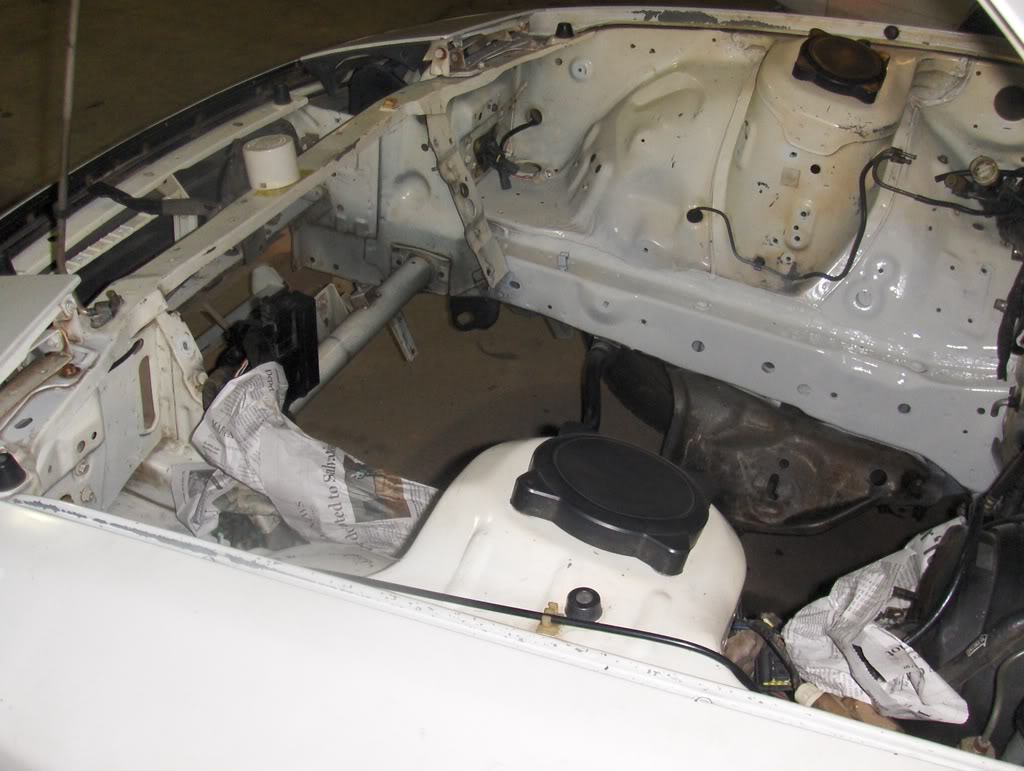
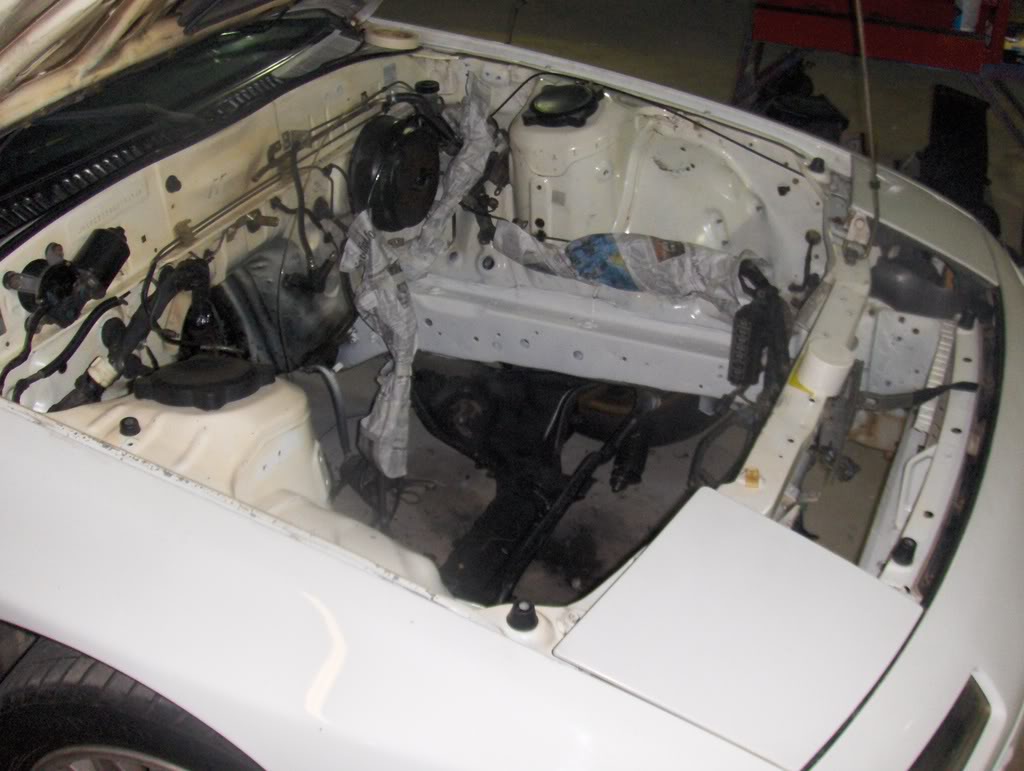
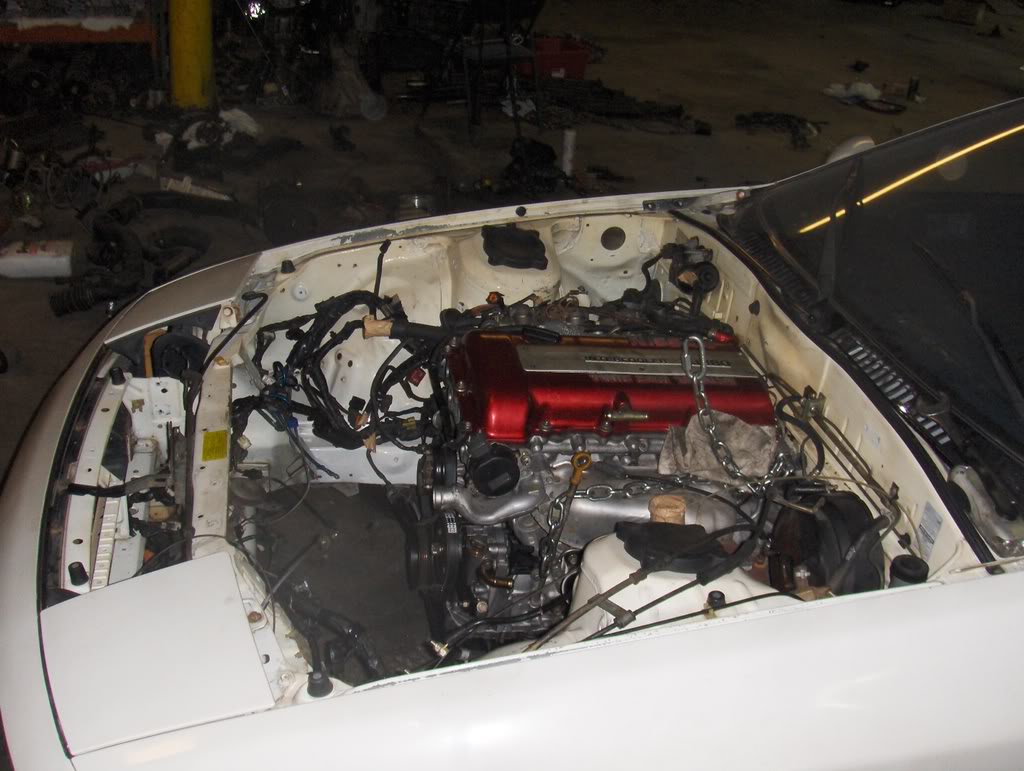
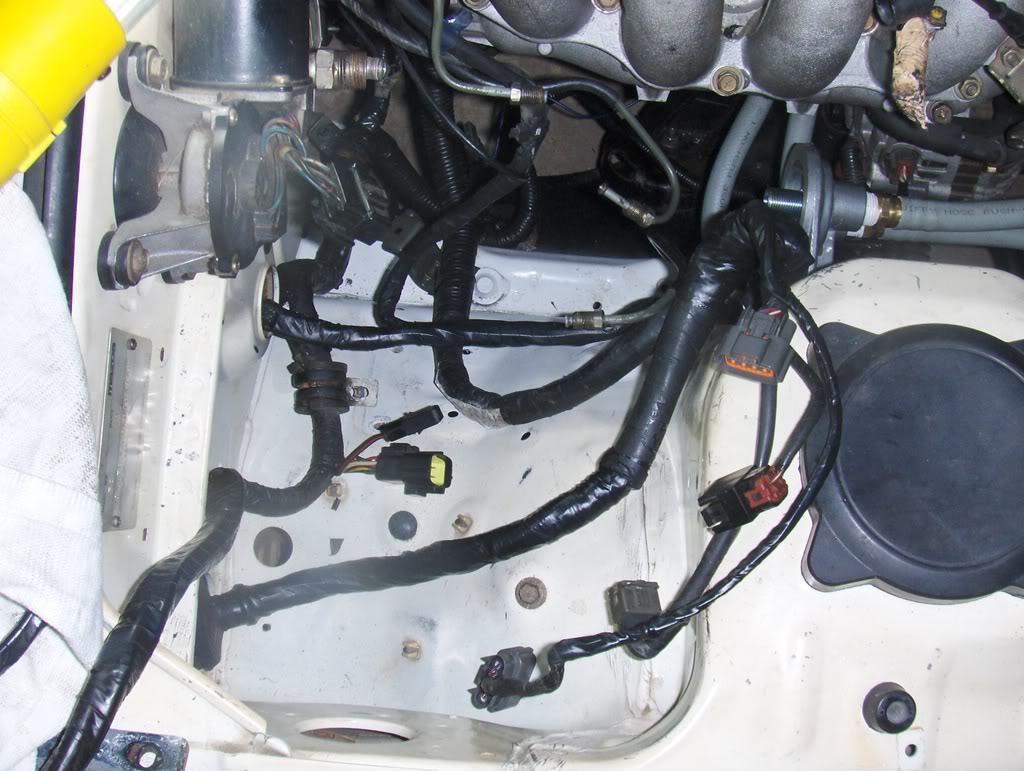
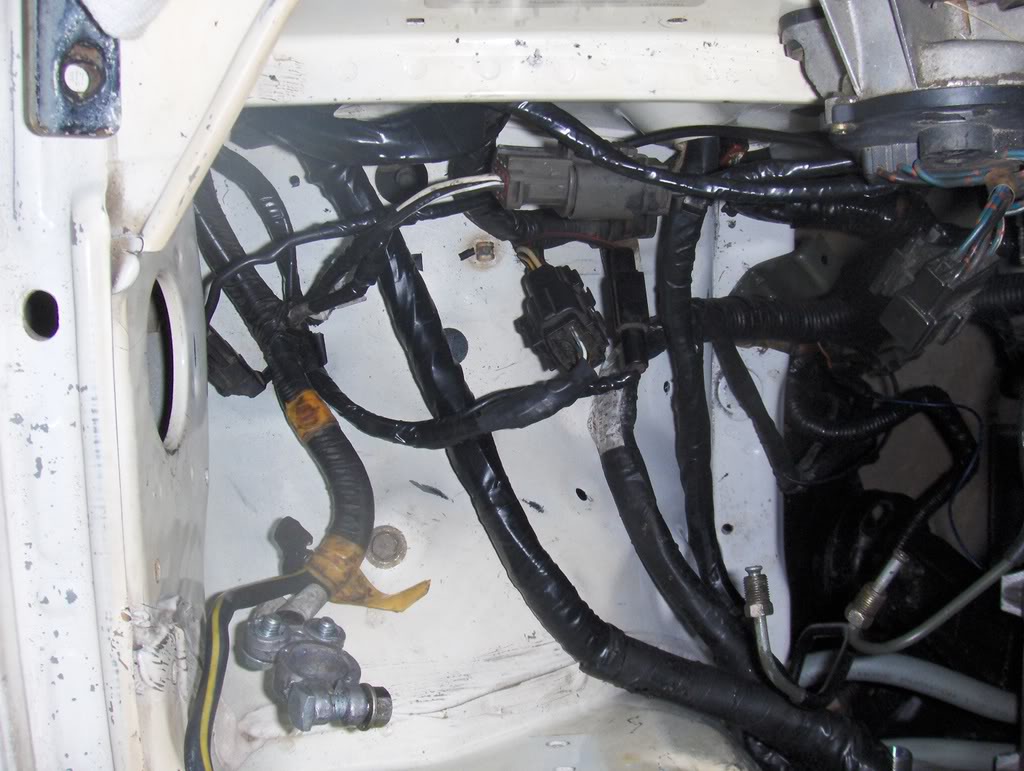
Spent this weekend cleaning up the engine bay and getting all the random junk I wont be using out of there. I must have removed 30 lbs of stuff, mainly ABS related and AC, both of which I am ditching. There was a ton of stuff in the passenger side fender opening (wiper fluid rezzy, some weird air canister, the ducting that pulls air from the wheel wells) that I removed also.
After removing the BS and cleaning the **** up:
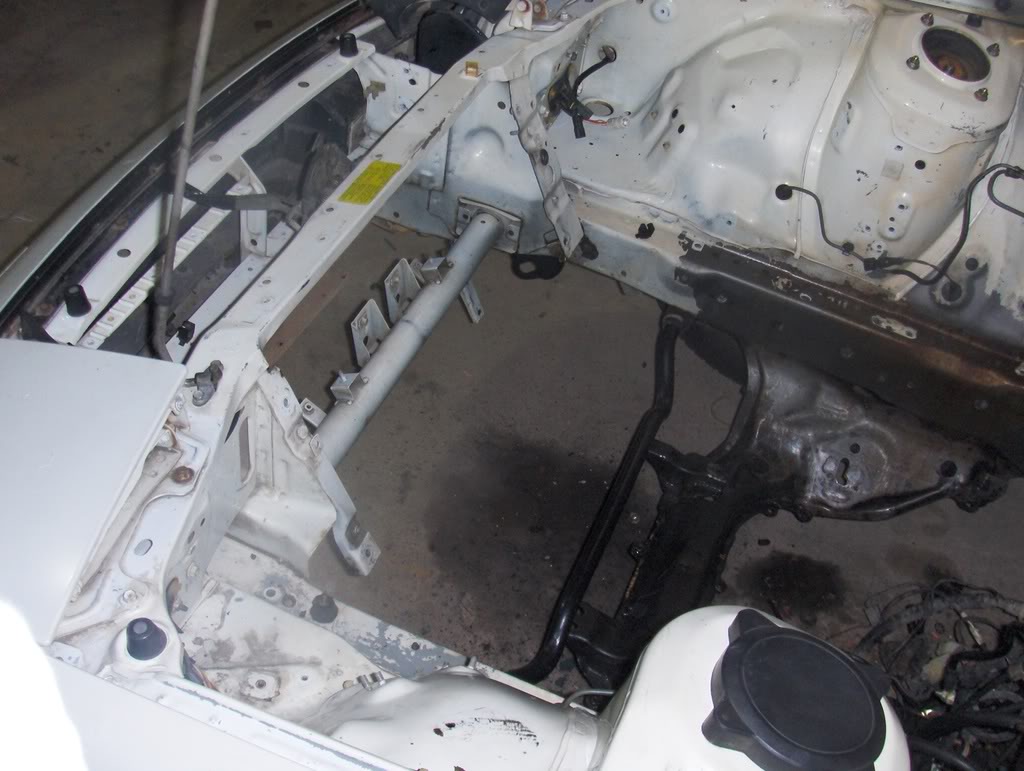
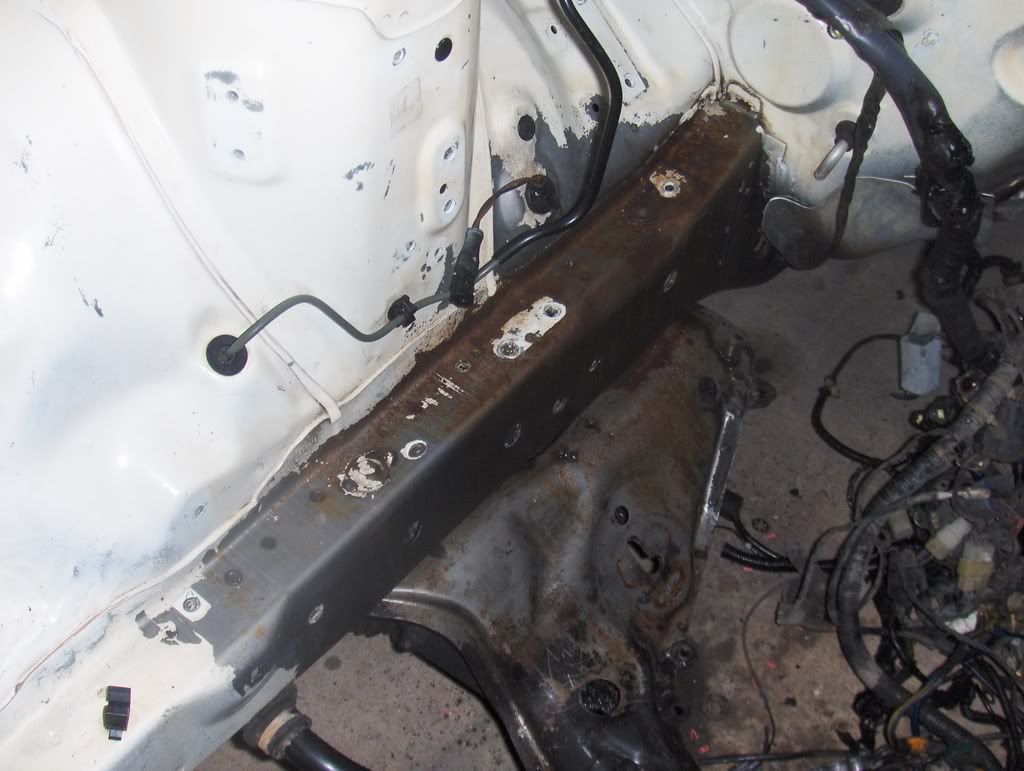
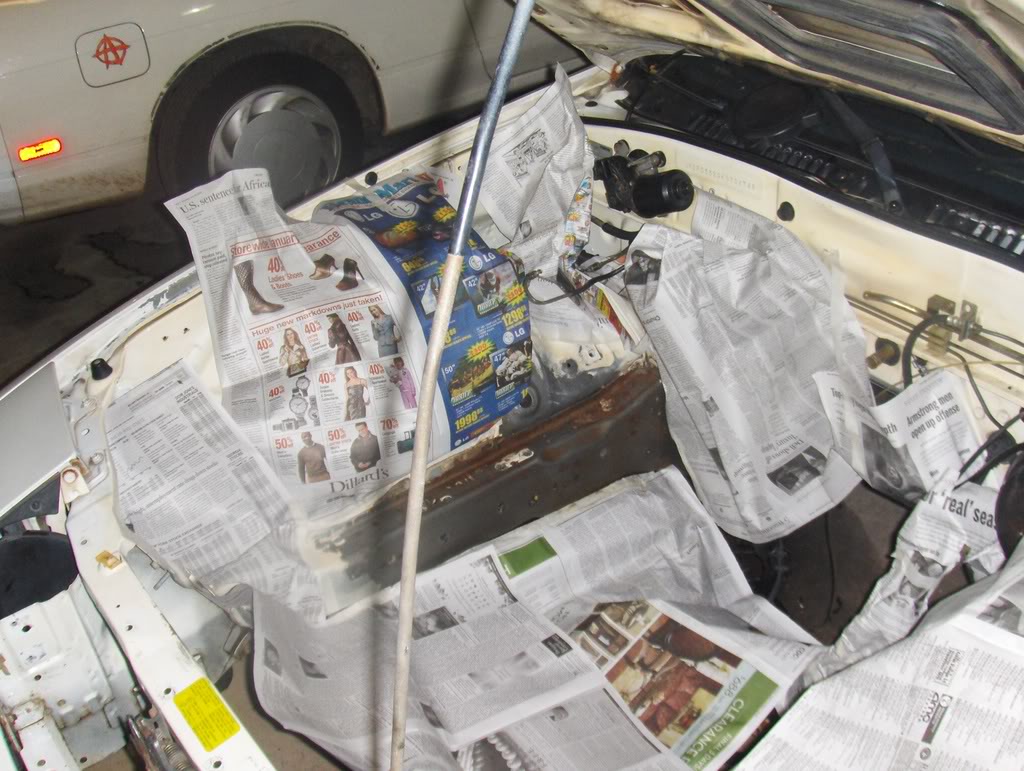
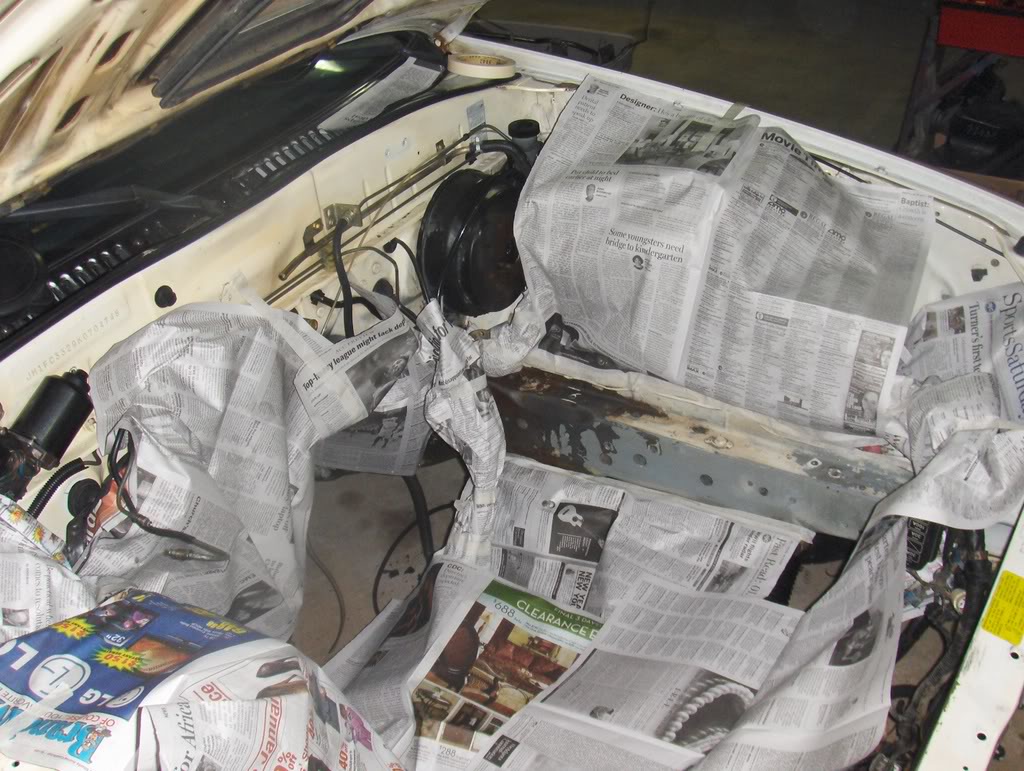
Next up was sanding and painting the frame rails, which were taxed heavily by the leaky BMC and ABS pump. I used some standard Duplicolor paint from AutoZone and it turned out a little too light, mainly because the paint in the bay is discolored from an exhaust leak or something.
Before:
Masking:
Spent this weekend cleaning up the engine bay and getting all the random junk I wont be using out of there. I must have removed 30 lbs of stuff, mainly ABS related and AC, both of which I am ditching. There was a ton of stuff in the passenger side fender opening (wiper fluid rezzy, some weird air canister, the ducting that pulls air from the wheel wells) that I removed also.
After removing the BS and cleaning the **** up:
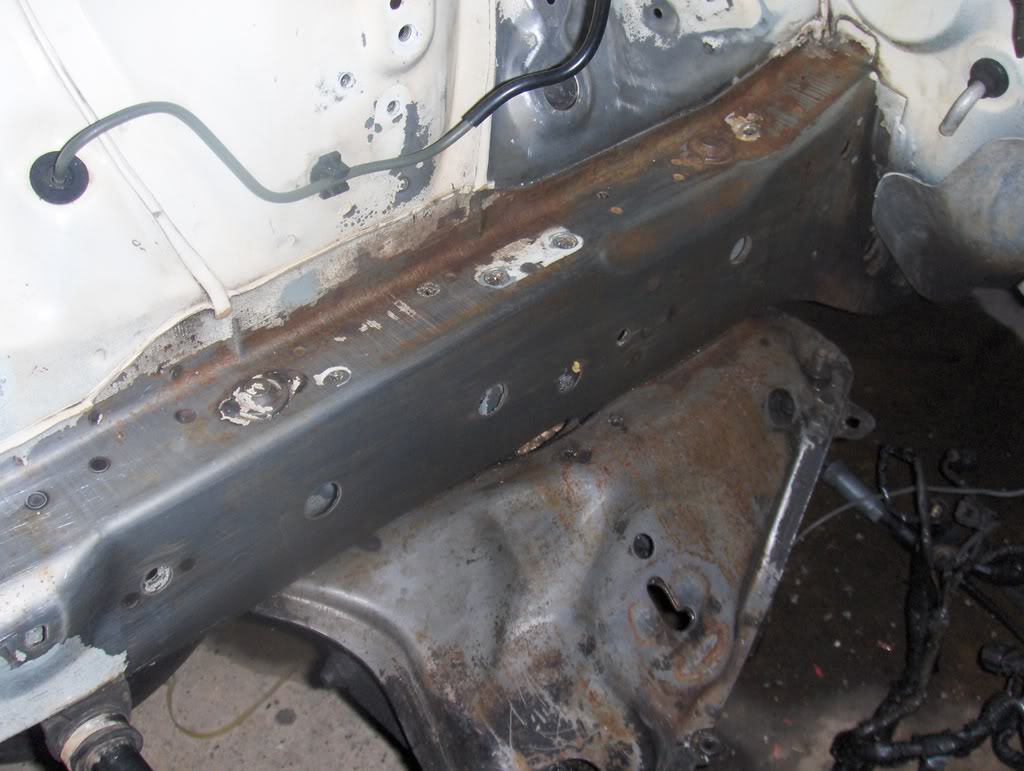
Next up was sanding and painting the frame rails, which were taxed heavily by the leaky BMC and ABS pump. I used some standard Duplicolor paint from AutoZone and it turned out a little too light, mainly because the paint in the bay is discolored from an exhaust leak or something.
Before:
Masking:
Painting:
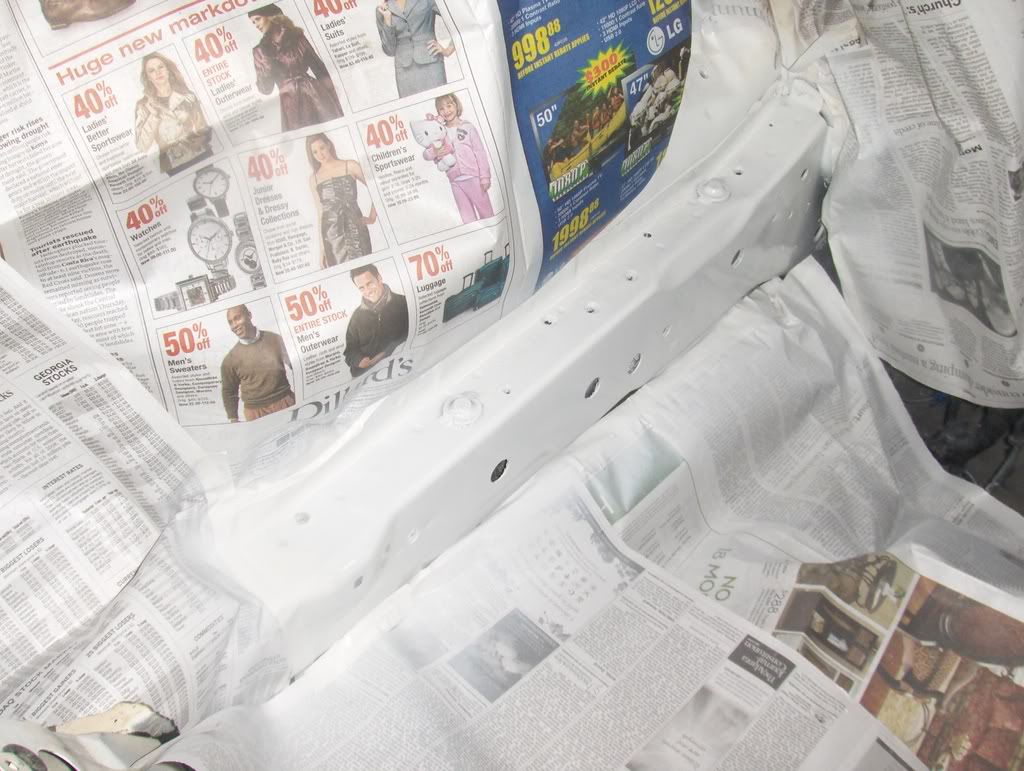
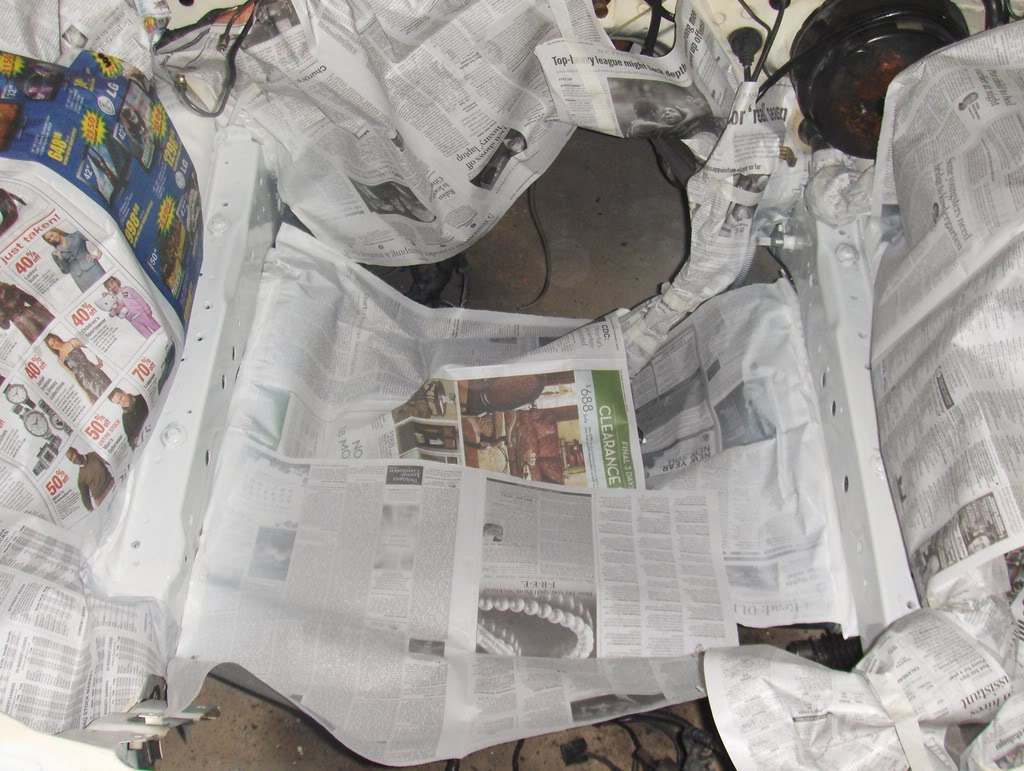
After:
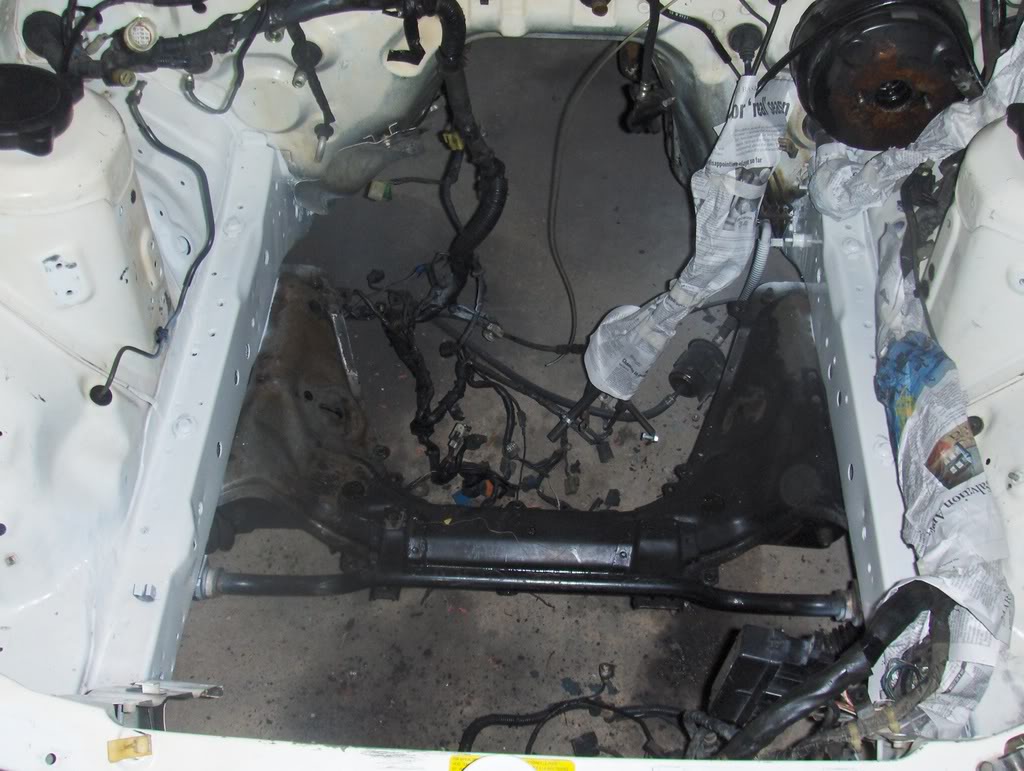
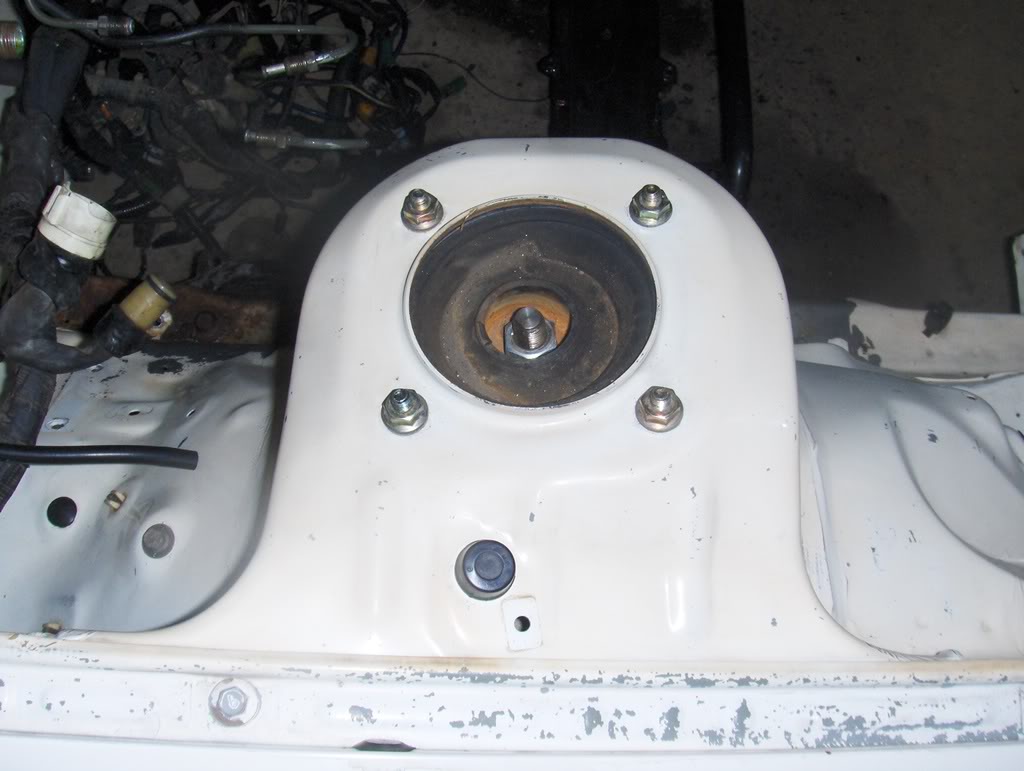
Next weekend I will probably be dropping the motor and/or working on the wiring. I got a game plan for that and it should be just time consuming, not really difficult. Also have to scrub and paint the crossmember, should be quick though as its purple powered up as we speak...
After:
Next weekend I will probably be dropping the motor and/or working on the wiring. I got a game plan for that and it should be just time consuming, not really difficult. Also have to scrub and paint the crossmember, should be quick though as its purple powered up as we speak...
1/17
No pictures this weekend because I forgot my camera yesterday and it died today after 3 pics. Boo!!
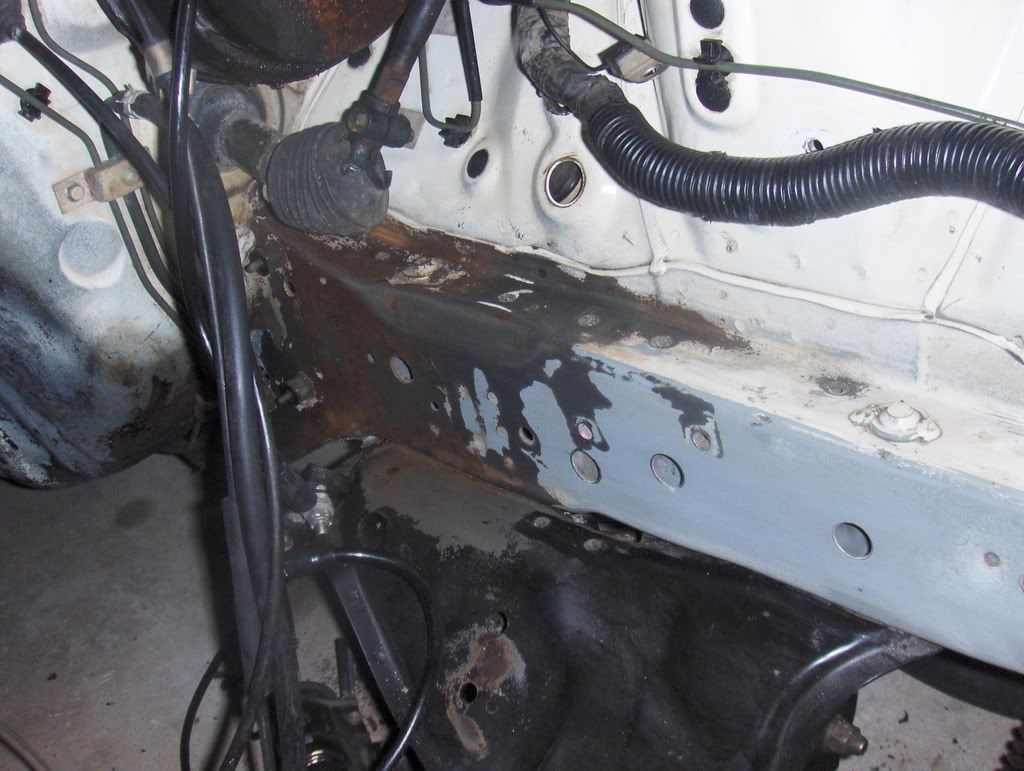
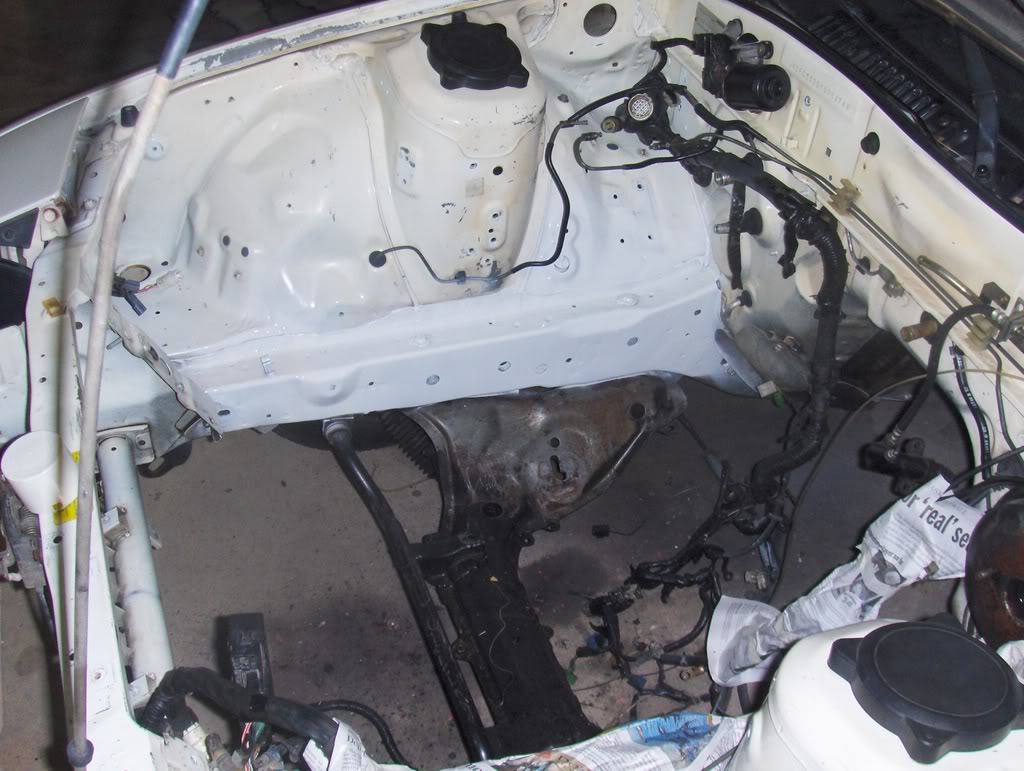
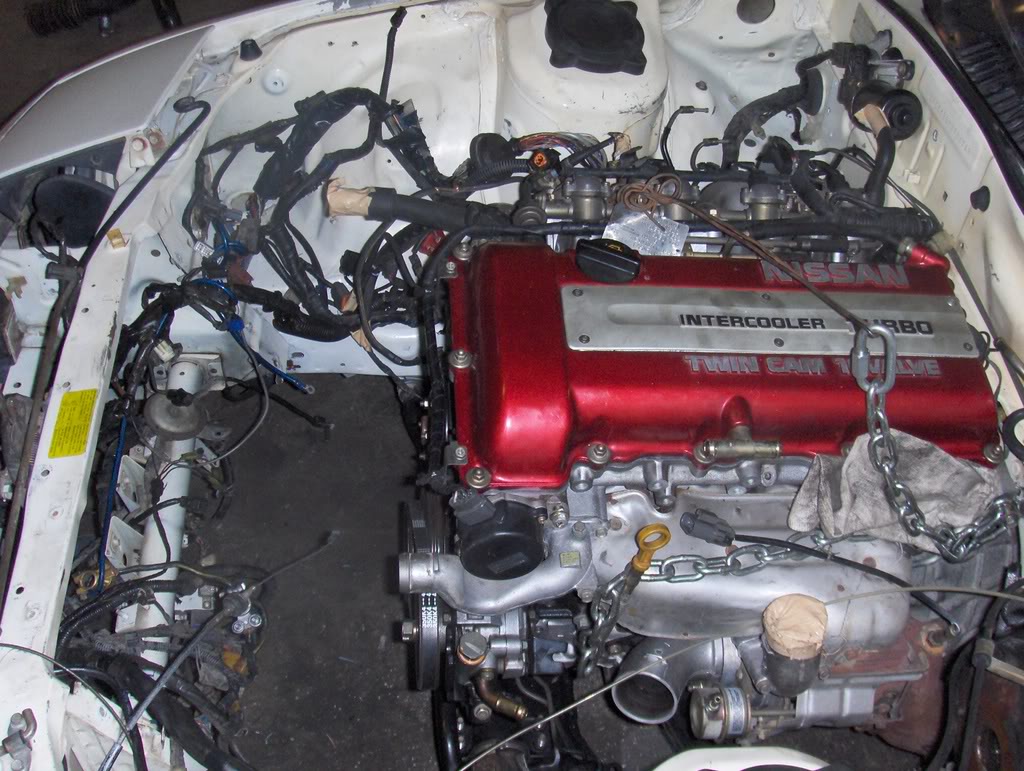
Basically I spent this weekend getting the motor ready to drop in, doing all the things that would be a PITA or not possible once its installed. Yesterday i spent entirely too much time installing the power steering rack and ******* around with tie rod spacers then giving up and moving on to something else. I painted the sub frame, pulled a few more things out of the engine bay, and scratched my head about where to run the fuel lines for a bit then made a decision and gt over it. All in all not very productive
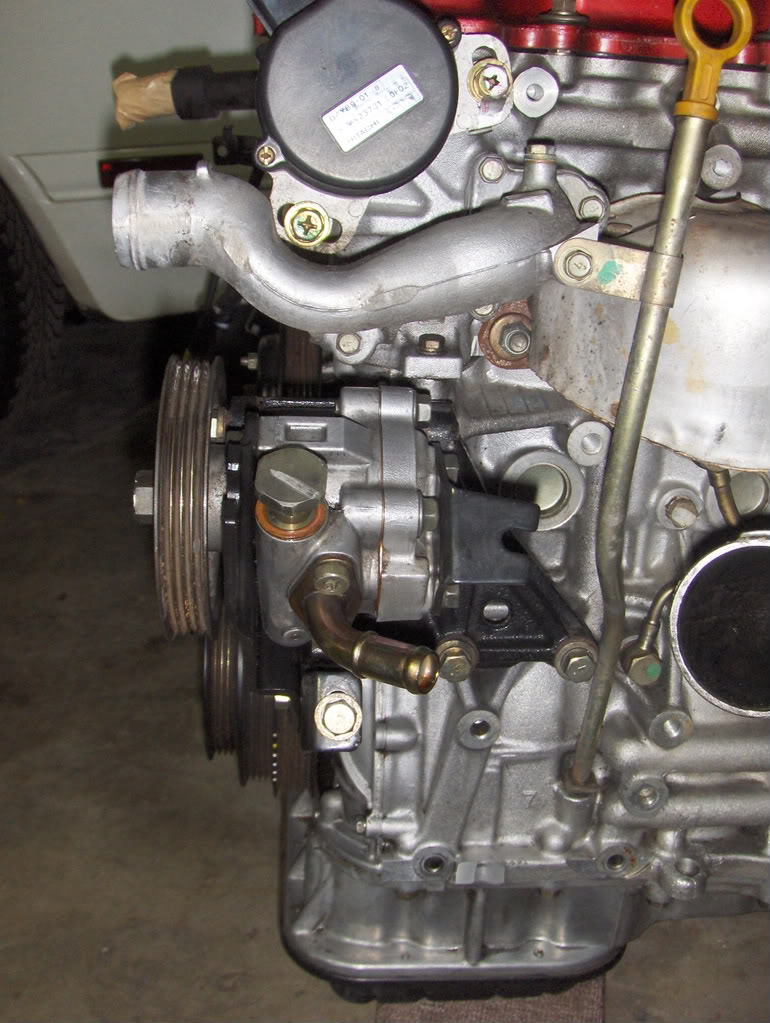
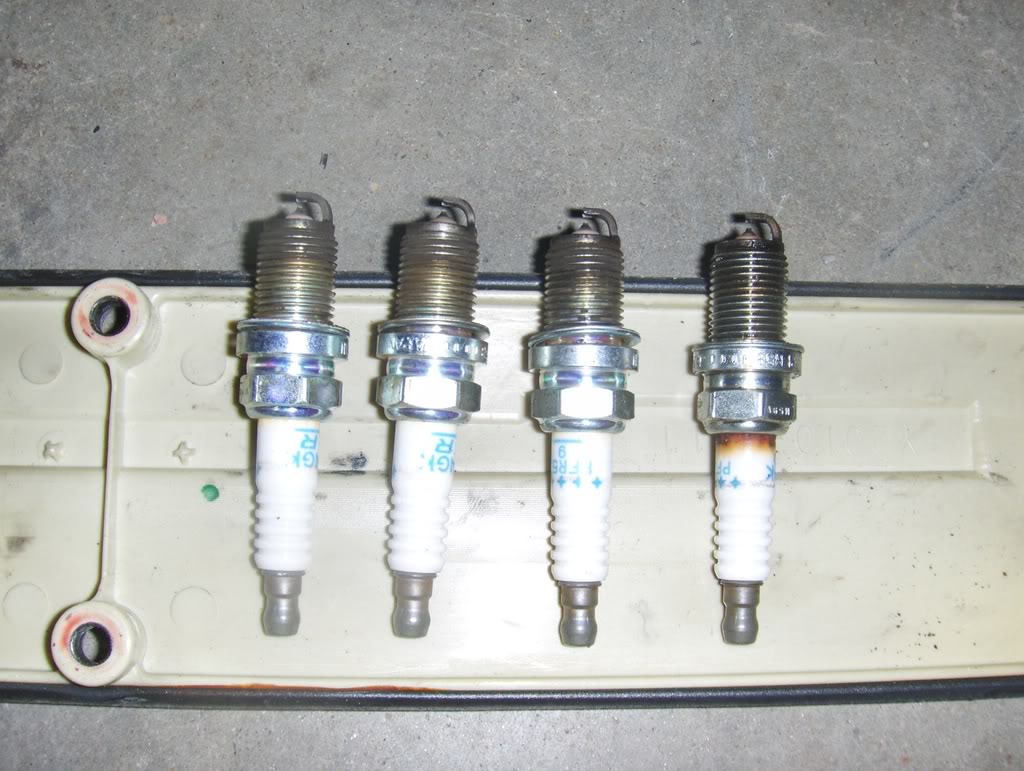
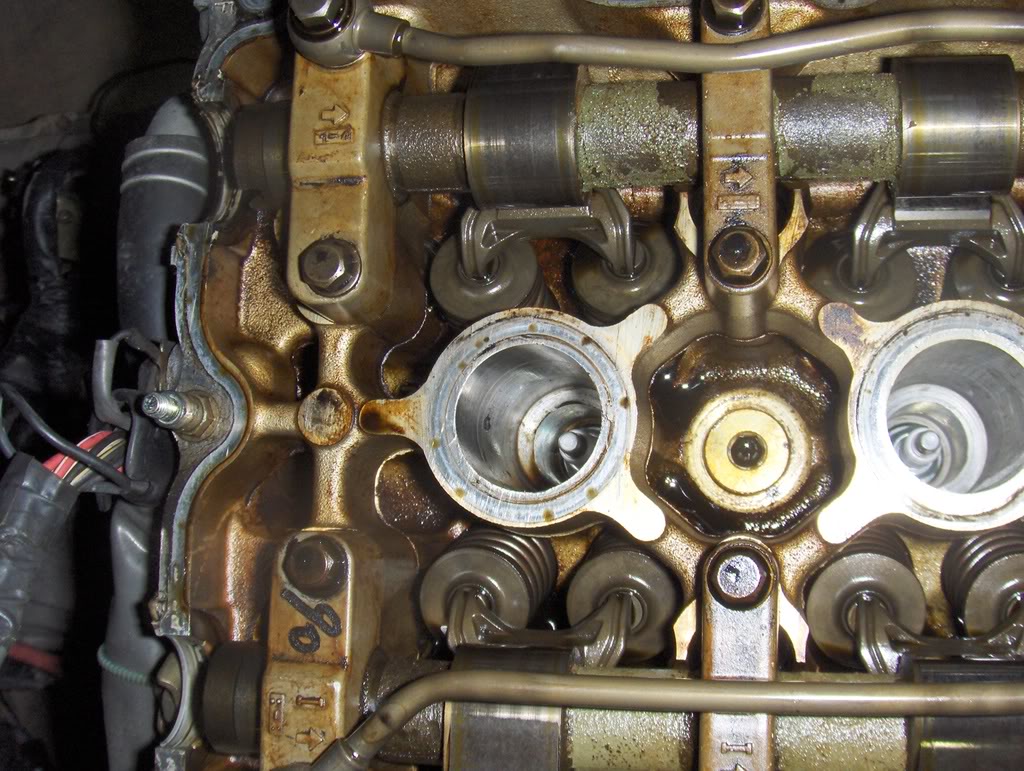
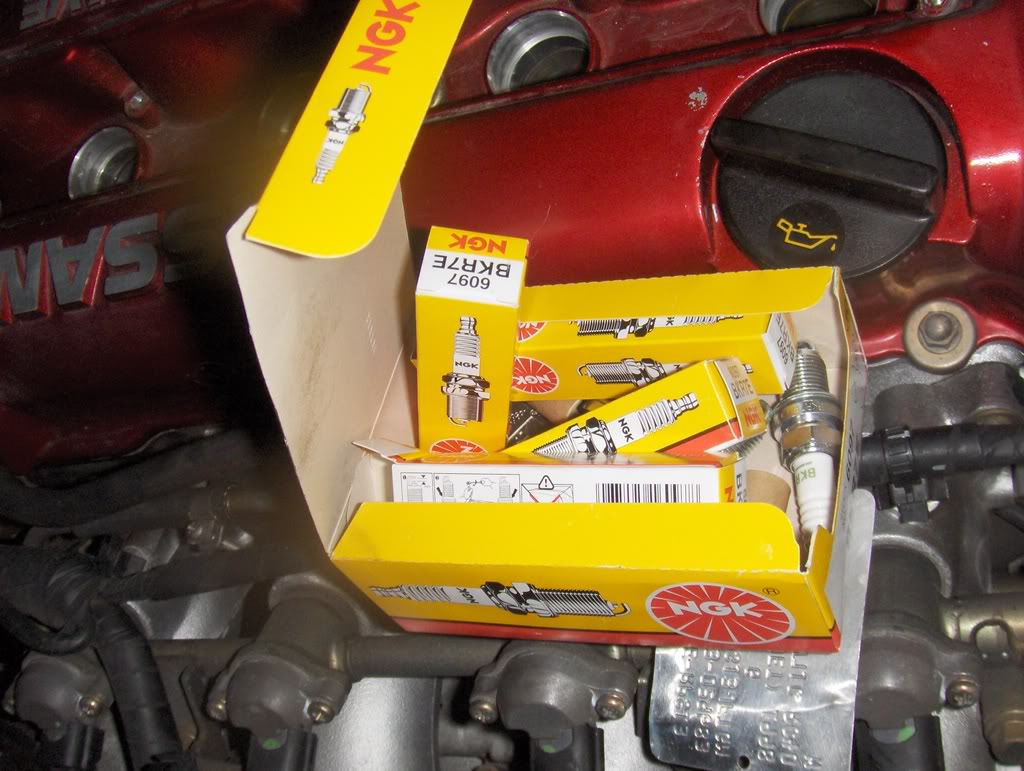
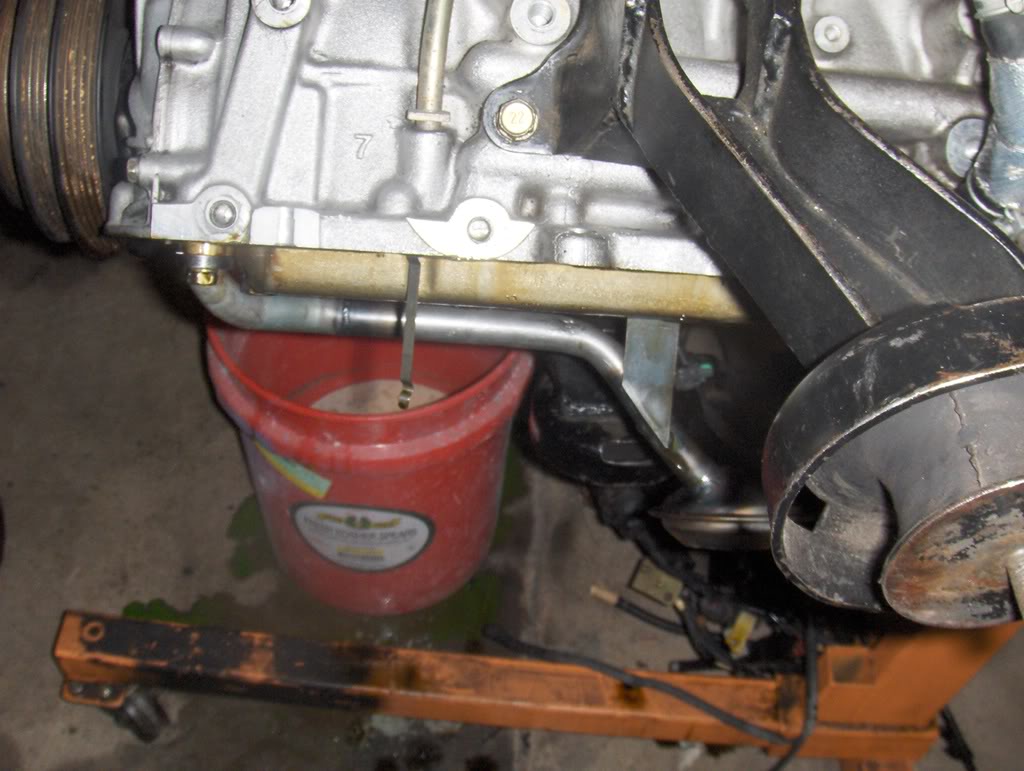
Today was a better day. I started out by doing a compression check, which turned out OK. Numbers were 155 on 1,2,and 4, with 145 on 3. With oil #3 went to 170 or so, so I think it should be OK. I got my shipment from TheNismoShop yesterday so i had some goodies to install, namely new NGK Coppers and a new spark plug well gasket. When I was initially checking out the motor I noticed oil in the #4 plug well, and after pulling the valve cover it was obvious why: the ring seal on that plug had a pretty big nick in it, so I replaced all the seals with a one-piece S14 gasket (which fit fine and was only $4 at TheNismoShop, vs. $25 elsewhere). I re-sealed the valve cover gasket with a dab or 4 of RTV, then tightened it down and buttoned everything else up so the top end should be good to go.
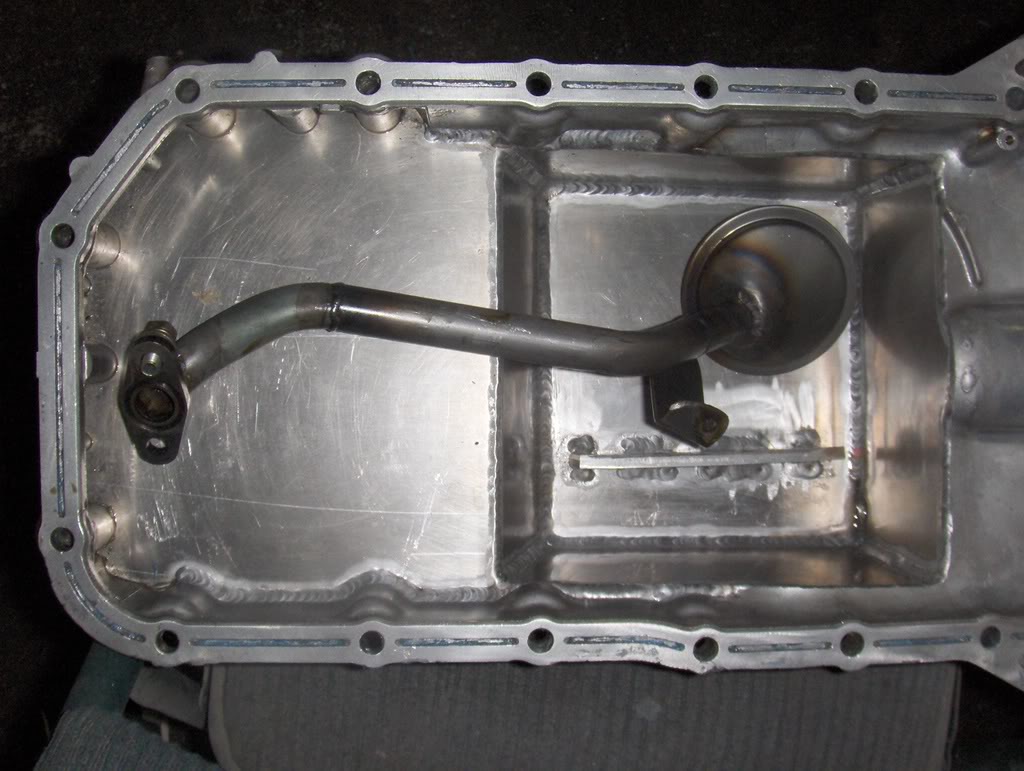
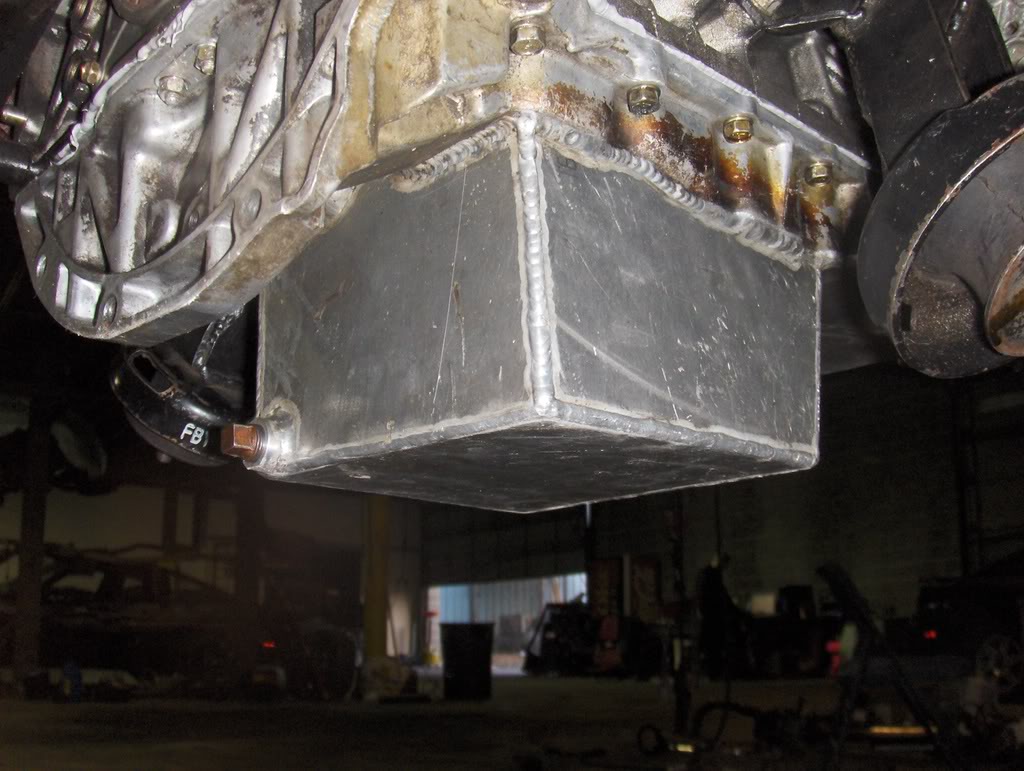
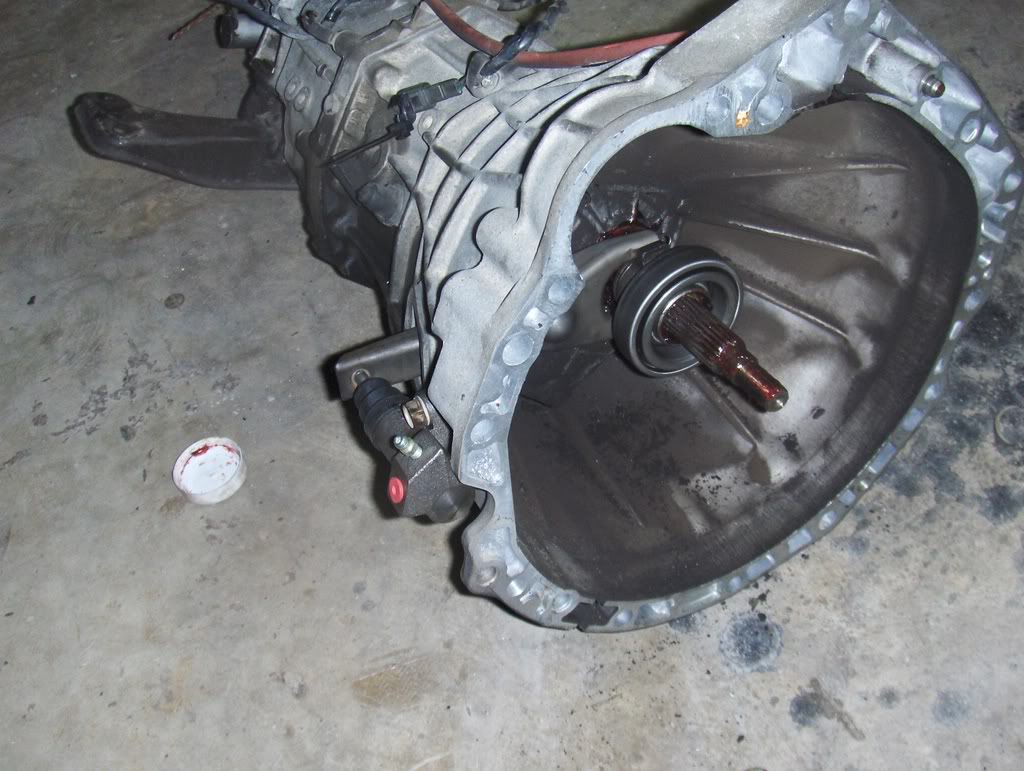
Next I tackled the rear main seal, which wasnt too hard but it was my first one so I asked for advice from the Killswitch crew a few times (thanks guys). Got that swapped out and sealed onto the block again, and in the mean time I dropped the oil pan. I have a new, one-off rear sump oil pan and pickup so it was off with the stock jank. I managed to pretty much coat my right glove in oil, it was pretty funny. A soaking wet, black oily leather glove of death later, the two oil pans and the baffle were out, and that was about time to call it a day.
This week I will be buying a TO bearing, pilot bearing, water temp sensor adapter, a few new bolts for the oil pan, and all the braided line and (super rice) fittings for my fuel lines. next weekend the new pickup (and new OEM gasket) are going on and I can put the new oil pan on also, w00t. Then Ill be doing the front main, clutch kit, and maybe a new flywheel (still havent decided, even though Tyler cut me an awesome deal on one he has at the shop. Is it worth it on a stock motor? Who cares...). If all goes well I should have the motor at least dropped in and mounted up next weekend!!!
Old plugs, check out the oil on #4
Caused by this:
New plugs going in, after changing out the spark plug well gasket:
Steering rack installed:
No pictures this weekend because I forgot my camera yesterday and it died today after 3 pics. Boo!!
Basically I spent this weekend getting the motor ready to drop in, doing all the things that would be a PITA or not possible once its installed. Yesterday i spent entirely too much time installing the power steering rack and ******* around with tie rod spacers then giving up and moving on to something else. I painted the sub frame, pulled a few more things out of the engine bay, and scratched my head about where to run the fuel lines for a bit then made a decision and gt over it. All in all not very productive
Today was a better day. I started out by doing a compression check, which turned out OK. Numbers were 155 on 1,2,and 4, with 145 on 3. With oil #3 went to 170 or so, so I think it should be OK. I got my shipment from TheNismoShop yesterday so i had some goodies to install, namely new NGK Coppers and a new spark plug well gasket. When I was initially checking out the motor I noticed oil in the #4 plug well, and after pulling the valve cover it was obvious why: the ring seal on that plug had a pretty big nick in it, so I replaced all the seals with a one-piece S14 gasket (which fit fine and was only $4 at TheNismoShop, vs. $25 elsewhere). I re-sealed the valve cover gasket with a dab or 4 of RTV, then tightened it down and buttoned everything else up so the top end should be good to go.
Next I tackled the rear main seal, which wasnt too hard but it was my first one so I asked for advice from the Killswitch crew a few times (thanks guys). Got that swapped out and sealed onto the block again, and in the mean time I dropped the oil pan. I have a new, one-off rear sump oil pan and pickup so it was off with the stock jank. I managed to pretty much coat my right glove in oil, it was pretty funny. A soaking wet, black oily leather glove of death later, the two oil pans and the baffle were out, and that was about time to call it a day.
This week I will be buying a TO bearing, pilot bearing, water temp sensor adapter, a few new bolts for the oil pan, and all the braided line and (super rice) fittings for my fuel lines. next weekend the new pickup (and new OEM gasket) are going on and I can put the new oil pan on also, w00t. Then Ill be doing the front main, clutch kit, and maybe a new flywheel (still havent decided, even though Tyler cut me an awesome deal on one he has at the shop. Is it worth it on a stock motor? Who cares...). If all goes well I should have the motor at least dropped in and mounted up next weekend!!!
Old plugs, check out the oil on #4
Caused by this:
New plugs going in, after changing out the spark plug well gasket:
Steering rack installed:
Trending Topics
1/25
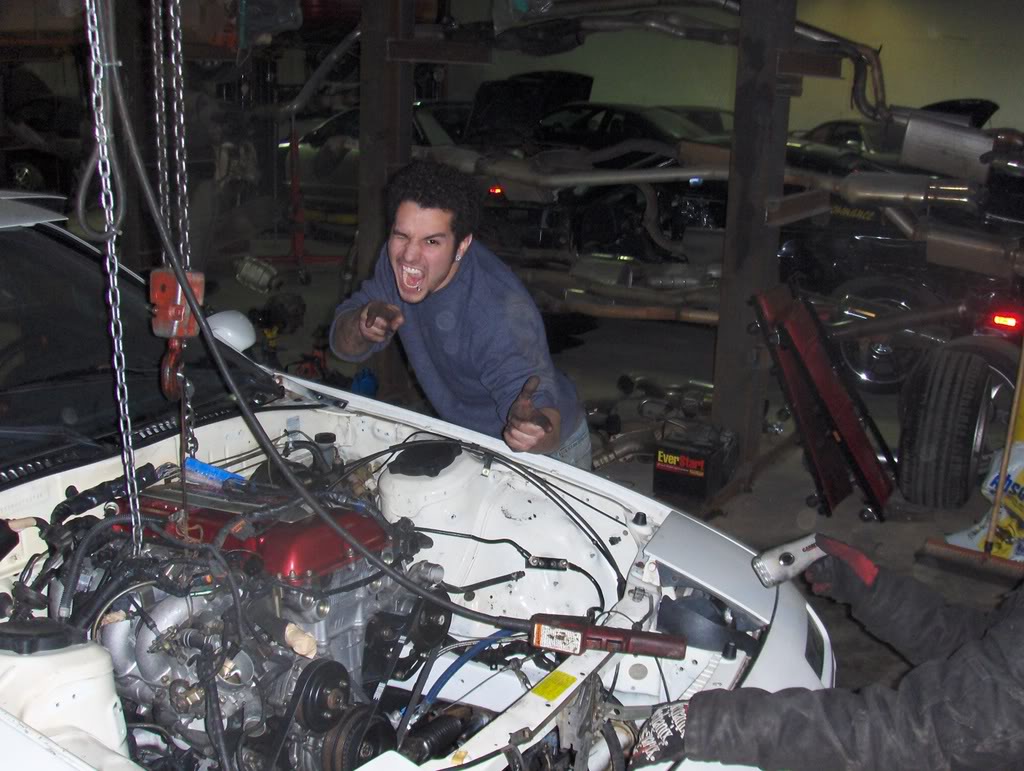
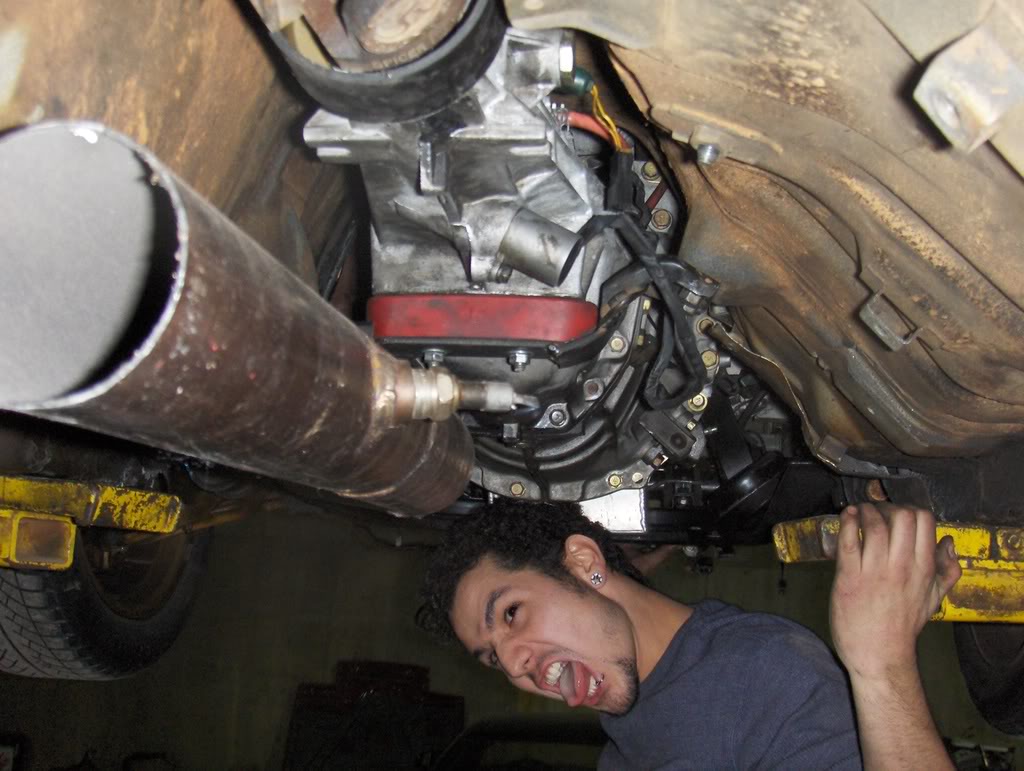
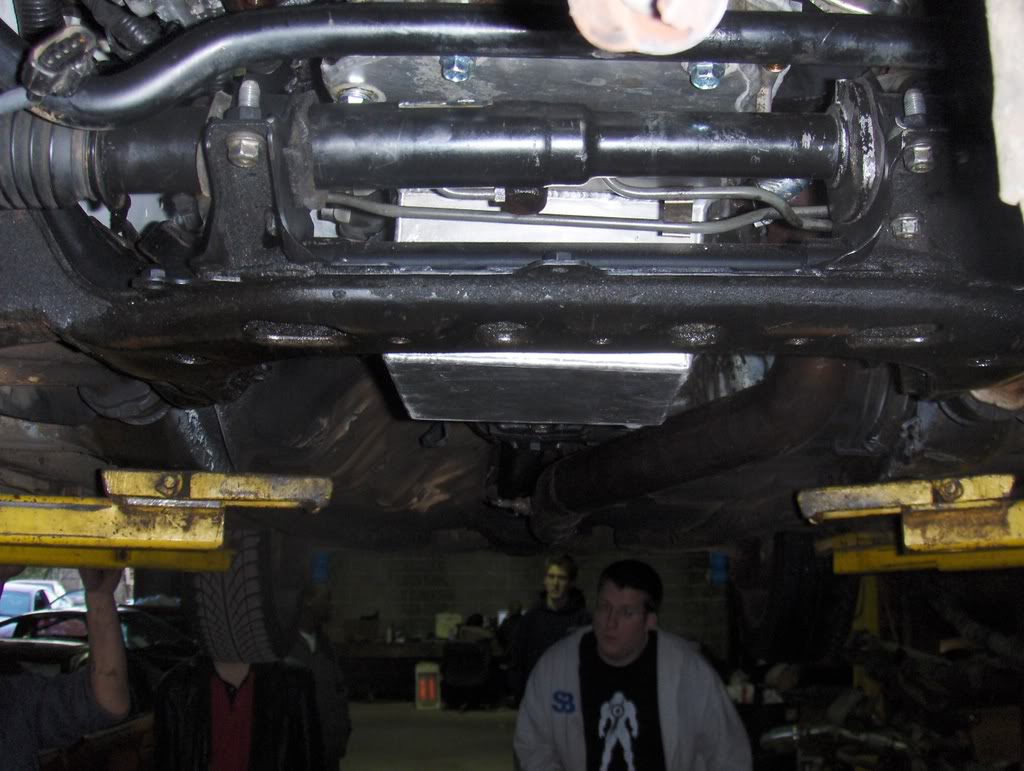
Made a lot of progress this weekend, got the motor buttoned up and dropped in finally! It was a tight *** fit but thanks to Decker and Tyler we got that **** bolted in.
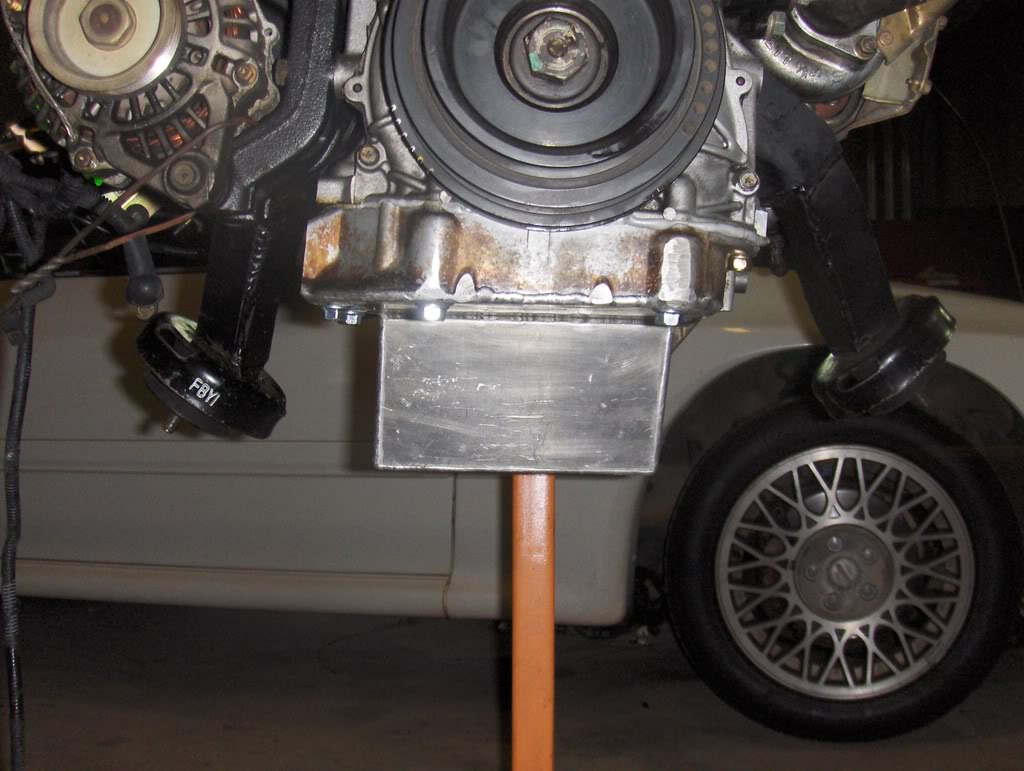
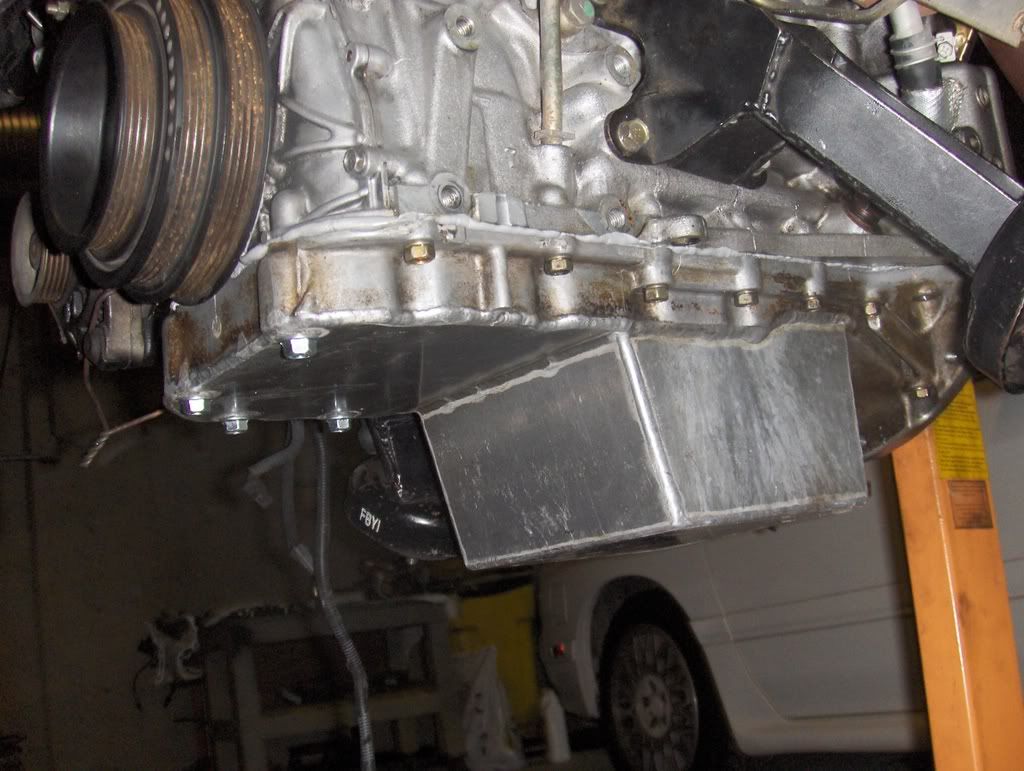
I started by cleaning up the new oil pan and pickup to get it ready for install. You can see the new windage plate welded in by Kyle, along with the pickup. He also added a small bead around the end of the pickup:

Then I started taking off the old oil pickup and putting the new one on with a new OEM gasket:
Old:
New:
New gasket

Locktite on this bolt for the new brace, it had some in there from the factory
Bolted on and ready to go. You can see see in these pics how the pickup clears the cradle and drops to the rear:
Made a lot of progress this weekend, got the motor buttoned up and dropped in finally! It was a tight *** fit but thanks to Decker and Tyler we got that **** bolted in.
I started by cleaning up the new oil pan and pickup to get it ready for install. You can see the new windage plate welded in by Kyle, along with the pickup. He also added a small bead around the end of the pickup:
Then I started taking off the old oil pickup and putting the new one on with a new OEM gasket:
Old:
New:
New gasket
Locktite on this bolt for the new brace, it had some in there from the factory
Bolted on and ready to go. You can see see in these pics how the pickup clears the cradle and drops to the rear:
Next I installed the new pan with new grade 8 hardware in the front:

Then it was on to the clutch and stuff:
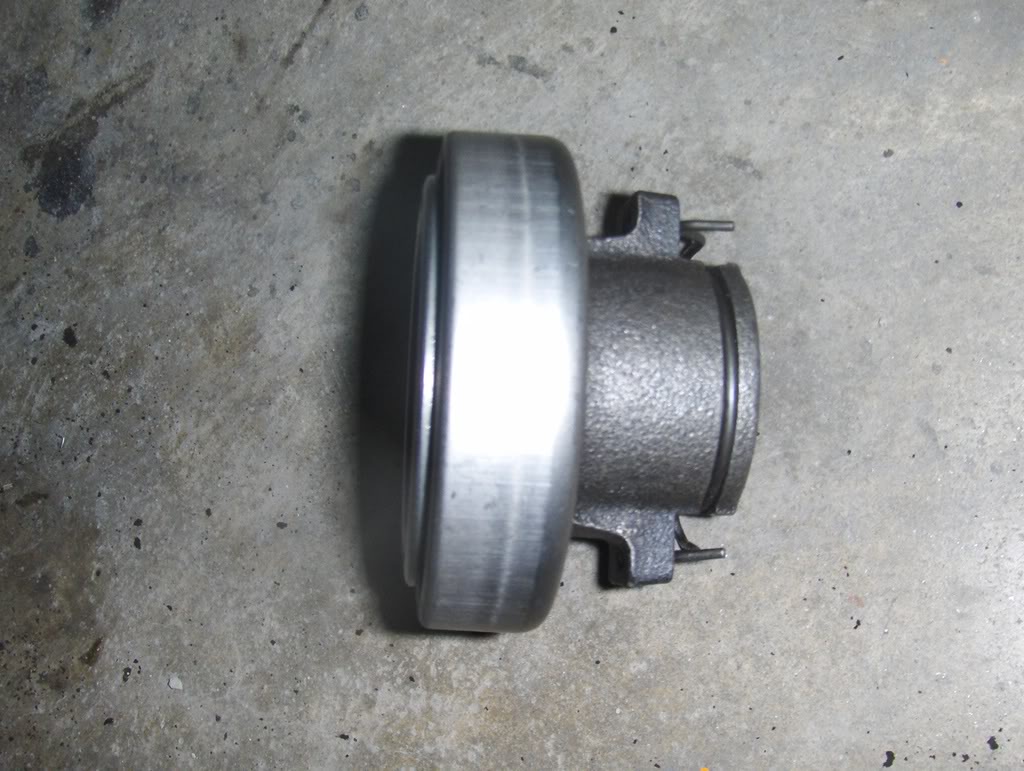
New TO bearing on the old carrier (clean!)
Cleaned up the output shaft
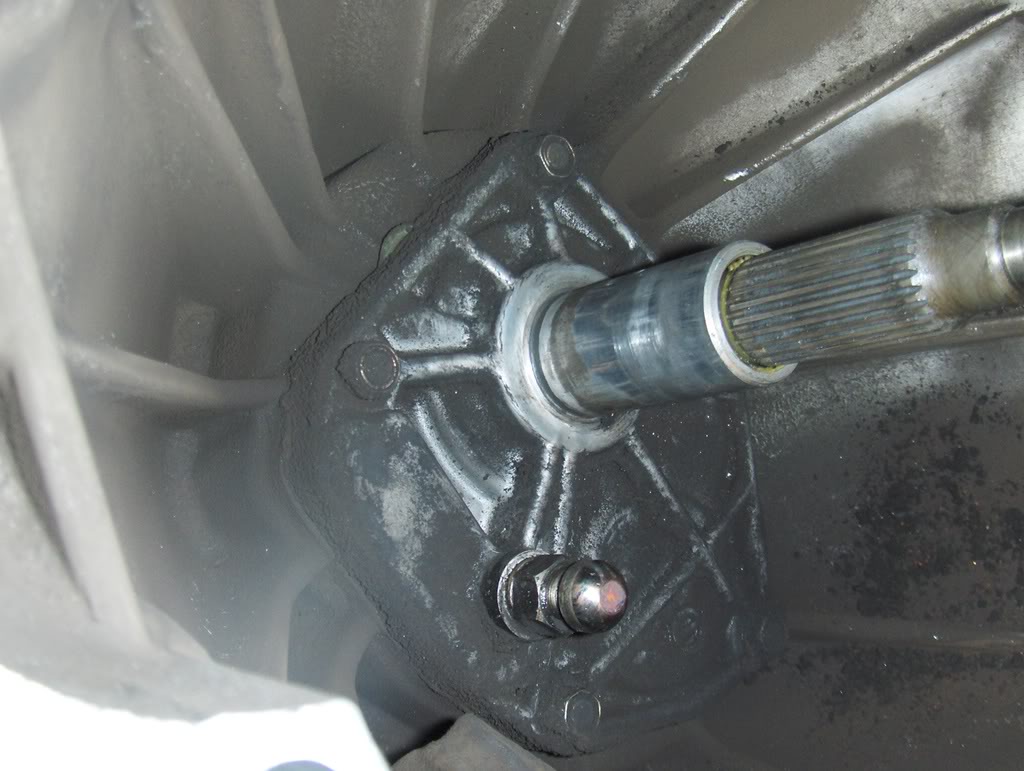
Greased up!
Installed with new slave cylinder:
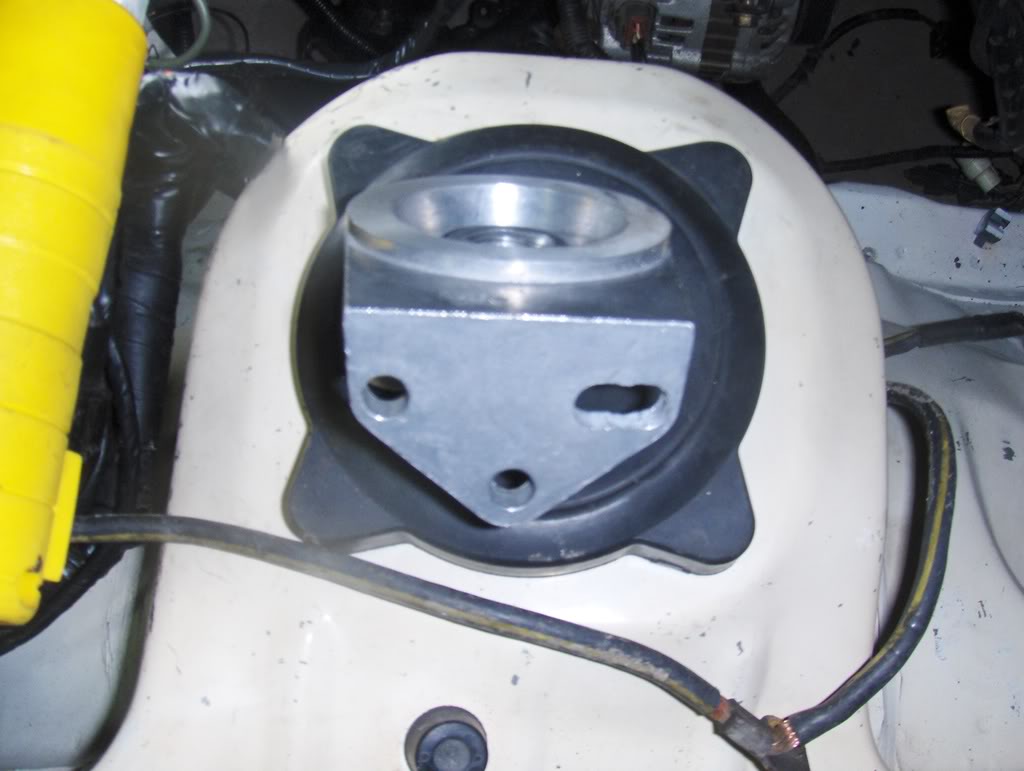
Clutch, flywheel, and new pilot bearing
All together again! You can see the new tranny mount in this pic, with the peak performance isolator.
Then it was on to the clutch and stuff:
New TO bearing on the old carrier (clean!)
Cleaned up the output shaft
Greased up!
Installed with new slave cylinder:
Clutch, flywheel, and new pilot bearing
All together again! You can see the new tranny mount in this pic, with the peak performance isolator.
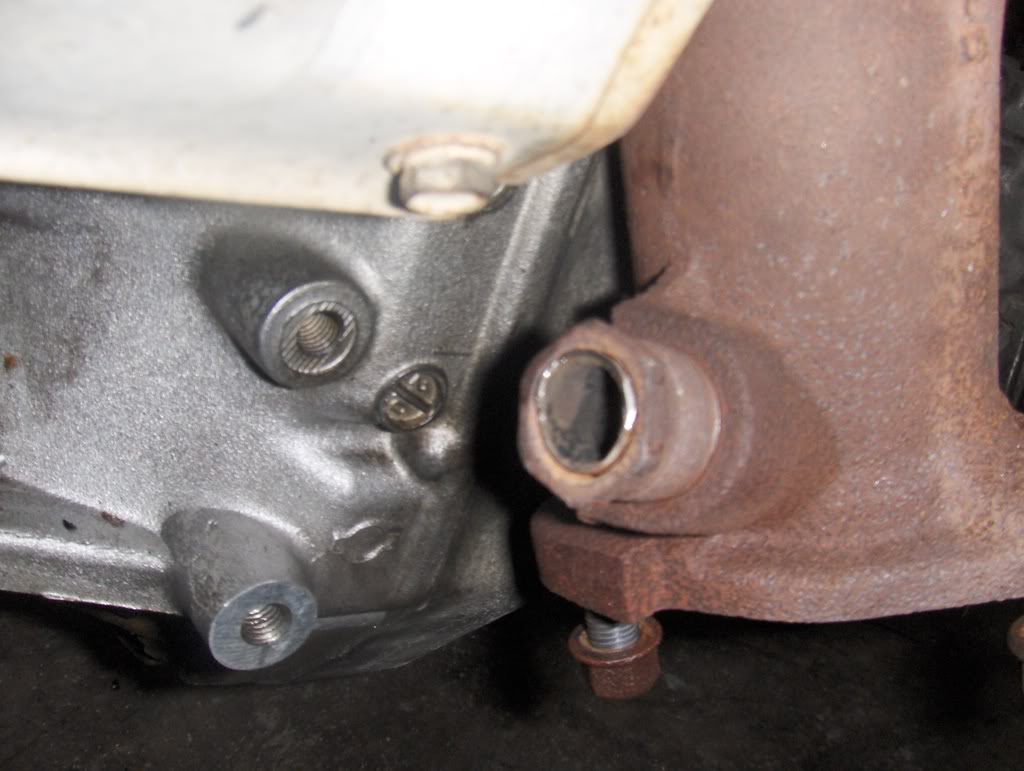
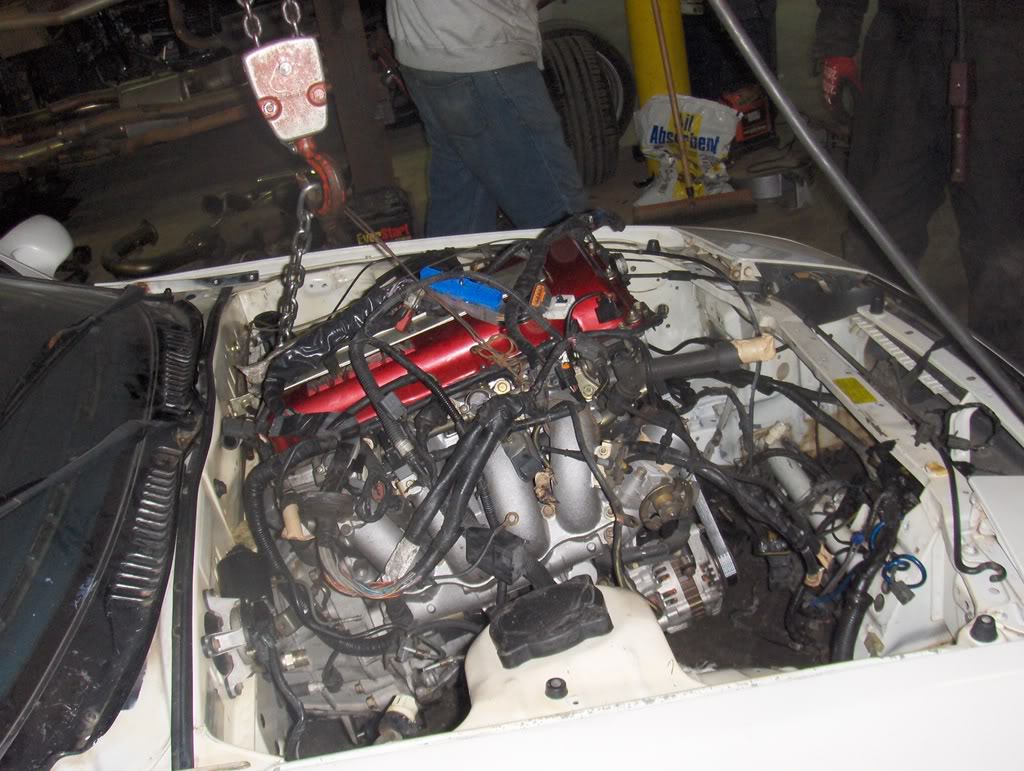
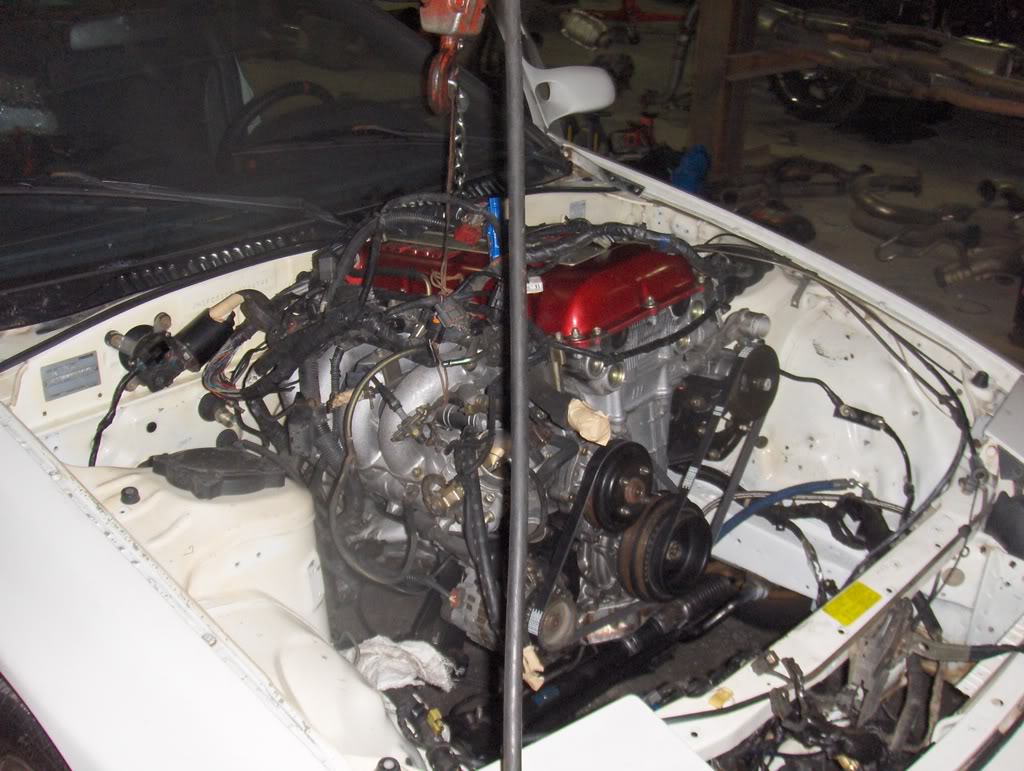


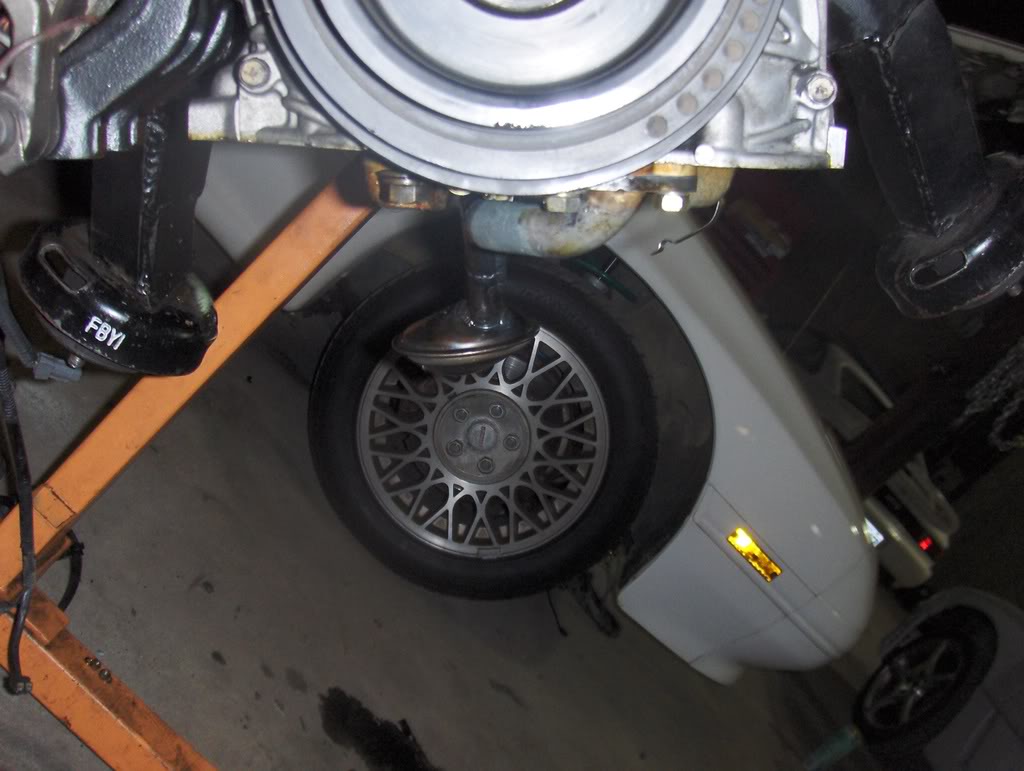
Last coupla pics, got the driveshaft and downpipe on to check the clearances:
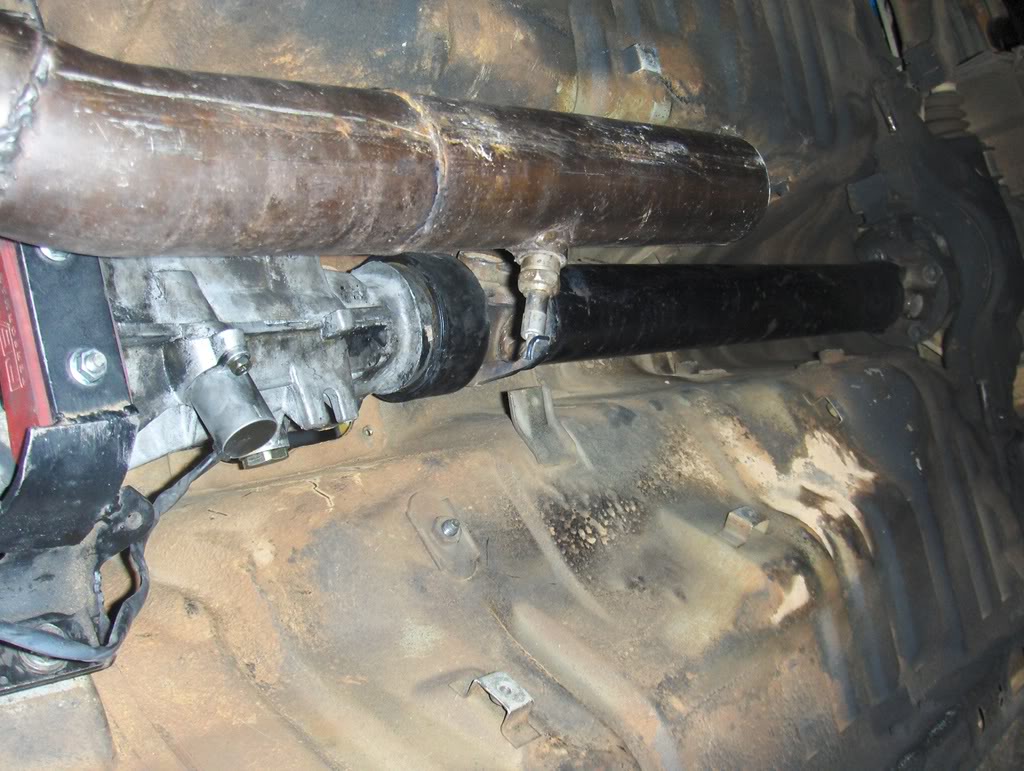
And checked the oil pan clearance. The bolts hit slightly on the swaybar and steering rack, but it should be pretty easy to fix:
Next week I start wiring (YAY!!) and can get some true measurements for the FMIC and radiator which need to go in ASAP. Wiring looks like its going to be no joke, hopefully it goes smooth...
nice
There was a first gen for sale not too long ago with an SR20 swap. I wish I had the money for it, but I guess its all for the best since non of the wiring was labeled.
Label the wiring! MY ONLY ADVICE TO YOU! If you don't do that, **** the whole swap, man.
There was a first gen for sale not too long ago with an SR20 swap. I wish I had the money for it, but I guess its all for the best since non of the wiring was labeled.
Label the wiring! MY ONLY ADVICE TO YOU! If you don't do that, **** the whole swap, man.
always modding
Joined: Mar 2005
Posts: 1,667
Likes: 3
From: on a tiny island in the middle of a sea
i'm suprised how painlessly that went in..
is the engine supposed to tilt slightly to one side ala BMW?
In my friends S13 it seemed to sit pretty level to me..
or did u do that intentionally?
is the engine supposed to tilt slightly to one side ala BMW?
In my friends S13 it seemed to sit pretty level to me..
or did u do that intentionally?

Yepper, and Im glad I did too. Everything was quality and made the swap so easy (at least, so far
).
Probably
Oh dude, trust that it will be labeled for sure. This is the first time I am going to be wiring anything on a mazda, only ever dealt with nissan in the past. Should be a whole bunch of fun!!

always modding
Joined: Mar 2005
Posts: 1,667
Likes: 3
From: on a tiny island in the middle of a sea
I had the same swap 2 years ago... now get rid of that ECU, get your self an OBD1 honda ECU ,harness and a distributor. get rid of the maf, get rid of the coils, mount the honda distributor on top of the cas (you need to mod some stuff), extend some wires and you got your self a $100 dollar stand alone system. i tuned my disco potato on crome and it ran perfect. i belive i still got the base maps on my laptop if you need it, let me know if you need some help its real easy.
I had the same swap 2 years ago... now get rid of that ECU, get your self an OBD1 honda ECU ,harness and a distributor. get rid of the maf, get rid of the coils, mount the honda distributor on top of the cas (you need to mod some stuff), extend some wires and you got your self a $100 dollar stand alone system. i tuned my disco potato on crome and it ran perfect. i belive i still got the base maps on my laptop if you need it, let me know if you need some help its real easy.
Sounds interesting, probably not going into all that though
2/8
I started on the harness this weekend, blah! I hate wiring so much...
I decided to start by figuring out the "engine" harness on the FC (aka the SR20 lower harness). Everything for this haarness is now on the passenger side of the car so I spent the day extending the x-07 plug on the FC harness to move it across the engine bay. Im planning to use the FC engine harness instead of the SR to simplify mating it to the chassis, so the following things have to be extended:
X-07 plug
- Alt signal
- Voltage signal to dash
- Oil pressure
- Backup light leads (x2)
Starter signal
Main power leads (x2)
Alternator jumper for the charging system
Got about halfway done and it was quitting time. Im also moving the fuse panel to behind the strut tower to make room for the IC piping and intake so that was a little extra work (extending the Head and Retractor wires). Hopefully next weekend I can have the lower harness finished and the charging system complete. After that its on to the SR motor harness and the rest of the dash items, along with wipers and fuel pump wiring.
Fun stuff
Wow, havent updated for awhile:
2/25
I tested the lower harness at all the vital points (alt, starter, alt signal, starter signal), and everything checked out. Even went so far as cranking it over a tad just to be sure, but it looks good so far.
I also tested out the jumper harness I made to run the SR ECU and engine harness off the FC body harness and it looks pretty dang good (if I do say so myself ). Constant, ground, 12v switched, start signal, etc all check out based on what the SR needs, and its all plug n play (pics soon). I pulled most everything from the X10 and X11 mazda plugs, with the exception of constant power which came from the Front to ABS merge connector. I could have ran it based off the FC ECU plug but wanted a quick disconnect for future use, hardwiring is not my style. JHot was awesome enough to give me the fuse boxes with my motor, so i had the S13 body harness side of the Brown and Grey plugs to use, which made it real easy to join those into the X10/11 plugs using the ends cut from the FC engine harness.
All that is left wiring-wise is tach, water temp, and oil pressure, which amusingly enough all go to separate locations on the FC and will probably consist of janky single loose wires that i cant stand. might have to take a closer look but Im not running a harness and connector across the car for one wire, sorry
Oh, i also got hooked up with a home brew battery relocation kit, some main fuses for that (150a and 300a), and a tray that has brackets welded on to fit in the FC cargo bin on the passenger side. Also got a new brake booster, newly rebuilt BMC, front brake lines, and some hardline to connect to the rear. All this for a grand total of $Free
Plan this week is to go in late one night and bang out the oil filter relocation and pressure sensor, wire the sensor in, then this weekend I should be good to crank it and check for oil pressure. if it is dead, Im pulling the motor
2/26
The boys at Gnarswitch stayed late last night so I was able to put in a few hour's work.
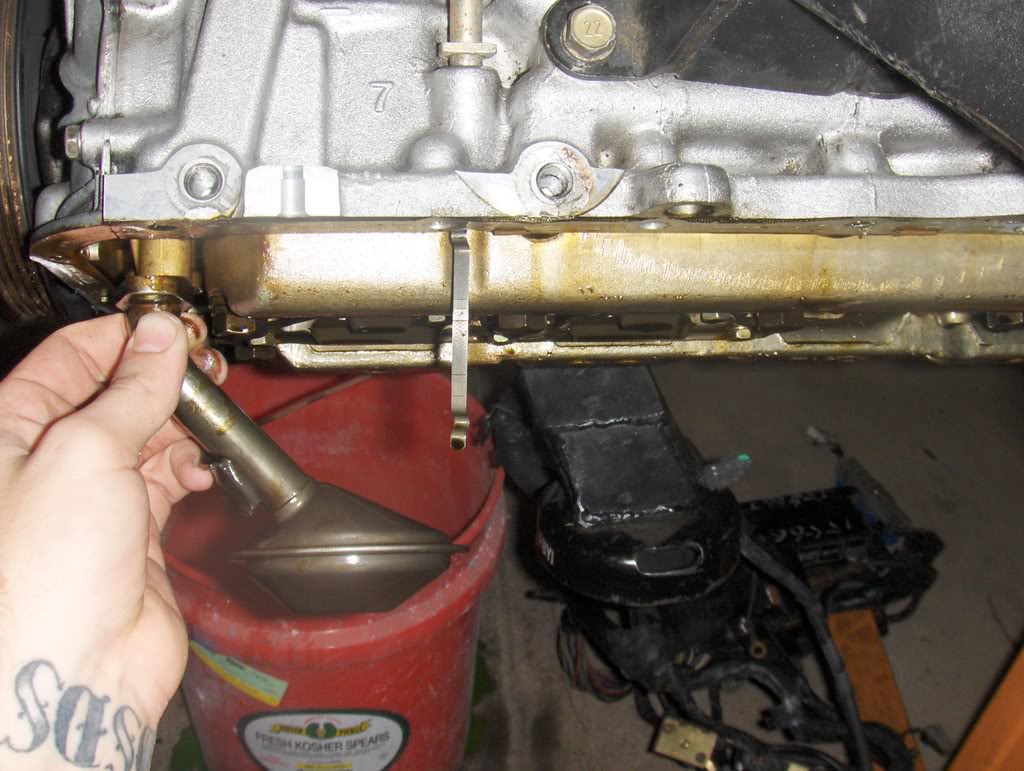
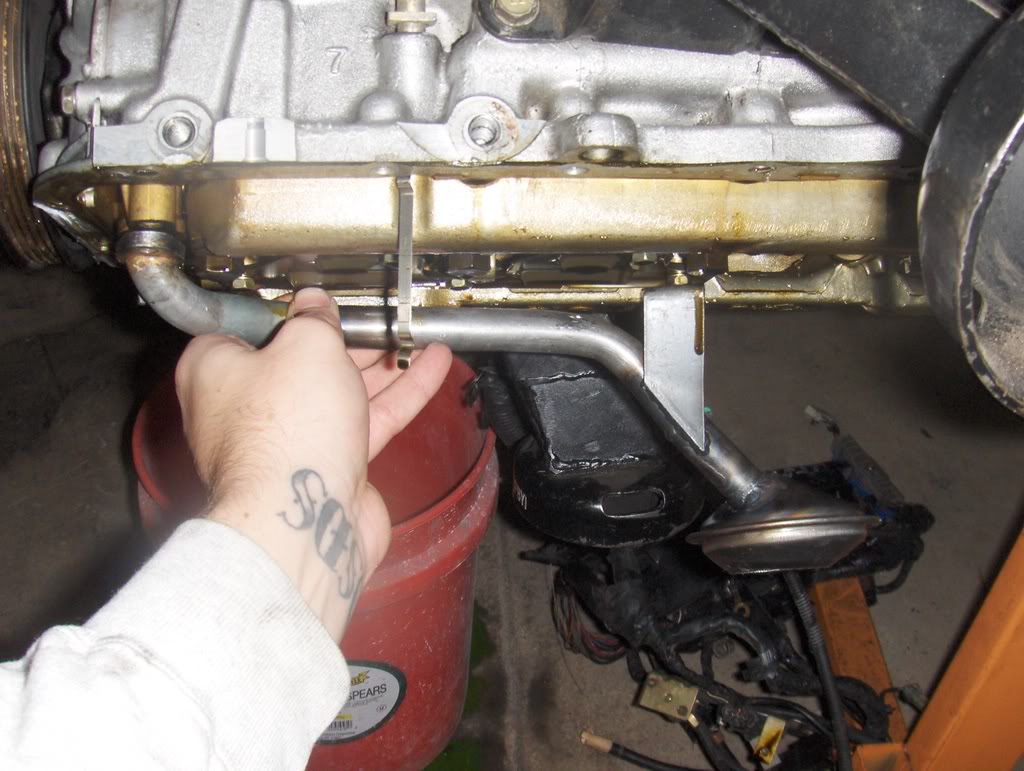
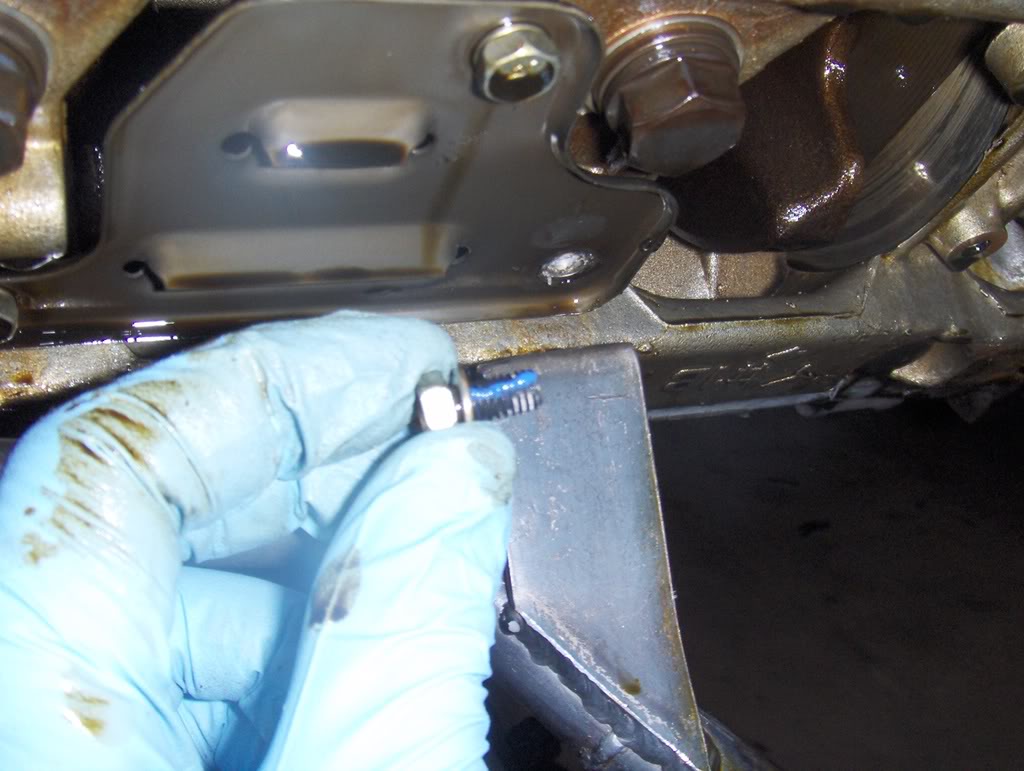
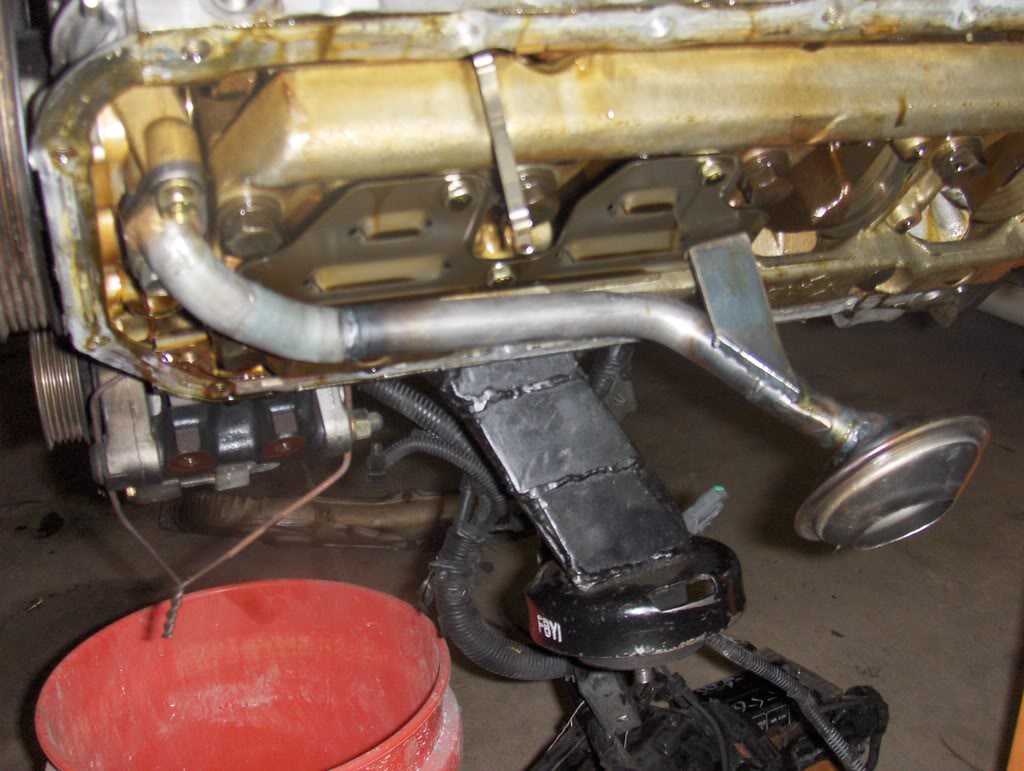
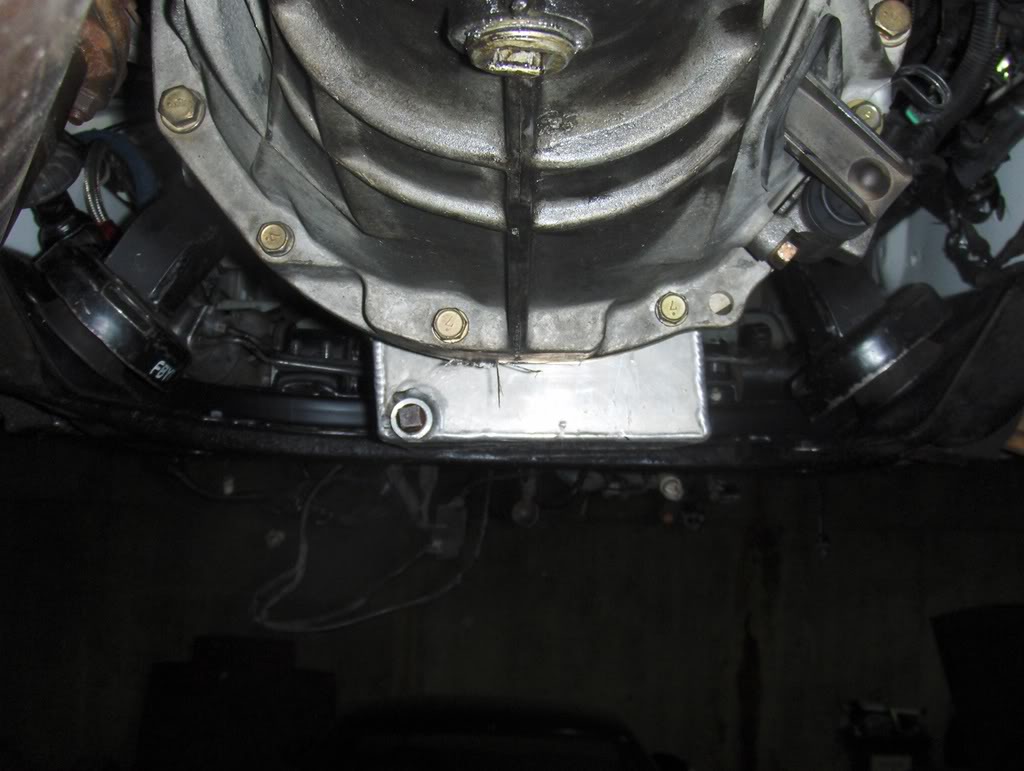
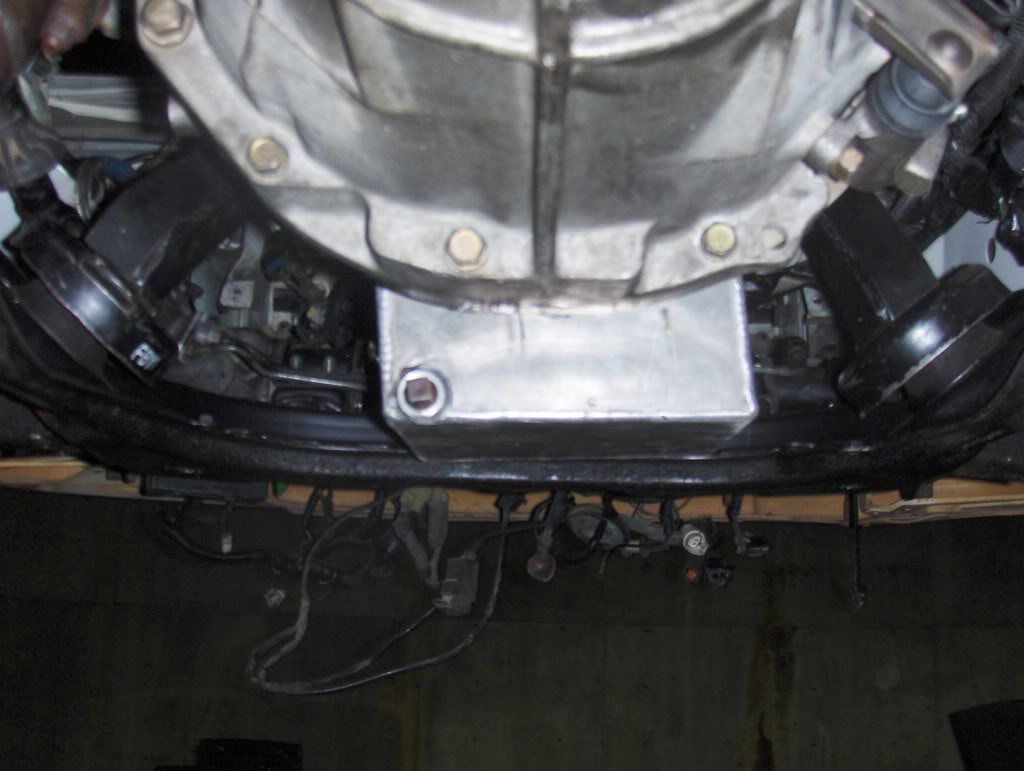
Got the oil filter kit installed, which went pretty well. The FC oil pressure sensor was super fat and hit the oil filter, so this was the easiest fix.
Notching the filter mount to match existing holes:
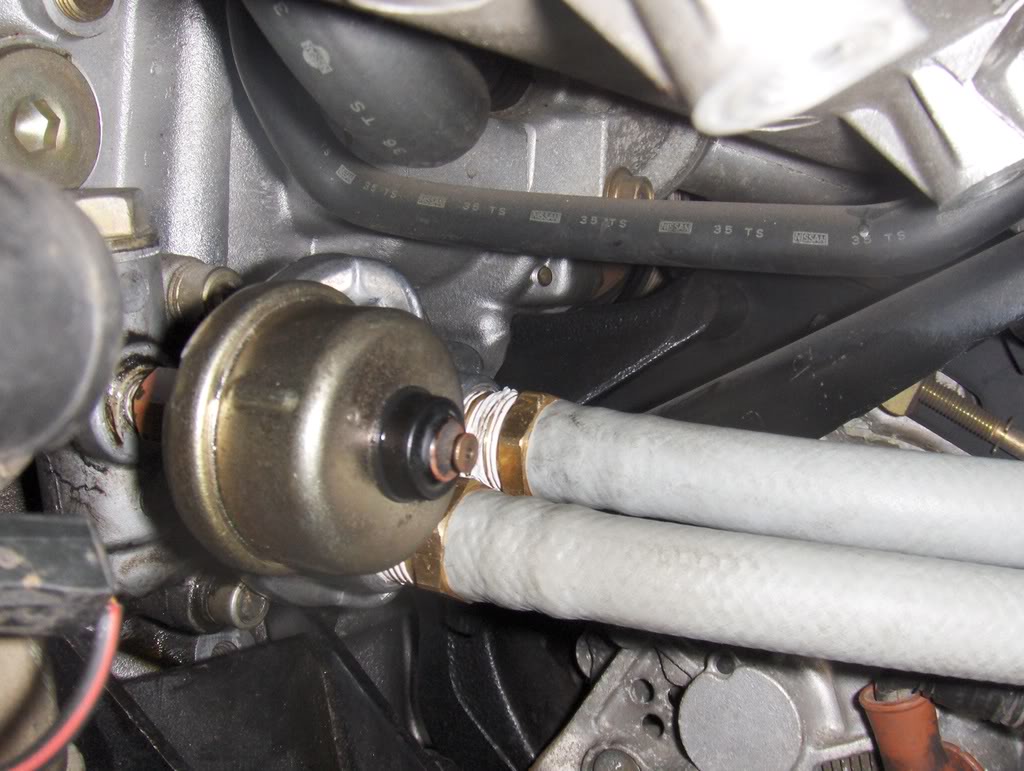
Hoses with the SR sensor:
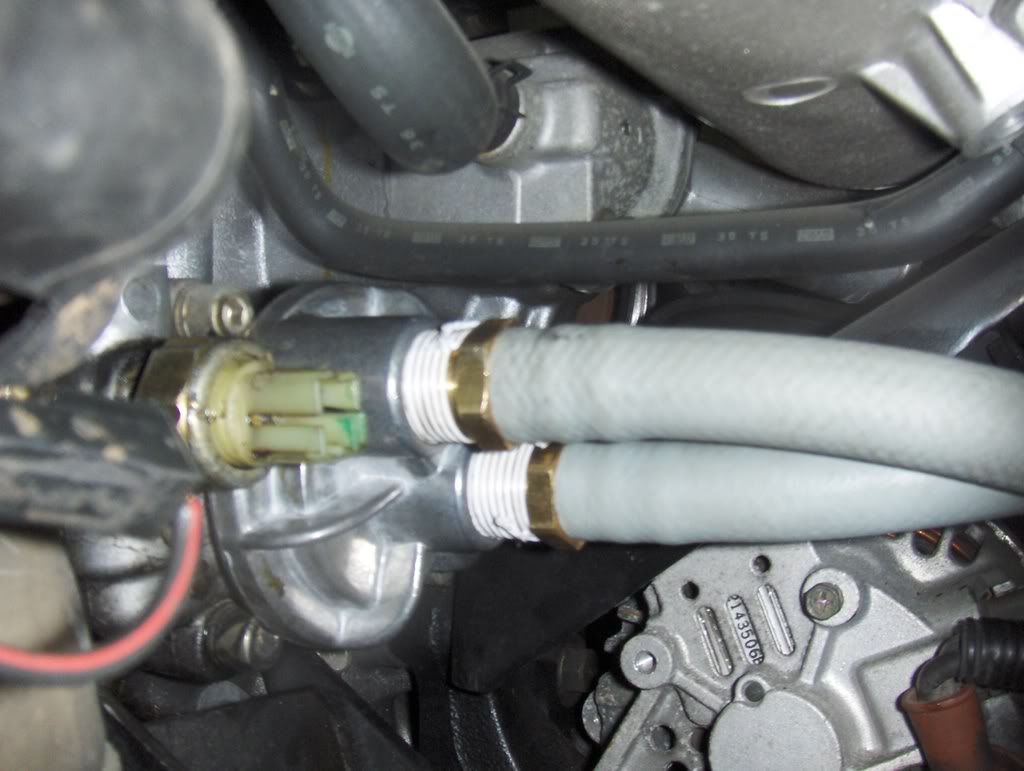
With the FC sensor:
Fin:
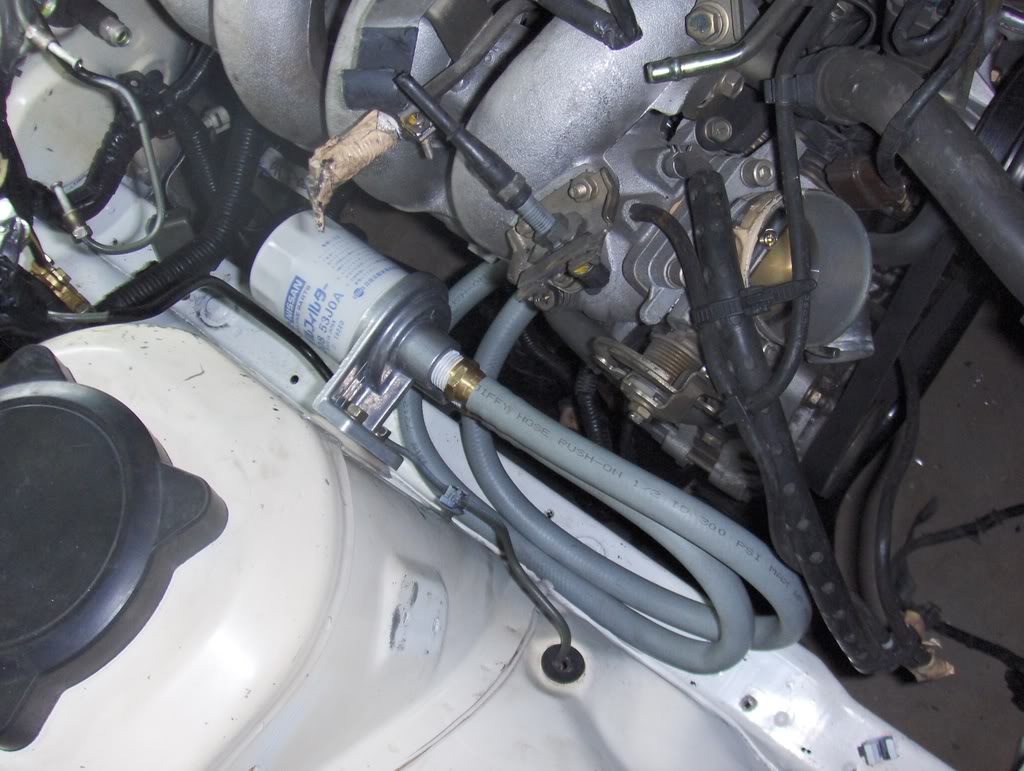
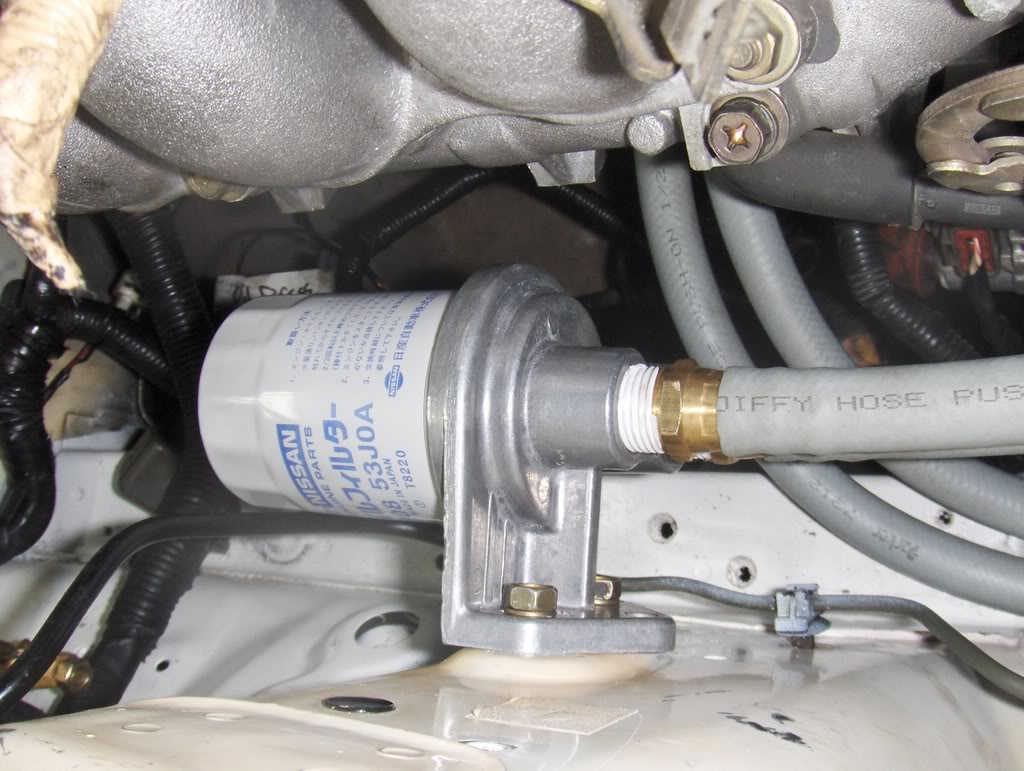
I might mount it somewhere else but its fine there for now I guess.
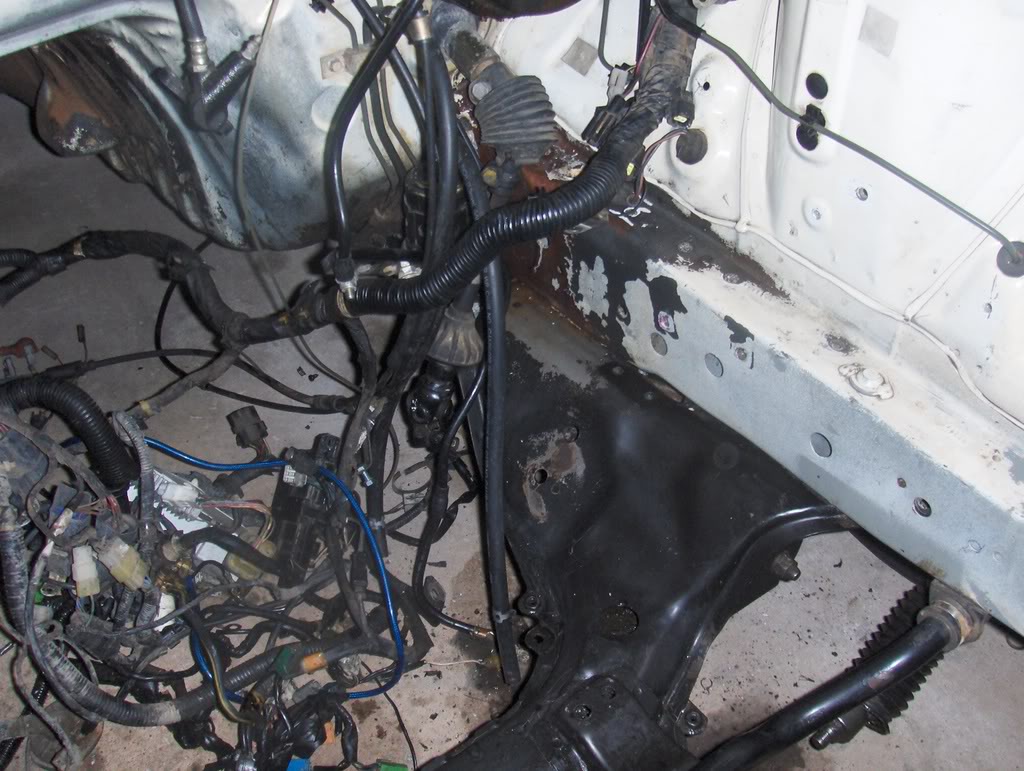
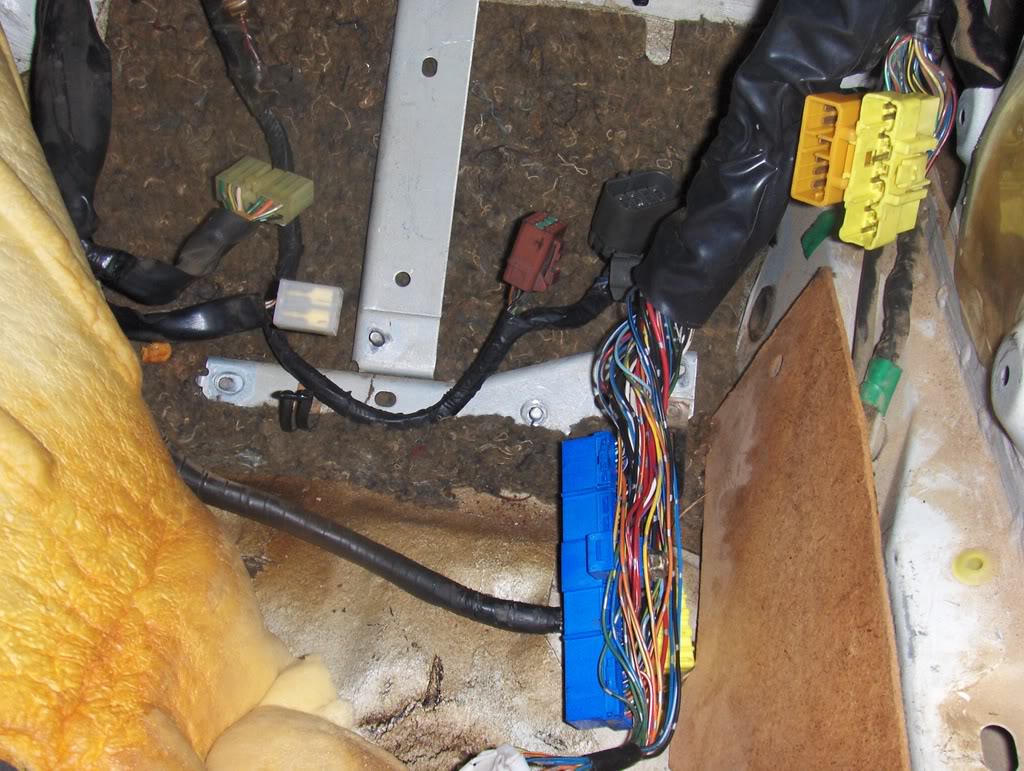
I also took some pics of the wiring I have done so far. This is the extension of the lower harness I made, which runs from the FC fuse panel and front harness on the driver's side over to the FC lower harness attached to the SR on the passenger side:
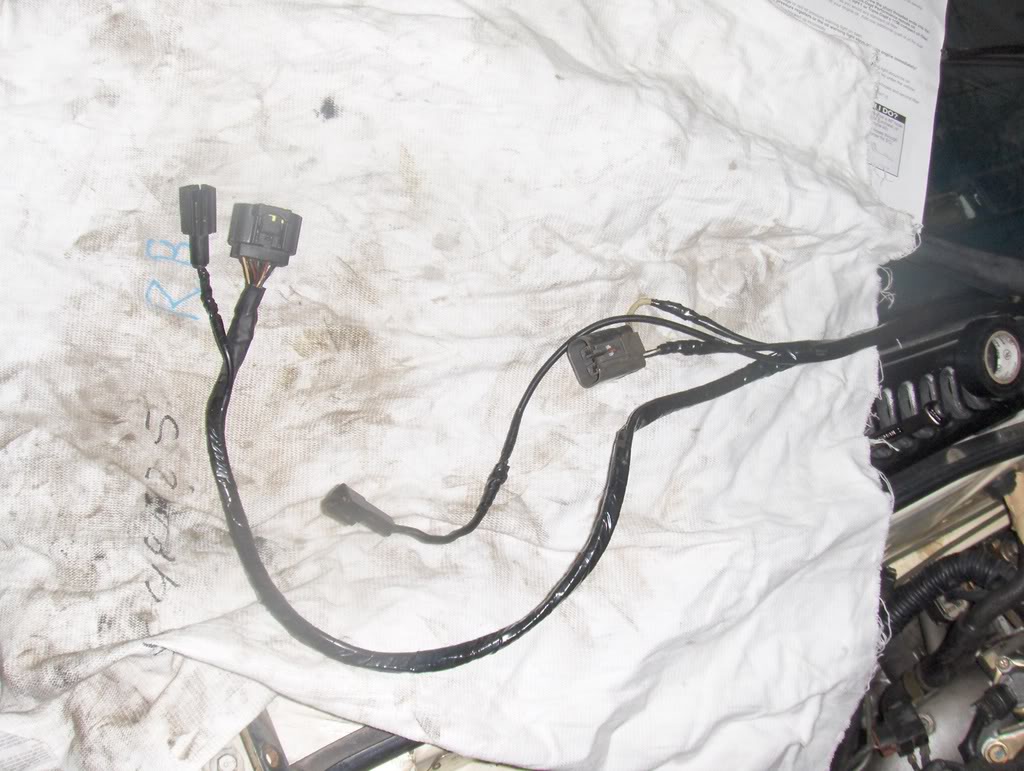
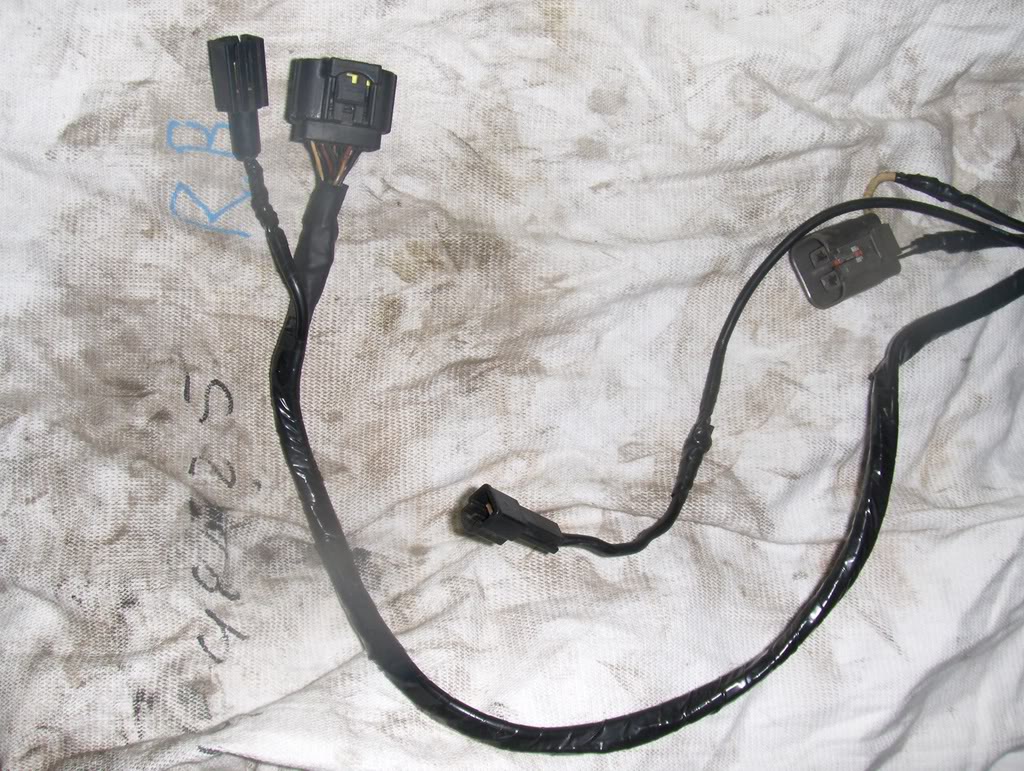
I used OEM connectors to make motor pulling easier. here is where it connects to the lower harness, along with the SR engine harnesses running into the firewall and the battery cables (ready for a relocation):
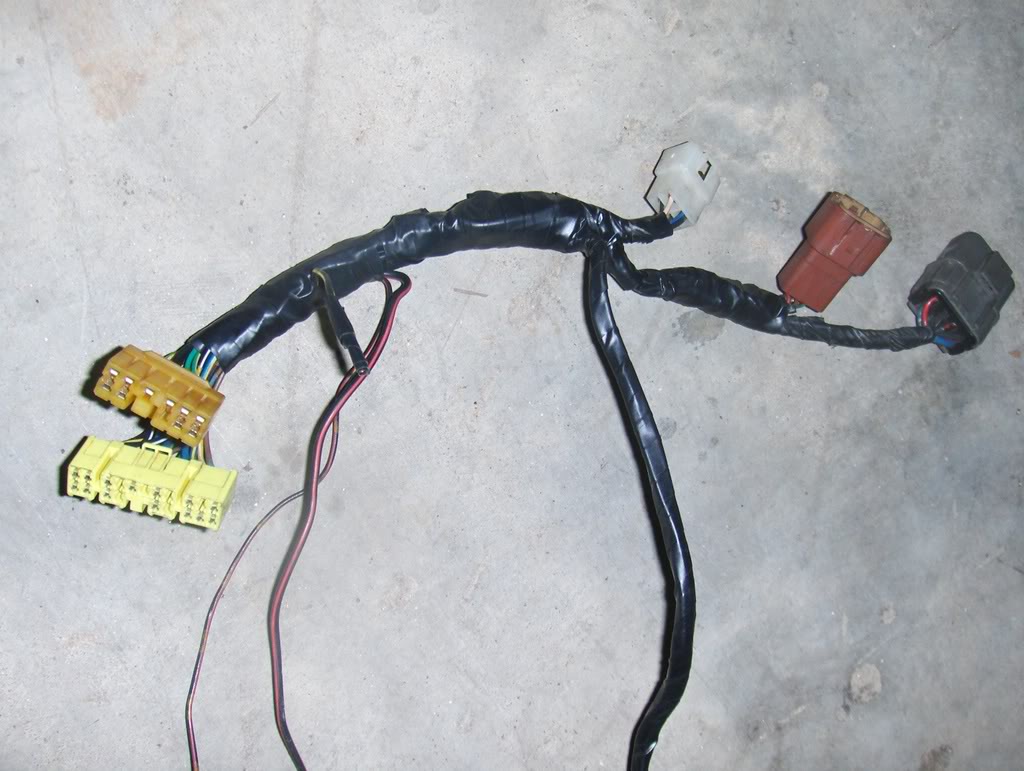
And finally the jumper harness that will run the SR engine and ECU. Notice the Brown/Grey plugs from the JDM fuse box, and the FC engine harness side of the X10/11 plugs, this makes it real easy to swap out or whatever :goodjob: Also have the wiper motor plug in there, and I left that loose connector out in case I needed switched power for gauges or something:

Aaaaaand the FC passenger kick panel, where the ECU will be mounted. Pretty much ready to rock!:
Also did the FC oil pressure wiring, which moved over to the passenger side with the lower harness and tied right in. Easy peasy.
2/25
I tested the lower harness at all the vital points (alt, starter, alt signal, starter signal), and everything checked out. Even went so far as cranking it over a tad just to be sure, but it looks good so far.
I also tested out the jumper harness I made to run the SR ECU and engine harness off the FC body harness and it looks pretty dang good (if I do say so myself ). Constant, ground, 12v switched, start signal, etc all check out based on what the SR needs, and its all plug n play (pics soon). I pulled most everything from the X10 and X11 mazda plugs, with the exception of constant power which came from the Front to ABS merge connector. I could have ran it based off the FC ECU plug but wanted a quick disconnect for future use, hardwiring is not my style. JHot was awesome enough to give me the fuse boxes with my motor, so i had the S13 body harness side of the Brown and Grey plugs to use, which made it real easy to join those into the X10/11 plugs using the ends cut from the FC engine harness.
All that is left wiring-wise is tach, water temp, and oil pressure, which amusingly enough all go to separate locations on the FC and will probably consist of janky single loose wires that i cant stand. might have to take a closer look but Im not running a harness and connector across the car for one wire, sorry
Oh, i also got hooked up with a home brew battery relocation kit, some main fuses for that (150a and 300a), and a tray that has brackets welded on to fit in the FC cargo bin on the passenger side. Also got a new brake booster, newly rebuilt BMC, front brake lines, and some hardline to connect to the rear. All this for a grand total of $Free
Plan this week is to go in late one night and bang out the oil filter relocation and pressure sensor, wire the sensor in, then this weekend I should be good to crank it and check for oil pressure. if it is dead, Im pulling the motor
2/26
The boys at Gnarswitch stayed late last night so I was able to put in a few hour's work.
Got the oil filter kit installed, which went pretty well. The FC oil pressure sensor was super fat and hit the oil filter, so this was the easiest fix.
Notching the filter mount to match existing holes:
Hoses with the SR sensor:
With the FC sensor:
Fin:
I might mount it somewhere else but its fine there for now I guess.
I also took some pics of the wiring I have done so far. This is the extension of the lower harness I made, which runs from the FC fuse panel and front harness on the driver's side over to the FC lower harness attached to the SR on the passenger side:
I used OEM connectors to make motor pulling easier. here is where it connects to the lower harness, along with the SR engine harnesses running into the firewall and the battery cables (ready for a relocation):
And finally the jumper harness that will run the SR engine and ECU. Notice the Brown/Grey plugs from the JDM fuse box, and the FC engine harness side of the X10/11 plugs, this makes it real easy to swap out or whatever :goodjob: Also have the wiper motor plug in there, and I left that loose connector out in case I needed switched power for gauges or something:
Aaaaaand the FC passenger kick panel, where the ECU will be mounted. Pretty much ready to rock!:
Also did the FC oil pressure wiring, which moved over to the passenger side with the lower harness and tied right in. Easy peasy.