
Stredrotors RX4 Coupe "Project 20b"

Thread Starter
Full Member
Joined: Nov 2009
Posts: 99
Likes: 0
From: Tasmania, Australia
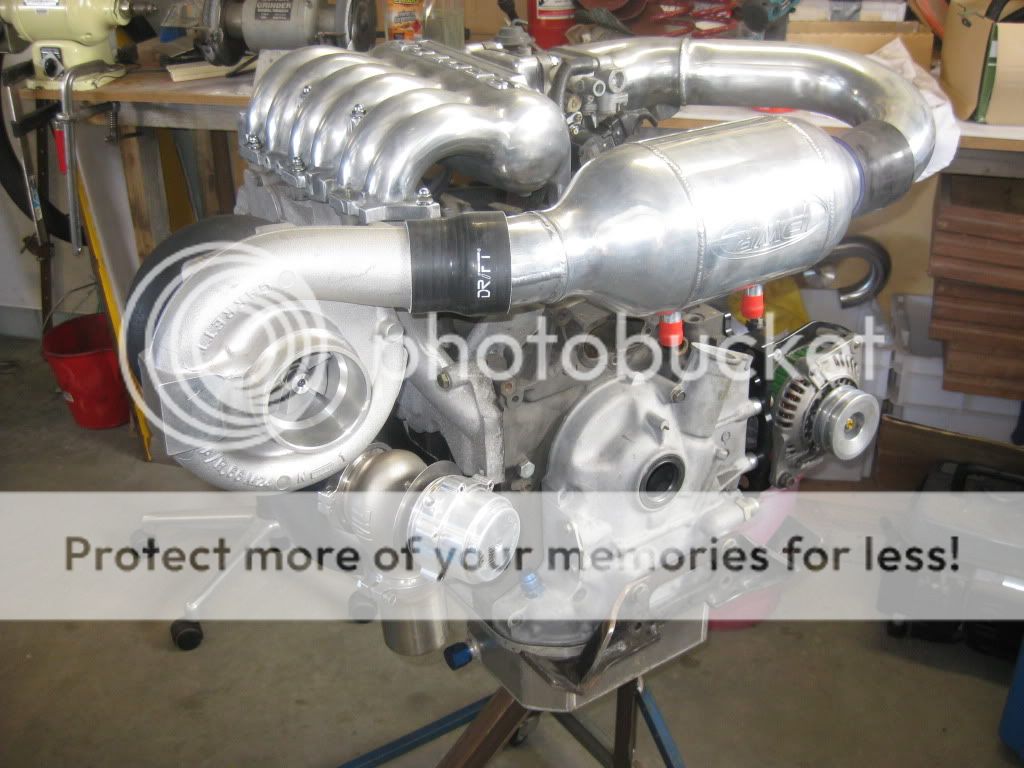
New update  . Purchased a Xtreme Rotaries side mount alternator kit and alternator with twin pulley.
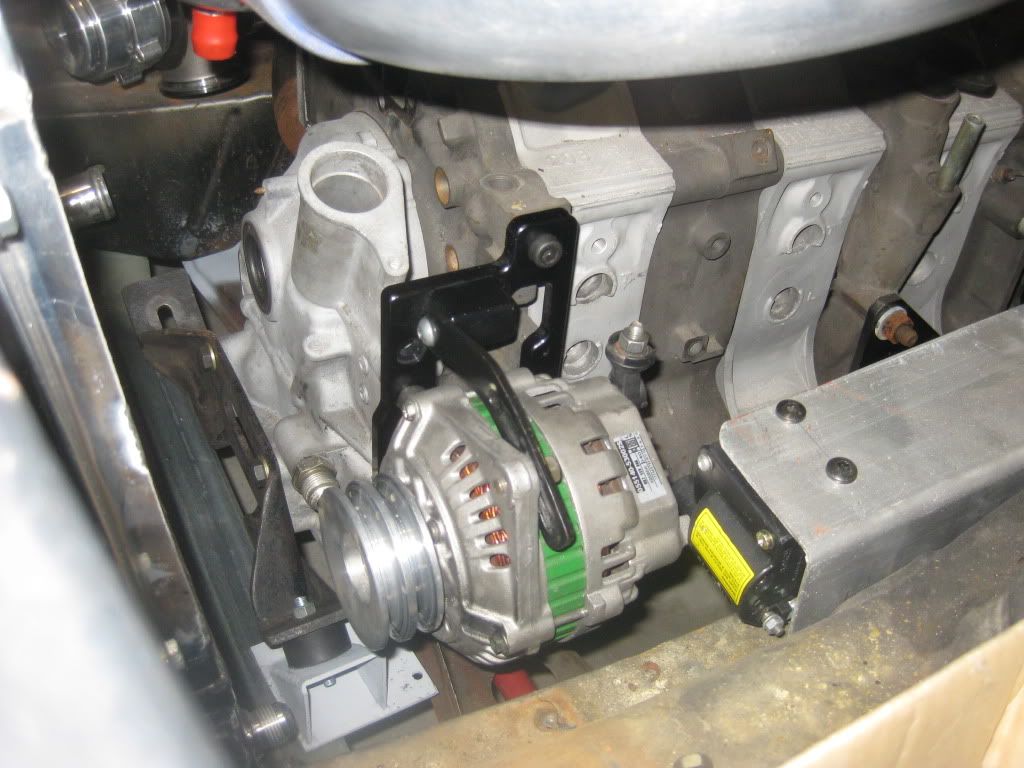
On the down side now have to modify my coil mount as there is slight fouling on the front coil. Oh well that's what ya get when you buy your parts one at a time.
. Purchased a Xtreme Rotaries side mount alternator kit and alternator with twin pulley.On the down side now have to modify my coil mount as there is slight fouling on the front coil.
Oh well that's what ya get when you buy your parts one at a time.
Thread Starter
Full Member
Joined: Nov 2009
Posts: 99
Likes: 0
From: Tasmania, Australia
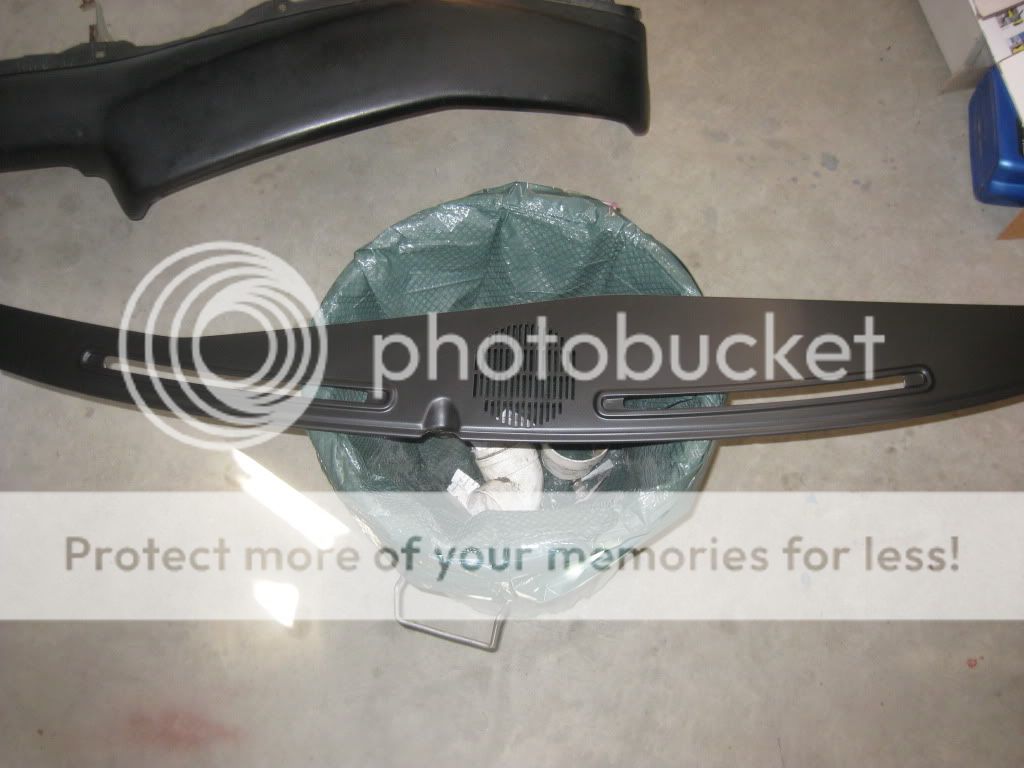
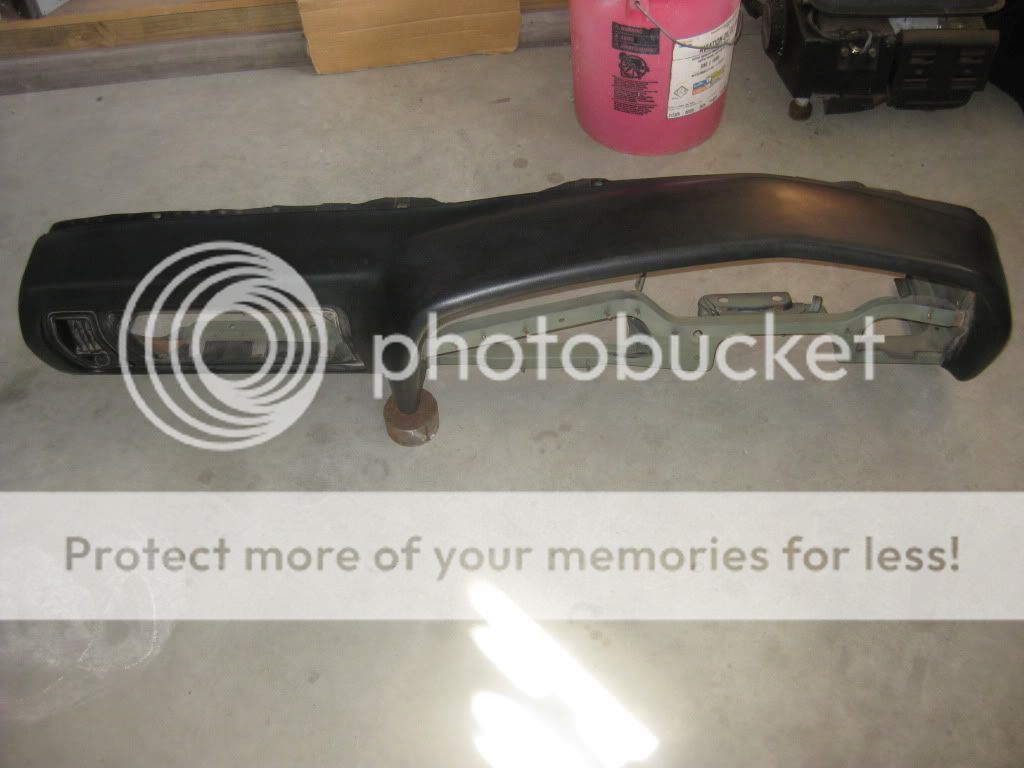
Bit of an update, I cleaned up the dash, rust converted and primed the dash frame. Also stripped and repainted the steel cover panel.
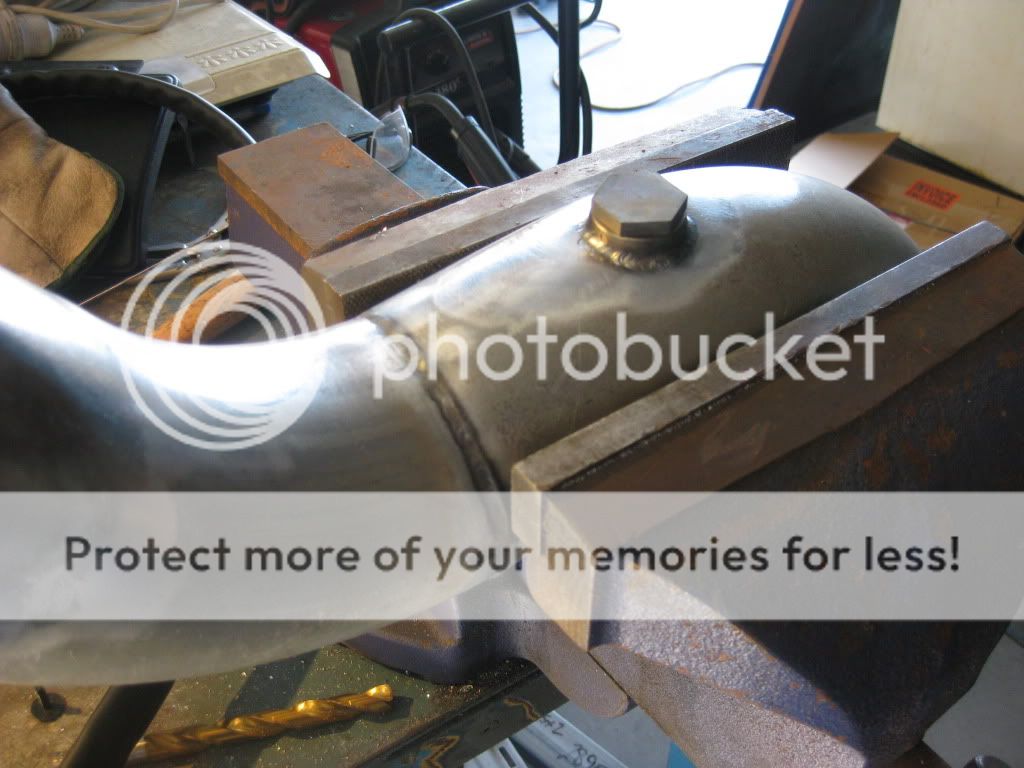
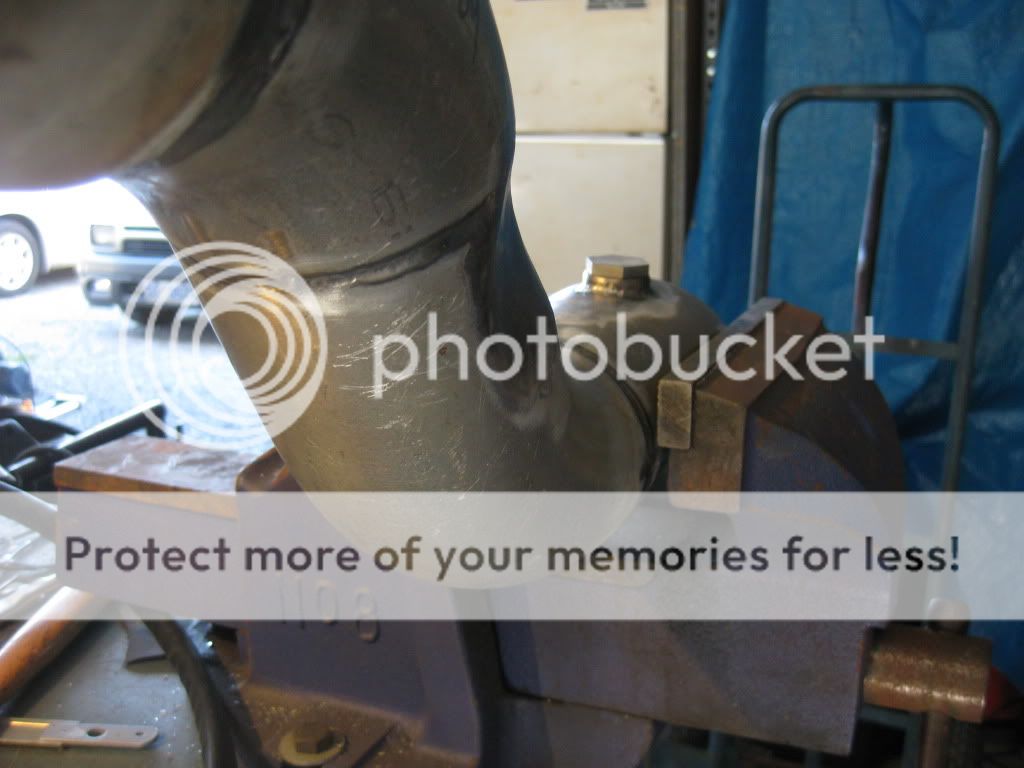
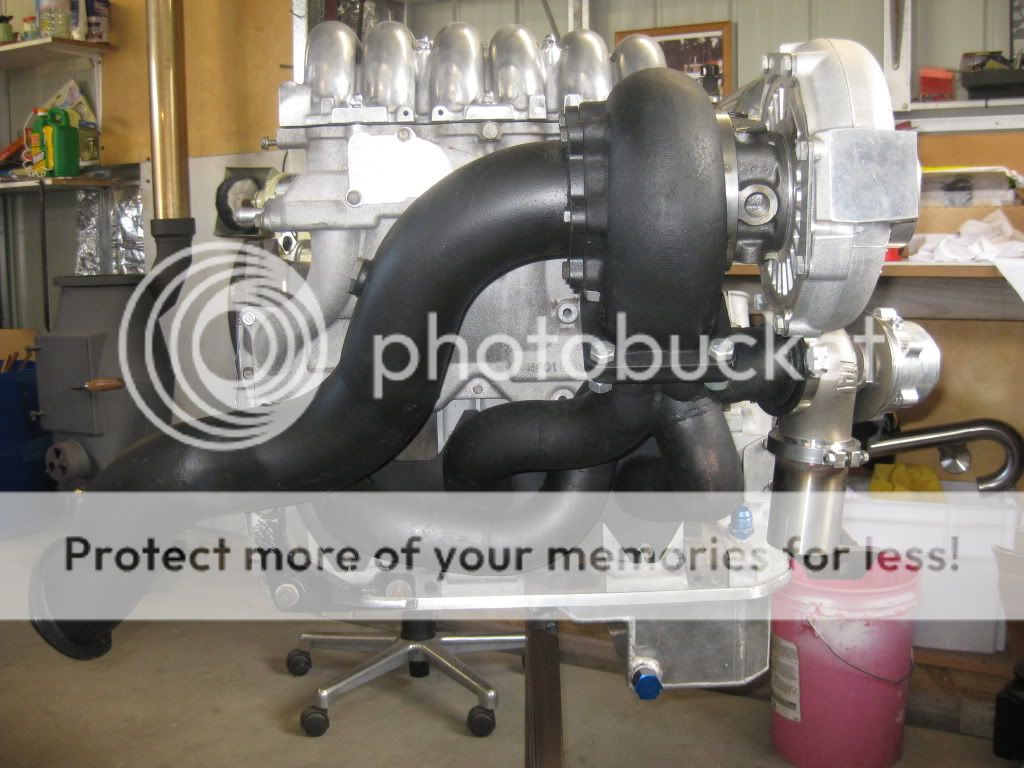
Also after finally after getting my TIG back (well they replaced it ) I got around to welding the exhaust probe bung in and shaping the dump pipe to give a bit more clearance for the steering box.
Should be able to send it off to get ceramic coated now!
Also after finally after getting my TIG back (well they replaced it
) I got around to welding the exhaust probe bung in and shaping the dump pipe to give a bit more clearance for the steering box.Should be able to send it off to get ceramic coated now!

Thread Starter
Full Member
Joined: Nov 2009
Posts: 99
Likes: 0
From: Tasmania, Australia
I think I will still make a heat shield, I've got a bit of stainless kicking around. The ceramic coating will help where it's too tight to fit a heat shield and for cosmetic purposes, to keep the mild steel from rusting.
Thread Starter
Full Member
Joined: Nov 2009
Posts: 99
Likes: 0
From: Tasmania, Australia
Hey Guys, got my exhaust manifold, dump pipe and turbo exhaust housing back from getting ceramic coated.

The finish is not as smooth as I thought it would be but it looks allright. As long as it holds on an keeps a lot of the heat in.
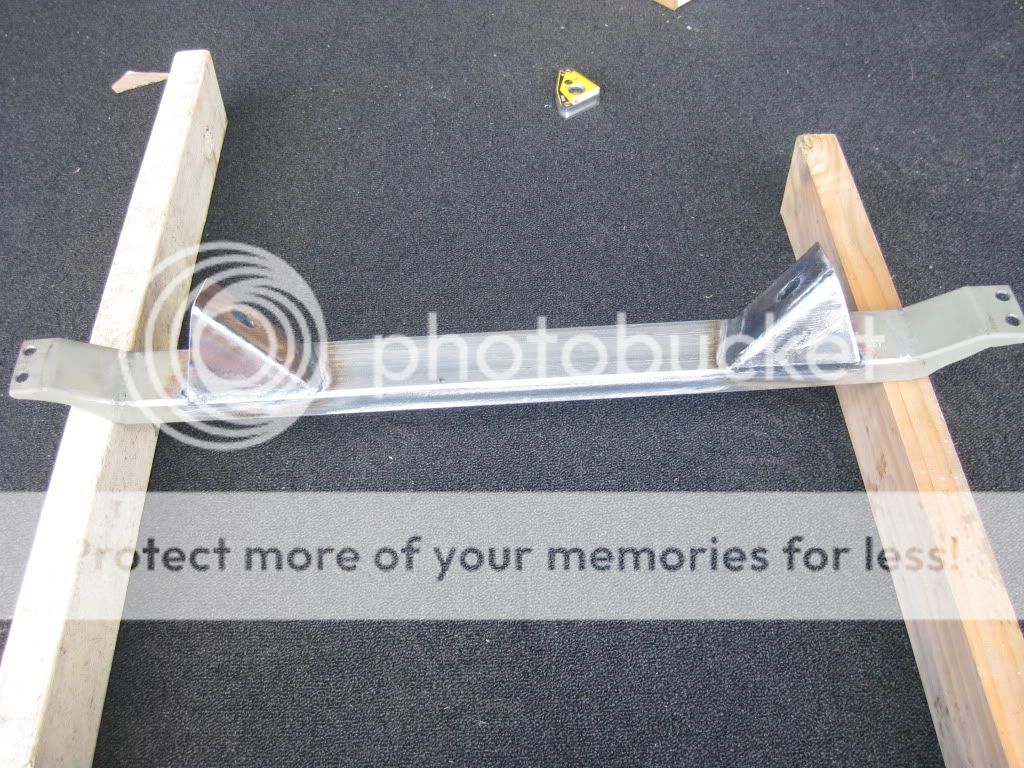
About half way through fabricating the front crossmember so after Monday I will have a break from my studies for 3 weeks so might be able to get a bit more done.
The finish is not as smooth as I thought it would be but it looks allright. As long as it holds on an keeps a lot of the heat in.
About half way through fabricating the front crossmember so after Monday I will have a break from my studies for 3 weeks so might be able to get a bit more done.
Thread Starter
Full Member
Joined: Nov 2009
Posts: 99
Likes: 0
From: Tasmania, Australia
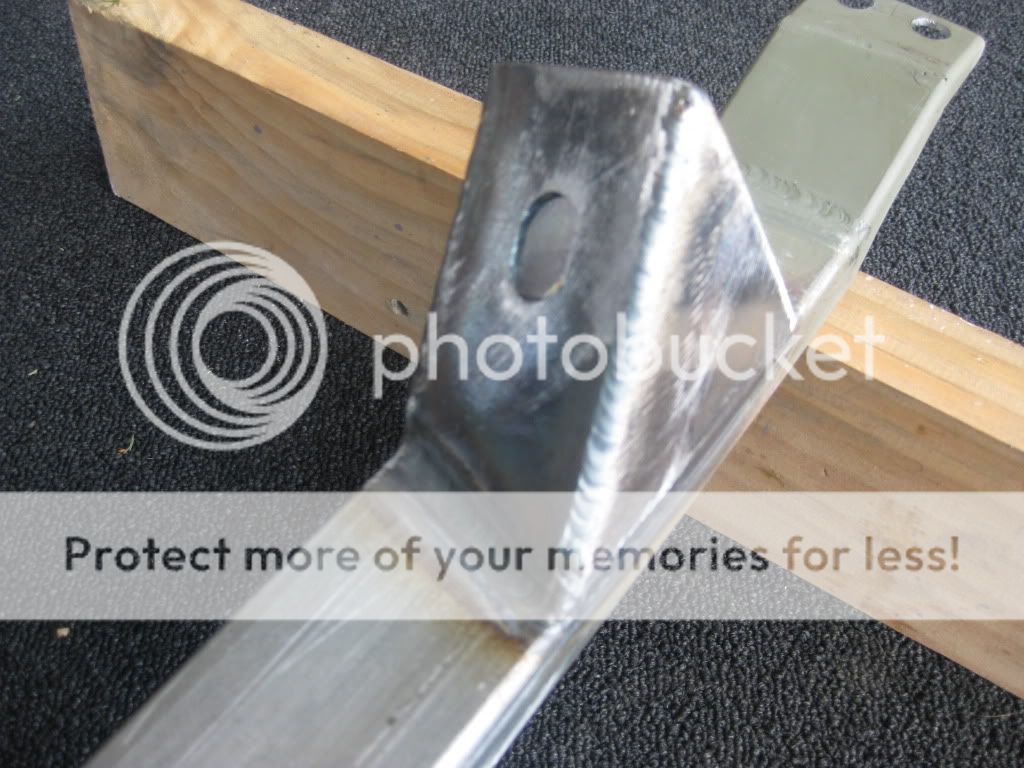
Fabricated the front engine mount crossmember...

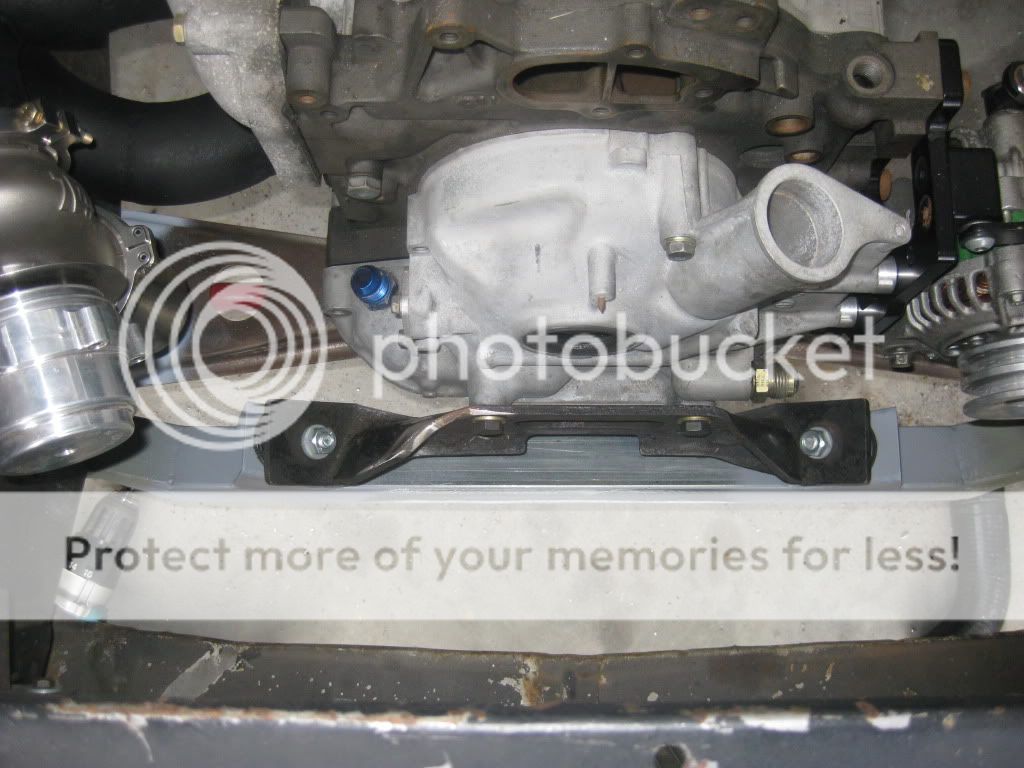
Should be able to pull the engine out now and throw a whole lot of money at it : .
Then start paint stripping the engine bay. The fun begins!
Should be able to pull the engine out now and throw a whole lot of money at it :
.Then start paint stripping the engine bay. The fun begins!
 nice work it seems like its really coming together


Thread Starter
Full Member
Joined: Nov 2009
Posts: 99
Likes: 0
From: Tasmania, Australia
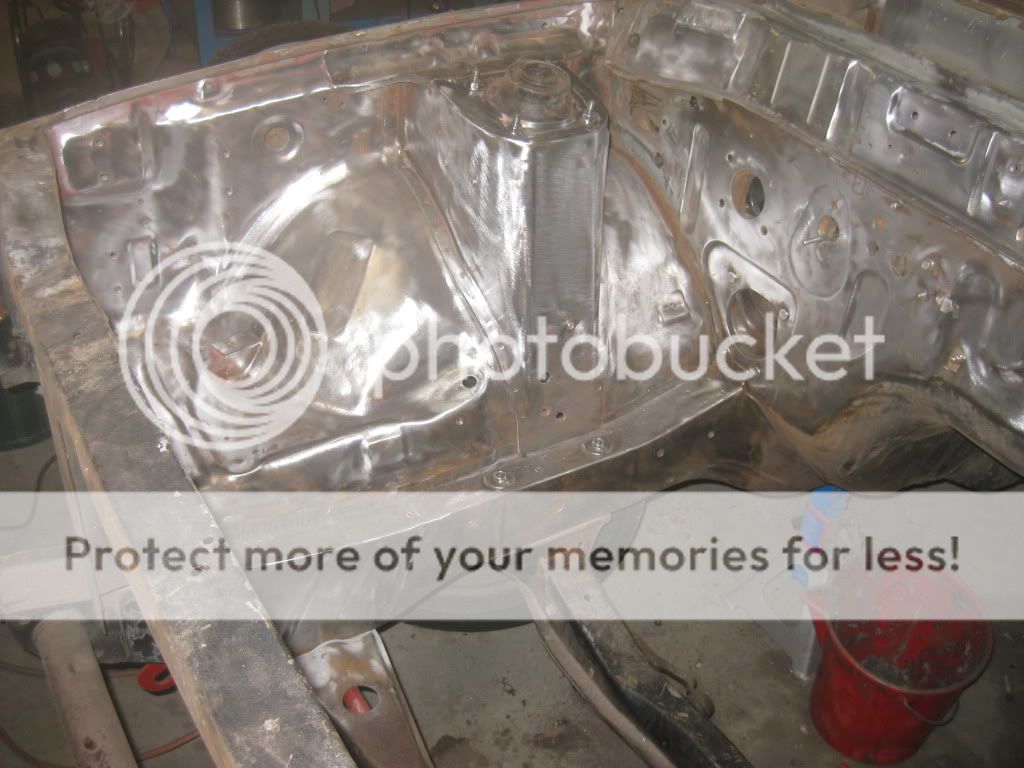
Well as my holiday in Sydney was ruined before it even started by the bastard ash cloud, I did get a bit done on the Mazda.
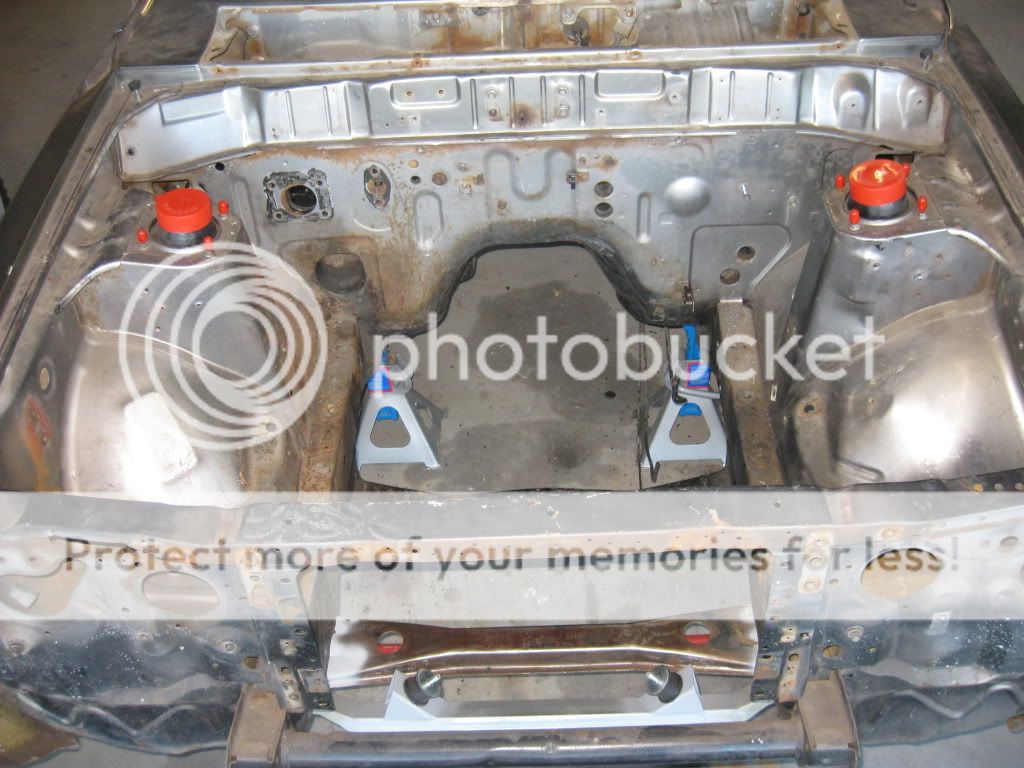
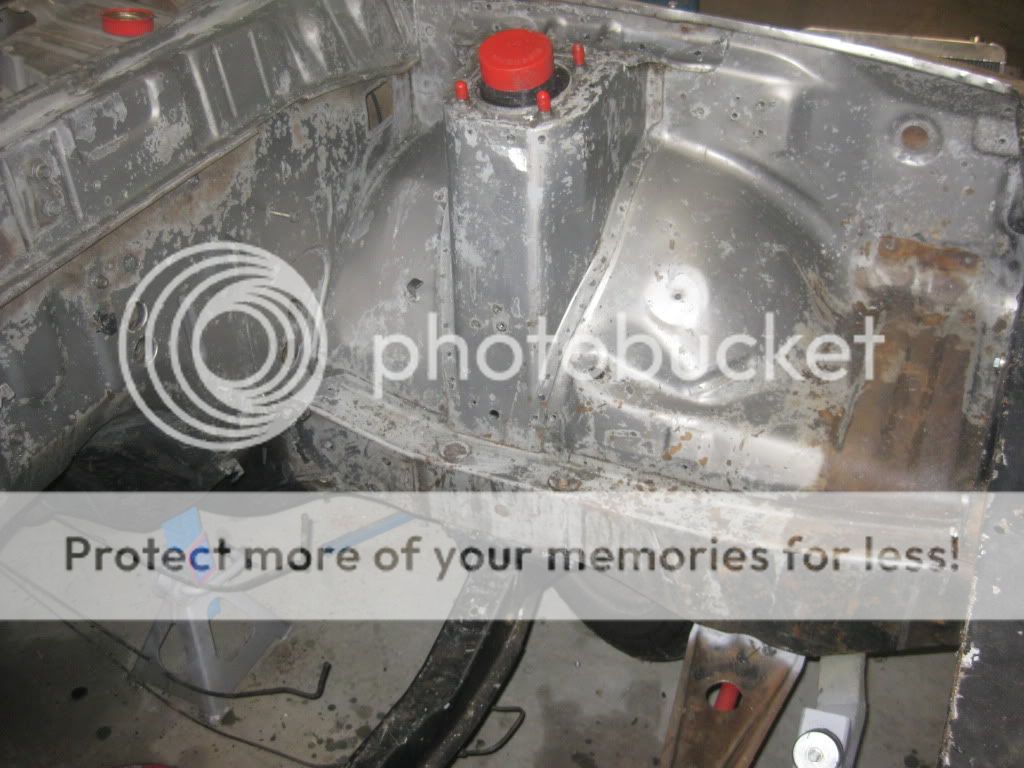
Removed everything from the engine bay.
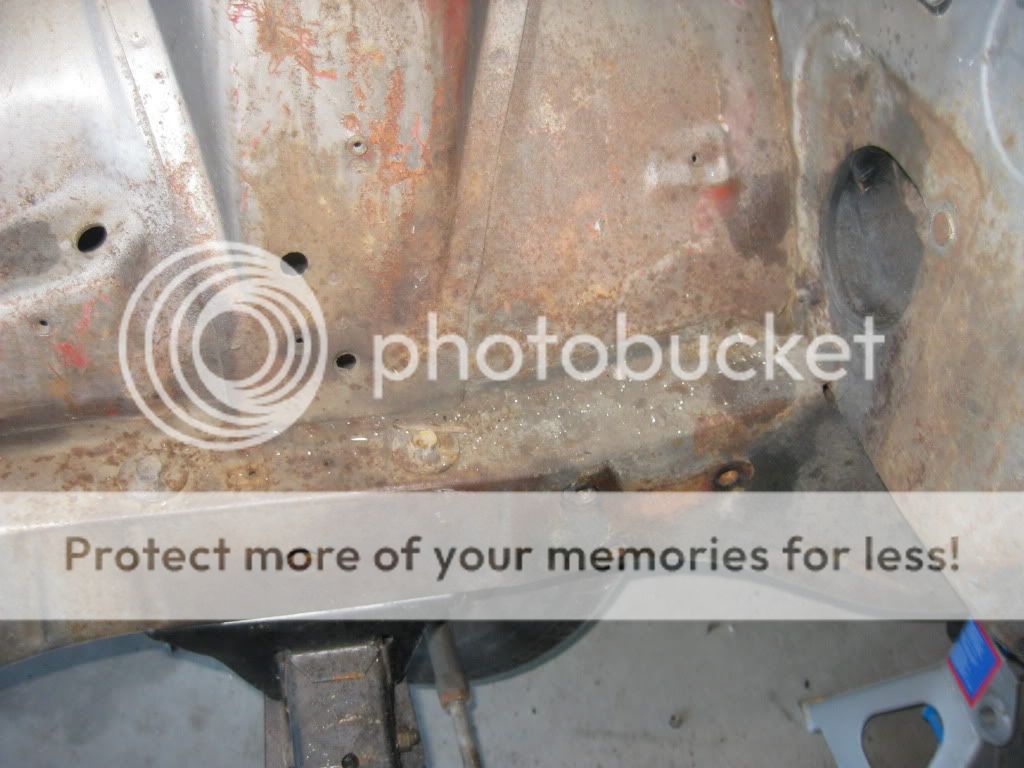
Looked a bit nasty down here. :shock:
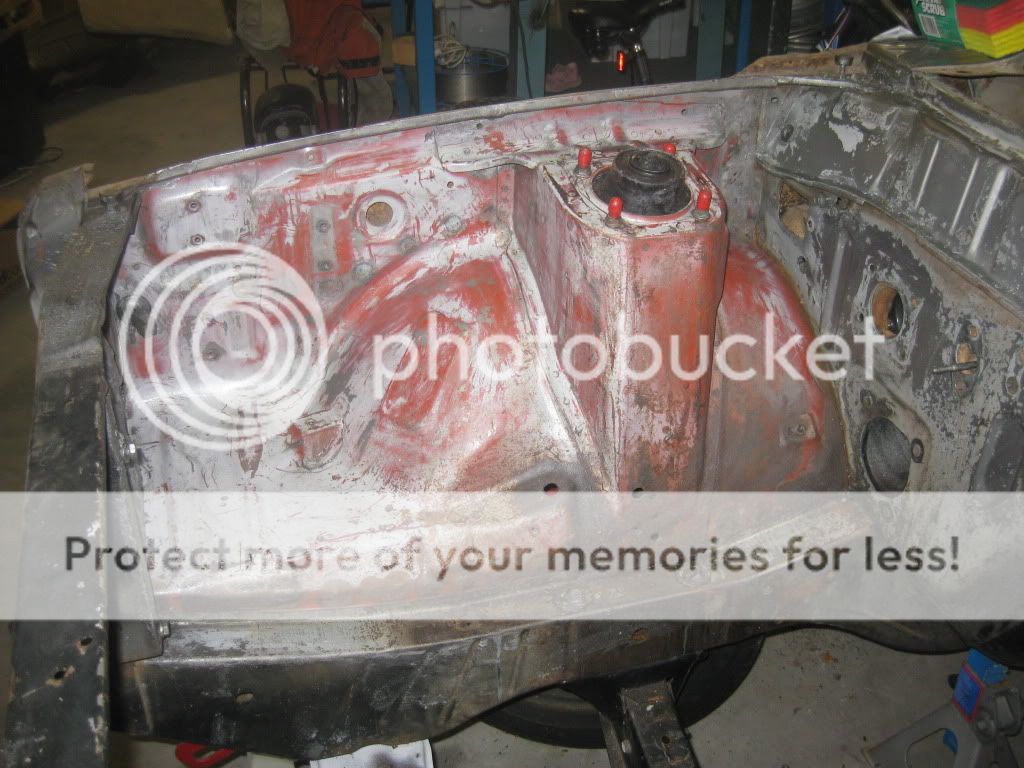
After a coat of paint stripper came to this.
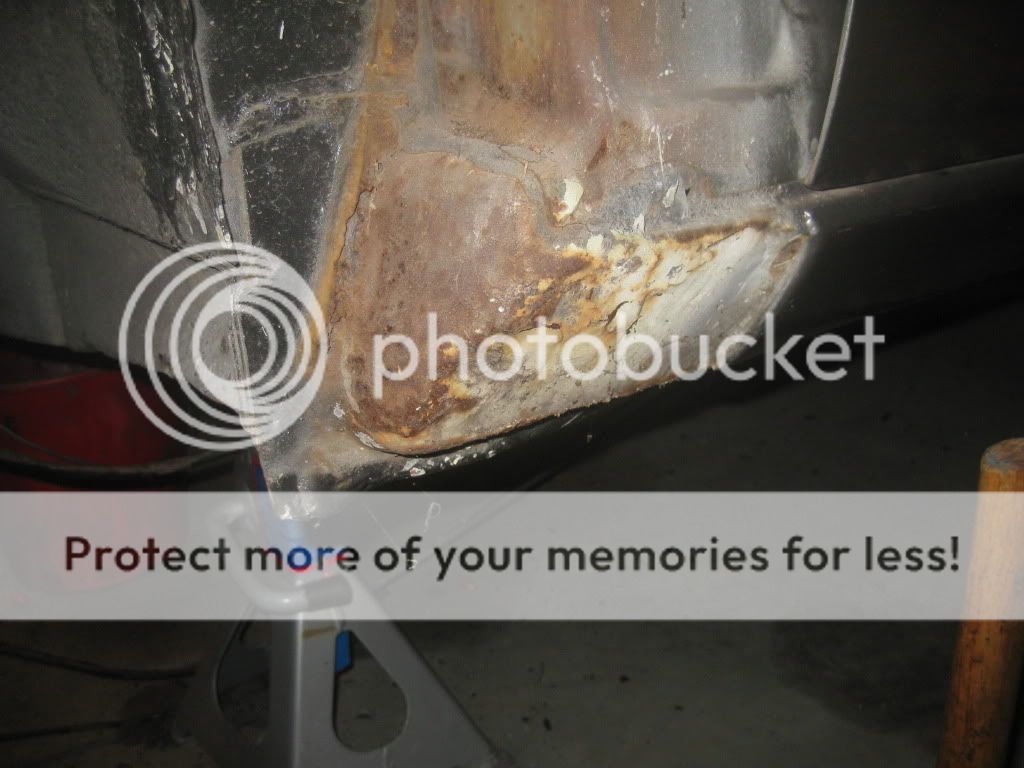
Note how this side was a different colour. Must have taken a hit once upon a time and replaced.
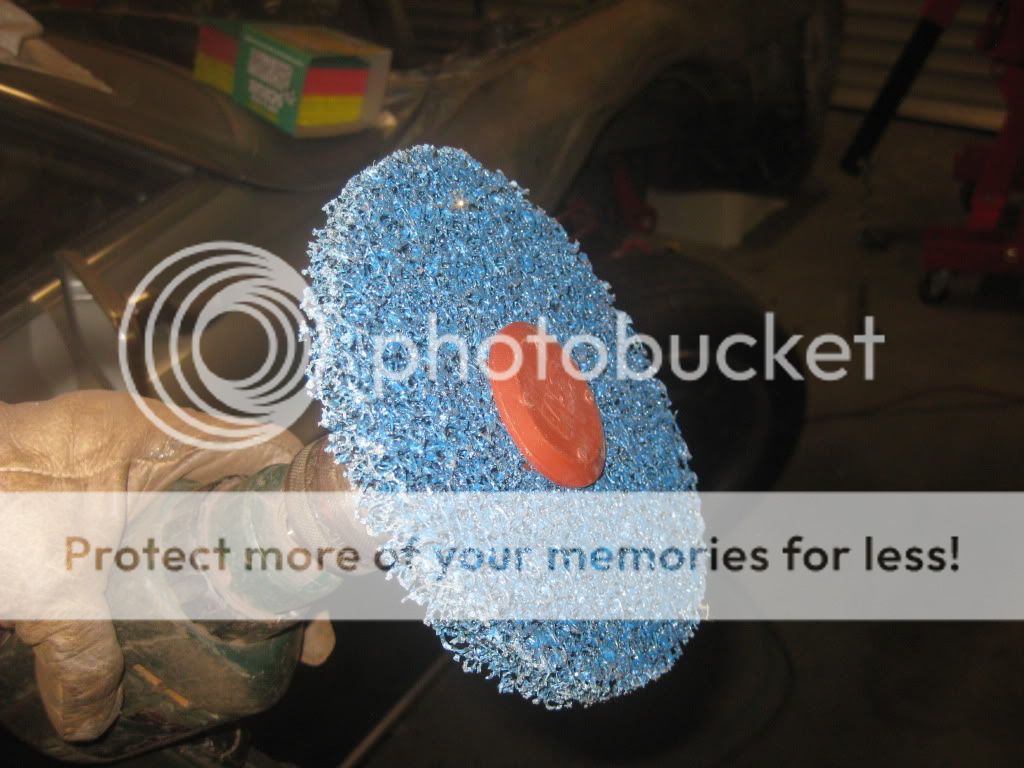
Then got stuck into it with a assortment of wire wheels and finished of with this little beauty.
And came up like this.
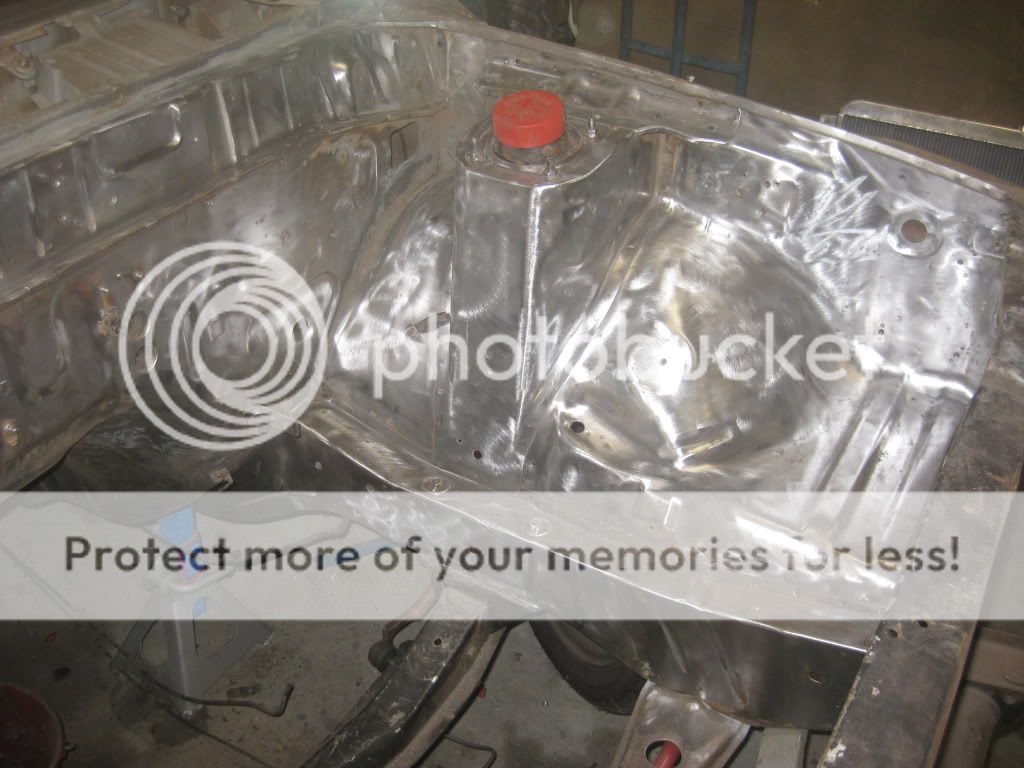
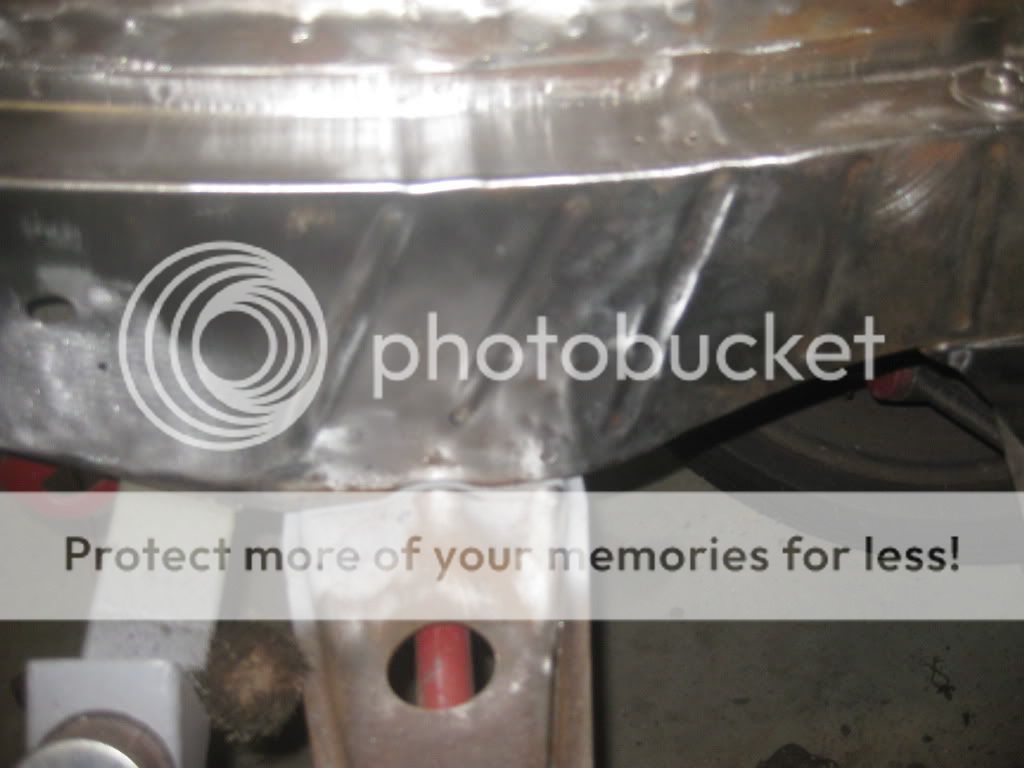
A bit of damage on the chassis rail probably when the inner guard was replaced.
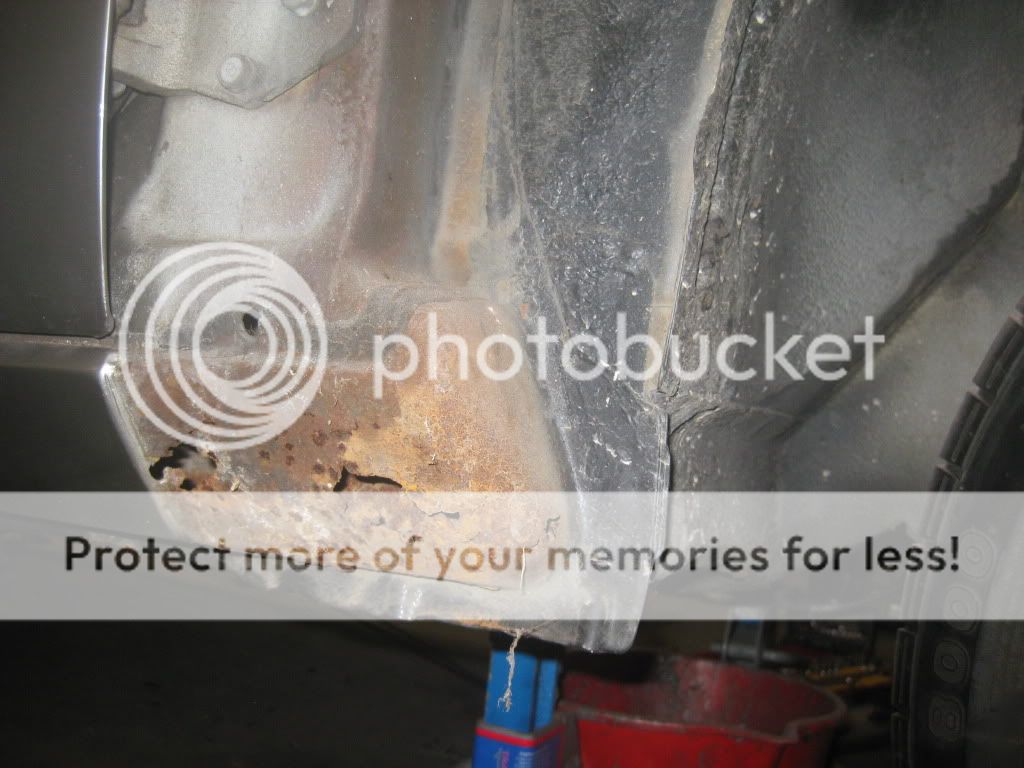
Now will throw a bit of rust converted around and finish the front panel. Also when I removed the front guards found this #-o but I will leave this for another time.
Removed everything from the engine bay.
Looked a bit nasty down here. :shock:
After a coat of paint stripper came to this.
Note how this side was a different colour. Must have taken a hit once upon a time and replaced.
Then got stuck into it with a assortment of wire wheels and finished of with this little beauty.
And came up like this.
A bit of damage on the chassis rail probably when the inner guard was replaced.
Now will throw a bit of rust converted around and finish the front panel. Also when I removed the front guards found this #-o but I will leave this for another time.
Thread Starter
Full Member
Joined: Nov 2009
Posts: 99
Likes: 0
From: Tasmania, Australia
Holy ****! Over 12 months since last update. 
Well I've had a bit on the go with a few home projects, work, family and serious case of CBF at times.
In the meantime I purchased a Toyota Hilux diff with the mounts already at the correct width for my RX4 with the axles machined and drilled for 4 x 110 studs and SV RX7 disks.
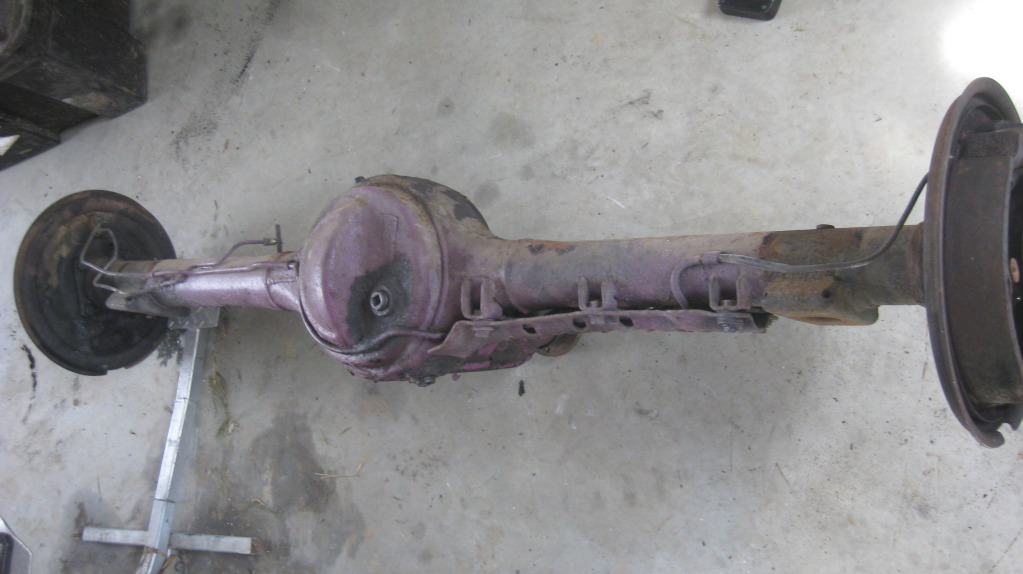
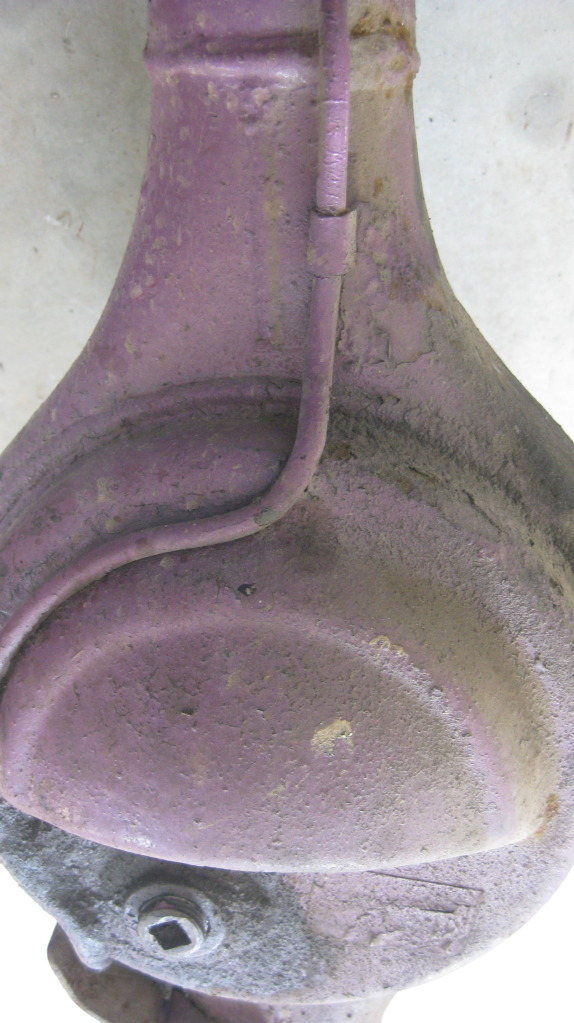
I removed the old diff and as you can see it was painted purple. Only on the rear side and over dirt, grease and grime.
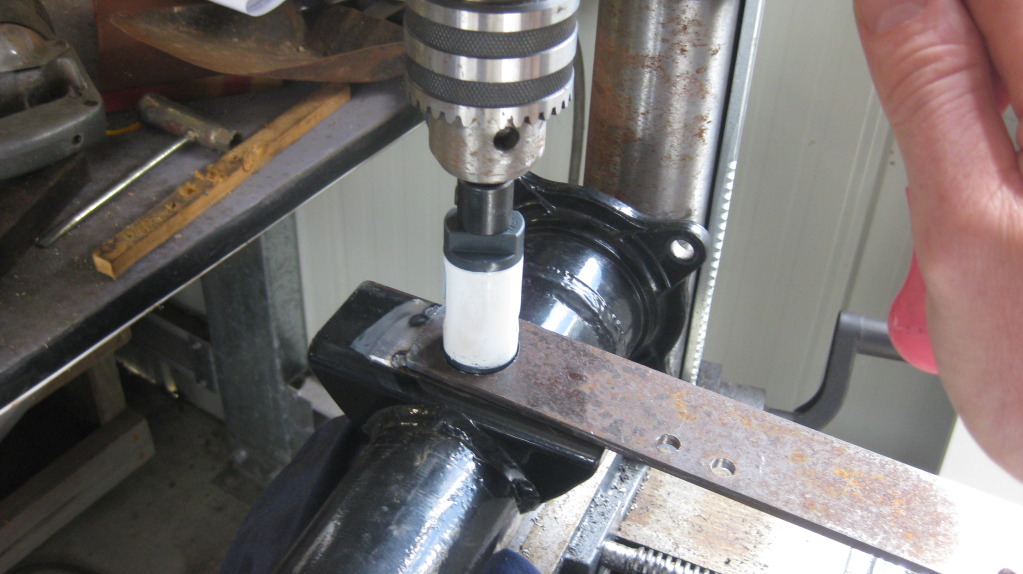
I went to test fit the Hilux housing and found the holes used to locate the housing on the spring spigots was too small.
So off to the local tool supplier and bought a 29mm hole saw. I cut a hole in a scrap bit of flat bar and then tack welded centrally around the hole on the housing.
I took the center drill out of the hole saw arbour and drilled a larger hole in the spring mount.
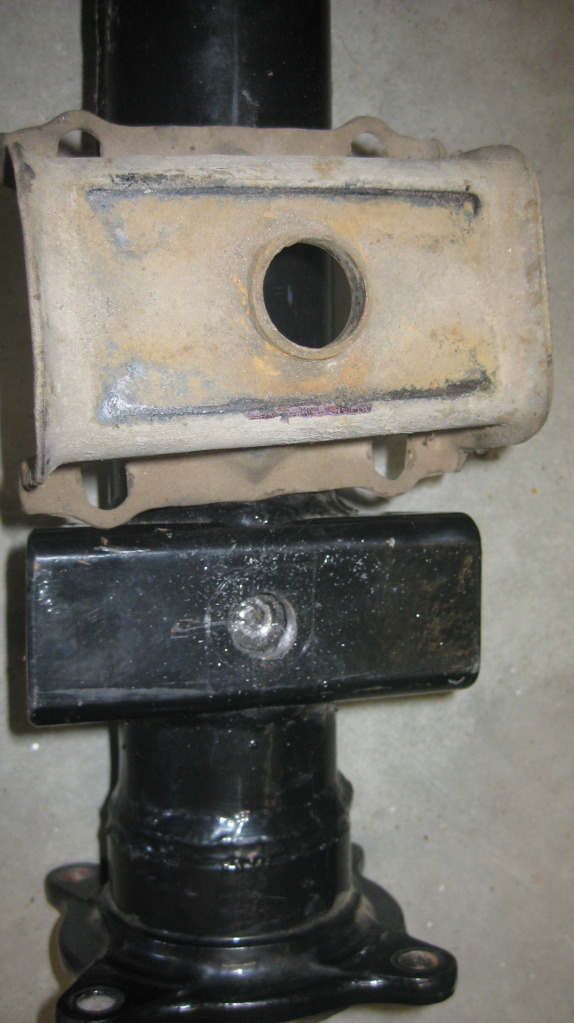
I cleaned the spring saddles and repainted them.
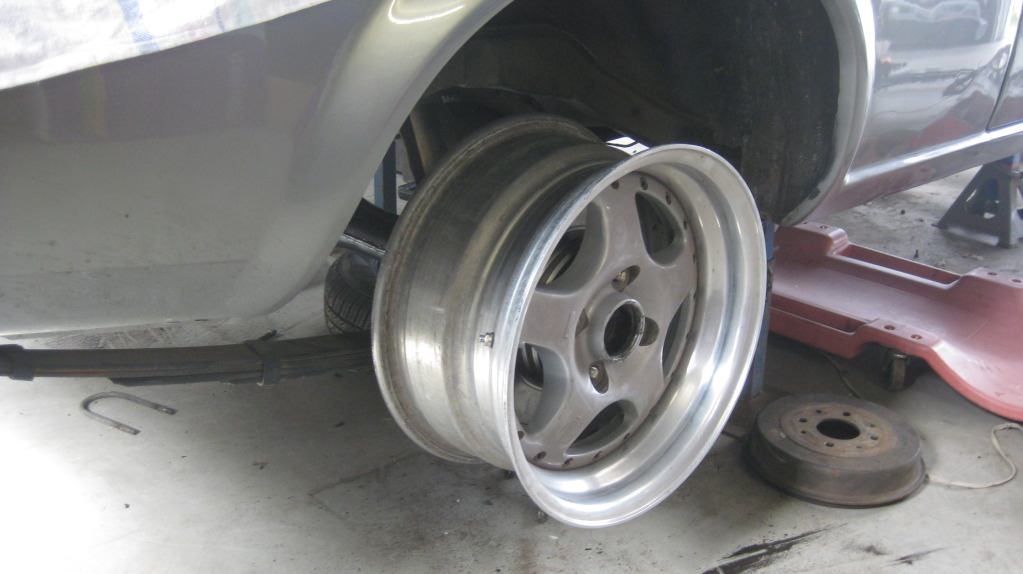
Did the same to the otherside then test fitted the housing. Even got to see what my Simmons look like on for the first time.
Now I am planning to duplicate the factory diff torque rods and mounts fitted factory to some rare RX4s but with some adjustability.
Well I've had a bit on the go with a few home projects, work, family and serious case of CBF at times.
In the meantime I purchased a Toyota Hilux diff with the mounts already at the correct width for my RX4 with the axles machined and drilled for 4 x 110 studs and SV RX7 disks.
I removed the old diff and as you can see it was painted purple. Only on the rear side and over dirt, grease and grime.
I went to test fit the Hilux housing and found the holes used to locate the housing on the spring spigots was too small.
So off to the local tool supplier and bought a 29mm hole saw. I cut a hole in a scrap bit of flat bar and then tack welded centrally around the hole on the housing.
I took the center drill out of the hole saw arbour and drilled a larger hole in the spring mount.
I cleaned the spring saddles and repainted them.
Did the same to the otherside then test fitted the housing. Even got to see what my Simmons look like on for the first time.
Now I am planning to duplicate the factory diff torque rods and mounts fitted factory to some rare RX4s but with some adjustability.


Thread Starter
Full Member
Joined: Nov 2009
Posts: 99
Likes: 0
From: Tasmania, Australia

Thread Starter
Full Member
Joined: Nov 2009
Posts: 99
Likes: 0
From: Tasmania, Australia
A bit more progress!
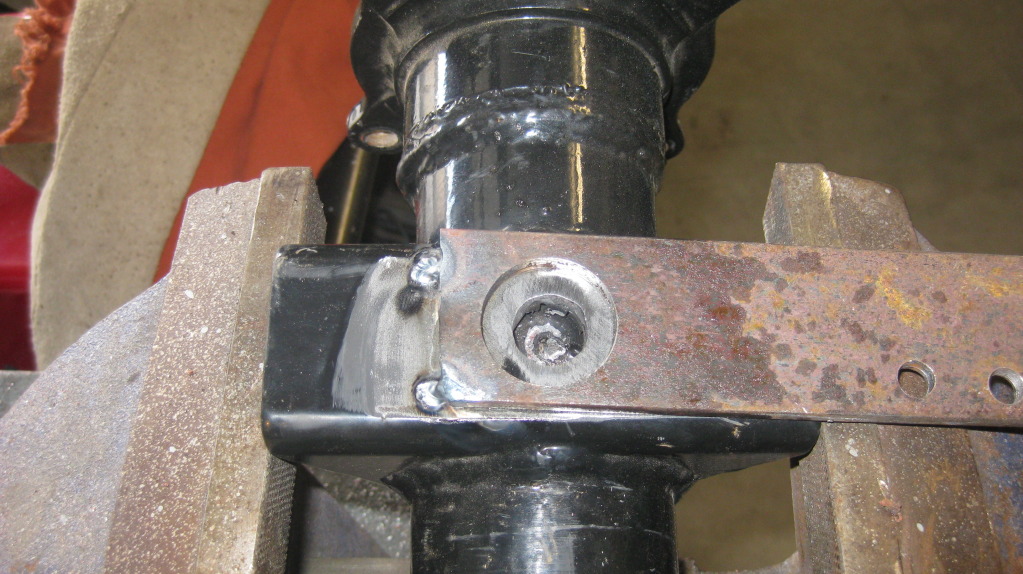
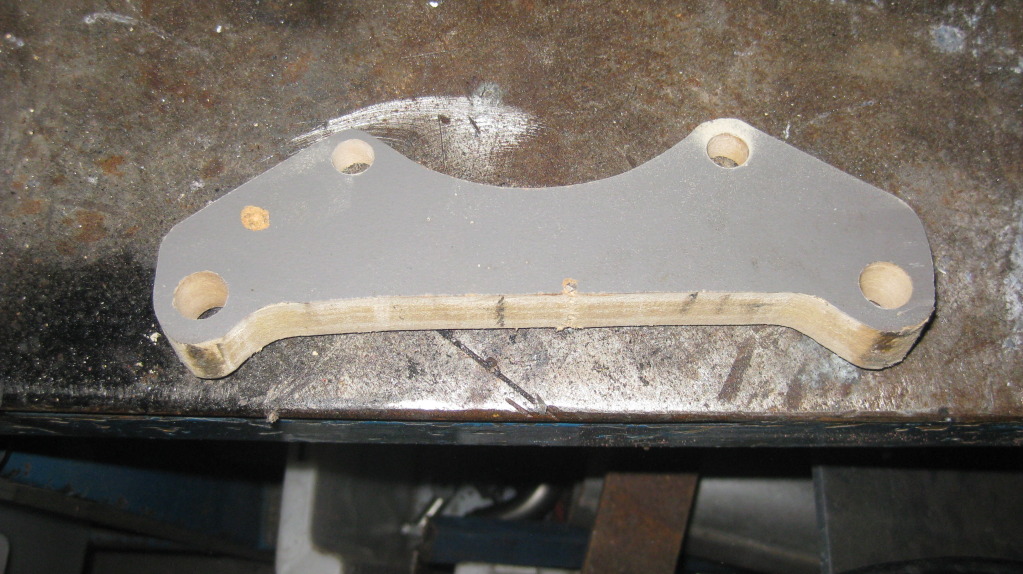
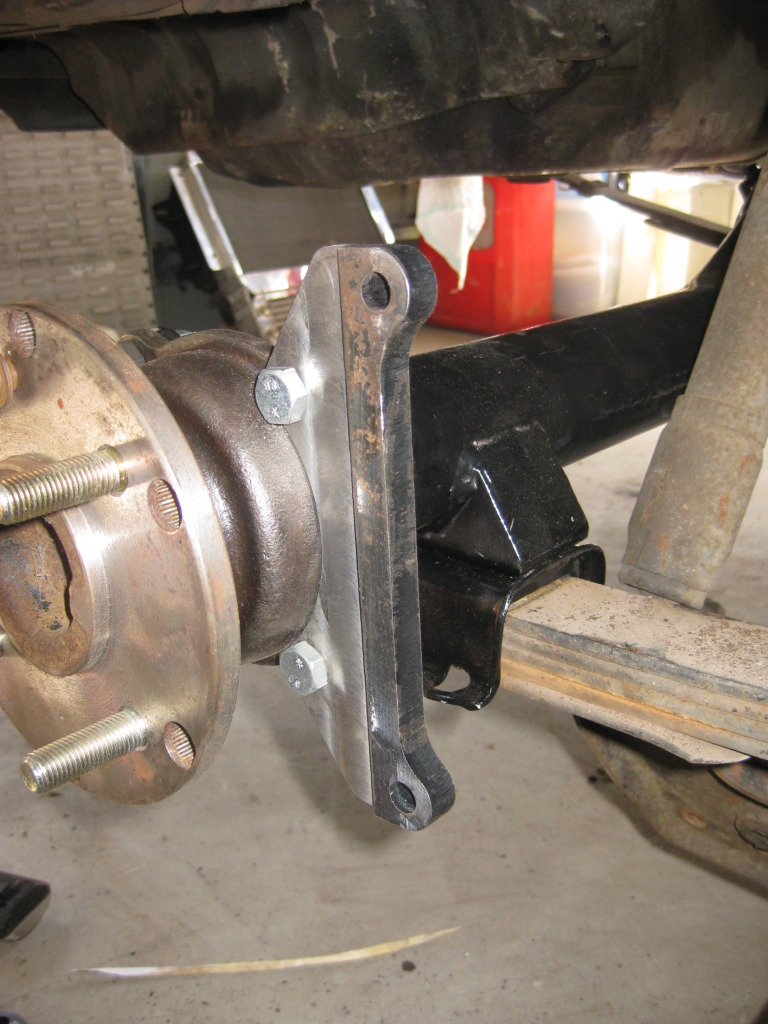
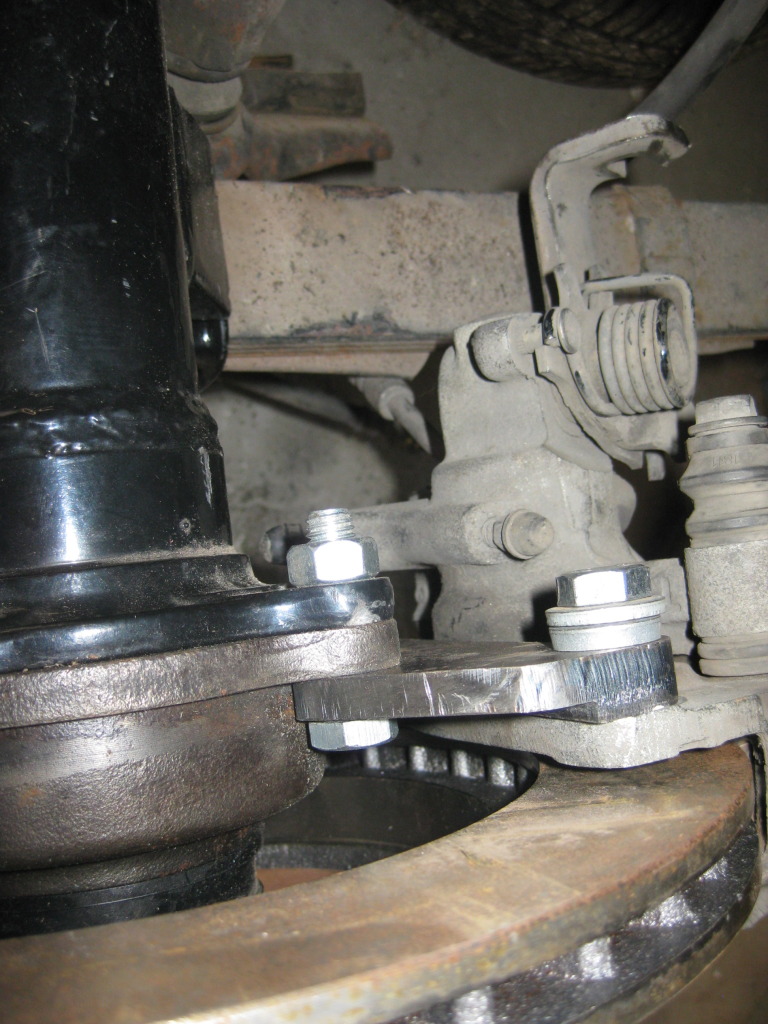
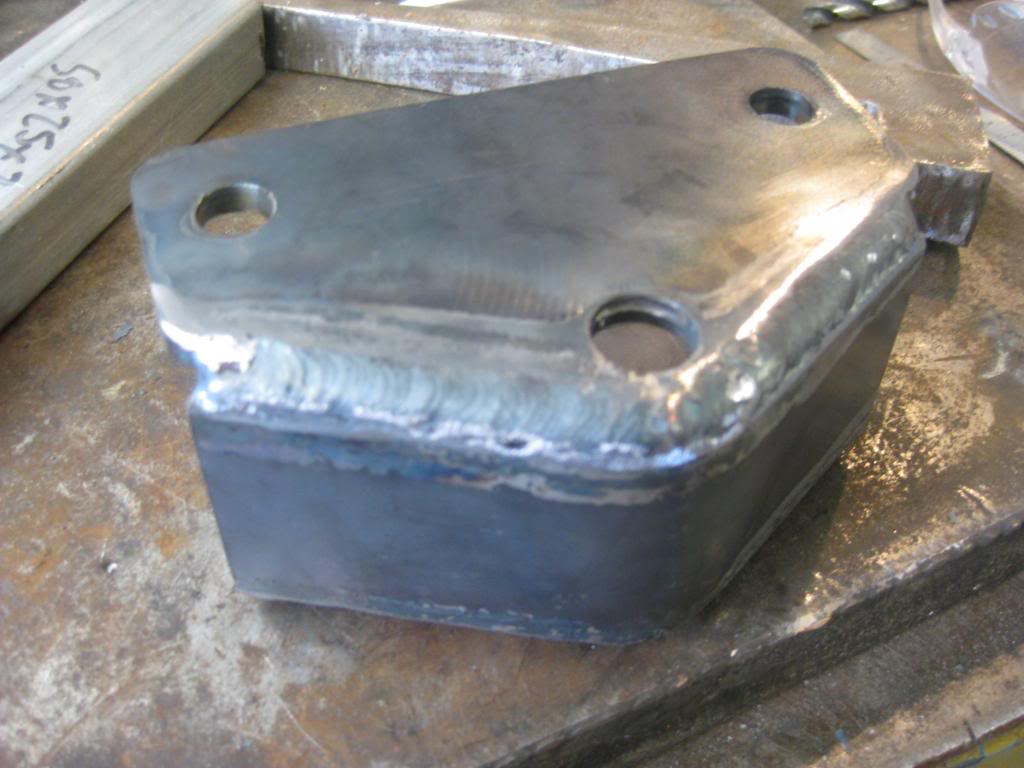
I have made my rear caliper brackets to adapt the RX7 calipers to fit the Toyota Hilux diff housing.
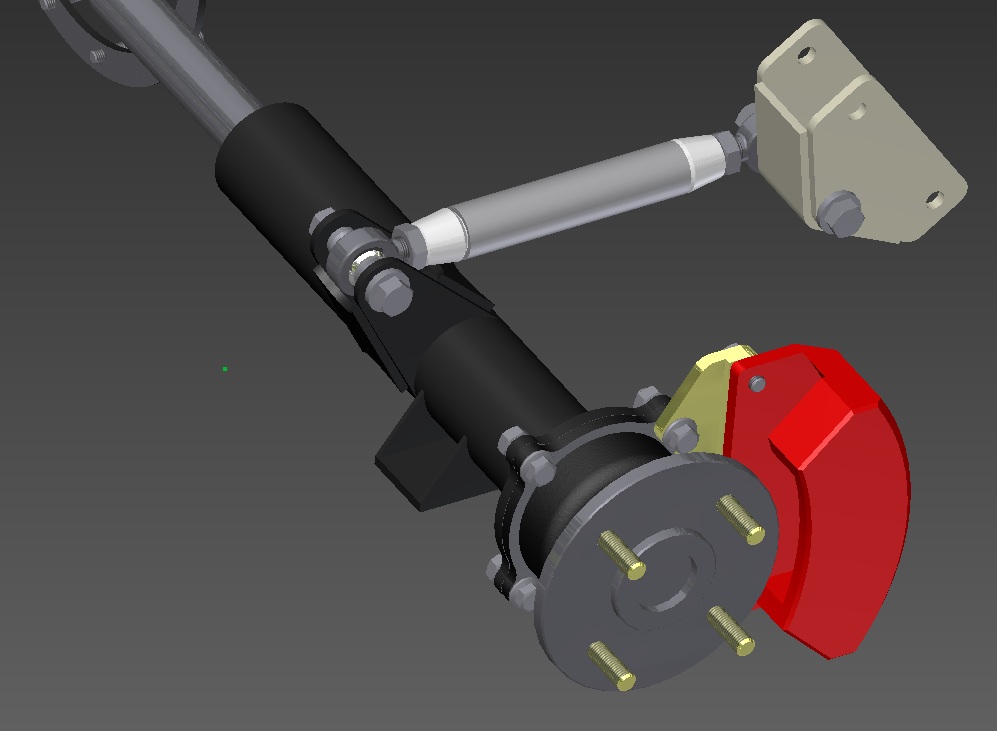
First I created a CAD model of the diffhousing, axles, bearing and housing, disk rotor and a rough model of the RX7 caliper.

Then I printed a 1 to 1 drawing of the profile an cut it out of MDF.
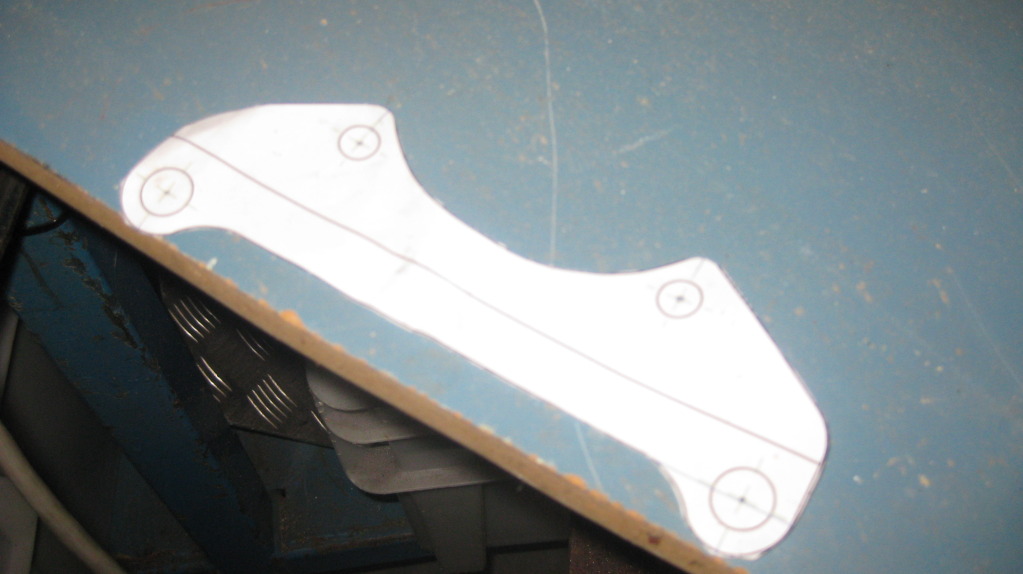
Then ground out the step down.
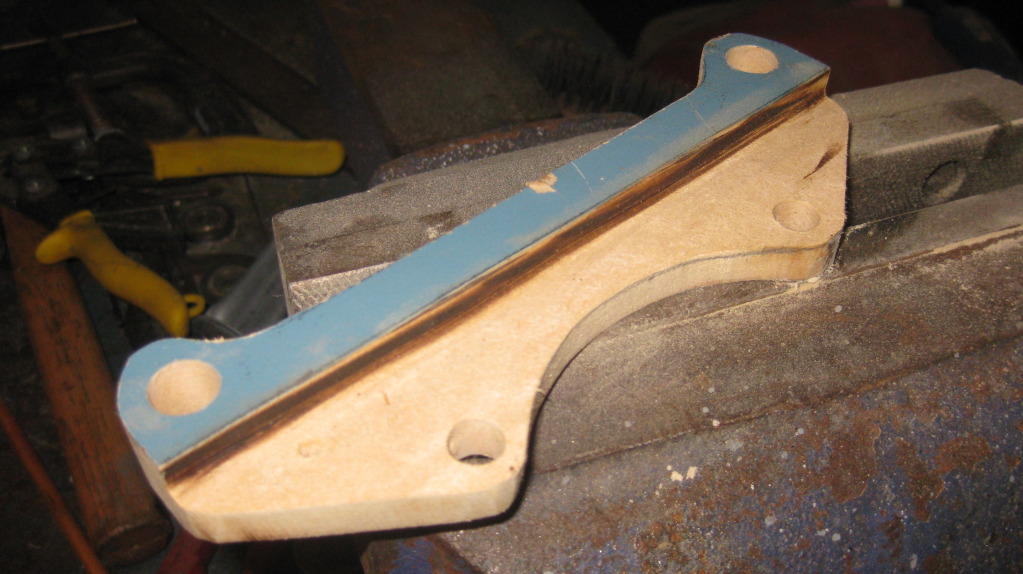
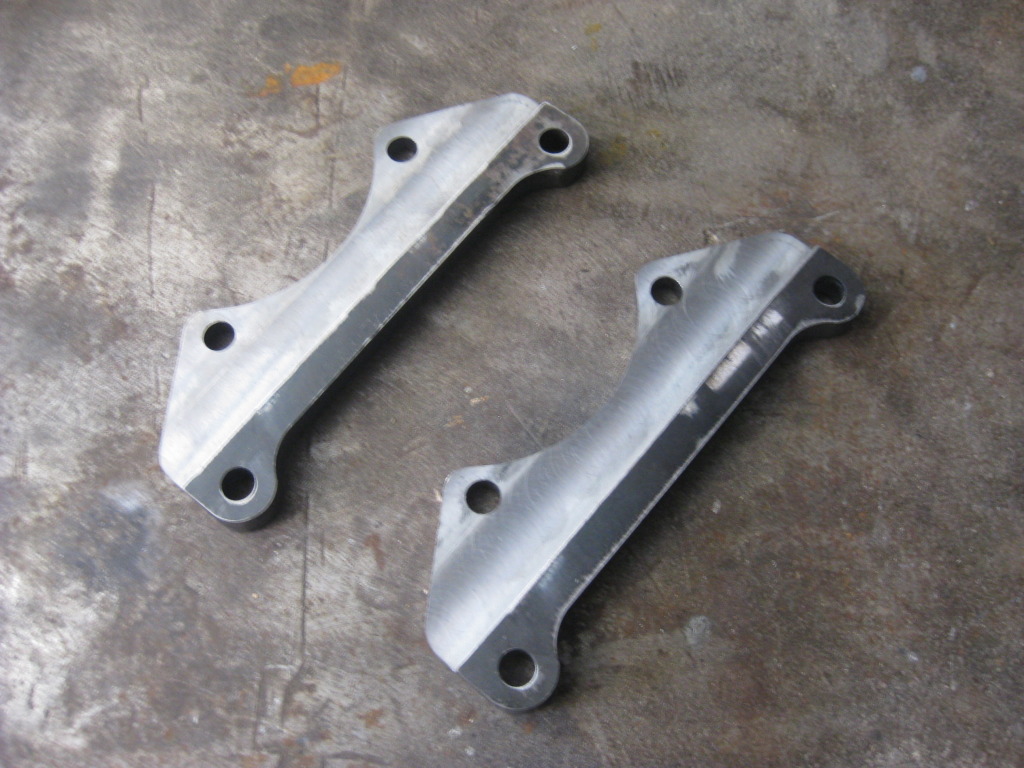
When I was happy with the fit I created a DXF file and had them laser cut and had a mate mill the step into them.
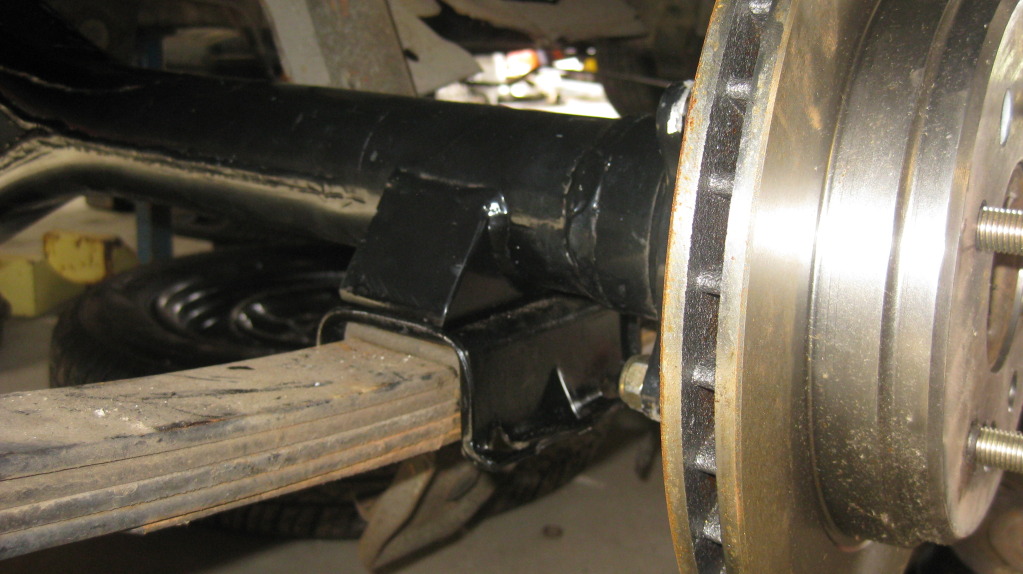
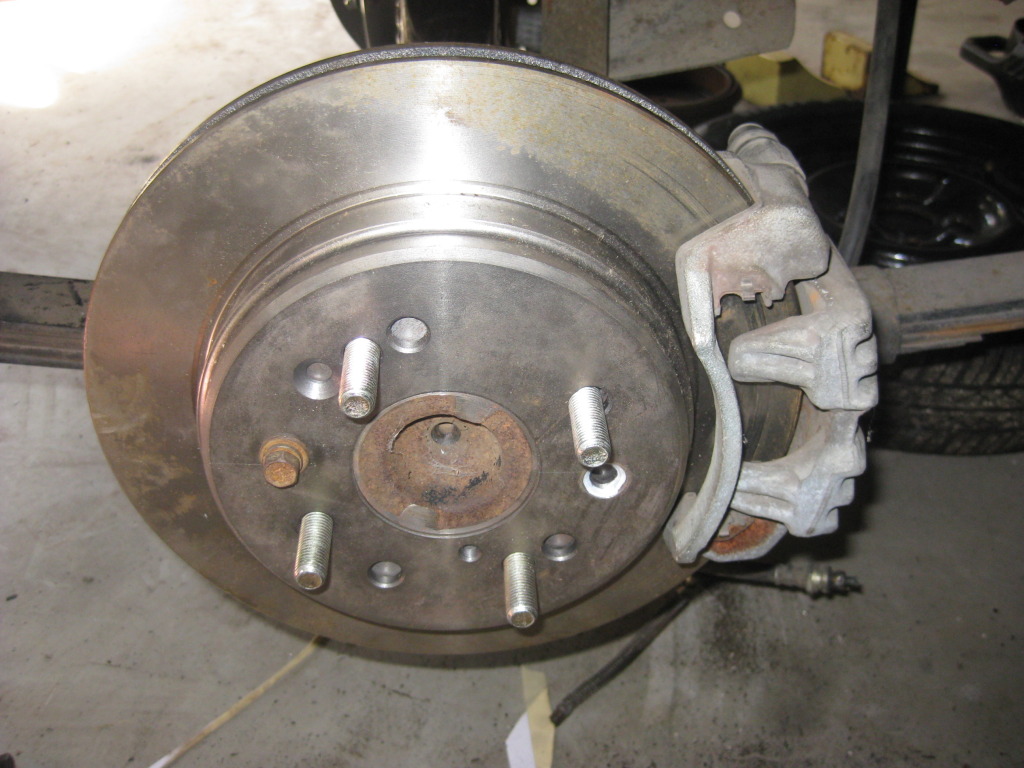
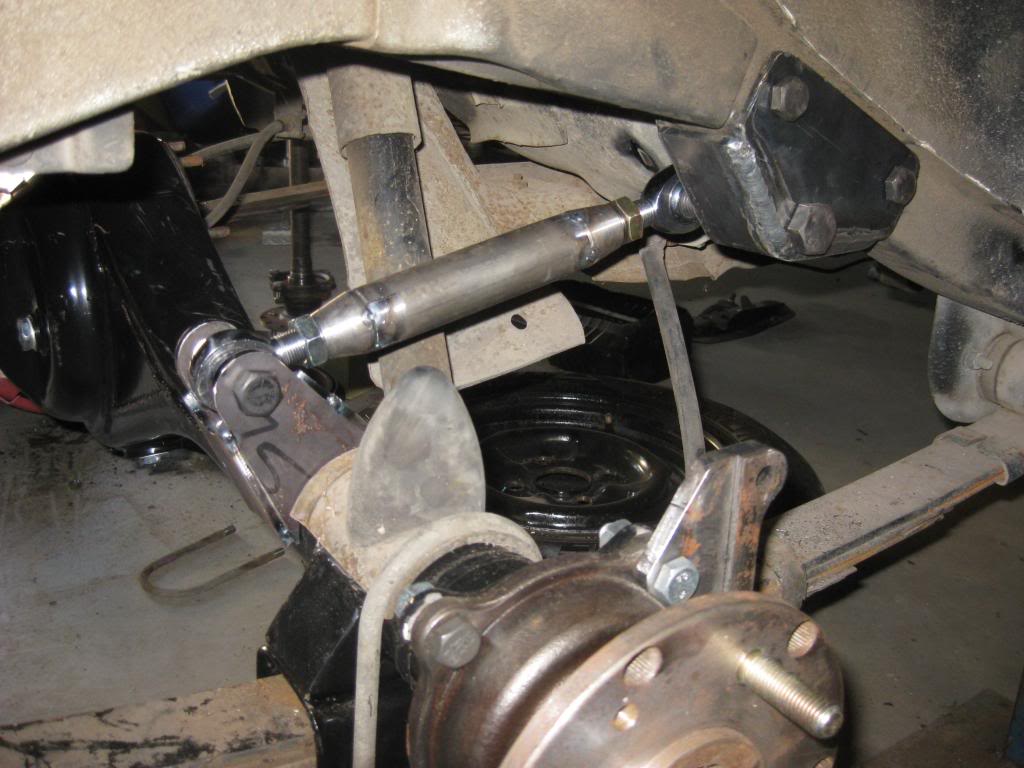
And here is one fitted!
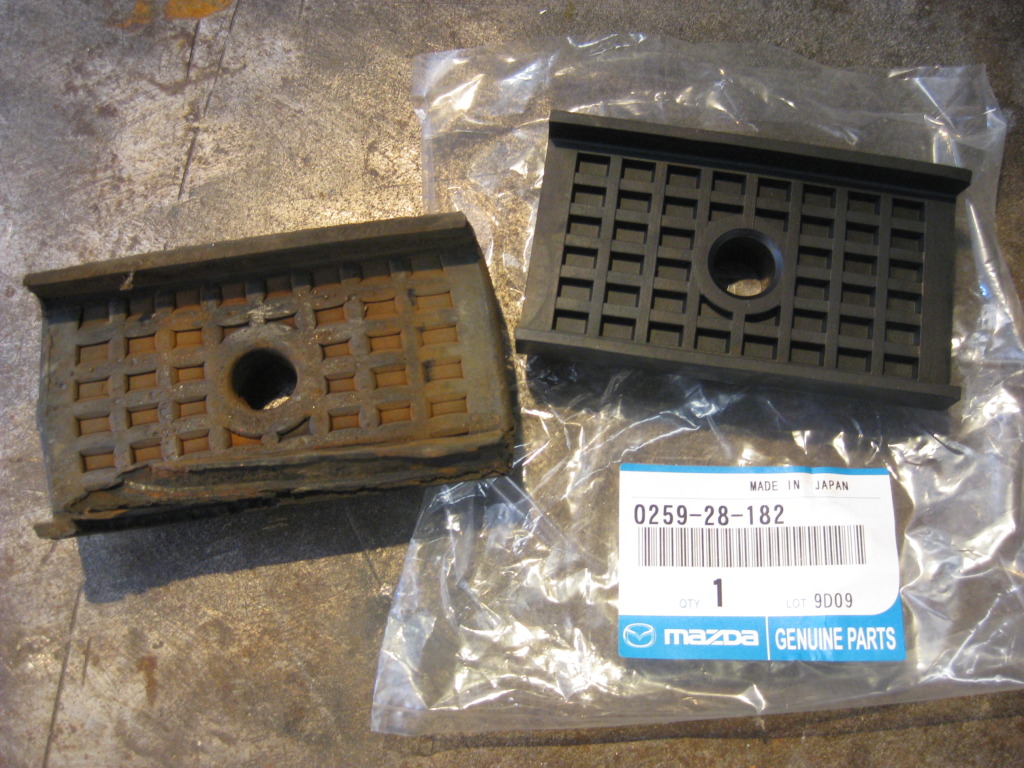
I also bought some new rubbers that go top and bottom of the leaf springs. Bought almost the last lot that Mazda had left.
I have made my rear caliper brackets to adapt the RX7 calipers to fit the Toyota Hilux diff housing.
First I created a CAD model of the diffhousing, axles, bearing and housing, disk rotor and a rough model of the RX7 caliper.
Then I printed a 1 to 1 drawing of the profile an cut it out of MDF.
Then ground out the step down.
When I was happy with the fit I created a DXF file and had them laser cut and had a mate mill the step into them.
And here is one fitted!
I also bought some new rubbers that go top and bottom of the leaf springs. Bought almost the last lot that Mazda had left.
Thread Starter
Full Member
Joined: Nov 2009
Posts: 99
Likes: 0
From: Tasmania, Australia
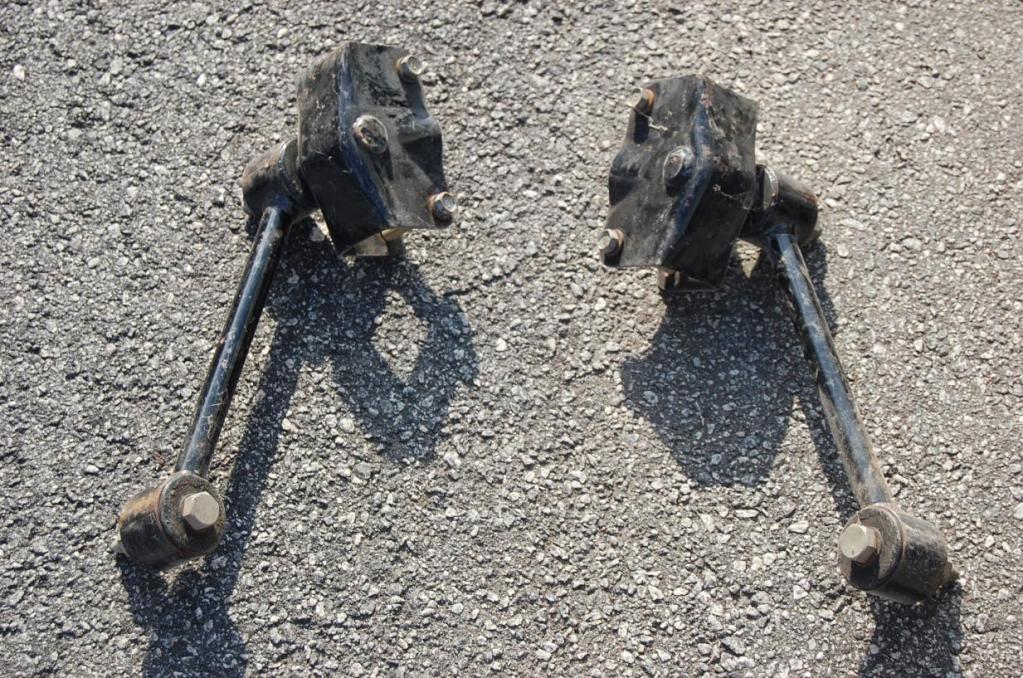
I got the laser cut parts back this week so I started work on the 2 link mounts.....
This is the CAD model.
This is the mount for the chassis.
These are the mounts to go on the diff housing.
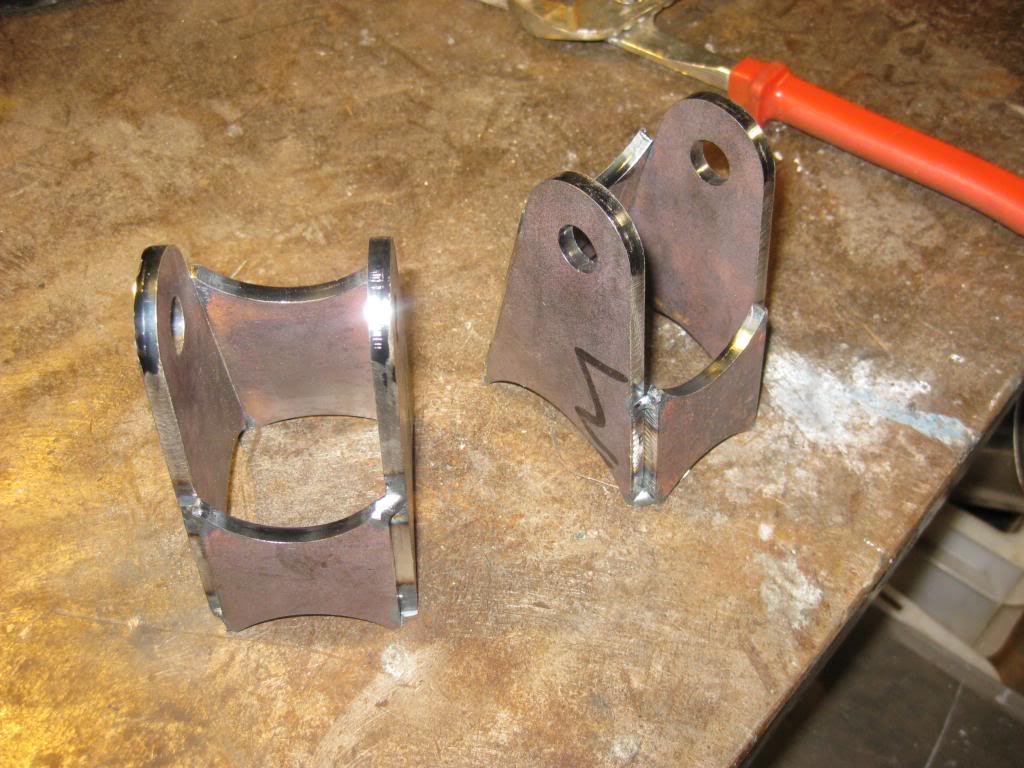
And here are they all are with a bit of a mockup.
This is the CAD model.
This is the mount for the chassis.
These are the mounts to go on the diff housing.
And here are they all are with a bit of a mockup.