
Starting Body and Paint Work on the REPU

Thread Starter
Old Car Preservationist
Joined: Mar 2004
Posts: 421
Likes: 0
From: tempe Az
Starting Body and Paint Work on the REPU
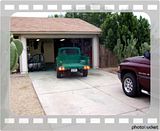
I have started doing the body and paint work on my buddy Tom's REPU (rotary engine pick up). Here's a couple of links to the project on AzRx7.com
http://azrx7.ipbhost.com/index.php?showtopic=5829&hl=
http://azrx7.ipbhost.com/index.php?showtopic=5830&hl=
http://azrx7.ipbhost.com/index.php?showtopic=5829&hl=
http://azrx7.ipbhost.com/index.php?showtopic=5830&hl=


Admitted 'rexaholic'

Joined: May 2002
Posts: 2,235
Likes: 19
From: Seymour, TN
Nice work.
I feel your pain, just now painting my REPU after 2 1/2 years of prep. Most of my rust damamge was hiding under the windshield rubber. Hey maybe you can help with my reasssembly...on the vent window frame on the outside, there are 4 holes. The lower two (bigger) are for the vent window bracket, but what are the upper (smaller) holes for?
I feel your pain, just now painting my REPU after 2 1/2 years of prep. Most of my rust damamge was hiding under the windshield rubber. Hey maybe you can help with my reasssembly...on the vent window frame on the outside, there are 4 holes. The lower two (bigger) are for the vent window bracket, but what are the upper (smaller) holes for?
Thread Starter
Old Car Preservationist
Joined: Mar 2004
Posts: 421
Likes: 0
From: tempe Az
Originally Posted by banzaitoyota
Brian,
Any specifics you can provide on the RX-2 Suspension setup?
Sorry for the thread hijach
John
Any specifics you can provide on the RX-2 Suspension setup?
Sorry for the thread hijach
John
Also, the car was built in 1986... ish by someone other than myself, so I'm ot sure on all the specifics.
Ok, the strut towers have been redrilled so that there are 3 positions. I have not measured how many degrees of negative camber the 2 non-stock positions yield. The lower controll arm has eccentric mounts too, so camber can be dialed in more that way. The front, and only sway bar has spacers between it and the frame. I think that this is to keep caster more consistant throughout the wheel's travel since the sway bar doubles as a radius arm. It may have a slight effect on how "stiff the sway bar is too. I'm not sure on that one thogh. The springs have been cut, and the shocks are revalved konis.
The rear end has no sway bar, cut springs, revalved konis and a panhard rod. The panhard may be stock on an Rx2, I don't know. The lower controll arms have been shortened by questonable means. I'm not sure why.
Originally Posted by Rx7UP
Looking good... Two question though. Is the lead harder than the bondo and can you put your finger nail in it and dent it?
John
John
 The reason that it is used instead of bondo is that it does not absorb moisture like bondo does. Bondo will absorb moisture, and hold it against the sheet metal. This serves to accelerate the corrosion process. This might be the reason for the hole getting as big as it did in the first place.
Sorry, I'm not sure how the window mounts. I'll try and take a look this weekend.
Trending Topics
Originally Posted by xrotaryguy
Uh, I think that it is probably harder than the bondo, but not by much if it is. It is probably possible to leave a finger nail mark in it if you have really hard fingernails... and really thick nail polish The reason that it is used instead of bondo is that it does not absorb moisture like bondo does. Bondo will absorb moisture, and hold it against the sheet metal. This serves to accelerate the corrosion process. This might be the reason for the hole getting as big as it did in the first place.
The reason that it is used instead of bondo is that it does not absorb moisture like bondo does. Bondo will absorb moisture, and hold it against the sheet metal. This serves to accelerate the corrosion process. This might be the reason for the hole getting as big as it did in the first place.I agree. My repu had sever small holes like that as well and I did not want to use bondo to fill them either. I ended up welding all my holes closed then was able to grid them down. This way if it sells or not it will look good longer than bondo would ever allow it.
Looks good, and I feel your pain. Mine is done with welding and is getting some touch up paint this week.
Chad
Thread Starter
Old Car Preservationist
Joined: Mar 2004
Posts: 421
Likes: 0
From: tempe Az
Cool, welding works too. The only trouble you run into with a welder is that steel melts an a pretty high temp compared to lead, or even brass. The excess heat tends to warp the metal that you're trying to get straight. Only the big boys really get stuff that straight though. When we knuckel draggers are working on our odd little rotary cars, we're generally not so concerned about making the car quite that straight. In fact, most of us will just put bondo on the hole 
Any way, It's done as of 6 pm last night! Ok, well, we still have to shoot the tail gate and take care of a couple of mistakes that I made, but for the most part, it's done Here's a vid of it hittin' the street again.
Tom, the owner, has more pics too.
Any way, It's done as of 6 pm last night! Ok, well, we still have to shoot the tail gate and take care of a couple of mistakes that I made, but for the most part, it's done Here's a vid of it hittin' the street again.
Tom, the owner, has more pics too.
Originally Posted by xrotaryguy
Cool, welding works too. The only trouble you run into with a welder is that steel melts an a pretty high temp compared to lead, or even brass. The excess heat tends to warp the metal that you're trying to get straight. Only the big boys really get stuff that straight though. When we knuckel draggers are working on our odd little rotary cars, we're generally not so concerned about making the car quite that straight. In fact, most of us will just put bondo on the hole
That is why you just tack weld around the hole untill you finally fill it. If it seems to be getting hot, take a break and let cool. After you make a circle around it and finally fill it then just hit it with a grinder. Also those older repu tend to have a thick bit of metal. After welding you do have to apply a small bit of spot putty and then sand.
Post more pics and congrats on spending the time to do it right.
Here is mine after welding the holes shut.
Last edited by Fire85GSLSE; Oct 23, 2006 at 08:35 PM.
Got some pics from start to finish
http://bud.homeunix.net:8000/imgs/REPU_paint/index.html
Well, not quite finish but getting close. Just a bit more trim and the tailgate to go.
http://bud.homeunix.net:8000/imgs/REPU_paint/index.html
Well, not quite finish but getting close. Just a bit more trim and the tailgate to go.
Admitted 'rexaholic'
Joined: May 2002
Posts: 2,235
Likes: 19
From: Seymour, TN
Nice, nice work!
You're lucky to have a relatively straight tailgate. My bed/tailgate was so beat up I'm convinced the previous owners hauled bowling ***** for a living.
Question; did you keep the stock fuse block in the engine compartment?
You're lucky to have a relatively straight tailgate. My bed/tailgate was so beat up I'm convinced the previous owners hauled bowling ***** for a living.
Question; did you keep the stock fuse block in the engine compartment?
Originally Posted by xrotaryguy
I have started doing the body and paint work on my buddy Tom's REPU (rotary engine pick up). Here's a couple of links to the project on AzRx7.com
http://azrx7.ipbhost.com/index.php?showtopic=5829&hl=
http://azrx7.ipbhost.com/index.php?showtopic=5830&hl=
http://azrx7.ipbhost.com/index.php?showtopic=5829&hl=
http://azrx7.ipbhost.com/index.php?showtopic=5830&hl=
Thread Starter
Old Car Preservationist
Joined: Mar 2004
Posts: 421
Likes: 0
From: tempe Az
Originally Posted by Fire85GSLSE
That is why you just tack weld around the hole untill you finally fill it. If it seems to be getting hot, take a break and let cool. After you make a circle around it and finally fill it then just hit it with a grinder. Also those older repu tend to have a thick bit of metal. After welding you do have to apply a small bit of spot putty and then sand.
Post more pics and congrats on spending the time to do it right.
Here is mine after welding the holes shut.
Post more pics and congrats on spending the time to do it right.
Here is mine after welding the holes shut.
Originally Posted by eatmyclutch
Your sig, is it drifting or autoX?


Thread
Thread Starter
Forum
Replies
Last Post
trickster
2nd Generation Specific (1986-1992)
25
Jul 1, 2023 04:40 PM