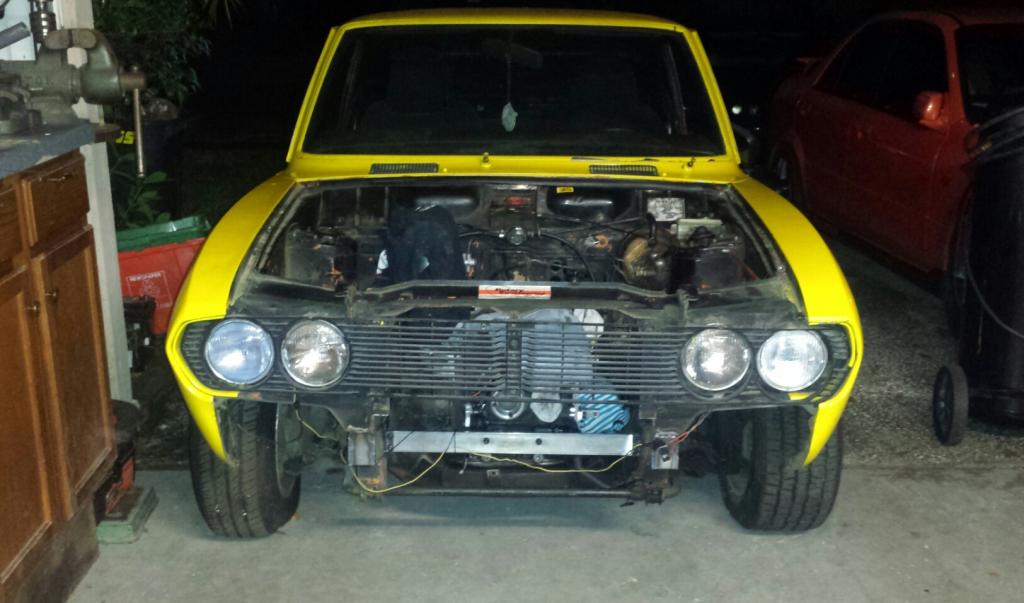
My new 73 Rx2!


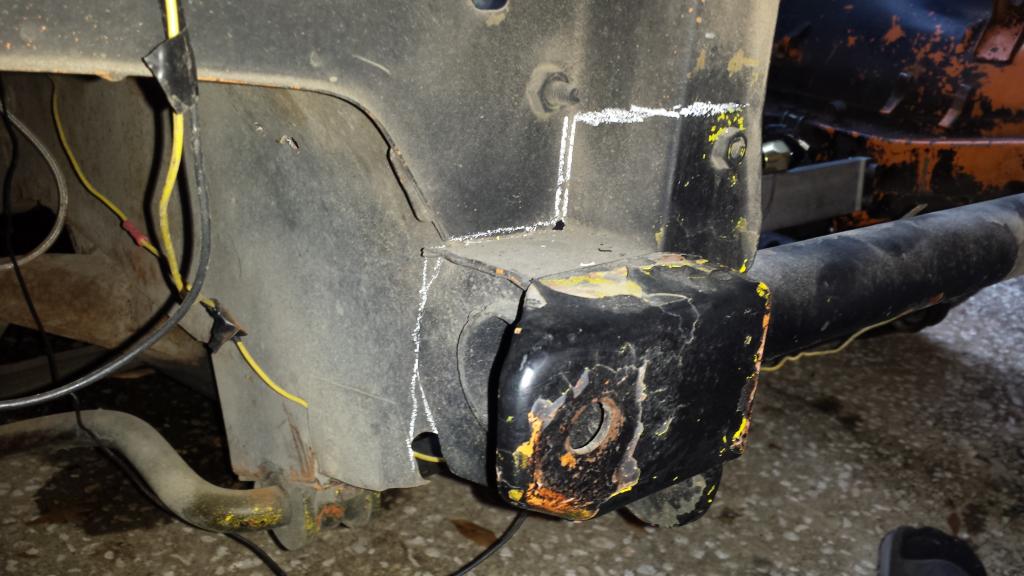
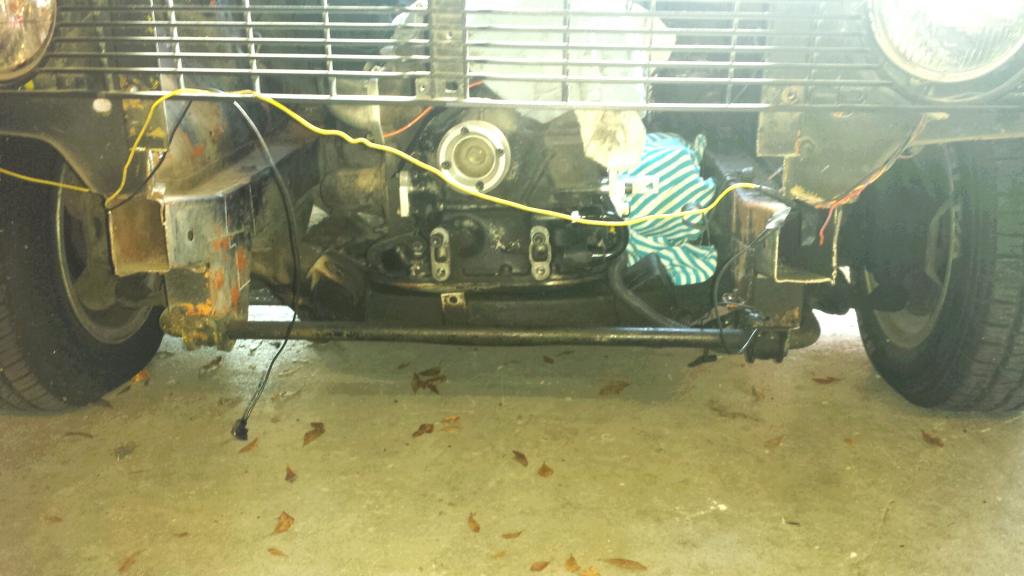
Here's something I have been wanting to do since I got the car. Cut the ugly bumper brace/mount off that sticks out past the front facia. It serves me no purpose since I will never use the stock front bumper again on this car. I then used some sheet metal to weld up the open areas. Nice bit of weight gone too hanging out on the front end of the car.
Before:
Cut lines:
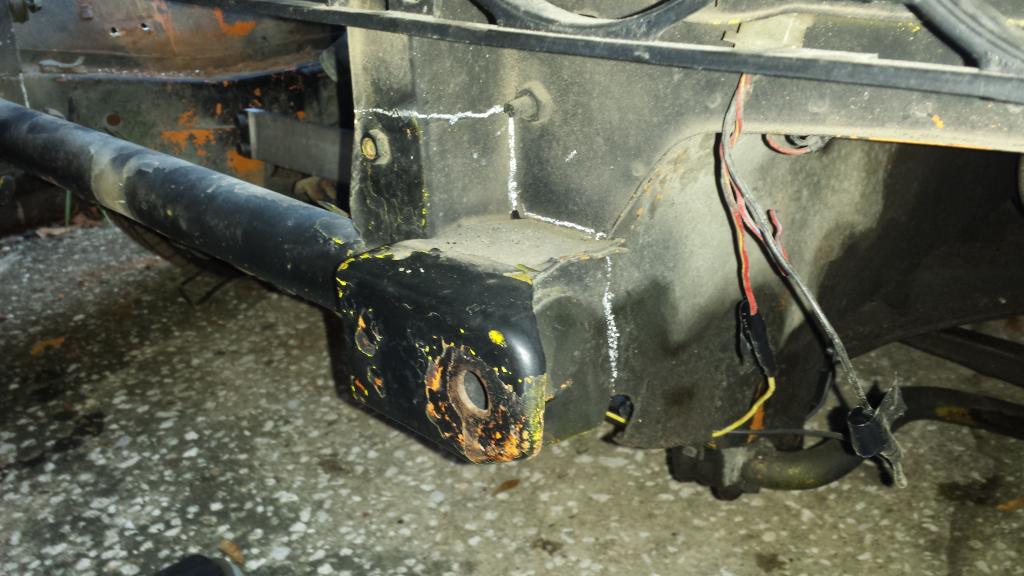
Cut out:
This is the only pic I have of it welded up. You cant really see anything, but you get the idea.
Before:

Cut lines:


Cut out:

This is the only pic I have of it welded up. You cant really see anything, but you get the idea.

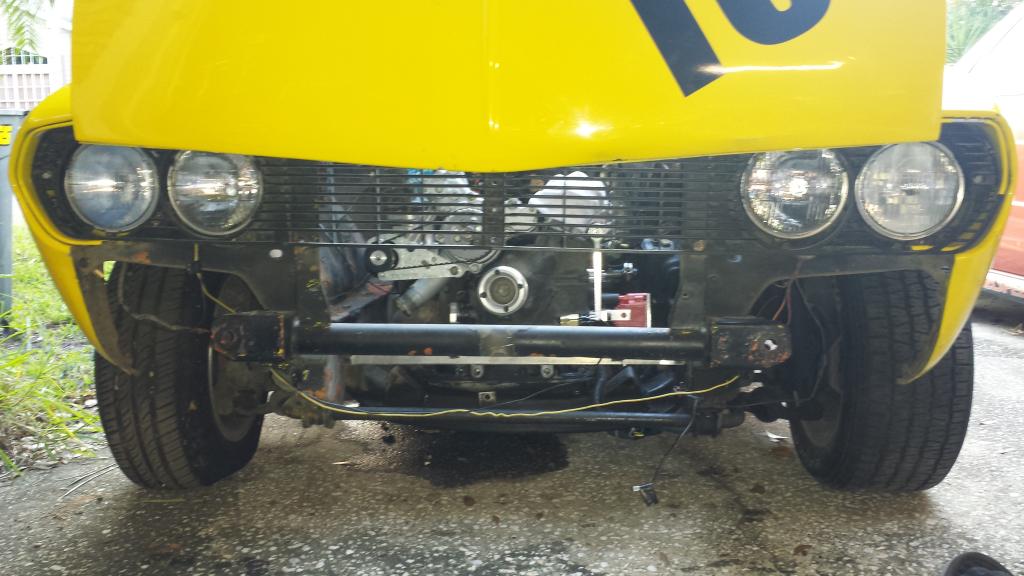
Since all of this is out, it gave me the opportunity to do another long awaited peoject. Get rid of the front motor mount and make my own. The flat bar is 7075-T6 aluminum. The mounts on the end are 4140 chromoly and are welded to the frame. This is step one in getting rid of the factory subframe. I also centered the engine dead nuts in the engine bay and lowered it about an inch.
The little area above the mount that holds the sway bar is slightly wider than the frame. I did put sheet metal there to take up the space to keep the weld strong. I just dont have a picture yet. But it is all wleded in now.

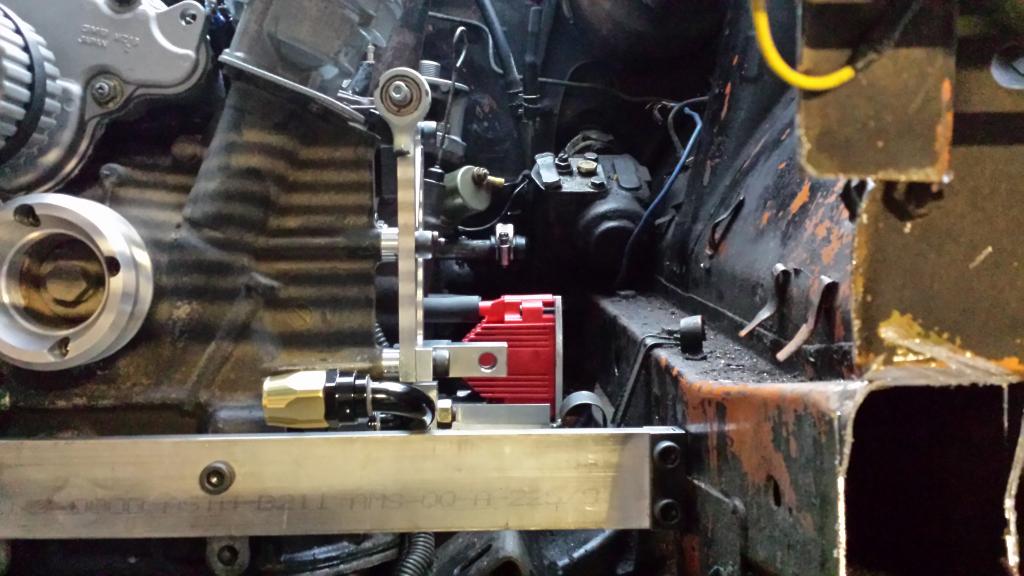
You can also see A side view of the coil on plug set up here. I thought it looked cool.
The little area above the mount that holds the sway bar is slightly wider than the frame. I did put sheet metal there to take up the space to keep the weld strong. I just dont have a picture yet. But it is all wleded in now.

You can also see A side view of the coil on plug set up here. I thought it looked cool.

I decided i no longer liked the aluminum hard pipe set up for the radiator hoses. They never fit quite right and I felt the silicone couplers and clamps looked cheap and unoriginal. So I did some cutting, welding, and a small amount of machining as usual. I feel this AN set up looks much better with less chance for a leak. It also is much easier to take in and out. Plus it's keeping with the theme of black and gold AN fittings.
Oil cooler and radiator before I welded on AN fittings.

AN fittings welded on and ready to go:
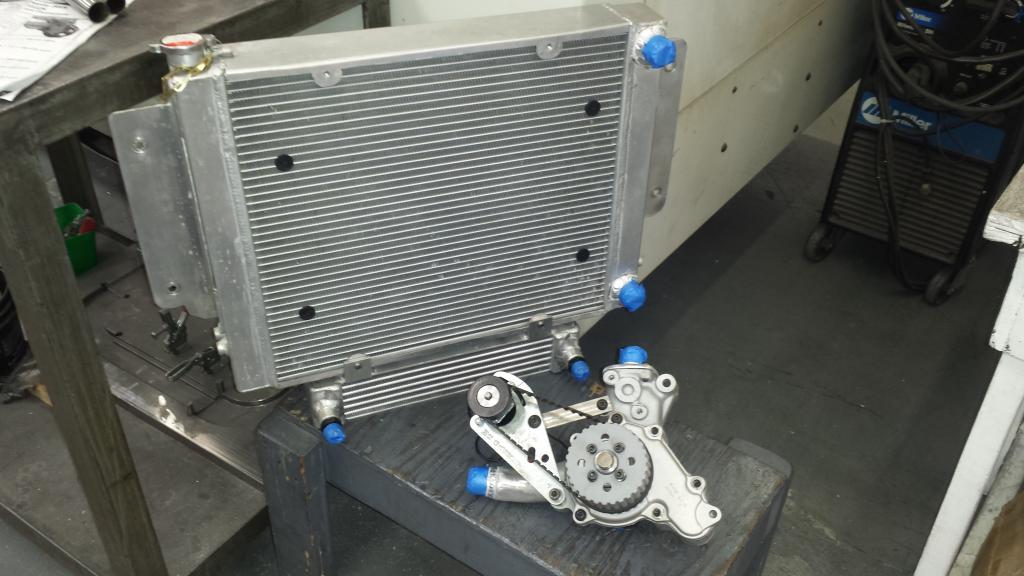
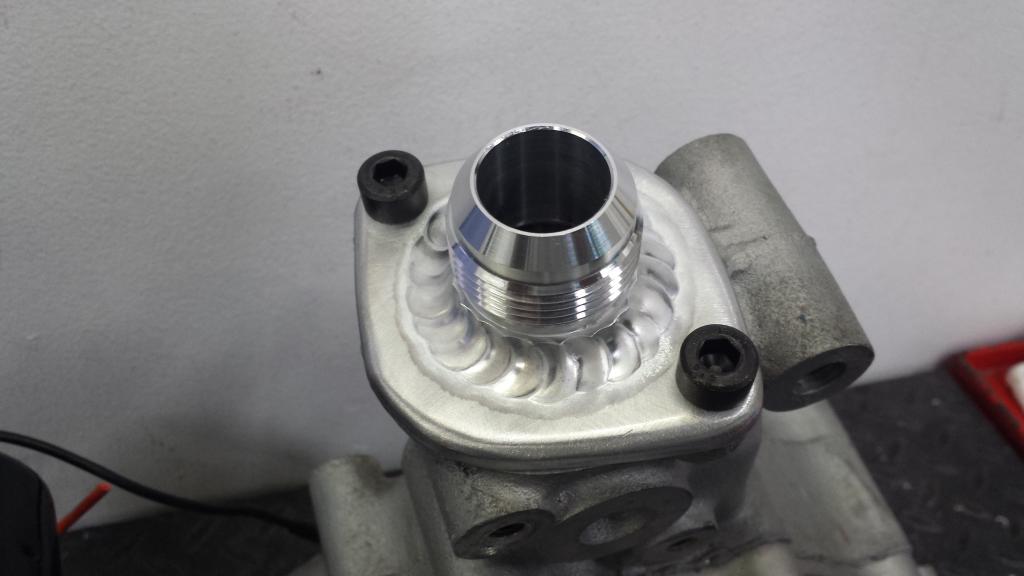
Close up of the flange I made for the water pump:
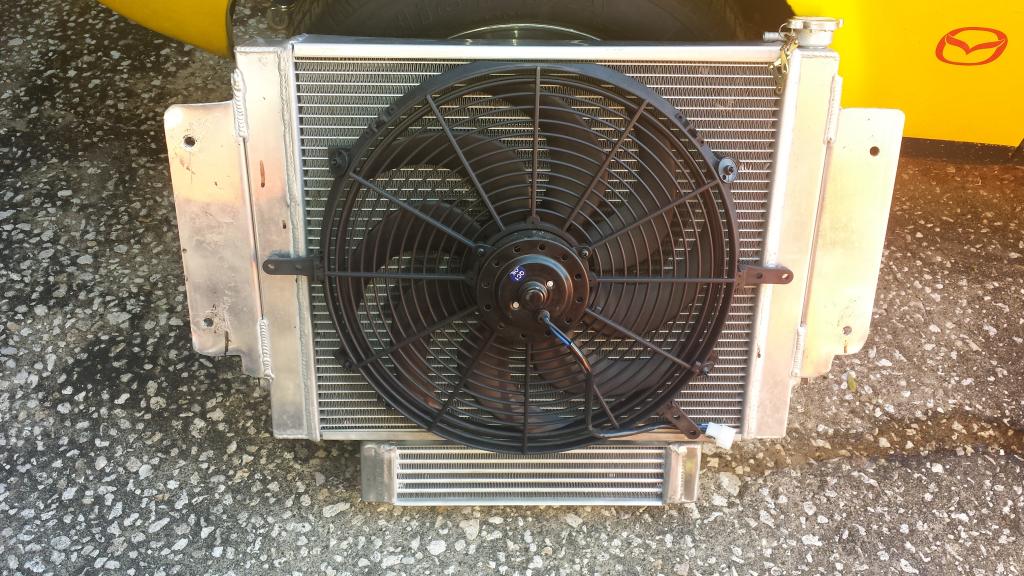
Fan mounted as a pusher to keep it hidden.
Oil cooler and radiator before I welded on AN fittings.

AN fittings welded on and ready to go:

Close up of the flange I made for the water pump:

Fan mounted as a pusher to keep it hidden.

I finally got around to removing the oil line that routed the rear iron to the front cover. I mounted the oil cooler long ago but never ran the lines because the factory motor mount location on the subframe was in the way of where I wanted to run my oil cooler line to the rear iron. Basically, this was the reason I need to redesign my entire front end, suspension, motor mount, ect. ect. Does that make me obsessed?
You can see here that the strait AN fitting would of hit the original motor mount if it was still there. It will still hit the subframe slightly it A line was ran there. I sneaks right under my new motor mount.
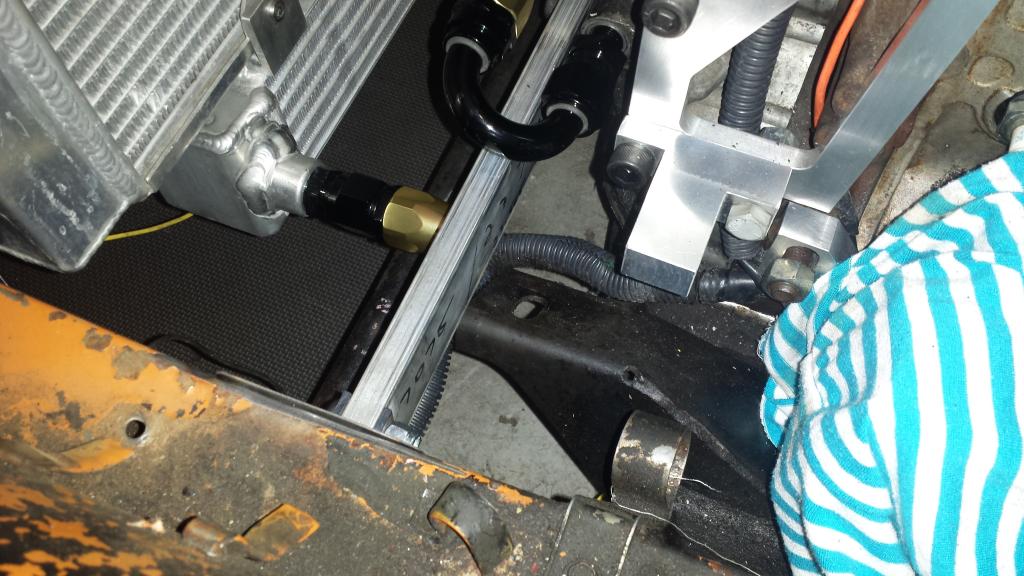
You can see here that the strait AN fitting would of hit the original motor mount if it was still there. It will still hit the subframe slightly it A line was ran there. I sneaks right under my new motor mount.


I am also making it official. I WILL be driving this car to DGRR 2015!
That's a 600-700 mile drive for me. With some of the things I am working on and some things I have planned, it will be close. But I know I can have this car ready to go.
Anyone else from the Florida area planning to make the drive?
That's a 600-700 mile drive for me. With some of the things I am working on and some things I have planned, it will be close. But I know I can have this car ready to go.
Anyone else from the Florida area planning to make the drive?
Not likely.. I'm cutting it damn close to be ready for DGRR in April.
The whole front end suspension and steering are coming out and being redesigned. Which means I also have to do the rear.
The whole front end suspension and steering are coming out and being redesigned. Which means I also have to do the rear.
So I was googling Rx2 pictures because I was bored and found this.
My 1973 Mazda RX2 - ClubRoadster.net
Some history and a little info on my car before it was mine. Cool!
My 1973 Mazda RX2 - ClubRoadster.net
Some history and a little info on my car before it was mine. Cool!
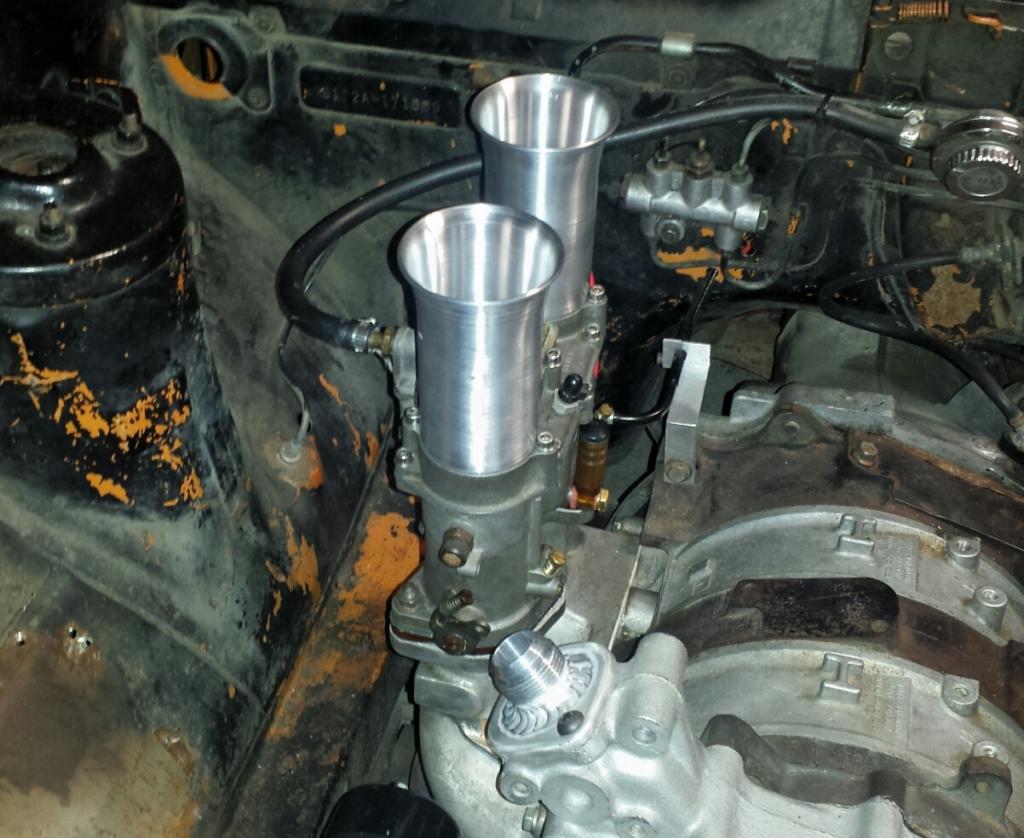
I decided to make my own velocity stacks for now. The car will eventually become turbo as I do with everything. So these are being made in a way that they will become part of the plenum later on down the road.
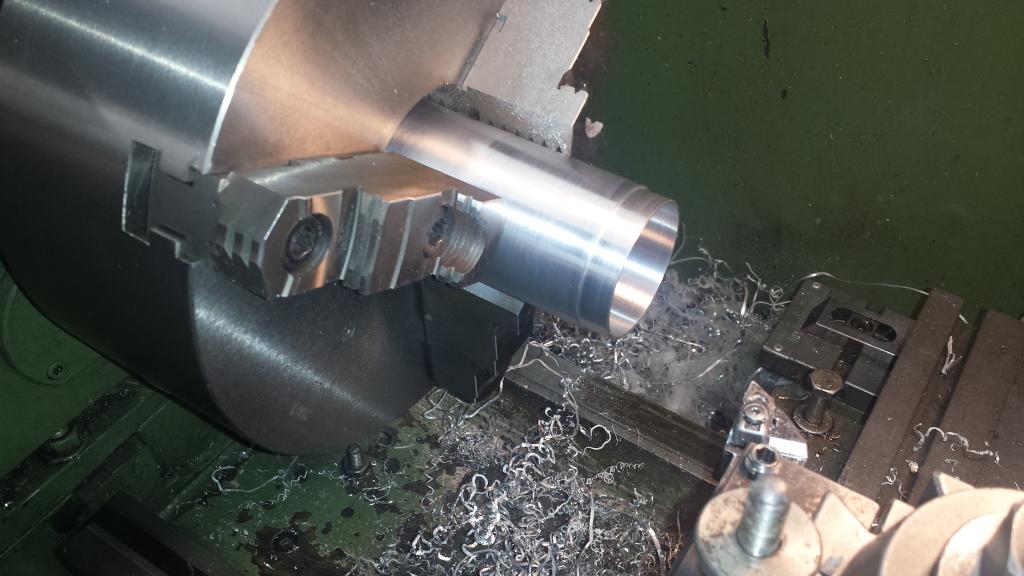
First I turned down the body and made a step downed portion to fit into the Weber where it had been machined by Racing Beat. Then cut the OD and length. I made them 4.500" taller than the Webers with the stepped down portion being .500".
Then I made a press die to create the air horn shape. And pressed them to shape. One got a little slanted in the press and crushed the stepped down area so I had to make another.
First I turned down the body and made a step downed portion to fit into the Weber where it had been machined by Racing Beat. Then cut the OD and length. I made them 4.500" taller than the Webers with the stepped down portion being .500".

Then I made a press die to create the air horn shape. And pressed them to shape. One got a little slanted in the press and crushed the stepped down area so I had to make another.


Joined: Sep 2004
Posts: 3,258
Likes: 9
From: South Florida
great progress....love the idea of the AN fitting right on top of the thermostat housing....AWESOME! cant wait to see more pics. what are you going to do about the lower oil cooler line? i ran into the same problem and lowered my oil cooler....not the best solution but it worked for me.
great progress....love the idea of the AN fitting right on top of the thermostat housing....AWESOME! cant wait to see more pics. what are you going to do about the lower oil cooler line? i ran into the same problem and lowered my oil cooler....not the best solution but it worked for me.
I'll post pics of this later.
Joined: Sep 2004
Posts: 3,258
Likes: 9
From: South Florida
Thanks. For the oil cooler lines, I milled an area for clearance on the motor mount to let my 180� an fitting on the front cover be parallel to the ground. The rear iron line exits the motor with a 90� fitting then goes almost perfectly strait just below the coil on plug set up and sneaks under the motor mount. Worked out pretty good.
I'll post pics of this later.
I'll post pics of this later.
And one final shot of the stacks installed in there finished state. I took a scotch brite pad to the inside and radius the edge of the bell mouth on the lathe with a file. They look much more professional with those two minor touches.