
My new 73 Rx2!

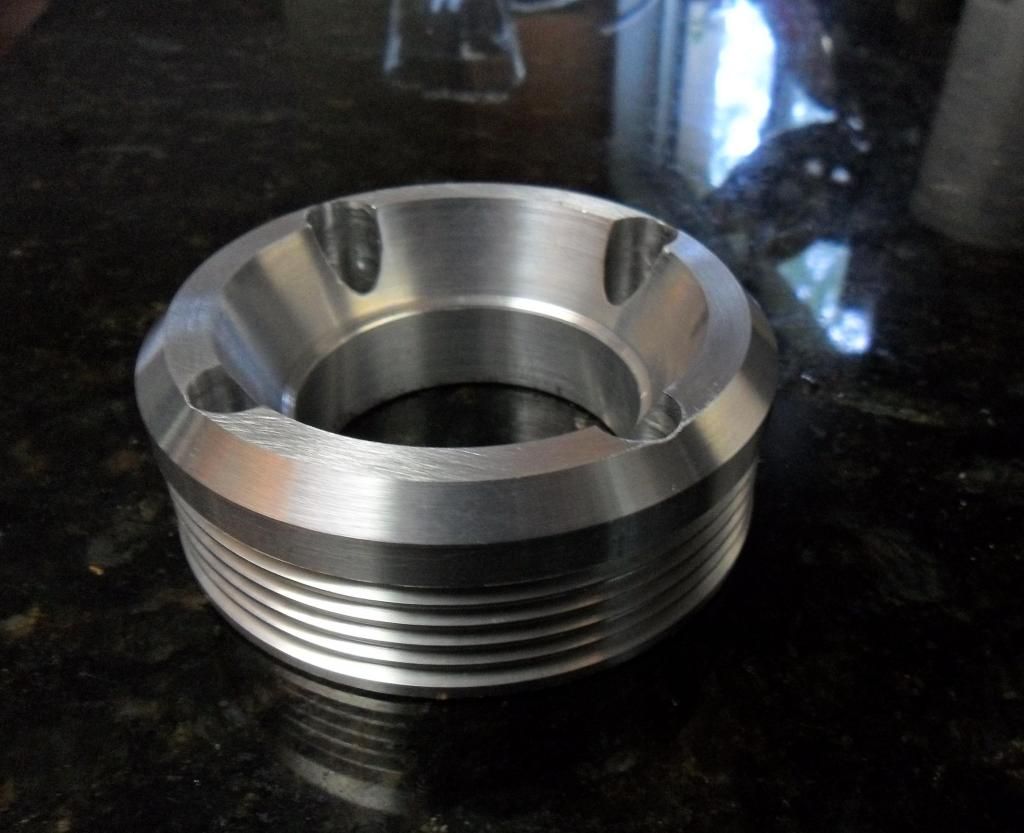
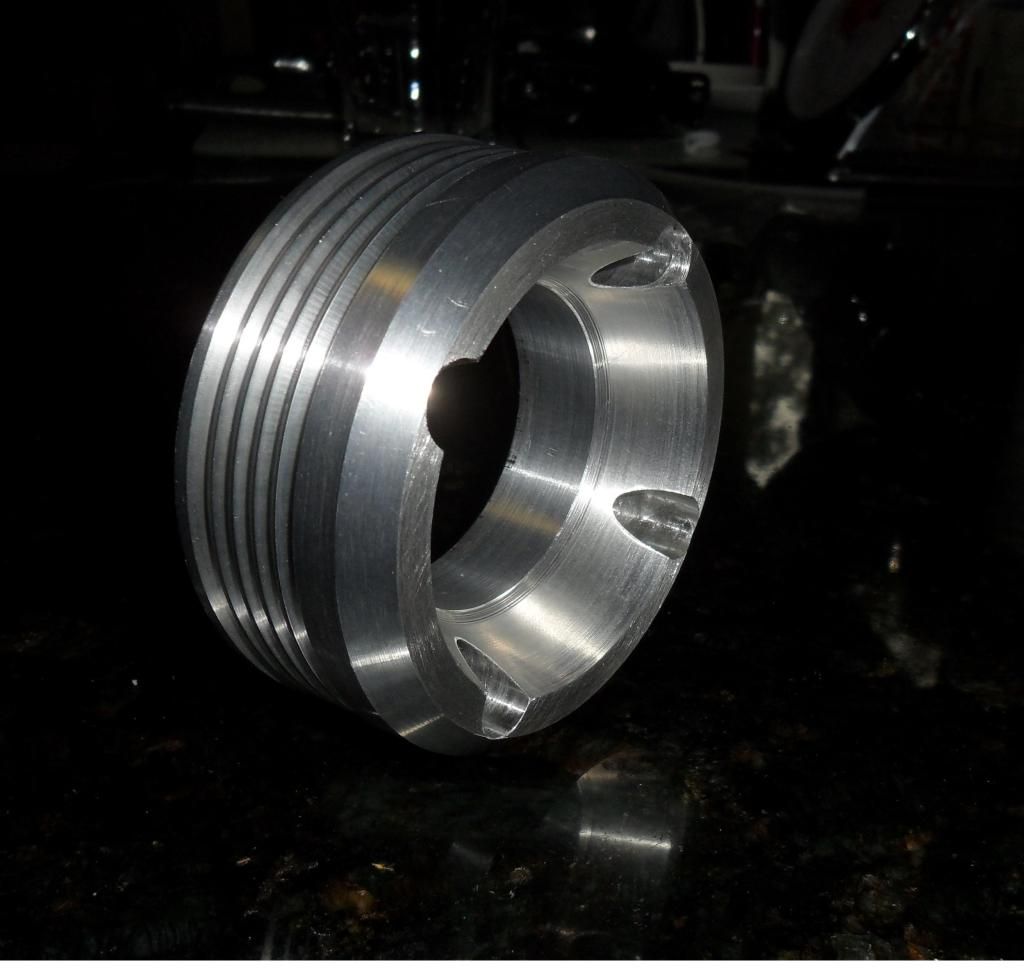
And finally, the hold up. Since I broke my S5 alternator, I decided to use the FD alternator. Not wanting to use a Gilmer style belt because of the power loss it creates due to the friction. I decided to use the FD style 5 rib belt. But I didnt want to ruin my FD Greddy pulley, so that left me i need to make my own pulley.
And here it is, I only had a few minutes here and there to make this on my breaks at work. I could only get a few cuts in here and there. And the result is this. The next onw, I will draw out and make a solid model before cutting any material. But this pulley will do for now.
And here it is, I only had a few minutes here and there to make this on my breaks at work. I could only get a few cuts in here and there. And the result is this. The next onw, I will draw out and make a solid model before cutting any material. But this pulley will do for now.


Heres another small update and a few steaps closer to having here back on the road.
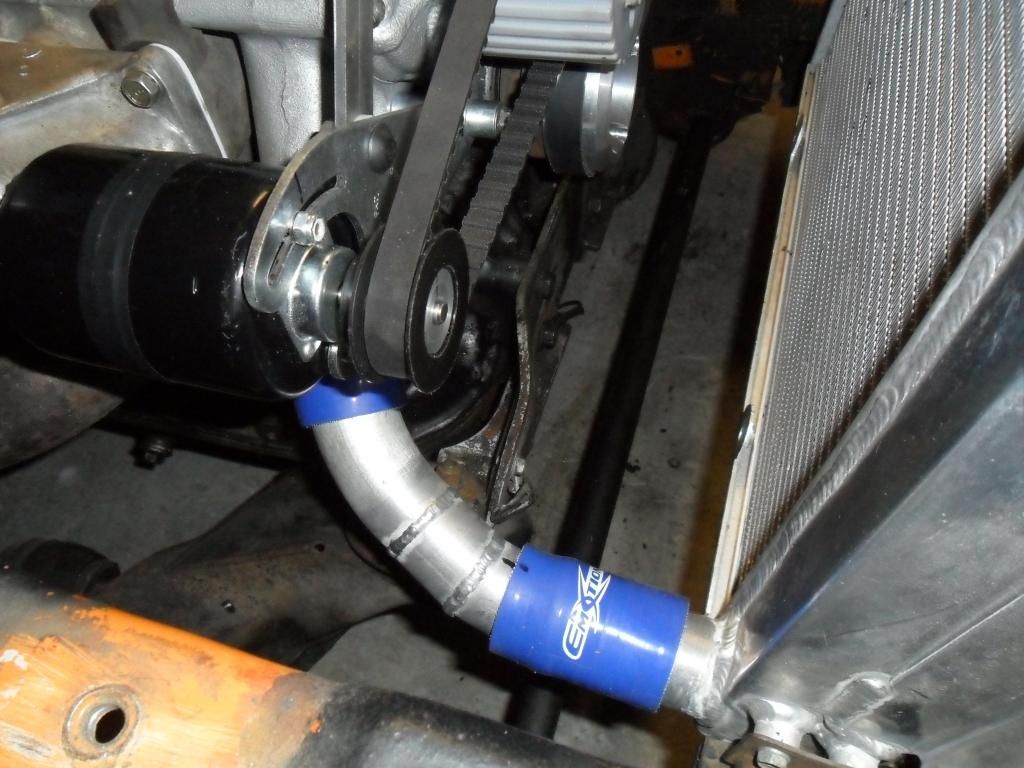
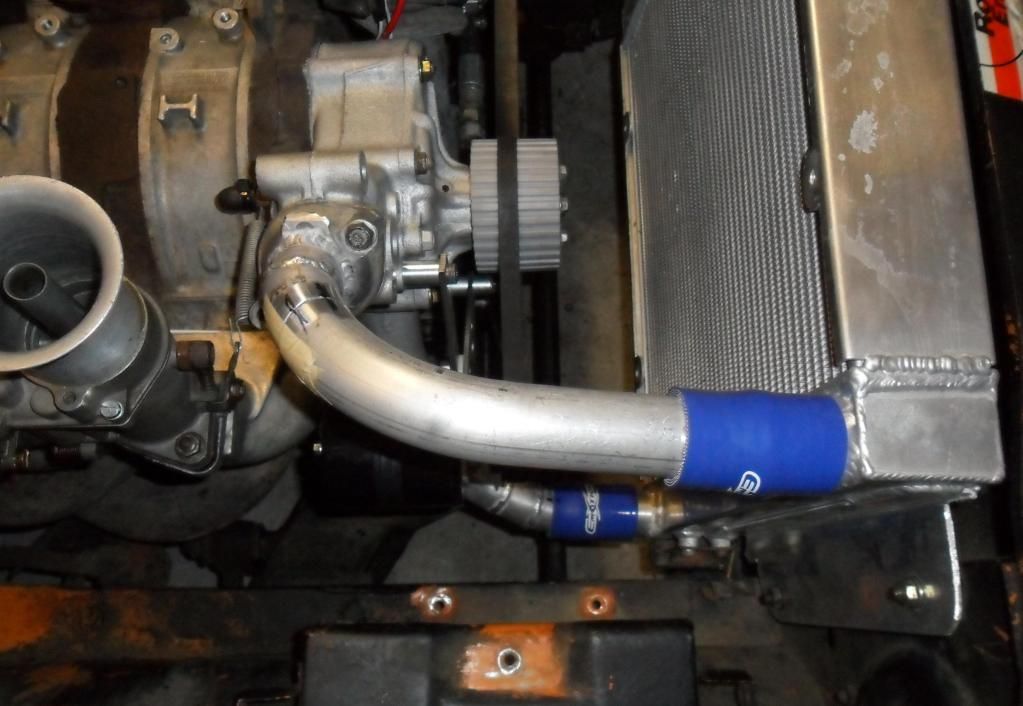
Im almost finished with the aluminum radiator hoses now. This is usually just an afternoon job but i havnt gotten around to wiring to 220v power to my garage to run my own welders. So I have to cut and fit at home, then take them to work to tack weld them. Then take them back home to test fit. Then make adjustments as needed and then take back to work for final welding. All while trying to find the extra time at work to do this... lol. What a mess.

Im almost finished with the aluminum radiator hoses now. This is usually just an afternoon job but i havnt gotten around to wiring to 220v power to my garage to run my own welders. So I have to cut and fit at home, then take them to work to tack weld them. Then take them back home to test fit. Then make adjustments as needed and then take back to work for final welding. All while trying to find the extra time at work to do this... lol. What a mess.
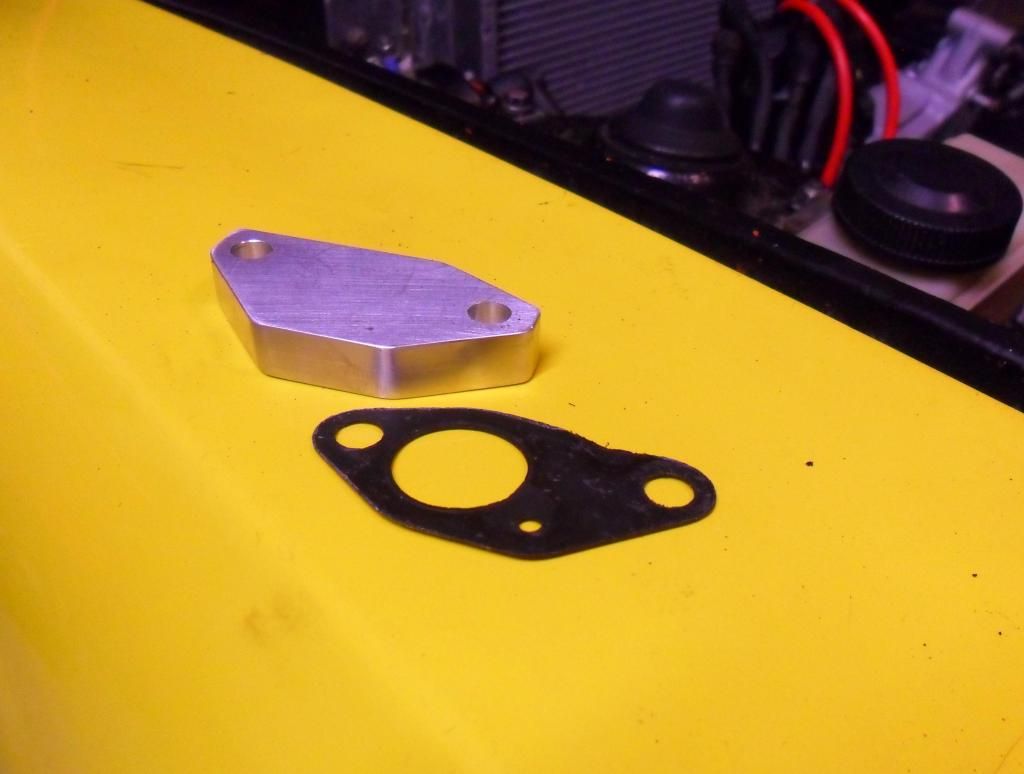
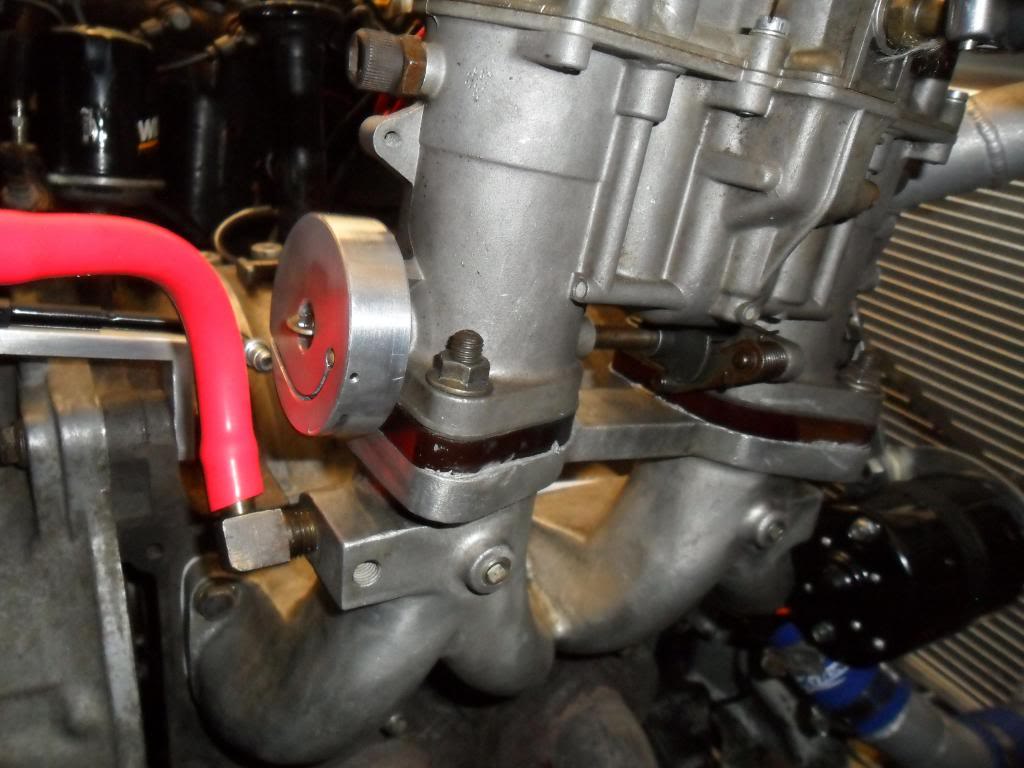
Here is the OMP block off plate I made from .250" aluminum. I know that every car I get I eventually go turbo. So I made it with thick enought to add an AN fitting in the future for the oil coming out of the turbo.
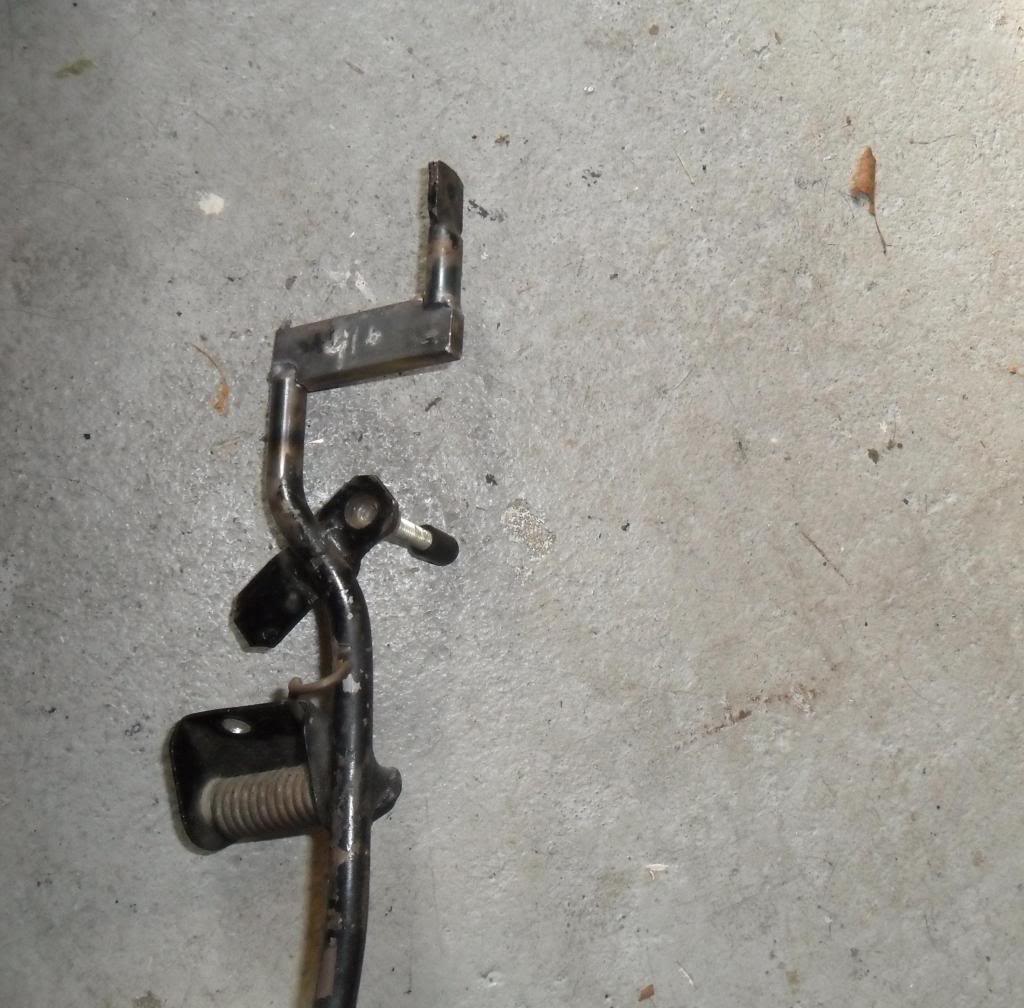
Heres an annoying part... lol. I was trying to get my throttle cable onto the webers and the end piece came off. So I had to make a new one. The bike tire cap is next to it for size comparison. Drilling and tapping holes that small is never fun when your in a rush. And below that is a shot of my Throttle cable bracket. I'm going to make a "flashier" one when I get the time. I just want to get the car on the road! so this is what I will use for now.
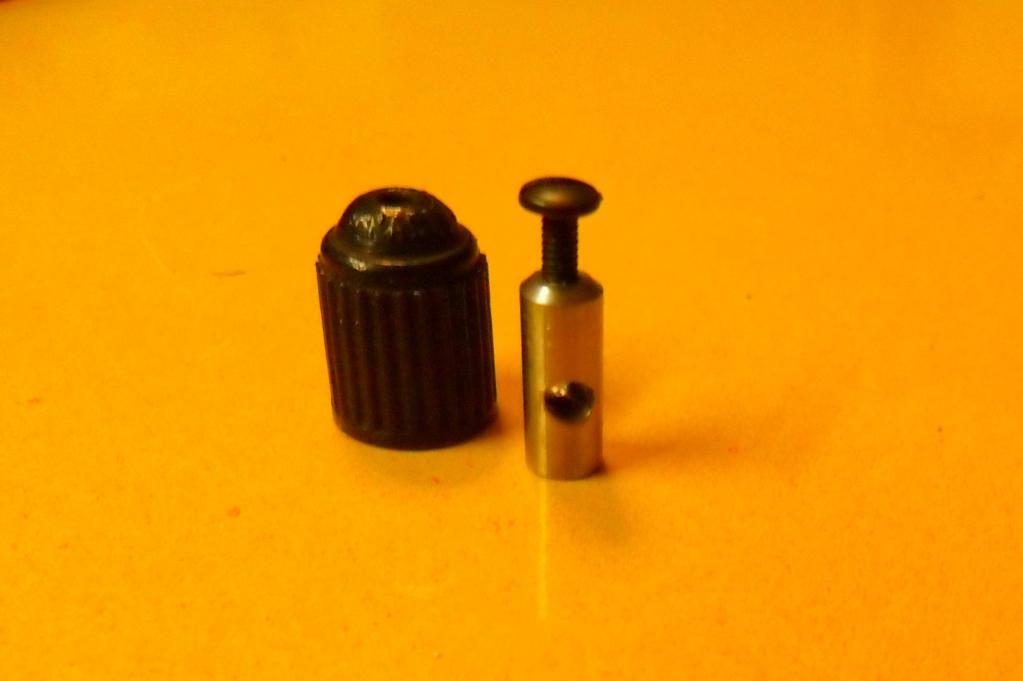
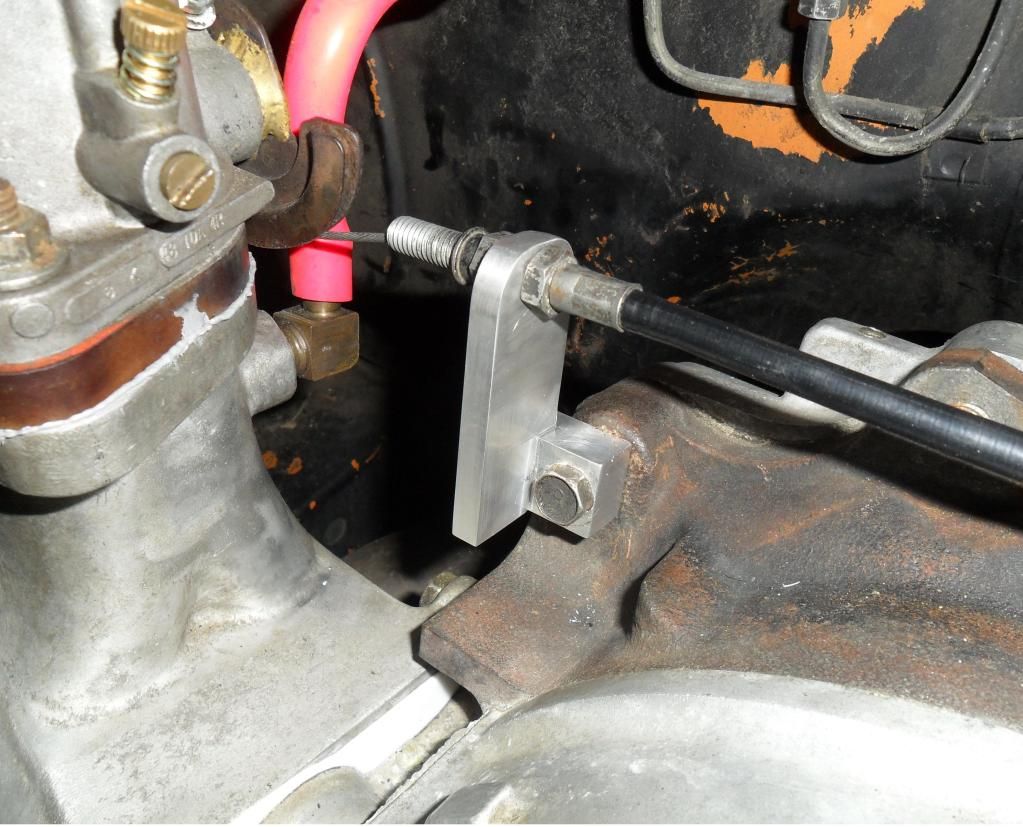
Heres an annoying part... lol. I was trying to get my throttle cable onto the webers and the end piece came off. So I had to make a new one. The bike tire cap is next to it for size comparison. Drilling and tapping holes that small is never fun when your in a rush. And below that is a shot of my Throttle cable bracket. I'm going to make a "flashier" one when I get the time. I just want to get the car on the road! so this is what I will use for now.
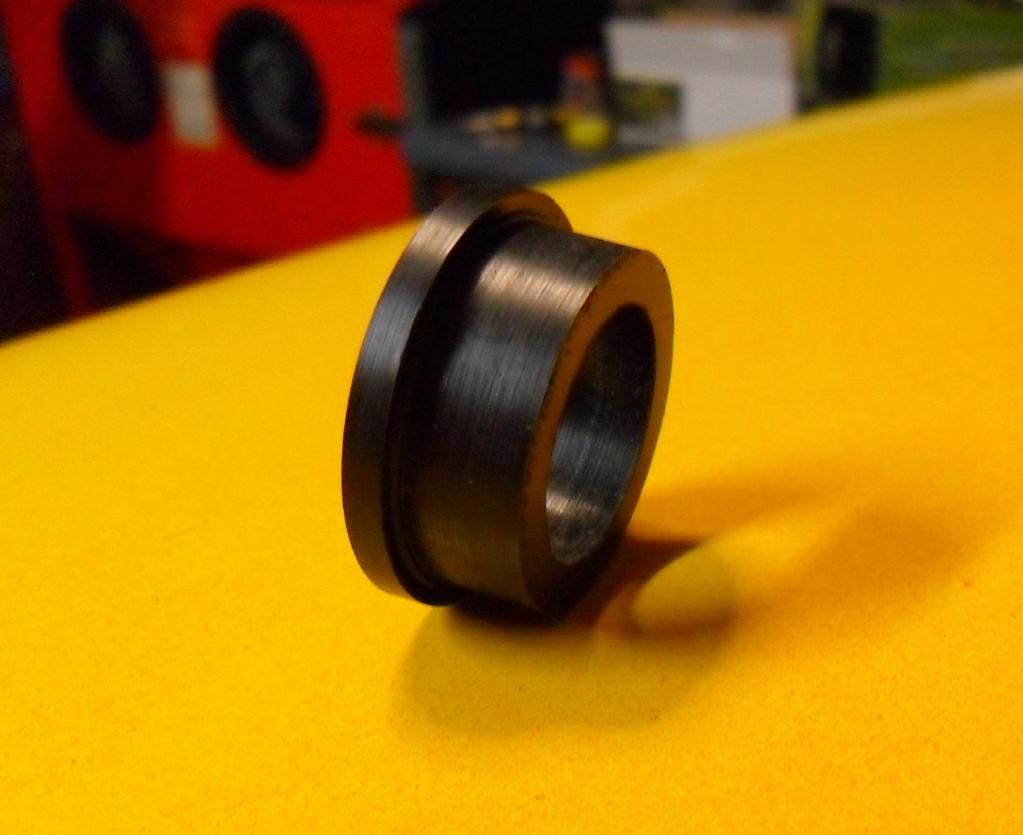
So when I decided to follow through with the whole dewire thing to the interior eventually it would come to removing all the doo-hickies on the steering column itself. What I didnt know was that stuff also kept the steering column centered in this tube. So I made a bushing from delrin to eleviate this problem.
With no bushing and everything removed:

Bushing:
Bushing installed:
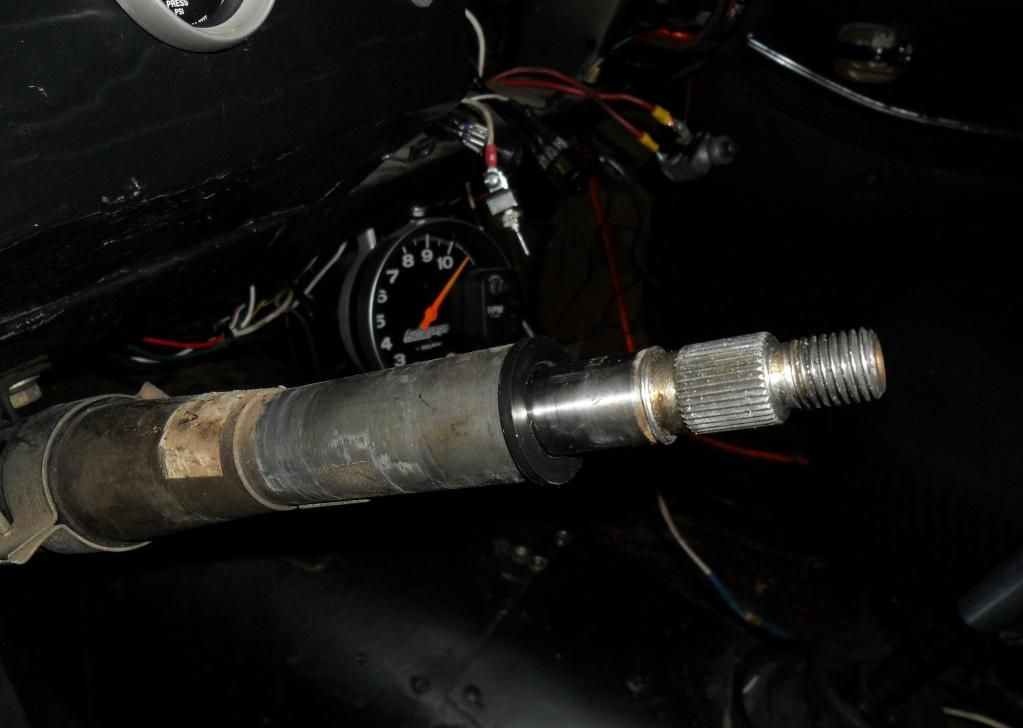
With no bushing and everything removed:
Bushing:
Bushing installed:
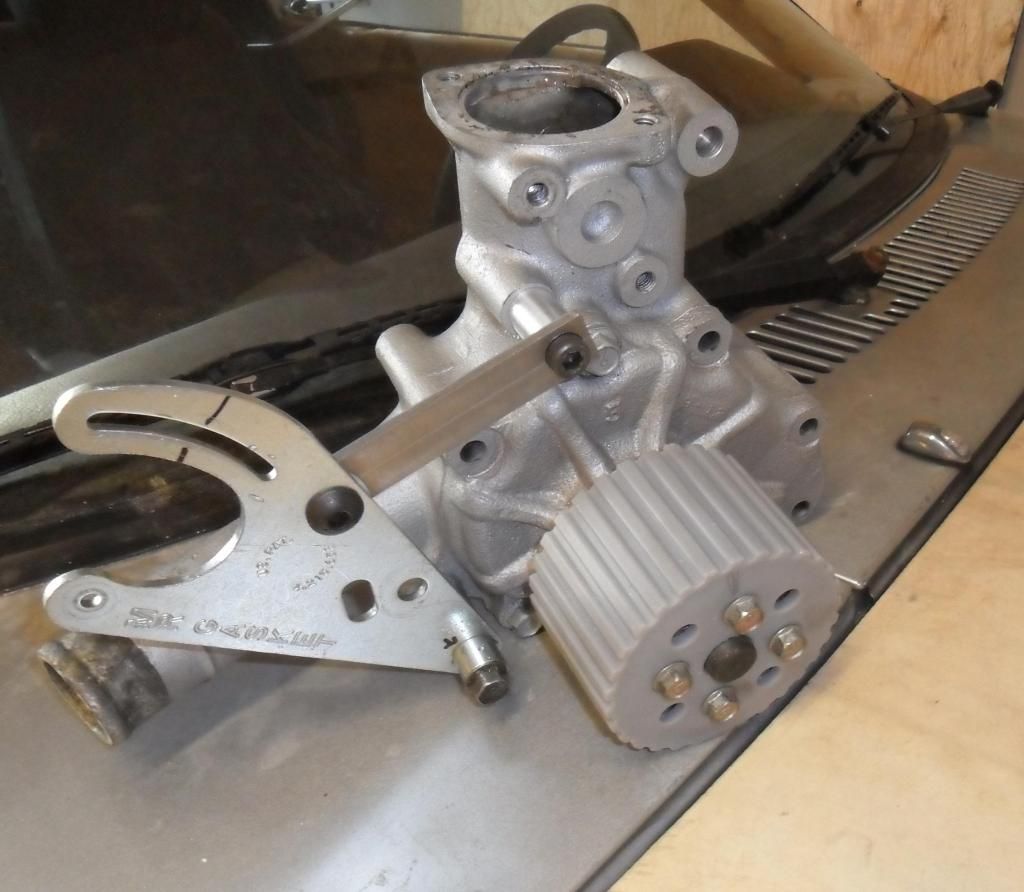
This is also "for the time being" set up. Here is how I am mounting the electric motor to drive the water pump. I added that piece of steel to make it a little stiffer. It is good for now. But I eventually want to make something a little nicer from aluminum.
And 2 more shots of the almost completed rewire of the interior. There is almost nothing left. I wish I had kept the HUGE pile of wires I removed to scrap them. That was some good quality old school copper wire in there. This shot was taken after removing about 30% of the wires. I have sinced removed another 80% of the wires in the photo. With power nothing, no radio, AC, ect. You can run a car on barely any wires at all...

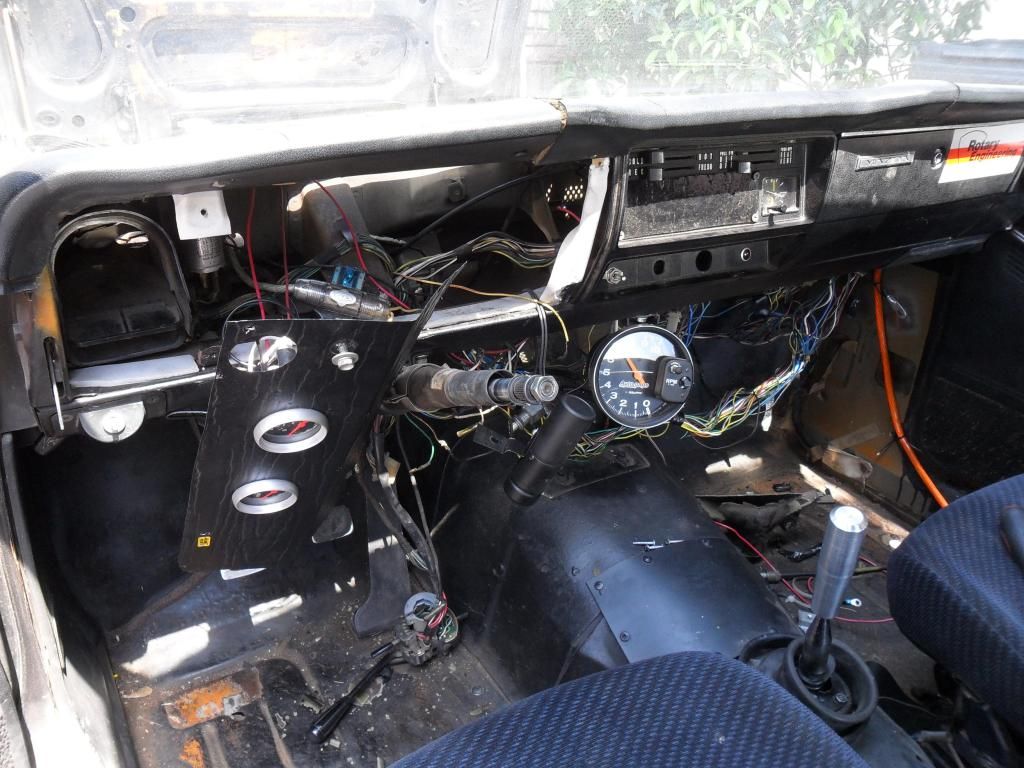
And 2 more shots of the almost completed rewire of the interior. There is almost nothing left. I wish I had kept the HUGE pile of wires I removed to scrap them. That was some good quality old school copper wire in there. This shot was taken after removing about 30% of the wires. I have sinced removed another 80% of the wires in the photo. With power nothing, no radio, AC, ect. You can run a car on barely any wires at all...
Heres an annoying part... lol. I was trying to get my throttle cable onto the webers and the end piece came off. So I had to make a new one. The bike tire cap is next to it for size comparison. Drilling and tapping holes that small is never fun when your in a rush. And below that is a shot of my Throttle cable bracket. I'm going to make a "flashier" one when I get the time. I just want to get the car on the road! so this is what I will use for now.
[
check it out.
Barrel Nut, Carburetor 311-129-777 EMPI VW | eBay
The goal of this car is to make eveything myself. With my last build I converted an FC to RHD and fabricated/modified everything I could. But I want to take this one to a whole new level, while keeping it old school though...

Just been working on a few throttle cable set ups. Should be done soon and ill post some pics up.
RX2 Update Finally!!!!!!!!!!
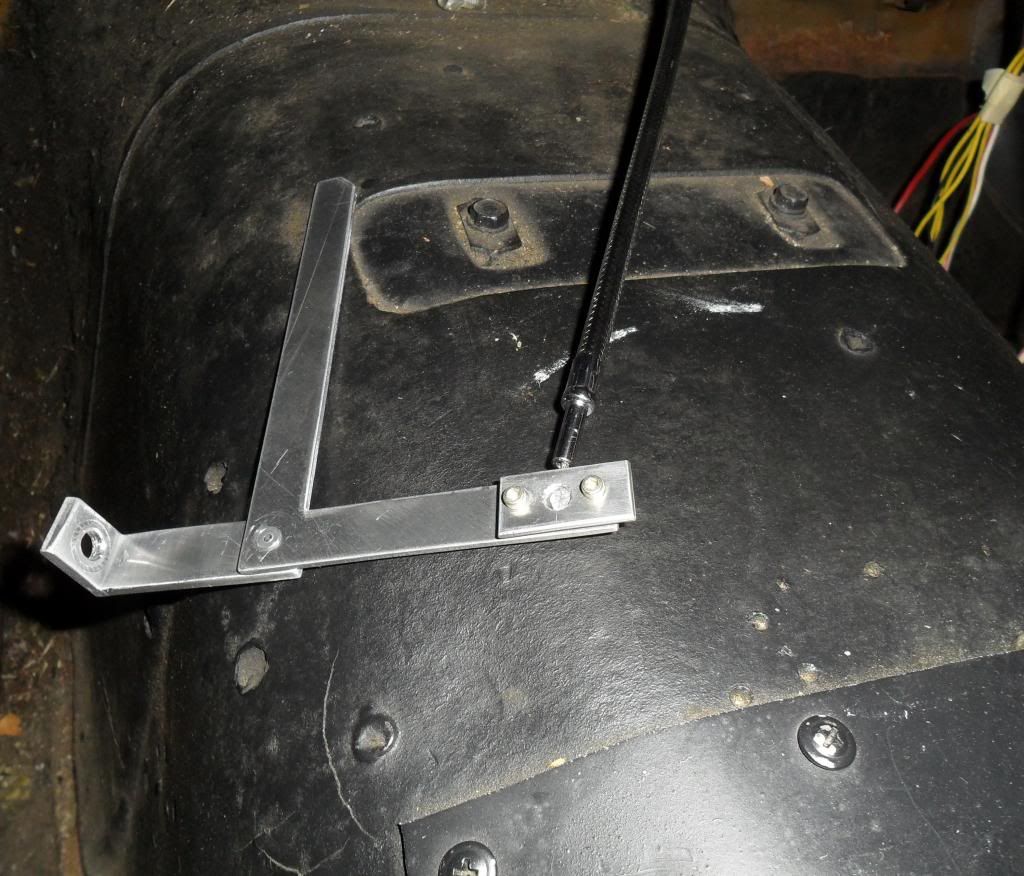
So here is Version 2 part 1 of my throttle cable set-up. This is my prototype set up and it will be beefed up now that I know it works. I wanted to hide the throttle cable as much as possible, keeping with my theme that less is more. So I had to turn the front to back pull of the cable into a side push/pull to run it behind the dash. I did this by creating a bell crank of sorts. This whole deal was a pain in the ***. When I did this, I did not have my own mill. I did this by taking measurements underneath the cramped dash and making a piece at work then trying it at home. This went on for waayyyyy longer than it needed to. but hey, it now works great.
I had a custom lenth cable made with a black carbon weave and a hard line 90* turn at one end. With the little bit that will show, I still wanted it to look cool.
The 1st picture is of the factory gas pedal I had to extend over towards the passenger side to ba able to actuate the bell crank at the right amount of movement.
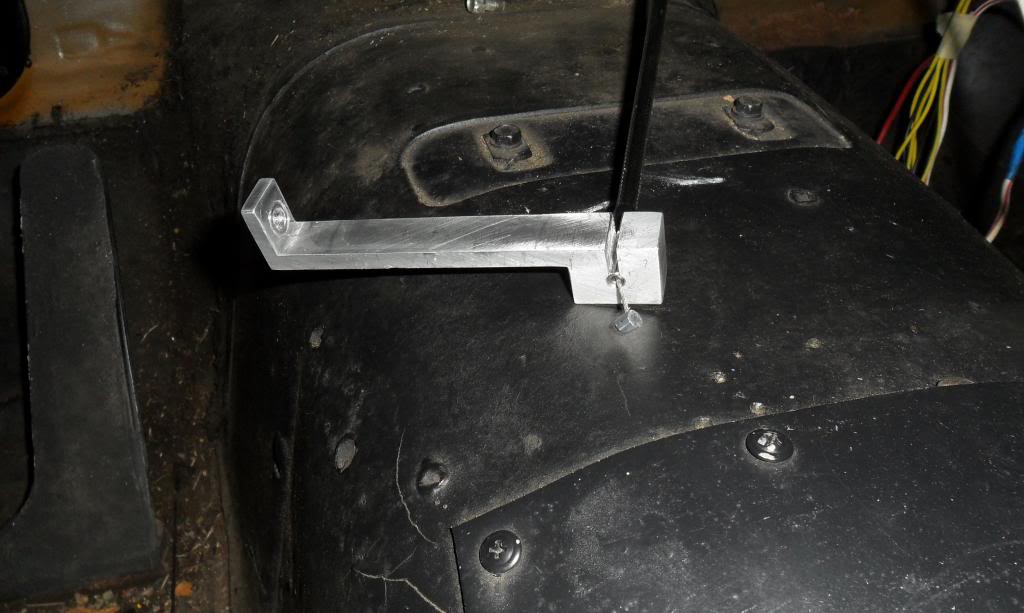
This picture is of the actual bell crank lever set up. Remember this is just a prototype piece. This is far to weak to race. I'm sure its fine for daily driving though. I will drive with this a few times to make sure all is well, that is if the car ever gets running....

This picture is of the guide/stop so the actual cable inside moves and the casing doesnt.
Here is a picture of the system sitting as normal followed by a picture of the gas pedal depressed
showing it moving the arm to create the pulling moting from the side.


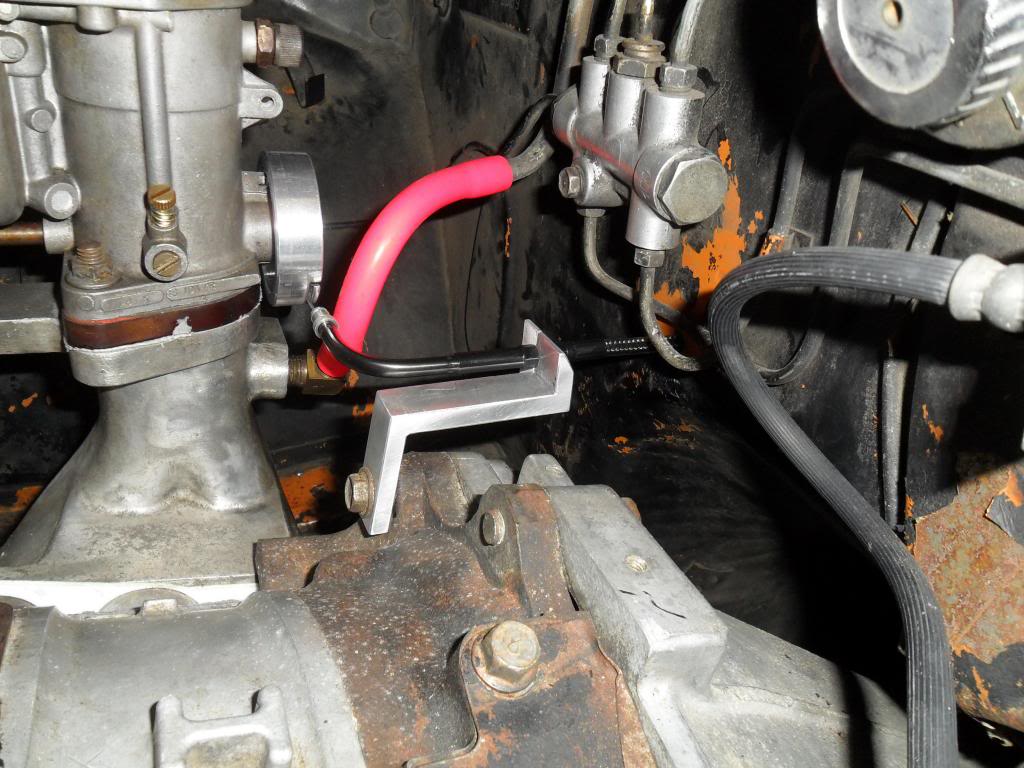
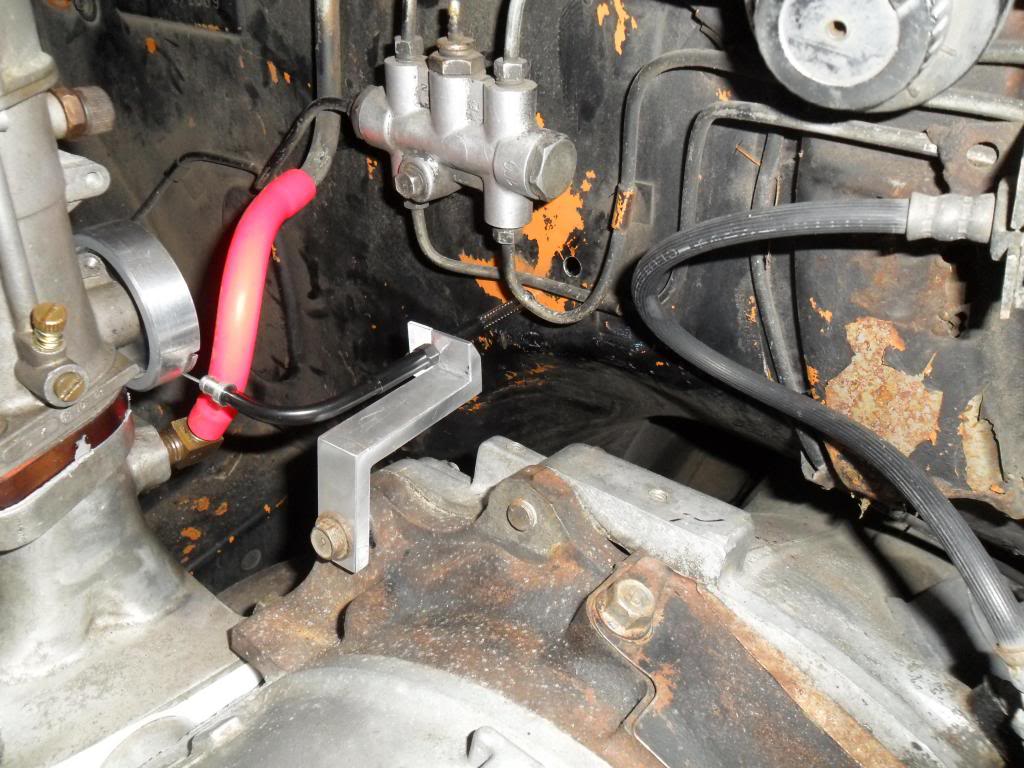
And here is a few pictures of the engine bay side of everything. Showing where I sneak the cable out of
and the guide/stop holding the in all in place before it makes a 90 degree turn towards the Webers.
Which was a REAL PITA the correct angle and height just right.

Here is a picture of the system sitting as normal followed by a picture of the gas pedal depressed
showing it moving the arm to create the pulling moting from the side.


And here is a few pictures of the engine bay side of everything. Showing where I sneak the cable out of
and the guide/stop holding the in all in place before it makes a 90 degree turn towards the Webers.
Which was a REAL PITA the correct angle and height just right.


And lastly, the arm/wheel to rotate the butterflys on the Weber. The backside is all machined away to sit as close as possible to the Weber to hide all the ugly factory mechanisims. Then milled a slot for the cable to sit flush in and a slot for it to slide in and out as it rotates, It's hel it with a small set screw at the end against the ball.Again, this was a bigger PITA because the slot depth had to be just right or the cable would bind and get crooked. Also, the placement of the cable of the wheel had to be just right or else it would either bottom out to quickly or not open all the way....
But now I have all the measurements, I can make a much nicer set up when the time comes. But there are more important pieces needing attention right now.
But now I have all the measurements, I can make a much nicer set up when the time comes. But there are more important pieces needing attention right now.

I also just did ANOTHER complete re-wire and hid, replaced, re-routed every remaining wire. And while doing that I made my own Coil on plug set up using TFIDLFIDISLMAOWTF or whatever it's called. Sucks that I have 4 times as many hours in the re-wire, but I can't even share any pics. If I could take pics of the wires, I didn't do a very good job of hiding everything. Sooooo.......
Here's what I did for the ignition...
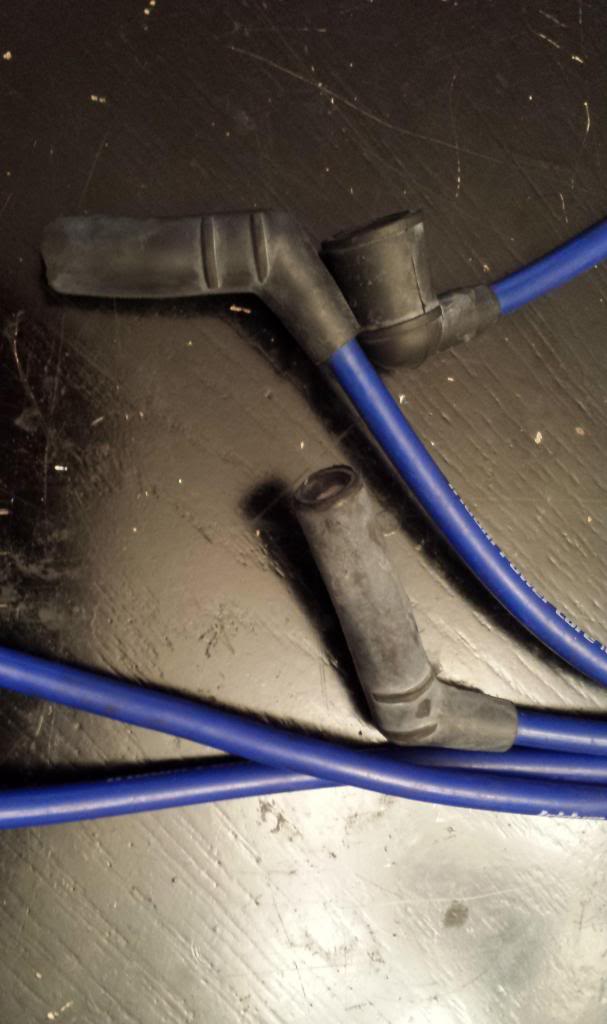
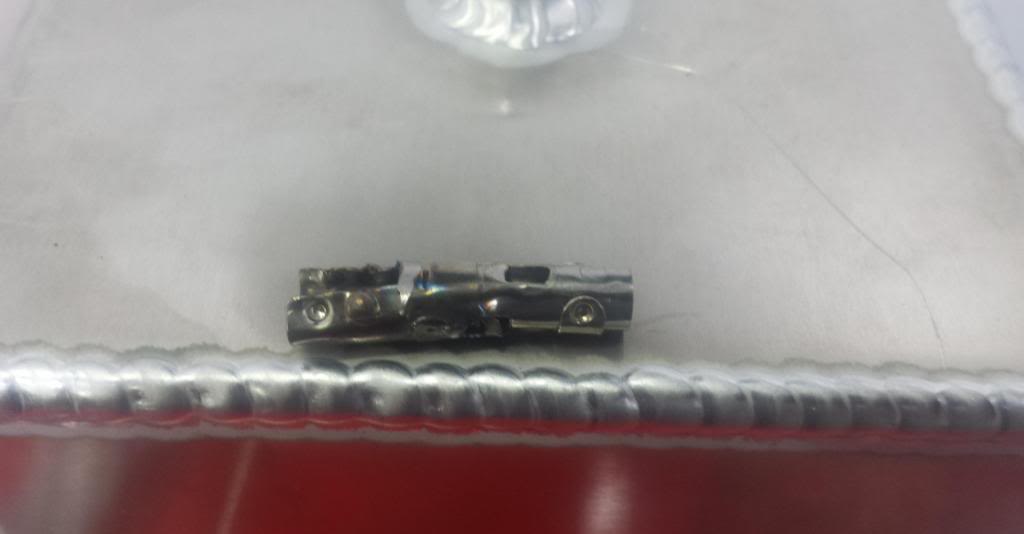
I took an old barely used set of aftermarket plug wires I had from a previous TII. I removed the boots on either end of 1 plug wire and removed the metal clips that snap onto the coil and spark plug. I then shortened the spark plug side clip to about half the length, and then cut off the 90* turn from the coil side. I then fused them together using TIG with no filler. For a boot, I cut down the spark plug side strait boot to the right length. and wa la... Coil on plug boot.
PICS!

Here's what I did for the ignition...
I took an old barely used set of aftermarket plug wires I had from a previous TII. I removed the boots on either end of 1 plug wire and removed the metal clips that snap onto the coil and spark plug. I then shortened the spark plug side clip to about half the length, and then cut off the 90* turn from the coil side. I then fused them together using TIG with no filler. For a boot, I cut down the spark plug side strait boot to the right length. and wa la... Coil on plug boot.
PICS!


And to mount them:
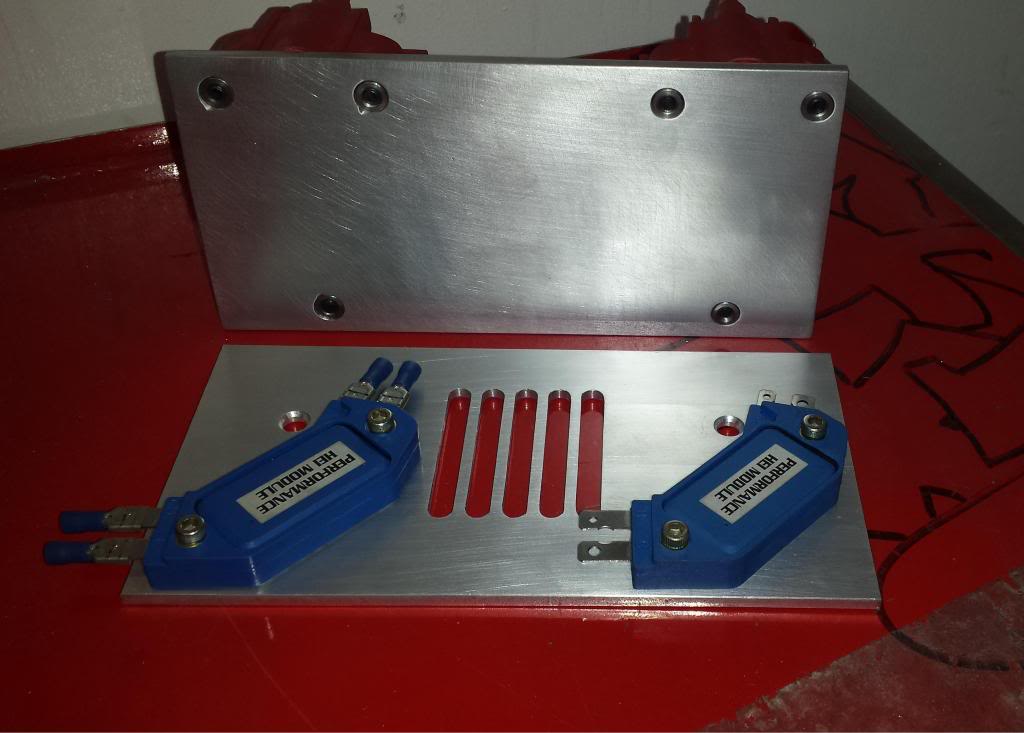
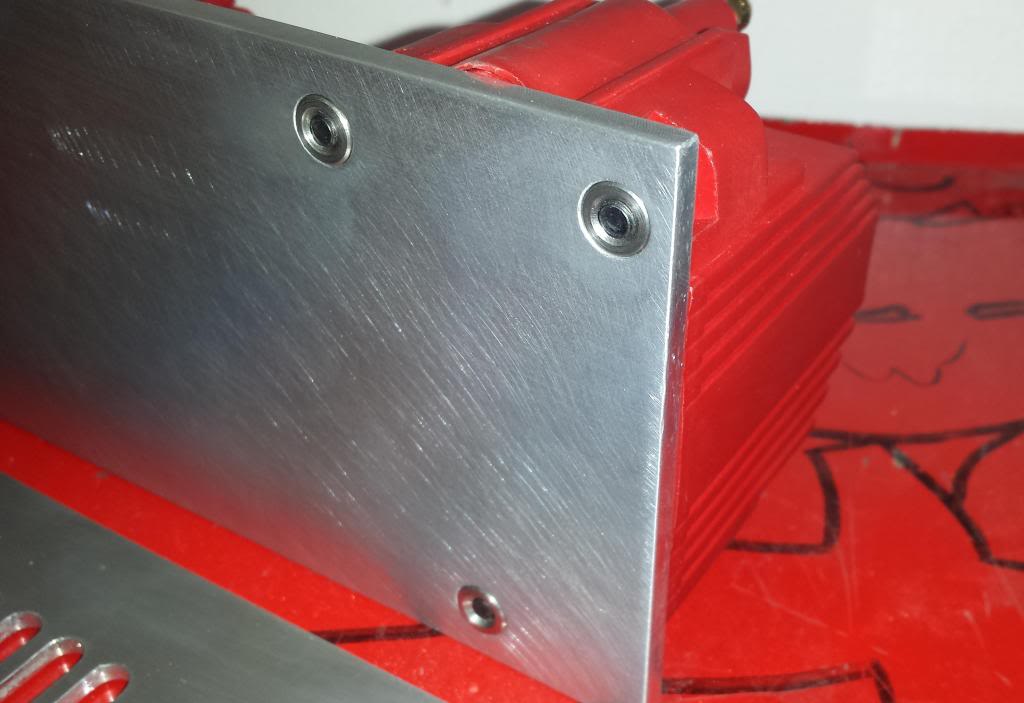
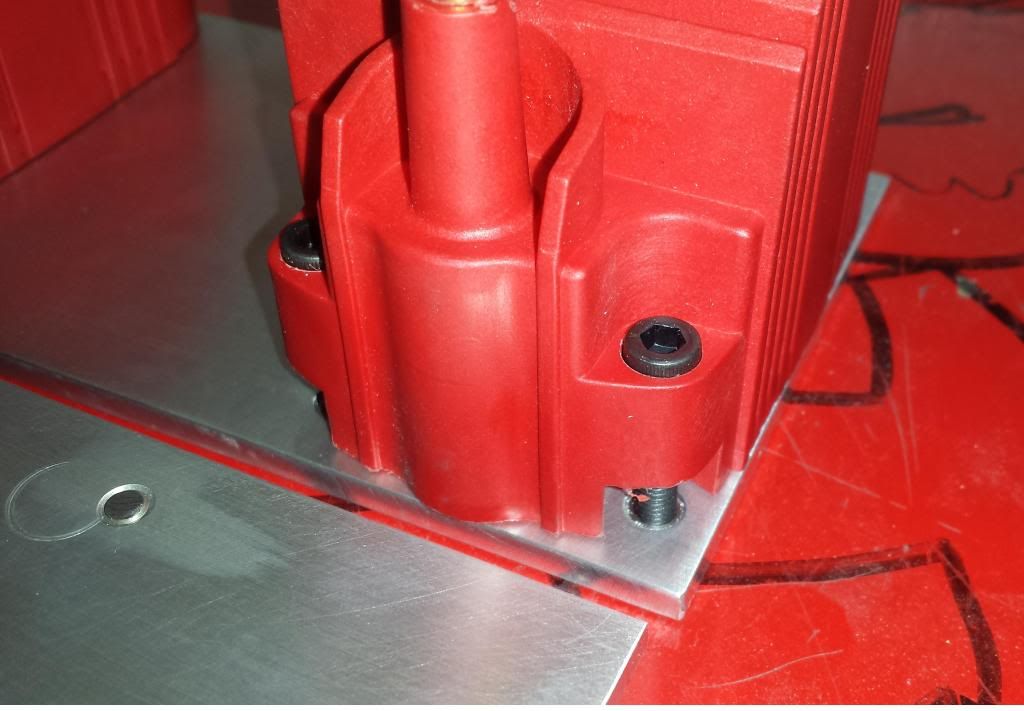
I used two plates of 3/16" aluminum and machined them to fit then welded the two plats together. Because of the weight of the coils, I used pressed fit stainless steel threaded inserts. I redrilled and counterbored the coil to use 10/32 cap screws to be the exact length to not sit flush with the backside of the mounting plate.
The igniters mount directly under the coils hidden away on the opposite side. Since these are so light I just threaded the plate and used 8-32 cap screws. I milled the cap screws down to also be the exact right length to not stick out, not just for looks. But they would hit the coils if sticking out past the mounting plate.
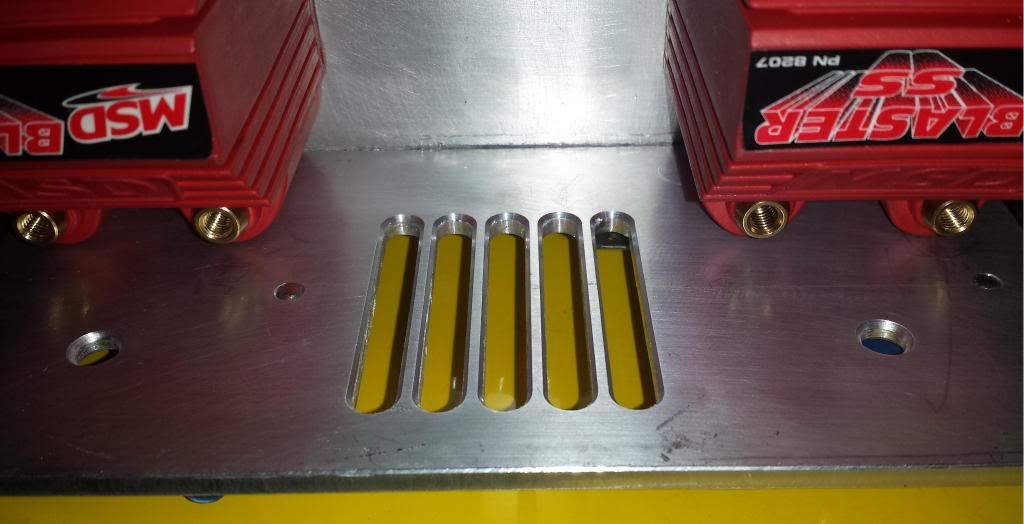
The fins were milled then beveled to aide in the heat dissapation as well as to add some asthetics.The hole you see in front of the coils on the bottom plate is for the wires to go from the coils to the igniters. These wires will not be seen when looking from above. The wires that from to anf from the dizzy will be ran across the bottom side and will also be completely hidden. I will show this in my next update.
So far I am liking the outcome, I have only the two mounts left to make. I already have one drawn up, I just need to mill it.
Pics...
A shot of the coils and igniters prior to welding it up to check for fit. And a shot of the SS inserts, slots, and counterbore work:
I used two plates of 3/16" aluminum and machined them to fit then welded the two plats together. Because of the weight of the coils, I used pressed fit stainless steel threaded inserts. I redrilled and counterbored the coil to use 10/32 cap screws to be the exact length to not sit flush with the backside of the mounting plate.
The igniters mount directly under the coils hidden away on the opposite side. Since these are so light I just threaded the plate and used 8-32 cap screws. I milled the cap screws down to also be the exact right length to not stick out, not just for looks. But they would hit the coils if sticking out past the mounting plate.
The fins were milled then beveled to aide in the heat dissapation as well as to add some asthetics.The hole you see in front of the coils on the bottom plate is for the wires to go from the coils to the igniters. These wires will not be seen when looking from above. The wires that from to anf from the dizzy will be ran across the bottom side and will also be completely hidden. I will show this in my next update.
So far I am liking the outcome, I have only the two mounts left to make. I already have one drawn up, I just need to mill it.
Pics...
A shot of the coils and igniters prior to welding it up to check for fit. And a shot of the SS inserts, slots, and counterbore work:


