
88' FC Build. First Rotary project!


Thread Starter
Junior Member
Joined: Sep 2012
Posts: 14
Likes: 0
From: Oakland, Ca
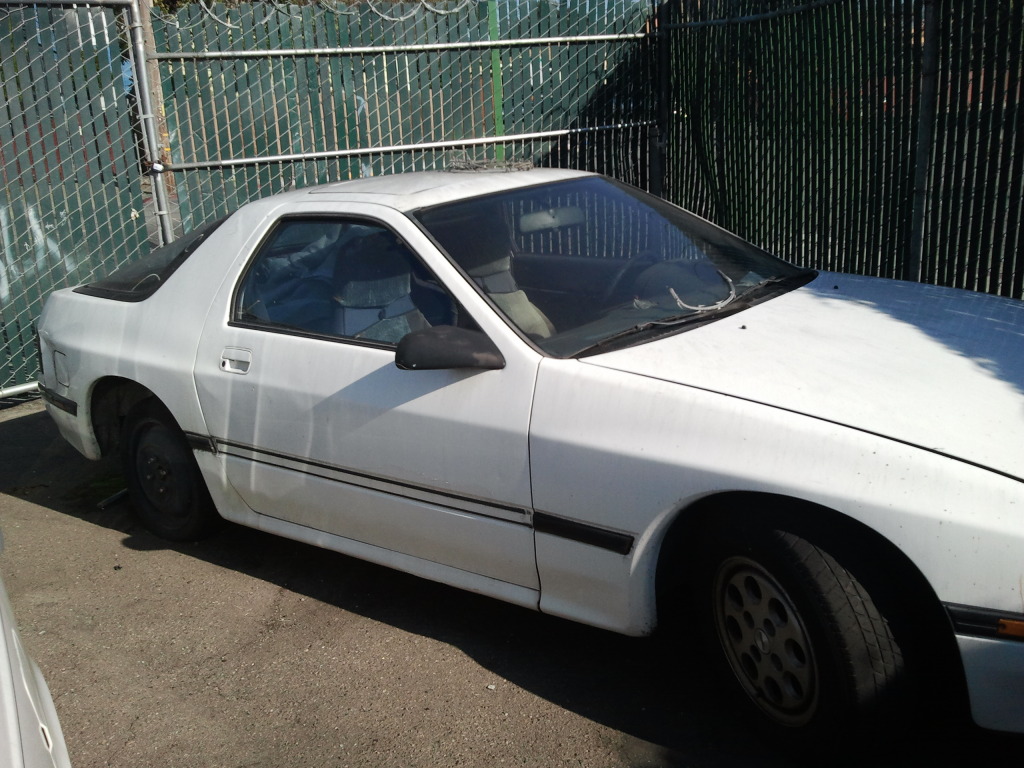
hello all... haha i finally have enough posts to make this thread possible... anyways i just got a 88 rx7 n/a the other day... its rusted up in a couple spots and has been sitting for at least 3 1/2 years... im not sure why its been sitting... i asked the previous owner whats wrong with it and all he gave me was that its leaking oil... thats it... so i got it for free and now im trying to figure out where do i start!? haha i have no experience with these rotory engines what so ever and i am really trying to get her started up and running... shes missing a battery and other stuff... also theres some connectors that seem to be unplugged too... i was wondering if you guys can tell me what these connectors are... why its leaking oil and where its leaking from... what i can do to fix it... where do i start? whats the best thing i can do about the rust? it can take me months to figure it all out but i need some advice... thank you for your time.


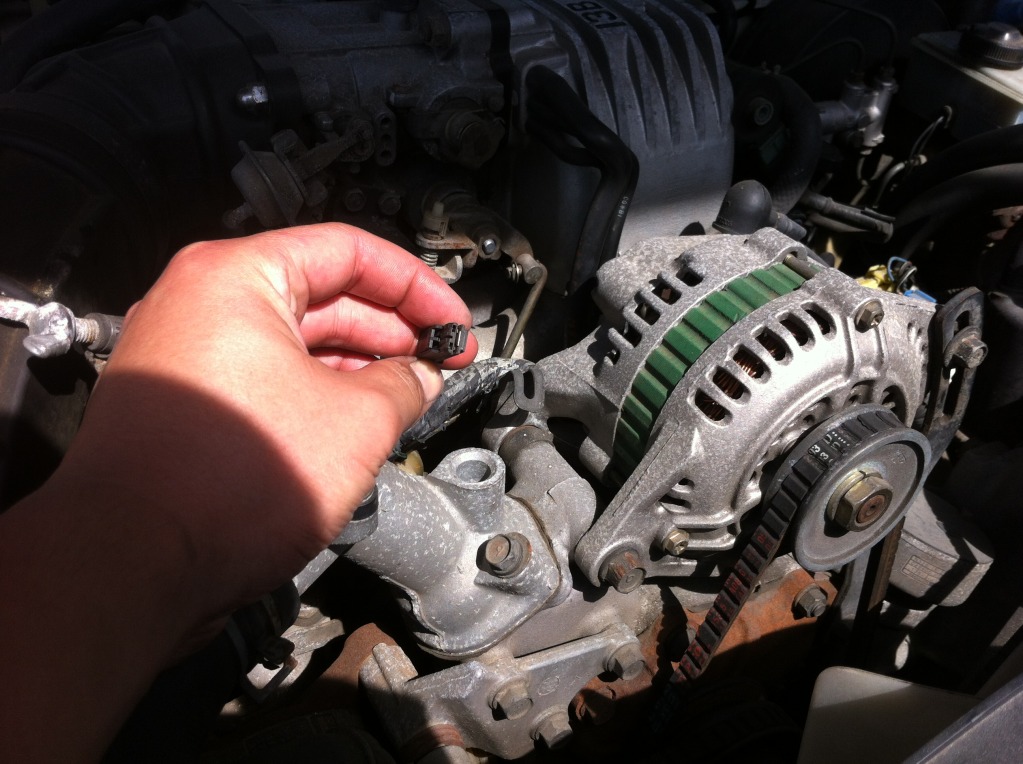
unknown connectors. please help! thanks

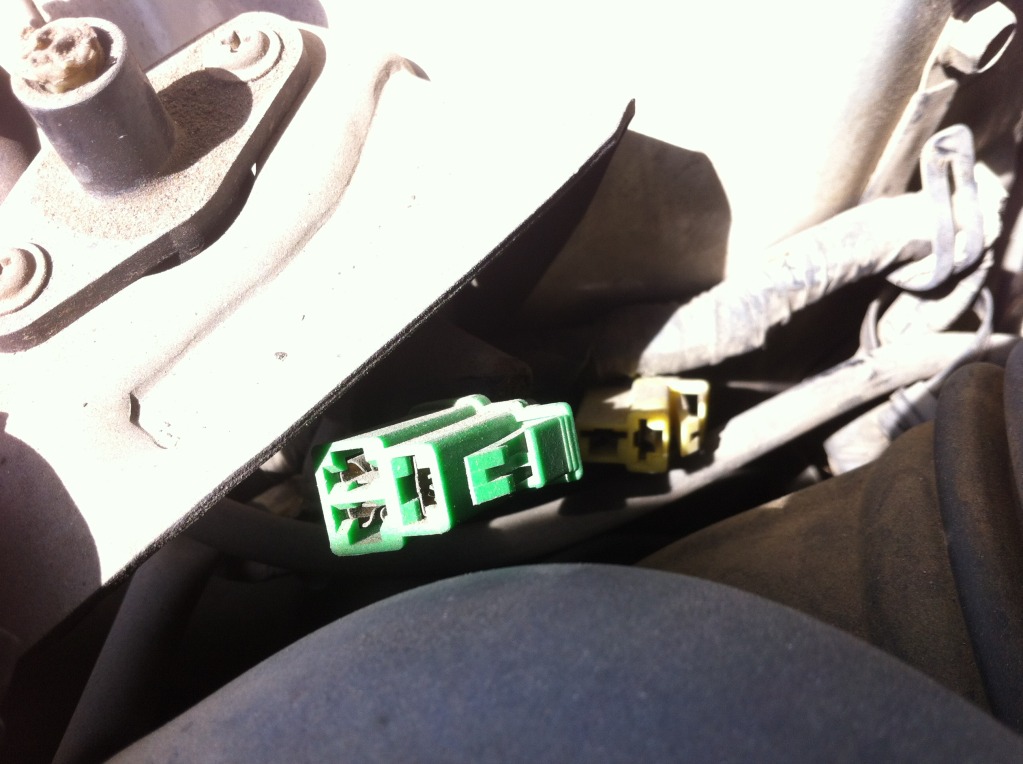
this bottom one is by the left headlight

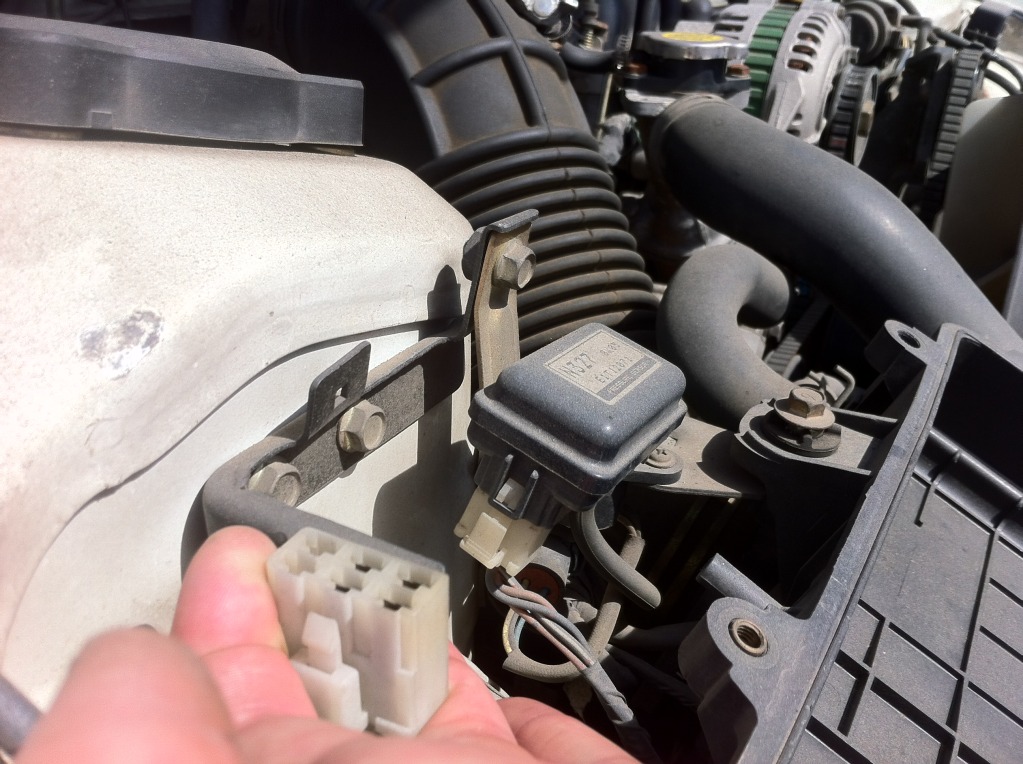
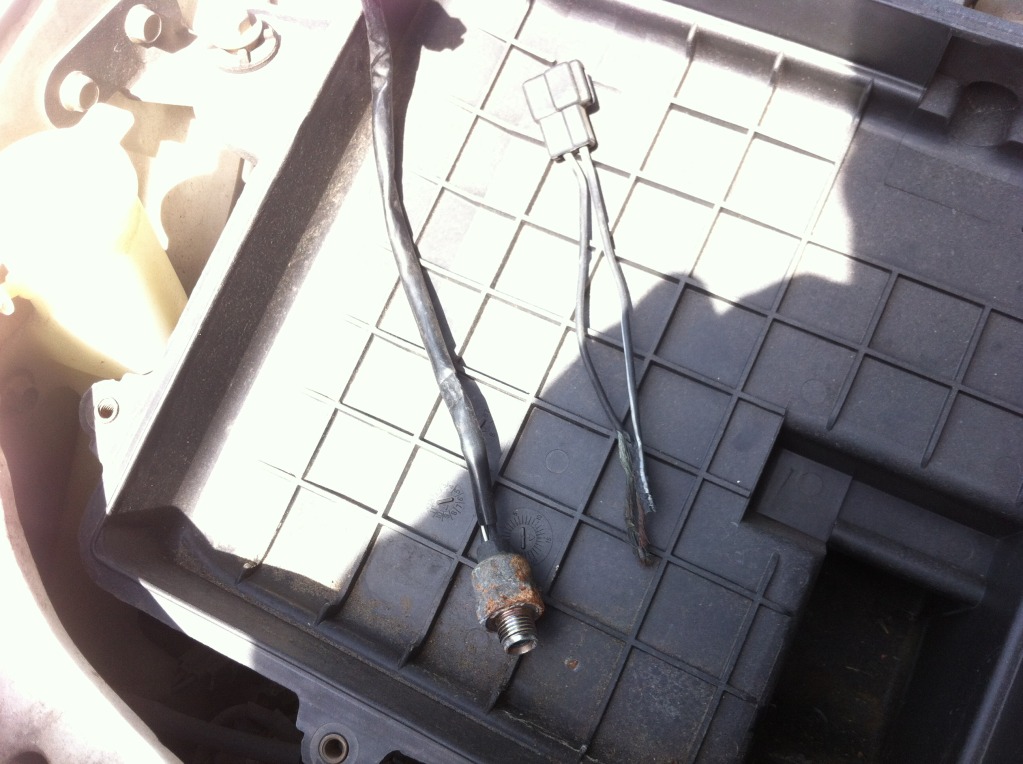
and what are these wires/ components? could this be the coolant temp sensor? where does it go?
part 2 down below... wont let me post more than 12 pics
unknown connectors. please help! thanks
this bottom one is by the left headlight
and what are these wires/ components? could this be the coolant temp sensor? where does it go?
part 2 down below... wont let me post more than 12 pics
Last edited by misterstyx69; Sep 15, 2012 at 12:23 AM.
Joined: Sep 2005
Posts: 25,581
Likes: 136
From: Smiths Falls.(near Ottawa!.Mapquest IT!)
Any green connector is a diagnostic type connector.Do not worry about them.
Pic1 connector is Auto adjusting suspension connector (AAS).Not on your car.(option)not used.
pic2 cooling fan connector,again not on your
car.(option).so NOT used.
pic 3 .Diagnostc and the Yellow 2 prong connector is Fuel pump Connector( you will get to know this one if you have fuel related problems)But do not worry about it for now.NOT Normally used.,so Diagnostic.
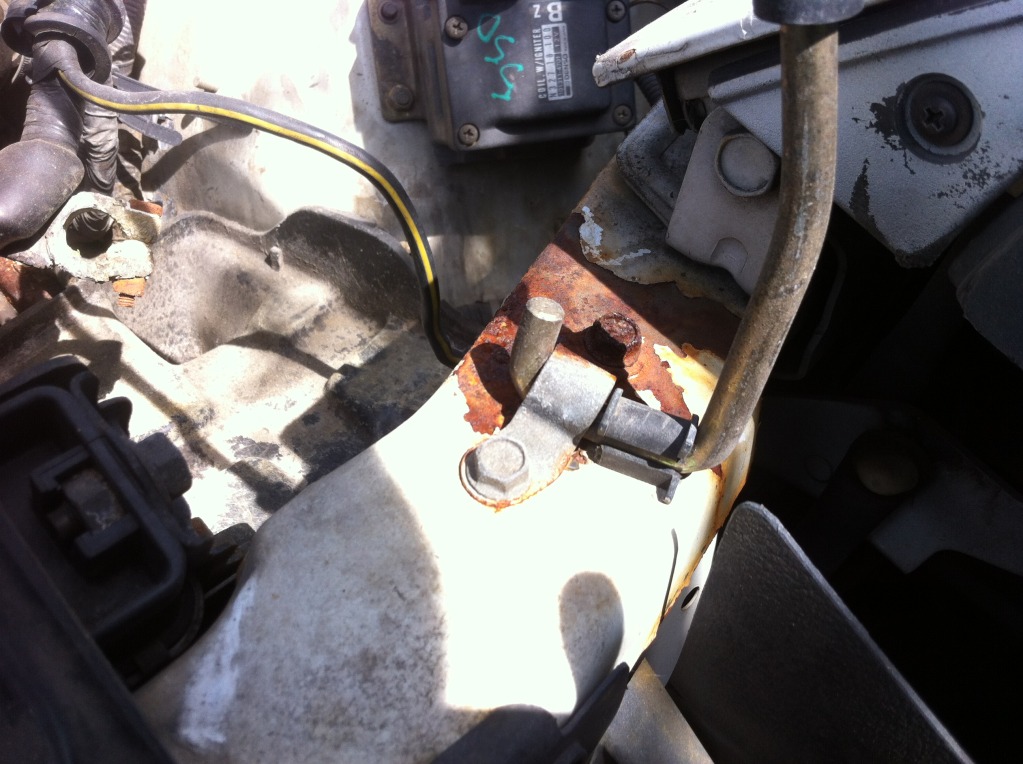
the last pic shows a screw in sensor that is for the BAC or ACV ( I get them mixed up) on the side of the lower intake manifold,Passenger side of car.I am not sure where that loose 2 wire connector is from.
Oh ya,That OTHER connector with the blue tape?.NOT used on your car.(optional equipment,don't worry about it)
Pic1 connector is Auto adjusting suspension connector (AAS).Not on your car.(option)not used.
pic2 cooling fan connector,again not on your
car.(option).so NOT used.
pic 3 .Diagnostc and the Yellow 2 prong connector is Fuel pump Connector( you will get to know this one if you have fuel related problems)But do not worry about it for now.NOT Normally used.,so Diagnostic.
the last pic shows a screw in sensor that is for the BAC or ACV ( I get them mixed up) on the side of the lower intake manifold,Passenger side of car.I am not sure where that loose 2 wire connector is from.
Oh ya,That OTHER connector with the blue tape?.NOT used on your car.(optional equipment,don't worry about it)
Thread Starter
Junior Member
Joined: Sep 2012
Posts: 14
Likes: 0
From: Oakland, Ca
PART 2!!
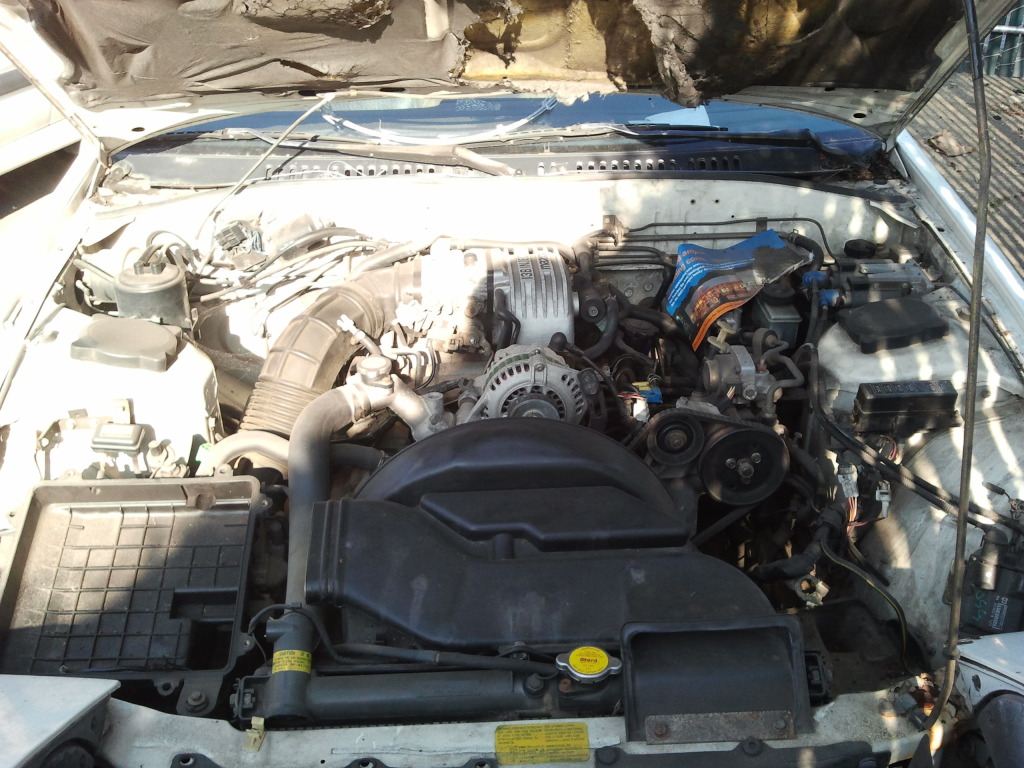
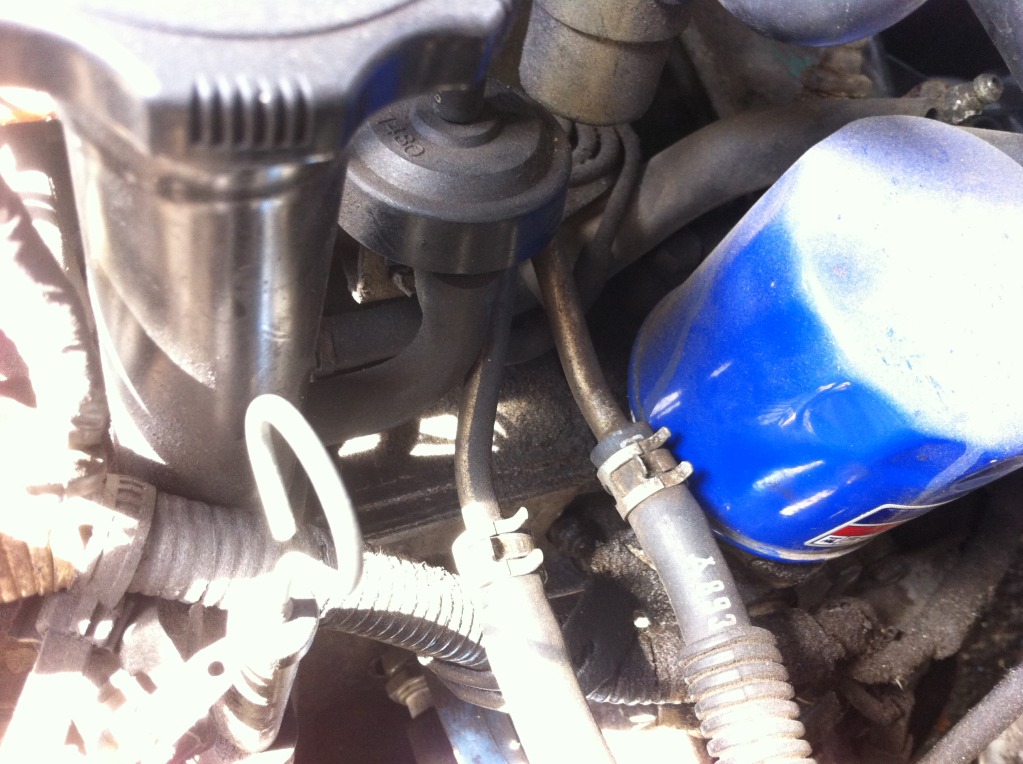
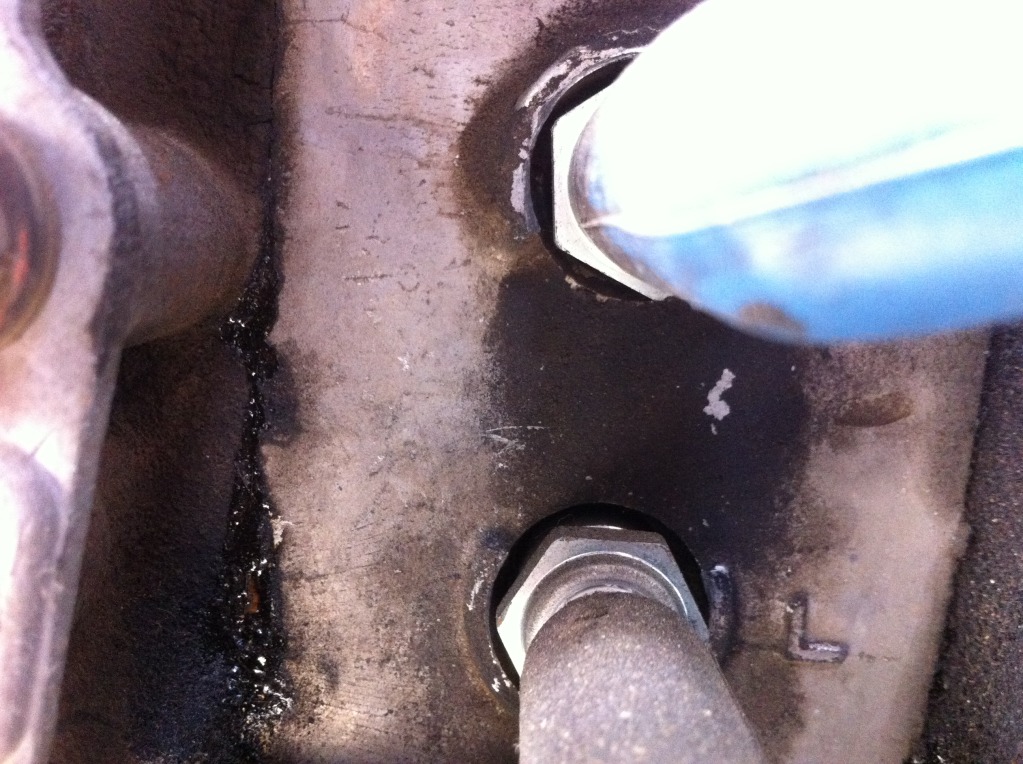
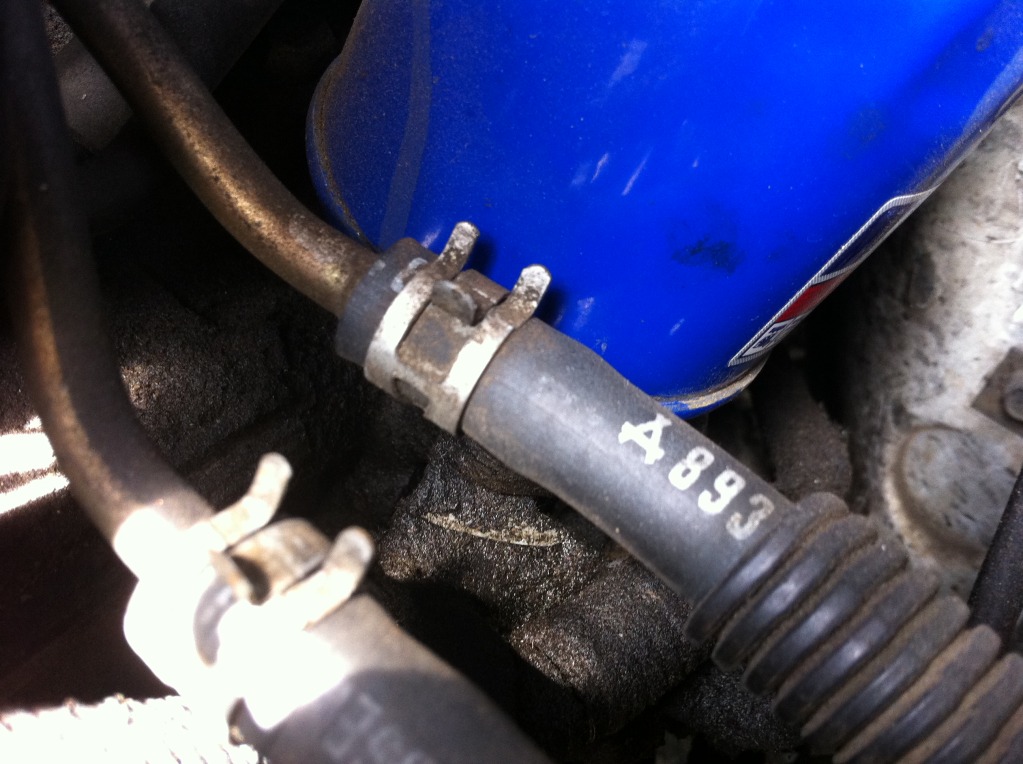
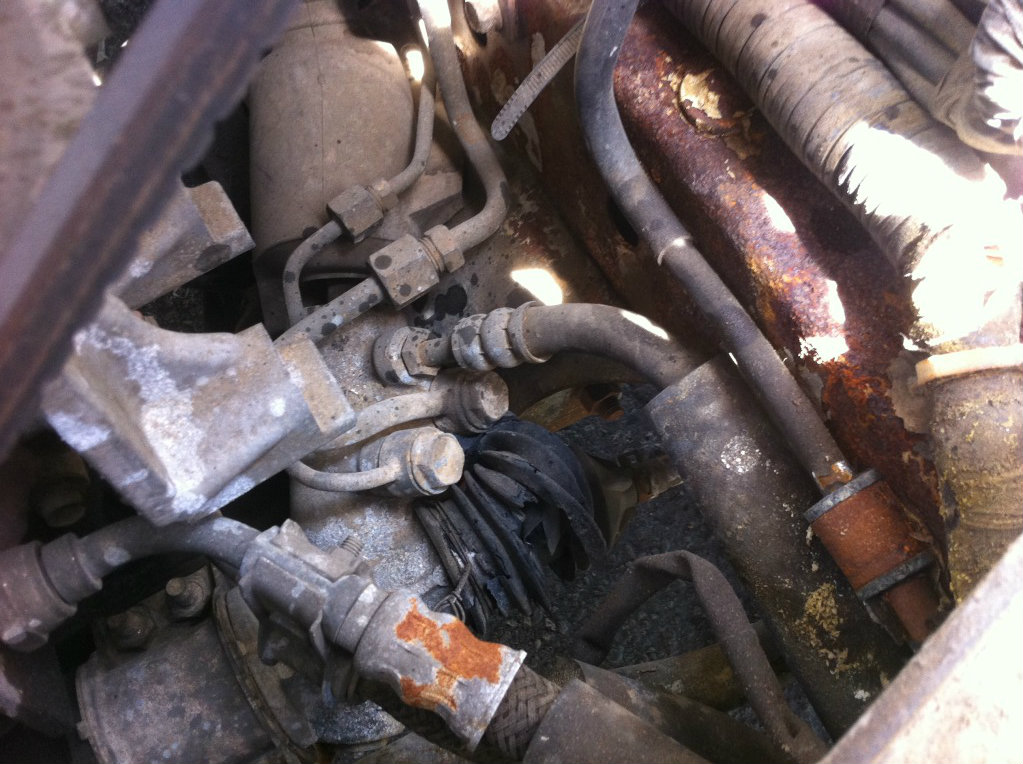
now for the oil leak... where is it coming from? why and how can i fix it?
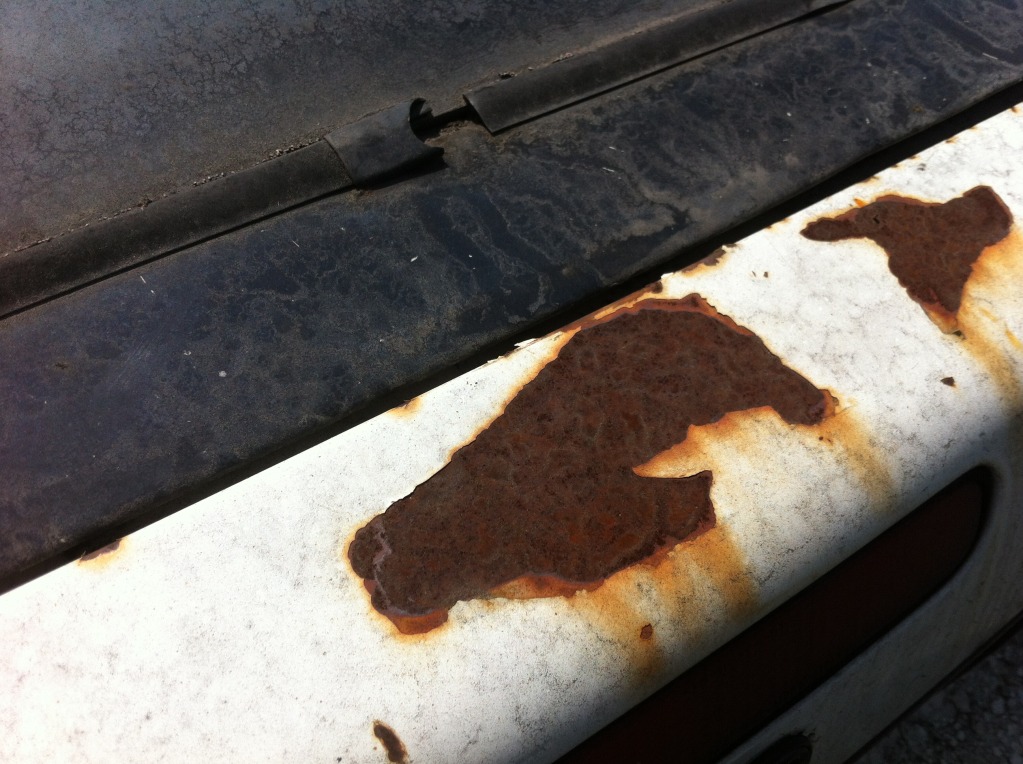
and finally the rust... what can i do about it? how to repair it?

thank you for you guys time. i really need some advice and help with this one. no one i've talked to knows anything about rotory engines... and even if they do they dont even want to bother with it. any help would be very appreciated. thanks.
now for the oil leak... where is it coming from? why and how can i fix it?
and finally the rust... what can i do about it? how to repair it?
thank you for you guys time. i really need some advice and help with this one. no one i've talked to knows anything about rotory engines... and even if they do they dont even want to bother with it. any help would be very appreciated. thanks.
Thread Starter
Junior Member
Joined: Sep 2012
Posts: 14
Likes: 0
From: Oakland, Ca
Any green connector is a diagnostic type connector.Do not worry about them.
Pic1 connector is Auto adjusting suspension connector (AAS).Not on your car.(option)not used.
pic2 cooling fan connector,again not on your
car.(option).so NOT used.
pic 3 .Diagnostc and the Yellow 2 prong connector is Fuel pump Connector( you will get to know this one if you have fuel related problems)But do not worry about it for now.NOT Normally used.,so Diagnostic.
the last pic shows a screw in sensor that is for the BAC or ACV ( I get them mixed up) on the side of the lower intake manifold,Passenger side of car.I am not sure where that loose 2 wire connector is from.
Oh ya,That OTHER connector with the blue tape?.NOT used on your car.(optional equipment,don't worry about it)
thank you so much brother... you just saved me lots of time. i was going crazy i thought there was a bunch of stuff missing from this car... haha. hey thanks again
The oil cooler lines could be leaking, you'd have to replace the copper crush washers for a quick easy fix , or you could go all out and get new oil cooler lines and possibly upgrade them to steel braided lines if you have the money, it could also be the housing itself if its cracked (hopefully its not that would require an engine teardown).
Thread Starter
Junior Member
Joined: Sep 2012
Posts: 14
Likes: 0
From: Oakland, Ca
The oil cooler lines could be leaking, you'd have to replace the copper crush washers for a quick easy fix , or you could go all out and get new oil cooler lines and possibly upgrade them to steel braided lines if you have the money, it could also be the housing itself if its cracked (hopefully its not that would require an engine teardown).
if and when it does go (assuming it is cracked and not the oil cooler lines), at that time would be the best time to do the swap
theres a few ways you can do it , doing it the right way will be more expensive but if you want it to be a true turbo car , youll want to swap everything from the engine to drivetrain back, engine/transmission, driveshaft/rearend)
Trending Topics

i would get a battery in it first, drain the gas tank and put fresh gas in it. for the oil leak worry about it after you try cranking the engine over, may not even be in the location you're looking at(even though that is a leaky spot, which looks to be the oil filter pedestal o-rings failing).
for the rust, luckily it's just surface rust but you will still need to take it down to the base metal with a DA sander and apply a rust proofing agent primer that you can get at most auto paint stores, you will need to seal the primer before it sees any wet weather after it dries and seals up.
the last picture in the original post is the ACV solenoids, they are known to melt down and looks like one of yours did. they are not necessary to get the car running but you will need them to get it ready to pass emissions testing. just pick up a used good condition ACV, they are dirt cheap and i have a few laying around.
key point here is to not spend a ton of money on things until you attempt to start the car, you have no idea if the engine is even good at all.
Last edited by RotaryEvolution; Sep 14, 2012 at 05:08 PM.
Thread Starter
Junior Member
Joined: Sep 2012
Posts: 14
Likes: 0
From: Oakland, Ca
you're right... im gonna try and find a battery for it soon... how would i go about draining the gass... should i do it from down under? stick a tube in the gas cap and siphon it out? and where does the acv snesor go?
There are two ways to drain the tank. The first is to remove the drain plug on the rear bottom edge of the tank. There's a good chance it has never been removed, is heavily rusted in place and will either break off or gall the threads out upon removal. This is very bad because it would be a hole you can't plug and is very dangerous to attempt to weld on. The other method is to remove the fuel pump assembly. Under the hatch carpet, you'll see a silver plate with 4 Phillips screws and a wire conduit (blue) in it. Remove this access cover and you'll see where the fuel lines attach to the tank. This panel has eight M4x0.7 phillips head screws in it and are a bear to remove.
Soak it down in PB Blaster and let it sit overnight. Soak it again the following morning, then a 3rd time that evening. 3 is the minimum of soaking, and the number of soaking shall be 3 (Monty Python reference ). What I used to remove the screws on my 87 GXL was to use a #2 Phillips screwdriver bit, spinner handle and 1/4" ratchet.
(Admins: please do not edit the following links as they are for illustration purposes only. A spinner handle like this can be difficult to find and the screwdriver bit set includes both the bit and drive adapter necessary for this)
The kind of spinner handle I have is like this one, machined to accept a 1/4" ratchet on the handle end: Shop Kobalt 1/4-in Drive Spinner Handle at Lowes.com
Add a 100 piece screwdriver bit set like this, use the hex to square drive adapter (upper half, top row, middle position) and the whole thing becomes a stuck screw removal tool: 100 Piece Security Bit Set
The bit set can be found at several hardware stores, computer stores like Micro Center and a few other places. I just linked to Harbor Freight because I know they'll have it in stock at the one nearest to you and it is most likely the least expensive. I'm not sure if HF offers a suitable spinner handle though. Check with your local store to find out.
Once you have the spinner handle, ratchet and bits assembled, the key is to place your left hand on the head of the ratchet, putting all of your weight onto it, while turning it with your right hand. Most of these screws strip on the head because of insufficient downforce to transmit the ratchet's torque to the screw. If you put all of your weight on it, it shouldn't strip but the screw head MAY twist right off. If it does, it was going to anyway and was beyond saving. A good fastener will break loose with a sudden "pop", a bad one will slowly move right before it twists in half. As long as you're careful, you should be able to remove all eight screws this way. Just in case, have some vise grips nearby too. On my car, all but two came out with only the ratchet assembly. I was very lucky.
Replace all eight screws with proper hex-head bolts (12-15mm long), preferably stainless steel and with anti-seize compound. There are plenty of horror stories in the Second Gen section about the fuel pump screws and what happened during extraction due to carelessness/cluelessness/neglect on the part of a previous owner or Mazda, you do NOT want to go cheap here
Once you get the pump hangar out, siphon the old gas out with a proper siphon pump. Harbor Freight and Walmart have siphon pumps for cheap.
Soak it down in PB Blaster and let it sit overnight. Soak it again the following morning, then a 3rd time that evening. 3 is the minimum of soaking, and the number of soaking shall be 3 (Monty Python reference
). What I used to remove the screws on my 87 GXL was to use a #2 Phillips screwdriver bit, spinner handle and 1/4" ratchet.(Admins: please do not edit the following links as they are for illustration purposes only. A spinner handle like this can be difficult to find and the screwdriver bit set includes both the bit and drive adapter necessary for this)
The kind of spinner handle I have is like this one, machined to accept a 1/4" ratchet on the handle end: Shop Kobalt 1/4-in Drive Spinner Handle at Lowes.com
Add a 100 piece screwdriver bit set like this, use the hex to square drive adapter (upper half, top row, middle position) and the whole thing becomes a stuck screw removal tool: 100 Piece Security Bit Set
The bit set can be found at several hardware stores, computer stores like Micro Center and a few other places. I just linked to Harbor Freight because I know they'll have it in stock at the one nearest to you and it is most likely the least expensive. I'm not sure if HF offers a suitable spinner handle though. Check with your local store to find out.
Once you have the spinner handle, ratchet and bits assembled, the key is to place your left hand on the head of the ratchet, putting all of your weight onto it, while turning it with your right hand. Most of these screws strip on the head because of insufficient downforce to transmit the ratchet's torque to the screw. If you put all of your weight on it, it shouldn't strip but the screw head MAY twist right off. If it does, it was going to anyway and was beyond saving. A good fastener will break loose with a sudden "pop", a bad one will slowly move right before it twists in half. As long as you're careful, you should be able to remove all eight screws this way. Just in case, have some vise grips nearby too. On my car, all but two came out with only the ratchet assembly. I was very lucky.
Replace all eight screws with proper hex-head bolts (12-15mm long), preferably stainless steel and with anti-seize compound. There are plenty of horror stories in the Second Gen section about the fuel pump screws and what happened during extraction due to carelessness/cluelessness/neglect on the part of a previous owner or Mazda, you do NOT want to go cheap here
Once you get the pump hangar out, siphon the old gas out with a proper siphon pump. Harbor Freight and Walmart have siphon pumps for cheap.
Thread Starter
Junior Member
Joined: Sep 2012
Posts: 14
Likes: 0
From: Oakland, Ca
i checked it out today and suprisingly the cover and screws arent rusted at all... there was a bunch of blankets and stuff in the trunk that covered it all those years and i guess that saved it... i cleaned her up today vacuumed it and threw away a bunch of trash that was in it... do any of you guys know how i can check compression on a rotory? theres two plugs... which one do i put the compression check on?


Thread Starter
Junior Member
Joined: Sep 2012
Posts: 14
Likes: 0
From: Oakland, Ca
no update yet... i just cleaned her inside out today as much as i could... got rid of some of the rust and vacuumed the carpet inside... its horrible threres grass growing inside and everything lol! a lot of cracked interior parts like vents and cup holders and what not... but first i gotta get a battery for it and a shifter ****... its missing one
Full Member
Joined: Sep 2012
Posts: 54
Likes: 0
From: Bay Area, California
Maybe I am wrong, but it seemed, in my small knowledge, that the alt belt was on backwards too. Not that this matters if it doesnt run. =P
awesome you got it for free though. thats great.
awesome you got it for free though. thats great.


The pic of the side of your front housing shows the infamous dowl pin leak. Running castrol gtx 20/50 high mileage deposit protection can slow it down (recommended oil for warm ambient temps)... but you'll eventually need to rebuild. GL man great project especially for free


great looking project i have an SE that i started working on too. i also had some questions about some of the plugs in your pix but thanks to his thread and he ppl thta poted now i know what they are. what part of cali are tou from i live in san diego

Thread
Thread Starter
Forum
Replies
Last Post
California style
Introduce yourself
0
Aug 26, 2015 03:45 AM