
Operation: No rattle left behind.


Operation: No rattle left behind.
Well just a little peek at some stuff ive been up to, mainly sound deadening... I decided i want my car to be very quiet and vibration free so i went to town.
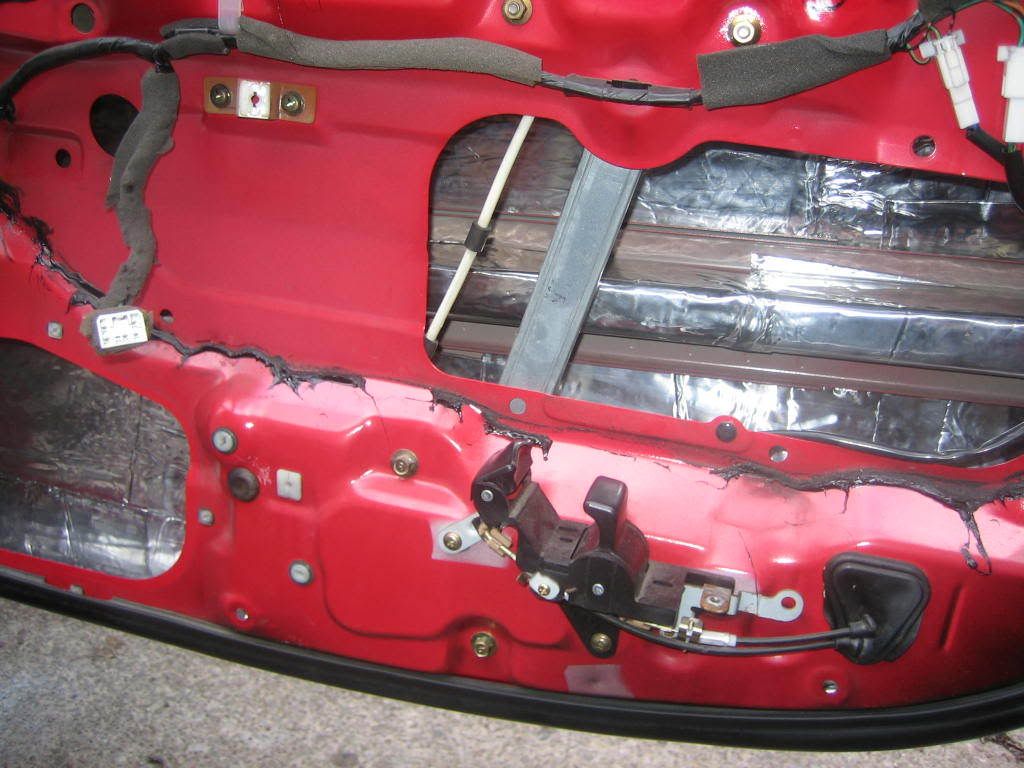
Doors got deadening and closed cell foam on the outer door skin, same on the inner skin, im not totally finished with them yet...
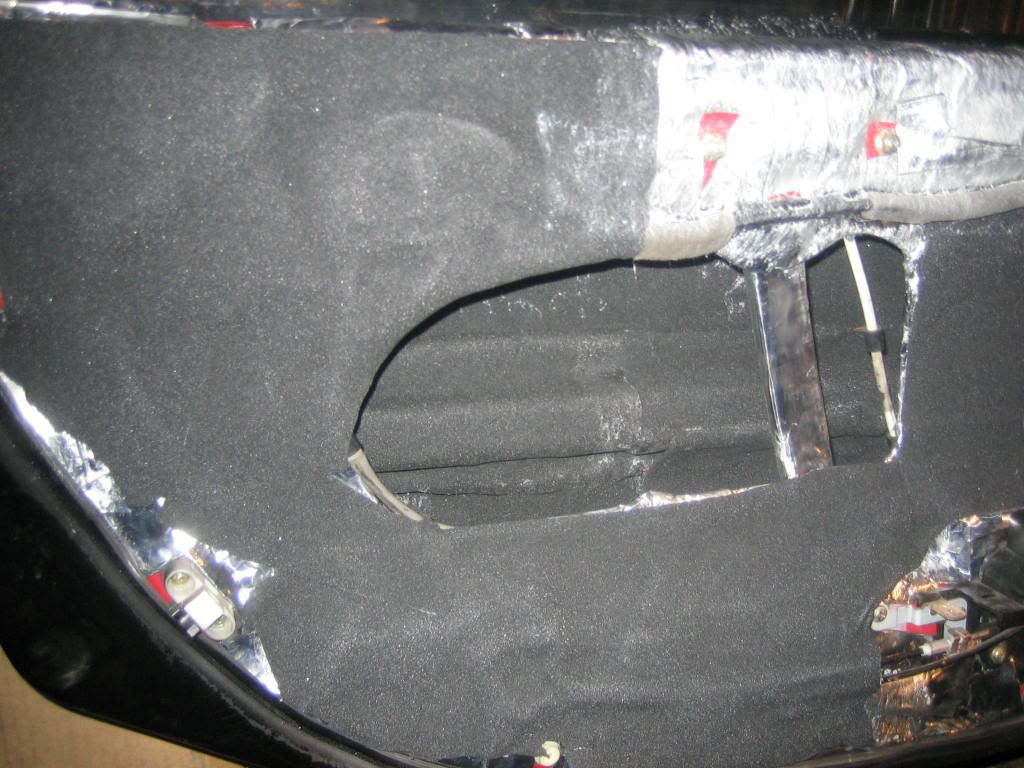

Closed cell foam used under the seating spots
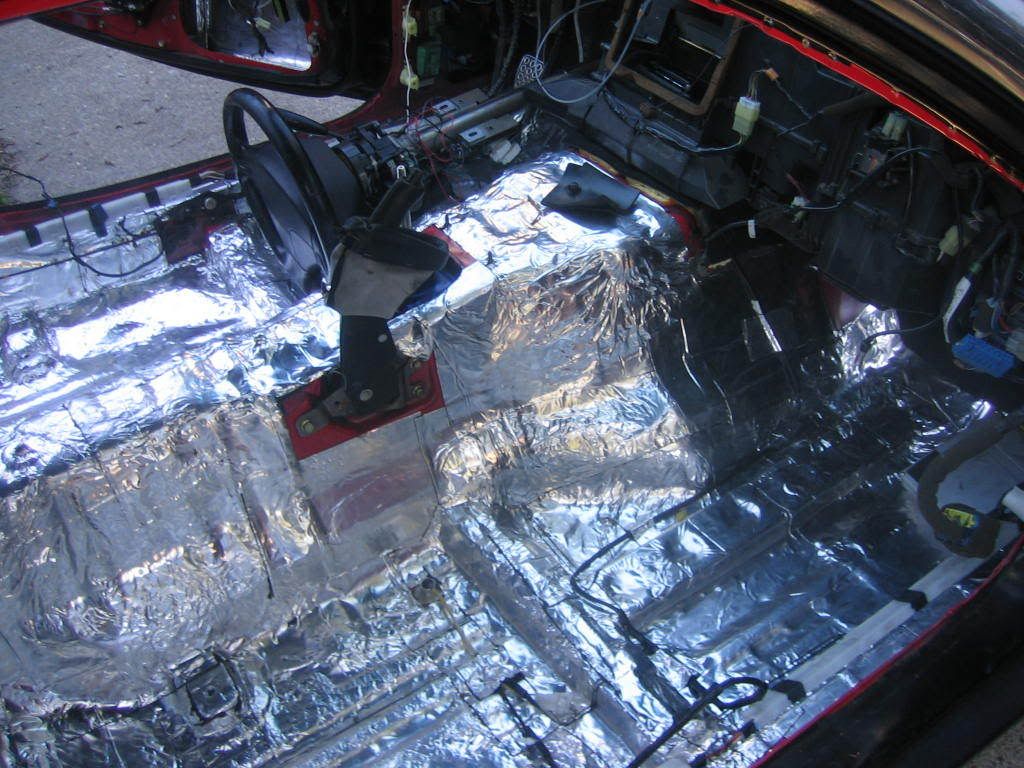

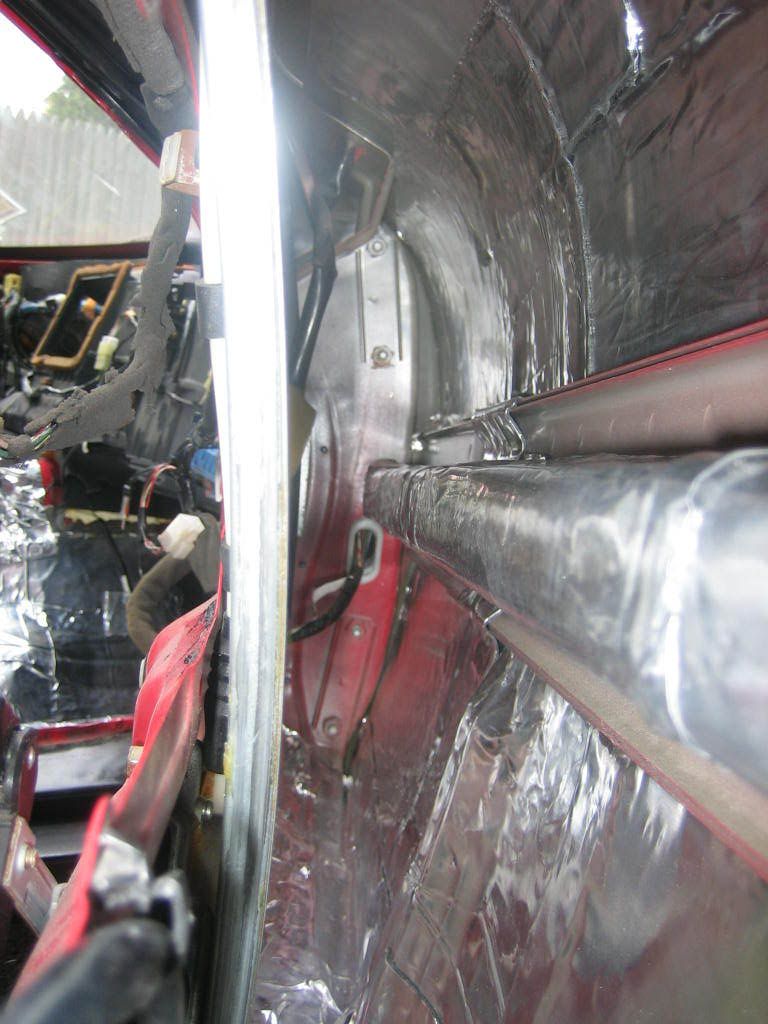
Heat matting+ sound deadening all in one placed over everything on the transmission tunnel.

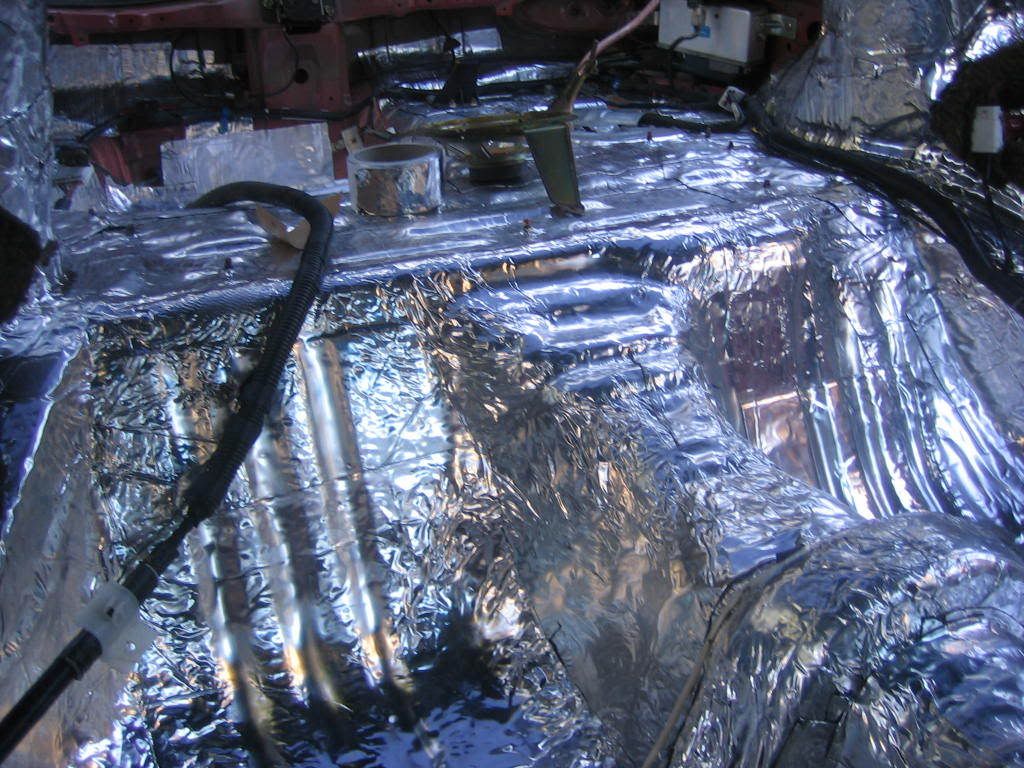
An open cell foam with a rubber backed layer.. this stuff is solid, why i chose to use it over the floor pans.
http://s222.photobucket.com/albums/d...Picture010.flv
Link to video which shows the difference in sound when i only had one of the doors deadened on the outer skin....the difference seems incredible...
Anywho i would love to give some before and afters while driving, but i cant until i get my car back together.
I forgot to add on a different note, i sent my tail lights off to seven lust for the 99 spec conversion and he did an incredible job thanks again seven lust.

Doors got deadening and closed cell foam on the outer door skin, same on the inner skin, im not totally finished with them yet...
Closed cell foam used under the seating spots
Heat matting+ sound deadening all in one placed over everything on the transmission tunnel.
An open cell foam with a rubber backed layer.. this stuff is solid, why i chose to use it over the floor pans.
http://s222.photobucket.com/albums/d...Picture010.flv
Link to video which shows the difference in sound when i only had one of the doors deadened on the outer skin....the difference seems incredible...
Anywho i would love to give some before and afters while driving, but i cant until i get my car back together.
I forgot to add on a different note, i sent my tail lights off to seven lust for the 99 spec conversion and he did an incredible job thanks again seven lust.


Your interior looks much like a communications satellite ready for orbit,just be careful of the gamma rays.Seriously your car looks like mine needs to be,keep up the good work and hope you get rewarding results for your efforts.I think I am going to select "second skin" versus "dynamat" myself. When applying the closed cell to the outer shell of the door how did you apply the adhesive w/o making a mess.
Last edited by satch; Oct 2, 2007 at 01:12 AM.
I used exclusively second skin products, and i must say i am not disappointed at all. Everything they sent seemed to be of good quality and stuck real well. I have not done the roof at all as im not sure it will make that much of a difference, i was mainly concerned about the exhaust/roadnoise/exhaust heat coming up from the bottom of the car and the doors because im going to be putting in a nasty system when i get the chance so the doors will be a very important component of that.
The closed cell to the outer door skin, i cut in small to medium size squares.. i then sprayed the spray adhesive on the inside of the door and then on the back of the closed cell foam, i let it set for about 5 seconds and then i carefully maneuvered the pieces of foam through the holes in the door. I bought more foam than i needed so that if it ended up overlapping in the doors i really didn't care. It was a pain to put through the door holes, the trick i found to work best was to partially fold it in half to make it thin enough to fit through the hole or even bend it to a W type shape and slight it in vertically. You want to make sure you do not have it stick to itself before you get it into the door because it will be a bear to get back apart. My arms were pretty scratched/slightly cut up and i lost a good amount of arm hair due to adhesive being caught up in it.,. if i had to do it again i would probably wear tight sleeves or wrap my arms in saran wrap lol. Speaking of the glue make sure you get a few cans of the spray adhesive from second skin, or if you can find a local supplier that is cheaper... they tend to run out quicker than i thought.
I plan to do the rear hatch and finish up my trunk area in the next few days, but i wanted to get the cabin done for the most part with the dash and everything else back in as winter is due in another month or so and motivation is hard to come by in under 30 degree weather. Everyone knows what happens when you let projects sit for a few months, you cant remember what or who goes where.
About 140 square feet of the damplifier (shiny aluminum backed butane) was enough to do the doors the entire cabin (minus roof) and the majority of the floor of the hatch area.
54 square feet of the various heat/sound matting second skin sells..
(36 sq ft overkill) Which was enough for the outer door skin and the inner door skins and below where the seats would be
(9 sq ft of heatwave pro) Which was enough for the transmission tunnel and a little bit left over
(9 sq ft of luxury liner) Which was enough for two strips underneath the rear bins and then two strips over the two feet areas up front
I currently have another small load coming as i decided to take the car off the road for the winter and finish/go all out, as in do under the headliner and finish up doing the top of the hatch area.
If you have anymore questions feel free to ask.
Trending Topics
I used just my hands + the back of a screw driver to get in the spots where it was grooved.. making sure to get it all the way down on the metal.. it does no good putting it in if it isnt touching the metal... Also MAKE SURE you clean inside the door, as the damplifier does not like to stick to dirt and it would be a shame to do this all only to have it be falling off on you down the road.
After you get the aluminum backed layer down i used the spray glue that they sell on the secondskin site to stick down the overkill mat (black foam like mat) spray it on both the foam and then on the area where you want it to stick let it set for a few seconds and then stick them together..
I used just box tape to tape down the heatwave mat and the luxury liner..
Its pretty self explanatory once you get going.. use a razor blade to cut the things you need cut.. doing the doors was the hard part as you have to maneuver your arms strategically through the small holes working with sticky material that likes to stick to itself if folder, but just take your time.

I left the hard deadening material on the floors but i pulled off the cloth type laid down the stuff and then re-glued that back on.
My goal for this round was to get rid of incoming noise from the outside and provide a nice environment for my future sound setup... i am not too worried about the inside plastics, but if they do become a problem it's pretty to just pull them off real fast and take care of it.
My goal for this round was to get rid of incoming noise from the outside and provide a nice environment for my future sound setup... i am not too worried about the inside plastics, but if they do become a problem it's pretty to just pull them off real fast and take care of it.

Thread
Thread Starter
Forum
Replies
Last Post
ZaqAtaq
New Member RX-7 Technical
2
Sep 5, 2015 08:57 PM