
NJGB '87 TII - Starting Bodywork and Paint - First Timer Here

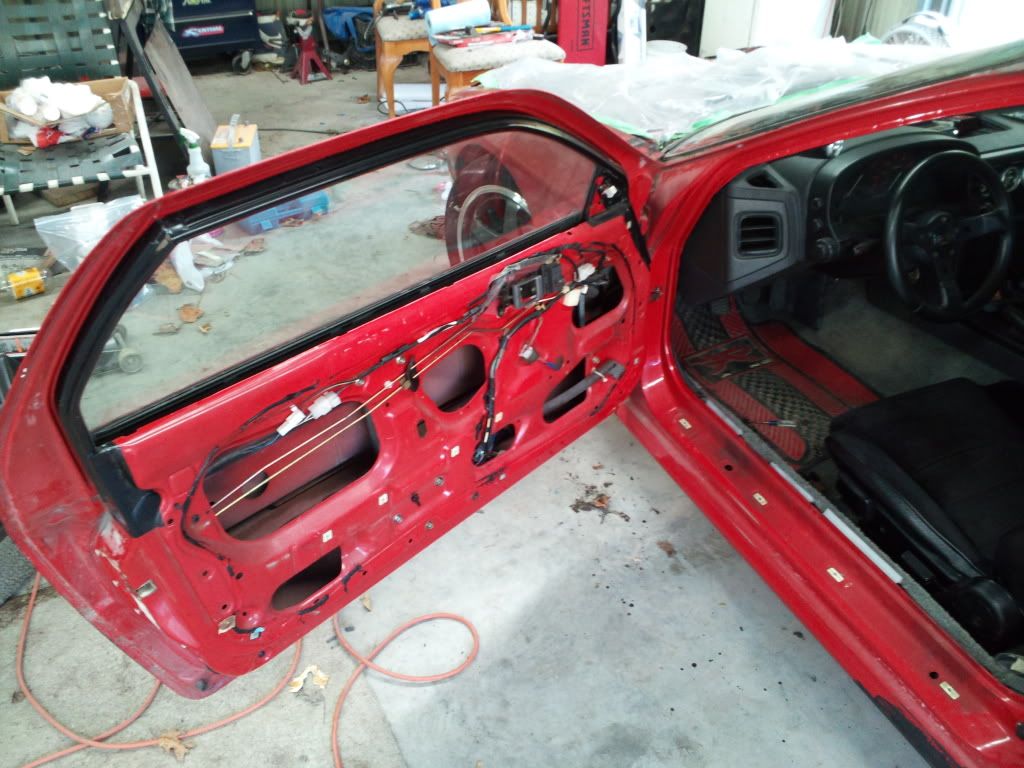
Looks good, that plastic over the hoopd, you should move how its taped on the fenders, you should tabe it on the "jam" area of the fender. And as for removing the door and hatch its completly personal preference, if it was me i would leave the door on, prep for paint, paint all the door jams and hatch jams first, let them dry and then close the door and hatch and spray the exterior. It seems like a smaller headach that way 
Looks awsome, btw are you using that vented hood or another style hood? and where did you get the carbon fiber headlight covers?
Looks awsome, btw are you using that vented hood or another style hood? and where did you get the carbon fiber headlight covers?
Looks good, that plastic over the hoopd, you should move how its taped on the fenders, you should tabe it on the "jam" area of the fender. And as for removing the door and hatch its completly personal preference, if it was me i would leave the door on, prep for paint, paint all the door jams and hatch jams first, let them dry and then close the door and hatch and spray the exterior. It seems like a smaller headach that way
Looks awsome, btw are you using that vented hood or another style hood? and where did you get the carbon fiber headlight covers?
Hi again, yeah made some decent progress last night but am heading back out shortly to pickup where I left off.
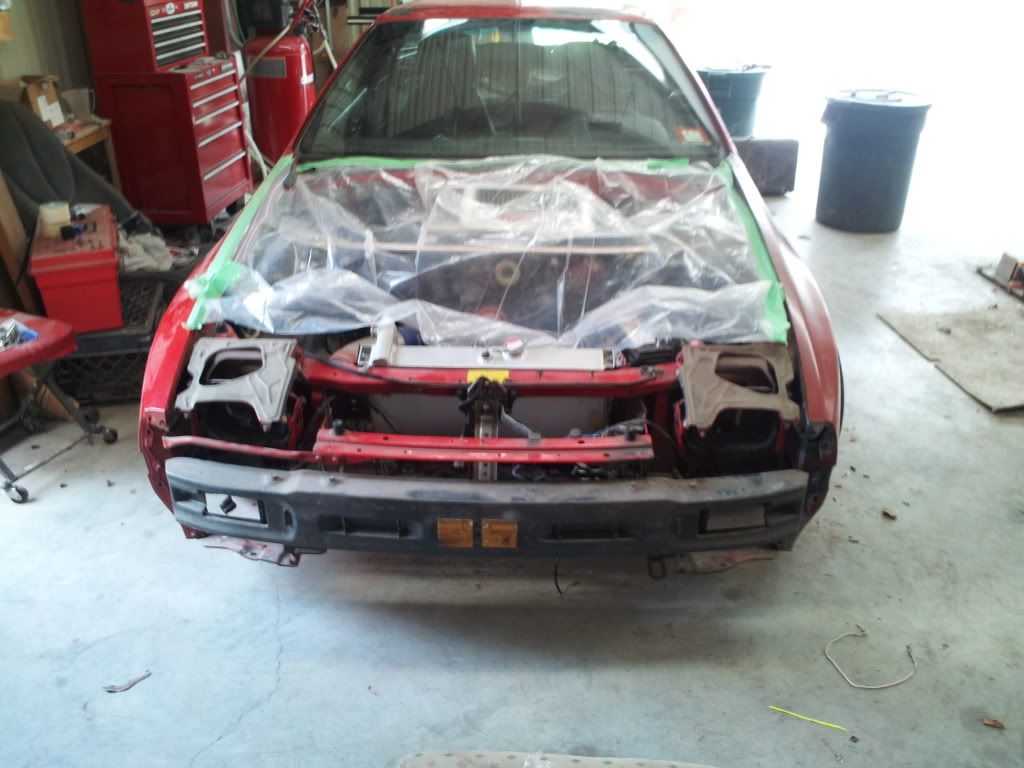
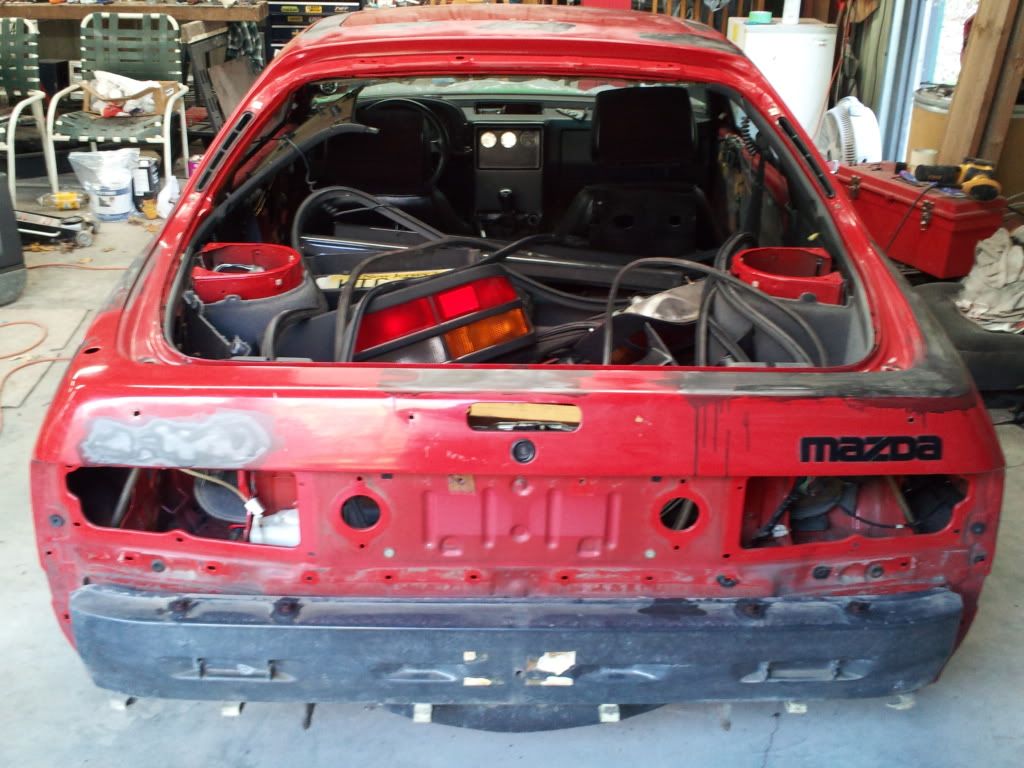
As for the plastic that's just a dust guard right now, has nothing to do with painting masking. I had thought about leaving the doors but I think for me it will be easier to do a good job with them off the car, same with the hatch, especially where it meets the roof it's pretty tight and I'd like to have a clear shot to get my best chance.
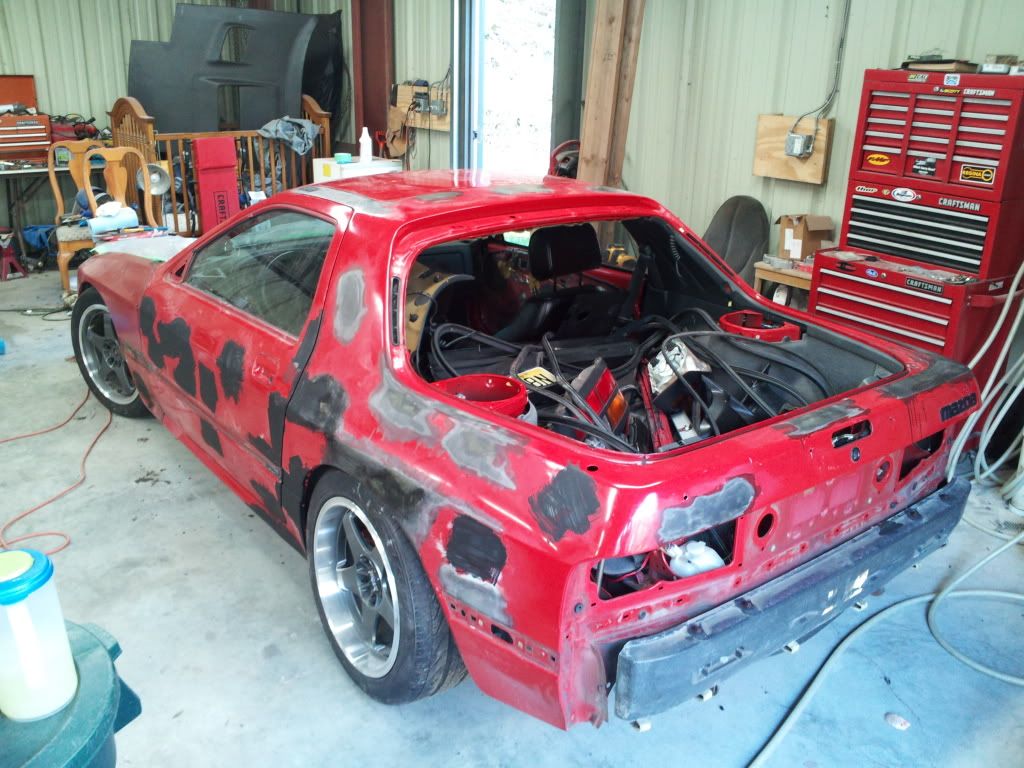
The hood is going to be swapped for the stock TII hood this season due to the VMIC not being used right now. When the VMIC goes back in next spring I'll spray this hood and reinstall it. The CF light covers are from snipe racing along with the cooling, panel, mirror triangles and demister grills. Need to order my CF sunroof and gas cover here shortly.
Looks awsome, btw are you using that vented hood or another style hood? and where did you get the carbon fiber headlight covers?
Hi again, yeah made some decent progress last night but am heading back out shortly to pickup where I left off.
As for the plastic that's just a dust guard right now, has nothing to do with painting masking. I had thought about leaving the doors but I think for me it will be easier to do a good job with them off the car, same with the hatch, especially where it meets the roof it's pretty tight and I'd like to have a clear shot to get my best chance.
The hood is going to be swapped for the stock TII hood this season due to the VMIC not being used right now. When the VMIC goes back in next spring I'll spray this hood and reinstall it. The CF light covers are from snipe racing along with the cooling, panel, mirror triangles and demister grills. Need to order my CF sunroof and gas cover here shortly.


its hard to prep and spray the door jamb where it meets the fender without removing it, rest of the jamb is easy but that part you really cant do a good job with the door on. Makes it alot easier to spray the bottom of the door as well, usually a little rust along the pinch welds


Took off the bumpers, hood, hatch and all the rest of the moldings.
I'm trying to decide how to finish the mirrors, trims and taillights so they still stand out like an S4. Maybe do them in a semi gloss? Or spray clear over the flat on them?
I'm trying to decide how to finish the mirrors, trims and taillights so they still stand out like an S4. Maybe do them in a semi gloss? Or spray clear over the flat on them?
Okay great. I have a quick question, assuming I go ahead and apply the high fill primer and block sand the car, am I supposed to apply another coat of epoxy before paint or go right from high fill primer to paint?
And in between coats of epoxy, high fill and paint, should I use wax and grease remover or alcohol/water mix to wipe off surface dust?
Thanks!
And in between coats of epoxy, high fill and paint, should I use wax and grease remover or alcohol/water mix to wipe off surface dust?
Thanks!

Two things. Do you know if you need to add some kind of flex agent to the paint since you will be painting the urethane bumpers? Also isn't your turbine unit more suited to painting walls and furniture as opposed to an automobile?
Hmm, Eastwoods response to your question:
"For your question, you do not need a flex additive. Eastwood’s single-stage urethane is far more forgiving than conventional basecoat products. Our chemist gave us a cool demo a while back by applying a basecoat to a semi-rigid piece of plastic, then applying our single-stage to an identical piece. As soon as he twisted and rolled the first sheet, the base delaminates. However, the single-stage urethane remained pliable and took an amazing amount of twisting without cracking or showing other signs of delamination.
The majority of our customers using the single-stage paint do not use flex agents, though some choose to just for their own peace of mind. We don’t offer such a product in our line, and I can’t recommend one over another, but certainly plenty of guys have added other manufacturer’s flex additives to the Eastwood paint and I’ve never heard a complaint. As is always the case, I would suggest mixing a small portion first (to test compatiblity and results), just to be on the safe side.
One important note worth your consideration… most flex additives are really intended to give the coating additional pliability for the day or two after it’s applied, so that flexible parts can be reassembled without damaging the paint. Those additives usually gas out of the film within the next few days. They generally do not contribute additional flexibility to the film over the long term."
And these turbine systems are like Wagner paint guns if that's what you mean. Lol. I don't know what to tell you other than it meets the requirements to spray the specified finishes. I'm not a HVLP expert and turbine systems in general are still becoming better known in the automotive areas. Check out some autobody forums, ask around, people are using them.
Flex agent is only going to keep the bumpers flexible for a hours, maybe a whole day, what it is used for is to keep the paint flexable when your re-installing the bumper so the paint does not crack.
Okay great. I have a quick question, assuming I go ahead and apply the high fill primer and block sand the car, am I supposed to apply another coat of epoxy before paint or go right from high fill primer to paint?
And in between coats of epoxy, high fill and paint, should I use wax and grease remover or alcohol/water mix to wipe off surface dust?
Thanks!
And in between coats of epoxy, high fill and paint, should I use wax and grease remover or alcohol/water mix to wipe off surface dust?
Thanks!
in between coats of primer no degreasers needed, unless it has remained "open" for a while and your not sure, it never hurts but its not usually needed at that point unless you suspect contamination. I use a dedicated solvent which is sold like a final wash or final prep type product, its basically a solvent that evaporates quicker then degreasers.
It depends on your primer, some are high builds only. This means that they are intended to be overcoated with a finish primer. Some primers can be both depending how you mix them, but generally speaking a high build primer will not hold the finish as well as a finish primer. This is along the lines of gloss retention ( which doesn't apply to you ), but basically its the primers ability to not shrink in and hold its topcoat truer.
Your bodywork wont be the best, you should high build, fill any remaining pin holes and fix other issues, block it really well, spray finish primer, then sand the finish primer for topcoat.
Both my epoxy primer and urethane high build primers are recommended as suitable substrates for the topcoat I'm using according to the tech sheet so I guess I'll probably end up doing one last coat of epoxy over the high build primer before paint.
This is making more and more sense as we go over this time and time again. I really appreciate the help guys, thank you for taking your time to help me out!
just watch the acetone, it will soften your bodywork slightly
i actually prefer urethane primers under topcoat, keeping in mind I spray ALOT of epoxy primer on the boats, but on cars I prefer the urethane
i actually prefer urethane primers under topcoat, keeping in mind I spray ALOT of epoxy primer on the boats, but on cars I prefer the urethane
Decided to use the stock hood, still doing body work on the hood and bumpers. I finally tried the new spray gun setup for some epoxy primer after the initial hood dent repairs. I only mixed a little bit to spray one light coat but it came out better than I had expected. I sprayed a few test runs on some plywood and then went right over the whole hood. No drips or runs or any problems, it went on nice and smooth. I will do another one or two coats of epoxy before the high build primer.
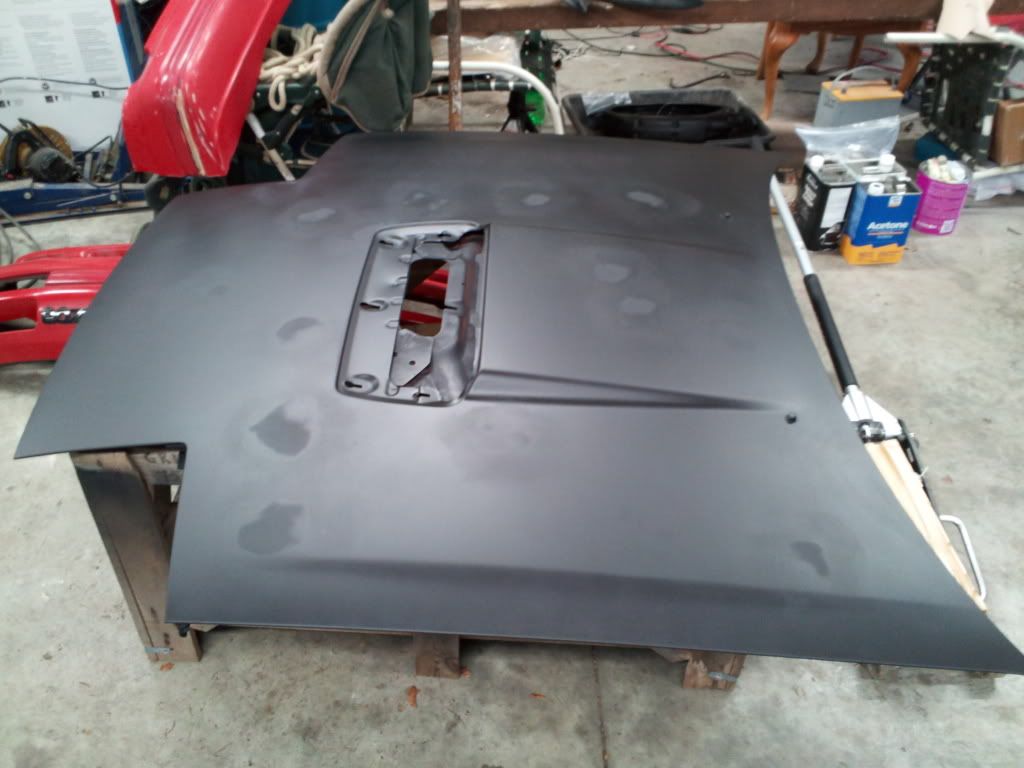
Yes I have two hoods, one for each intercooler setup, right now I am using the stock TMIC again. I will redo the Vmount with some tweaking next spring and will reinstall the Knightsports vented hood at that point. It's already in black primer but I will give it one more coat of epoxy before painting it.
Quick shot of the gun and turbine, really nice equipment, very solid construction. Looks like top notch manufacturing compared to lower end setups I have seen in person. I am using an extra 6ft whip hose on the end of the regular 25ft rubber hose, it makes it very easy to hold and move the gun compared to without it. Can't wait to shoot more paint.
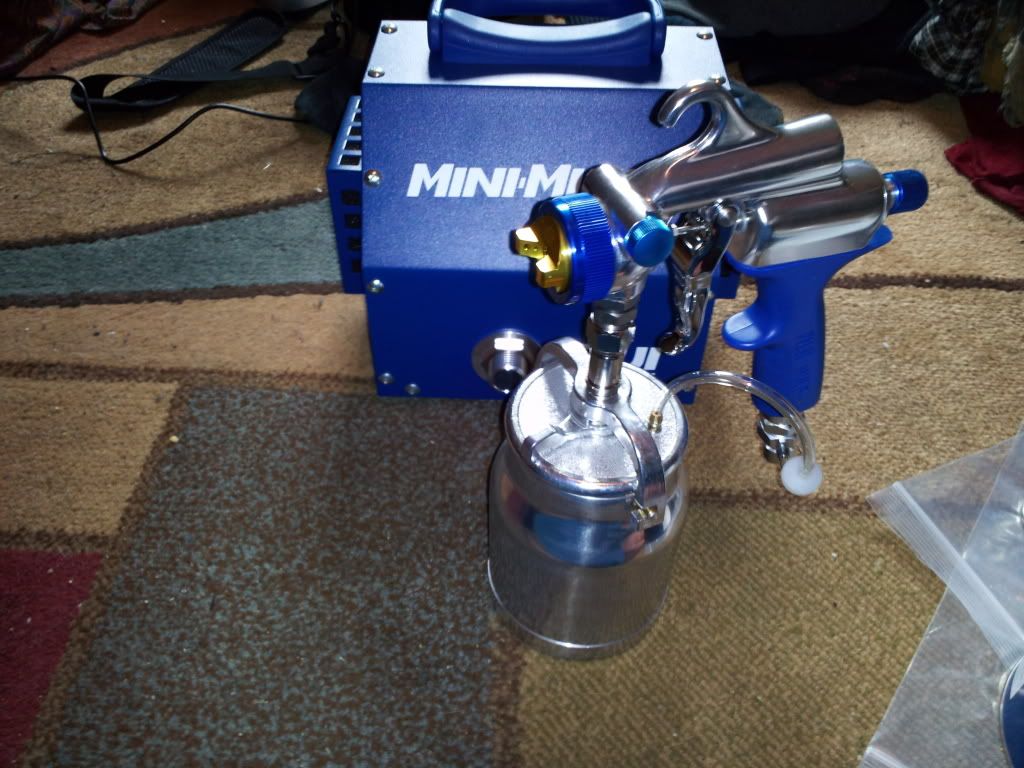
Quick shot of the gun and turbine, really nice equipment, very solid construction. Looks like top notch manufacturing compared to lower end setups I have seen in person. I am using an extra 6ft whip hose on the end of the regular 25ft rubber hose, it makes it very easy to hold and move the gun compared to without it. Can't wait to shoot more paint.

Masking the car for primer
Thanks man, trying to get as much done before winter as possible but it's tought cause I am at the office 6 days a week.
Is this correct, I am basically taping to the very edge of the trim lip. This will leave about 2mm of red paint that will get covered by the moldings. Sorry for the terrible pic but I think you can see what I am saying.
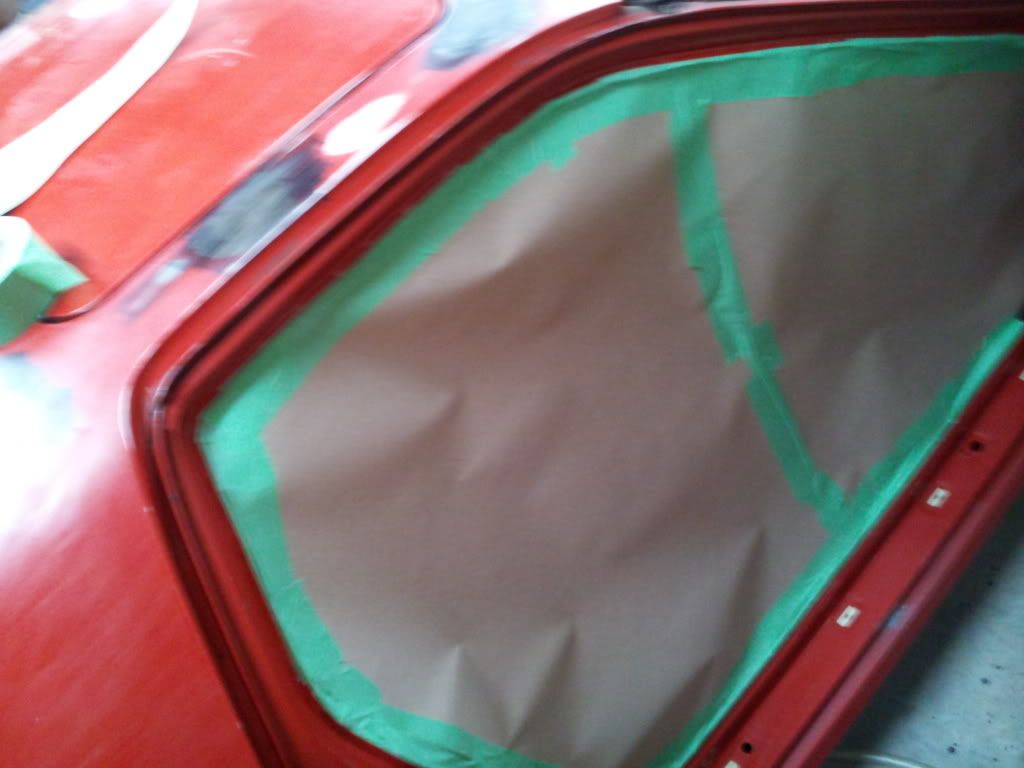
Is this correct, I am basically taping to the very edge of the trim lip. This will leave about 2mm of red paint that will get covered by the moldings. Sorry for the terrible pic but I think you can see what I am saying.
those spots on the hood may not have needed bodywork, it is the adhesive that holds the skin down deforming the hood.
pop the adhesive and the hood normally gets its shape back
pop the adhesive and the hood normally gets its shape back
I'll keep that in mind as I do more work in the future. But there were several small, sharp dents that were clearly visible. Again very small like the other dents but significant and I didn't want to rely on the high build primer to fill those.
I agree with this, I would most definately sand the whole car with 180 grit after first prime job, then prime it again then water sand with 400 and 600 before sealing..