
FD Interior Plastics - Refinishing

How do you remove the blue/red and arrows pointing at seat ? There's some sort of black goo that looks like windshield sealer keeping them in. How to remove the number plate on the fan control ? Did you guys remove these or just mask them off ?


Just following up on my refinishing project which turned out to be a nightmare.
The Goof Off is definitely something I can vouch for, I tried just sanding off that crap on the 93 plastics and the sand paper would just instantly get clogged. I eventually went to home depot, bought some goof off and rough pads and it made short work of the rubberized coating.
Caution: do NOT get the goof off onto any plastics that you aren't going to be painting. I had my entire interior laid out in the garage and I got some on my gauges, which immediately got discolored. It turned out ok after some polishing but it was something that could have been avoided.
I also discovered that the duplicolor bumper paint will show marks from running your fingernail across the surface. I wanted a permanent solution so I ended up bringing my plastics over to Seven Apple to get them sprayed with automotive paint. I'm not sure what Makito used, but it's tough and it matches pretty much perfectly.


Junior Member
Joined: Jan 2012
Posts: 48
Likes: 0
From: So Cal
Just following up on my refinishing project which turned out to be a nightmare.
The Goof Off is definitely something I can vouch for, I tried just sanding off that crap on the 93 plastics and the sand paper would just instantly get clogged. I eventually went to home depot, bought some goof off and rough pads and it made short work of the rubberized coating.
Caution: do NOT get the goof off onto any plastics that you aren't going to be painting. I had my entire interior laid out in the garage and I got some on my gauges, which immediately got discolored. It turned out ok after some polishing but it was something that could have been avoided.
I also discovered that the duplicolor bumper paint will show marks from running your fingernail across the surface. I wanted a permanent solution so I ended up bringing my plastics over to Seven Apple to get them sprayed with automotive paint. I'm not sure what Makito used, but it's tough and it matches pretty much perfectly.
that looks GREAT man. something i have to get around to doing soon. i hate how the crappy 93 interior pieces flake like that :/

Senior Member
Joined: Oct 2002
Posts: 526
Likes: 5
From: Atlanta
I'm a little bit late to the party, but. . .I just found the best product I have ever experienced to remove the sludge/goo from the black interior plastic parts. It is ZEP FORMULA 50 R.T.U. in the spray (Ready to Use) 32 oz bottle. I think you have to buy it from an industrial supply company. Anyway, spray it on full strength, wait a minute or two, wipe it down (not rub hard) with a 3M pad (again, not hard enough to scratch), then rinse with water. First application got about 95% of the goo off, second application finished it. It literally disintegrates the goo and doesn't do anything to the plastic underneath! Wish I had taken before and after pictures. . .

Hey guys, I know a lot of people have pretty good ways for taking the crap off of the plastics, I just want to share my experience. I sand blasted my plastics and took it down to bare plastic. All that gunk came off fairly easy. I went to harbor freight and bought a cheap media blast gun and some media as well. I think I paid somewhere around $35 for them. The good thing is that you can reuse media if you have a way of collecting it after blasting. It took maybe 3 minutes to get the gunk off of my door plastics. Of course none of this would work without an air compressor. If you don't have one, take it to a place that does it. It's usually fairly cheap.
Last edited by Mraxg7; Apr 2, 2015 at 07:49 PM.
Gues what it is?

It is a 2002 Rx-7 Spirit R instrument cluster illumination adjustment cap. I found this part by accident when checking 2002 Rx-7 brochures, it looked like it was painted same colour as instrument cluster. Next moment I was ordering this part from Japan.

You can see section of the plug is covered with clear coat to identify exact paint code.
Yes I've spent quite a lot for a part which was only be used to know exact paint code.
Let me share this holy grail with you, closest paint to match Spirit R interior is:
199 black pearl (blue-black) (blauschwarz) used by Mercedes Benz.
This is the outcome after all panels were coated with black pearl color and matte coat in paint shop.


I think this would be as close as we can get to Spirit-R interior panel color replication.
It is a 2002 Rx-7 Spirit R instrument cluster illumination adjustment cap. I found this part by accident when checking 2002 Rx-7 brochures, it looked like it was painted same colour as instrument cluster. Next moment I was ordering this part from Japan.
You can see section of the plug is covered with clear coat to identify exact paint code.
Yes I've spent quite a lot for a part which was only be used to know exact paint code.
Let me share this holy grail with you, closest paint to match Spirit R interior is:
199 black pearl (blue-black) (blauschwarz) used by Mercedes Benz.
This is the outcome after all panels were coated with black pearl color and matte coat in paint shop.
I think this would be as close as we can get to Spirit-R interior panel color replication.
Gues what it is?
It is a 2002 Rx-7 Spirit R instrument cluster illumination adjustment cap. I found this part by accident when checking 2002 Rx-7 brochures, it looked like it was painted same colour as instrument cluster. Next moment I was ordering this part from Japan.
You can see section of the plug is covered with clear coat to identify exact paint code.
Yes I've spent quite a lot for a part which was only be used to know exact paint code.
Let me share this holy grail with you, closest paint to match Spirit R interior is:
199 black pearl (blue-black) (blauschwarz) used by Mercedes Benz.
This is the outcome after all panels were coated with black pearl color and matte coat in paint shop.
I think this would be as close as we can get to Spirit-R interior panel color replication.
Yes it is, you can check more about this in here -> Pale white Rx-7 build: Interior trim restoration
Yes it is, you can check more about this in here -> Pale white Rx-7 build: Interior trim restoration
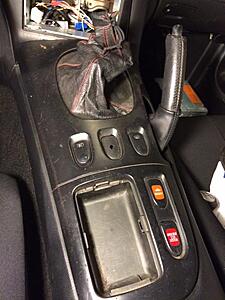
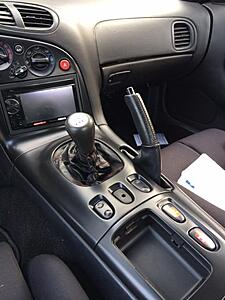
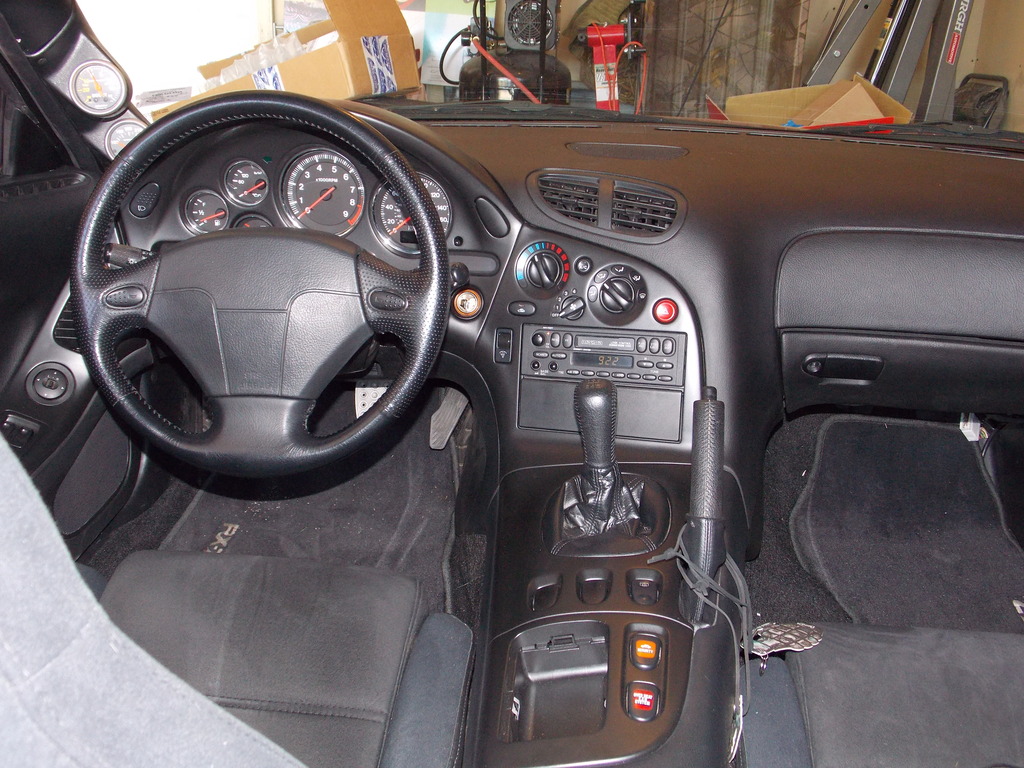
I just finished my interior refurb and it turned out great. I didn't get the black-gray finish I wanted but what I have now is far better than what it was. Only thing I wish I would have done was take before pics. I tried the duplicolor bumper paint but the way it sprayed was too inconsistent. There are too many curves and crevices that caused a lot of overspray. I have a slight OCD and need things to be as perfect as possible lol. I ended up using black trim paint made by SEM. Works amazing and it's very durable so far. It doesn't leave scratches or marks from my fingernail. Hope this helps people with their project. Sorry for crappy cell pics.


Did you use any of the SEM adhesion promoters or the texture spray before your topcoat?
Does anyone know what type of plastic the interior is made of? SEM has different adhesion promoters for different plastics.
Does anyone know what type of plastic the interior is made of? SEM has different adhesion promoters for different plastics.
I just finished my interior refurb and it turned out great. I didn't get the black-gray finish I wanted but what I have now is far better than what it was. Only thing I wish I would have done was take before pics. I tried the duplicolor bumper paint but the way it sprayed was too inconsistent. There are too many curves and crevices that caused a lot of overspray. I have a slight OCD and need things to be as perfect as possible lol. I ended up using black trim paint made by SEM. Works amazing and it's very durable so far. It doesn't leave scratches or marks from my fingernail. Hope this helps people with their project. Sorry for crappy cell pics.


Well, here's what I did. I had first sprayed with duplicator adhesion promoter, then sprayed it with the duplicolor black and didn't care for it at all. I scuffed that up with Brillo pad and painted SEM over it. I used about three to four coats. This stuff is tough and I feel like would do just fine with or without. There's something they put in SEM paint that doesn't spray like regular rattle can. Like its self leveling or something.
Well, here's what I did. I had first sprayed with duplicator adhesion promoter, then sprayed it with the duplicolor black and didn't care for it at all. I scuffed that up with Brillo pad and painted SEM over it. I used about three to four coats. This stuff is tough and I feel like would do just fine with or without. There's something they put in SEM paint that doesn't spray like regular rattle can. Like its self leveling or something.

Thanks for the info. I was considering getting a can of the texture as well. Or does just the paint with no texture look pretty good as is? My car is a driver, not for show and not in mint condition by any means. Just want to be able to touch the interior and not stick to it.
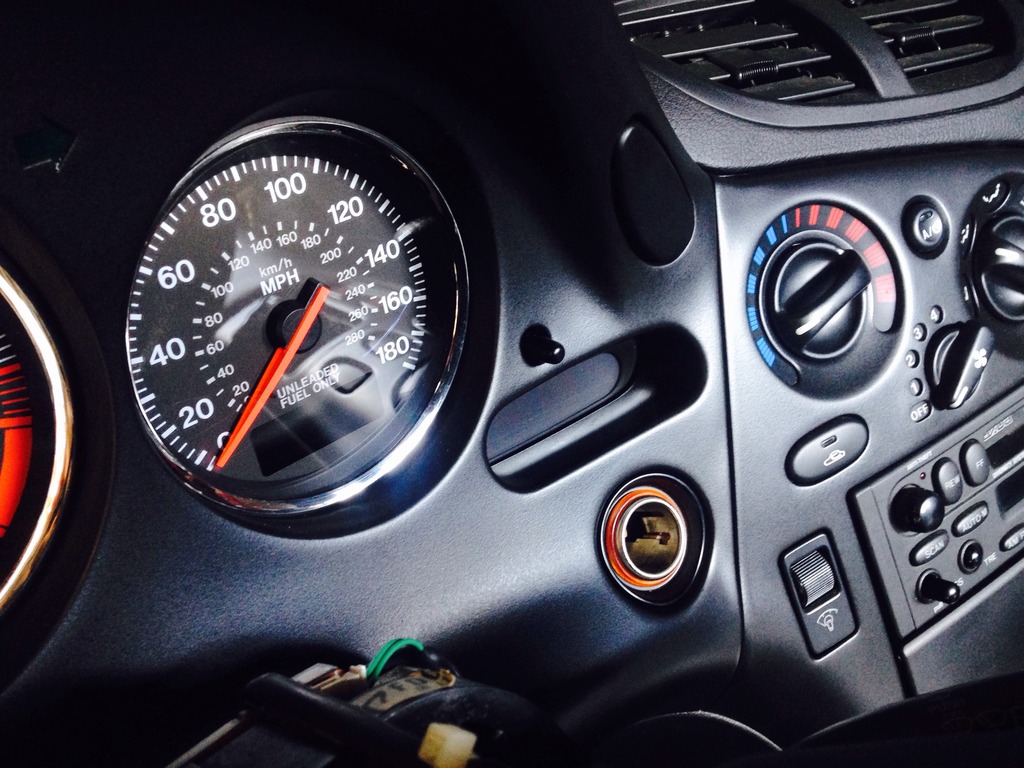
some better pics of SEM painted interior.
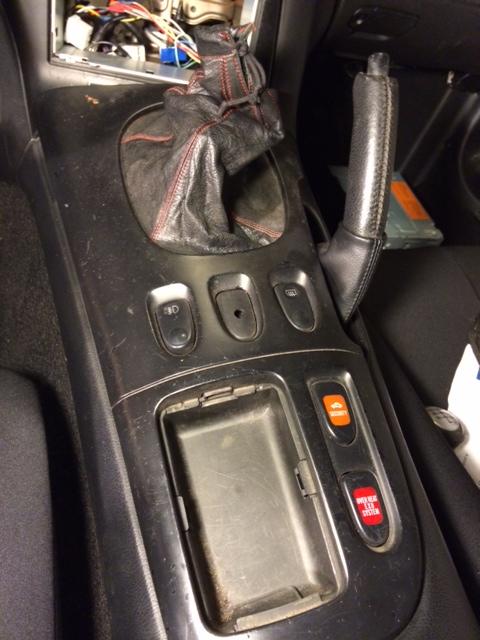
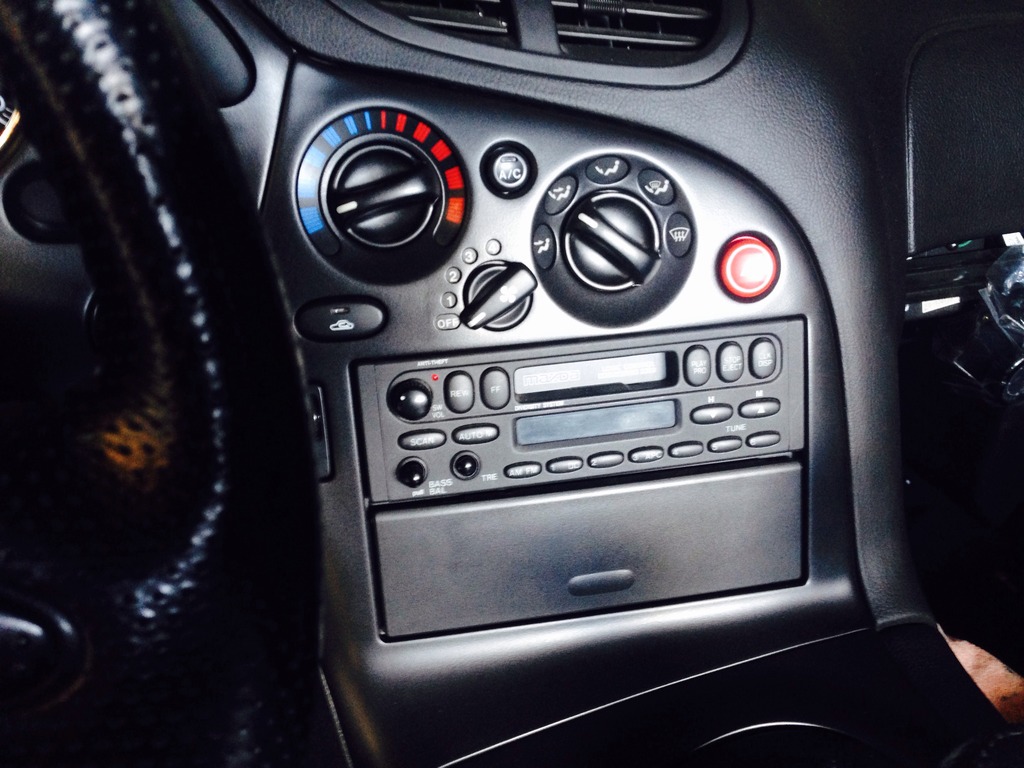
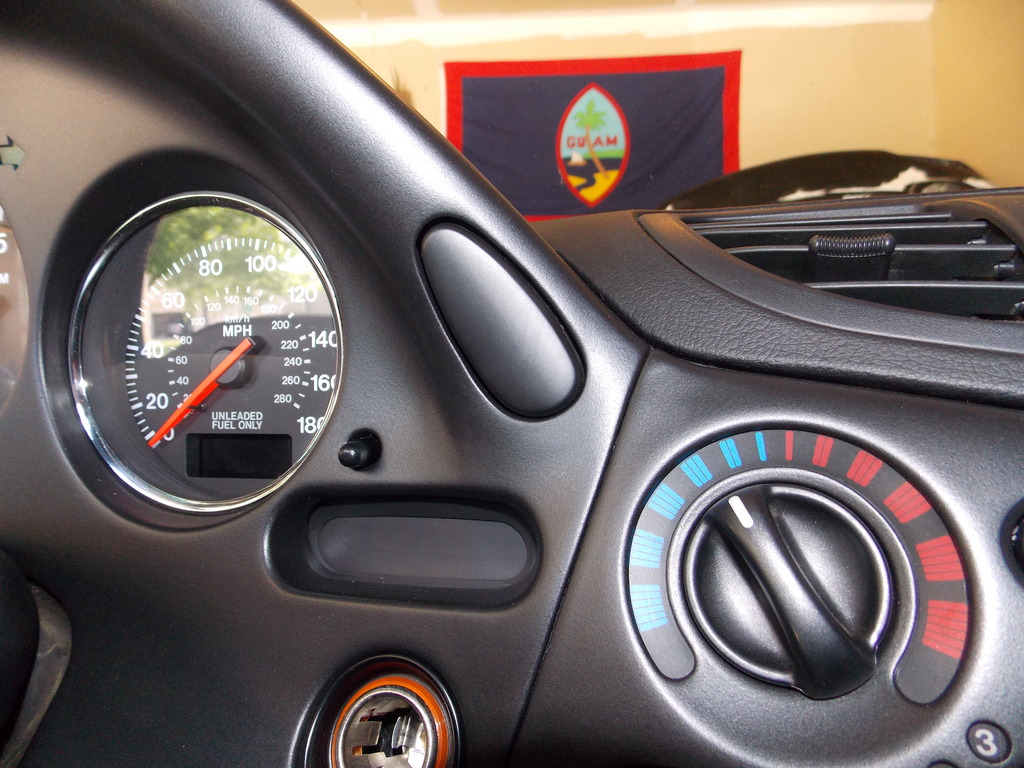
here is SEM paint compared to stock colored button. I left it unpainted for contrast. It's more apparent in pictures but if you just sat in my interior you probably wouldn't notice. vvvv

you can see some texture here. It's real easy to clean.
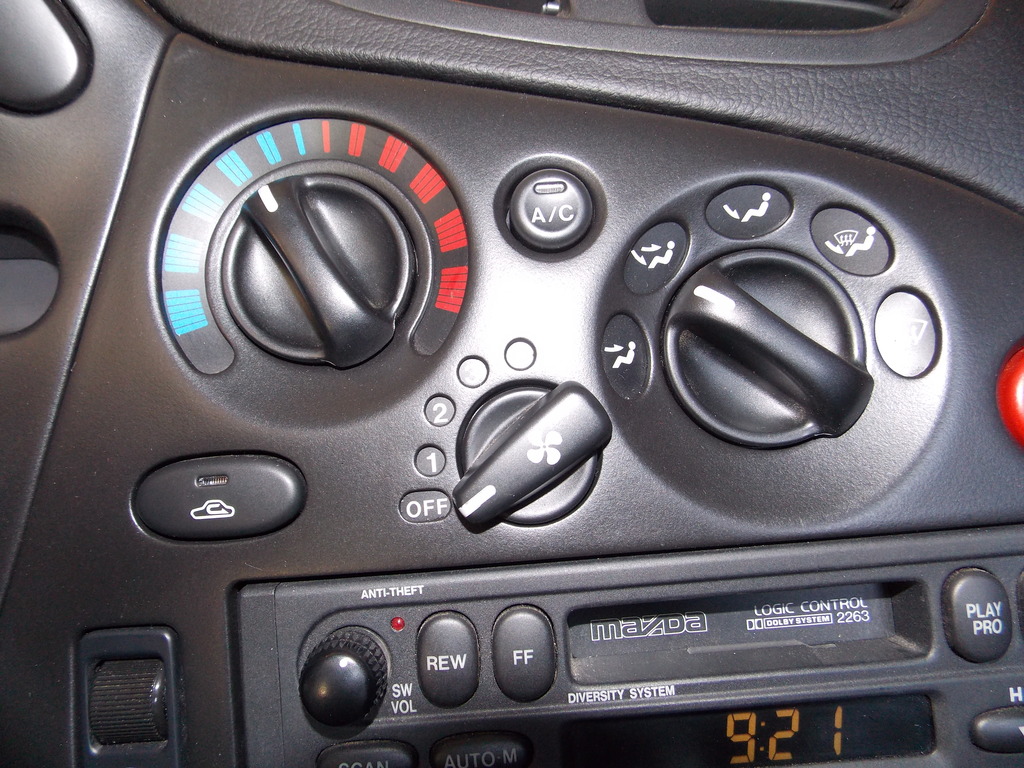
Again, buttons are left untouched for contrast.


here is SEM paint compared to stock colored button. I left it unpainted for contrast. It's more apparent in pictures but if you just sat in my interior you probably wouldn't notice. vvvv


you can see some texture here. It's real easy to clean.

Again, buttons are left untouched for contrast.


Some parts I had to do more than 4 coats to cover minor imperfections from when I sanded and media blasted. Like I mentioned before, the SEM paint levels out very well and covered the imperfections. It saved me a lot of time from having to go back and sand those parts back down.
One more tip, if you come across blobs of paint that shoot out from build up on the tip of the nozzle (and I'm sure you will because it's rattle can) just wait for it to dry, use 2000 grit sand paper and lay another coat. Like it never even happened.
One more tip, if you come across blobs of paint that shoot out from build up on the tip of the nozzle (and I'm sure you will because it's rattle can) just wait for it to dry, use 2000 grit sand paper and lay another coat. Like it never even happened.

This is going to be a premature post as I've been planning on posting pictures and doing a mini review... but I want to chime in here. I've been testing out several colors of SEM vinyl/plastic interior spray paint in search for the closest stock 93 FD interior plastic finish (with rattle cans). So far I've tried SEM Trim black, Satin Black, and Landau Black. Also about to test the same SEM colors but with a coat of flat clear and regular clear. I'm trying to match the stock 93 look with just rattle cans.
After some research I went in assuming SEM Trim Black was going to be the best match because it seems to be the most popular on multiple forums. I really like the color, but if you're going to do one piece, you're going to have to do them all. It's more of a deep charcoal grey that has a tiny hint of something like glitter/shimmer. It's hard to explain, but next to a stock piece under the right light you can definitely notice it. SEM Satin black is much closer to the right color (darkness) black, but it's slightly less shiny/reflective than the stock trim pieces. So far SEM Landau black has been the closest to stock. It's the middle point between Satin and Gloss black.
Some quick notes about the paint. The texture on all the SEM products isn't totally smooth. It is a tiny bit course and feels something like ultra fine sandpaper. It is pretty durable for being spray paint though, high quality stuff. The paint sprays on very thin and 4 coats with half a day of drying in between each coat is going to get you about the best results you can get from a spray can.
Once I try them with the coats of clear I'm going to decide on and write about which combination worked best for me, how I prepped the pieces (adhesion promoter is a must), and include some pictures for some side to side comparison of the colors and clear combinations.
This is going to be a premature post as I've been planning on posting pictures and doing a mini review... but I want to chime in here. I've been testing out several colors of SEM vinyl/plastic interior spray paint in search for the closest stock 93 FD interior plastic finish (with rattle cans). So far I've tried SEM Trim black, Satin Black, and Landau Black. Also about to test the same SEM colors but with a coat of flat clear and regular clear. I'm trying to match the stock 93 look with just rattle cans.
After some research I went in assuming SEM Trim Black was going to be the best match because it seems to be the most popular on multiple forums. I really like the color, but if you're going to do one piece, you're going to have to do them all. It's more of a deep charcoal grey that has a tiny hint of something like glitter/shimmer. It's hard to explain, but next to a stock piece under the right light you can definitely notice it. SEM Satin black is much closer to the right color (darkness) black, but it's slightly less shiny/reflective than the stock trim pieces. So far SEM Landau black has been the closest to stock. It's the middle point between Satin and Gloss black.
Some quick notes about the paint. The texture on all the SEM products isn't totally smooth