
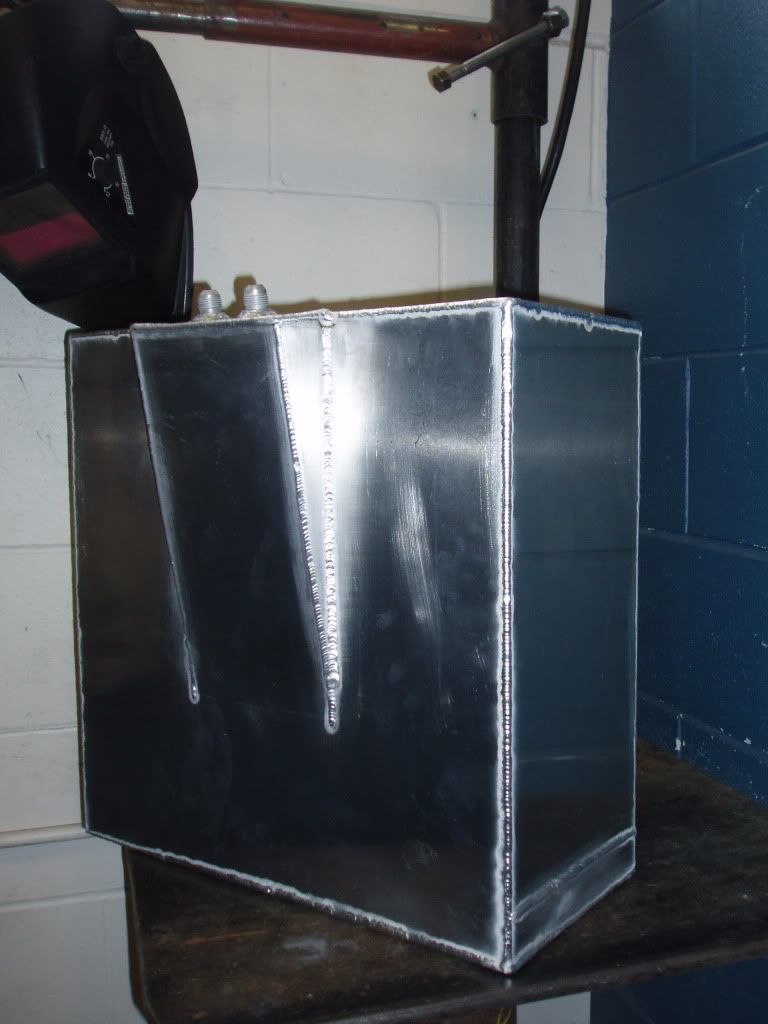
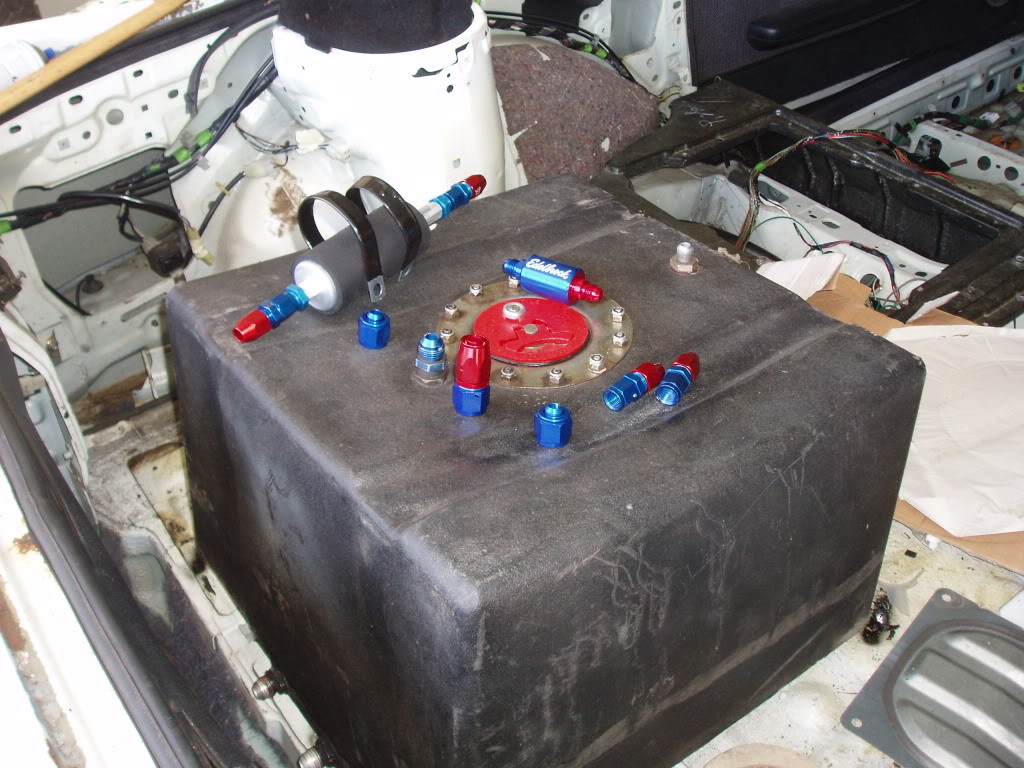
my 1st home made fuel cell!

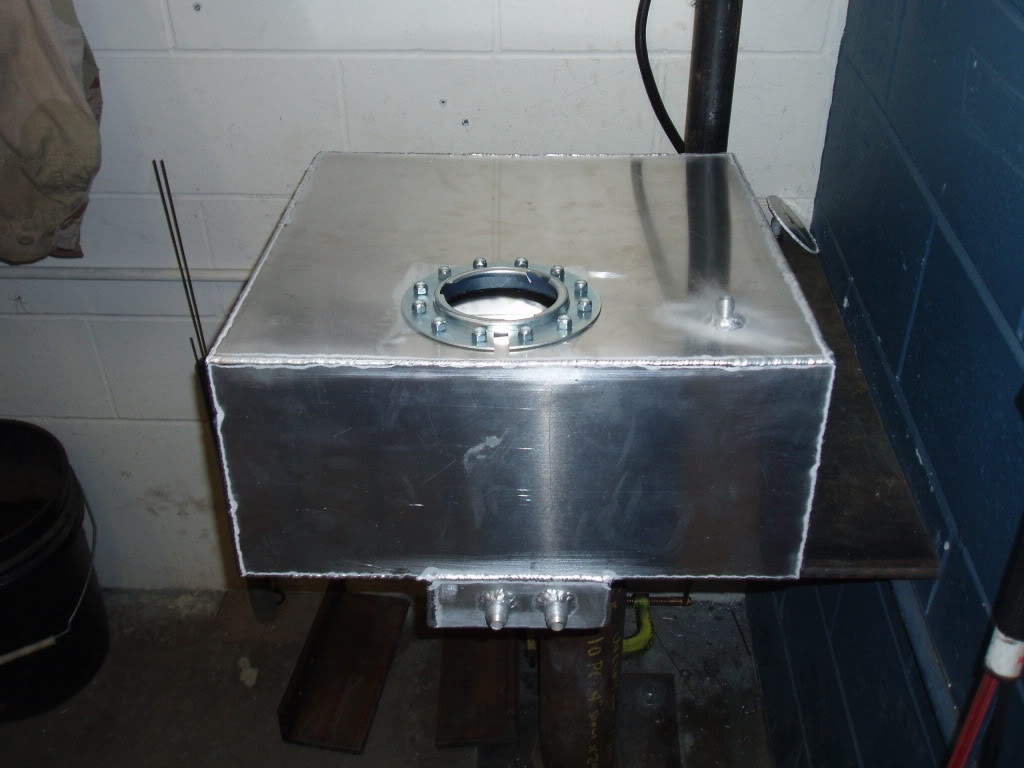
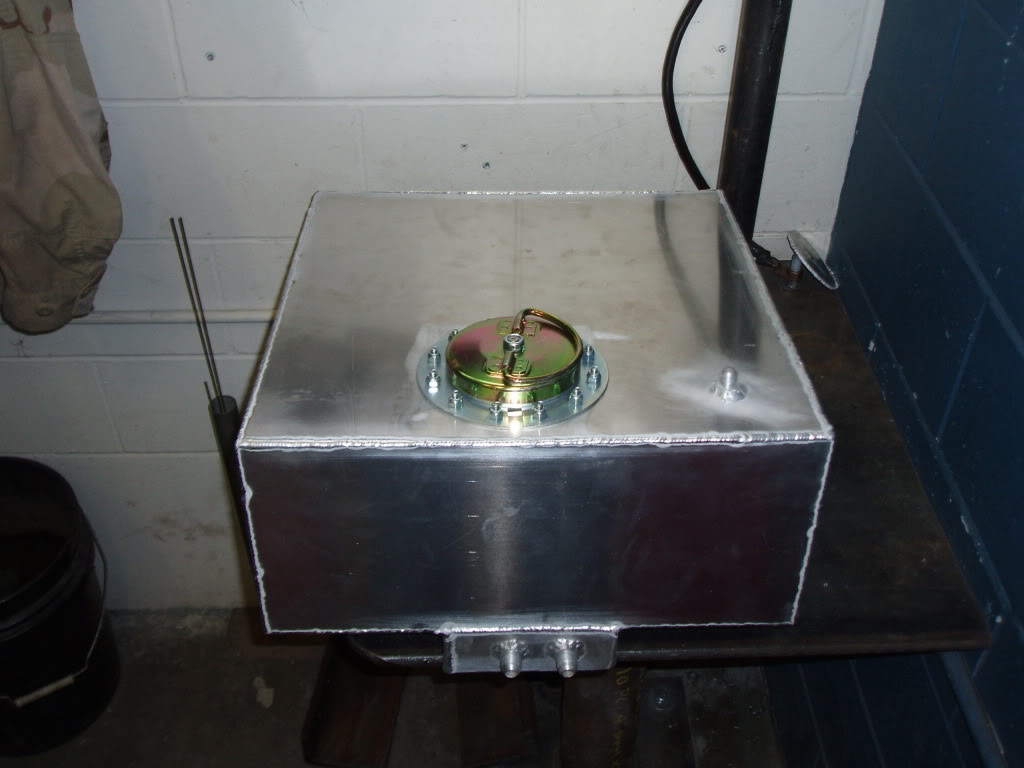
2 more...
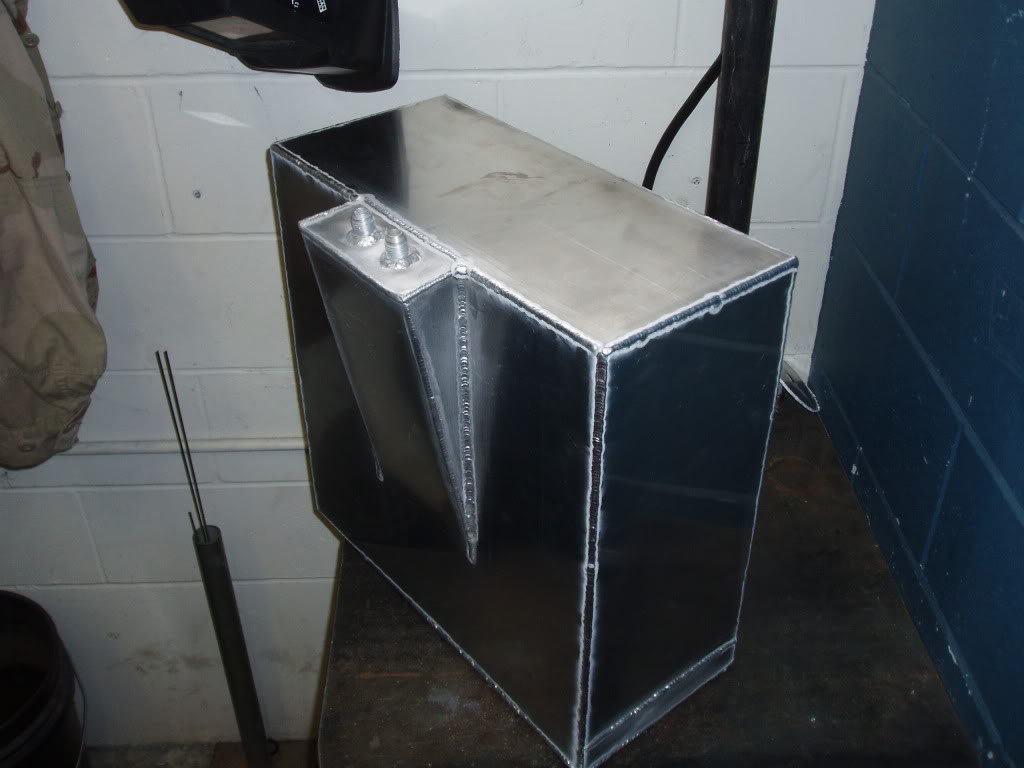
and and this is what i had in there... its lighter and came out to about the same price... but i dont smell the gas anymore and i think mine just look much better! also, having it in aluminum over thin plastic makes me feel a little safer also. unless it hits me in the back of the head.
and and this is what i had in there... its lighter and came out to about the same price... but i dont smell the gas anymore and i think mine just look much better! also, having it in aluminum over thin plastic makes me feel a little safer also. unless it hits me in the back of the head.
oh, and TIG welding is actually a lot easier than people make it out to be. its just the machines are exspensive, most people dont want to spend $2000 on something they dont know how to use...
Joined: Feb 2001
Posts: 29,798
Likes: 128
From: London, Ontario, Canada
I love it! I'm currently making my own aluminum fuel tank (it's only a cell if there is an internal bladder  ) but I am going the other direction....100 litres!
How did you stop the metal from warping? I am building mine with an internal frame of angle for extra strength (mounted under the car in the stock location) yet I'm still seeing significant warpage of the sides even though I'm keeping the heat down and only welding about 4" at a time.
) but I am going the other direction....100 litres!How did you stop the metal from warping? I am building mine with an internal frame of angle for extra strength (mounted under the car in the stock location) yet I'm still seeing significant warpage of the sides even though I'm keeping the heat down and only welding about 4" at a time.
to keep it from warping i tacked the whole thing together in its complete shape. then i welded it up from one side to the other. 18" from side to side without stopping the weld. i didnt have any problem with it warping.
also, i would weld 2 sides on the top opposite eachother. then 2 on the bottom. then 2 opposite sides veritcally. and then finish up the same way...
if its already in its complete finished shape. it should hold its shape and weld just fine. dont weld it in pieces. you would have to brace it everywhere if doing it in pieces...
Trending Topics
Joined: Feb 2001
Posts: 29,798
Likes: 128
From: London, Ontario, Canada
I'm quite surprised that it has not warped, using that welding method. Tacking doesn't prevent warping, so I am curious, have you put a straight edge on the seams? 
I should be more clear about what I mean regarding warping. I'm not talking about the basic shape moving around, but about the panel staying flat. As the whole panel grows as it heats up, it could gain 1/16" or so. Then it gets welded into place in it's larger form and thus it bows in or out once it is cooled.
I should be more clear about what I mean regarding warping. I'm not talking about the basic shape moving around, but about the panel staying flat. As the whole panel grows as it heats up, it could gain 1/16" or so. Then it gets welded into place in it's larger form and thus it bows in or out once it is cooled.

I'm quite surprised that it has not warped, using that welding method. Tacking doesn't prevent warping, so I am curious, have you put a straight edge on the seams?
I should be more clear about what I mean regarding warping. I'm not talking about the basic shape moving around, but about the panel staying flat. As the whole panel grows as it heats up, it could gain 1/16" or so. Then it gets welded into place in it's larger form and thus it bows in or out once it is cooled.
I should be more clear about what I mean regarding warping. I'm not talking about the basic shape moving around, but about the panel staying flat. As the whole panel grows as it heats up, it could gain 1/16" or so. Then it gets welded into place in it's larger form and thus it bows in or out once it is cooled.
Usually when pieces are 90 deg to eachother it greatly reduces warping. The other thing is you are supposed to only weld about 6 inches, stop, and cool, that should help as well.
ok ill be the one to say it why in the hatch?!!! also nice little aluminum project ill be doing similar for my water/meth tank. deffinatly some good practice for tig with those lengths i like it.
ill second the machine being expensive but actuall welding tig easier than most make it out.
z
ill second the machine being expensive but actuall welding tig easier than most make it out.
z
Yeah TIG is not tough. Learning how to weld edges on thin aluminum usually takes practice since you usually end up melting it away if you aren't careful. Also doing a nice weave on steel takes practice. You don't see too many weaves.

Joined: Feb 2001
Posts: 29,798
Likes: 128
From: London, Ontario, Canada
That's exactly what I did, and I also alternated sides as well. I'm really not happy with how my tank worked out warpage wise because it moved a lot. I think I'll probably make another but try to minimize welds by having the basic box shape made at a metal shop in a brake out of one piece, and then just welding sides, the baffles and the sump. 5052 instead of 6061 might help as well.
you will not need pulse with such thin material. Pulse is almost useless anyways, no matter the case. I have a Lincoln 175 square wave.
This tank is also made from 5052 and not 6061, but that has nothing to do with the warping or not warping.
The only thing i can say is, if your having trouble with warpage, your set-up needs work. Where you place your tacks and how you brace the item is key here. I have welded countless aluminum pieces and i only experience warpage on the smaller items. The smaller thinner aluminum pieces need more bracing and support to keep from warping. Larger items like a fuel cell have pleny of material for the heat to go. If everything is tacked up correctly, there shouldnt really be a problem.
Joined: Feb 2001
Posts: 29,798
Likes: 128
From: London, Ontario, Canada
Well, I tacked every few inches and then welded only a few inches at a time, at about 130-150A. I can't think of any other way it could have been done. 5052 is better in this application though since it has less of a tendency to become brittle and is more springy then 6061.
I don't know if this is of any help, but I've welded some .02" stainless sheet before and it seemed like it didn't distort as much if i kept on going as oppose to stop and go every 2 inches. I still had it tacked about every 1" or so though.
Pre-heating is the key to dimensional stability. Unfortunately, it can be very difficult, or at least a huge PITA, for us mere hobbyists.
you will not need pulse with such thin material. Pulse is almost useless anyways, no matter the case. I have a Lincoln 175 square wave.
This tank is also made from 5052 and not 6061, but that has nothing to do with the warping or not warping.
The only thing i can say is, if your having trouble with warpage, your set-up needs work. Where you place your tacks and how you brace the item is key here. I have welded countless aluminum pieces and i only experience warpage on the smaller items. The smaller thinner aluminum pieces need more bracing and support to keep from warping. Larger items like a fuel cell have pleny of material for the heat to go. If everything is tacked up correctly, there shouldnt really be a problem.
This tank is also made from 5052 and not 6061, but that has nothing to do with the warping or not warping.
The only thing i can say is, if your having trouble with warpage, your set-up needs work. Where you place your tacks and how you brace the item is key here. I have welded countless aluminum pieces and i only experience warpage on the smaller items. The smaller thinner aluminum pieces need more bracing and support to keep from warping. Larger items like a fuel cell have pleny of material for the heat to go. If everything is tacked up correctly, there shouldnt really be a problem.
Here is a professional who says otherwise:
http://www.youtube.com/watch?v=geasK5nD4T0
http://www.youtube.com/watch?v=2NkFRlbJNZk
I wont bother repeating Ron Covell's thoughts on Pulse option but the pros say otherwise.
Well, I tacked every few inches and then welded only a few inches at a time, at about 130-150A. I can't think of any other way it could have been done. 5052 is better in this application though since it has less of a tendency to become brittle and is more springy then 6061.
Apply clever comment here
Joined: Sep 2005
Posts: 125
Likes: 0
From: Post Falls ID
I work for a company called Fluid design and we make tanks. Just a few concerns. have you pressure tested the tank at 3 PSI and used SNOOP, or another soapy liquid to find leaks such as cold lap, pinholes, missed seems. Did you use a baffel inside?....And you really should have used glipnal for a coating on inside. But other then that it looks good ...;o)
Set your tank at an angle with the peak of the "V" you are welding straight up. Wet rags and place them on both sides of the location you are about to weld. Do about 6 inches at a time. Don't drop your current, but raise it to a point where you can travel fairly quickly. If you raise the current by 20 percent, but decrease the time to travel the 6" by 50%, the overall amount of heat transfered to the metal wil be considerably less.
Another trick is to weld into a weld. If you are right handed, start 6" from the left edge (welding right to left). Next, move 12" from the left edge and weld into the start of your previous weld, and so on. It's a very effective technique (especially with MIG) but you will see all of your stops then.
Another trick is to weld into a weld. If you are right handed, start 6" from the left edge (welding right to left). Next, move 12" from the left edge and weld into the start of your previous weld, and so on. It's a very effective technique (especially with MIG) but you will see all of your stops then.

Thread
Thread Starter
Forum
Replies
Last Post
Skeese
Adaptronic Engine Mgmt - AUS
65
Mar 28, 2017 03:30 PM
rx8volks
Canadian Forum
0
Aug 13, 2015 04:55 AM