
My First Wiring Solder :)

Thread Starter
Joined: Oct 2006
Posts: 6,604
Likes: 17
From: Toronto, Canada
My First Wiring Solder :)
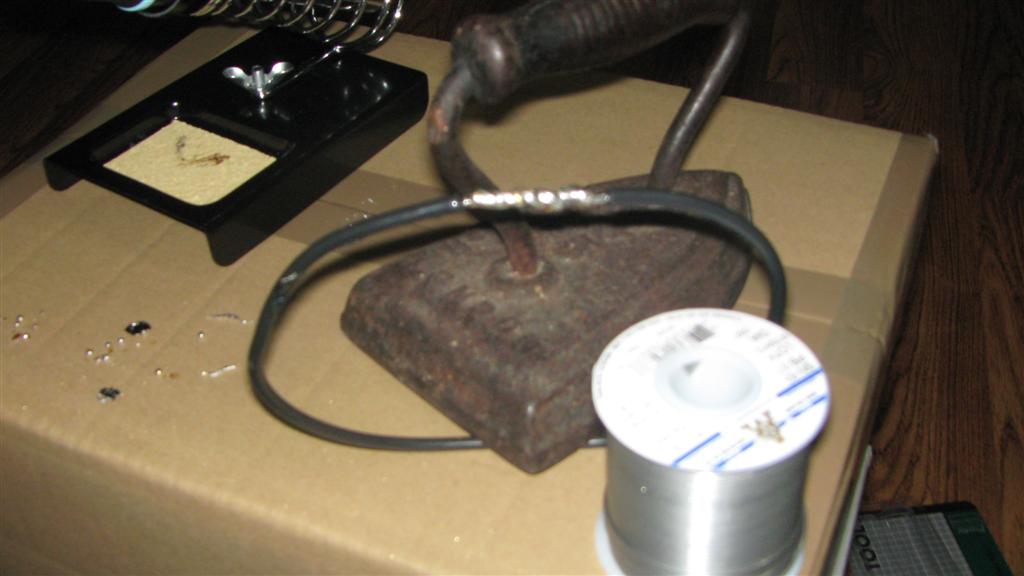
Well its about time I got a soldering needle/gun and here is my very first attempt at soldering. I was able to successfully solder 2 wires, I feel proud  . Now I just need to get some shrink tube and im ready to go.
Anyone know what the yellow stuff is left on the wire? I thought it was supposed to look silver all over.
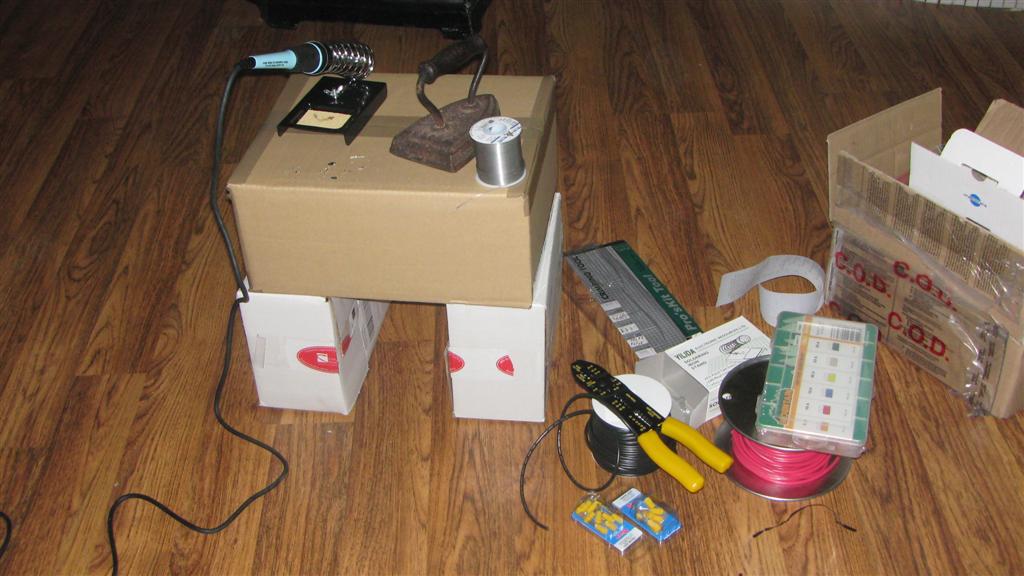
My setup "table"
My first wire solder, I accidentally burned the wire a bit with the needle
Second wire solder, no burning this time, success
thewird
. Now I just need to get some shrink tube and im ready to go.Anyone know what the yellow stuff is left on the wire? I thought it was supposed to look silver all over.
My setup "table"
My first wire solder, I accidentally burned the wire a bit with the needle
Second wire solder, no burning this time, success
thewird
Better then my first solder! Yours is way more in depth too. I try to get a solder all the way around the wire if I have time, otherwise I just put a nice solder on the top and done deal.
Looks great for a first time. I do like how you meshed the two wires together well nothing sharp sticking out  A lot of people don't do that which makes the difference between a good solder and a bad one
A lot of people don't do that which makes the difference between a good solder and a bad one
Did you use a flux paste? it will allow you to get better penetration with the solder and will make the joint stronger.
The yellow stuff is likely the rosin core of the solder, it's supposed to be like flux, but never really works the same. Also allows the use of lead free solders for user friendliness.
The yellow stuff is likely the rosin core of the solder, it's supposed to be like flux, but never really works the same. Also allows the use of lead free solders for user friendliness.
Thread Starter
Joined: Oct 2006
Posts: 6,604
Likes: 17
From: Toronto, Canada
I didn't use separate flux. The solder I used has flux in it and that is what the yellow stuff is I think. The joint seems pretty strong, I tried yanking on it with all my might and was not able to break it.
thewird
thewird
Looks good.
I agree with using separate flux - look in the plumbing dept at Home Depot / Rona etc.
Wash the yellow flux off with varsol.
Use a good quality shrink tube over the finished joint. It will provide a good seal and mechanical strength to prevent breakage at the joint which can occur if the wire can flex. Electrical tape is for house wiring. (IMHO)

Trending Topics
Thread Starter
Joined: Oct 2006
Posts: 6,604
Likes: 17
From: Toronto, Canada
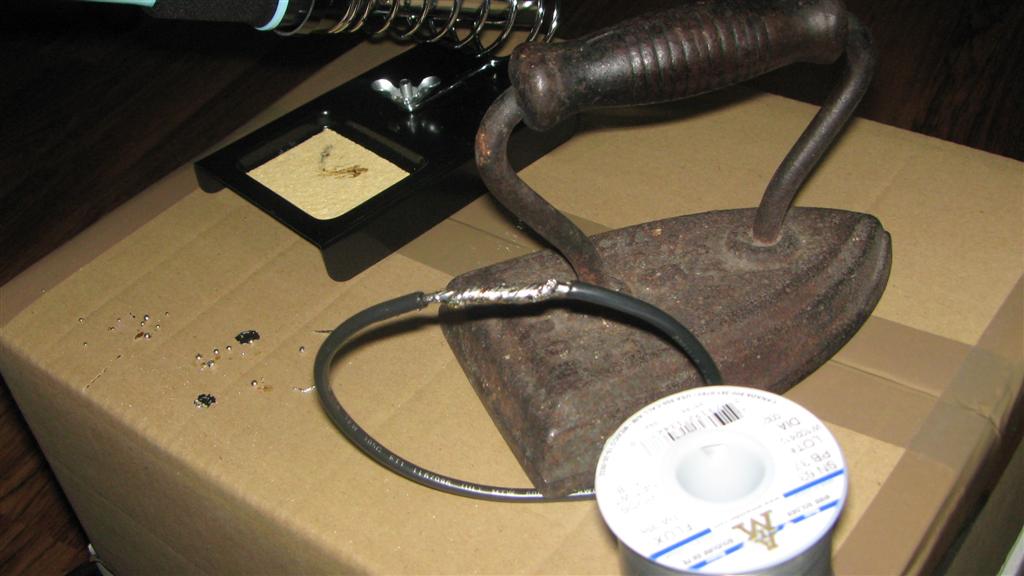
LOL, I just used the iron to hold the wire.
Sayal owns! There was so much more stuff I wanted to get but didn't really need so I only got what I needed. I'm scared to go there again for fear of leaving full of bags.
thewird
Sayal owns! There was so much more stuff I wanted to get but didn't really need so I only got what I needed. I'm scared to go there again for fear of leaving full of bags.
thewird

not sure if you're aware of not , but the sponge in the solder holder is suppose to be wetted before using. Otherwise you just ruin it. Now solder on a whole megasquirt ... that'll be a real chalenge.
Also is that a weller? The one that I'm using right now is pretty much a hybrid of 3 solderers lol.
Also is that a weller? The one that I'm using right now is pretty much a hybrid of 3 solderers lol.
Full Member
Joined: Mar 2009
Posts: 106
Likes: 0
From: guelph, ontario
holy crap man. that second one could be framed. lol. looks great.
BTW, your comment about "now all i need is shrink tube" made me laugh. I seem to always forget to put the heat shrink on before i solder the wires at least once per wiring project. and if i dont forget, im about 2 seconds away from the wire being up to temp to start metling the solder and i realize i havent put it on yet. haha. so now that you've got the act of soldering down, thats all you need to work on.
BTW, your comment about "now all i need is shrink tube" made me laugh. I seem to always forget to put the heat shrink on before i solder the wires at least once per wiring project. and if i dont forget, im about 2 seconds away from the wire being up to temp to start metling the solder and i realize i havent put it on yet. haha. so now that you've got the act of soldering down, thats all you need to work on.
Thread Starter
Joined: Oct 2006
Posts: 6,604
Likes: 17
From: Toronto, Canada
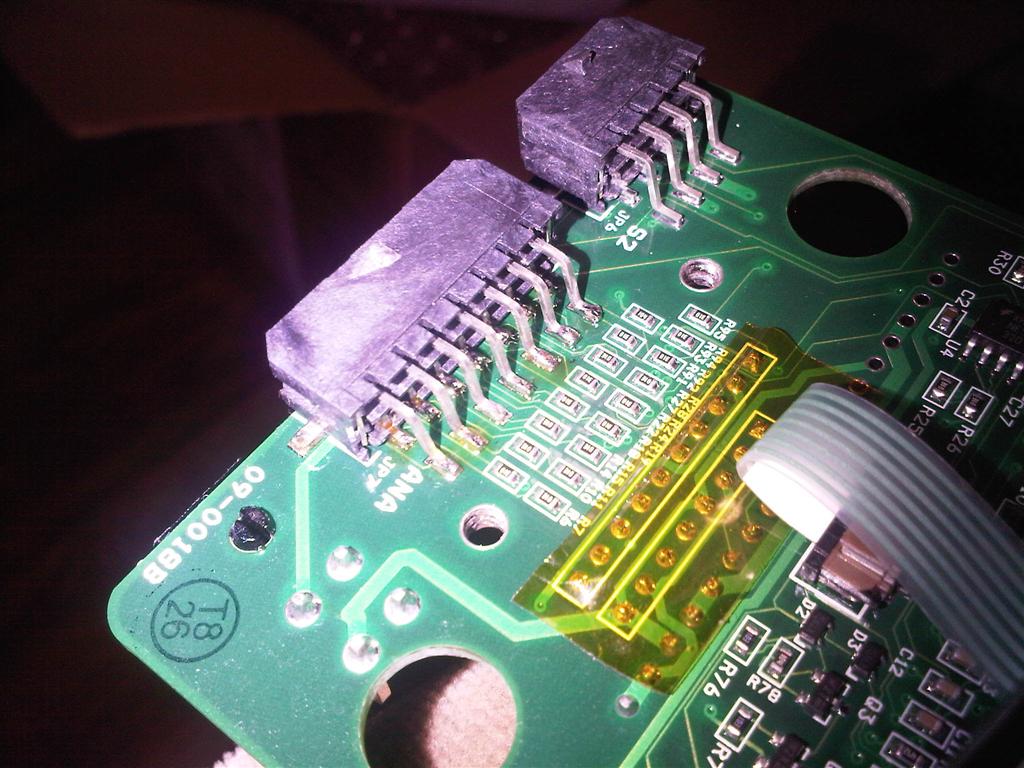
So my portable wideband that I use for tuning the connector for the analog out broke from constant stress I'm assuming. I desoldered all the pins and removed the connectors. Cleaned off the old sauder with a vacuum pump. Super glued the side pins, and proceeded to solder all pins one by one. I used a separate flux this time and it seemed to work well. I remembered this thread so I decided to post it. Here is my finished work . The camera makes the flux residue look worse then it is >_>
thewird
. The camera makes the flux residue look worse then it is >_>thewird
Thread Starter
Joined: Oct 2006
Posts: 6,604
Likes: 17
From: Toronto, Canada
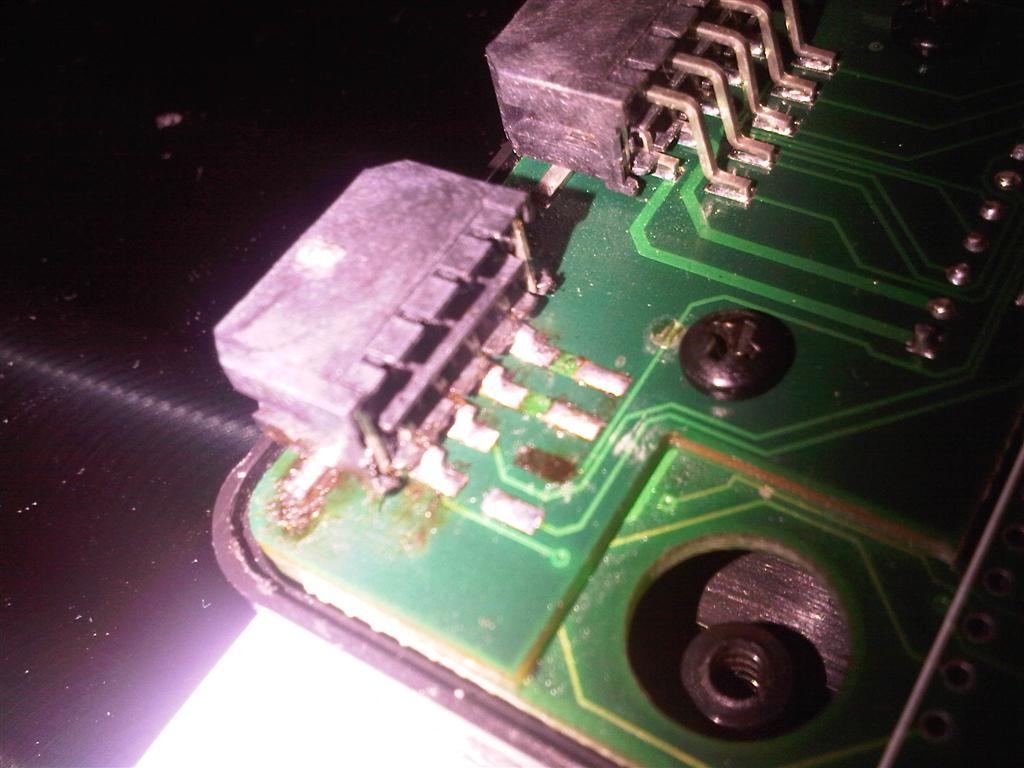
Well, I fail... I was gonna resolder this since I didn't like how it looked... but for some reason when I desoldered one of the pins, the tab came off with it. Oops?

thewird
thewird

haha good job man you should try to get whats left of that rosen/flux off it will oxidize your connections, its a little acidic so it helps clean the wires so its easier for the Solder to flow
Now do a whole engine harness
Soon you won't be using crimps anymore for anything! Soldering is the way to go, Canadian tire has those little torches and they work very well for soldering in cars i find
Now do a whole engine harness
Soon you won't be using crimps anymore for anything! Soldering is the way to go, Canadian tire has those little torches and they work very well for soldering in cars i find
If its just a male pin and that came loose out of the plastic casing, you should be fine to just let it sit there. Hold the pin with a needle nose pliers and wait till it sets in .
Thread Starter
Joined: Oct 2006
Posts: 6,604
Likes: 17
From: Toronto, Canada
thewird
Joined: Feb 2006
Posts: 3,162
Likes: 1
From: London, Ontario, Canada
I suck at soldering, so I just use a my propane torch. Luckily I have a carb, so there's much less wiring involved in my car than an F.I car. Only problem is that have to solder all my wires outside the car. I can just picture my whole car in flames, and me standing aside trying to hide the torch.
Thread Starter
Joined: Oct 2006
Posts: 6,604
Likes: 17
From: Toronto, Canada
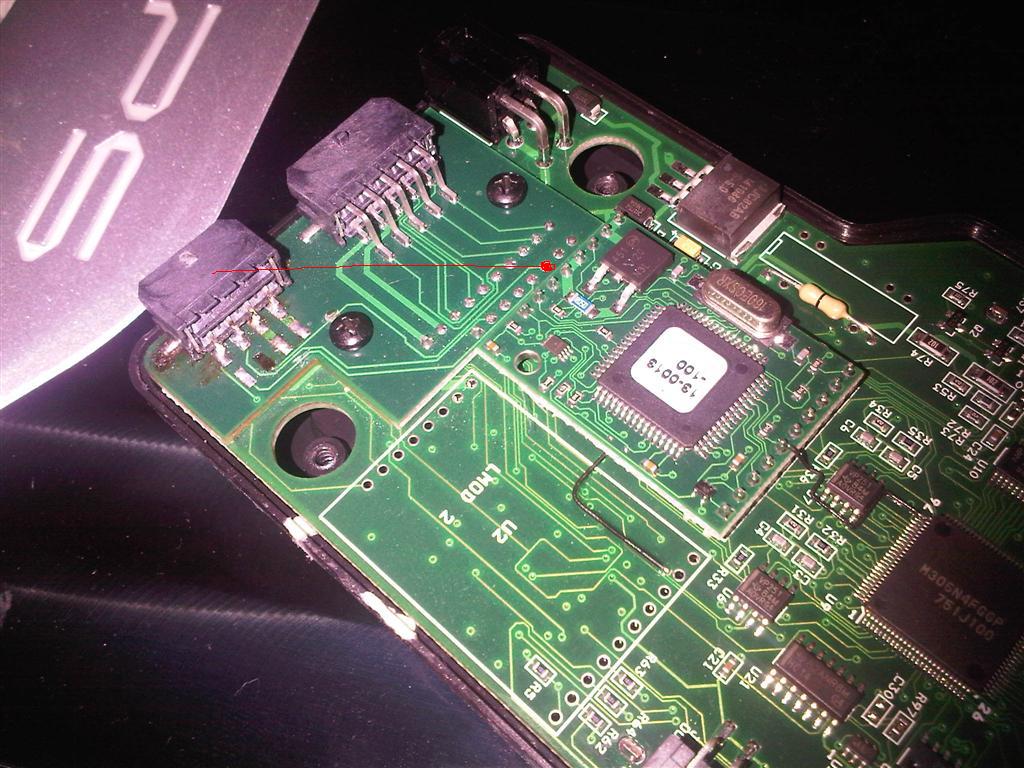
The other side just has more connectors (the first picture I took of my successful solder work is actually the other side of what your seeing). I took a further picture so you could see the bigger picture. The connectors i was working on are on a daughterboard which isn't removable. I was thinking maybe I could just run a thin wire to the pin, is that a bad idea?
thewird
thewird
Oh nvm ... I see what you're talking about now on what you broke. You're taking about the part that is on the circuit board has come off (The wiring on there). That is an easy fix, yes you can run a wire there if you would like, but another thing that you could also do is etch off top side of the printed wiring close to where you're soldering. So that green coating is off and the copper is exposed. When you have you're pin setup there, you'll be able to bridge it across. I've done that a few times before with success.
Your soldering gun isn't adjustable is it? Thats one bonus you get with an adjustable one, not using too much heat. As an alternative what you could do to cool it down a tad is, clean the tip on that sponge before going into the weld, doing so will drop the temperature of the tip a bit and might help you get a bit more control. Also clean your tip as often as possible, as a dirty tip will not transfer heat as good and you would be sitting on top of your piece longer trying to get it to heat up to temperature for the solder to adhere. What this will do is actually overheat all the surrounding parts and burn off things. This is what I'm guessing happed with that tab coming off. My general rule for things like this is, if the solder doesn't liquefy in about 3 seconds or so, then you're tip isn't hot enough for the job yet.
Your soldering gun isn't adjustable is it? Thats one bonus you get with an adjustable one, not using too much heat. As an alternative what you could do to cool it down a tad is, clean the tip on that sponge before going into the weld, doing so will drop the temperature of the tip a bit and might help you get a bit more control. Also clean your tip as often as possible, as a dirty tip will not transfer heat as good and you would be sitting on top of your piece longer trying to get it to heat up to temperature for the solder to adhere. What this will do is actually overheat all the surrounding parts and burn off things. This is what I'm guessing happed with that tab coming off. My general rule for things like this is, if the solder doesn't liquefy in about 3 seconds or so, then you're tip isn't hot enough for the job yet.
Thread Starter
Joined: Oct 2006
Posts: 6,604
Likes: 17
From: Toronto, Canada
Well here is the result of my efforts ... Getting the wire to solder onto that joint was super tricky since my hands are epic fail at being steady >.<. Now how do I clean the flux residue?
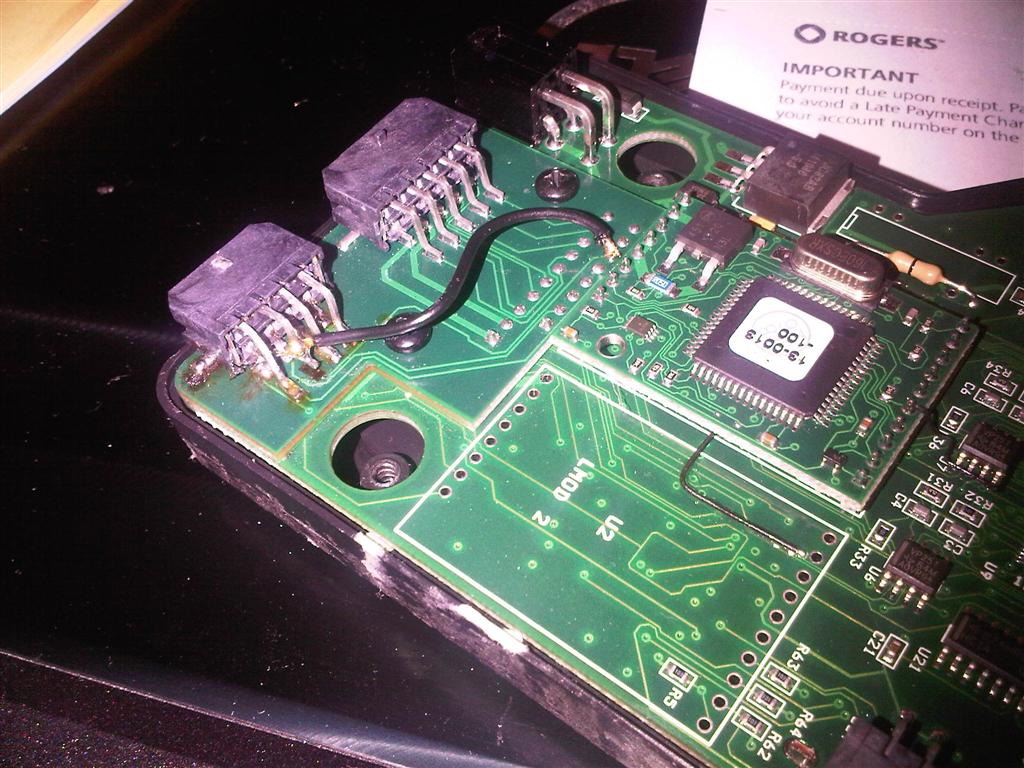
And woot, it works

thewird
... Getting the wire to solder onto that joint was super tricky since my hands are epic fail at being steady >.<. Now how do I clean the flux residue?And woot, it works
thewird

careful what type of external flu you are using. I admit it works great and really sucks the solder in however for electrical boards some flux's can be very damaging and will eat the board away. Some eat a hole in a couple weeks, others in months. I didn't believe it myself, but in grade 12 electronics my teacher demonstrated using 3 different BAD external flux's and one good one. Amazed the bad ones literally do eat a complete hole! I wish I could remember the brand names, but the label should say "safe for electronics" or "safe for circuit boards" something along those lines. Best of luck!
Thread Starter
Joined: Oct 2006
Posts: 6,604
Likes: 17
From: Toronto, Canada
I'm using this type of flux...

thewird
An electronic quality rosin flux mixed with petroleum jelly. This flux is not flammable, cannot spill and is non-corrosive (no acid). Type PF400.
Recommended for electrical or electronic soldering applications. After soldering, the flux residue can be removed by wiping with a cloth or with solvent cleaning.
Recommended for electrical or electronic soldering applications. After soldering, the flux residue can be removed by wiping with a cloth or with solvent cleaning.