
From Zero to Hero: Heavy JDM Influenced Restoration

A glitch in the space/time continuum lead to a missing post which later reappeared, disguised as a duplicate.
I apologize for the embarrassment and hasten to assure that every available Agency resource is focused on actualizing a solution.
As you were.
I apologize for the embarrassment and hasten to assure that every available Agency resource is focused on actualizing a solution.
As you were.
Last edited by clokker; Jan 10, 2016 at 09:43 PM.
Thread Starter


Joined: Apr 2015
Posts: 398
Likes: 169
From: St. Louis, MO
You bring up a good point. I'm picking up the rear bumper cap next Friday. I'll throw it on and see how it looks then. I plan on, hopefully, getting a lot done with the extended holiday weekend.
dont kill the cones

Joined: Dec 2004
Posts: 361
Likes: 1
From: Kennewick, WA
Wow, I just repainted my engine bay and I feel like I wasted my time LOL. You build is amazing so far good job!! I changed the color from white to a darker color and had to wire brush all the bolts and didn't even think about rust protection, so thanks for that.
Thread Starter
Joined: Apr 2015
Posts: 398
Likes: 169
From: St. Louis, MO
Thanks! Your build is coming along nicely as well. I'm hoping the way my engine looks doesn't ruin everything. I'm waiting to paint it until I have to pull it (again) later on down the road.
Thread Starter
Joined: Apr 2015
Posts: 398
Likes: 169
From: St. Louis, MO
Thread Starter
Joined: Apr 2015
Posts: 398
Likes: 169
From: St. Louis, MO
Update 1/17/2016:
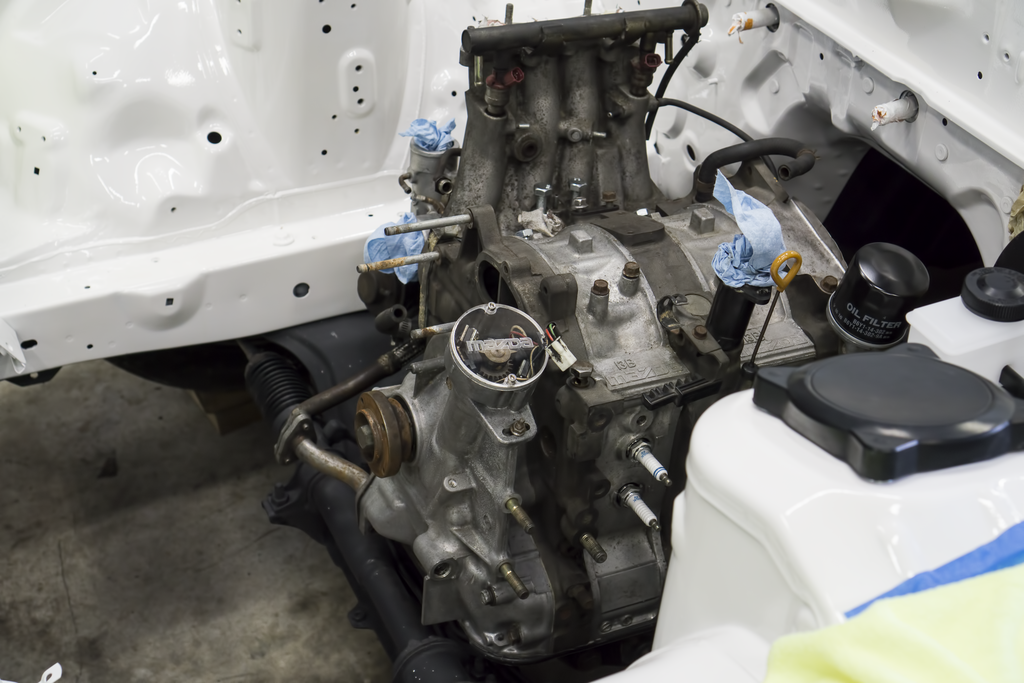
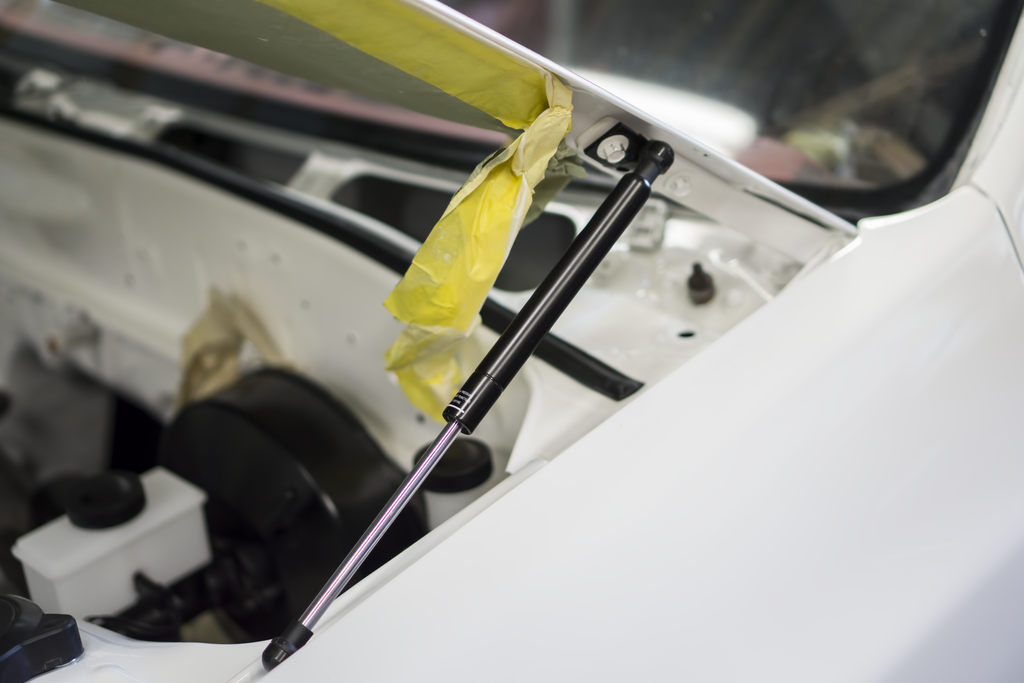
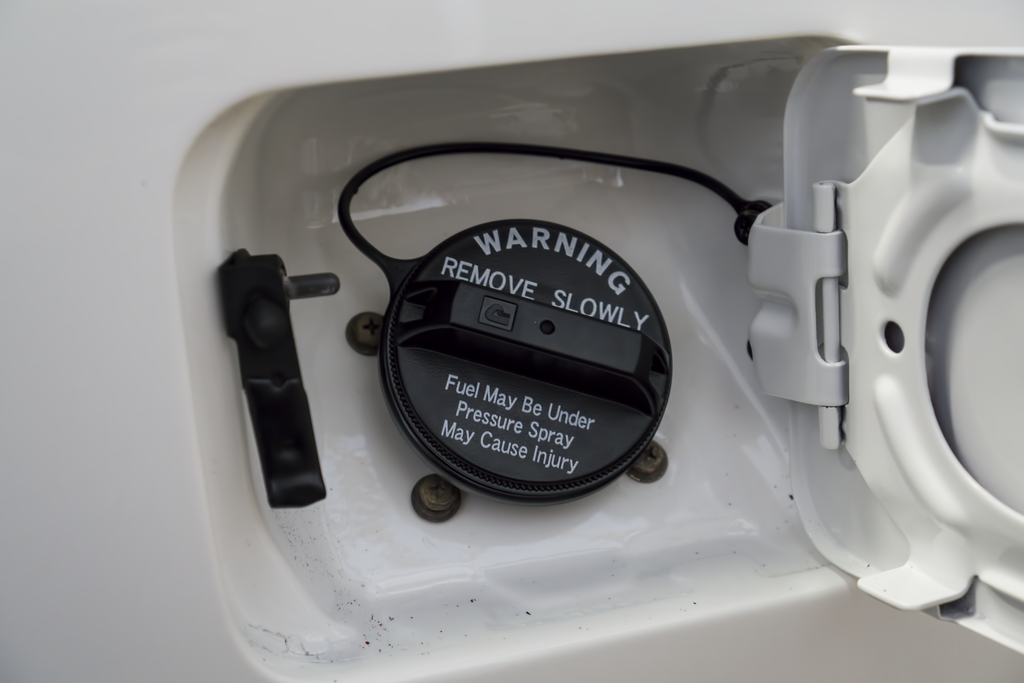
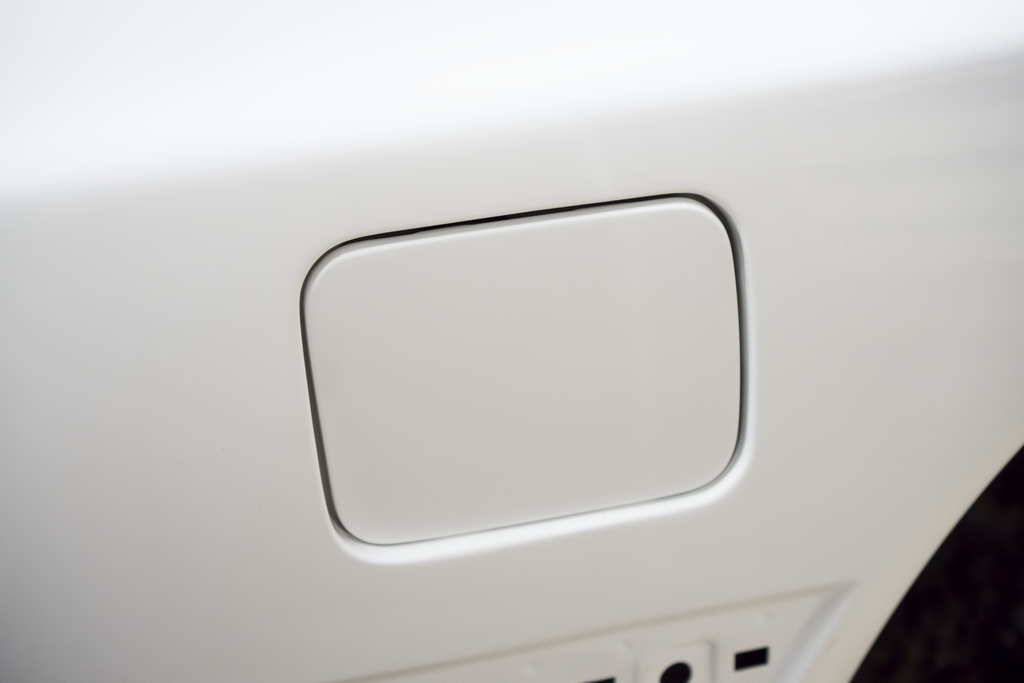
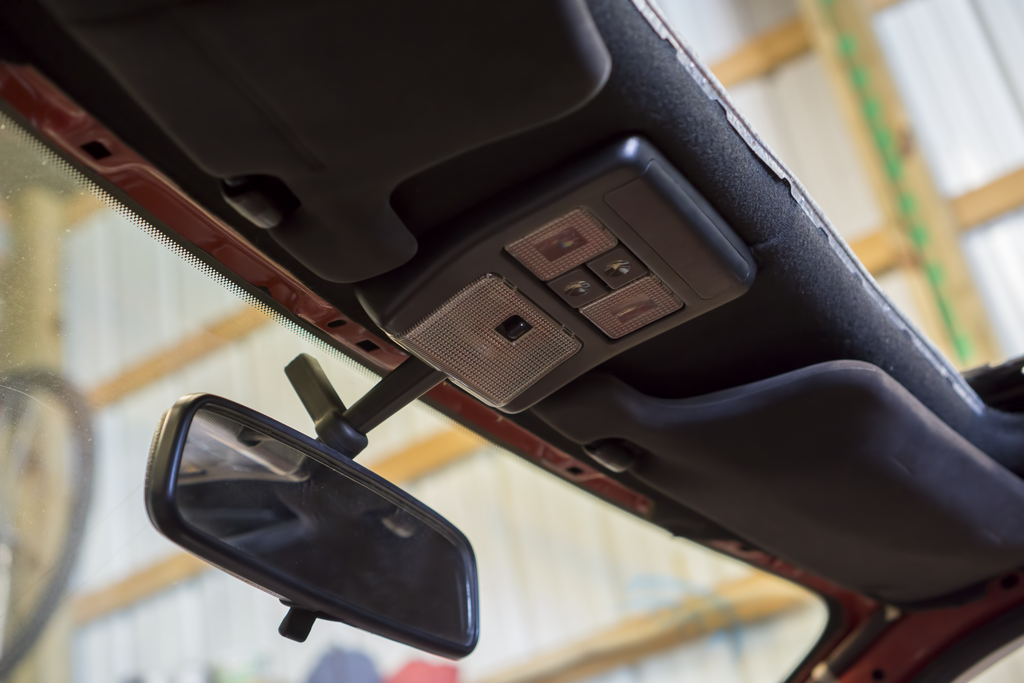
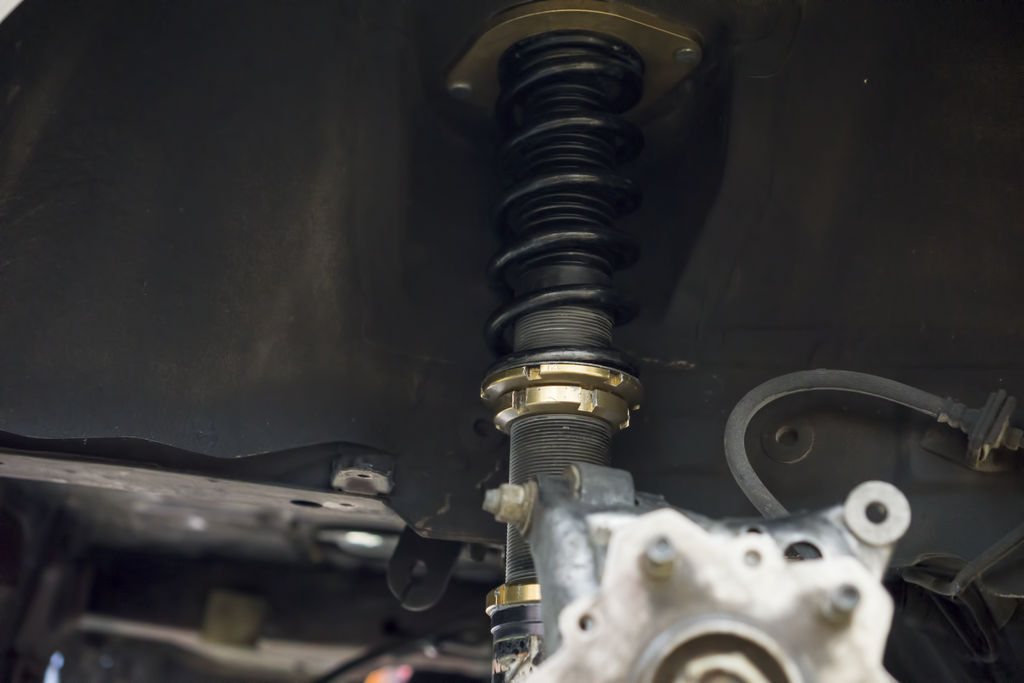
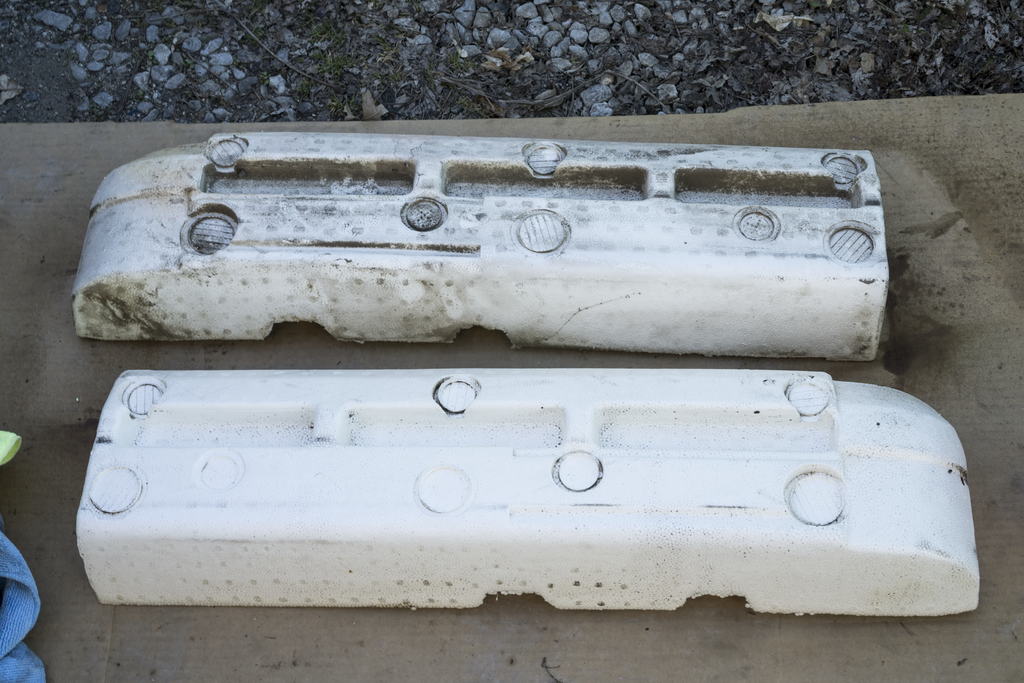
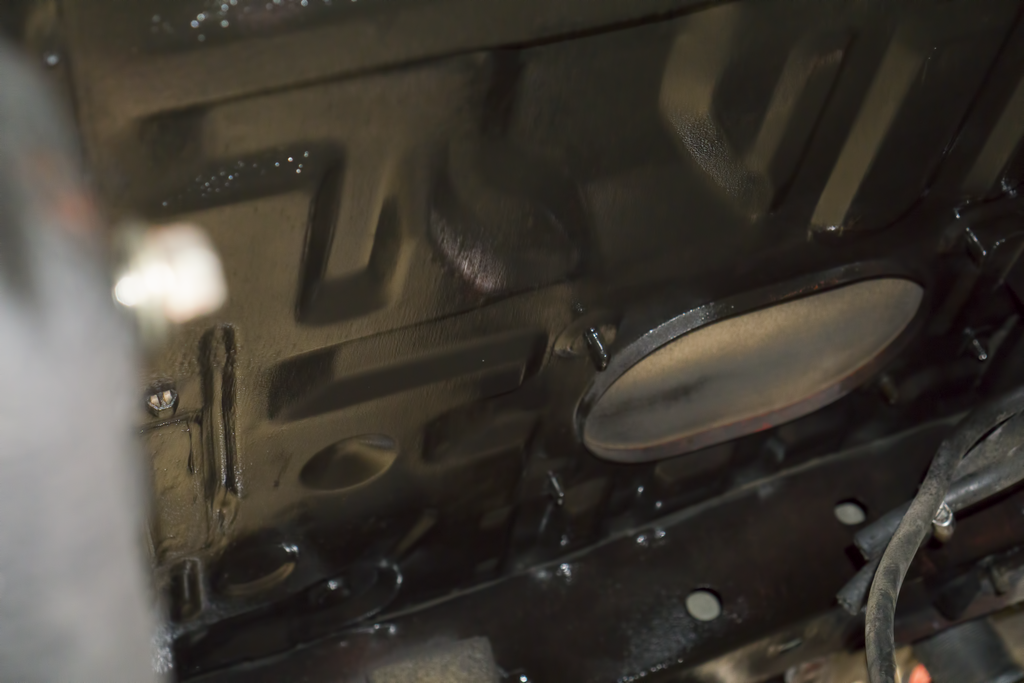
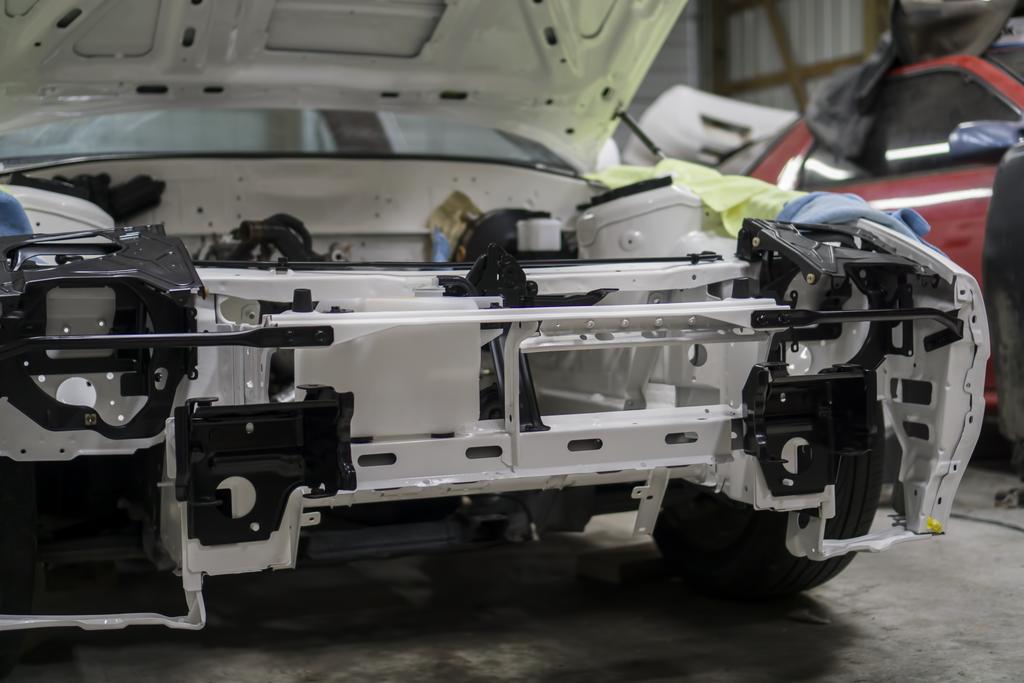
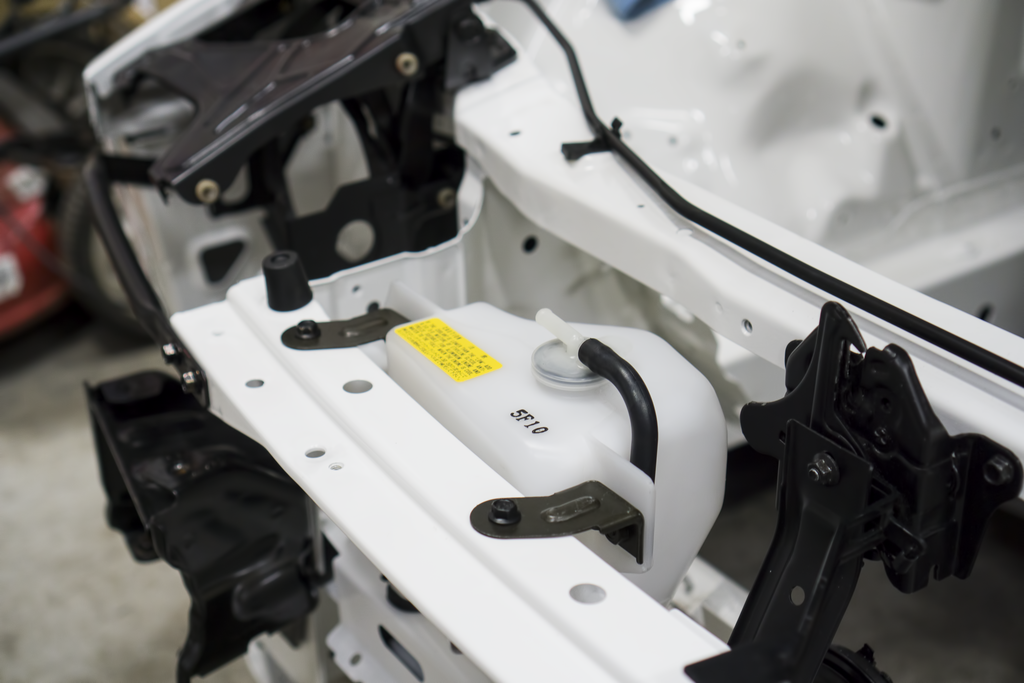
It�s been a good week. I feel I�ve gotten a lot done and I still have tomorrow off to get things done as well. We got the engine back in the car. I cleaned up the motor mounts and had a few friends assist with getting it back in. I don�t think we�ve ever been as careful dropping an engine in haha. Since the engine is in I decided to officially bolt up the hood. One of the side bolt holes stripped out resulting in the hood sitting lower than it should be. I normally wouldn�t fret about this, but it�s causing the hood to collide with the fender. I suppose I�ll have to tap it out and run a slightly larger bolt. I decided to bolt up the Sokie Tech hood dampeners. For a fifty dollar pair of hood struts I�m fairly impressed. I didn�t have any clearance issues and they seem decently made. I feel they increase the aesthetics, but that is my opinion. I also went ahead and put on the 626 fuel cap and fuel door. I�ll never have to worry about the fuel cap going anywhere and it looks great. With all of our brains combined we were able to successfully get on the rear knuckles. That allowed me to get on the rear coilovers and get the car back on the ground. I also finished with my plan to undercoat the area underneath the fuel tank. I was reluctant to remember the screws for the rear view mirror and got it on. I finished out the day by cleaning up the foam pieces for the rear bumper cap, which is going on tomorrow. I ordered a lot of things this week. Some of them are already coming in, but I�m waiting on a lot of them still. Below will be a list of what I ordered and a list of what I still need to get things running (hopefully the last of the things).
What I Ordered:
Dead Pedal
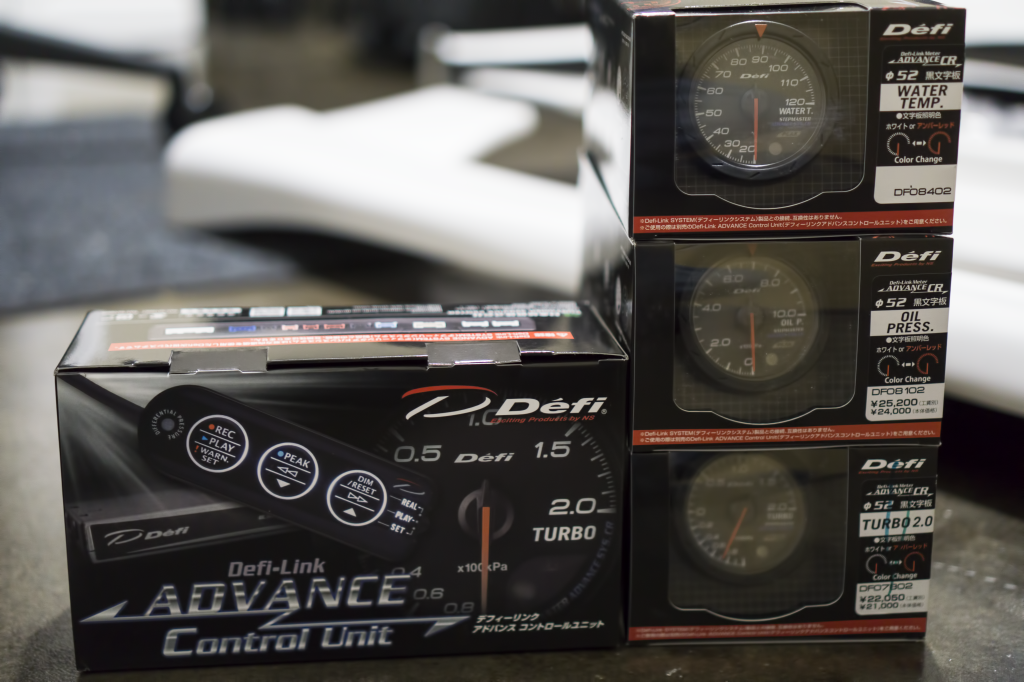
Defi Control Unit
Defi Gauge - Boost, Oil Pressure, and Water Temp
Gilmer Pulley Kit
Inner and Outer Tie Rods
Innovate LC-2 Wideband and Square LCD Display
Pioneer DEH-X6800BT Headunit
Polished Aluminum Door Striker Covers
Sun Roof Seal
Top Windshield Trim
Water Pump and Thermostat
Windshield Cowl Protector
What I Still Need to Order:
Rotors and Pads
Stainless Steel Brake Lines
Tires
Here is an in progress shot of the engine drop and it completed:

Here is a shot of the Sokie Tech hood dampeners:
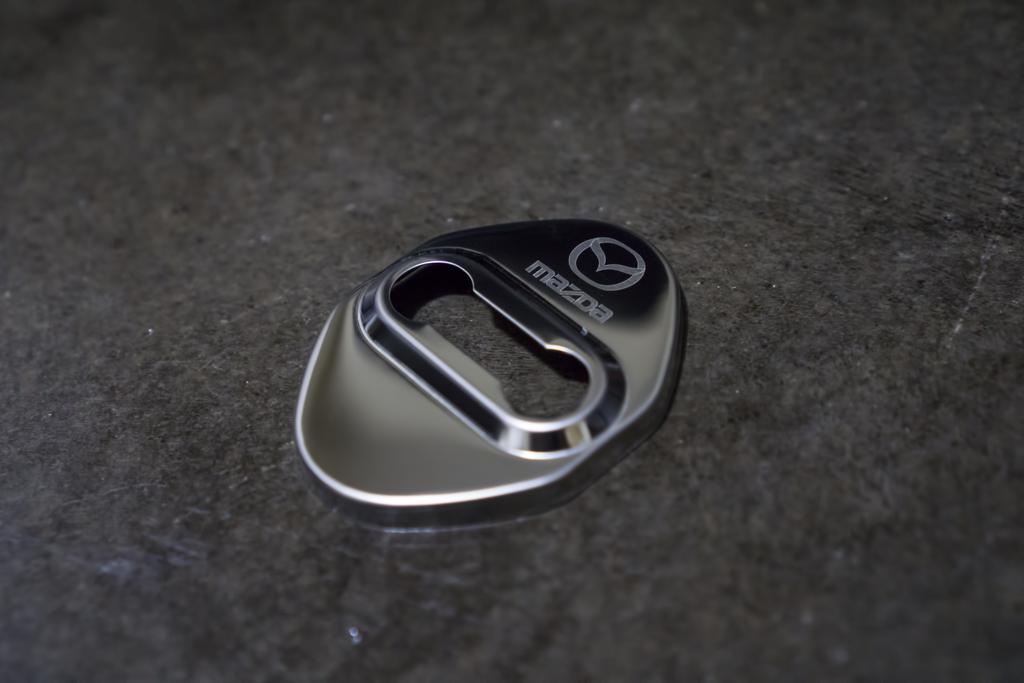
Here is a shot of the fuel door on and the 626 fuel cap:
Here is the rear view mirror and the coilovers finally on:
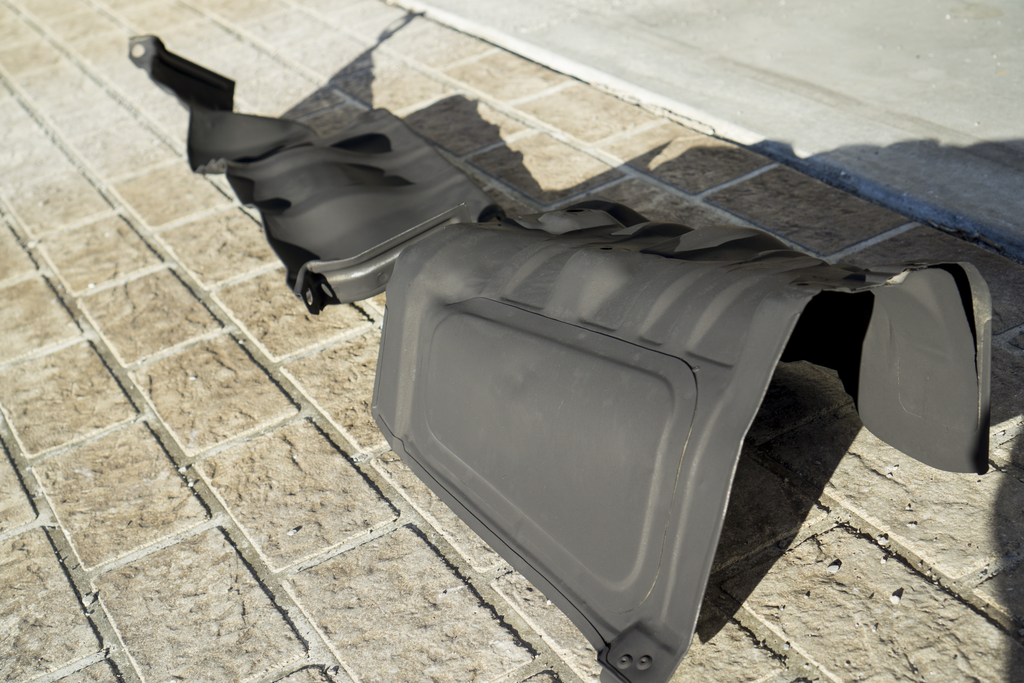
Here is a shot of the cleaned up bumper Styrofoam and the undercoating:
It�s been a good week. I feel I�ve gotten a lot done and I still have tomorrow off to get things done as well. We got the engine back in the car. I cleaned up the motor mounts and had a few friends assist with getting it back in. I don�t think we�ve ever been as careful dropping an engine in haha. Since the engine is in I decided to officially bolt up the hood. One of the side bolt holes stripped out resulting in the hood sitting lower than it should be. I normally wouldn�t fret about this, but it�s causing the hood to collide with the fender. I suppose I�ll have to tap it out and run a slightly larger bolt. I decided to bolt up the Sokie Tech hood dampeners. For a fifty dollar pair of hood struts I�m fairly impressed. I didn�t have any clearance issues and they seem decently made. I feel they increase the aesthetics, but that is my opinion. I also went ahead and put on the 626 fuel cap and fuel door. I�ll never have to worry about the fuel cap going anywhere and it looks great. With all of our brains combined we were able to successfully get on the rear knuckles. That allowed me to get on the rear coilovers and get the car back on the ground. I also finished with my plan to undercoat the area underneath the fuel tank. I was reluctant to remember the screws for the rear view mirror and got it on. I finished out the day by cleaning up the foam pieces for the rear bumper cap, which is going on tomorrow. I ordered a lot of things this week. Some of them are already coming in, but I�m waiting on a lot of them still. Below will be a list of what I ordered and a list of what I still need to get things running (hopefully the last of the things).
What I Ordered:
Dead Pedal
Defi Control Unit
Defi Gauge - Boost, Oil Pressure, and Water Temp
Gilmer Pulley Kit
Inner and Outer Tie Rods
Innovate LC-2 Wideband and Square LCD Display
Pioneer DEH-X6800BT Headunit
Polished Aluminum Door Striker Covers
Sun Roof Seal
Top Windshield Trim
Water Pump and Thermostat
Windshield Cowl Protector
What I Still Need to Order:
Rotors and Pads
Stainless Steel Brake Lines
Tires
Here is an in progress shot of the engine drop and it completed:


Here is a shot of the Sokie Tech hood dampeners:

Here is a shot of the fuel door on and the 626 fuel cap:


Here is the rear view mirror and the coilovers finally on:


Here is a shot of the cleaned up bumper Styrofoam and the undercoating:


Thread Starter
Joined: Apr 2015
Posts: 398
Likes: 169
From: St. Louis, MO
Update 1/17/2016 Continued:
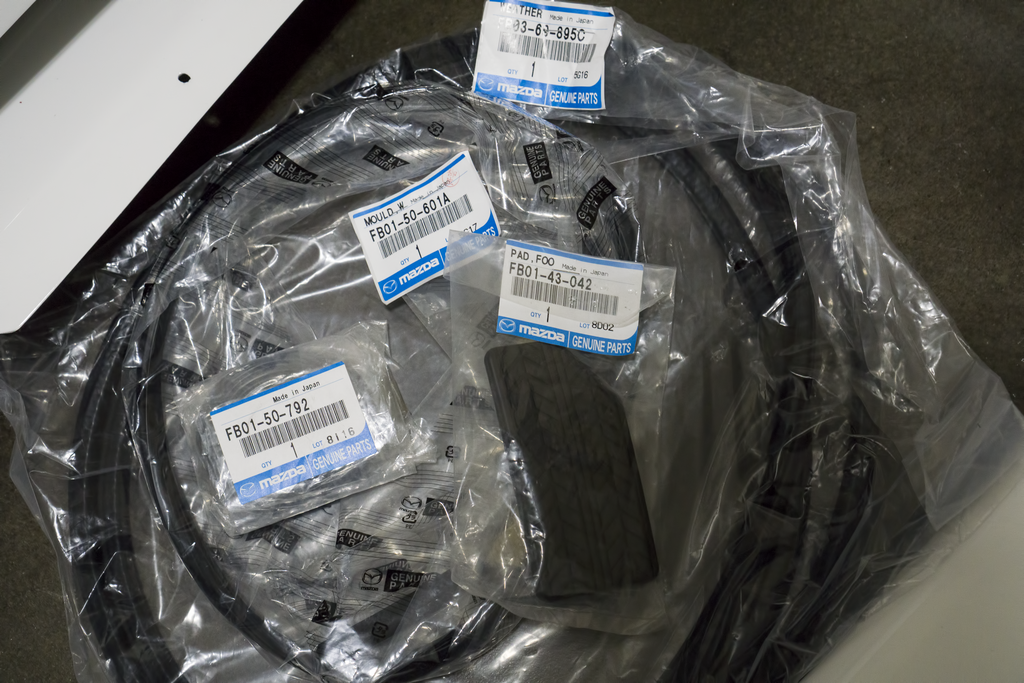
Here are all the items that came in so far:

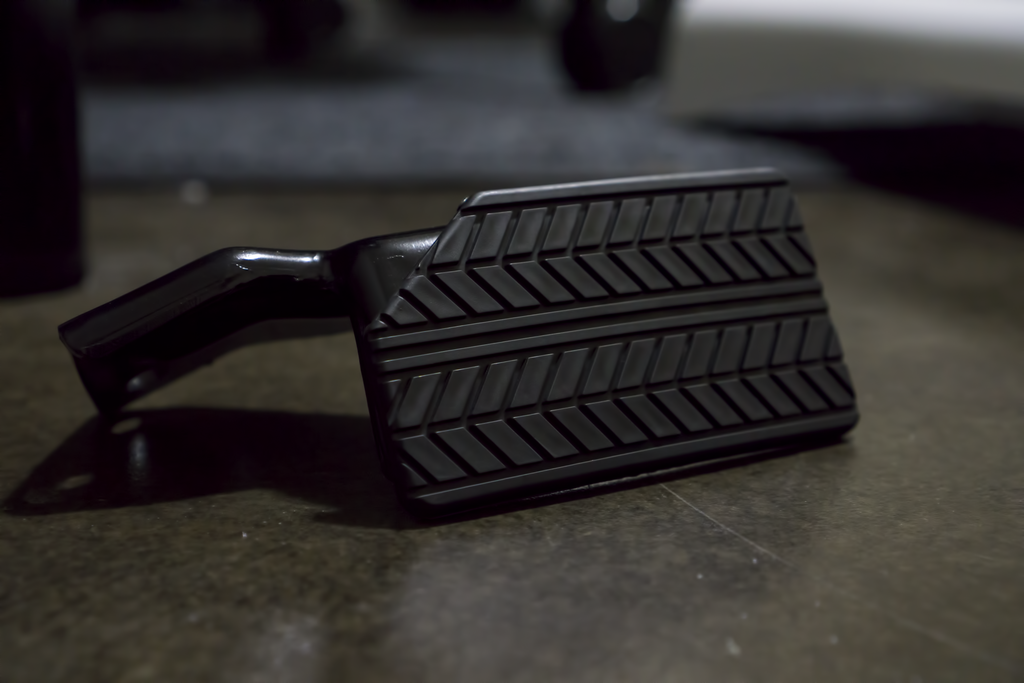
Picture of the dead pedal installed on the freshly painted bracket:
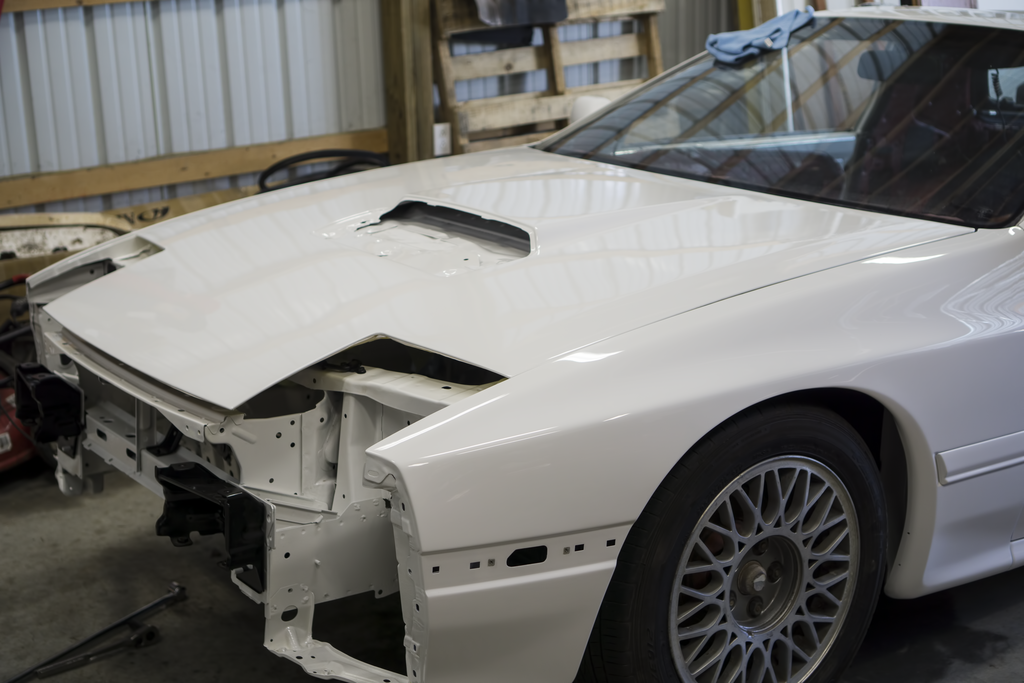
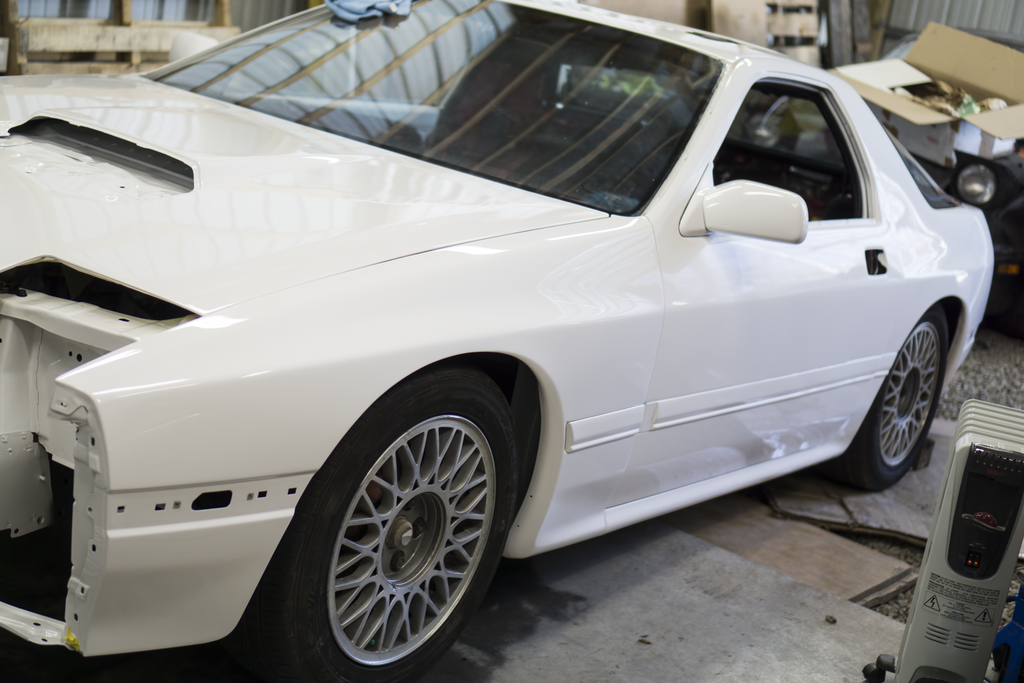
Updated shots of the car:
Here are all the items that came in so far:


Picture of the dead pedal installed on the freshly painted bracket:

Updated shots of the car:


Thread Starter
Joined: Apr 2015
Posts: 398
Likes: 169
From: St. Louis, MO
Thread Starter
Joined: Apr 2015
Posts: 398
Likes: 169
From: St. Louis, MO
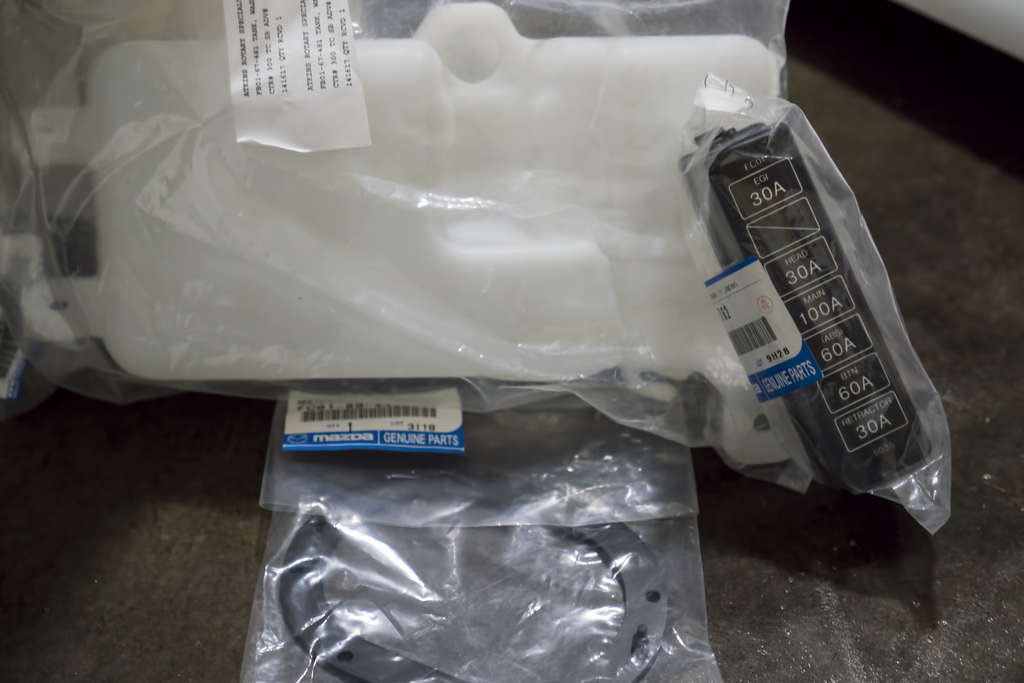
Update 1/24/2016:
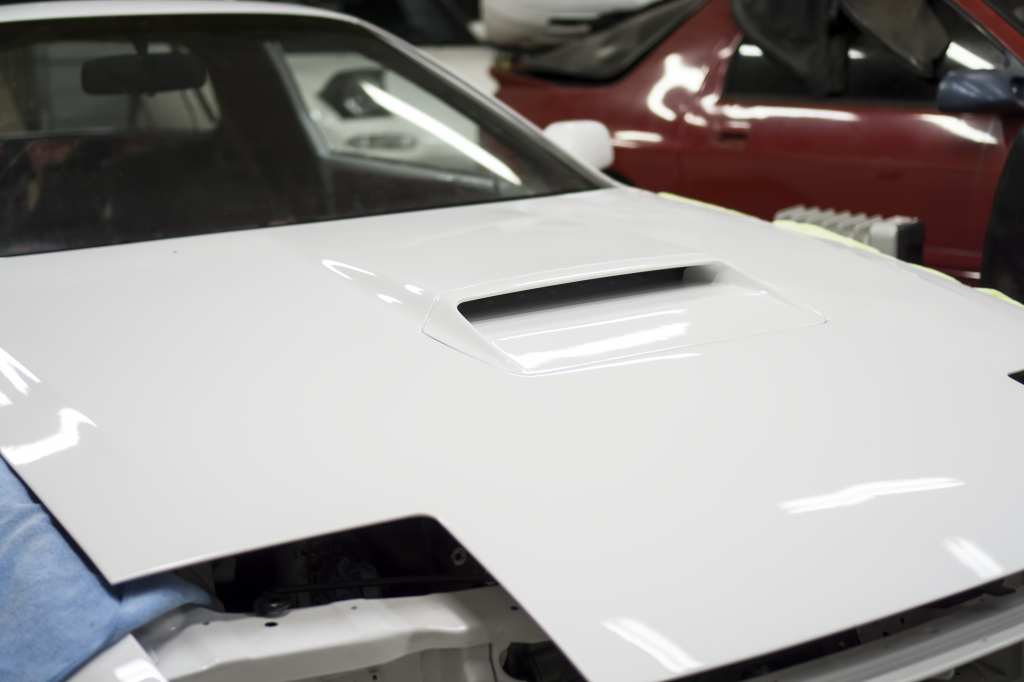
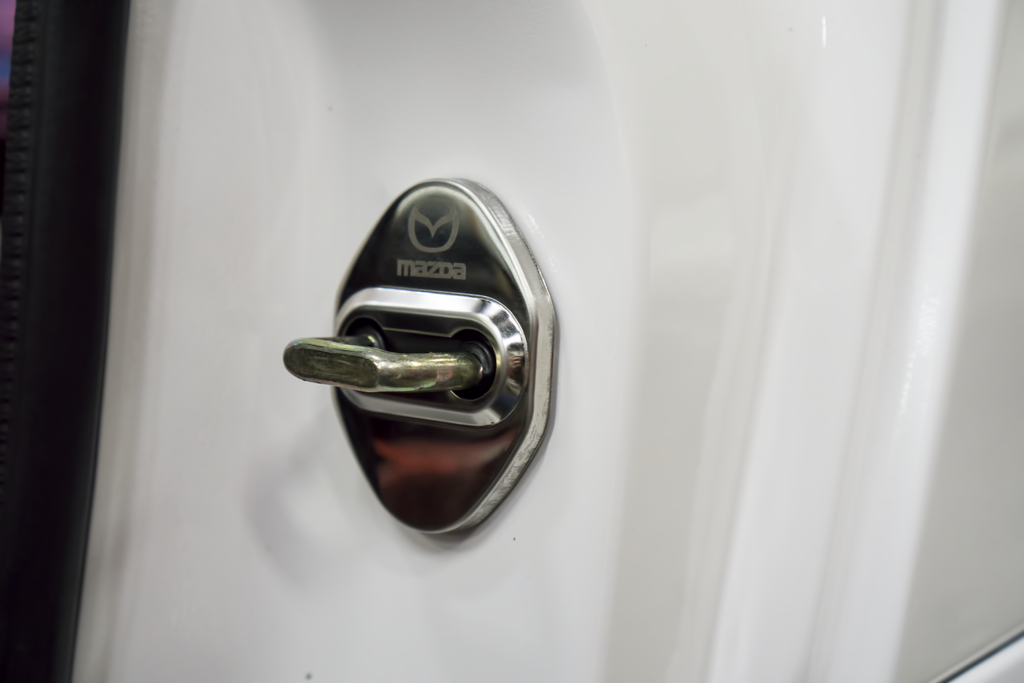
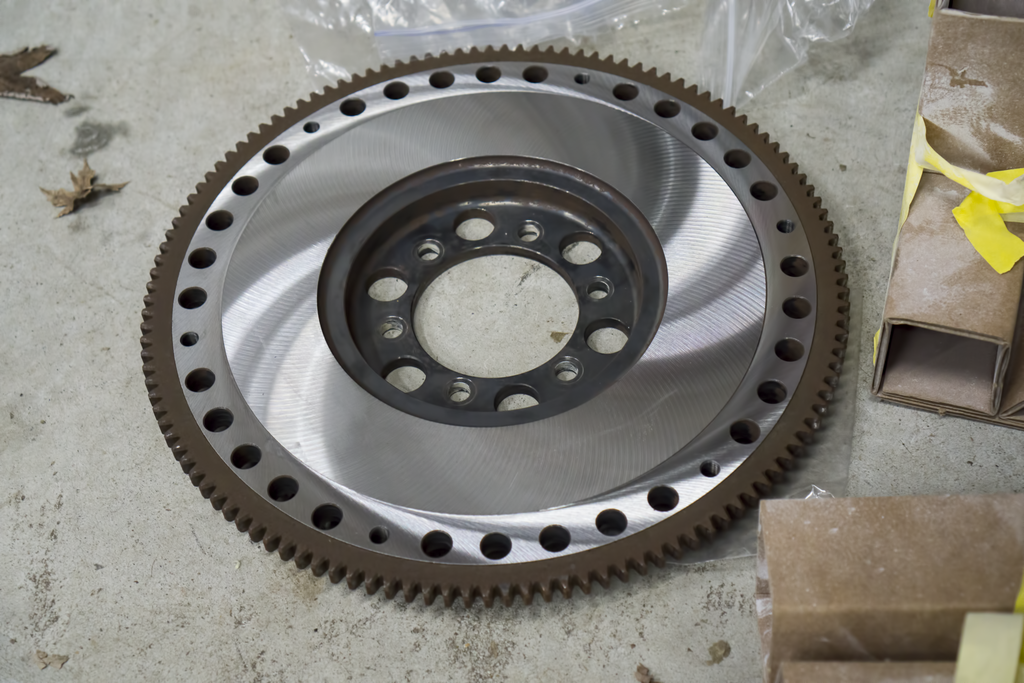
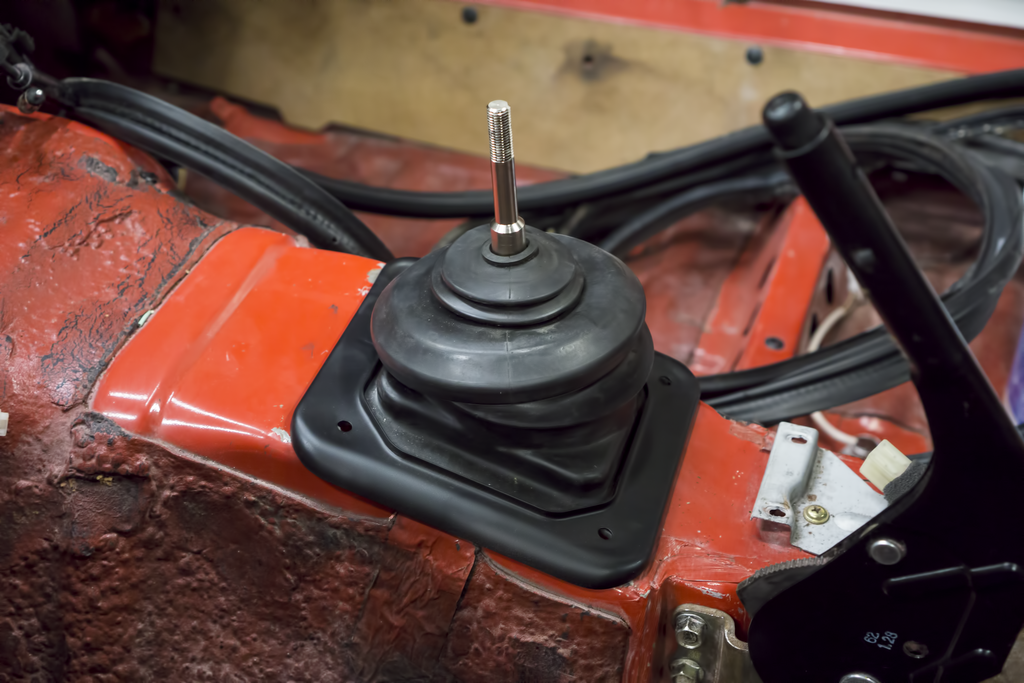
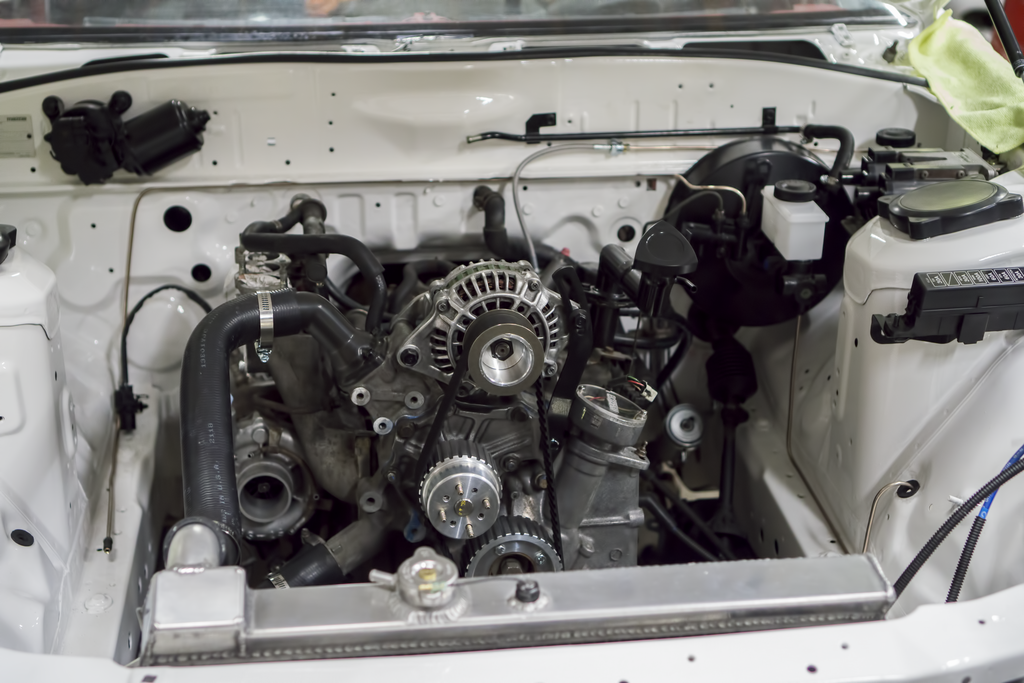
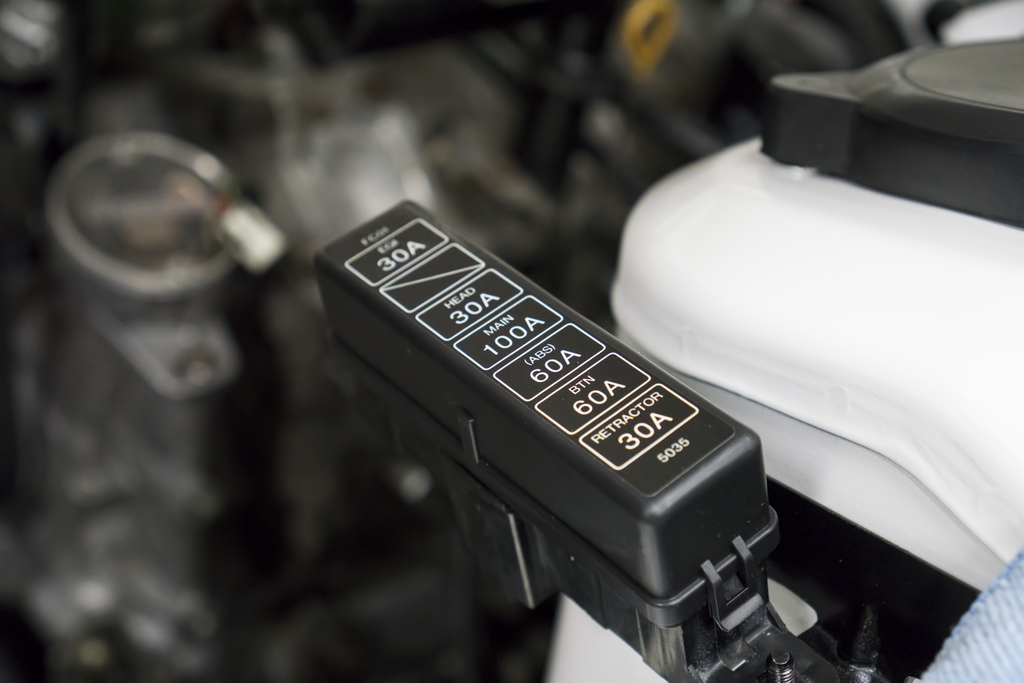
It�s been a pretty eventful week again. I was fortunate enough to have Monday off and used it to my advantage. I went ahead and put the hood scoop on, and also the rear bumper cap. I also fitted a few miscellaneous items like the door striker covers and the rear antenna delete. Earlier in the week I went and had my flywheel resurfaced. I�m very happy with the turnaround time and how well it came out. The rest of my Defi gauges ended up coming in. I�m super excited to begin working on the interior. My water pump housing and thermostat came in as well; it seems to be of a decent quality. Yesterday a lot of moves ended up happening. I started out by getting a few pieces attached in the front. I had a hand and ended up getting the transmission and driveshaft in. I also mounted the downpipe and midpipe. I would have put the rest of the exhaust on, but I�m still working on getting the exhaust shields cleaned up/painted and the gas tank is still not back in. Next weekend it is supposed to be in the upper 50�s. I hope I am able to take advantage of that and get a lot done.
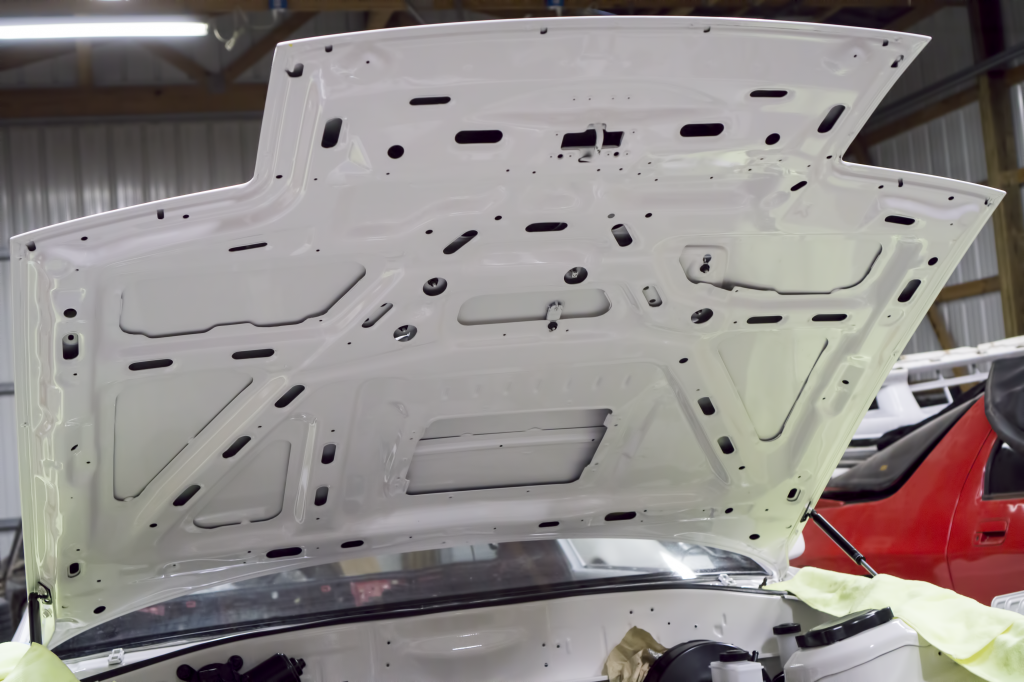
Below are some shots of all the odds and ends I got on over the week:

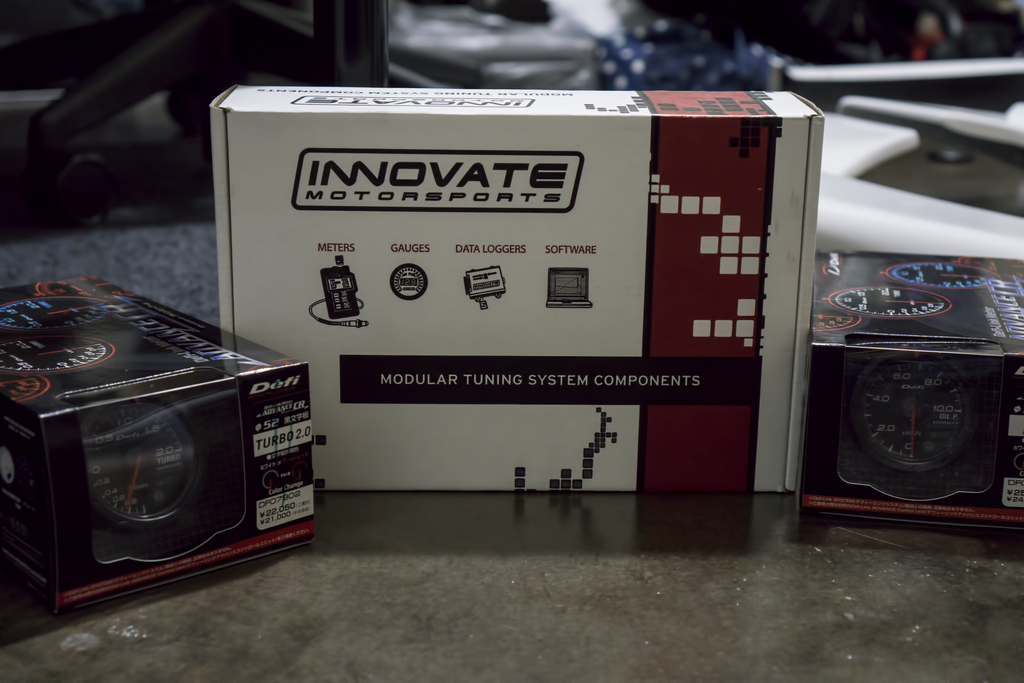
Here is a shot of all the Defi equipment:
Here�s the flywheel after resurfacing:
Getting everything ready for the transmission to go in:
Here�s an undershot of the car with everything in:
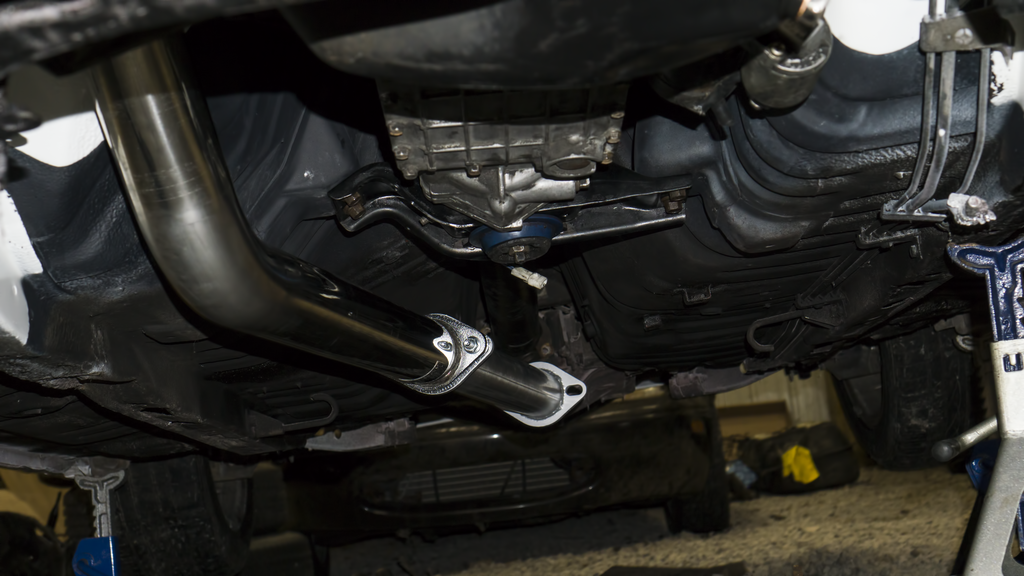
It�s been a pretty eventful week again. I was fortunate enough to have Monday off and used it to my advantage. I went ahead and put the hood scoop on, and also the rear bumper cap. I also fitted a few miscellaneous items like the door striker covers and the rear antenna delete. Earlier in the week I went and had my flywheel resurfaced. I�m very happy with the turnaround time and how well it came out. The rest of my Defi gauges ended up coming in. I�m super excited to begin working on the interior. My water pump housing and thermostat came in as well; it seems to be of a decent quality. Yesterday a lot of moves ended up happening. I started out by getting a few pieces attached in the front. I had a hand and ended up getting the transmission and driveshaft in. I also mounted the downpipe and midpipe. I would have put the rest of the exhaust on, but I�m still working on getting the exhaust shields cleaned up/painted and the gas tank is still not back in. Next weekend it is supposed to be in the upper 50�s. I hope I am able to take advantage of that and get a lot done.
Below are some shots of all the odds and ends I got on over the week:


Here is a shot of all the Defi equipment:

Here�s the flywheel after resurfacing:

Getting everything ready for the transmission to go in:


Here�s an undershot of the car with everything in:

Thread Starter
Joined: Apr 2015
Posts: 398
Likes: 169
From: St. Louis, MO
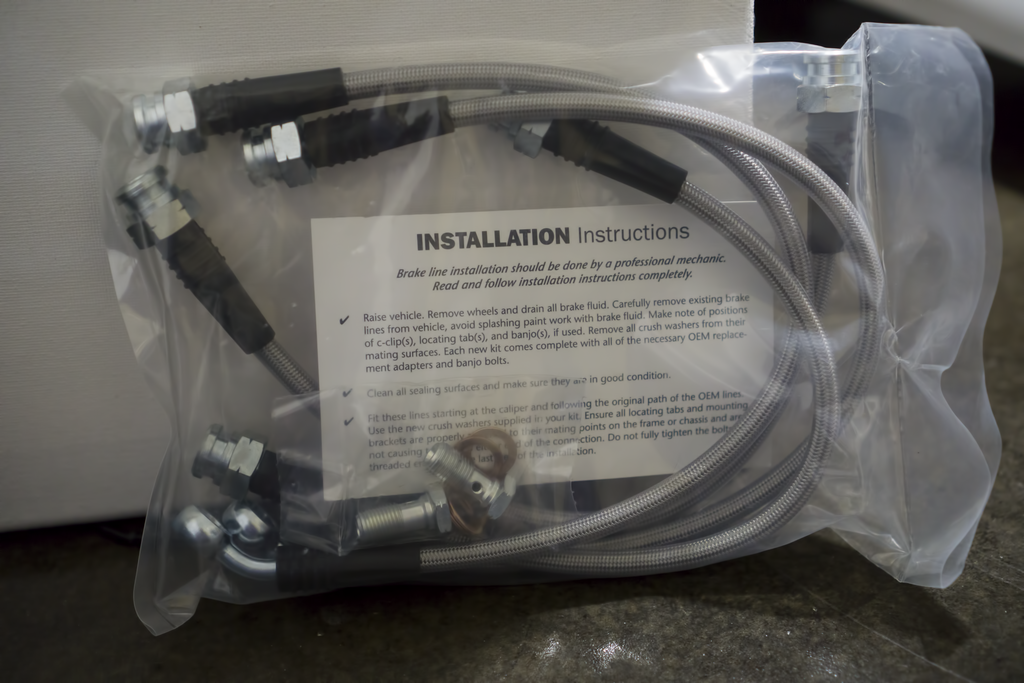
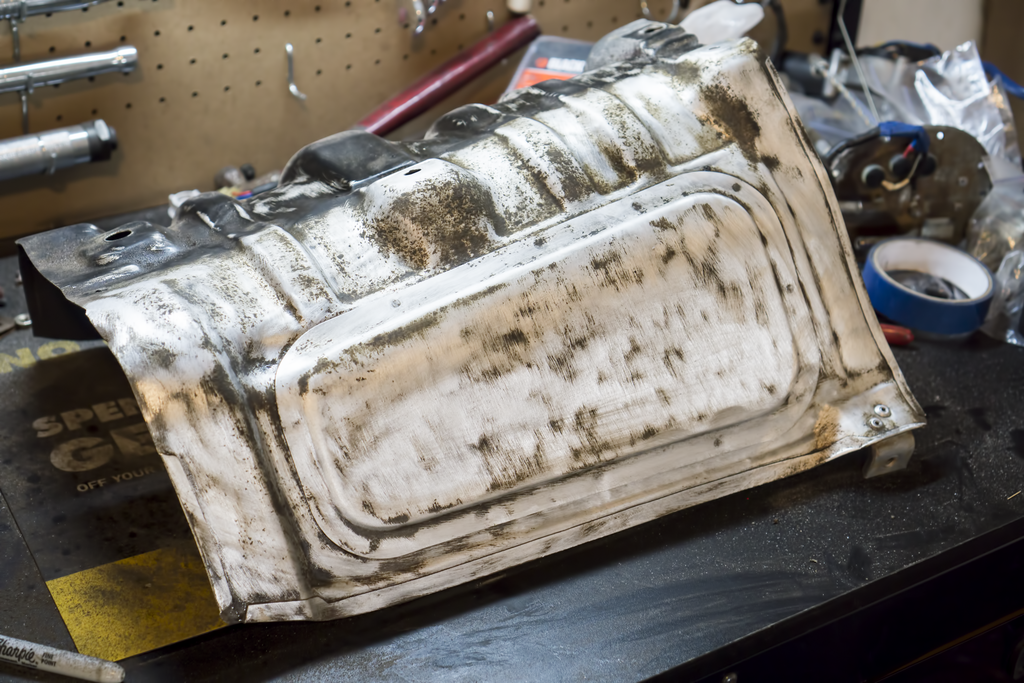
Update 1/31/2016:
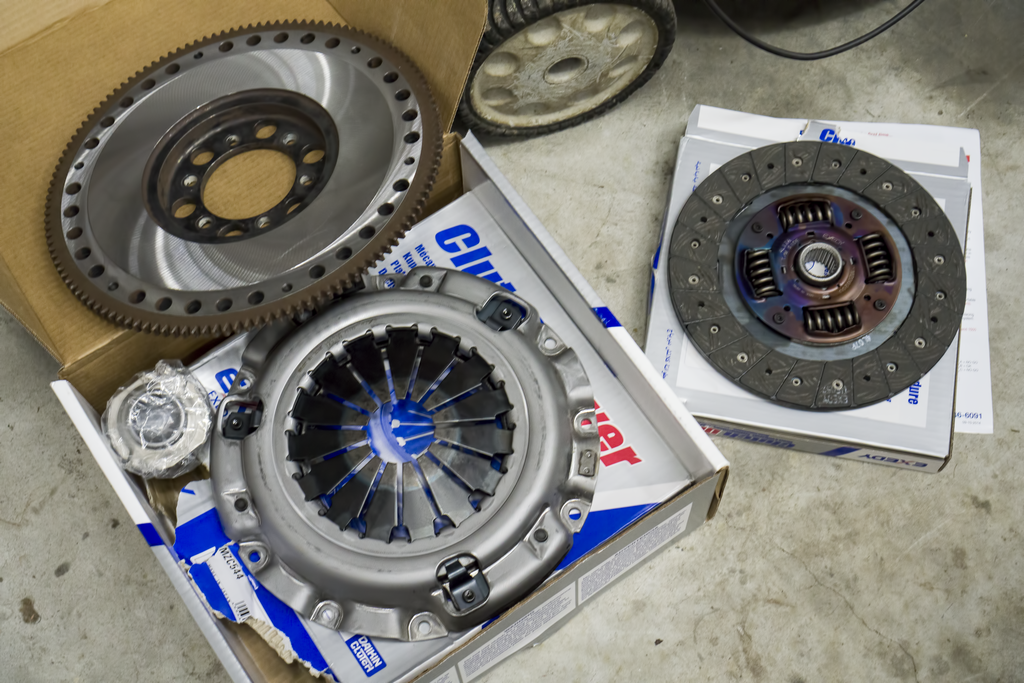
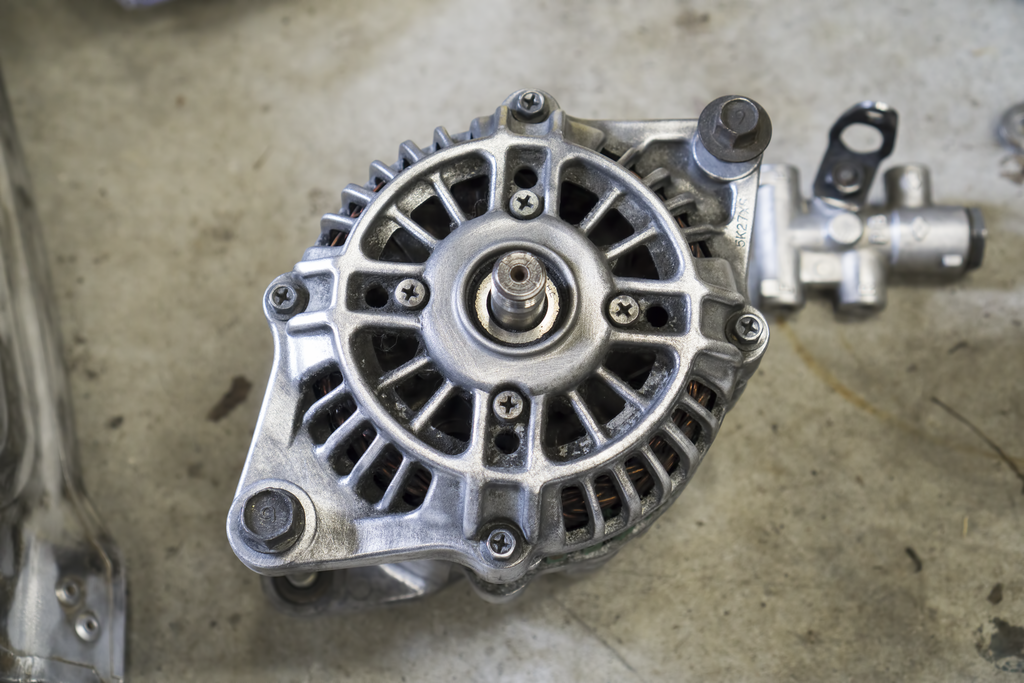
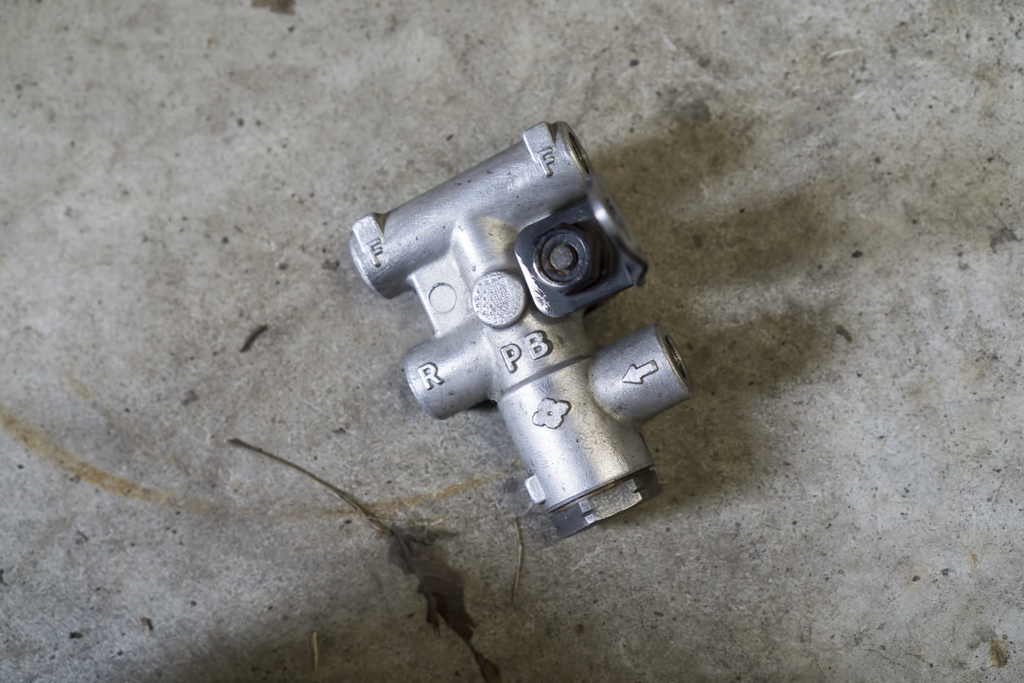
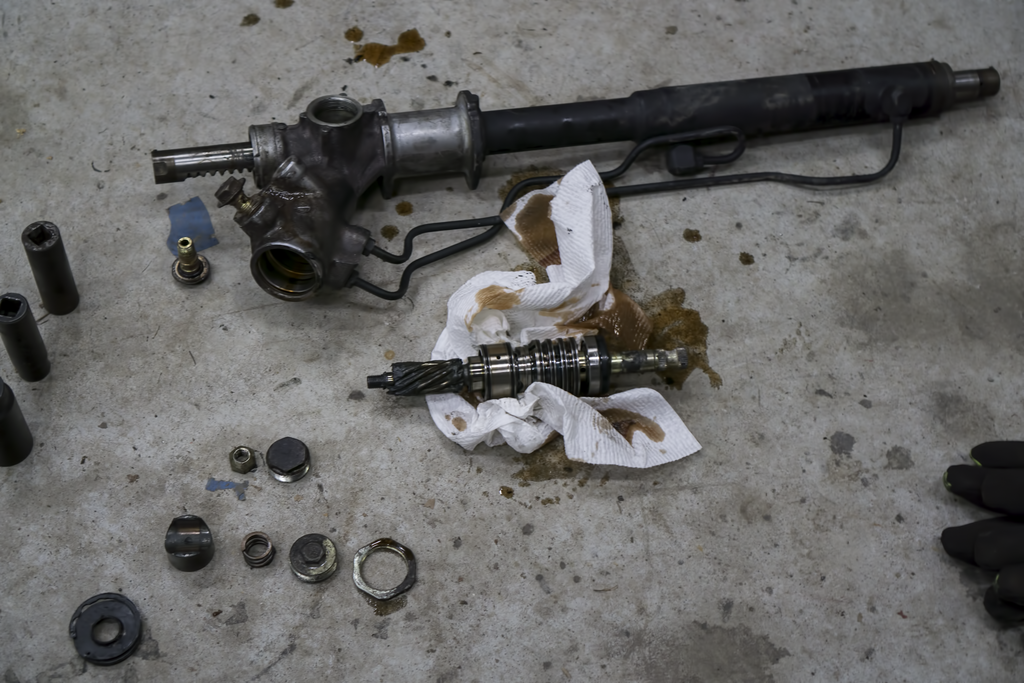
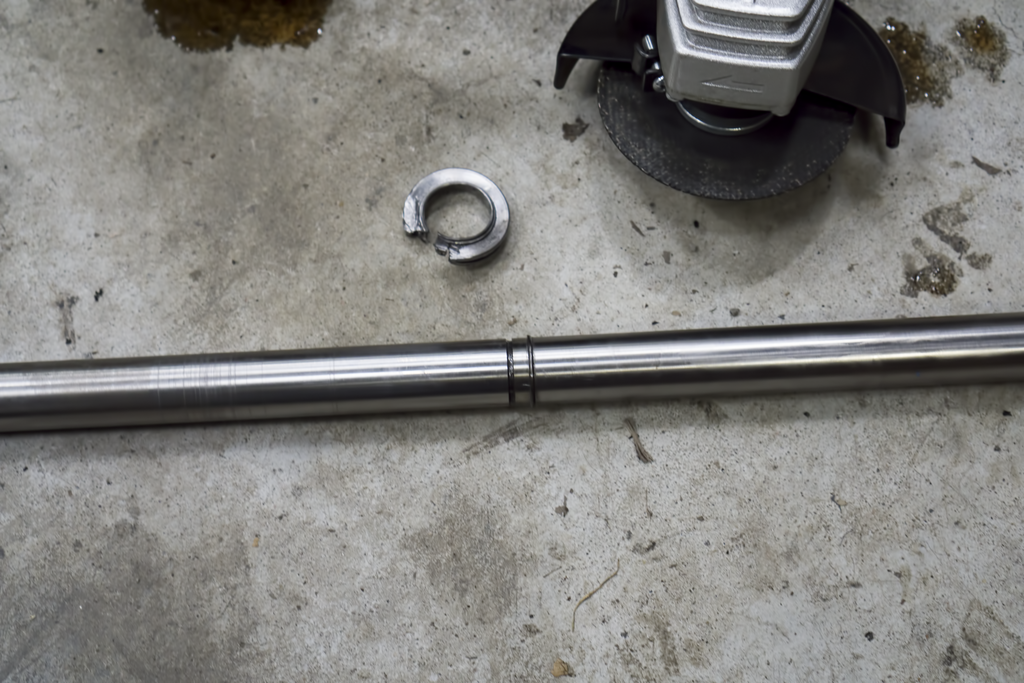
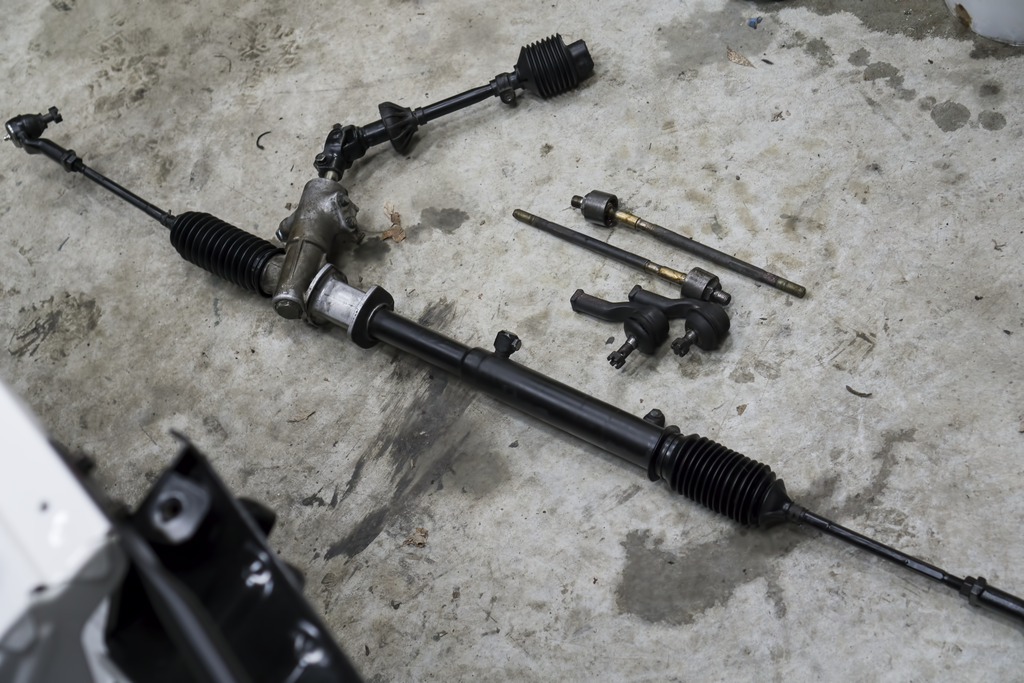
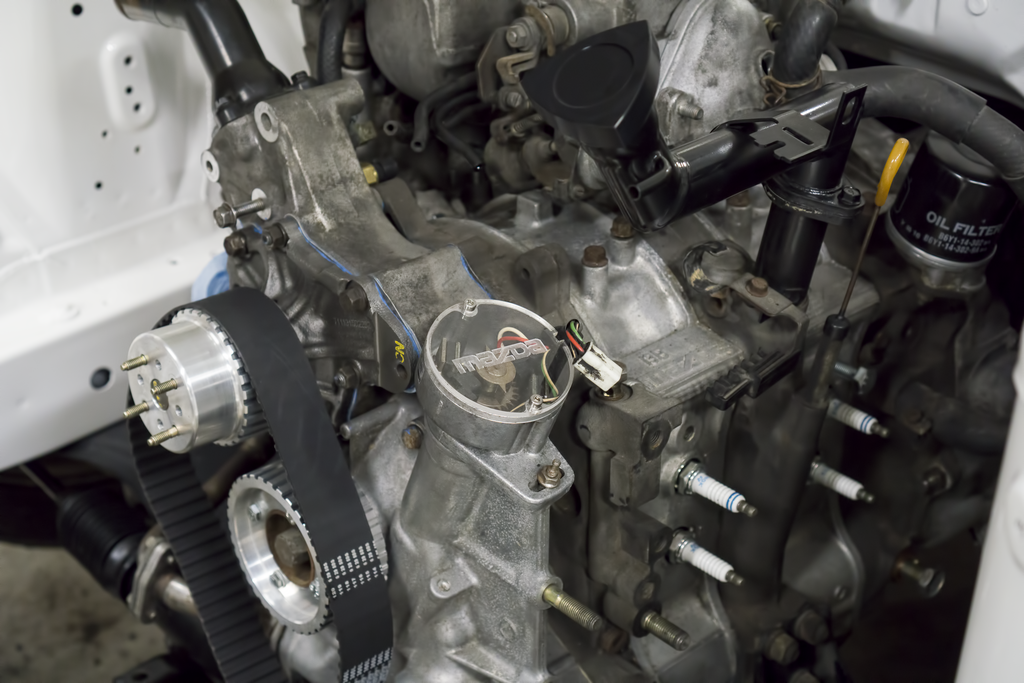
The date is set: The car will be running on 2/12/2016. I have a friend coming down to stay the weekend and assist with getting the rest of the car done (in order to drive), as well as tuning the car. A few more items came in this week. In my quest to eliminate all yellow�ed plastic I ordered a new windshield washer reservoir. The reservoir doesn�t come with the fill neck, so I�m going to attempt a few different things to �un-yellow� it. My stainless steel brake lines also came in. They look pretty good, even though you will probably never see them. Branching off of making things pretty that will never be seen: I got my exhaust shields painted. They turned out pretty good. I painted them with manifold paint that�s good up to some high number (2000 I think). I went to install the rest of the exhaust system and realized it exits on the passenger side. The APEXi GT exhaust exits on the driver side, so I had assumed wrong. I have brought back home the other sides exhaust shield to paint as well. I cleaned the CAS finally, it looks a little bit better behind the clear cover now. I also re-painted the oil fill tube and got it on with the Atkins rotor shaped cap. I fitted two of the Gilmer pulleys on and realized I will have to modify the water pump pulley. I also slapped on the short throw shifter and made sure everything is shifting as intended. I had a hand with de-powering the steering rack and knocked that out this weekend as well. I went ahead and put on new inner and outer tie rods. I brought back a few items to clean up until next weekend. I am just going to clean up the alternator and possibly paint the prop valve (I�m still undecided on the valve). A lot of things need done next weekend, hopefully I will be able to accomplish them all.
Here are a few of the shinies that came in this week (hooray for not seen non-yellowed plastic):
Here is a before and after of theexhaust shields and a few of the projects I brought back (I�ve already started on them as seen):
Here is a few in progress and a completed shot of the steering rack:
Here are a few of the things I got on this weekend:
The date is set: The car will be running on 2/12/2016. I have a friend coming down to stay the weekend and assist with getting the rest of the car done (in order to drive), as well as tuning the car. A few more items came in this week. In my quest to eliminate all yellow�ed plastic I ordered a new windshield washer reservoir. The reservoir doesn�t come with the fill neck, so I�m going to attempt a few different things to �un-yellow� it. My stainless steel brake lines also came in. They look pretty good, even though you will probably never see them. Branching off of making things pretty that will never be seen: I got my exhaust shields painted. They turned out pretty good. I painted them with manifold paint that�s good up to some high number (2000 I think). I went to install the rest of the exhaust system and realized it exits on the passenger side. The APEXi GT exhaust exits on the driver side, so I had assumed wrong. I have brought back home the other sides exhaust shield to paint as well. I cleaned the CAS finally, it looks a little bit better behind the clear cover now. I also re-painted the oil fill tube and got it on with the Atkins rotor shaped cap. I fitted two of the Gilmer pulleys on and realized I will have to modify the water pump pulley. I also slapped on the short throw shifter and made sure everything is shifting as intended. I had a hand with de-powering the steering rack and knocked that out this weekend as well. I went ahead and put on new inner and outer tie rods. I brought back a few items to clean up until next weekend. I am just going to clean up the alternator and possibly paint the prop valve (I�m still undecided on the valve). A lot of things need done next weekend, hopefully I will be able to accomplish them all.
Here are a few of the shinies that came in this week (hooray for not seen non-yellowed plastic):


Here is a before and after of theexhaust shields and a few of the projects I brought back (I�ve already started on them as seen):


Here is a few in progress and a completed shot of the steering rack:


Here are a few of the things I got on this weekend:


You did all this, and yet you didnt paint the inside of the car, Why was that? Just curious!!!!
The attention to detail is amazing here. Maybe one day I'll be able to re-do an FC to this level!
P.S. how much have you got into the project money wise if I may ask?
The attention to detail is amazing here. Maybe one day I'll be able to re-do an FC to this level!
P.S. how much have you got into the project money wise if I may ask?
Thread Starter
Joined: Apr 2015
Posts: 398
Likes: 169
From: St. Louis, MO
Let me tackle the initial question first. I sometimes regret not having painted the inside. I was literally at the point I could have easily had that done. I just didn't have readily available access to the funds required to go that extra step. I figured that since no one will ever see underneath the interior, the red, it didn't matter. I still tell myself that to sleep better at night haha. The way I'm tackling the project now is completely different from when I first started.
The second question is probably the second most question I get from local friends. To be truthfully honest, I don't know. I've been meaning to get a list together to see just how much I have in it. I quoted my insurance company 12,000 for storage insurance and I know it's probably much higher than that. My dad always told me things growing up: One was, "If you are going to do something, do it right the first time." This is something I enjoy, so I try not to fret to much about the spending aspects of it. If I need or want a part, I just buy it.


Thread Starter
Joined: Apr 2015
Posts: 398
Likes: 169
From: St. Louis, MO
Thank you!
Thanks Jerry. As soon as I get it running I may take it slower for a bit. I've been spending a lot of time getting things done on the car and would like some time to do a few other things for a change haha.
Thanks Jerry. As soon as I get it running I may take it slower for a bit. I've been spending a lot of time getting things done on the car and would like some time to do a few other things for a change haha.
Thread Starter
Joined: Apr 2015
Posts: 398
Likes: 169
From: St. Louis, MO

Thread Starter
Joined: Apr 2015
Posts: 398
Likes: 169
From: St. Louis, MO
Thank you! I've been following yours since you threw it up. Really amazing work you are doing.
Update 2/7/2016:
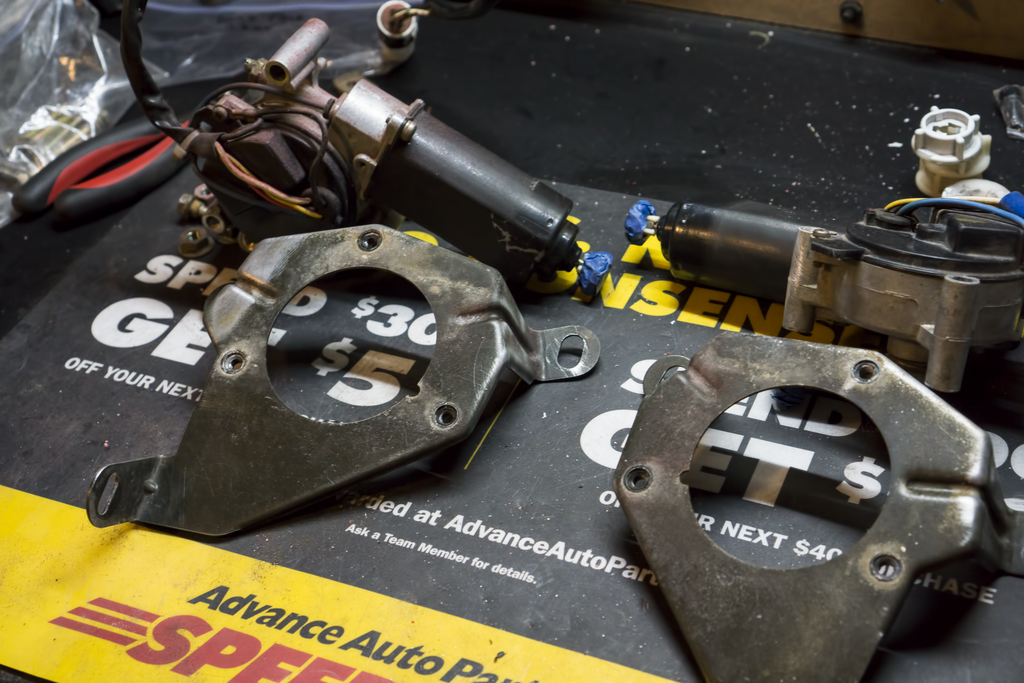
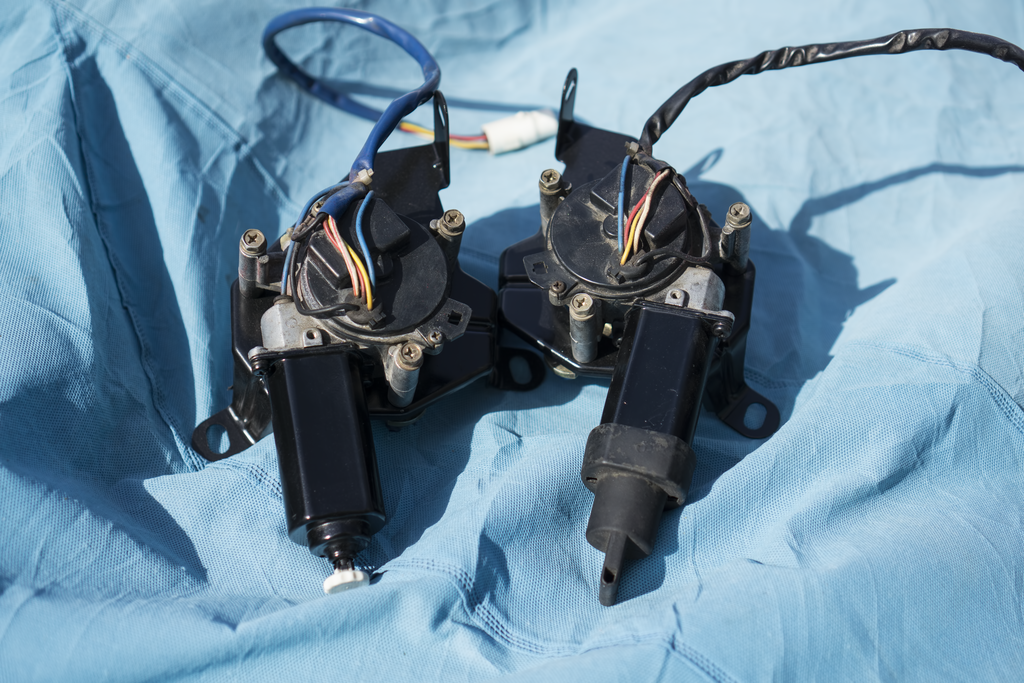
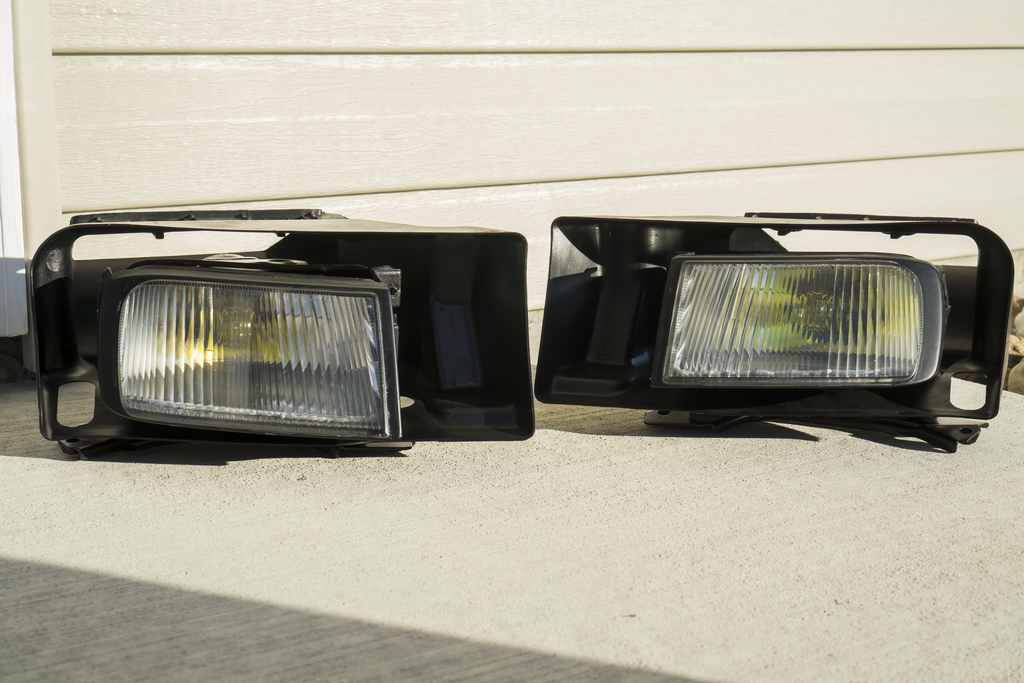
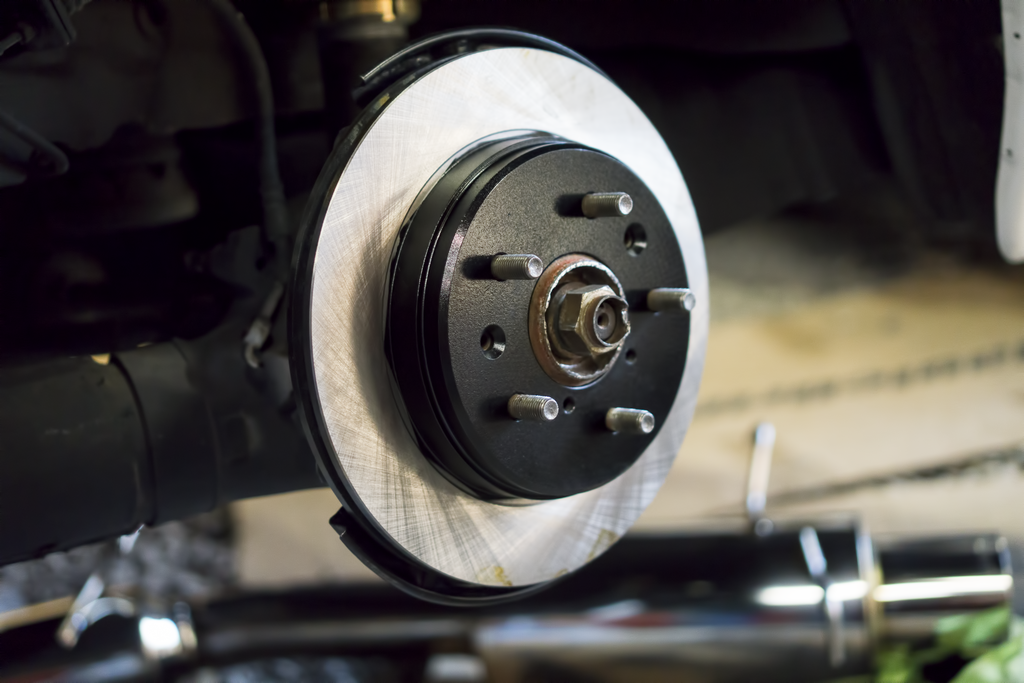
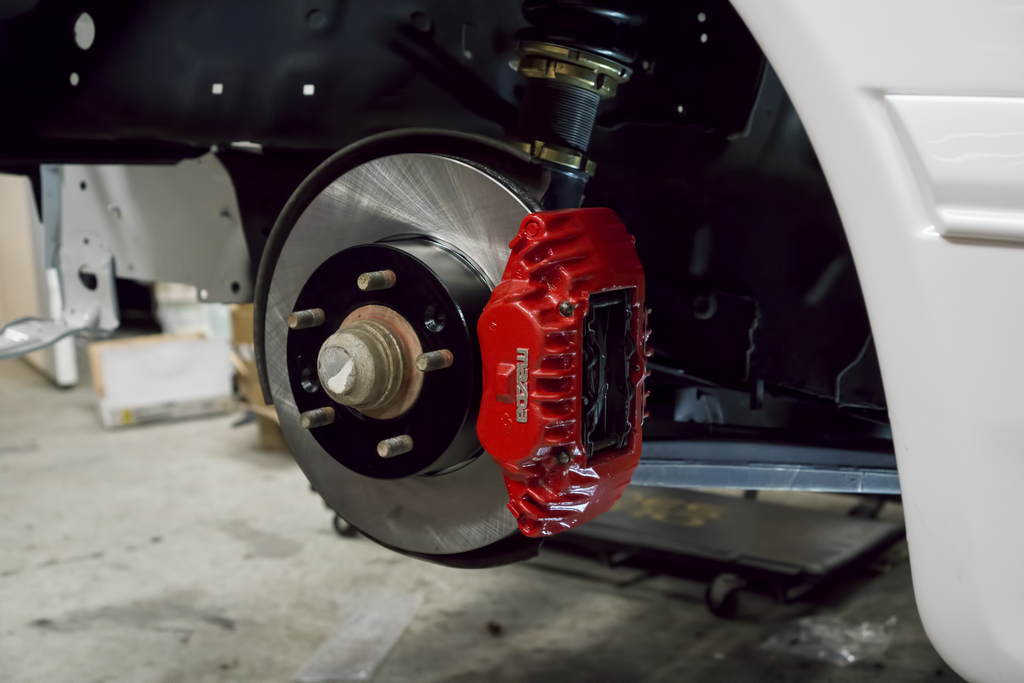
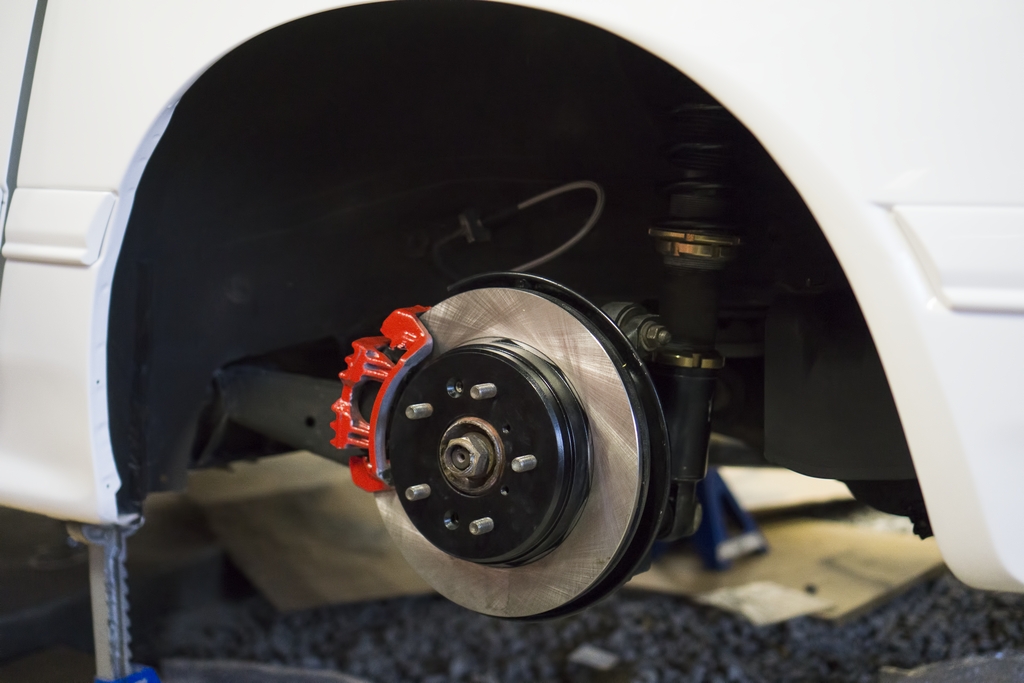
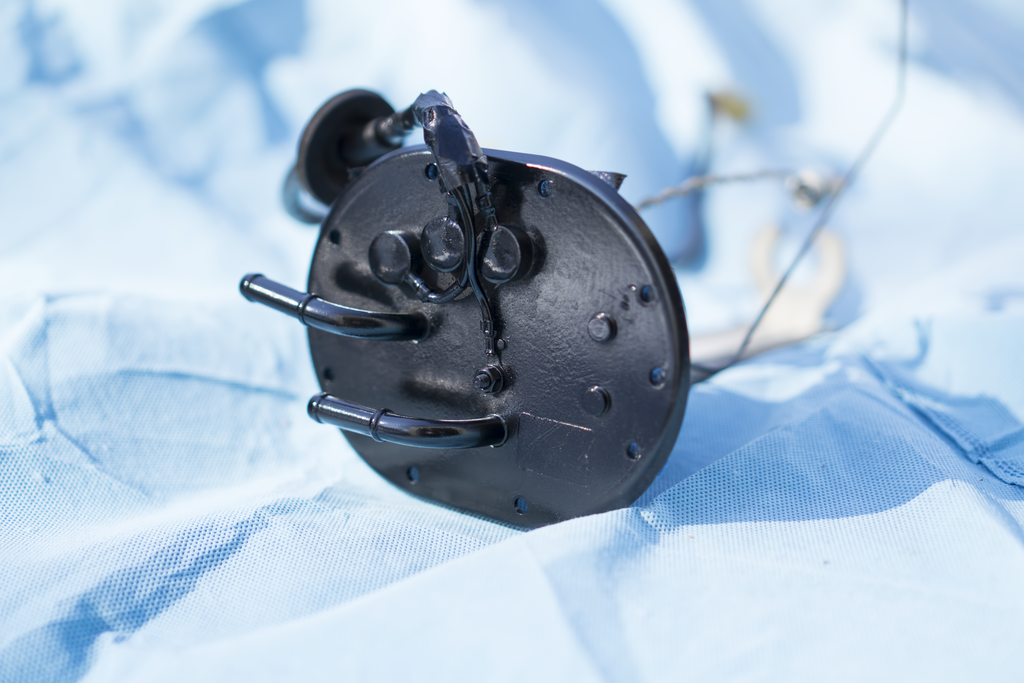
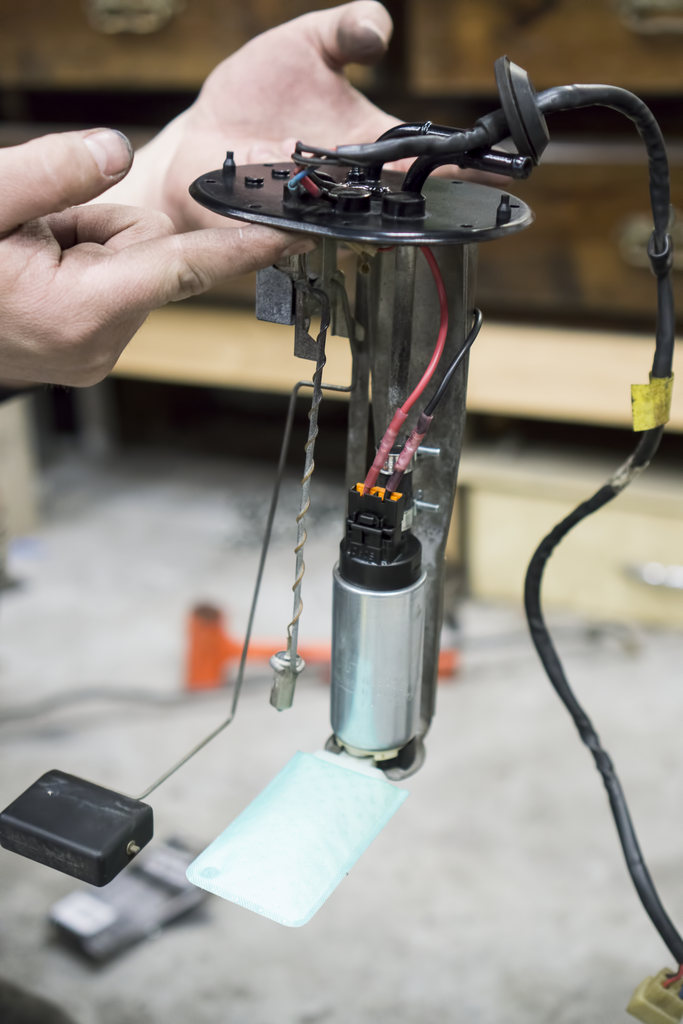
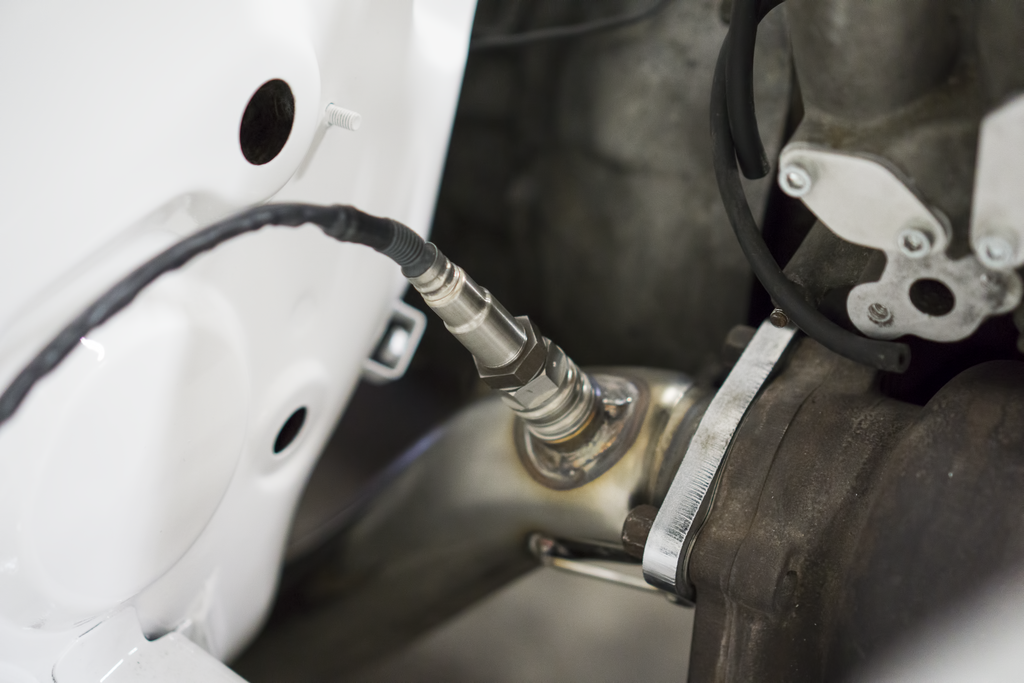
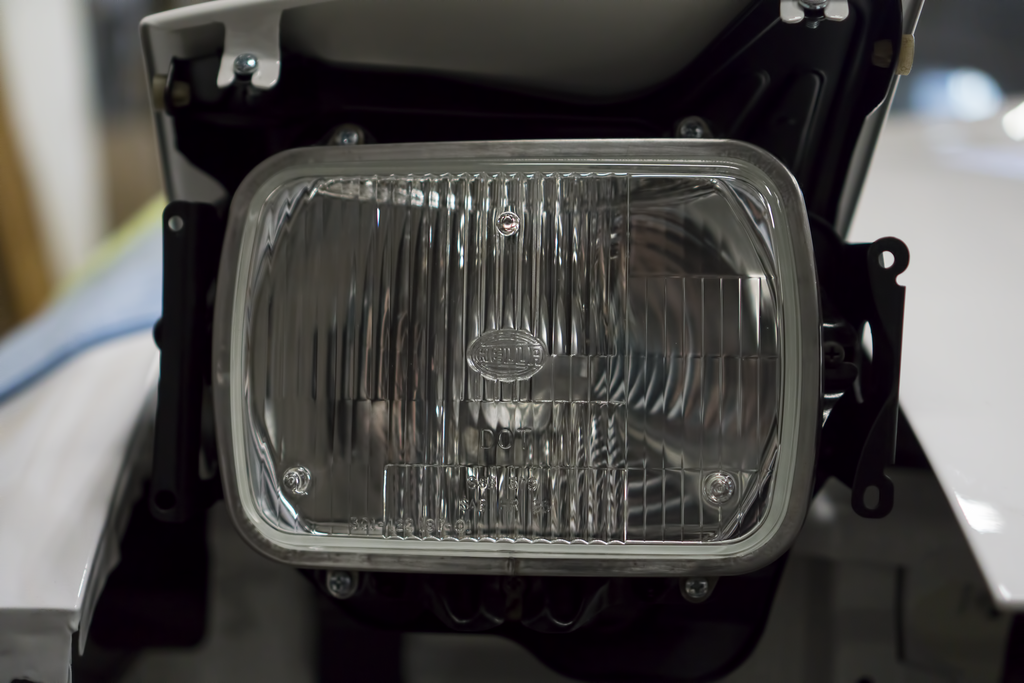
As you may remember the plan is for the car to start next weekend. That idea has been the drive for this current weekend. Tons of things have gotten done. I started a headlight motor project ages ago, and finally got it completed. Pulled the motors off of their brackets and sprayed the brackets. I also finished my fog light project and got the assembly finished. I decided to stop being lazy and buy the bolts I needed haha. I decided to rebuff the lenses and they turned out pretty nice. I went ahead and sprayed the prop valve and it turned out really nice. I like that it kind of blends in with the brake booster. I finished transferring the Walbro 255 over to the new fuel pump assembly. I also painted the top of the assembly to, hopefully, prevent future rust. I bought some rotor blanks from Oreilly�s and brought them home and sprayed the hubs. They turned out much better than I had expected. I went ahead and put the headlights on, as well as the top covers. Finally got to �break� out my brake calipers and slap them on. They look pretty good, the paint sure doesn�t hold up very well to being hit, but they definitely look better than dull grey. Tons of things went on inside the engine bay today. I had some assistance, and we began running the brake lines. I was finally able to put the radiator in, as well as the oil cooler. There was a lot more, but I�ll just post a picture below. My paint guy brought over some more goodies to slap on the car. Just waiting on front side markers and sunroof now. Updated body shots will be below.
Here is the headlight motor project:
Here is the finally finished fog lights (They are upside down, wouldn�t stand up the other way -_-):
Here is all the shots of the rotors, and calipers:
Here is the completed fuel pump:
Update 2/7/2016:
As you may remember the plan is for the car to start next weekend. That idea has been the drive for this current weekend. Tons of things have gotten done. I started a headlight motor project ages ago, and finally got it completed. Pulled the motors off of their brackets and sprayed the brackets. I also finished my fog light project and got the assembly finished. I decided to stop being lazy and buy the bolts I needed haha. I decided to rebuff the lenses and they turned out pretty nice. I went ahead and sprayed the prop valve and it turned out really nice. I like that it kind of blends in with the brake booster. I finished transferring the Walbro 255 over to the new fuel pump assembly. I also painted the top of the assembly to, hopefully, prevent future rust. I bought some rotor blanks from Oreilly�s and brought them home and sprayed the hubs. They turned out much better than I had expected. I went ahead and put the headlights on, as well as the top covers. Finally got to �break� out my brake calipers and slap them on. They look pretty good, the paint sure doesn�t hold up very well to being hit, but they definitely look better than dull grey. Tons of things went on inside the engine bay today. I had some assistance, and we began running the brake lines. I was finally able to put the radiator in, as well as the oil cooler. There was a lot more, but I�ll just post a picture below. My paint guy brought over some more goodies to slap on the car. Just waiting on front side markers and sunroof now. Updated body shots will be below.
Here is the headlight motor project:


Here is the finally finished fog lights (They are upside down, wouldn�t stand up the other way -_-):

Here is all the shots of the rotors, and calipers:


Here is the completed fuel pump:


Thread Starter
Joined: Apr 2015
Posts: 398
Likes: 169
From: St. Louis, MO
Update 2/7/2016 Continued:
Here is all the fun things that happened in the engine area:
Here is the headlights on the car:
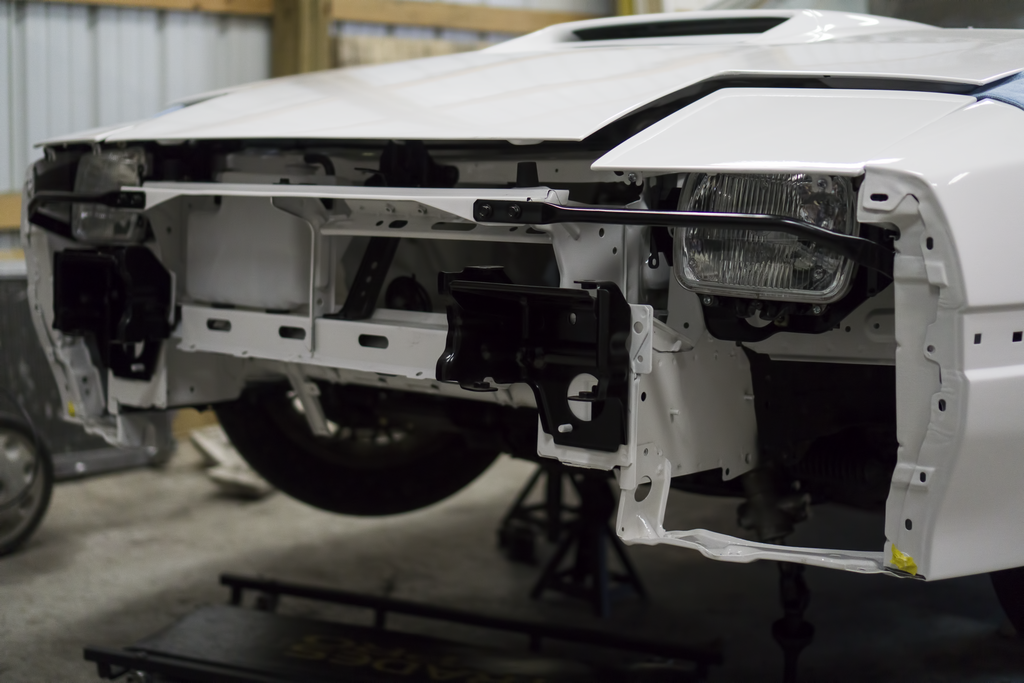
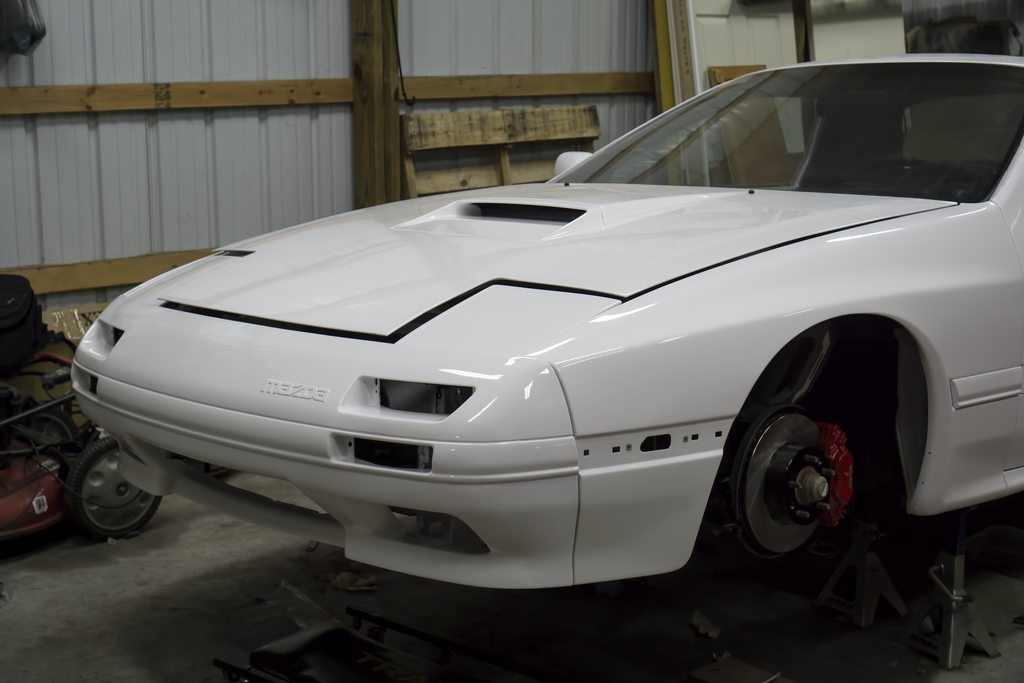
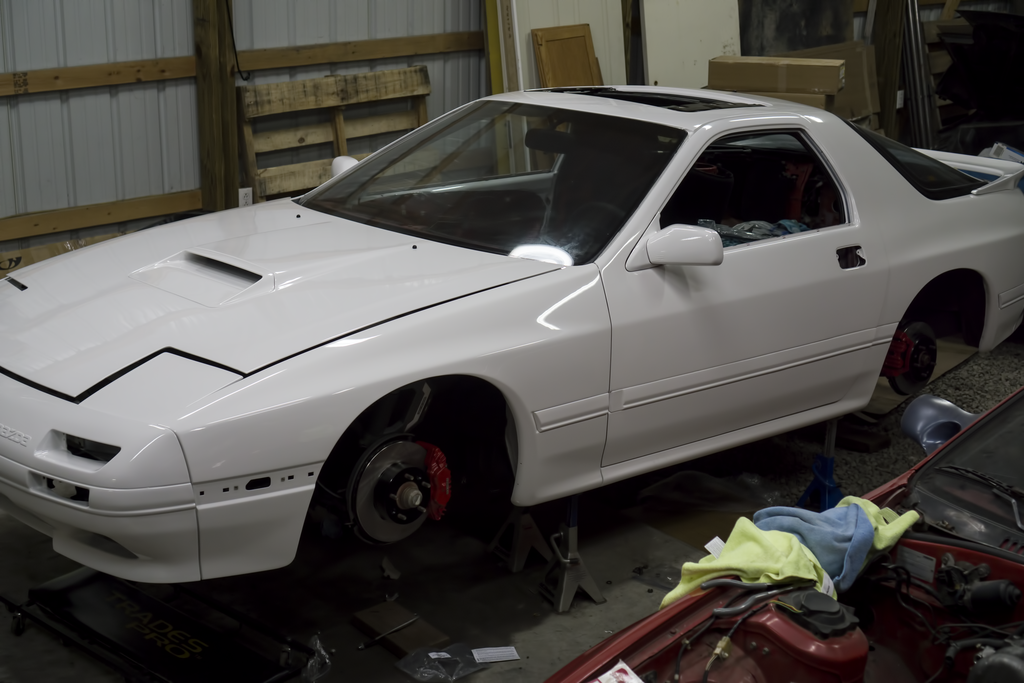
Here are the most up to date pictures of the exterior:
Here is all the fun things that happened in the engine area:


Here is the headlights on the car:


Here are the most up to date pictures of the exterior:


