When you click on links to various merchants on this site and make a purchase, this can result in this site earning a commission. Affiliate programs and affiliations include, but are not limited to, the eBay Partner Network.
This is the most inspiring build ever. I am just going to say that I am in love with your car and your license plate is perfect. Well done all around. Amazing!
This is the most inspiring build ever. I am just going to say that I am in love with your car and your license plate is perfect. Well done all around. Amazing!
Thanks guys! Appreciate it. Should have another update before long. I feel like I'm restoring the restoration
I checked out your build thread restored rotary. Looking good! It's all in the details and you are definitely hitting that with super clean turn signals and flash to passes.
Update 3/10/19:
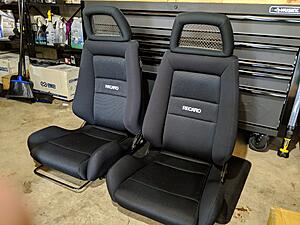
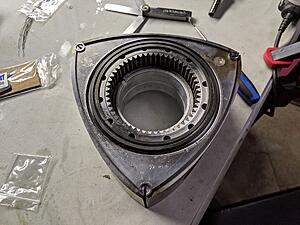
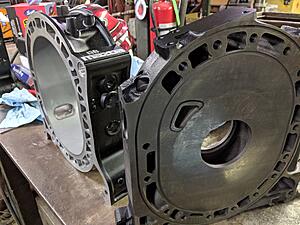
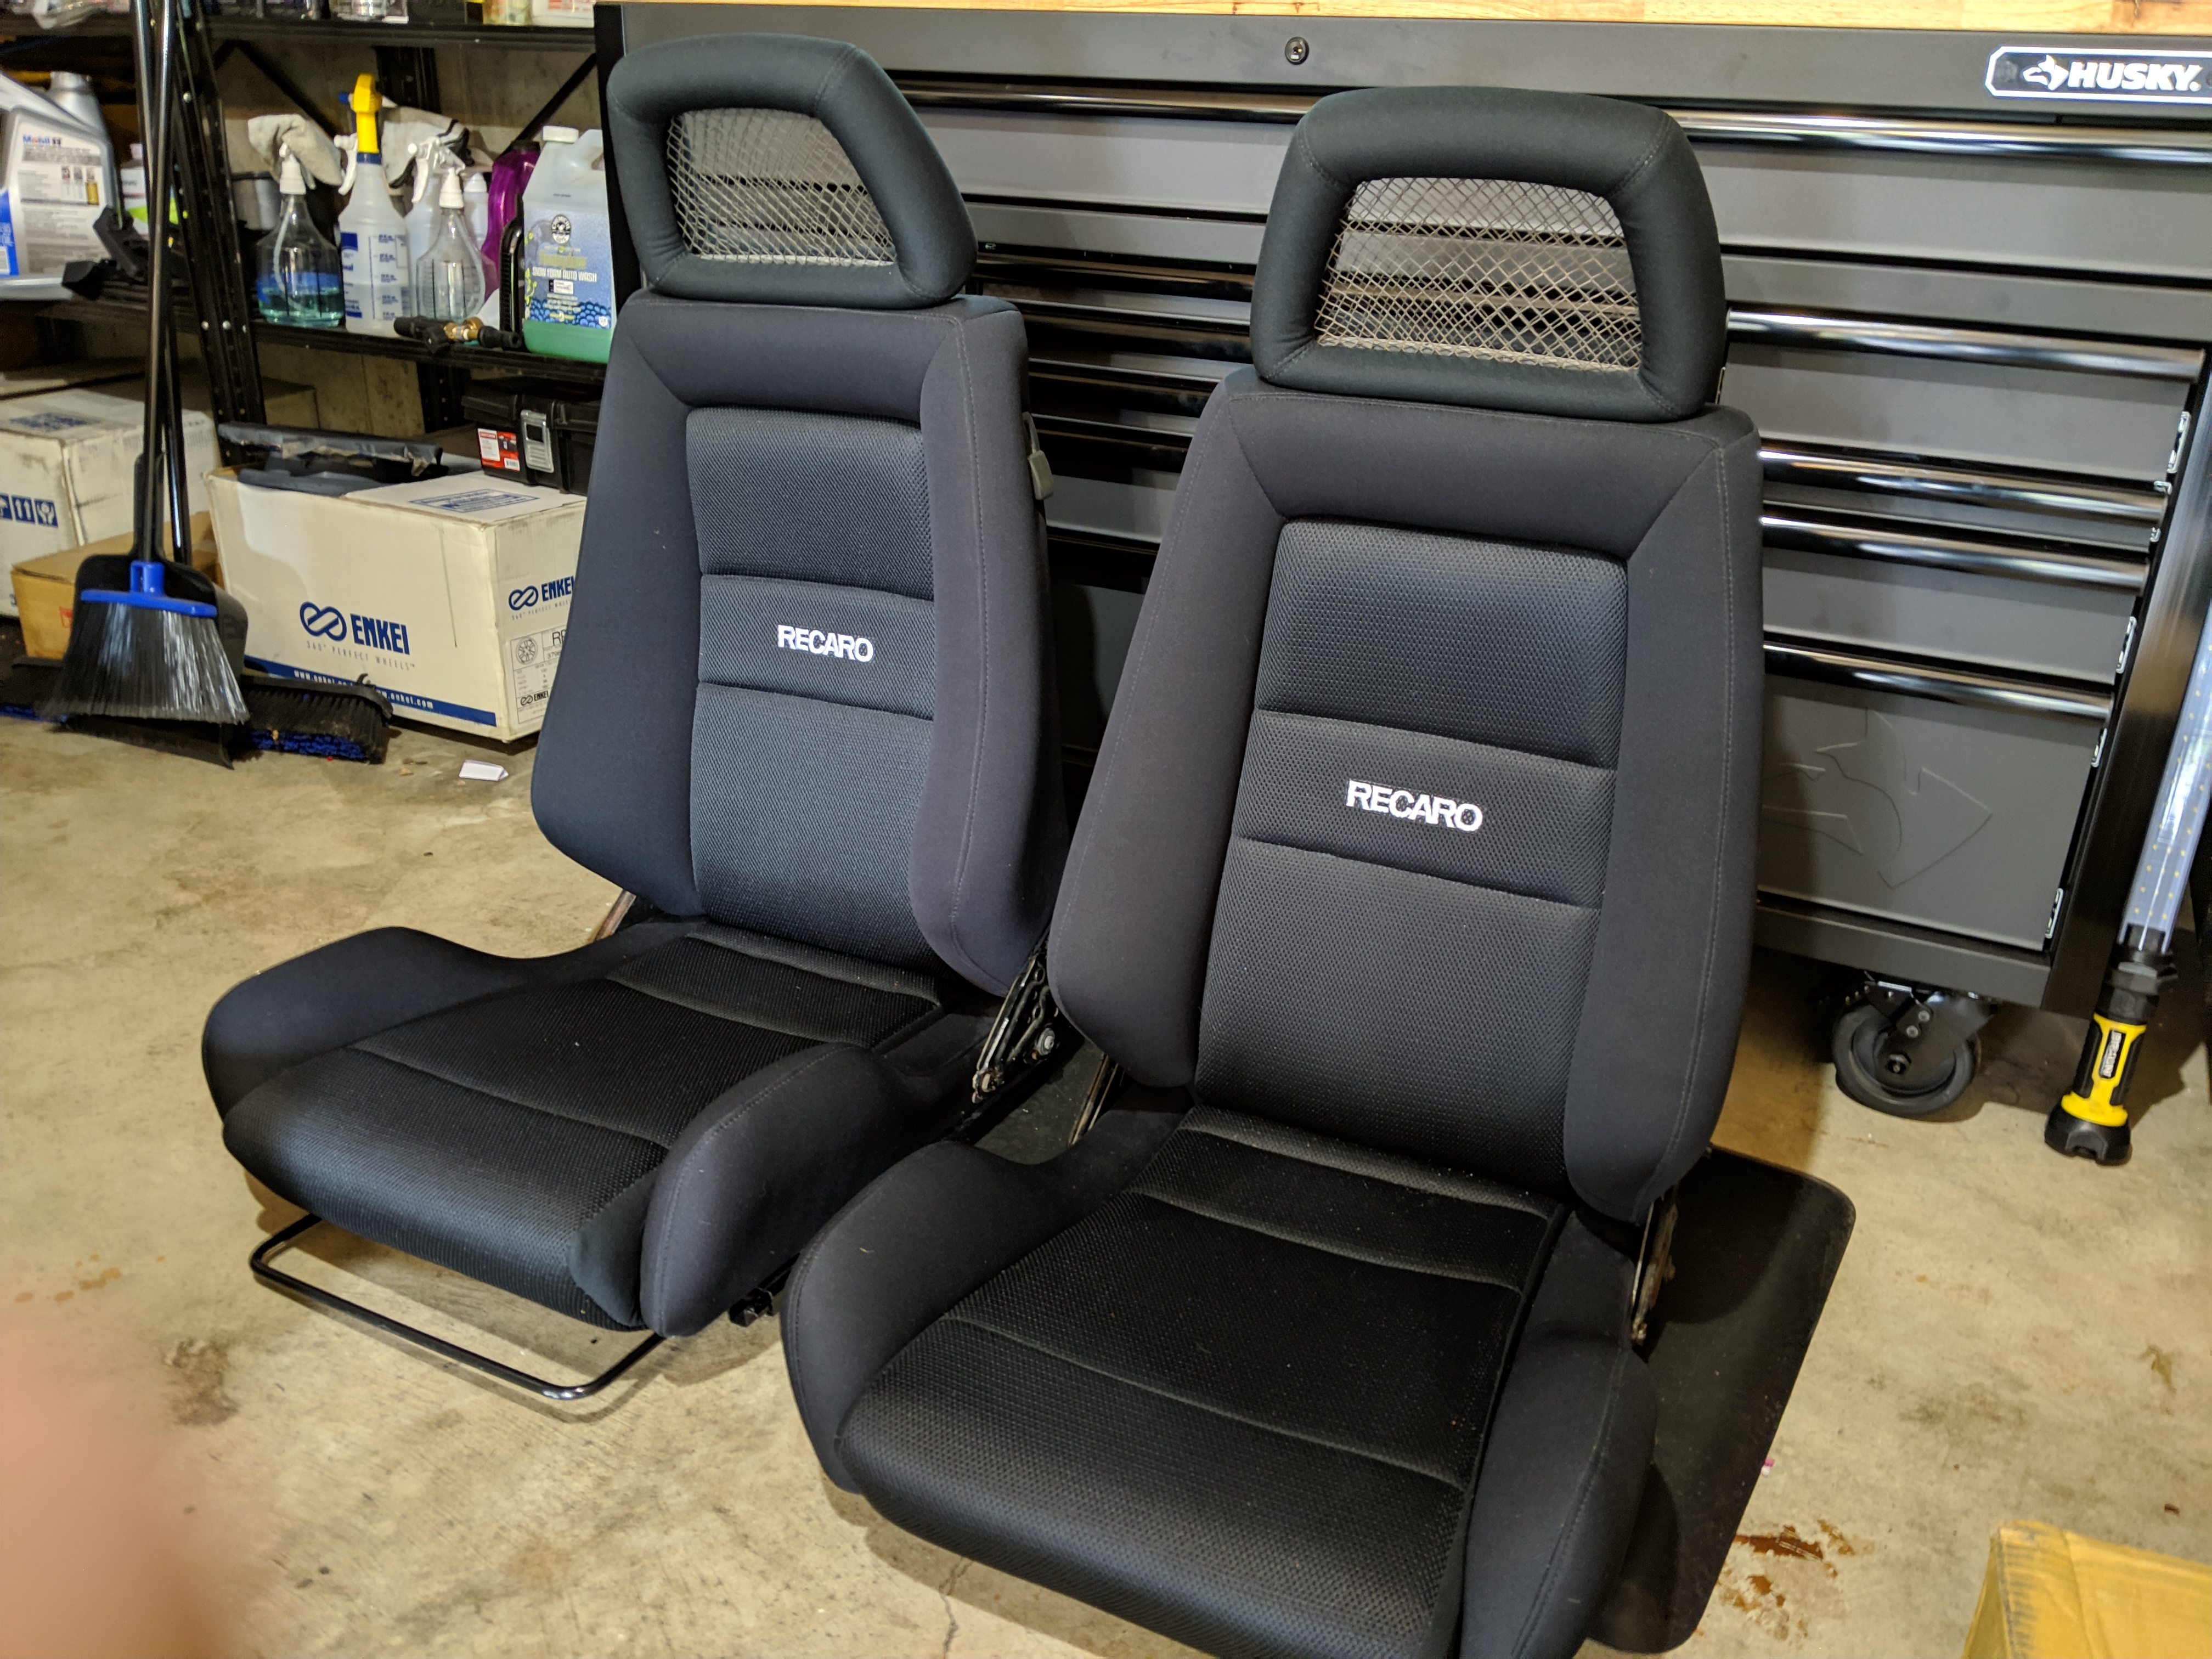
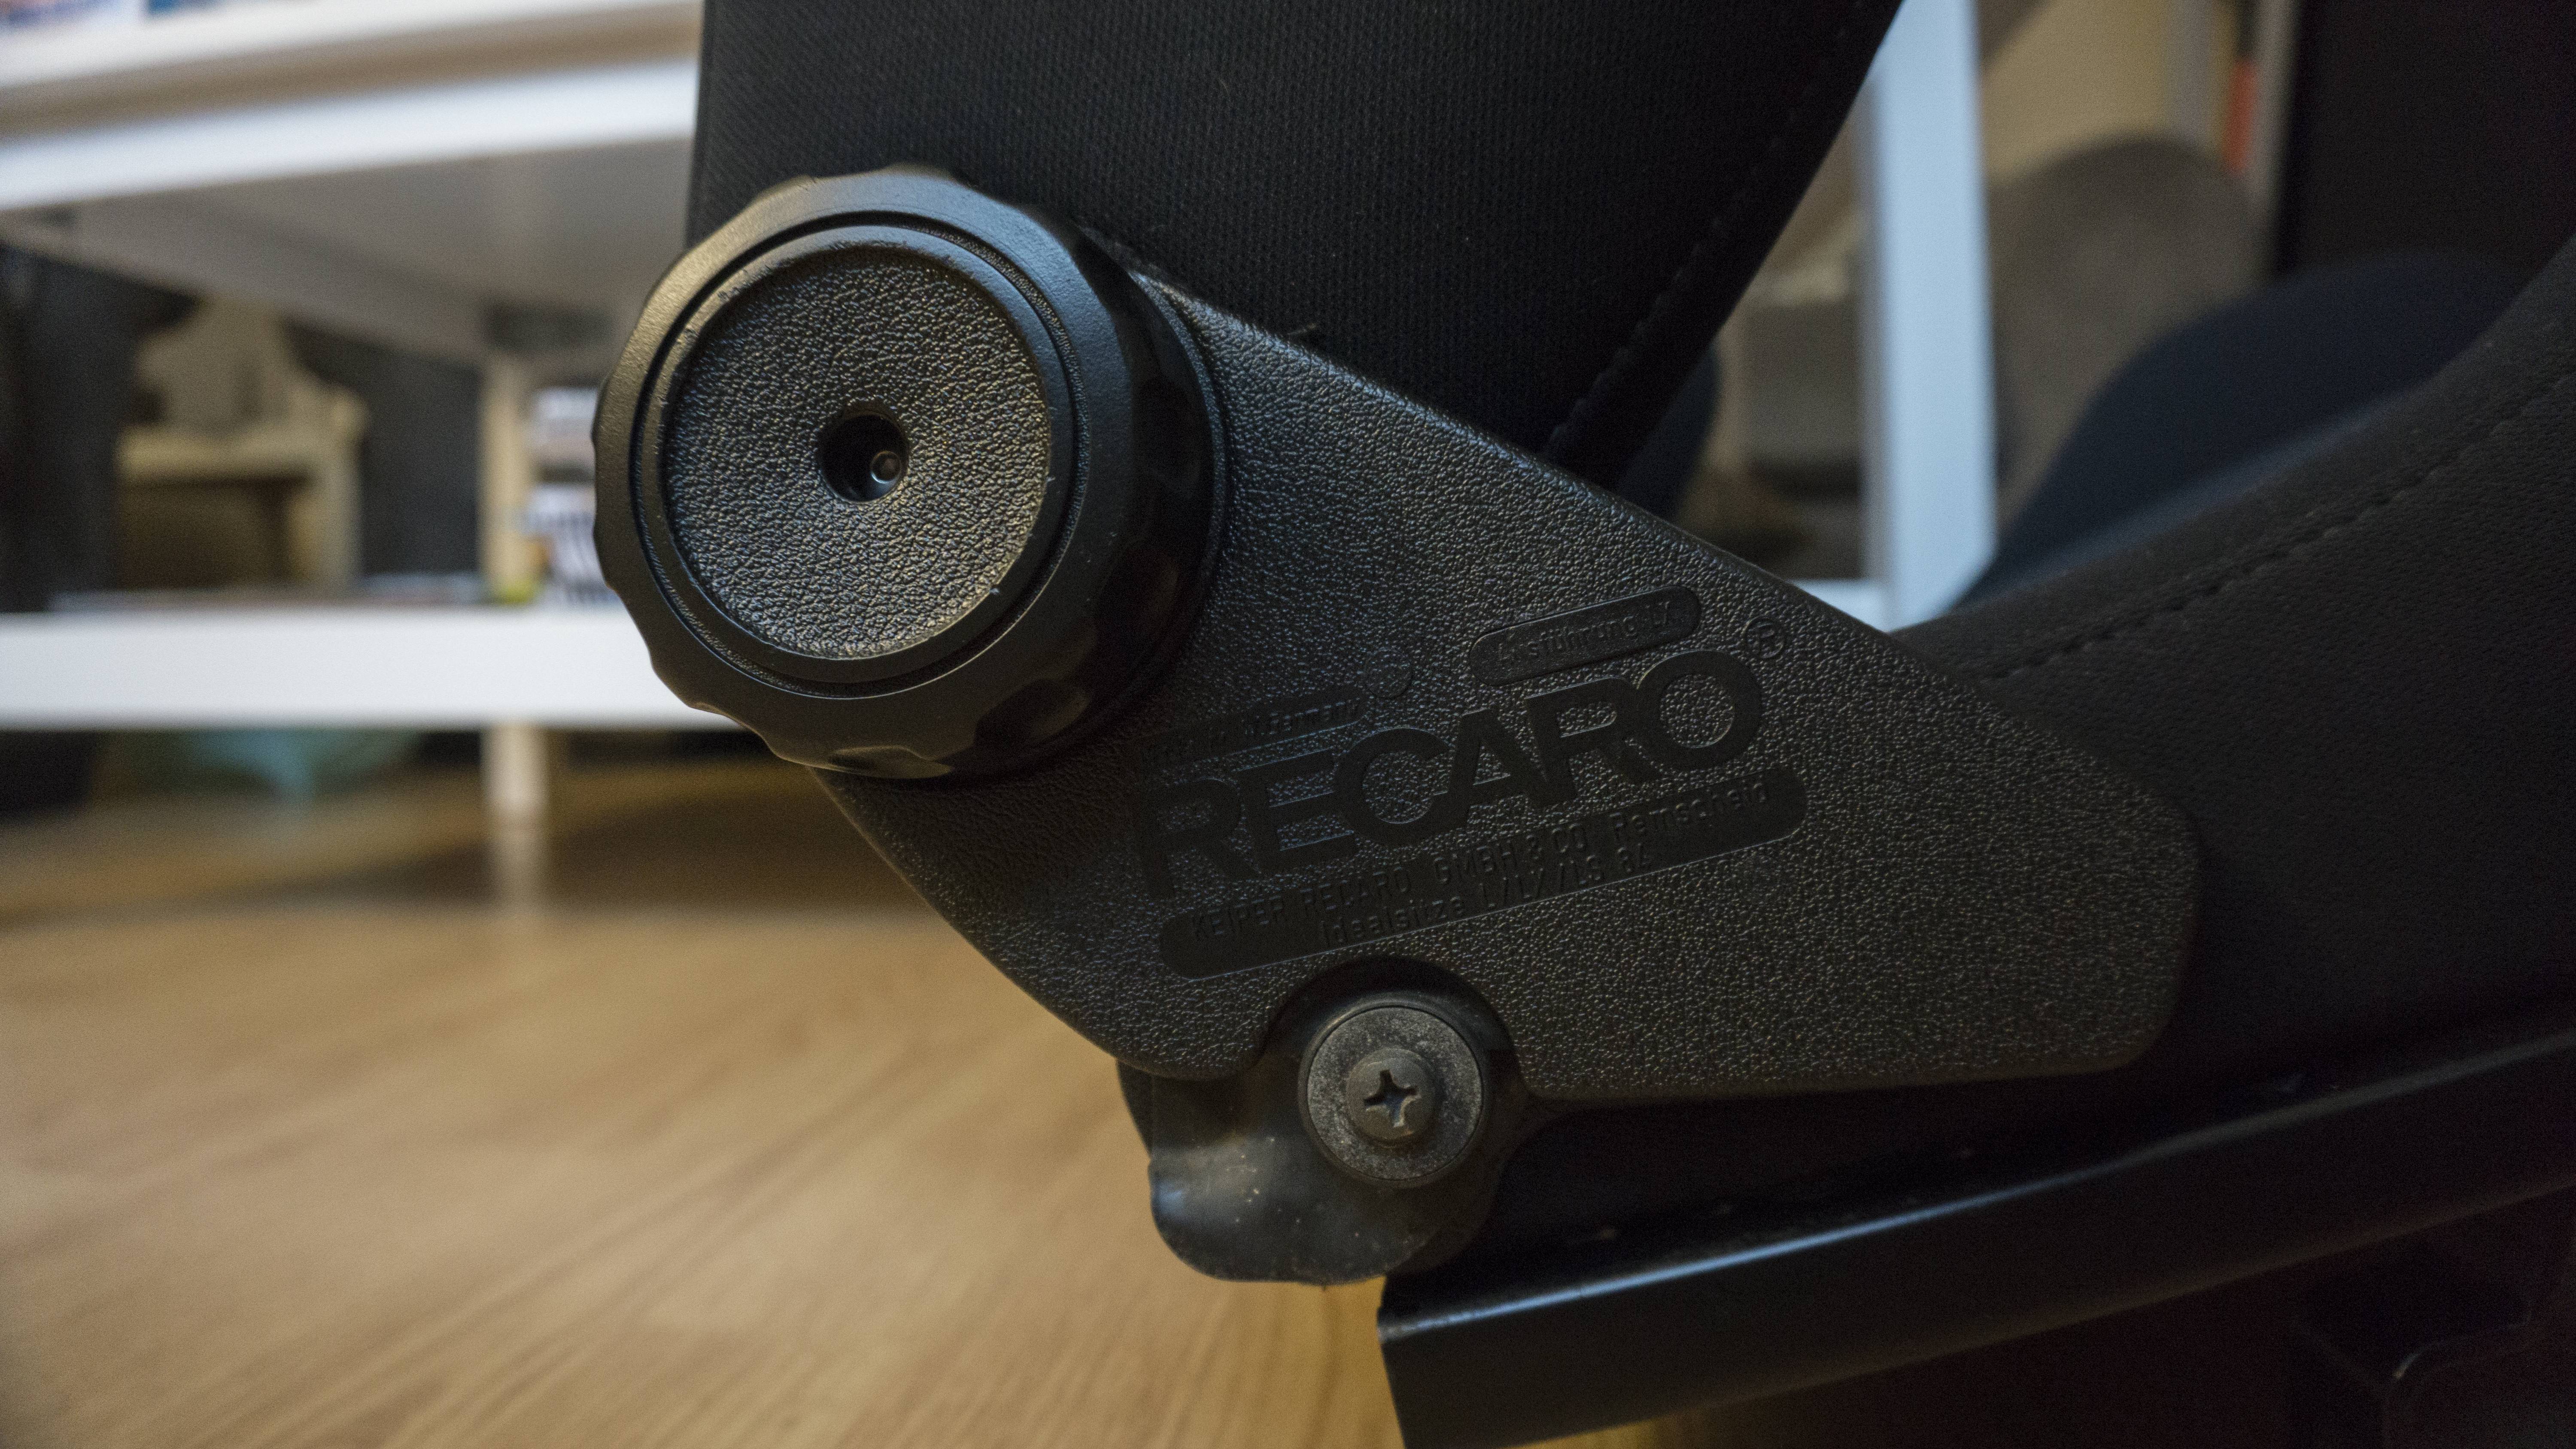
I lied - the engine is not back together. So, I wanted to throw together a little update to show where I’m currently at. I was finally able to source my dream seats for the car - A mint pair of Recaro LXBs. My friend was nice enough to drive 6 hours to pick them up for me and now I just need to drive 5 hours north to pick them up. I received almost everything back from powder coating and it all looks great. I’ve also began painting the irons and housings. The housings are done and after getting them done….I regret not having them powder coated. However, I do not think it is worth taking them to my powdercoater as I would not receive bulk pricing for them. I’ve decided to take more time with the interior and exterior even if it means the car being down longer (I can drive the FD now in the time being). I’ve also decided to ditch the rear mud guards and the side skirts and go back to a more stock look. I’ll be running the T2 side skirts and the Shine Auto front lip. I was fortunate enough to have a friend that wanted more aggressive side skirts for his T2 so we are going to swap. I’m slated to go up north and pick up the seats, side skirts, and get the engine rebuilt in April. I imagine the next update will be around then.
If you know anyone selling mint black OEM carpet let me know!
Here are a few items back from powder coating:
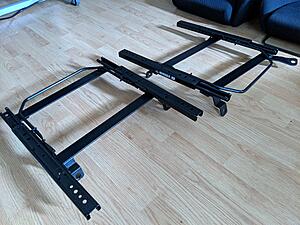
Here are the seats:
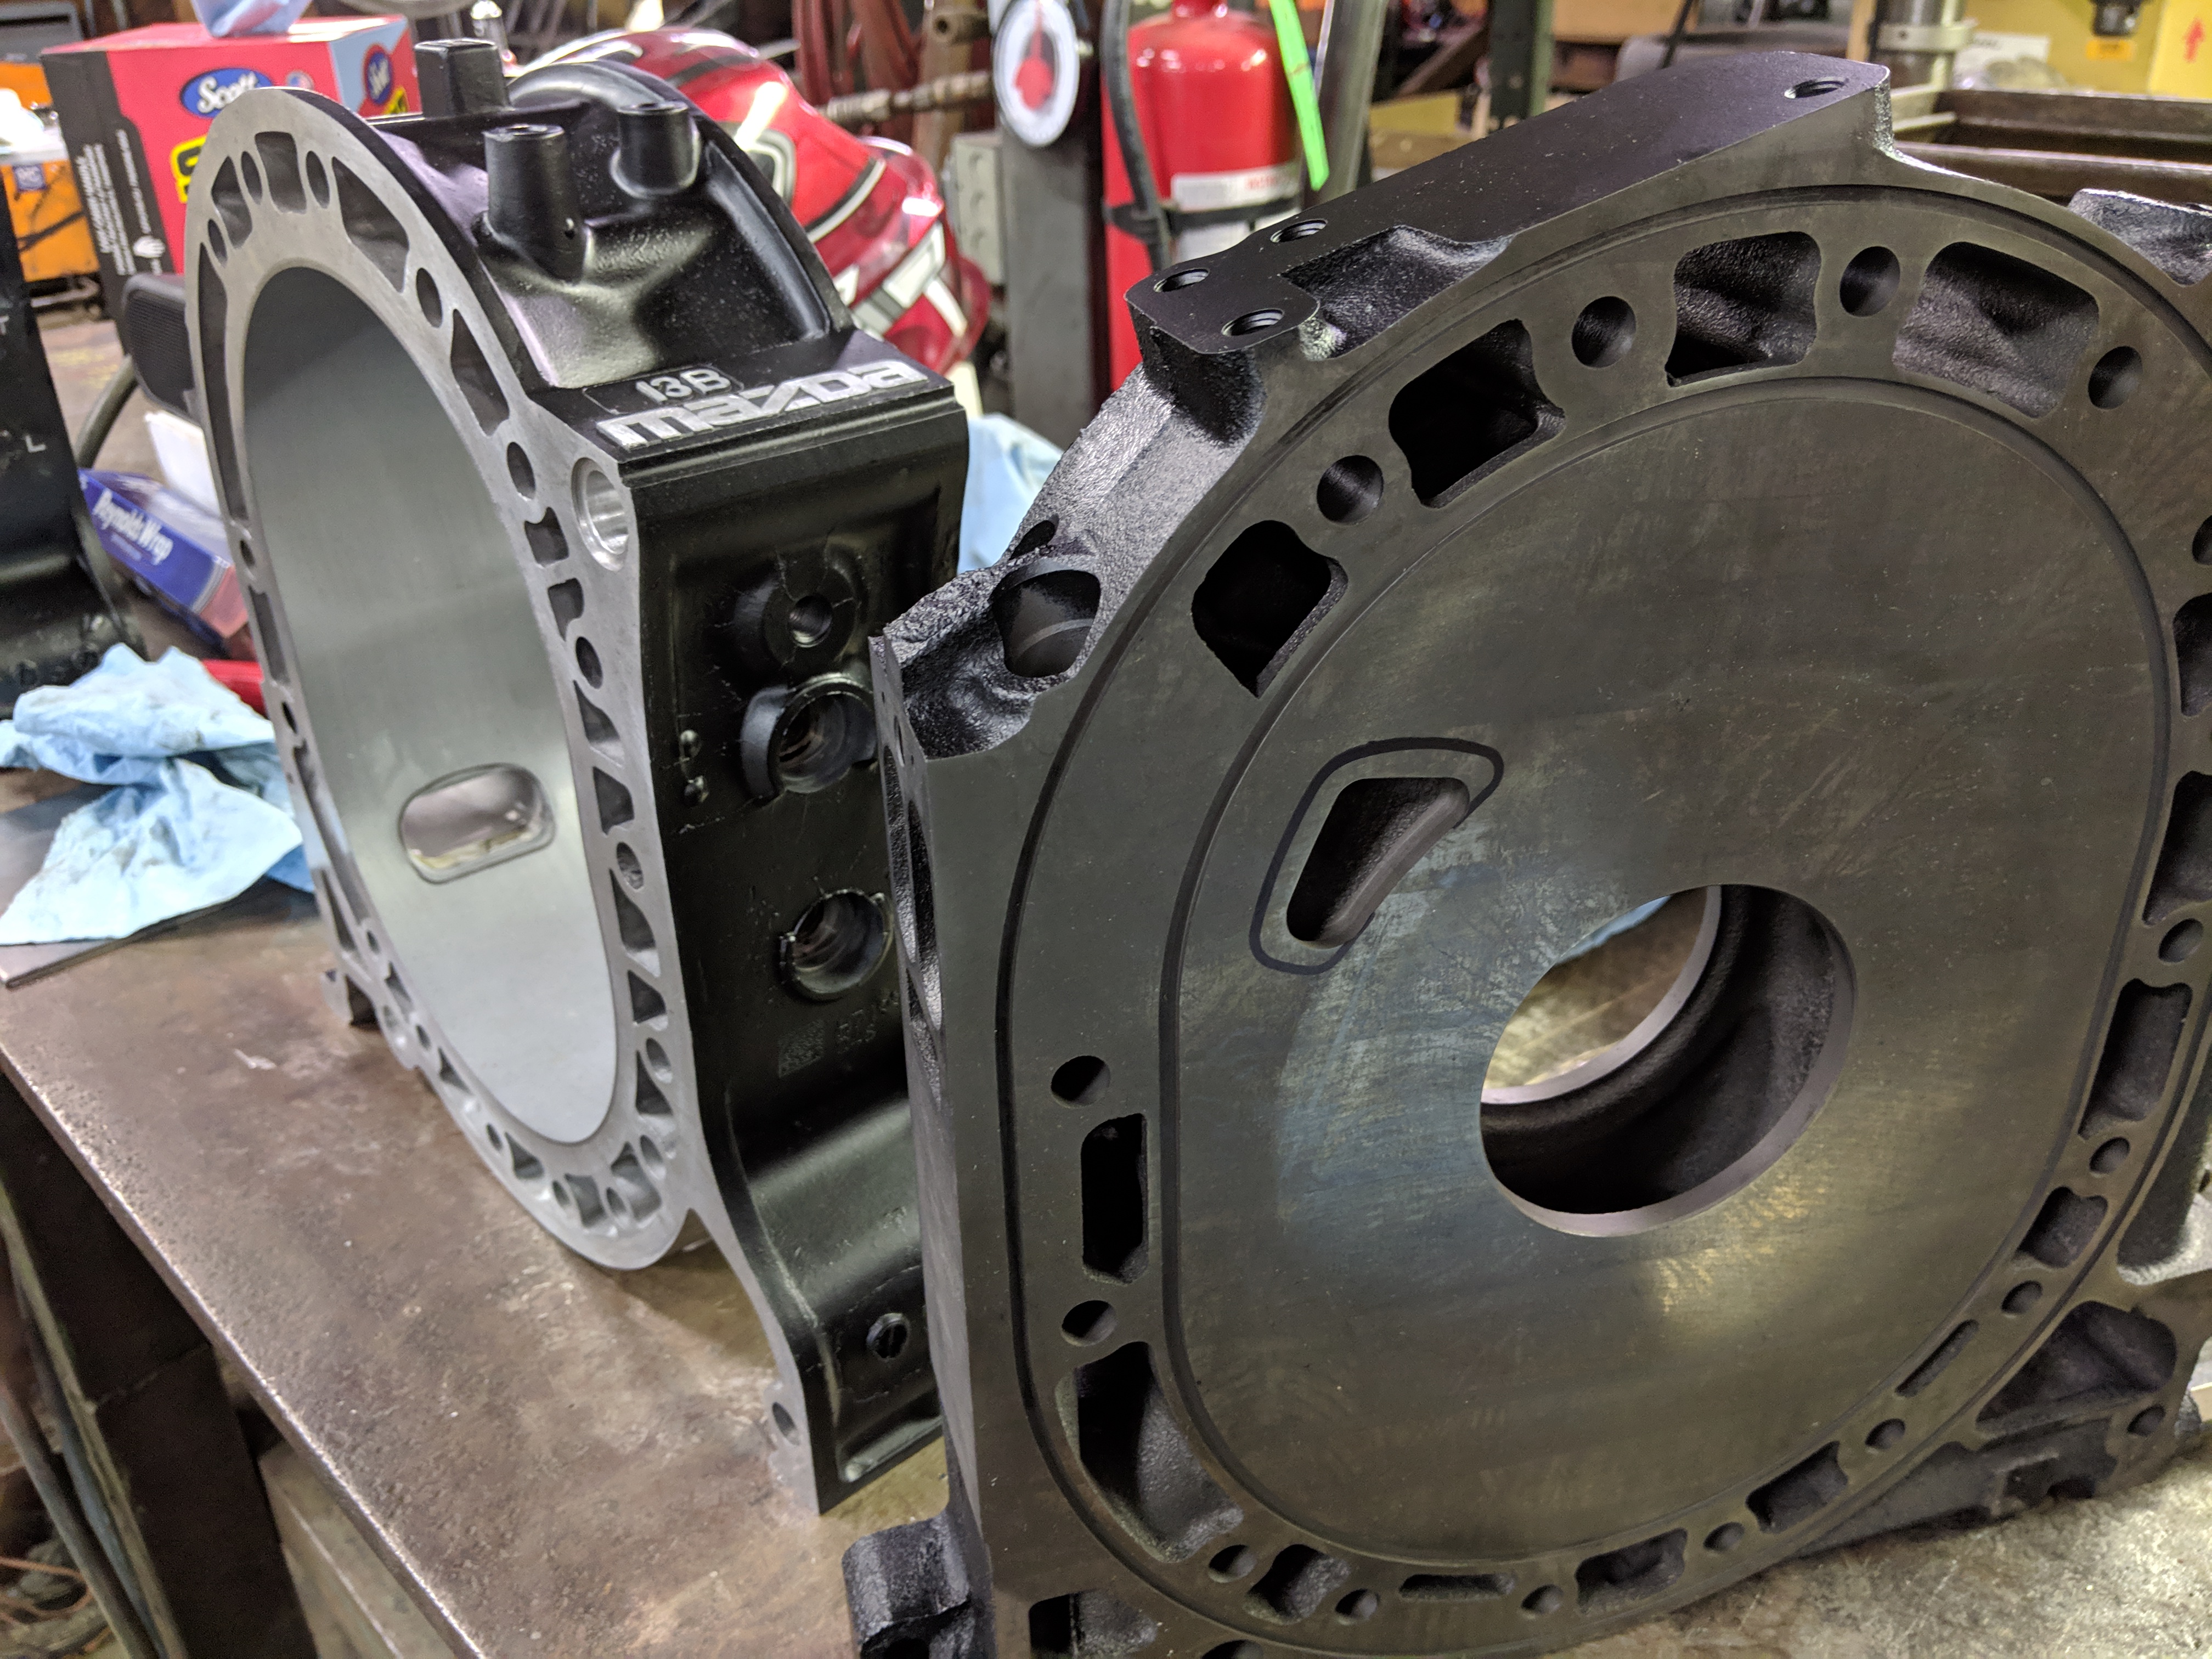
Here are the housings painted:
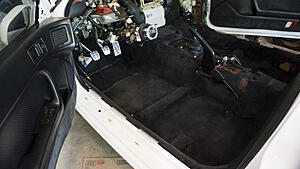
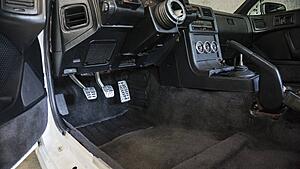
Here is how the car currently sits (minus the 3M tape):
WOW!!! I love all those goodies! This build is so inspiring! I love the BNR cover, always have loved their stuff! Neat that it is getting OEM turbo skirts. OEM goodies are always a nice touch! Someday I will get another set of those mazdaspeed strut bars, those are the coolest. Keep up the amazing work! I look forward to seeing the progress!
Last edited by Restored Rotary; Mar 18, 2019 at 09:39 PM.
Update 4/14/2019:
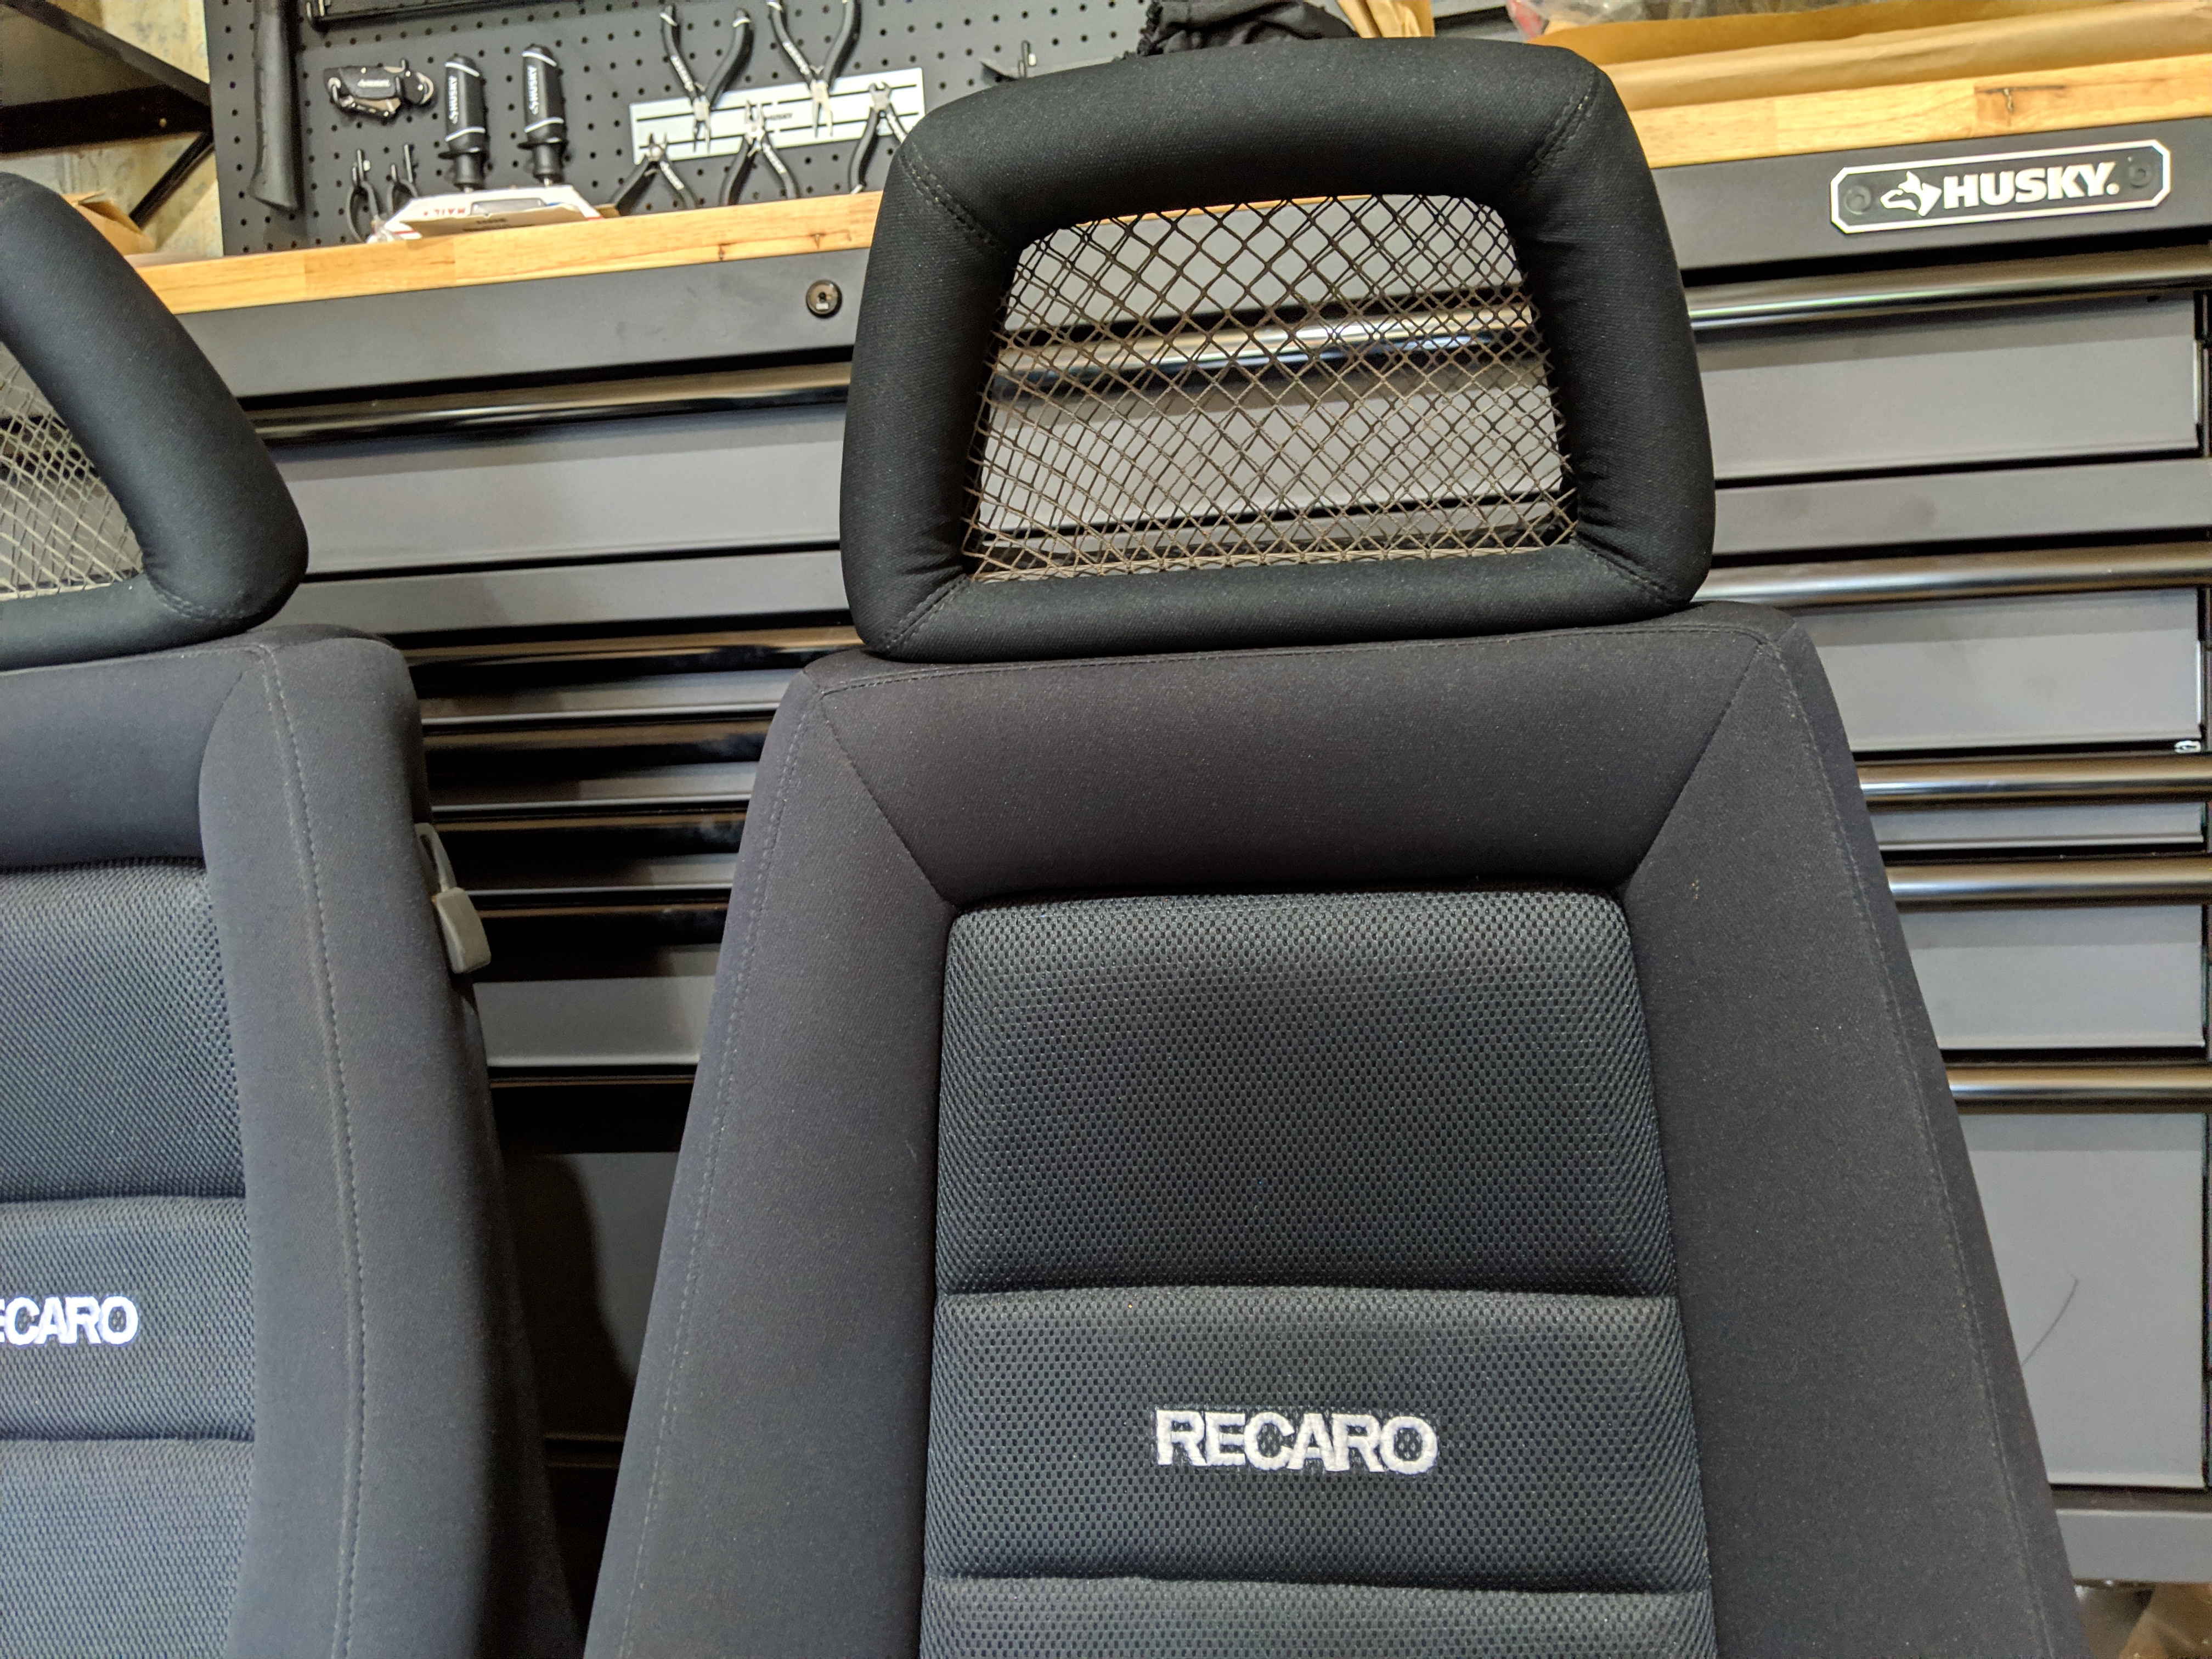
One step closer to being able to start up the FC again! I traveled up to Chicago and traded off my Shine side skirts for some OEM Turbo II side skirts. Really happy with them, I plan to use rivnuts and 3M as my installation method. I�ll have to get them resprayed to match the car, but I need to get the hood fixed as the paint cracked a bit anyway. I was also able to pick up my Recaro LX-Bs from my friend. They look even better than what I thought - these are super mint. I�m debating dying the threads in the headrest, but I�m not sure I want to ruin how original they are. They came with Keiper Recaro sliding rails, but I plan to sell them and my previous Bride FG rails and purchase new Bride RO rails. The bigger point of traveling up was to get my engine rebuilt. We knocked it out in a day and everything checks out! Strapped it to a pallet and brought it back home. I still need to get a few more things powder coated and receive my V-Mount kit and everything should be ready to go in.
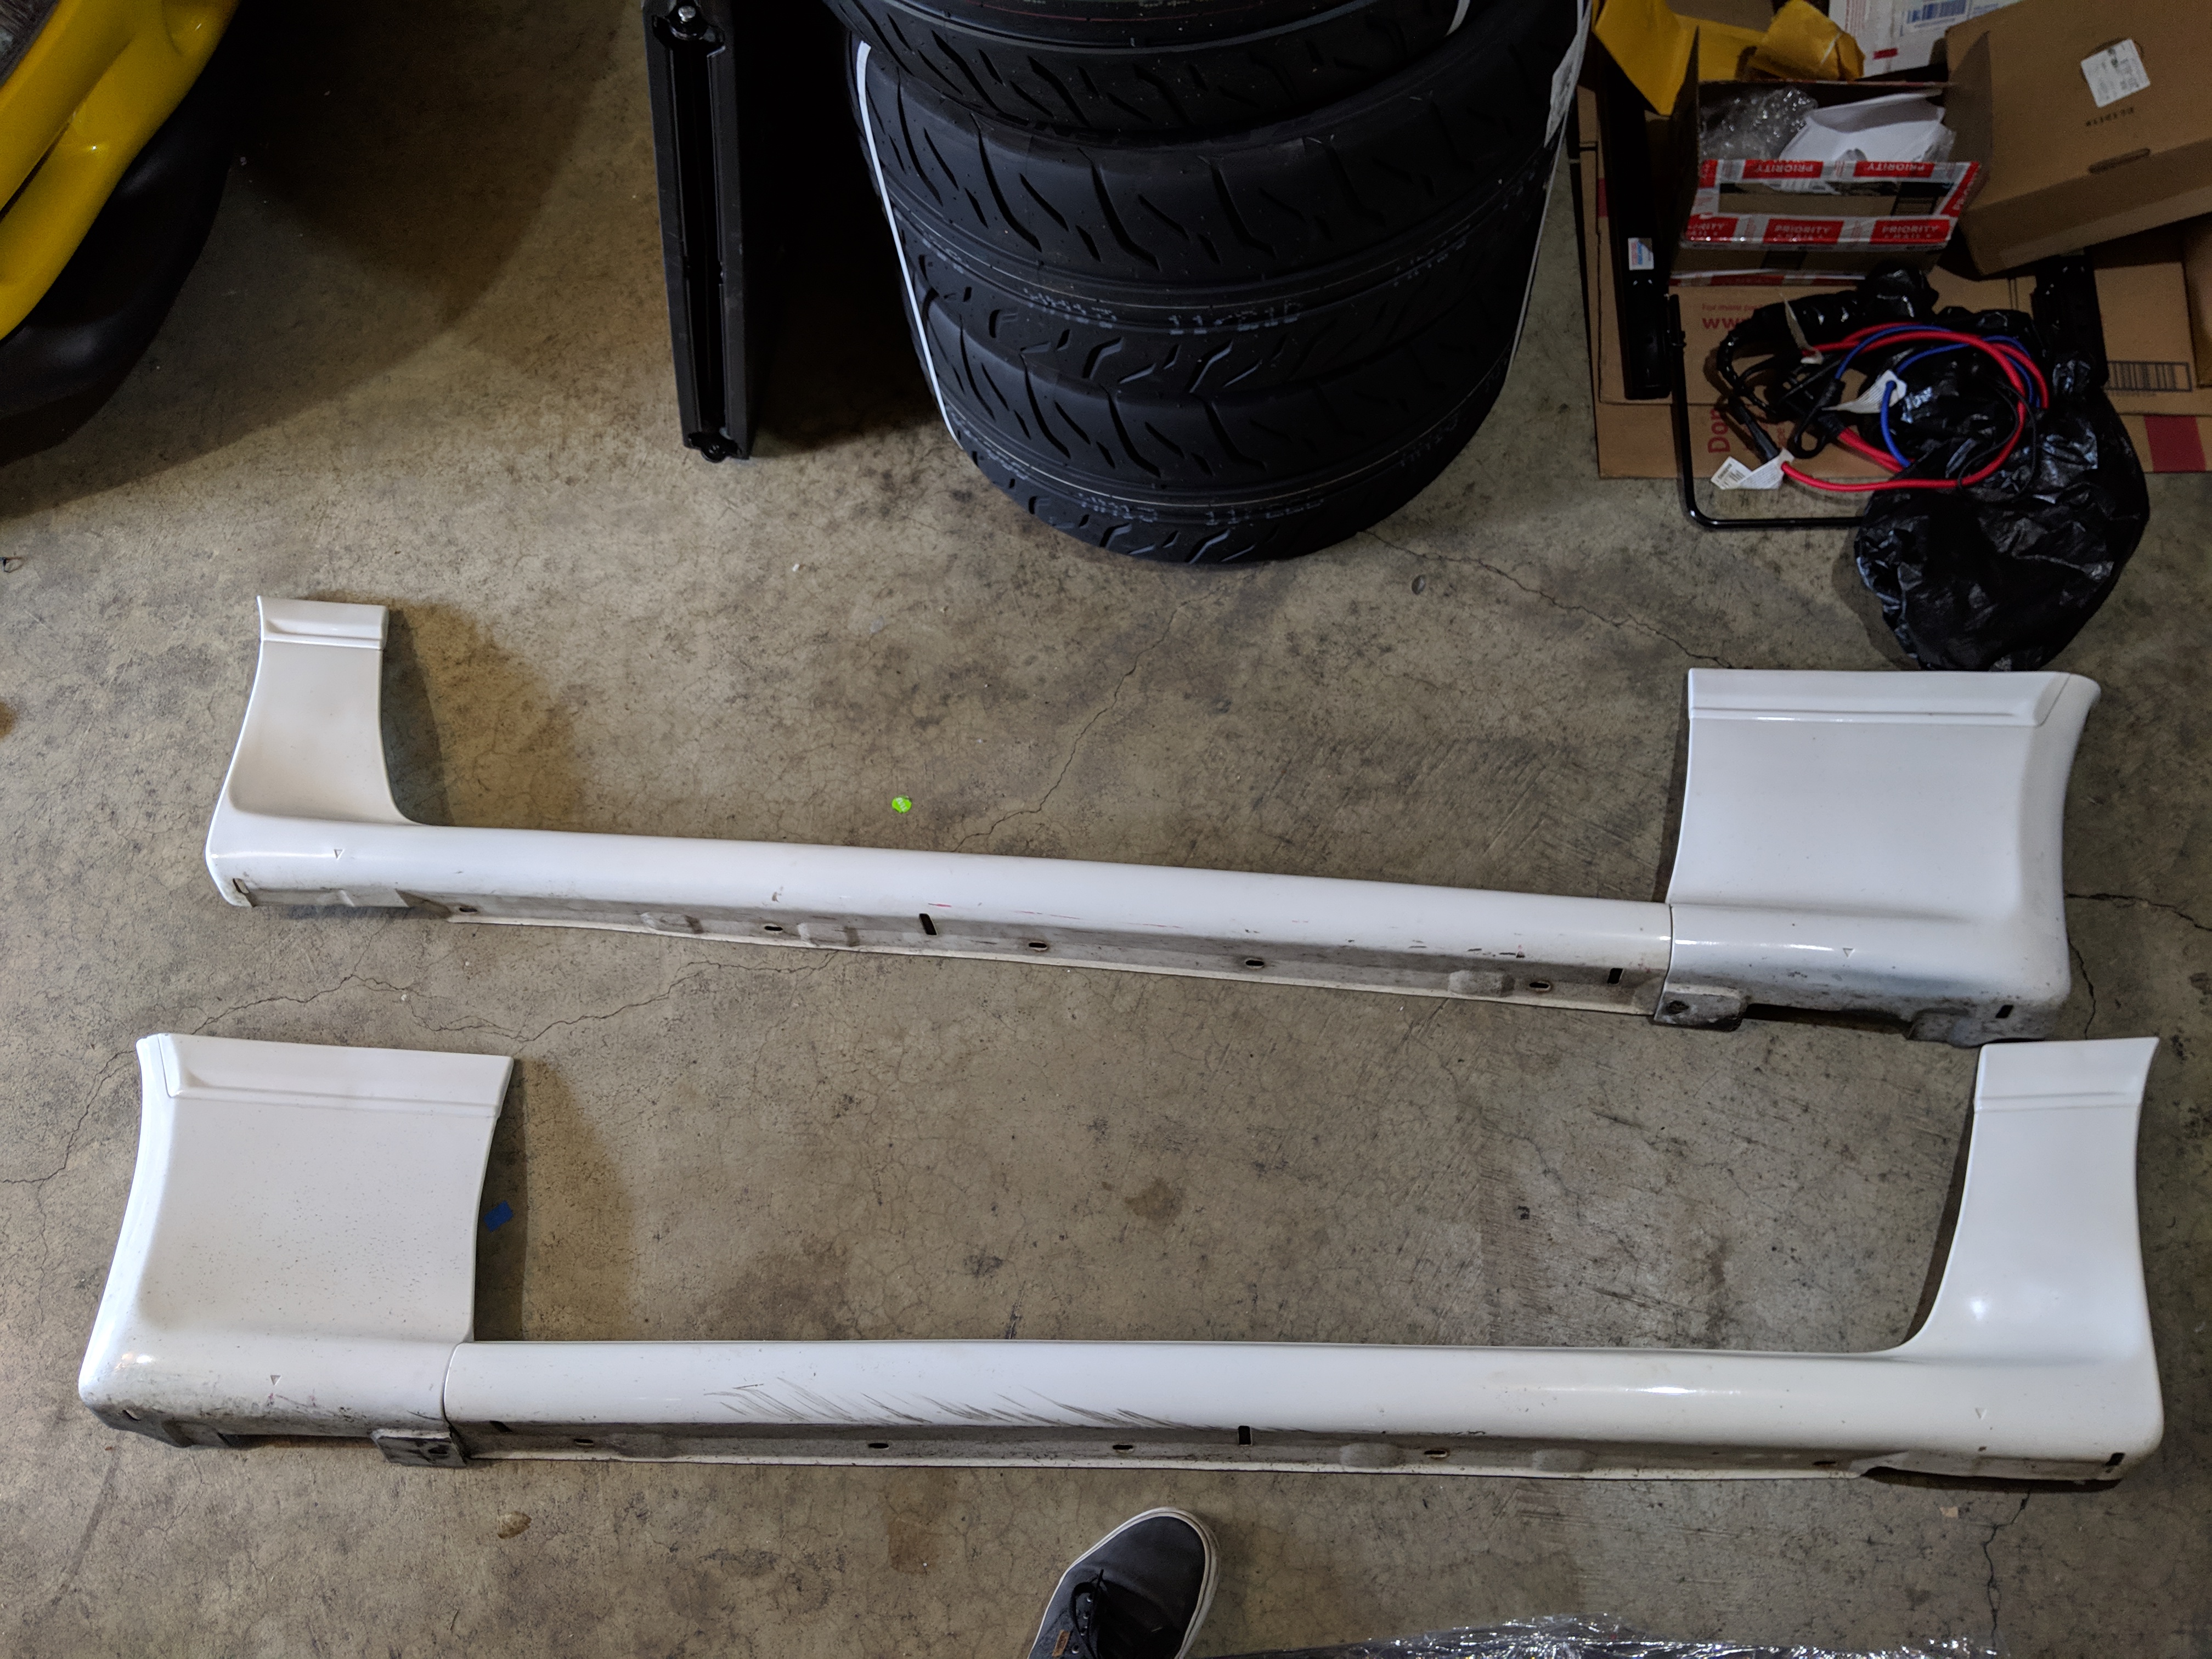
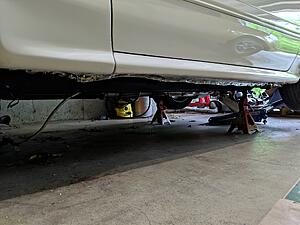
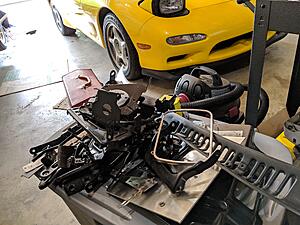
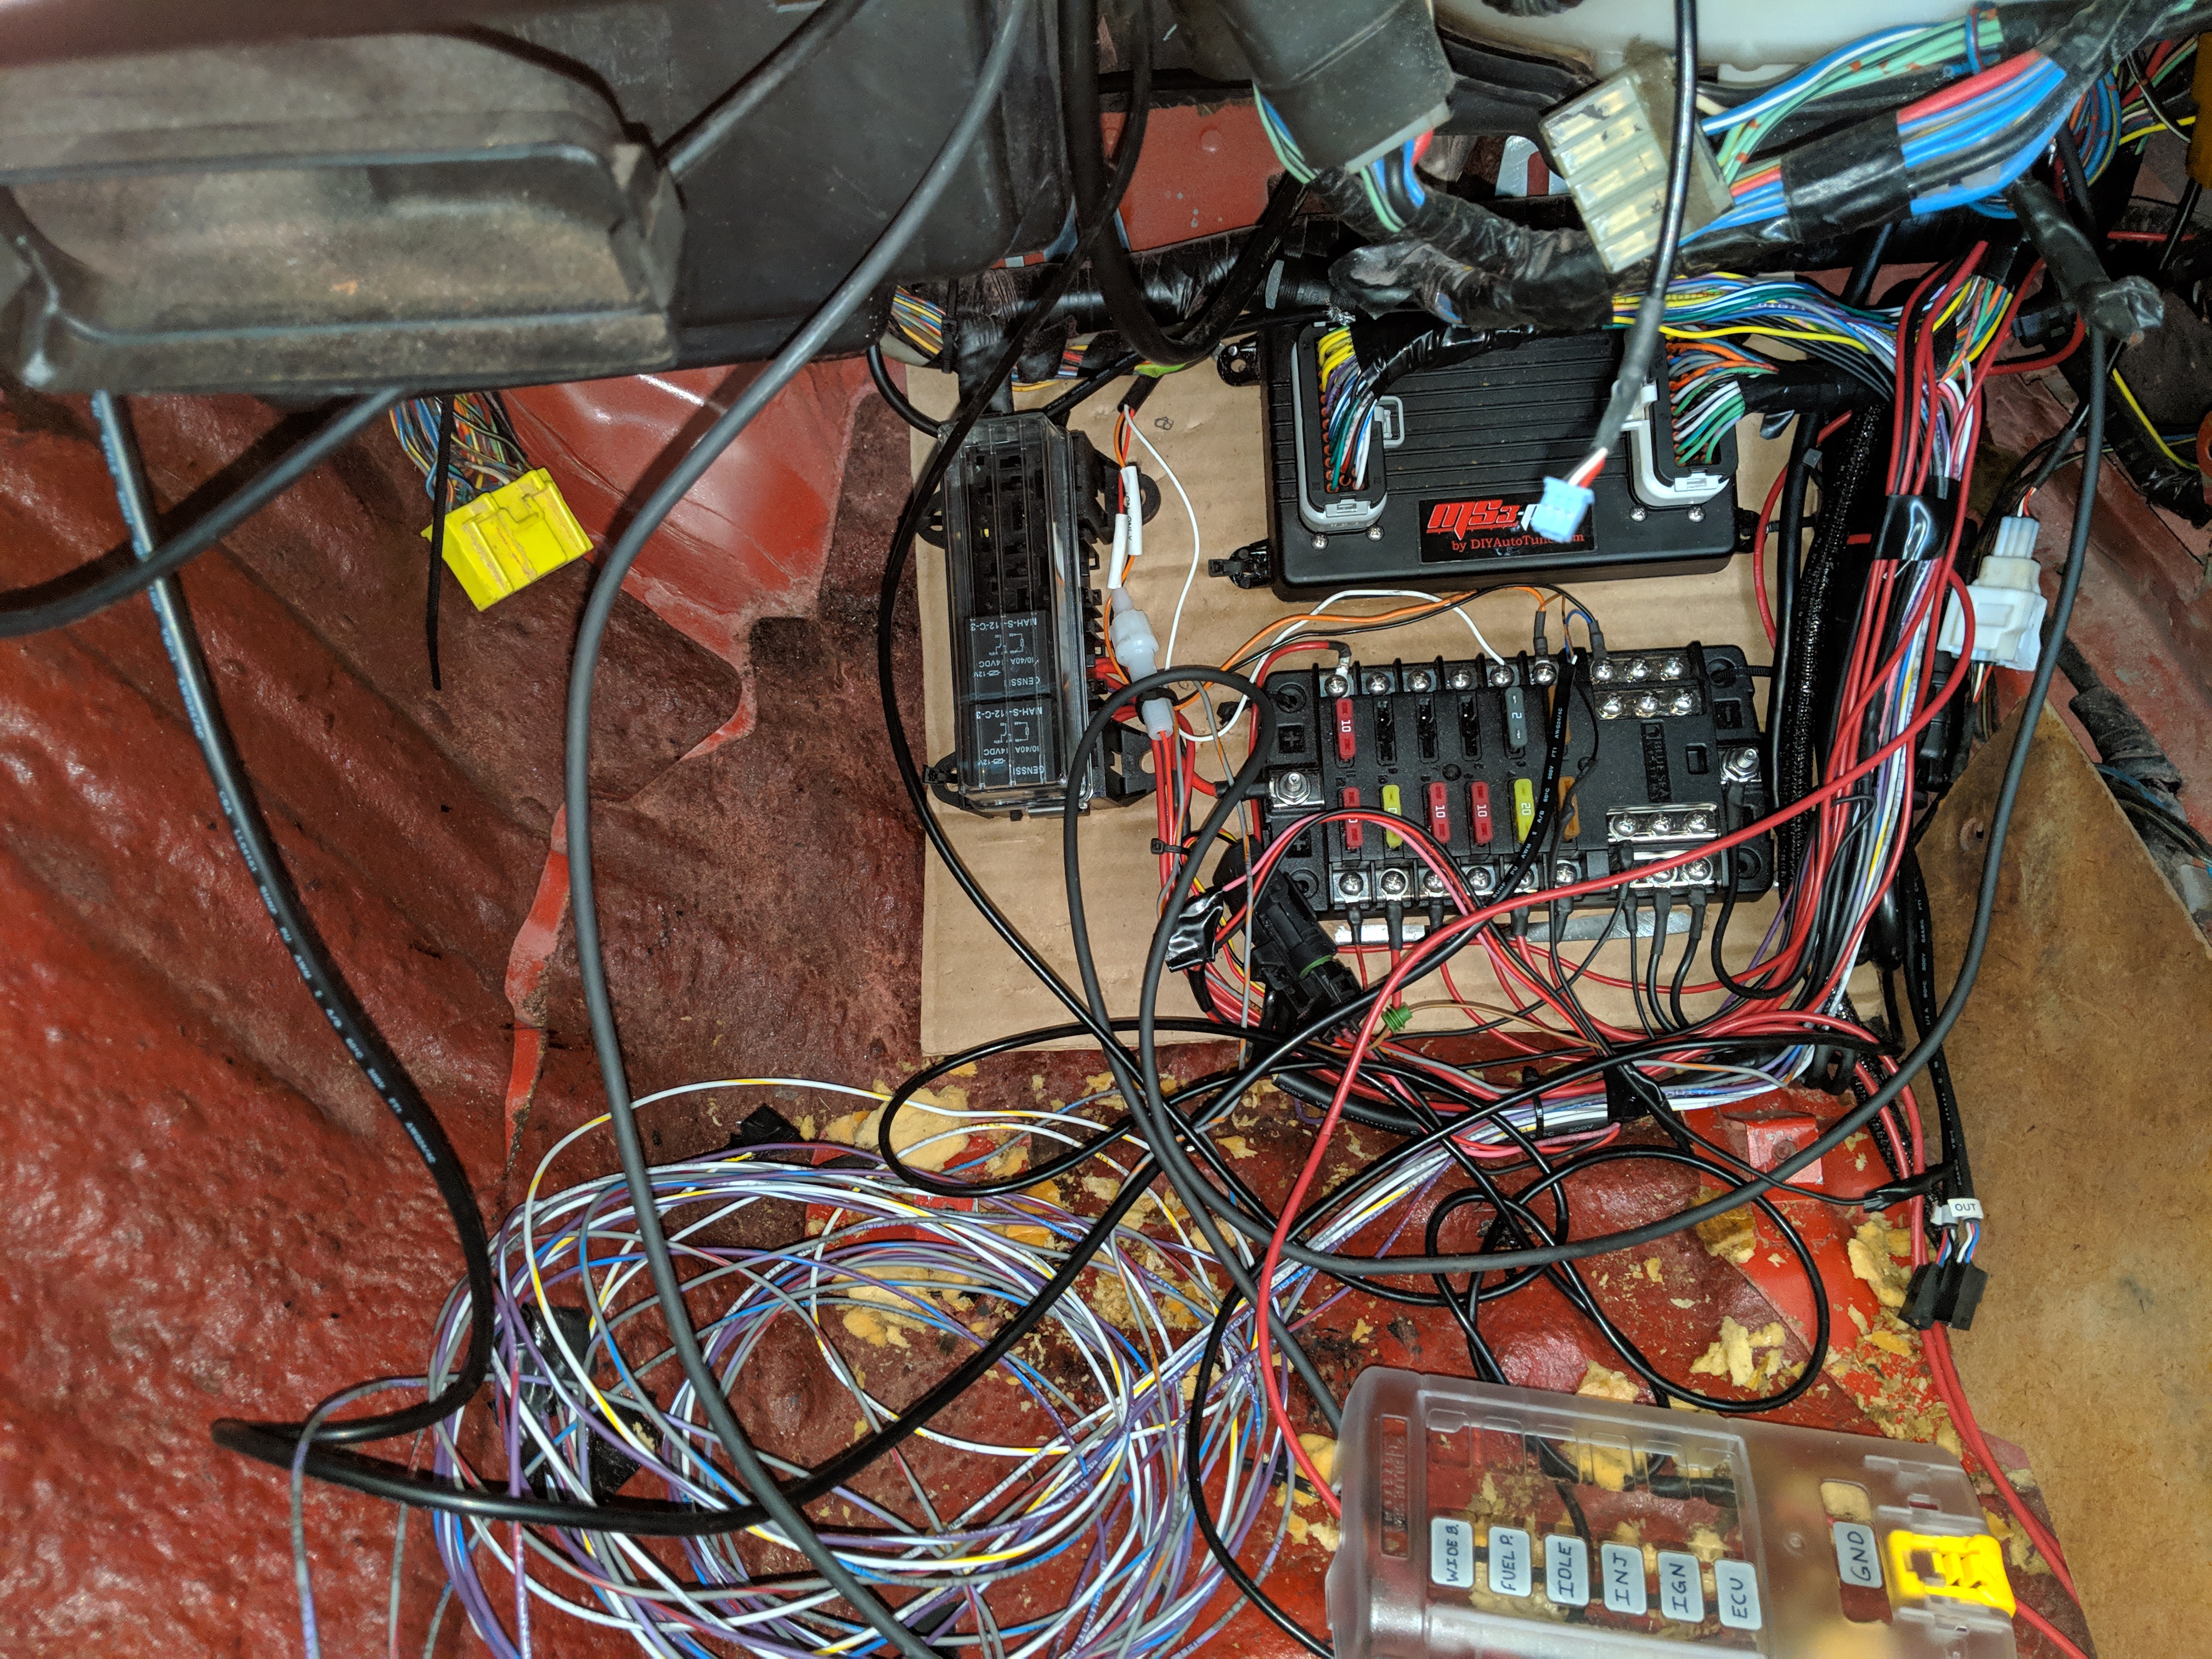
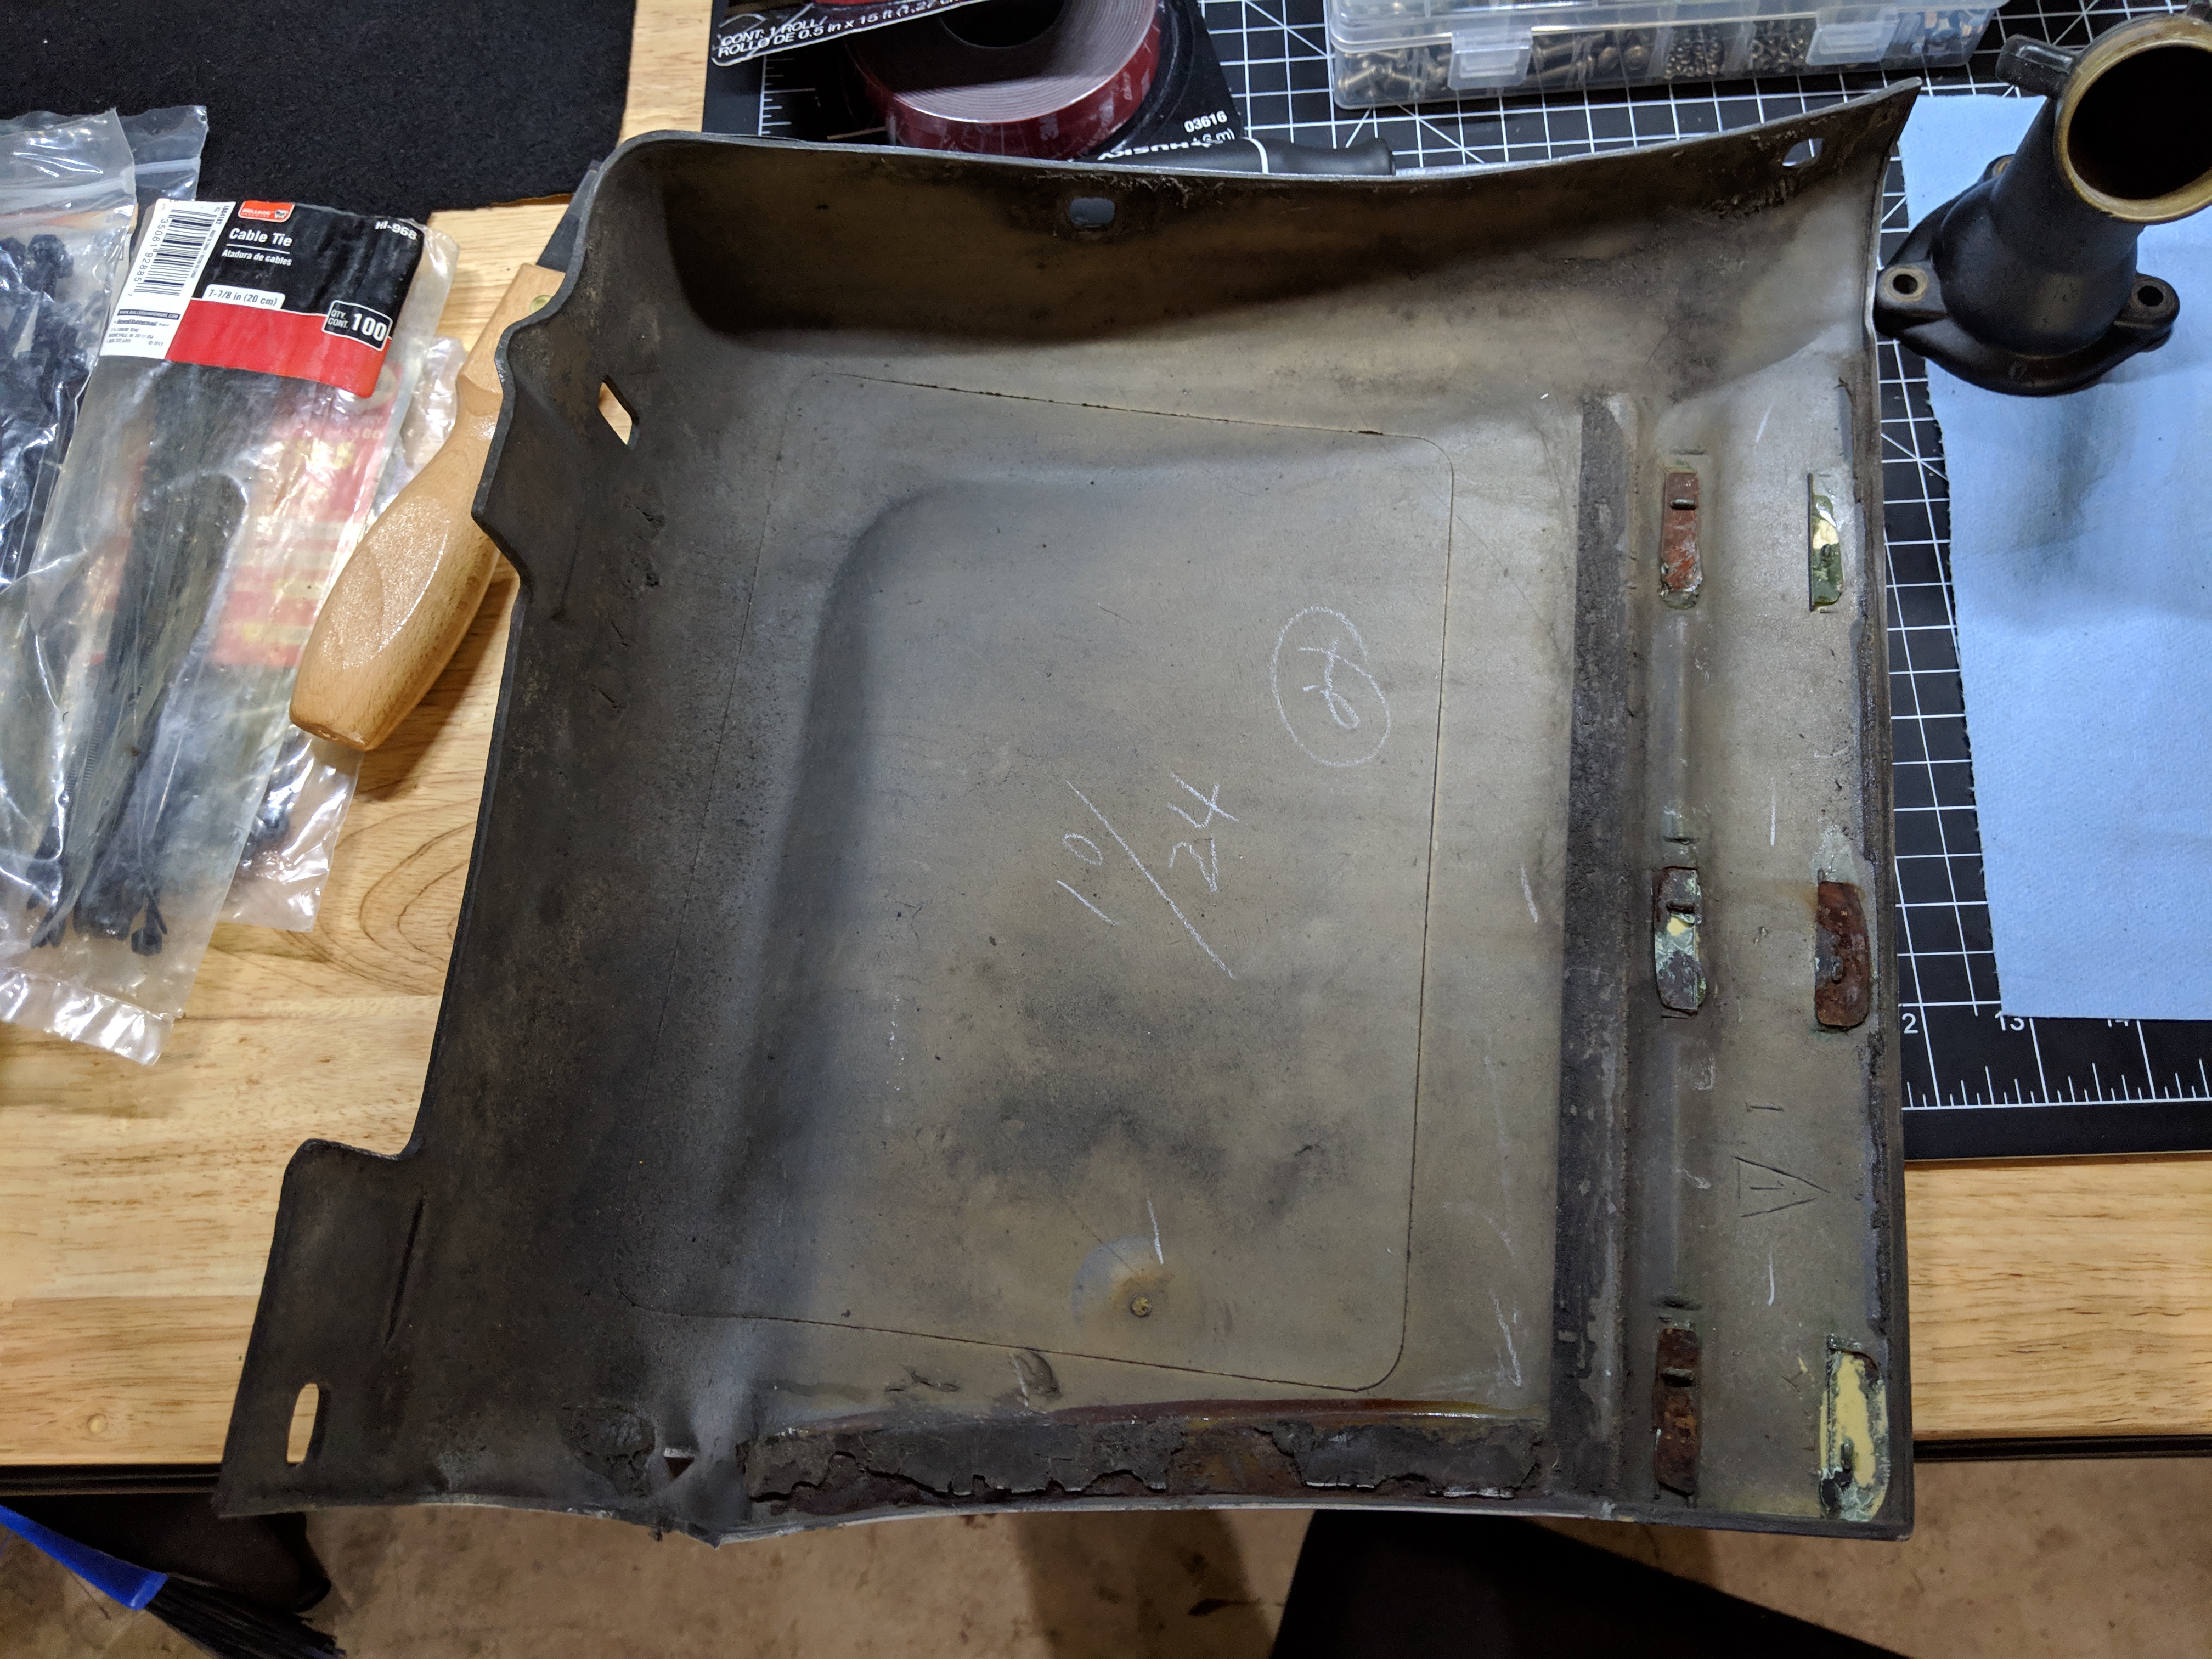
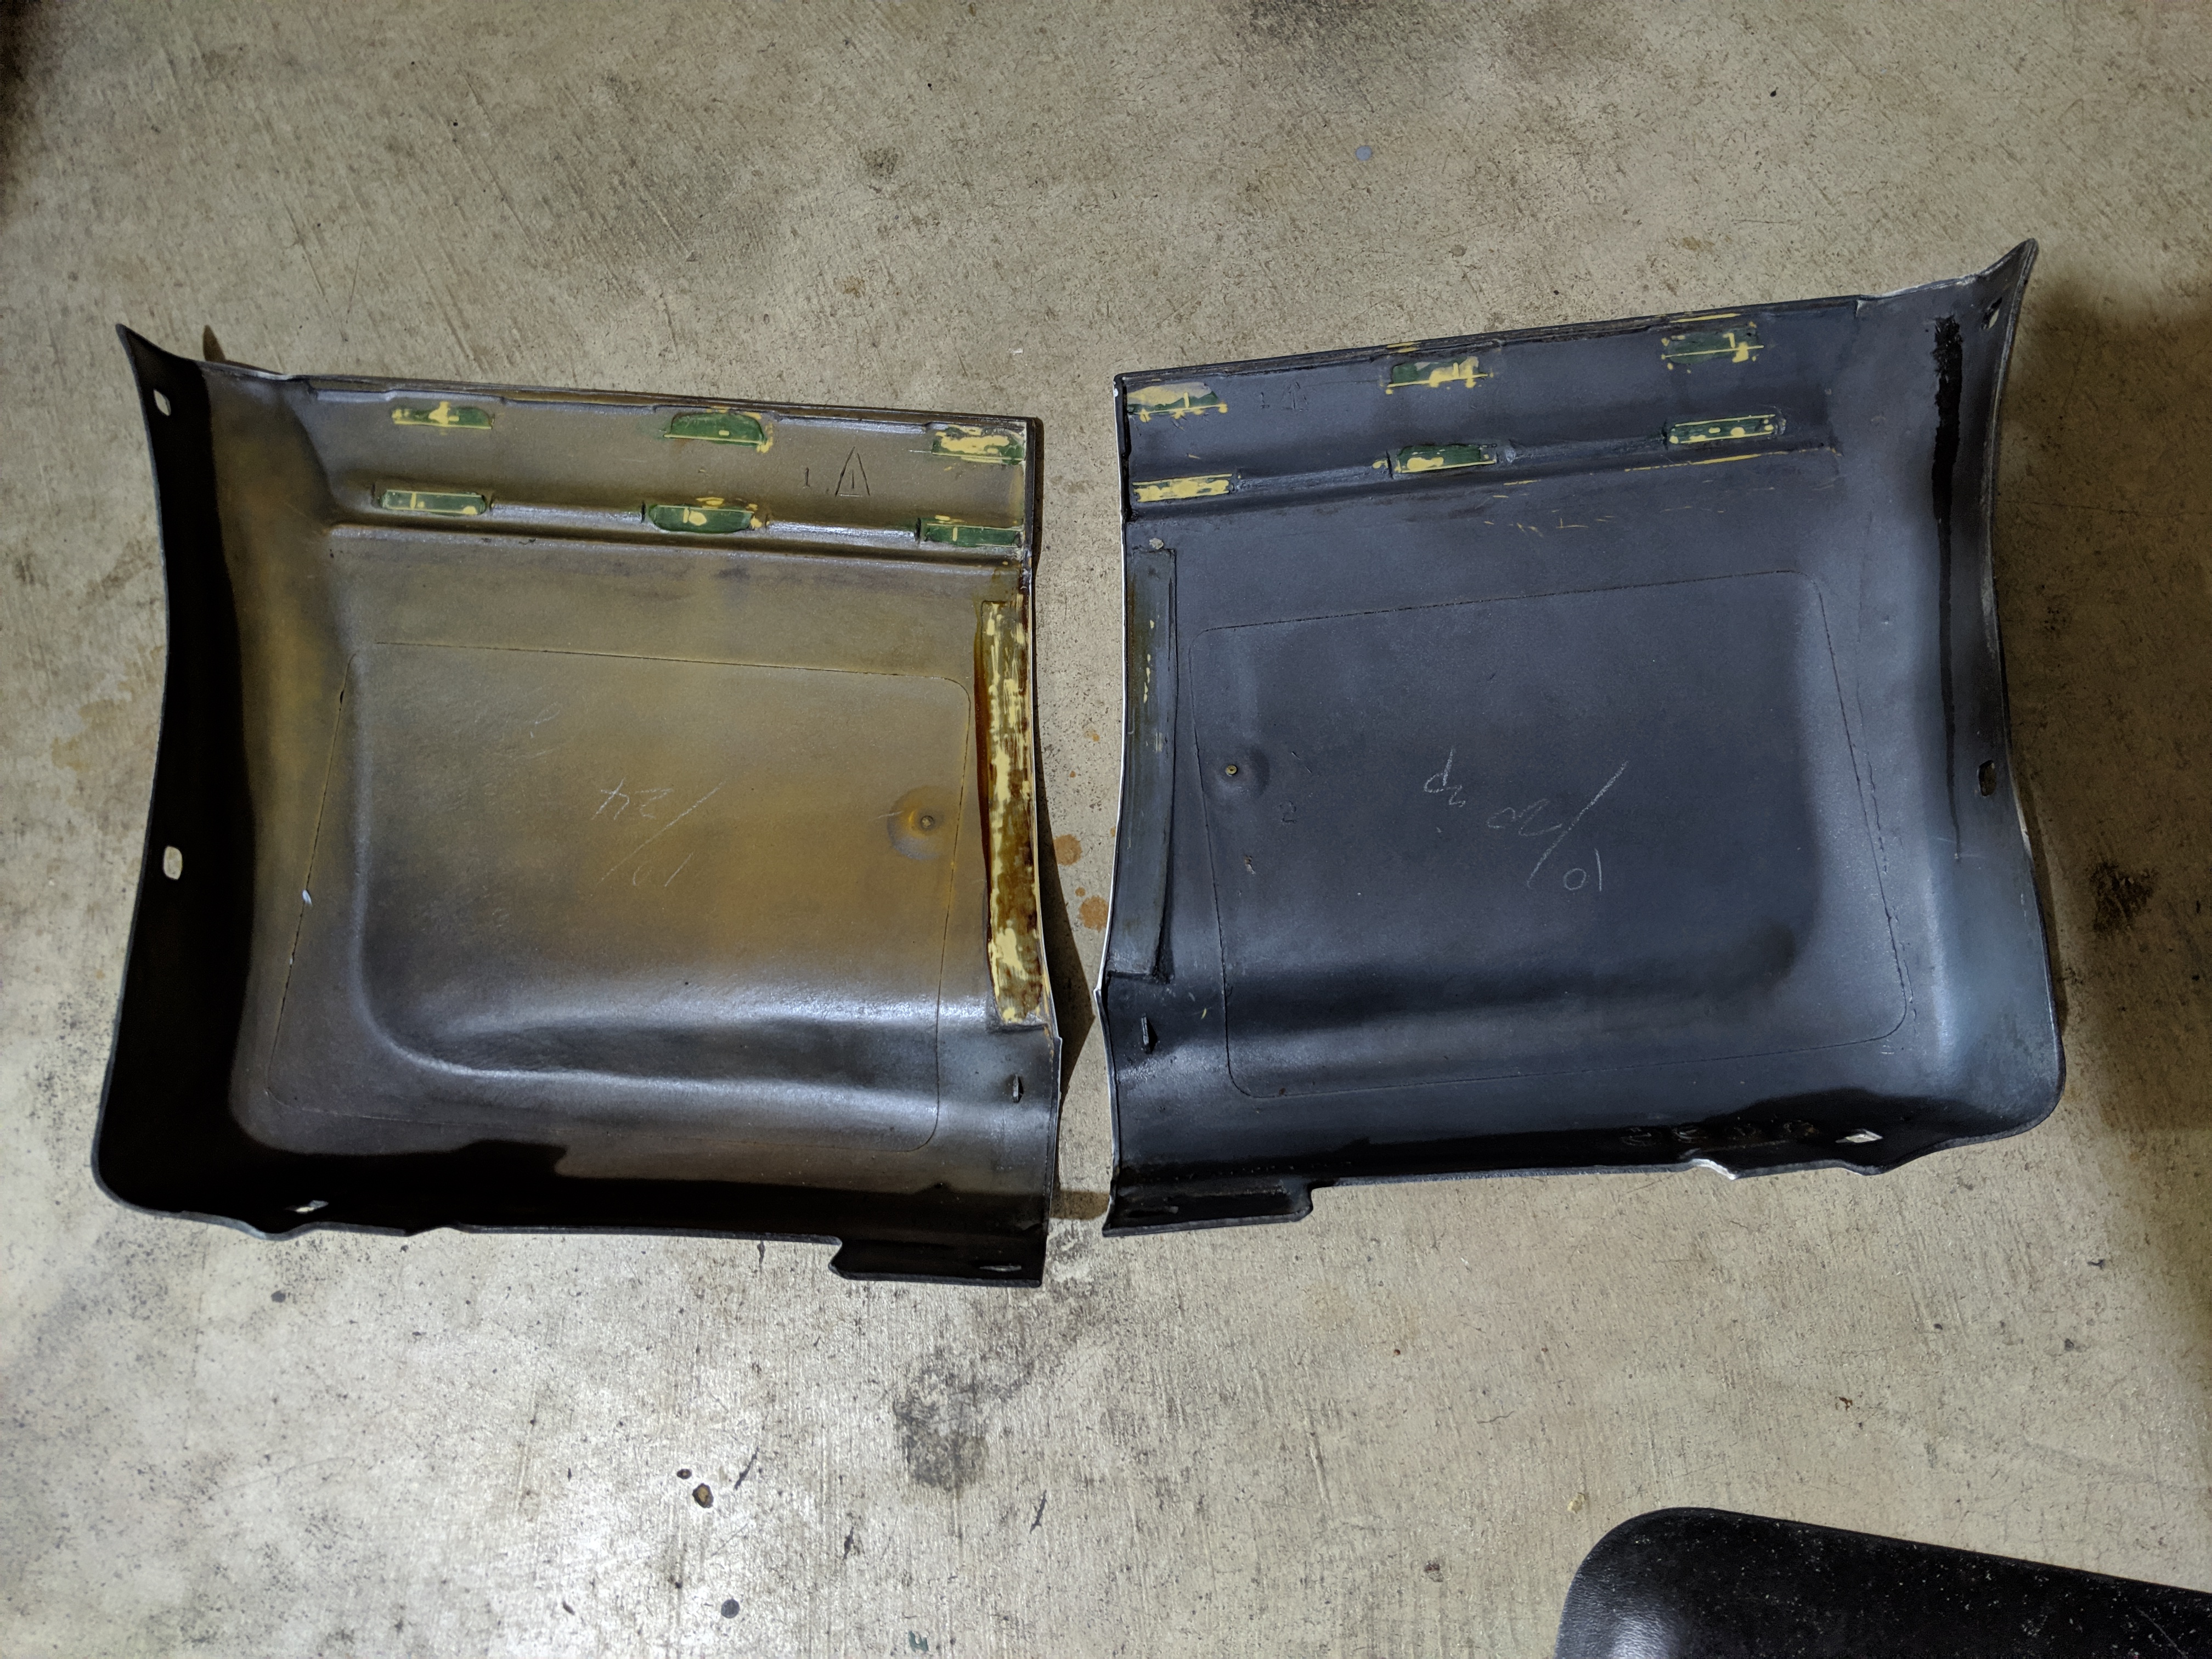
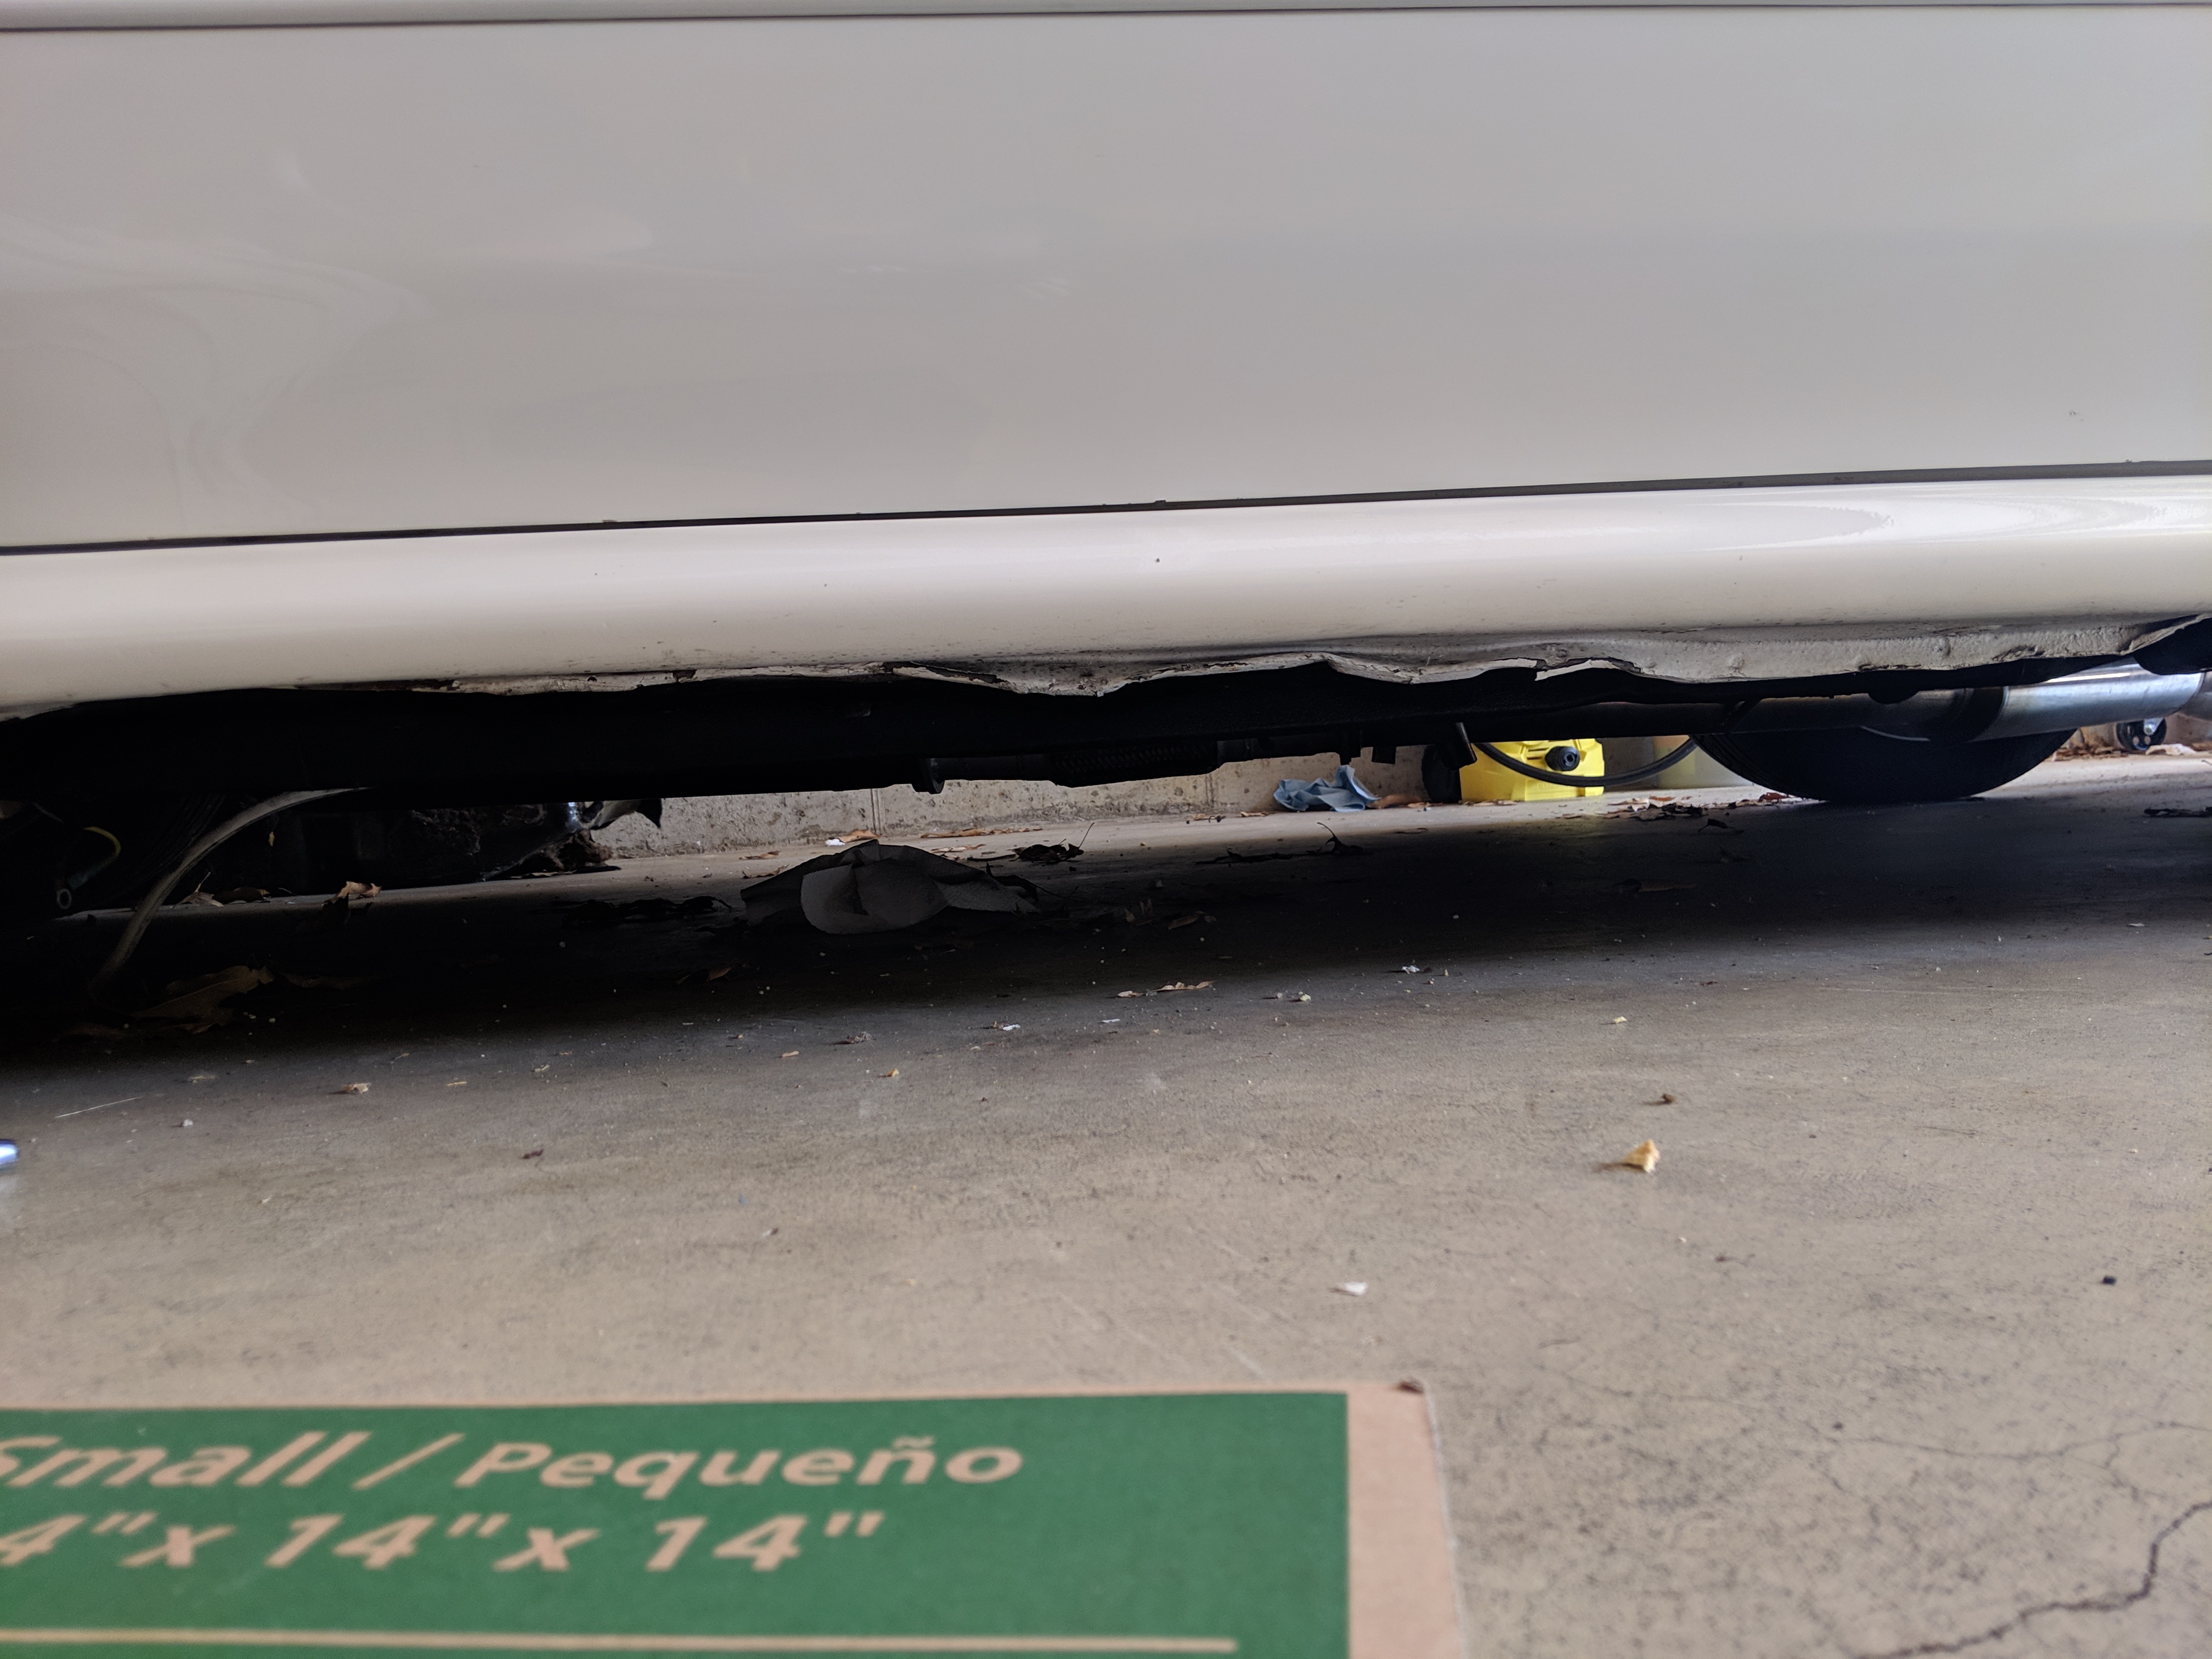
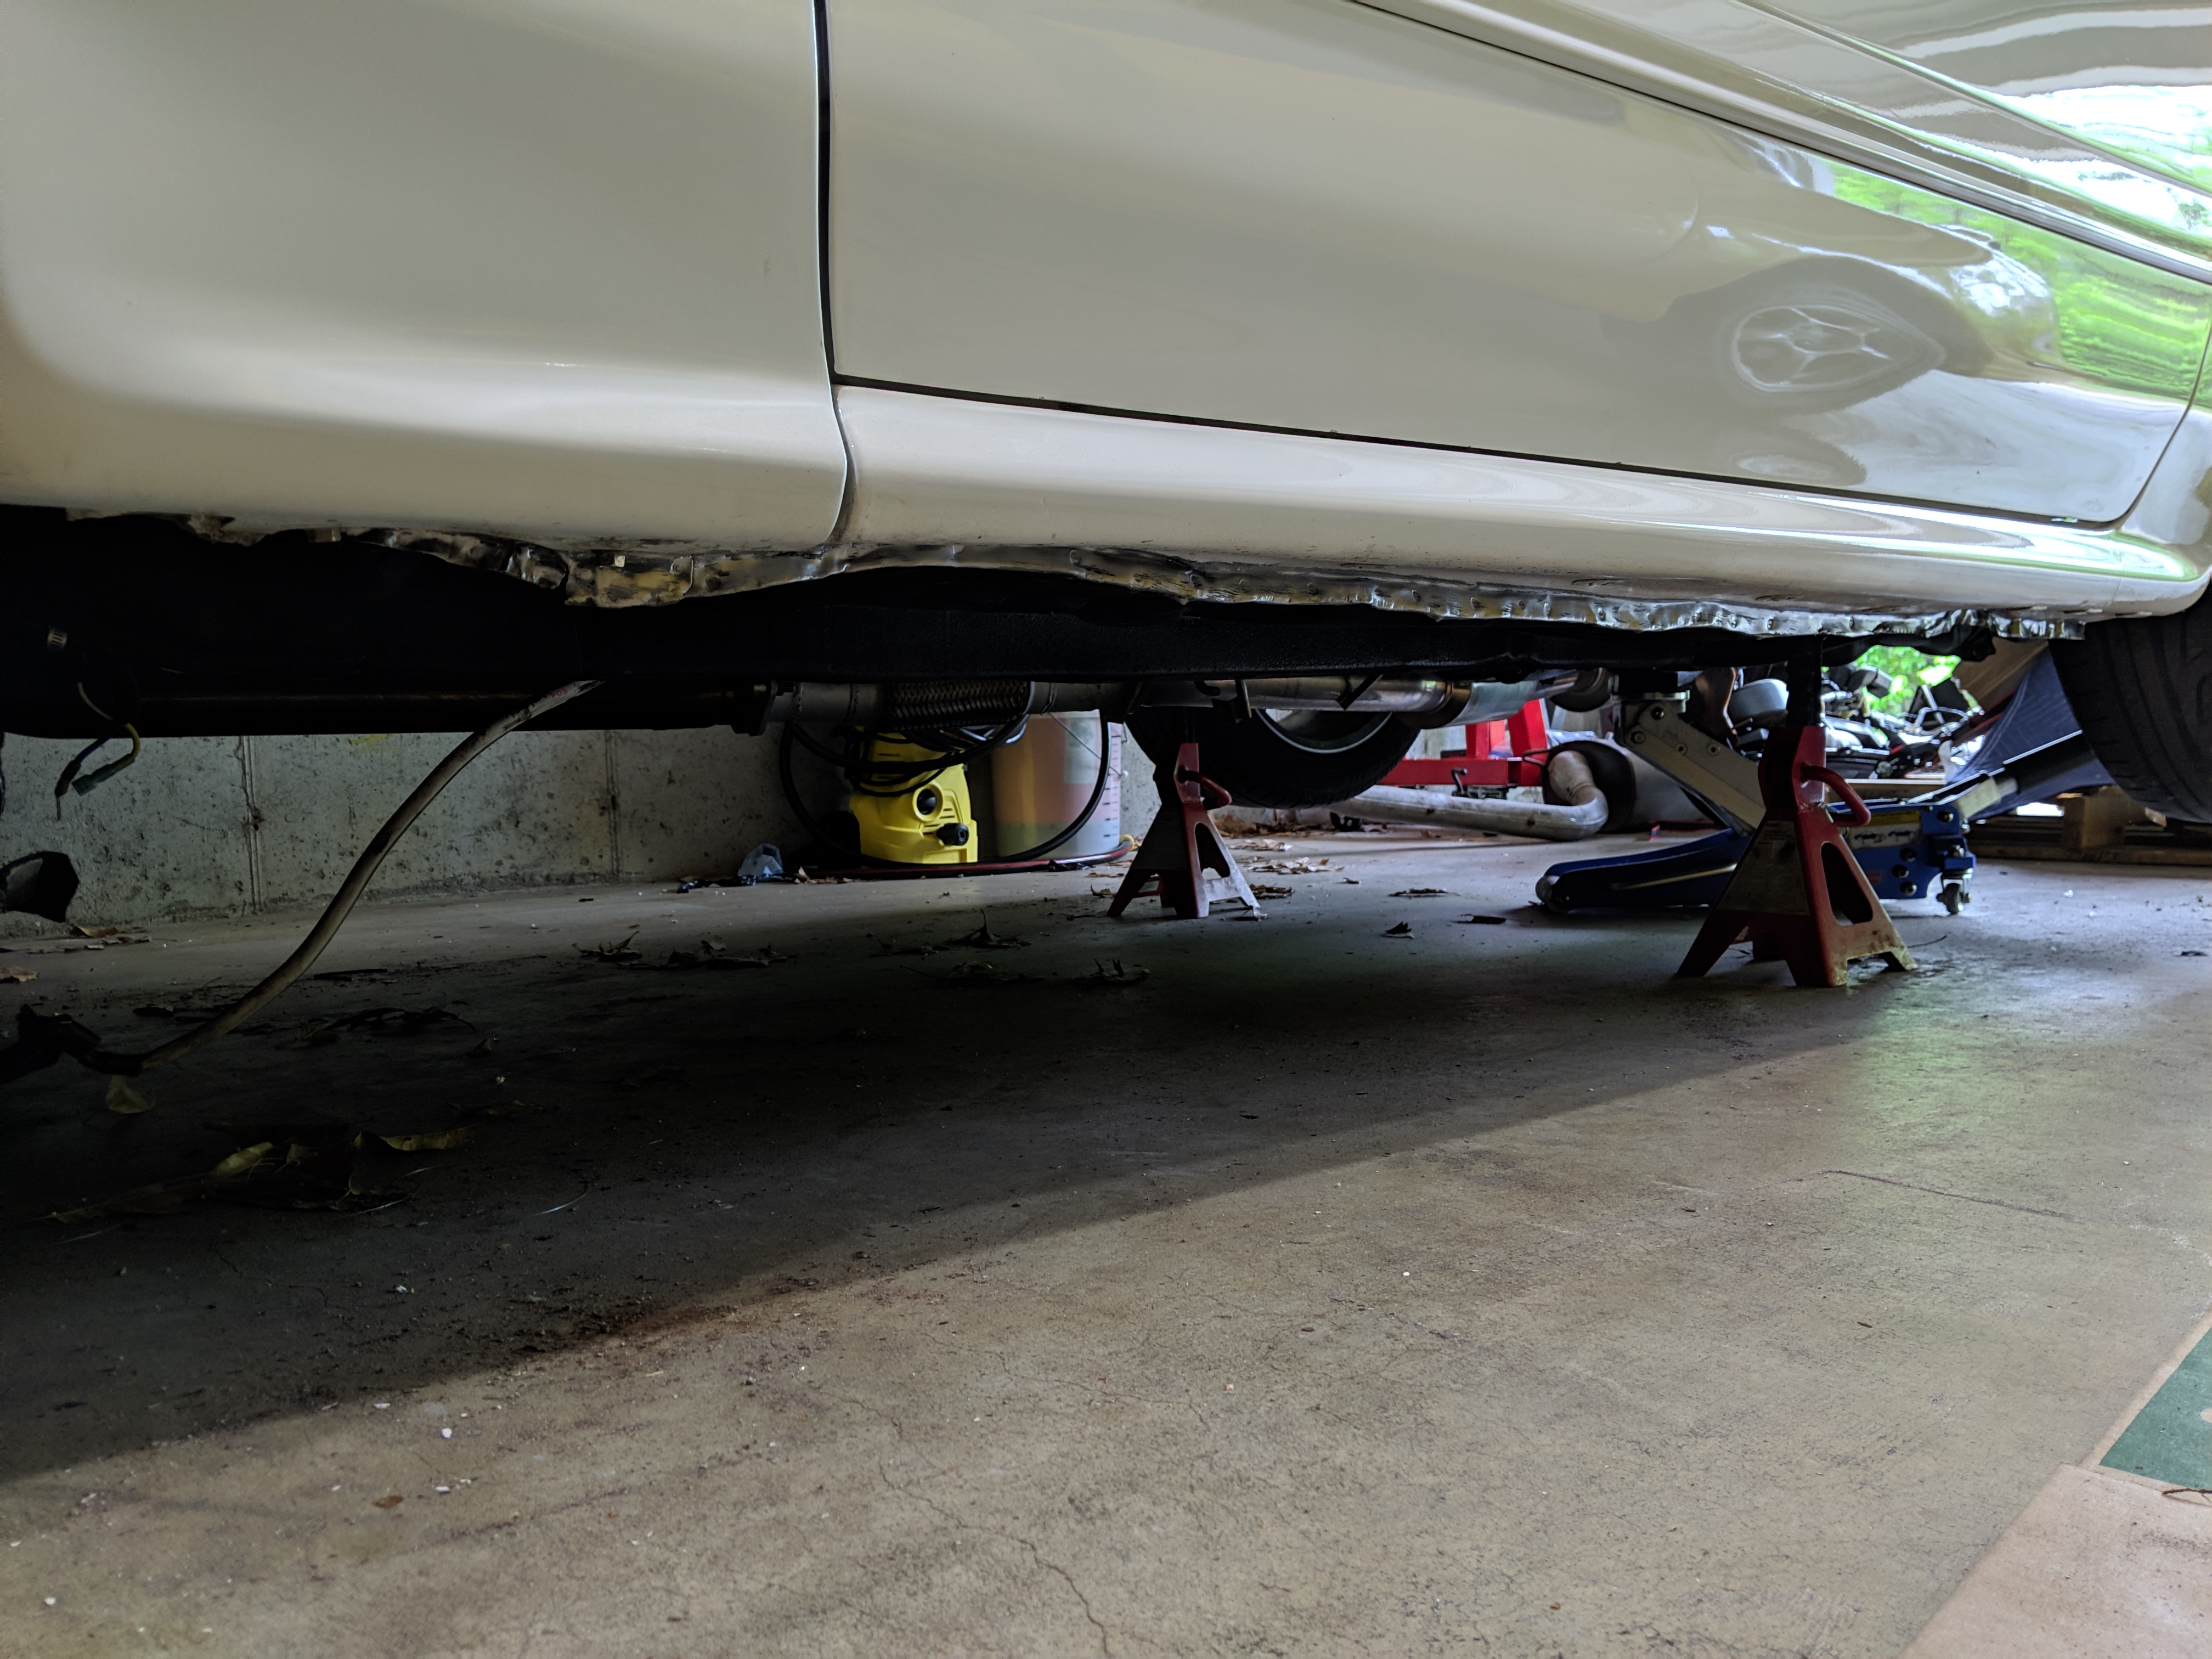
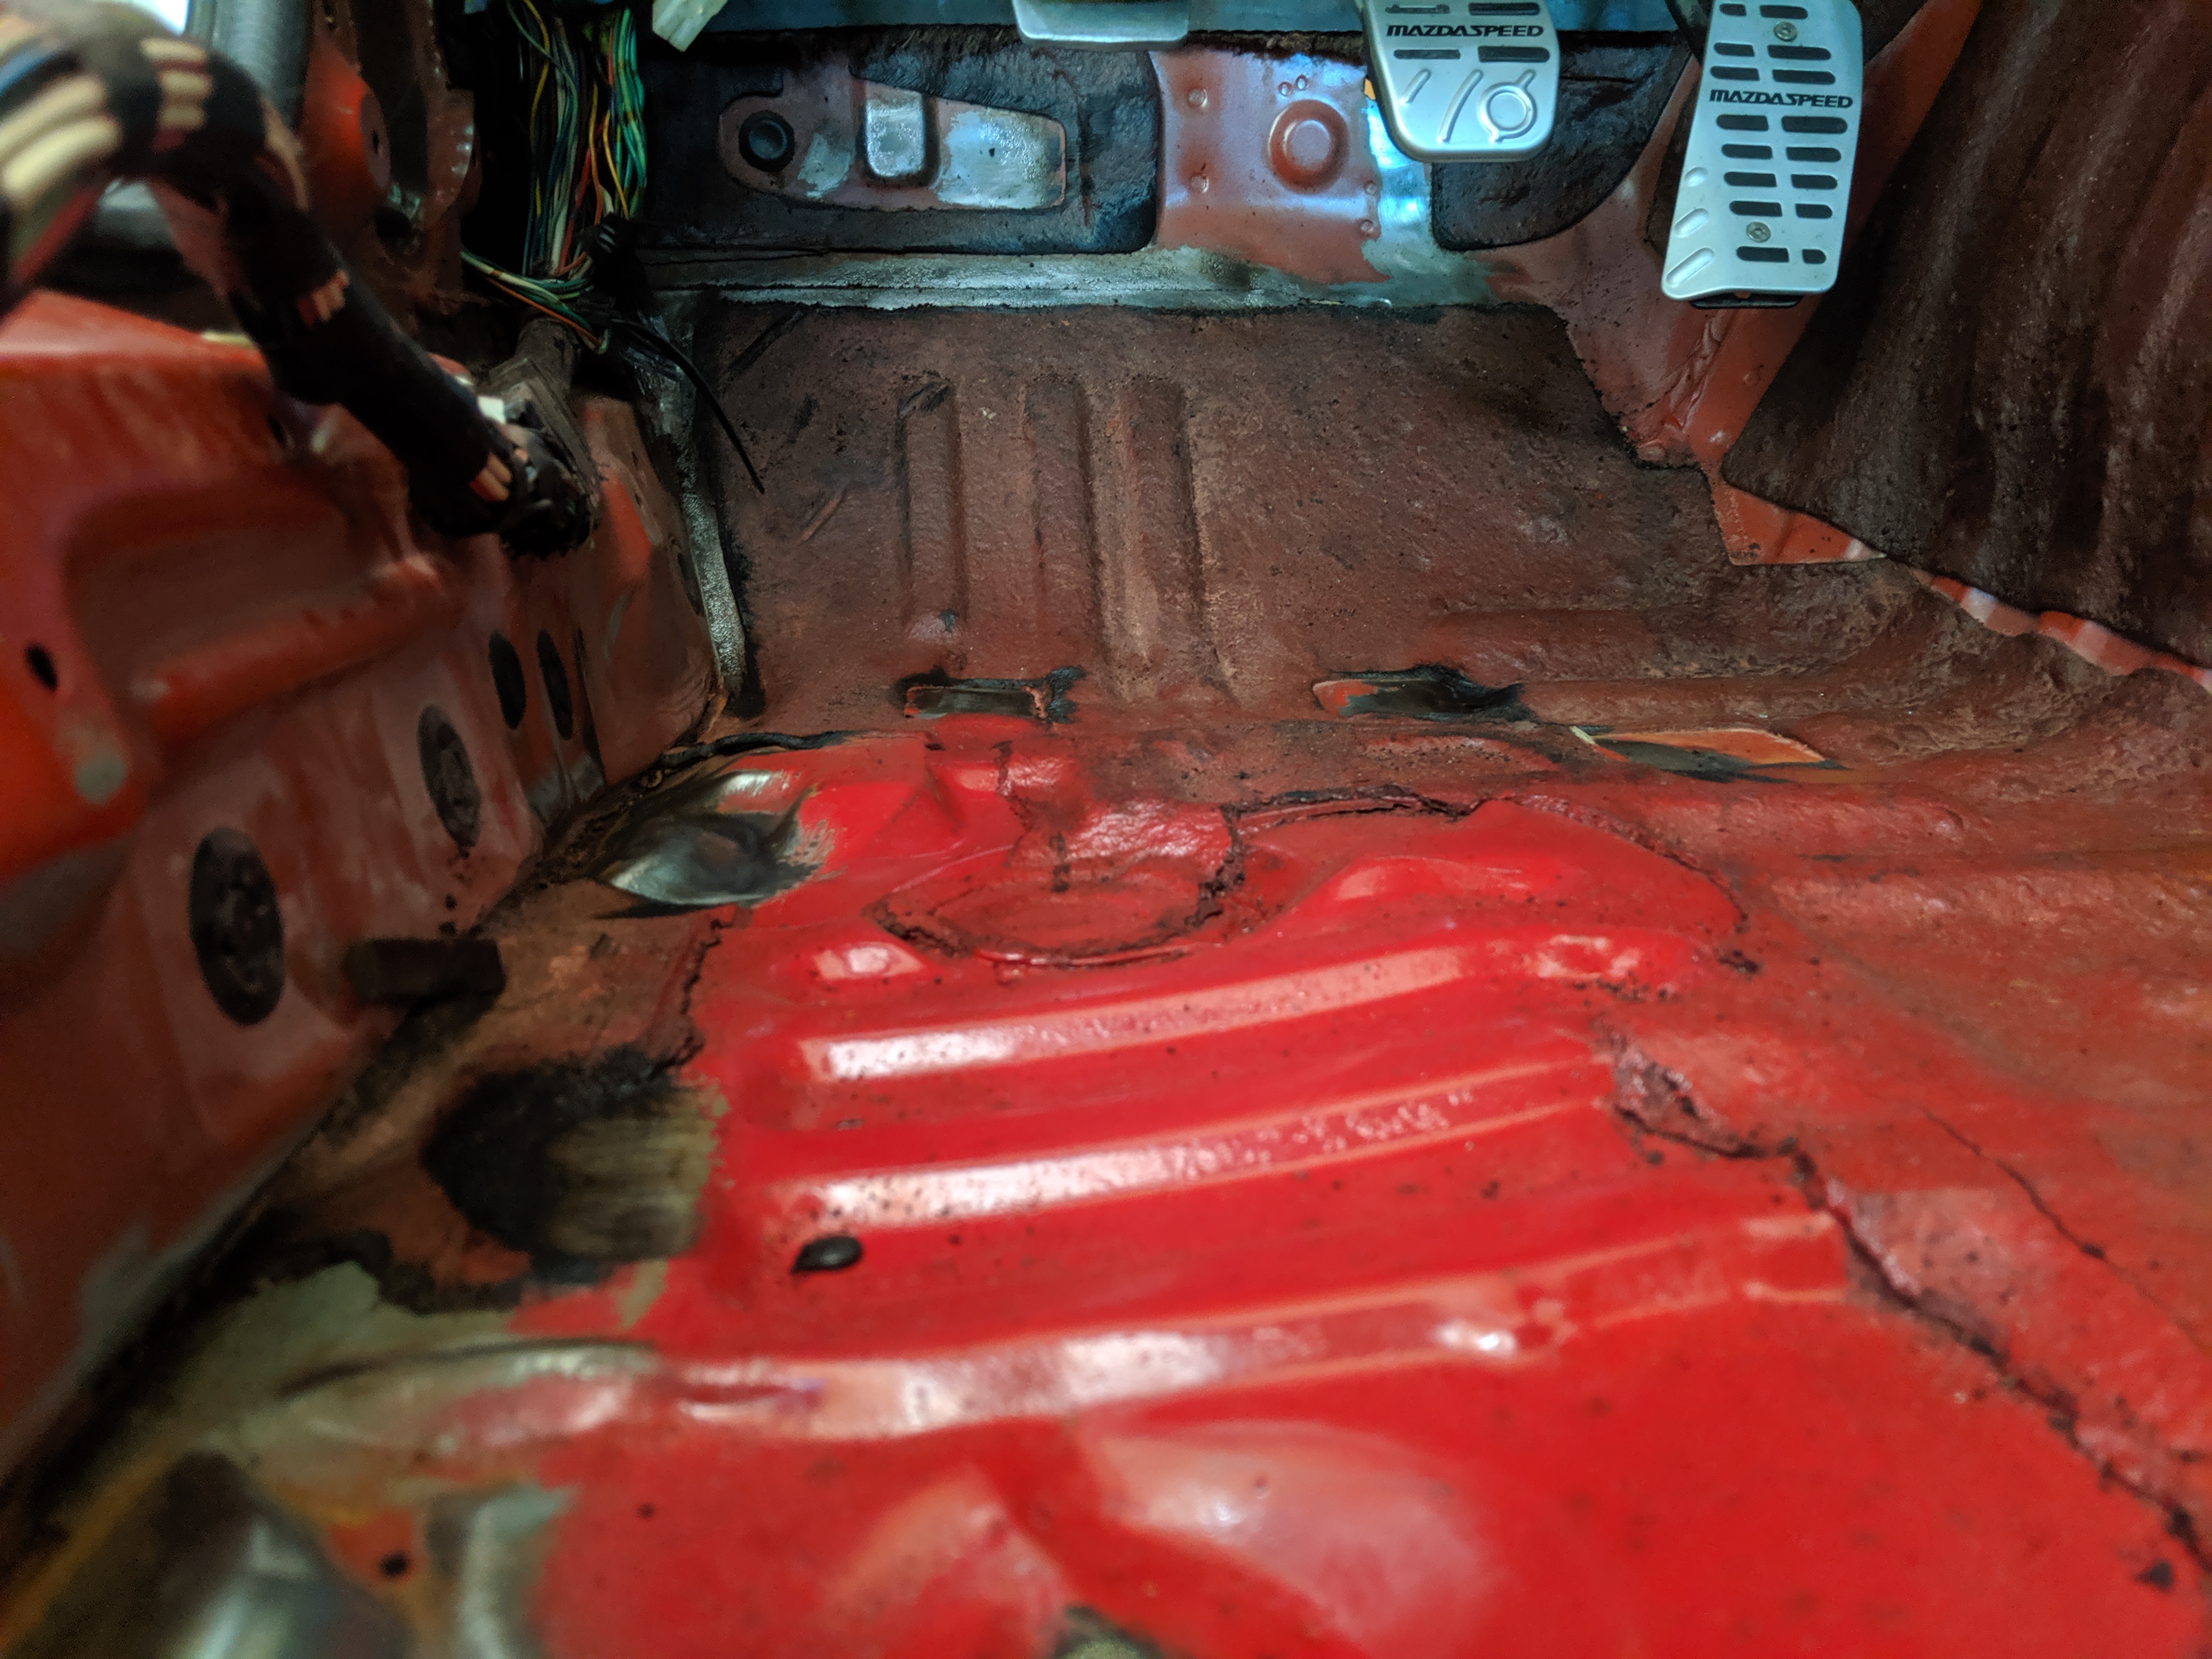
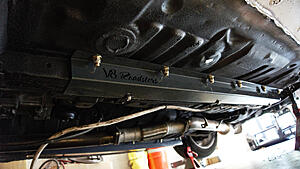
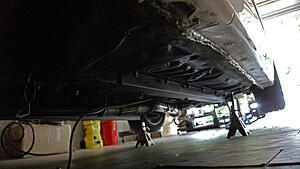
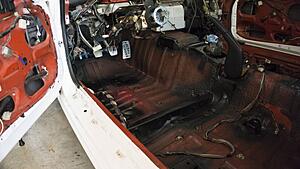
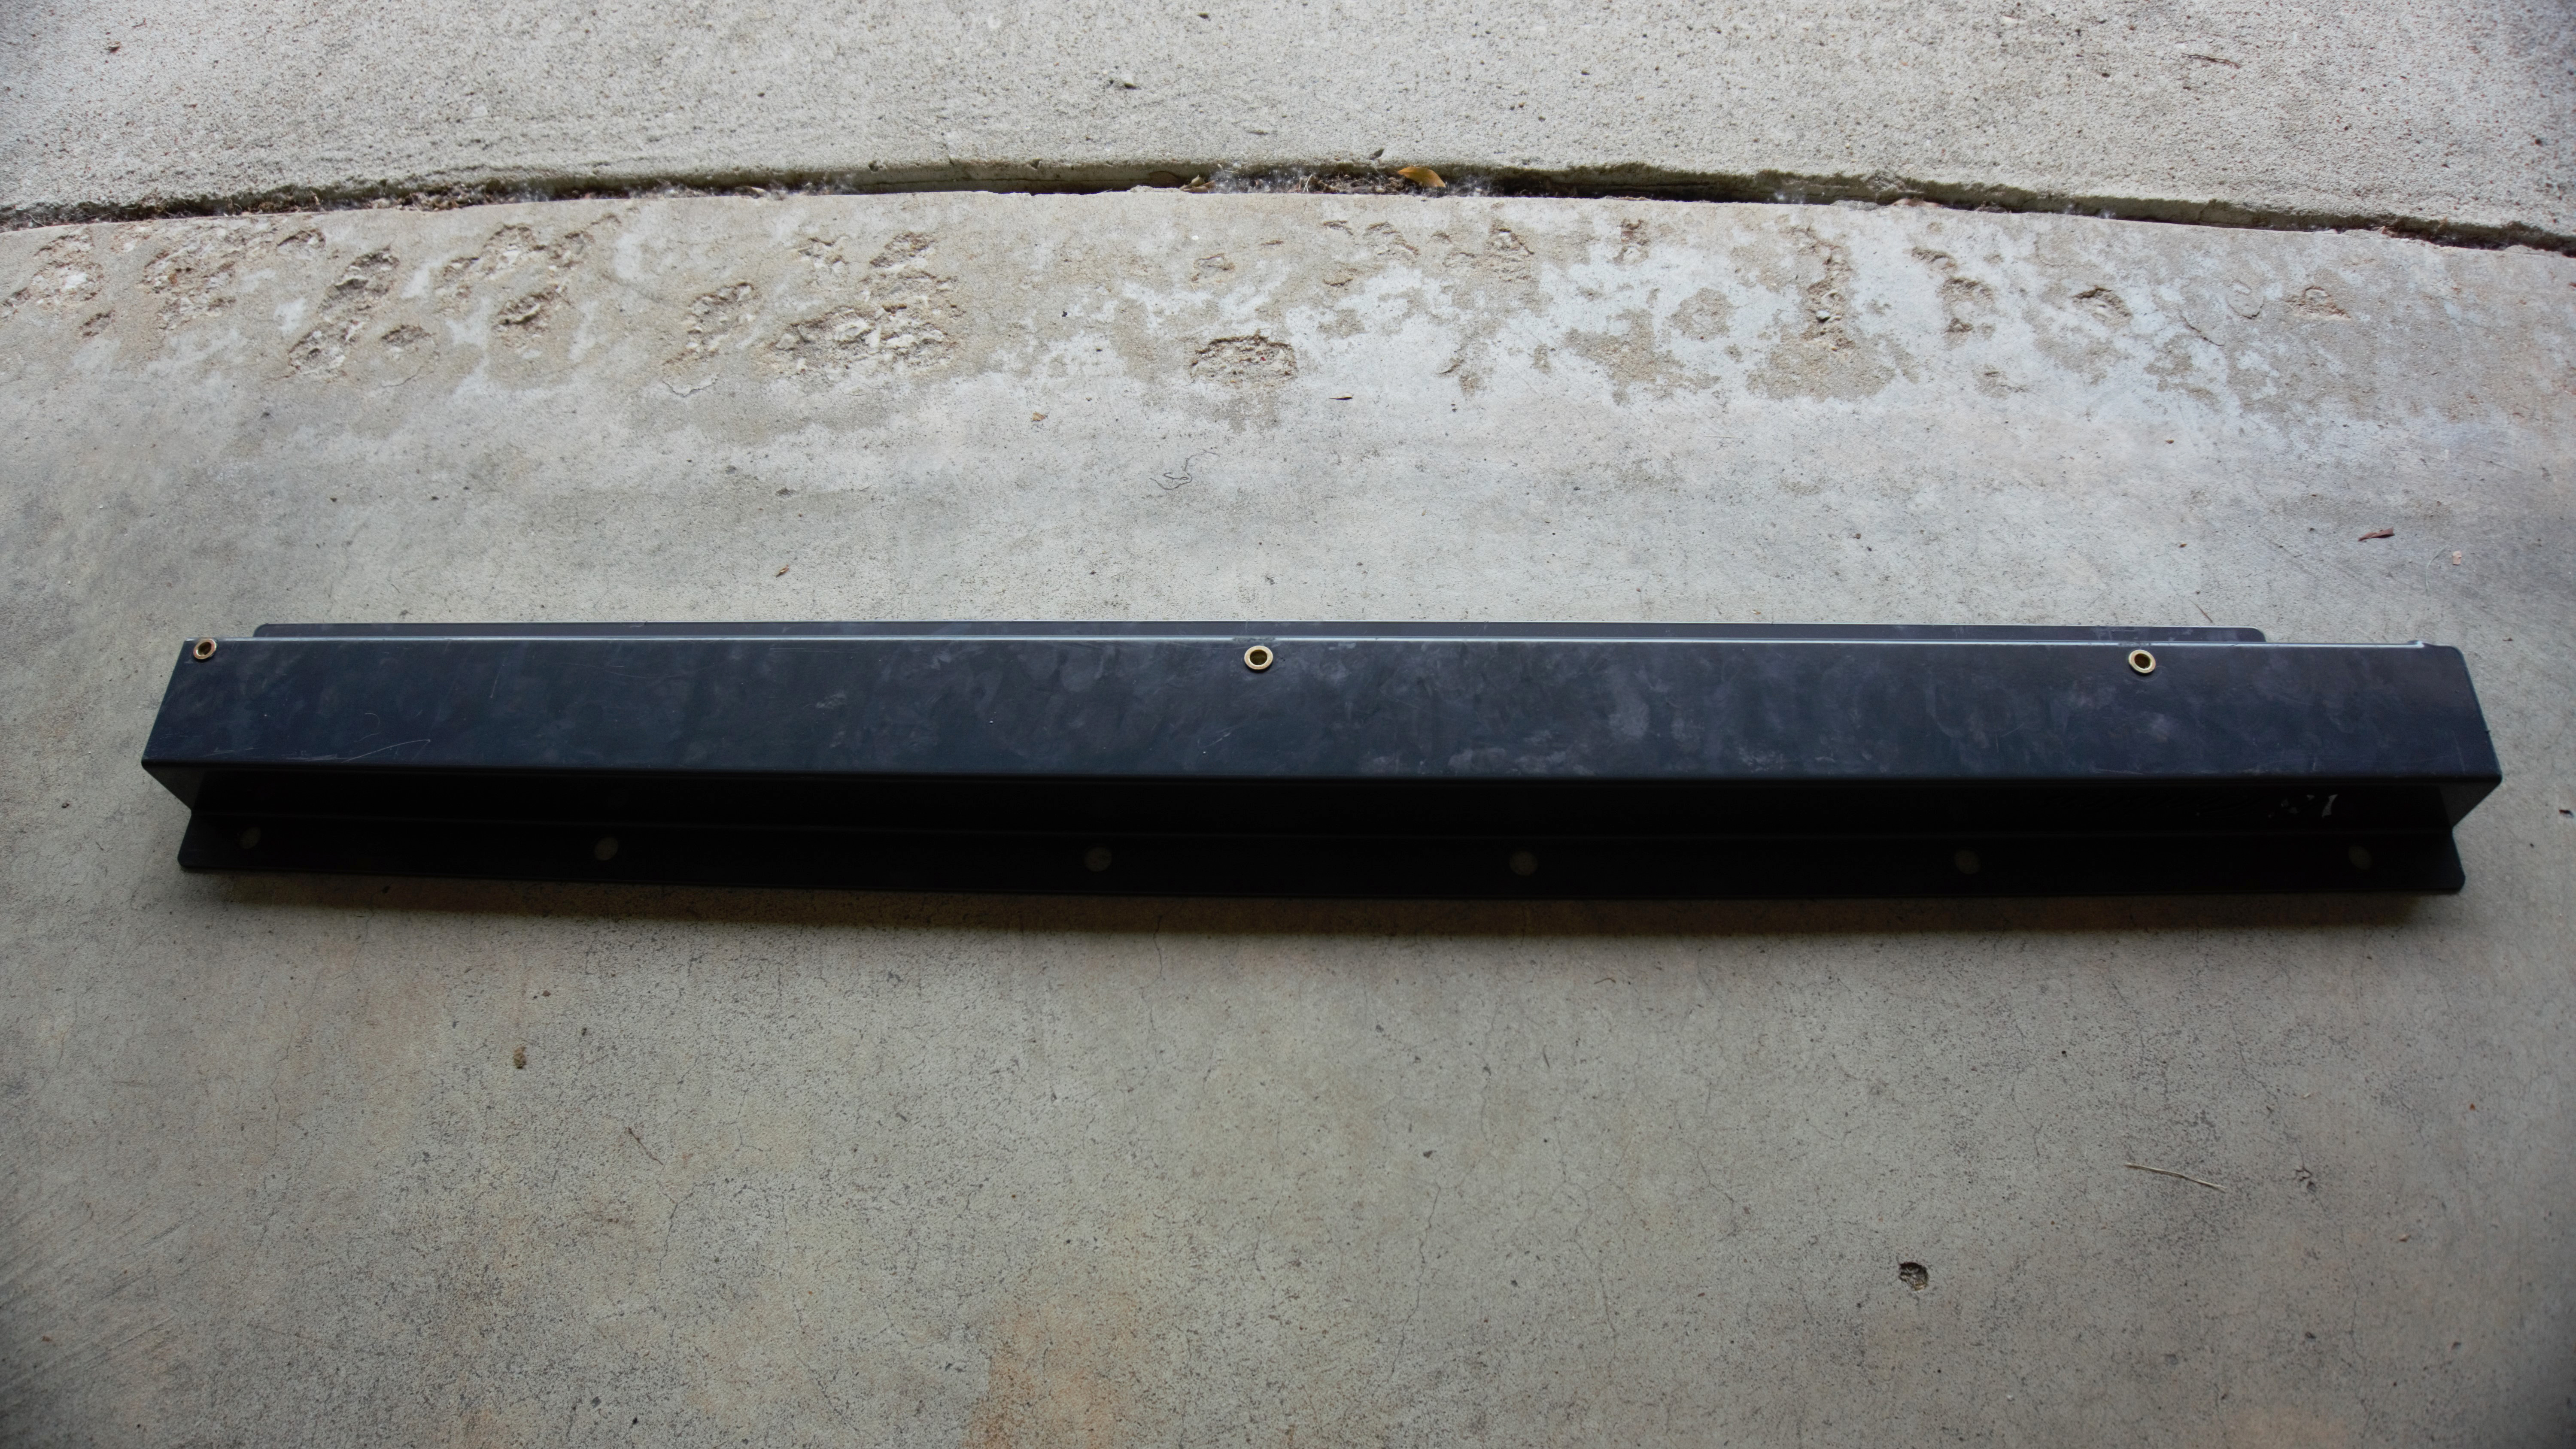
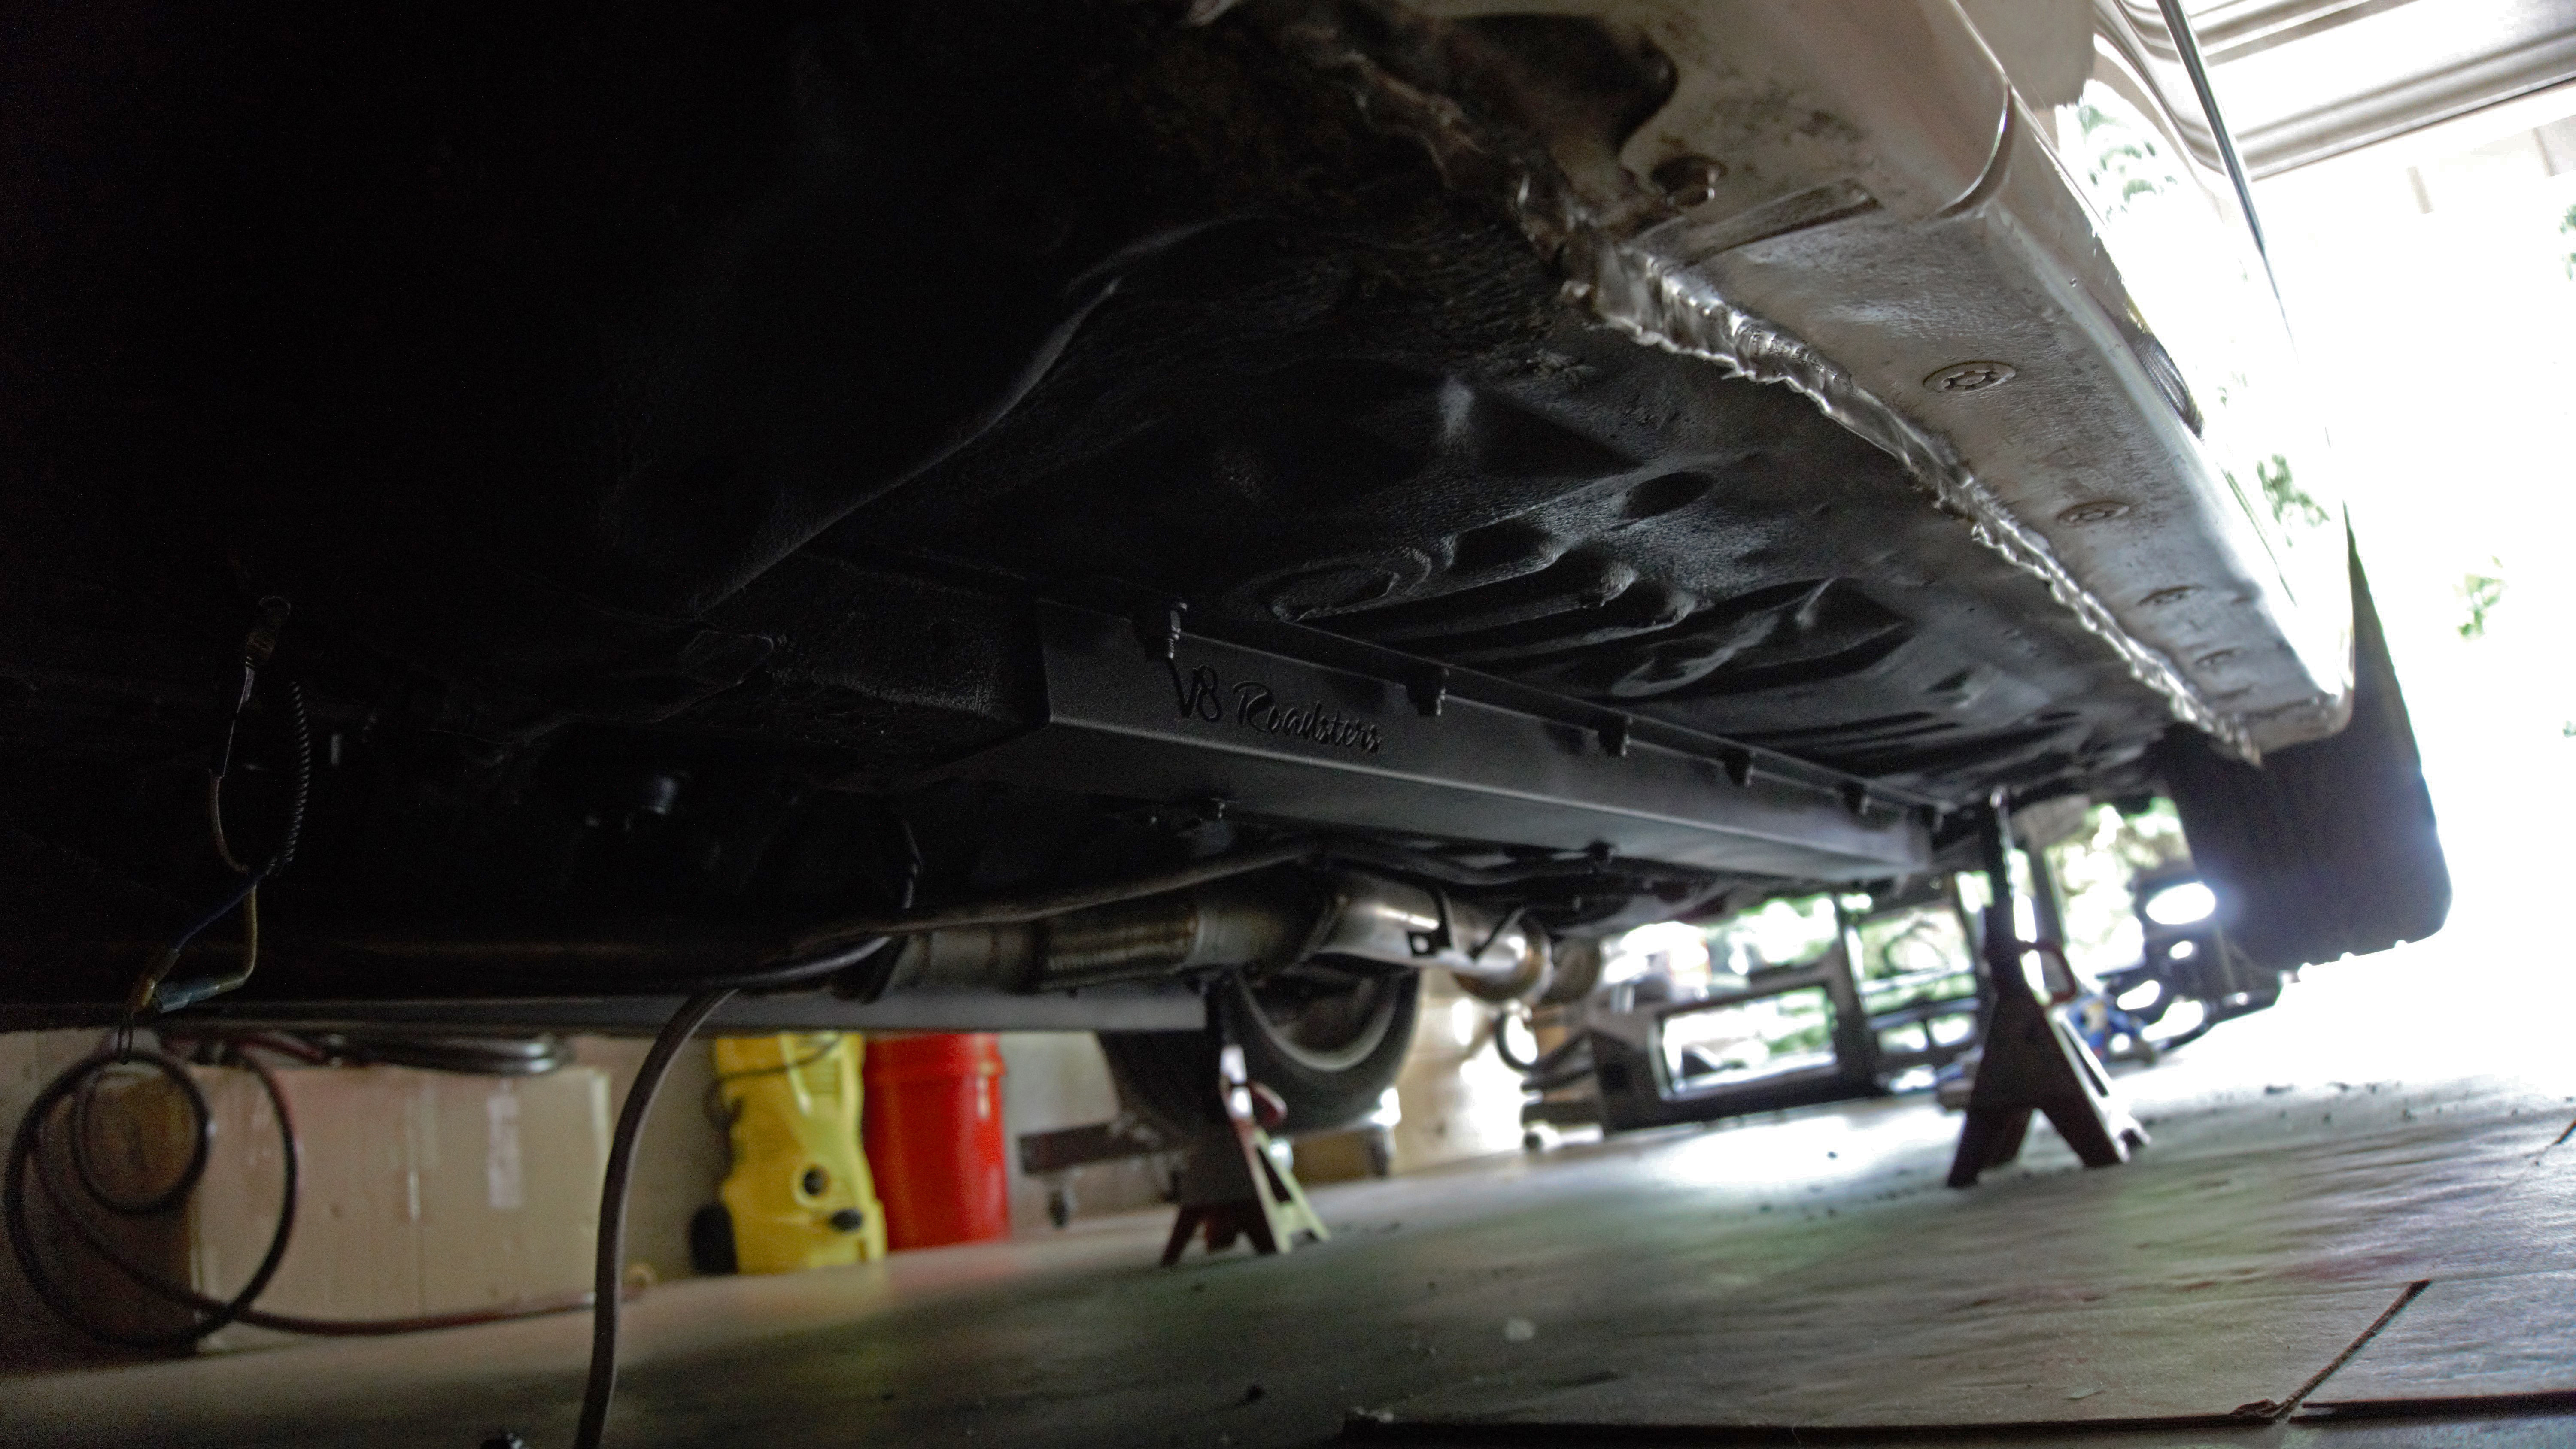
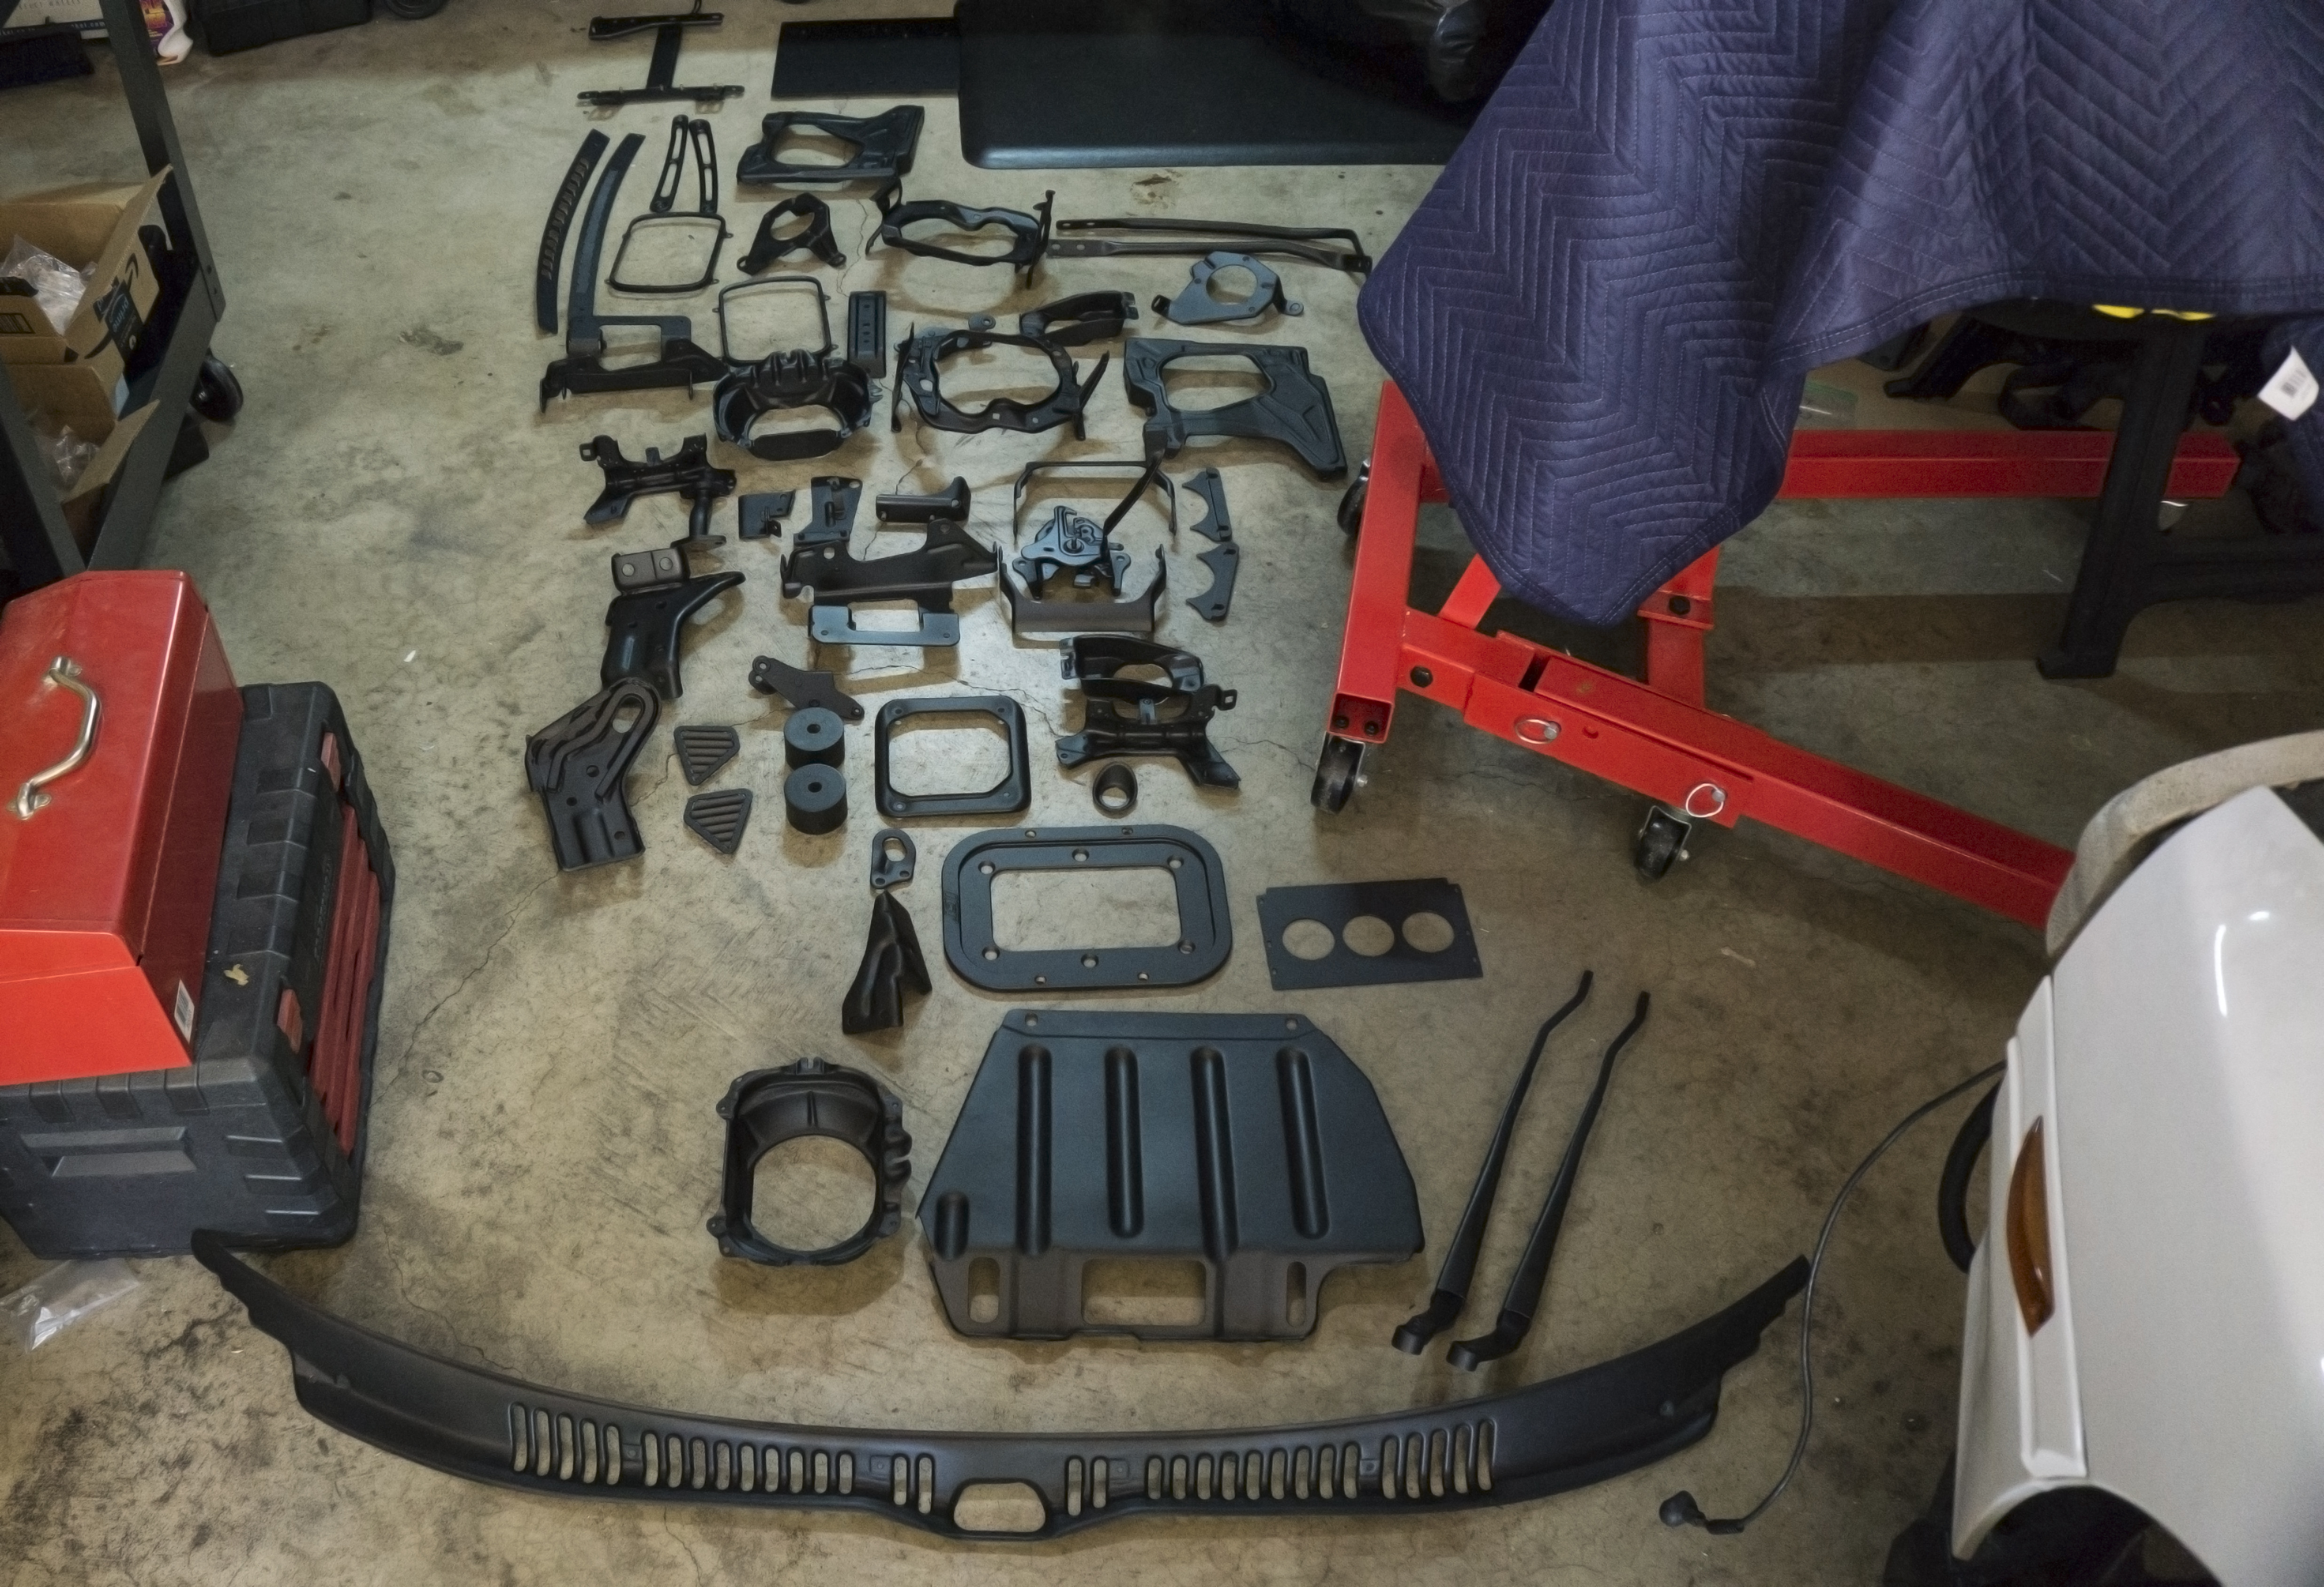
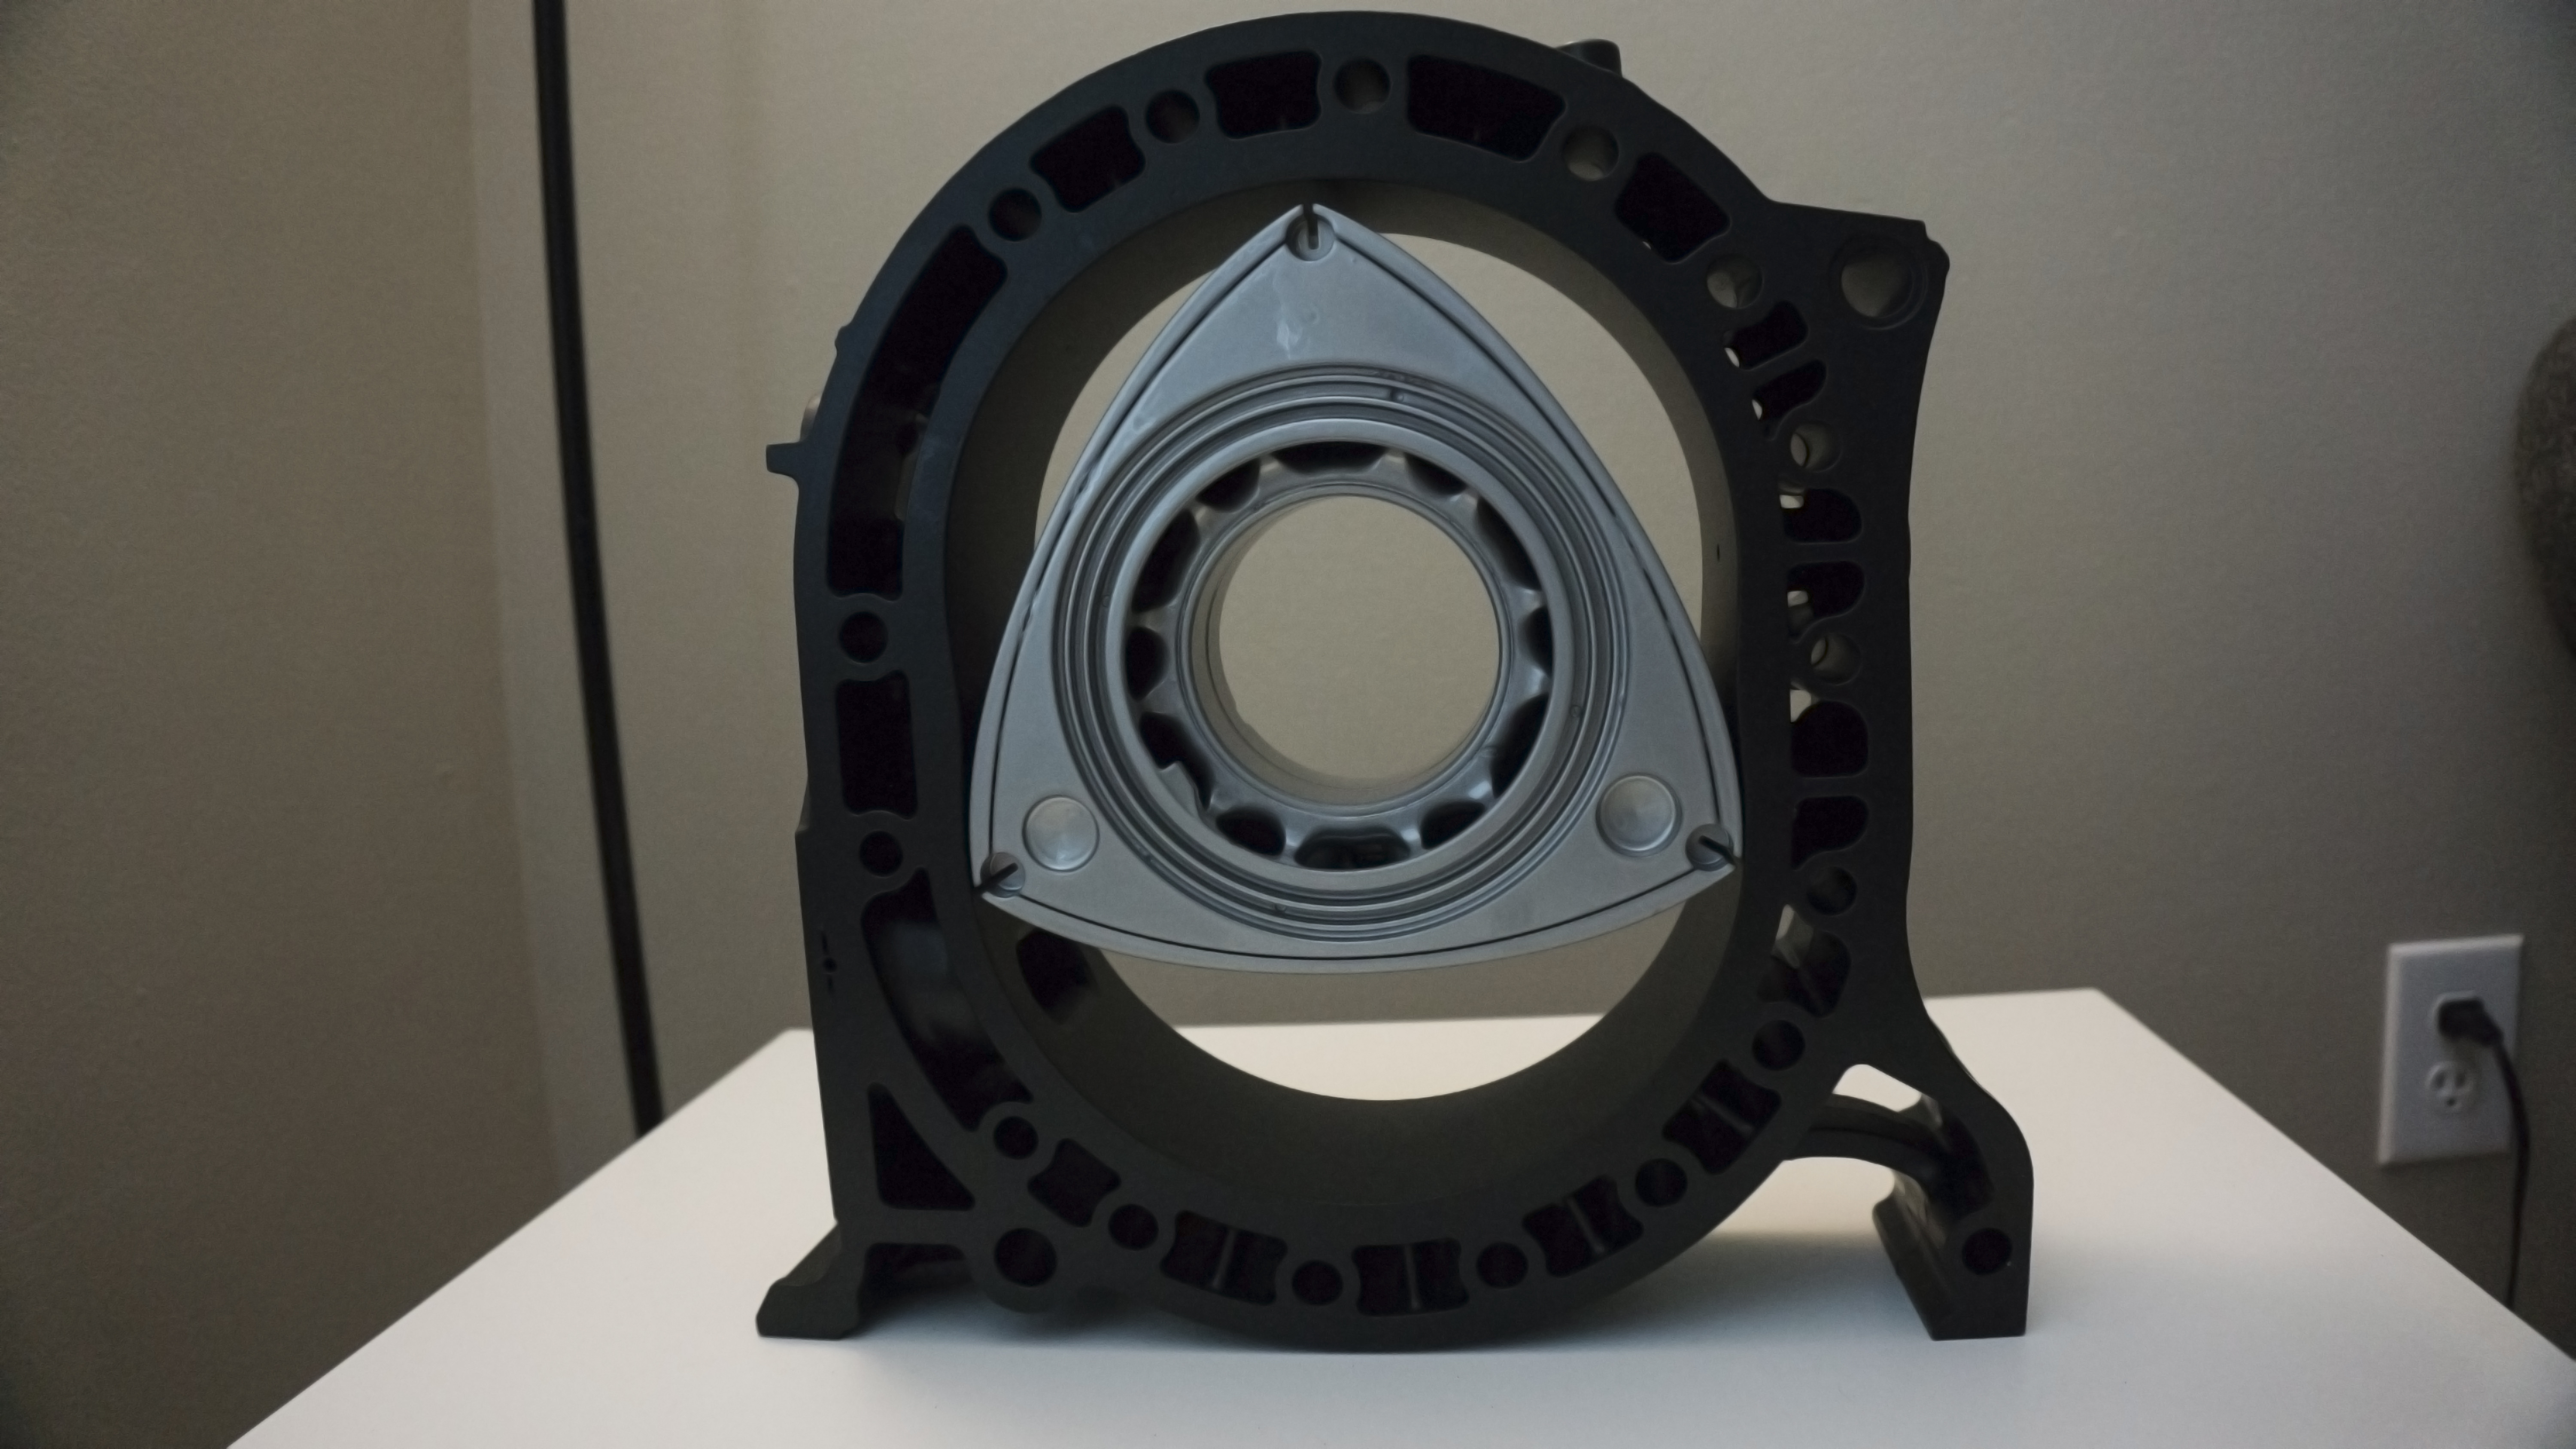
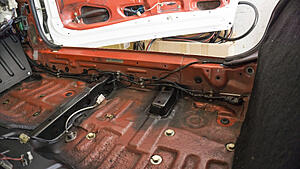
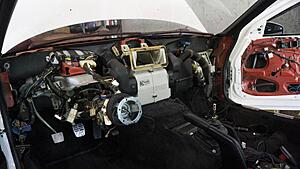
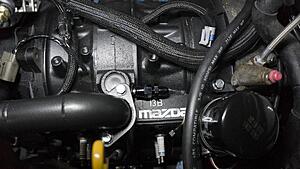
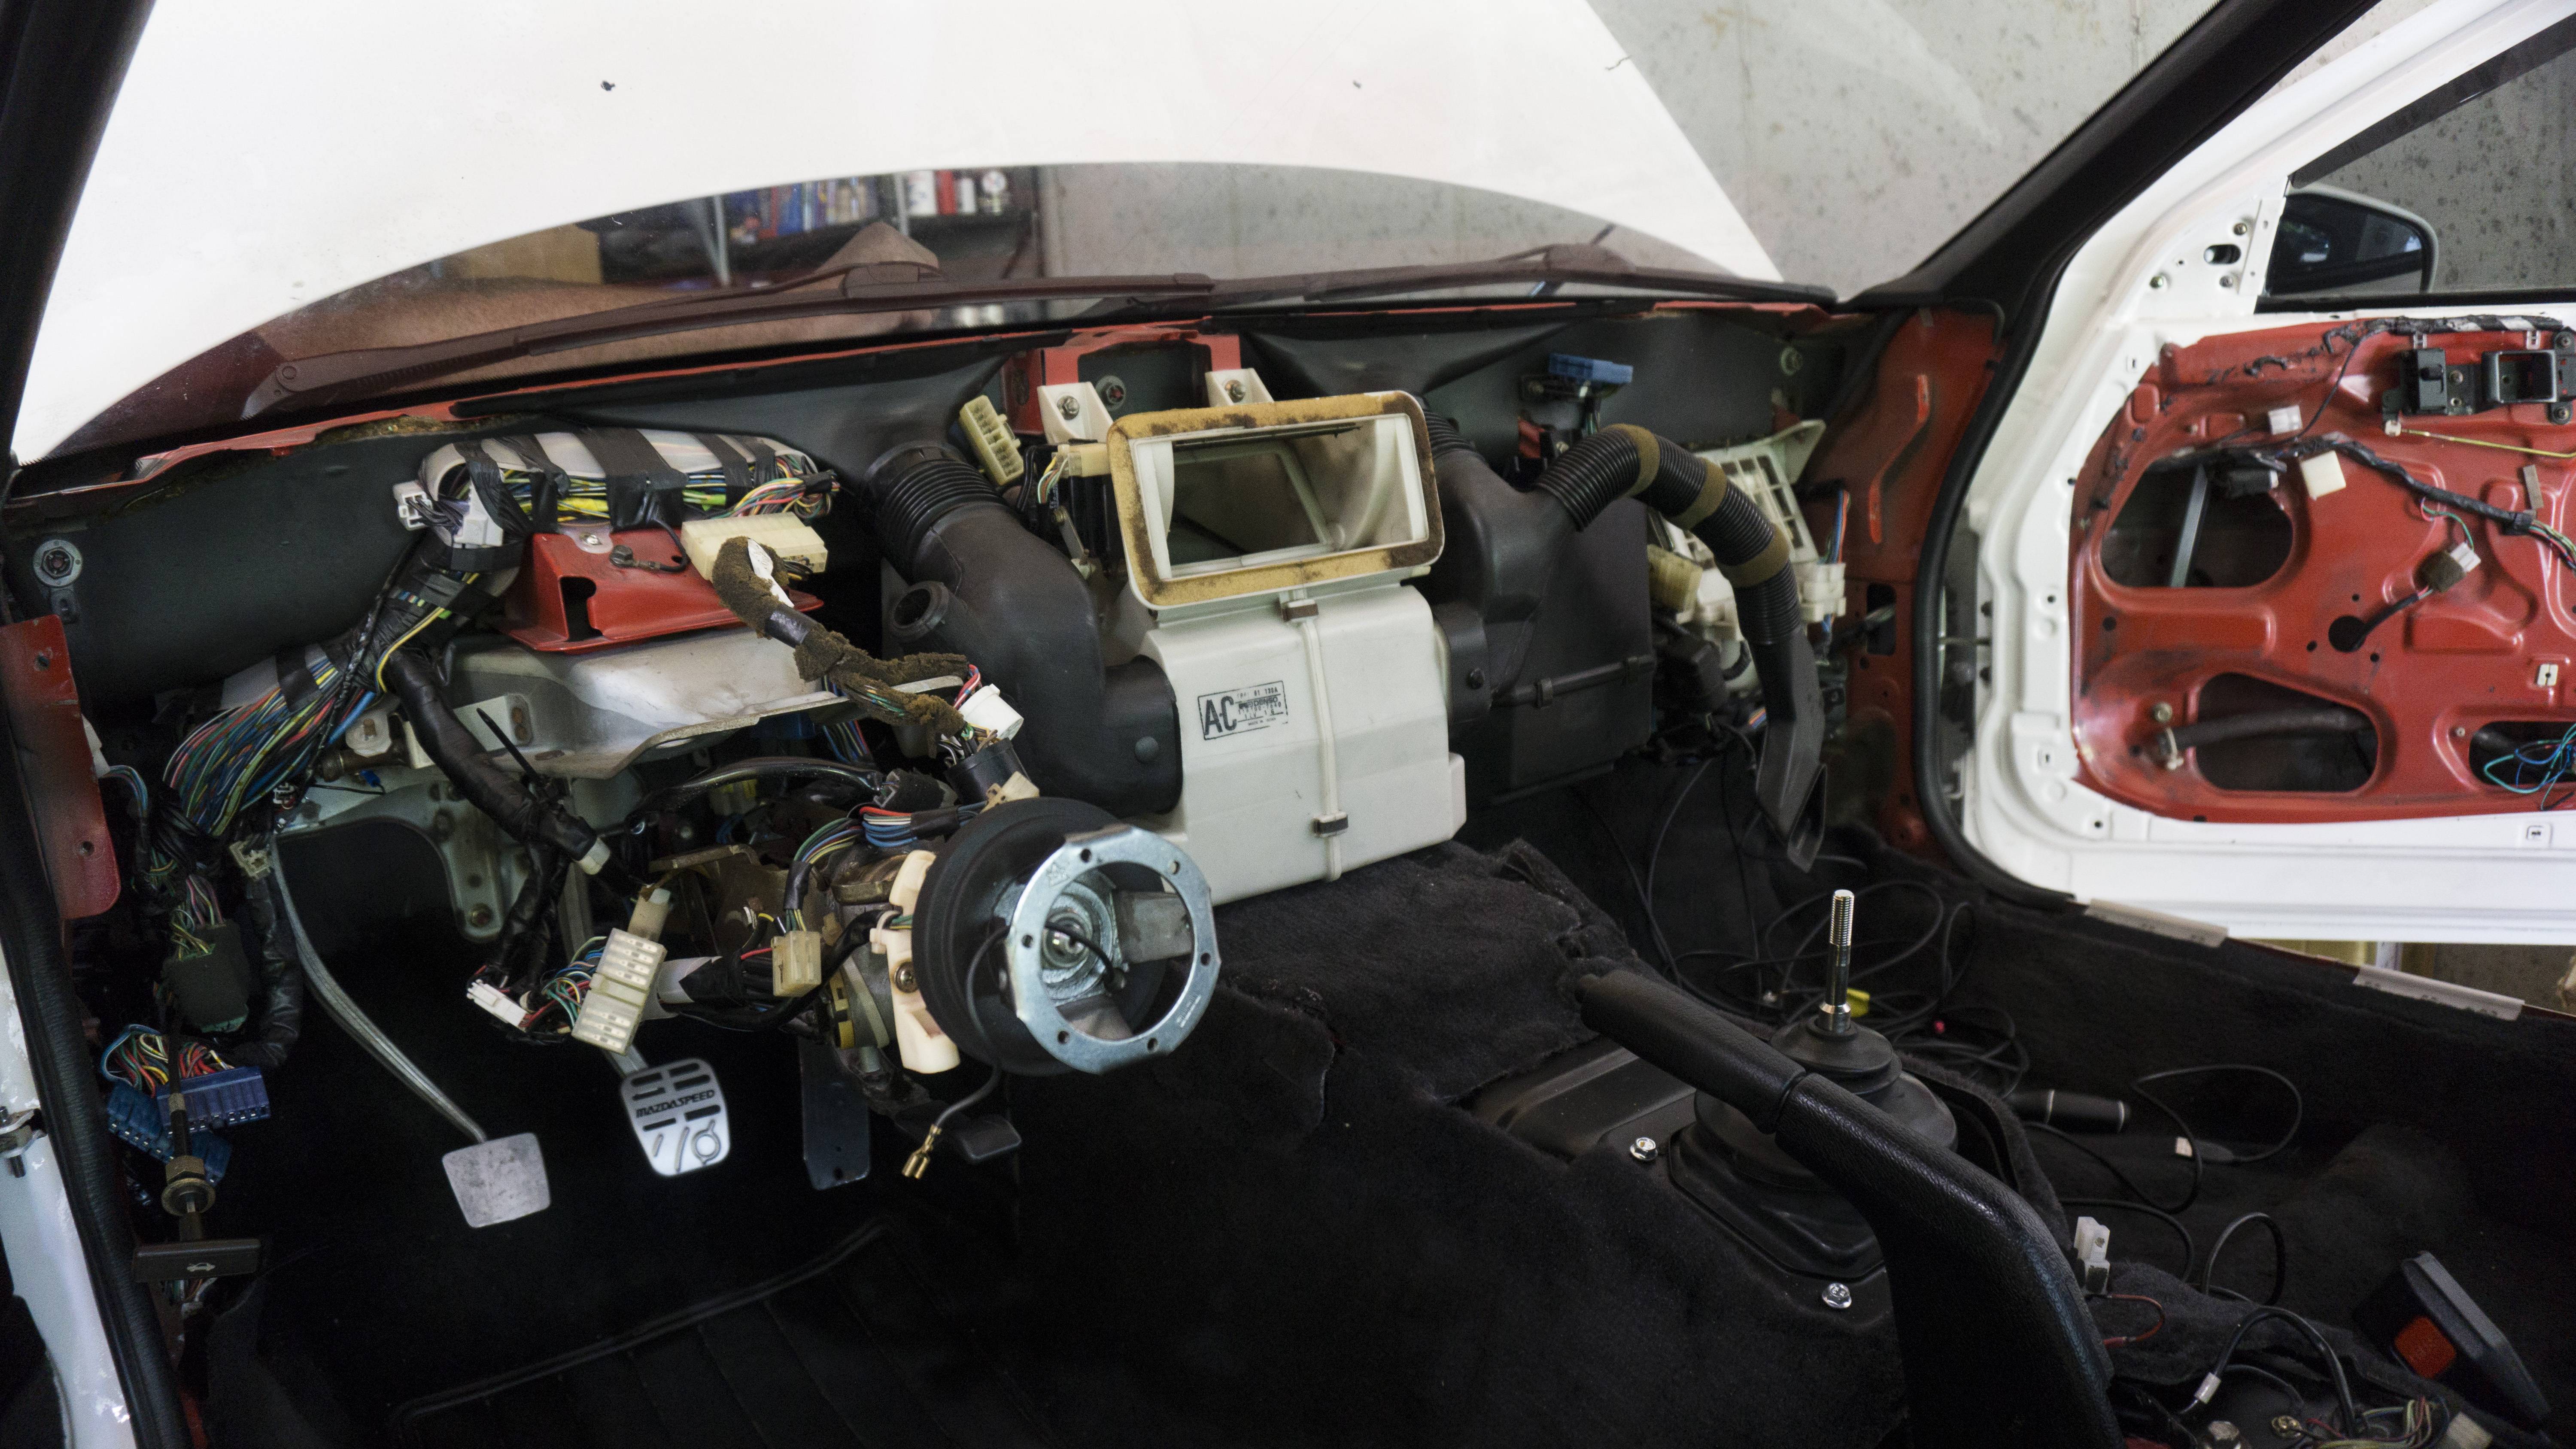
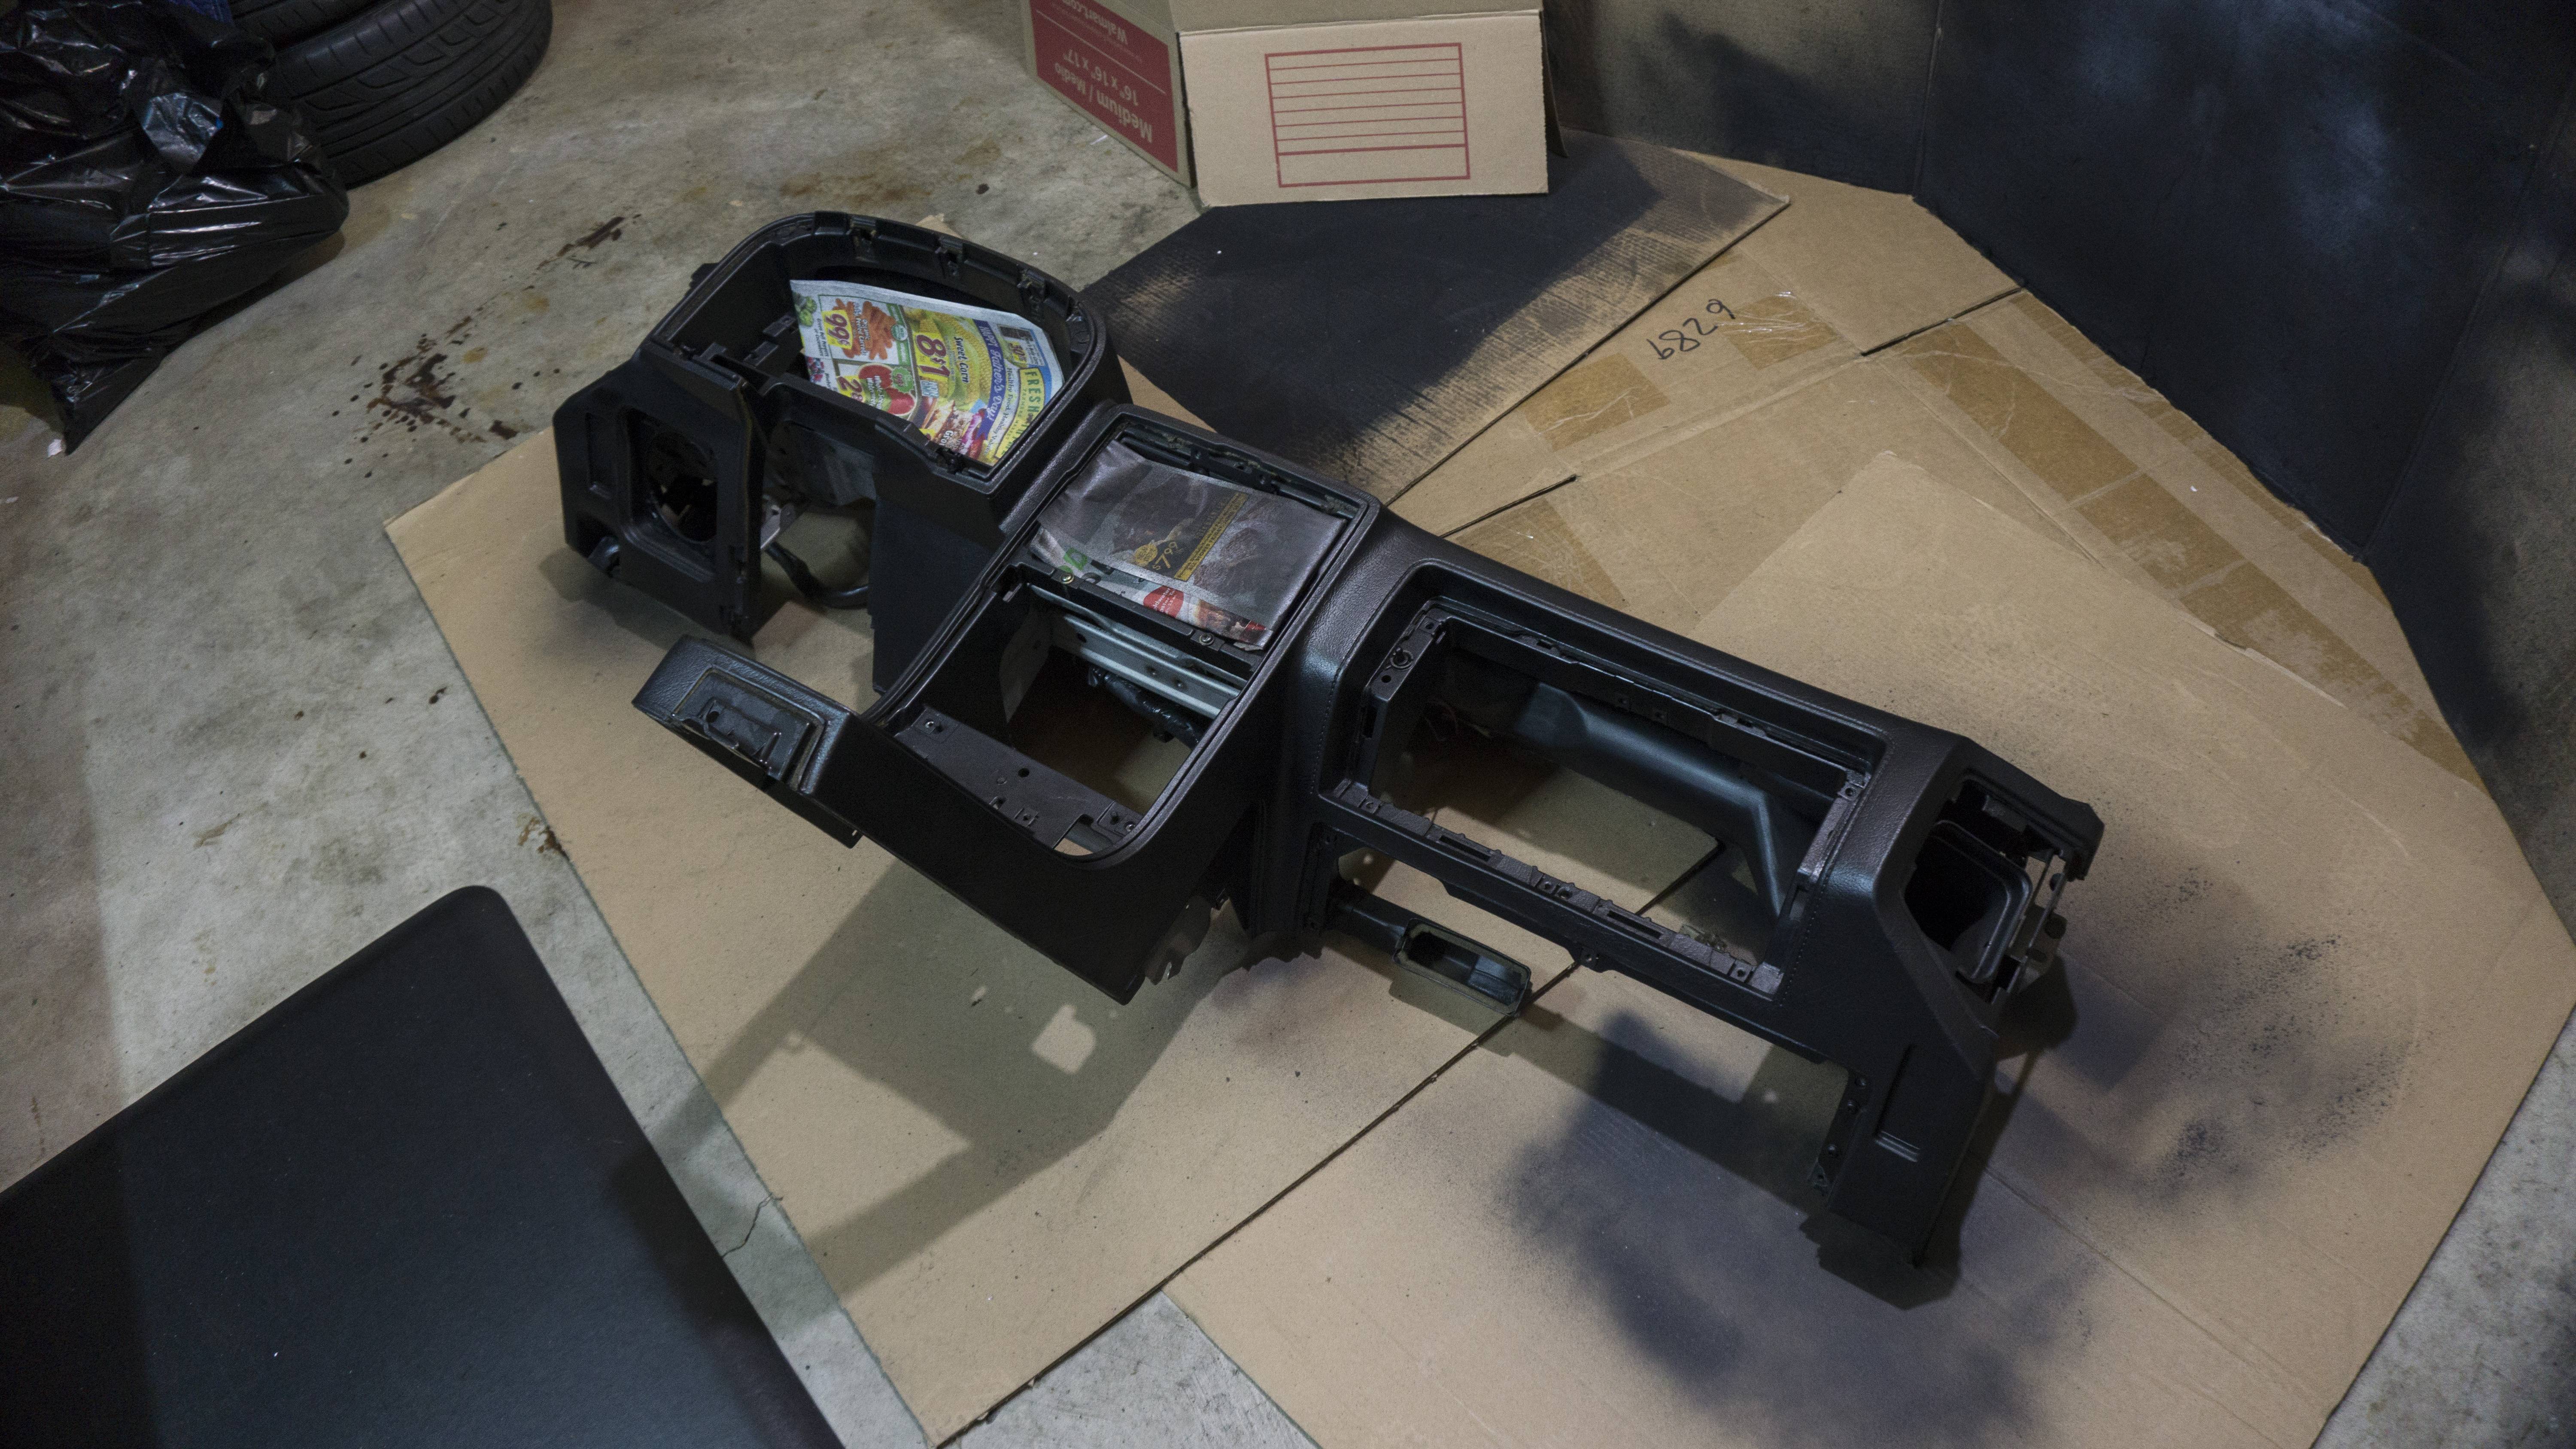
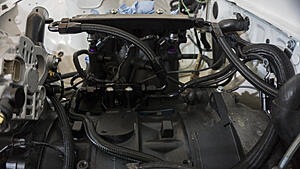
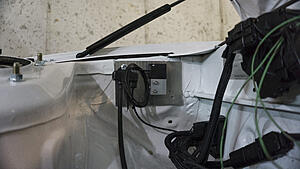
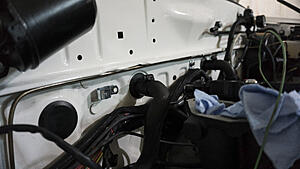
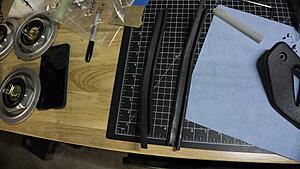
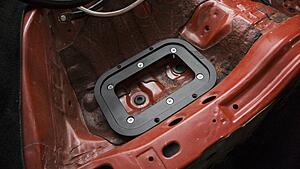
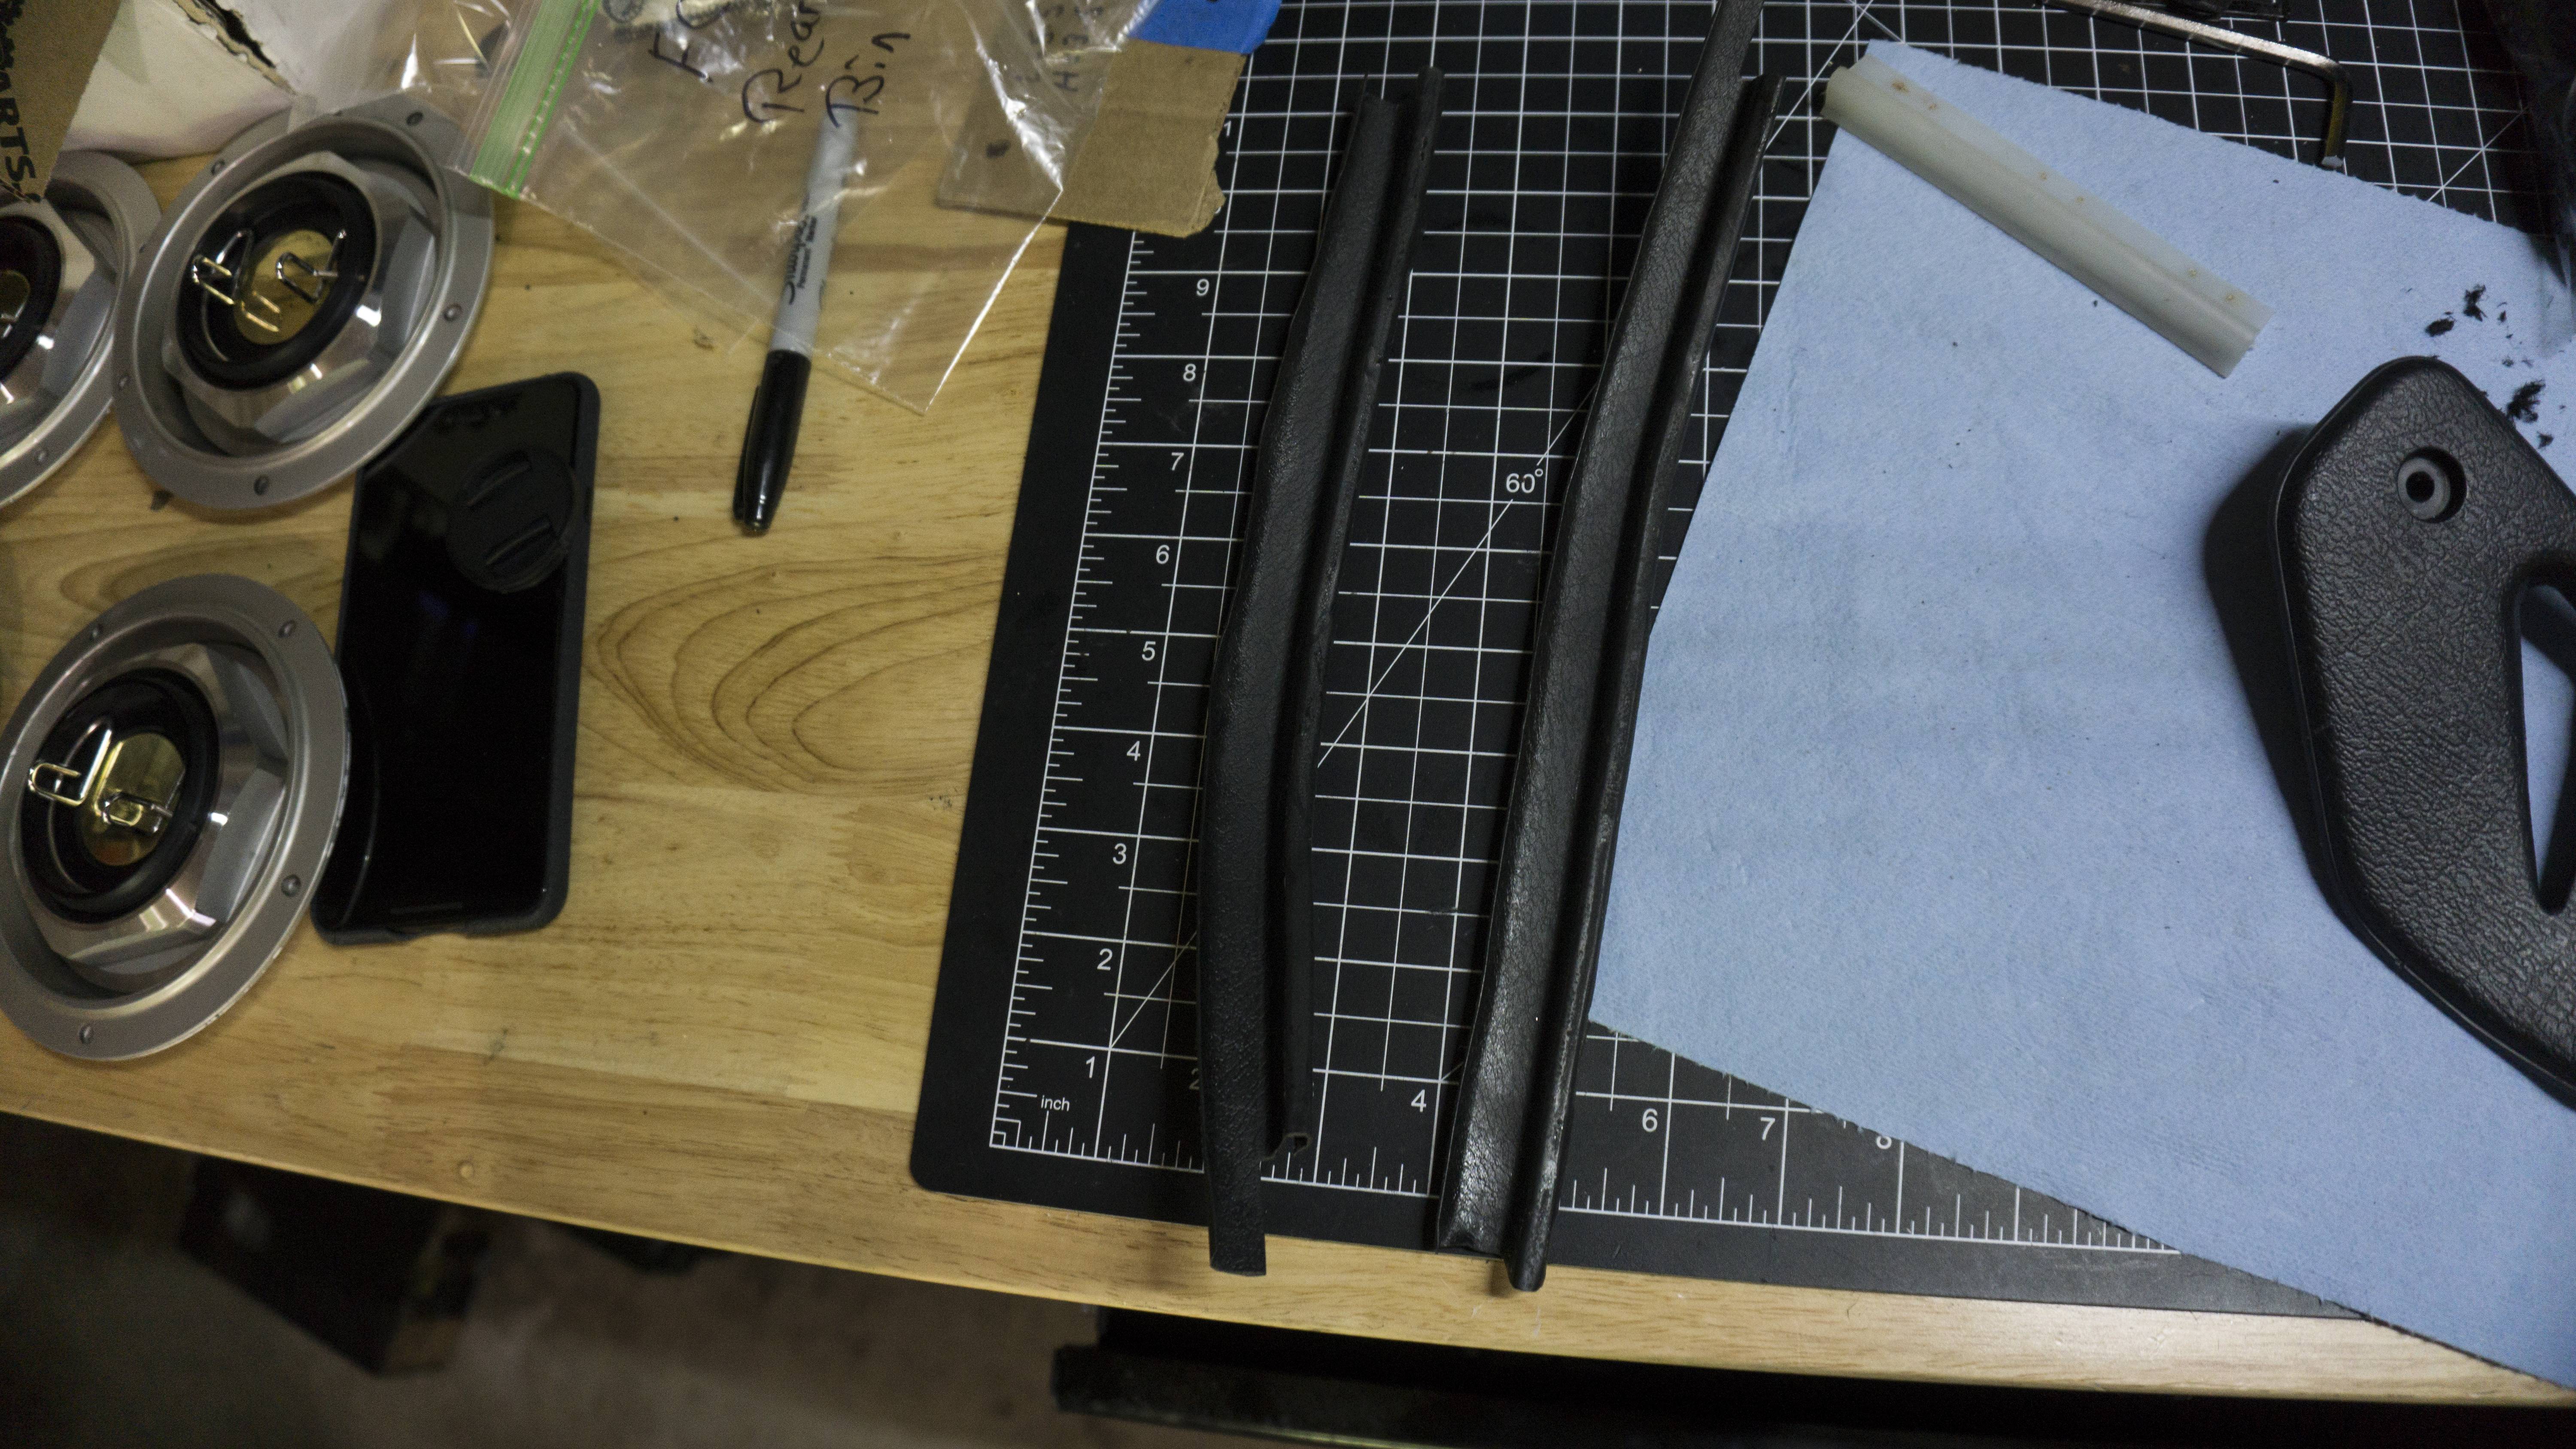
Update 5/19/2019: Well, I still don�t have the engine in�.BUT! I have gotten a lot done. I decided since I have the FD to cruise around in it�s a good time to overhaul the FC and get things a lot nicer. I went ahead and purchased OEM carpet instead of this black overlaid grey that I had in the car. However, before it goes in I need to take care of some surface rust on the inside and go through all interior wiring and delete what's not being used. I�m still on the lookout for 10th AE interior pieces and will upgrade as time goes on. While the carpet was out I pulled off the ECU cover and to my surprise...the area was a mess. I�ll be going back through it and tidying it up. I�m also replacing the cardboard ECU mount with an aluminum one and having it powder coated. In addition, a lot of the pieces I originally sprayed during the original restoration will now be going to get powder coated. I've taken this to the extreme and pulled almost every single bracket from the firewall forward. In addition to this, I'm also replacing every single bolt in the engine bay with a new one. I also discovered that the majority of my pinch welds are flat (probably partly due to original owner and partly myself), so I�ve been working to get those straightened, de-rusted, and resprayed over with rust converter, epoxy paint, and undercoating. There are a few sections that simply are unable to be brought back. Maybe one day I�ll re-shell, but today is not that day! I went ahead and threw on the new Bride frame rails, that I recently purchased, on the Recaro�s; however, I still need to restore the plastic bits that go on the sides of the seat. I also ordered V8 Roadsters Miata frame rail reinforcements which fit the FC as well. I�ll have to do some slight modifications, but they should work extremely well. I went ahead and purchased a brake booster brace which will be going on as well. I finally got around to buying a mount for the battery in the passenger bin as well. I bought a nice brake master brace and went ahead and threw it on as well. I�ve also been spending a lot of time cleaning the Turbo II Side Skirts. They are a mess, Silicon was used as a gap to hold it closer to the car and it�s a chore removing - the OEM double sided tape that was used is no fun as well. I also had to grind down all the tabs since my S4 chassis did not have these originally and I am unable to use them. My plan while the car is fully in the air is to walk through everything underneath and tidy things up; repairing what is needed. I also plan on replacing all suspension related bushings, adding bigger sways, and new coilovers; the sways and coilovers may come a bit later though. I�ve decided that once the OEM coil packs go I�ll be upgrading to some IGN-1As, but I�m hoping (my wallet is hoping) that doesn�t happen for a while. I have a lot of stuff in work so I'll just show off where I'm at in the middle of it all.
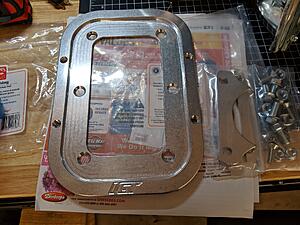
Here is the mess of the ECU and the aluminum one I created:
Here is a before and after of part of the side skirt cleanup:
Here is some before and afters of where I�m currently at in pinch weld section:
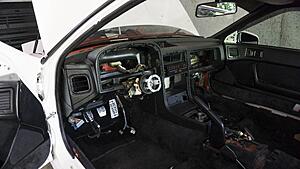
Here is where I�m at on driver side interior surface rust:
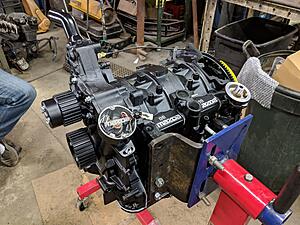
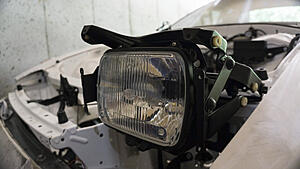
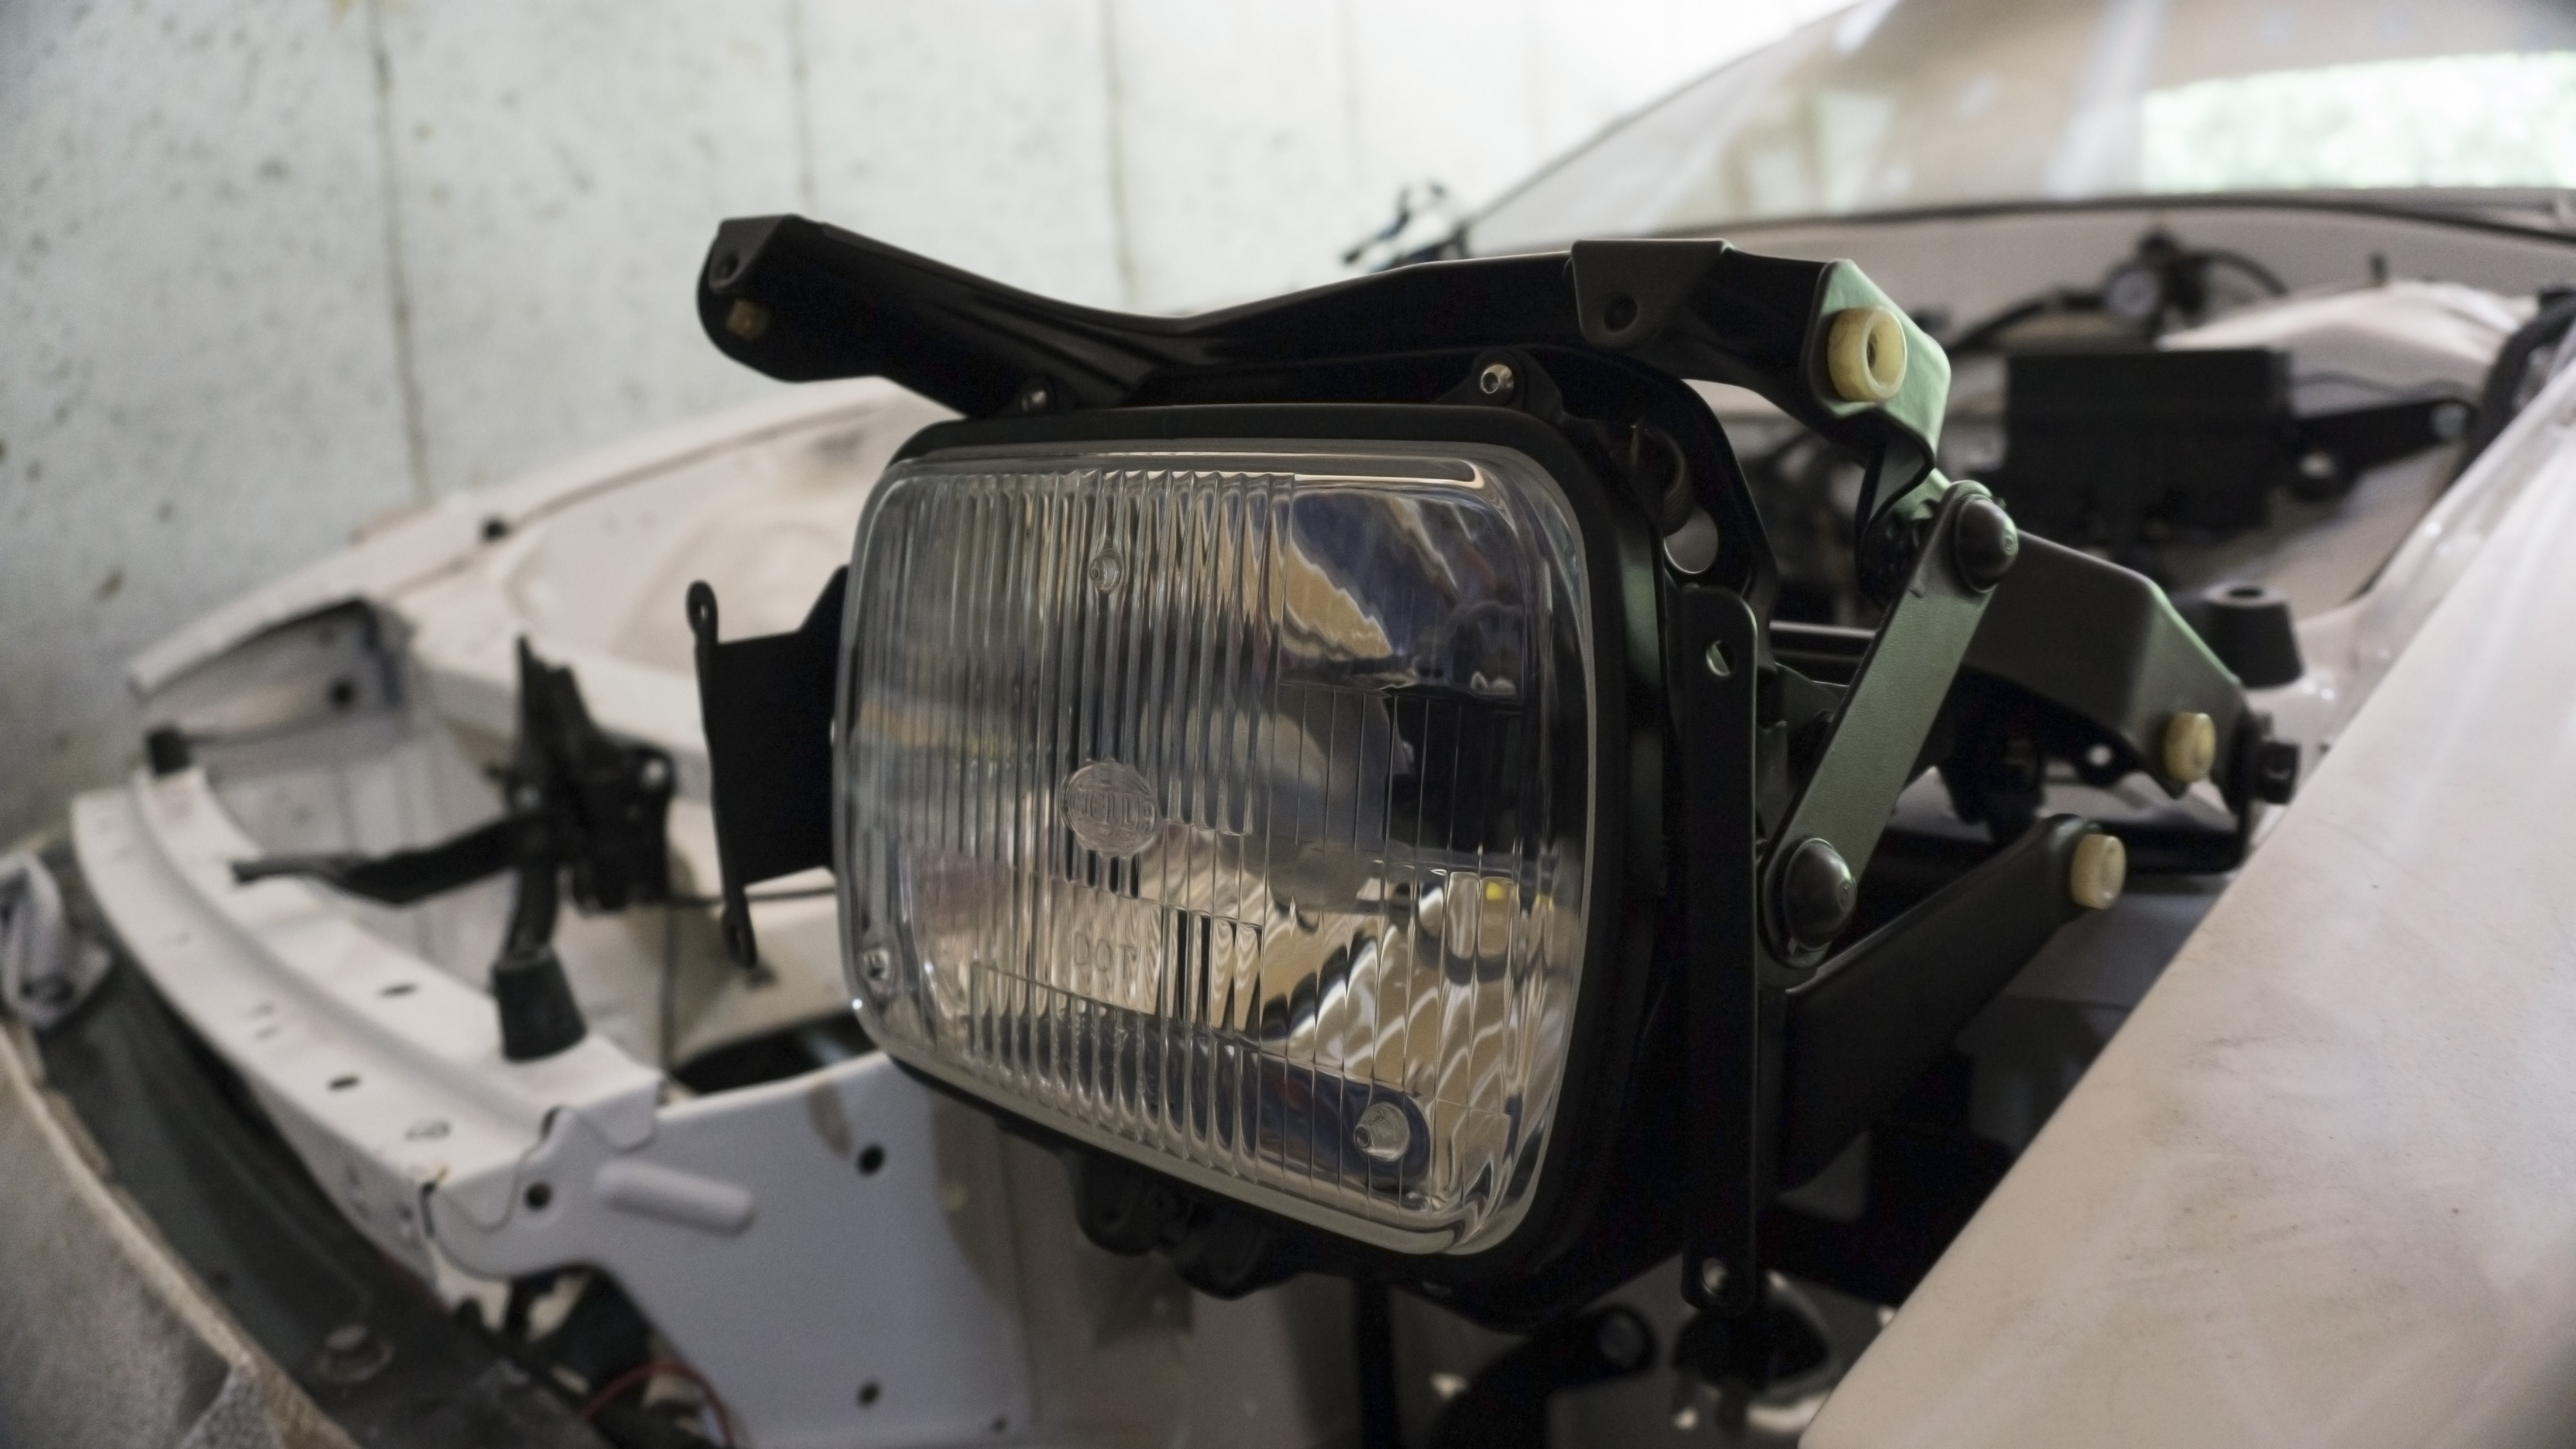
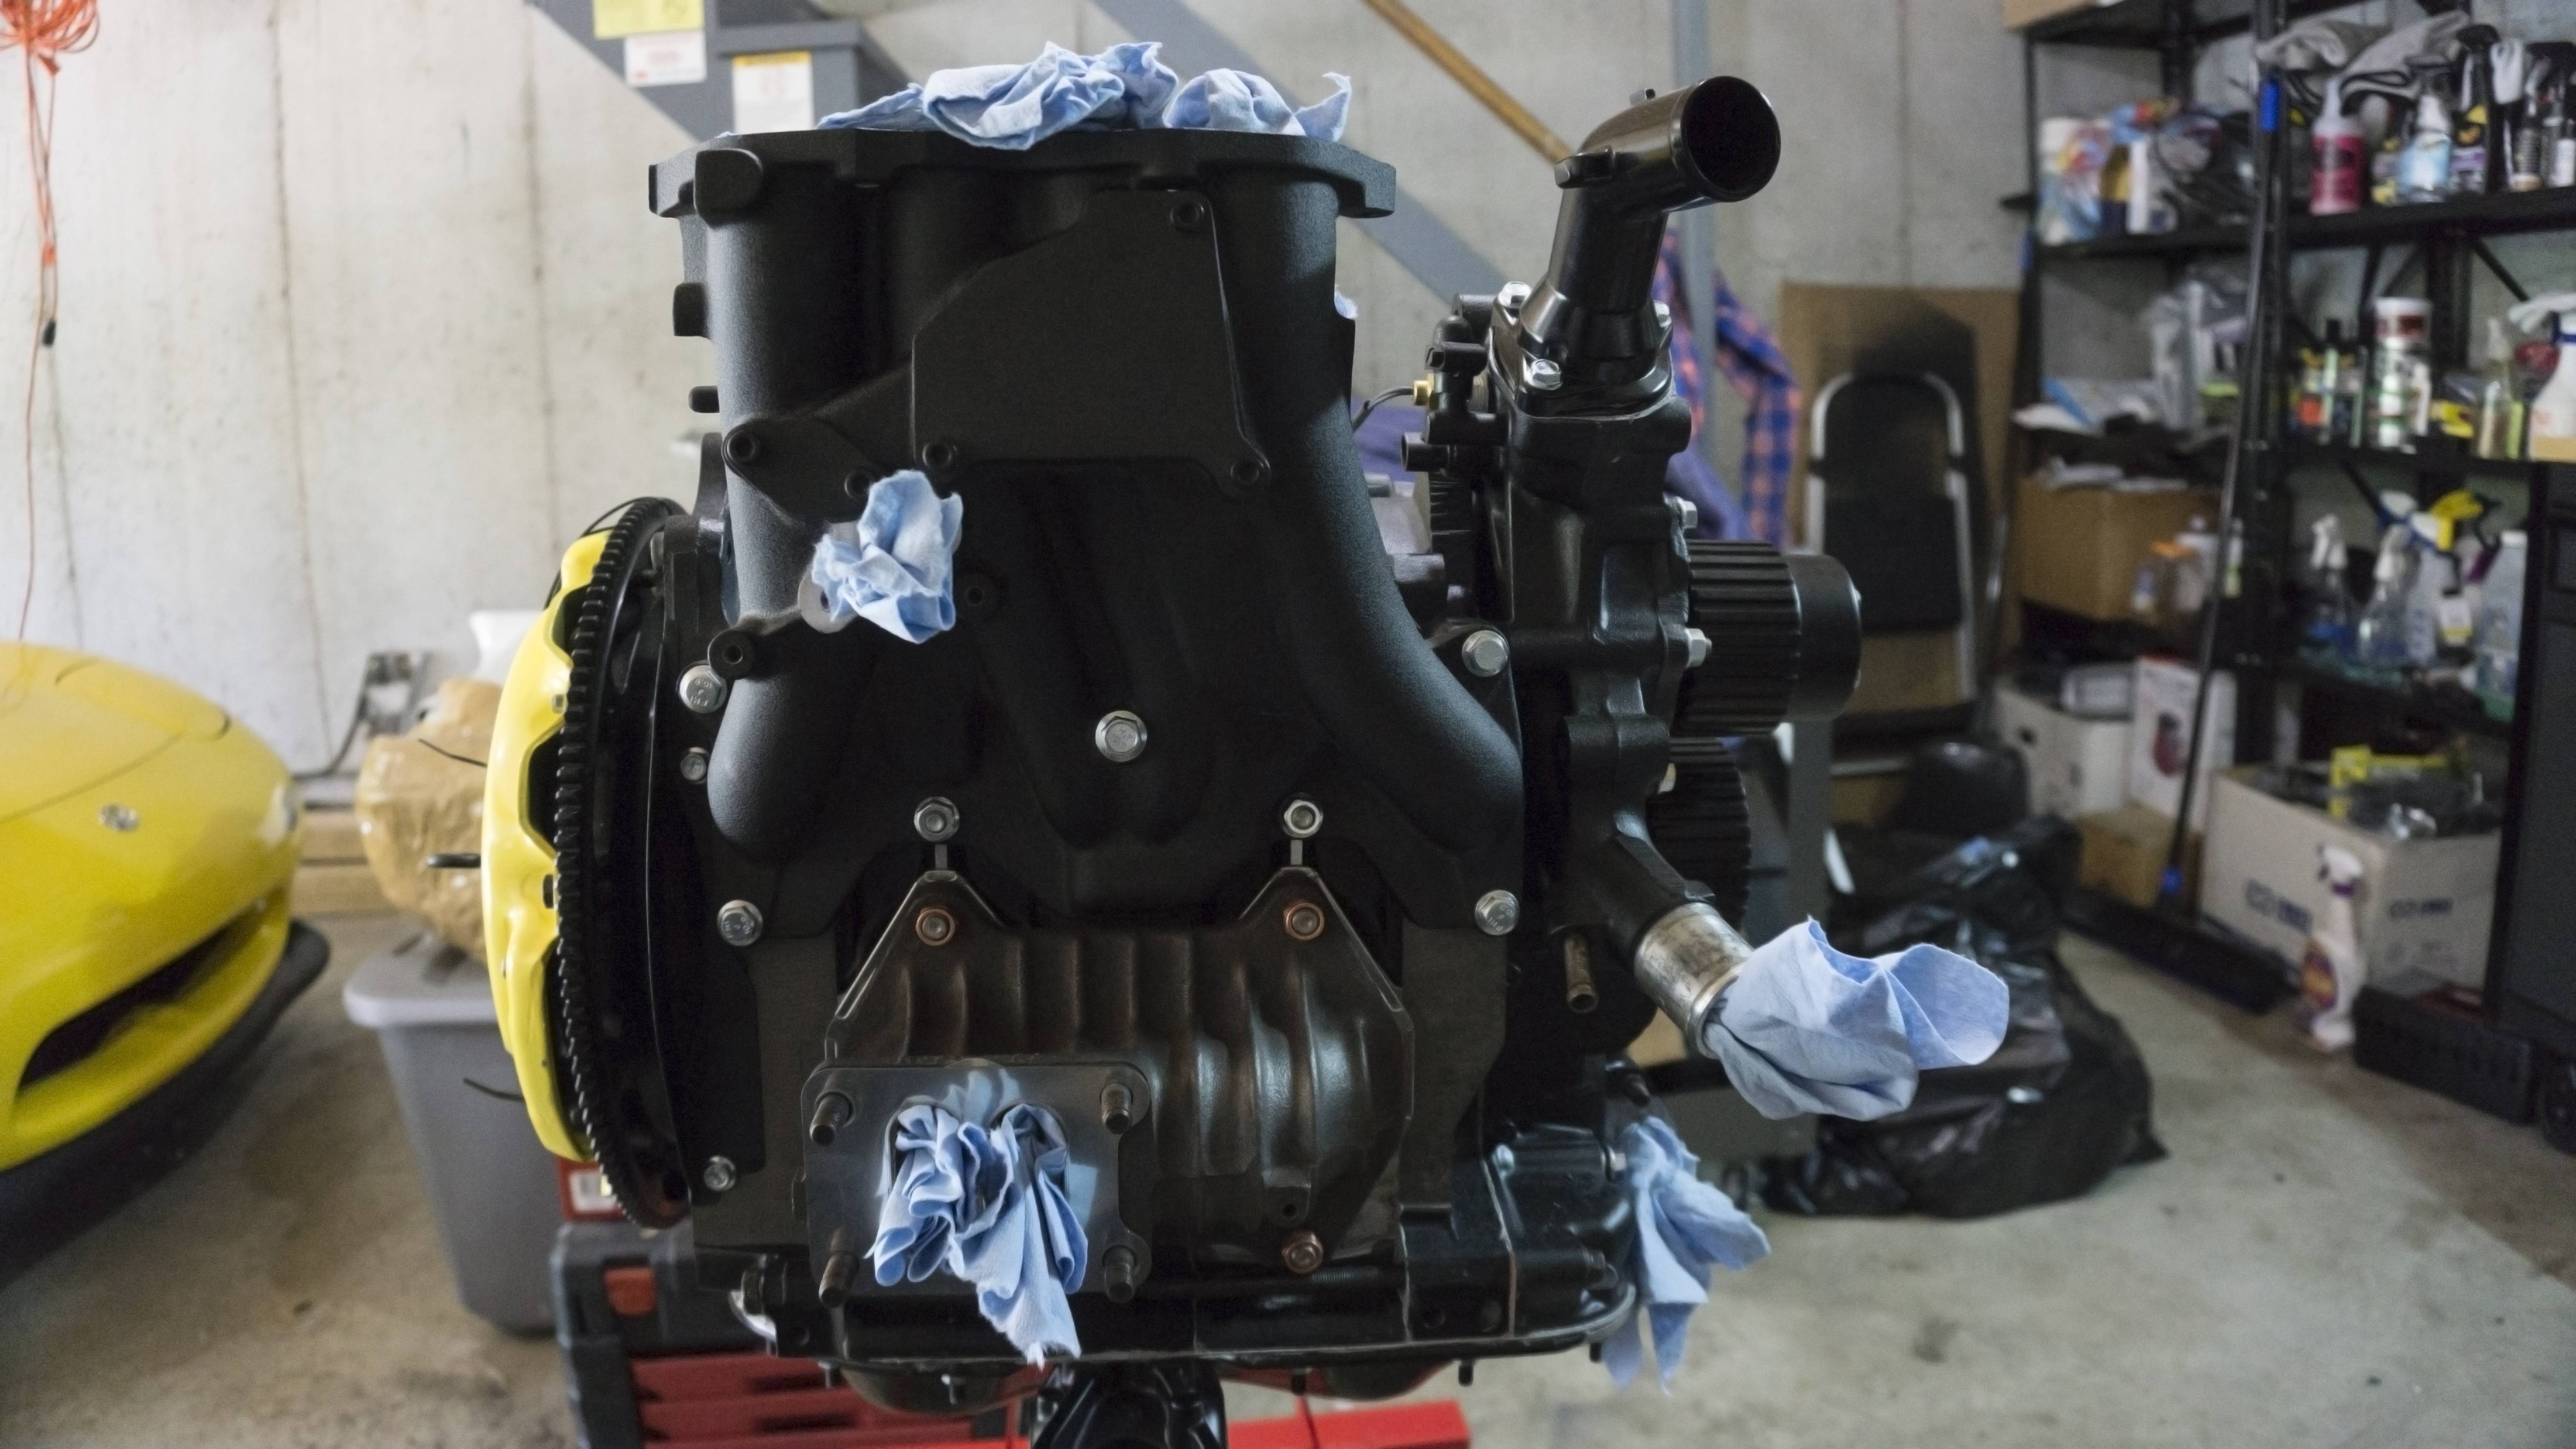
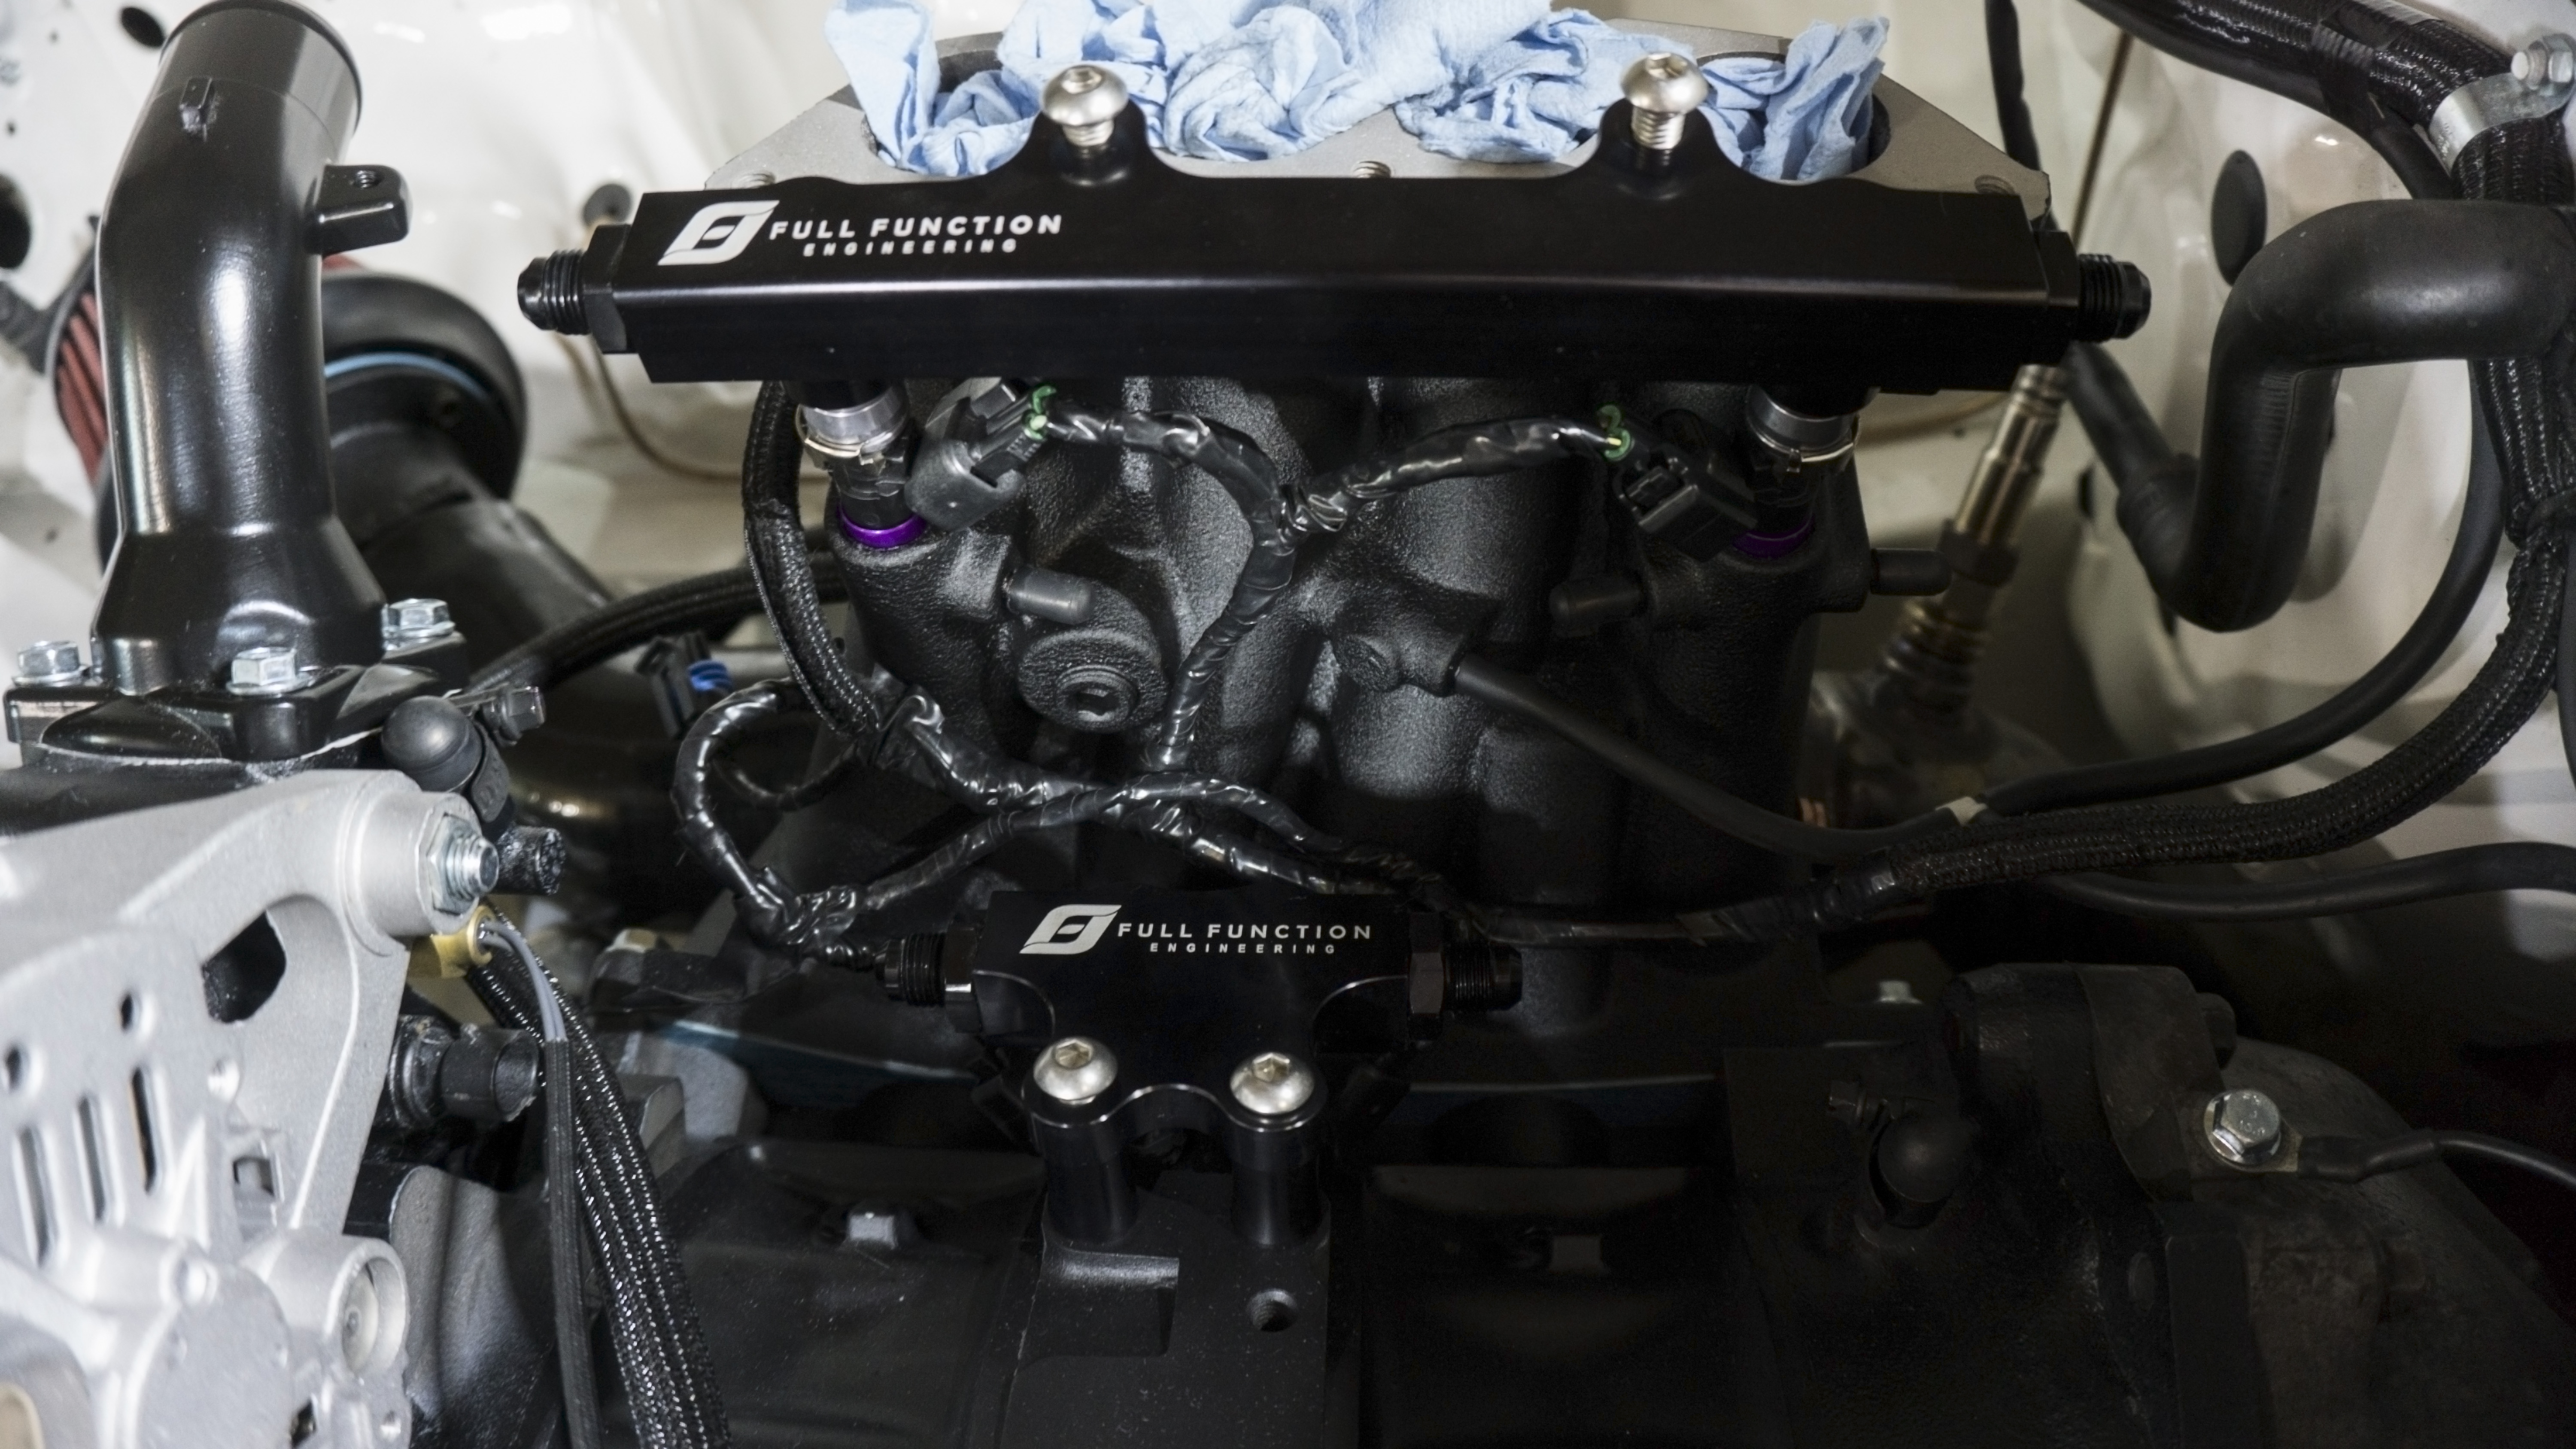
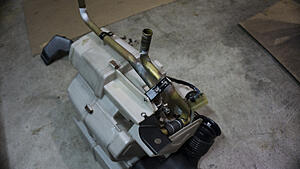
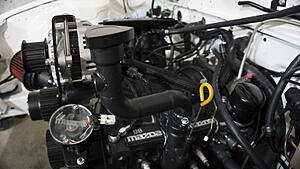
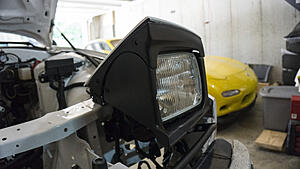
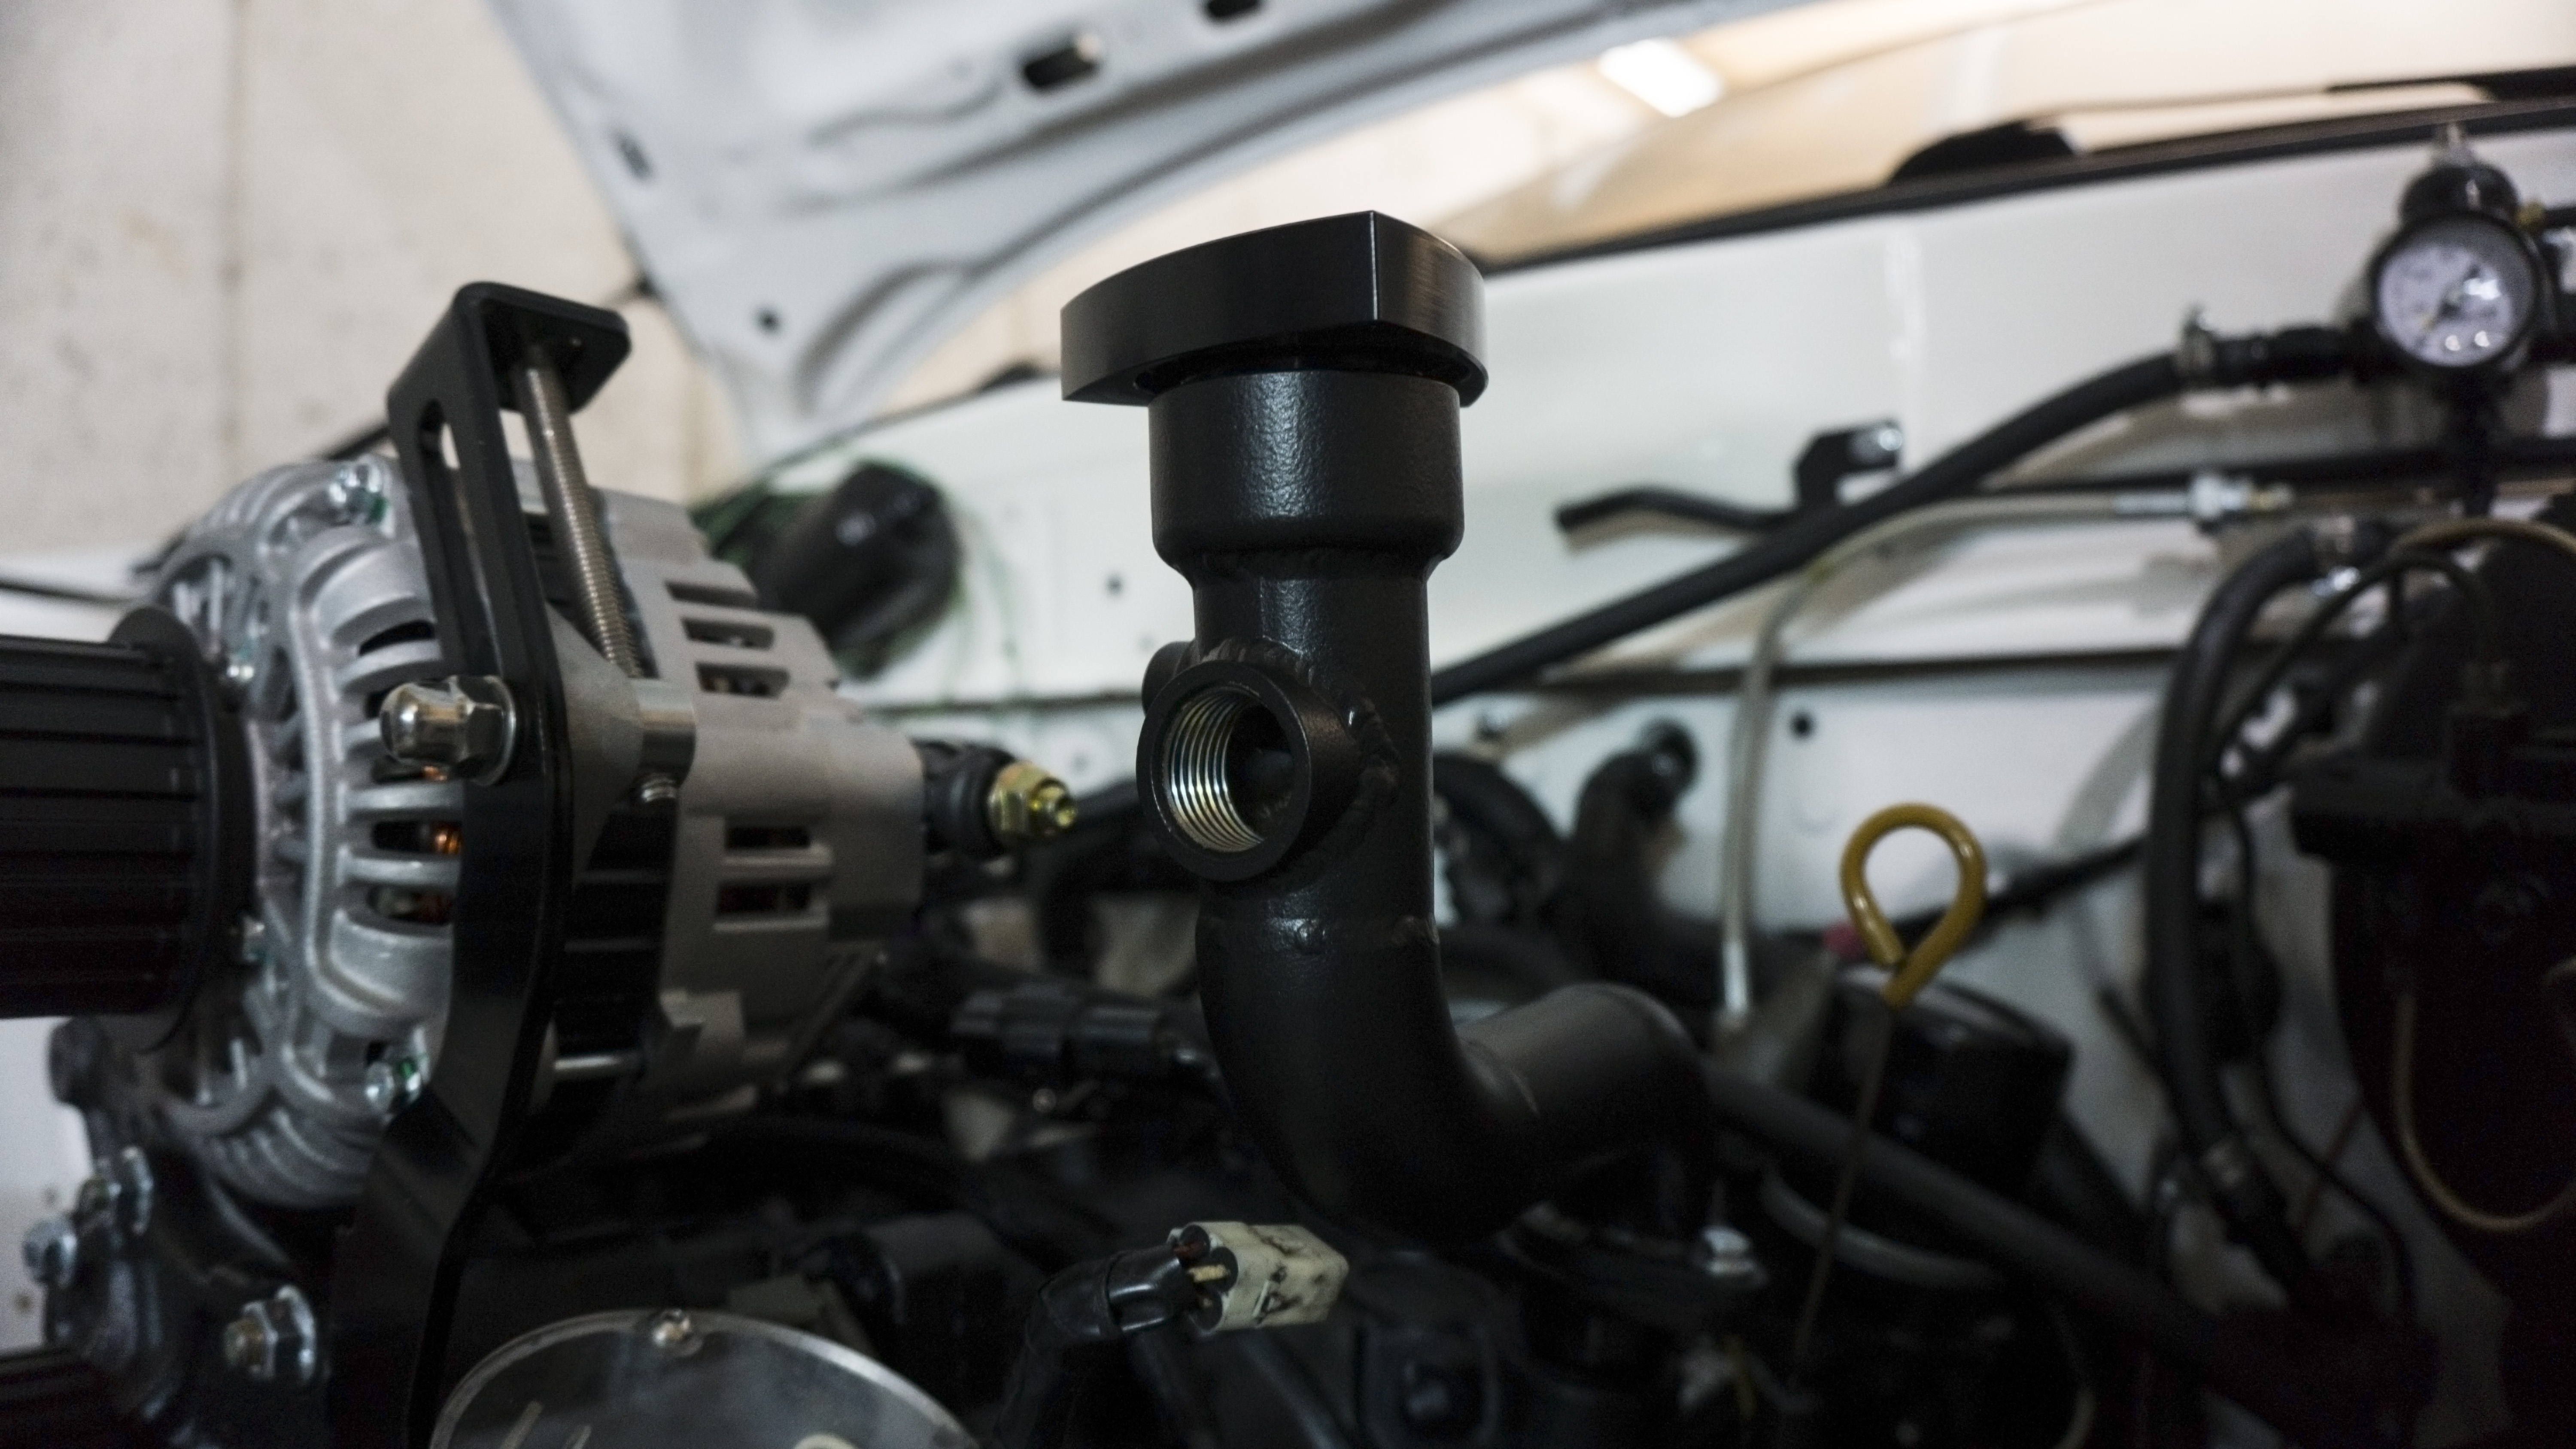
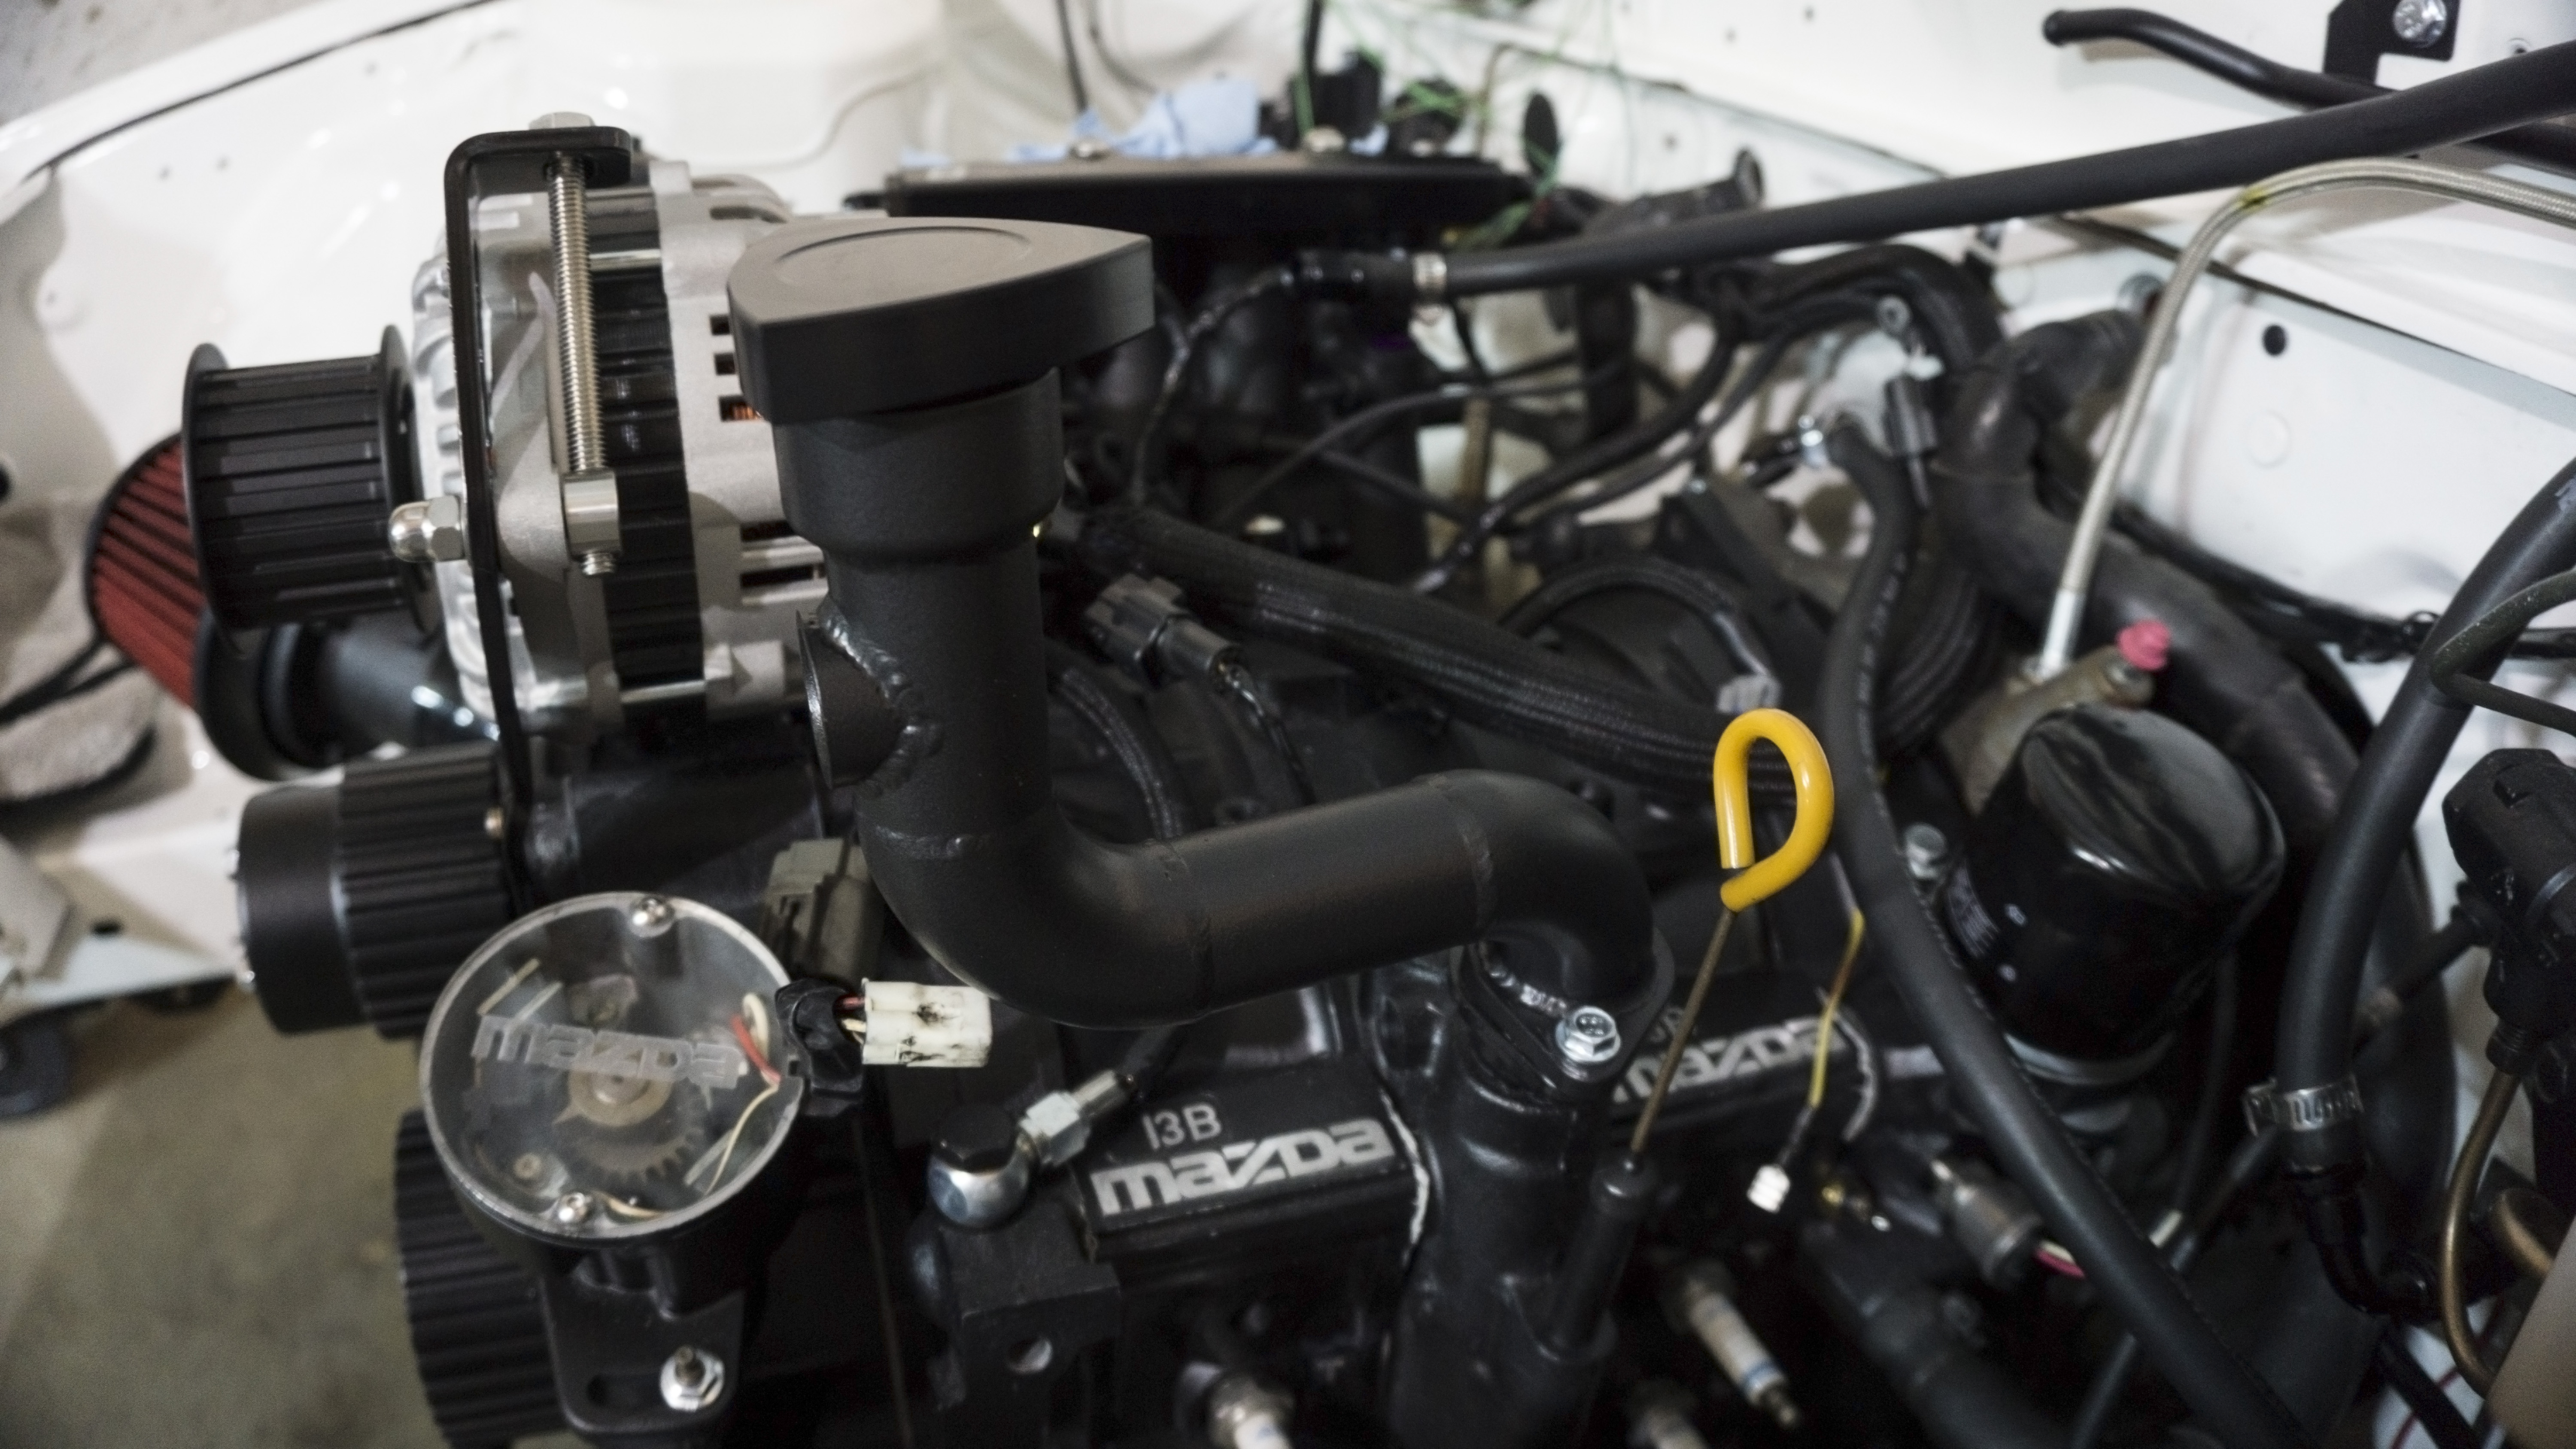
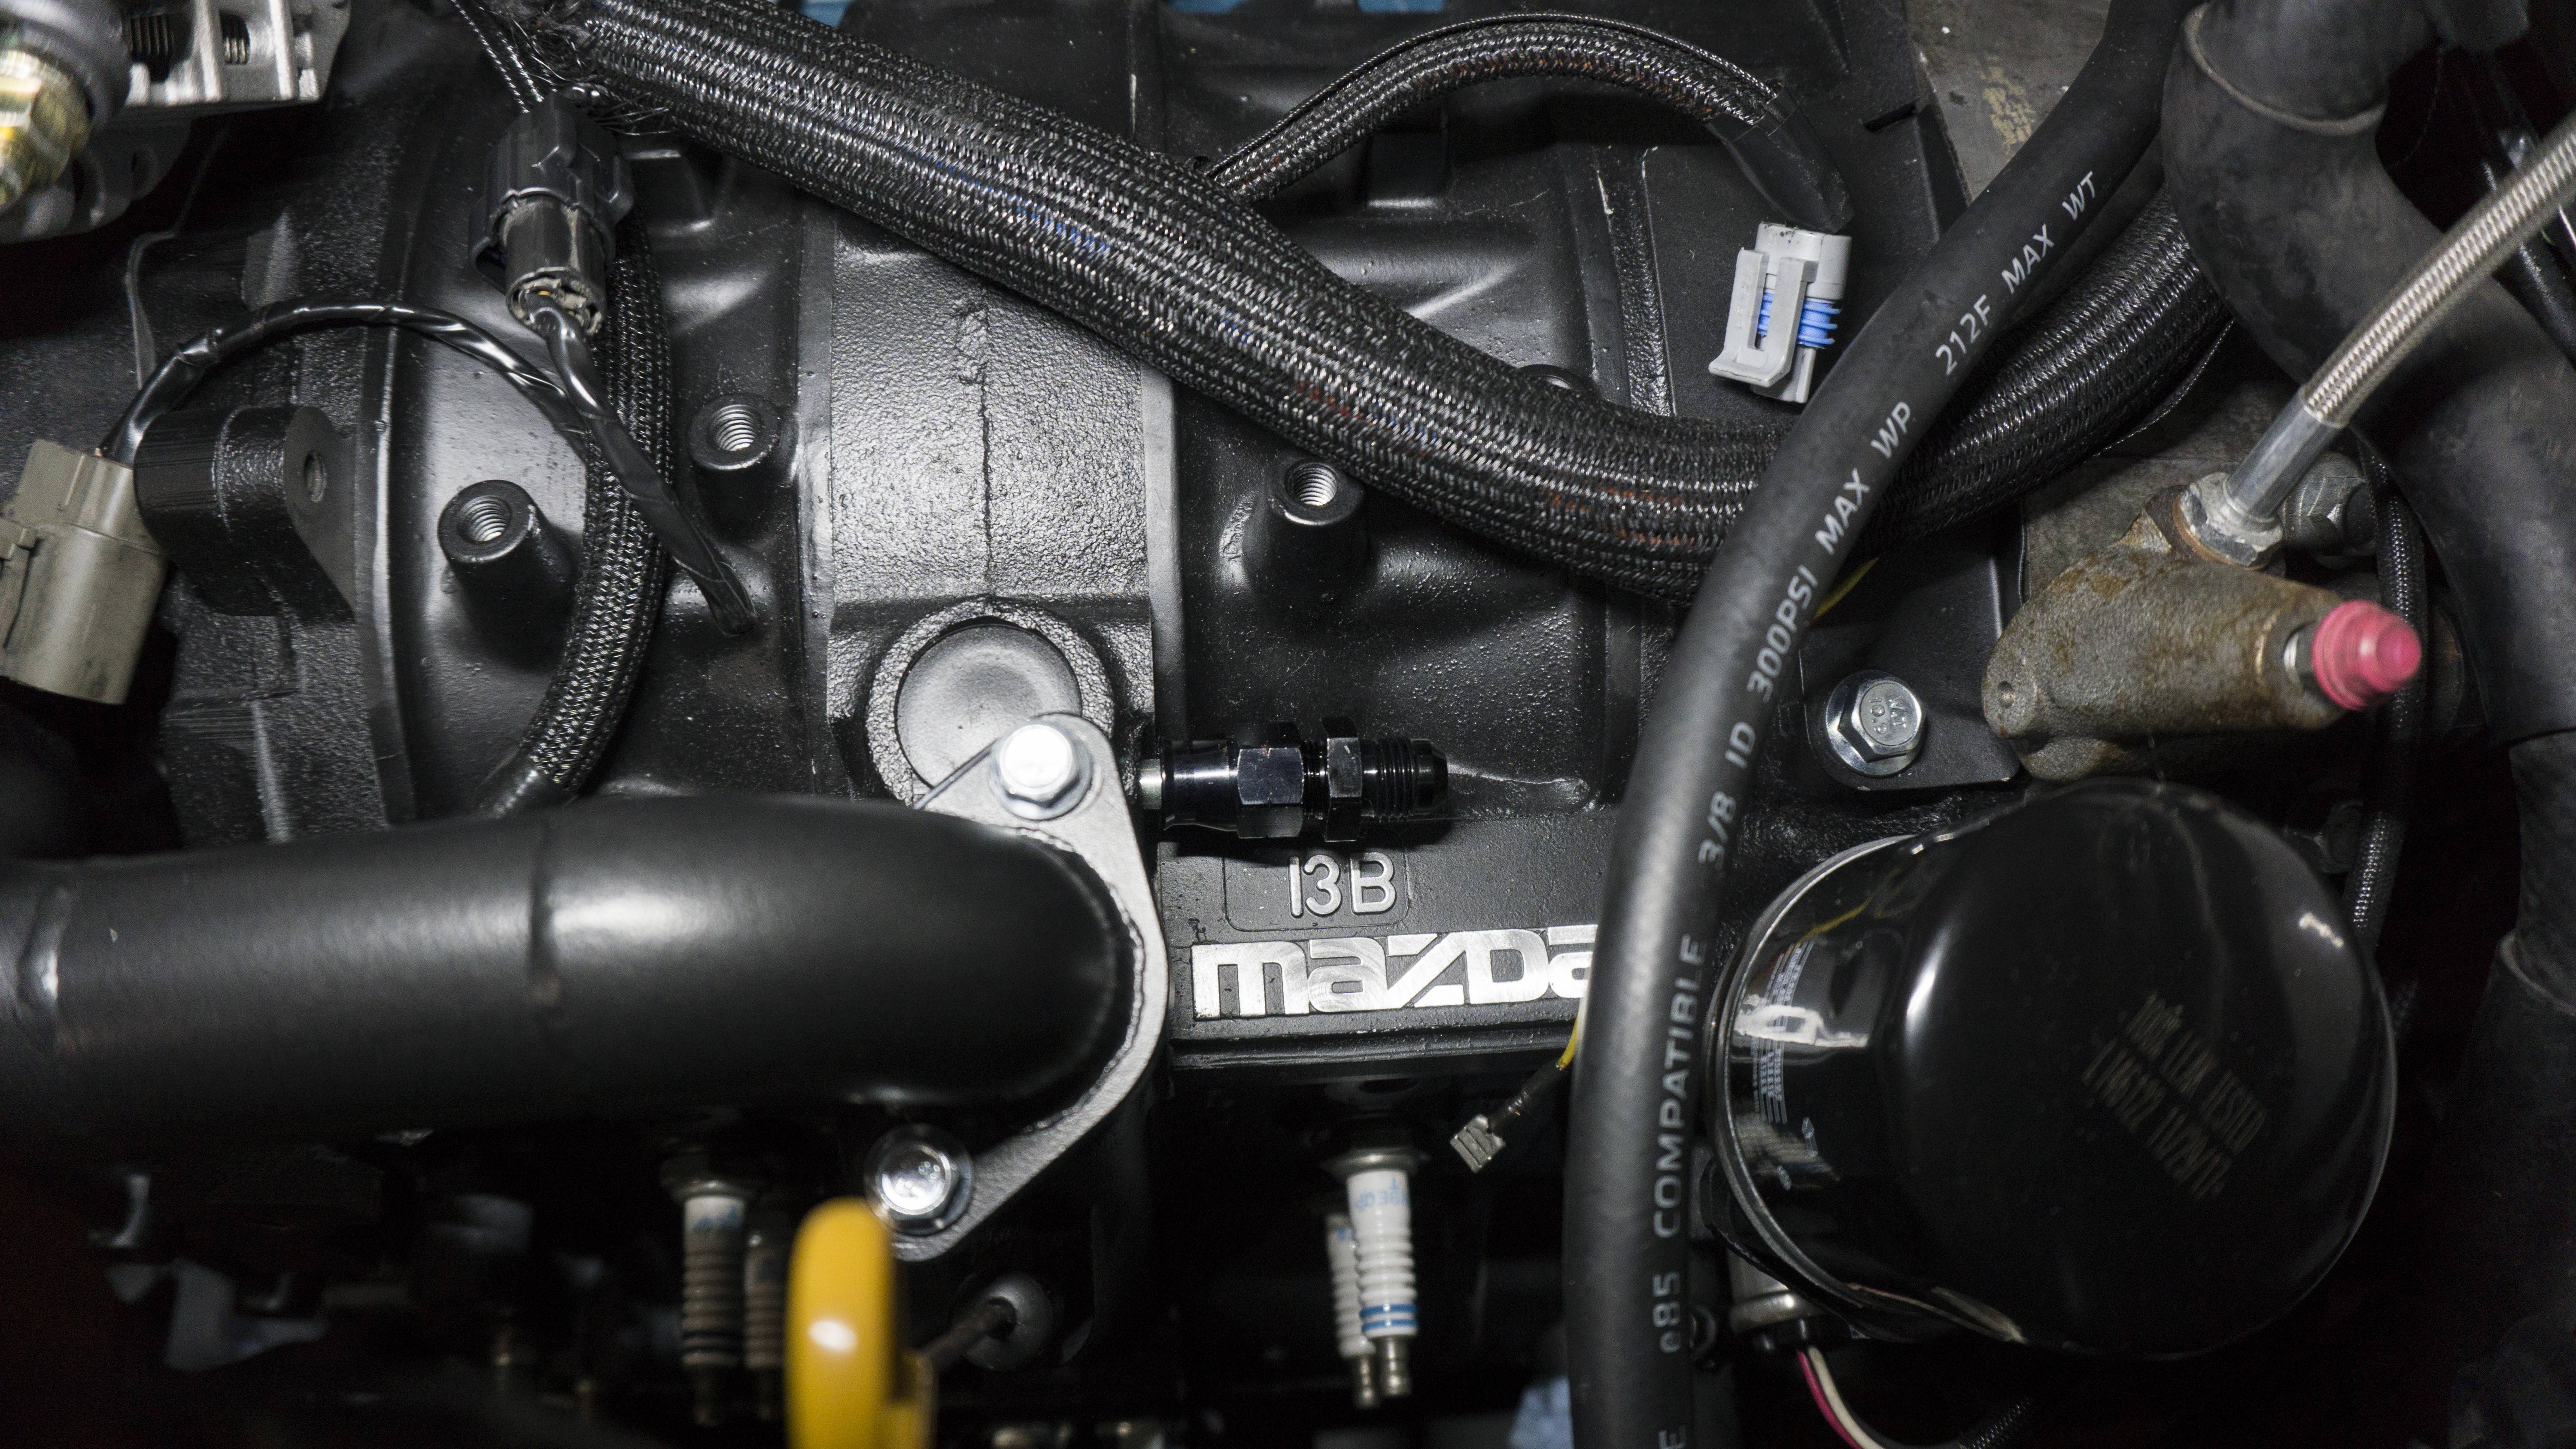
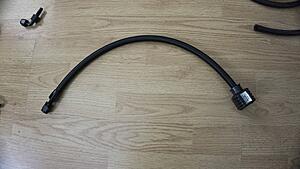
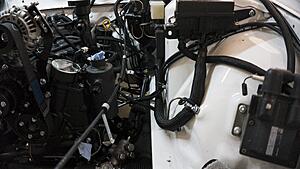
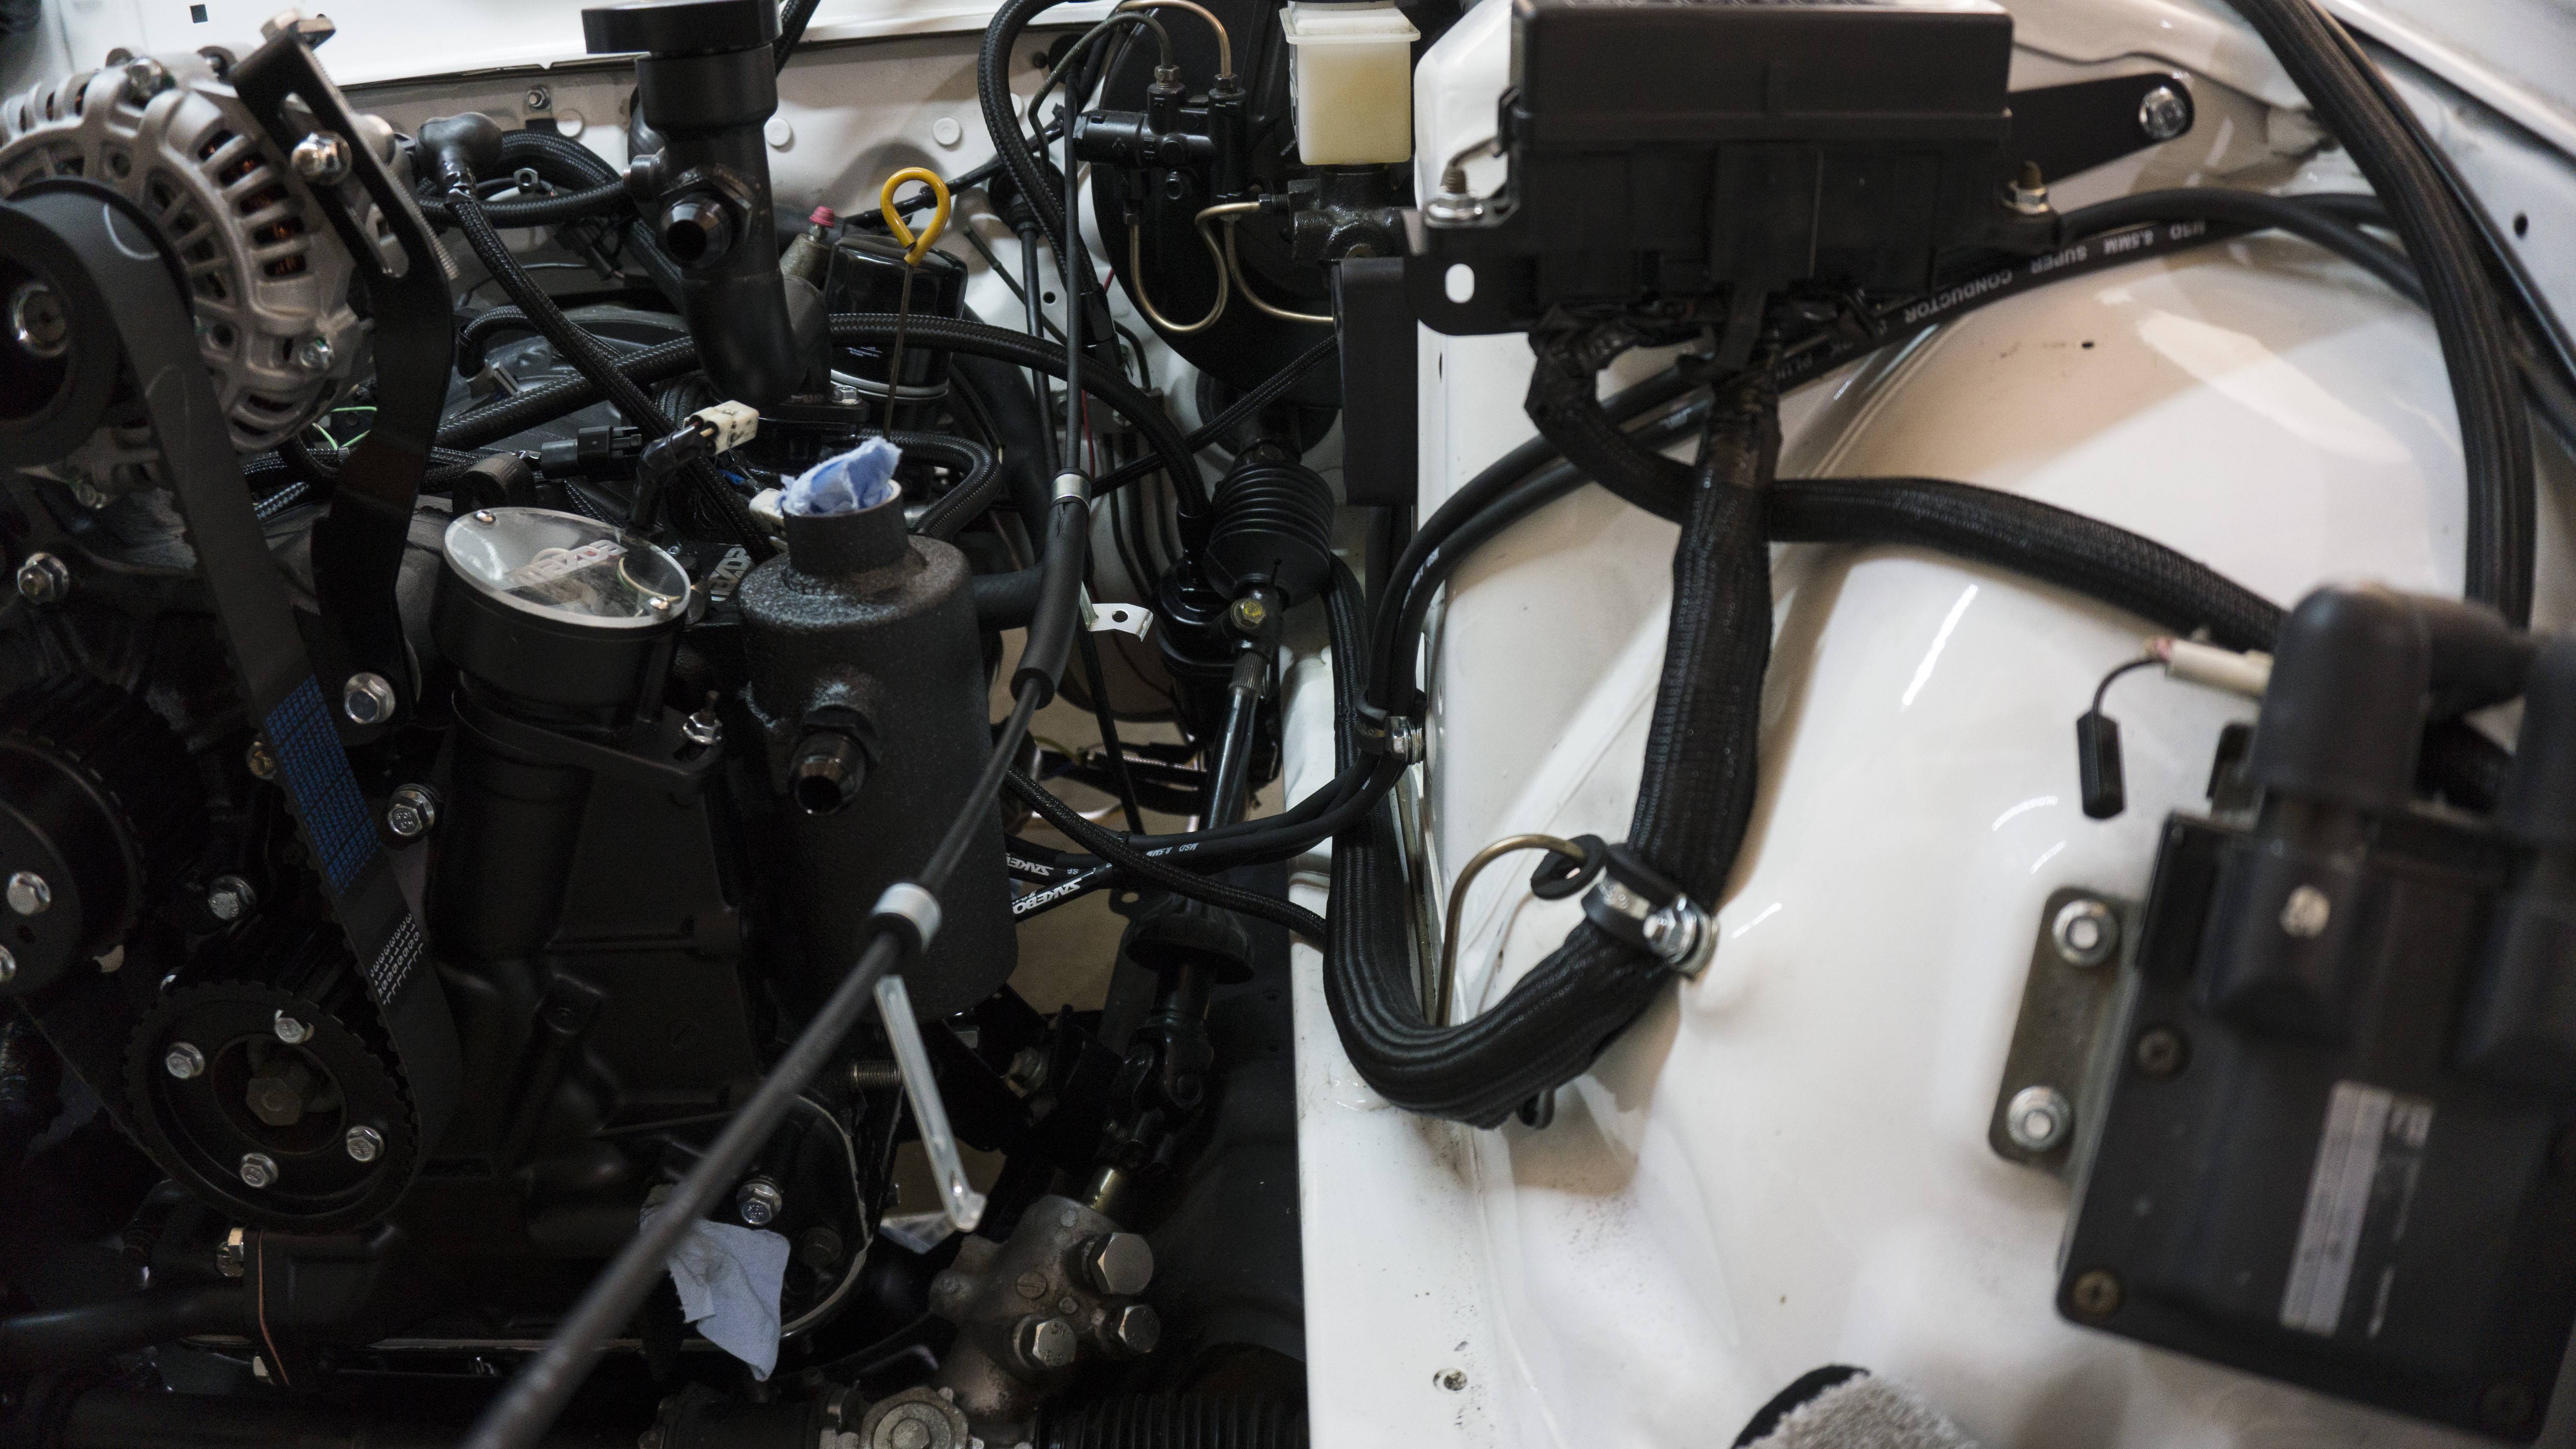
Update 6/9/2019: I’ve decided since I have the FD to putts around in I’m going to take my time and really do the FC right. I’ve been replacing every single bolt on the engine, except the ones that go all the way through the keg, with brand new JIS spec flange bolts and nuts. The water line that feeds into the turbo stripped so I’m waiting to install a heli-coil to get the engine in. That is the last thing I’m waiting on as everything finally came back from powder coating. I went ahead and got a damaged housing and rotor coated too for the living room. I’m not sure the girlfriend is too happy about it, but I think it looks great! I already rebuilt the headlight assemblies and got those back on the car. I also finished up all the interior surface rust removal and sprayed rust reformer and epoxy paint over top. I had some friends over a couple of weeks ago and we knocked out the frame rail reinforcements. I used rivnuts to hold the fuel lines and bent them upwards so rail would take the hit and not the fuel lines. I also went ahead and undercoated the rails as I knicked them in a few spots when drilling. The last thing I did was restore the grey dull plastic of the new Recaro seats I bought. I didn’t restore them in original grey, but went ahead and painted them black - I think they turned out really nice. My oil feed tube was pretty rusty so I went ahead and purchased a stainless steel one from IR Performance and converted to a FD lower neck. This will allow me to run a 10 AN line to my catch can in addition to a 6 AN line from the middle iron. The next update I should have the engine in, and working towards it’s first start up.
Heres some shots of the frame rail installation:
Here’s all the stuff back from powder coating:
Here’s the restored Recaro plastic:
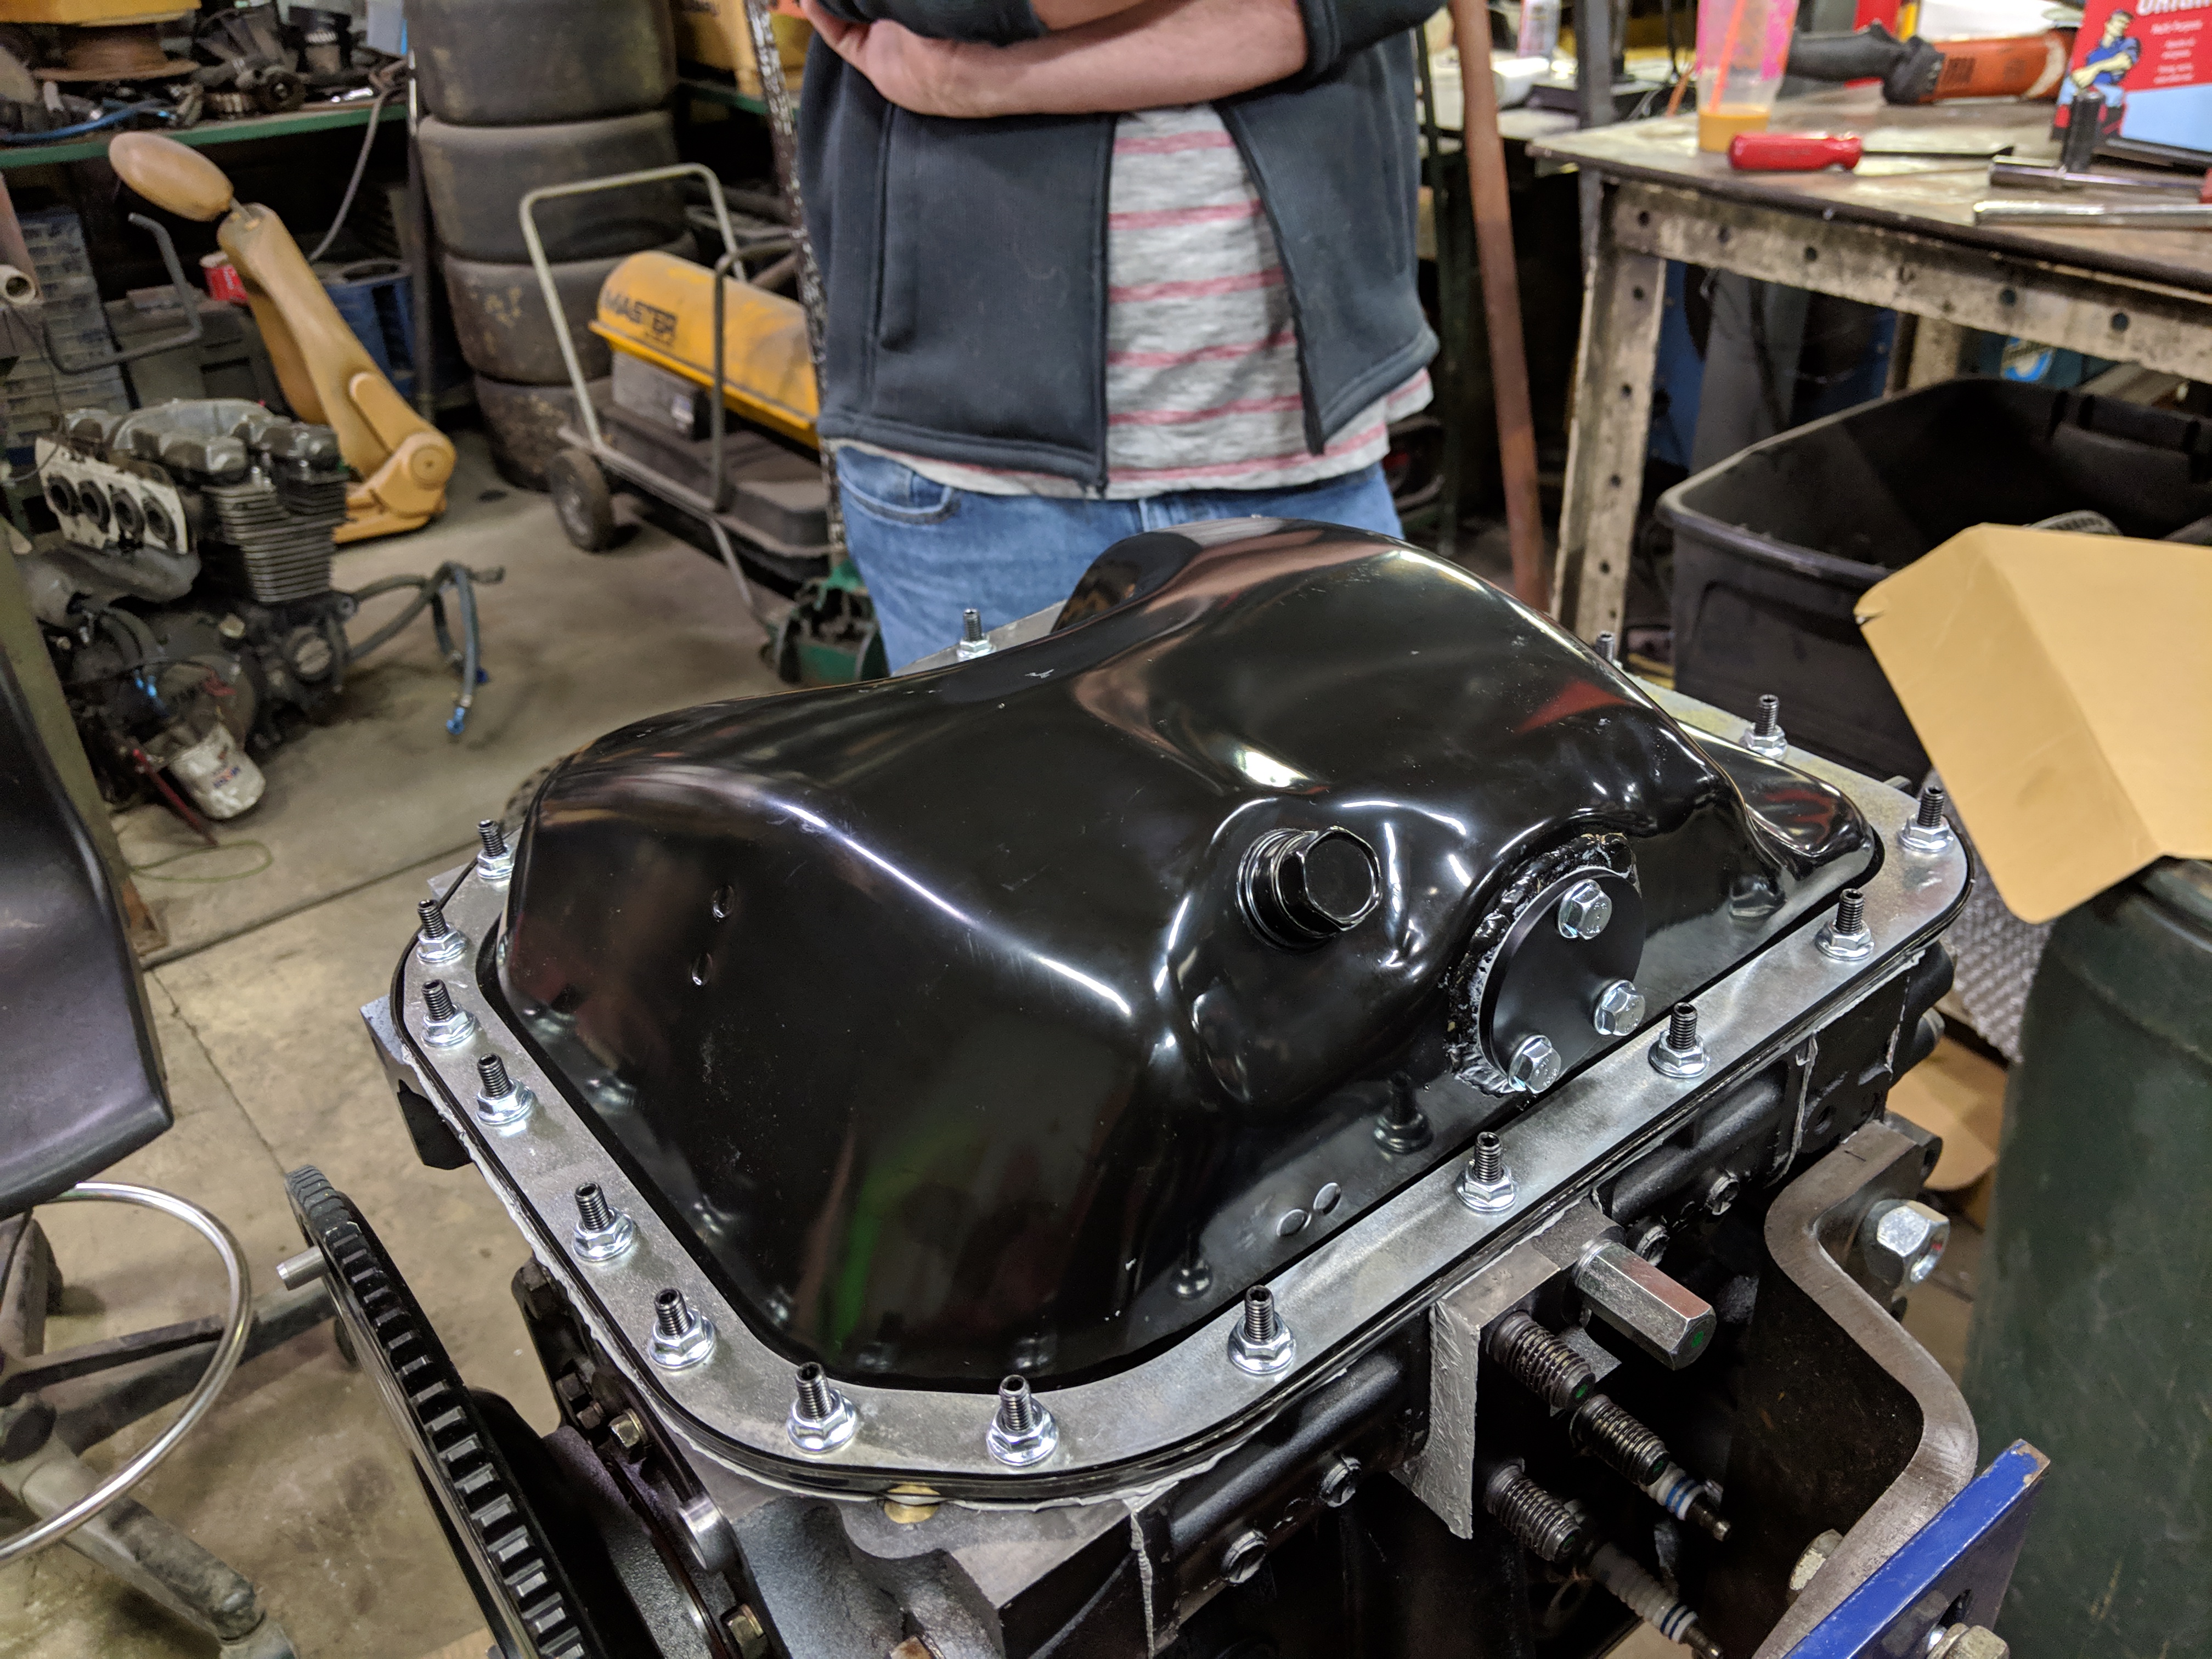
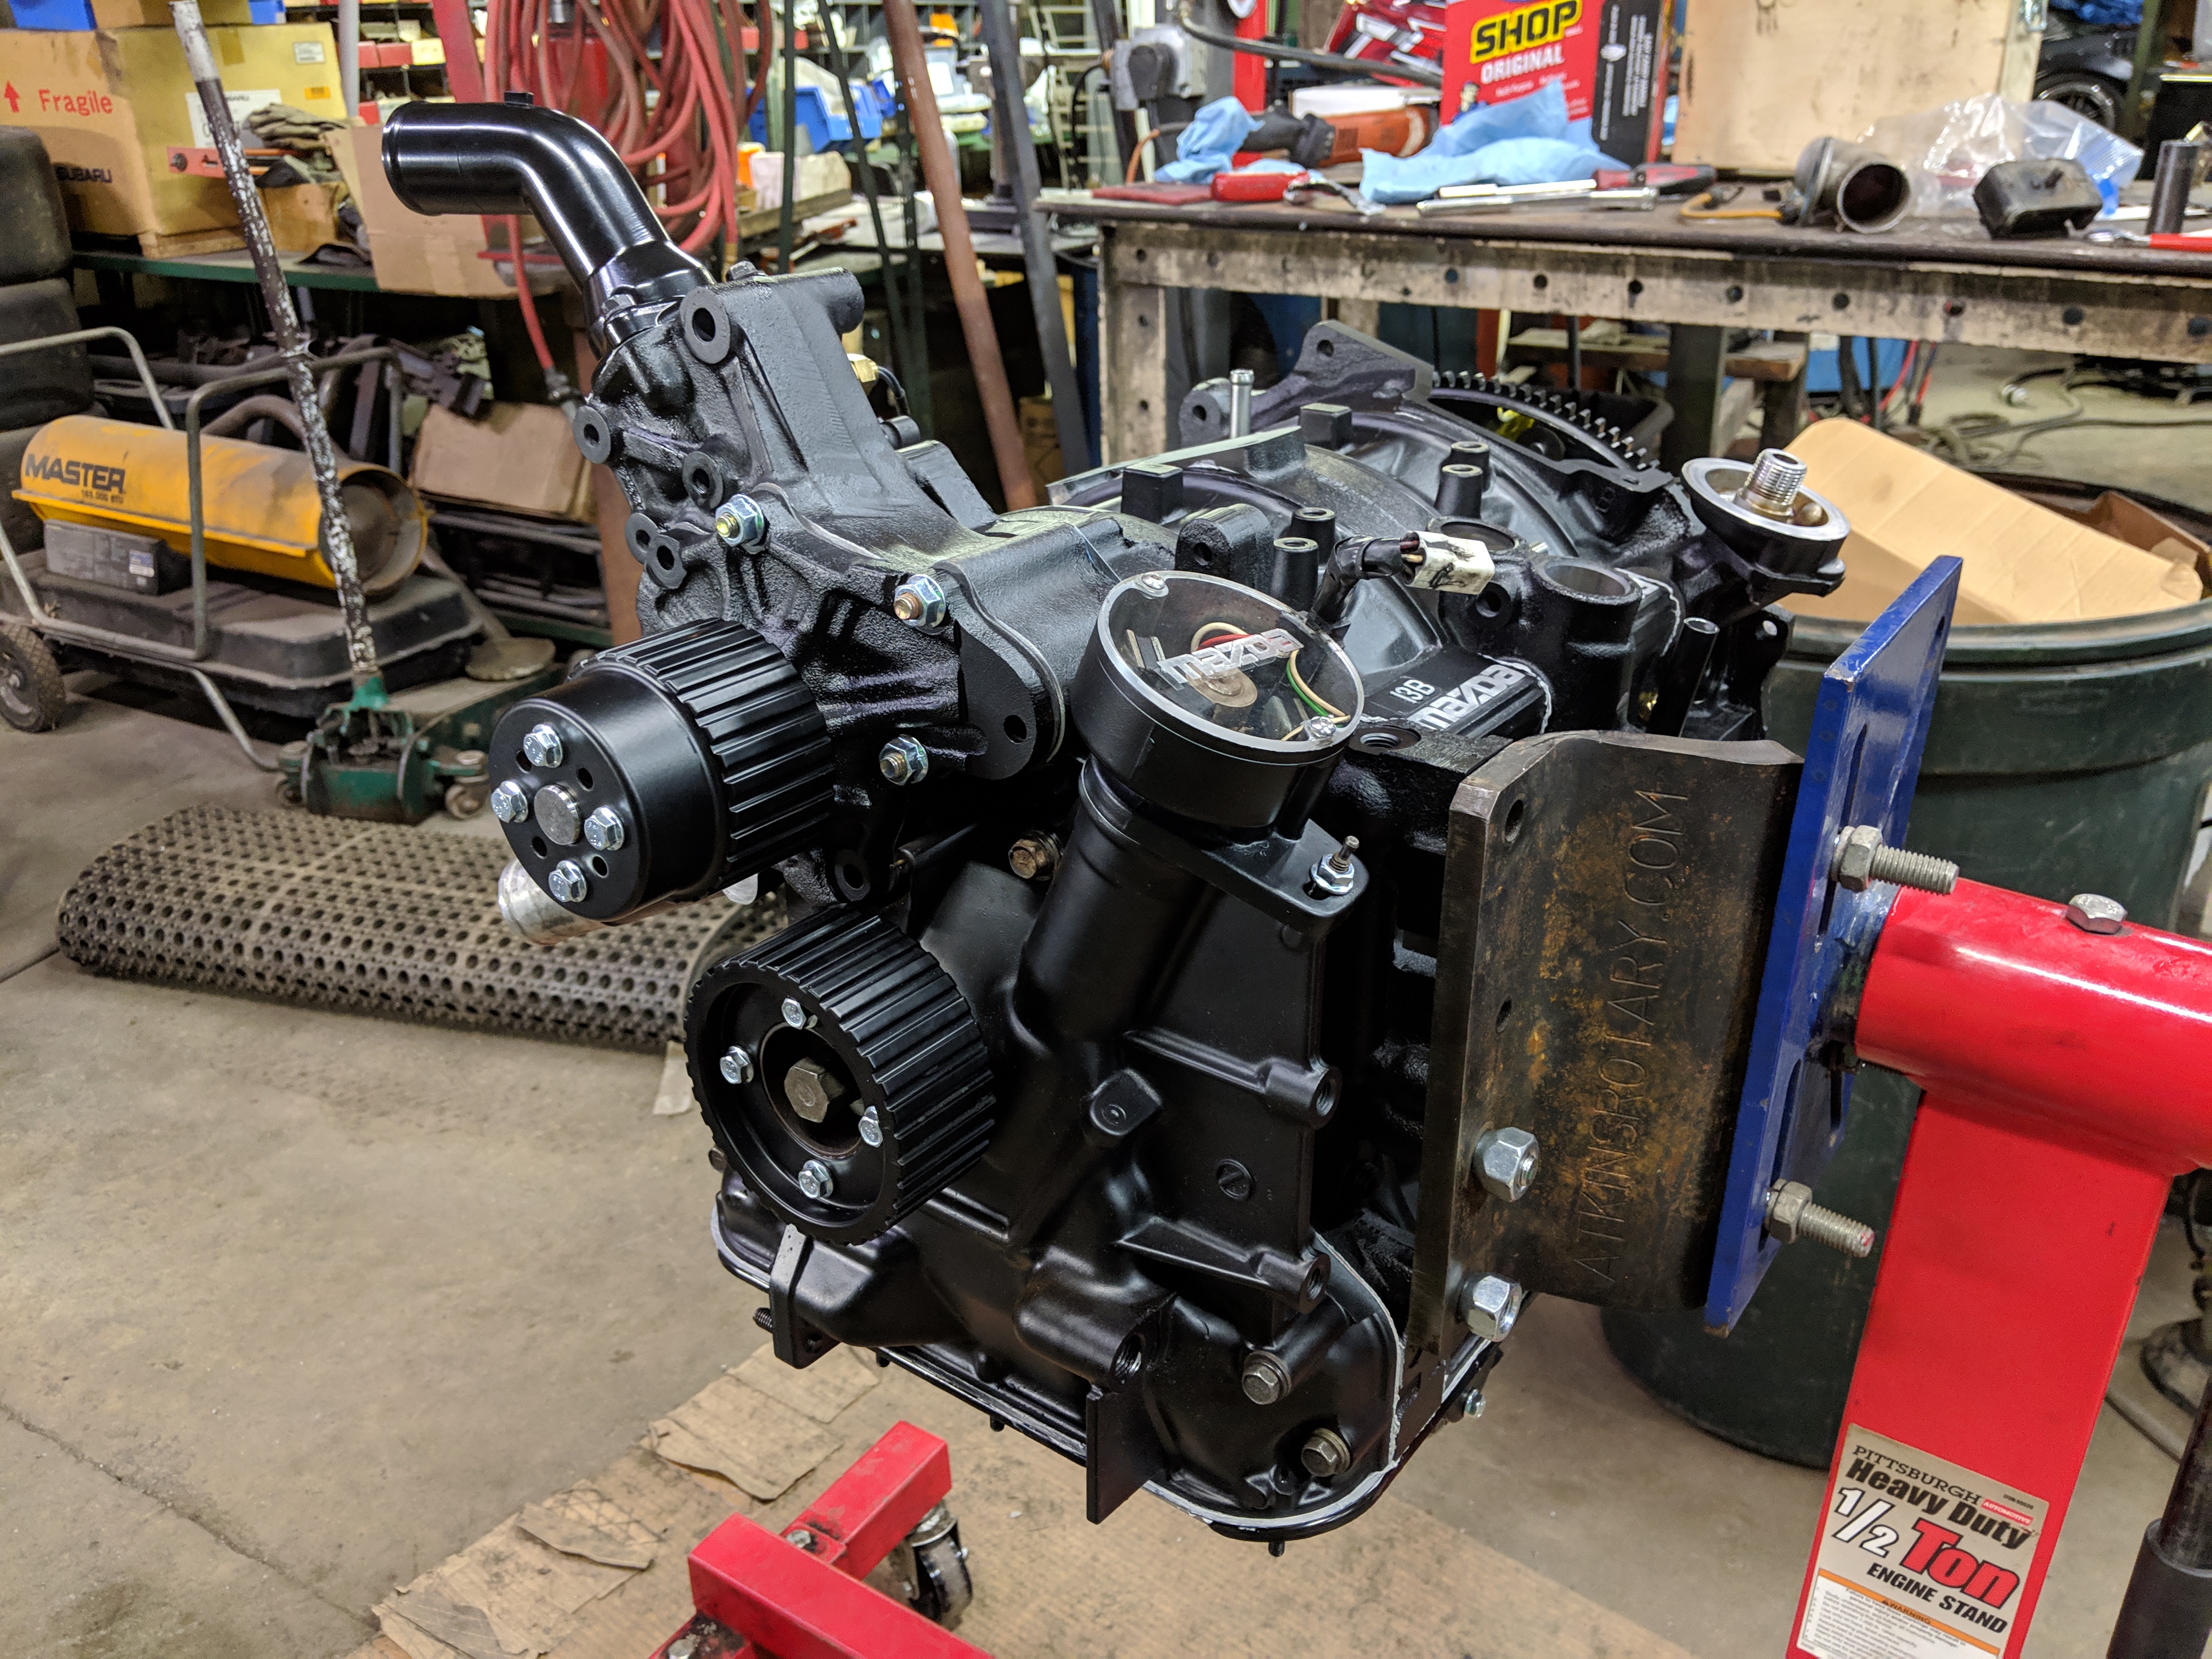
Here’s where I’m currently at on the engine with the new hardware:
Had no idea you were over on the East side. I really like the Miata frame rail reinforcements. Did you have to cut the new rail to clear the exhaust hanger, being single exit?
Had no idea you were over on the East side. I really like the Miata frame rail reinforcements. Did you have to cut the new rail to clear the exhaust hanger, being single exit?
I read in the guide you had to. I just unbolted the hangers entirely. With my exhaust setup I wasn't even using them.
I'm a little late to the party but DAYUM that is one heck of a restoration! Excellent job! My son and I are just getting started with ours. Between yours and the build locoelectrician and his sons did, we have some real goals now.
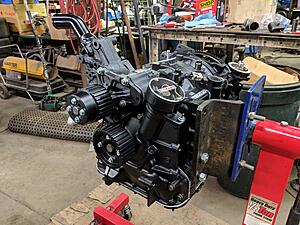
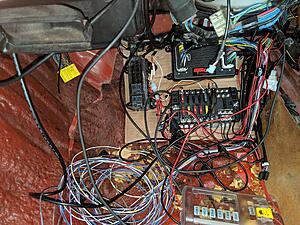
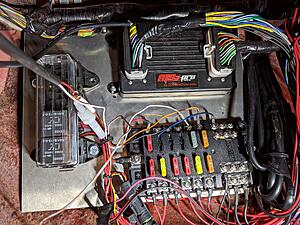
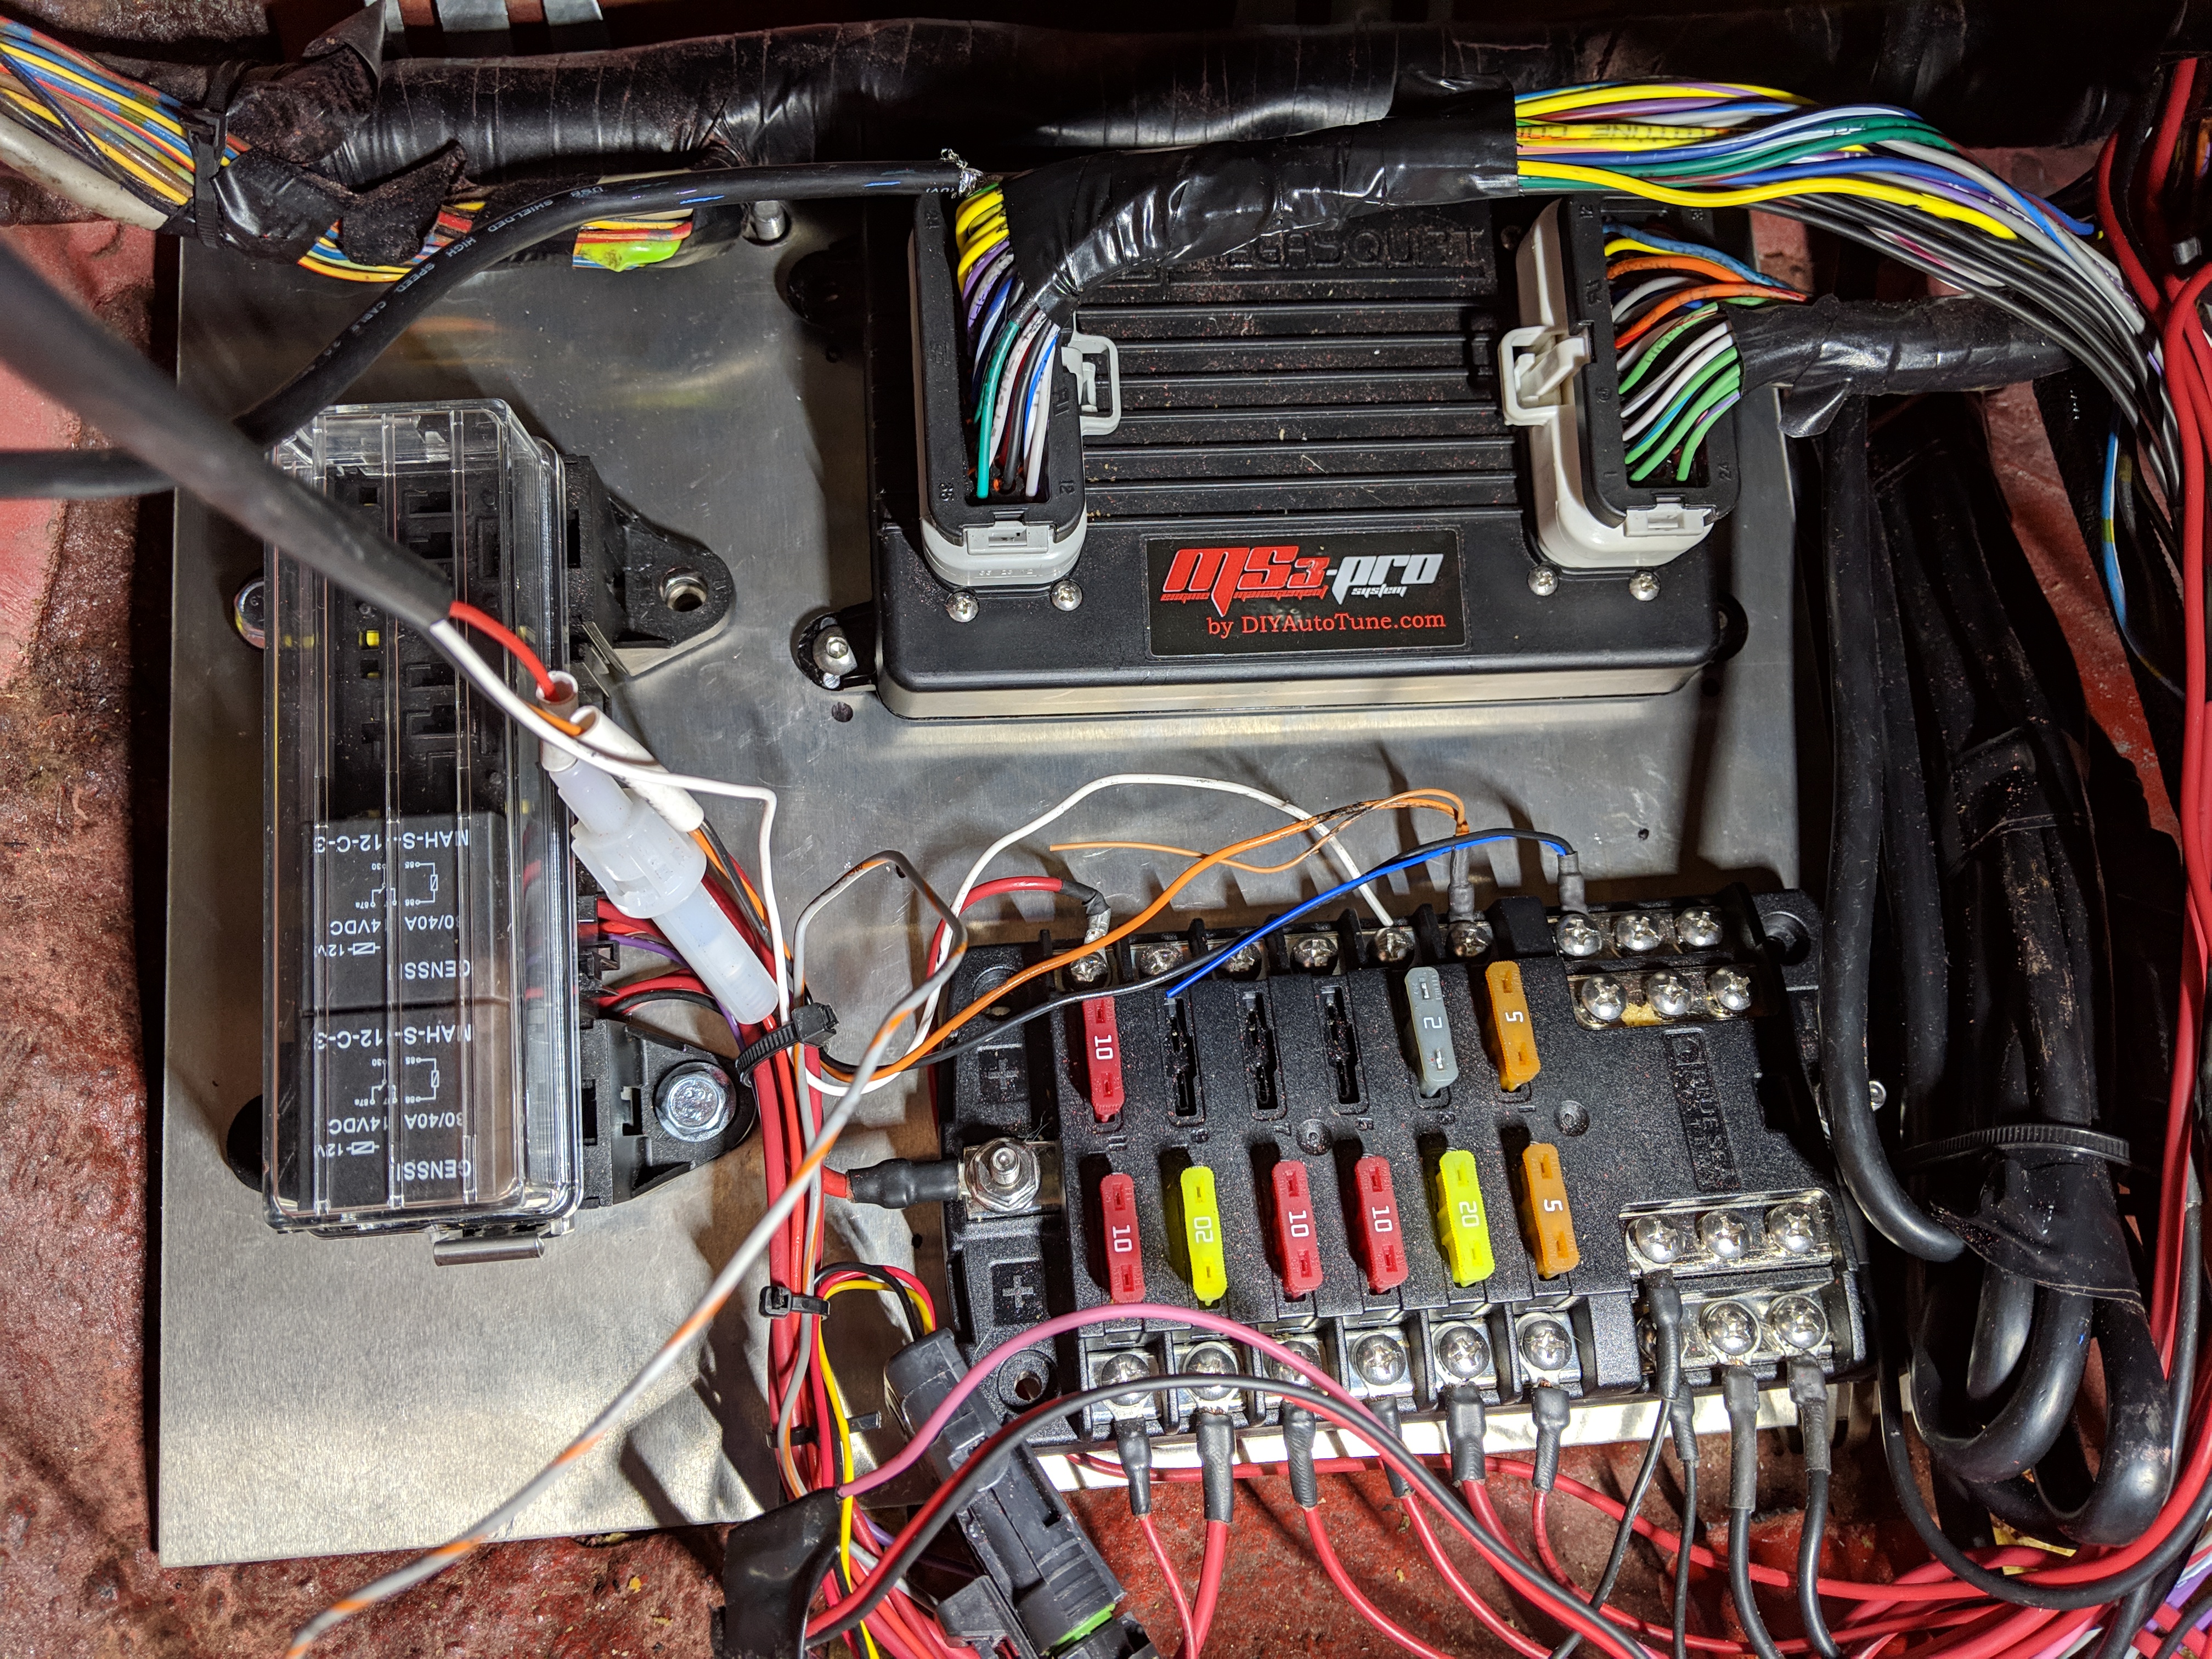
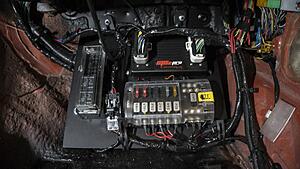
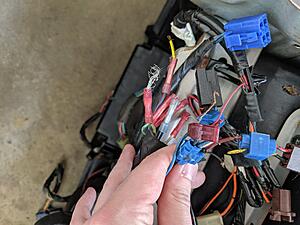
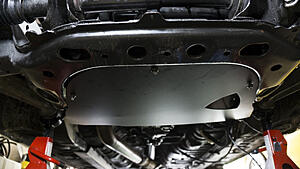
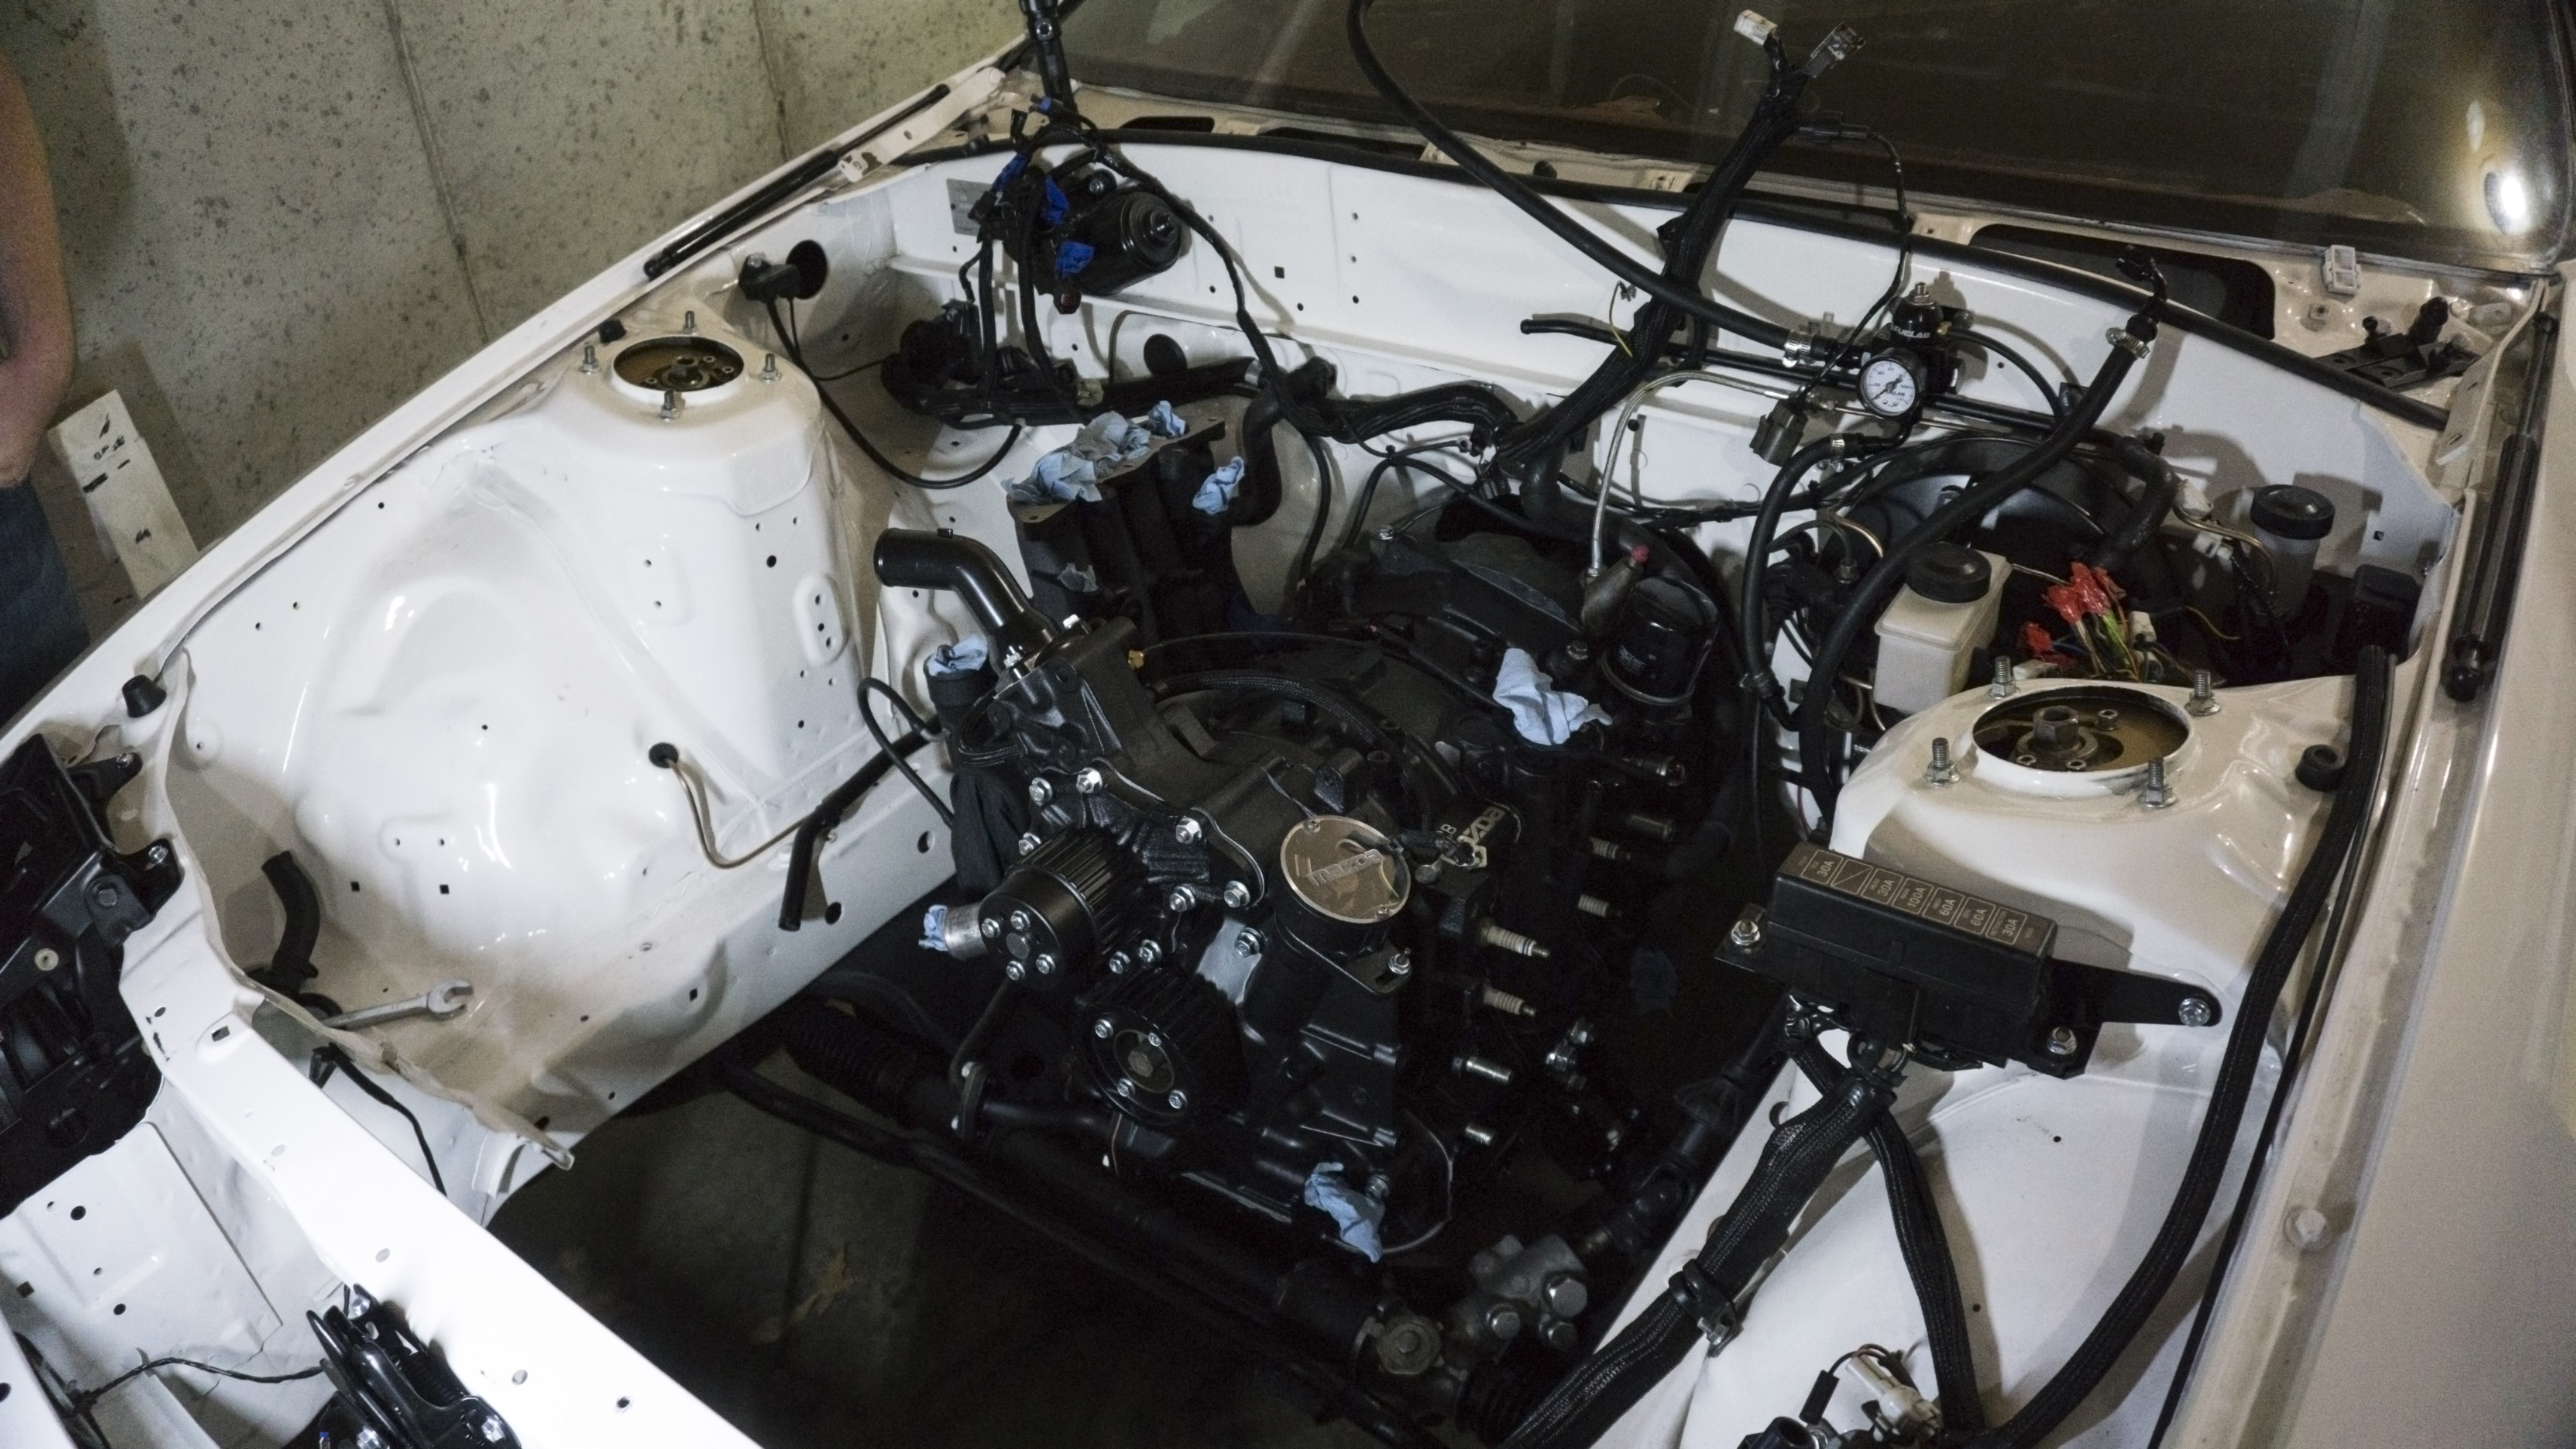
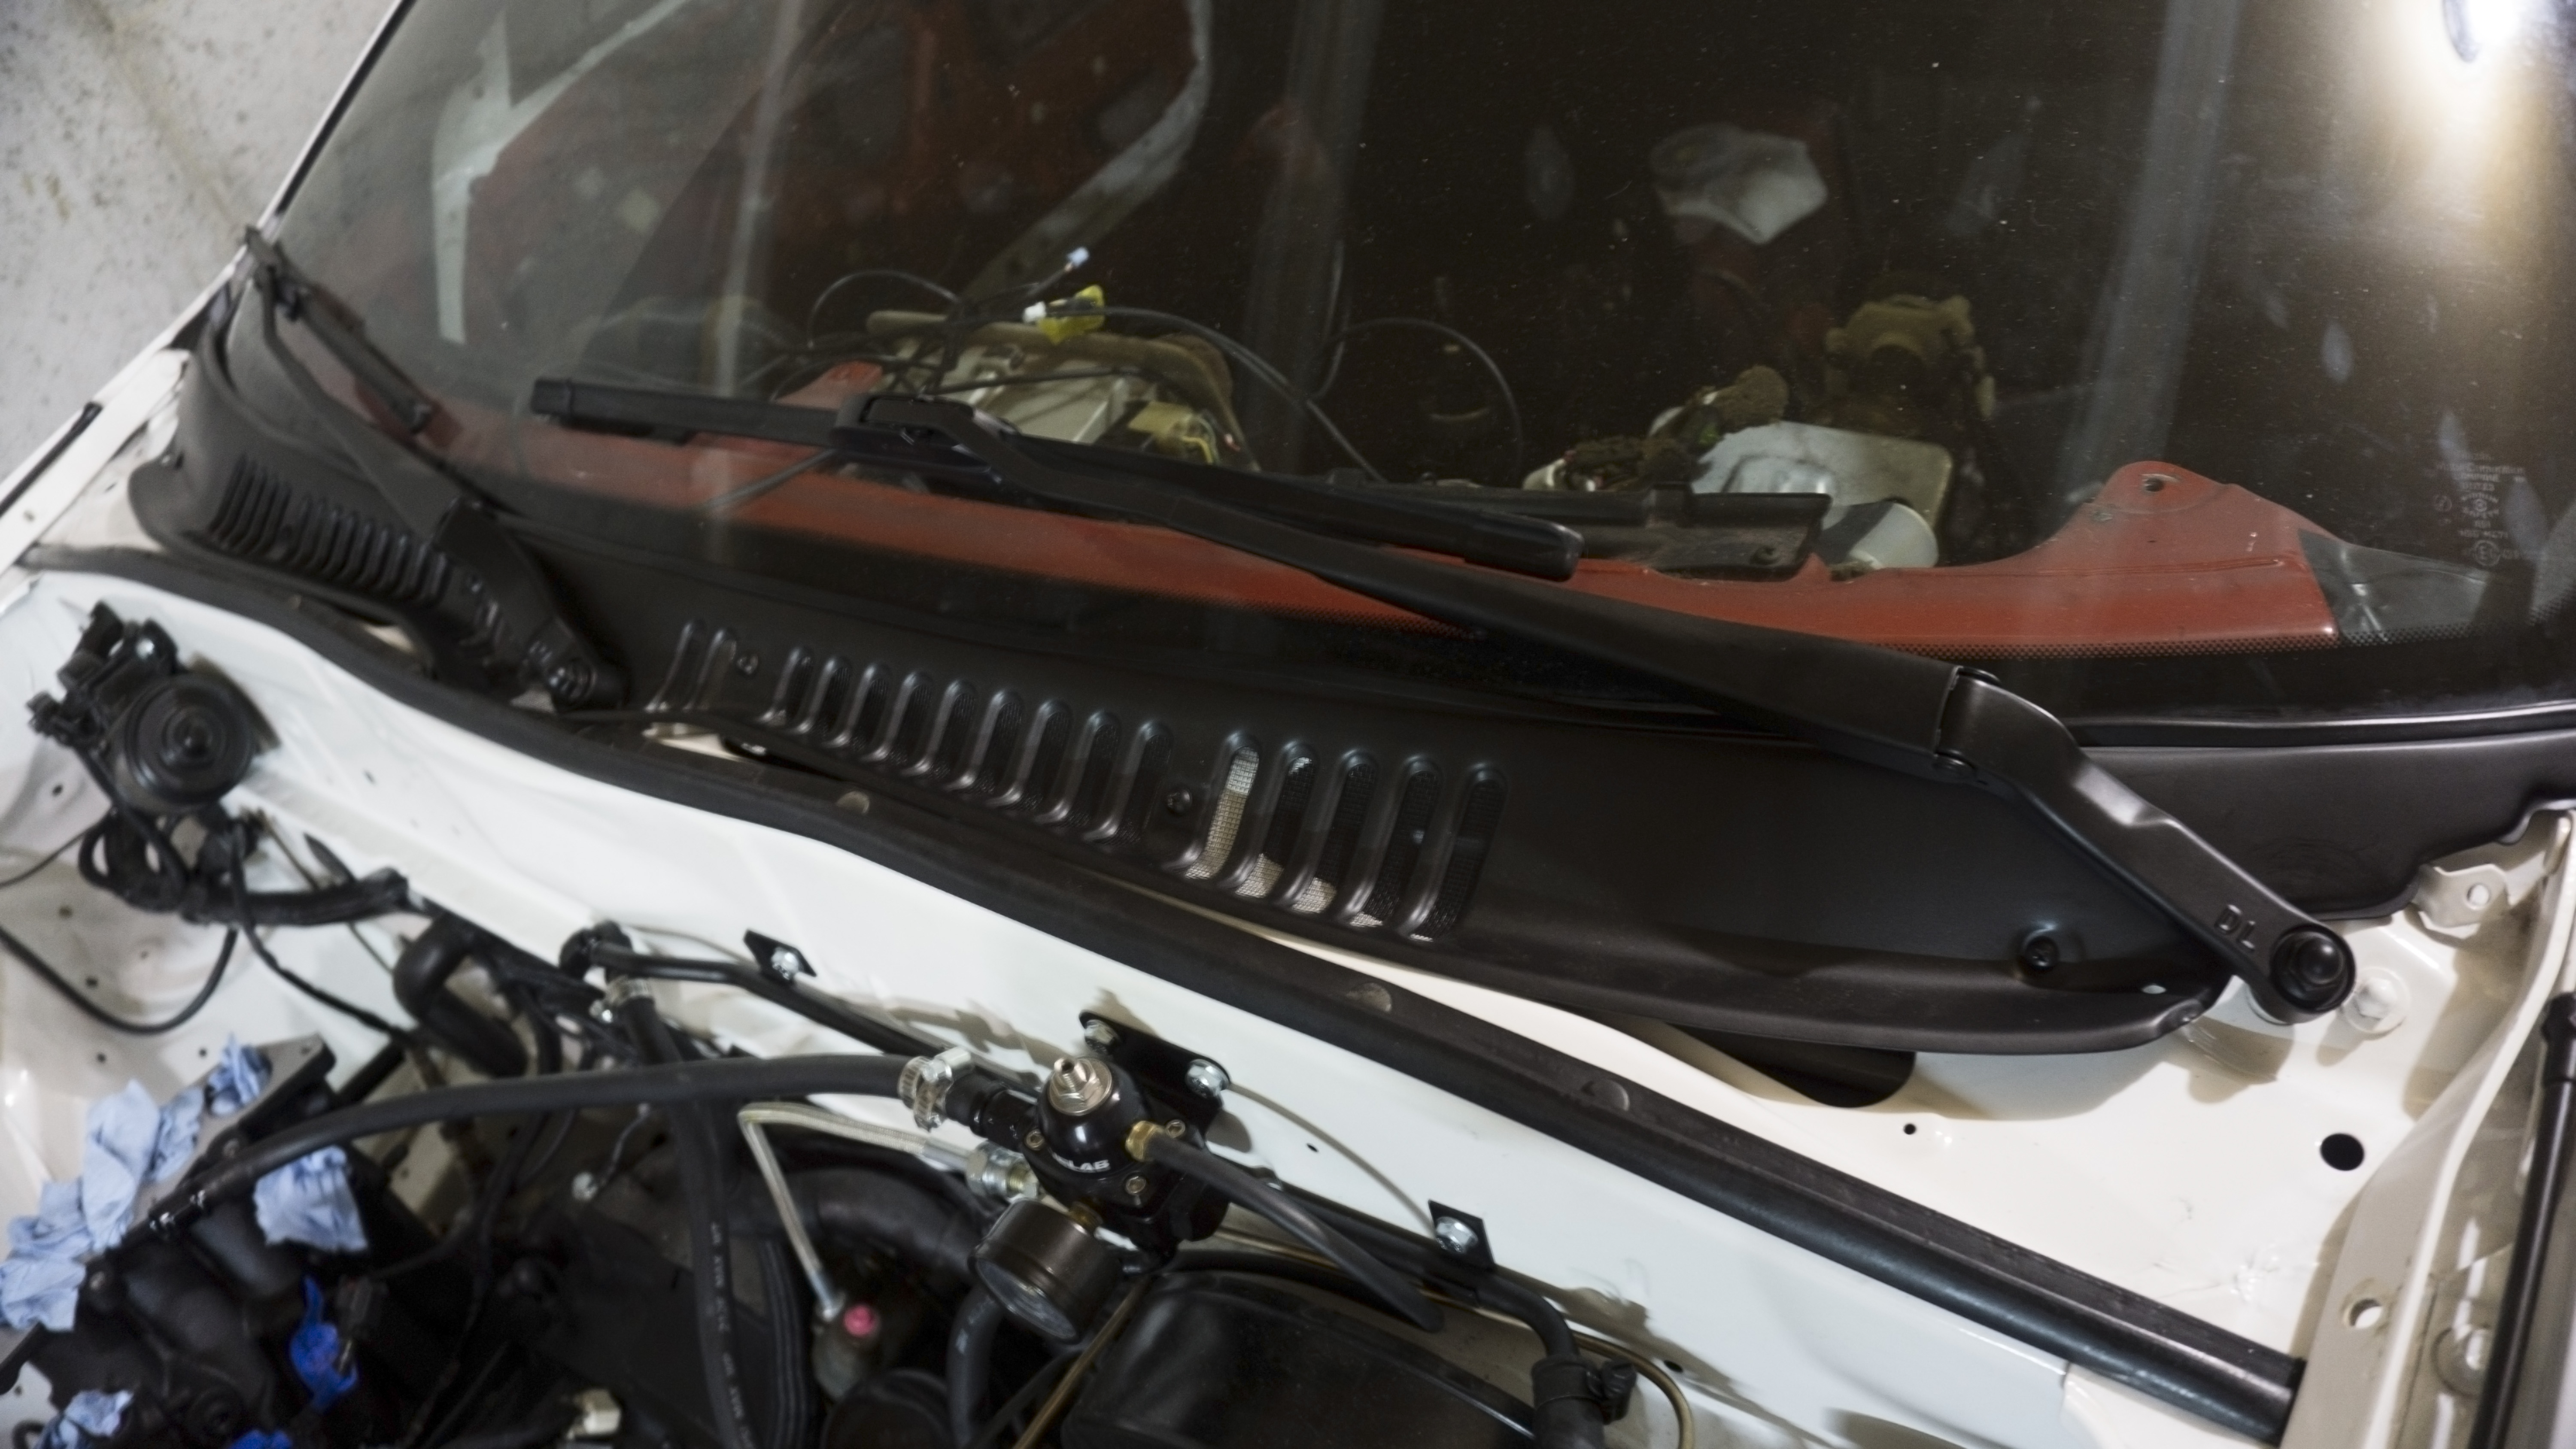
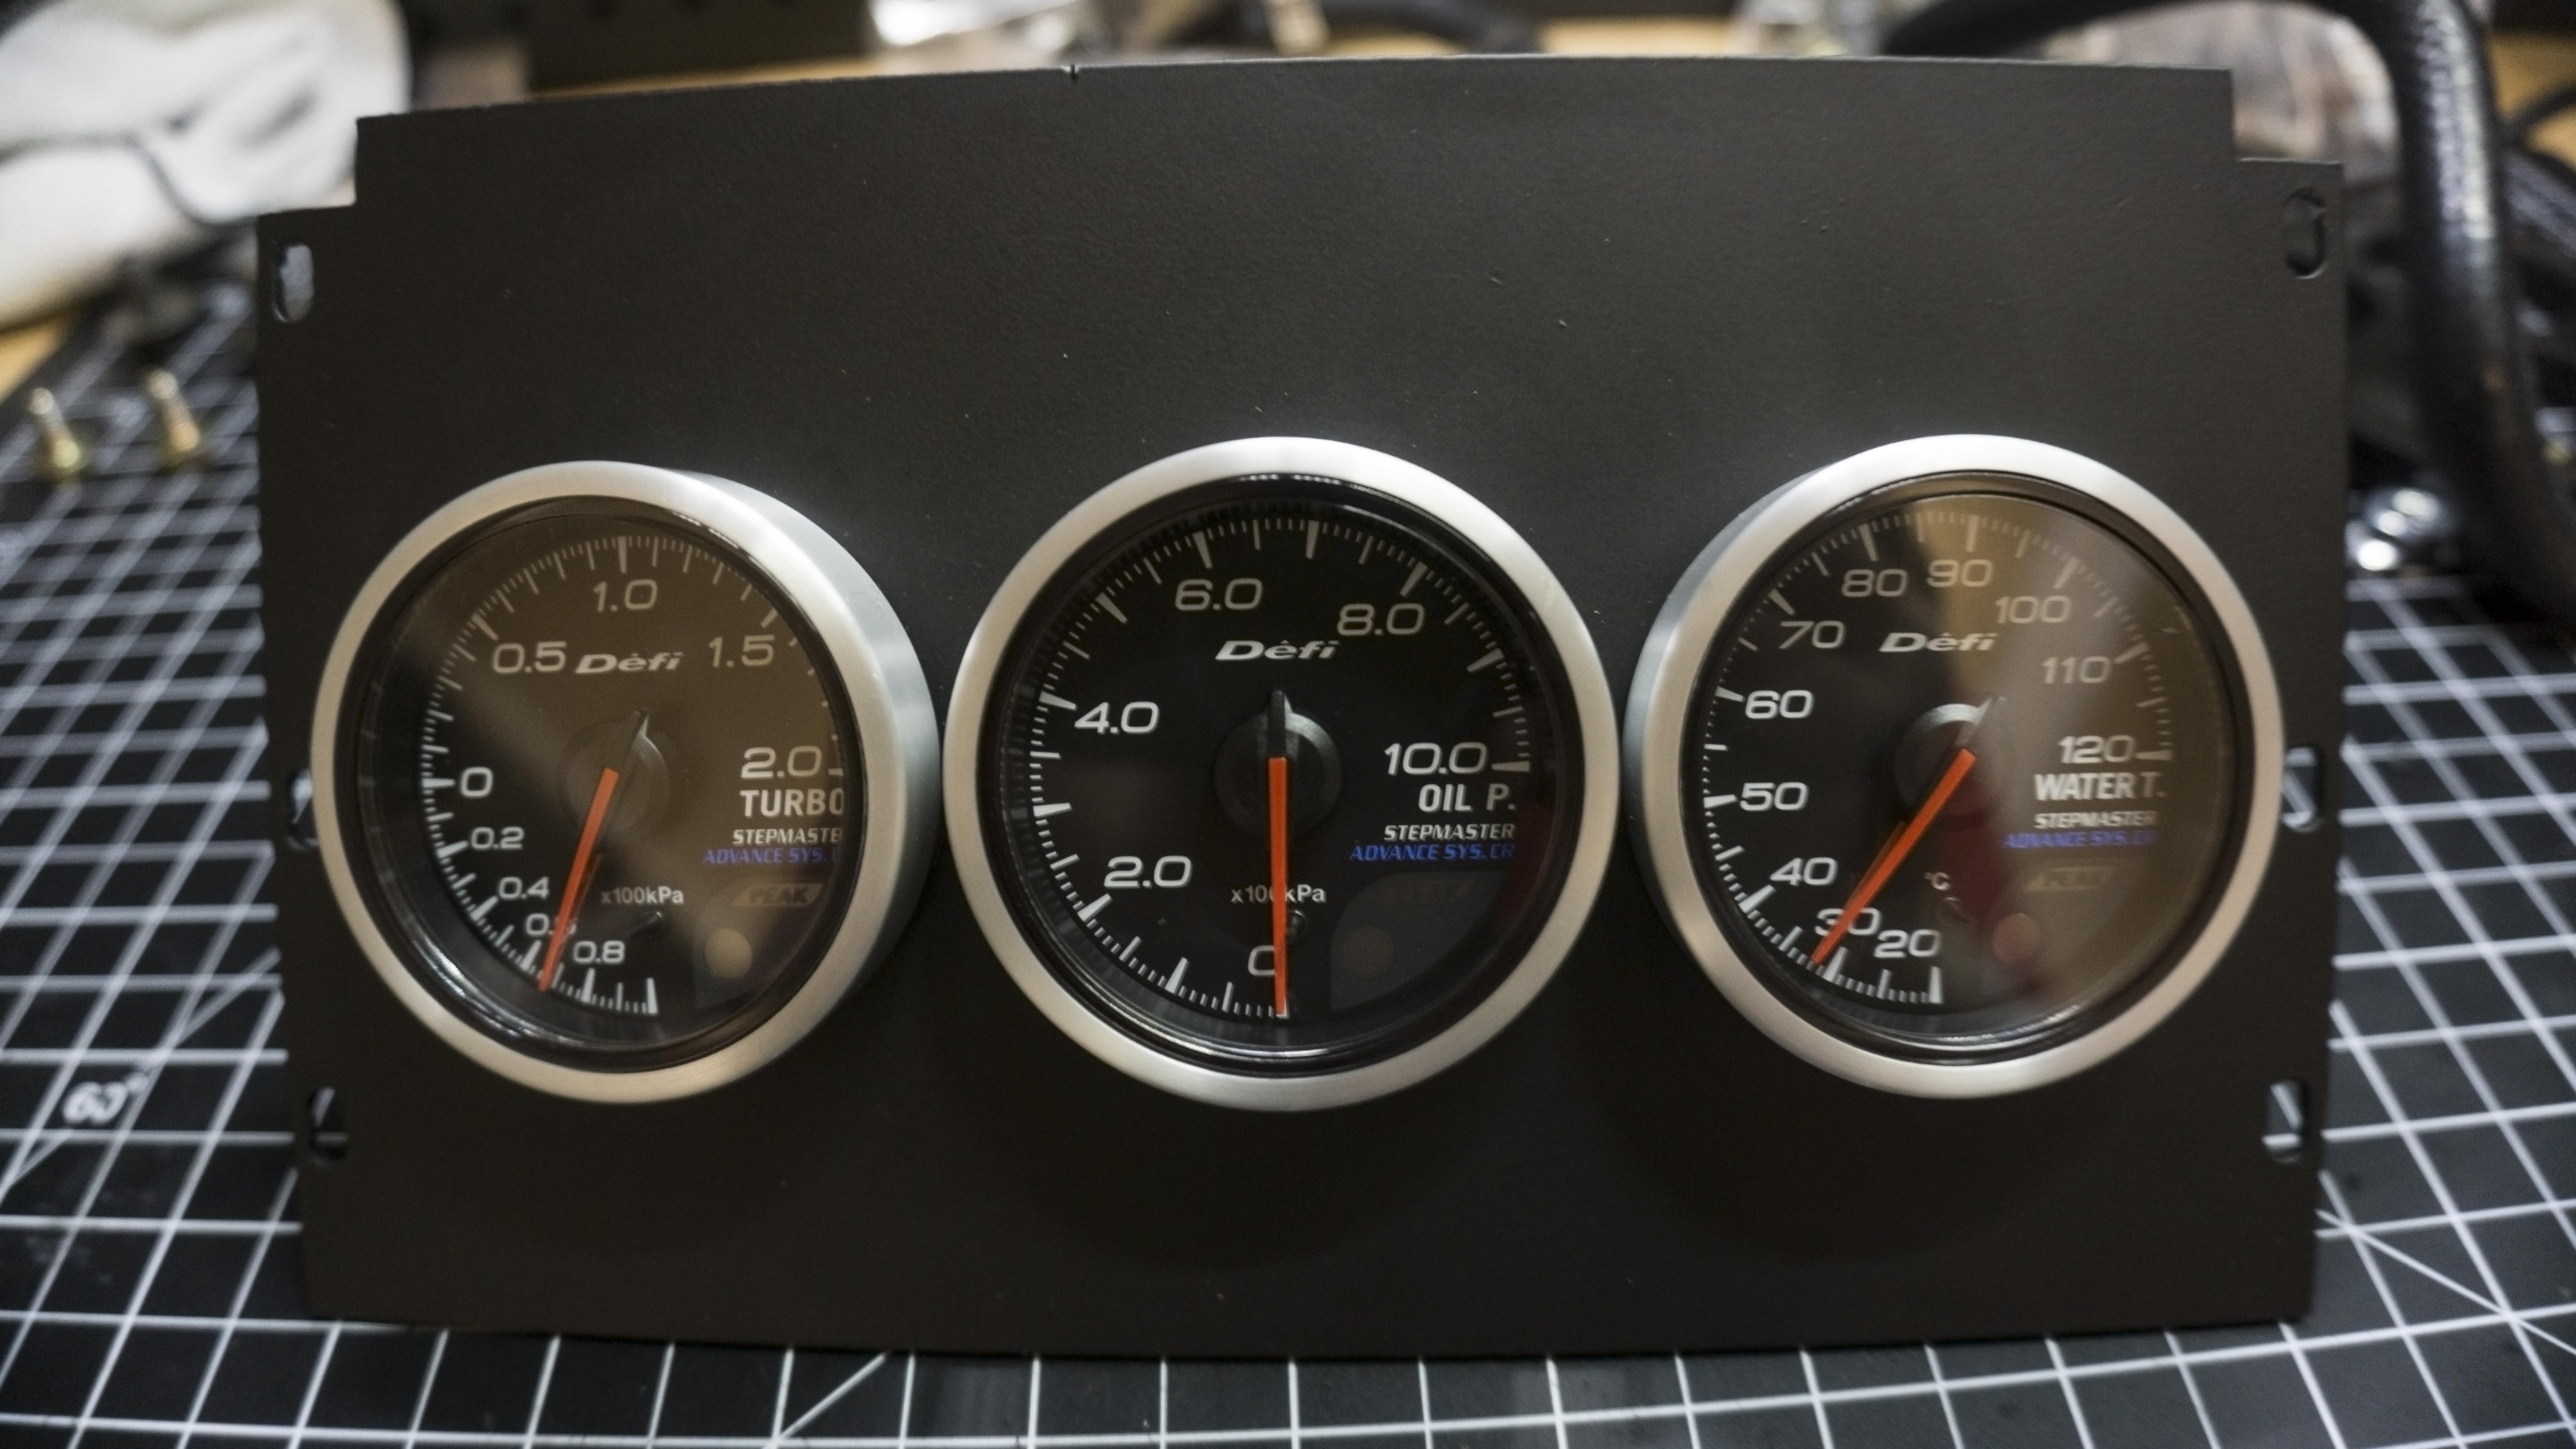
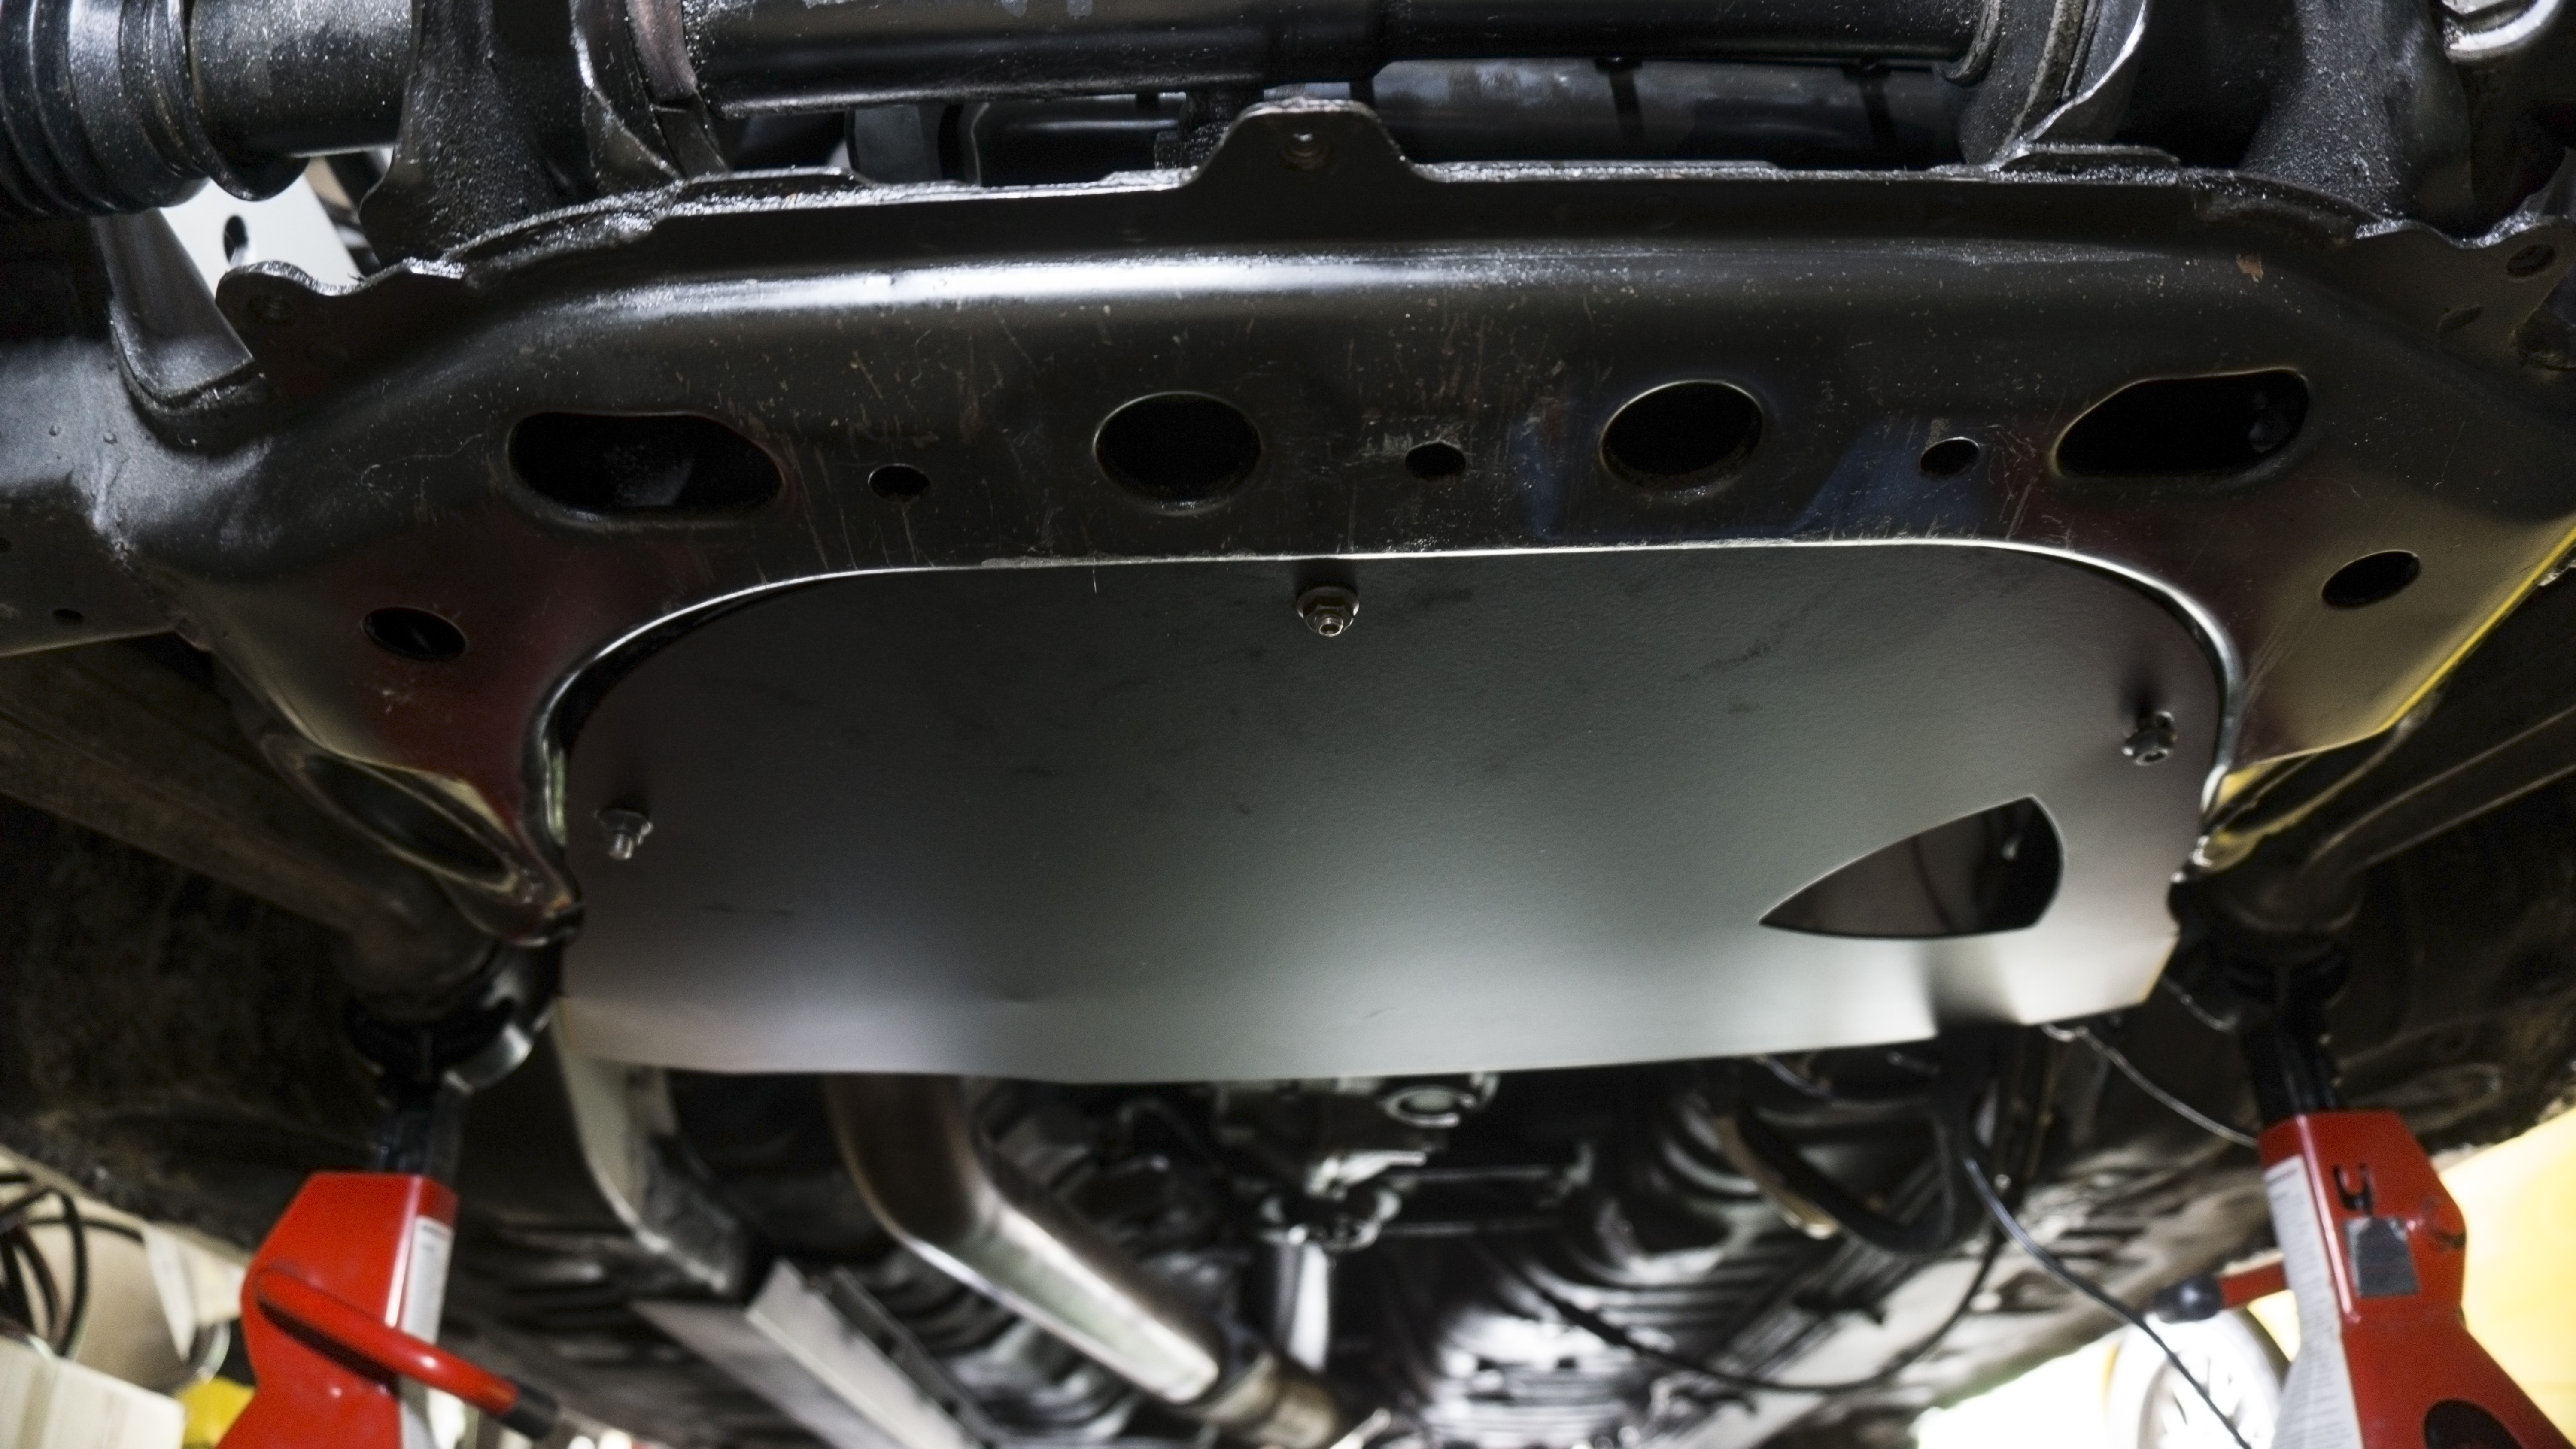
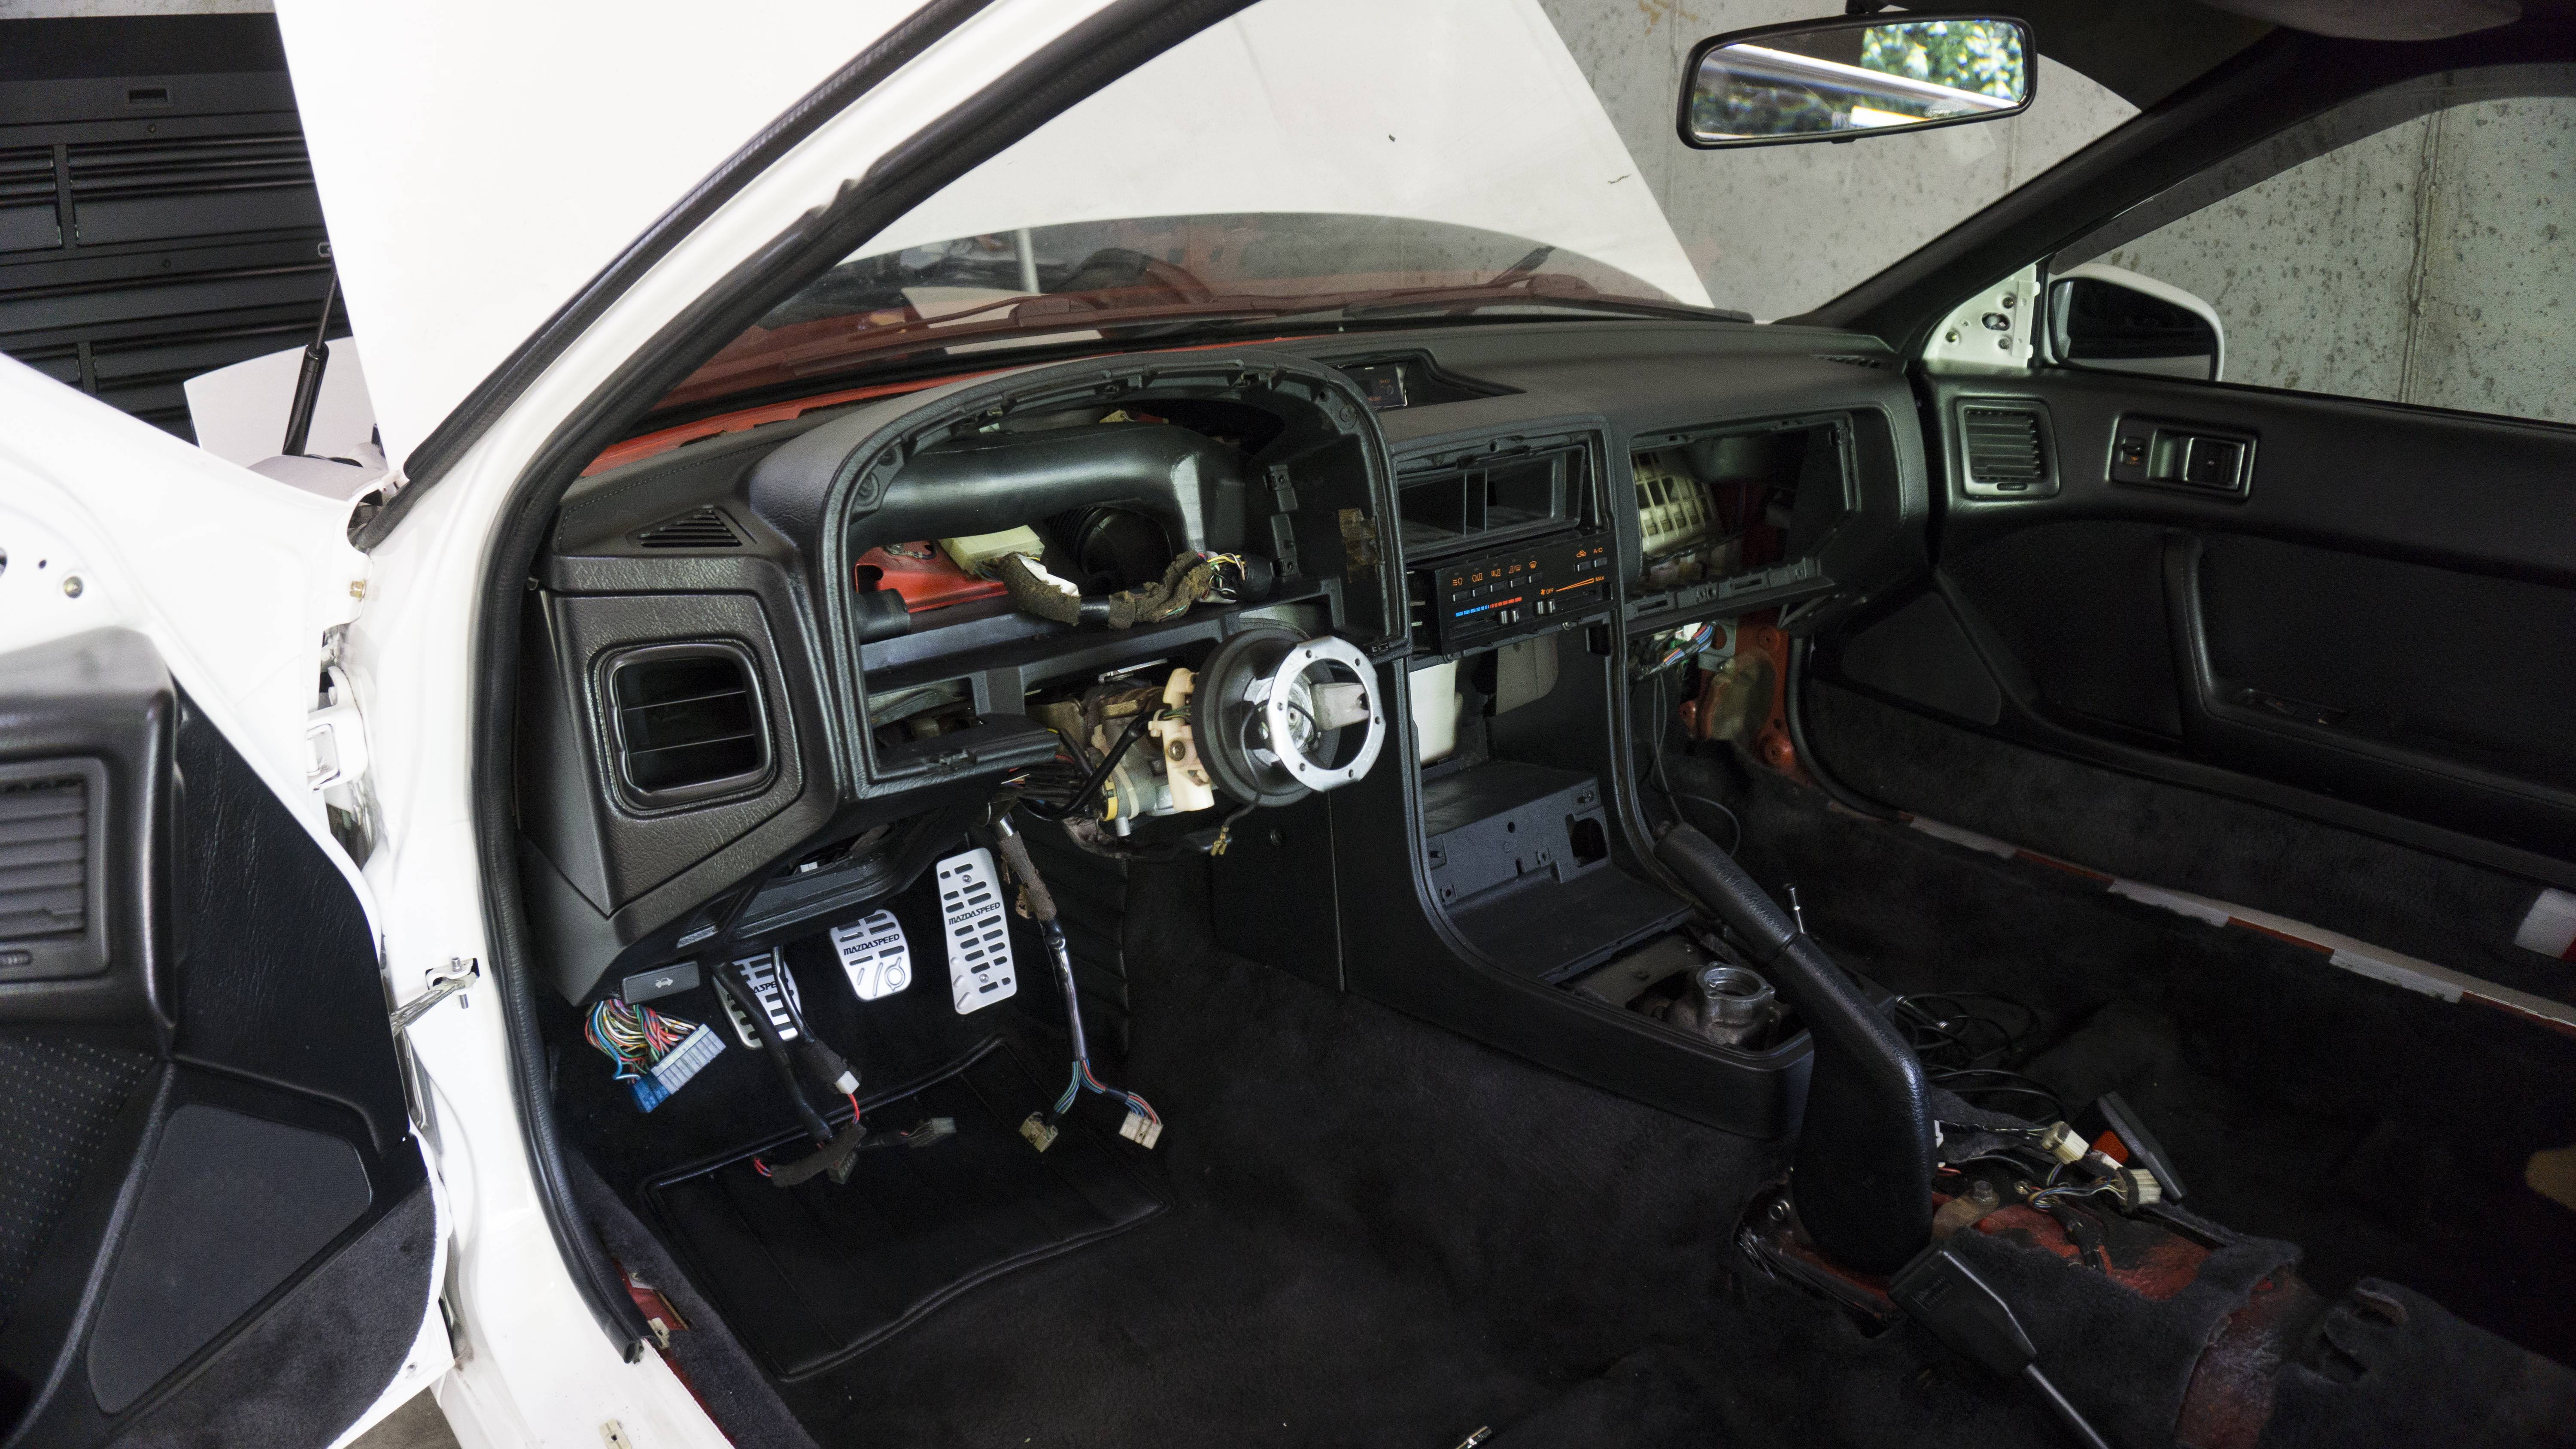
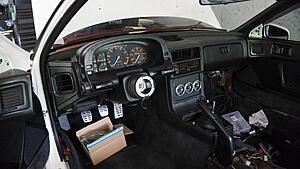
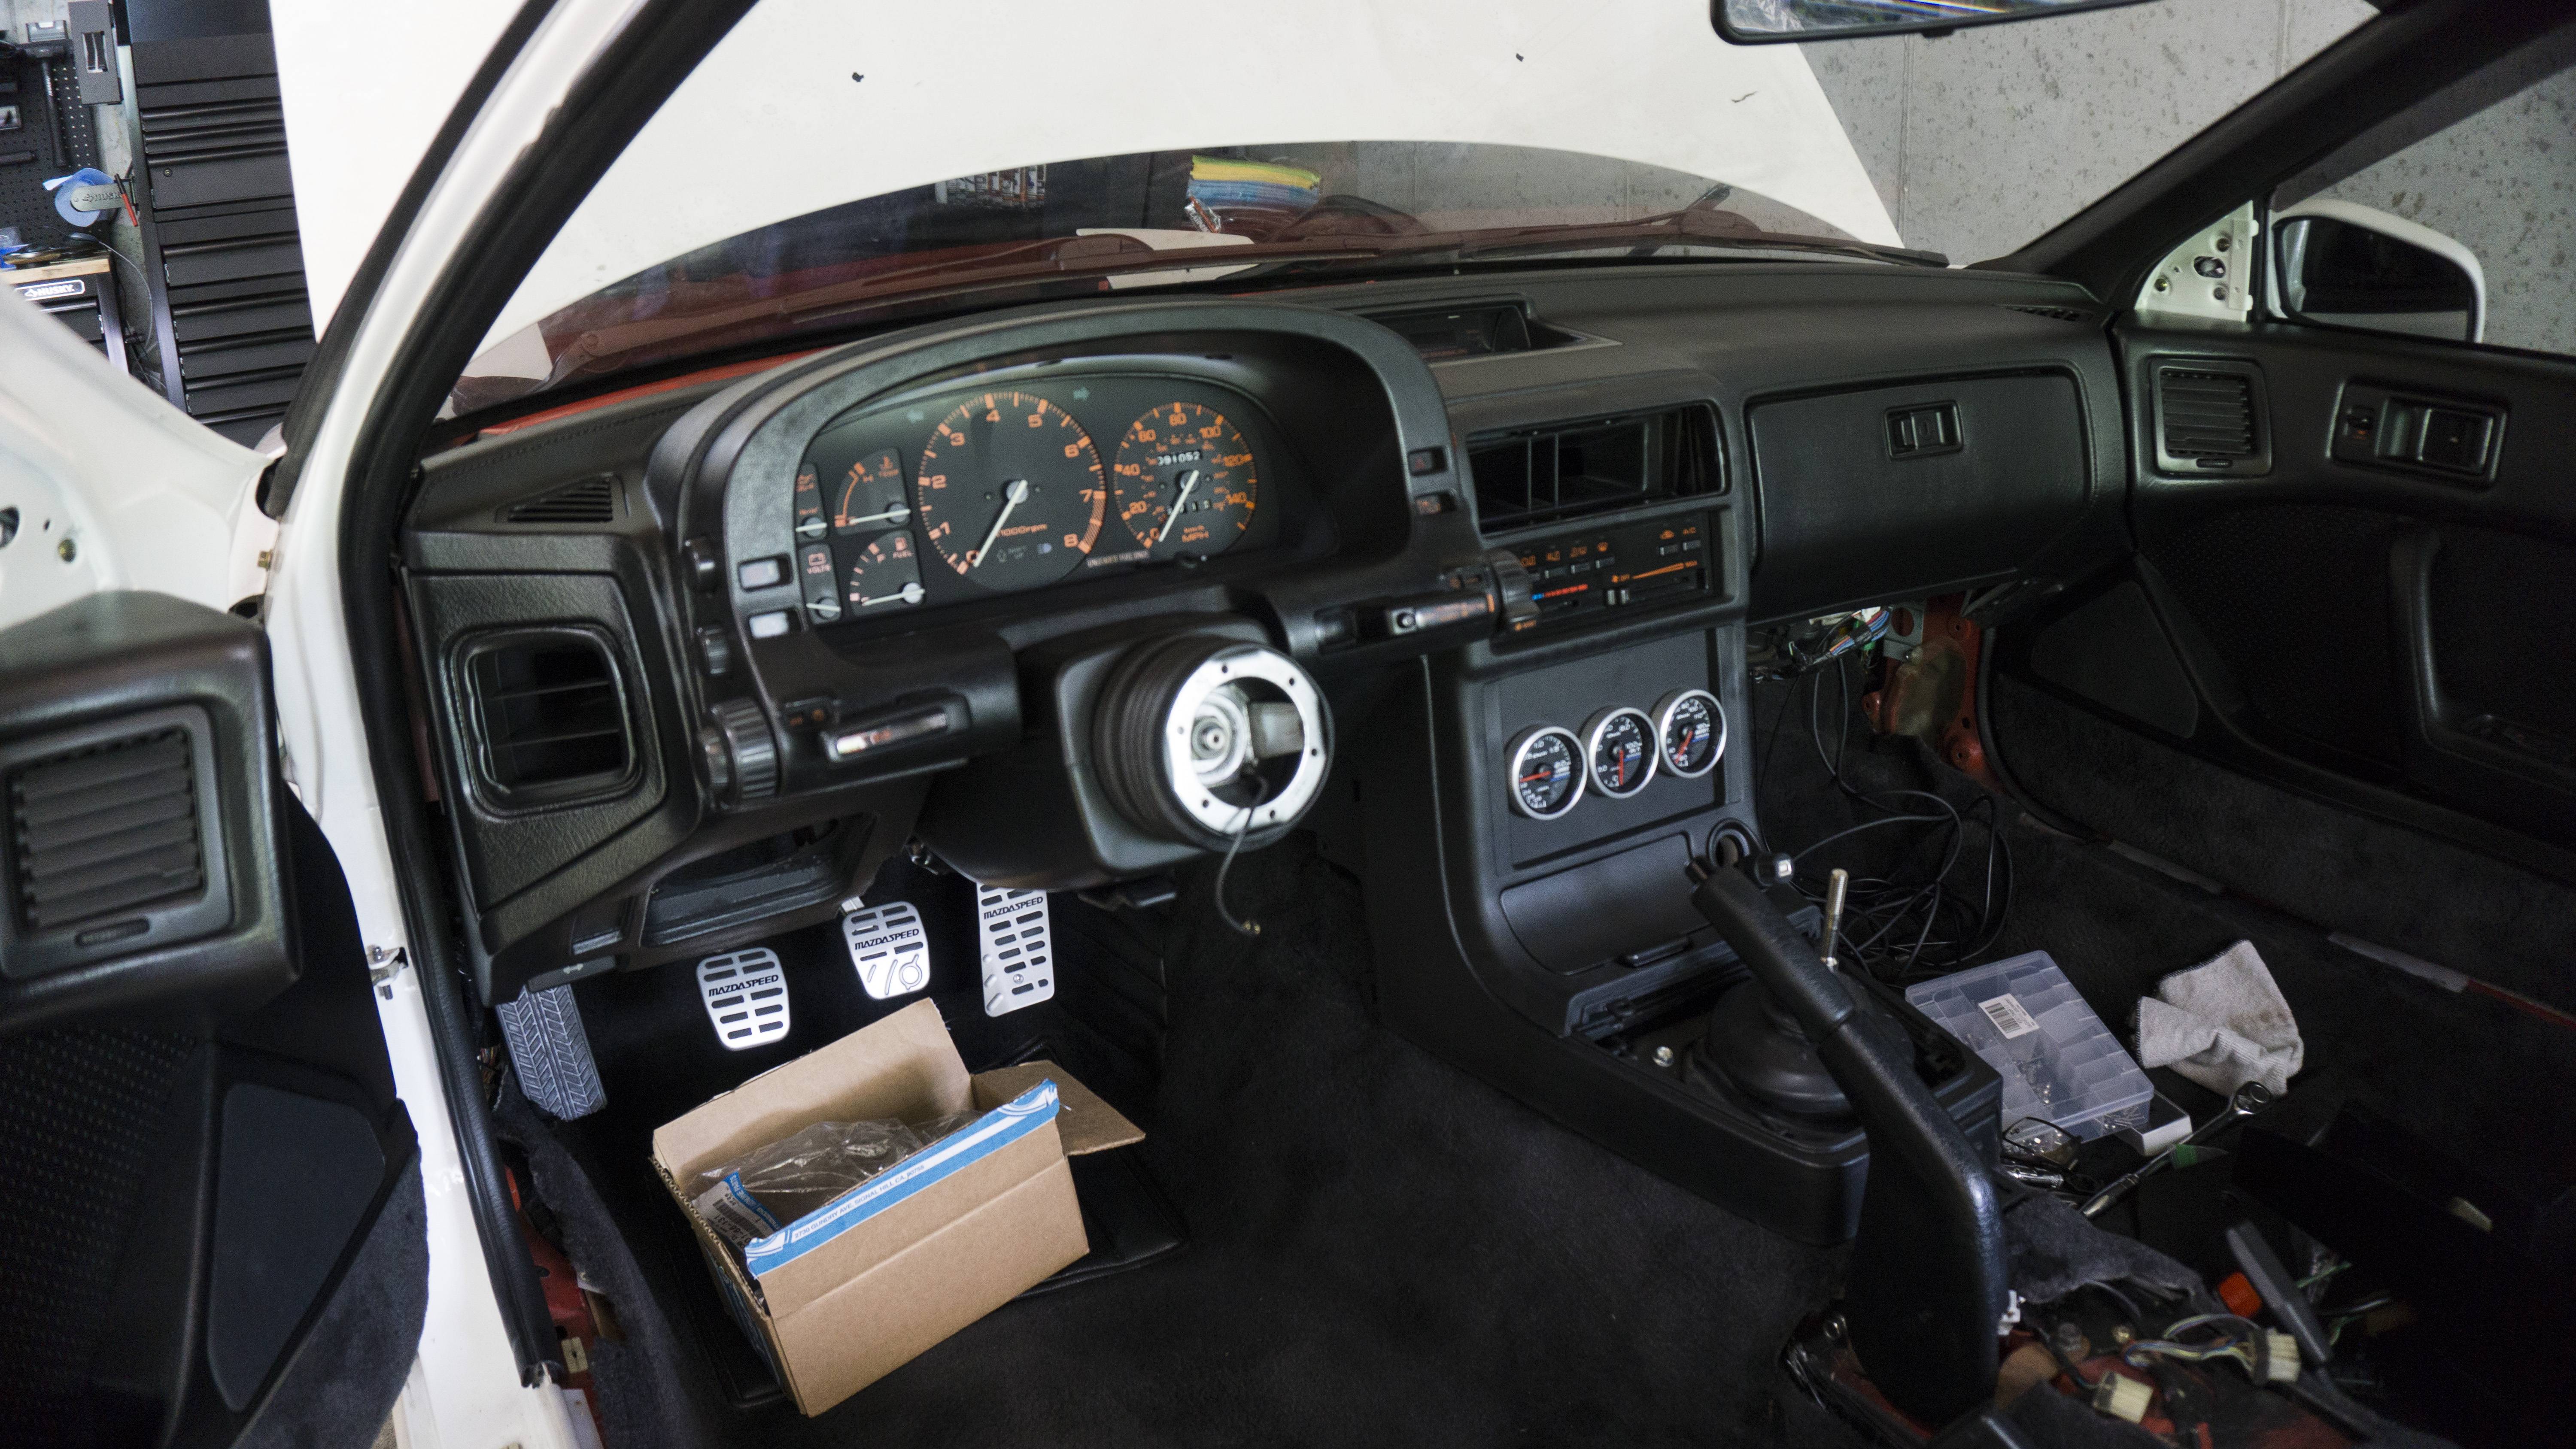
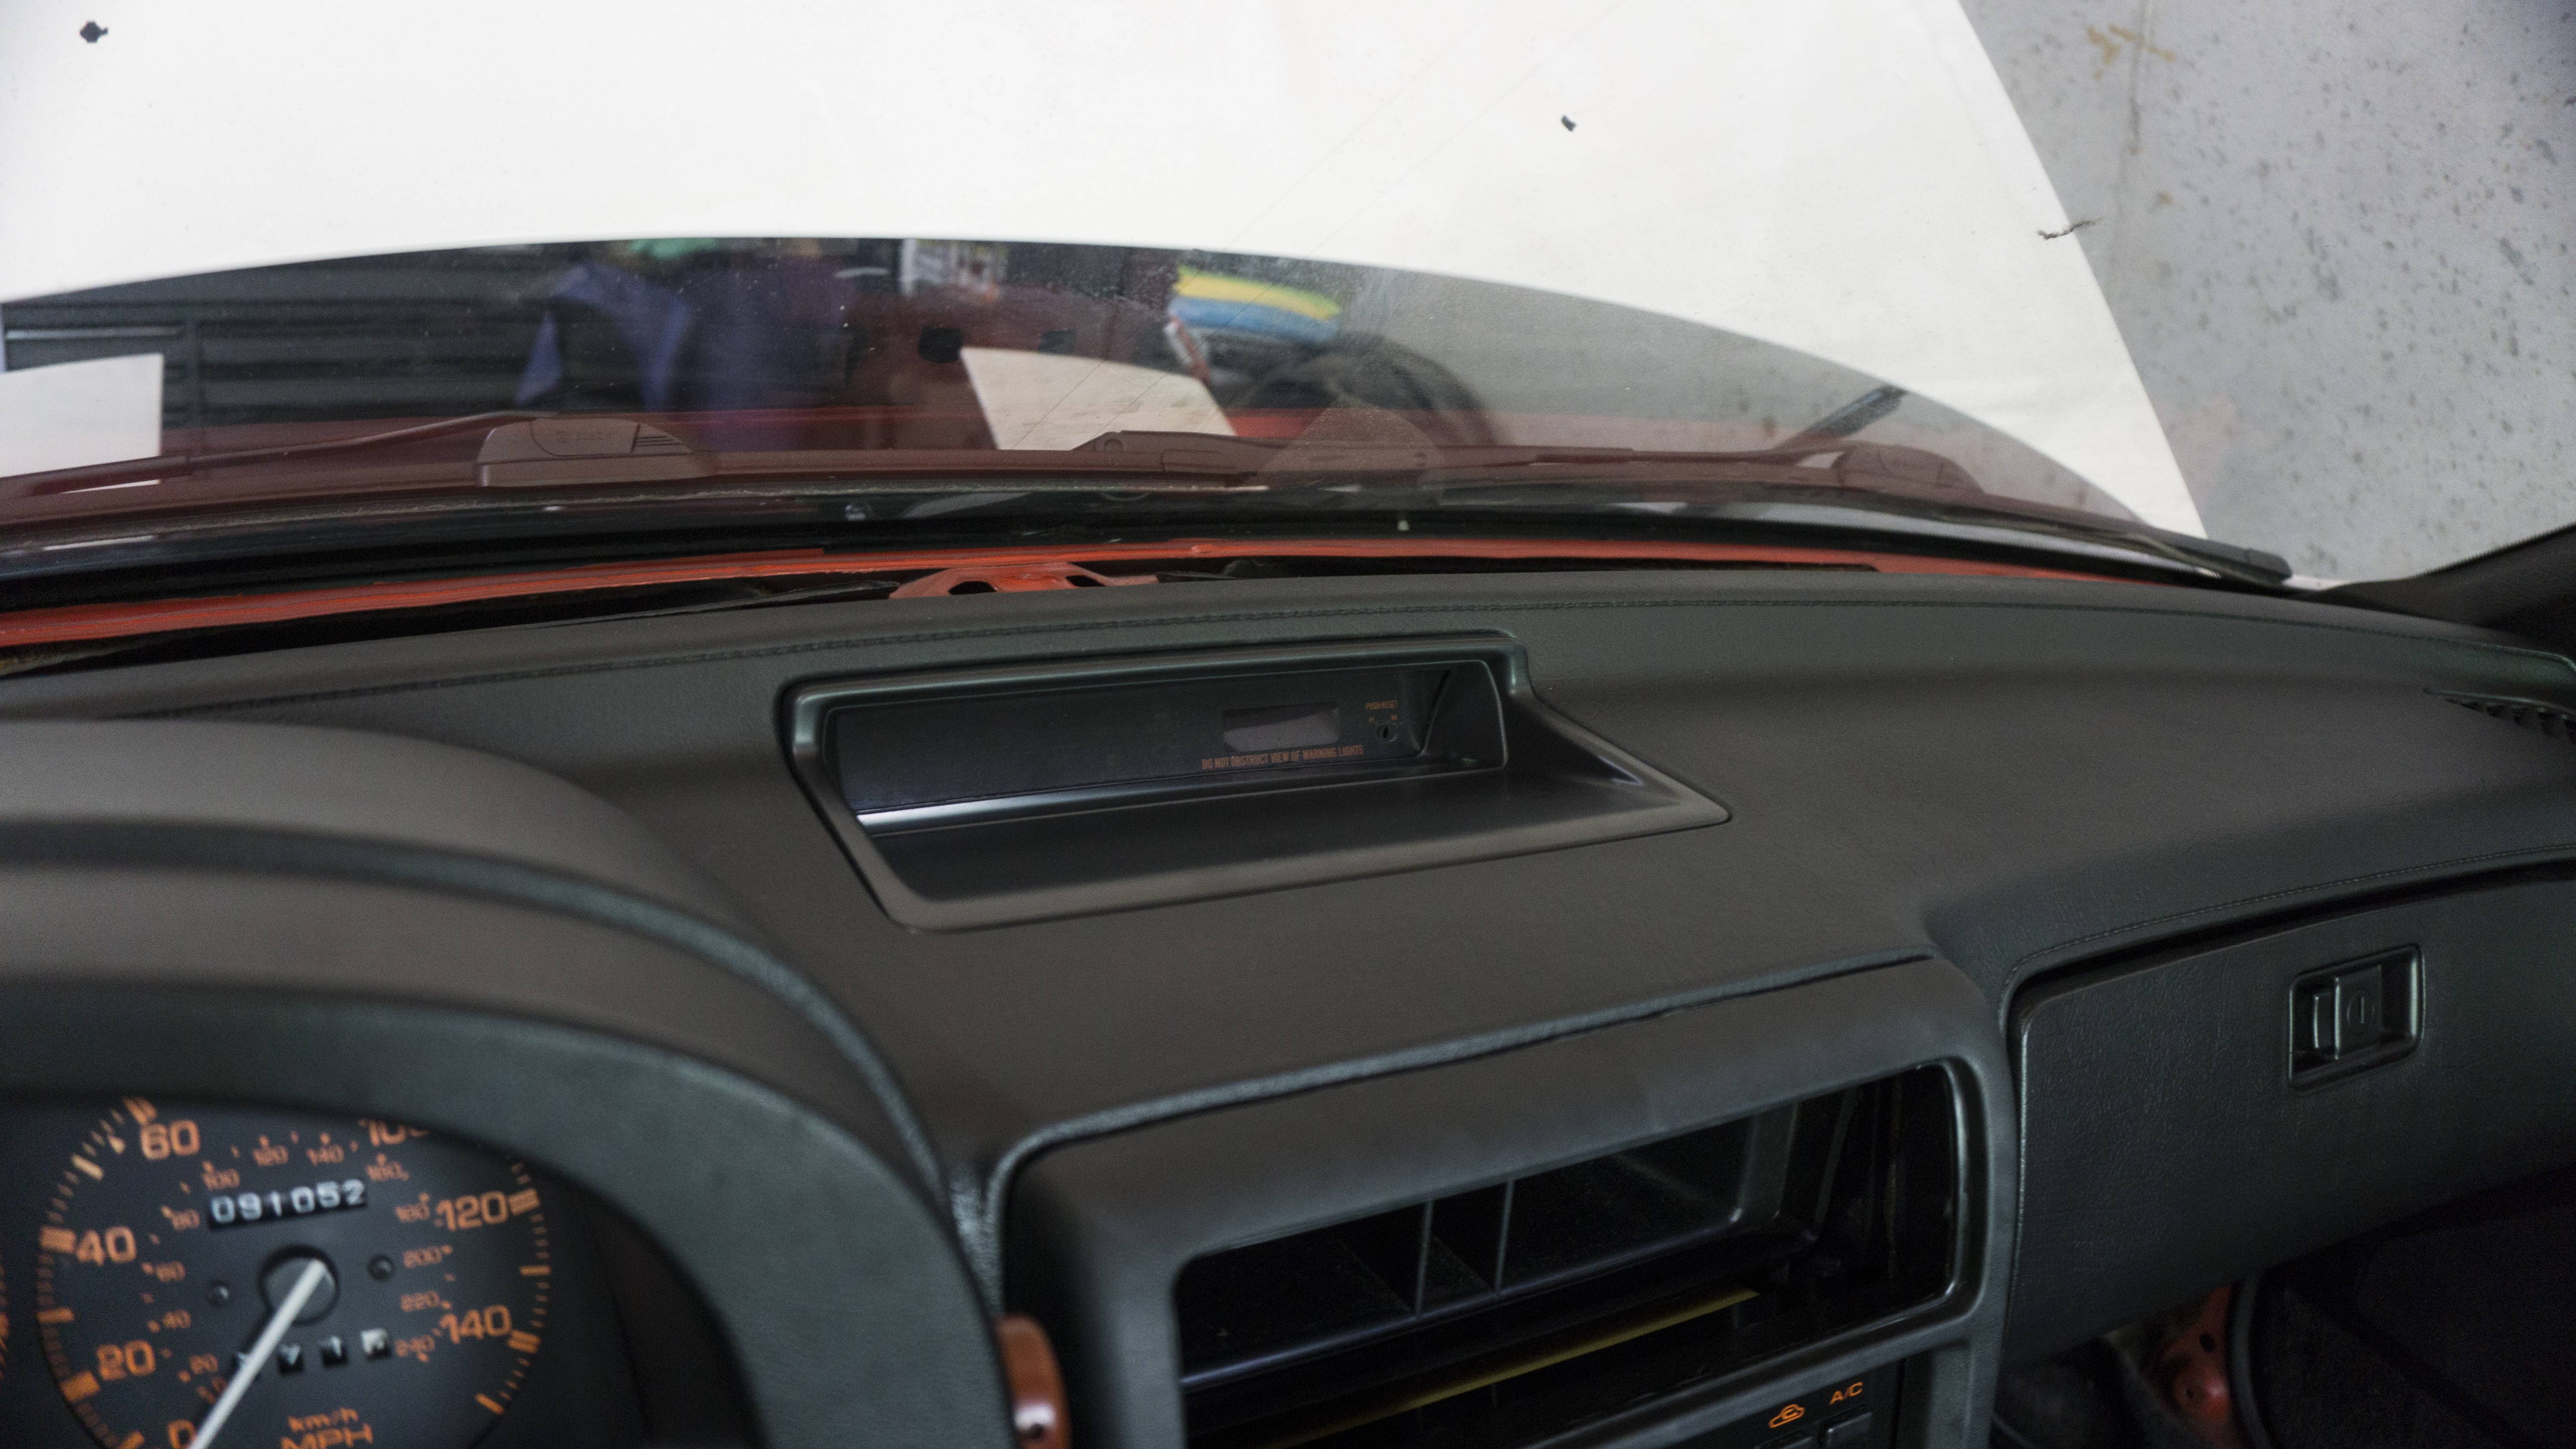
Update 6/23/2019: Finally - the engine is in! I�m still nowhere close to starting it though lol. I�m slowly getting stuff back on the engine and the powder coated stuff back on the car. I have only gotten a couple of things back on the engine - mainly the fuel rails and injectors. I still need to rebuild the fuel lines with quality AN lines. I have the lines and all the fittings...but just haven�t gotten around to it. My priority right now is getting the new front carpet in. However, first I wanted to knock out a lot of wiring issues. I finished cable management on the ECU, it�s much better and I�m really happy with how it turned out (If you want to see the mess it was before - scroll up). I ran a lot of the excess wires along the side and out of the way. I took the time to do some quality of life things like making my idiot cluster AFR gauge modular (it was a pain last time it wasn�t). I still need to run a couple of things into the car and then the carpet should be able to go in. Before the seats can go in I need to knock out a lot of the wiring for the dash and the kick panel fuse box. It�s a mess to be blunt - the previous owner did a lot of hack jobs and didn�t clean them up (I�ll provide a picture below of the nightmare fuel). I�ve also started re-putting back on a lot of the powdercoated goodness. I had to re-do the screen mesh on my front gutter guard, but was able to get it and the windshield wipers back on. I also threw my gauges back in the double din holder and installed the aero panel underneath. I�m not throwing on the big underbelly panel until I get everything tidied up. I still have a lot to finish, but I�ve basically just been working on what I feel like. It feels like I have a never ending list, and I just keep adding to it. I ended up selling my STANCE SS+ Coilovers. I think I�m going to get some BC ER type coilovers. It�s a little disappointing Ohlin or KW doesn�t make anything for the FC - really no one does and I don�t really want to drop 3-4k on Zeal�s.
I apologize for the lackluster photo quality. I�ve been using my girlfriend�s camera and have been having to reteach myself everything I used to know.
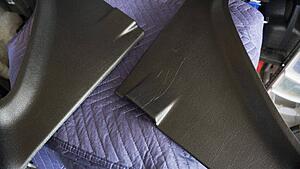
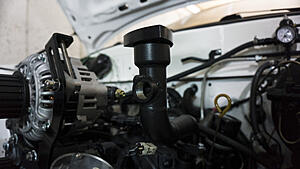
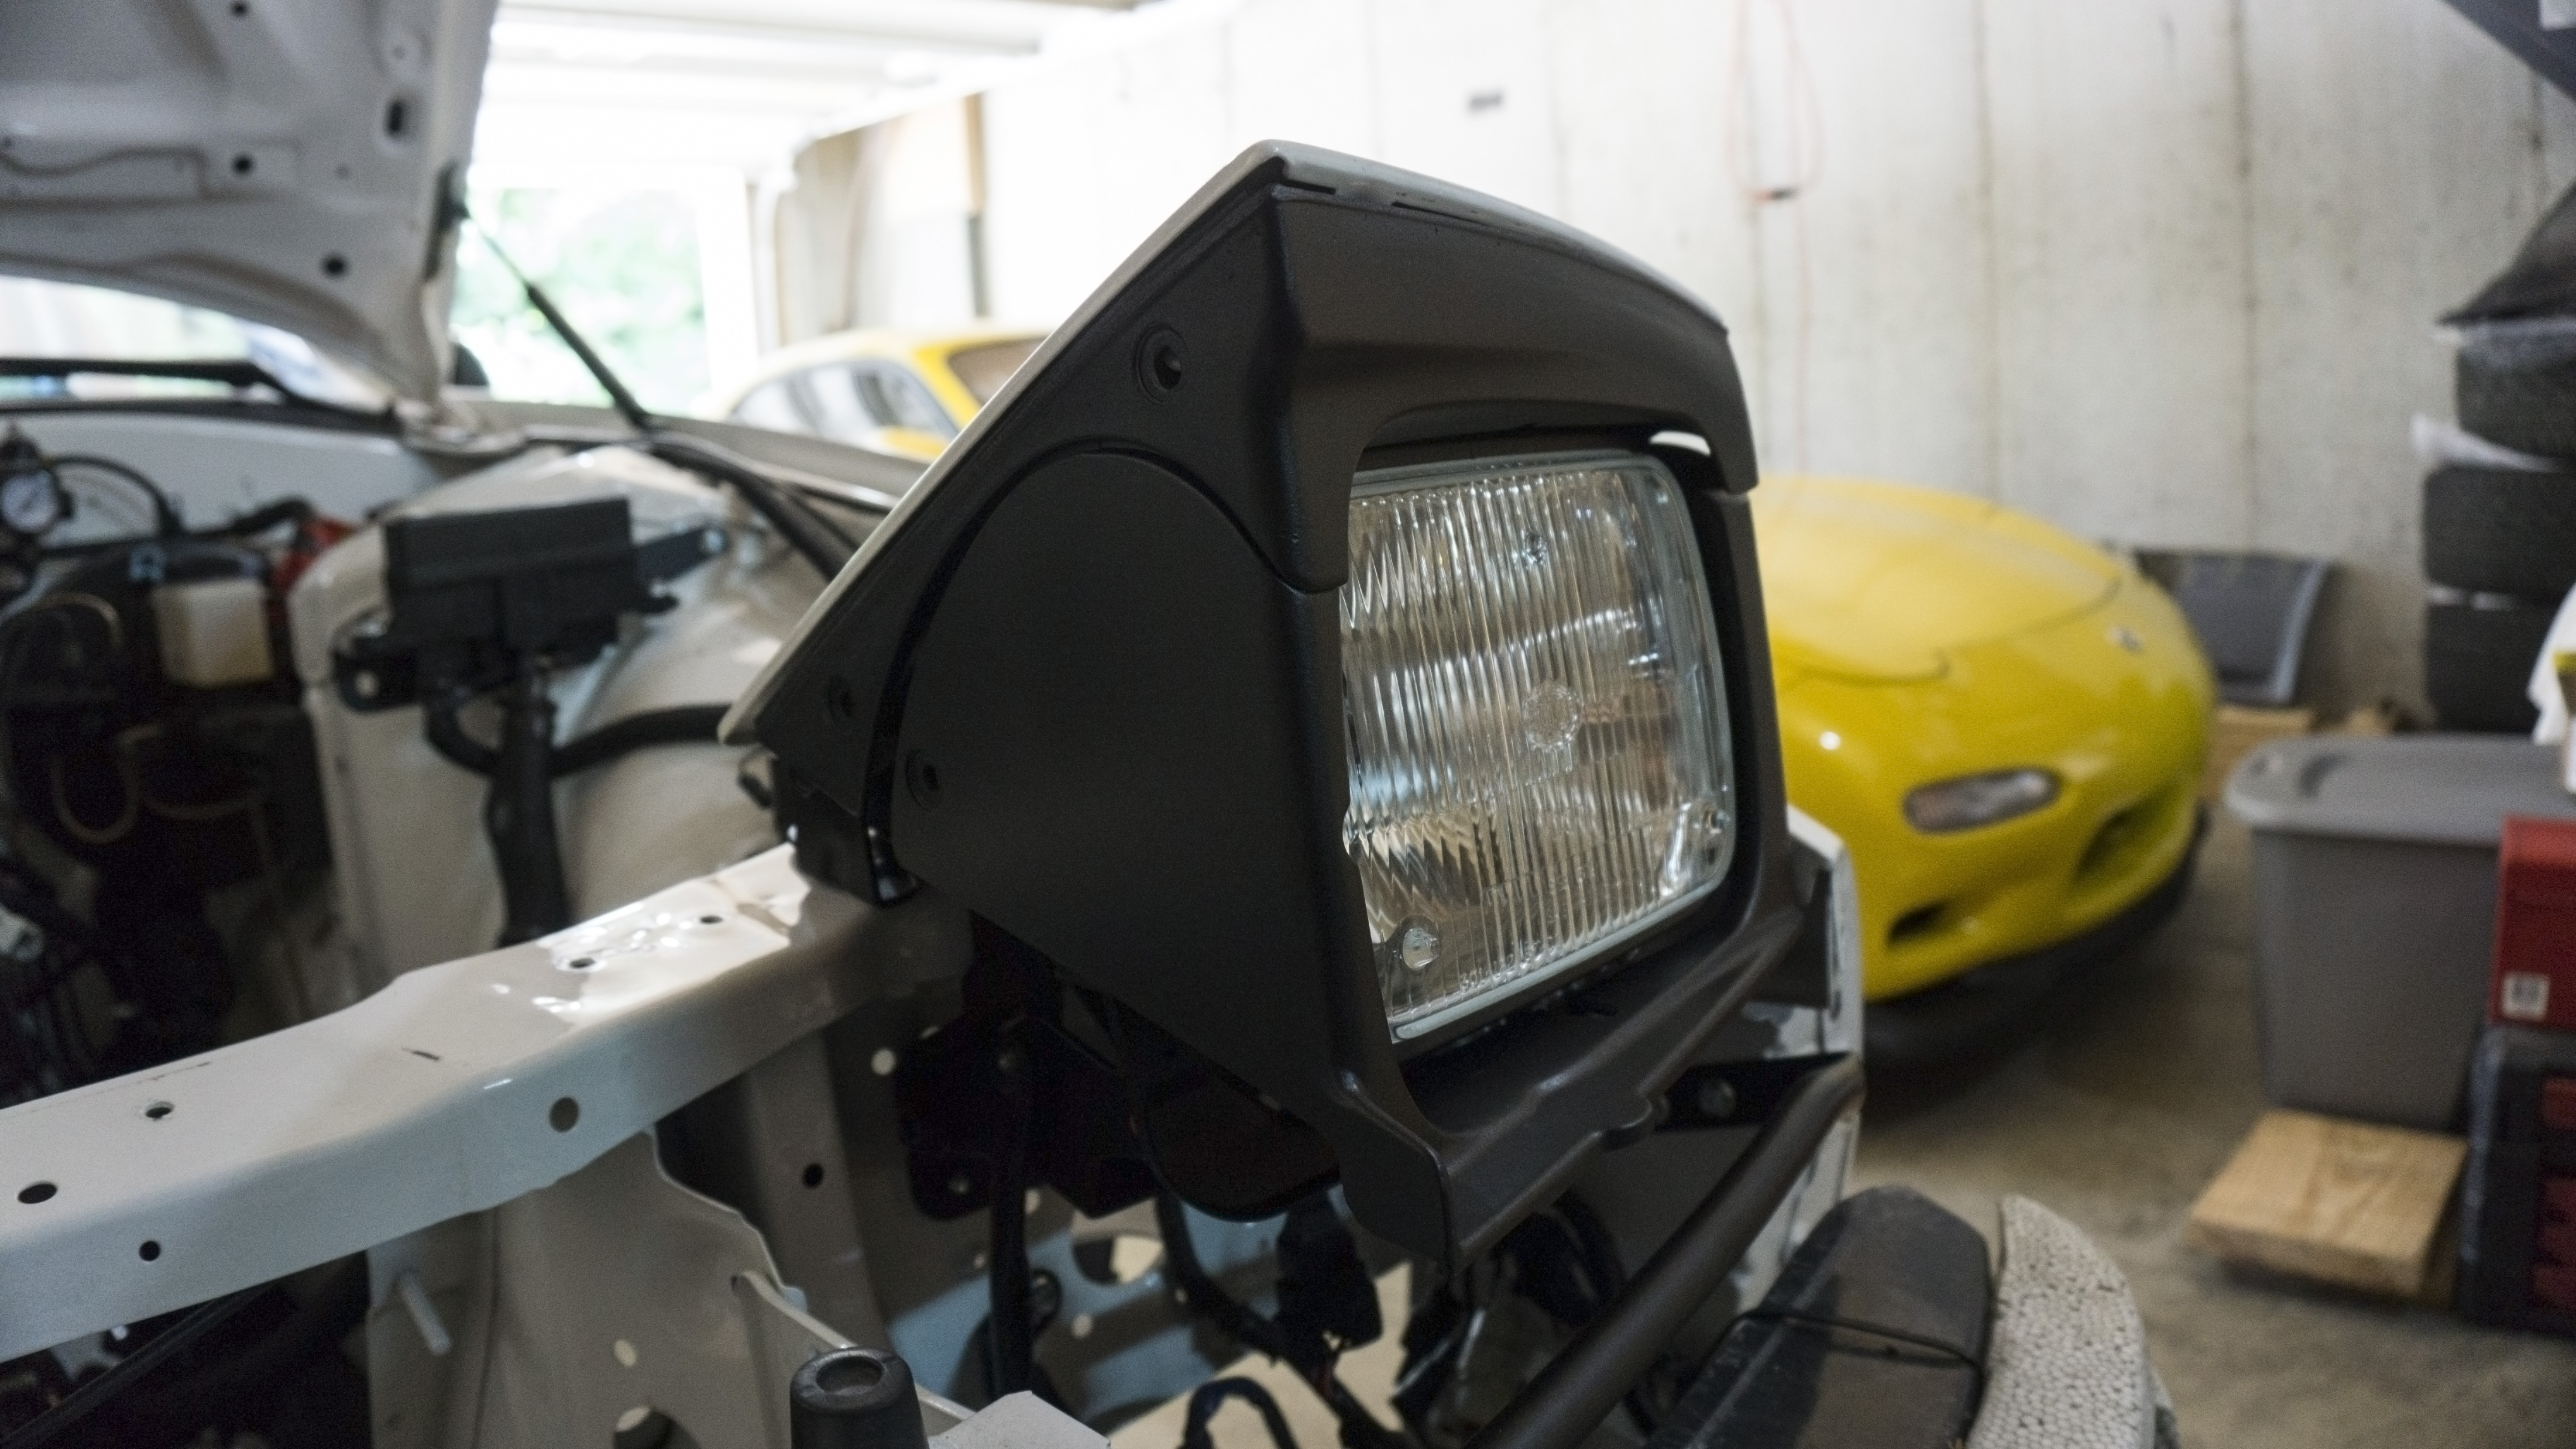
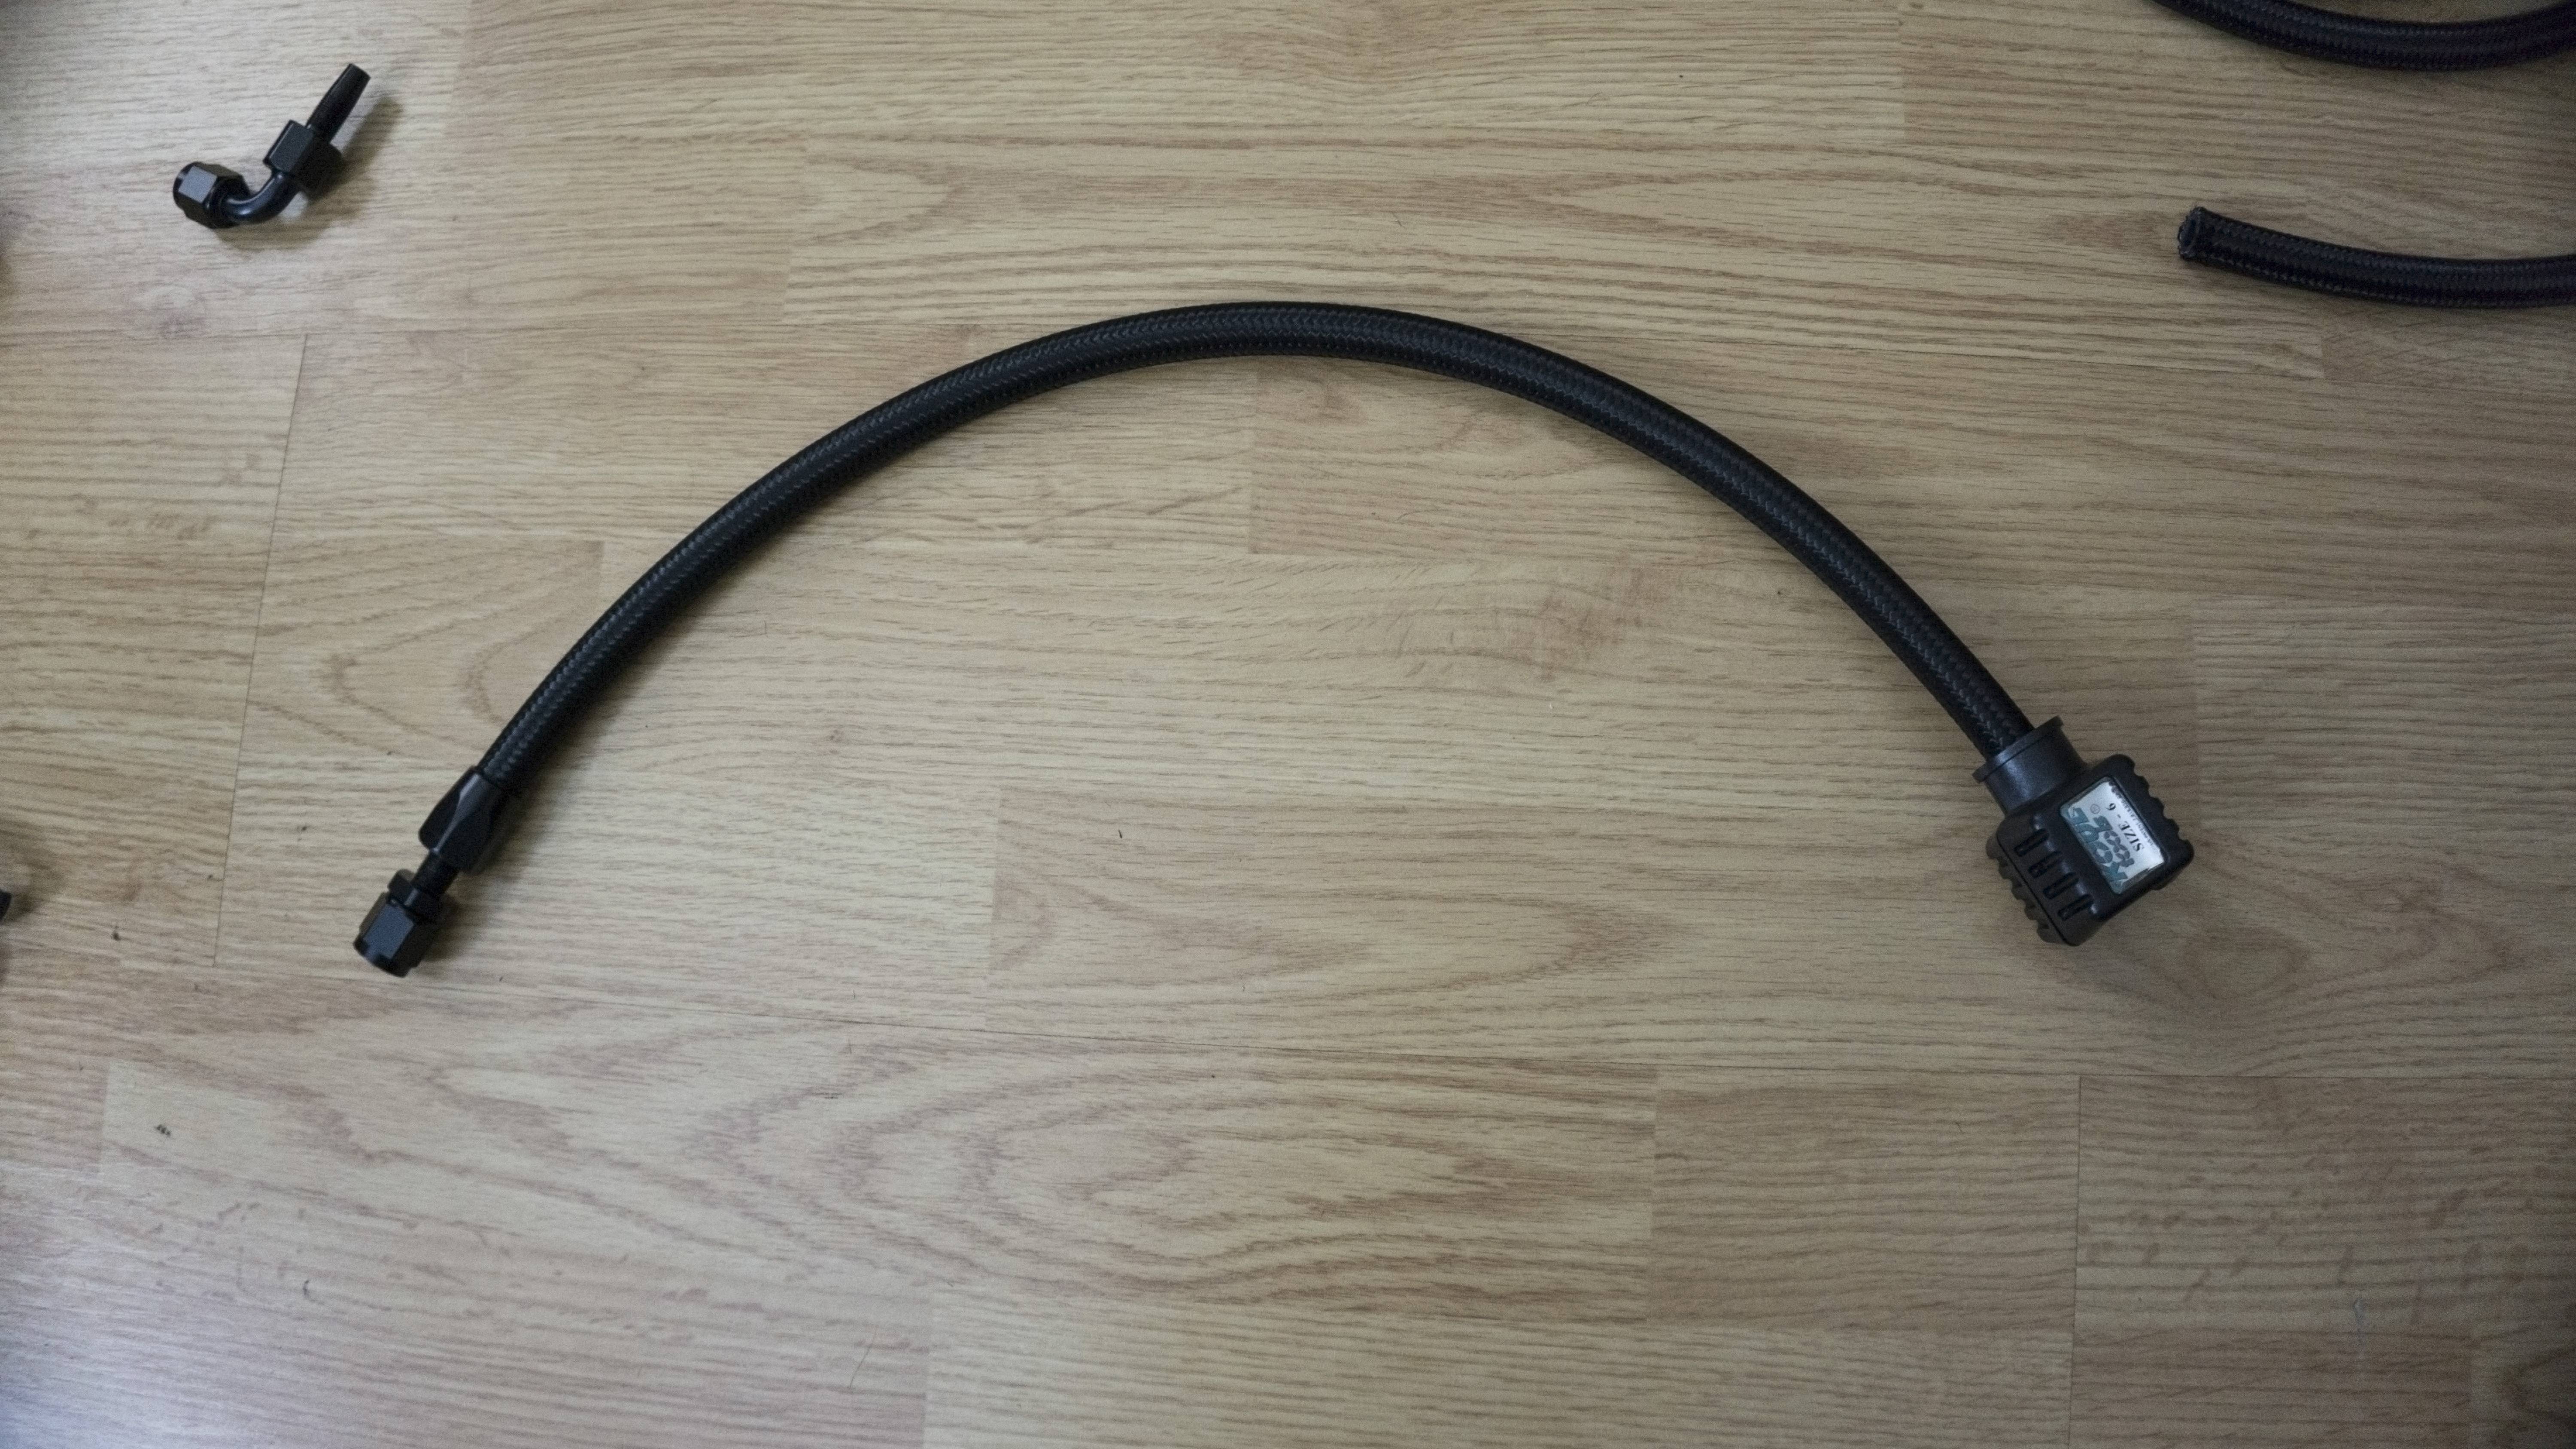
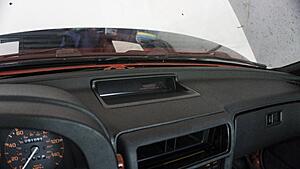
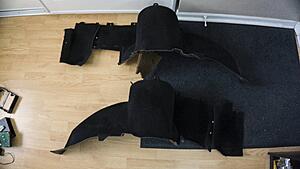
Update 7/7/19: I�ve been getting a steady amount of things done on the FC. I�ve really been working to one prioritization at a time. I needed to make some room in the house so I�ve been working on getting the interior back together and in. I got the new dash sprayed black, I had a lot of issues with this one over the last one. I think it may be because I used an adhesion promoter and it wasn�t able to cling to the vinyl as easy. After three attempts I think it�s looking really good. I also fixed a lot of the driver side wiring that the previous owner had taped into and snipped random wires off. I pulled out every fuse and made sure they were all good before cleaning the panel and putting them all back in. I also, after like 2 years of owning it, was able to put on my fuse box cover. In order to install the new carpet I had to remove the heater core, and while it was out I went ahead and replaced a lot of the bolts and refinished the rusted brackets on it. I also replaced the driver side B-Panel as it has deep gouges in it for some reason. The last thing I did interior wise was install my brand new interior door handles. They look really good and I hope they remain that way for awhile. Engine wise I threw on my IRP filler neck and converted the rear vent port to 6 AN to run to the catch can - I�ll also be running a 10 AN from the fuel neck to the can. I also refinished the headlight plastic bezels, however, as an impulse decision I just purchased brand new bezels. I�ve started creating my AN lines now for the fuel system and should be wrapping up the interior. I still need to clean the new carpet - I think the seats will probably be the last thing I put in.
Here is all the fun that was had with the interior stuff:
Here is the IRP filler neck and vent port:
Here is the refinished headlight bezels, that will probably be for sale now:
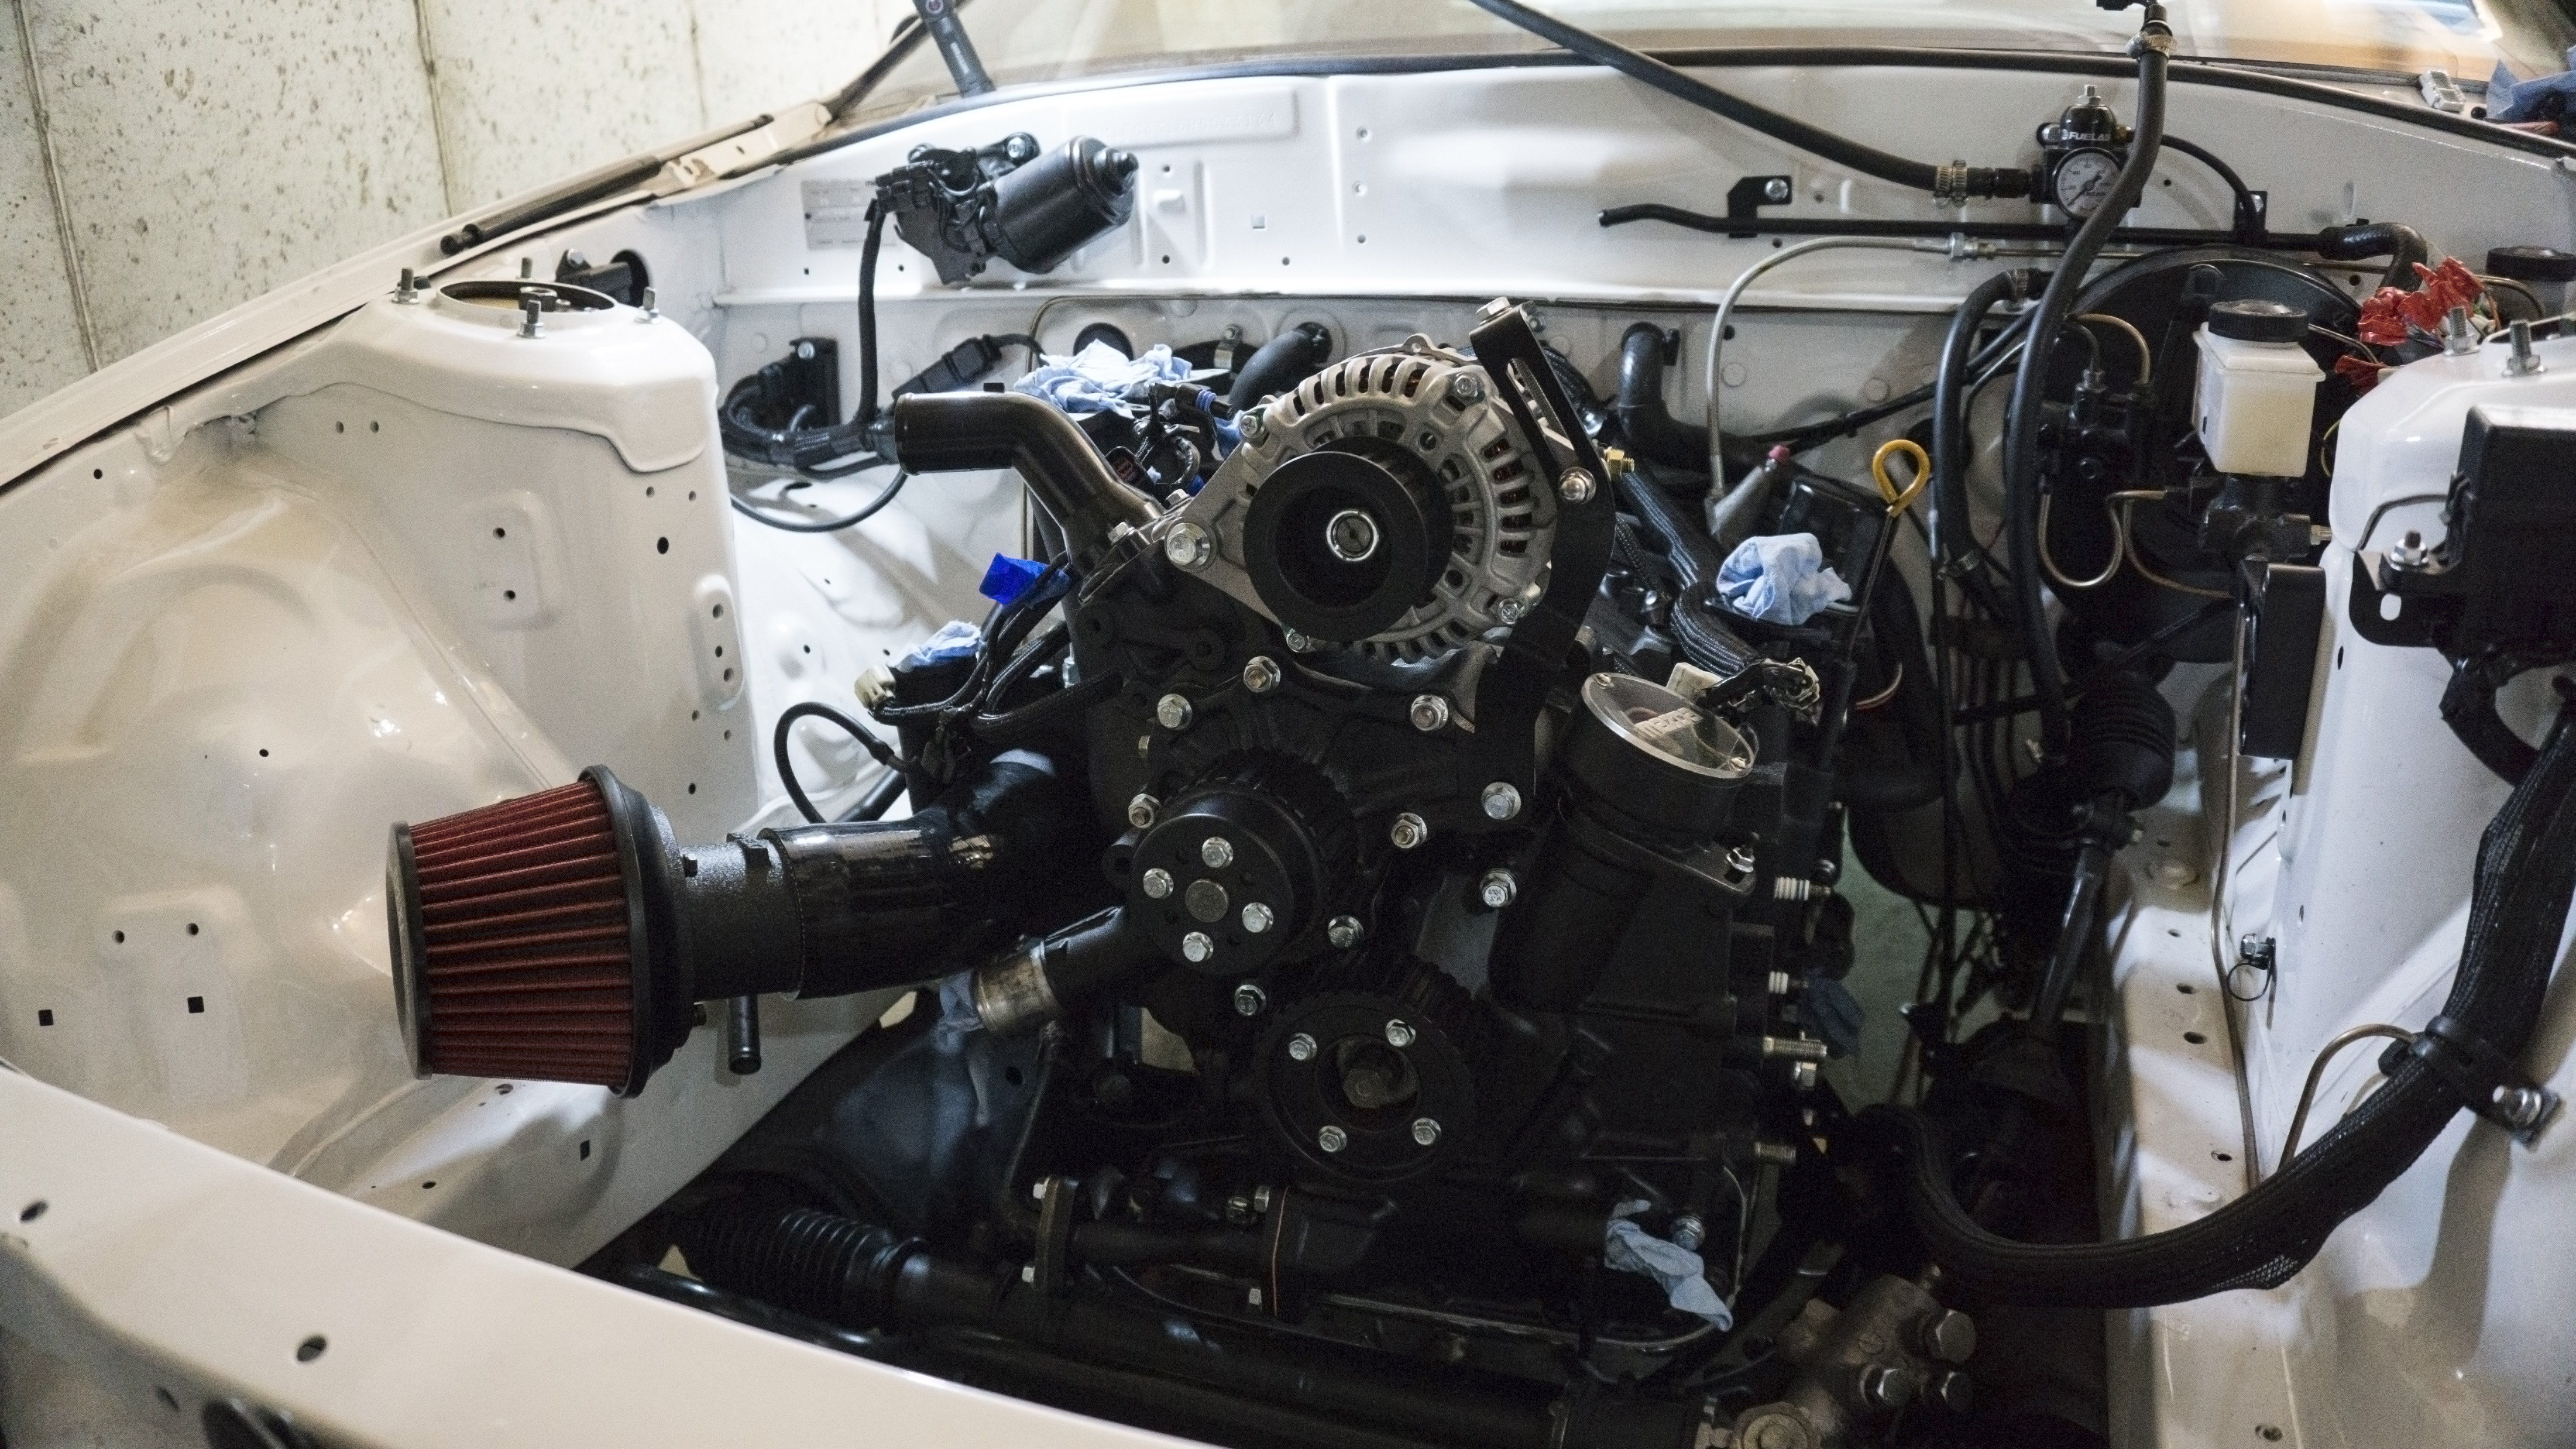
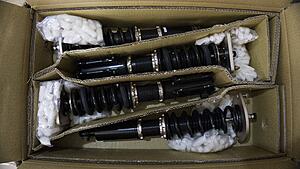
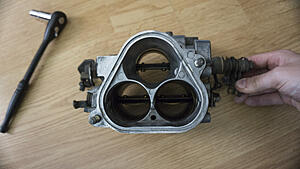
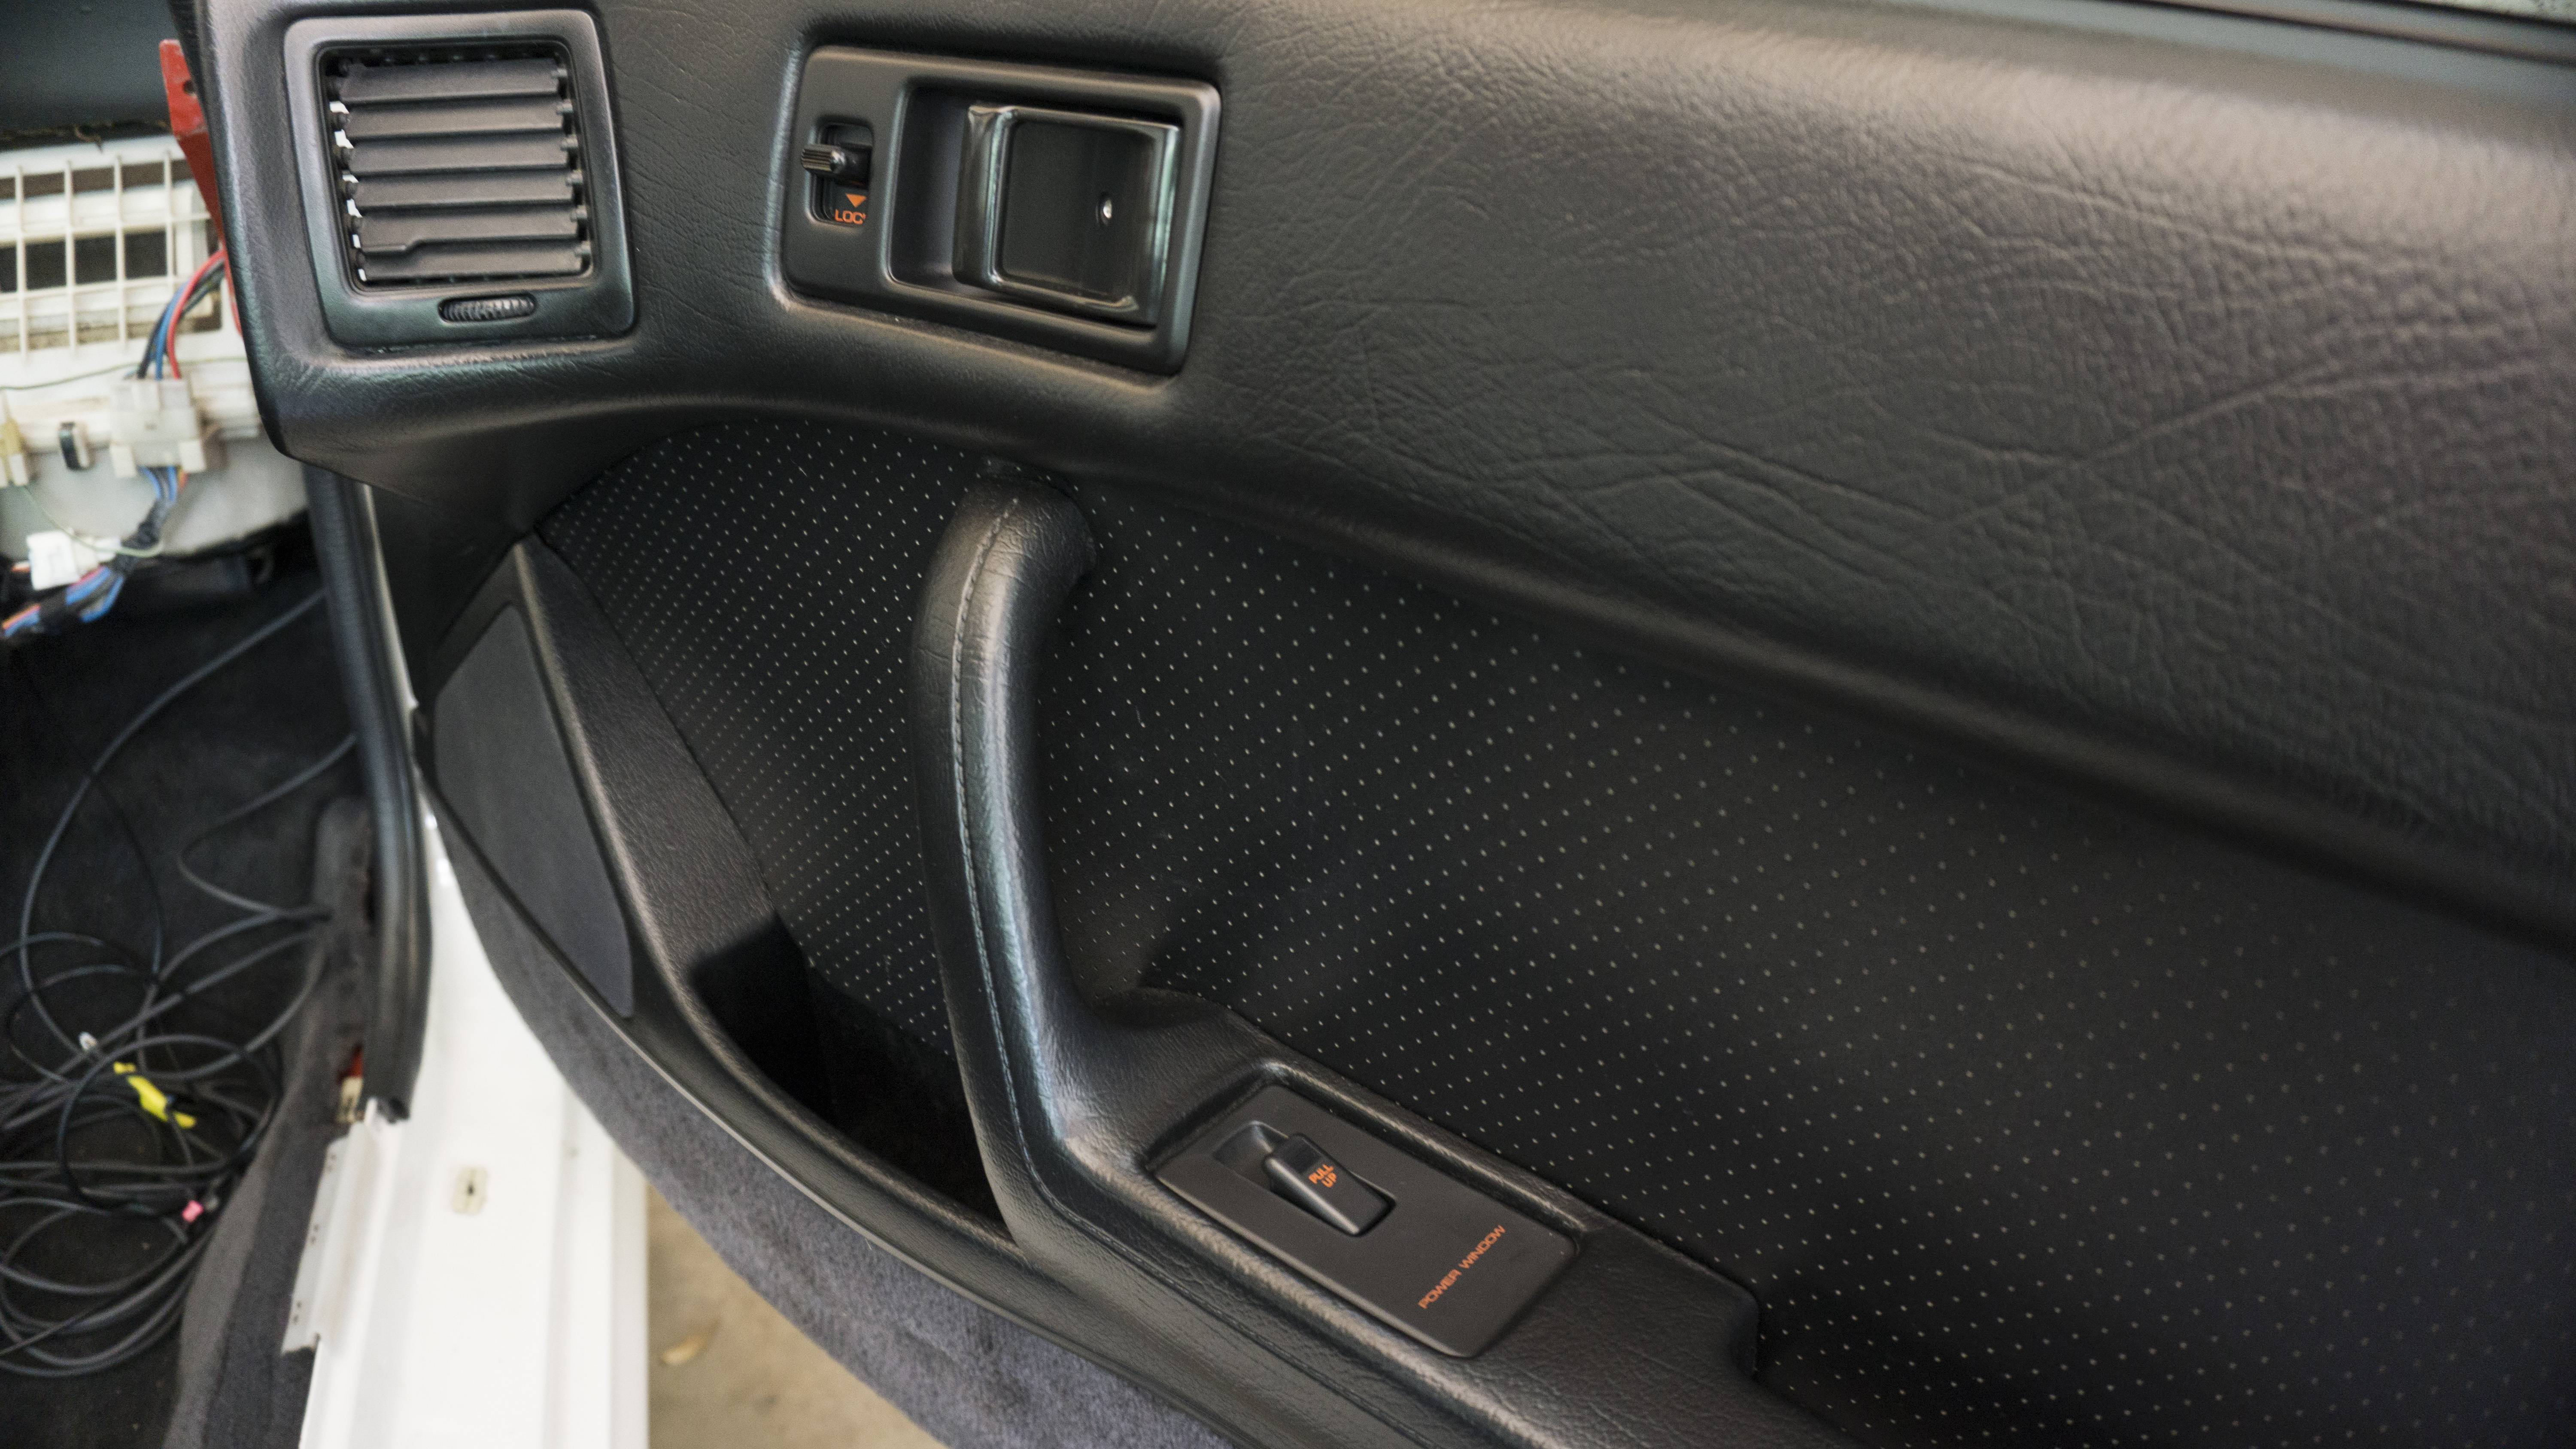
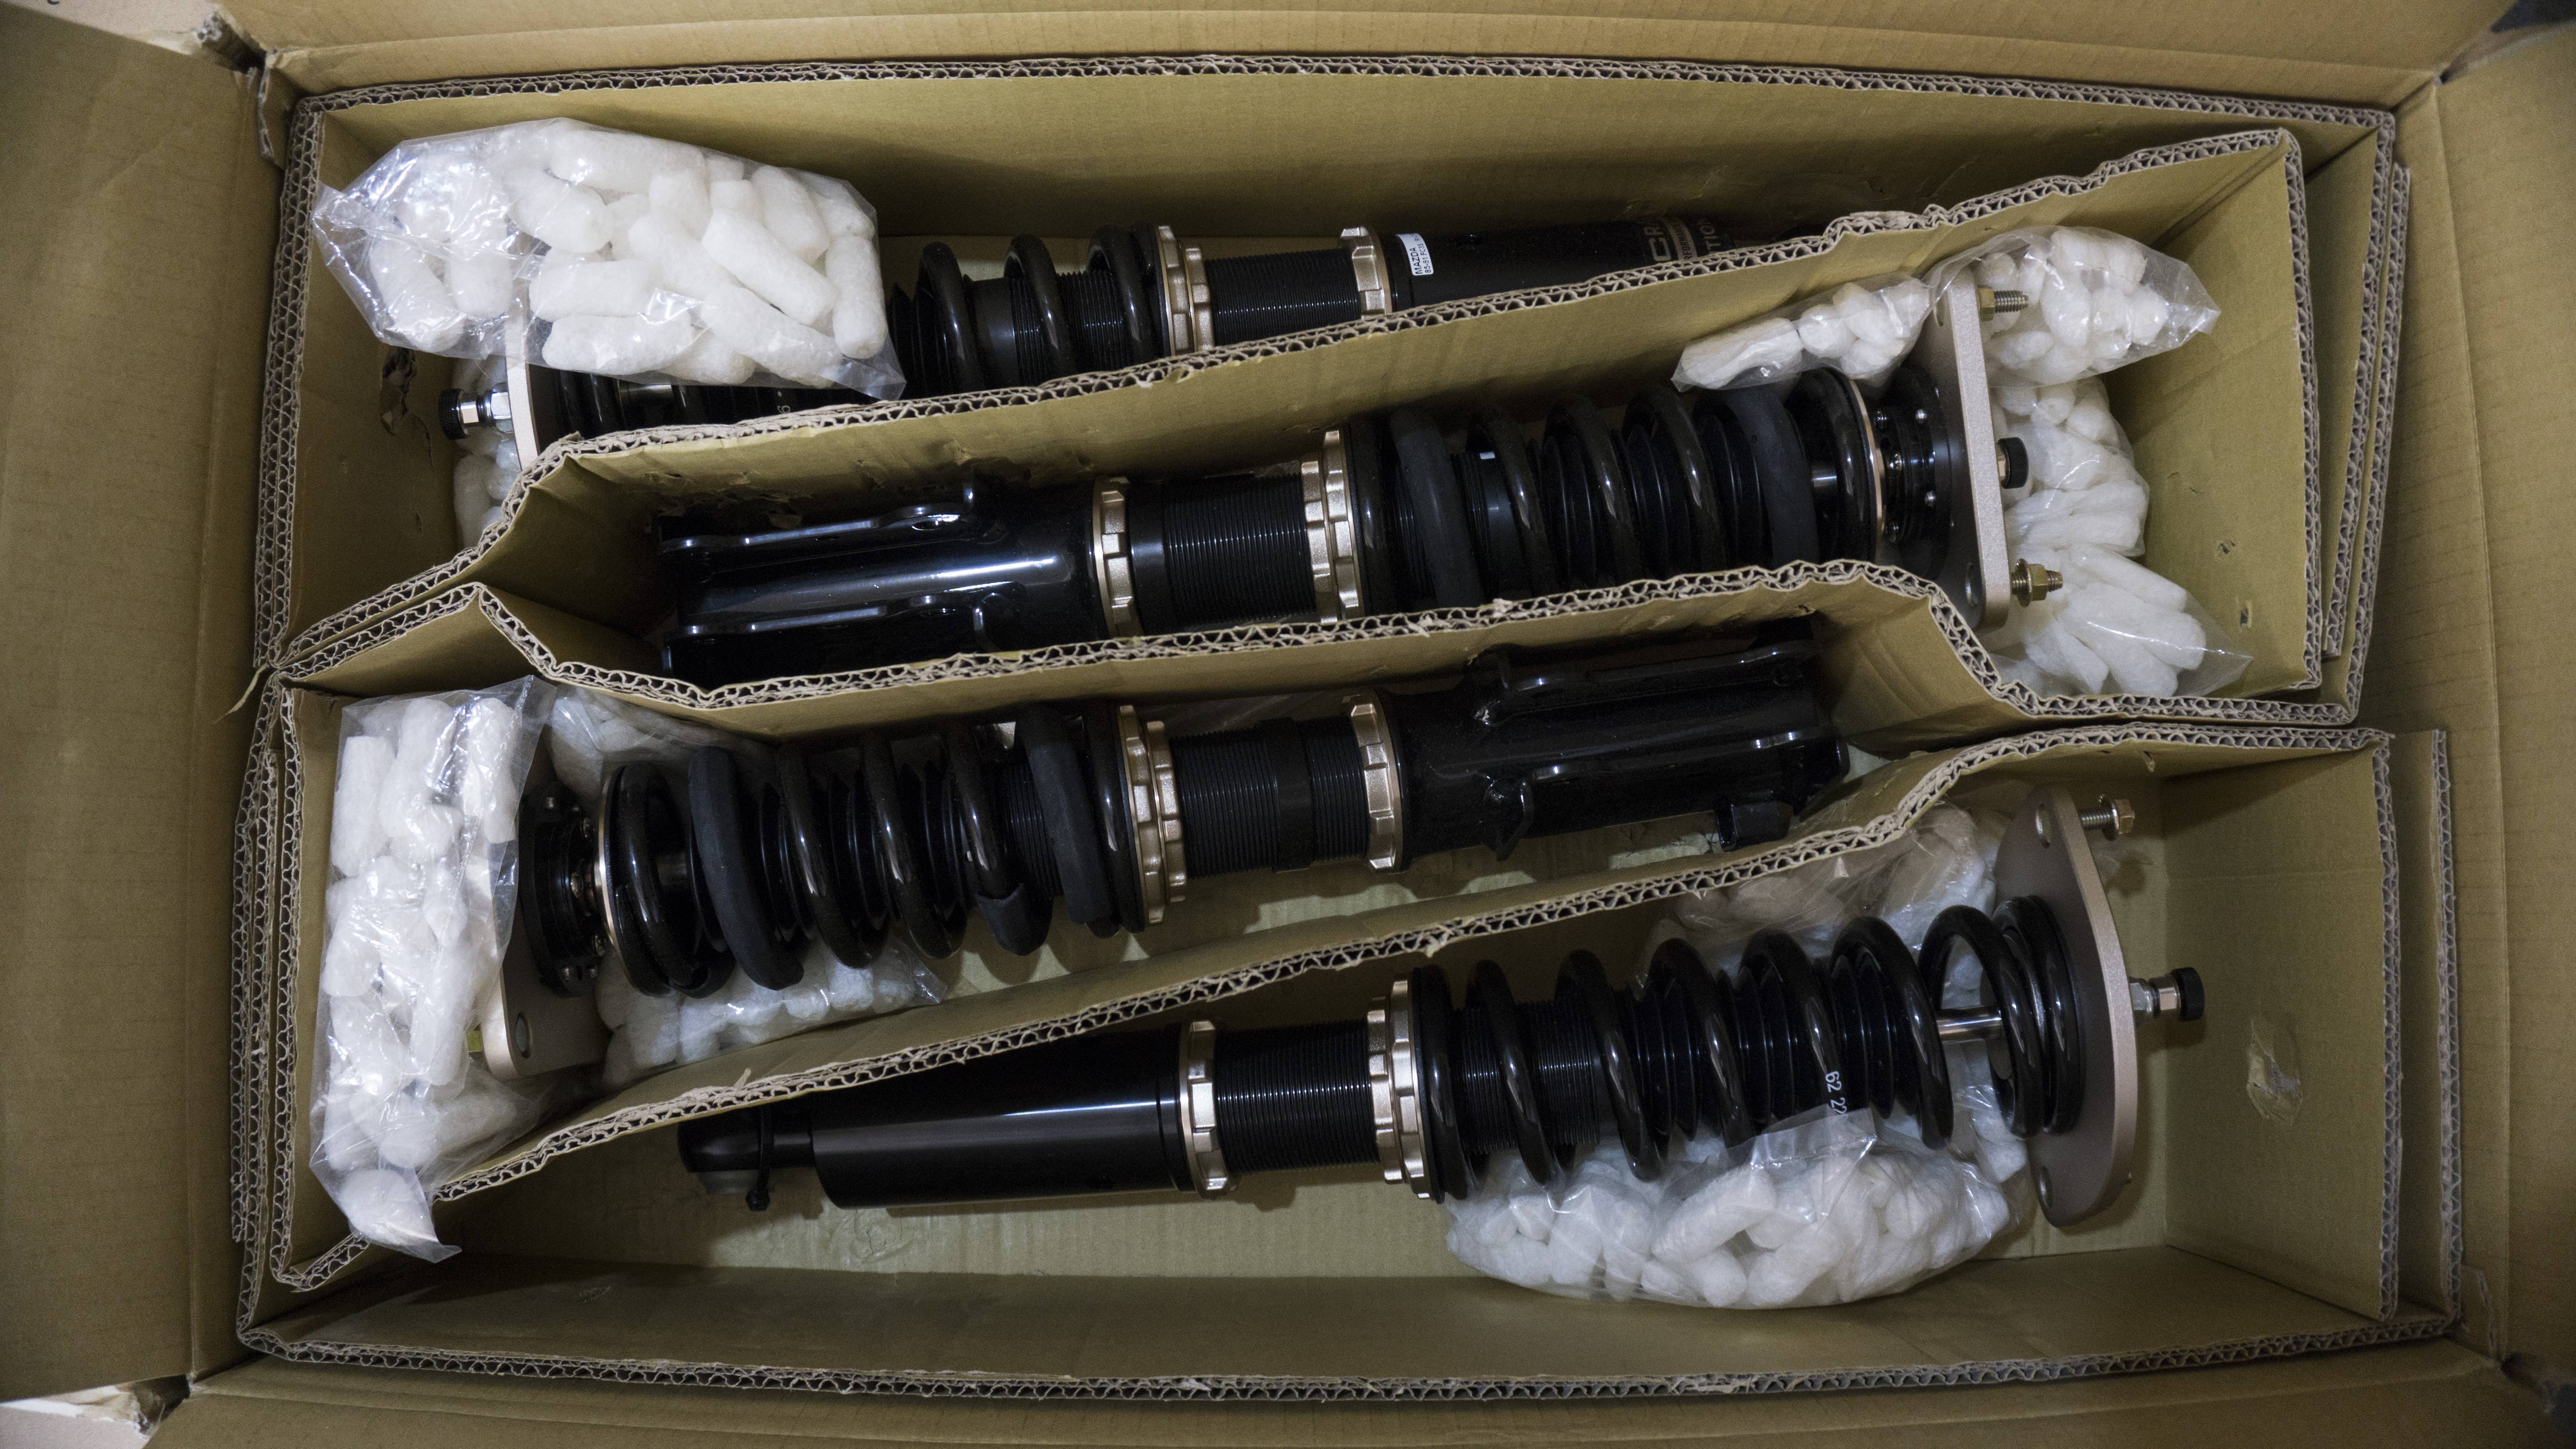
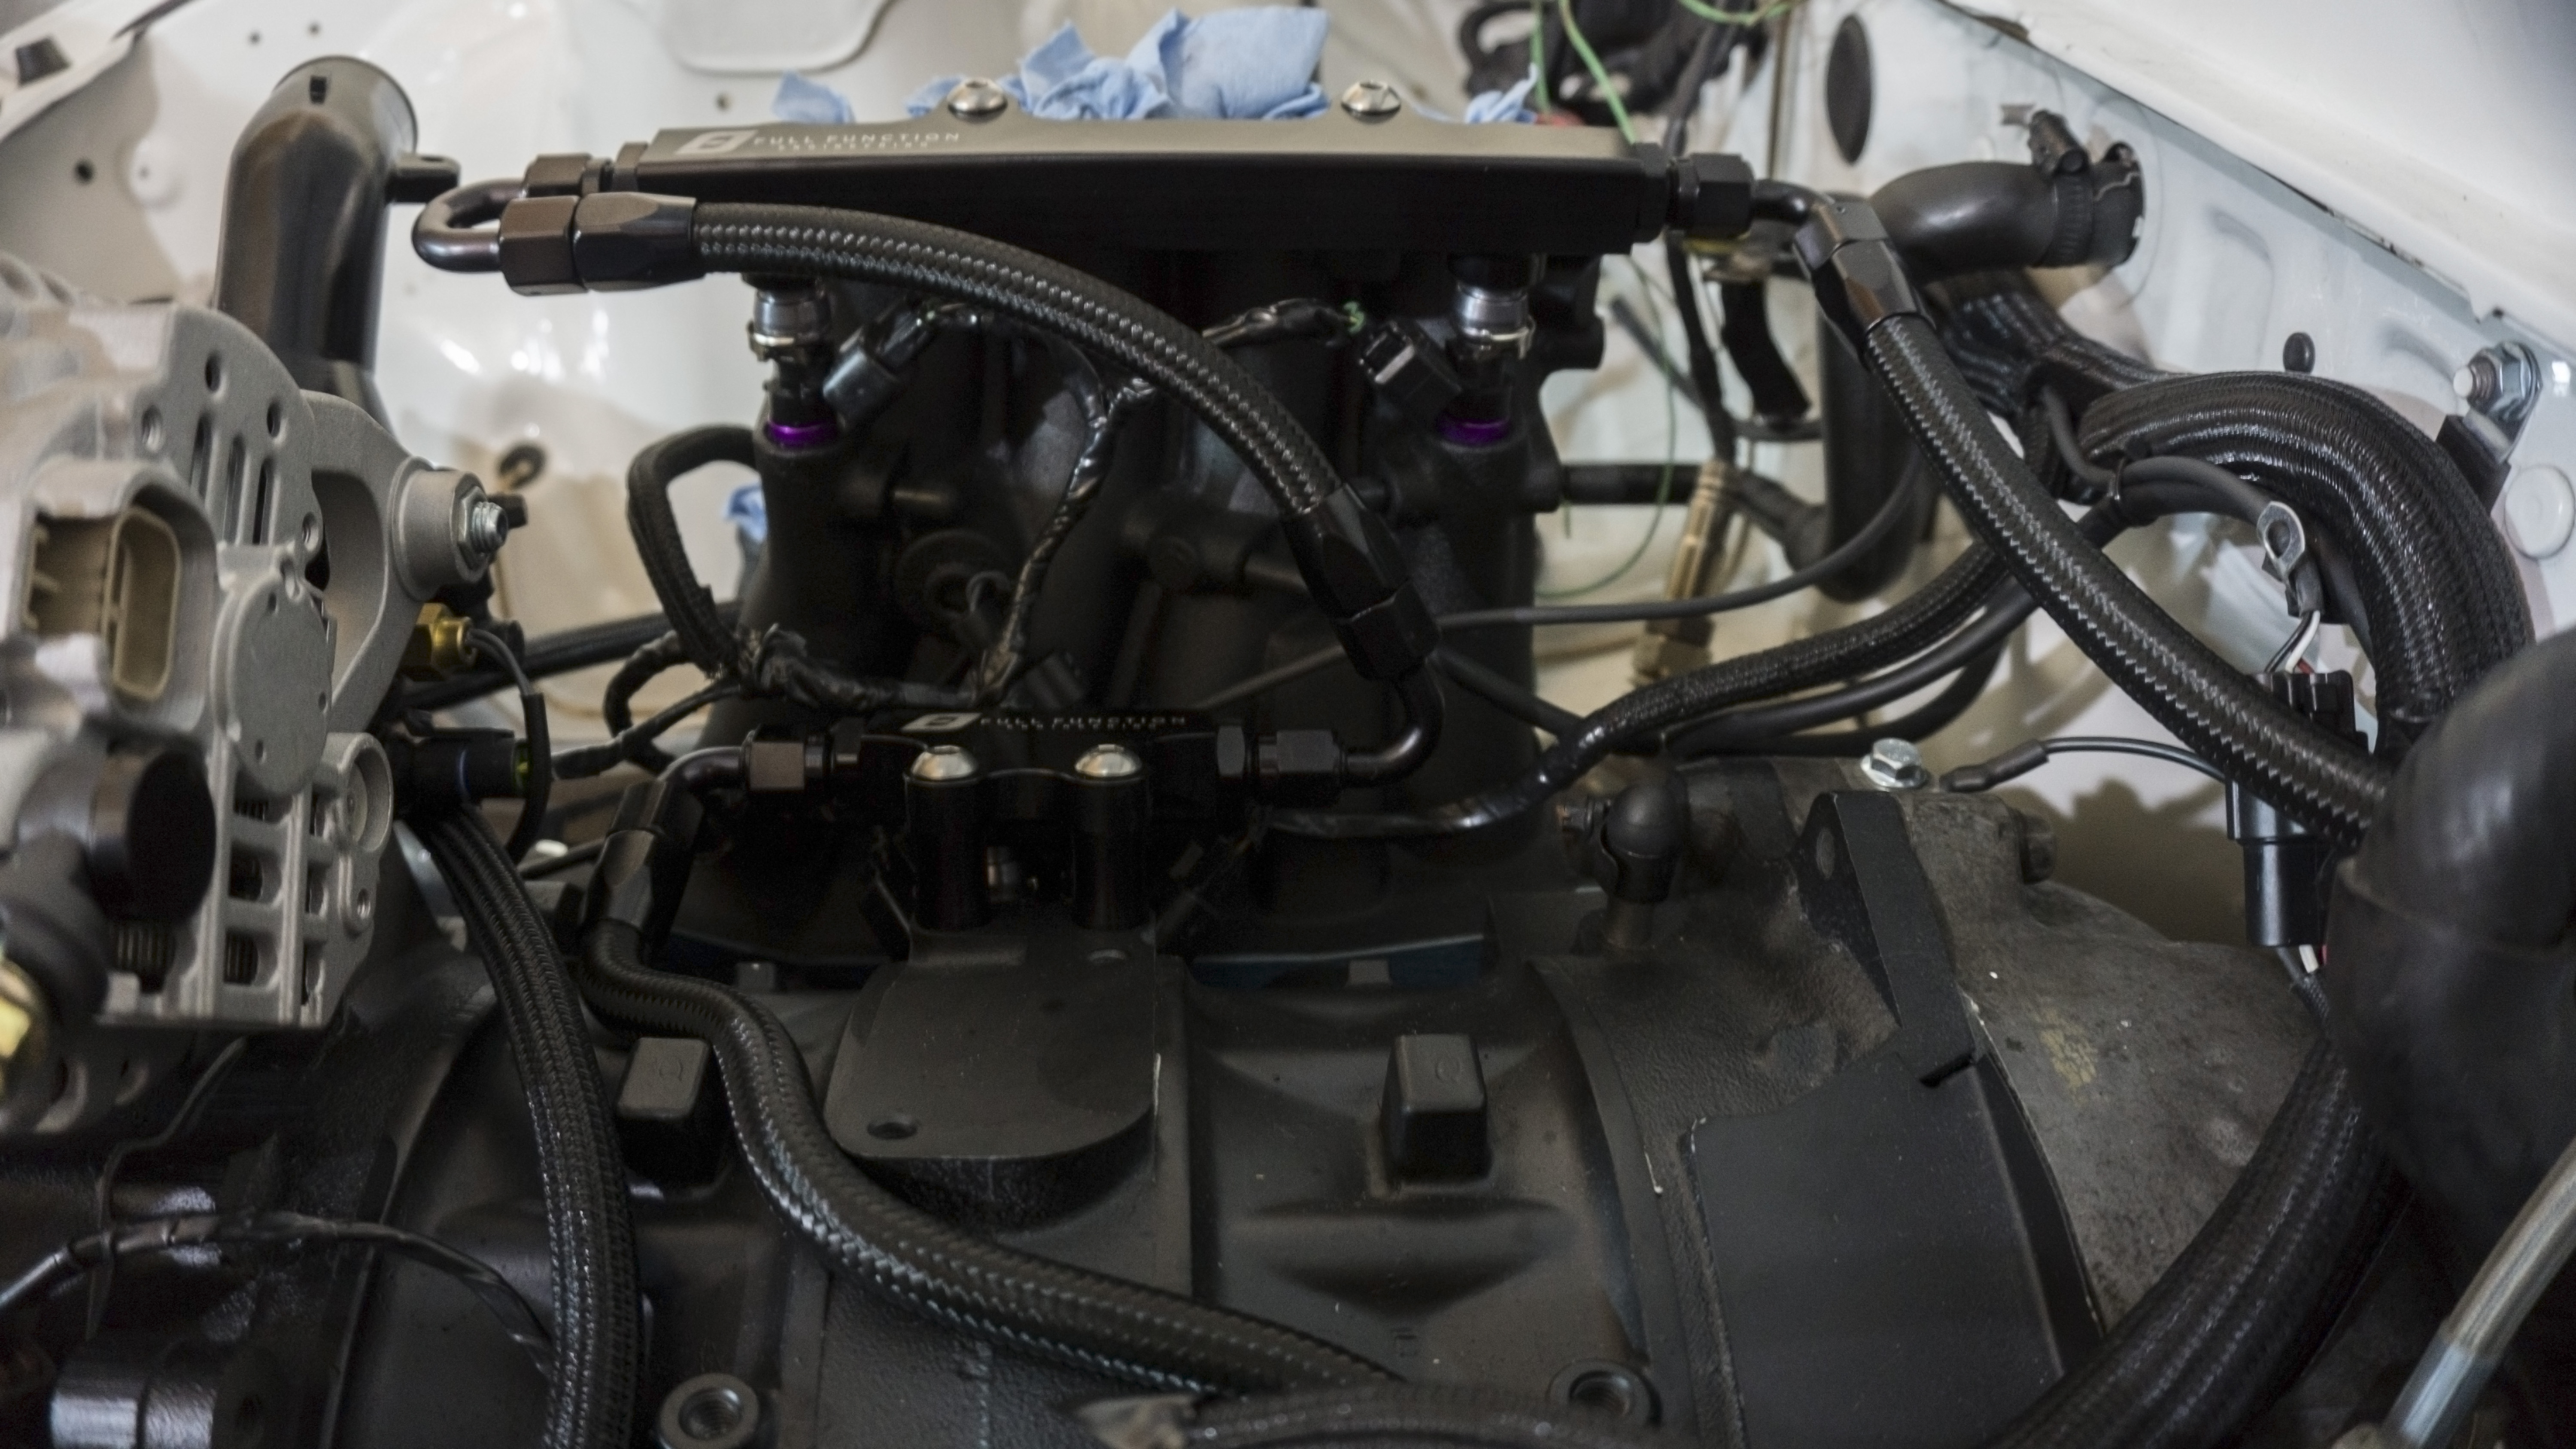
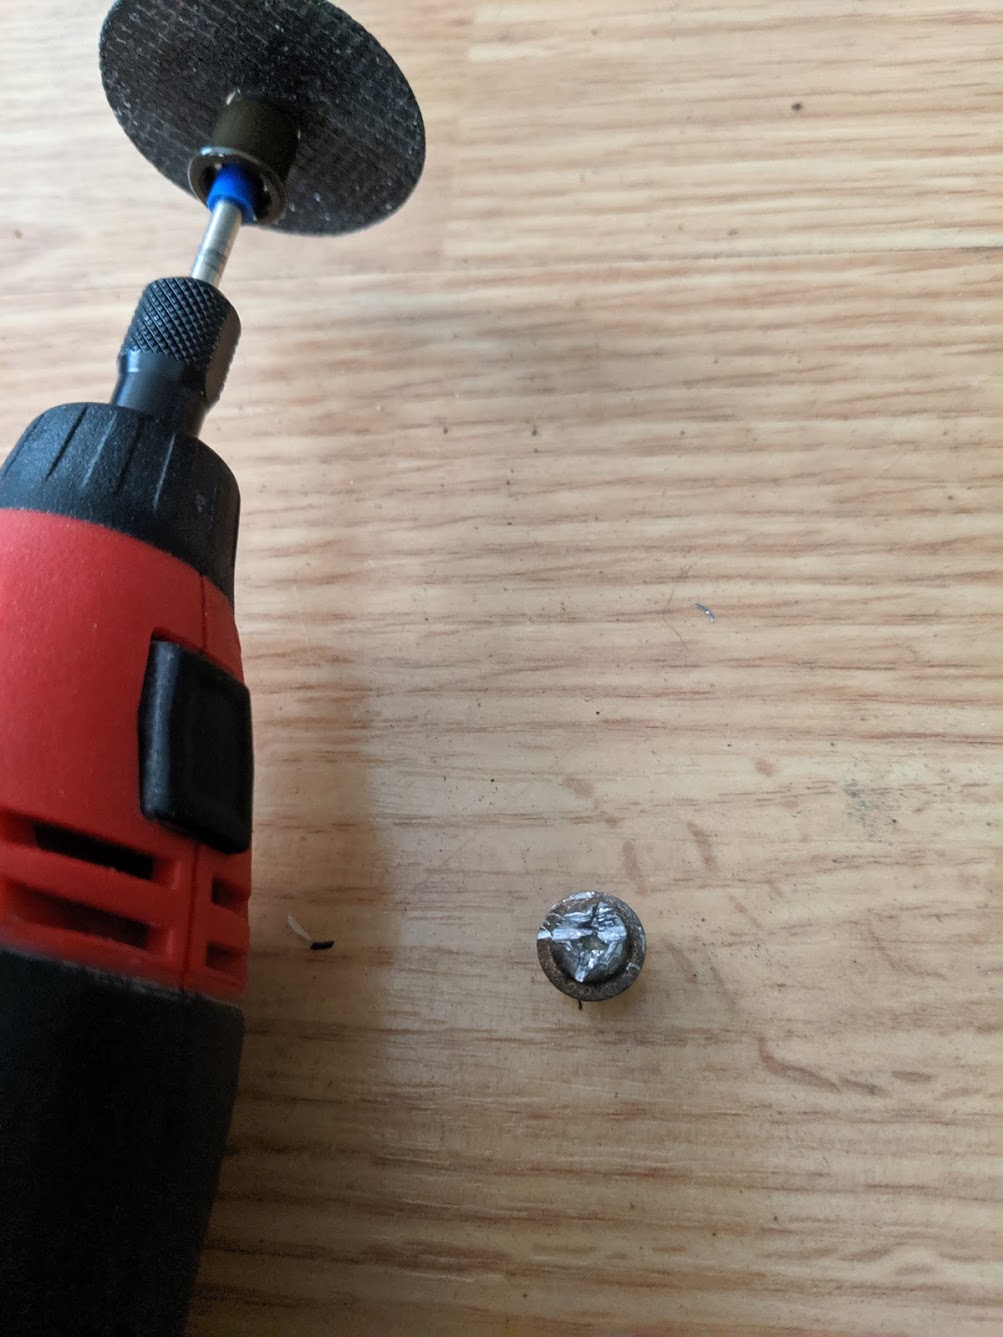
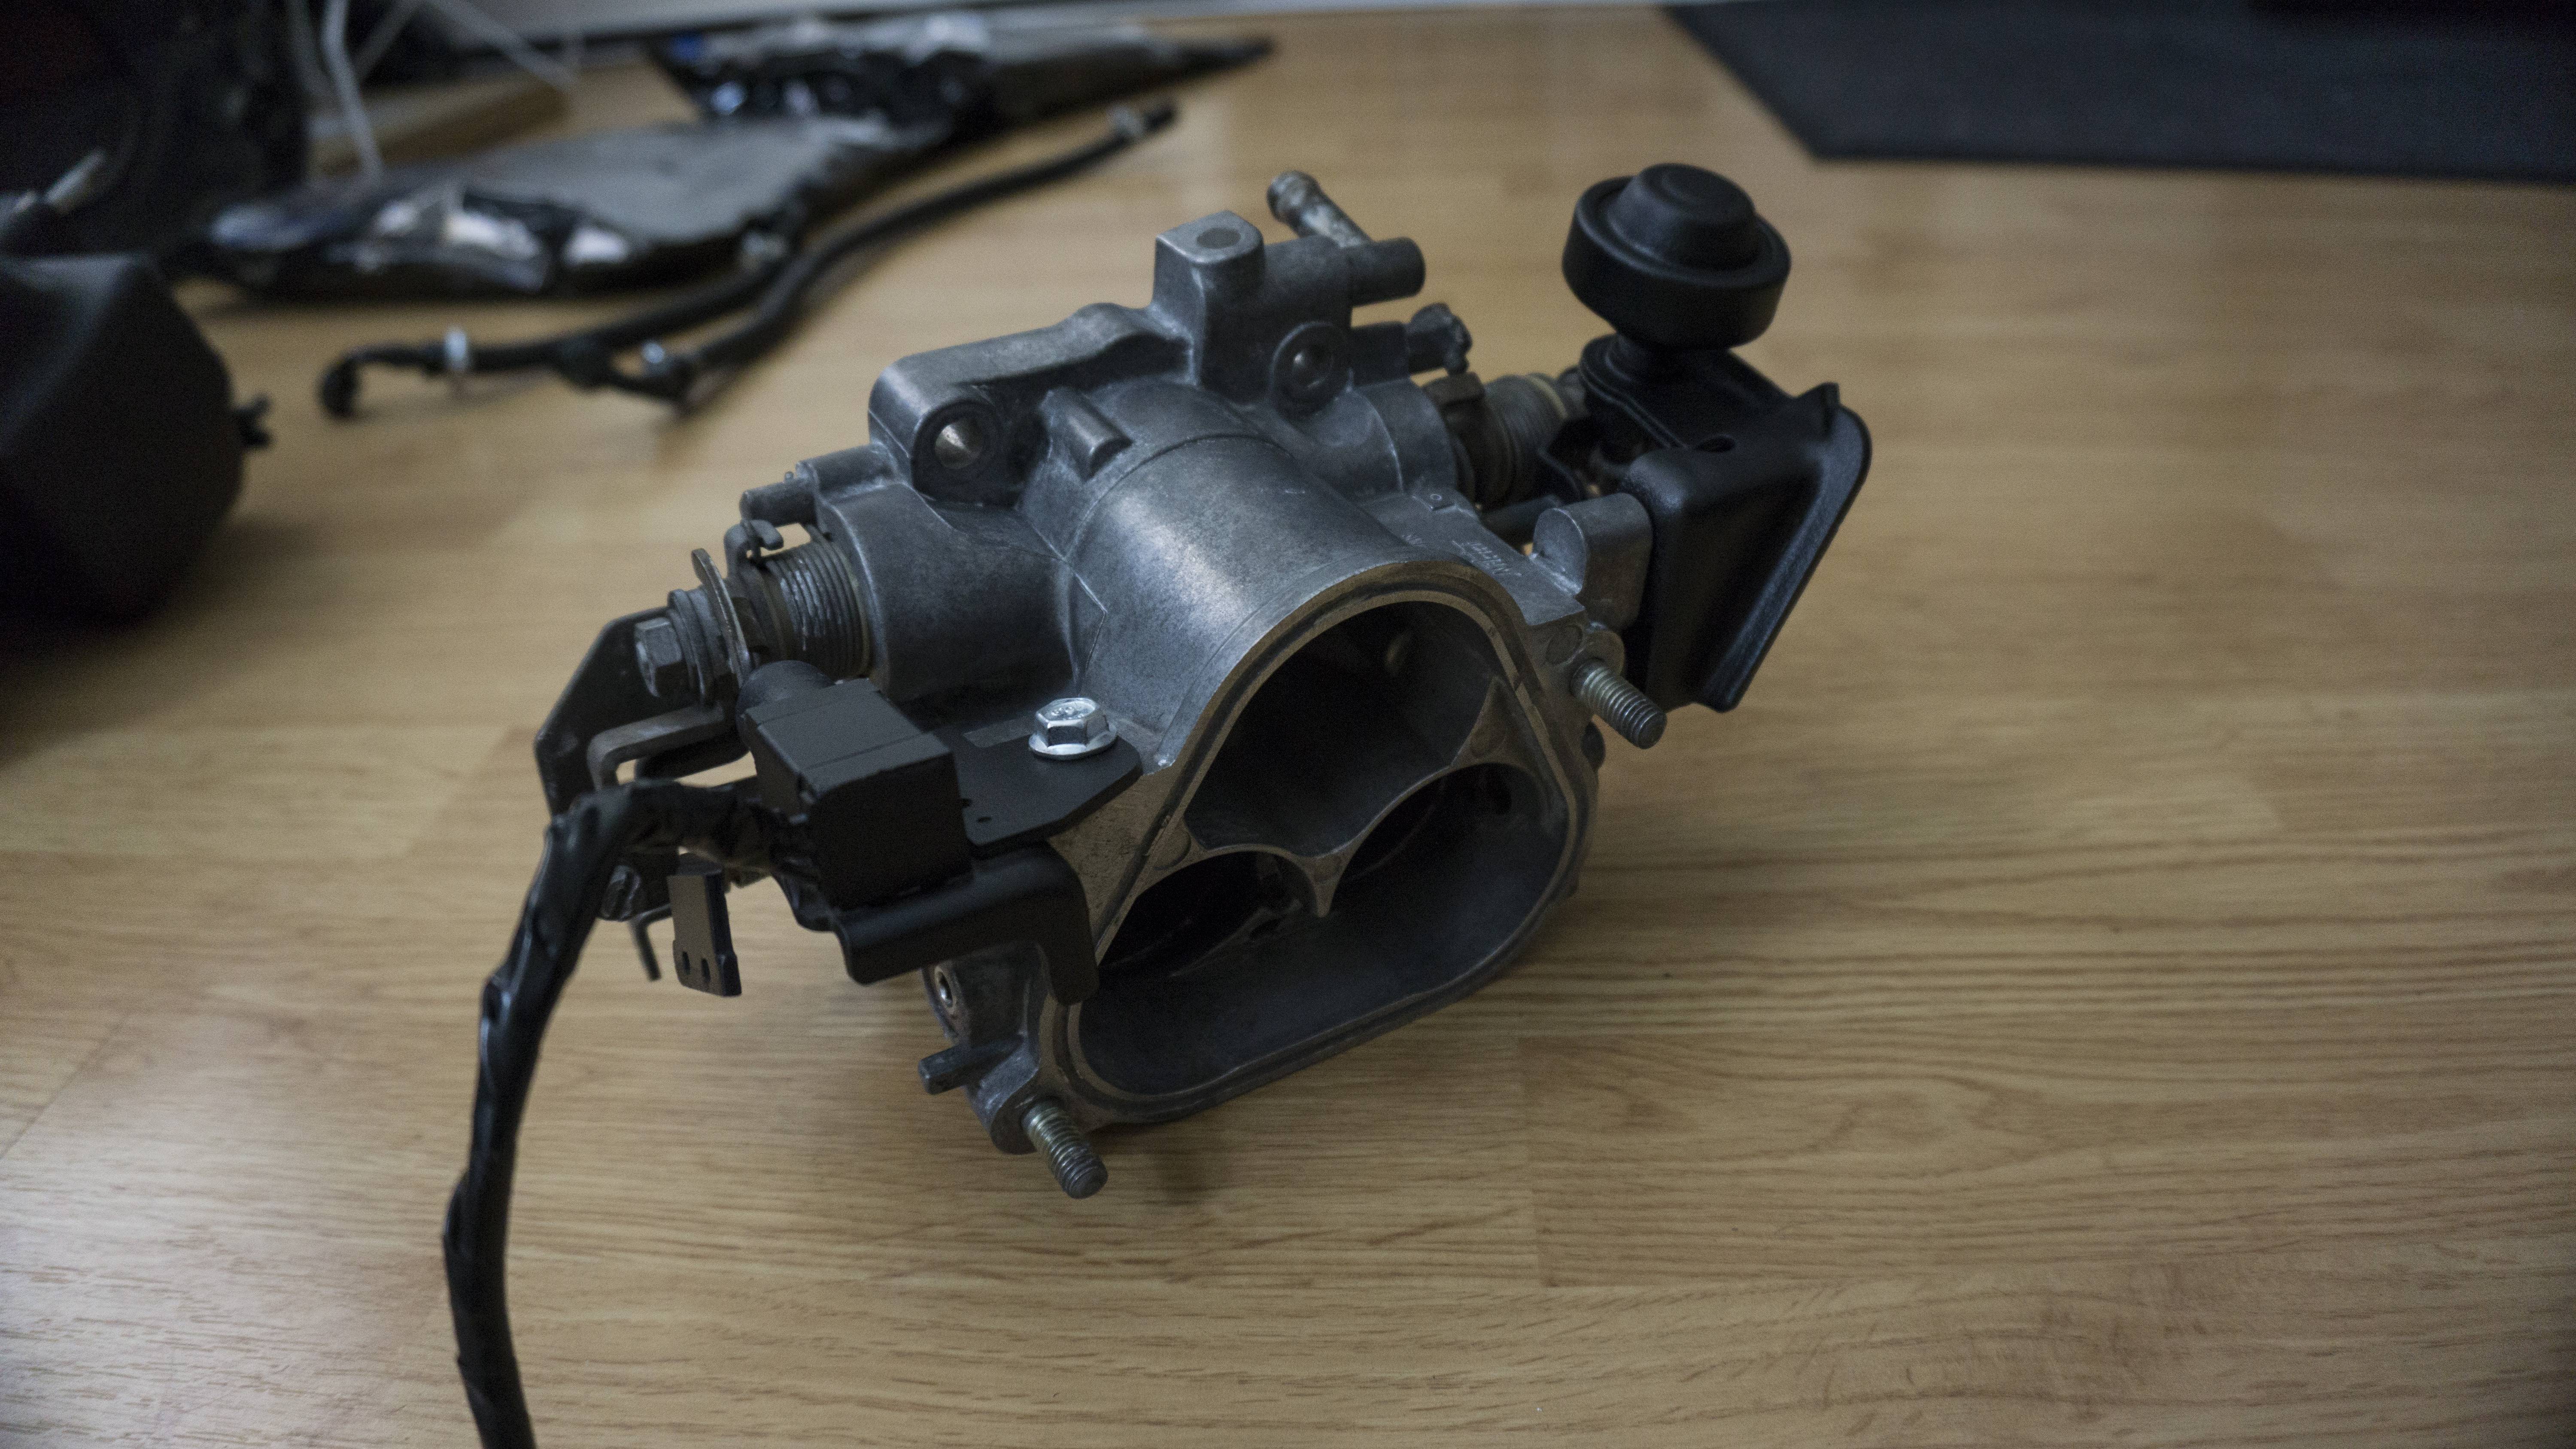
Update 7/14/2019: I feel like it�s been a pretty eventful week for the FC. I purchased a ton of new items for the FC including new headlight bezels, new oil cooler brackets, and a ton of other stuff! A lot has progressed on the interior of the car. I was able to get my door cards back on, with the new passenger window switch. The window is binding on the molding, so I�ll have to pull it back off and fix it - shouldn�t be a big deal though. I also got the new carpet completely in and the dash. There are a couple of fitment issues with the dash and the door card. I�m not sure why that�s the case, maybe the series difference? I�m not too overly concerned about it though. I�m pretty fluent at pulling the dash now; at least it feels like it. My new coilovers came in. I decided to go with BCs until I learn how to drive the car appropriately. If I get super serious into it I may source an entirely different car and make it track oriented. I also built my first set of AN lines - ever. They turned out really nice and I threw 40 PSI through them and no leaks. The last thing I did was the throttle body mod to remove the thermowax. It�s not that bad of a process...but the screws. I attached a picture of one of them. I changed all of them out with allen bolts. Still a ton of more stuff to do to the car�.good thing I guess since I�m being told my V-mount will not be done until November time frame.
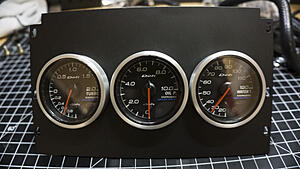
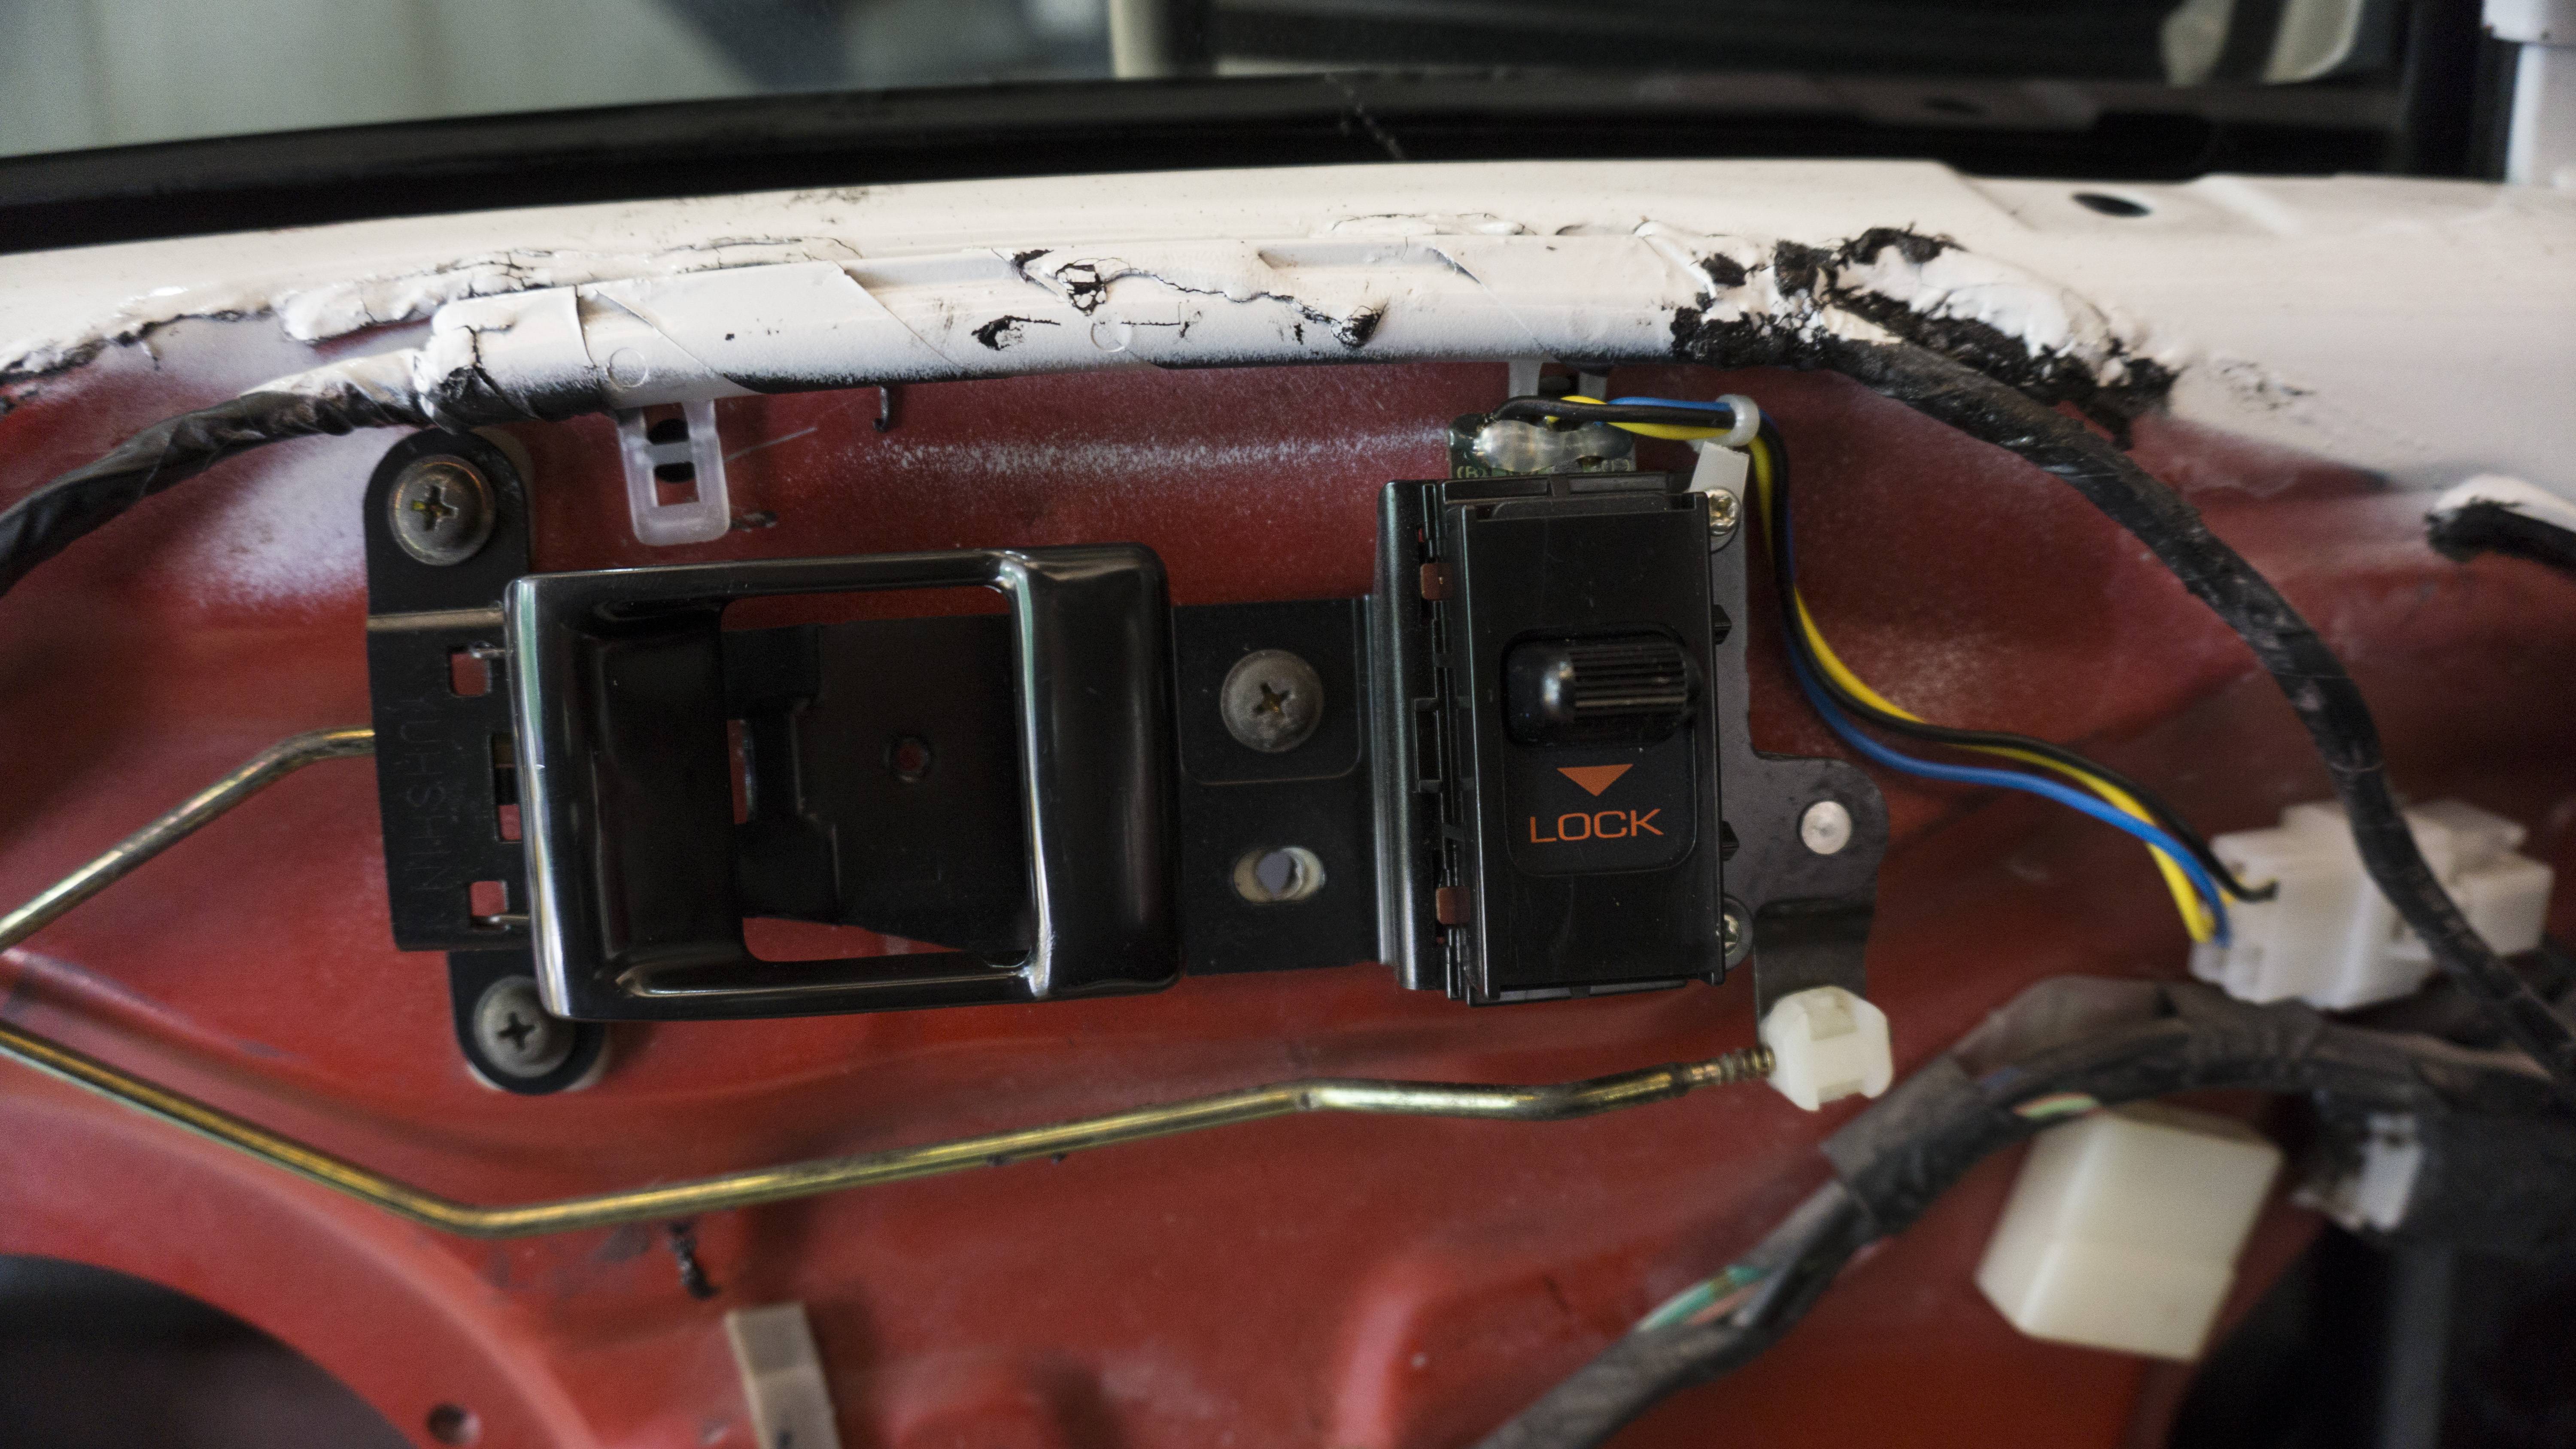
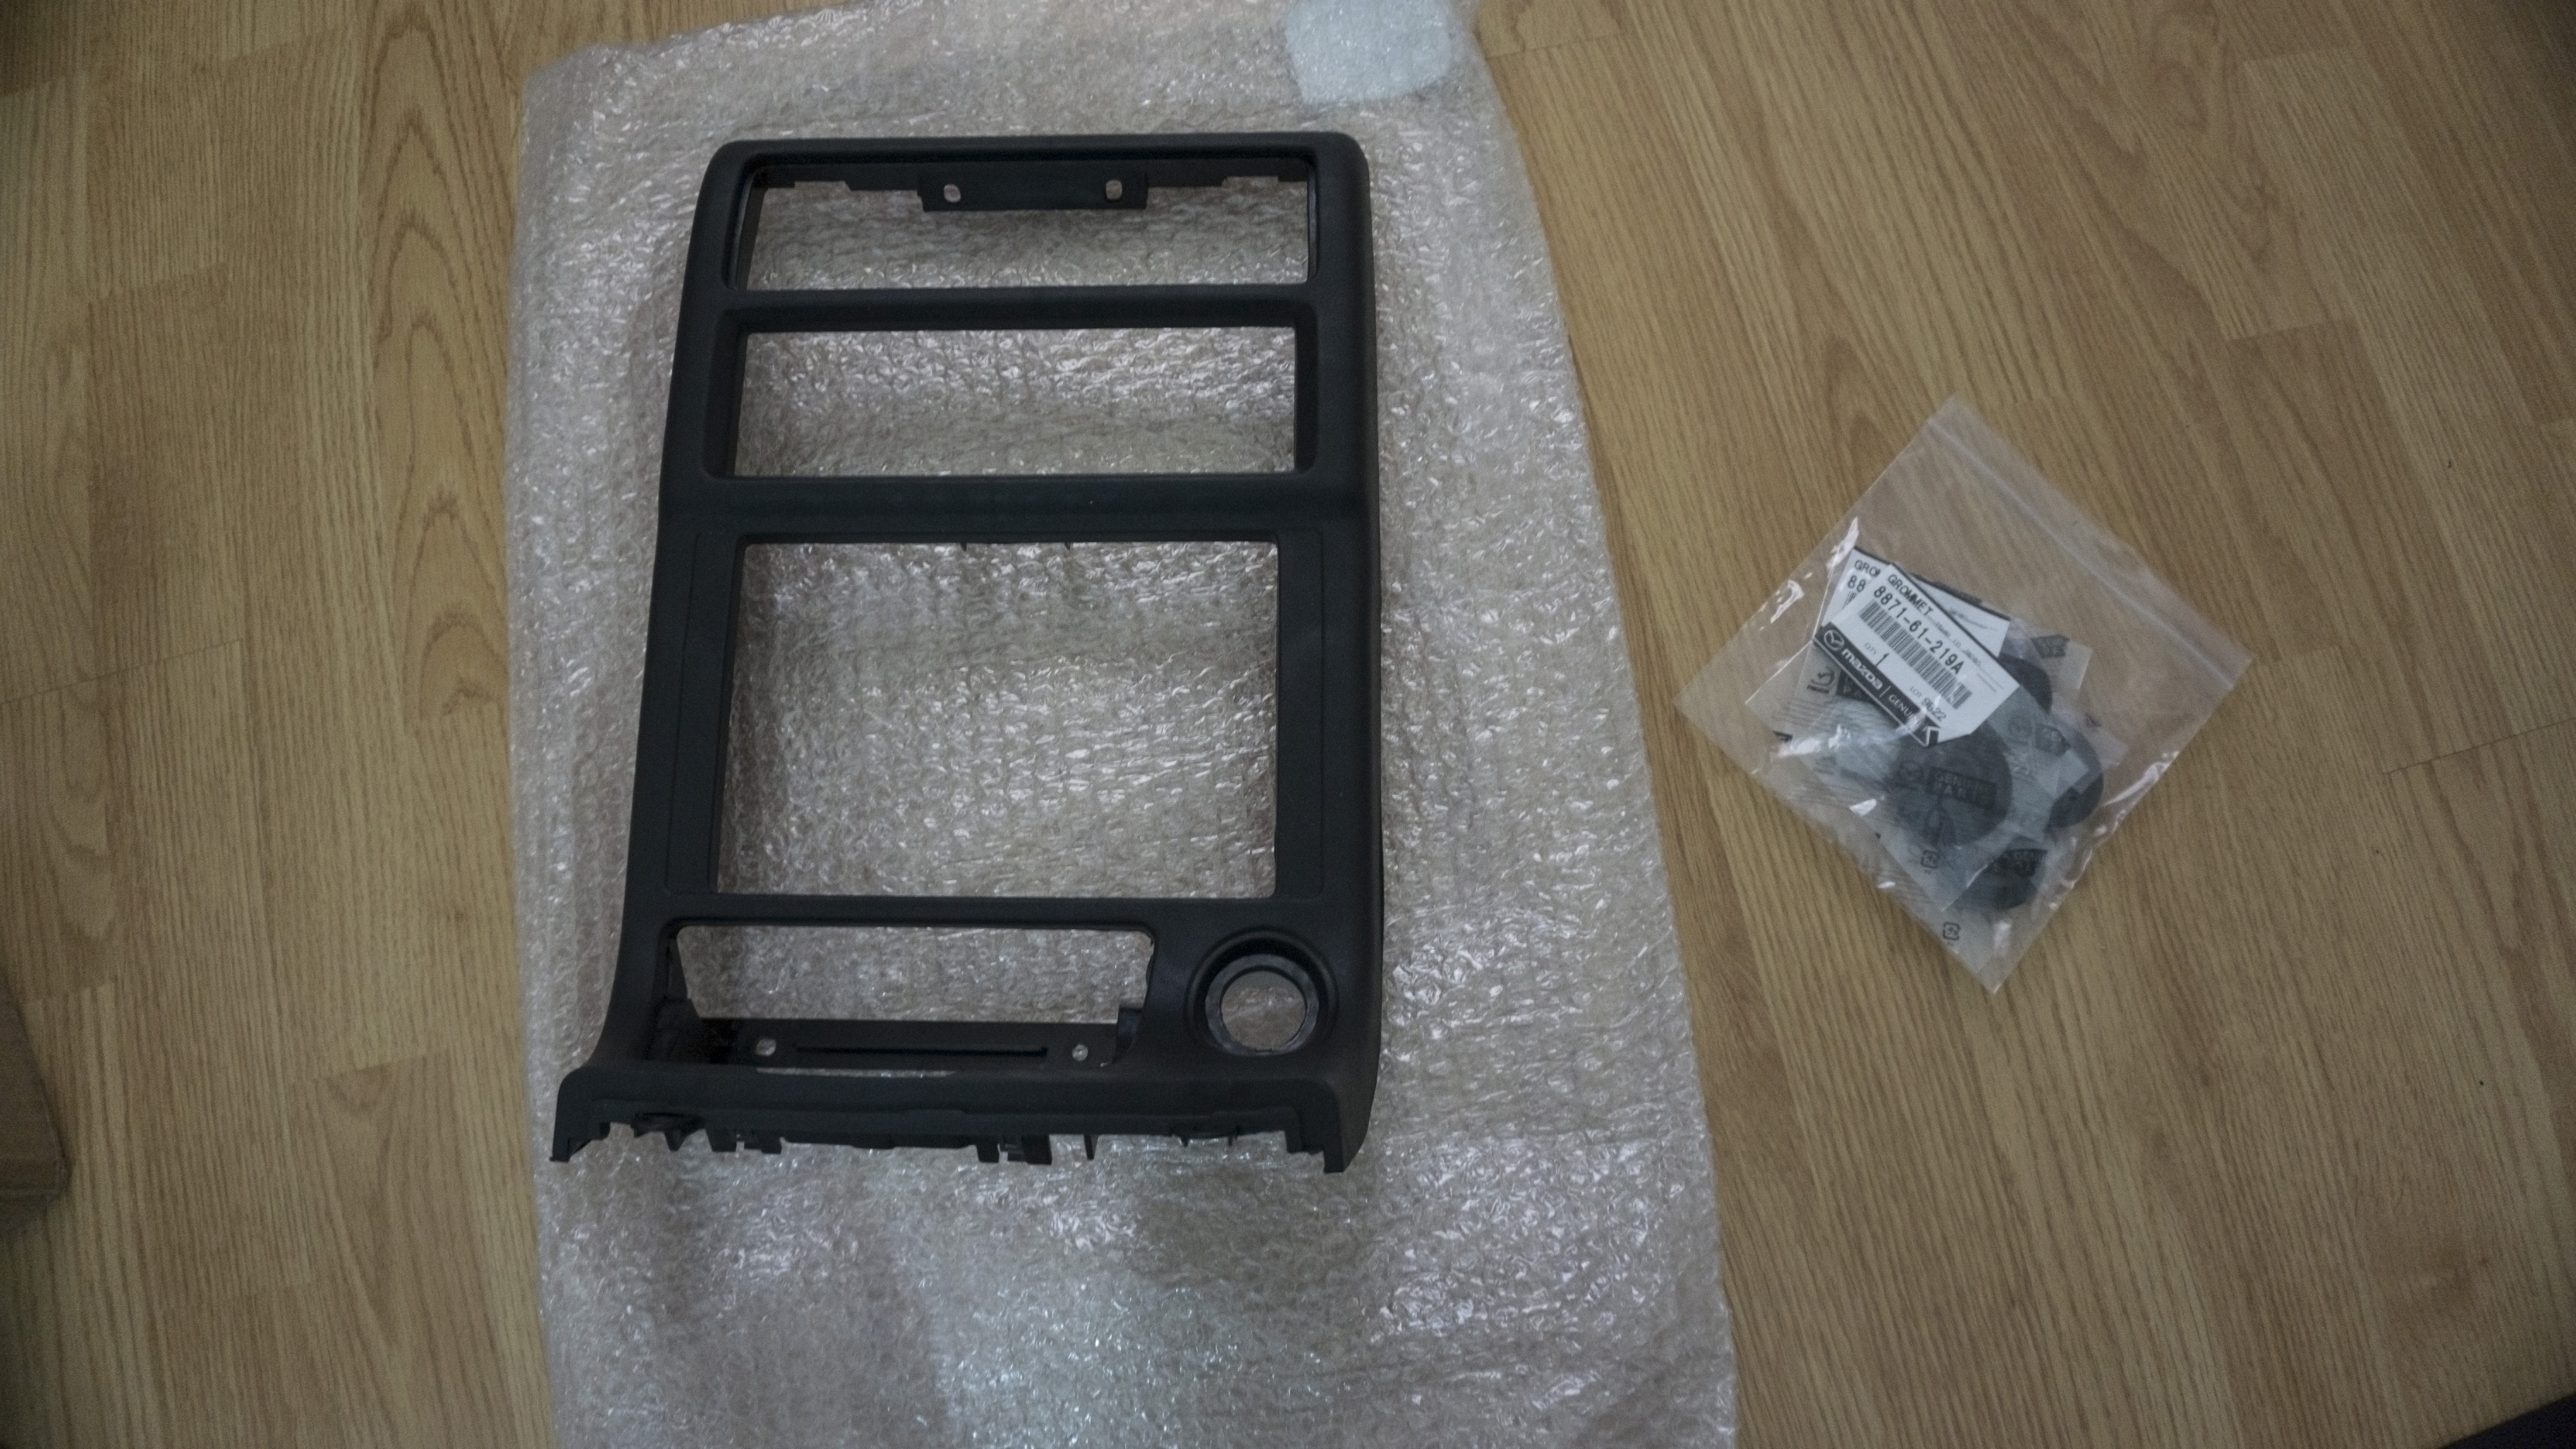
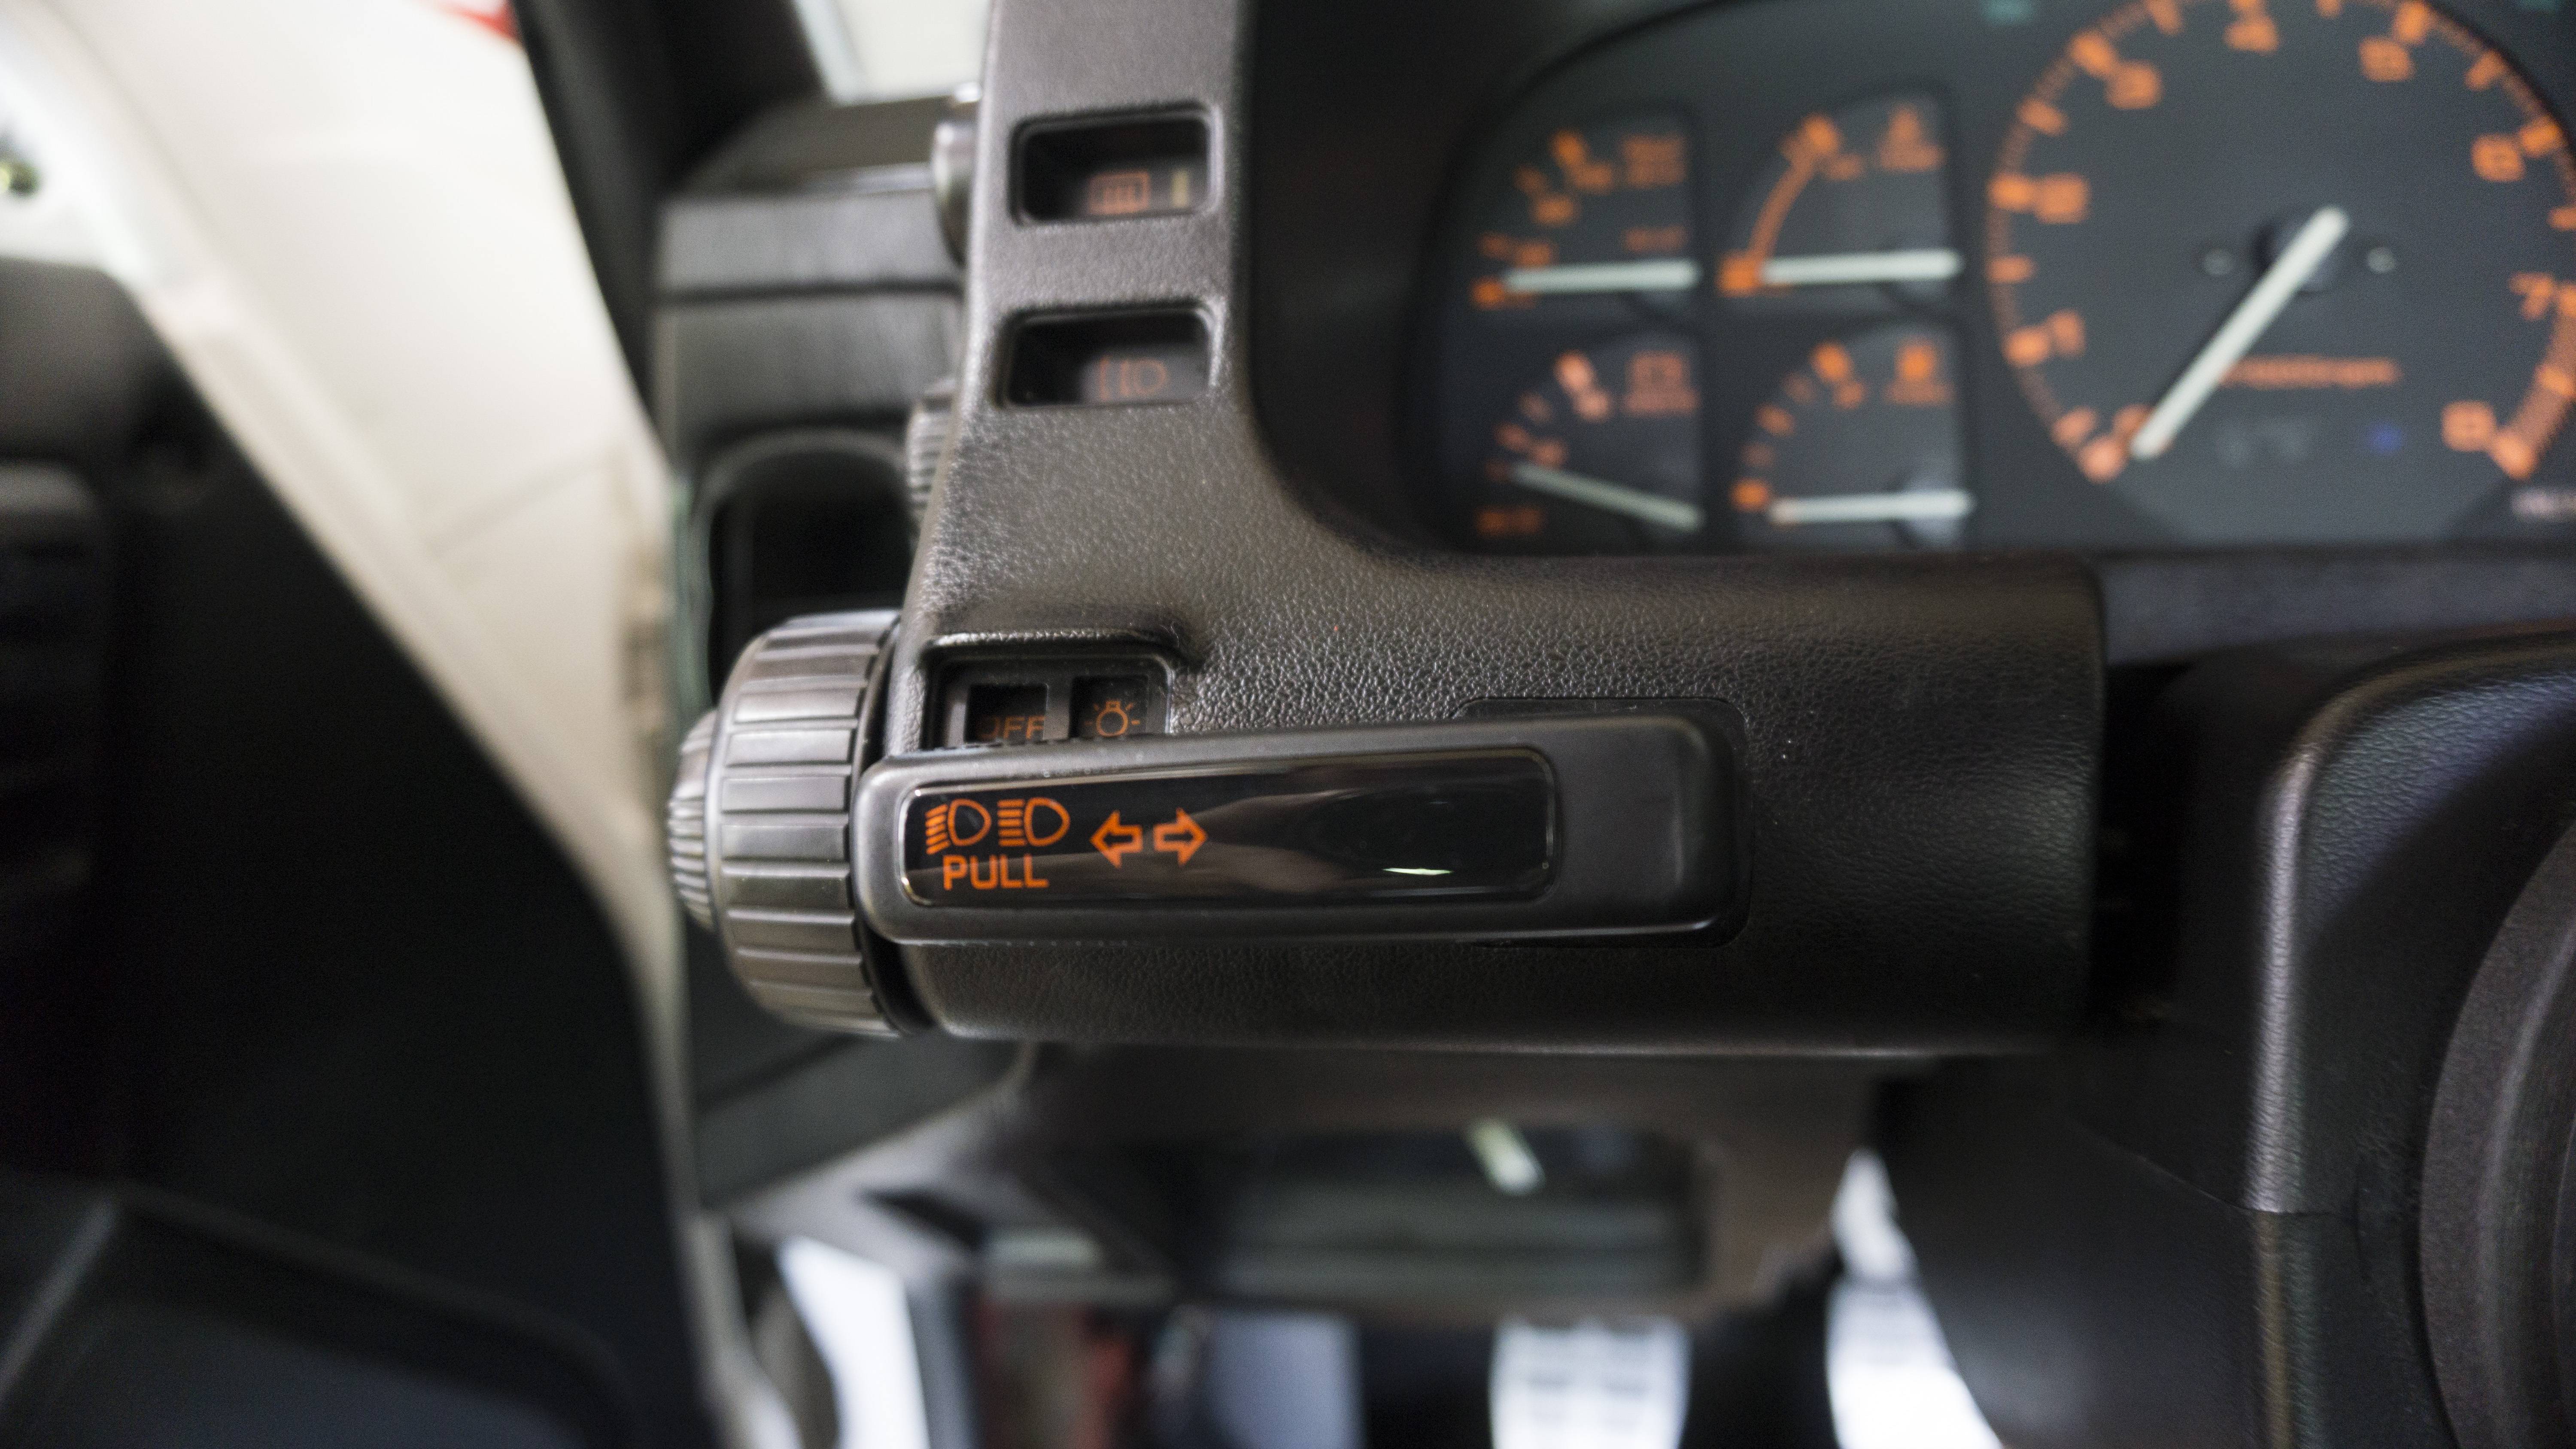
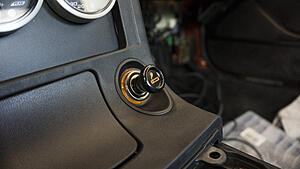
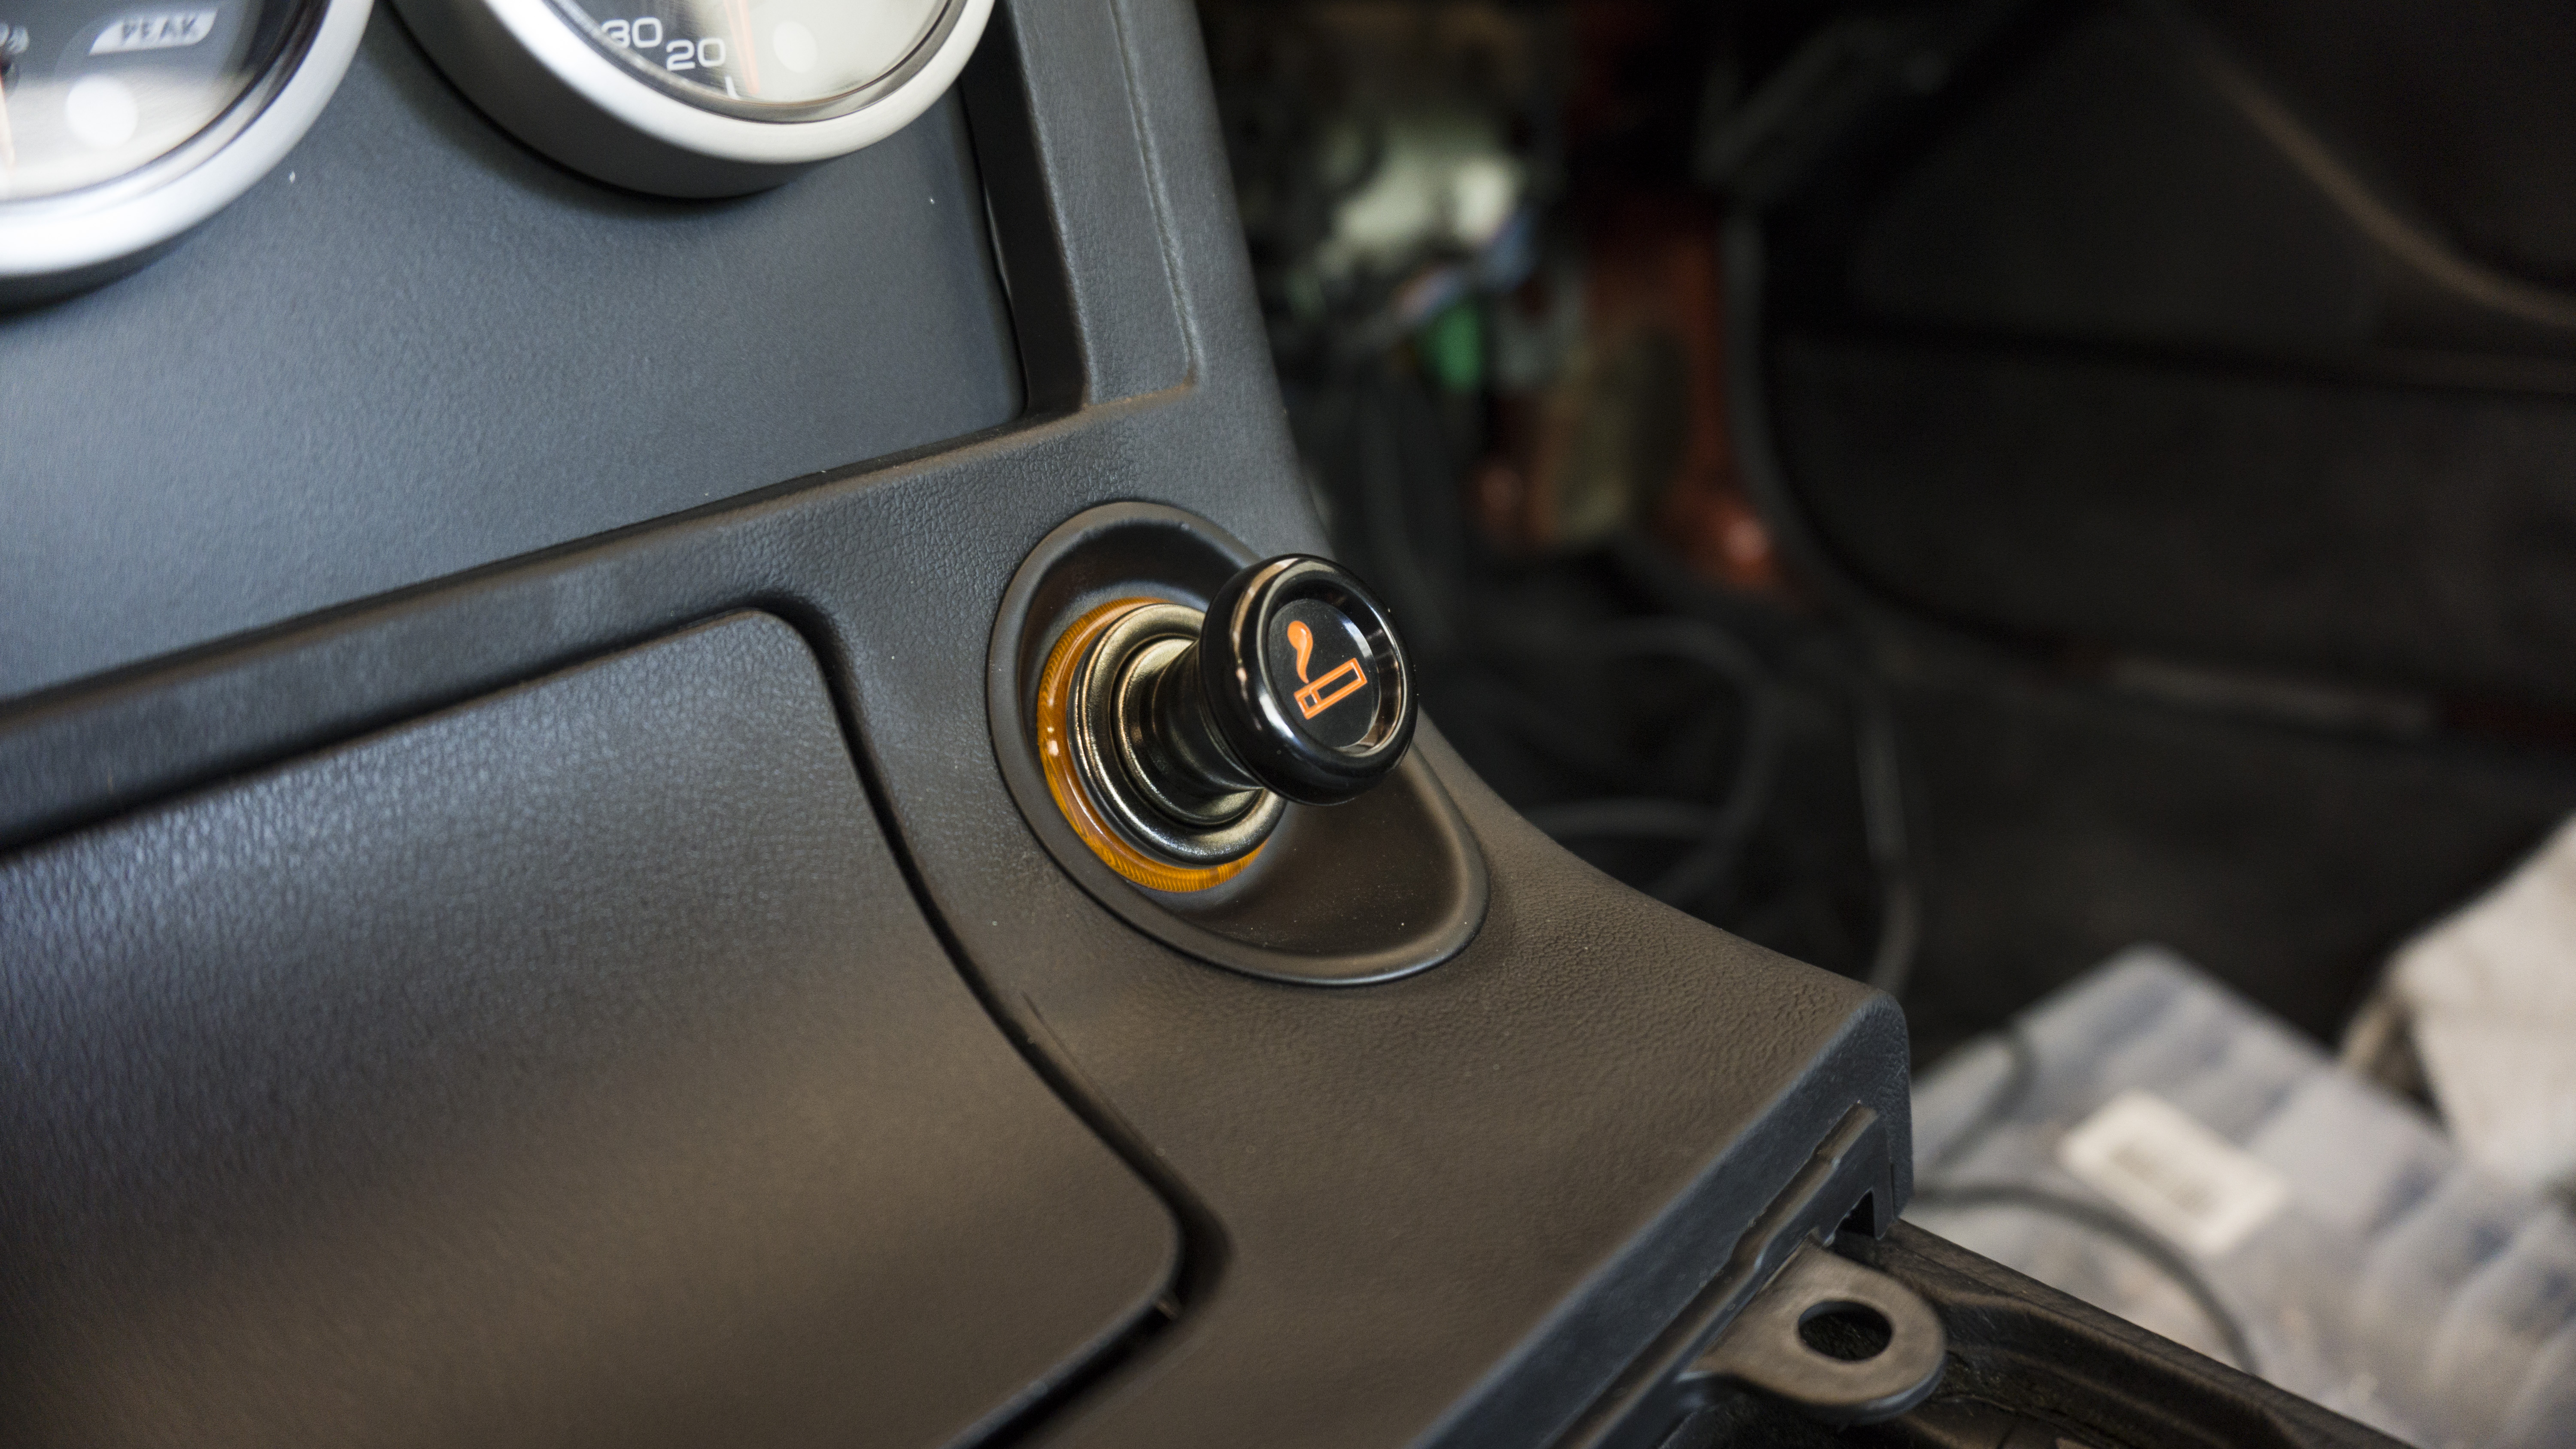
Update 7/21/19: I didn’t get a chance to get a lot of work done this week due to how hot it was. My house AC couldn't even keep up with the heat and it was +5 what I was trying to cool it to. I did however get enough that I think it warrants an update. I ended up purchasing a new stereo bezel and new heater core firewall grommets. I ended up getting both of those put on. I’m very happy to say that the interior is starting to look more like a car again. For the first time, ever - I think, the car has an idiot cluster bezel. I’ve been holding on that for years and I felt it was finally time to put it on. I also put on a brand new turn signal ****. I need to finish up under wiring on the Defi gauges and find a new location for my laptop to connect to the ECU. I ordered a new OEM cigarette lighter assembly (just for looks - I don’t smoke lol), so I’ll need to find a clever place to mount the connector. I also fabbed up a plate to mount the Defi boost sensor and the boost control solenoid. I’ll eventually have that powder coated to match the rest of the brackets. I’d like to eventually learn how to do a lot more with fabbing. Currently I can only do very minor bends and drill holes haha - I plan to get a welder when I get my own house. I finished out the weekend by creating the last of the AN lines I needed. I also rerouted some cables and got the new spark plugs and cables on. Next thing up on the list is dropping the headliner and fixing the sunroof fitment/alignment. I also need to figure out a smart way of wrapping the throttle cable.
Here are some shots of what I accomplished in the engine bay:
Here are some shots of what I accomplished in the interior:
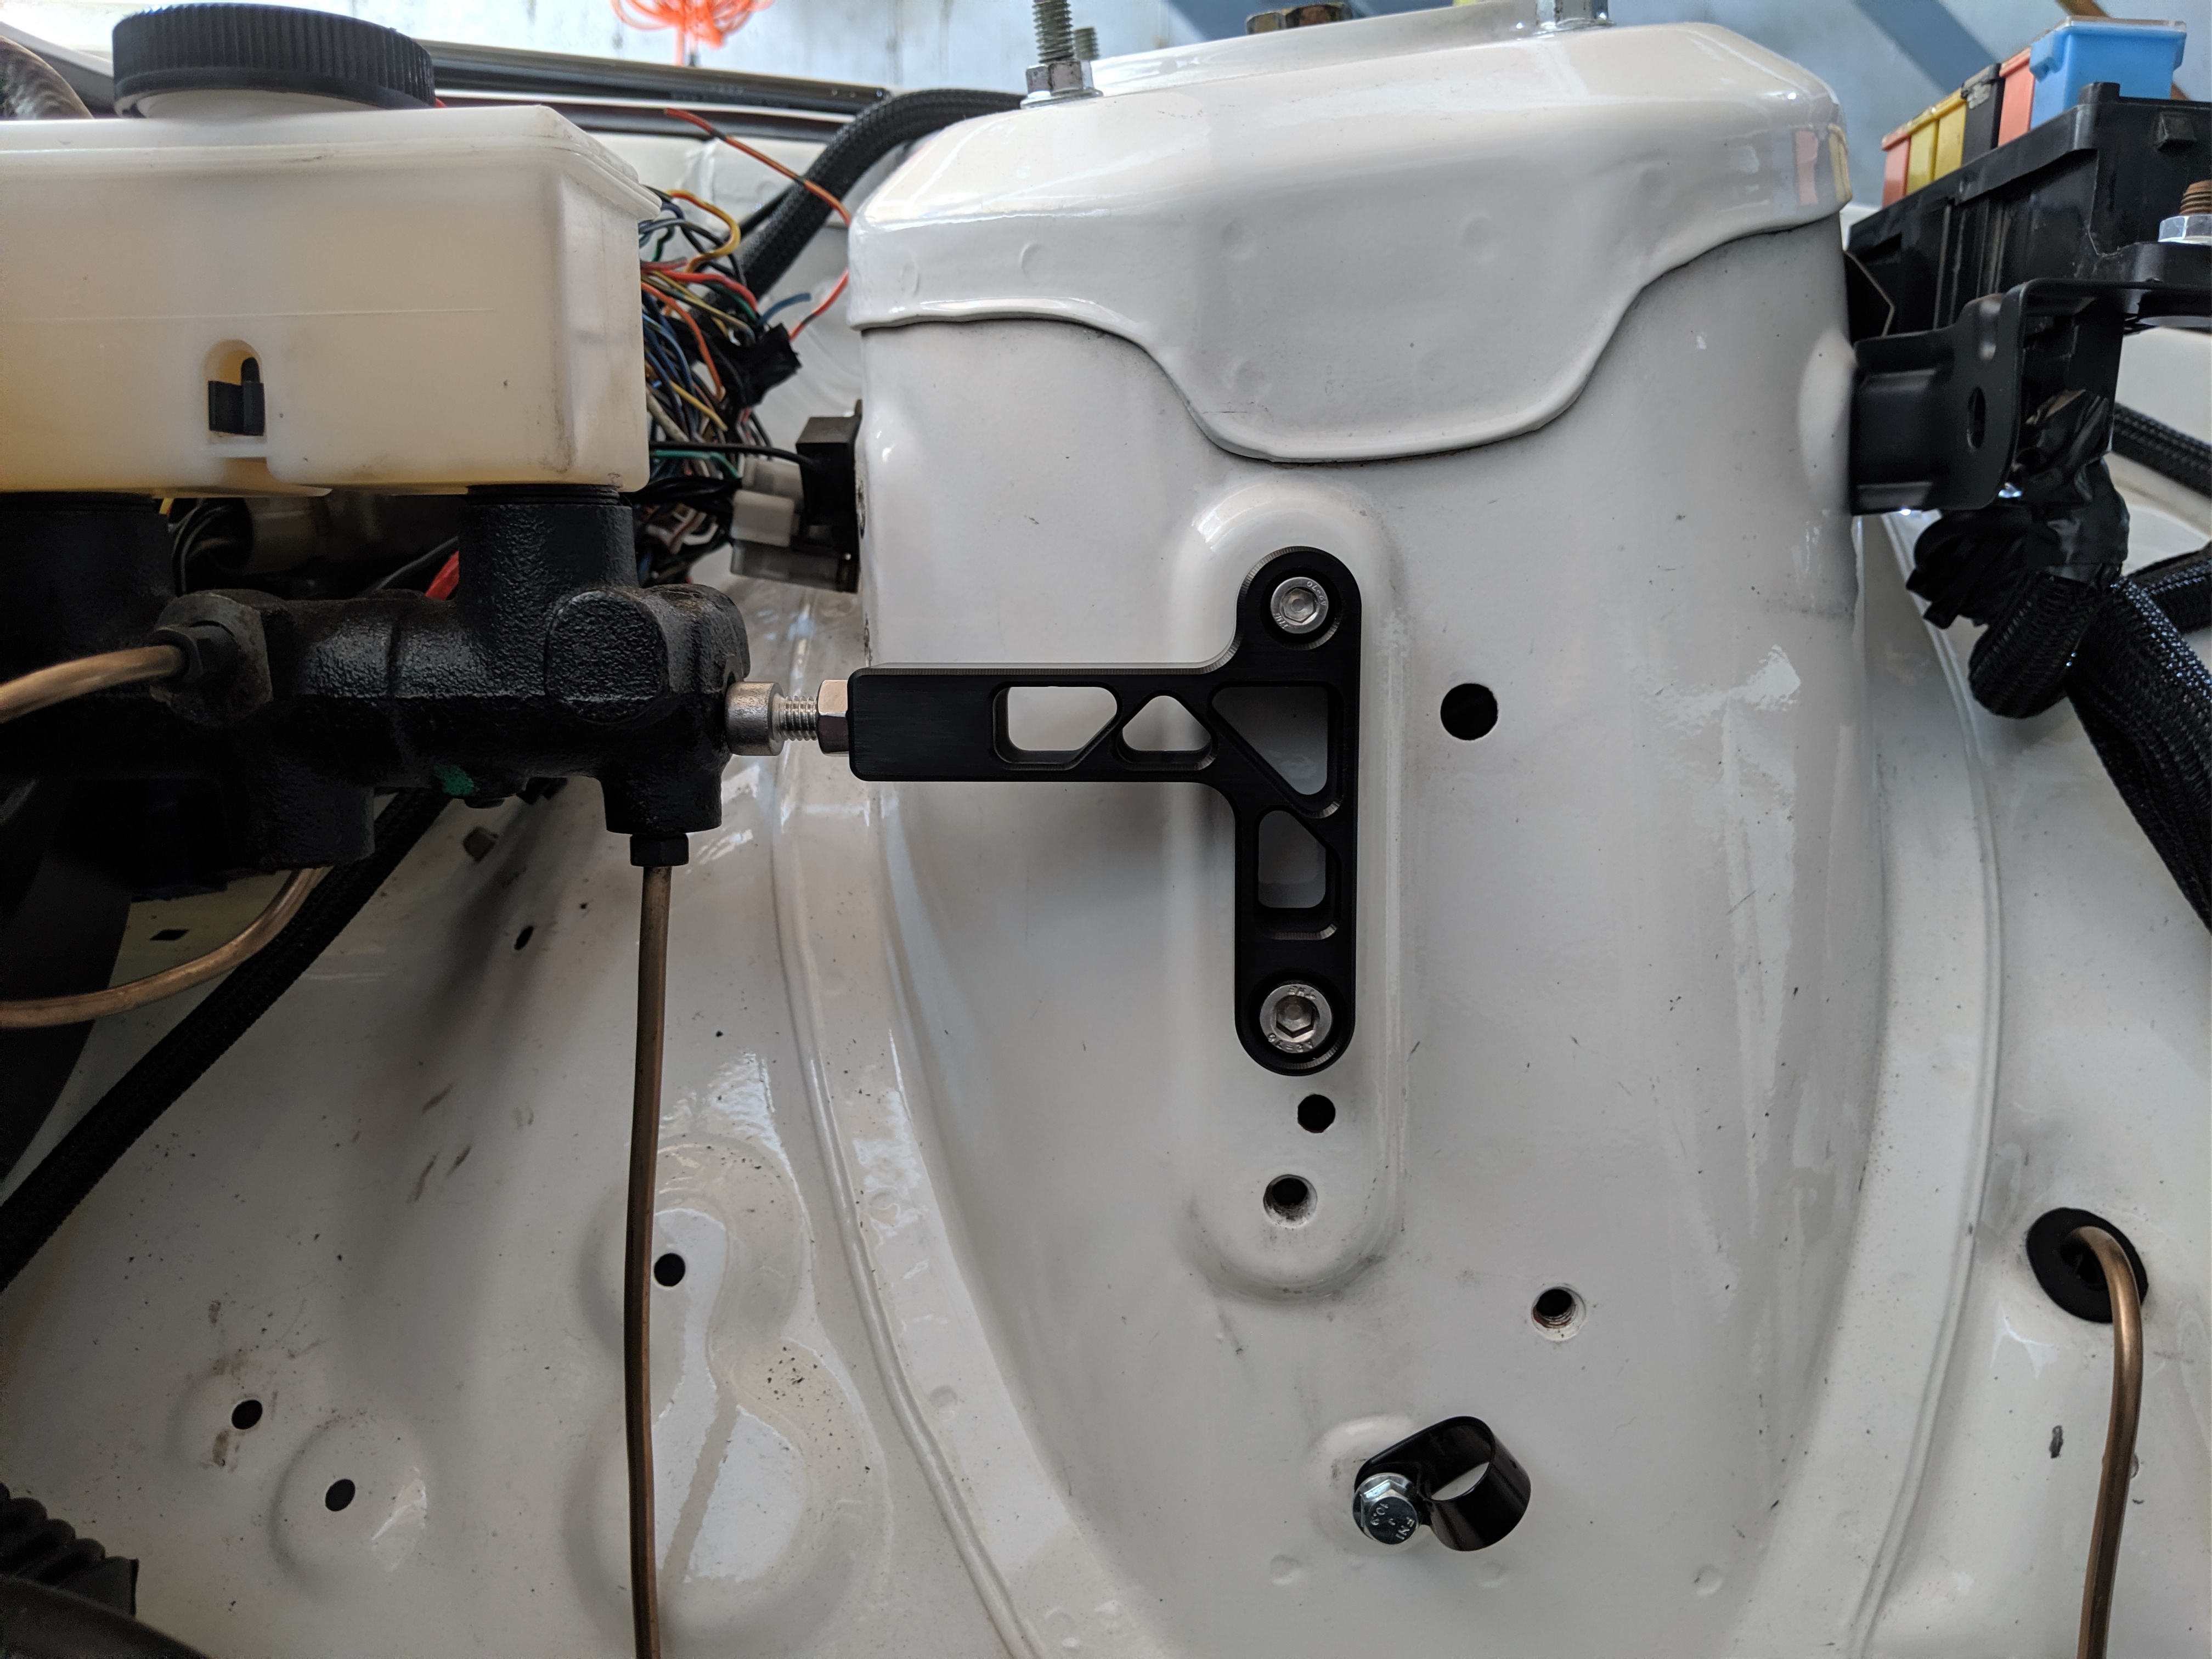
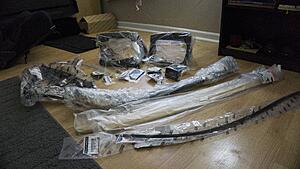
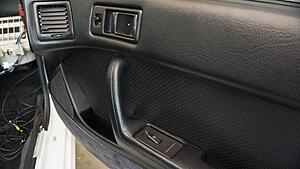
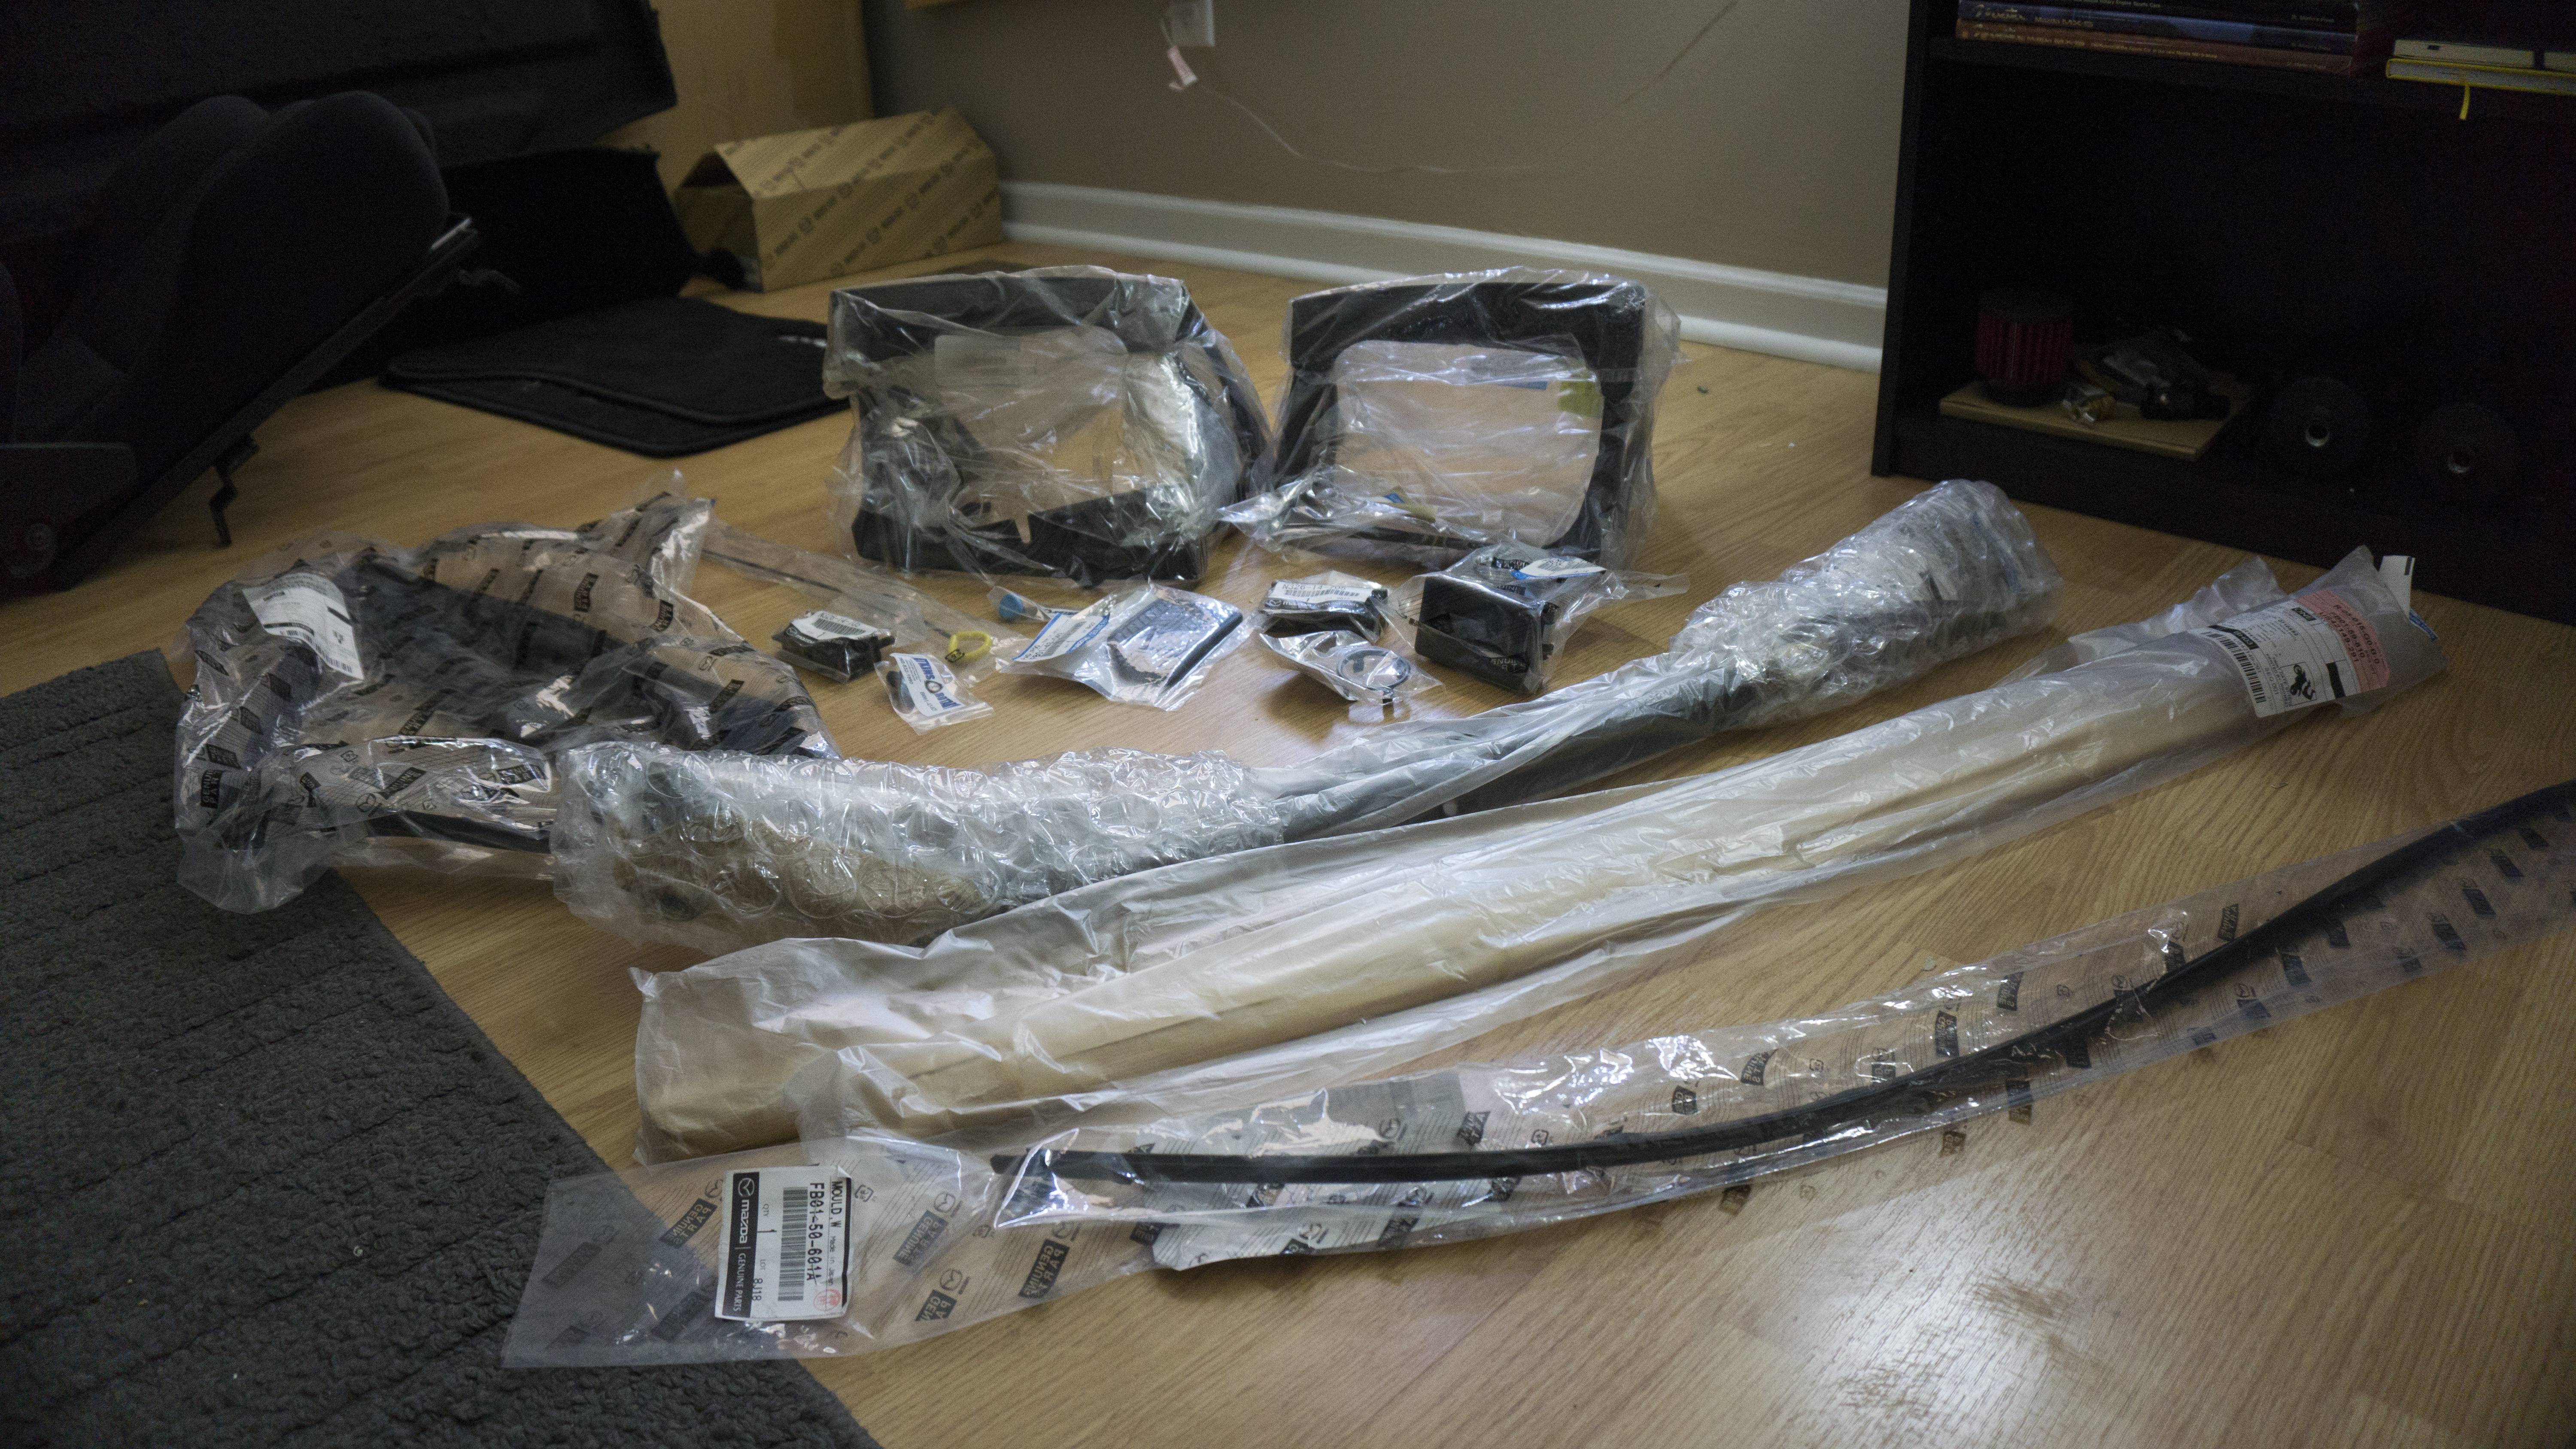
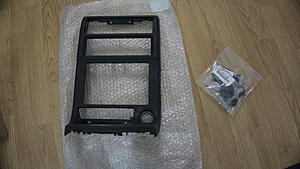
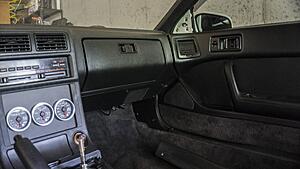
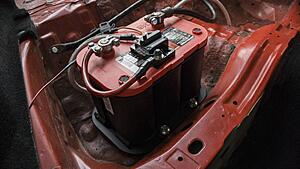
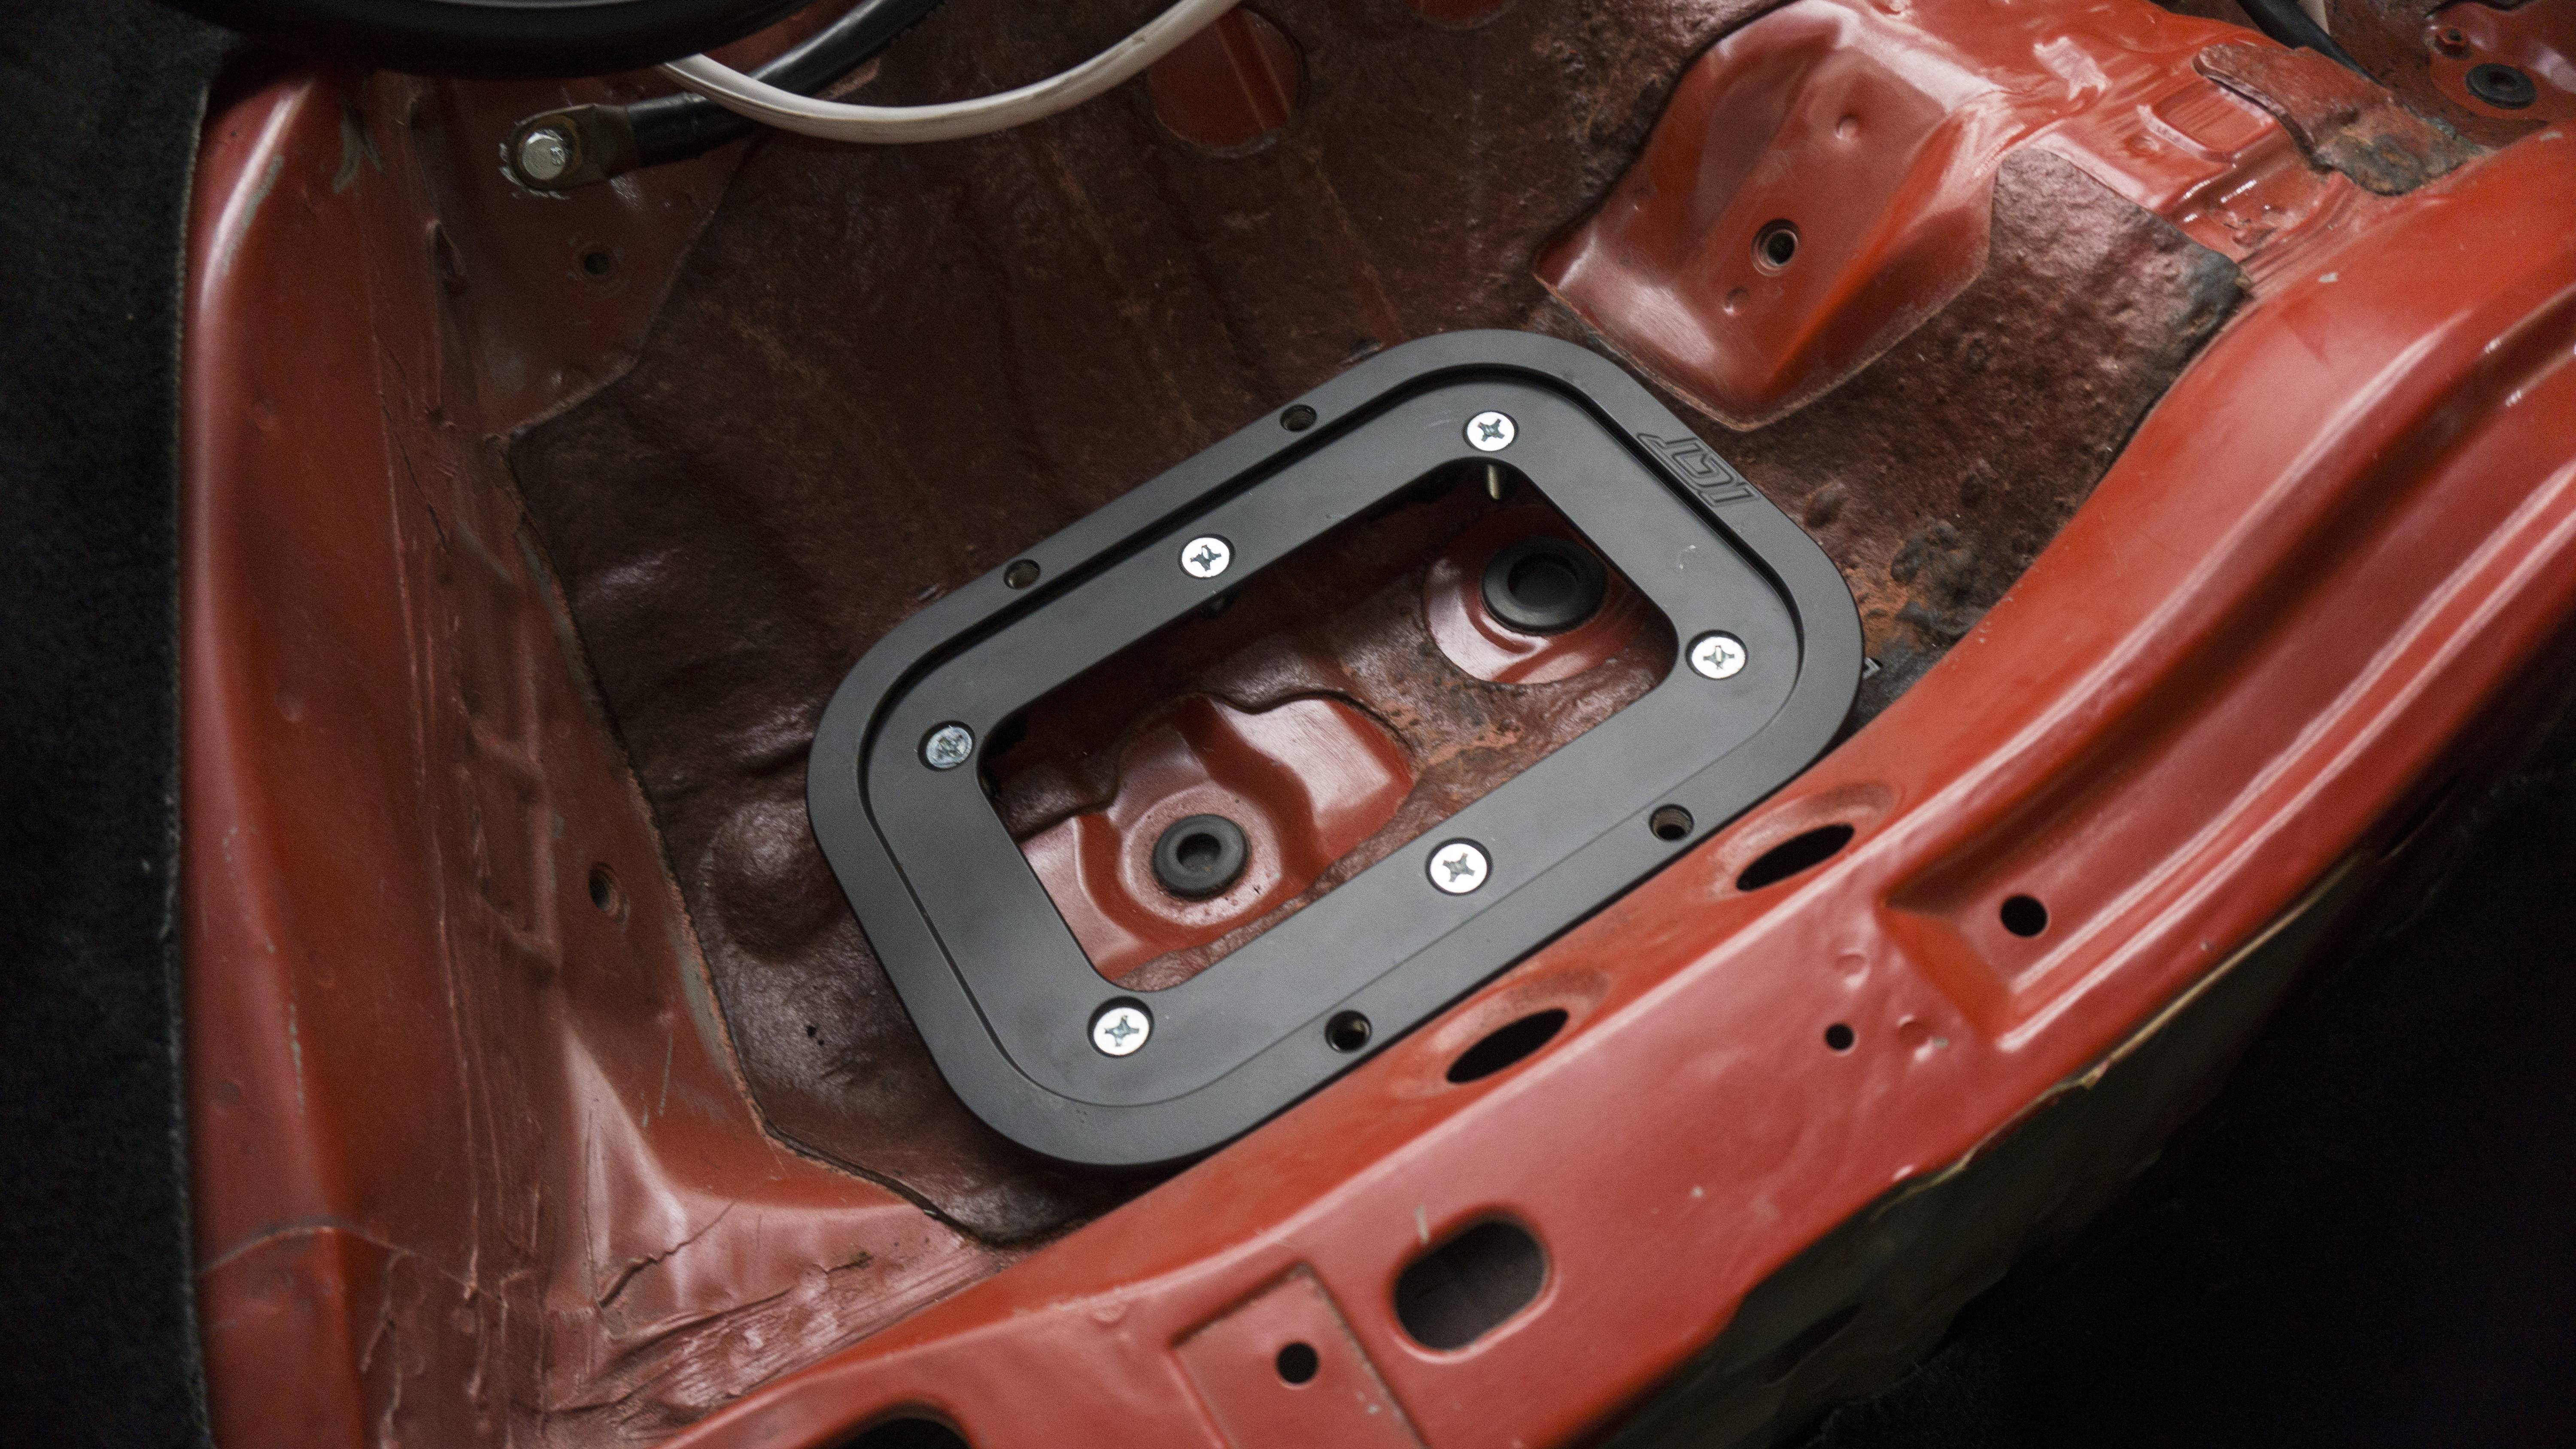
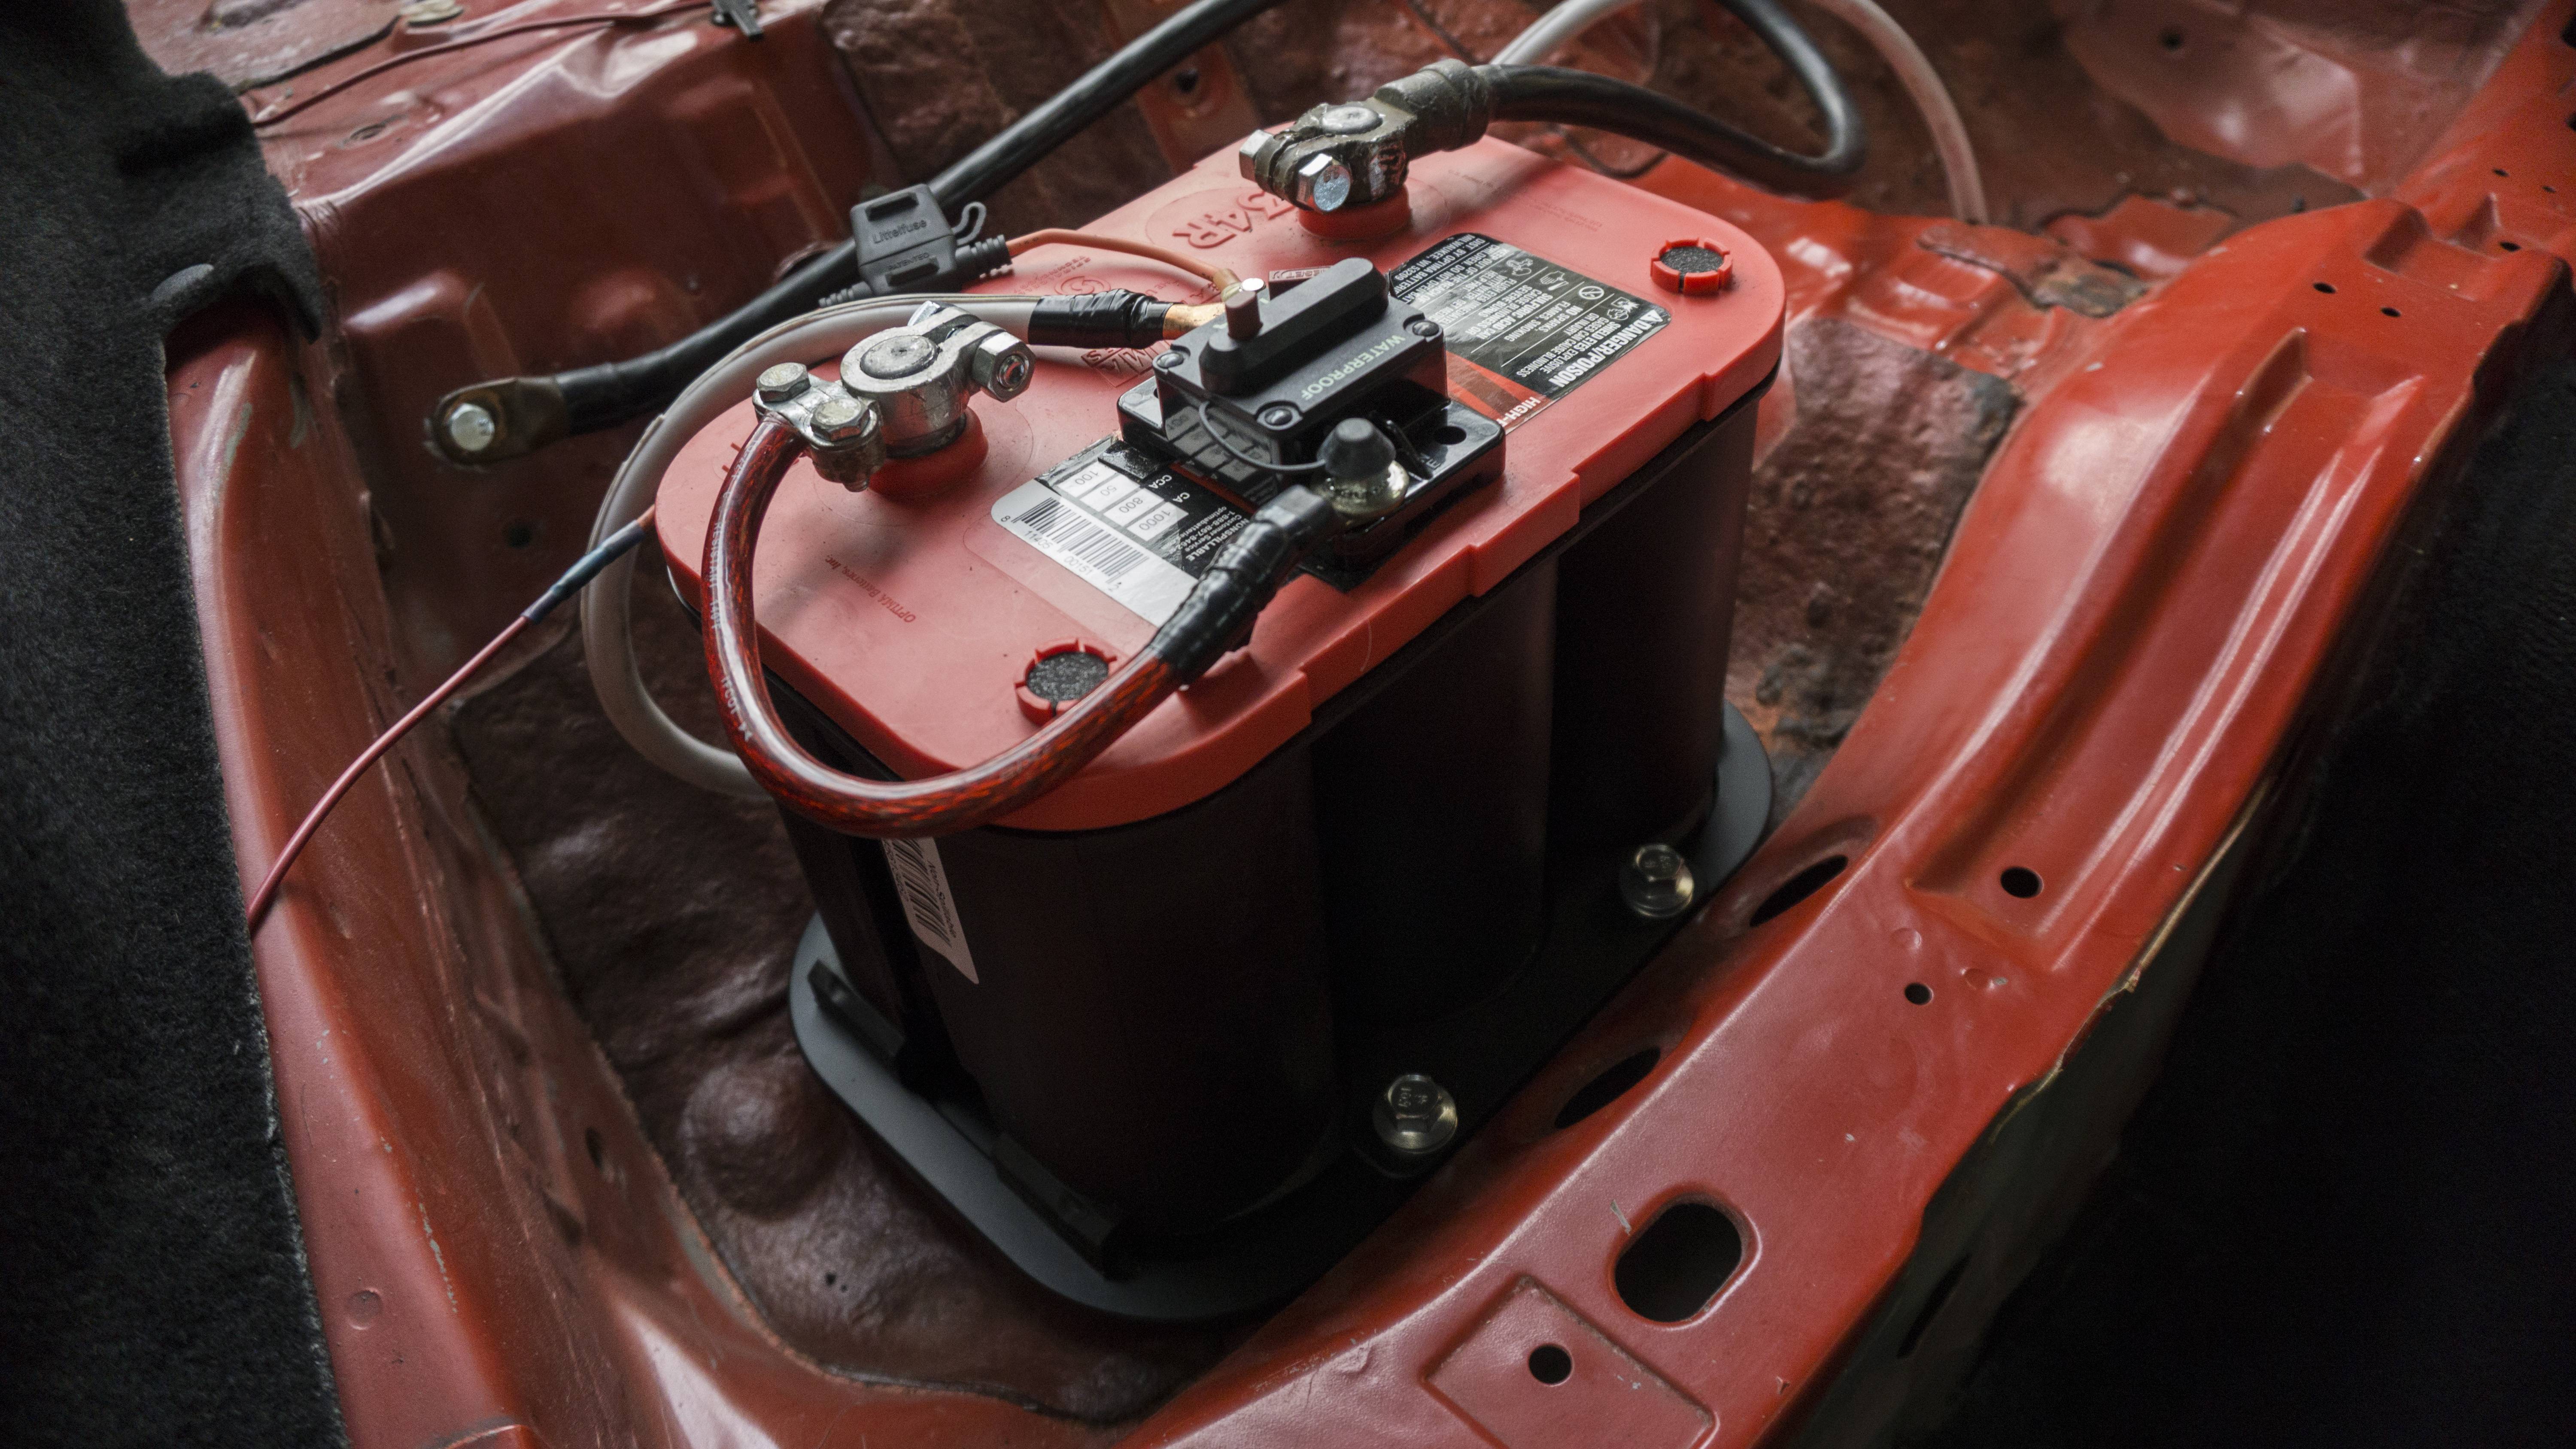
Update 8/4/2019: Everything is still moving along swimmingly. Still working on the interior of the car and have moved on to what I dub �Phase 2� of the interior project. I got a lot of new stuff in that I ordered. I bought some clean OEM shock tower carpet, a piece I haven�t seen before - it goes in between the dash and the A-Pillar and hides the dash mounting point, and a lot of new OEM stuff from Atkins. New stuff includes a new cigarette lighter, shifter bezel and boot, upper and lower column trim, and a new metering hood. Unfortunately, when I went to switch over the switches to the new hood some of the buttons shattered. I guess 30 years will do that. I�m going to source some switches and pull the ***** off that and keep the switches as back-ups. In the front of the car I can officially say every trim piece is on for the first time ever. I never took the time to get the kick-panels on, but they are on and looking good now! Unfortunately, I couldn�t get a completed look because I had to re-pull the door cards and fix the upper� I�m not sure what it�s called. The window slides against it, but it�s loose. Previously the battery was always just sitting in the bin, but finally it is now mounted. It�s rock solid, looking good, and not going anywhere - and that�s all I care about. While most of the rear carpet is out I went ahead and changed out all the Phillips bolts on the fuel pump. I did the same with the FD, so just wanted to be more safe than sorry. The ones that were currently in there came out with ease, but if I don�t look at it for another few years would they still? I didn�t want to stick around and find out so I replaced them all with allen M4s.
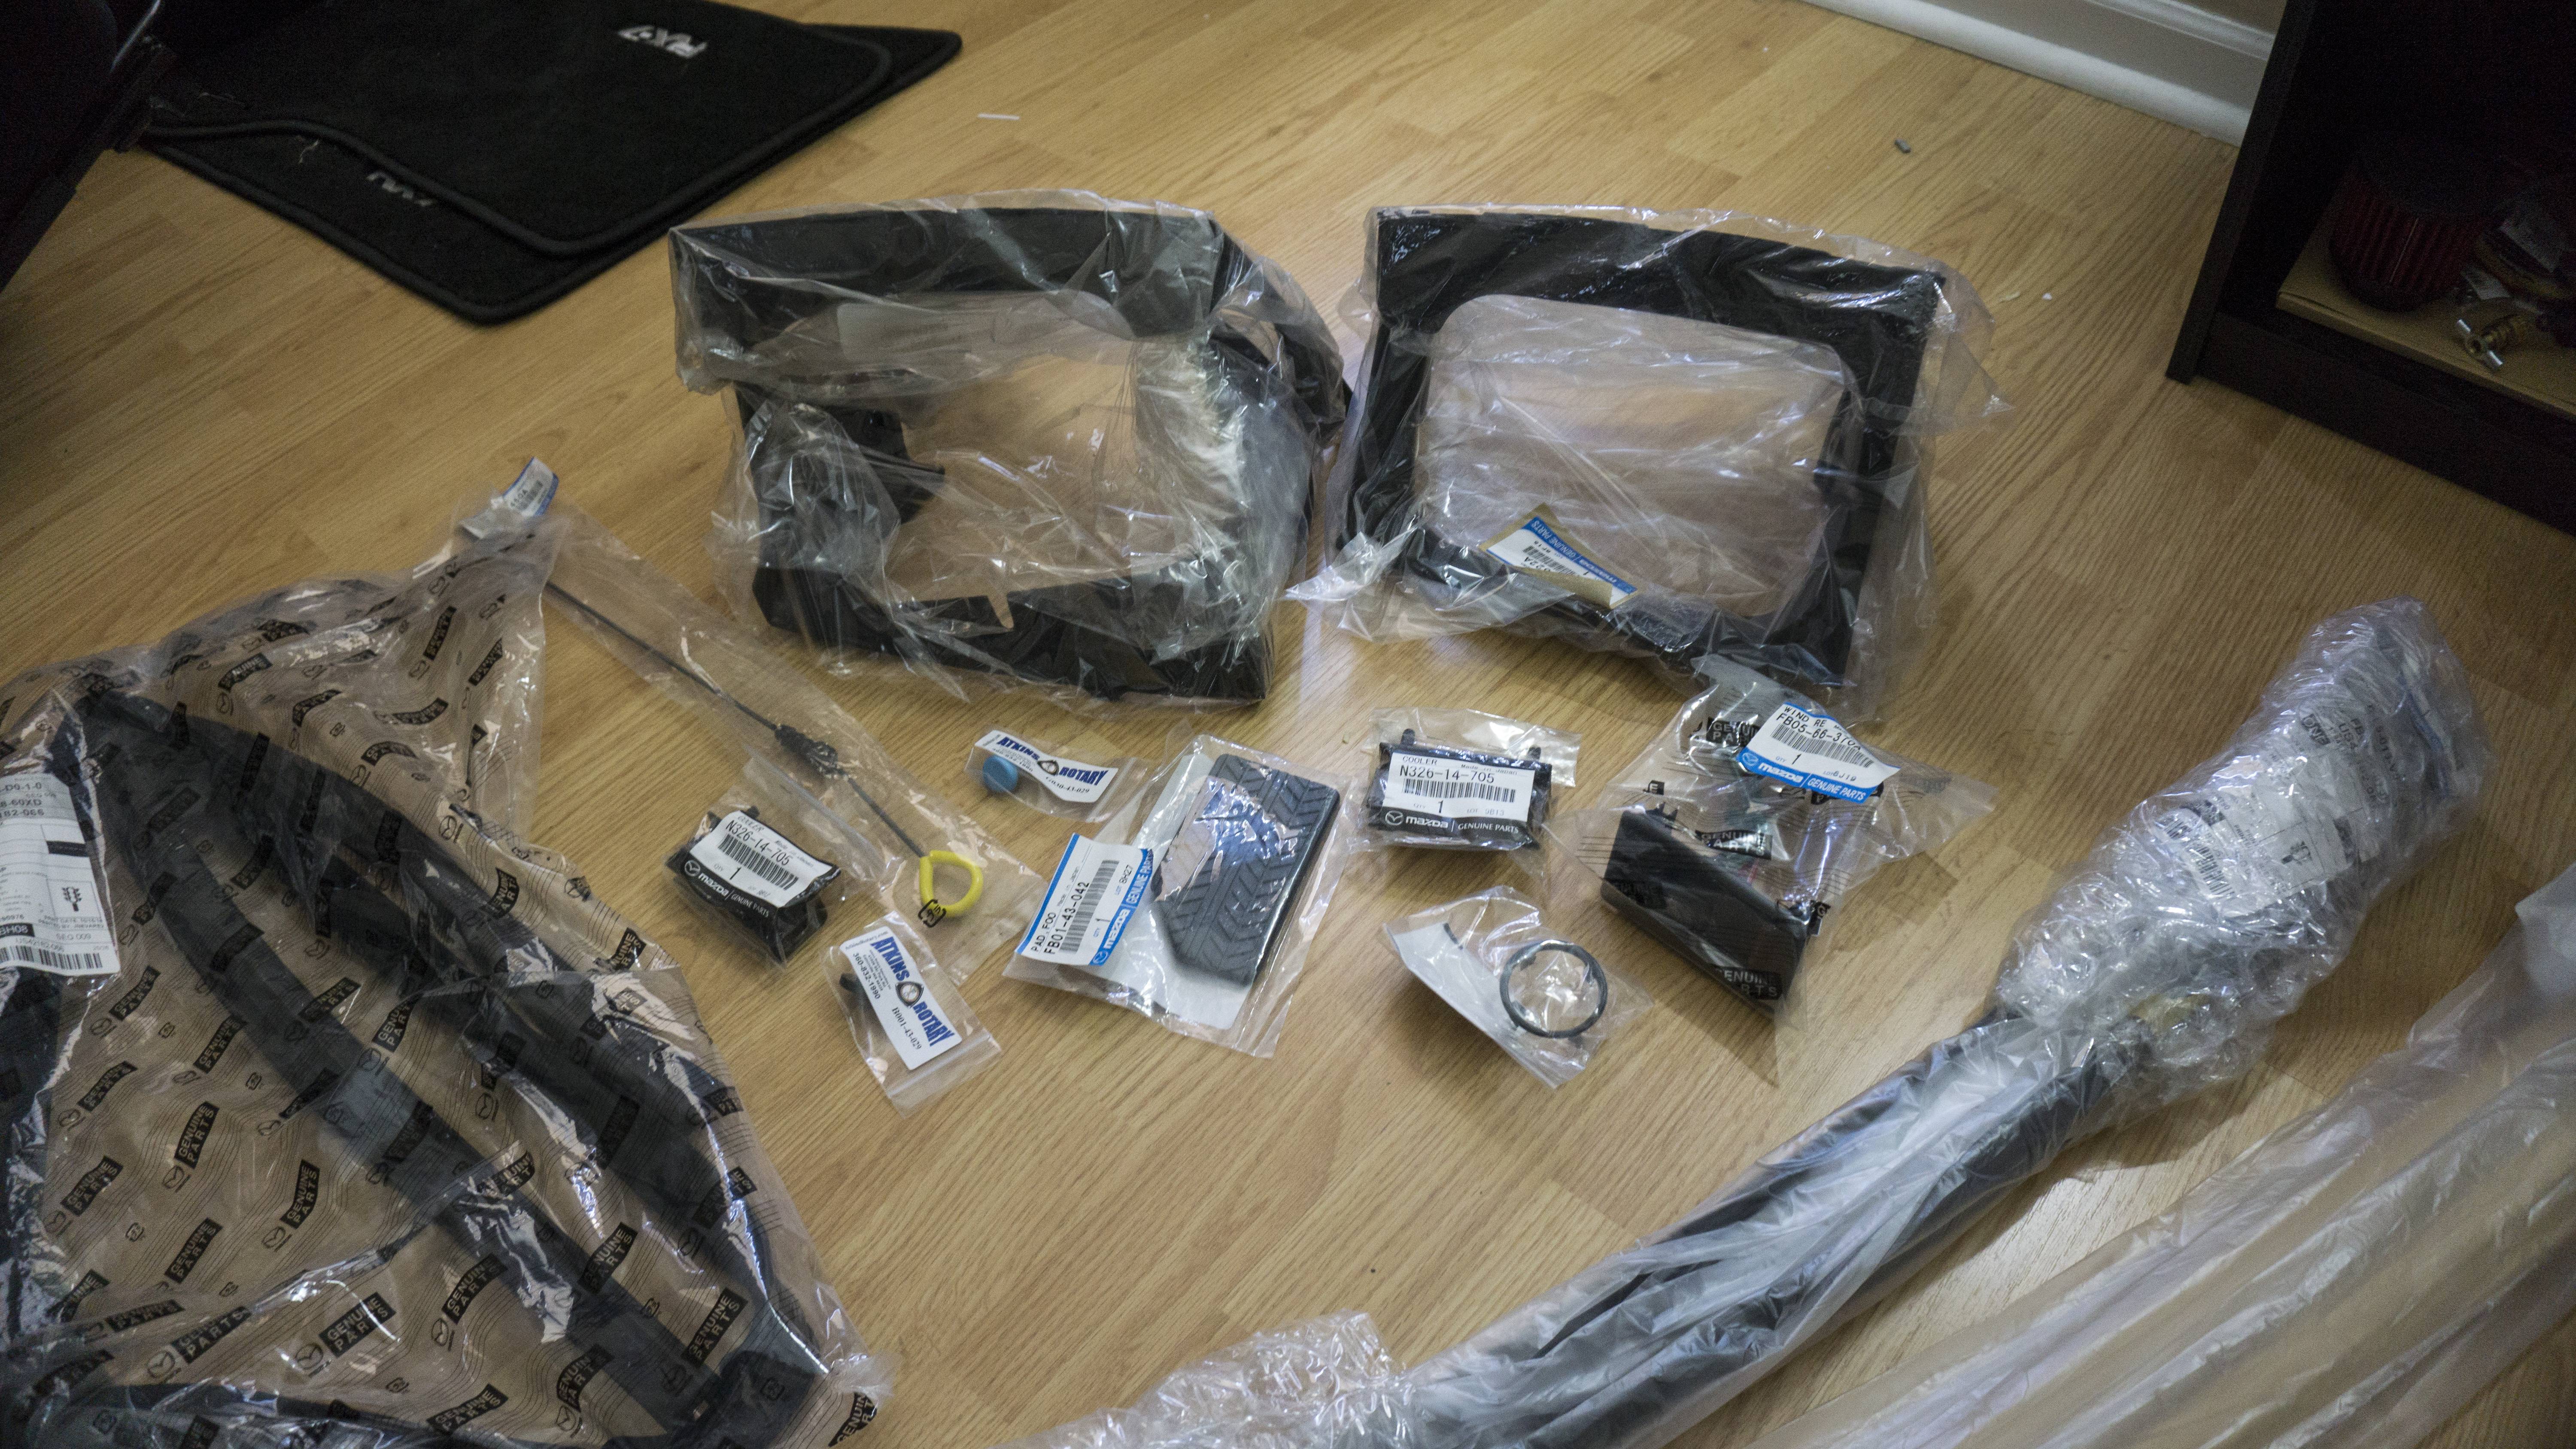
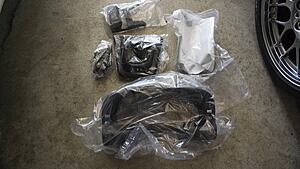
Here�s some of the fun stuff that came in:
Here�s the front of the car with some of the new goodies:
Is that a Bride Type MO bracket for the passenger? I have type MO and couldn't figure out how to install the bolt on the left rear, bracket to body. It seems the rail is interfering
Is that a Bride Type MO bracket for the passenger? I have type MO and couldn't figure out how to install the bolt on the left rear, bracket to body. It seems the rail is interfering
I am using Type RO for the Recaro's. I'll let you know if I run into the same issue.
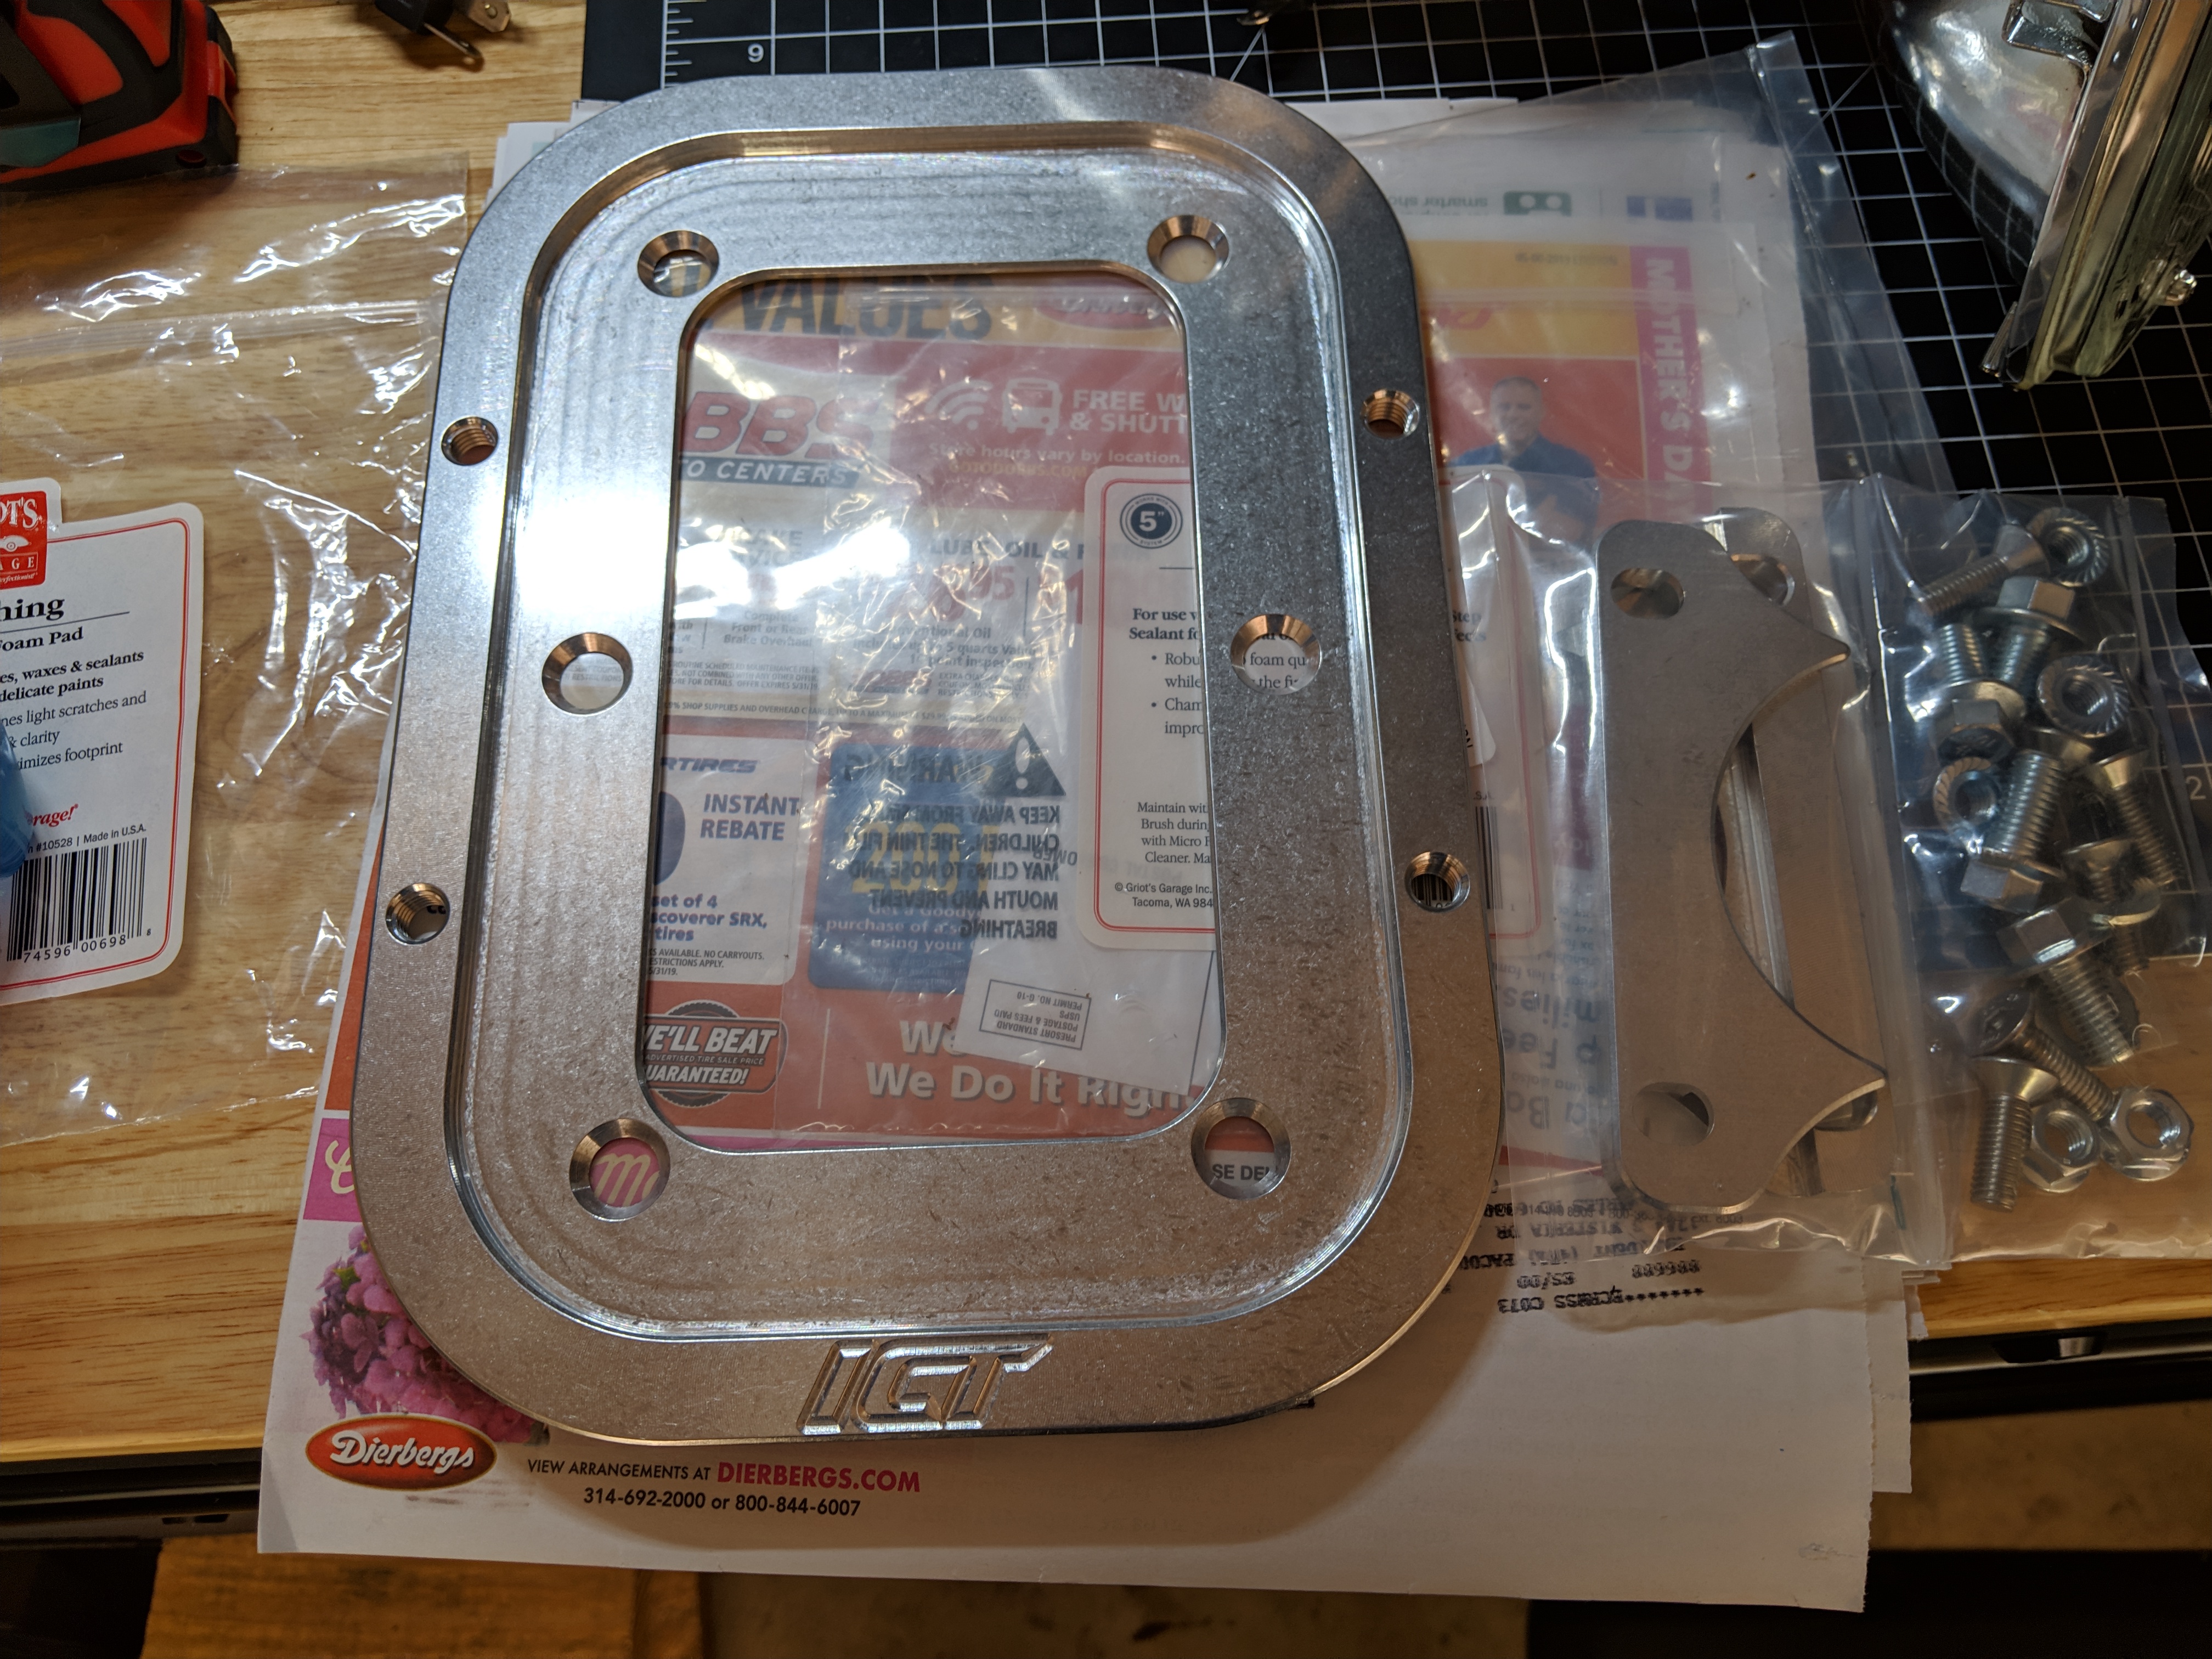
hold up - details on that battery tie-down please?!?!
Jerry hit the nail on the head it's an ICT Billet Optima Battery Tray. I had to source extended bolts because the ones supplied weren't log enough given the awkward angles of the passenger bin.
Originally Posted by JerryLH3
ICT Billet Optima Battery Tray.
This build keeps getting even better. Everything looks fantastic!
Thanks Jerry and good to hear from you again. I decided to just throw cost out of the equation and get the car what it deserved