
Tornado Silver Time - Now with 100% more REPU and 20b

Thread Starter


Joined: Jan 2007
Posts: 1,946
Likes: 107
From: Wilmington, DE
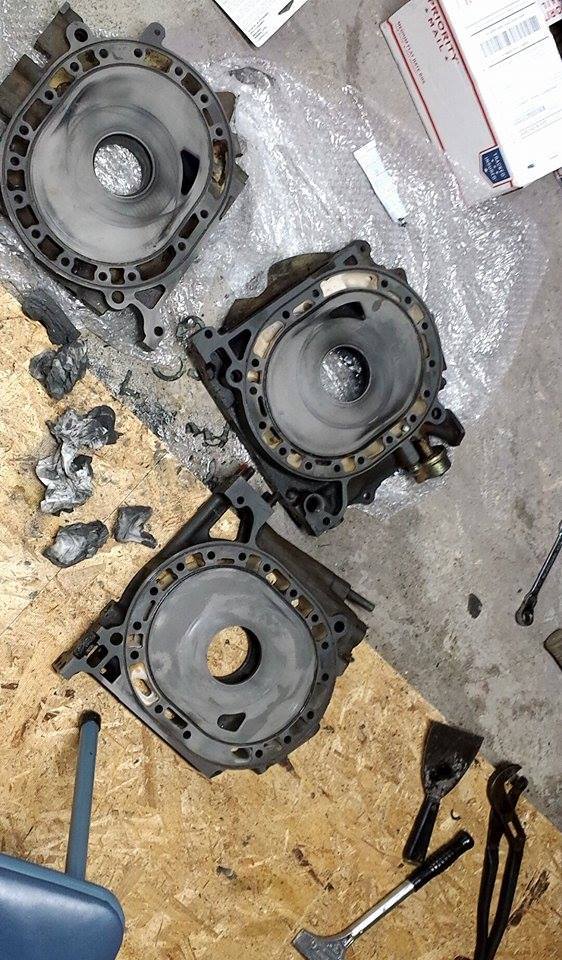
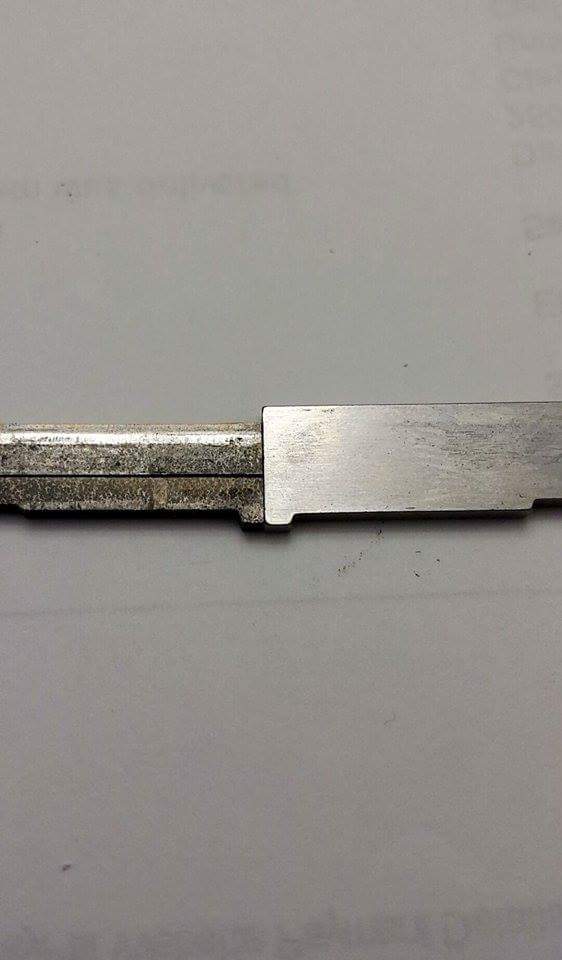
Got some work done towards the Black T2's engine. Upon disassembly it was noted that there were S5 rotors with the S4 counterweight...I spoke with Rotary Resurrection and he confirmed they were in fact S5 NA rotors! Also, while cleaning the front stack assembly I found a semi-crushed torrington bearing. Thankfully nothing else was ruined. It looks like they used a FD stat gear with the FC torrington bearings because the metal ring/bearing did not fit tightly around the stat gear recess. I'll try and take a photo of it tonight.
pics!
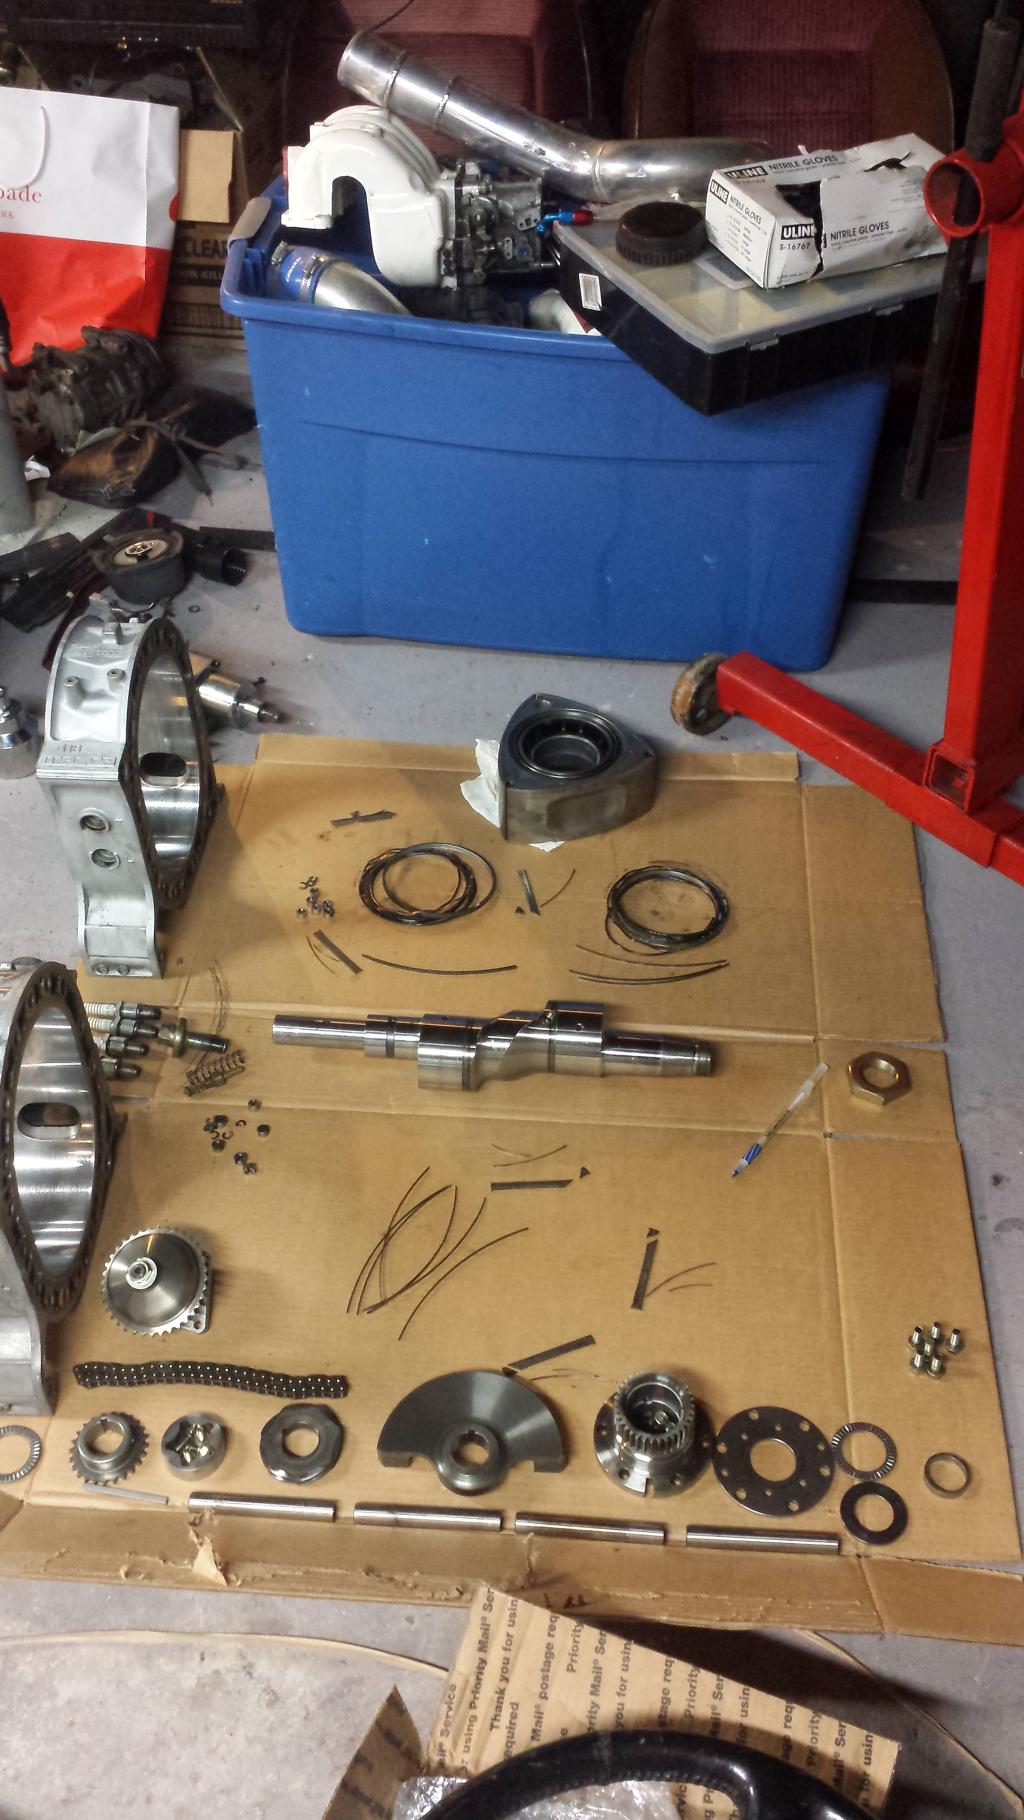
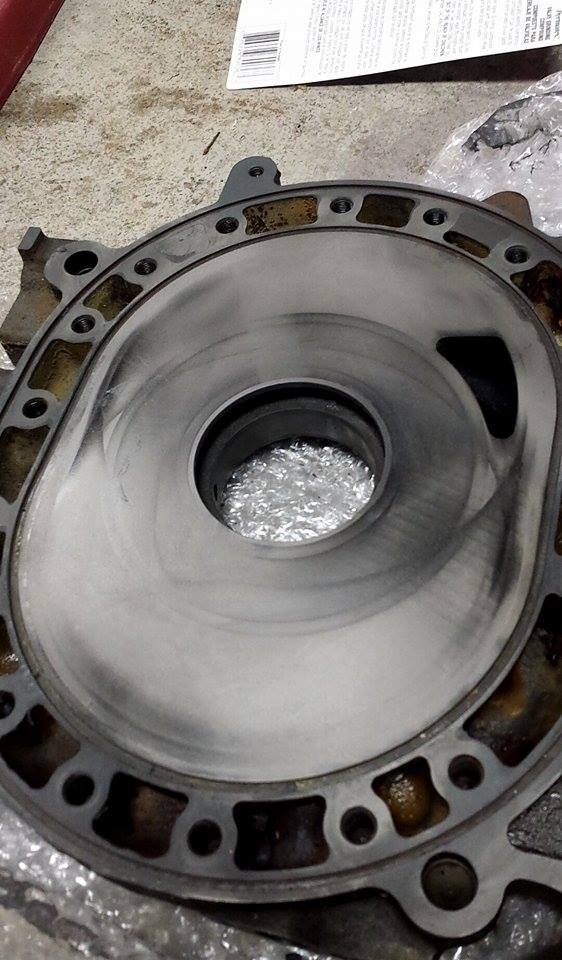
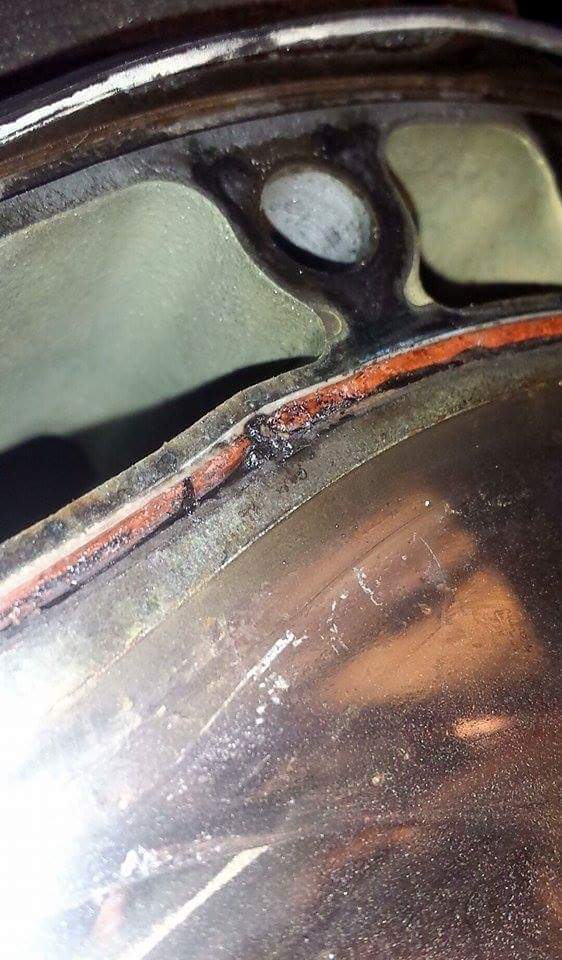
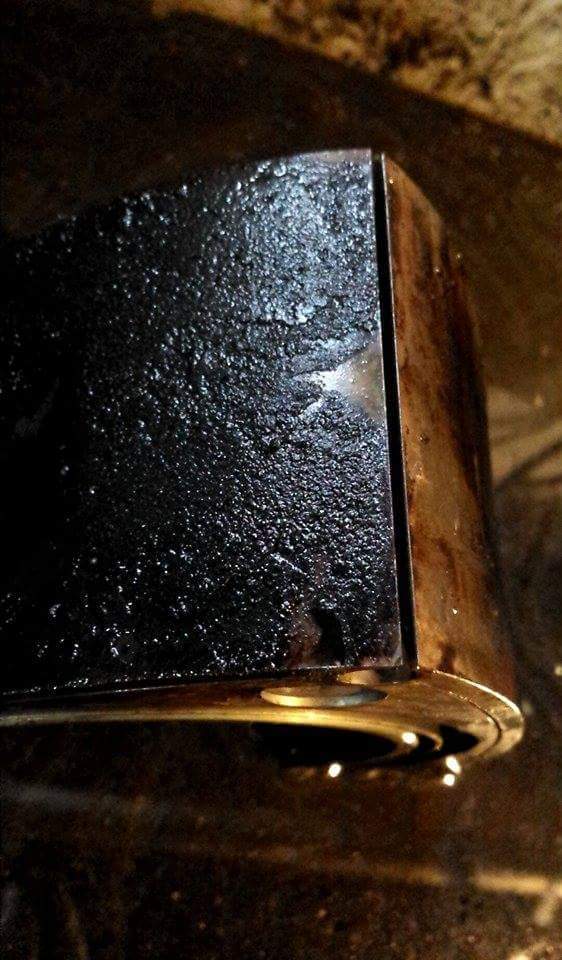
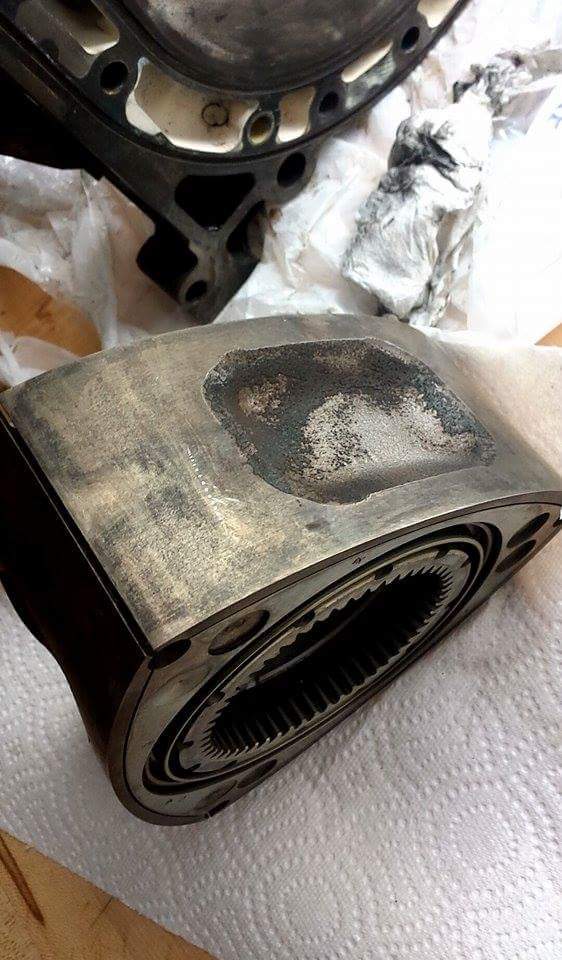
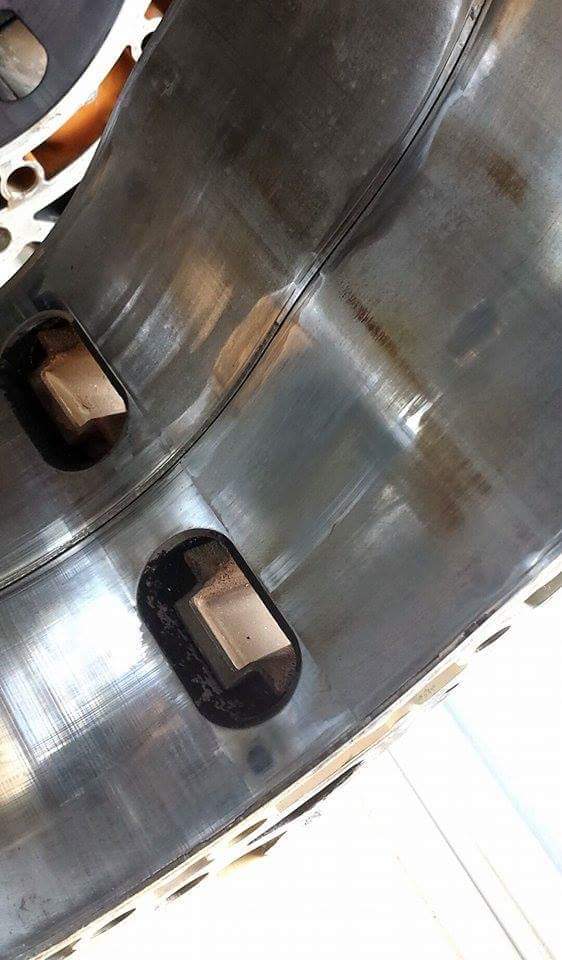
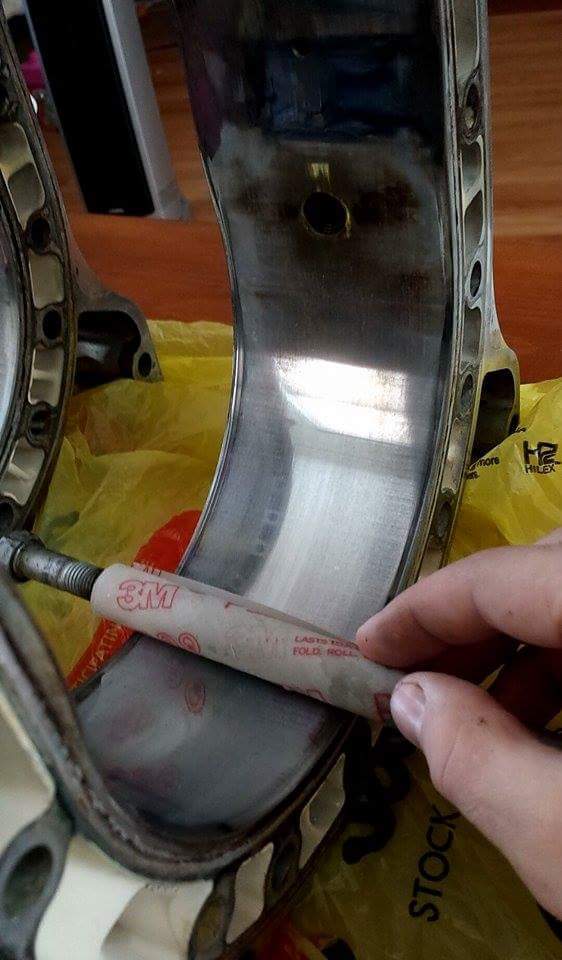
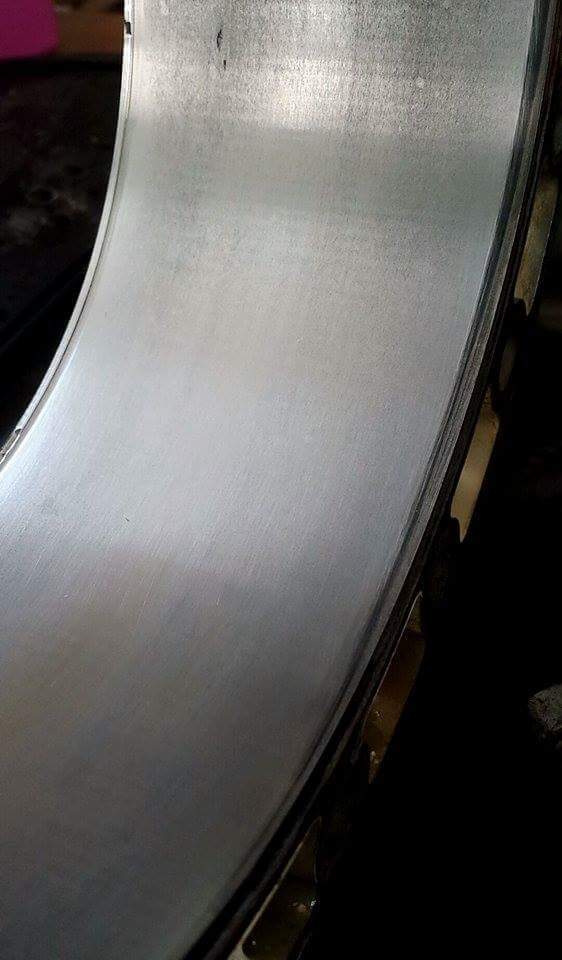
before lapping
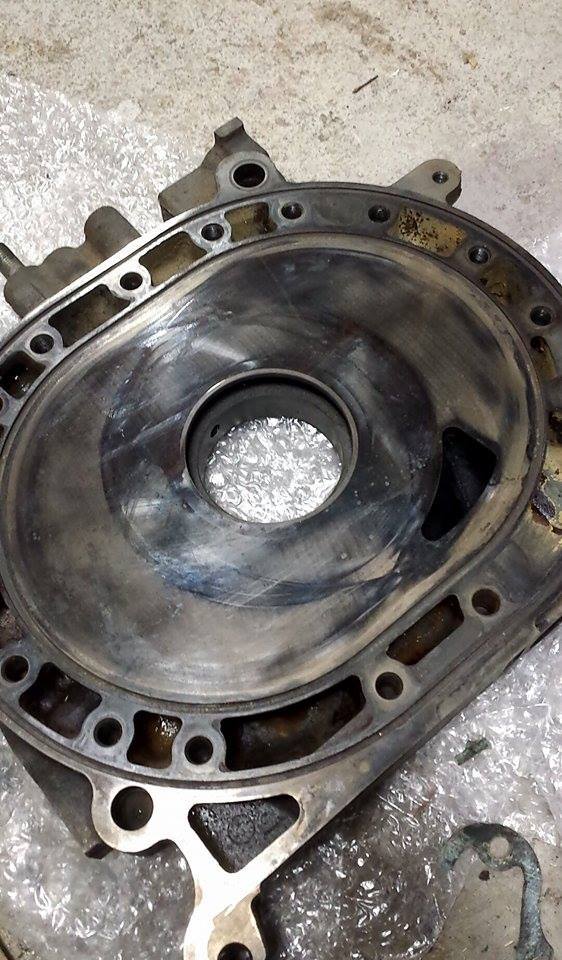

valve grinding compound
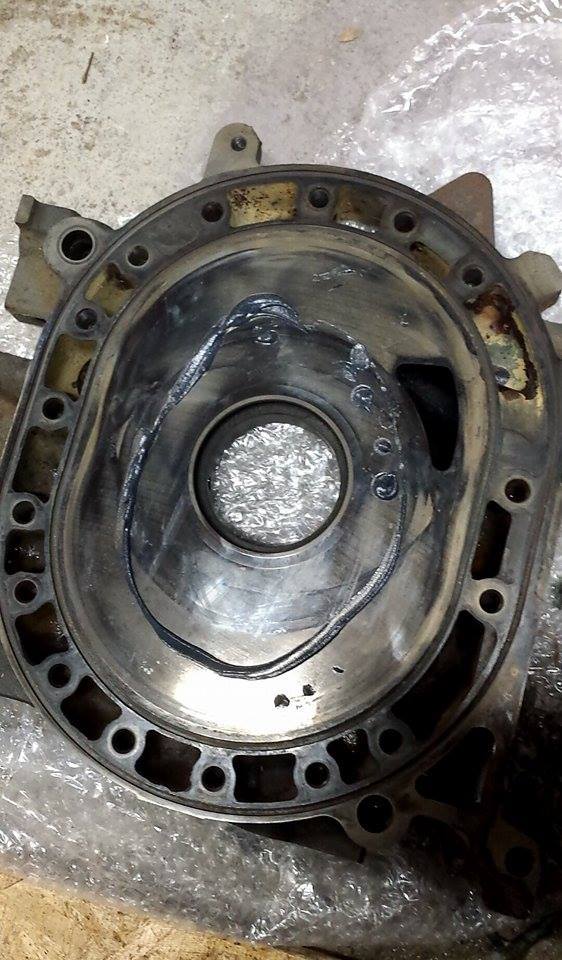
after!
So now I need to find a set of S4 T2 rotors and then I can spec the seals in their slots and then I'd say its almost assembly time.
Anything else to check in the mean-time?
pics!
before lapping
valve grinding compound
after!
So now I need to find a set of S4 T2 rotors and then I can spec the seals in their slots and then I'd say its almost assembly time.
Anything else to check in the mean-time?

Thread Starter
Joined: Jan 2007
Posts: 1,946
Likes: 107
From: Wilmington, DE
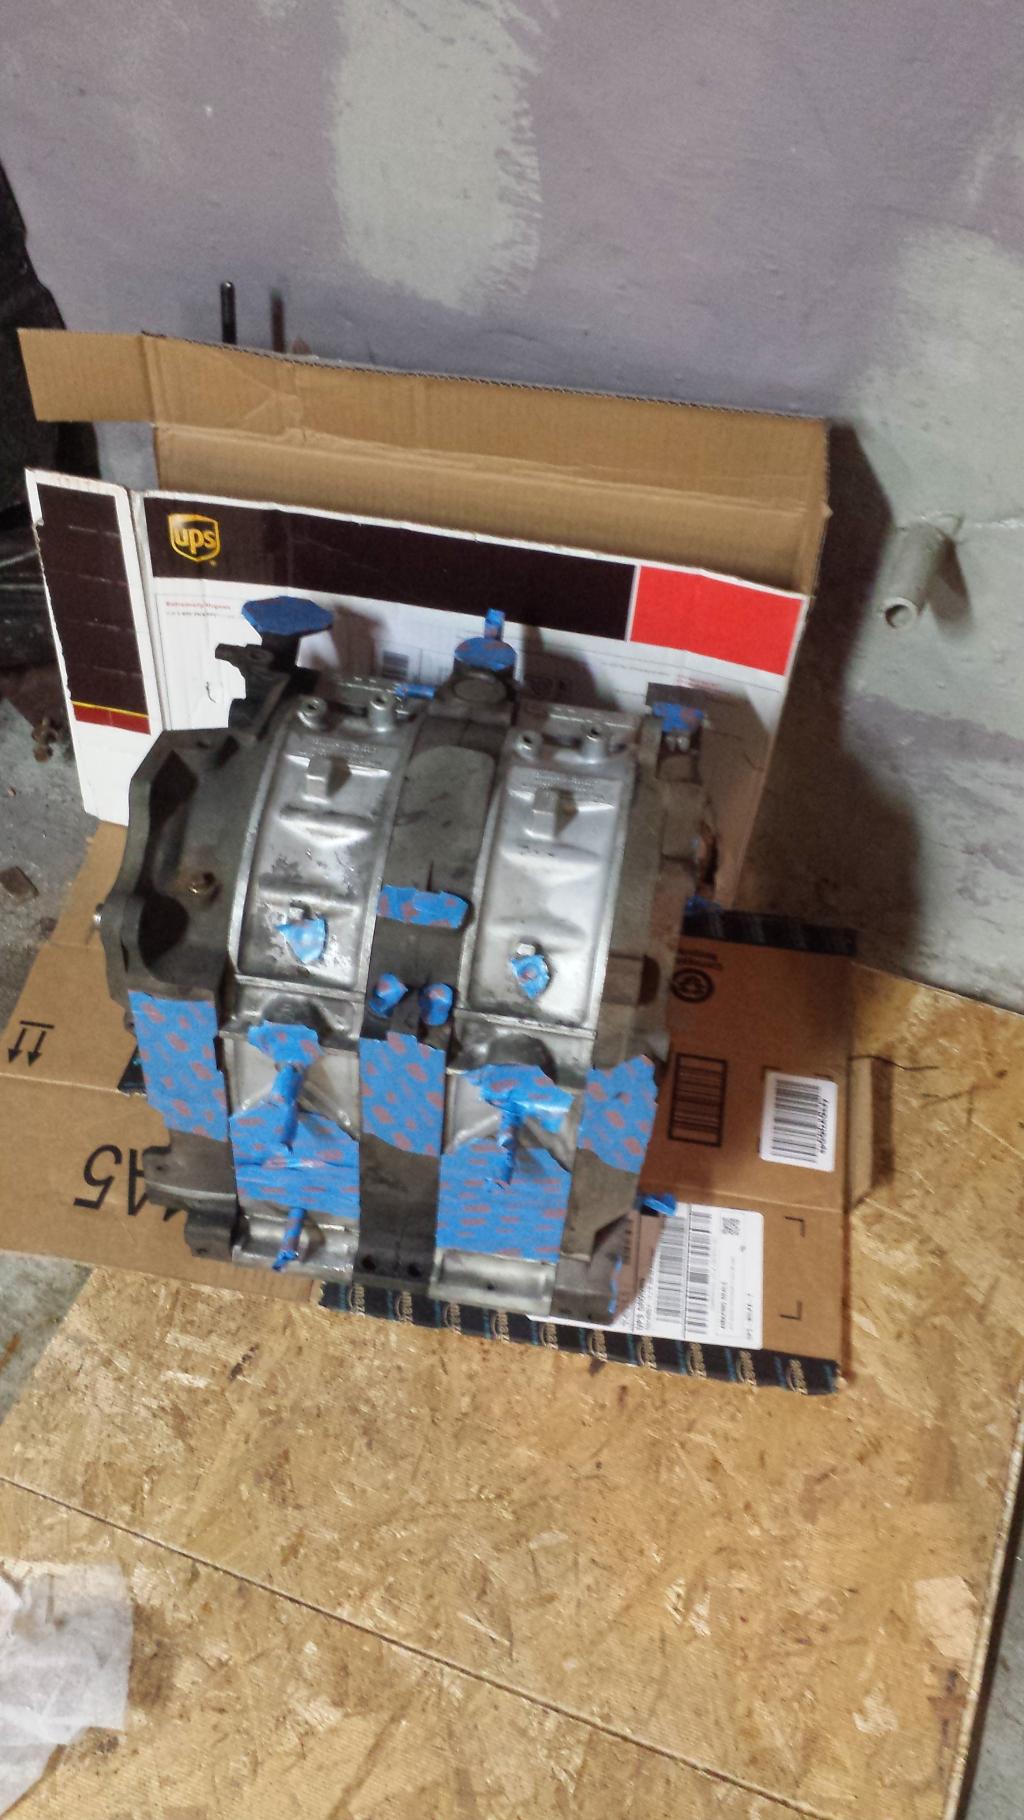
Rotors purchased, they should be arriving tomorrow. Gonna clean em up and jump right into clearancing seals! Need to purchase a soft seal kit and expect to have to purchase a side seal or 2.
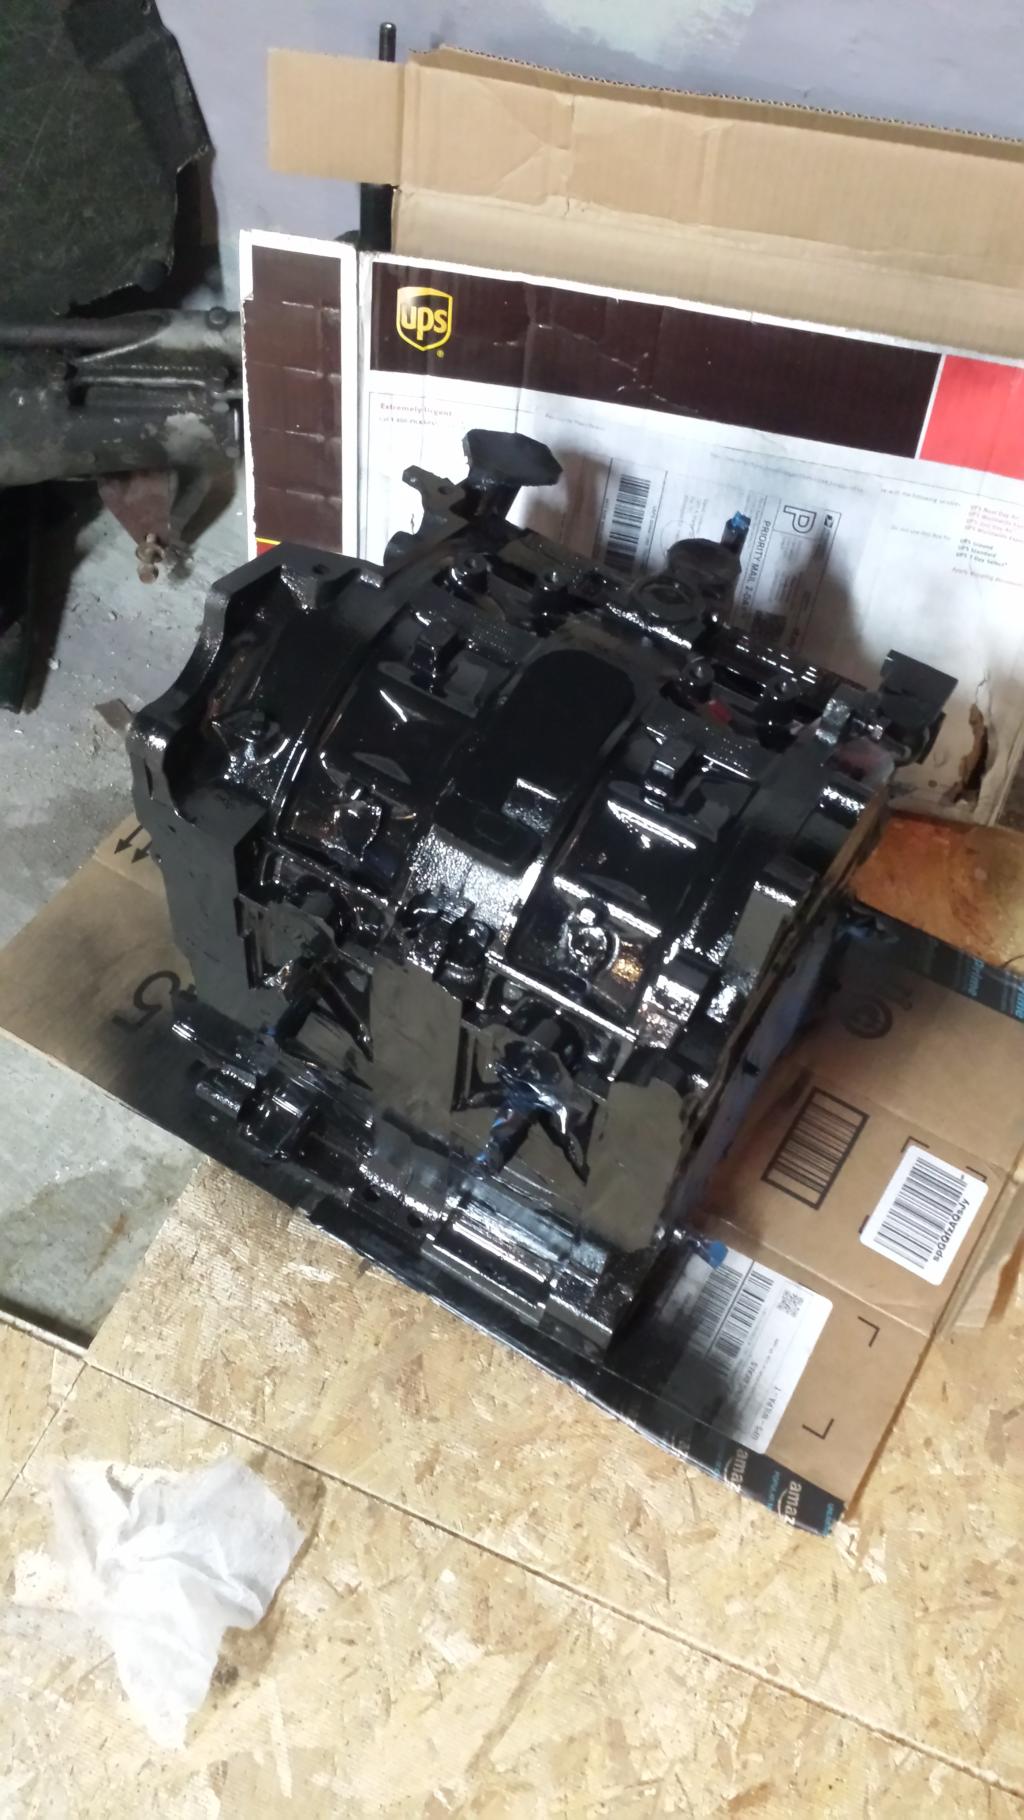
The plan is to paint the engine all black and polish the mazda letters on the housings. intake will be all black as well. I think it'll look clean with the S4 black TMIC!
any first time build tips? haha
The plan is to paint the engine all black and polish the mazda letters on the housings. intake will be all black as well. I think it'll look clean with the S4 black TMIC!
any first time build tips? haha
its really easy to bend or warp the sideseals when grinding them down to the right length which then prevents them from springing out the way they should, and if you rush this process you will either grind them down too much, grind at the incorrect angle, or do the first two right and the damn thing wont spring back because excessive pressure bent the seal.
Also i made an oupsie when i put a thermal pellet delete in backwards and torqued it down to 90 ft/lbs and toasted the eshaft.
Make sure you use a good helping of vaseline on all the seals to hold them in place, ive heard of a story where the corner seal fell into the intake passage during the rebuilt and tore through the motor when they started it. Sometimes even people who are experienced make mistakes like the noobs.
put on some music, relax, and have a manual or instructional video open throughout the process to double check all your work.
OH and dont forget to bend over the crush washer on the oil pump, that one got me a couple of times haha
Thread Starter
Joined: Jan 2007
Posts: 1,946
Likes: 107
From: Wilmington, DE
Thanks for the tips!
I ordered the gasket kit from atkins and should be arriving in a few days. There are a few more items to clean up that I've been pushing off..Besides that I need to pick up some RTV and paint for the outside and we are ready to go.
I ordered the gasket kit from atkins and should be arriving in a few days. There are a few more items to clean up that I've been pushing off..Besides that I need to pick up some RTV and paint for the outside and we are ready to go.
Thread Starter
Joined: Jan 2007
Posts: 1,946
Likes: 107
From: Wilmington, DE
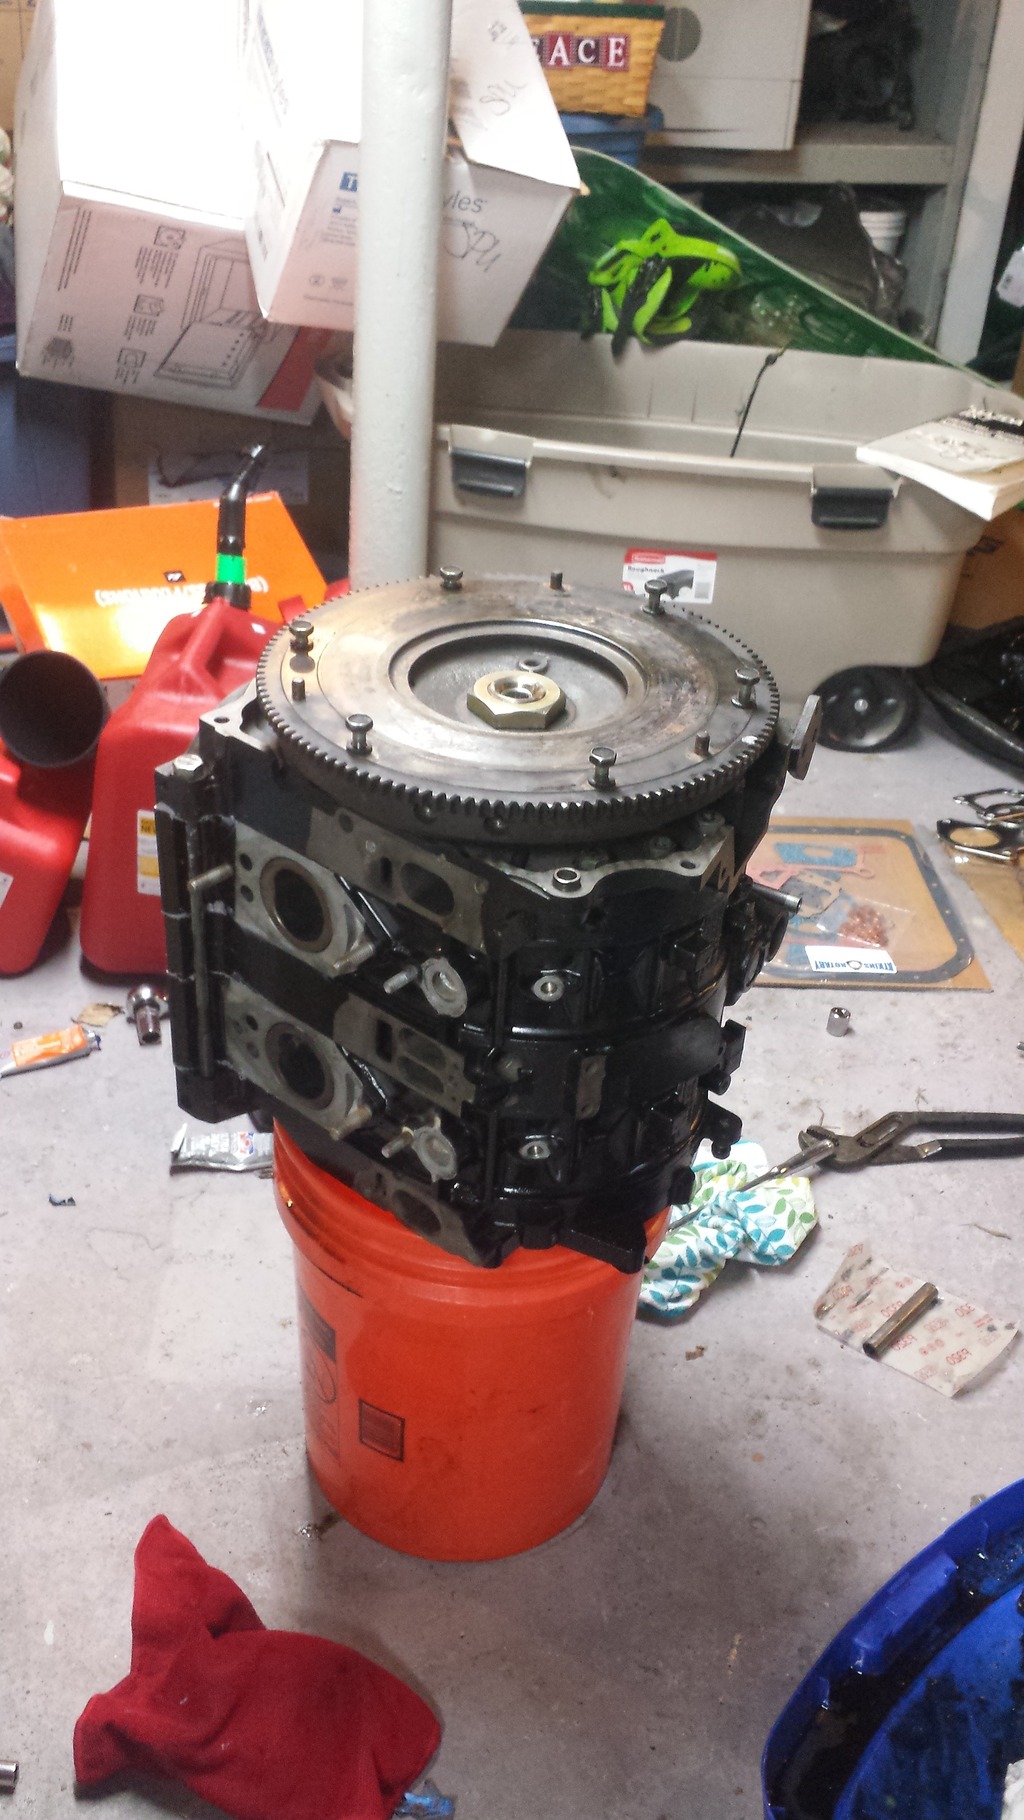
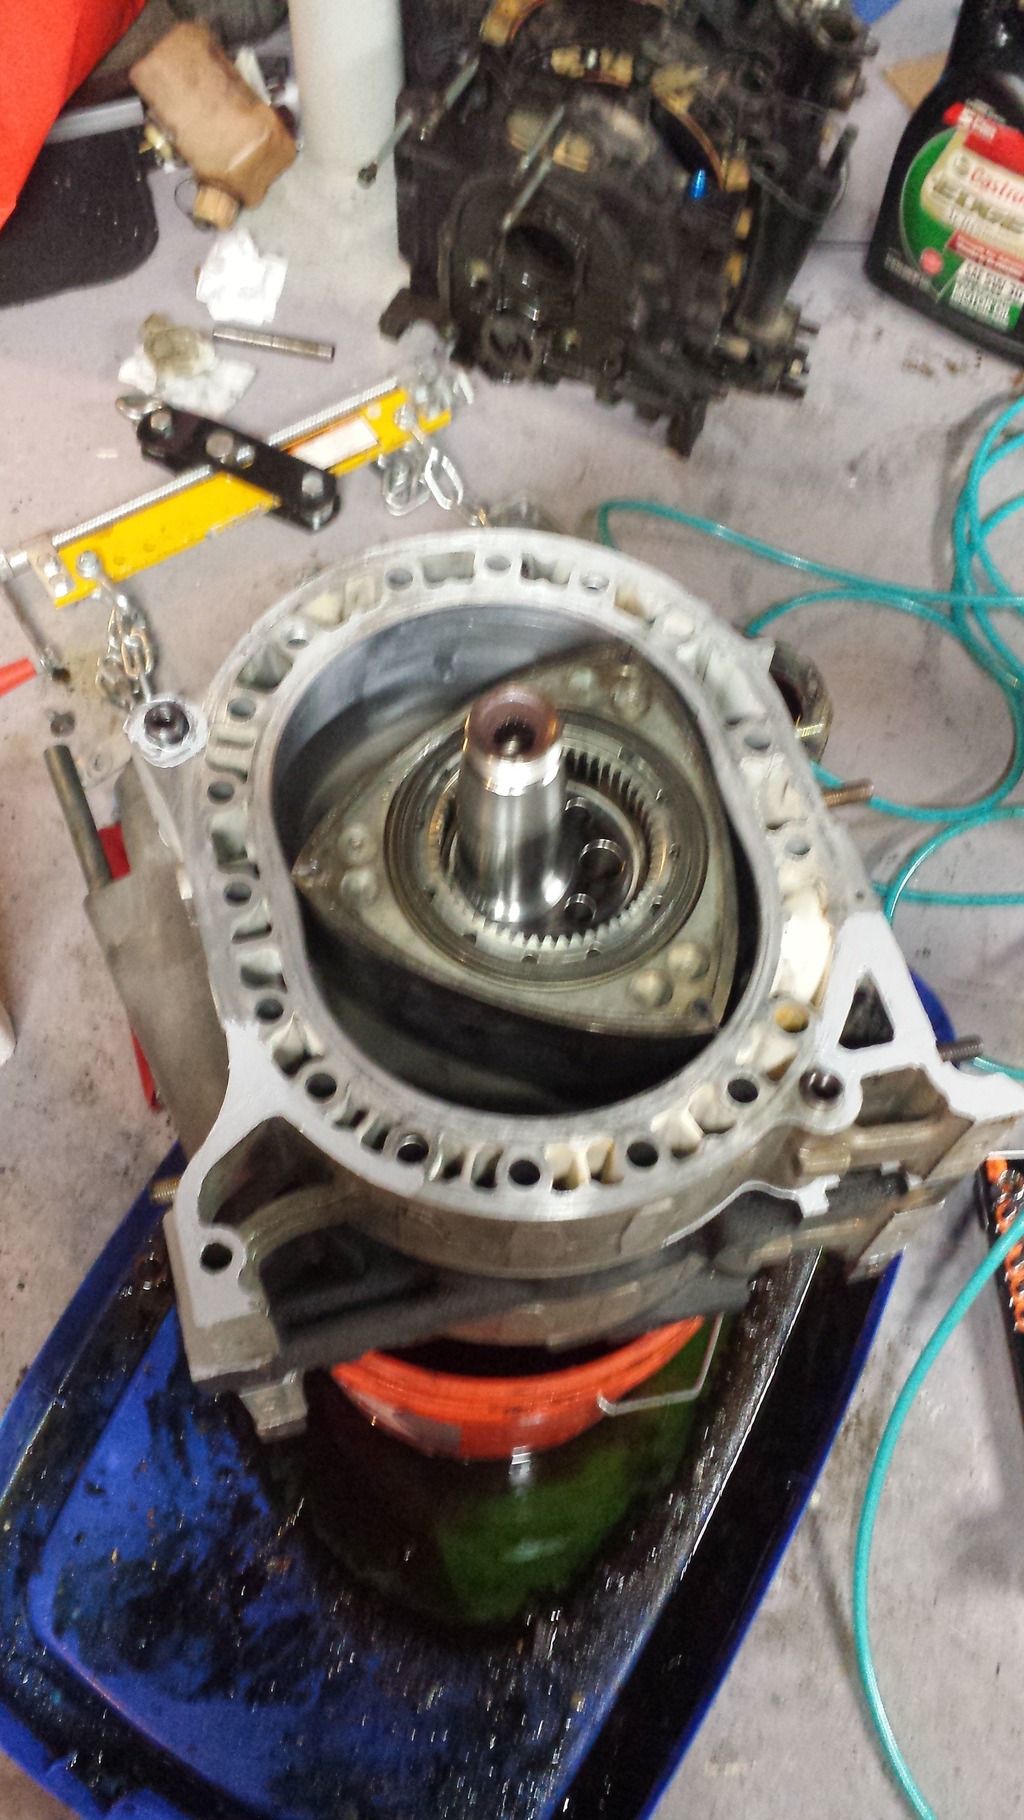
Shortblock assembled! Everything went smoothly. Nice strong chugs for each chamber. We ran out of time to get the front stack assembled so that comes this week. I regret not taking photos of the assembly...my hands were full of RTV and gasket dressing. :P
bonus pic...dinner!
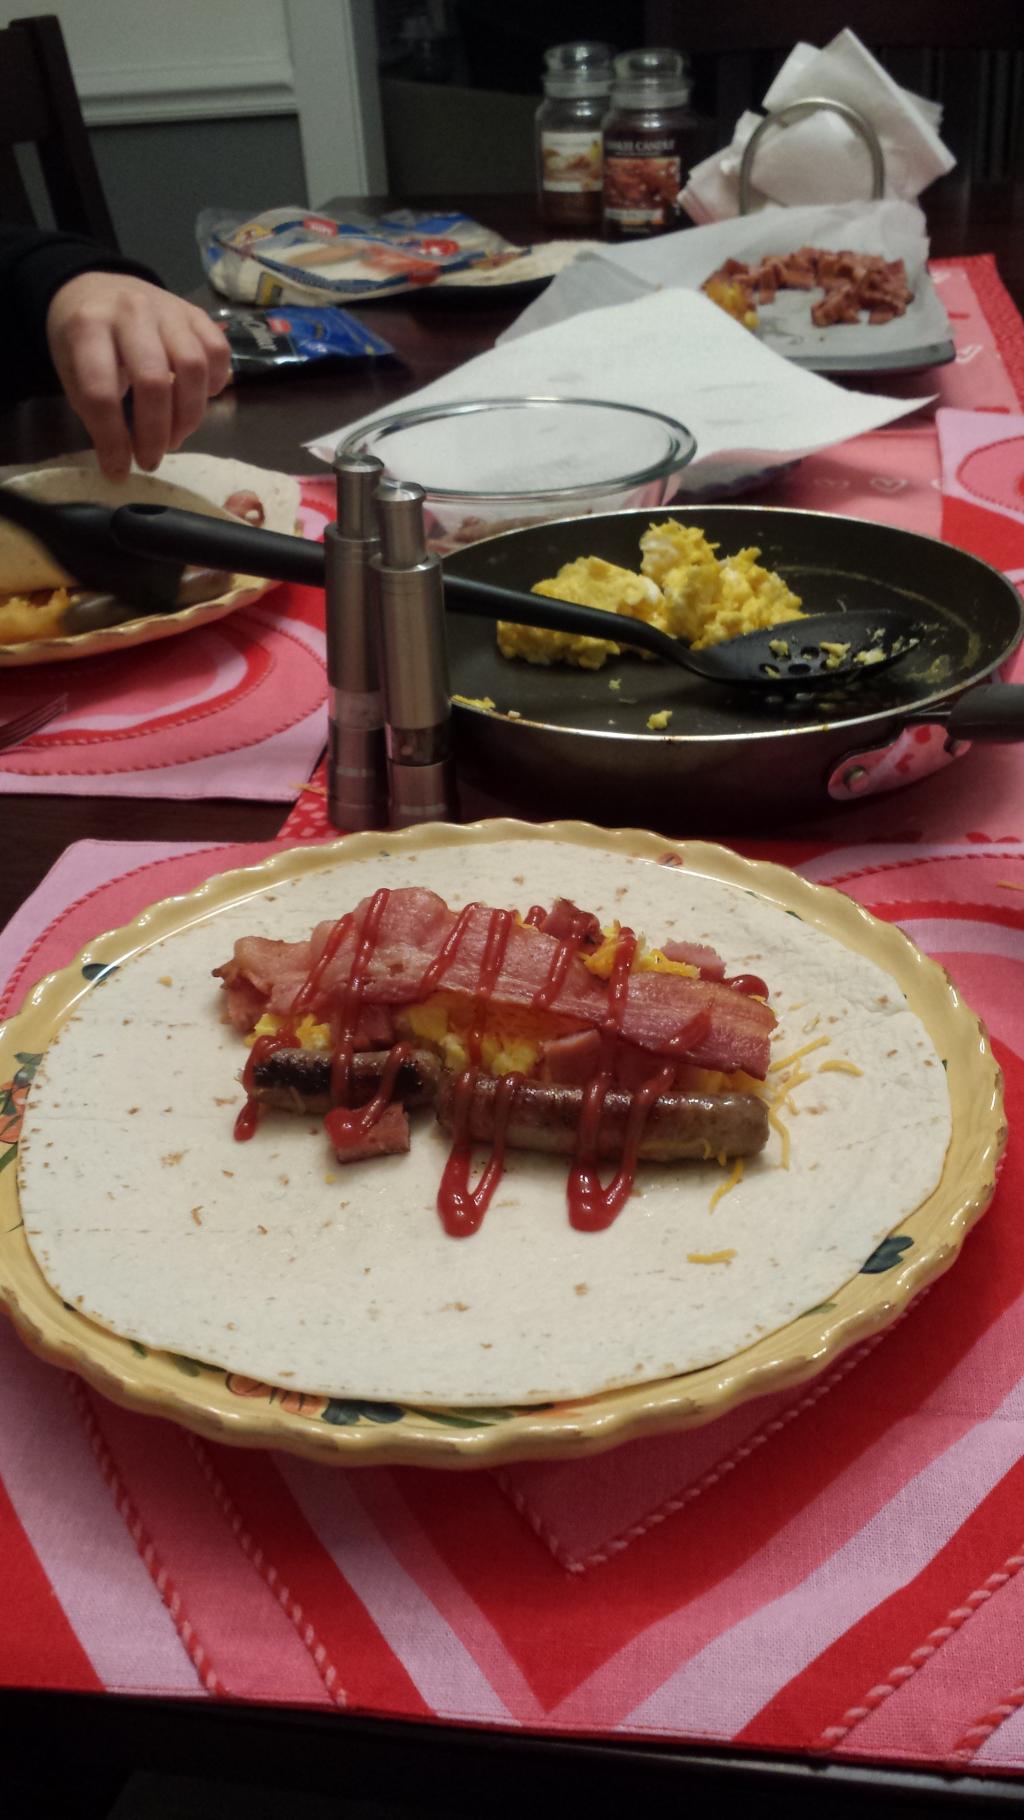
bonus pic...dinner!

Thread Starter
Joined: Jan 2007
Posts: 1,946
Likes: 107
From: Wilmington, DE
Thanks!
The wife helped me get the front stack/cover assembled last night after a local stopped by to help me check the end play. End play was great at .002! I did run into a small snag...After we checked end play and my buddy left, I took the front hub off and noticed someone had drilled out 2 of the holes for some reason. Luckily I had another laying around, which isnt a huge deal...my concern was it throwing off the end play we had just set. From what I read, this shouldnt effect anything.
The wife helped me get the front stack/cover assembled last night after a local stopped by to help me check the end play. End play was great at .002! I did run into a small snag...After we checked end play and my buddy left, I took the front hub off and noticed someone had drilled out 2 of the holes for some reason. Luckily I had another laying around, which isnt a huge deal...my concern was it throwing off the end play we had just set. From what I read, this shouldnt effect anything.
Thread Starter
Joined: Jan 2007
Posts: 1,946
Likes: 107
From: Wilmington, DE
Not a problem! Both should be S4 t2 engines as they were all original for the most part at least...
Over the weekend we attempted to drop the T2 engine in the T2 and failed miserably. First I forgot to replace to the pilot bearing which put a halt on that, and I couldnt find my air compressor hose to get the flywheel attached. With that put to the side we worked on the wife's NA.
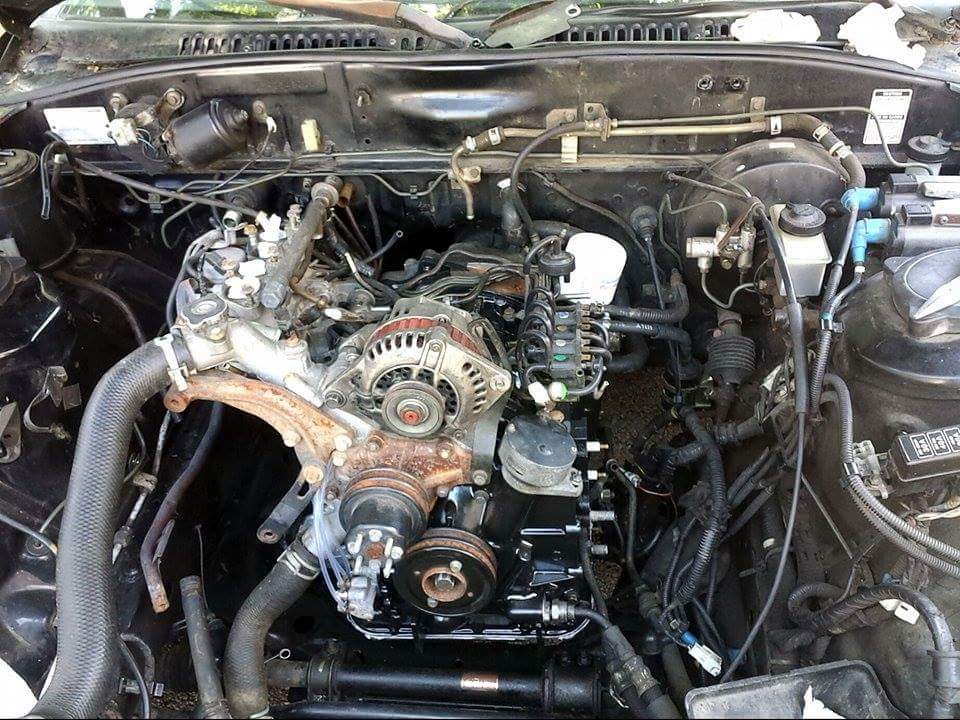
This is getting utmost priority at the moment because I am selling my DD to drive the RX7. This may sound crazy, but hear me out...haha. I am selling my DD and beginning to bike to work, the RX7 will only be a backup for days that it rains...or my legs need a break. It's a 5 mile ride each way and only adds 10 minutes to my commute vs driving. So with that said I have a buyer on the hook for the DD and need to get her engine rebuilt ASAP. It took us around 2 hours to get the UIM off the car, and another hour or 2 to get the PS and AC off the bracket so the bracket could be removed without pulling either pumps. I didnt want to have to deal with bleeding either of those systems. All I have left to do is unhook the downpipe, starter, and trans bolts and it should be ready to come out. I'm really excited to see these internals...it's clearly original and pulled 105 PSI! I dont think I want to clean the outside of the engine much. I'd rather have it look original
Over the weekend we attempted to drop the T2 engine in the T2 and failed miserably. First I forgot to replace to the pilot bearing which put a halt on that, and I couldnt find my air compressor hose to get the flywheel attached. With that put to the side we worked on the wife's NA.
This is getting utmost priority at the moment because I am selling my DD to drive the RX7. This may sound crazy, but hear me out...haha. I am selling my DD and beginning to bike to work, the RX7 will only be a backup for days that it rains...or my legs need a break. It's a 5 mile ride each way and only adds 10 minutes to my commute vs driving. So with that said I have a buyer on the hook for the DD and need to get her engine rebuilt ASAP. It took us around 2 hours to get the UIM off the car, and another hour or 2 to get the PS and AC off the bracket so the bracket could be removed without pulling either pumps. I didnt want to have to deal with bleeding either of those systems. All I have left to do is unhook the downpipe, starter, and trans bolts and it should be ready to come out. I'm really excited to see these internals...it's clearly original and pulled 105 PSI! I dont think I want to clean the outside of the engine much. I'd rather have it look original
Last edited by driftxsequence; Mar 24, 2015 at 08:52 AM.
Thread Starter
Joined: Jan 2007
Posts: 1,946
Likes: 107
From: Wilmington, DE
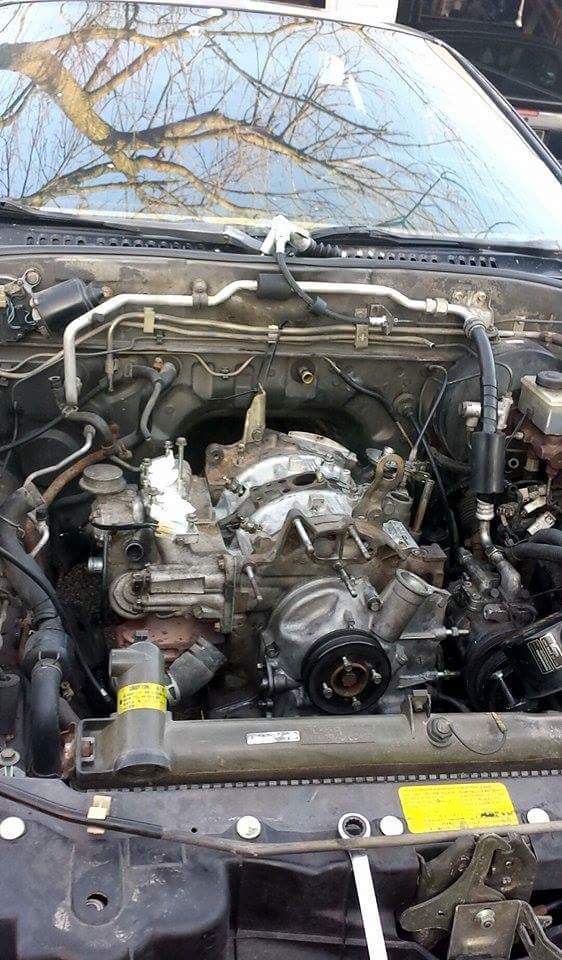
Both engines are now in the cars! Big thanks to the locals who came and helped get them in the cars.
Saturday was spent on the T2 getting the pilot bearing replaced, attaching the clutch, and getting it dropped in. I didnt realize the T2 had a different splined clutch disk so I had to take an hour's drive away to get one from a friend. We installed that engine without dropping the trans. It wasnt overly difficult, but would have required me taking the NA car off jackstands to get that car up and pull it out....and that would have wasted too much time.
Sunday consisted of front stack assembly, oil pan, (NEW!) motor mounts, exhaust mani, and LIM installation. I forsee in the future spending the extra time installing the manis before dropping the motor in. I regret not doing that for the T2. Anyways, We dropped the transmission in prep for mating it to the engine....to find out that I didnt have bolts to attach the lightweight flywheel to the rear counterweight! So, we installed the engine without the trans temporarily. Its a minor setback, but I anticipate it'll be running in 2-ish weeks as long as I can get these OMP lines made.
It was one of the most relaxing days I've had in a long time. I cant thank those guys enough for helping out, because otherwise I'd still have a lot of work to do!!
onto some pics!
Old 3 piece seals vs the atkins 2 piece
3 piece seal in its slot (dangerously close to falling out!)
I remembered to snap a photo during assembly this time.
T2 engine in the car

NA in the car
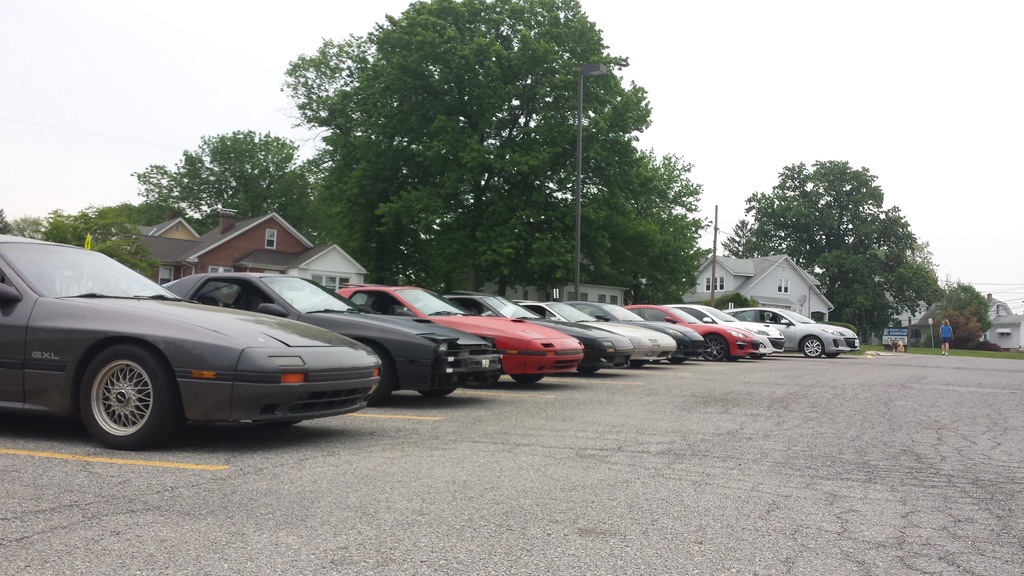
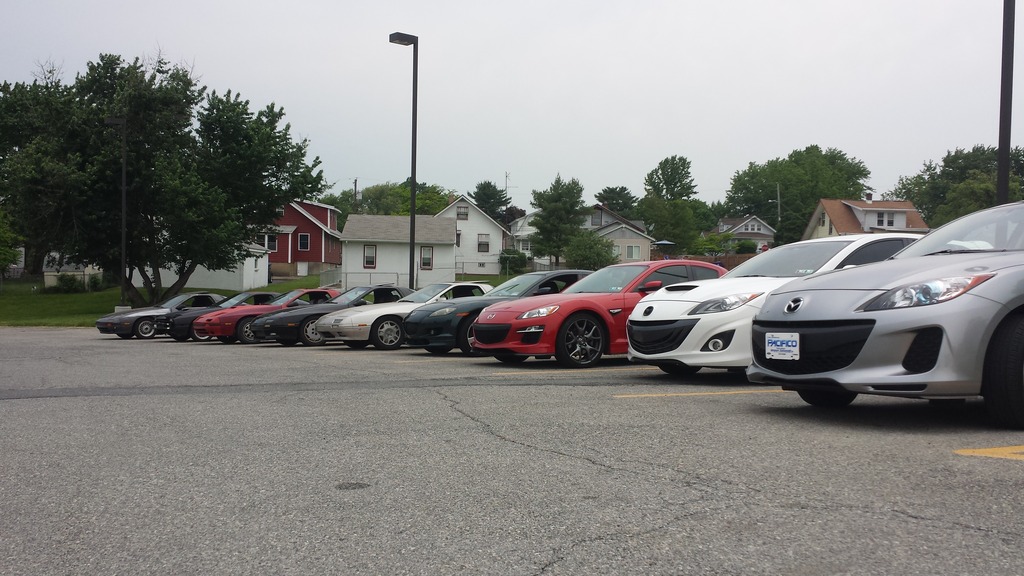
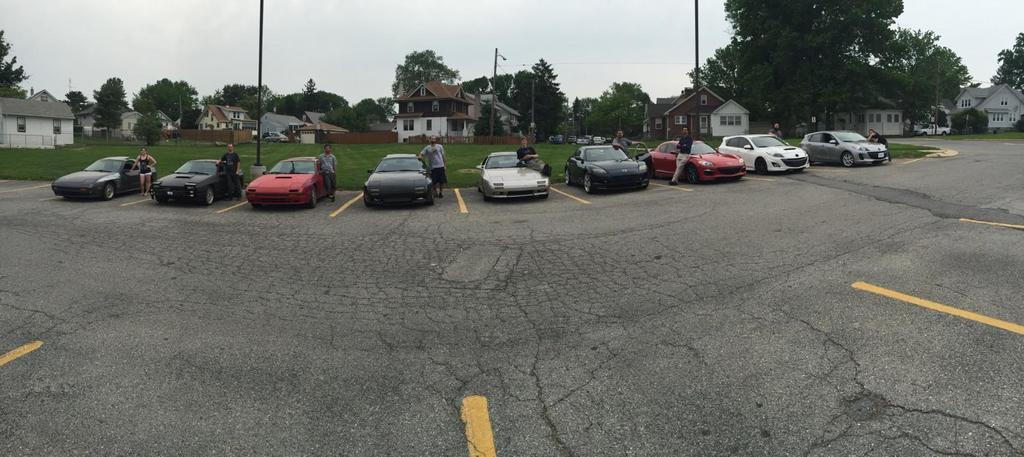
5 out of the 6 RX7s that were in the driveway on sunday

Saturday was spent on the T2 getting the pilot bearing replaced, attaching the clutch, and getting it dropped in. I didnt realize the T2 had a different splined clutch disk so I had to take an hour's drive away to get one from a friend. We installed that engine without dropping the trans. It wasnt overly difficult, but would have required me taking the NA car off jackstands to get that car up and pull it out....and that would have wasted too much time.
Sunday consisted of front stack assembly, oil pan, (NEW!) motor mounts, exhaust mani, and LIM installation. I forsee in the future spending the extra time installing the manis before dropping the motor in. I regret not doing that for the T2. Anyways, We dropped the transmission in prep for mating it to the engine....to find out that I didnt have bolts to attach the lightweight flywheel to the rear counterweight! So, we installed the engine without the trans temporarily. Its a minor setback, but I anticipate it'll be running in 2-ish weeks as long as I can get these OMP lines made.
It was one of the most relaxing days I've had in a long time. I cant thank those guys enough for helping out, because otherwise I'd still have a lot of work to do!!
onto some pics!
Old 3 piece seals vs the atkins 2 piece
3 piece seal in its slot (dangerously close to falling out!)
I remembered to snap a photo during assembly this time.
T2 engine in the car
NA in the car
5 out of the 6 RX7s that were in the driveway on sunday
Last edited by driftxsequence; Apr 13, 2015 at 09:21 AM.
Thread Starter
Joined: Jan 2007
Posts: 1,946
Likes: 107
From: Wilmington, DE
The past weekend was very productive! Saturday's main goal was to reattach the transmission. The shifter assembly went back in (all the rubber boots accounted for and in good shape), the clutch slave was attached, the driveshaft was slipped in anddddddd thats about it. The rest of the day was spent replacing a mirror and fender on the DD golf TDI. The focus switched to the engine bay where I was blocked by the fact that with no OMP system, no progress could continue!
So I made some OMP lines and rebuilt the leaky leaky pump. $20 for the rebuild kit and $30 for the OMP line materials. It was a super easy job.
Goal is to have the first start up on saturday. If that is to happen then I need to:
install exhaust
hook up trans wires
bolt in starter
attach waterpump + hoses
install OMP lines
attach UIM + associated connections
run harness into the car
attach airbox, air pump, PS/AC belts, fan, battery box and battery
add fluids
annnnnd I think it should be ready to start.
Thread Starter
Joined: Jan 2007
Posts: 1,946
Likes: 107
From: Wilmington, DE
So this happened on Saturday. This was the second attempt. I flooded it the first time since I did not tap the gas.
Got 2 hours of seat time so far. TPS is a little off, idle is dead on. I stabbed the CAS correctly the first time and after 2-3 minutes it came down to a solid 700 RPM. Damn it feels good for things to just "work" for once.
Also acquired a RB catback from a friend so it purrs like a kitten now....minus the exhaust leak. This video was taken with a open header, the cats can be seen on the sawhorse in the video. :P Next up is a paint job and get the rest of the black interior installed.
All attention will be put towards the black T2 now! Time to get that sucker going. Then hopefully we can get back to the car that started this thread
Last edited by driftxsequence; Apr 27, 2015 at 09:26 AM.
Thread Starter
Joined: Jan 2007
Posts: 1,946
Likes: 107
From: Wilmington, DE
One month in, no major issues! No leaks anywhere. My only issue is after it does the warmup it wont hold an idle on its own. I have to pump the pedal for a minute or so before it'll finally hold an idle on its own. Sometimes it'll come down from 3000 to 1500 and hold there but not always. Is something on the throttlebody sticking? Theres a clicking noise when I go into reverse sometimes so I suspect the driveshaft is on it's way out.
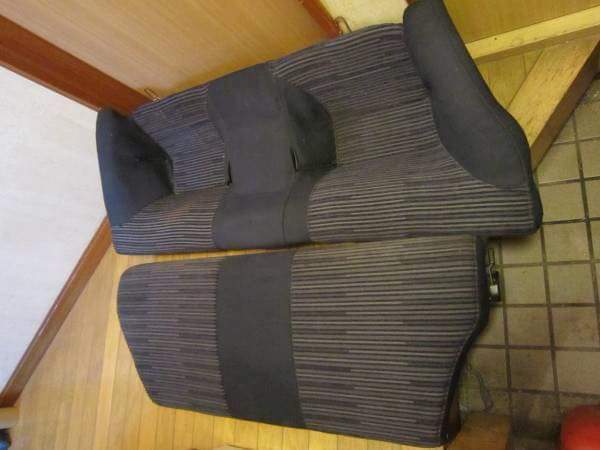
I am looking for these rear seats if anyone has any!
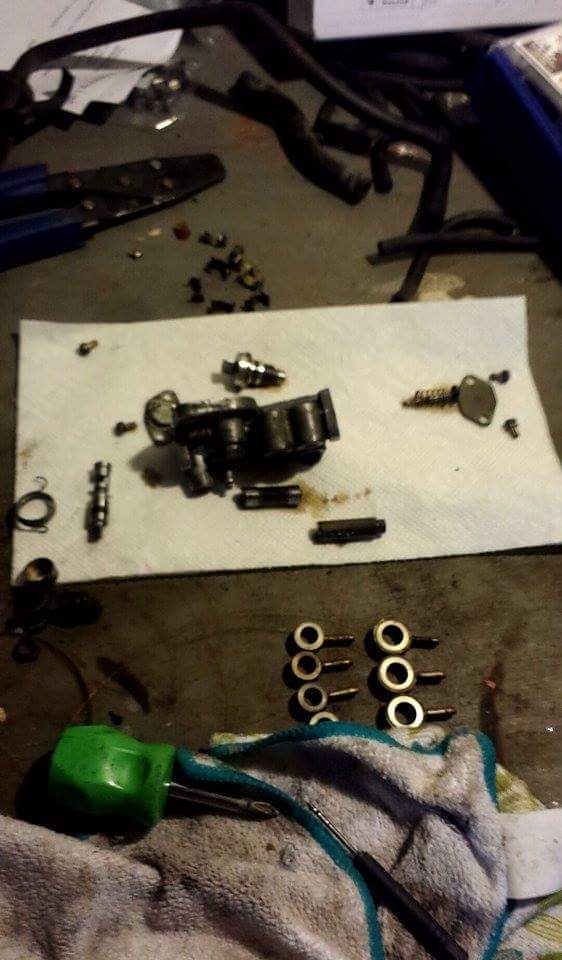
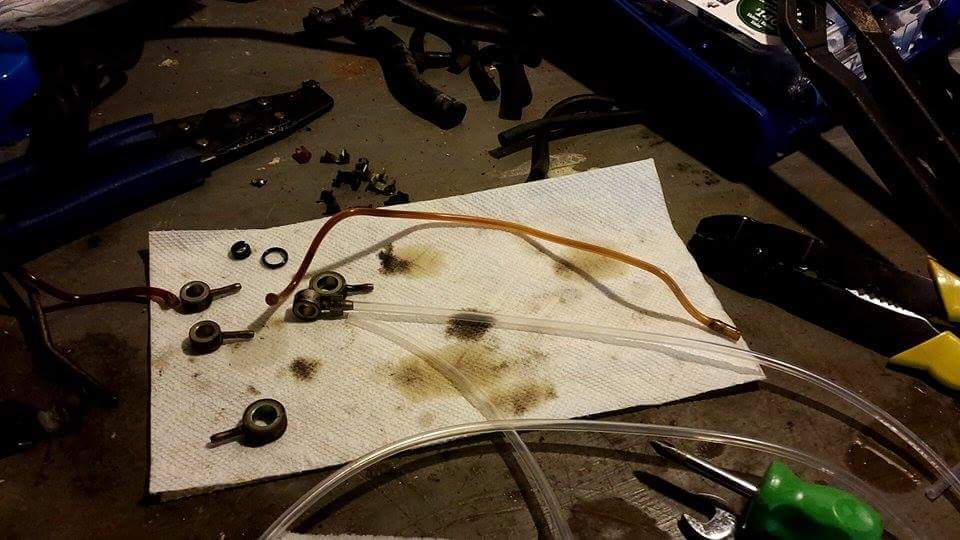
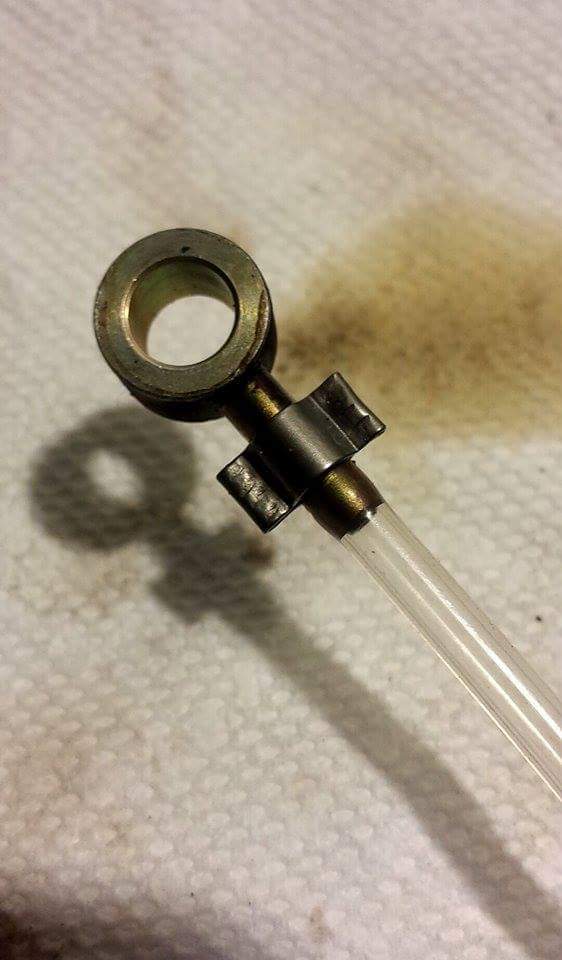
Made some progress on the Black T2. Title issue is moving forward...as is the engine bay. Oil meter lines made up and installed. LIM attached with orings, solenoid rack installed with silicone hose throughout. Now to get the fuel system in and maybe the UIM?
I am looking for these rear seats if anyone has any!
Made some progress on the Black T2. Title issue is moving forward...as is the engine bay. Oil meter lines made up and installed. LIM attached with orings, solenoid rack installed with silicone hose throughout. Now to get the fuel system in and maybe the UIM?

Thread Starter
Joined: Jan 2007
Posts: 1,946
Likes: 107
From: Wilmington, DE
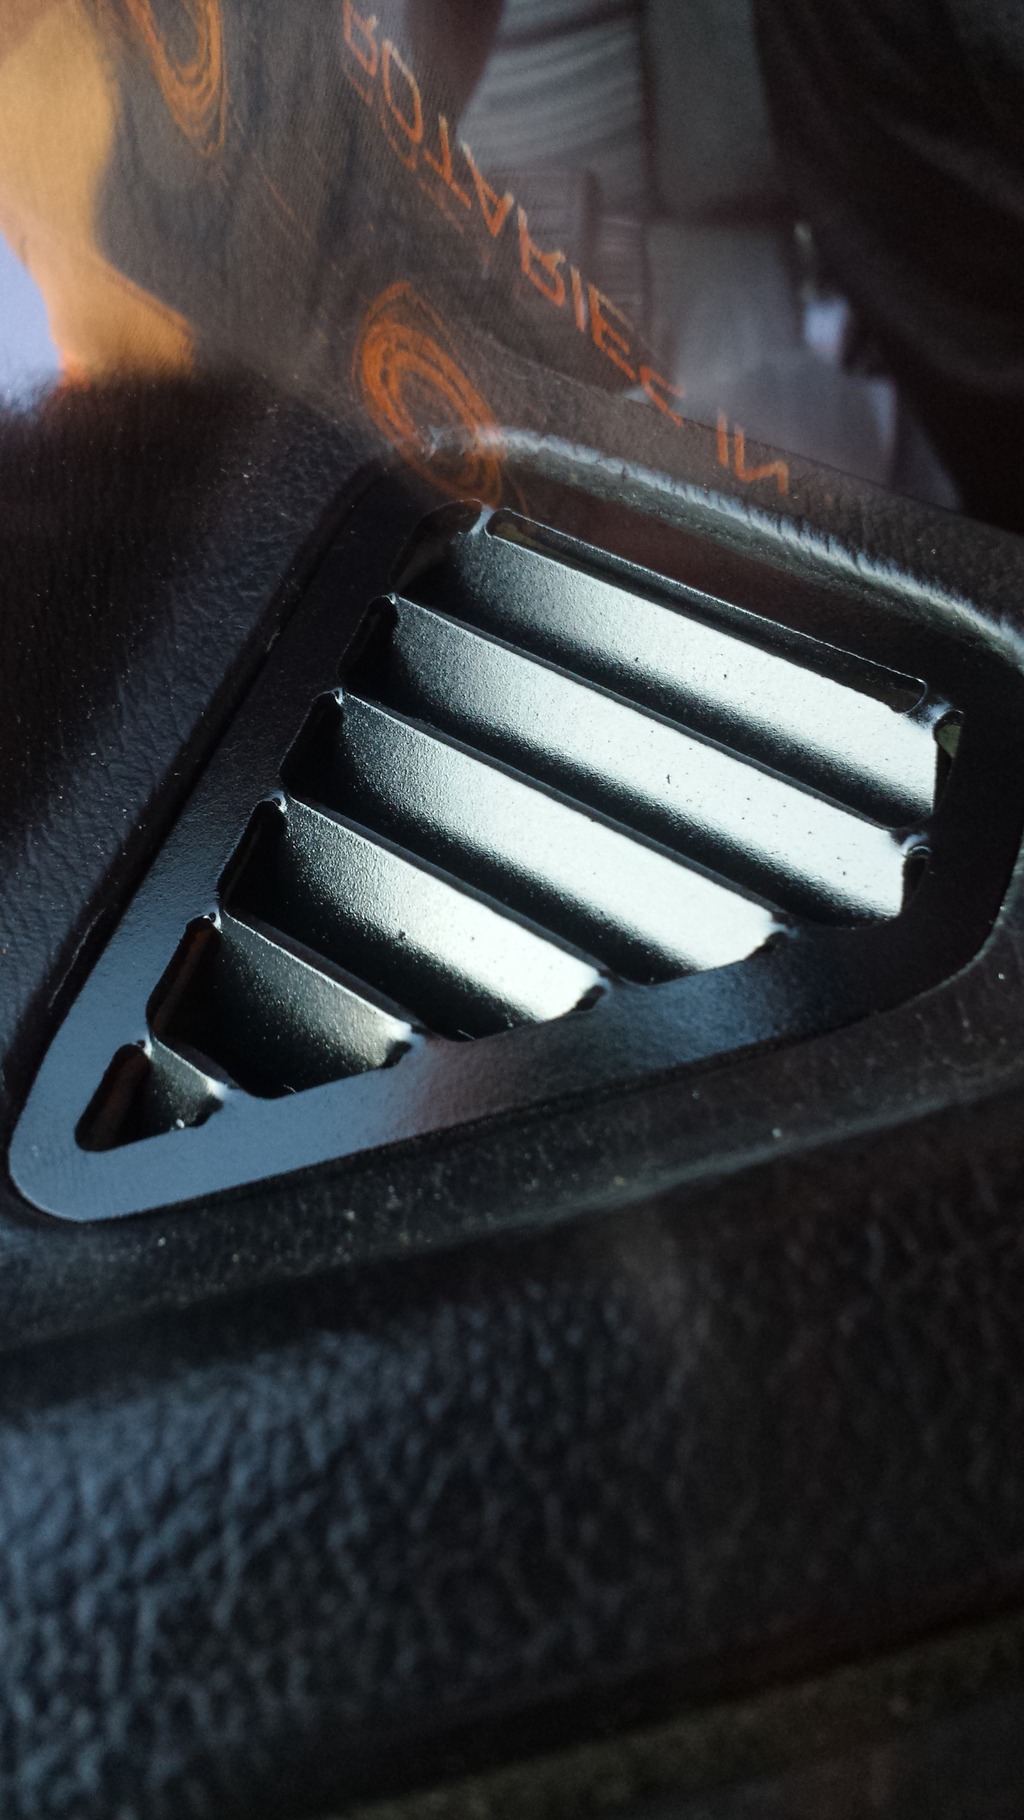
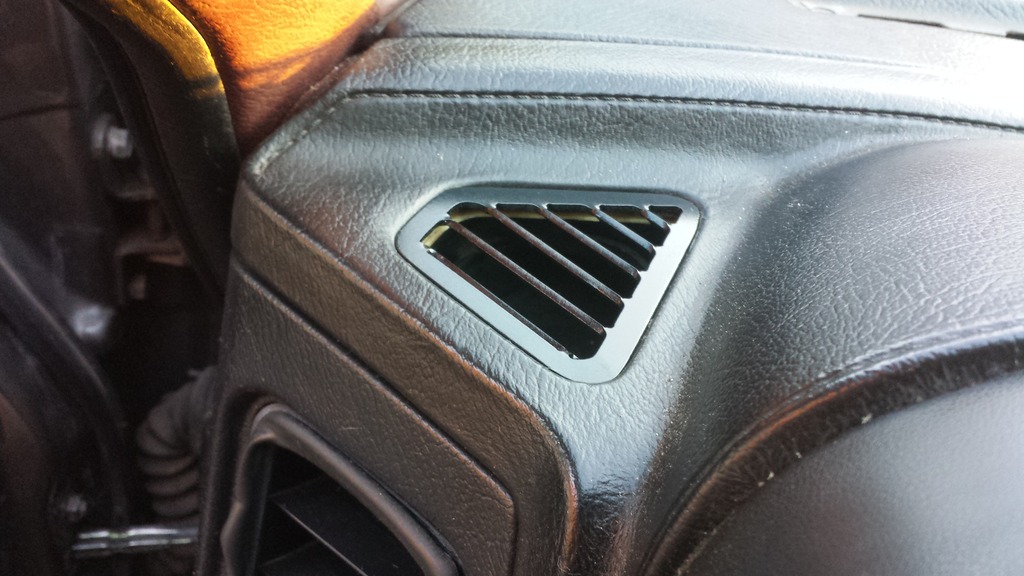
Got to spend a few days with Landon and Chad down in virginia beach for Angel Motorsport's east coast rotary classic event. Such a great time! Car had NO issues at all. Got a few upgrades while there thanks to Landon. He is producing corner and demister vents out of aluminum so no more broken dash vents! They are also cheaper than factory vents. check out www.lrbspeed.com
No pics of the demister vents as I still need to paint and attach them.
I also got to drive a RHD Infini. That was probably the highlight of the weekend! Super cool car!
Also managed to get 350 miles to a tank. 25.9 MPG!! It would have been higher had we not sat in traffic for nearly half an hour. I drove 60mph the entire way through delaware on rt 1 / 113.
