
RX7 20B Build Thread - Australia


Thread Starter
Junior Member
Joined: Apr 2004
Posts: 16
Likes: 0
From: Australia
RX7 20B Build Thread - Australia
Hello,
Thought I would start a build thread on my car (aka Clementine)
Started out looking like this when I bought it.
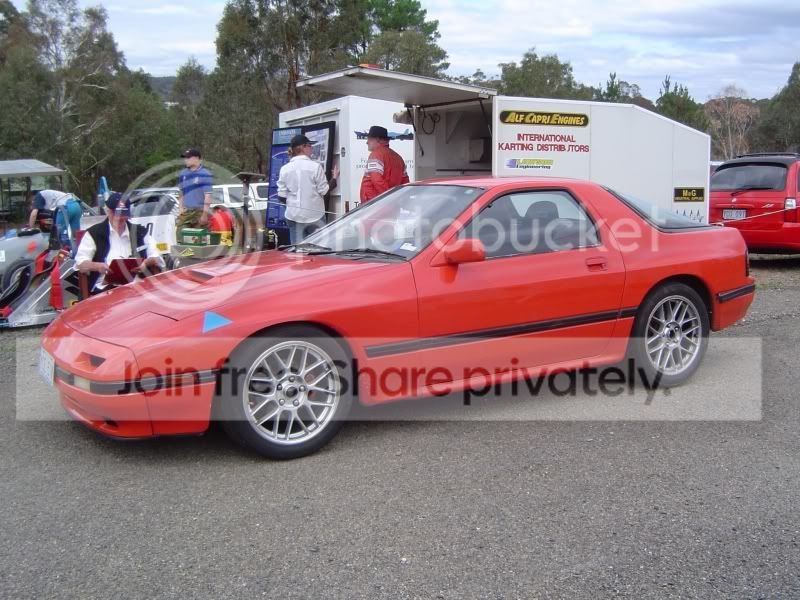
The car started life as a NA 13B automatic and 1985 build plate (I thought these generation were 86 onwards)
The previous owner had converted the car to a standard 13BT setup, but with a Microtech some wheels and an exhaust.
I bought the car and then performed the usual mods after the original engine started getting tired - freshen engine, GT35R turbo, FMIC. I blew up the NA Diff, and thankfully I got a good deal from Reliance which saw me drive away with a Turbo Diff/LSD/Axels etc.
This was my only car for a few years, but it gradually became more track focused and I let the rego expire. The first mods then were a CAMS 6-point weld in cage, stripped interior, harnesses and racing recaro's and some softer tyres. In this guise, she got around the SDMA hillclimb in 48.2 and a best of 1:09 at Wakefield.
Around 2007 Michael from Reliance Rotary was looking to build a S4 RX7 PRC and we struck a deal to swap running gear between cars and my dream of a 20B came to life
Pics from 2007
Thought I would start a build thread on my car (aka Clementine)
Started out looking like this when I bought it.
The car started life as a NA 13B automatic and 1985 build plate (I thought these generation were 86 onwards)
The previous owner had converted the car to a standard 13BT setup, but with a Microtech some wheels and an exhaust.
I bought the car and then performed the usual mods after the original engine started getting tired - freshen engine, GT35R turbo, FMIC. I blew up the NA Diff, and thankfully I got a good deal from Reliance which saw me drive away with a Turbo Diff/LSD/Axels etc.
This was my only car for a few years, but it gradually became more track focused and I let the rego expire. The first mods then were a CAMS 6-point weld in cage, stripped interior, harnesses and racing recaro's and some softer tyres. In this guise, she got around the SDMA hillclimb in 48.2 and a best of 1:09 at Wakefield.
Around 2007 Michael from Reliance Rotary was looking to build a S4 RX7 PRC and we struck a deal to swap running gear between cars and my dream of a 20B came to life
Pics from 2007
Thread Starter
Junior Member
Joined: Apr 2004
Posts: 16
Likes: 0
From: Australia
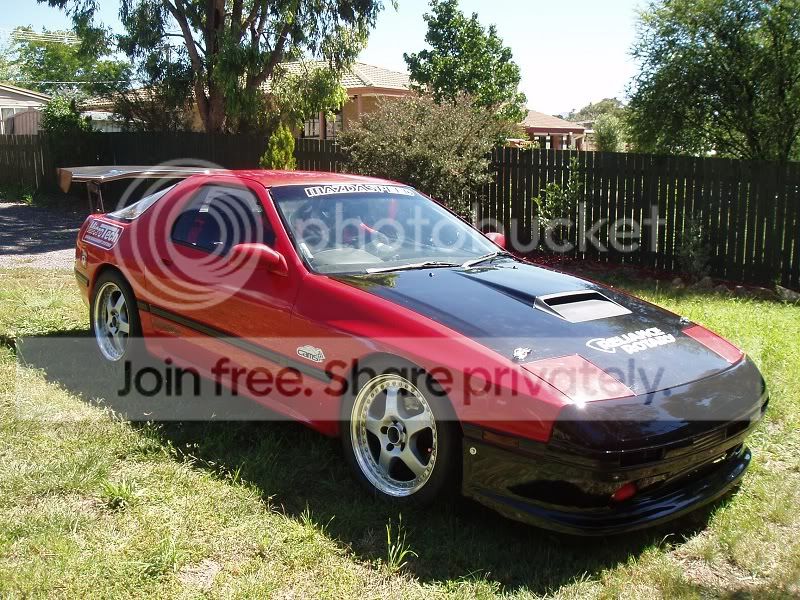
Evolution # 2 of Clementine
Some of the photo's aren't great.....
Along the way I bought a genuine RE-Amemiya GT Wing for the car. Not cheap but I just had to have one.
The car served me well (two lunched gearboxes) and in 2010 (or maybe 2009) I entered in the first World Time Attack at Oran Park. About 2 weeks before the event the standard import motor unfortunately chipped an apex seal on the dyno. Instead of trying to quickly repair the motor for WTAC, my wife and I decided to bite the bullet and rebuild the motor.
Enter Xtreme Rotaries and Reliance Rotary.
The motor was pulled down and only 1x housing had sustained damage (picture pending) - a replacement 20B housing was sourced and the entire rotating assembly and engine plates were sent to Xtreme Rotaries for 'the treatment'
12.7 mm Stud Kit
Balanced rotating assembly
Bored oil galleries
Xtreme finishing of the eccentric shaft
3mm Apex seal grooves
3mm MT (metal technology) apex seals
Side clearanced rotors
Turbo porting
Extra oil circulation to the front the central engine plates
The engine was put back together and into the car and I spent several loooong days at Wakefield running the motor in.
At this stage I had been talking with Maztech (Anthony Rodriguez) about tuning the motor, and I loaded the car onto the trailer and myself and my wife (who was 35 weeks pregnant at the time!) made the drive down the Melbourne. After a day�s tuning on pump98, we walked away with 347 rwkw @ 12 psi. Anthony explained the bumps in the dyno sheet to me, but buggered if I can remember what it was.

After experiencing a few setbacks with the car, I went to see John Godschalx (MazPrep) to get him to perform some analysis on the car and fix some issues. His experience and knowledge with high end race cars (Sports Sedans / SpeedWay and most importantly 20B Turbo setups) plus being not far away from home is very handy.
I thought that if I am going to do it once, I will do it properly. So the car was pulled off the road in 2011 to look at improving the reliability of the car and making any improvements where we could.
Almost the entire fuel system has been replaced after I started experiencing some fuel delivery issues at the track and finding some issues with the existing setup.
2x lift pumps mounted in the fuel tank
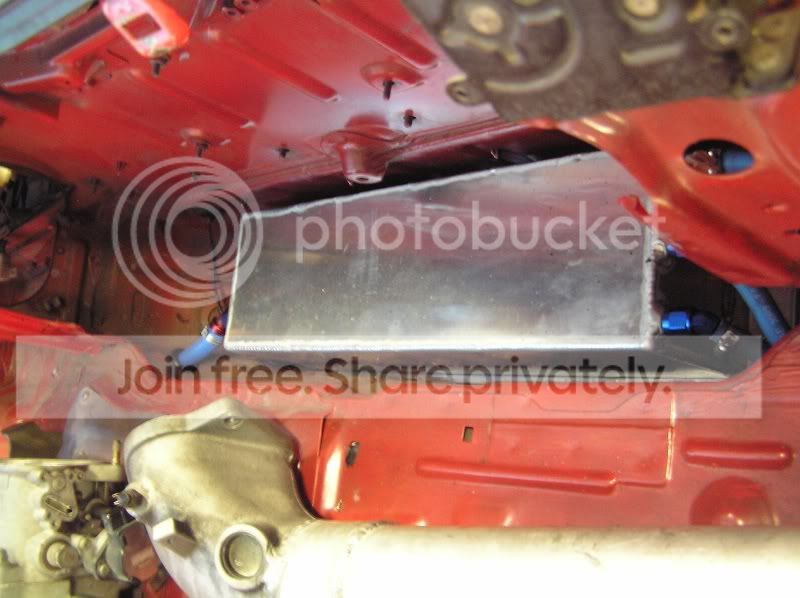
3L surge tank mounted in the spare wheel compartment
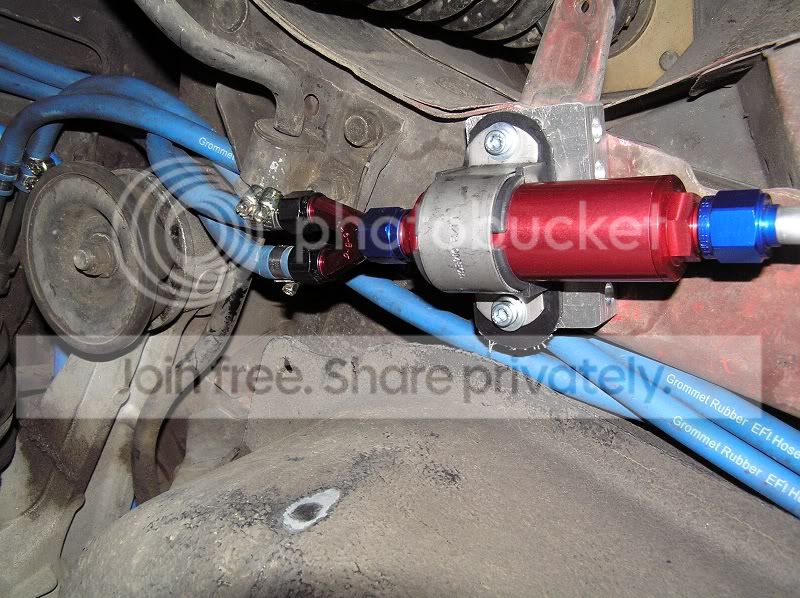
1000hp Main fuel pump with an in-line filter (Aeromotive)
2000hp fuel pressure regulator (Turbosmart)
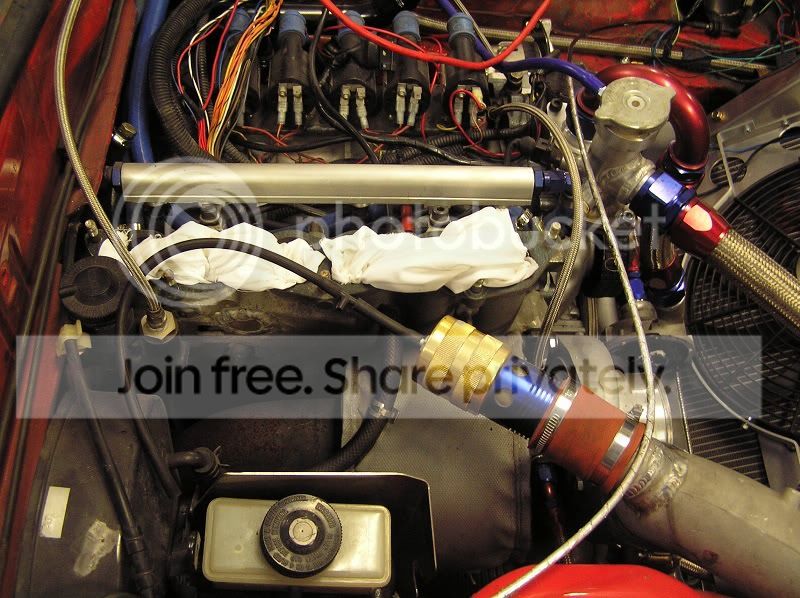
Xtreme Rotaries secondary fuel rail
1600cc secondary injectors. The standard primary injectors will stay for now
Everything has been setup, so in the future with a couple of small mods, E85 fuel can be used. But for now I am happy with 98 pump fuel.
Surge Tank
Secondary Fuel Rail
Primary fuel pump

Inline filter
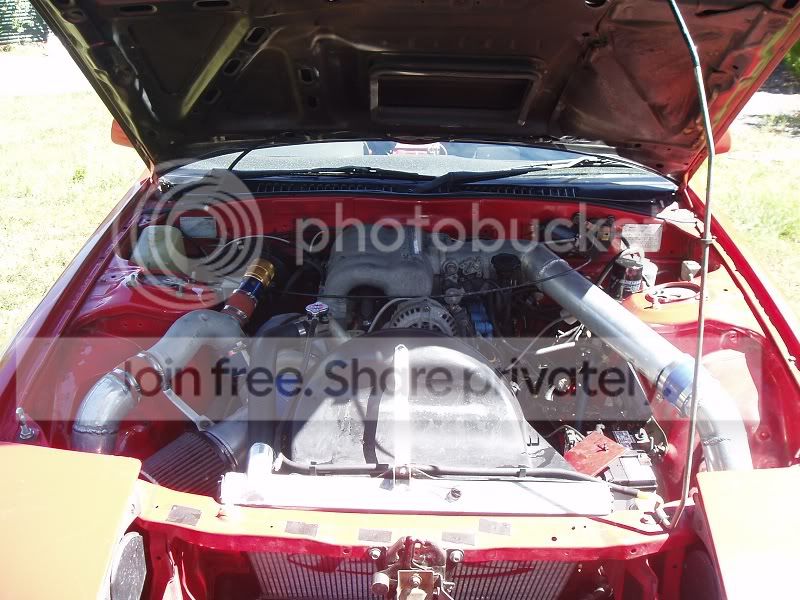
The 20B needs plenty of cooling. I originally had the standard clutch type fan, PWR radiator, standard oil cooler, under driven water pump and a 1.3 bar Mazdaspeed radiator cap.
After only a handful of laps at Wakefield with this setup, the coolant temp would be 100�C.
Some mods were made to try and improve things.
� Some small water coolers were added into the corner of the nose cone.
� The engine fan was modded so it would be turning at full speed all the time. Made getting the car up to temp a real bastard though at the hillclimbs :P
� Water spray bar for the intercooler and radiator which was triggered by positive boost pressure.
� Turbine housing bag for the turbo
This helped this a bit, but the existing issue of overheating remained. Having a massive intercooler blocking the radiator (and oil cooler) from receiving any direct airflow definitely didn�t help things. Intake air temps were nice and low though
MazPrep came up with some suggestions and the following changes were made.
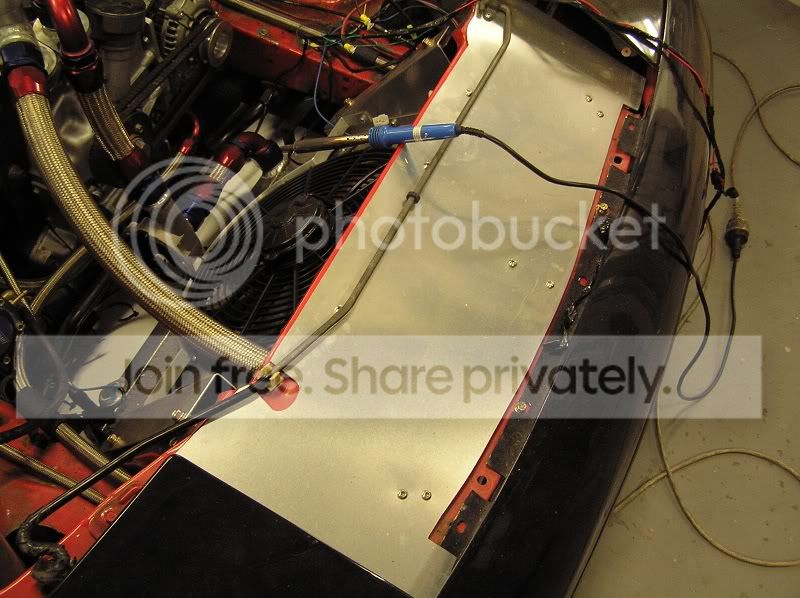
� I found a D-Max CF vented bonnet to help with under bonnet temps and increase airflow. Plus the weight loss would be handy.
� Original oil cooler deleted & 2x Setrab oil coolers mounted in the front corners of the car. Some additional ducting to feed extra cool air to the radiator.
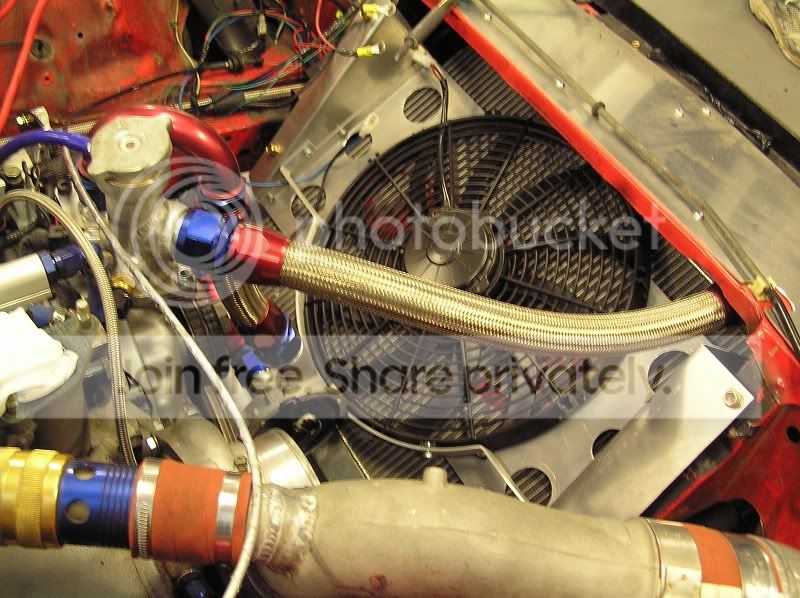
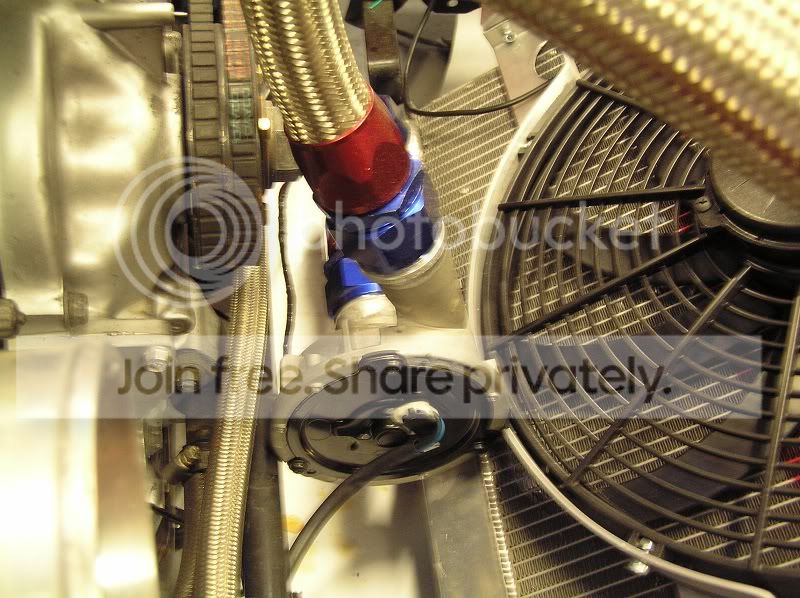
� Intercooler lay down and the radiator lay over it. Not a v-mount, but will ensure that cooling air will be available to both cores.
� SPAL electric fan and shroud.
� Davies Craig electric water pump.
� Controller for the fan and pump to maintain preset coolant temperature.
� Speedflow fittings and braided lines for all coolers.
� New coolant overflow bottle and AST.
� Side mount kit for the alternator from Xtreme Rotaries to make room for the EWP.
� Custom splitter for the entire front end of the car.
� Bung welded into the radiator to ensure the turbo coolant exit does not get circulated into the motor without going through the radiator first.
The EWP runs after engine shutdown to prevent heat soak. Very weird standing looking at the engine and hearing the engine coolant being pumped around the system. Without the mechanical fan or water pump now the car revs so much quicker than before, lightning throttle response when just reving the motor.
Electric Fan
Electric Water Pump


Some of the photo's aren't great.....
Along the way I bought a genuine RE-Amemiya GT Wing for the car. Not cheap but I just had to have one.
The car served me well (two lunched gearboxes) and in 2010 (or maybe 2009) I entered in the first World Time Attack at Oran Park. About 2 weeks before the event the standard import motor unfortunately chipped an apex seal on the dyno. Instead of trying to quickly repair the motor for WTAC, my wife and I decided to bite the bullet and rebuild the motor.
Enter Xtreme Rotaries and Reliance Rotary.
The motor was pulled down and only 1x housing had sustained damage (picture pending) - a replacement 20B housing was sourced and the entire rotating assembly and engine plates were sent to Xtreme Rotaries for 'the treatment'
12.7 mm Stud Kit
Balanced rotating assembly
Bored oil galleries
Xtreme finishing of the eccentric shaft
3mm Apex seal grooves
3mm MT (metal technology) apex seals
Side clearanced rotors
Turbo porting
Extra oil circulation to the front the central engine plates
The engine was put back together and into the car and I spent several loooong days at Wakefield running the motor in.
At this stage I had been talking with Maztech (Anthony Rodriguez) about tuning the motor, and I loaded the car onto the trailer and myself and my wife (who was 35 weeks pregnant at the time!) made the drive down the Melbourne. After a day�s tuning on pump98, we walked away with 347 rwkw @ 12 psi. Anthony explained the bumps in the dyno sheet to me, but buggered if I can remember what it was.
After experiencing a few setbacks with the car, I went to see John Godschalx (MazPrep) to get him to perform some analysis on the car and fix some issues. His experience and knowledge with high end race cars (Sports Sedans / SpeedWay and most importantly 20B Turbo setups) plus being not far away from home is very handy.
I thought that if I am going to do it once, I will do it properly. So the car was pulled off the road in 2011 to look at improving the reliability of the car and making any improvements where we could.
Almost the entire fuel system has been replaced after I started experiencing some fuel delivery issues at the track and finding some issues with the existing setup.
2x lift pumps mounted in the fuel tank
3L surge tank mounted in the spare wheel compartment
1000hp Main fuel pump with an in-line filter (Aeromotive)
2000hp fuel pressure regulator (Turbosmart)
Xtreme Rotaries secondary fuel rail
1600cc secondary injectors. The standard primary injectors will stay for now
Everything has been setup, so in the future with a couple of small mods, E85 fuel can be used. But for now I am happy with 98 pump fuel.
Surge Tank
Secondary Fuel Rail
Primary fuel pump
Inline filter
The 20B needs plenty of cooling. I originally had the standard clutch type fan, PWR radiator, standard oil cooler, under driven water pump and a 1.3 bar Mazdaspeed radiator cap.
After only a handful of laps at Wakefield with this setup, the coolant temp would be 100�C.
Some mods were made to try and improve things.
� Some small water coolers were added into the corner of the nose cone.
� The engine fan was modded so it would be turning at full speed all the time. Made getting the car up to temp a real bastard though at the hillclimbs :P
� Water spray bar for the intercooler and radiator which was triggered by positive boost pressure.
� Turbine housing bag for the turbo
This helped this a bit, but the existing issue of overheating remained. Having a massive intercooler blocking the radiator (and oil cooler) from receiving any direct airflow definitely didn�t help things. Intake air temps were nice and low though
MazPrep came up with some suggestions and the following changes were made.
� I found a D-Max CF vented bonnet to help with under bonnet temps and increase airflow. Plus the weight loss would be handy.
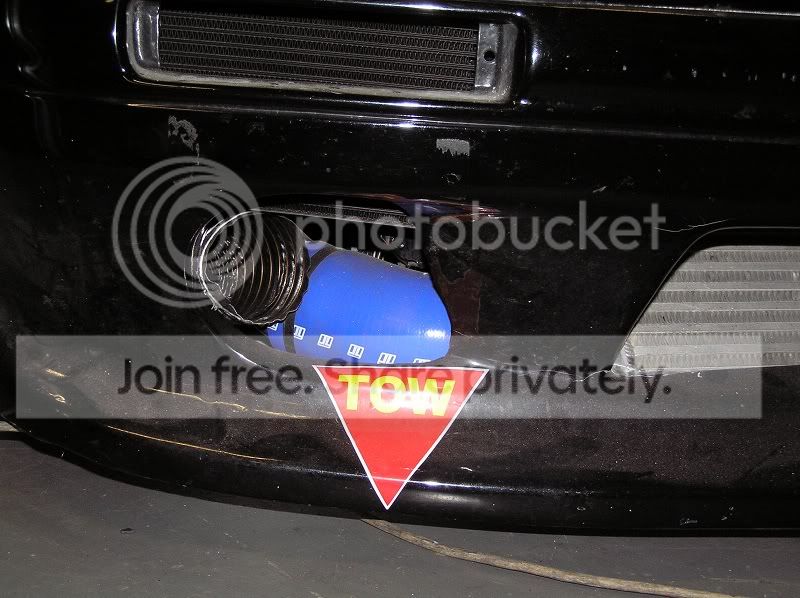
� Original oil cooler deleted & 2x Setrab oil coolers mounted in the front corners of the car. Some additional ducting to feed extra cool air to the radiator.
� Intercooler lay down and the radiator lay over it. Not a v-mount, but will ensure that cooling air will be available to both cores.
� SPAL electric fan and shroud.
� Davies Craig electric water pump.
� Controller for the fan and pump to maintain preset coolant temperature.
� Speedflow fittings and braided lines for all coolers.
� New coolant overflow bottle and AST.
� Side mount kit for the alternator from Xtreme Rotaries to make room for the EWP.
� Custom splitter for the entire front end of the car.
� Bung welded into the radiator to ensure the turbo coolant exit does not get circulated into the motor without going through the radiator first.
The EWP runs after engine shutdown to prevent heat soak. Very weird standing looking at the engine and hearing the engine coolant being pumped around the system. Without the mechanical fan or water pump now the car revs so much quicker than before, lightning throttle response when just reving the motor.
Electric Fan
Electric Water Pump
Thread Starter
Junior Member
Joined: Apr 2004
Posts: 16
Likes: 0
From: Australia
One of the oil coolers and some ducting for the radiator
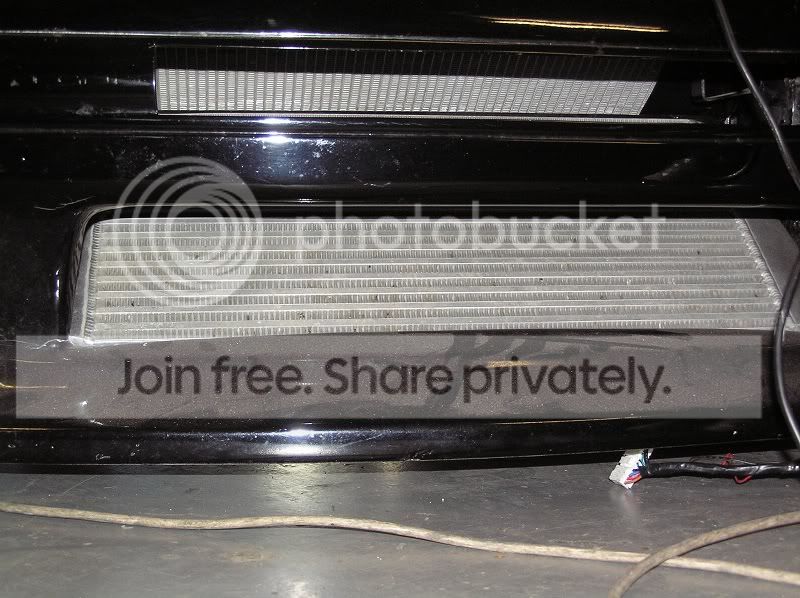
Here is a better example of how the intercooler and radiator are laid out
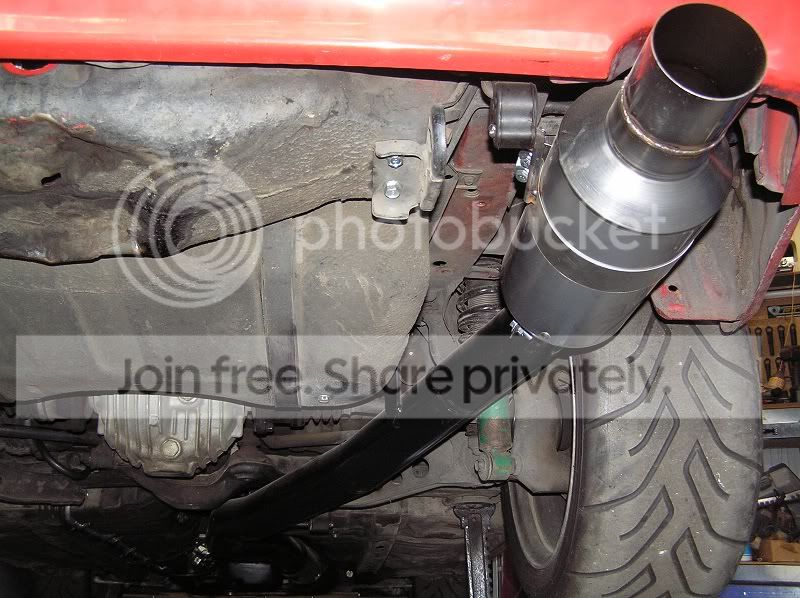
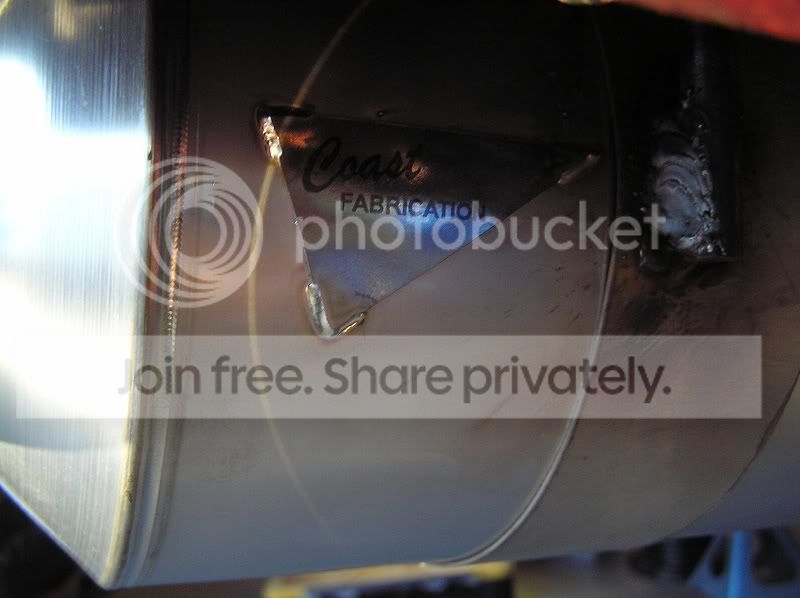
The back half of the exhaust system has been replaced. The muffler had collapsed and the exhaust pipe was �only� 3 inches. This was replaced with a 3.5 inch system and an American made repackable racing muffler built specifically for rotaries.
Most of the wiring in the car was in ordinary condition and was definitely showing its age. Bad earths, burnt wiring and untidiness was causing some issues.
All wiring has been stripped from the car and replaced with only the essentials. So much wiring was removed, the pile of it could not be carried to the bin. It had to be dragged :P We guessed around 60 kilo in total. On top of this a nice easy to reach fuse box will be installed into the cabin.
Proper power kill switch and push button start will also go in.
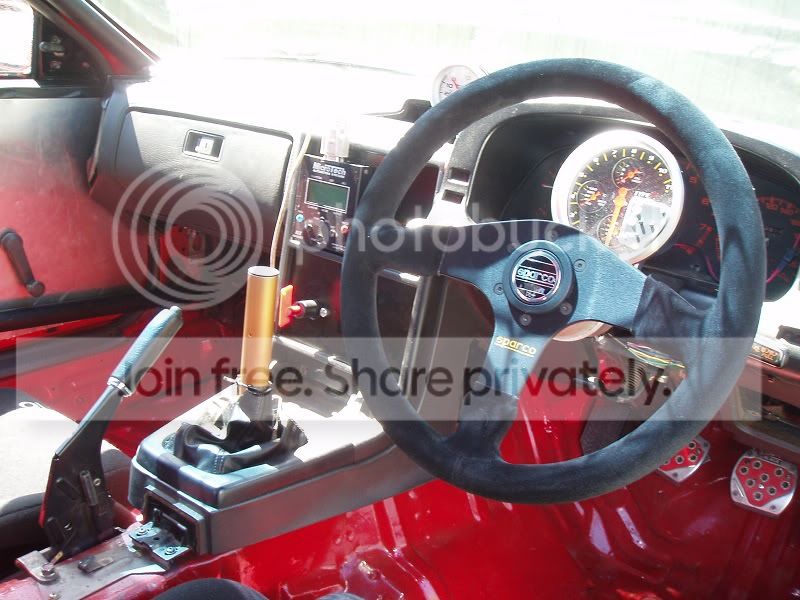
The dash has been replaced with a custom alloy unit and the necessary engine gauges installed. Not only is this lighter but it�s much better looking in my opinion. It�s a race car, but I would like an aesthetically pleasing neat car also.
Relocated battery � Mostly to make room in the engine bay, but to also try and get some better weight distribution within the car.
Relocated battery
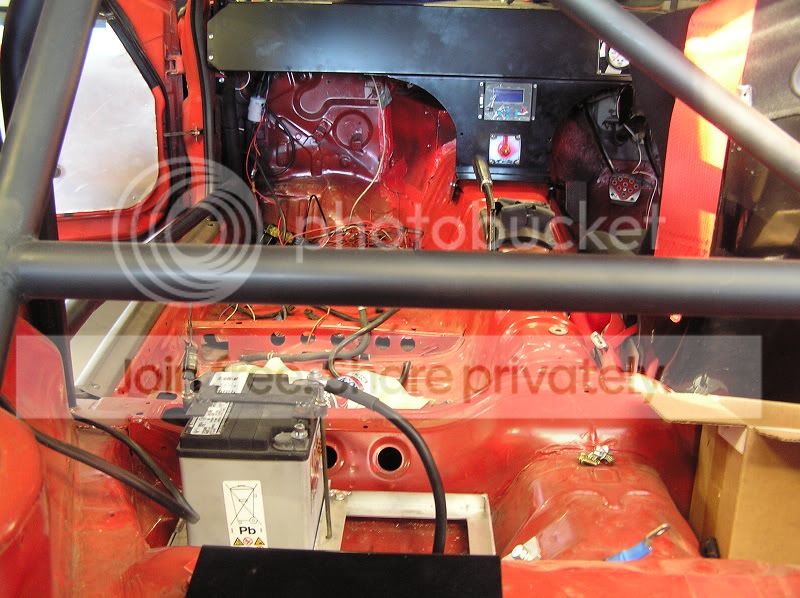
Push button start

Some of the new dials in the dash

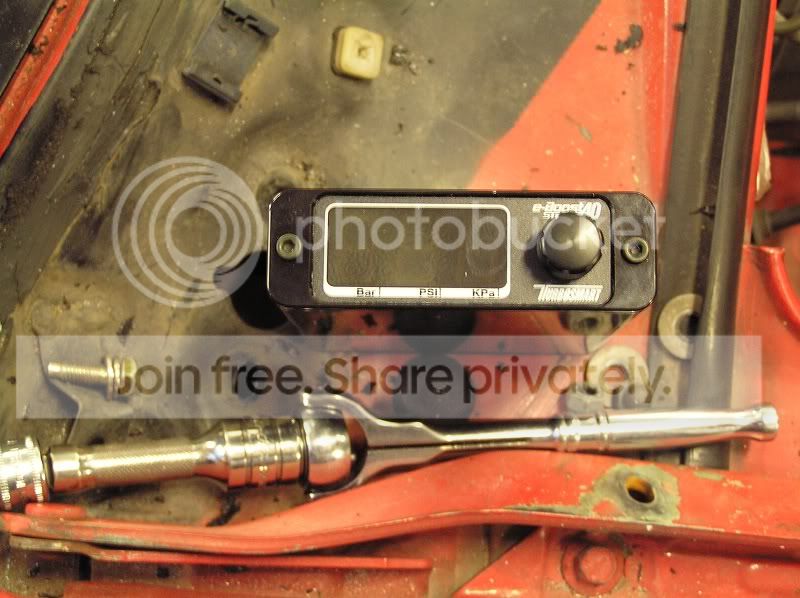
Elec boost controller � On advice from Maztech, as the old boost controller was bleeding off at high rpm. The new eboost should help with this and allow some better boost control.
eBoost
Some of the wiring is still being finished by InTune and once that is done I hope it will not be too much longer before the car can be tuned and driven in anger.
Here is a better example of how the intercooler and radiator are laid out
The back half of the exhaust system has been replaced. The muffler had collapsed and the exhaust pipe was �only� 3 inches. This was replaced with a 3.5 inch system and an American made repackable racing muffler built specifically for rotaries.
Most of the wiring in the car was in ordinary condition and was definitely showing its age. Bad earths, burnt wiring and untidiness was causing some issues.
All wiring has been stripped from the car and replaced with only the essentials. So much wiring was removed, the pile of it could not be carried to the bin. It had to be dragged :P We guessed around 60 kilo in total. On top of this a nice easy to reach fuse box will be installed into the cabin.
Proper power kill switch and push button start will also go in.
The dash has been replaced with a custom alloy unit and the necessary engine gauges installed. Not only is this lighter but it�s much better looking in my opinion. It�s a race car, but I would like an aesthetically pleasing neat car also.
Relocated battery � Mostly to make room in the engine bay, but to also try and get some better weight distribution within the car.
Relocated battery
Push button start
Some of the new dials in the dash
Elec boost controller � On advice from Maztech, as the old boost controller was bleeding off at high rpm. The new eboost should help with this and allow some better boost control.
eBoost
Some of the wiring is still being finished by InTune and once that is done I hope it will not be too much longer before the car can be tuned and driven in anger.


Thread Starter
Junior Member
Joined: Apr 2004
Posts: 16
Likes: 0
From: Australia
No video's yet. Will get some and post when the car is ready. Haven't gone down the aux water injection path yet. Will discuss this topic with my workshop in the future depending on how things go.
The dash was built by a local fabrication shop (who have nice folding machines etc) after the workshop made a template of the desired dash from some cardboard etc.
Cheers
The dash was built by a local fabrication shop (who have nice folding machines etc) after the workshop made a template of the desired dash from some cardboard etc.
Cheers
Trending Topics


Thread
Thread Starter
Forum
Replies
Last Post
Azevedo
Other Engine Conversions - non V-8
26
Mar 1, 2019 09:19 PM
stickmantijuana
20B Forum
8
Aug 18, 2015 02:46 PM