
Project: let the great turd debate begin...

Thread Starter
Joined: Mar 2002
Posts: 1,726
Likes: 540
From: binghamton, ny
Trust me....I had a plastic elbow in my hands and was contimplating it. I feel like things like this are more a "can I actually do this?" than a "welp, I guess I have no other options". I enjoy pushing my limits and doing things I'm not overly familiar with.

Senior Member


Joined: Apr 2021
Posts: 393
Likes: 70
From: GA
I'm the king of project creep, I get it. Do t forget my pedal thingy either!
Thread Starter
Joined: Mar 2002
Posts: 1,726
Likes: 540
From: binghamton, ny
Senior Member
Joined: Apr 2021
Posts: 393
Likes: 70
From: GA

Thread Starter
Joined: Mar 2002
Posts: 1,726
Likes: 540
From: binghamton, ny
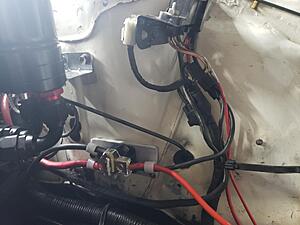
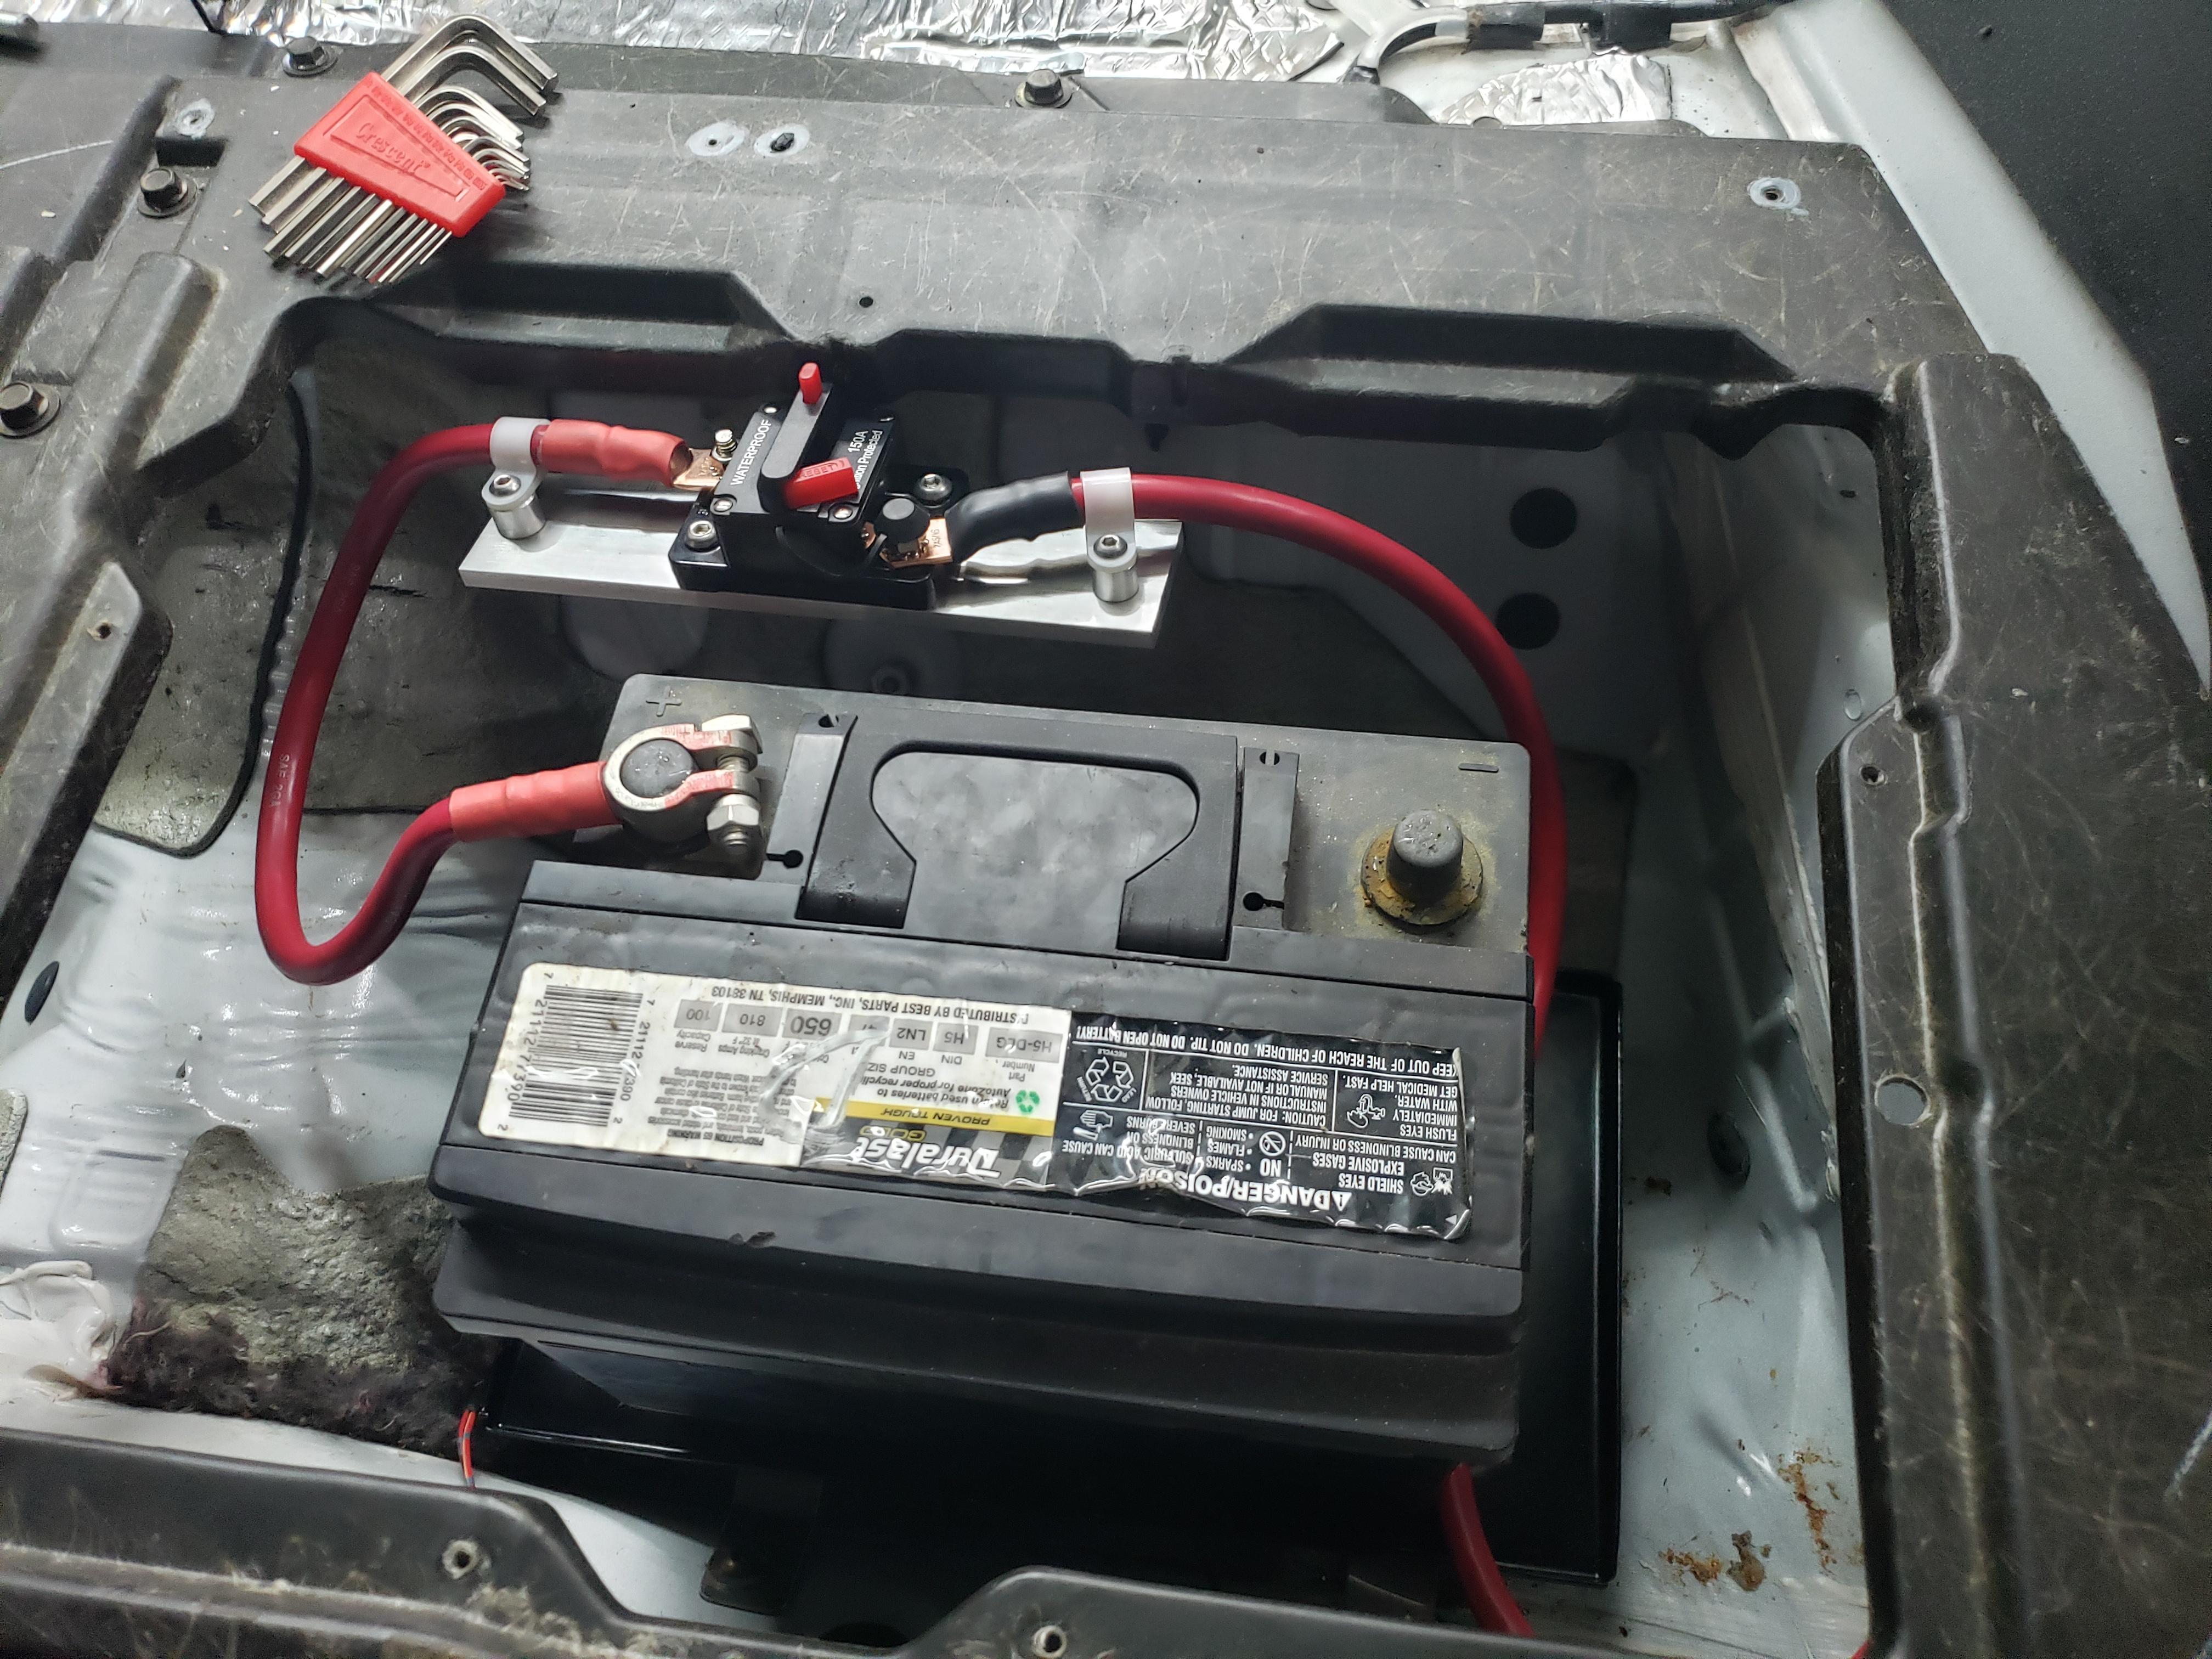
Battery relocation is pretty much done. Just need to attach the ground cable to the chassis and I THINK, i'll be ready to try and fire it up.
I got the Jegs relocation kit, and it was pretty decent. I decided to put the battery behind the drivers seat as i'd like to be able to reach back and access the passenger bin. Any who, made some stainless brackets to mount the tray to.

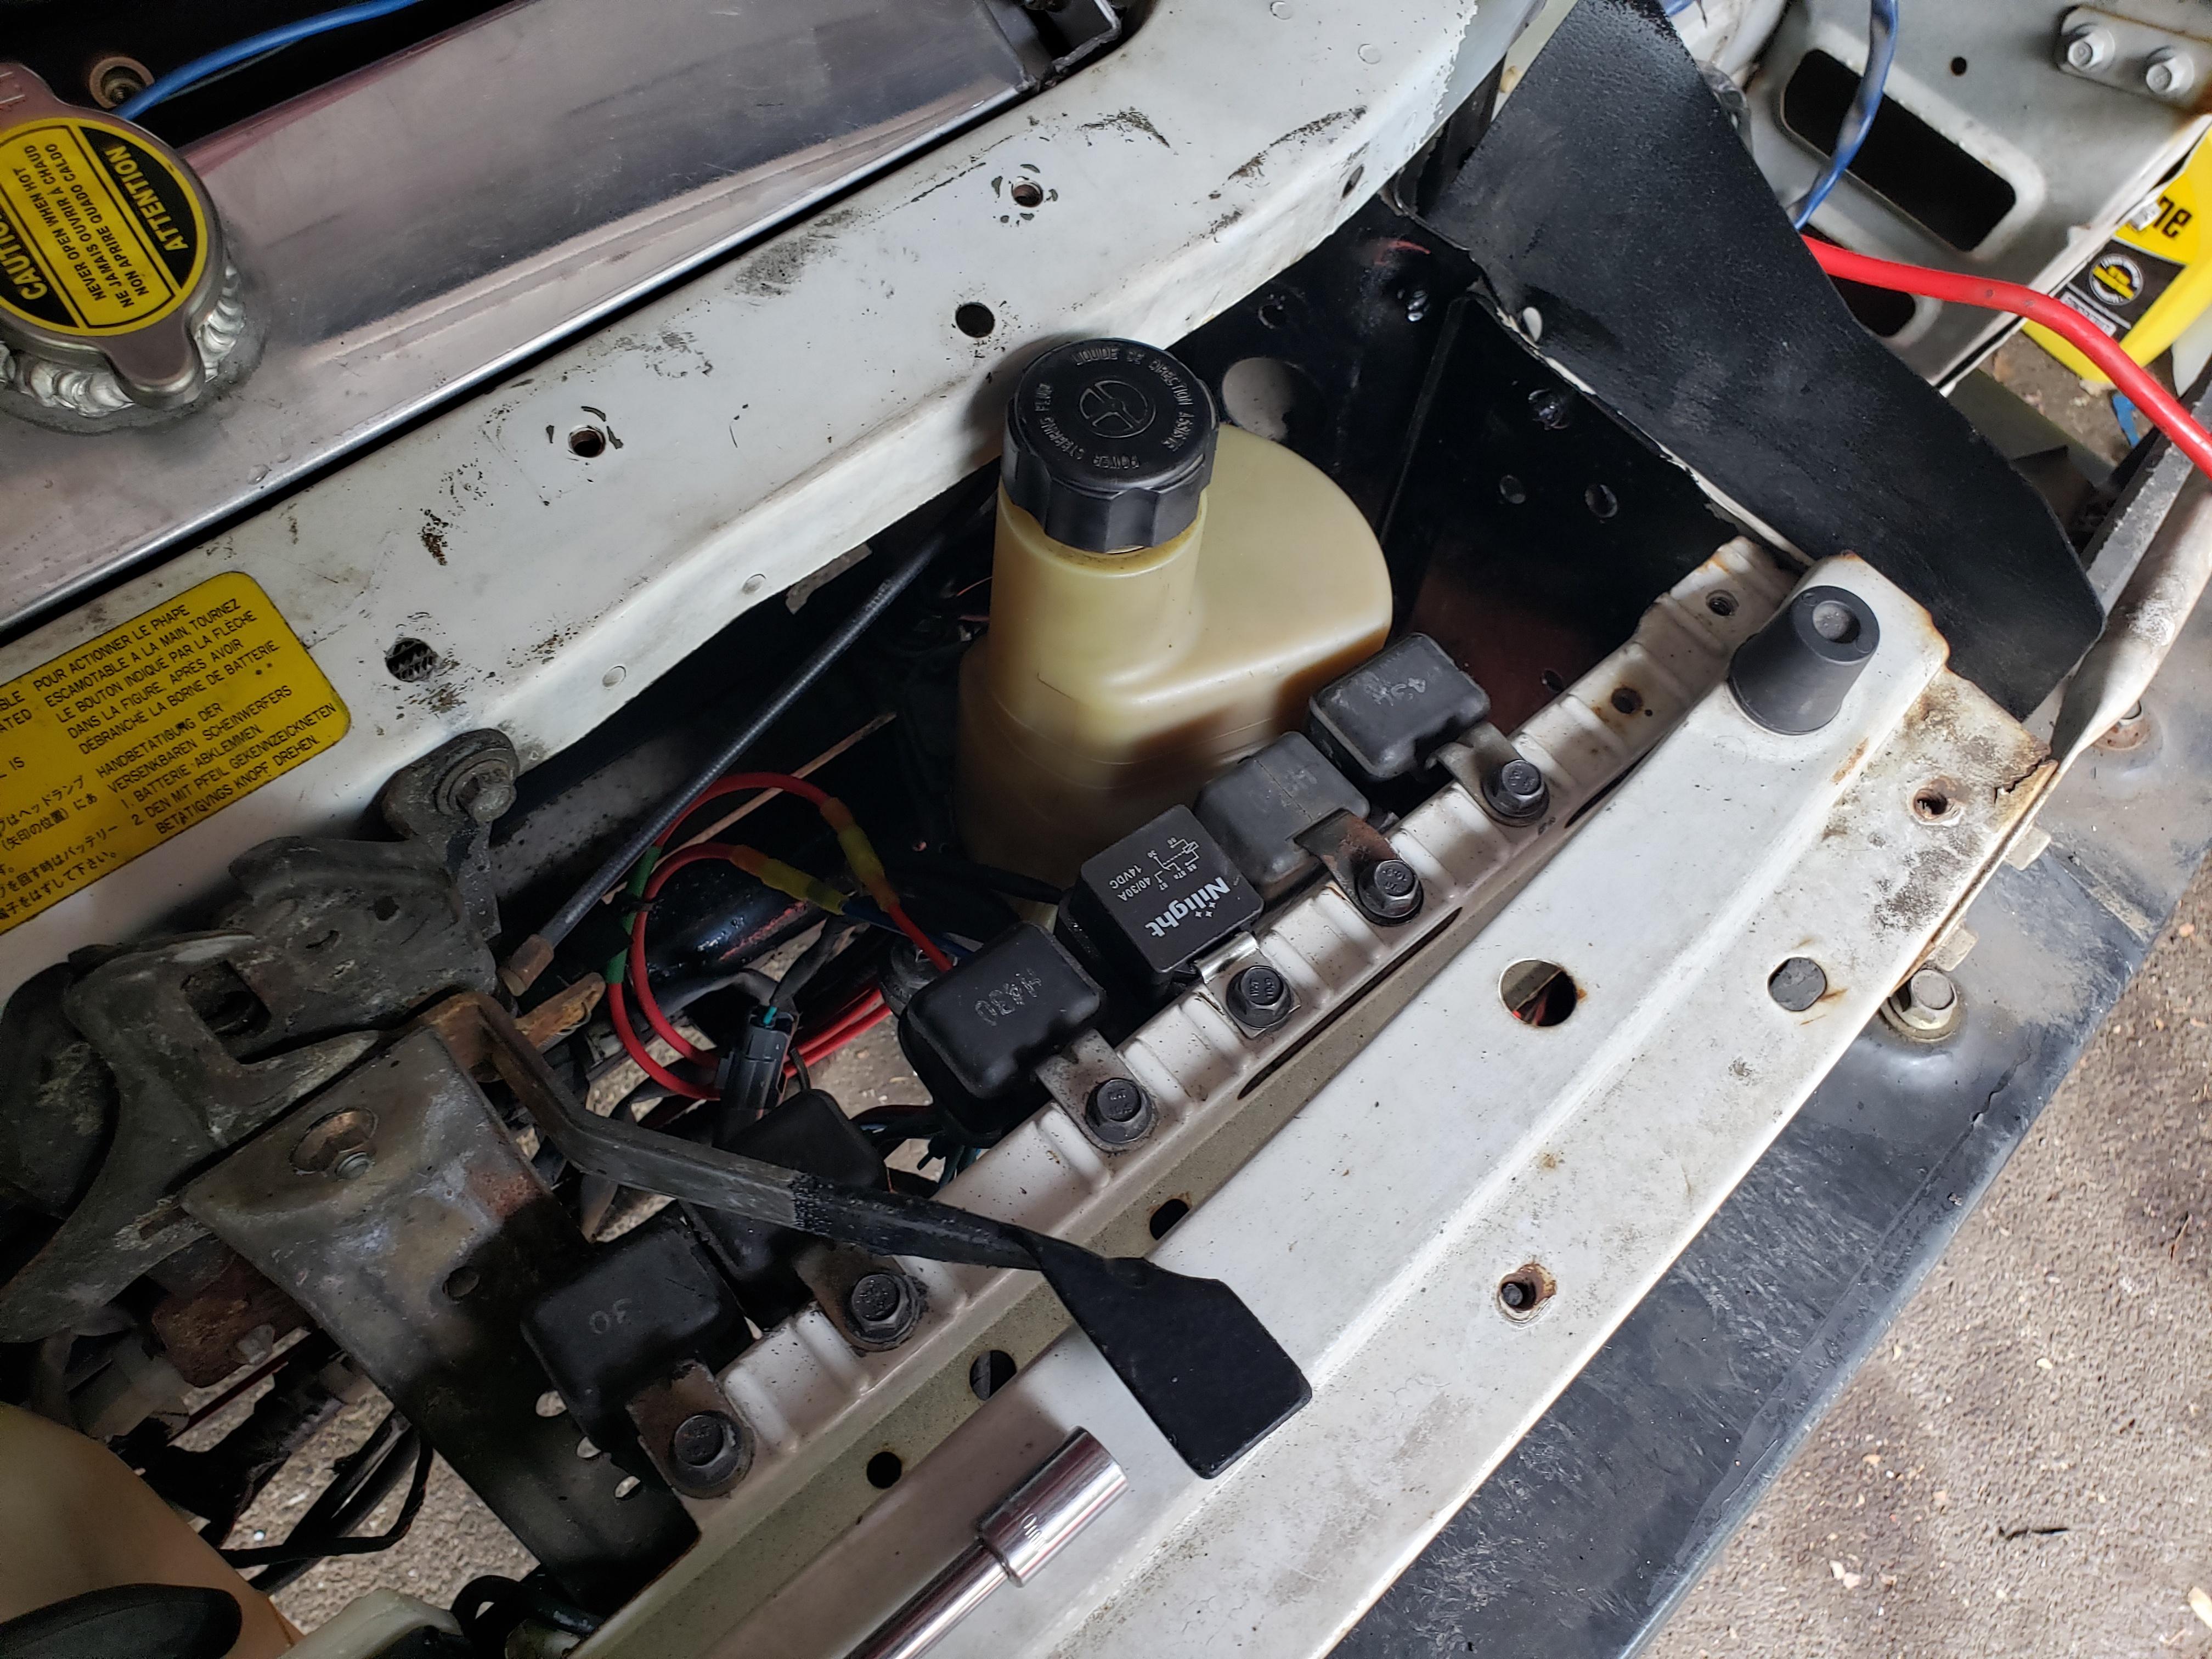
I'm also super paranoid about wires coming loose so I made this bracket that hold this and a 150A breaker. I'll mount this bracket to the bin once i'm ready to install the interior back in.

pretty sure I routed the wire like everyone behind the little fiber board panel and out by the fuse box. Got to have a grommet to protect the wire as well.
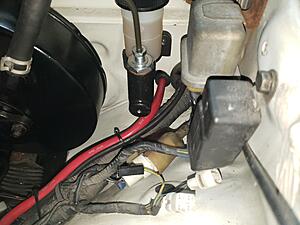
Wire runs to a distribution block that splits power off for the starter and the primary fuse block.
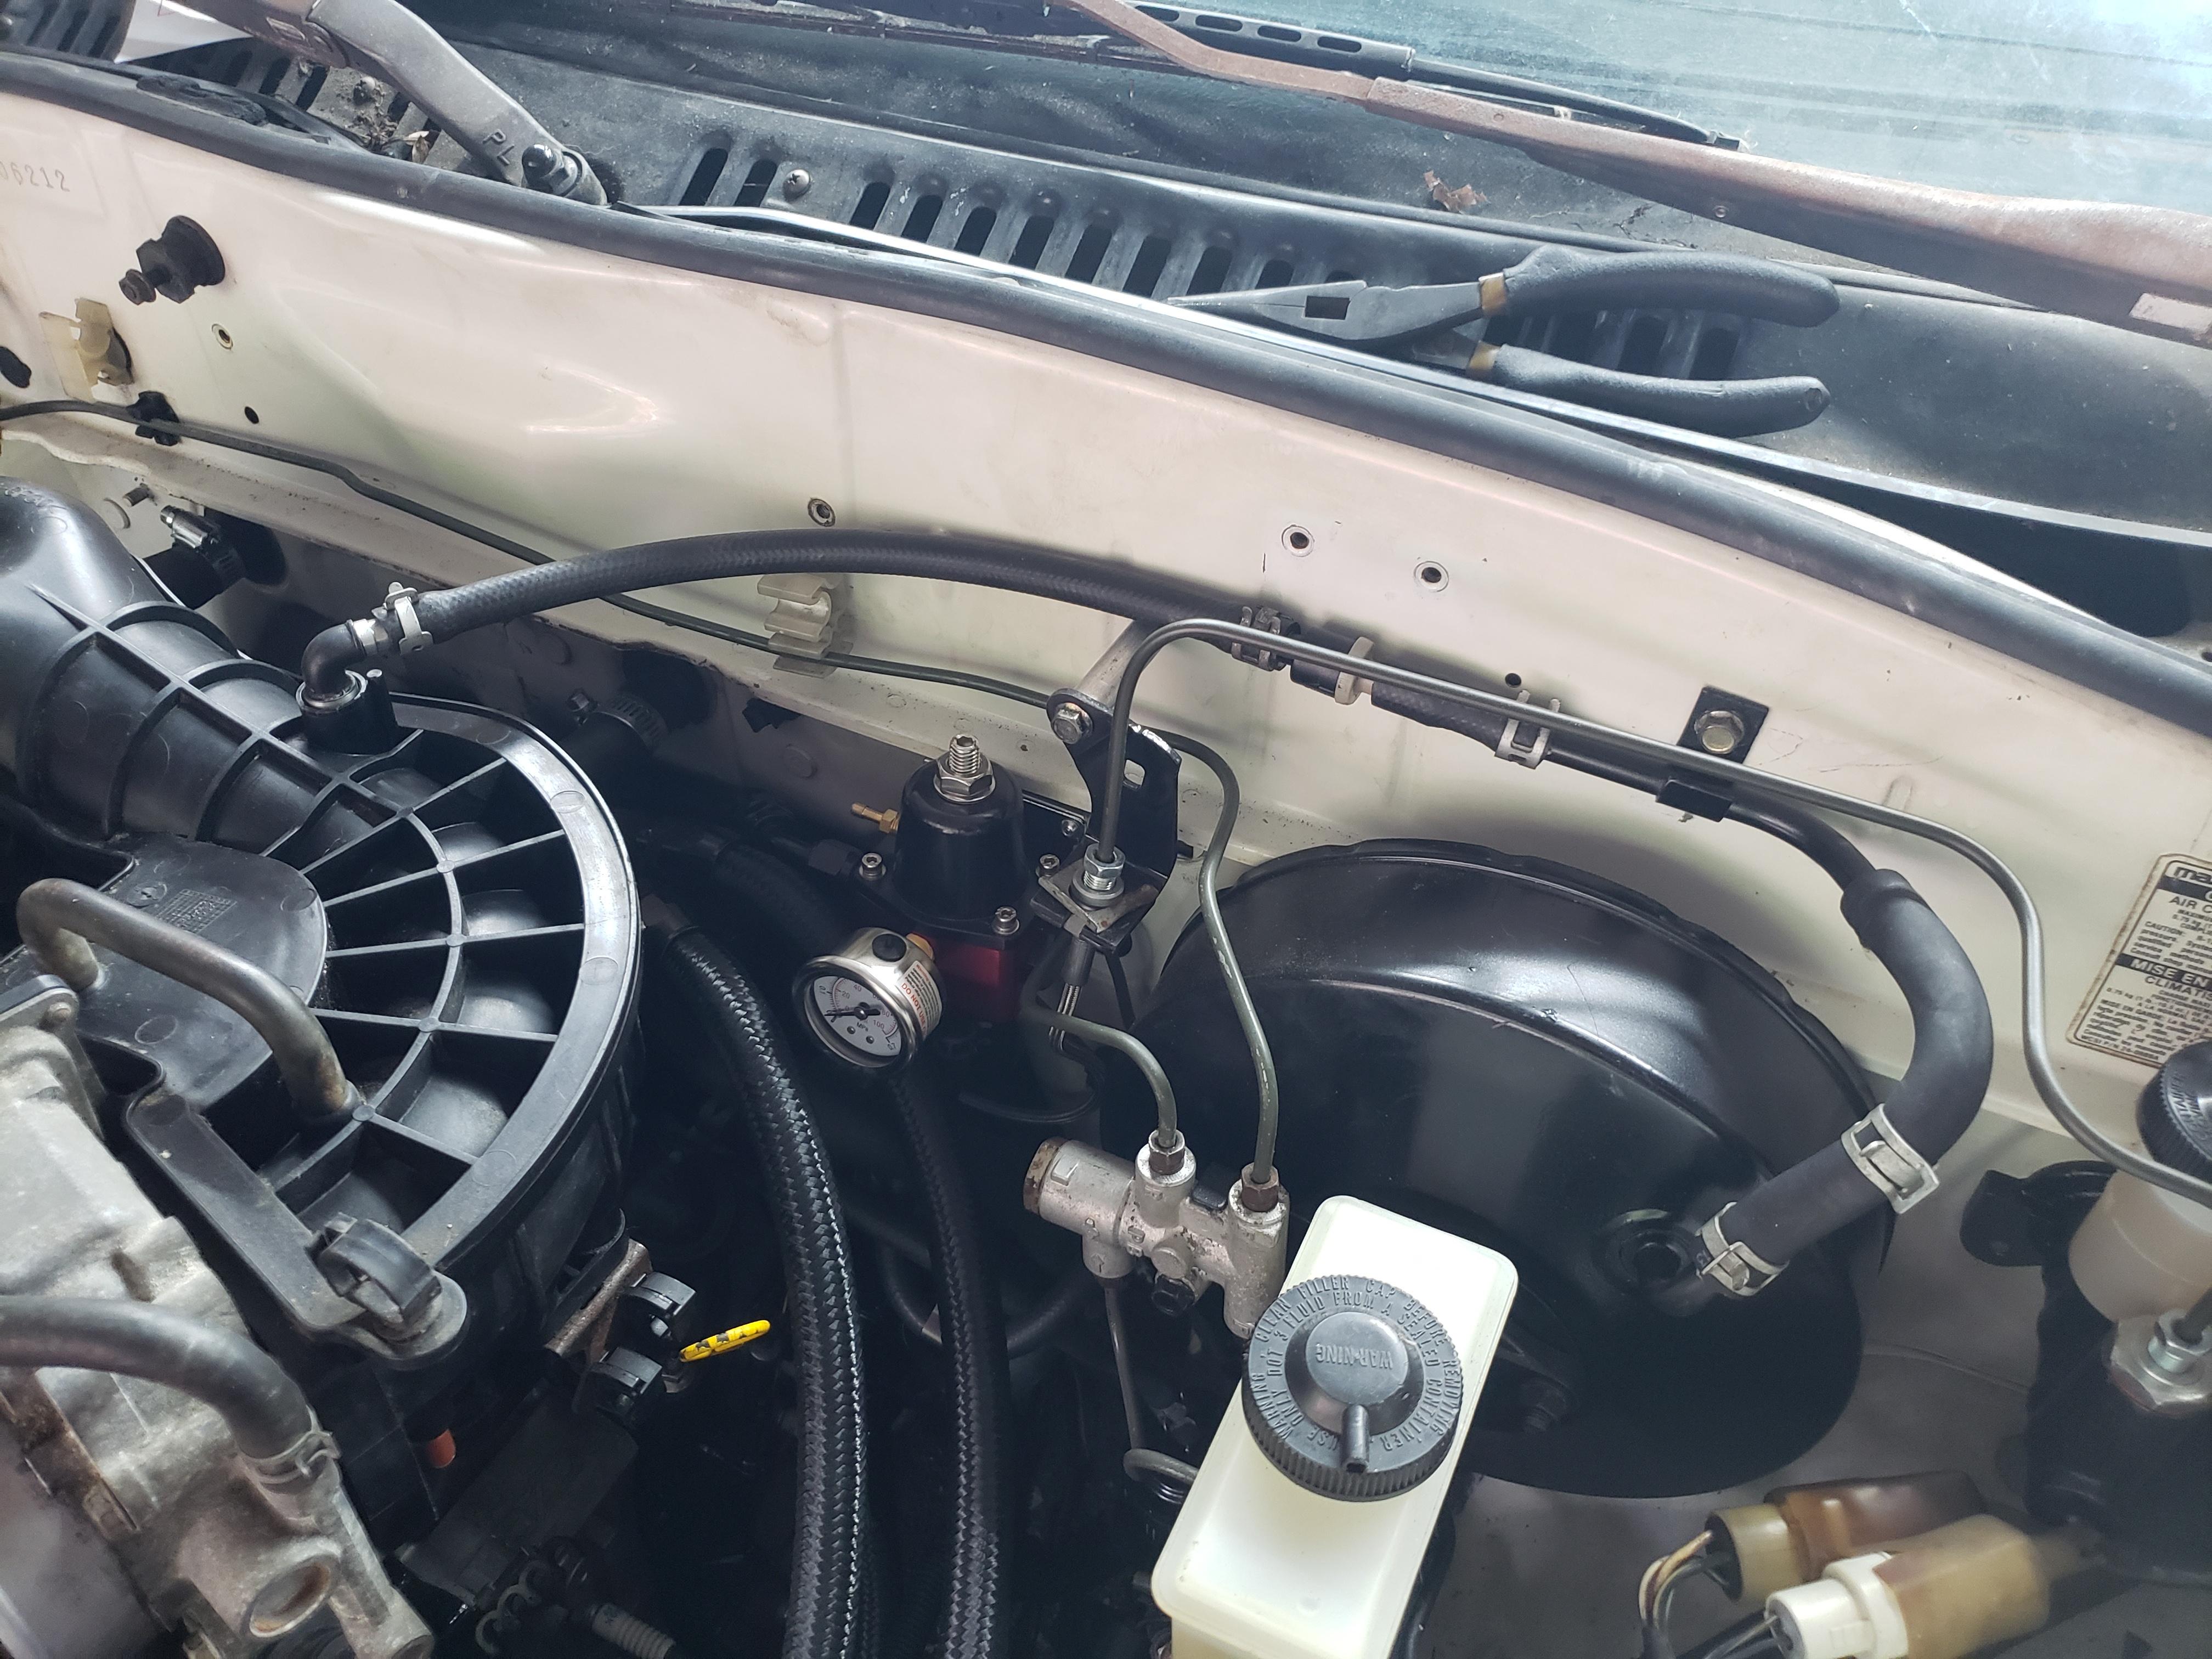
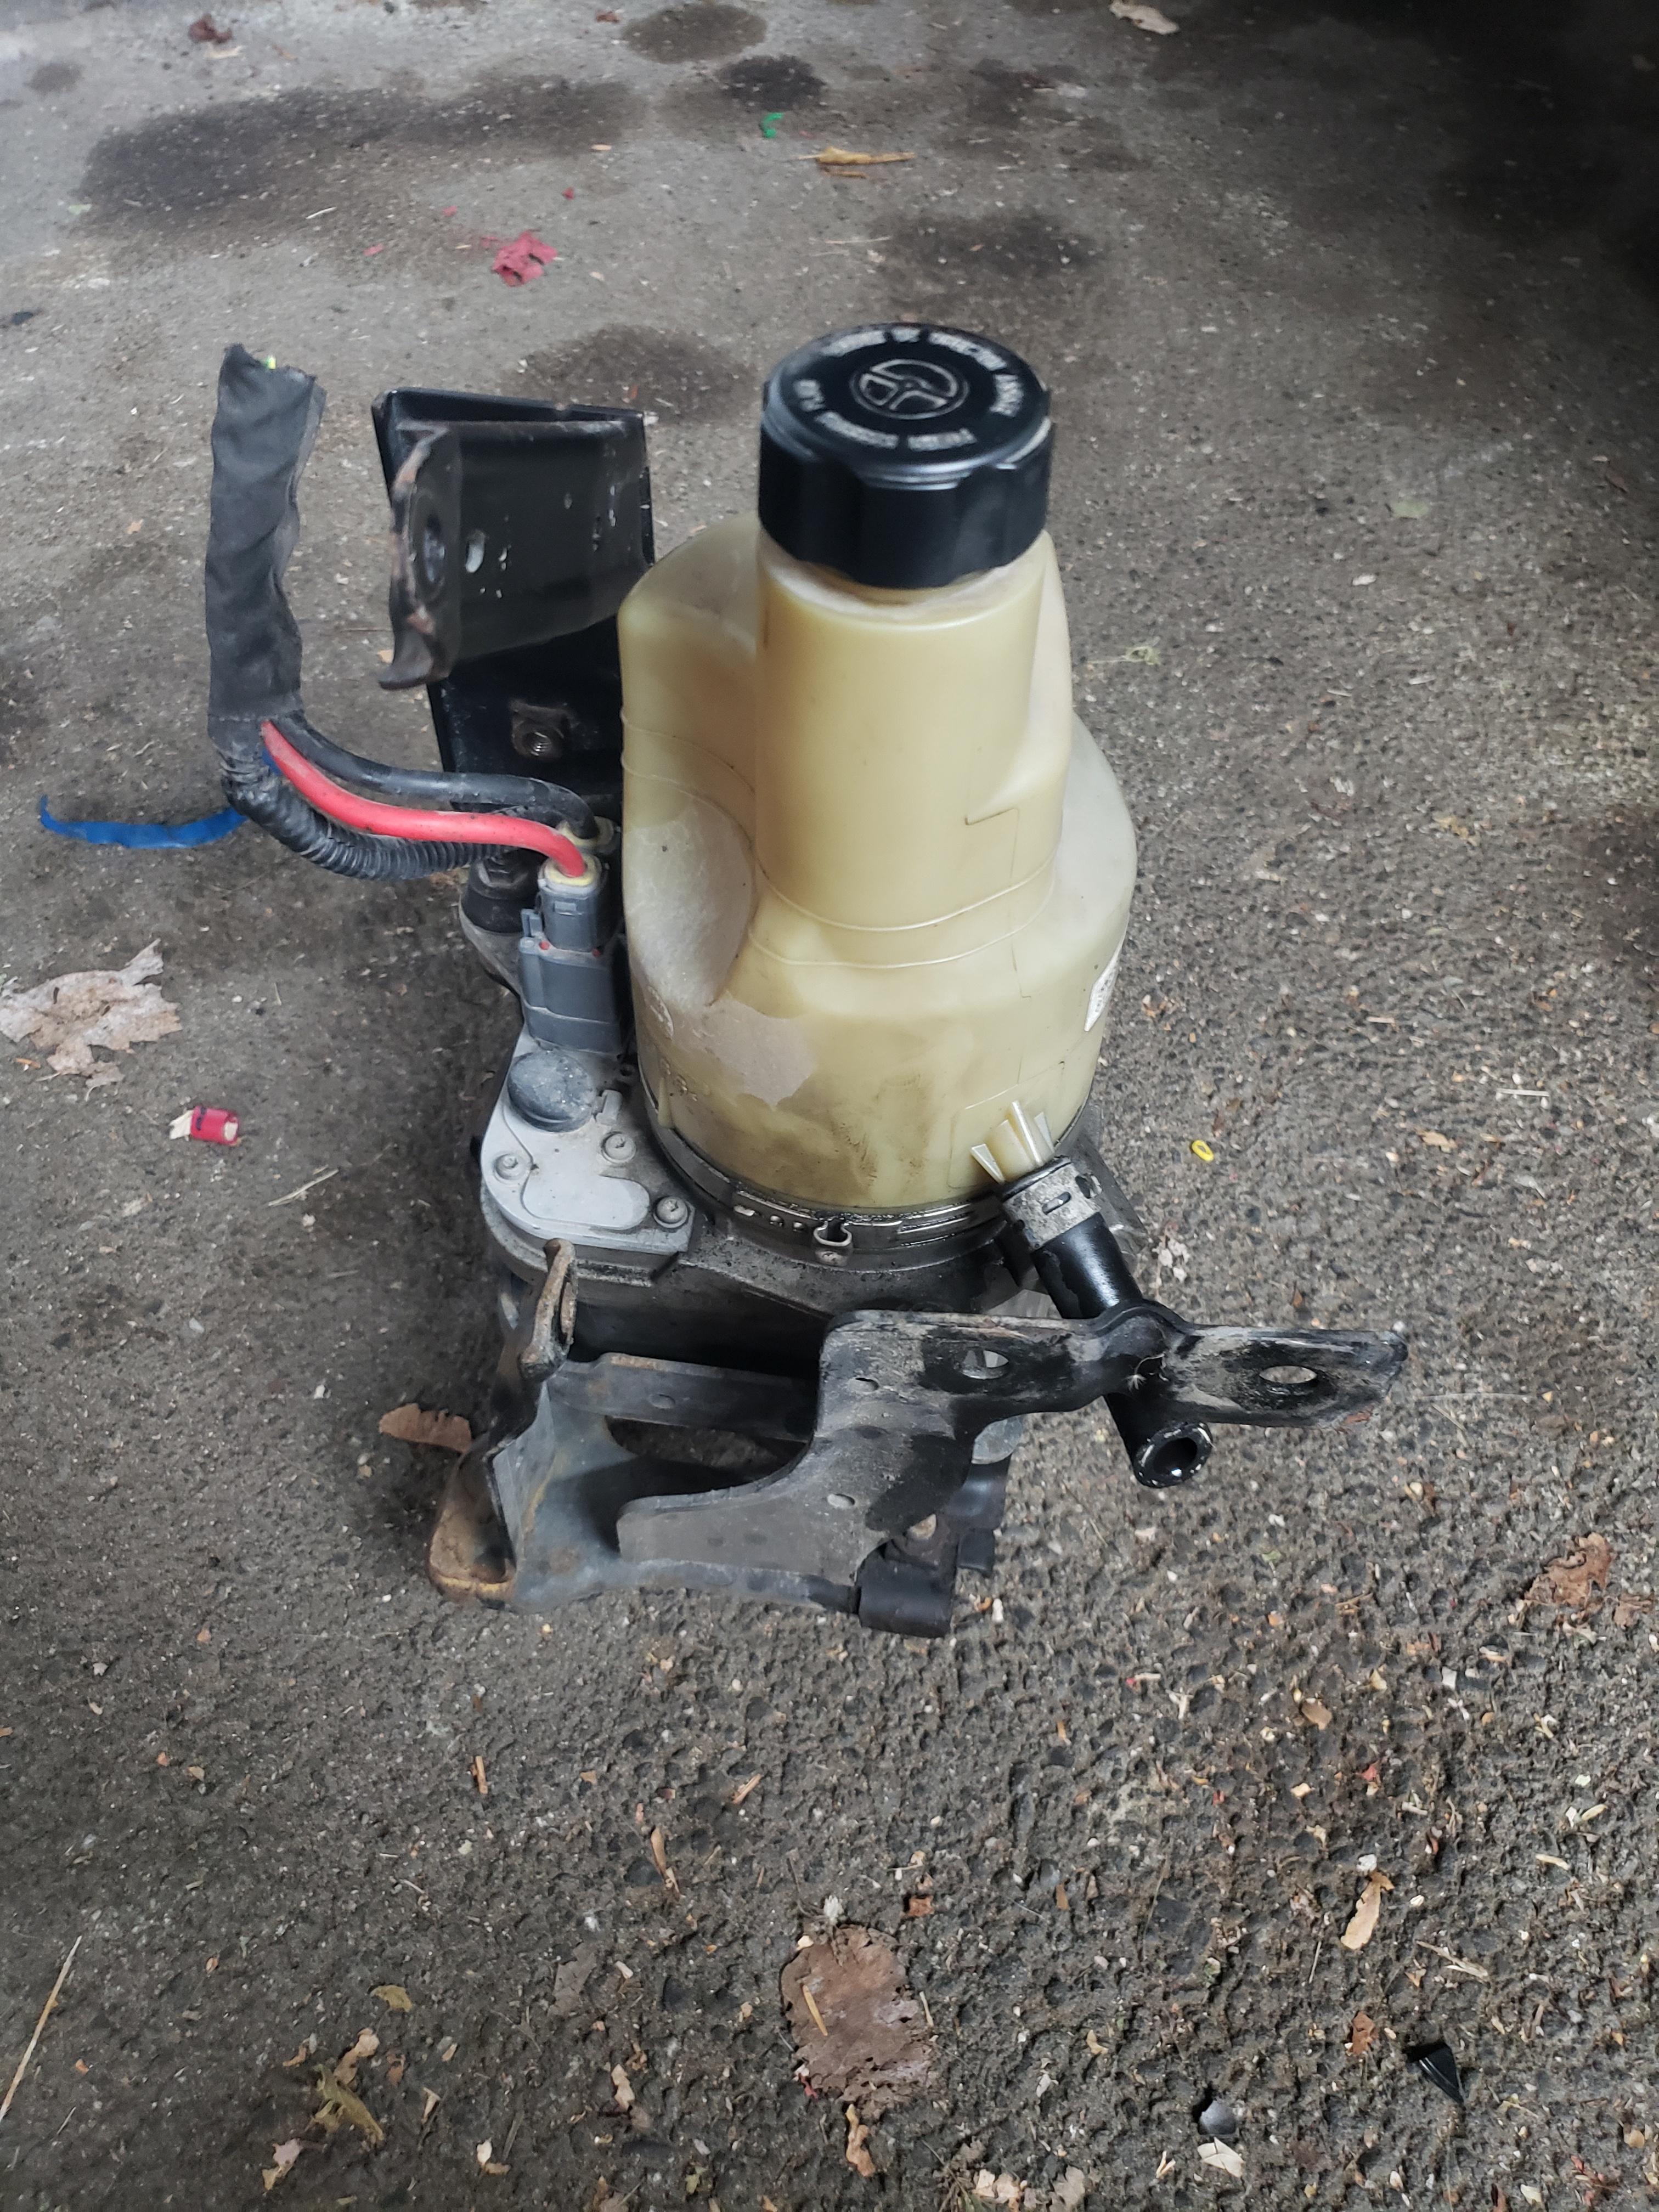
Also went down to the local junk yard and was lucky enough to find the solution to my power steering issue. The RX8 uses an electronic rack so there is no power steering pump that bolts up to the engine. Certain Volvo cars happen to have an electronic power steering pump and the last row of cars in the lot happen to have a Vovlo V50 with an intact pump. After arguing with the clerk that it indeed was a power steering pump, I now need to find a place to mount this thing. It's a bit bigger than I expected.
TBD...
I got the Jegs relocation kit, and it was pretty decent. I decided to put the battery behind the drivers seat as i'd like to be able to reach back and access the passenger bin. Any who, made some stainless brackets to mount the tray to.

I'm also super paranoid about wires coming loose so I made this bracket that hold this and a 150A breaker. I'll mount this bracket to the bin once i'm ready to install the interior back in.
pretty sure I routed the wire like everyone behind the little fiber board panel and out by the fuse box. Got to have a grommet to protect the wire as well.

Wire runs to a distribution block that splits power off for the starter and the primary fuse block.

Also went down to the local junk yard and was lucky enough to find the solution to my power steering issue. The RX8 uses an electronic rack so there is no power steering pump that bolts up to the engine. Certain Volvo cars happen to have an electronic power steering pump and the last row of cars in the lot happen to have a Vovlo V50 with an intact pump. After arguing with the clerk that it indeed was a power steering pump, I now need to find a place to mount this thing. It's a bit bigger than I expected.
TBD...

Rotary Freak
Joined: Jul 2016
Posts: 1,838
Likes: 599
From: Beeton, Ontario
Looking good!
If you figure out the communication protocol for the V50 pump, please let us know. It has a variable assist function, but it seems to need a CAN signal to tell it how much assist to provide. The minimal research I did into the V50 pump shows a lot of people running it without the variable assist because of this, or using a switch. There was even a post about it a few days ago in the 2nd gen tech section.
Also, apparently the V50 pump uses a different fluid than our steering racks, and they aren't interchangeable. Don't know how much of an issue this is in real application, but if I were doing it I'd use what the rack wants. The pumps are easier to find than the racks are this point
Thread Starter
Joined: Mar 2002
Posts: 1,726
Likes: 540
From: binghamton, ny
Well I got my CAN sniffer up and running today, so maybe I can fool around with it for a bit. would be super helpful to find someone with a running V50 and sniff it out while driving. I may also just get one of these controllers. I'm pretty sure i can read the wheel speed sensor, run it thru an arduino and output the required voltage. We'll see.
Well today was fill of surprises. My goal for this weekend was to get everything buttoned up so that I could crank the engine over. That means filling all the fluids, finish the wiring, install the new plugs, ect....First surprise was my poor cast thermostat cover has a crack running thru it that intersected one of the mounting holes. So when filling up the system I noticed water coming out of the mounting hole. Notice the weird discolored part....that's the culprit...

A little weld later and she sealed right up. But the real surprise (sorry, i don't know how to link videos):
https://imgur.com/gallery/XdAHCe1
I was actually just trying to log some CAN data and it started up without a blink. I have a slight oil leak on my oil relocation pedestal, but everything else seems pretty peachy. Can't tell you how excited I am right now.
Well today was fill of surprises. My goal for this weekend was to get everything buttoned up so that I could crank the engine over. That means filling all the fluids, finish the wiring, install the new plugs, ect....First surprise was my poor cast thermostat cover has a crack running thru it that intersected one of the mounting holes. So when filling up the system I noticed water coming out of the mounting hole. Notice the weird discolored part....that's the culprit...
A little weld later and she sealed right up. But the real surprise (sorry, i don't know how to link videos):
https://imgur.com/gallery/XdAHCe1
I was actually just trying to log some CAN data and it started up without a blink. I have a slight oil leak on my oil relocation pedestal, but everything else seems pretty peachy. Can't tell you how excited I am right now.
Last edited by need-a-t2; Aug 29, 2022 at 07:06 PM.


Thread Starter
Joined: Mar 2002
Posts: 1,726
Likes: 540
From: binghamton, ny
getting close now gents (and ladies).
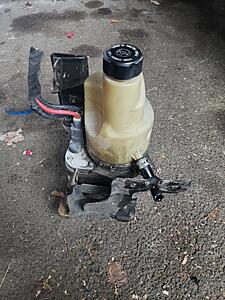
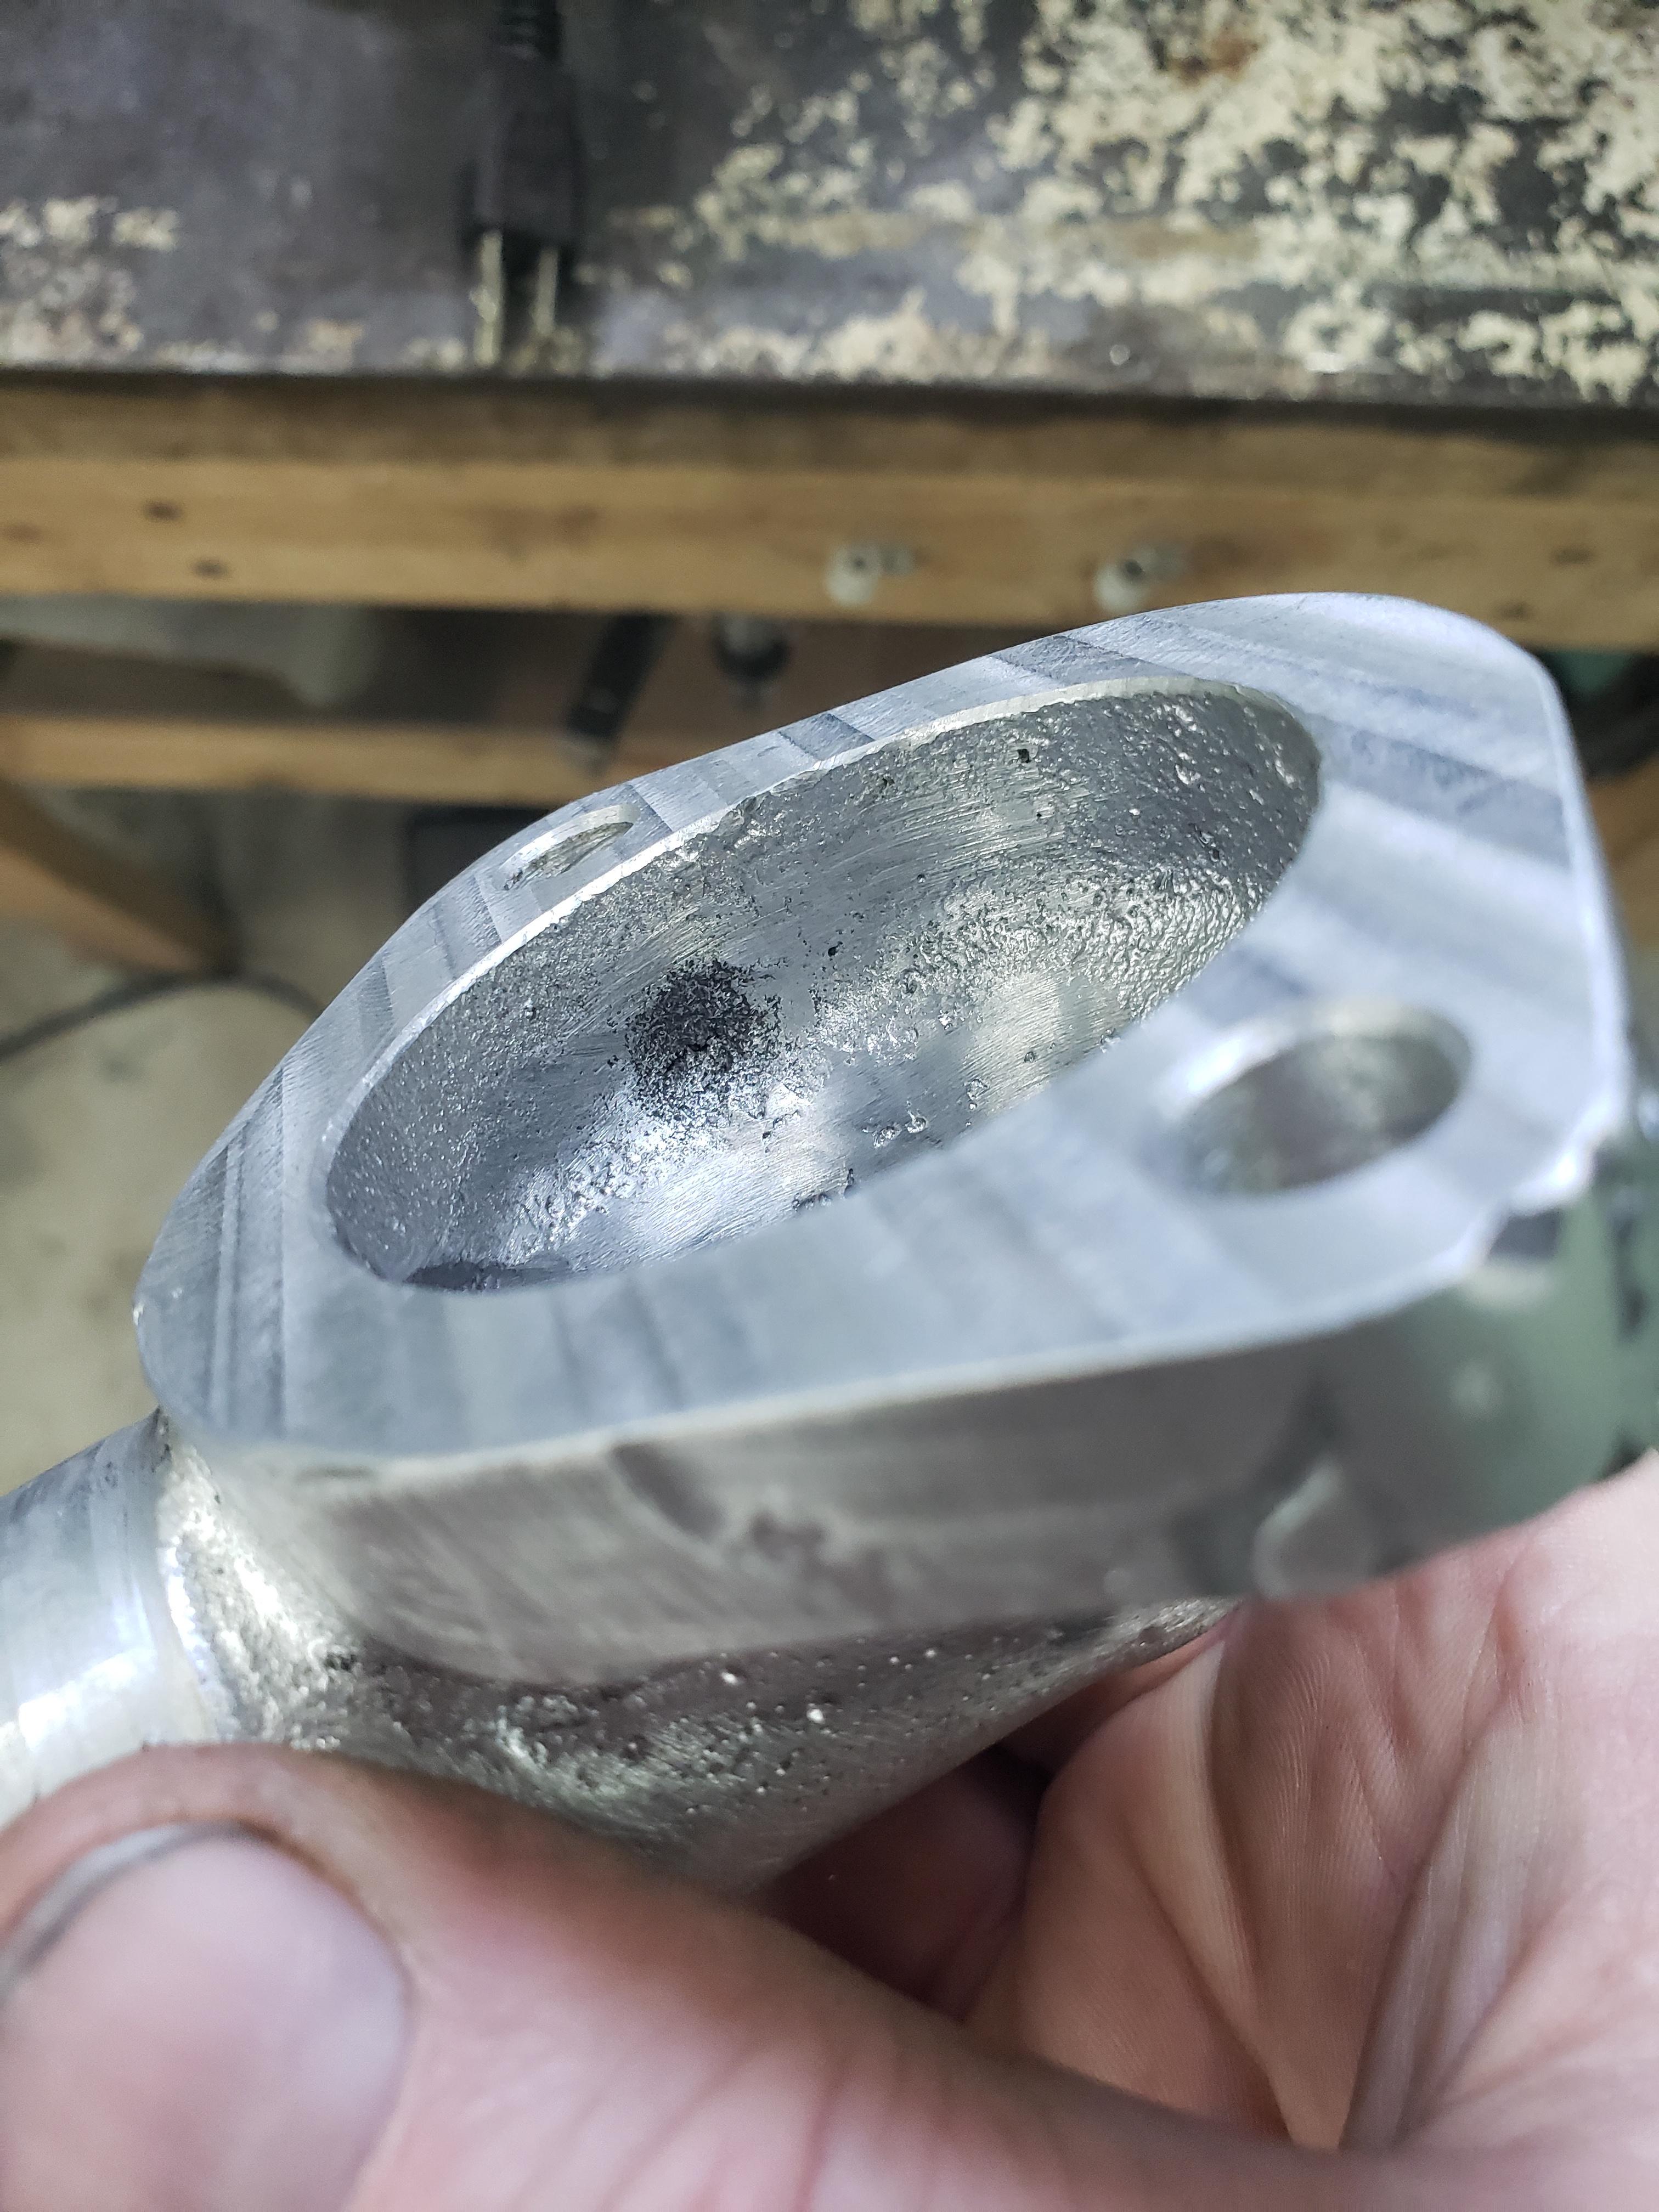
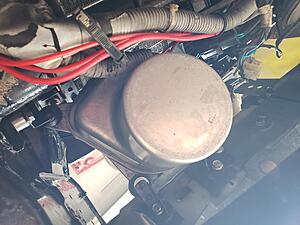
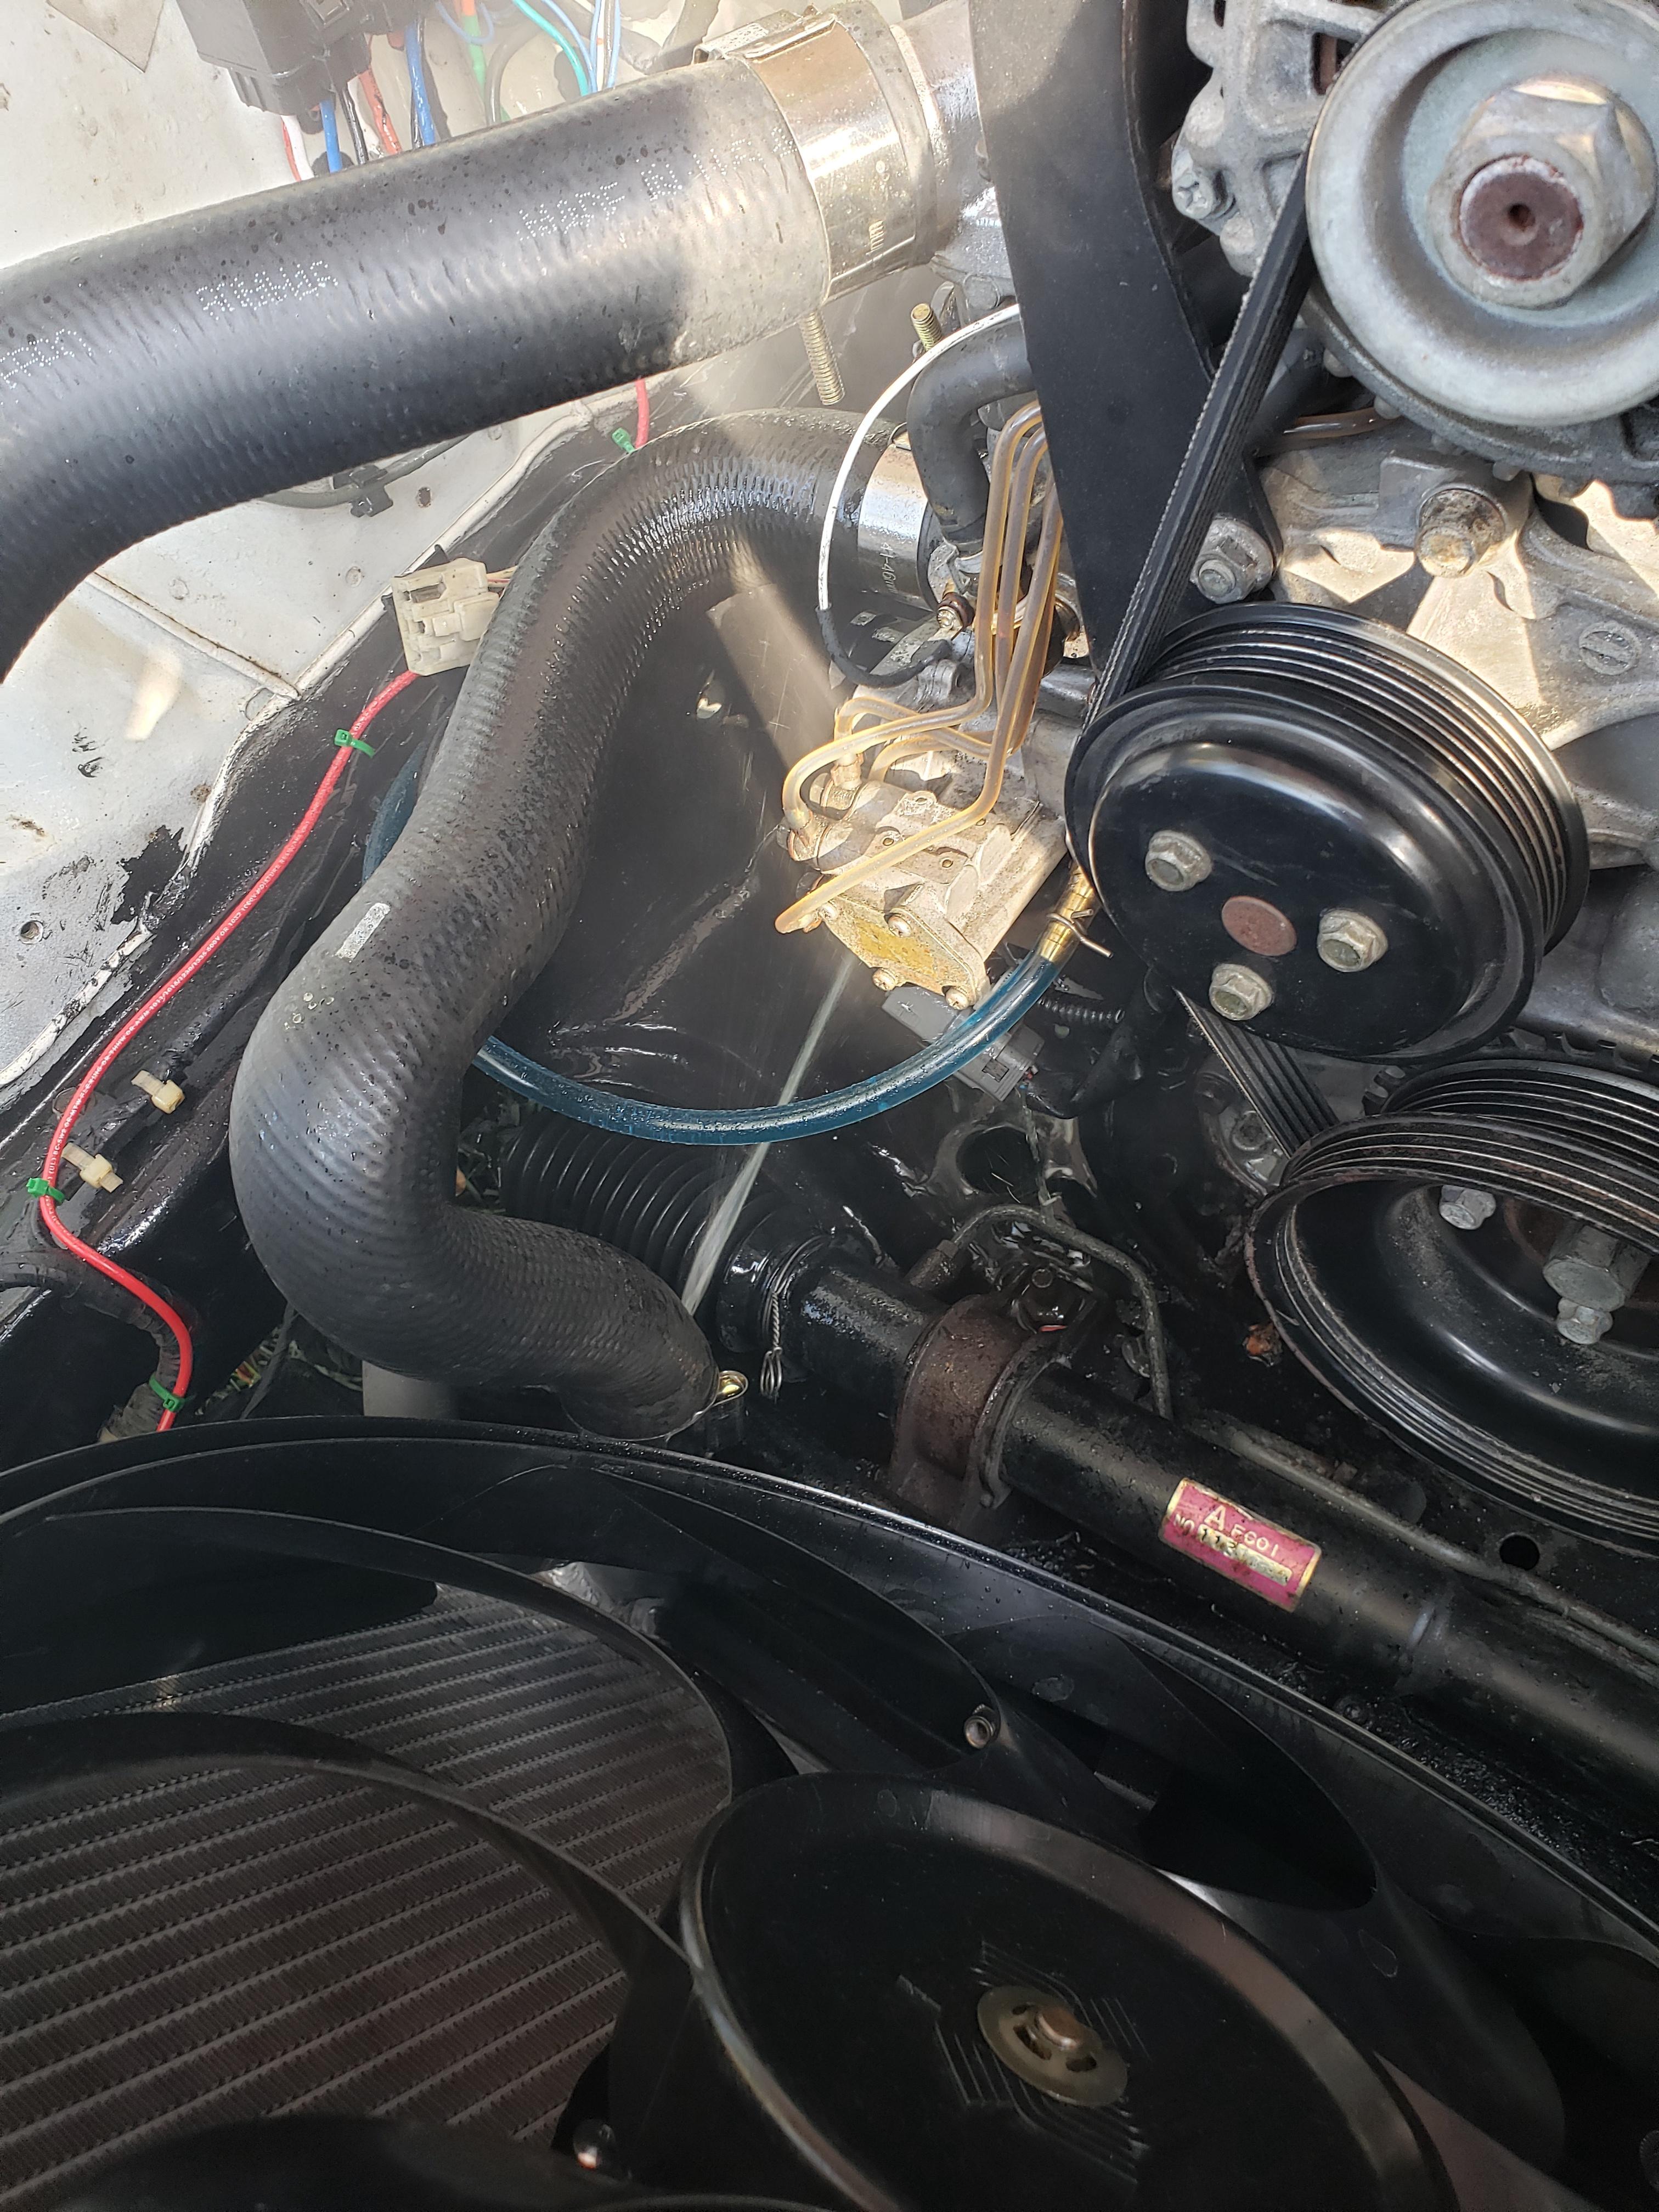
Fixed up that oil leak from the relocation pedistal. Turns out buying cheap parts can lead to issues. The outter fitting on this part is so close to the outter diameter that when you tighten down the fitting, the sealing oring just flops over the side creating a leak. Look close and you can see it in this picture. So I took Spider2k's advice and JB welded the fittings in place. It's a good short term fix until I make/buy a new pedistal. I also decided that oil changes might be easier if the filter were facing the other way, so that happened.

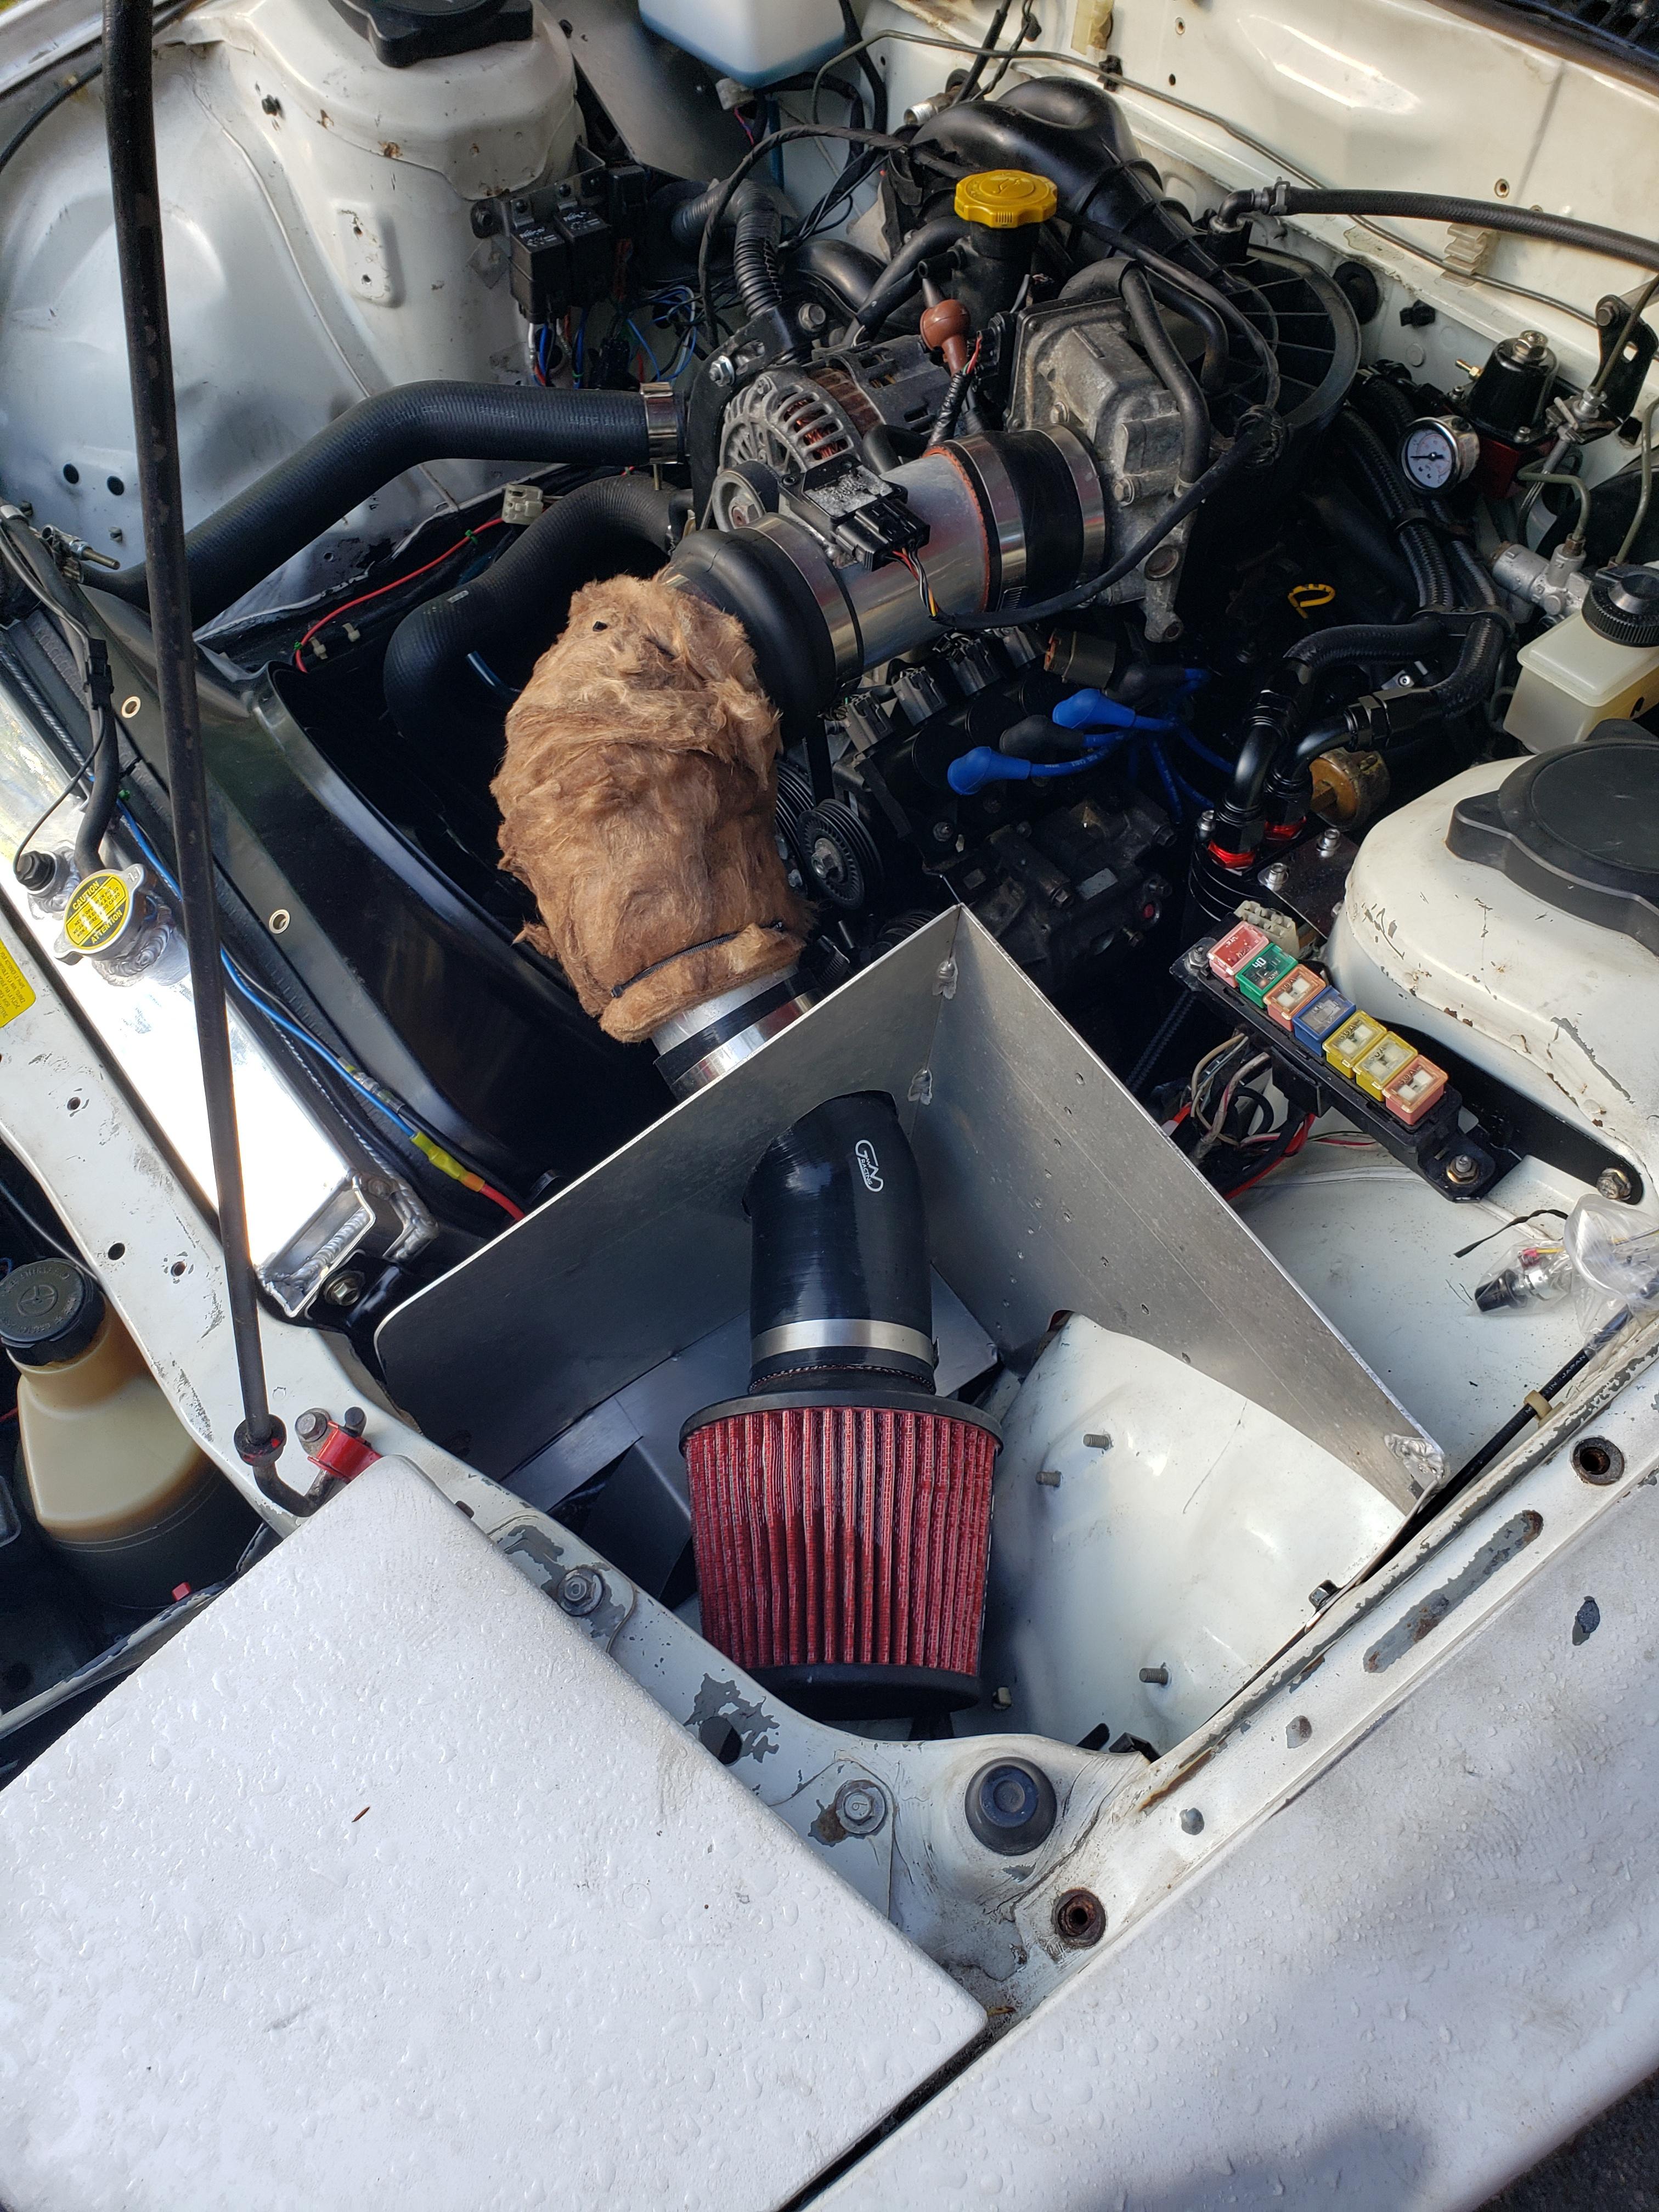
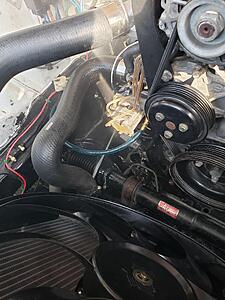
Also got the intake semi-mocked in place. I'm not 100% happy with it so I'll likely revisit this setup at some point, but it gets me on the road. This adapter piece that houses the MAF was on the green RX8 and looks to be part of the AEM kit. I put a hood on the car as well to check clearances....there is none...haha. The MAF sensor itself just barely touches the crossmembers on the bottom side of the car. BUT the hood does latch! Another reason i'll be revisiting this intake at some point. I clearly need a different filter as well.
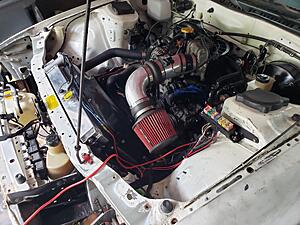
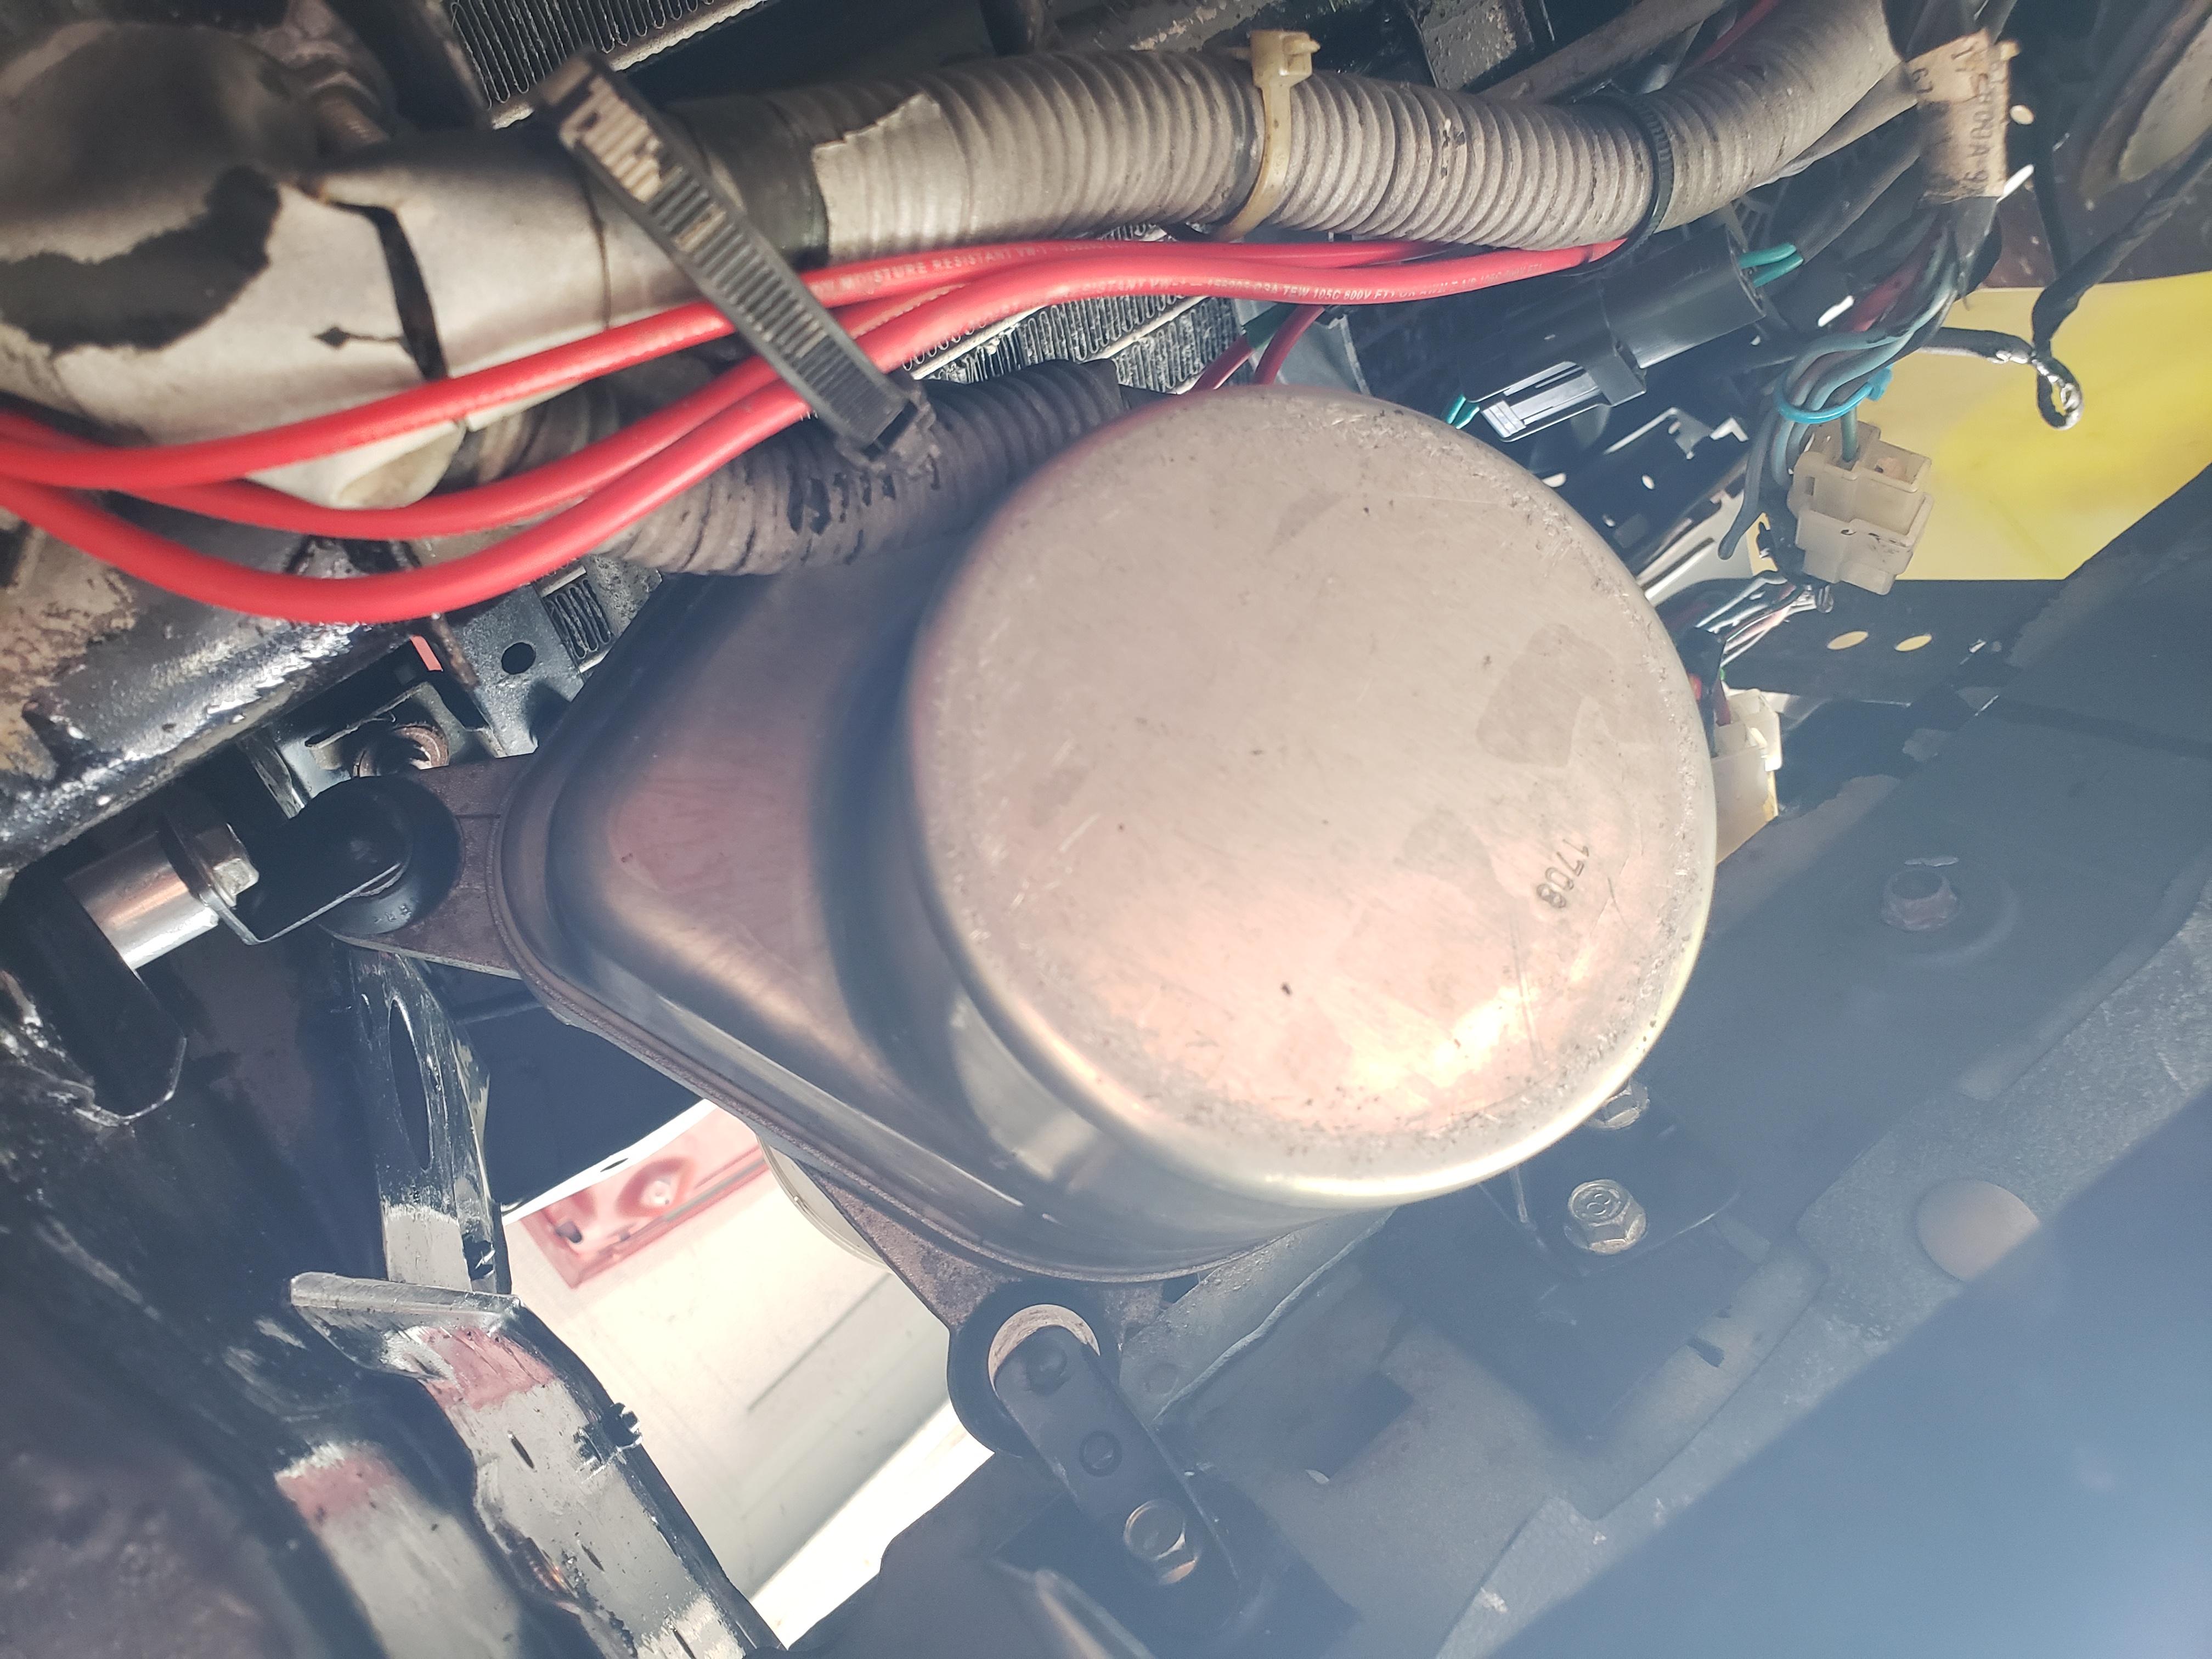
The power steering pump is now mounted as well. It just barely fits here and was a right PITA to mount, but it seemed like the best option, and gives it that "right or stock or factory or something" look.

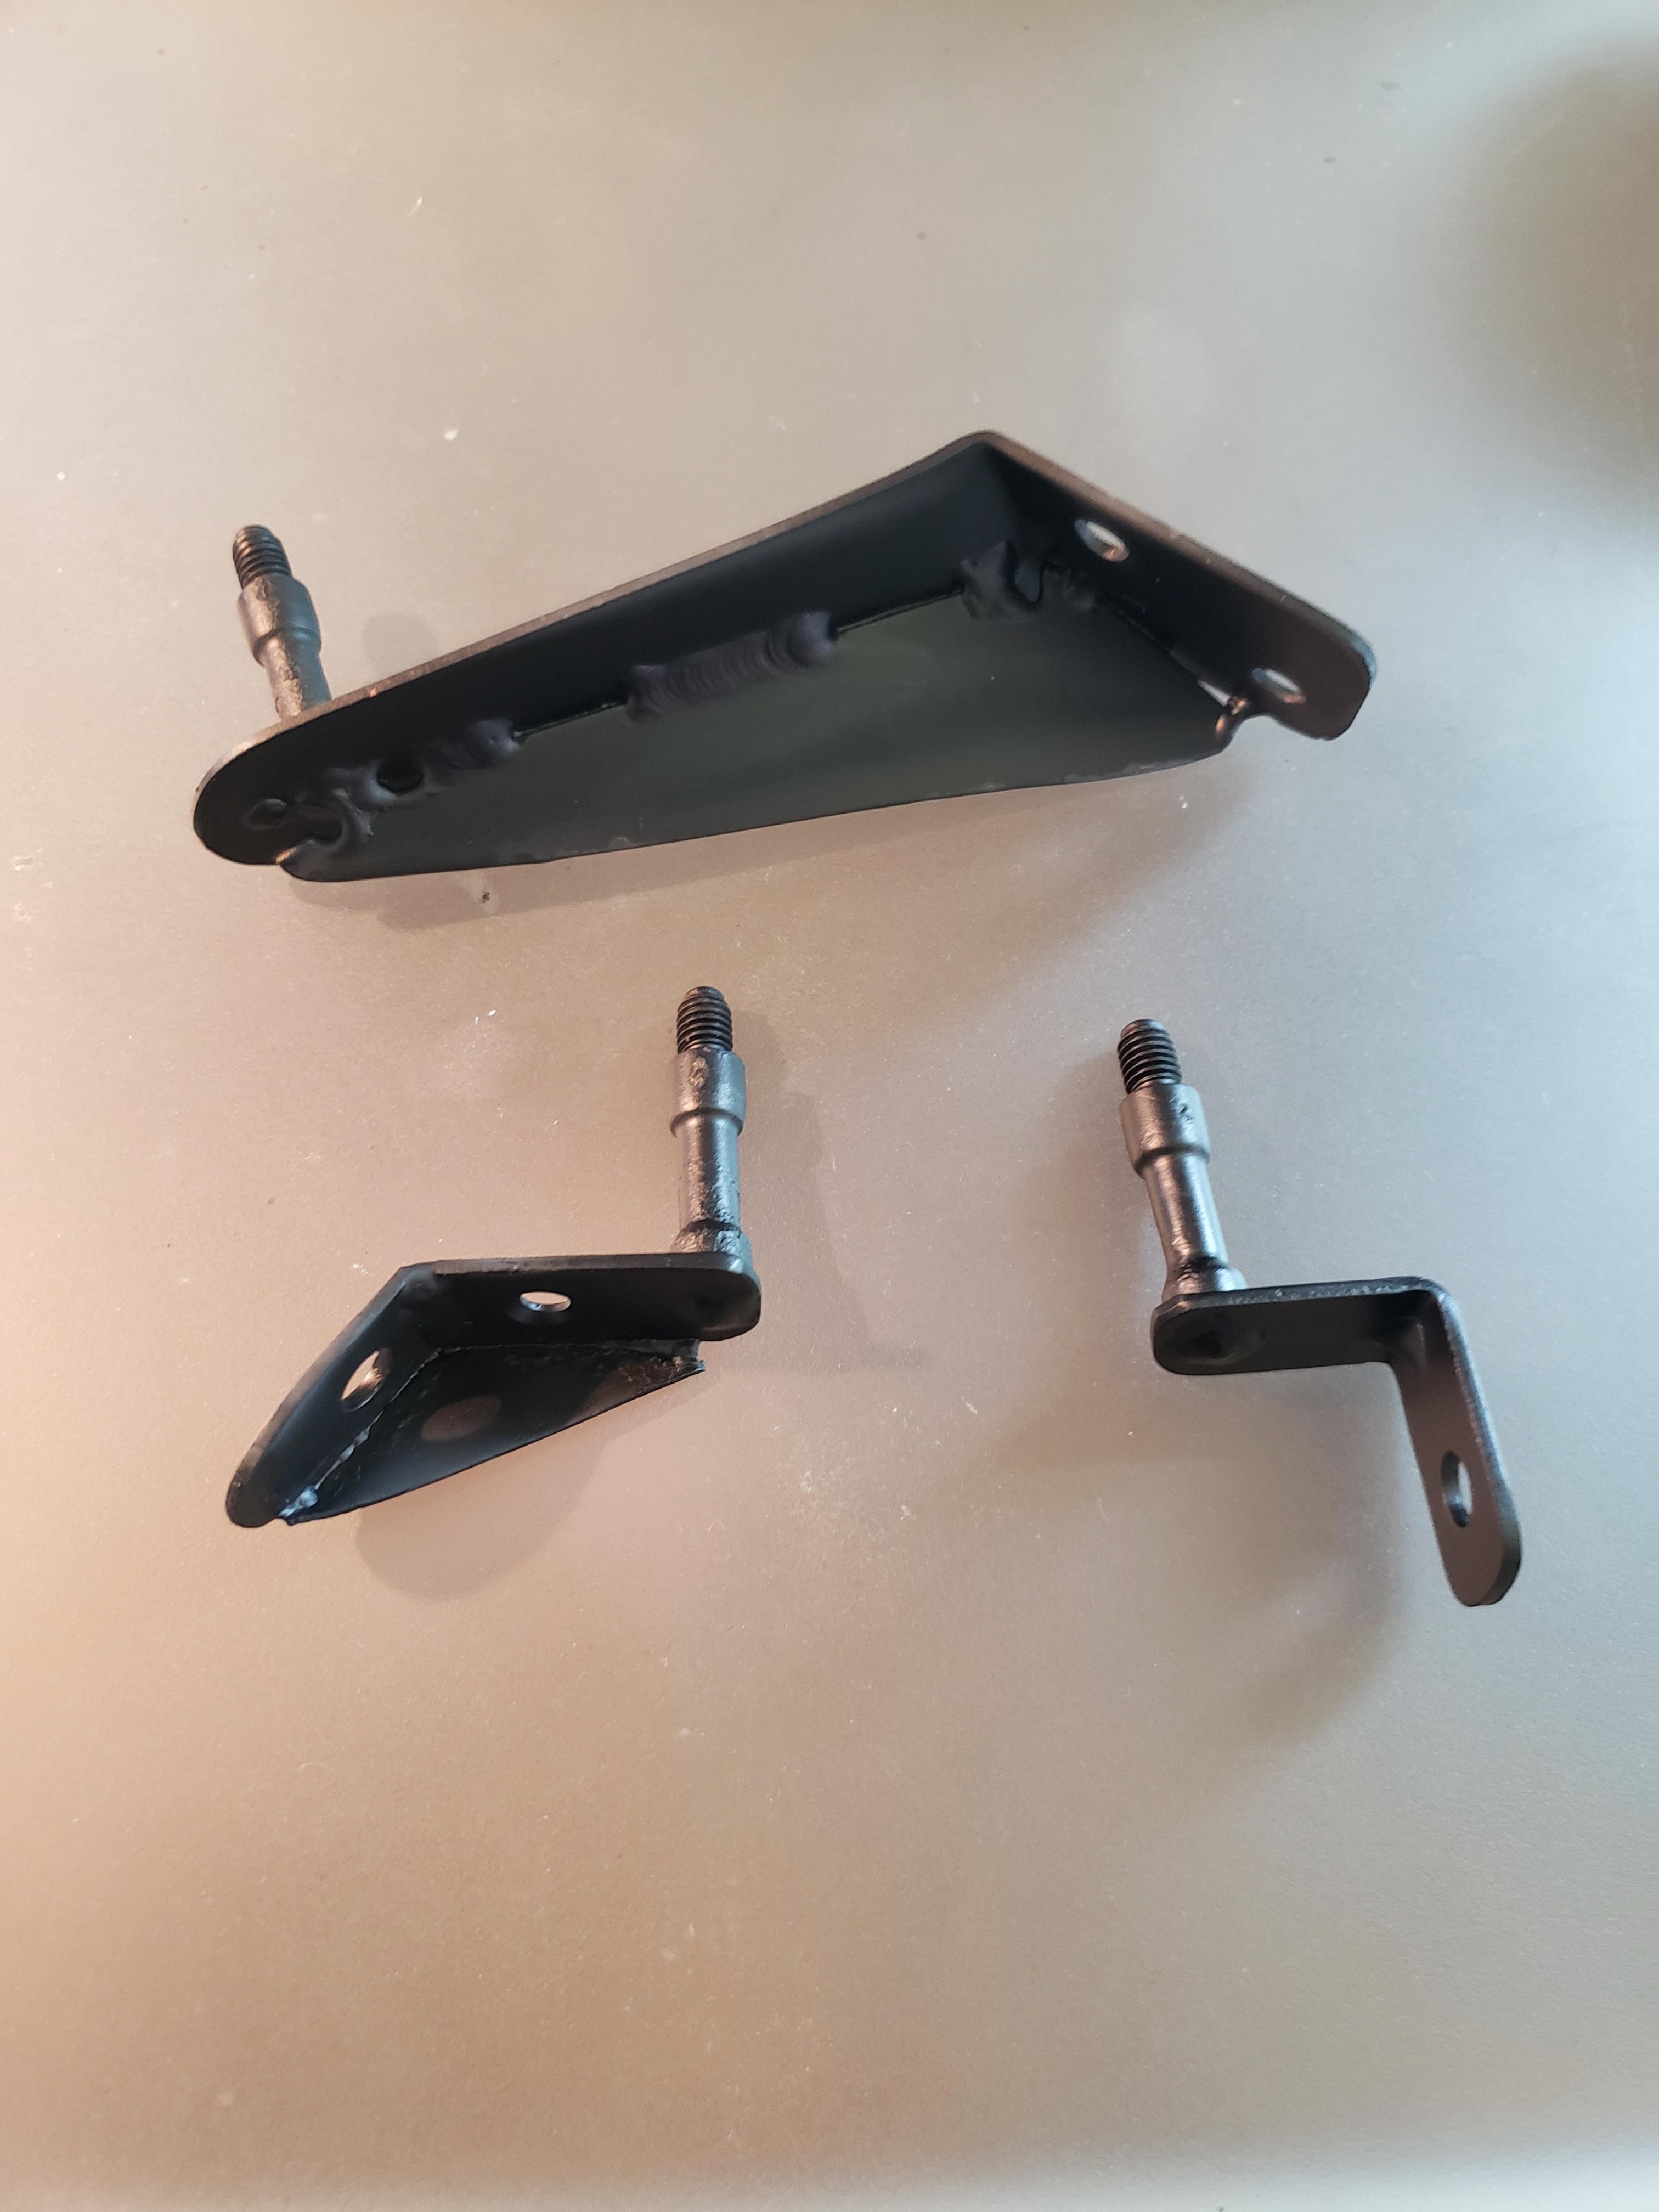
I chopped up the original Volvo mount for the moutning studs and welded them to some custom made brackets as they are pretty funky and I'm lazy and didn't want to make new ones.

Had to modify the bumper mount a tiny tiny bit. There was a little air intake tube there at one point, but besides drilling for rivnuts and moving some wires around, that's the only modification that was needed to make it fit.
Just need to wire it up and get a high pressure hose made and I think I'll be ready to hit the road.
New suspension and braided brake lines installed as well. KYB AGX shocks with Tein springs.

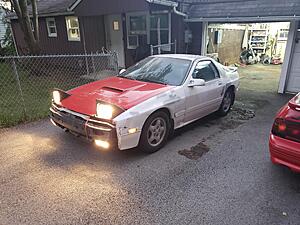
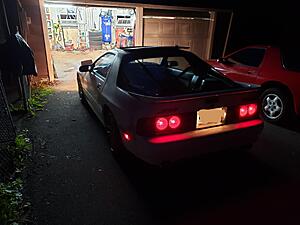
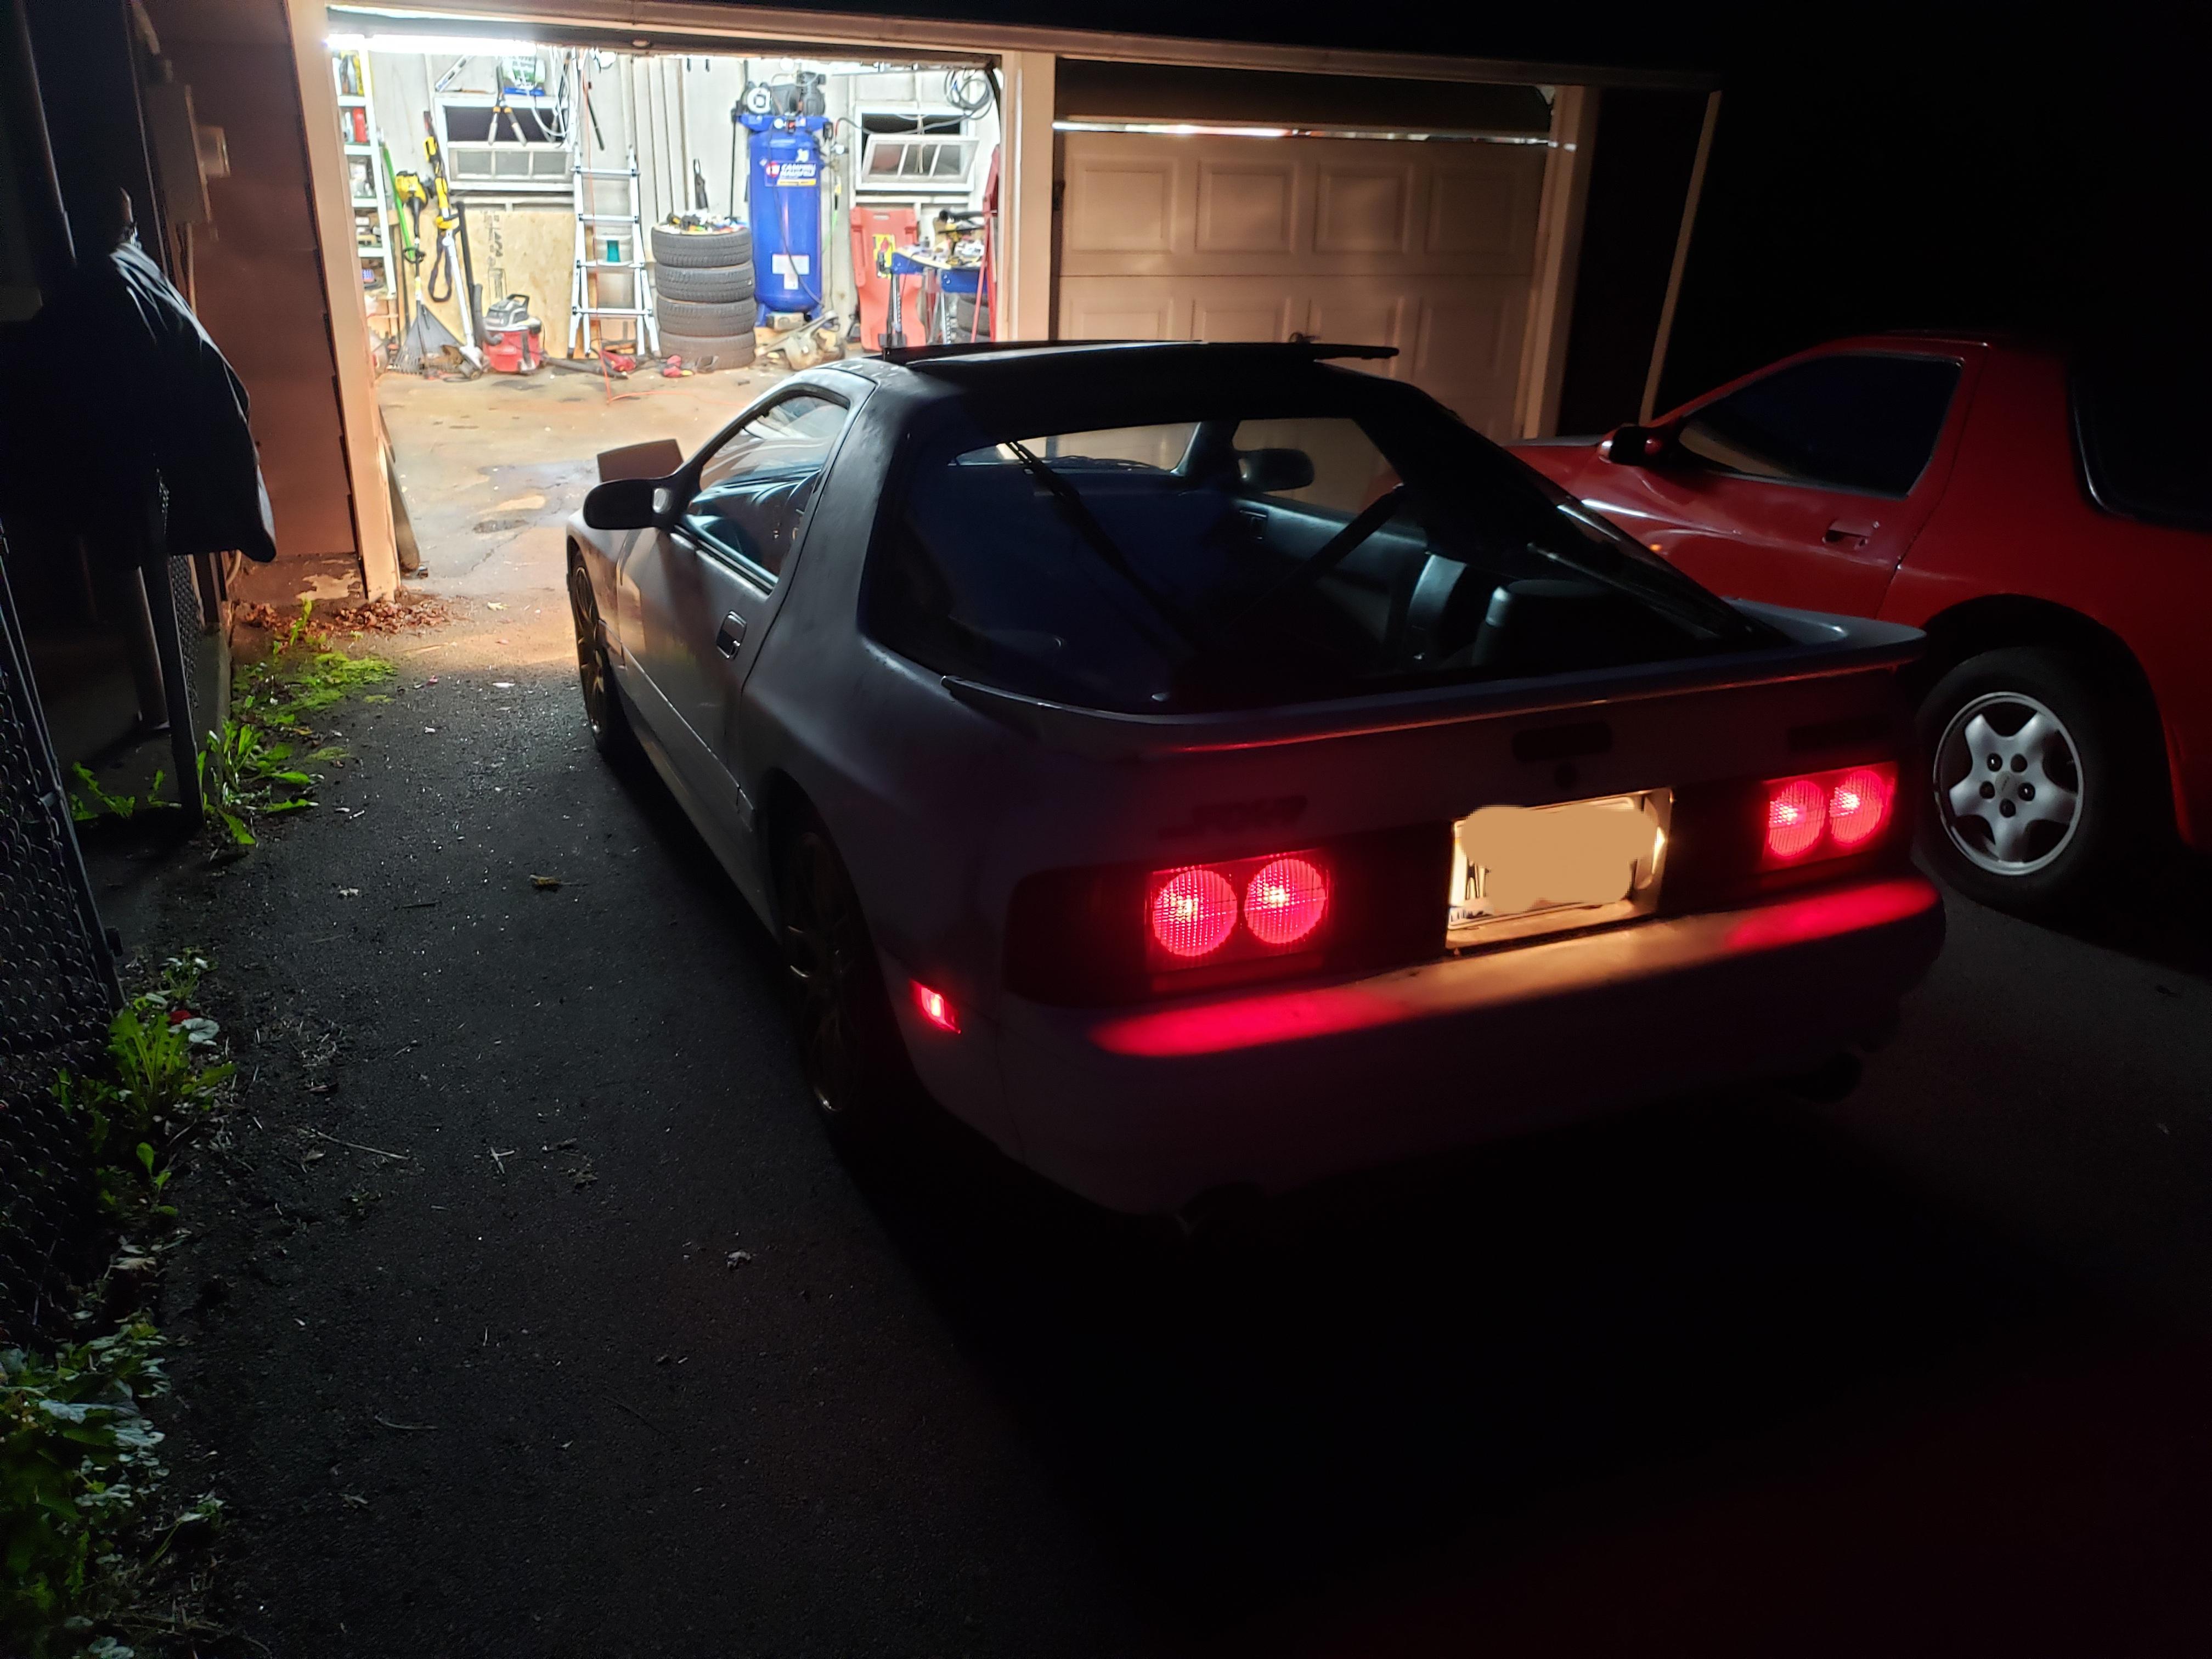
AND...it moves under it's own power. This is the first time it's been out of the garage in about a year. Feels pretty good.
might be time to do something about the dry rotted tires now....
Fixed up that oil leak from the relocation pedistal. Turns out buying cheap parts can lead to issues. The outter fitting on this part is so close to the outter diameter that when you tighten down the fitting, the sealing oring just flops over the side creating a leak. Look close and you can see it in this picture. So I took Spider2k's advice and JB welded the fittings in place. It's a good short term fix until I make/buy a new pedistal. I also decided that oil changes might be easier if the filter were facing the other way, so that happened.
Also got the intake semi-mocked in place. I'm not 100% happy with it so I'll likely revisit this setup at some point, but it gets me on the road. This adapter piece that houses the MAF was on the green RX8 and looks to be part of the AEM kit. I put a hood on the car as well to check clearances....there is none...haha. The MAF sensor itself just barely touches the crossmembers on the bottom side of the car. BUT the hood does latch! Another reason i'll be revisiting this intake at some point. I clearly need a different filter as well.

The power steering pump is now mounted as well. It just barely fits here and was a right PITA to mount, but it seemed like the best option, and gives it that "right or stock or factory or something" look.
I chopped up the original Volvo mount for the moutning studs and welded them to some custom made brackets as they are pretty funky and I'm lazy and didn't want to make new ones.
Had to modify the bumper mount a tiny tiny bit. There was a little air intake tube there at one point, but besides drilling for rivnuts and moving some wires around, that's the only modification that was needed to make it fit.
Just need to wire it up and get a high pressure hose made and I think I'll be ready to hit the road.
New suspension and braided brake lines installed as well. KYB AGX shocks with Tein springs.

AND...it moves under it's own power. This is the first time it's been out of the garage in about a year. Feels pretty good.

might be time to do something about the dry rotted tires now....
Last edited by need-a-t2; Sep 8, 2022 at 07:23 PM.
Thread Starter
Joined: Mar 2002
Posts: 1,726
Likes: 540
From: binghamton, ny
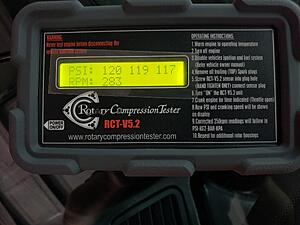
So these projects are always highs and lows. Over the last few days I got the car registered/insured and on the road. This thing is going to be a BLAST to drive once I'm done with the break in. It's supper peppy and you can just tell it wants to take off. But all wasn't golden in paradise. The car originally started so great and I noticed that it was progressively taking a bit longer to kick over the more I drove it. It also seemed like everyone once in a while while under load, like going up a hill, the car would sputter and be down on power intermittently. I did notice that the air intake temps were pretty high (140F!) when the cooling fan kicks on, and was thinking maybe that was an issue causing the car to loose power. Then today after going for a quick little ride the car refused to start. Being a bit paranoid about slowly loosing power I decided maybe a quick compression test wasn't such a bad idea. Mush to my delight, the rebuild looks pretty solid. This is after about 40 miles of driving and while the engine was mostly warm still. Front rotor:

rear is even better
So confidence gained that were is no issues with the rebuild I stated looking elsewhere. It seemed like it wasn't getting gas, so I started looking at the FPR, making little adjustments here and there. I noticed that every time I made an adjustment to the FPR the engine would try so hard to start, but just seemed like it wasn't getting fuel. The next logical spot to look was the fuel pump. So I pulled the pump assembly and found the culprit. The fuel hose connecting the pump outlet to the fuel cradle had slipped off the pump and was allowing the pump to just spew pack into the tank. So I cut a longer piece of hose connected it all back up, and after priming the fuel system again, she started right up again! Time to go for a night drive!
I also got the seats done and installed.
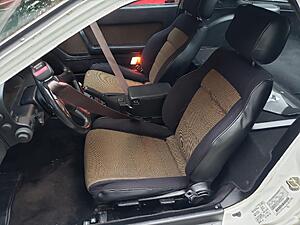
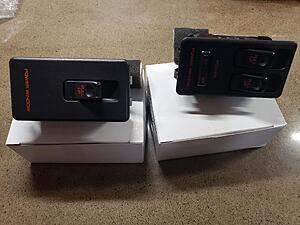
The interior is looking so good. A few little things to address, like the wiper switch needs to be rebuild, and the automatic seatbelts and windows need a good lubing. I did treat myself to new window switches
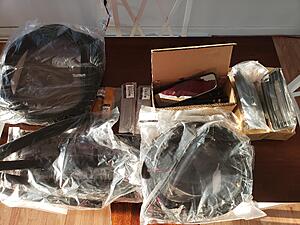
Also got a bunch of other goodies, the I'll probably hold off on installing until the car is painted. All new door seals, hatch seal, sunroof seal, FTP lenses, blinker covers, and a rear view mirror!

rear is even better

So confidence gained that were is no issues with the rebuild I stated looking elsewhere. It seemed like it wasn't getting gas, so I started looking at the FPR, making little adjustments here and there. I noticed that every time I made an adjustment to the FPR the engine would try so hard to start, but just seemed like it wasn't getting fuel. The next logical spot to look was the fuel pump. So I pulled the pump assembly and found the culprit. The fuel hose connecting the pump outlet to the fuel cradle had slipped off the pump and was allowing the pump to just spew pack into the tank. So I cut a longer piece of hose connected it all back up, and after priming the fuel system again, she started right up again! Time to go for a night drive!
I also got the seats done and installed.

The interior is looking so good. A few little things to address, like the wiper switch needs to be rebuild, and the automatic seatbelts and windows need a good lubing. I did treat myself to new window switches

Also got a bunch of other goodies, the I'll probably hold off on installing until the car is painted. All new door seals, hatch seal, sunroof seal, FTP lenses, blinker covers, and a rear view mirror!

Joined: Mar 2001
Posts: 31,857
Likes: 3,243
From: https://www2.mazda.com/en/100th/
mine will do the high intake temp thing with the fan running too, the fix for mine was to drive it faster, lol. if its moving its fine. for a while i put a thing between the radiator and filter, i tried a bunch of stuff, and card stock worked best of all things.
Thread Starter
Joined: Mar 2002
Posts: 1,726
Likes: 540
From: binghamton, ny

I'm also in the "try a bunch of stuff" stage. I rerouted the intake to not be RIGHT NEXT to the fan outlet path...didn't really help. So then I made a custom box to try and block more of the hot fan air. It worked a little. So now I'm trying to insulate the exposed pipes that are still right next to the radiatior. It helped minimally as well. My next step is to see about brining the air box up so it seals against the hood, or maybe make a little cover for the top to truley isolate the intake filter from the engine bay air.
The insulation is not a permanent fixture for the car. It's pretty ugly, but it's what I have on hand. It's that stuff you put in kilns to insulate them. Needless to say it should be more than sufficient for blocking 200F air. haha
Thread Starter
Joined: Mar 2002
Posts: 1,726
Likes: 540
From: binghamton, ny
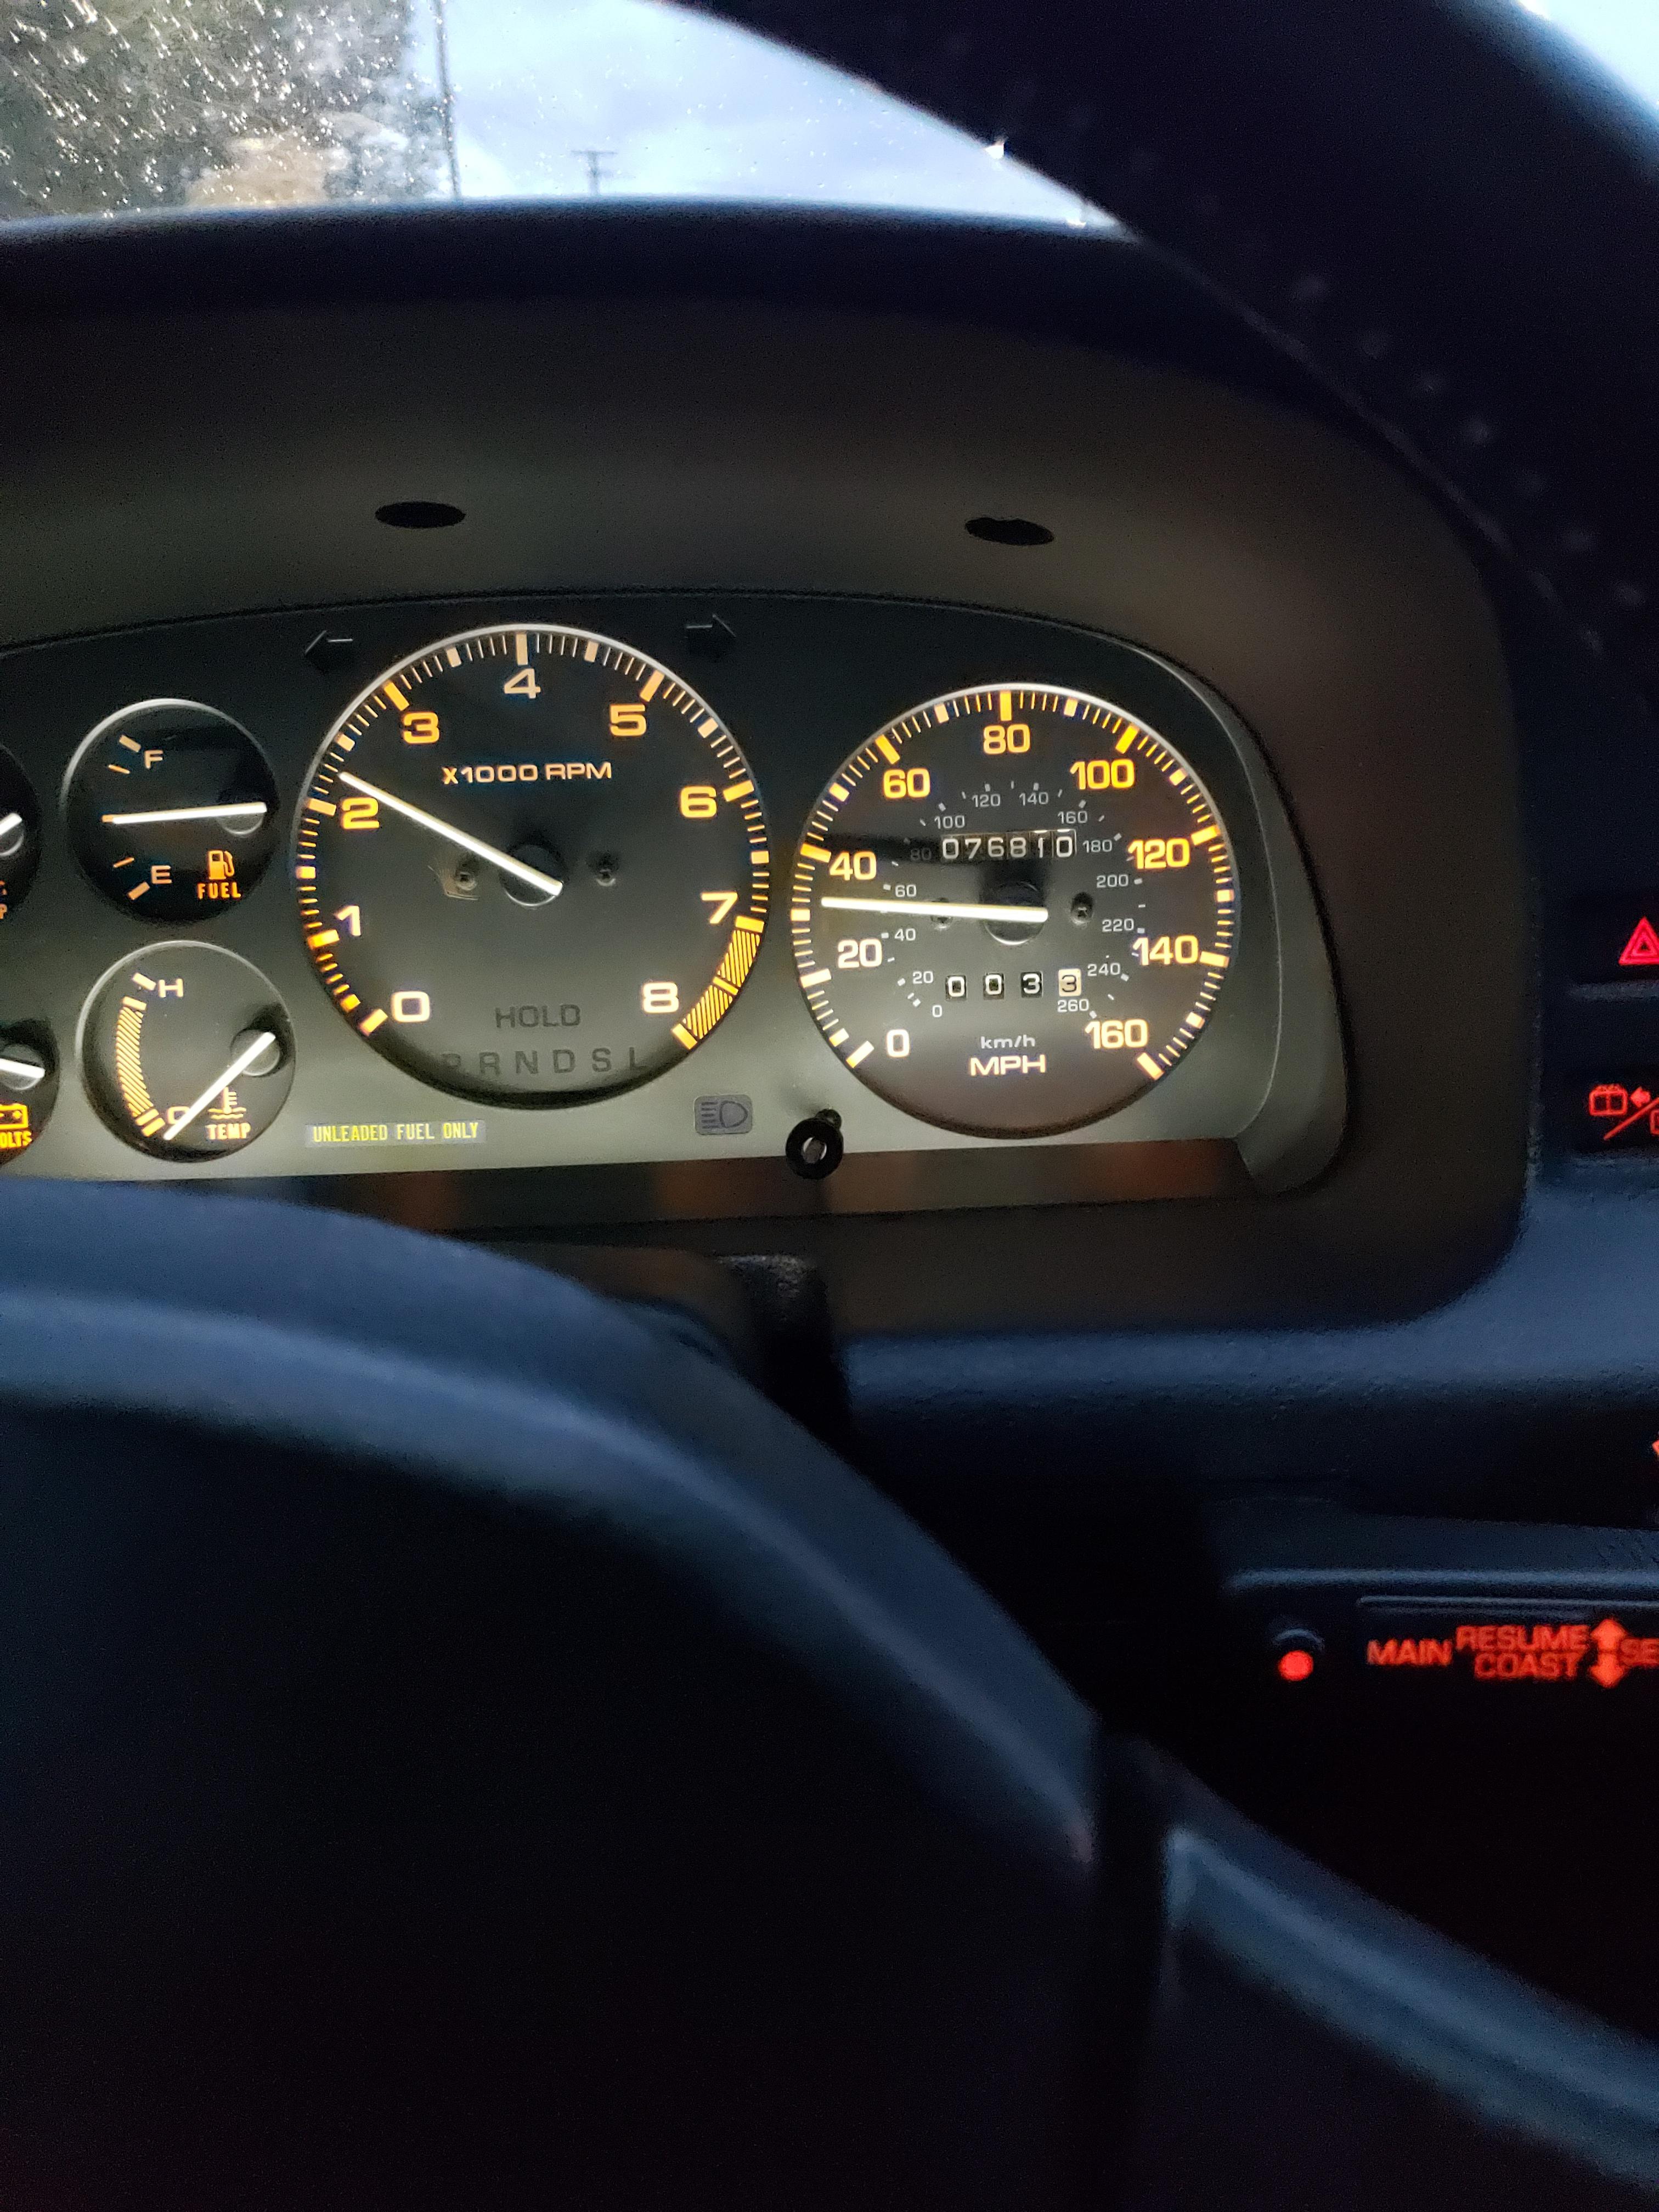
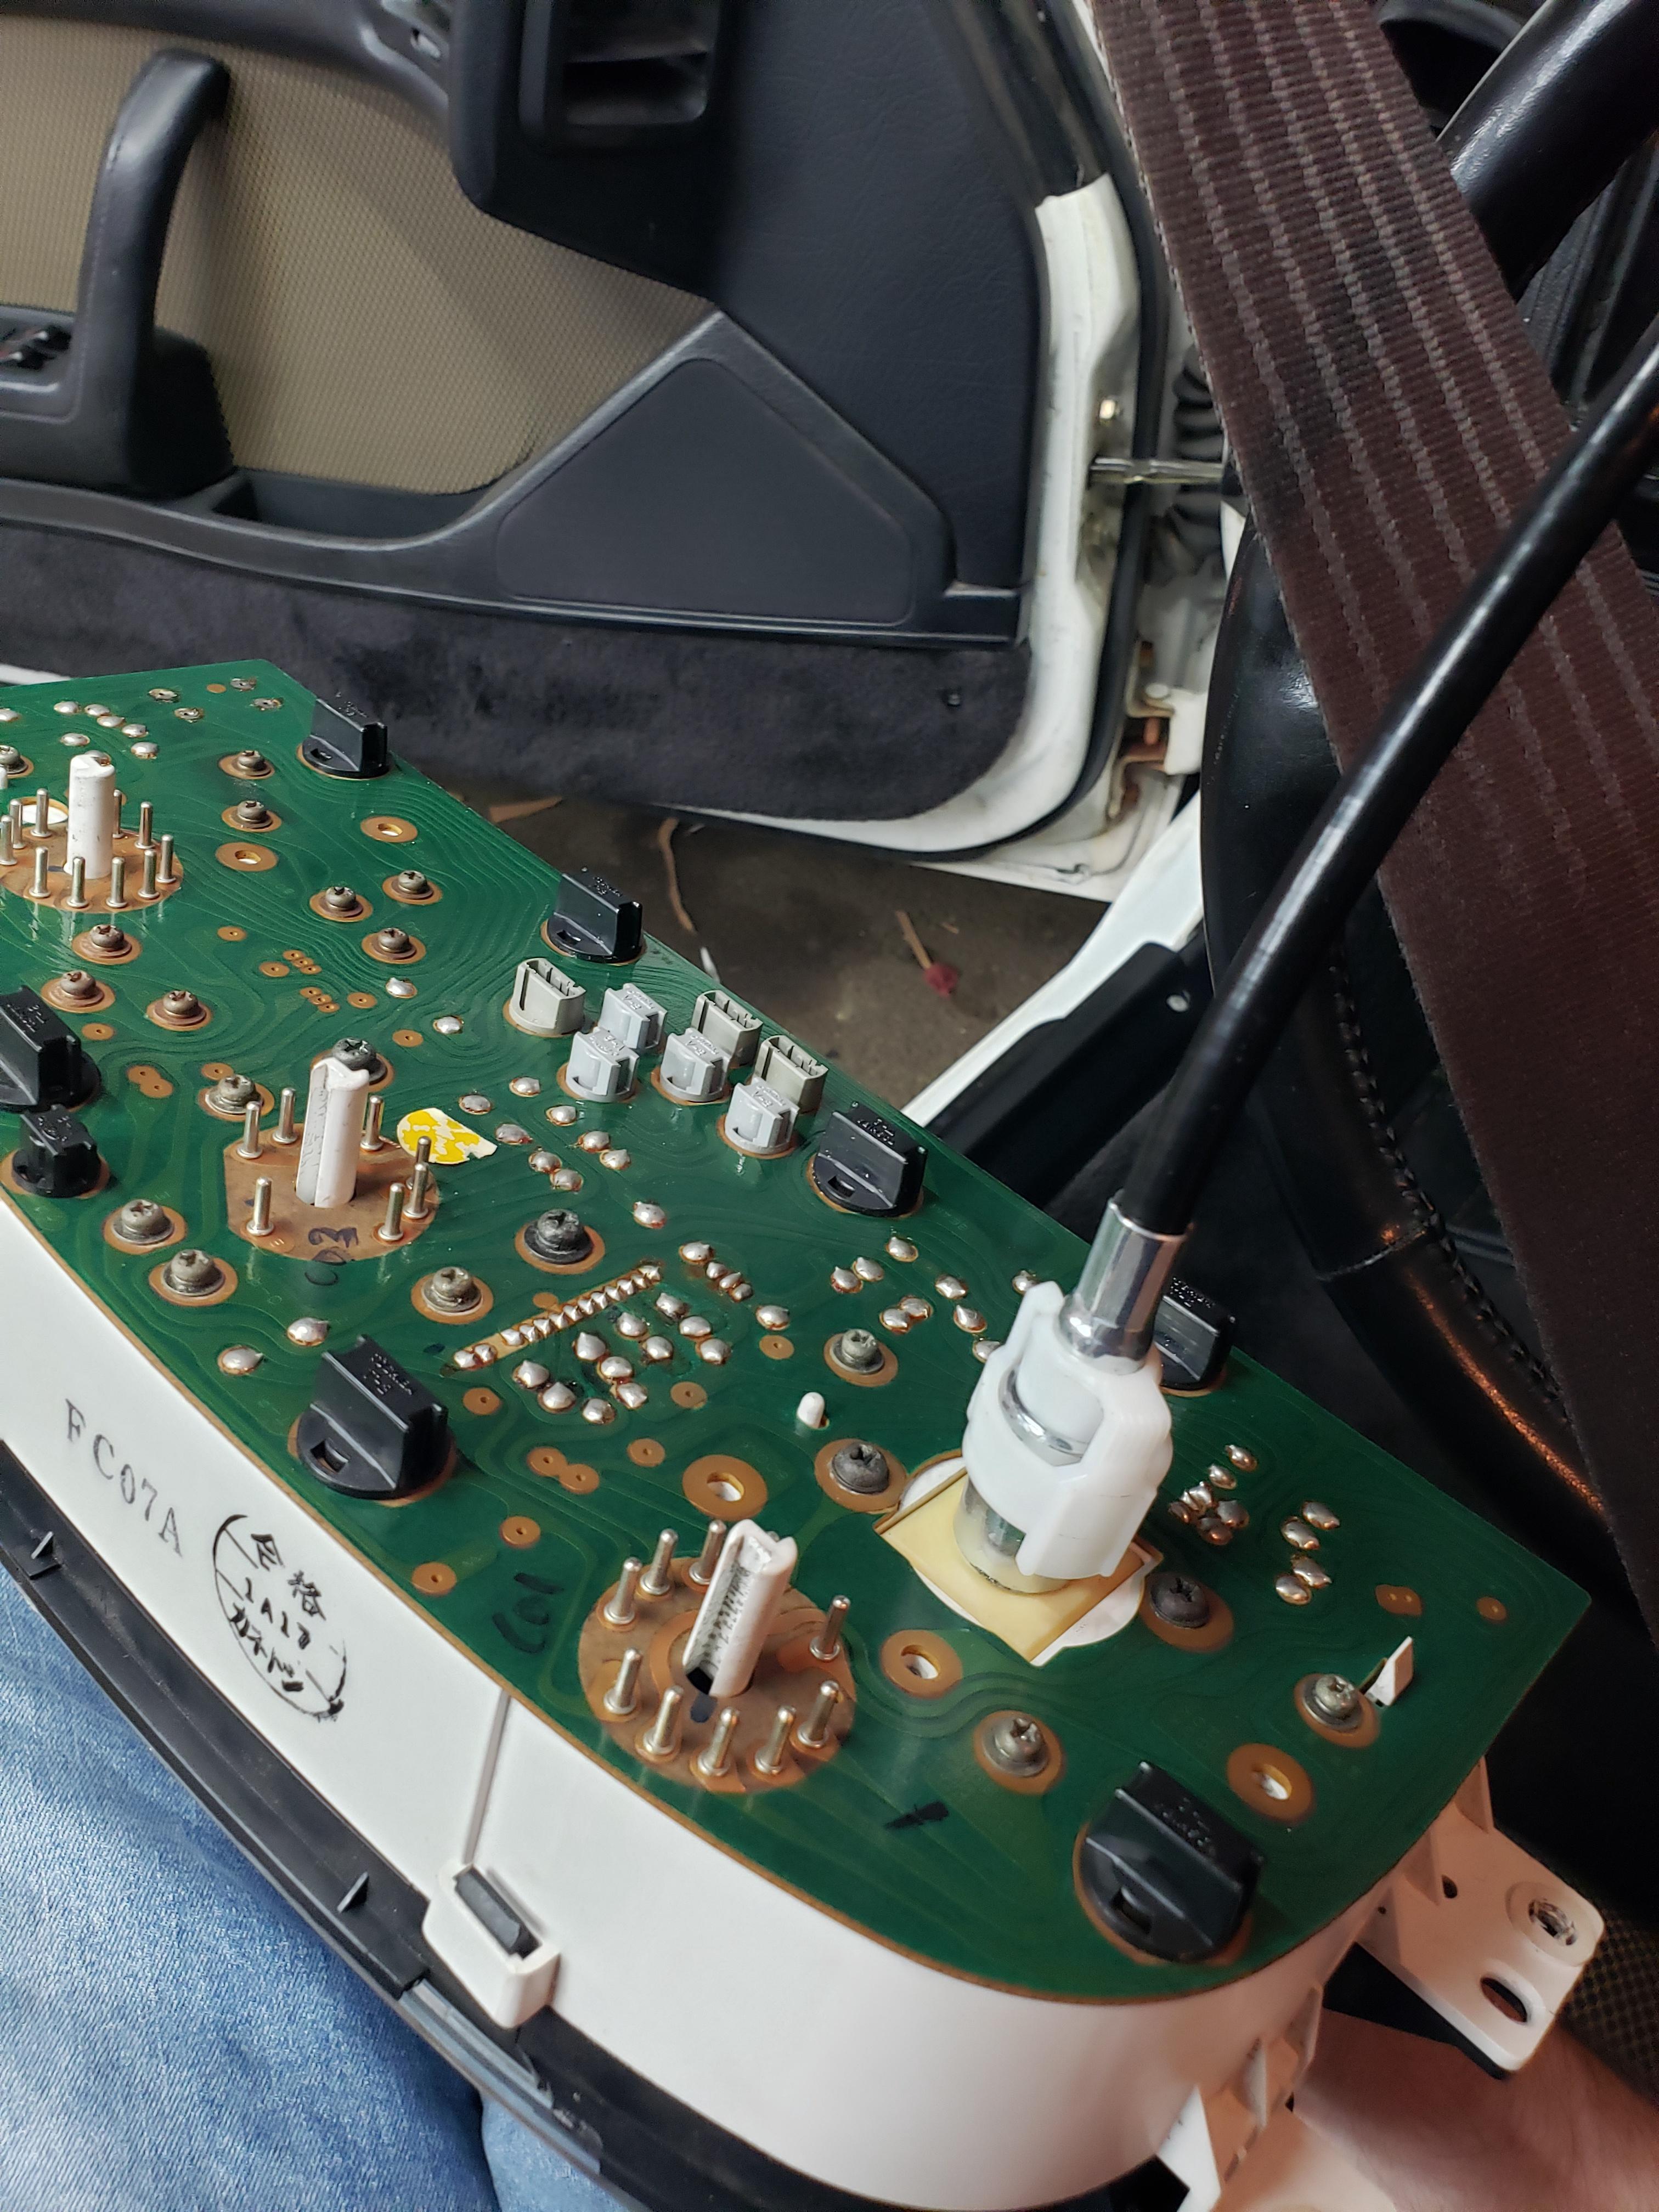
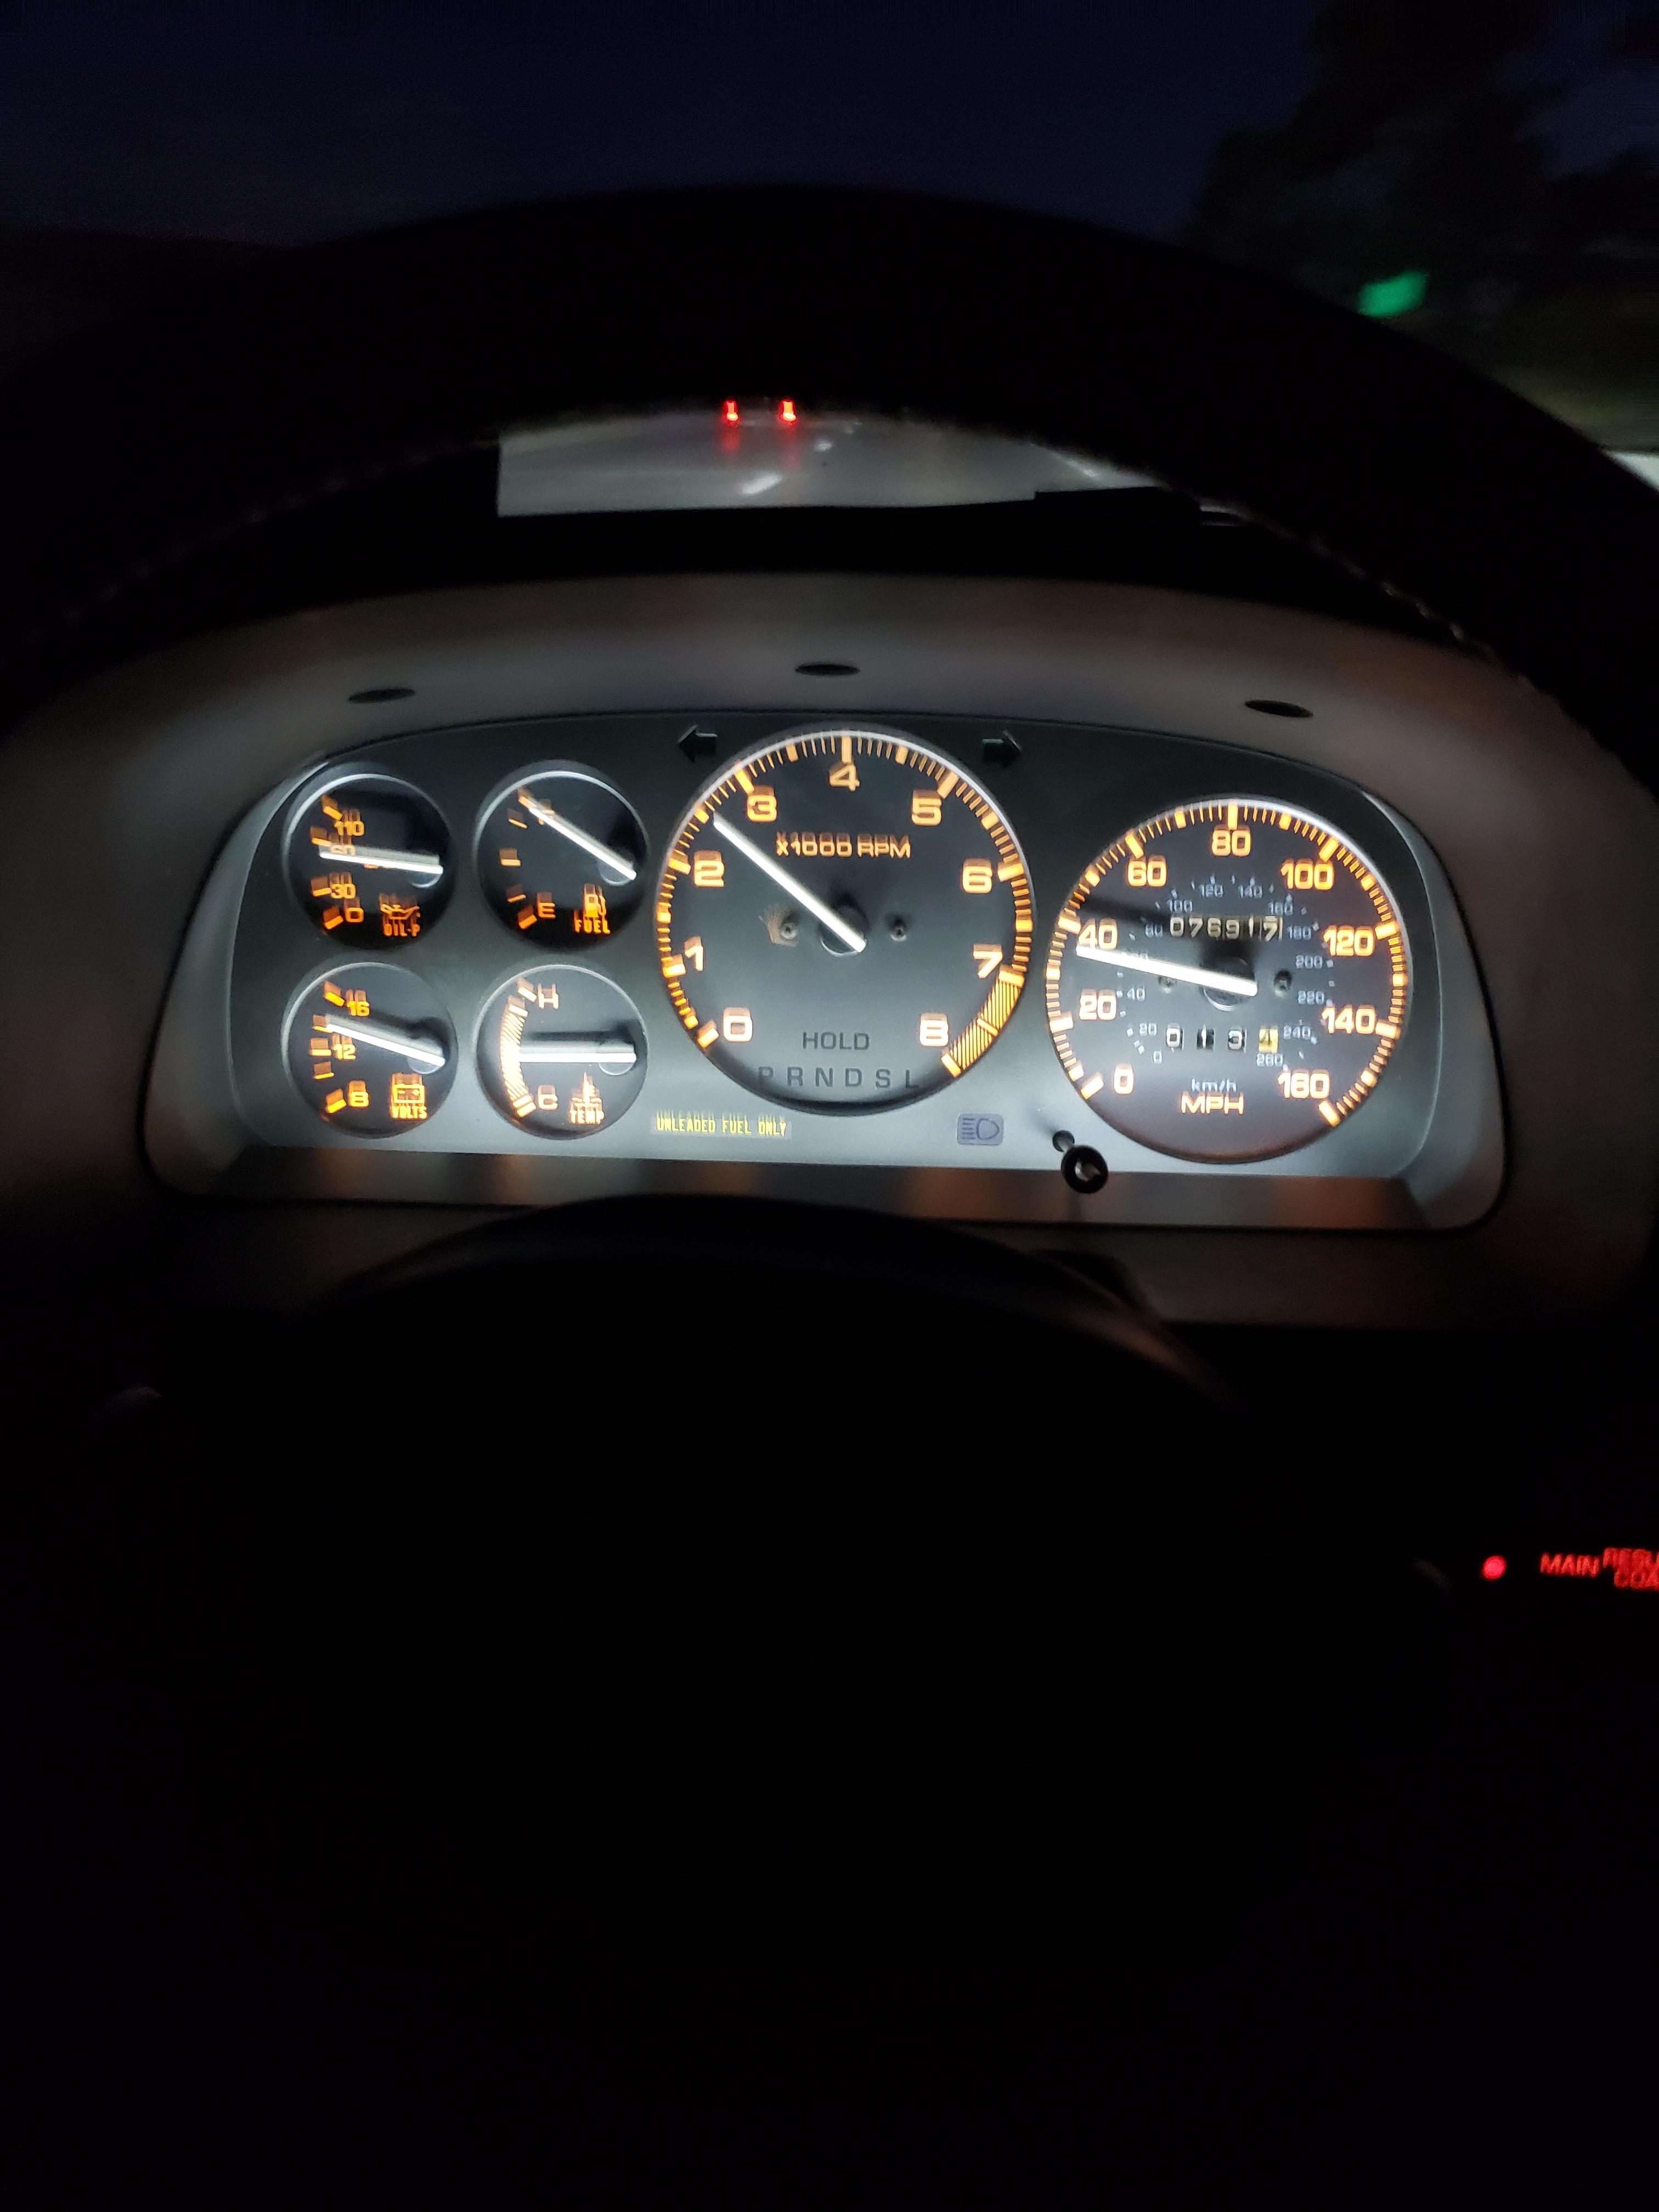
tach and speedometer are working! One of the other reasons I bought this turd is the mileage. As far as I can tell It's accurate.
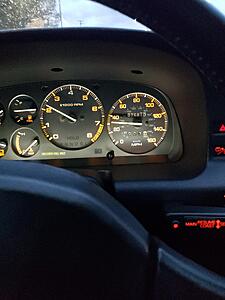
Let's talk speedometer first. I ended up getting one of the speedhut speedbox's. I can now confirm that the ford cable does indeed work with a little modification. Here's the ford cable next to the the Mazda cable.

All that is required is to cut the shield down to the same length as the stock one. The square drive is the same size. The only downside is the locking clip does not fit on the gauge cluster. So I just bend the shield a tiny bit so it's pressing against the gauge cluster.
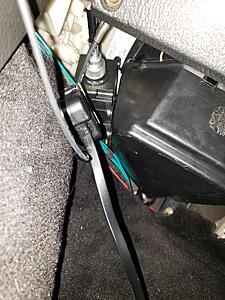
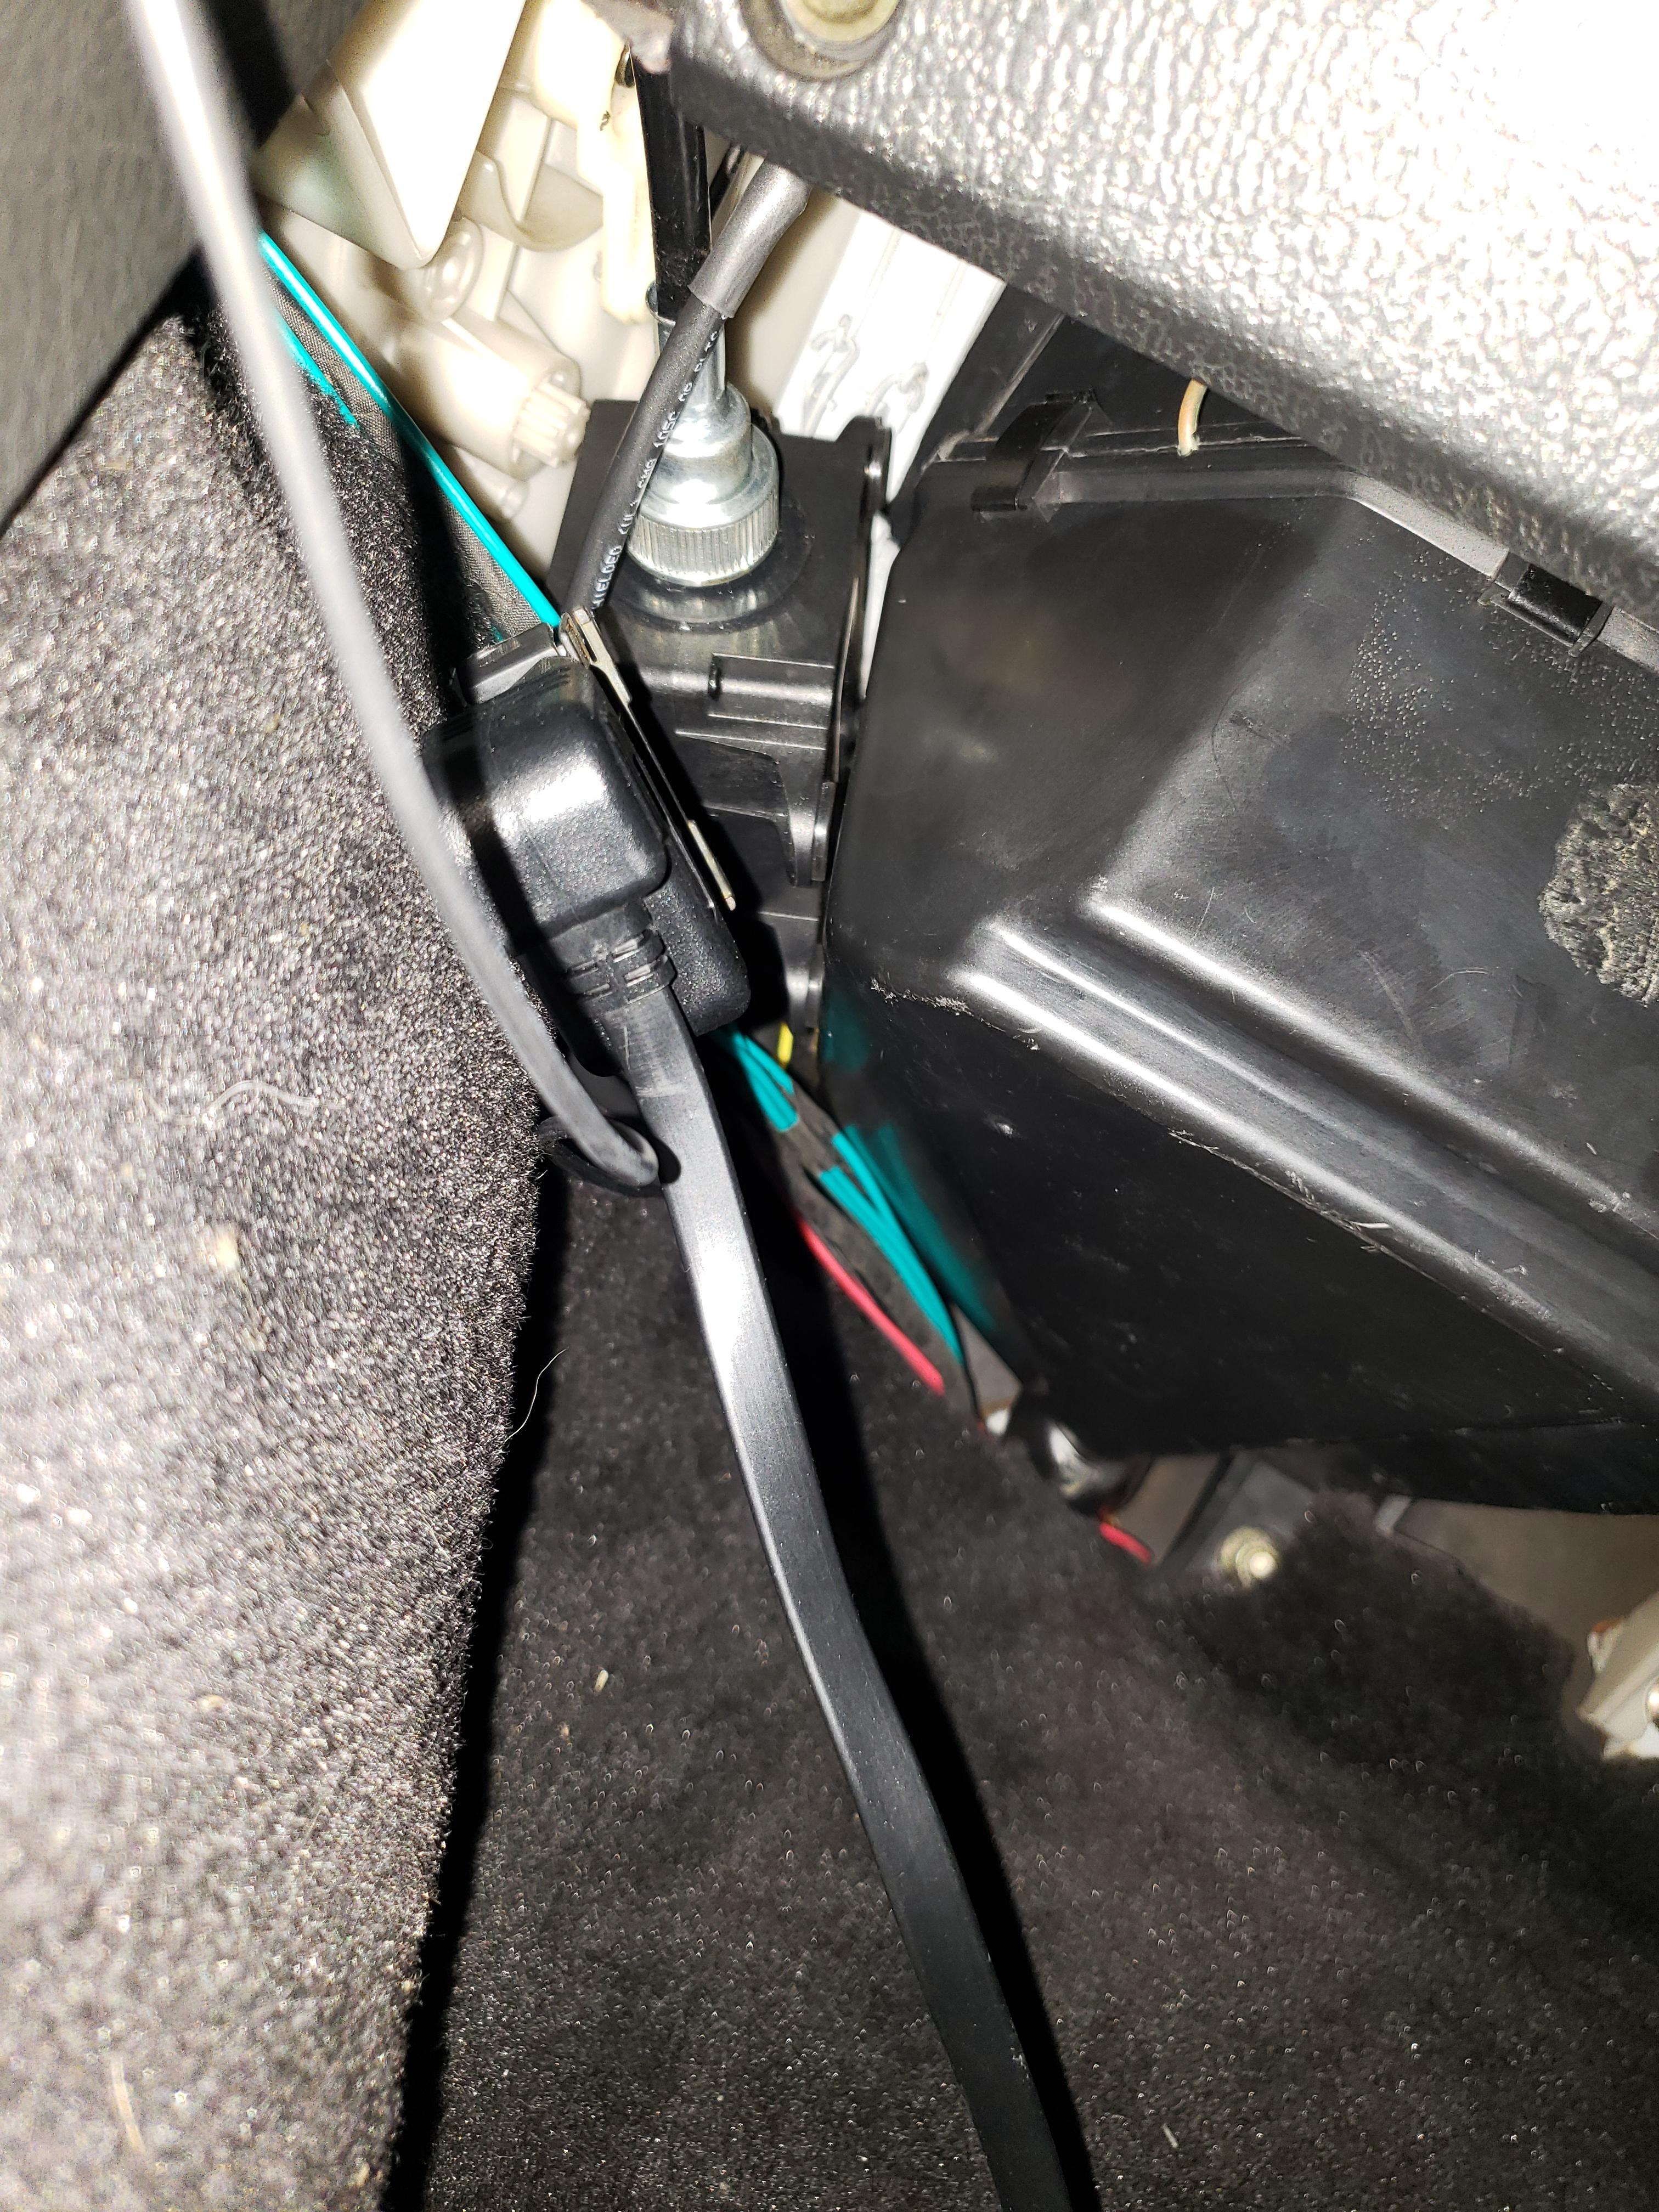
Mounting for the box is temporary, but the length of the cable lends itself to mounting in on the passinger's side between the heater core plastic and the A/C unit. It's also where my OBDs plug is for the time being.
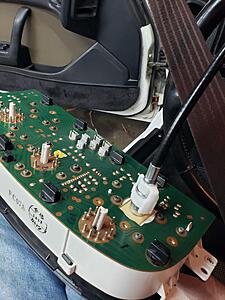
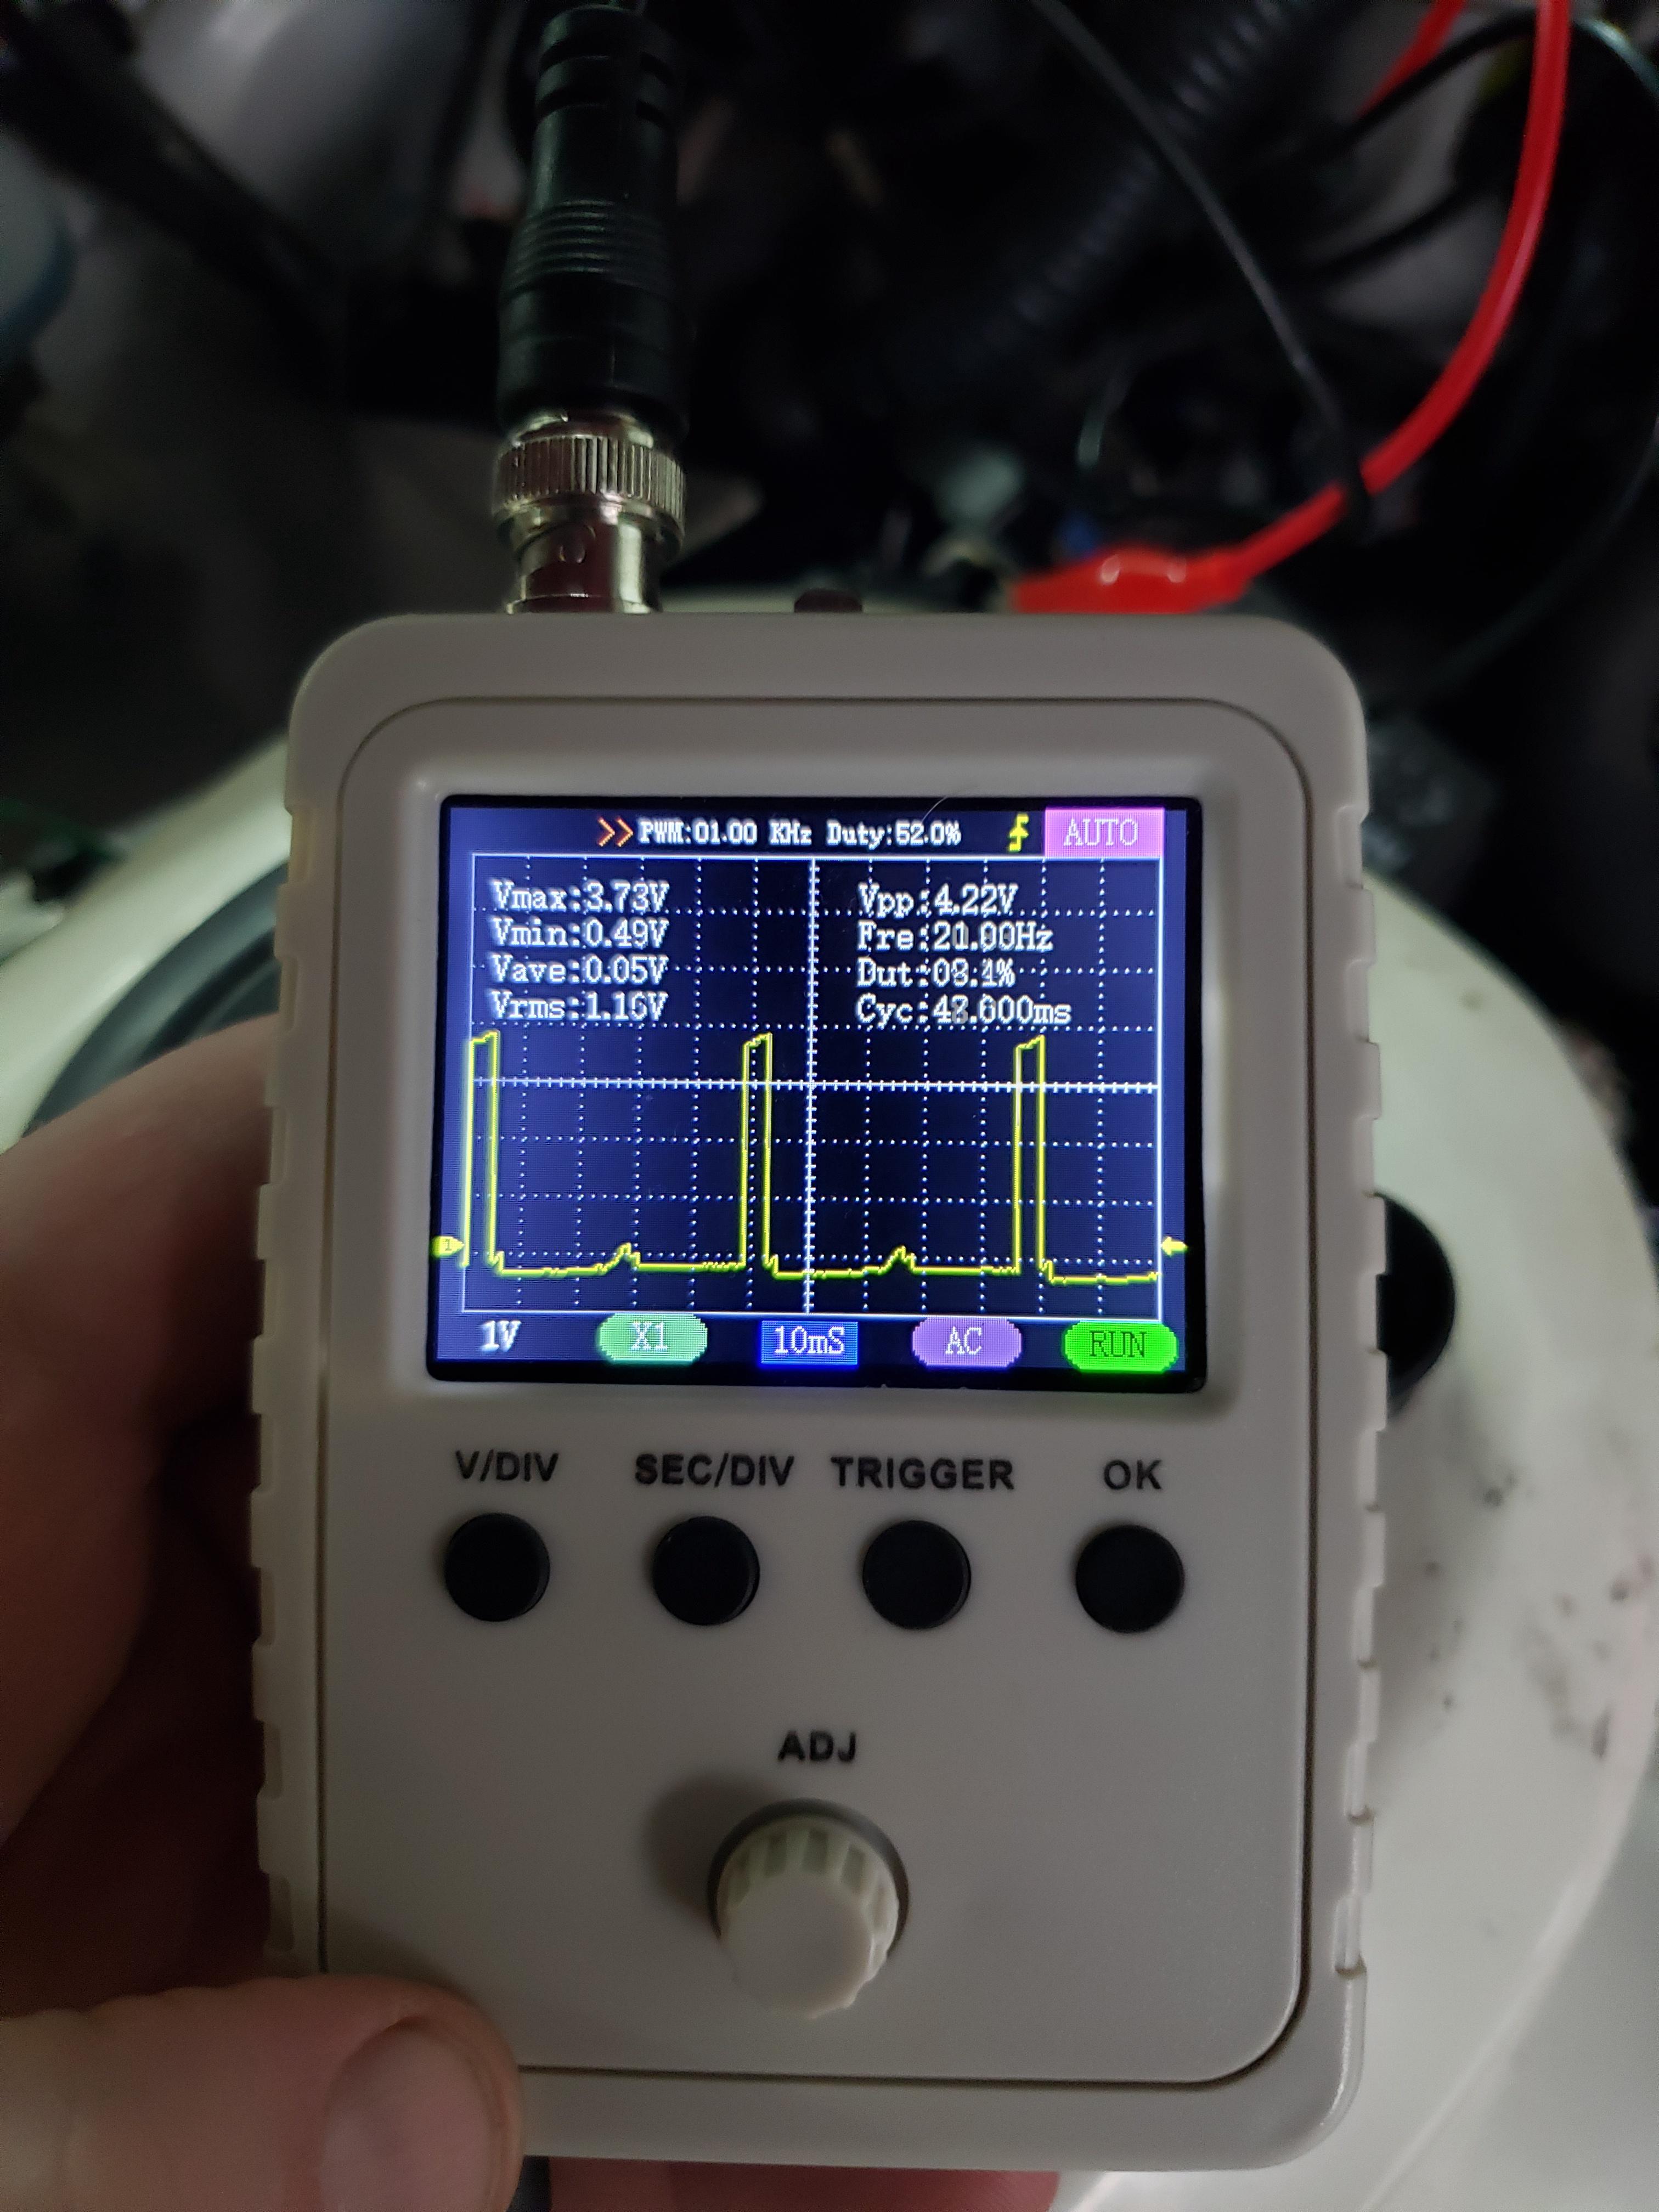
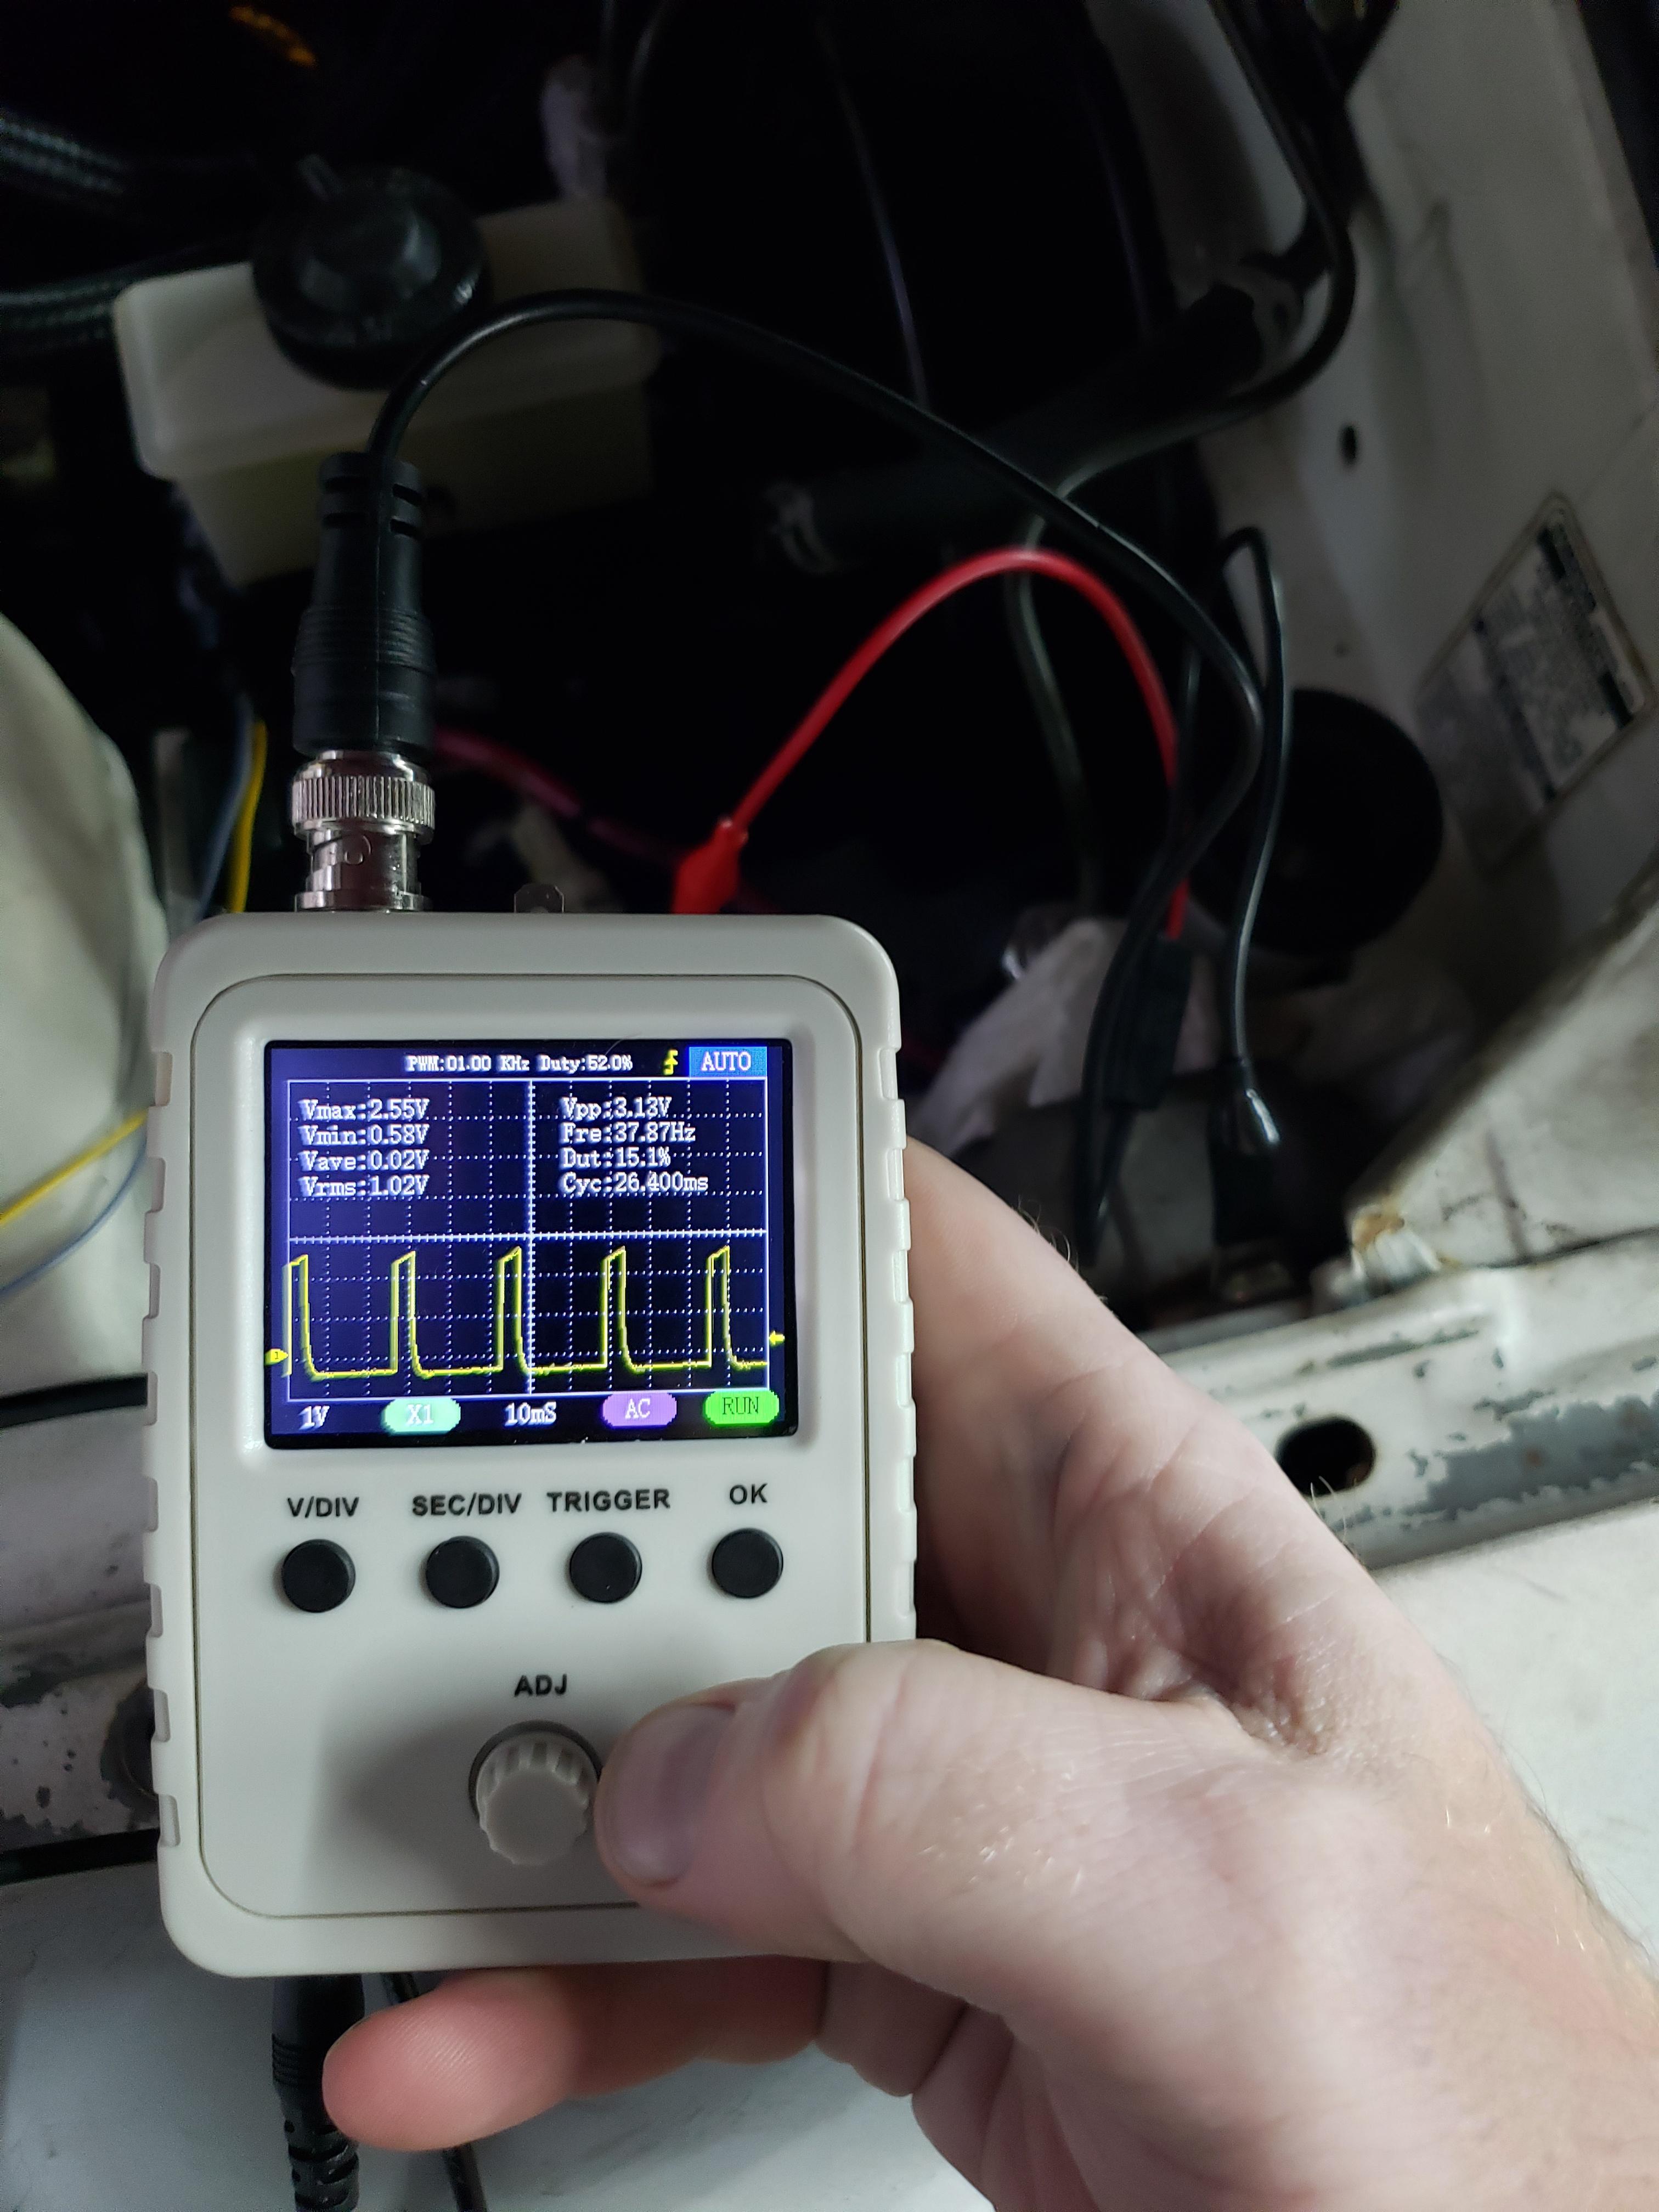
The tachometer is mostly working. It has a bit of a bug that I need to work out. It won't work until the engine has been running for 10ish minuets. The FC gauge cluster gets it's signal off the secondary coils, which both fire at the same time. The RX8's trailing coils only fire once per combustion event so hooking up the signal wire to one of the RX8 trainling coils would net you 1/2 the actual engine RPM on the FC cluster. So I needed to tap into both RX8 trailing coils to get the proper pulses. So a few diodes later and it all should be working.
Signal from a singular trailing coil:
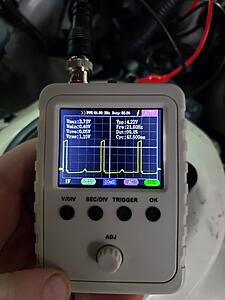
both signals tied together is

So I'm not sure if the diodes I'm using are oversized and I'm experiencing voltage drop to the point where the tach doesn't read, or there's a wiring issue somewhere. If anyone knows anything about sizing diodes I'd love to pick your brain.
Let's talk speedometer first. I ended up getting one of the speedhut speedbox's. I can now confirm that the ford cable does indeed work with a little modification. Here's the ford cable next to the the Mazda cable.
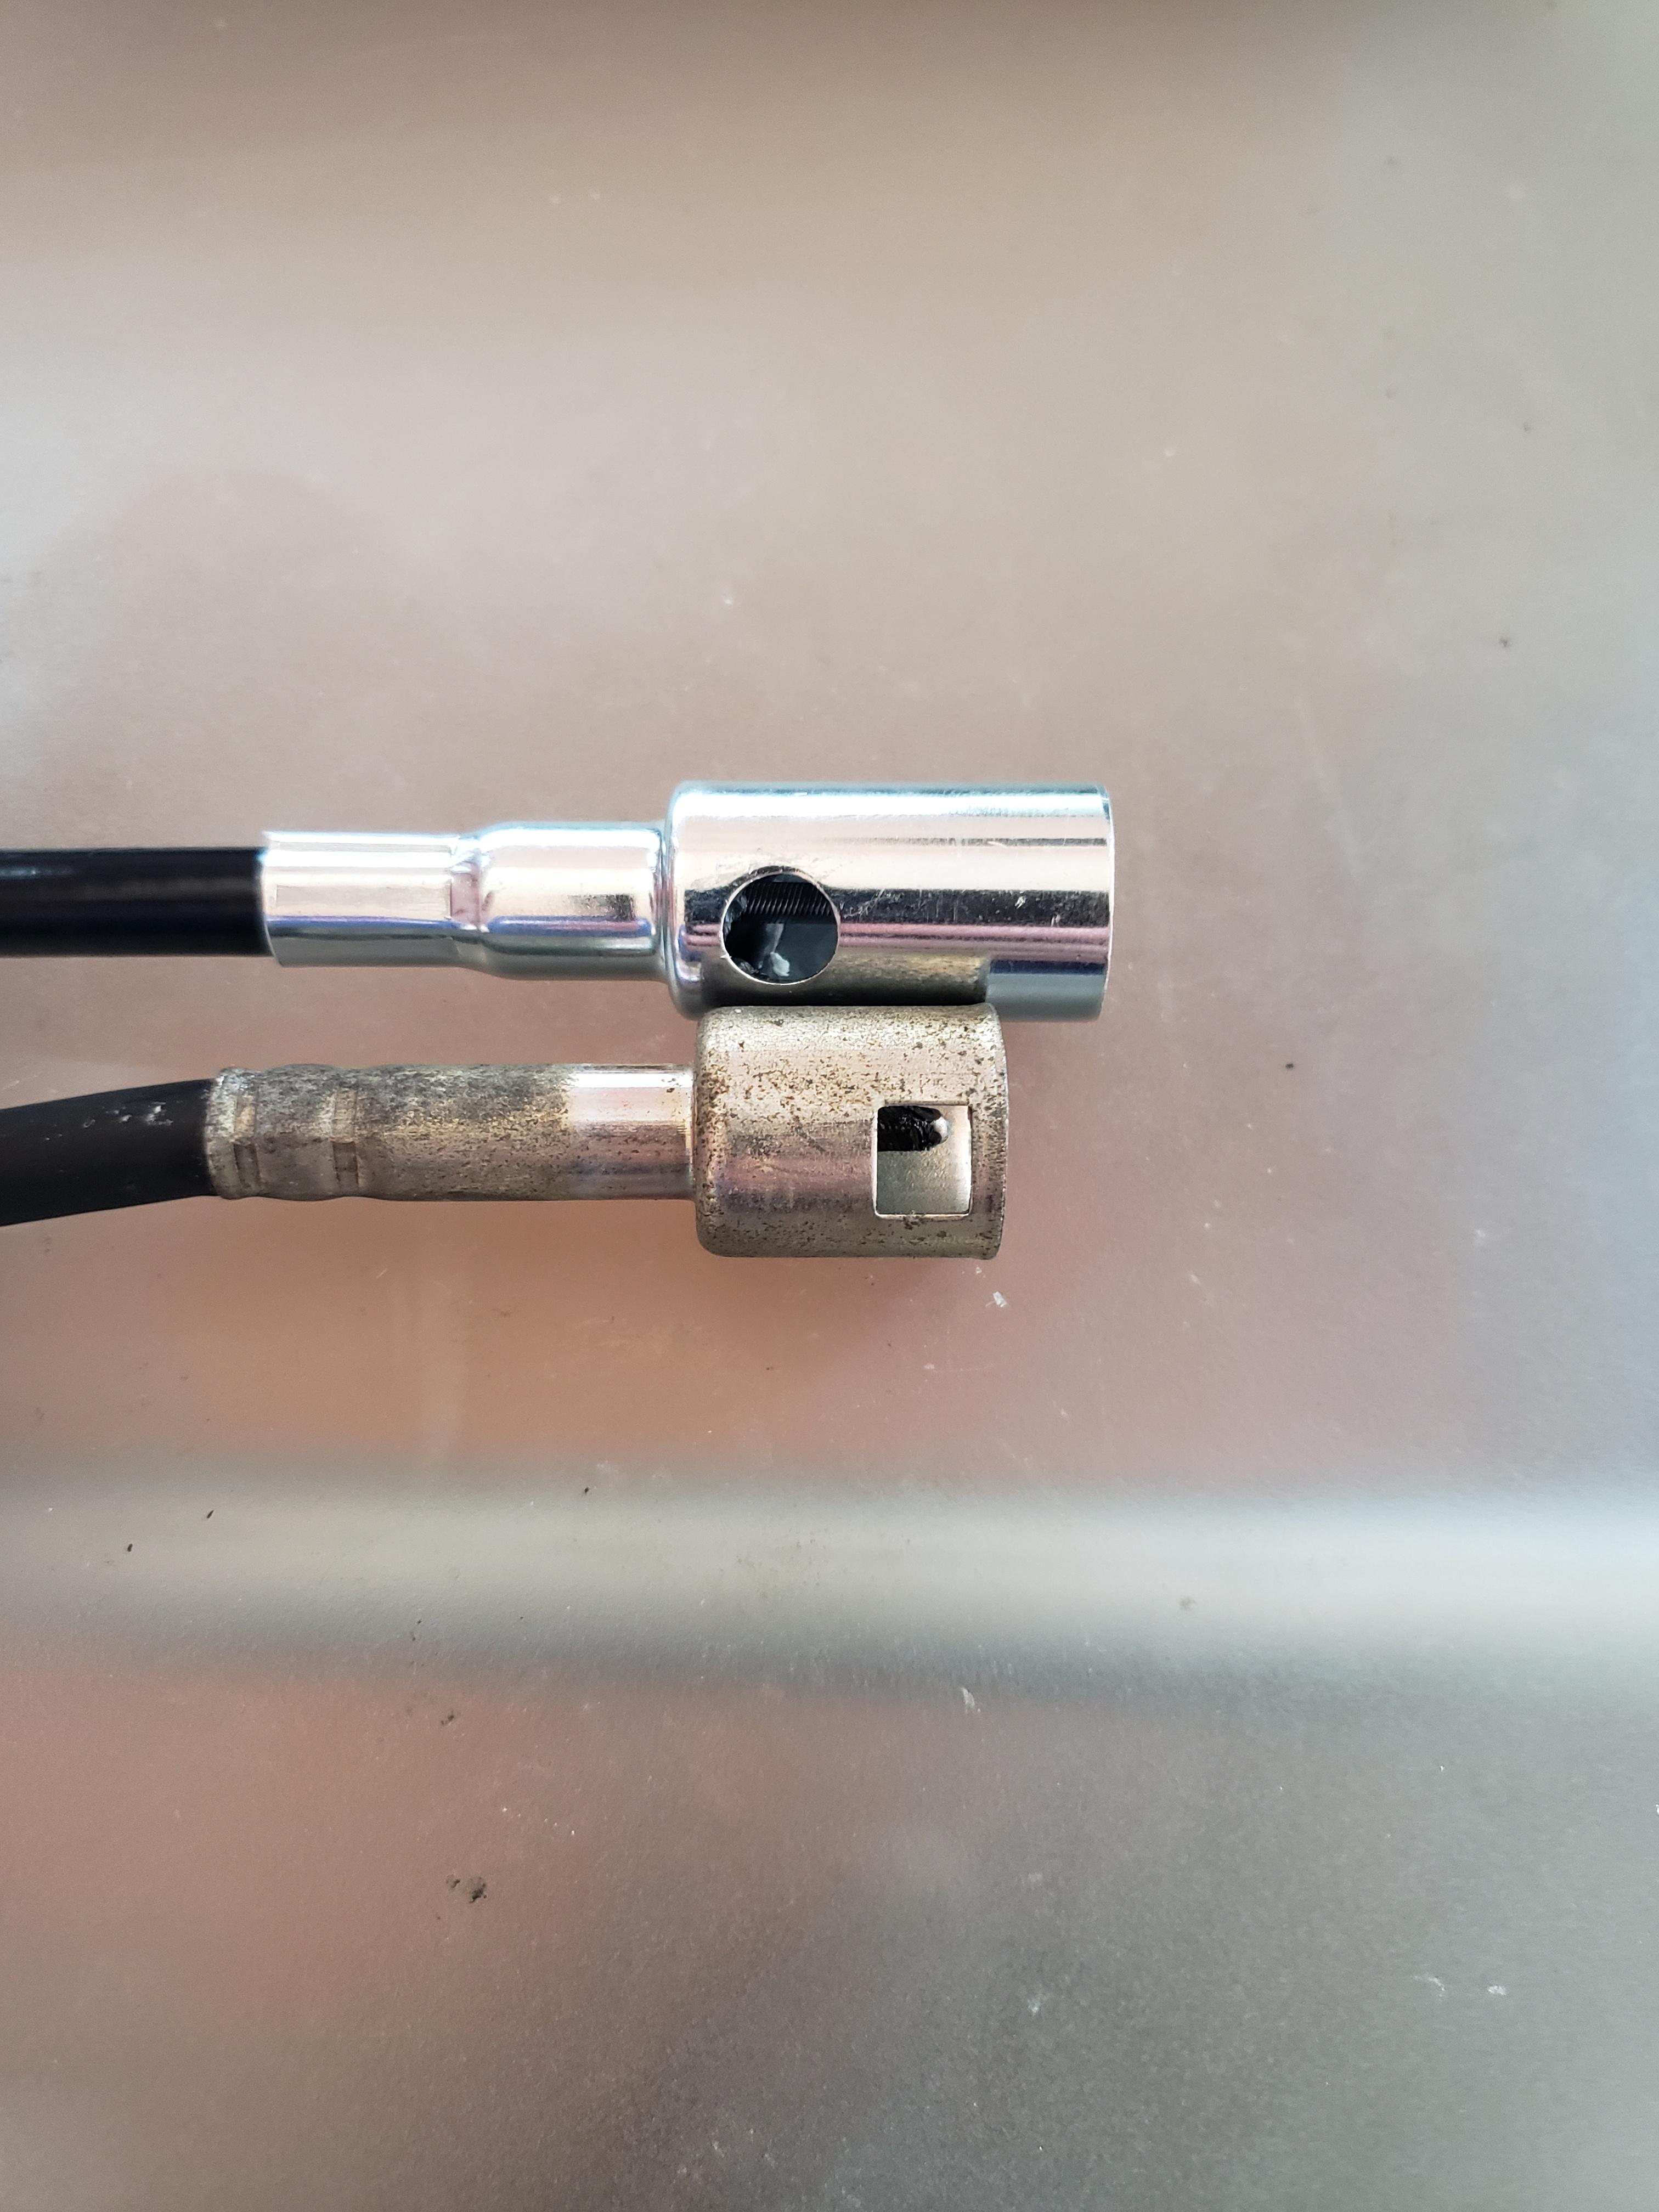
All that is required is to cut the shield down to the same length as the stock one. The square drive is the same size. The only downside is the locking clip does not fit on the gauge cluster. So I just bend the shield a tiny bit so it's pressing against the gauge cluster.
Mounting for the box is temporary, but the length of the cable lends itself to mounting in on the passinger's side between the heater core plastic and the A/C unit. It's also where my OBDs plug is for the time being.
The tachometer is mostly working. It has a bit of a bug that I need to work out. It won't work until the engine has been running for 10ish minuets. The FC gauge cluster gets it's signal off the secondary coils, which both fire at the same time. The RX8's trailing coils only fire once per combustion event so hooking up the signal wire to one of the RX8 trainling coils would net you 1/2 the actual engine RPM on the FC cluster. So I needed to tap into both RX8 trailing coils to get the proper pulses. So a few diodes later and it all should be working.
Signal from a singular trailing coil:
both signals tied together is
So I'm not sure if the diodes I'm using are oversized and I'm experiencing voltage drop to the point where the tach doesn't read, or there's a wiring issue somewhere. If anyone knows anything about sizing diodes I'd love to pick your brain.
Thread Starter
Joined: Mar 2002
Posts: 1,726
Likes: 540
From: binghamton, ny
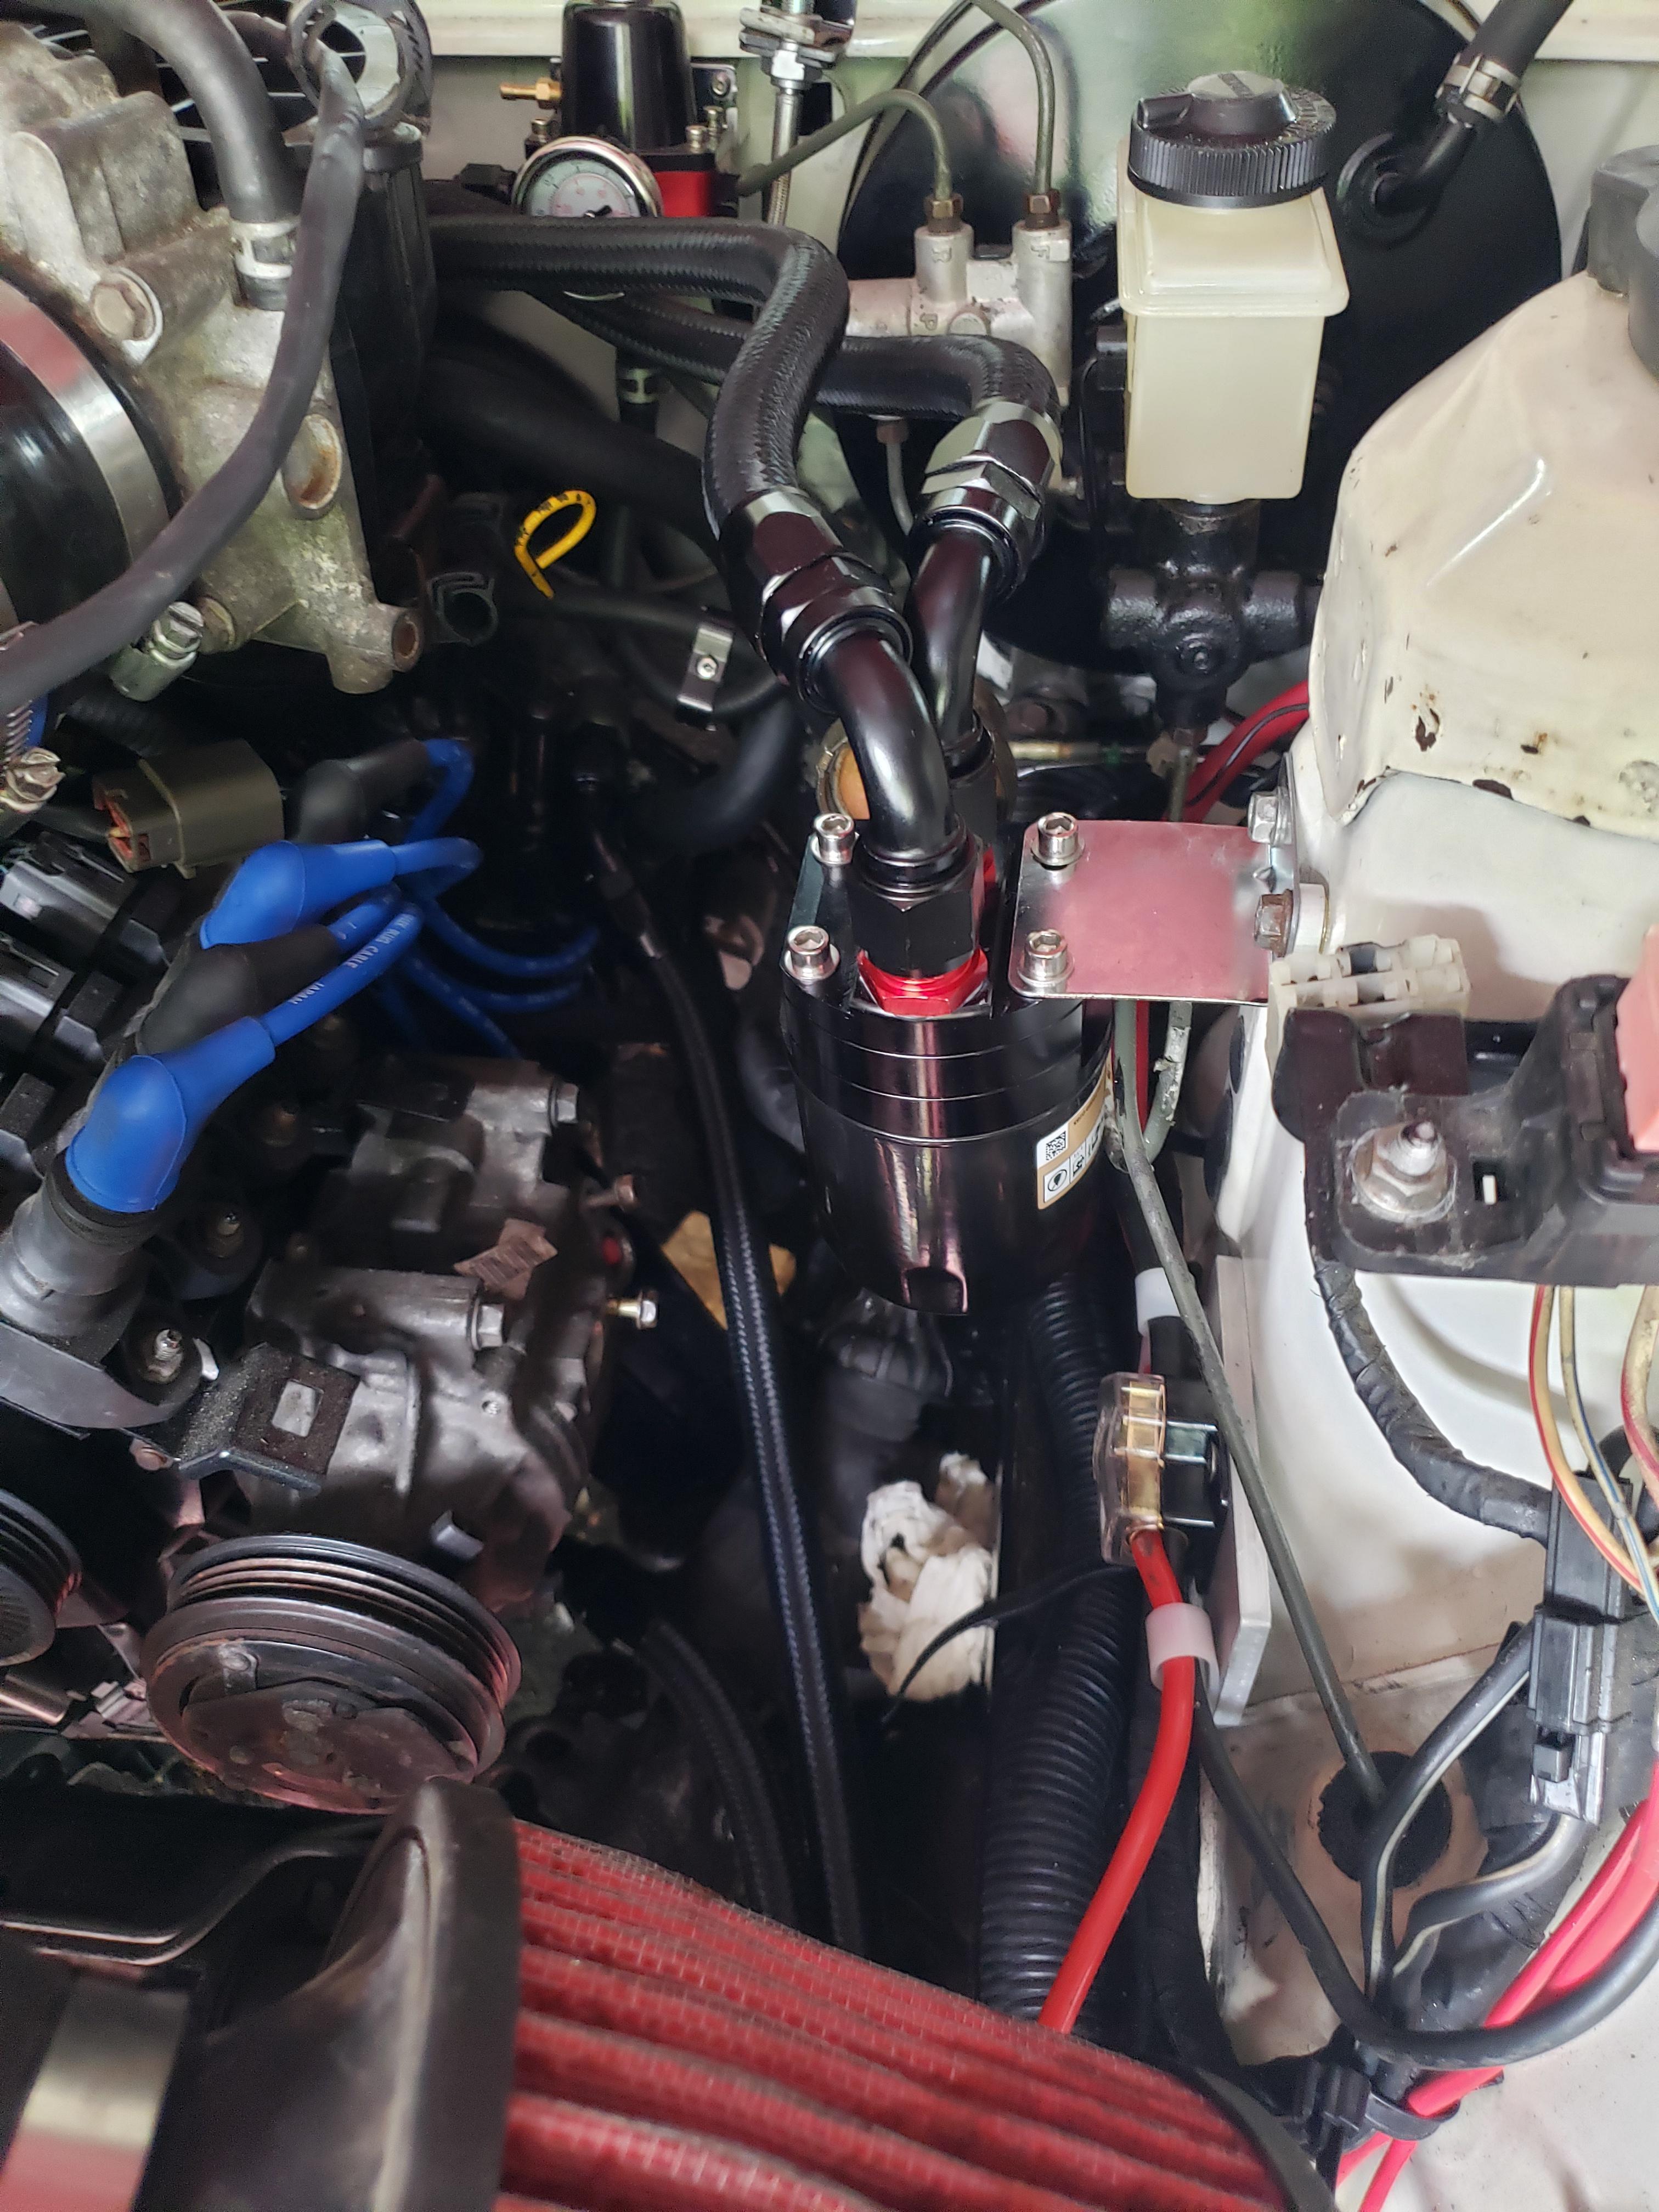
So this happened...you'll know it when you see it...haha
So turns out the edge of the radiatior was razor sharp and just wore thru the hose from vibrations. An easy fix, but one of those annoying things that shouldn't have happened.
Also, got all the gauges working!

Well kinda. the tach still takes a while to get working. I replaced the diodes I was using with some that are a little more suitable for the application, but I still see quite a bit of voltage drop before the signal gets to the gauge cluster. It's not a huge problem, but an annoyance that I'll have to deal with as some point.
So turns out the edge of the radiatior was razor sharp and just wore thru the hose from vibrations. An easy fix, but one of those annoying things that shouldn't have happened.
Also, got all the gauges working!
Well kinda. the tach still takes a while to get working. I replaced the diodes I was using with some that are a little more suitable for the application, but I still see quite a bit of voltage drop before the signal gets to the gauge cluster. It's not a huge problem, but an annoyance that I'll have to deal with as some point.
Thread Starter
Joined: Mar 2002
Posts: 1,726
Likes: 540
From: binghamton, ny
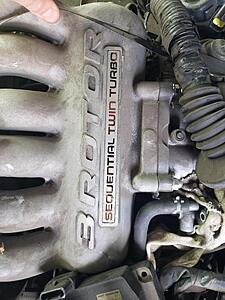
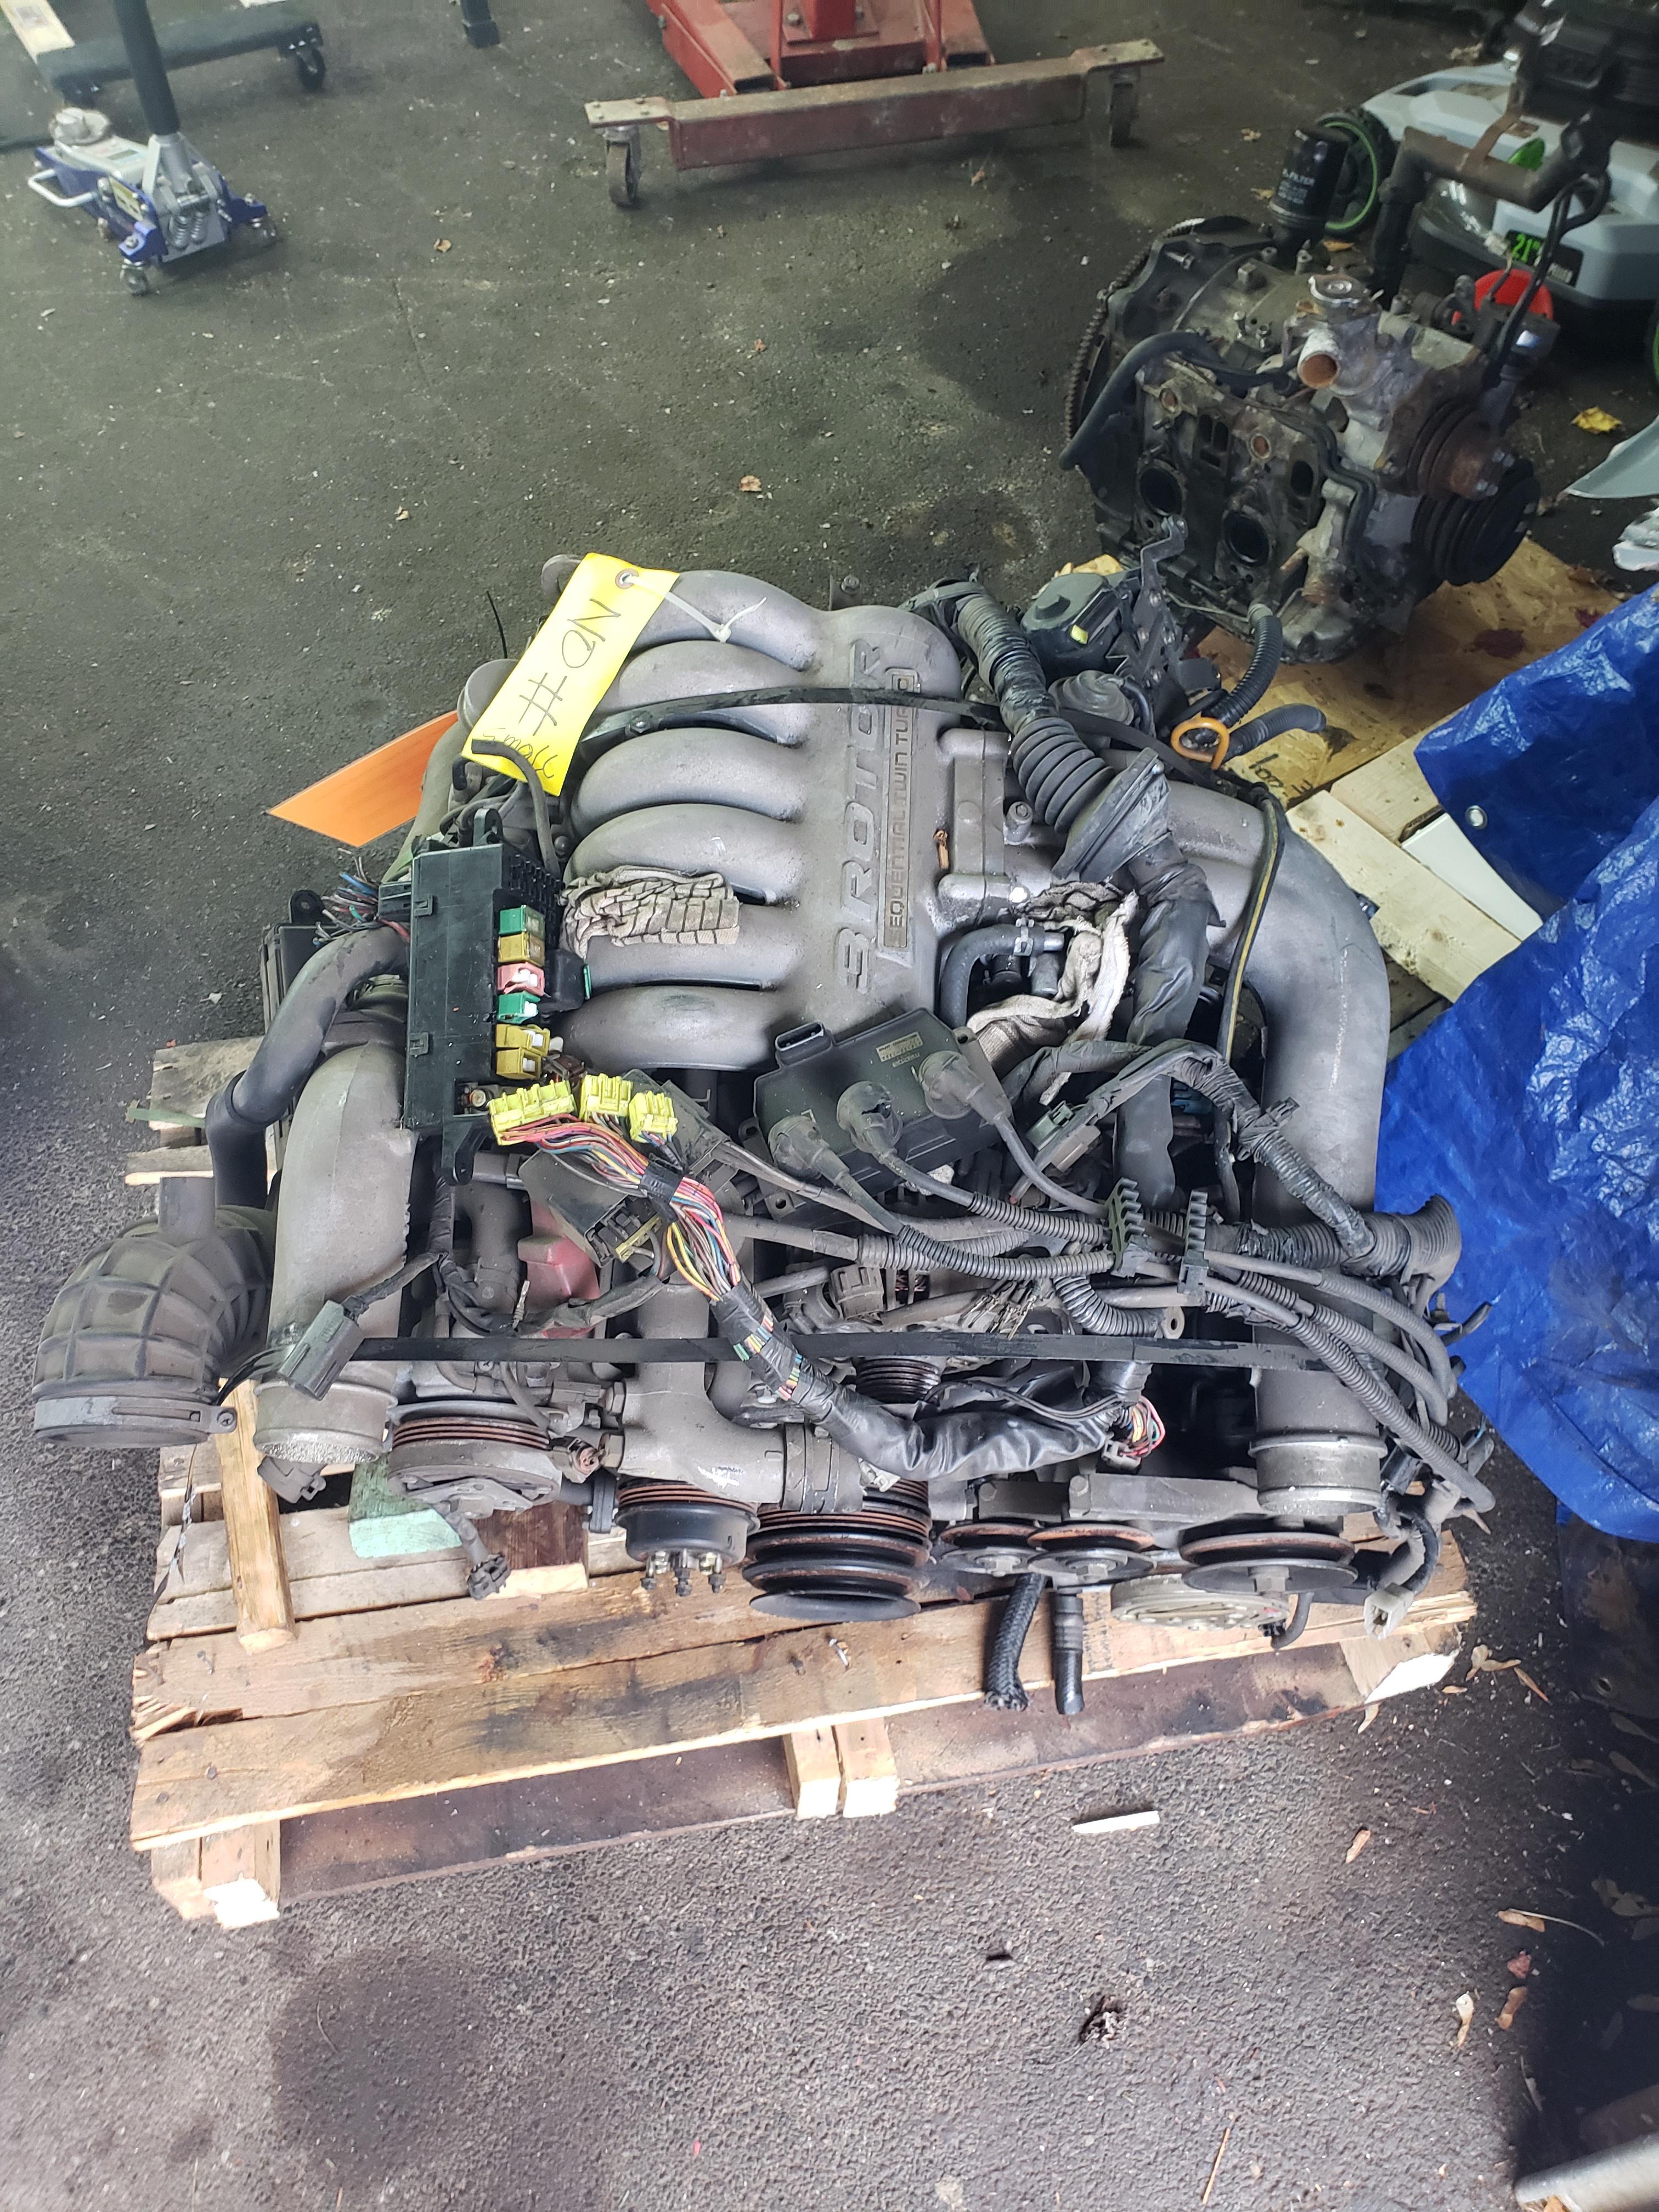
Well folks, seems I can never leave well enough alone, but this is the result of it being cold out and not having motivation to actually go outside to work on the car.....Not sure if this will end up in this chassis or if I should put it in my other FC roller that I have. I also need to figure out what to do with that turbo engine in the background too....first world problems I know.

yum....
yum....

Thread Starter
Joined: Mar 2002
Posts: 1,726
Likes: 540
From: binghamton, ny