
Project: let the great turd debate begin...

Thread Starter
Joined: Mar 2002
Posts: 1,726
Likes: 540
From: binghamton, ny
no going back now...

not sketchy at all....
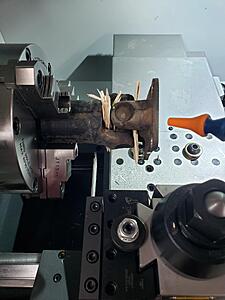
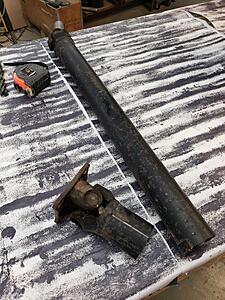
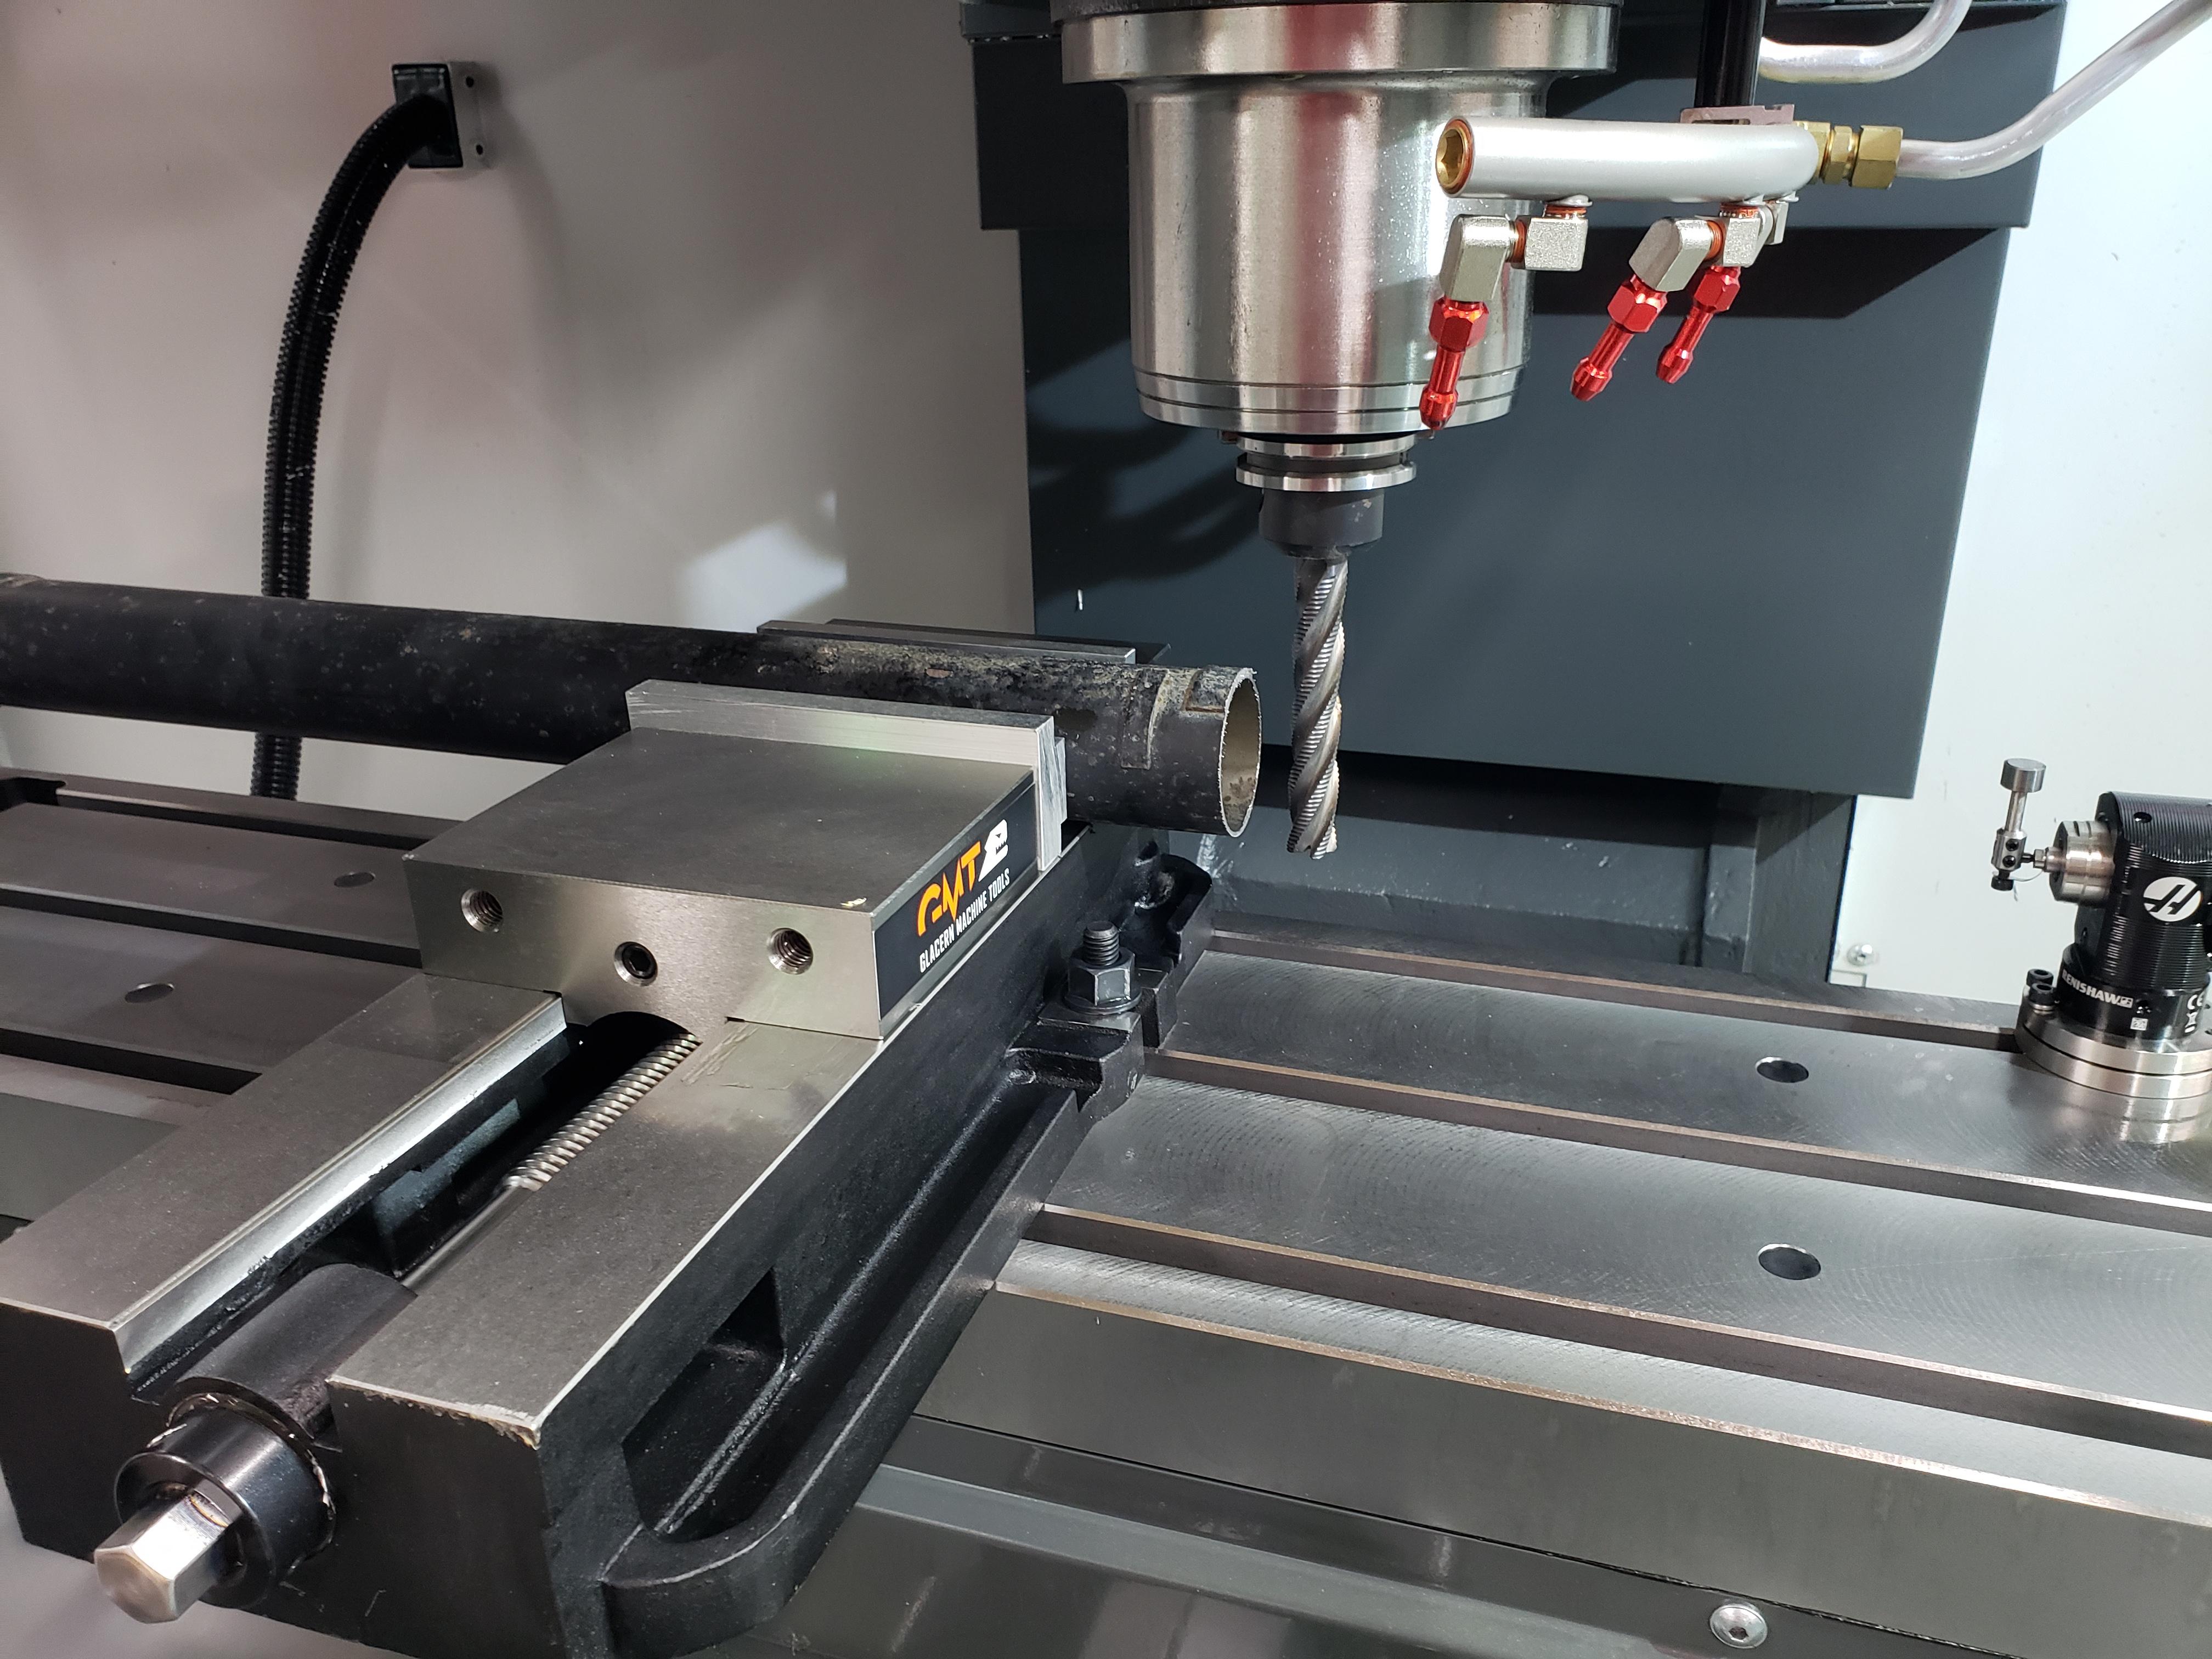
driveshaft is too short to fit thru the lathe so some creativity had to be used to square up the end again.
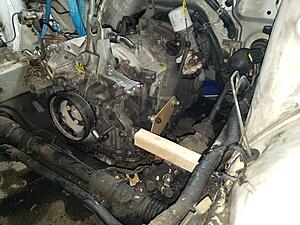
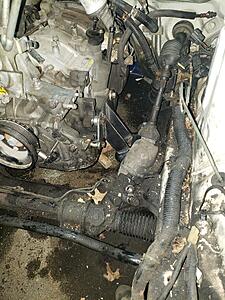
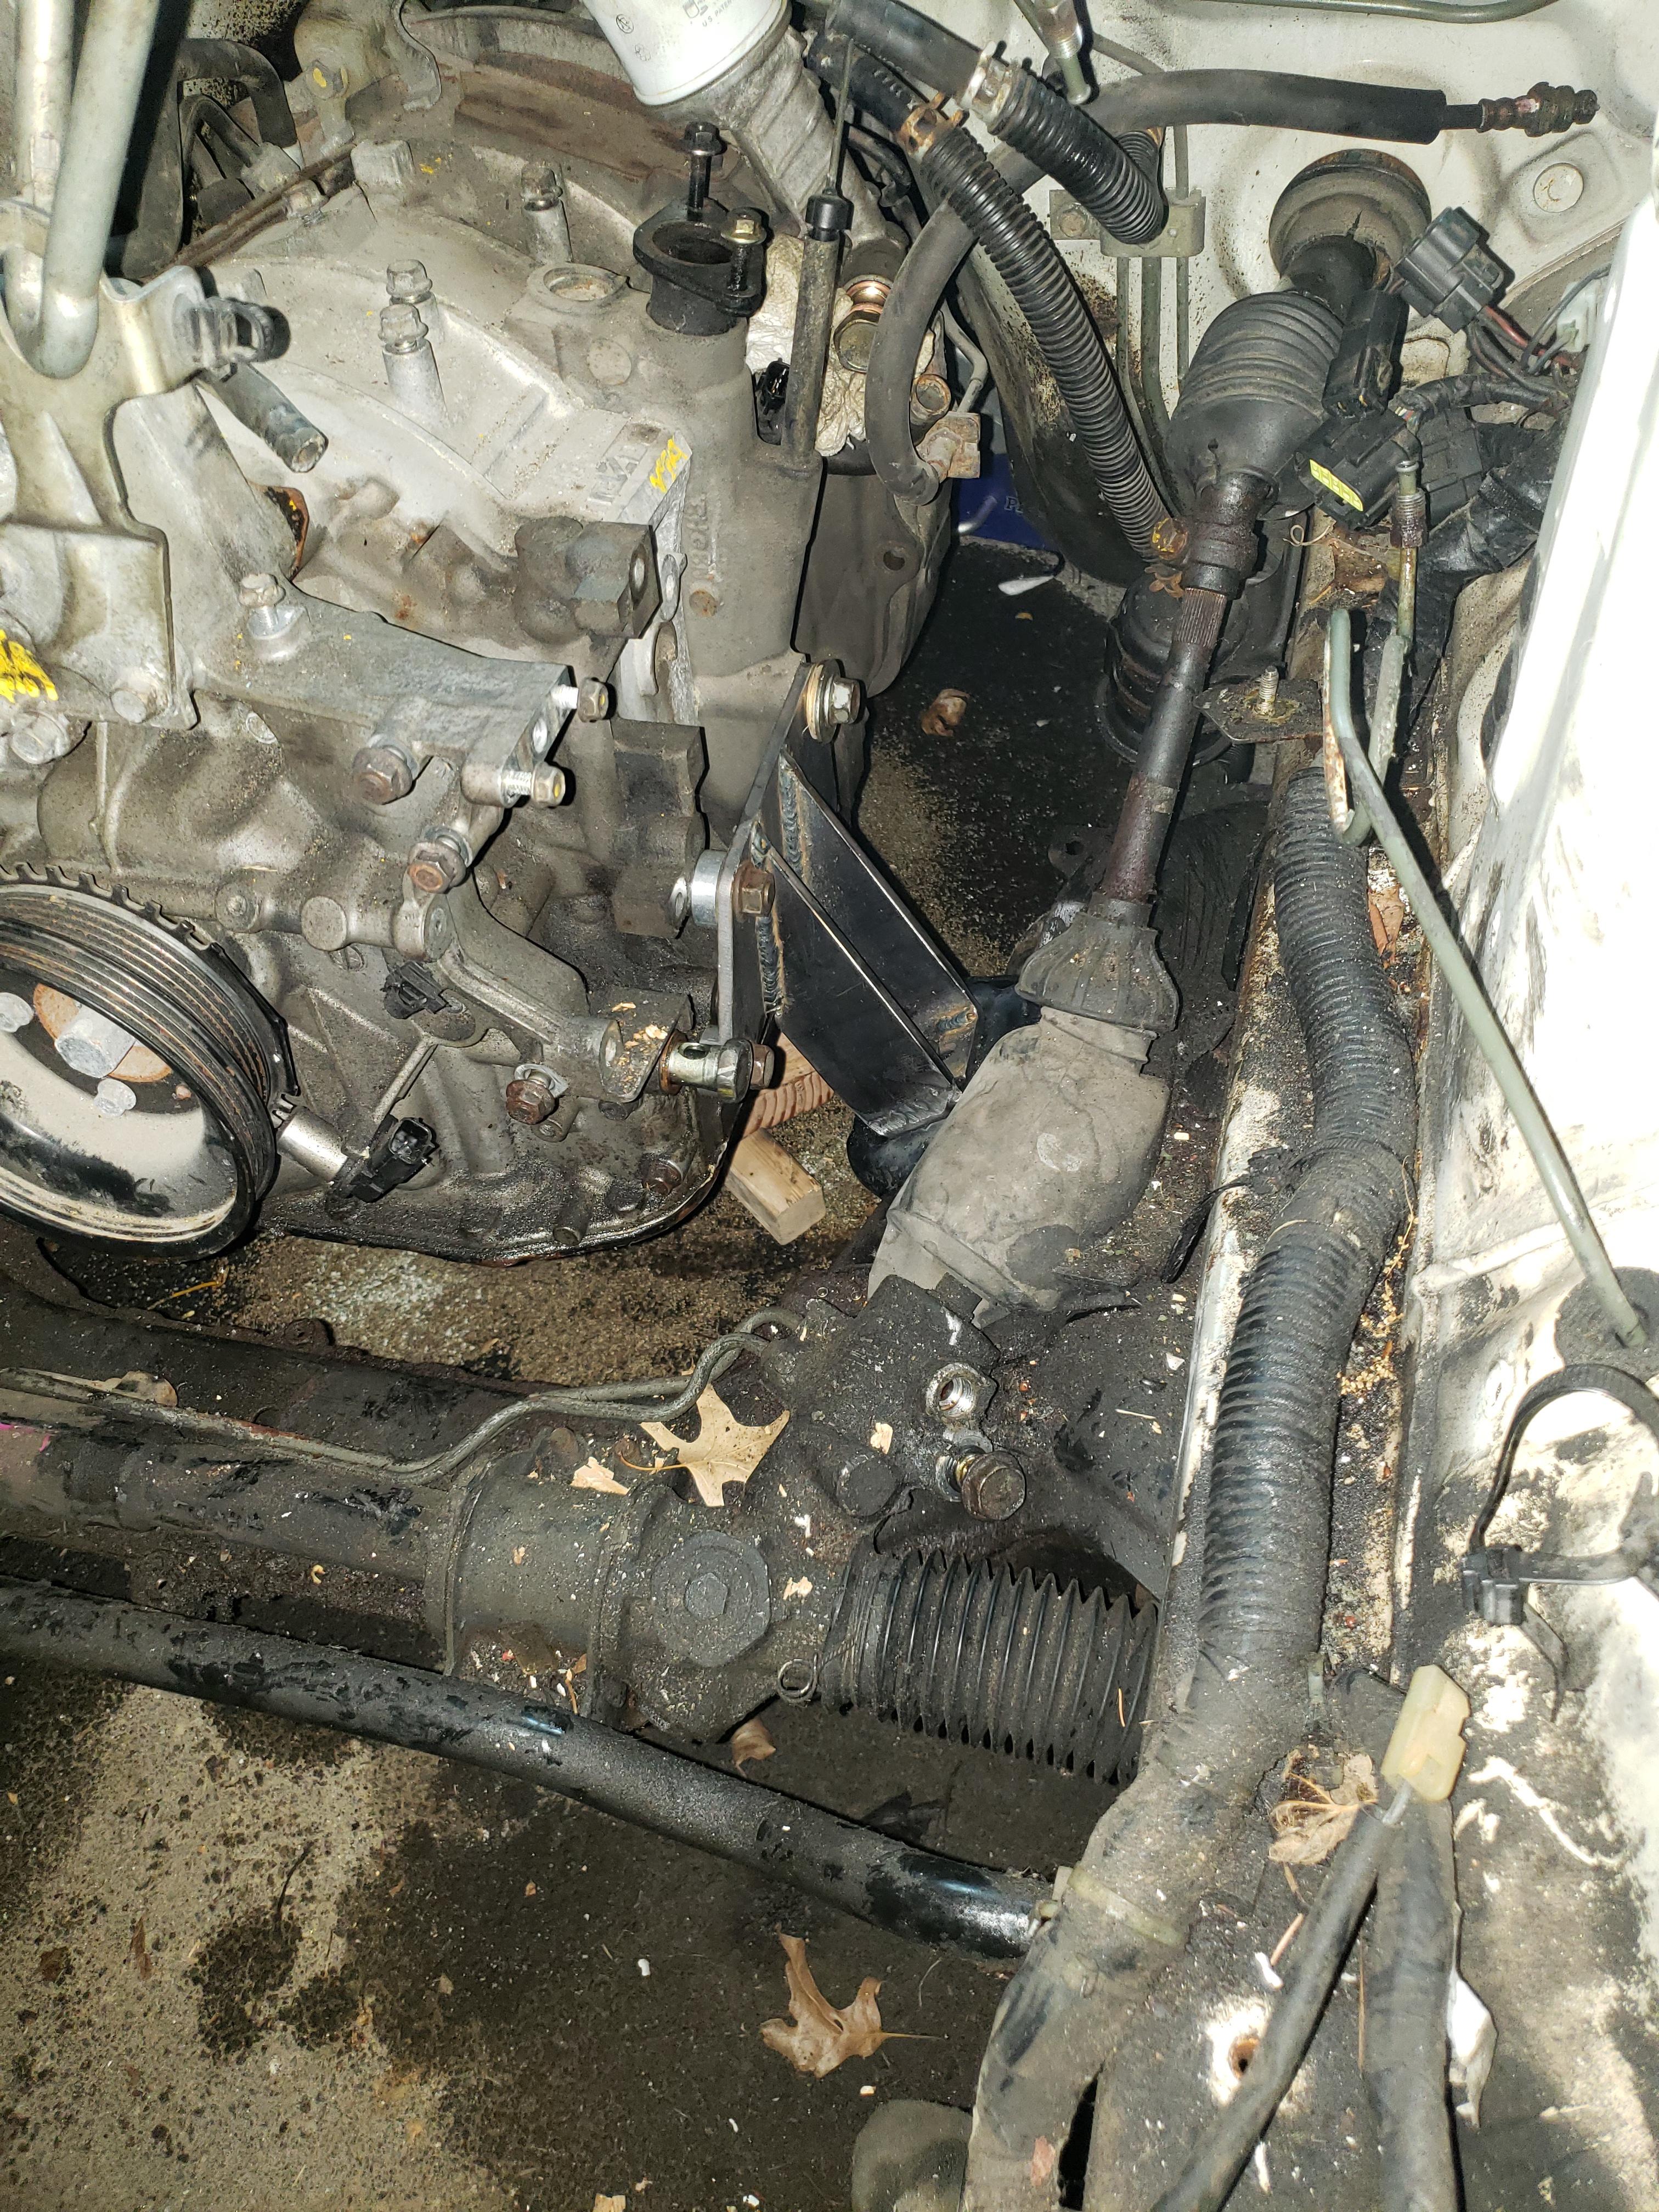
New position of the motor. This route was absolutely the right decision.
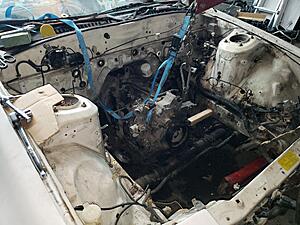
shifter sits perfect now. Don't worry, I'll replace the cut out sections as well.

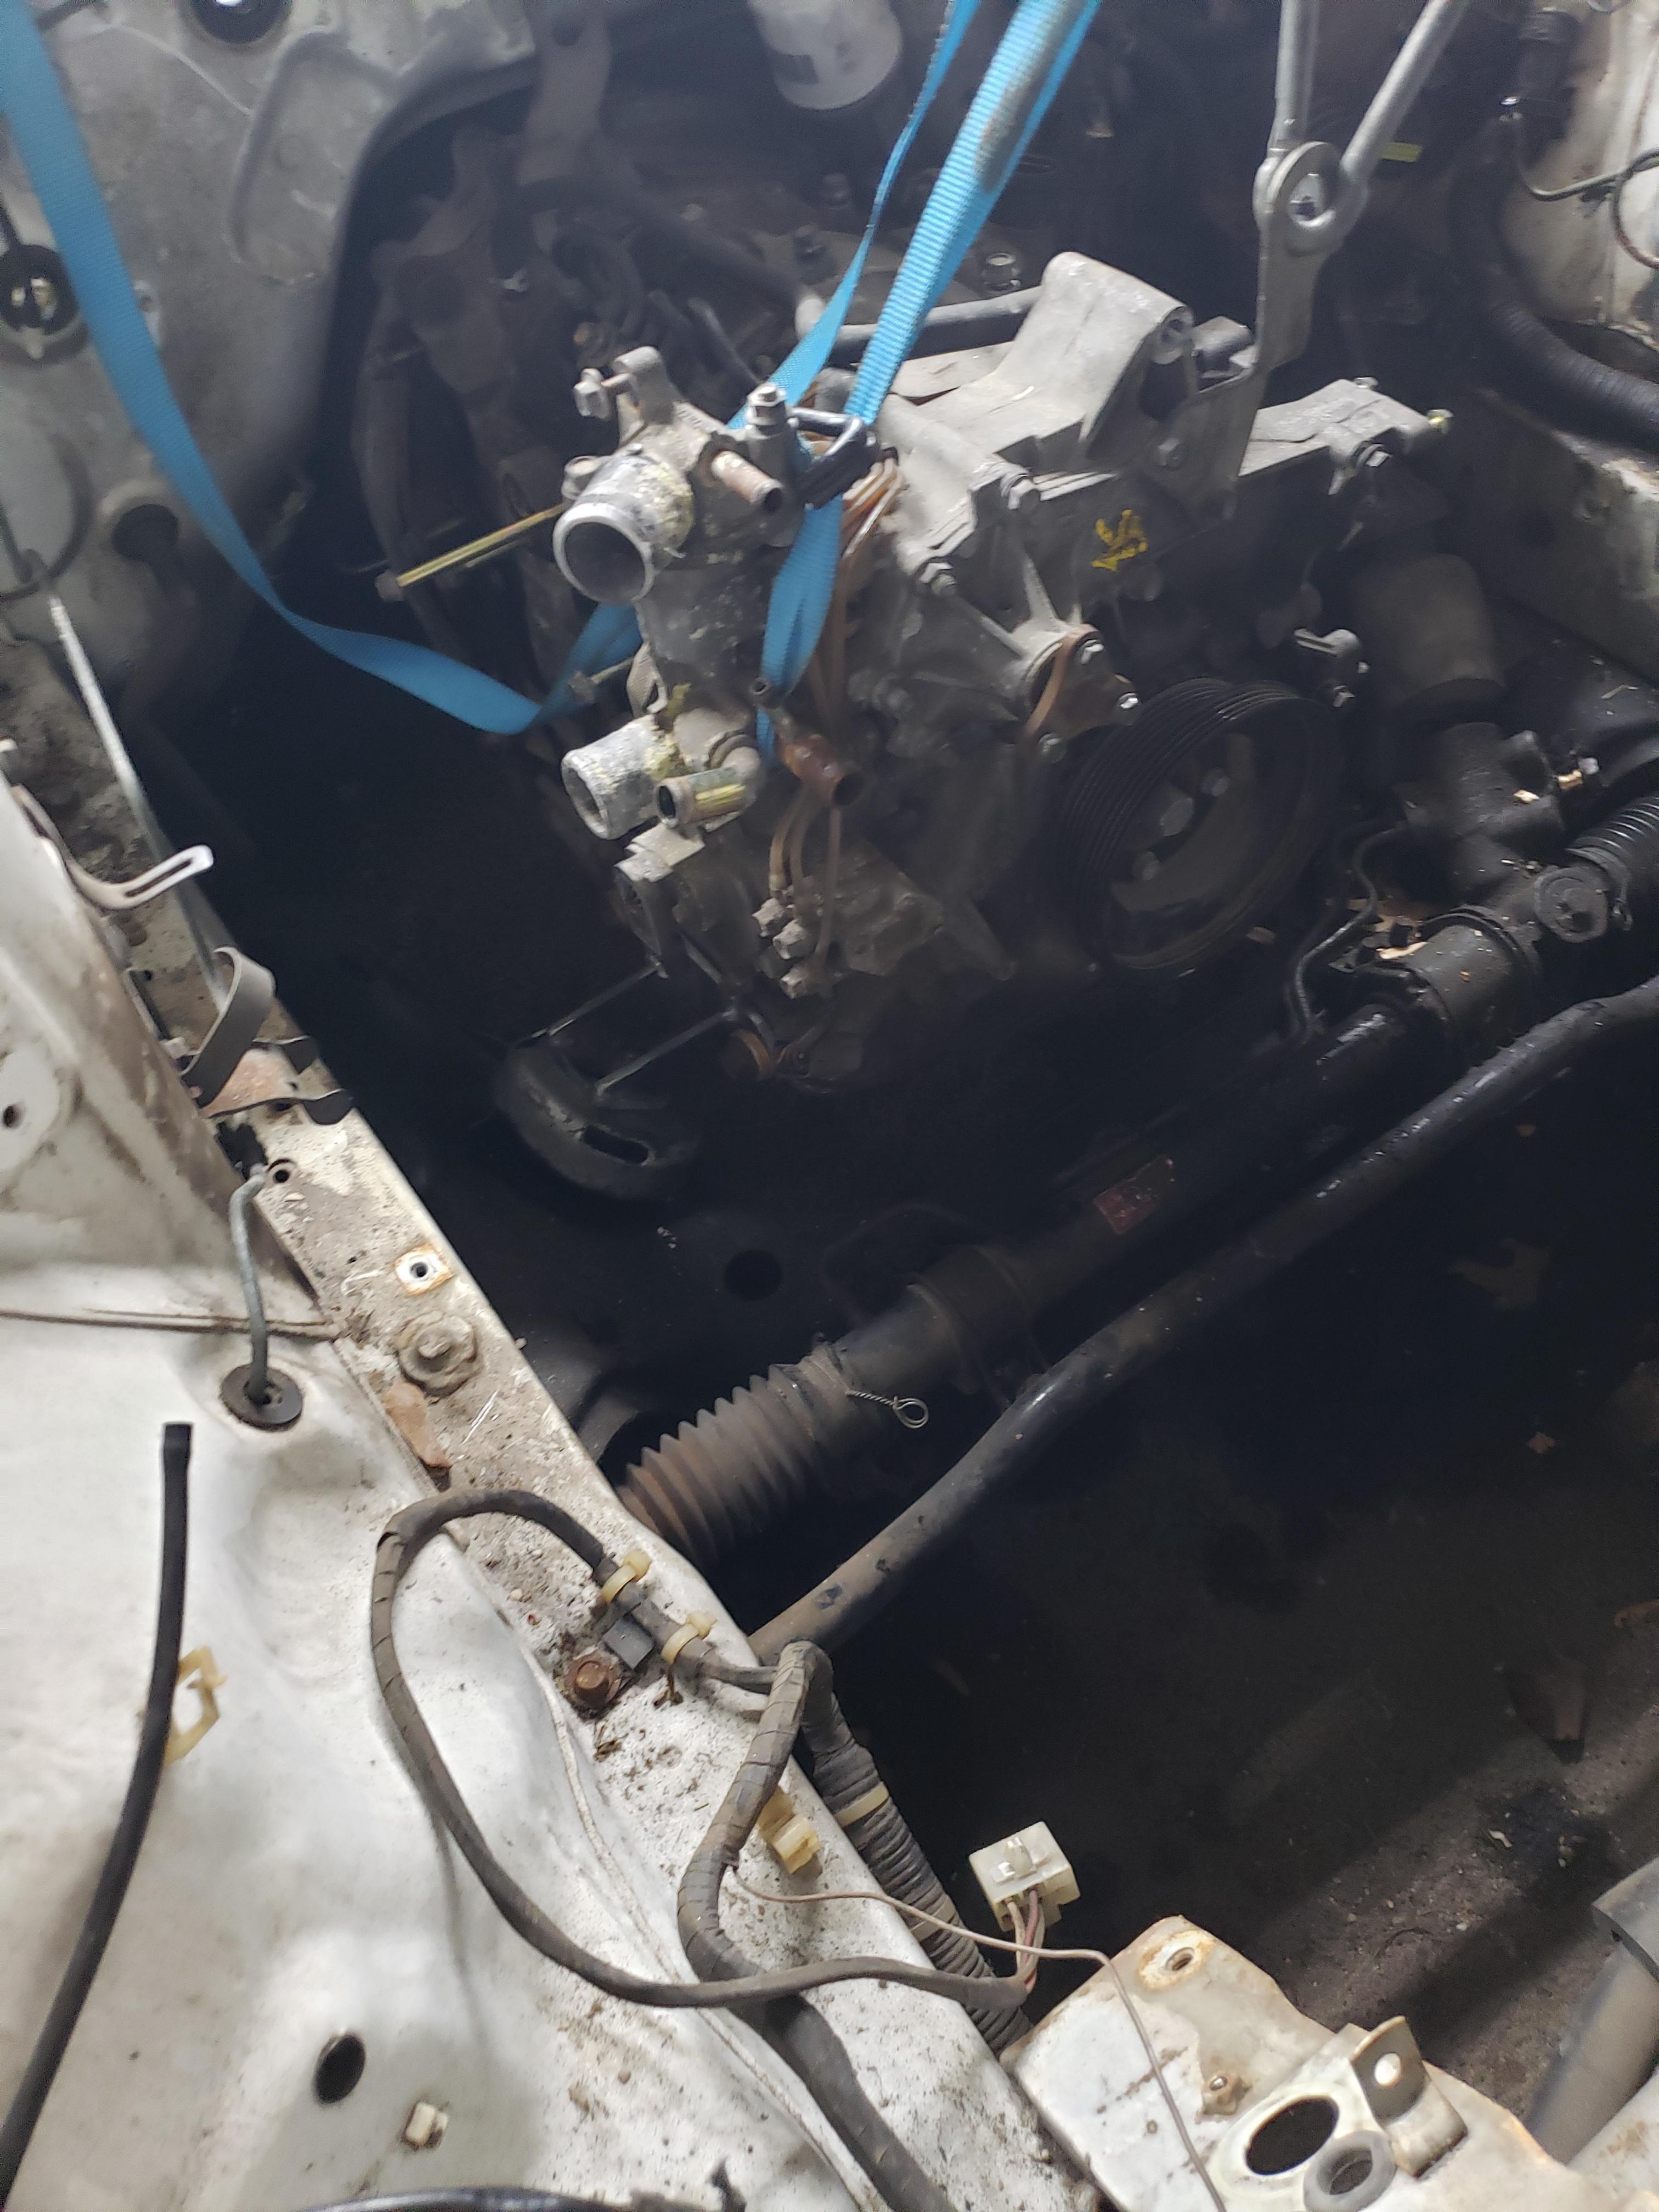
I had been wondering what oil pan I would use. Seems like everyone who's done this before either used a modified GSL-SE pan or made a custom one. Not sure why there's plenty of clearance around everything.
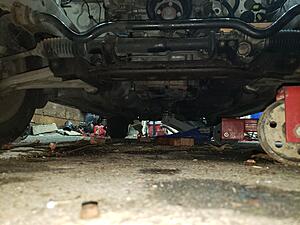
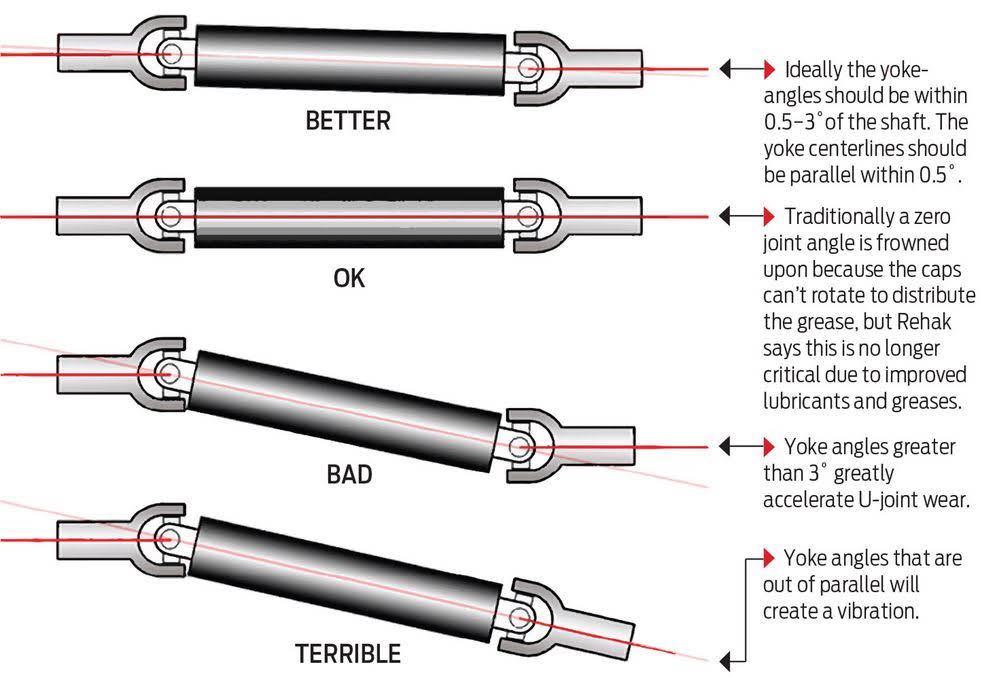
just need to make sure the tranny and rear end are aligned correctly. Found this helpful cheat sheet. Once everything is aligned I'll double check the driveshaft length an weld it up again. I MAY go ahead and swap out the rear end and order a custom driveshaft still. The u-joints on this diff are pretty questionable already


not sketchy at all....

driveshaft is too short to fit thru the lathe so some creativity had to be used to square up the end again.
New position of the motor. This route was absolutely the right decision.


shifter sits perfect now. Don't worry, I'll replace the cut out sections as well.

I had been wondering what oil pan I would use. Seems like everyone who's done this before either used a modified GSL-SE pan or made a custom one. Not sure why there's plenty of clearance around everything.

just need to make sure the tranny and rear end are aligned correctly. Found this helpful cheat sheet. Once everything is aligned I'll double check the driveshaft length an weld it up again. I MAY go ahead and swap out the rear end and order a custom driveshaft still. The u-joints on this diff are pretty questionable already

Rotary Freak


Joined: Jul 2016
Posts: 1,838
Likes: 599
From: Beeton, Ontario
Looking good, shifter is in the perfect location 
I would probably get it balanced even if it doesn't technically need it. Just in case. I don't want to find out what happens when you have a driveshaft imbalance...
I would probably get it balanced even if it doesn't technically need it. Just in case. I don't want to find out what happens when you have a driveshaft imbalance...

Thread Starter
Joined: Mar 2002
Posts: 1,726
Likes: 540
From: binghamton, ny
Yup, I sure did cut thru one of the weights. I'm going to replace the ujoints while its out, so ill likely get it balanced after that. I'm pretty sure I have a local company that does it.
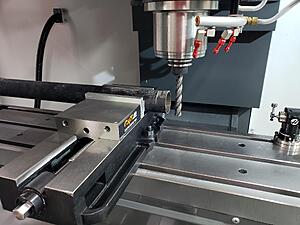
I have lots of fun toys that are going to help me out. You may see another cool one posted tonight if I get the chance to cut my motor mount plates.
I have lots of fun toys that are going to help me out. You may see another cool one posted tonight if I get the chance to cut my motor mount plates.
Thread Starter
Joined: Mar 2002
Posts: 1,726
Likes: 540
From: binghamton, ny
Who made a CNC plasma cutter for projects just like this? This guy...

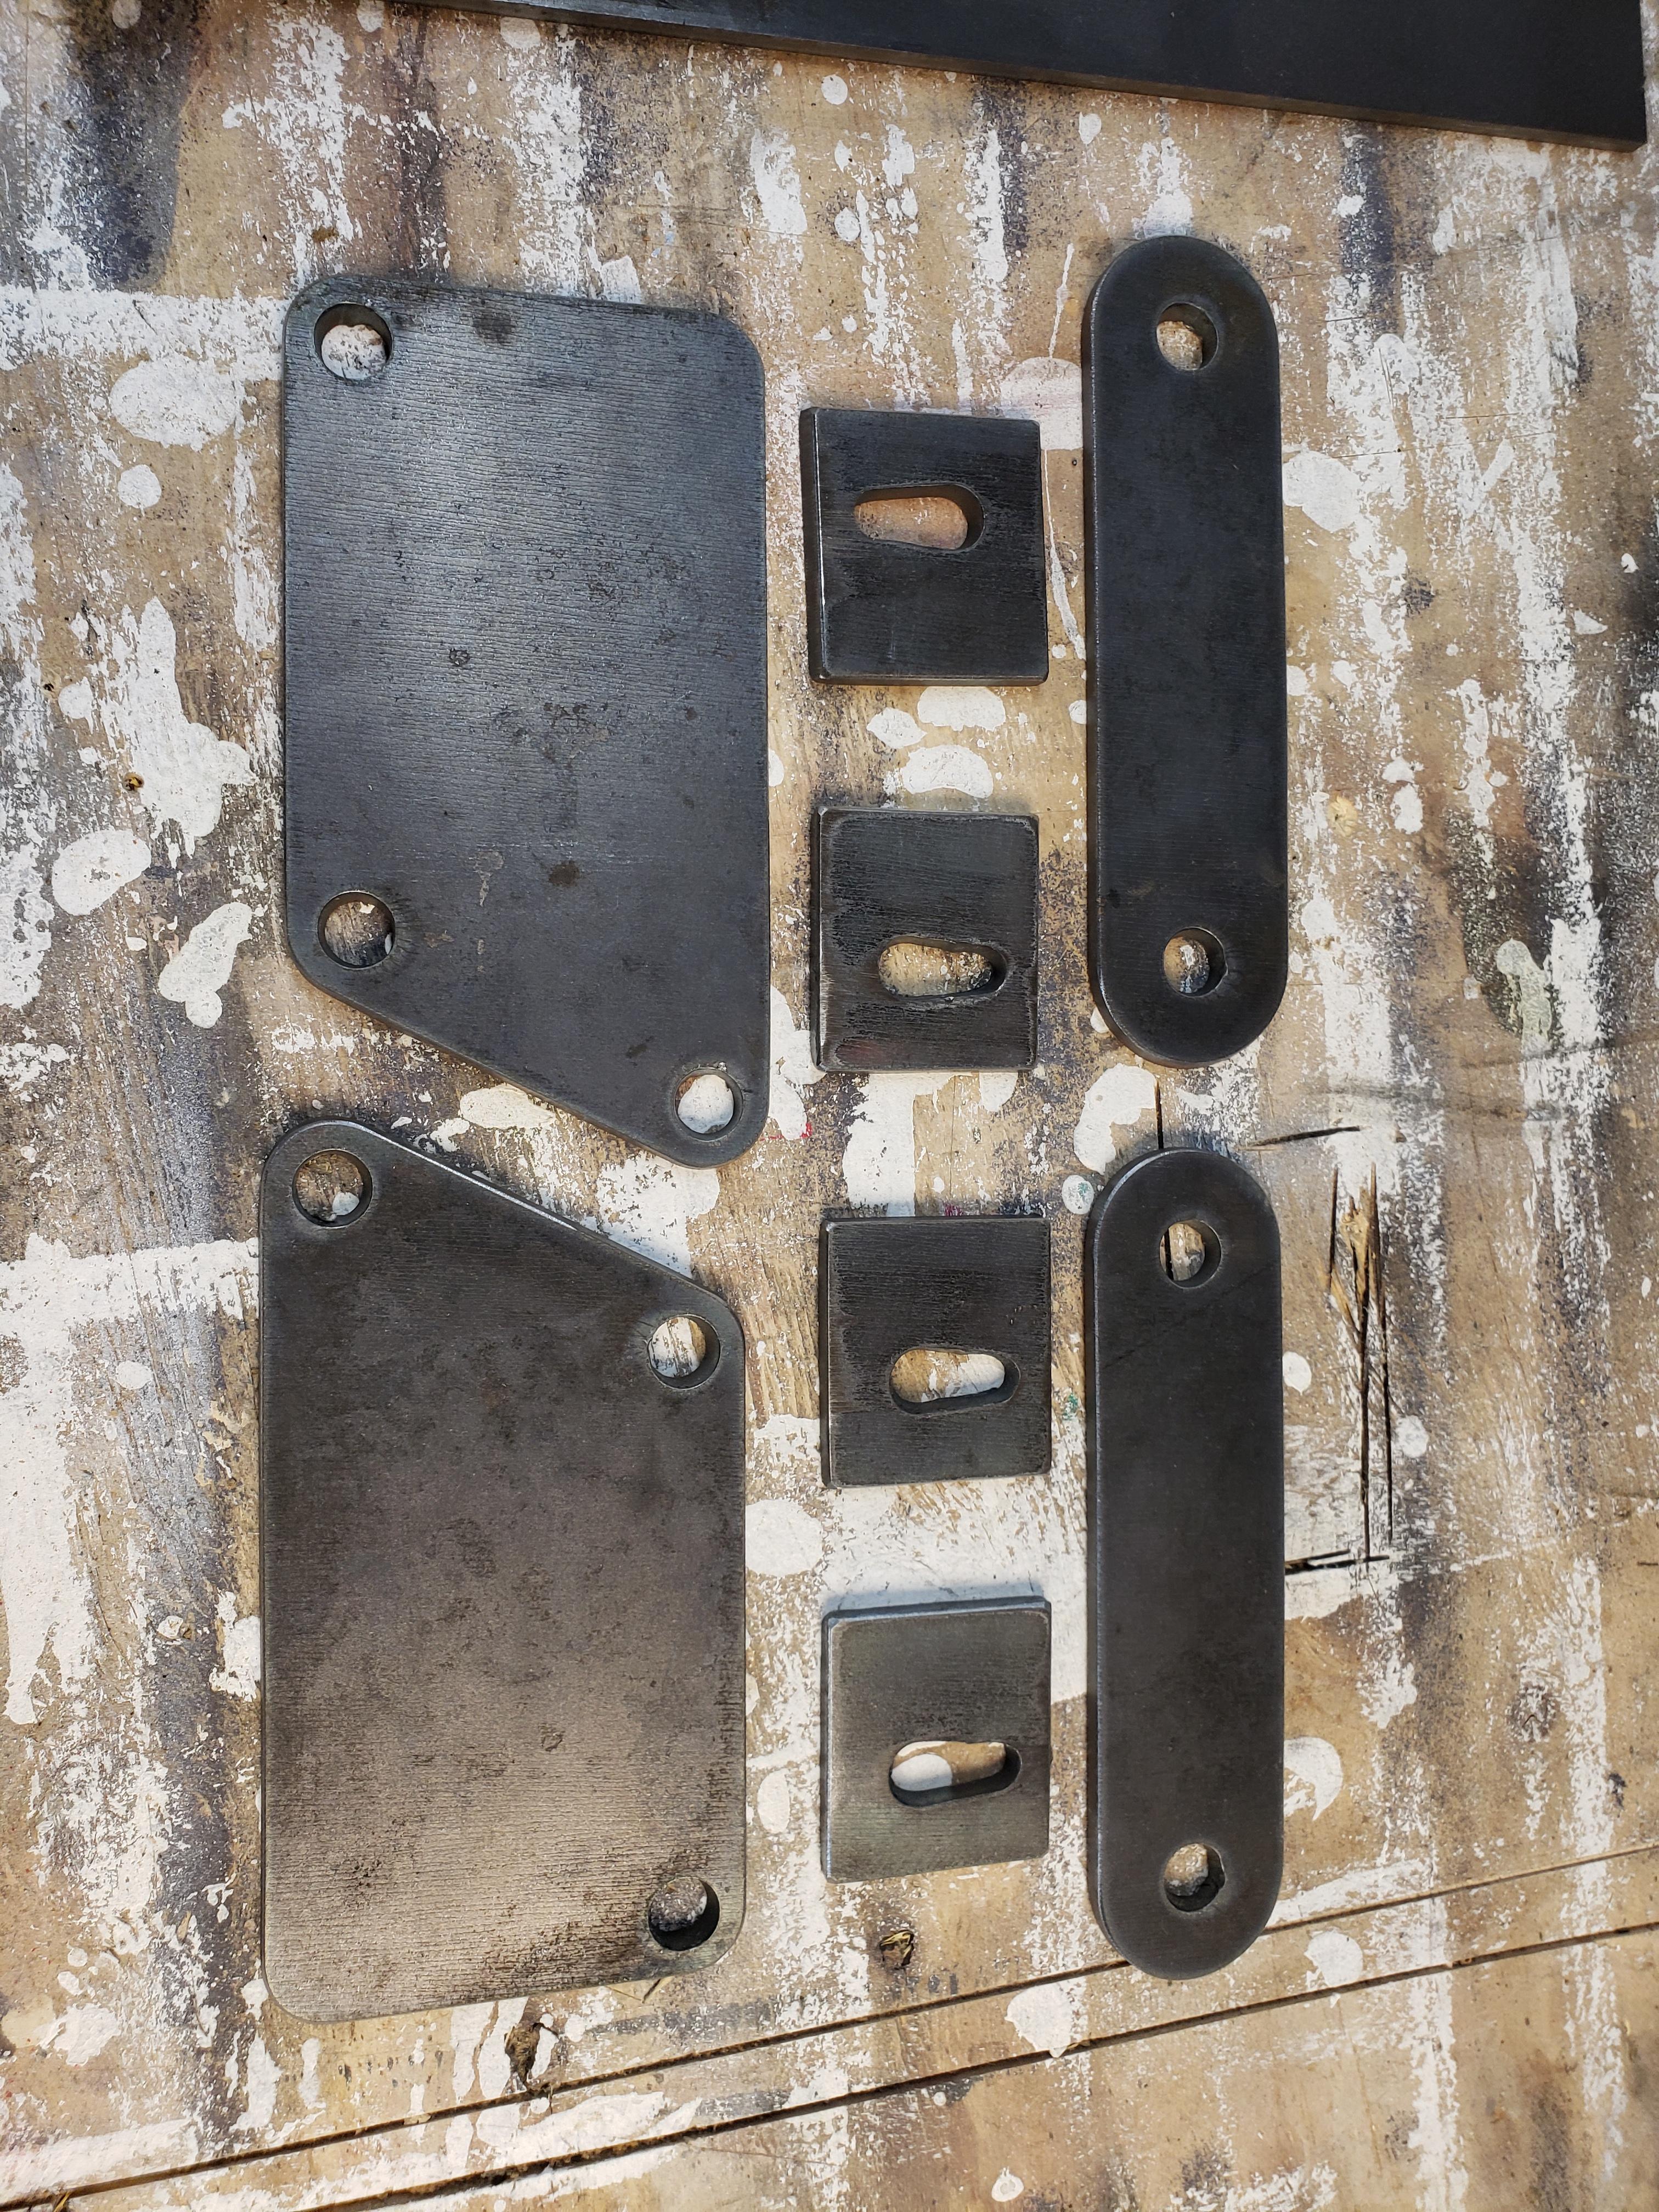
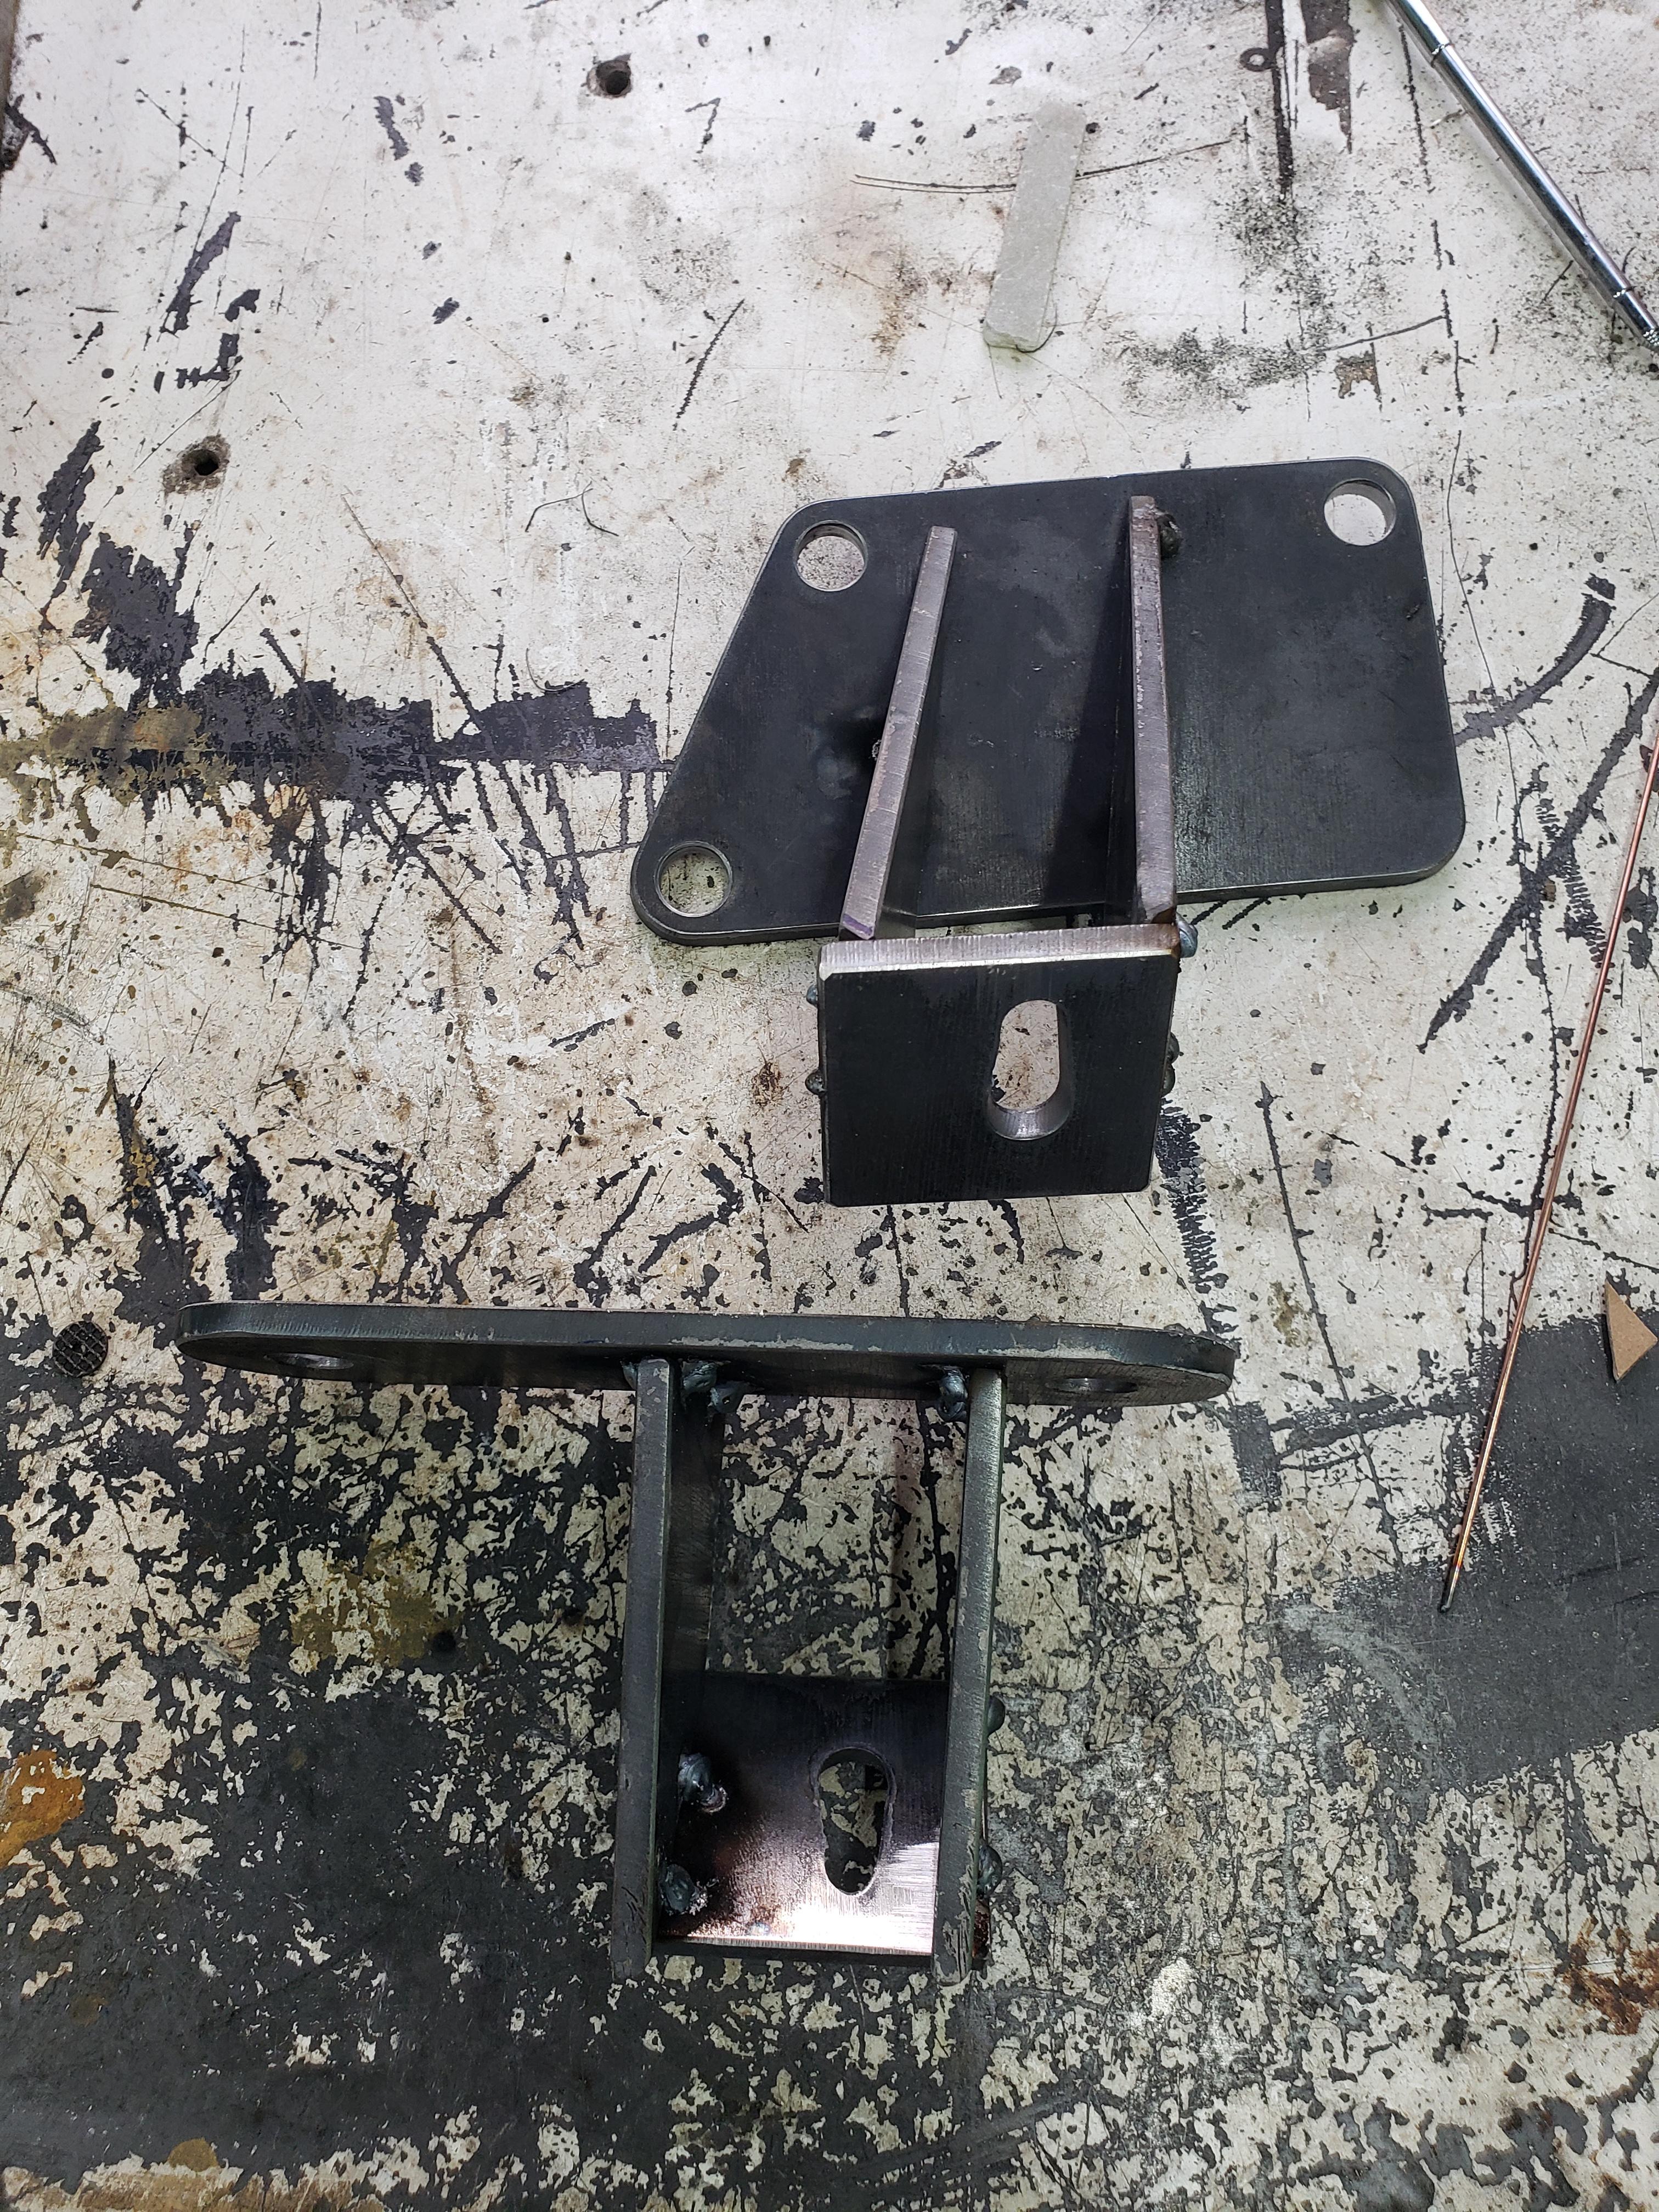
2 sets of motor mounts ready for mock up. Still need to cut a few more pieces, but can't do that until the engine is in the correct and final location and i can get a few more measurements. Hopefully this weekend i'll have them finished up.

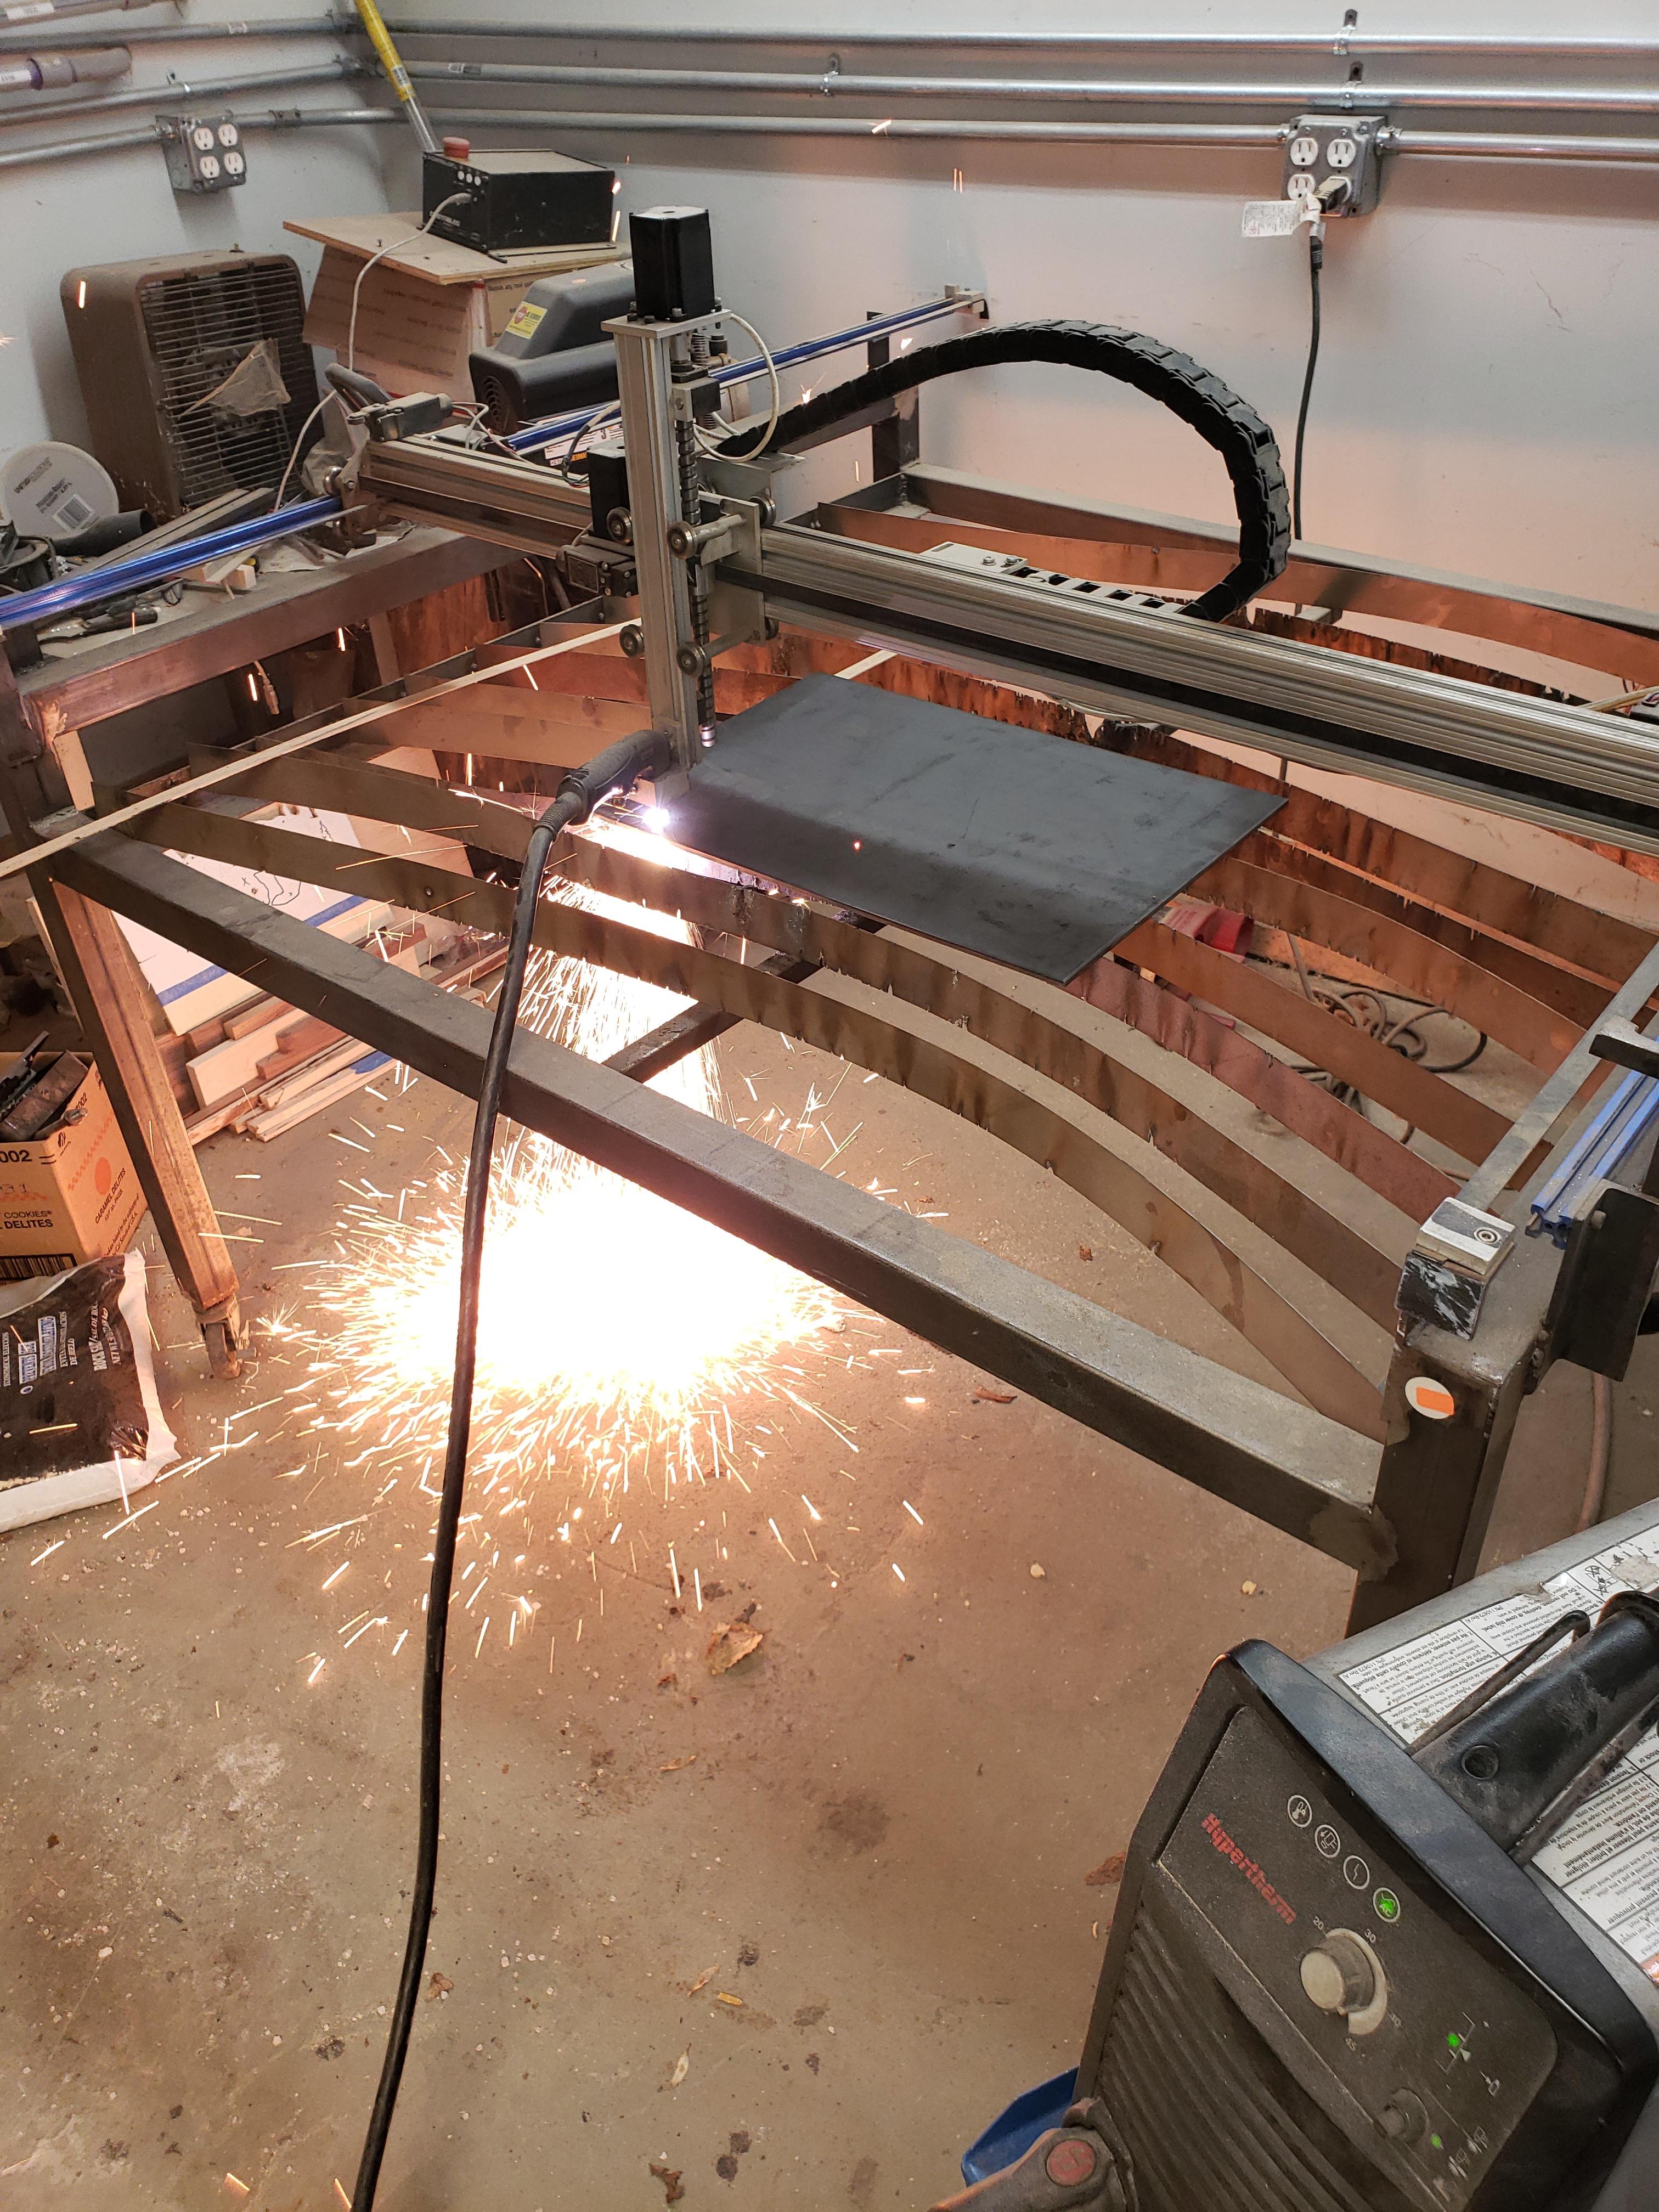
2 sets of motor mounts ready for mock up. Still need to cut a few more pieces, but can't do that until the engine is in the correct and final location and i can get a few more measurements. Hopefully this weekend i'll have them finished up.
Thread Starter
Joined: Mar 2002
Posts: 1,726
Likes: 540
From: binghamton, ny
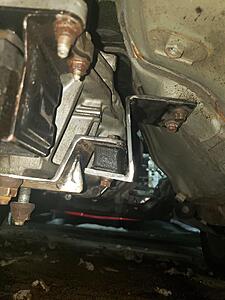
Made more progress on the car this weekend. Friday night I had welded up the motor mounts. I bolted the plasma cut parts to the motor mounts and the engine and tack welded everything in place in the car.
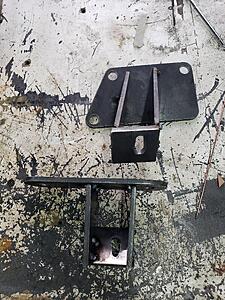
Not sure how it happened but after removing the mounts and welding them up; when I reinstalled the engine was sitting about 1 inch too far back...In this picture you can kind of see the rear engine lift bracket is right up against the firewall. disappointment....
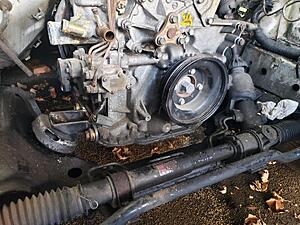
not that it really mattered, there was a fairly fatal flaw with my original design.....who needs to access the lower spark plug anyways right?
So this is why I cut two sets to begin with. Did it over again, and it's just about perfect now. AND i can access the spark plug now.

Almost done with the tranny mounts as well. Ran out of welding wire, so maybe next weekend I can get it finished.
Not sure how it happened but after removing the mounts and welding them up; when I reinstalled the engine was sitting about 1 inch too far back...In this picture you can kind of see the rear engine lift bracket is right up against the firewall. disappointment....
not that it really mattered, there was a fairly fatal flaw with my original design.....who needs to access the lower spark plug anyways right?
So this is why I cut two sets to begin with. Did it over again, and it's just about perfect now. AND i can access the spark plug now.


Almost done with the tranny mounts as well. Ran out of welding wire, so maybe next weekend I can get it finished.

Senior Member
Joined: Apr 2021
Posts: 393
Likes: 70
From: GA
Just wanted to say I found a center section complete with heater core and valve assembly from a 91 on yahoo Japan. It was only $50 but the shipping was $150 lol. It showed up in a few days and looks way nicer than what was in my car. Just bought it for the valve assembly but I may clean it up and use it.
Thread Starter
Joined: Mar 2002
Posts: 1,726
Likes: 540
From: binghamton, ny
Just wanted to say I found a center section complete with heater core and valve assembly from a 91 on yahoo Japan. It was only $50 but the shipping was $150 lol. It showed up in a few days and looks way nicer than what was in my car. Just bought it for the valve assembly but I may clean it up and use it.
Senior Member
Joined: Apr 2021
Posts: 393
Likes: 70
From: GA
If I can find it, sure. I know it's broken as I went to take it apart and the tabs on the copper broke. Really it's just an elbow with a rubber plunger and a seal around the arm that moves it.
All you really need is a mounting bracket for one of these
And you can replace the hard line with hose. That was my plan until I nabbed a replacement.
All you really need is a mounting bracket for one of these
And you can replace the hard line with hose. That was my plan until I nabbed a replacement.
Thread Starter
Joined: Mar 2002
Posts: 1,726
Likes: 540
From: binghamton, ny
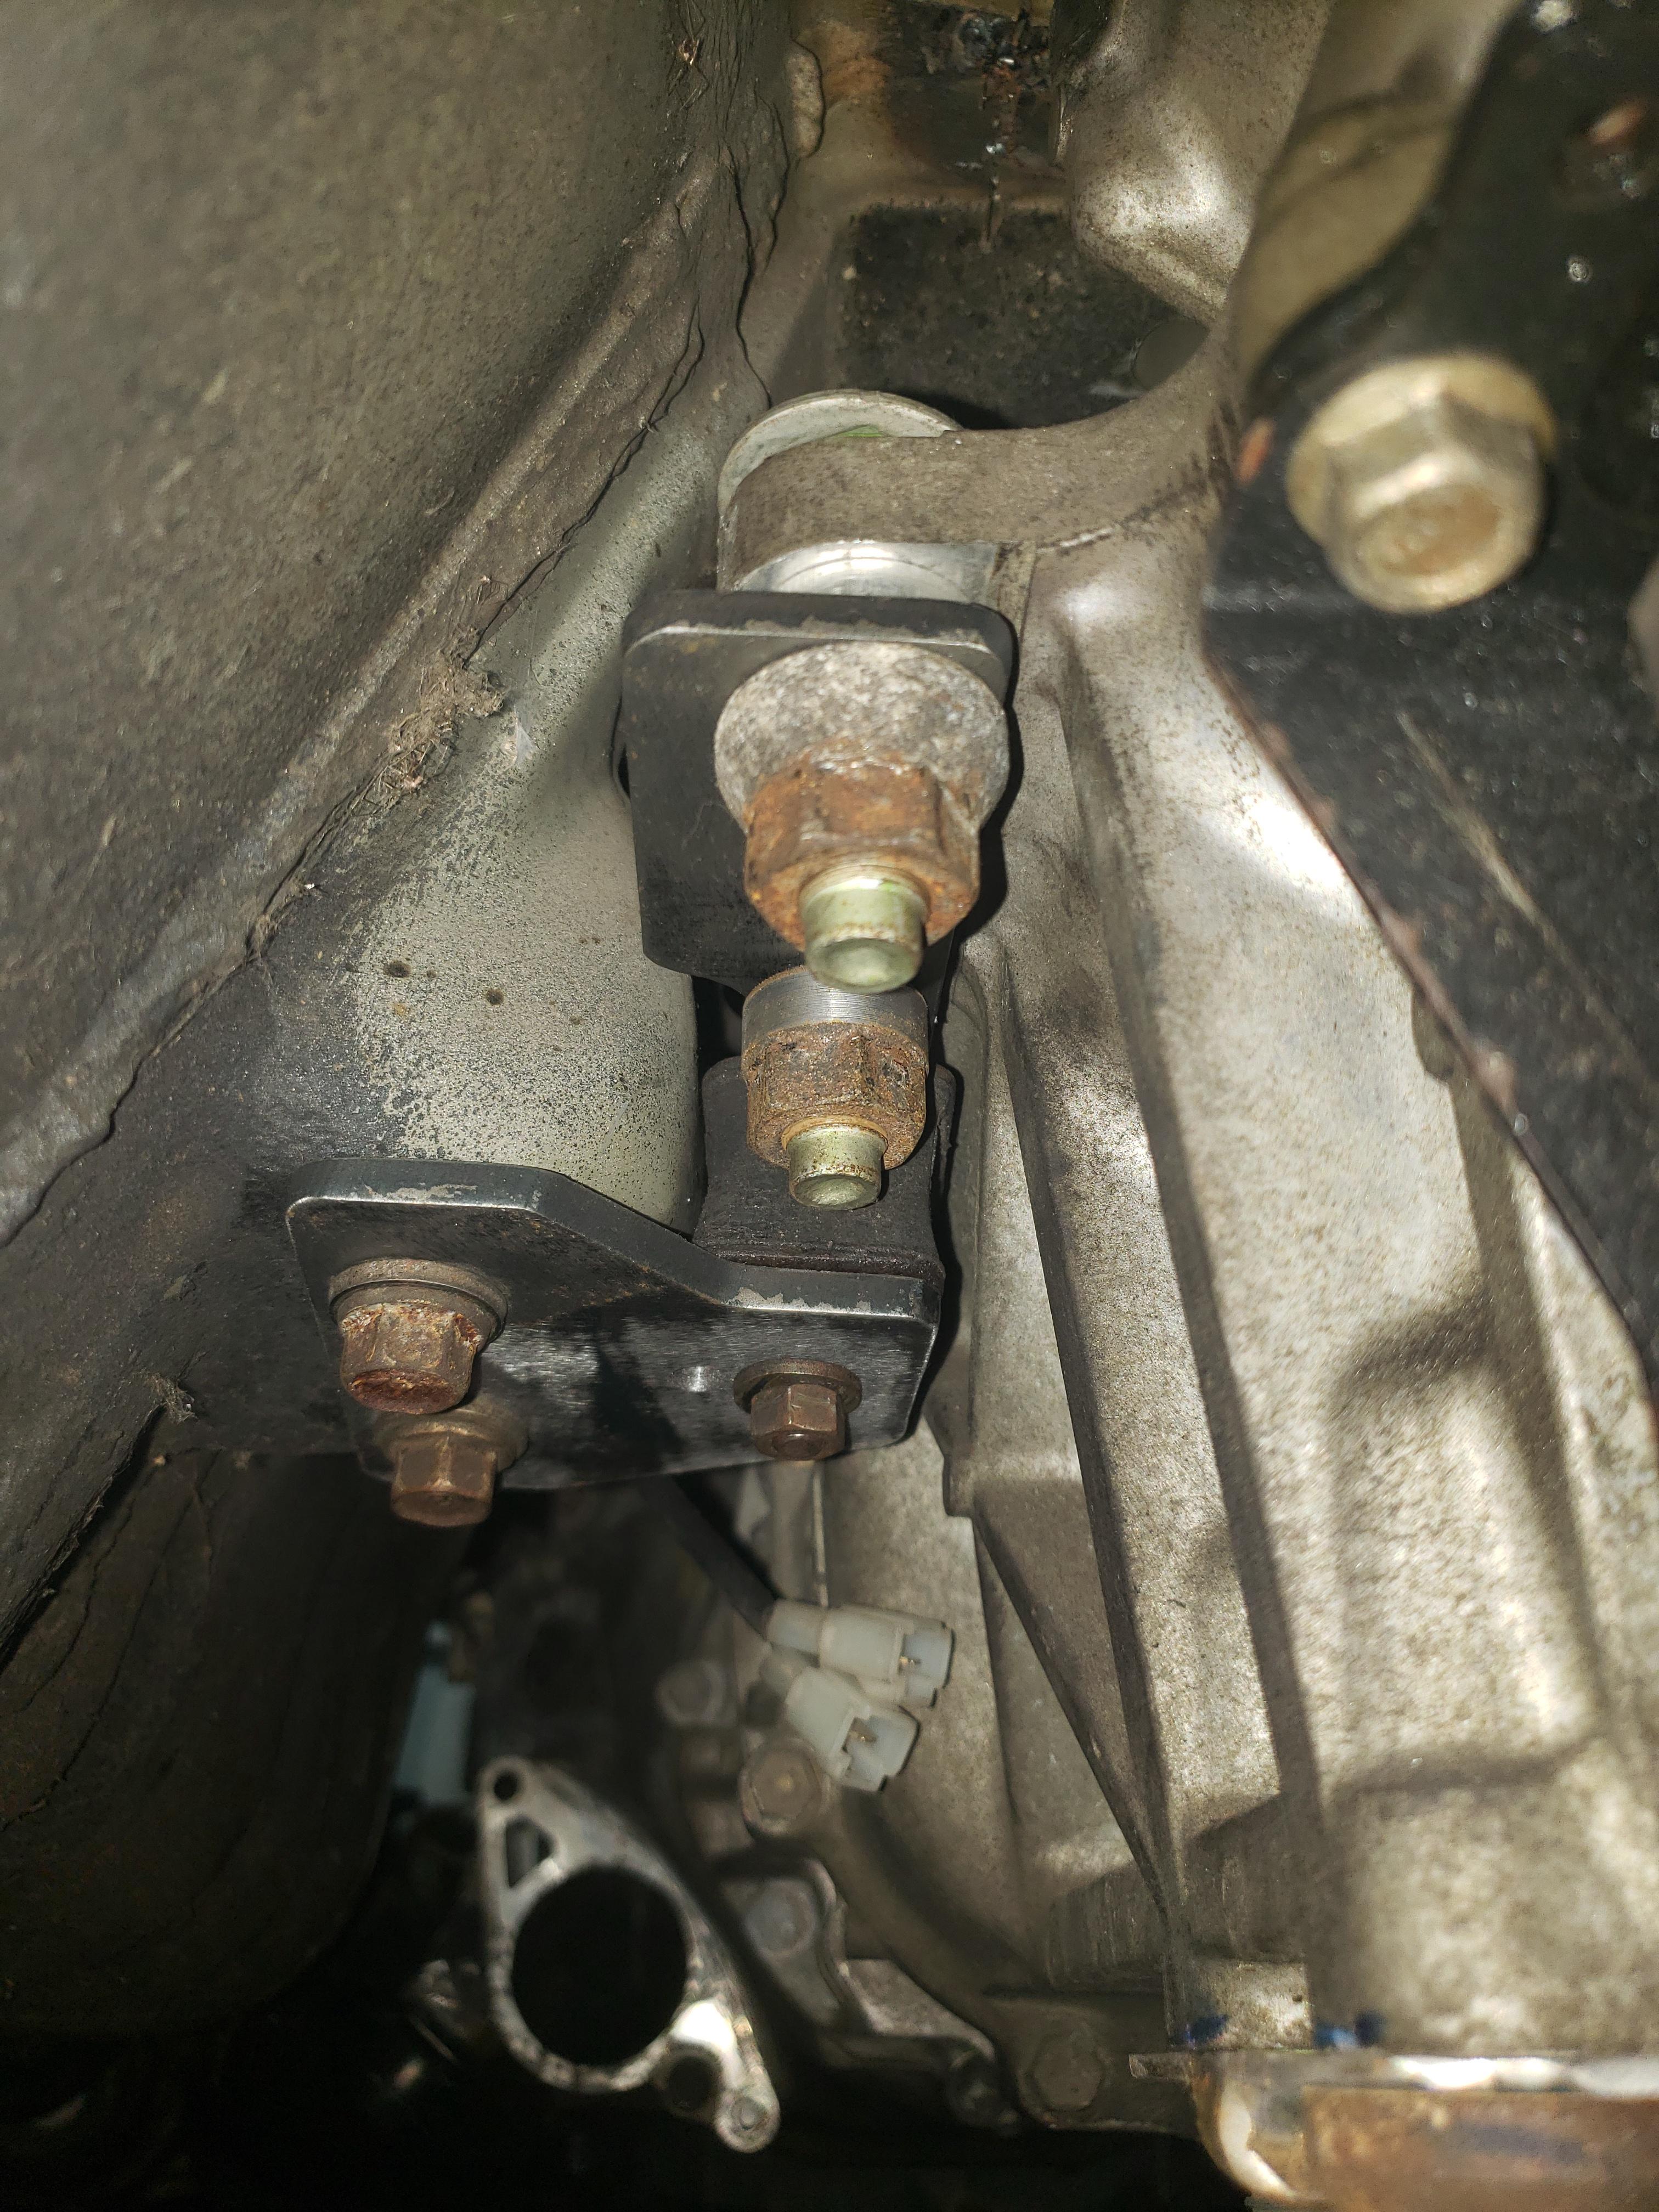
Engine and trans mounts are done. It's in and fully supported on it's own! Trans mounts utilize the stock bushings, and i'm hoping the passenger side mount won't get in the way of the exhaust.
Here's the driver's side. If I were too make it over again i'd push the bushing forward a bit. you can see i had to turn down one of the nuts to get the clearance I wanted. Live and learn i guess.

passenger side. I'll probably reinforce it a bit once i know where the exhaust sits.
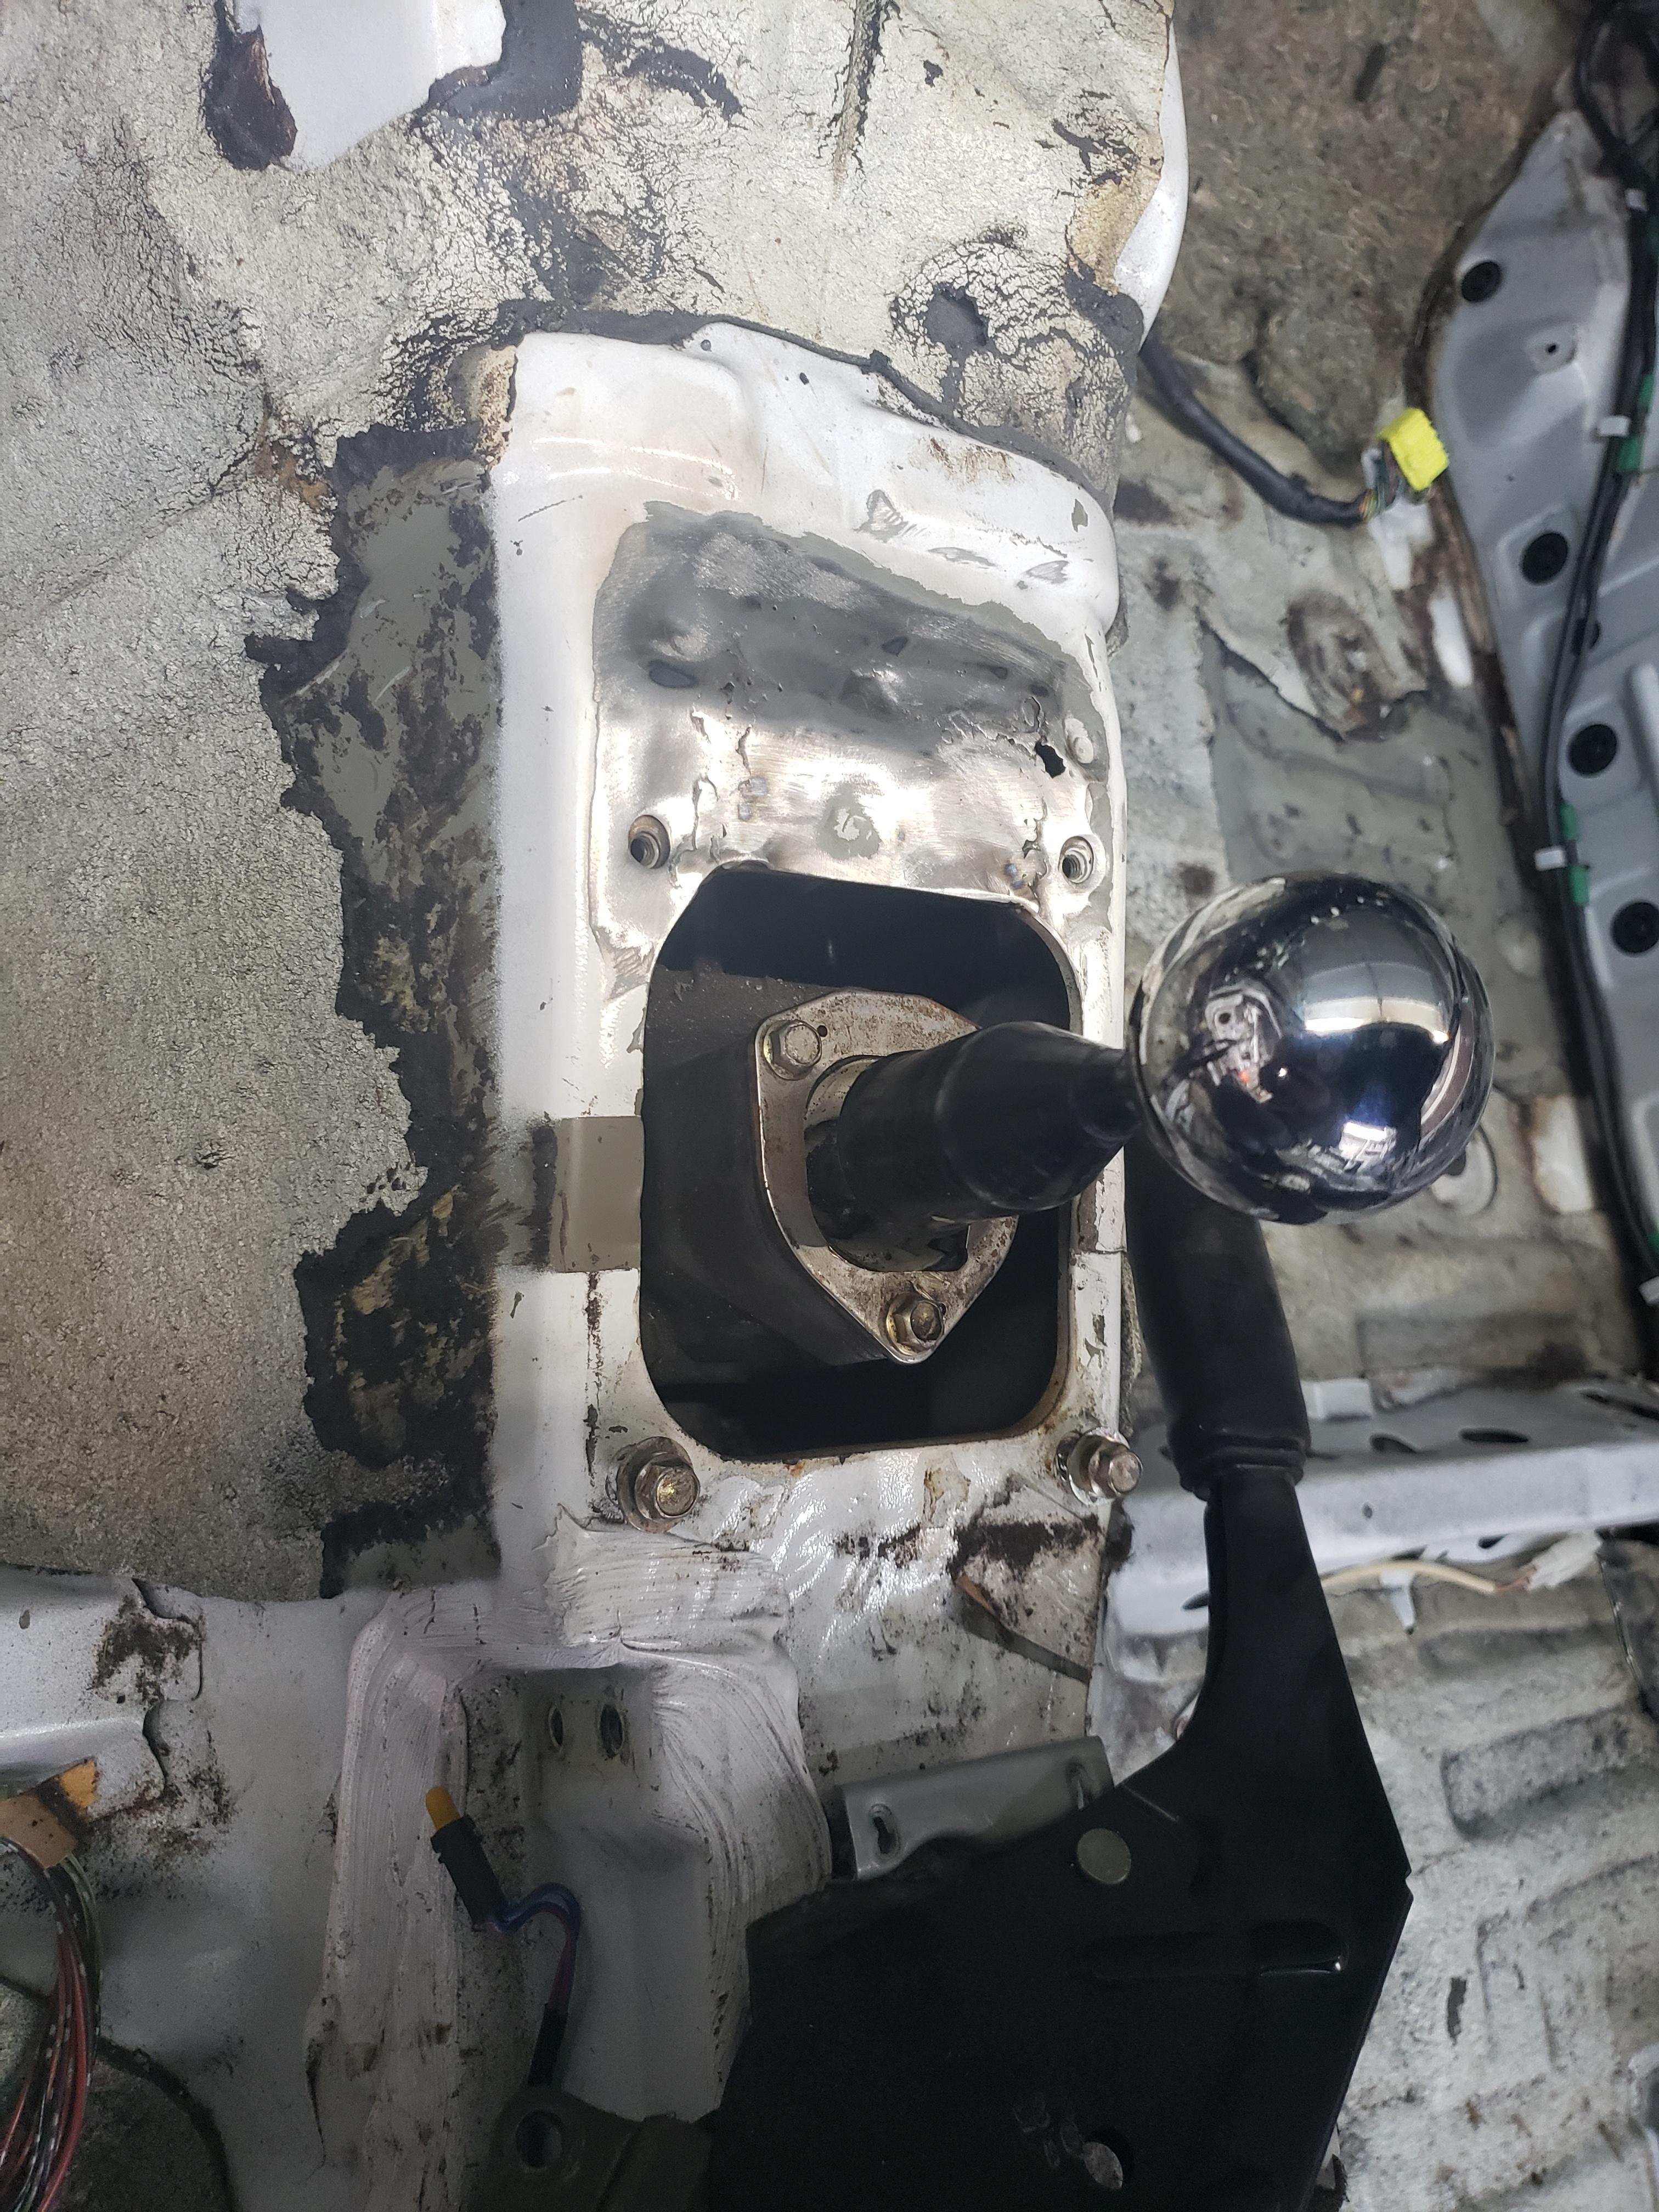
shifter is right where it should be now. I also started to patch the holes i cut out previously. Still have a little touch up work to do.
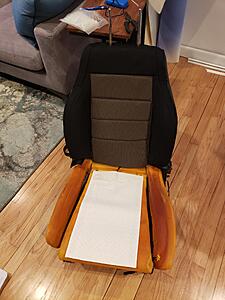
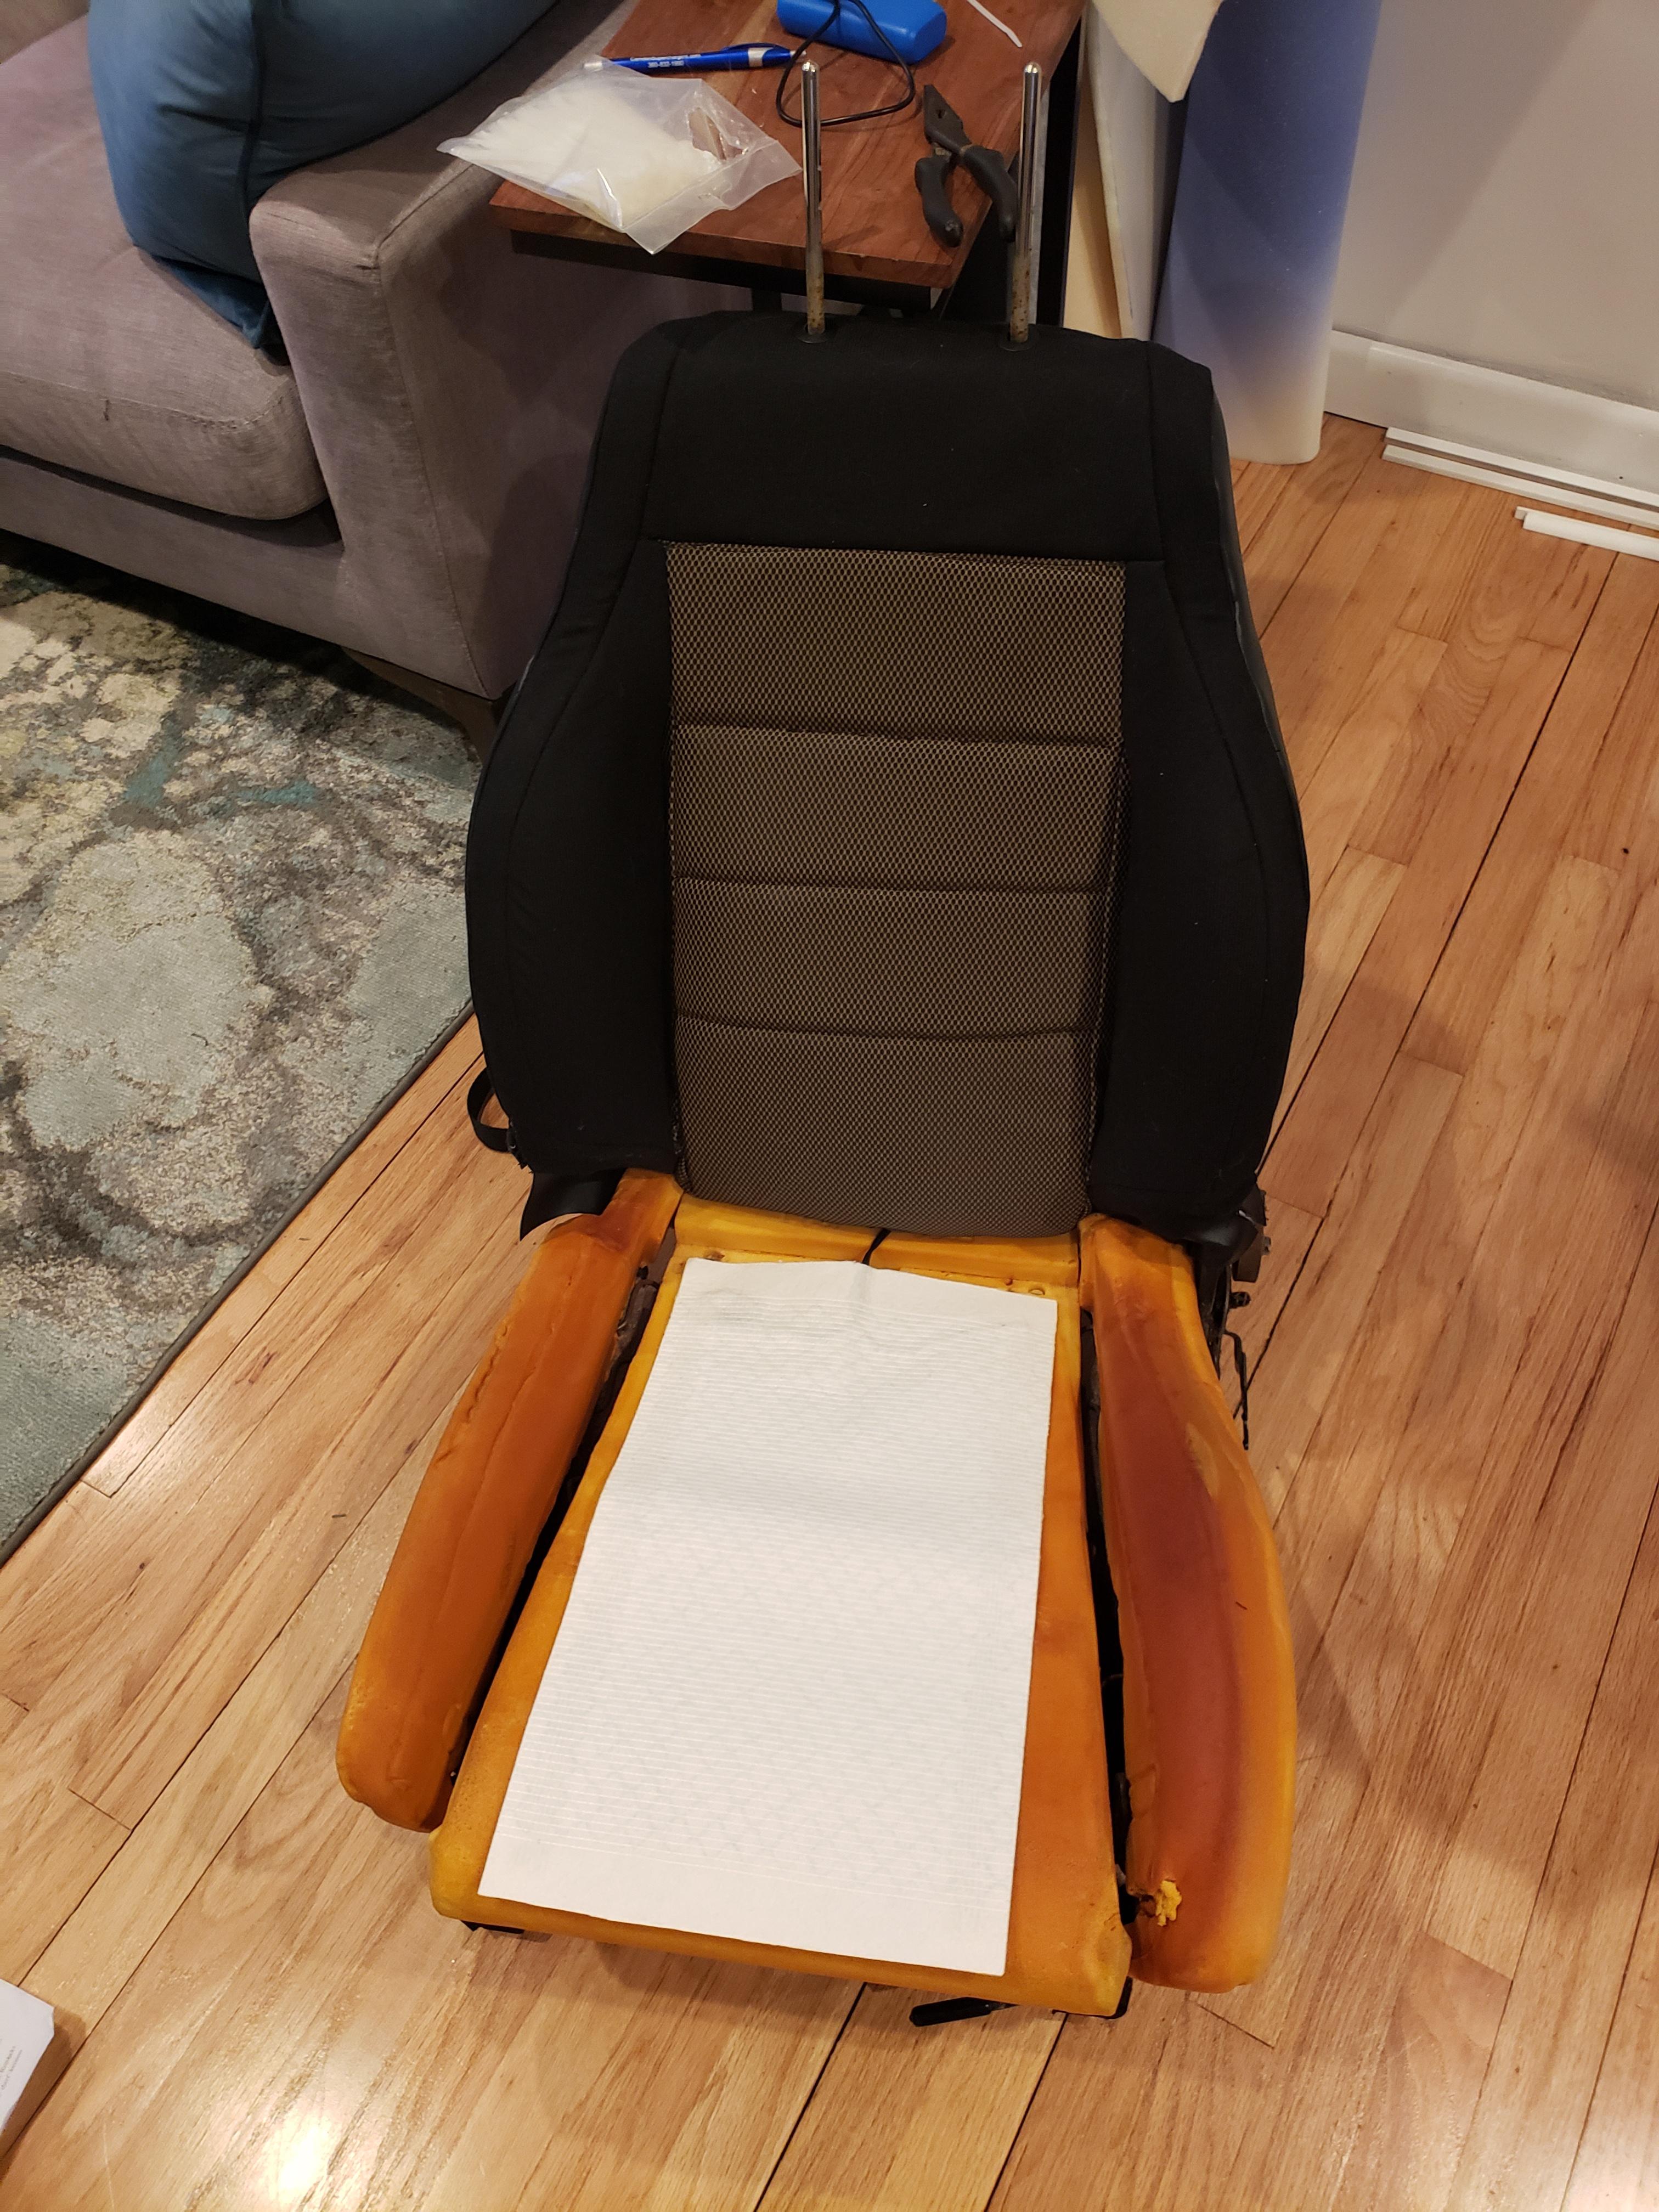
Also worked on the seats a little bit. first of 4 covers is 90% done. not perfect by any means, but at least it doesn't have a giant rip down the side. Also adding heated seats while I'm at it.
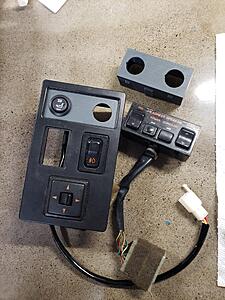
speaking of heated seats. I 3d printed a mount for the controls. I bought a vert center console which has a removable switch for the seat speakers. I think the FCs with adjustable suspension also have a removable switch. Either way, it's 3d printed from ABS so it'll have no problem in the hot summer sun.
Here's the driver's side. If I were too make it over again i'd push the bushing forward a bit. you can see i had to turn down one of the nuts to get the clearance I wanted. Live and learn i guess.
passenger side. I'll probably reinforce it a bit once i know where the exhaust sits.

shifter is right where it should be now. I also started to patch the holes i cut out previously. Still have a little touch up work to do.
Also worked on the seats a little bit. first of 4 covers is 90% done. not perfect by any means, but at least it doesn't have a giant rip down the side. Also adding heated seats while I'm at it.
speaking of heated seats. I 3d printed a mount for the controls. I bought a vert center console which has a removable switch for the seat speakers. I think the FCs with adjustable suspension also have a removable switch. Either way, it's 3d printed from ABS so it'll have no problem in the hot summer sun.

Thread Starter
Joined: Mar 2002
Posts: 1,726
Likes: 540
From: binghamton, ny
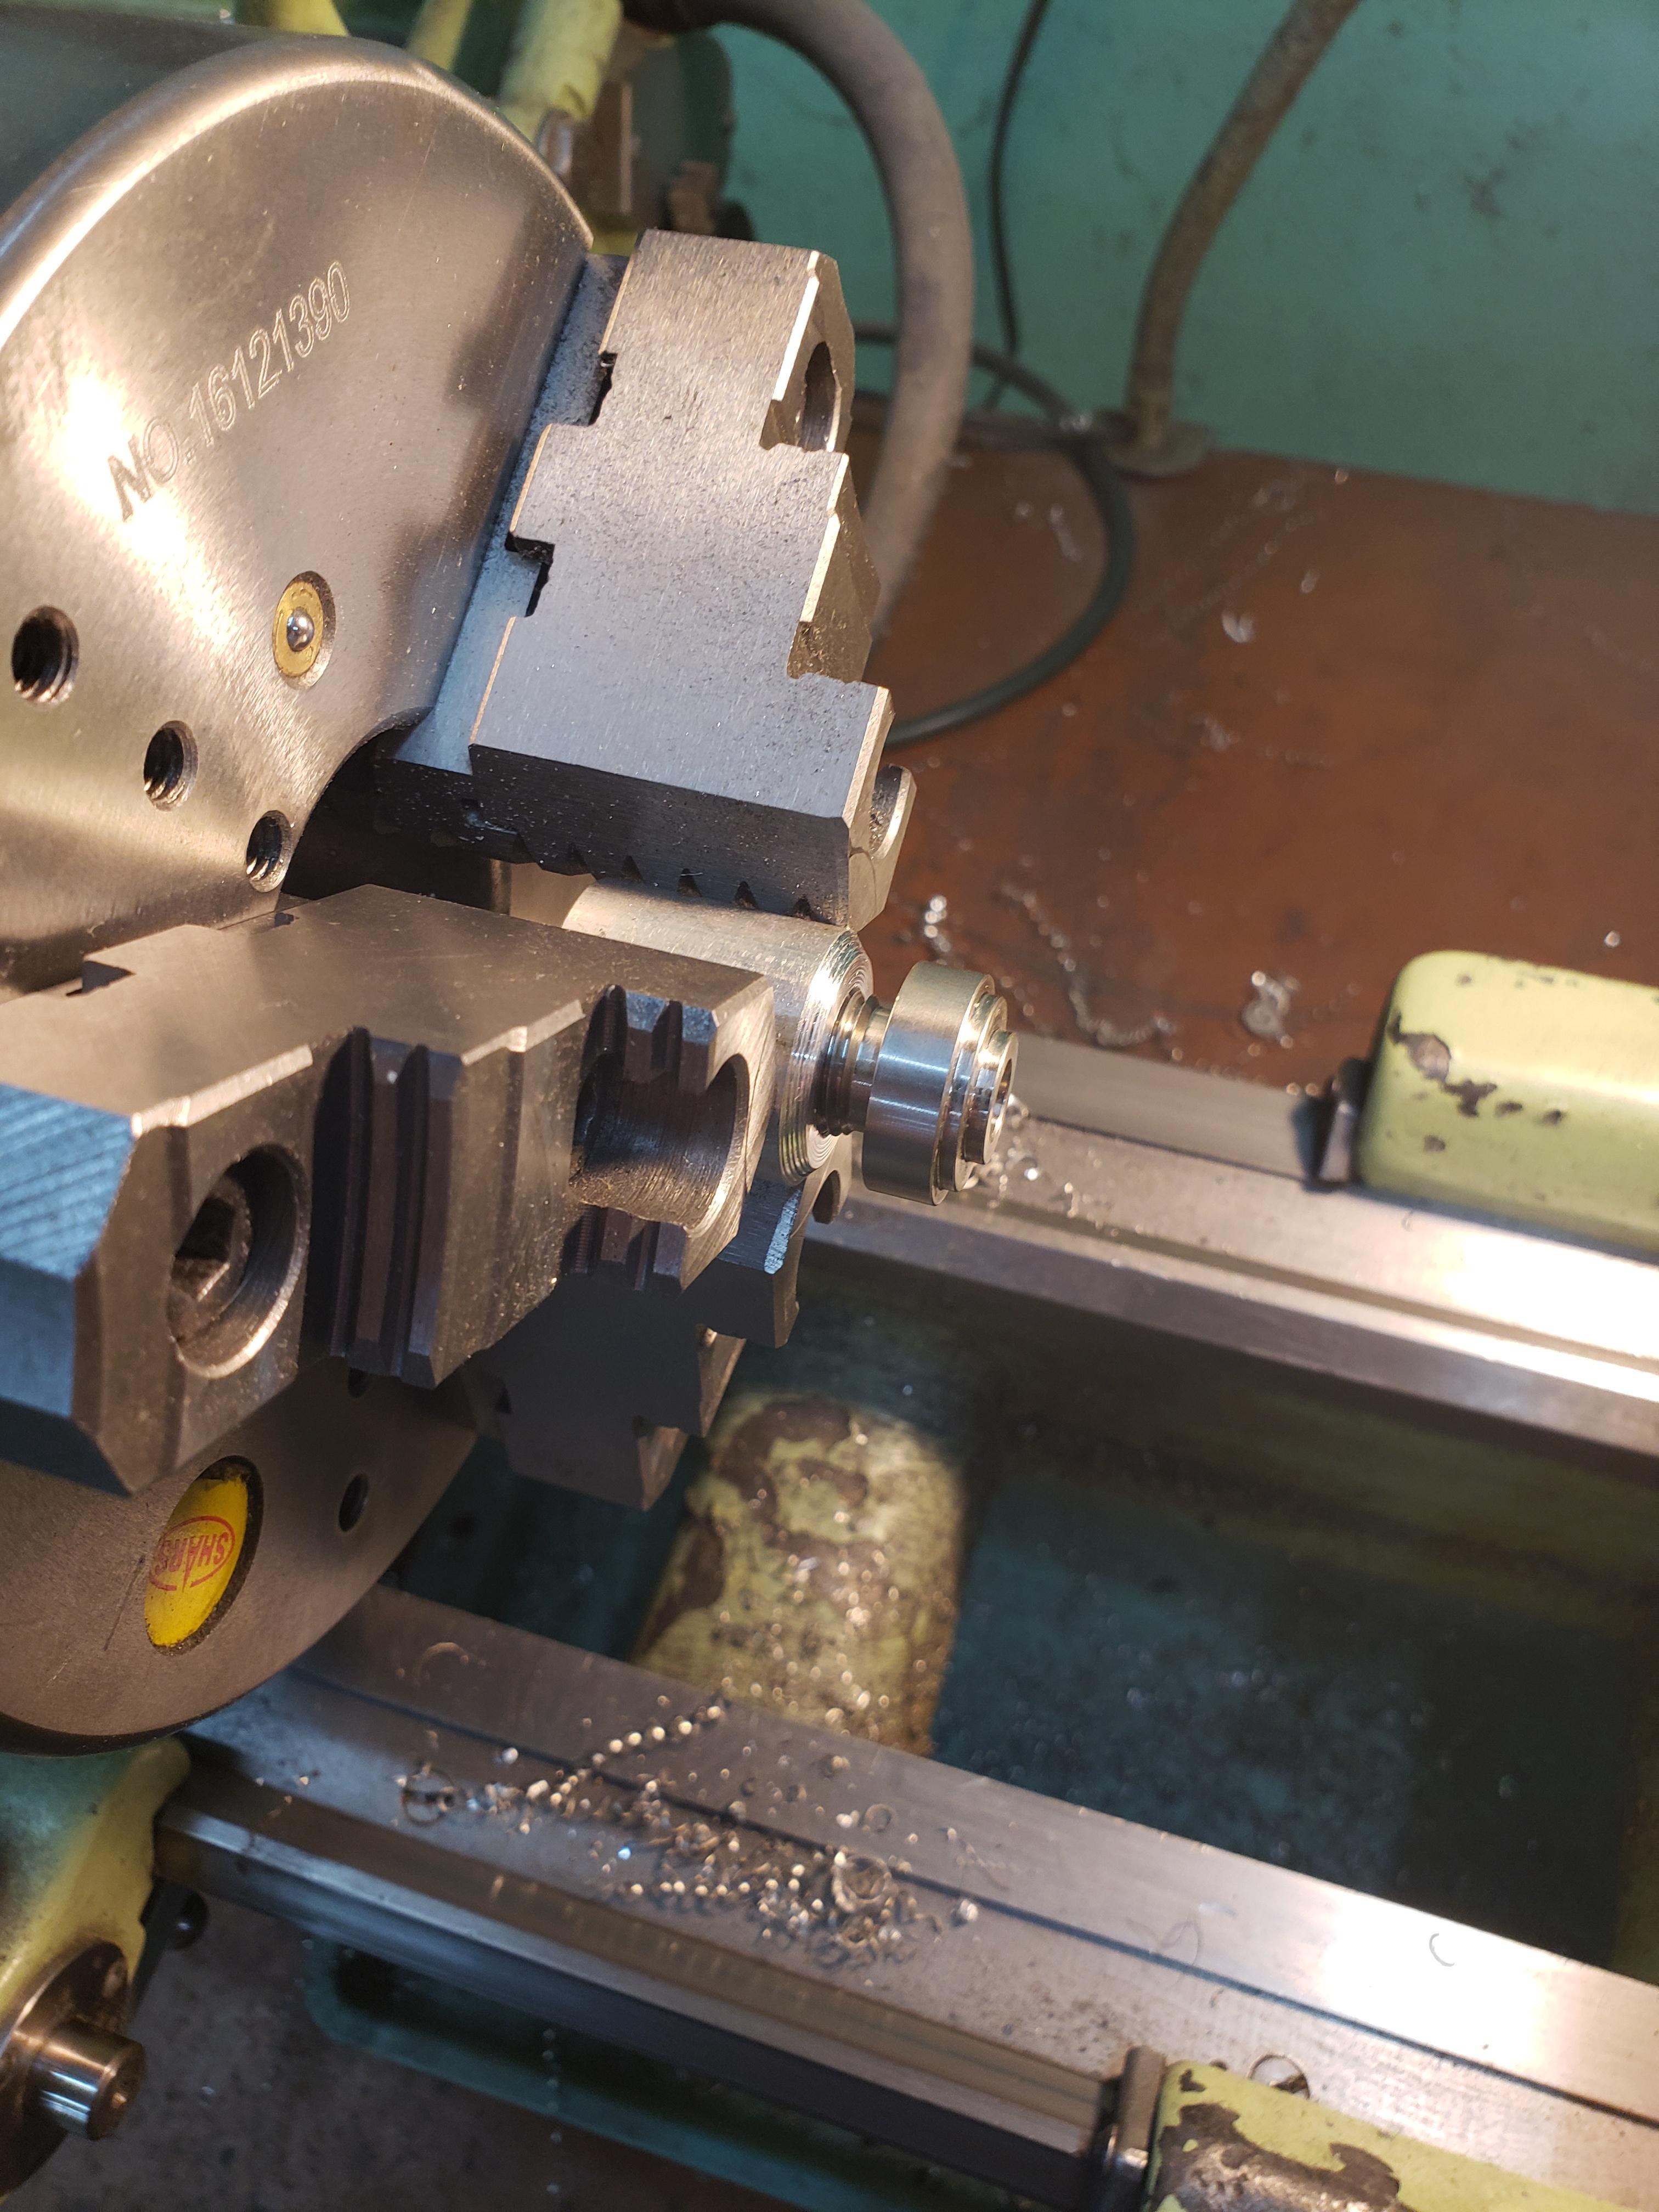
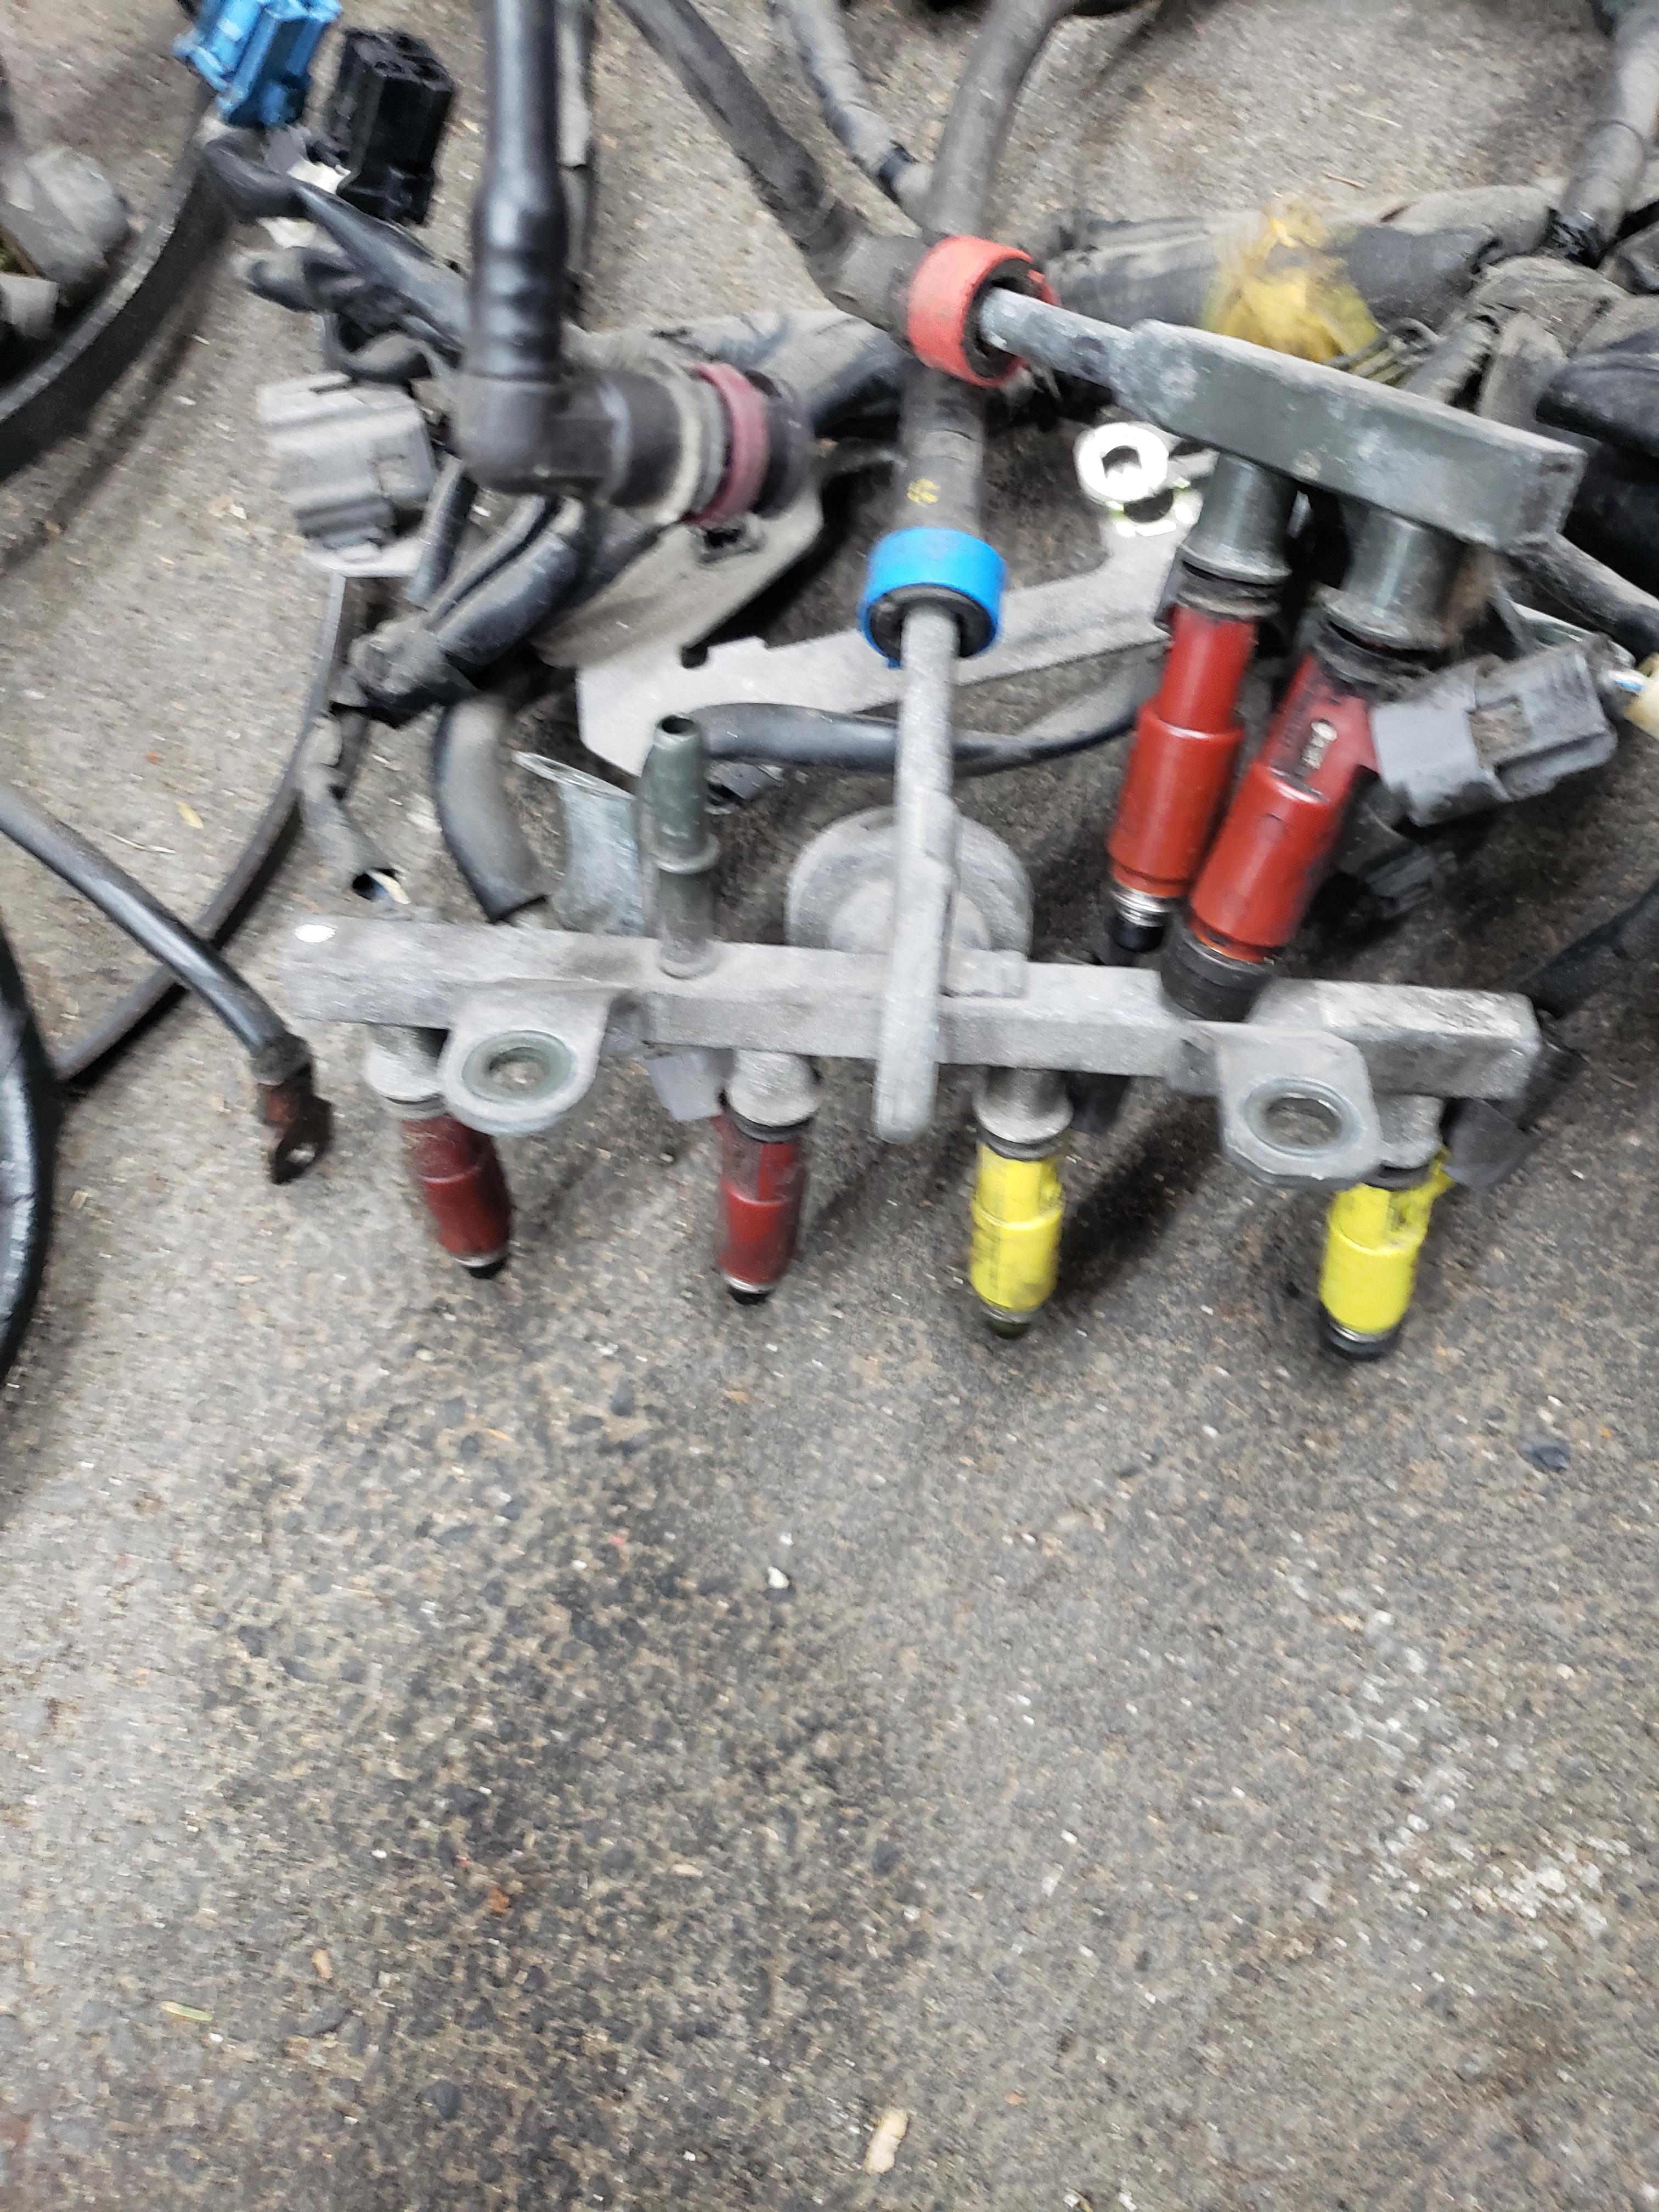
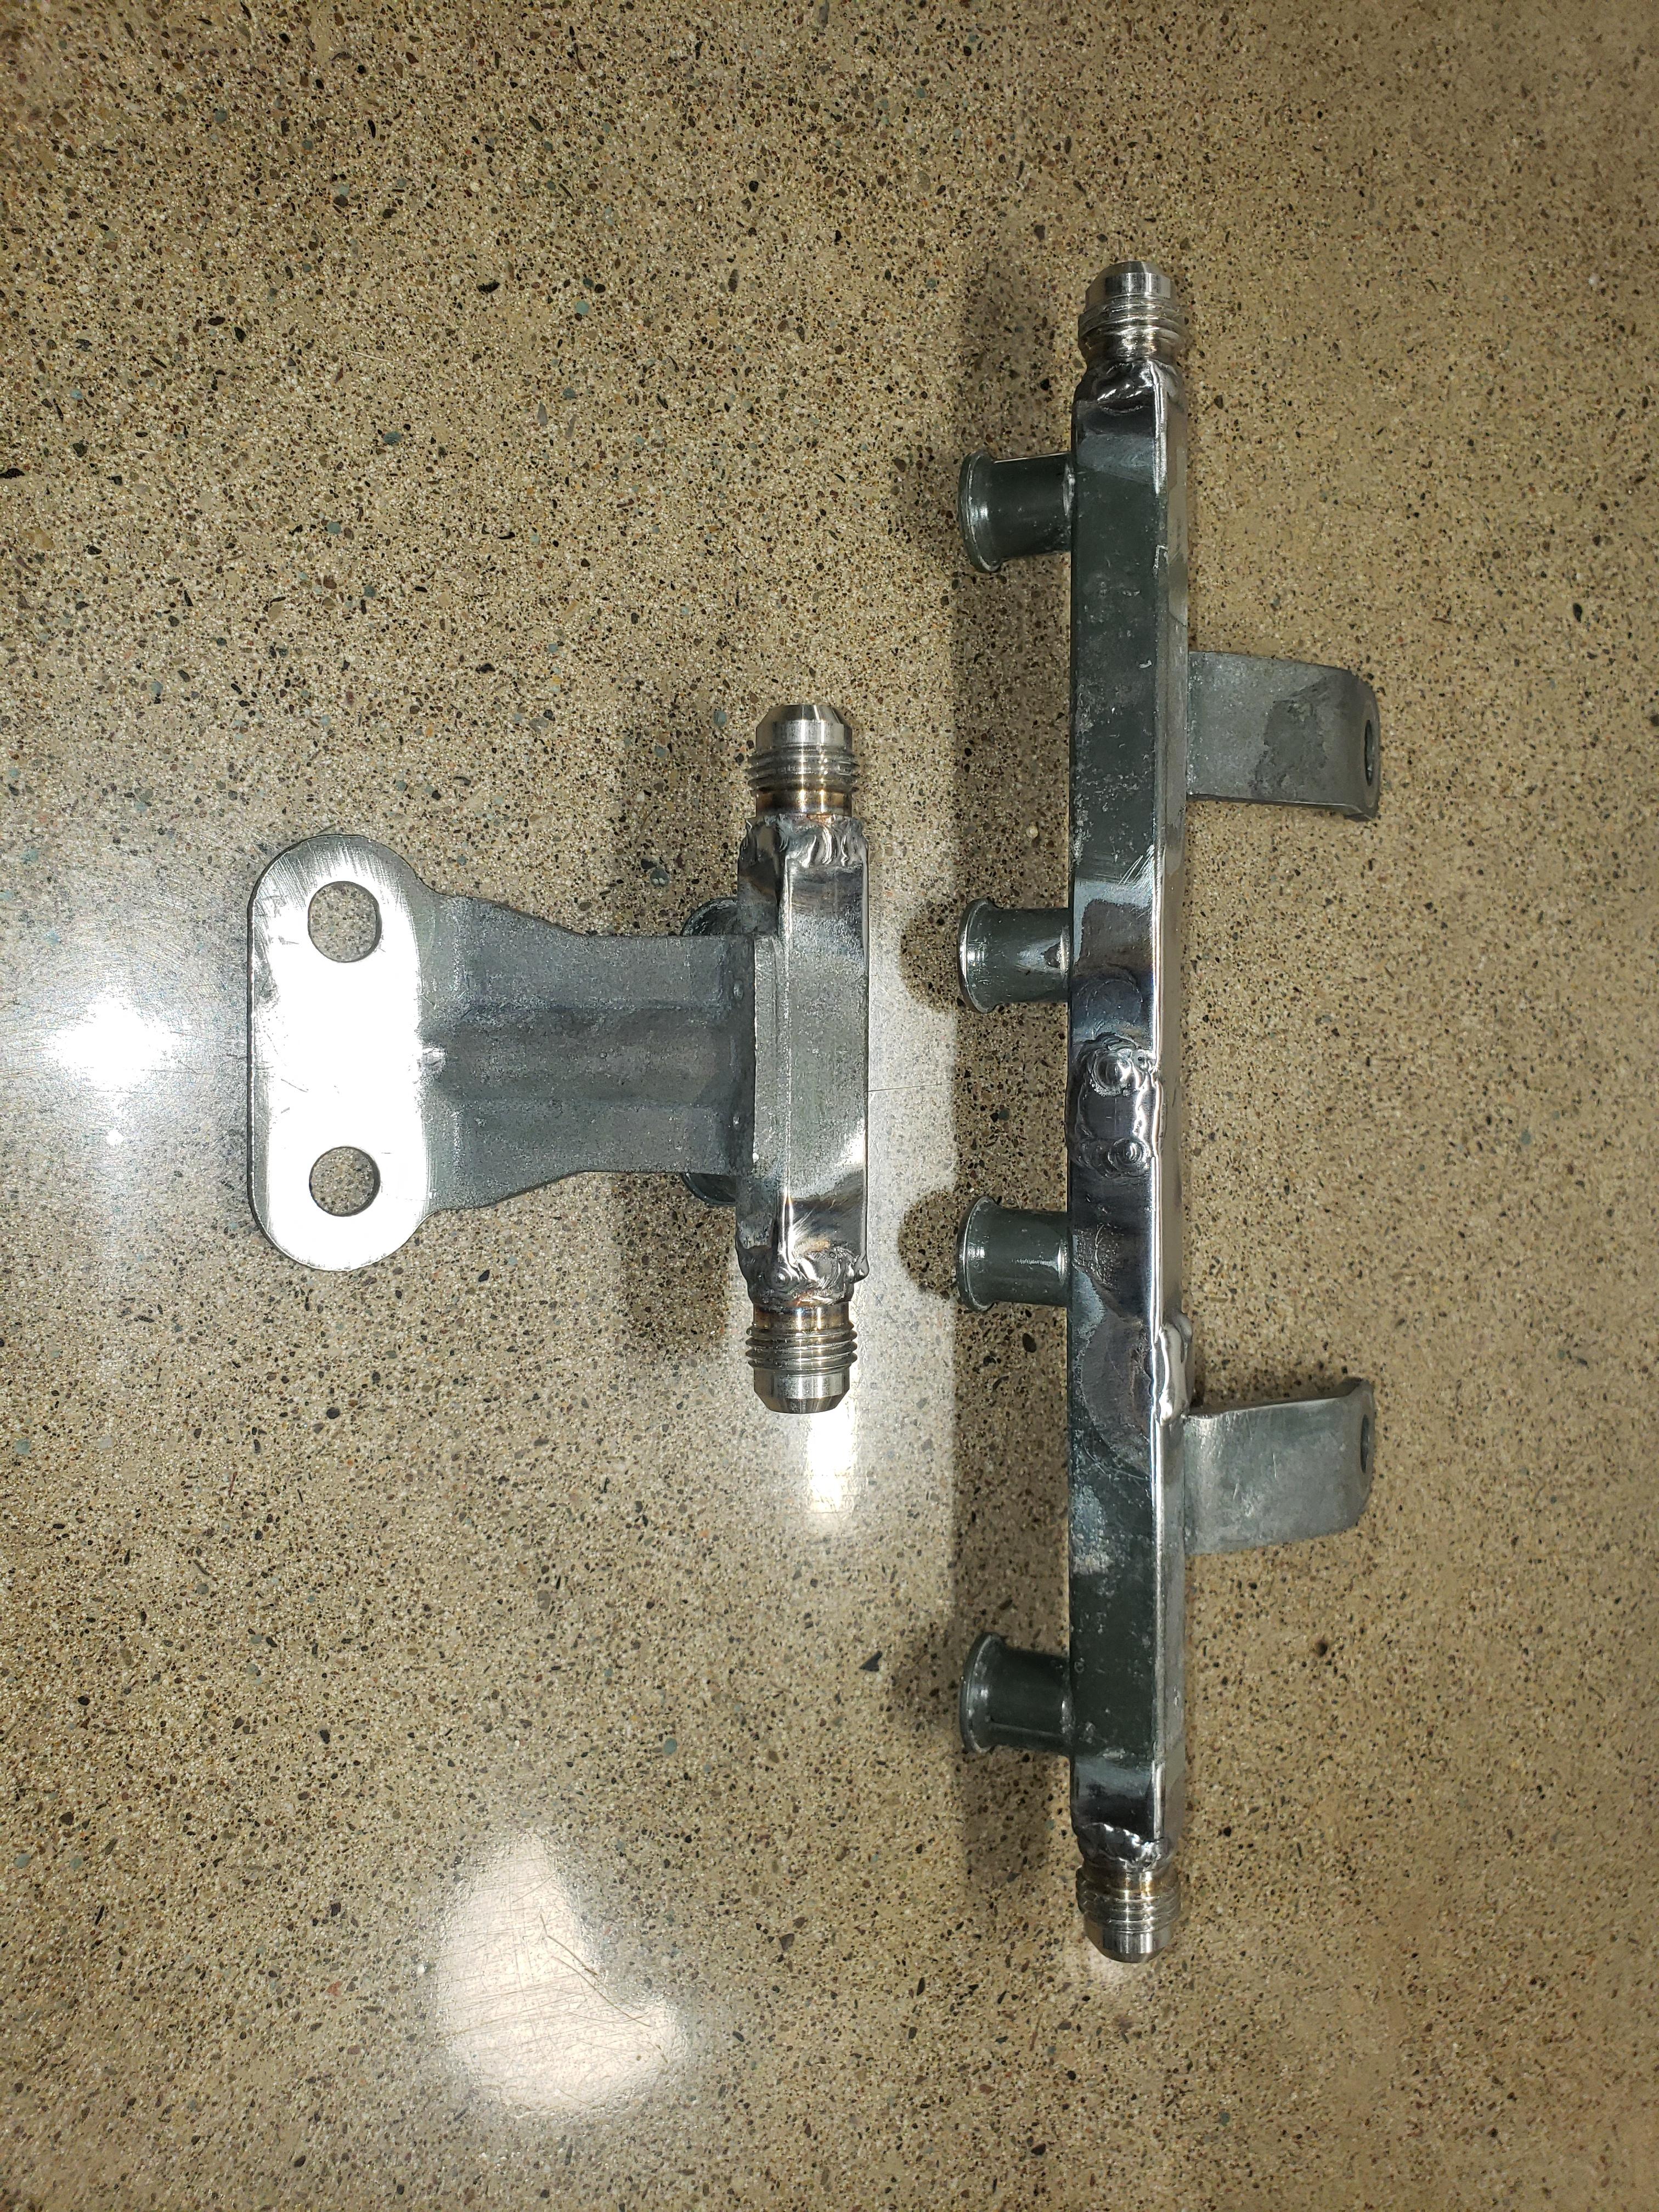
been a busy week, but i'm trying to make small incremental progress. Yesterday/today's progress....fuel rails. The RX8 runs a return-less fuel system, which i do not plan on doing in the FC chassis. so the fuel rails do not work as is. I thought about getting some of those cheap fuel rails that are under $100, but I just don't trust them. Then I thought, ok, i'll reverse engineer the stock rails and machine some billet ones myself, but promptly realized how lazy I truly am. So I decided maybe a good compromise was to modify the stock rails to accept AN fittings and make them return style. So I bought myself some weld on AN fittings which came in massively oversized for what I need, so I thought the best option was to turn them down a bit to suite the application. Made a neat little fixture to hold the fittings by the threads so the tips didn't get damaged.

Them proceeded to turn all 4 of the down. before and after:

Didn't get pictures of modifying the actual fuel rail, but it was just drilling holes in both ends of the rail and removing the brazed on brackets and pulsation dampener. For reference here's the stock RX8 rails w/ injectors
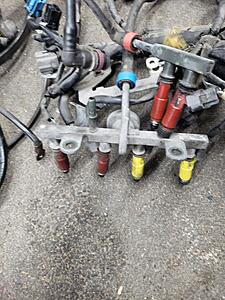
and modified
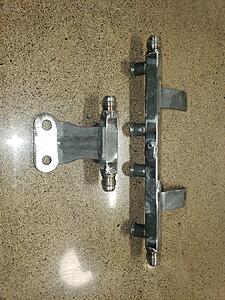
I was a bit nervous about welding them. The cups that the injectors seat into are just brazed to the rail and if I got it too hot the braze would melt and they'd fall right off. So did the old, wrap a wet towel around the weld area and everything seems to have come out in one piece. Still need to pressure test them for leaks and maybe give them a fresh powder coating, but otherwise i've got fuel rails for under $20!
Them proceeded to turn all 4 of the down. before and after:

Didn't get pictures of modifying the actual fuel rail, but it was just drilling holes in both ends of the rail and removing the brazed on brackets and pulsation dampener. For reference here's the stock RX8 rails w/ injectors
and modified
I was a bit nervous about welding them. The cups that the injectors seat into are just brazed to the rail and if I got it too hot the braze would melt and they'd fall right off. So did the old, wrap a wet towel around the weld area and everything seems to have come out in one piece. Still need to pressure test them for leaks and maybe give them a fresh powder coating, but otherwise i've got fuel rails for under $20!
Thread Starter
Joined: Mar 2002
Posts: 1,726
Likes: 540
From: binghamton, ny
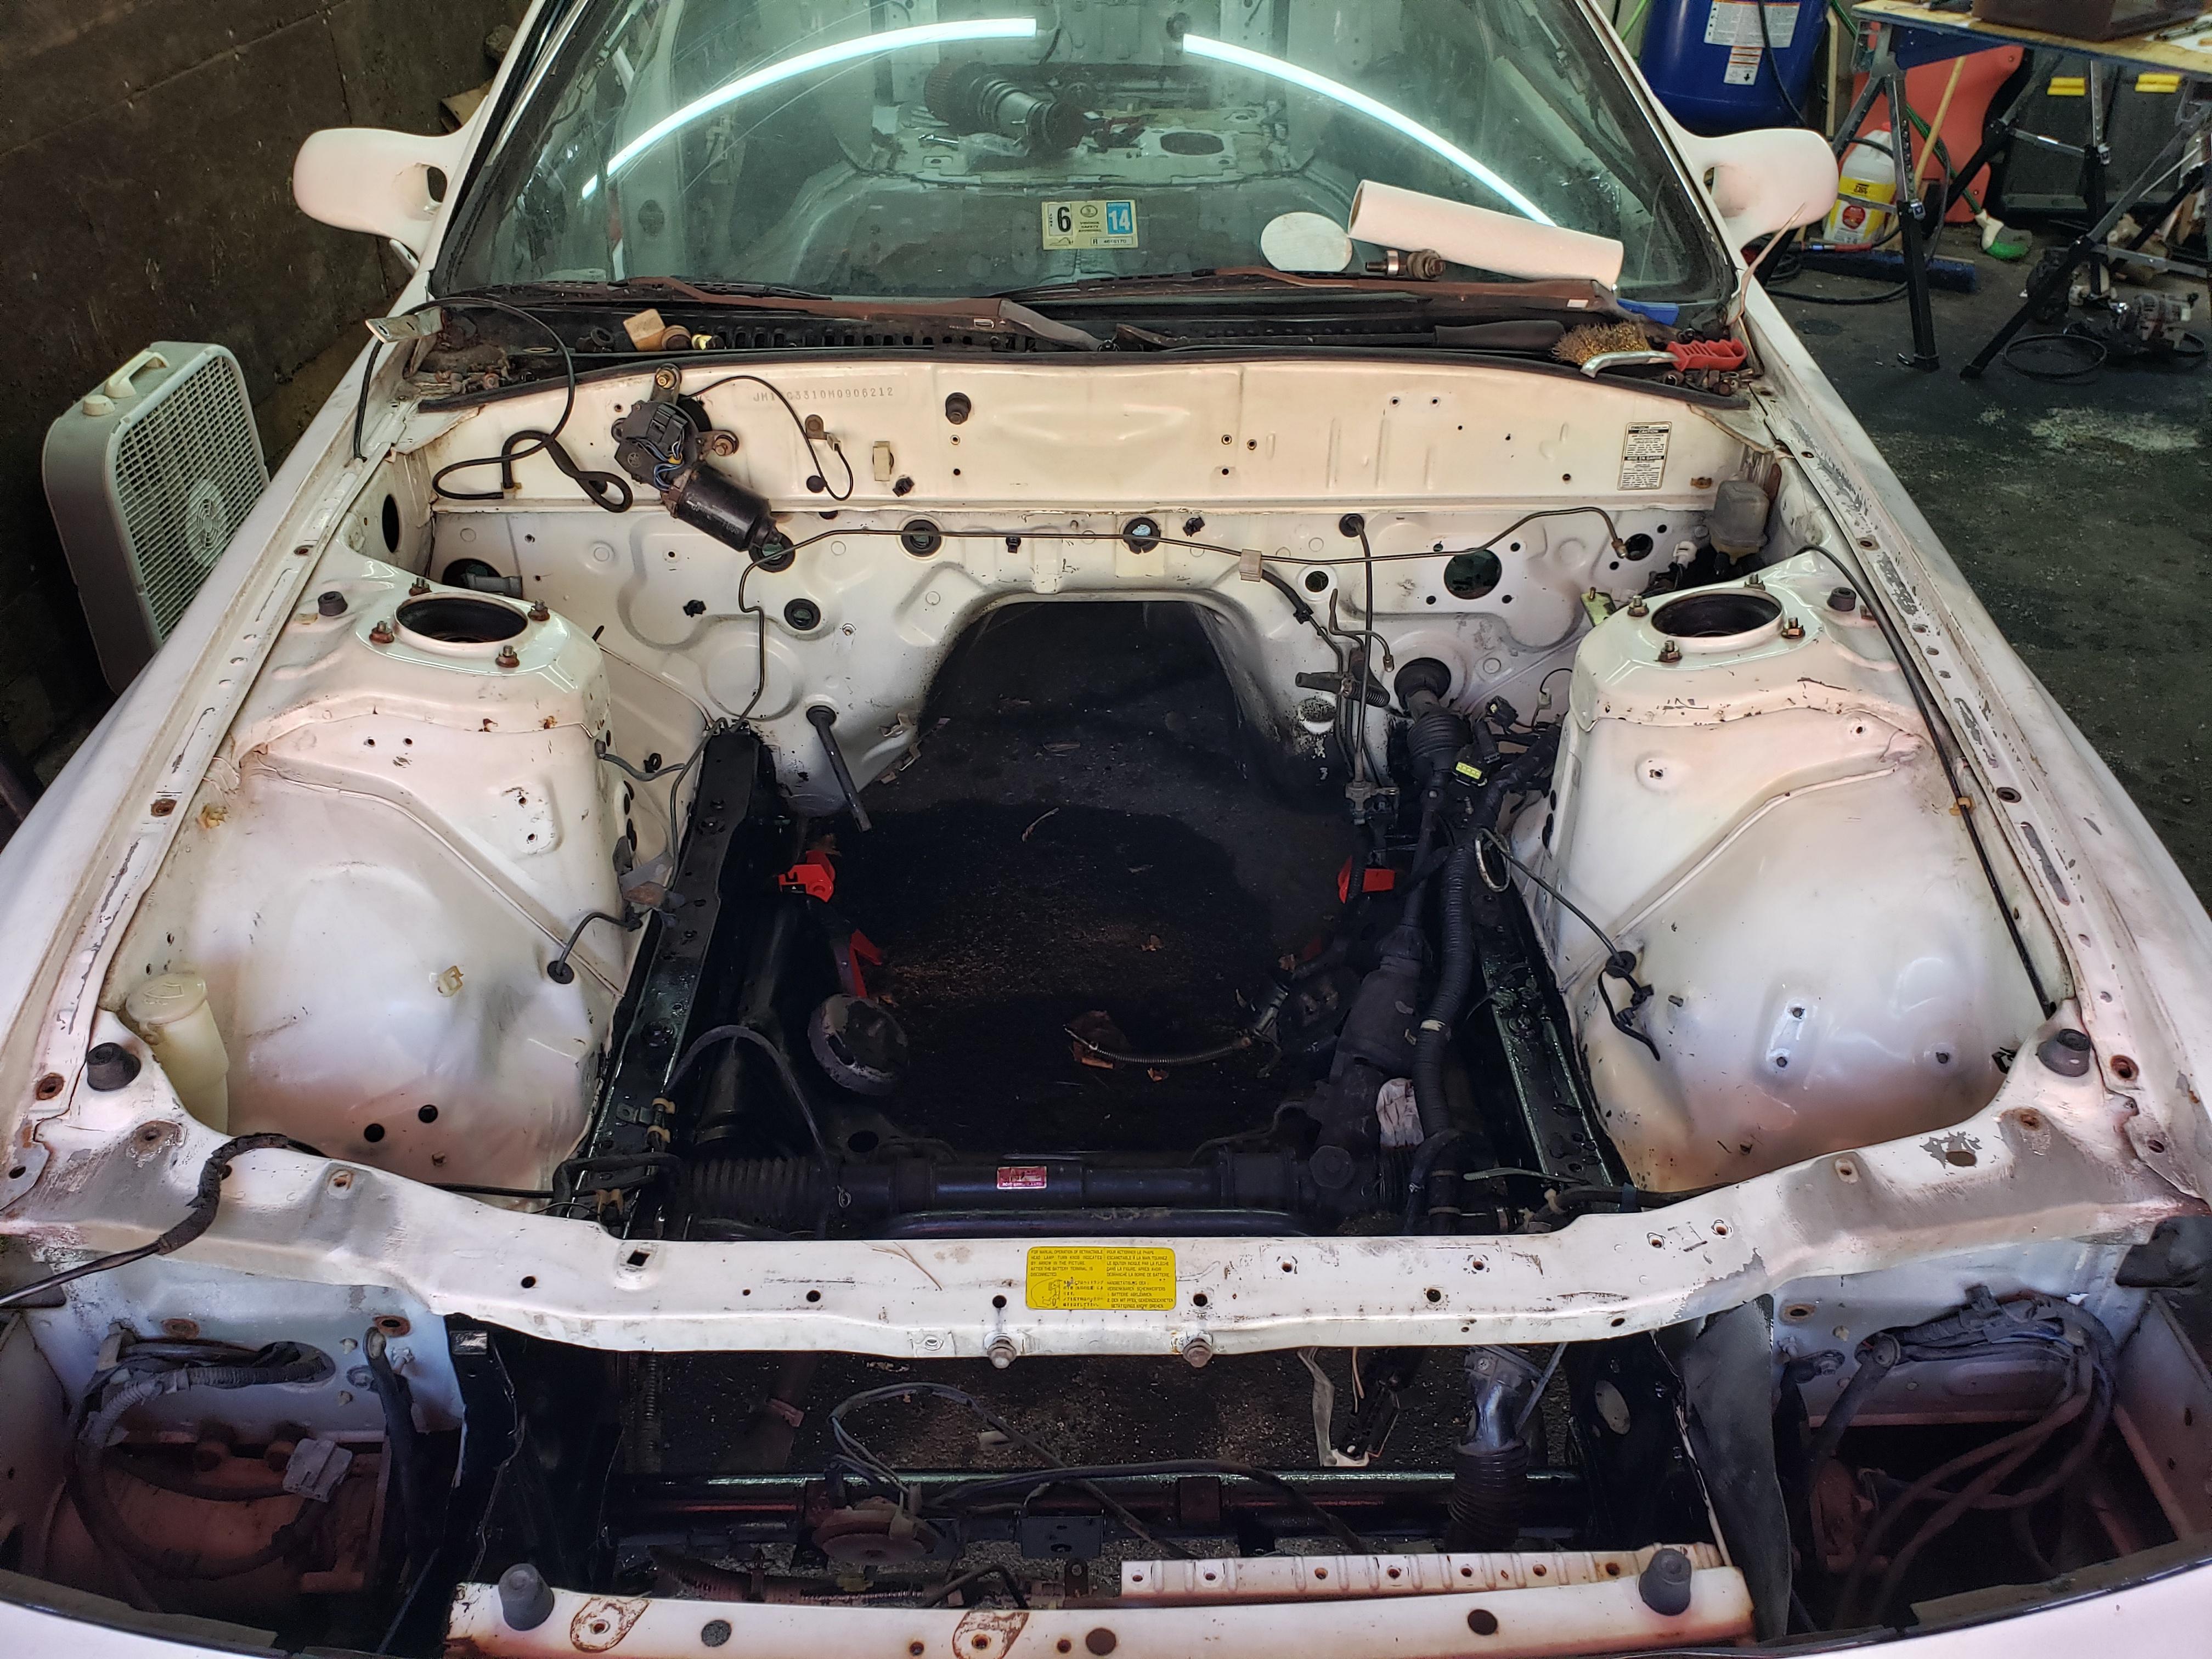
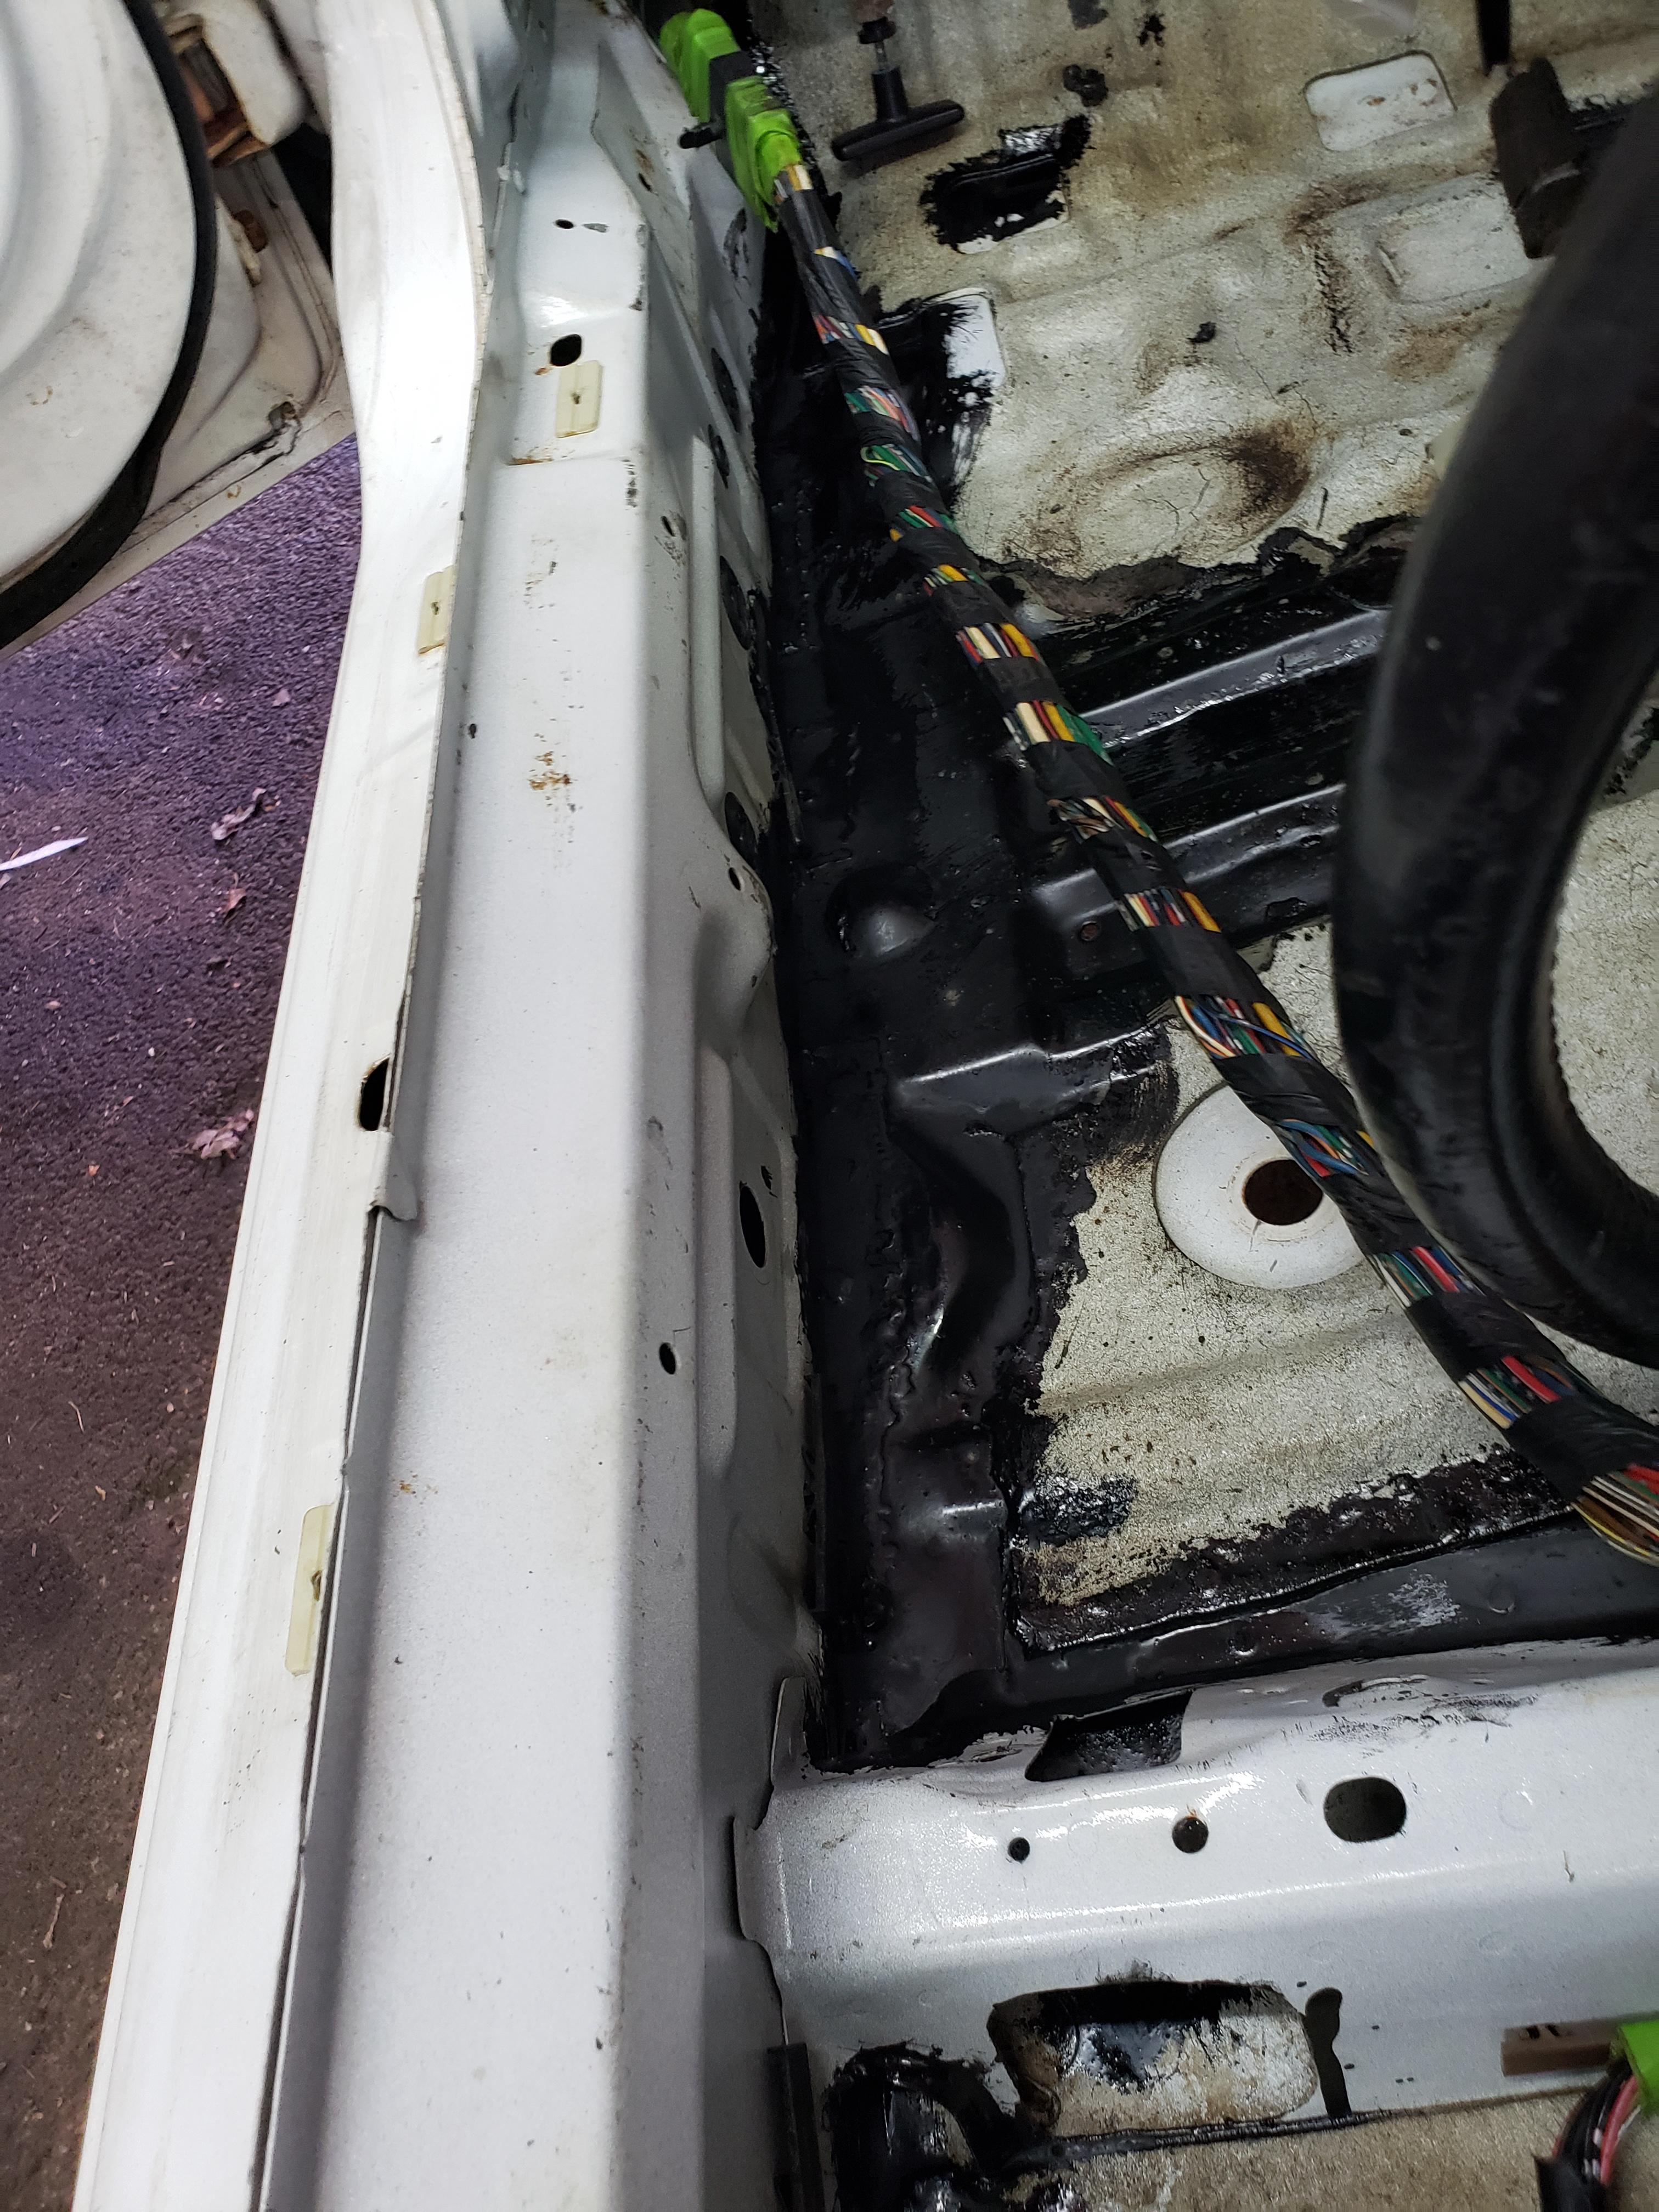
been a while since i did an update, but I've been making progress on the more boring things. like cleaning the engine bay a bit.

and fixing that rust spot in the spare wheel well.
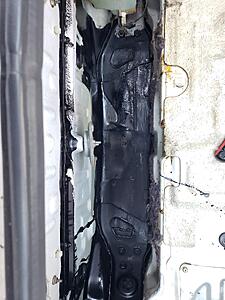
I found a couple little rust holes near the drivers side pinch rails as well. So fixed those as well. Think i'm rust free now.

but I did start doing something a little more fun...
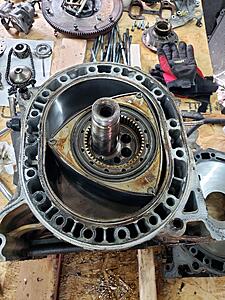
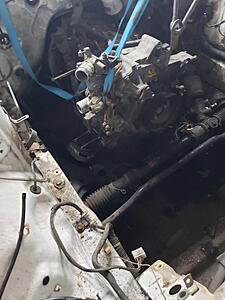
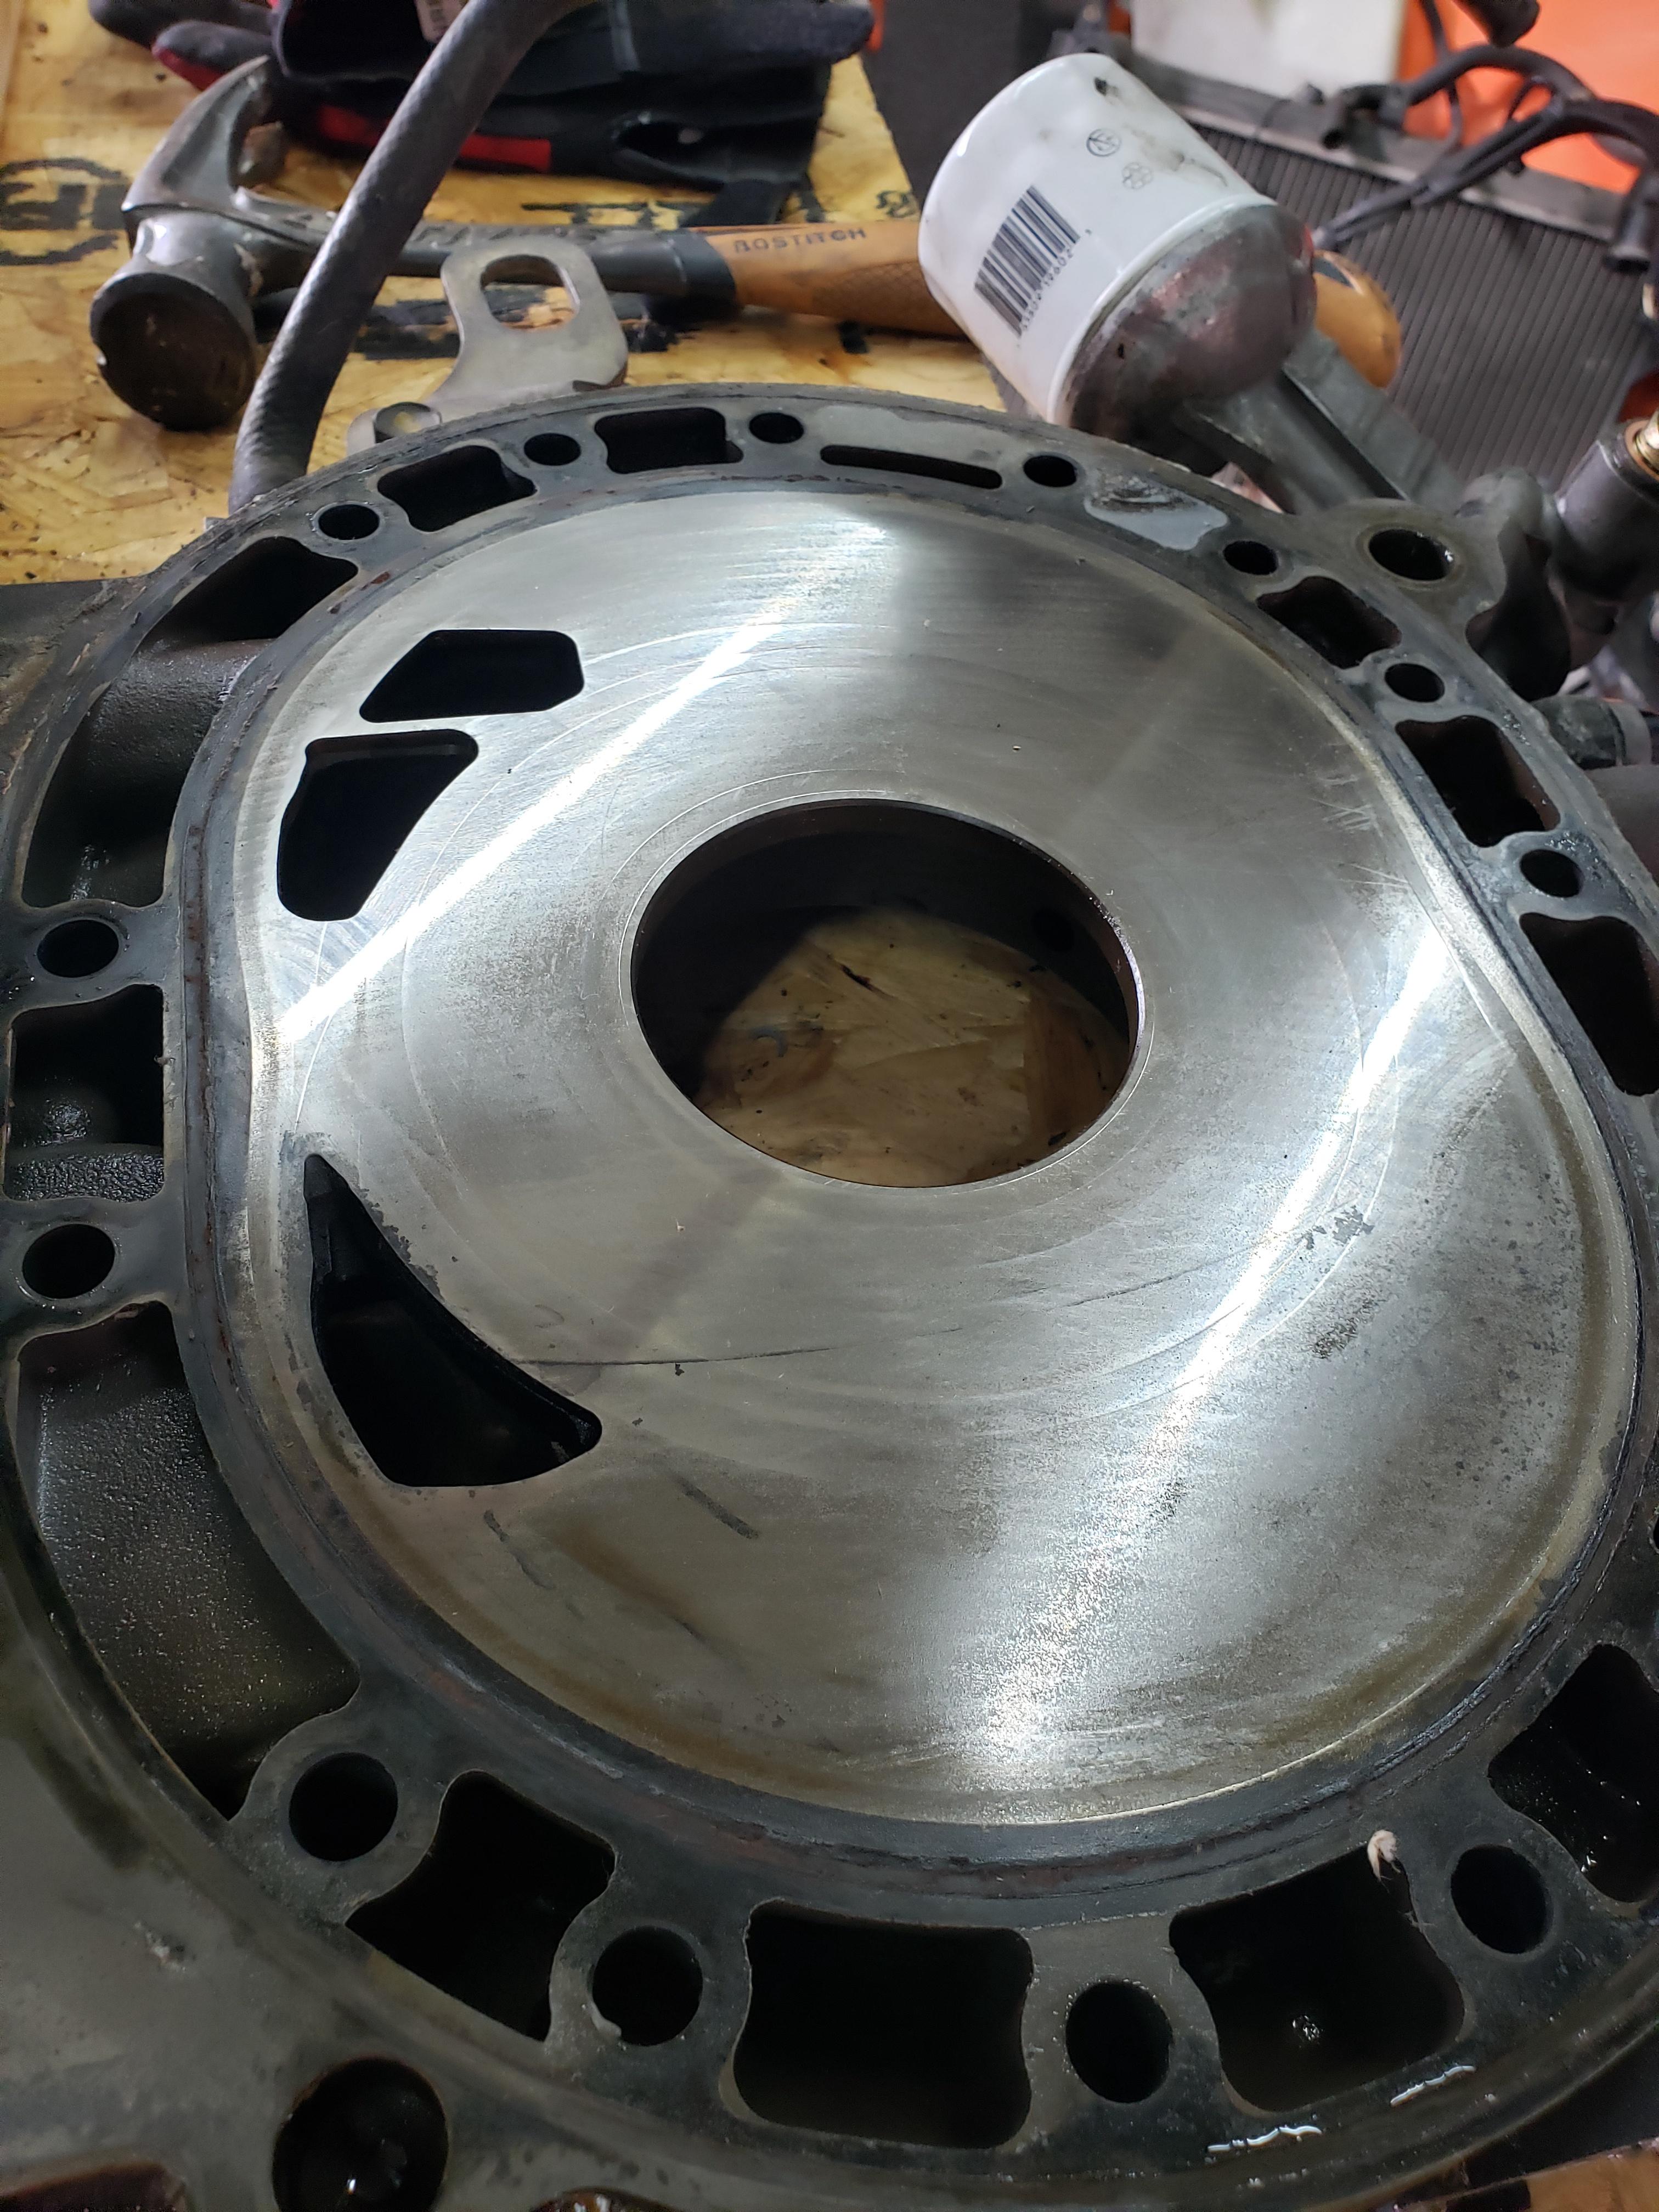
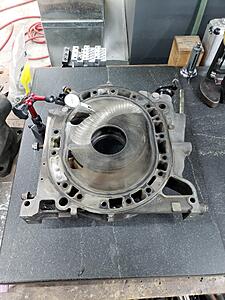
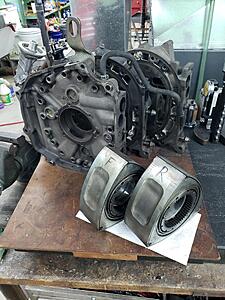
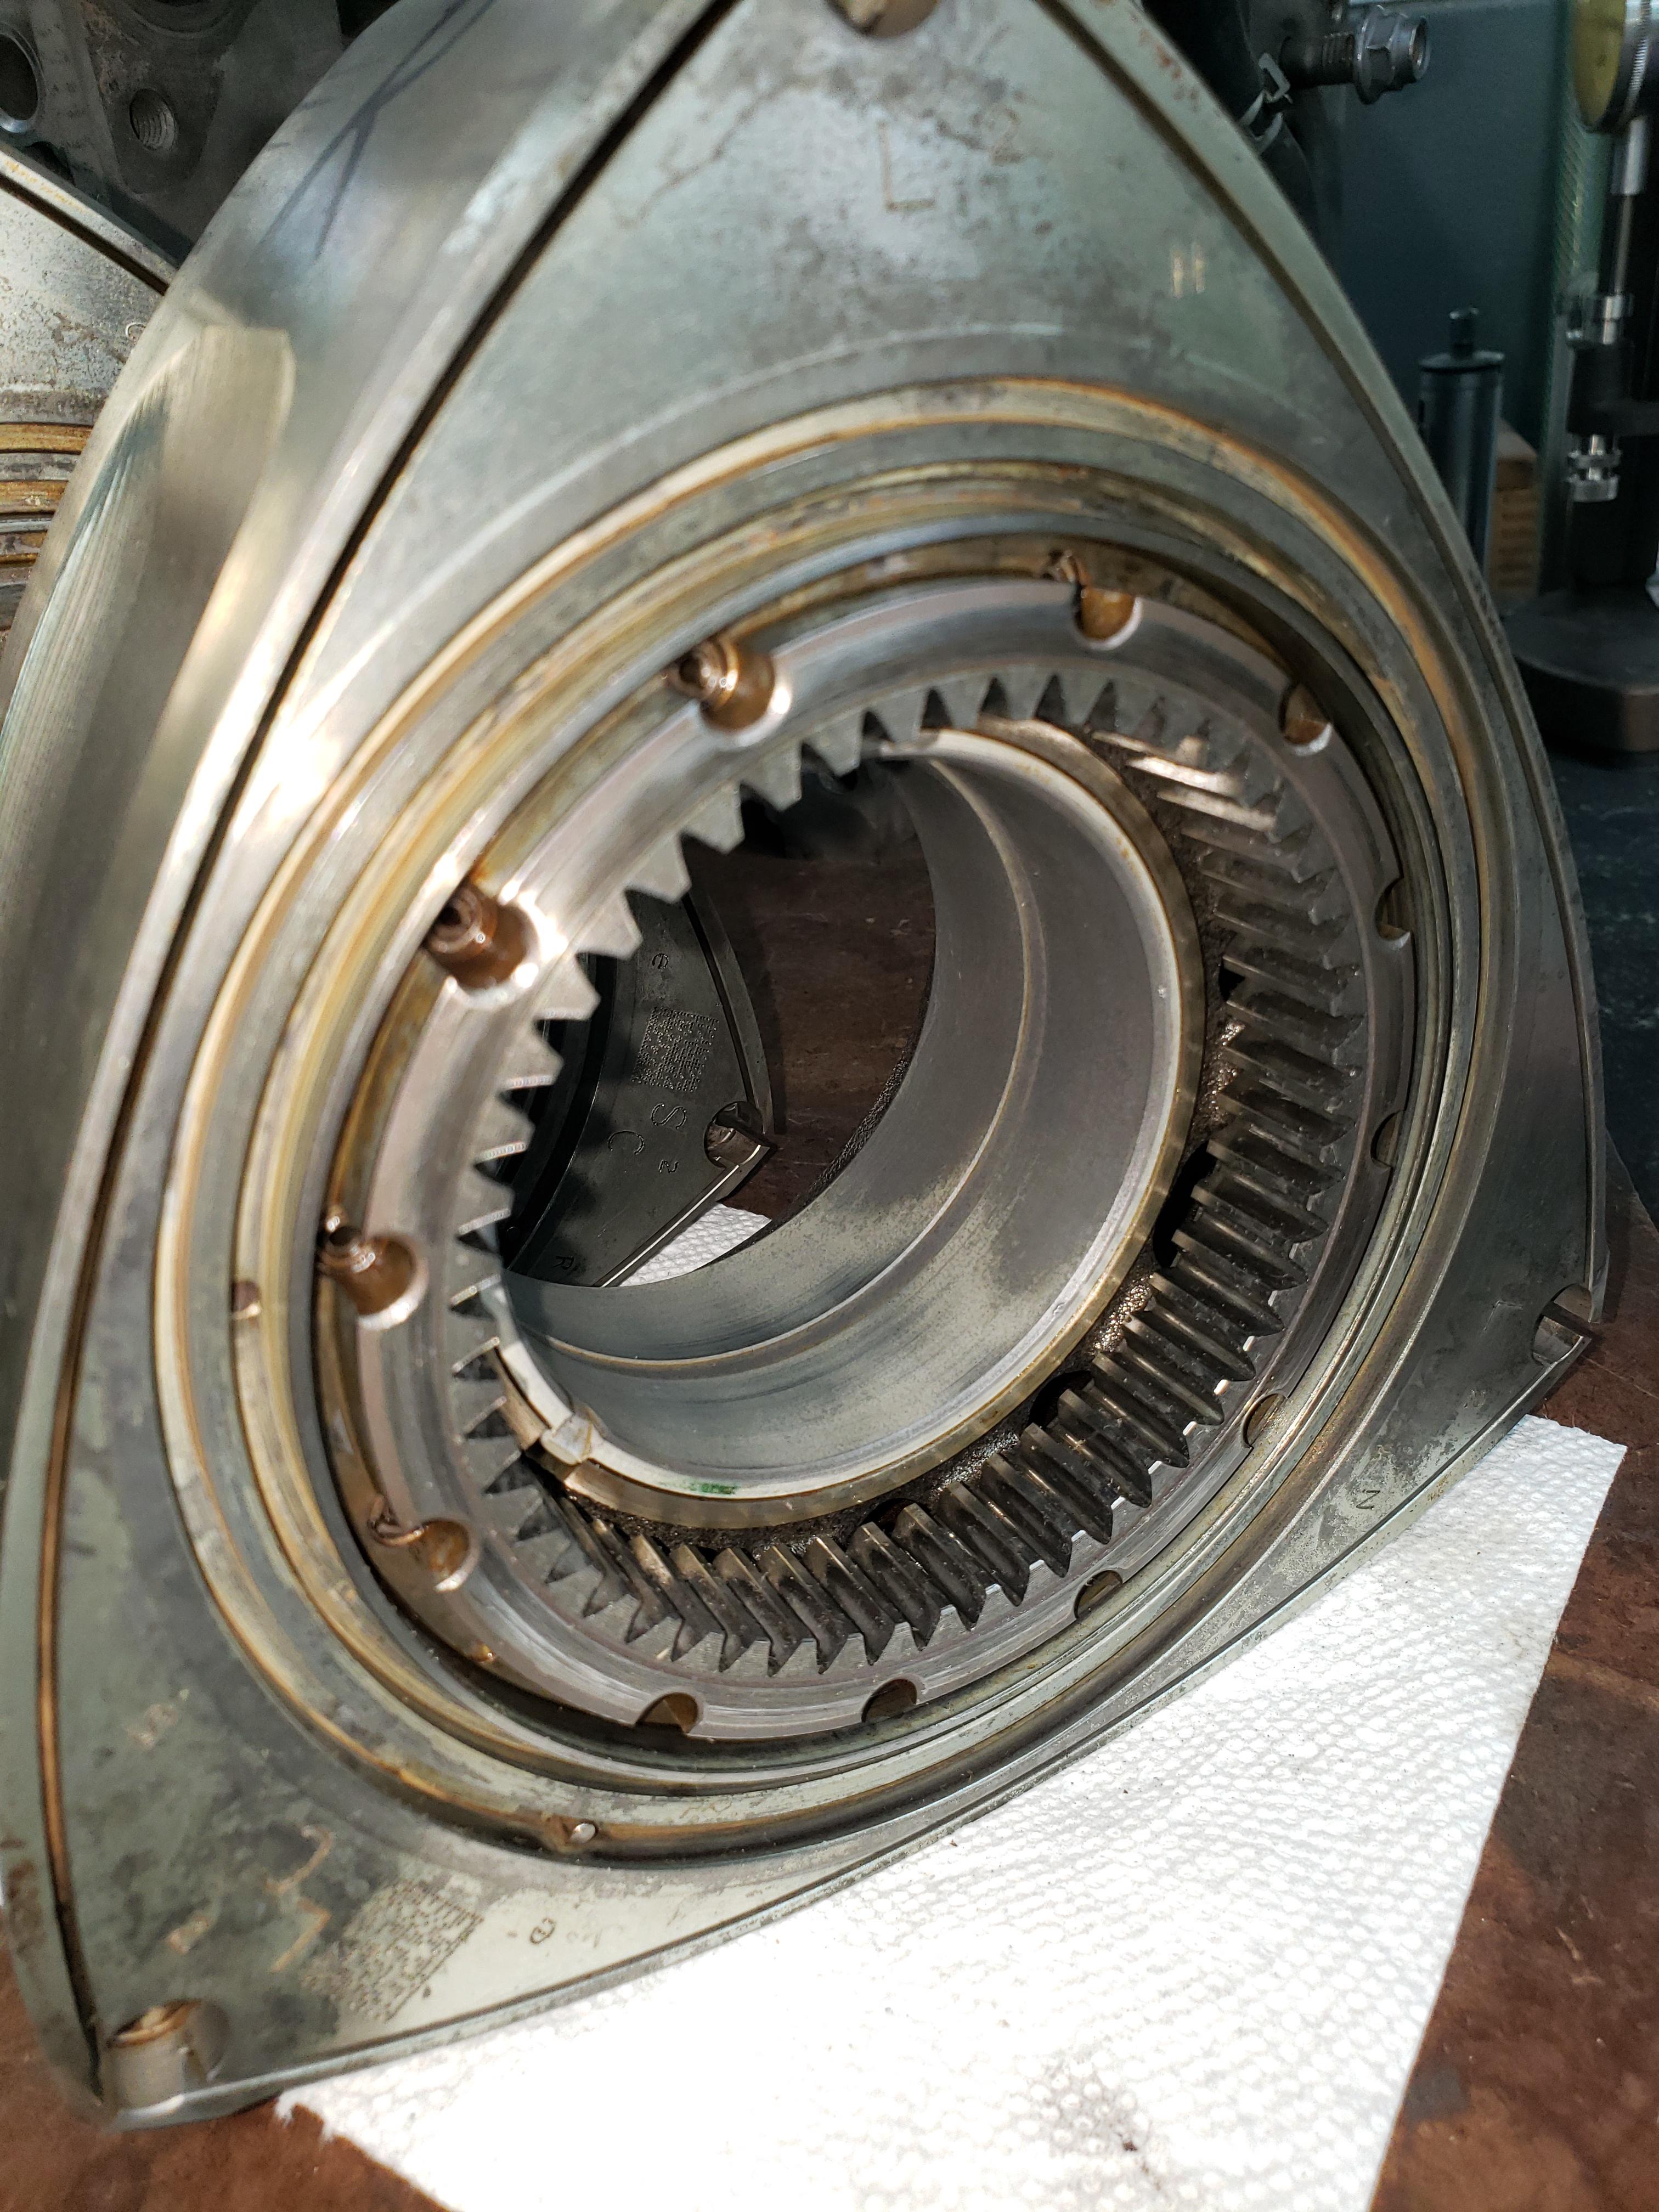
so this is not the motor I pulled from the original RX8 show earlier. There was a guy selling an engine and trans on ebay for ridiculously cheap so i gambled and bought it. I've never taken a renesis apart before, but everything looks pretty mint. There is very little carbon buildup and the coolant passages look great. Pretty minimal wear on the irons. Still need to clean them and measure everything.
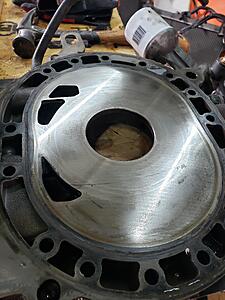
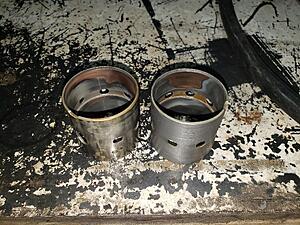
the rotor housings aren't too bad. There's the typical wear groove from the corner seal, but very minimal actual flaking. You can see it here, but i'l likely buy new housings and seals while it's all apart.
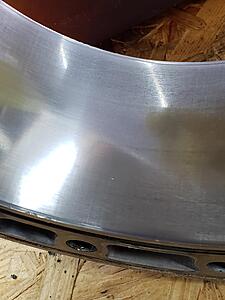
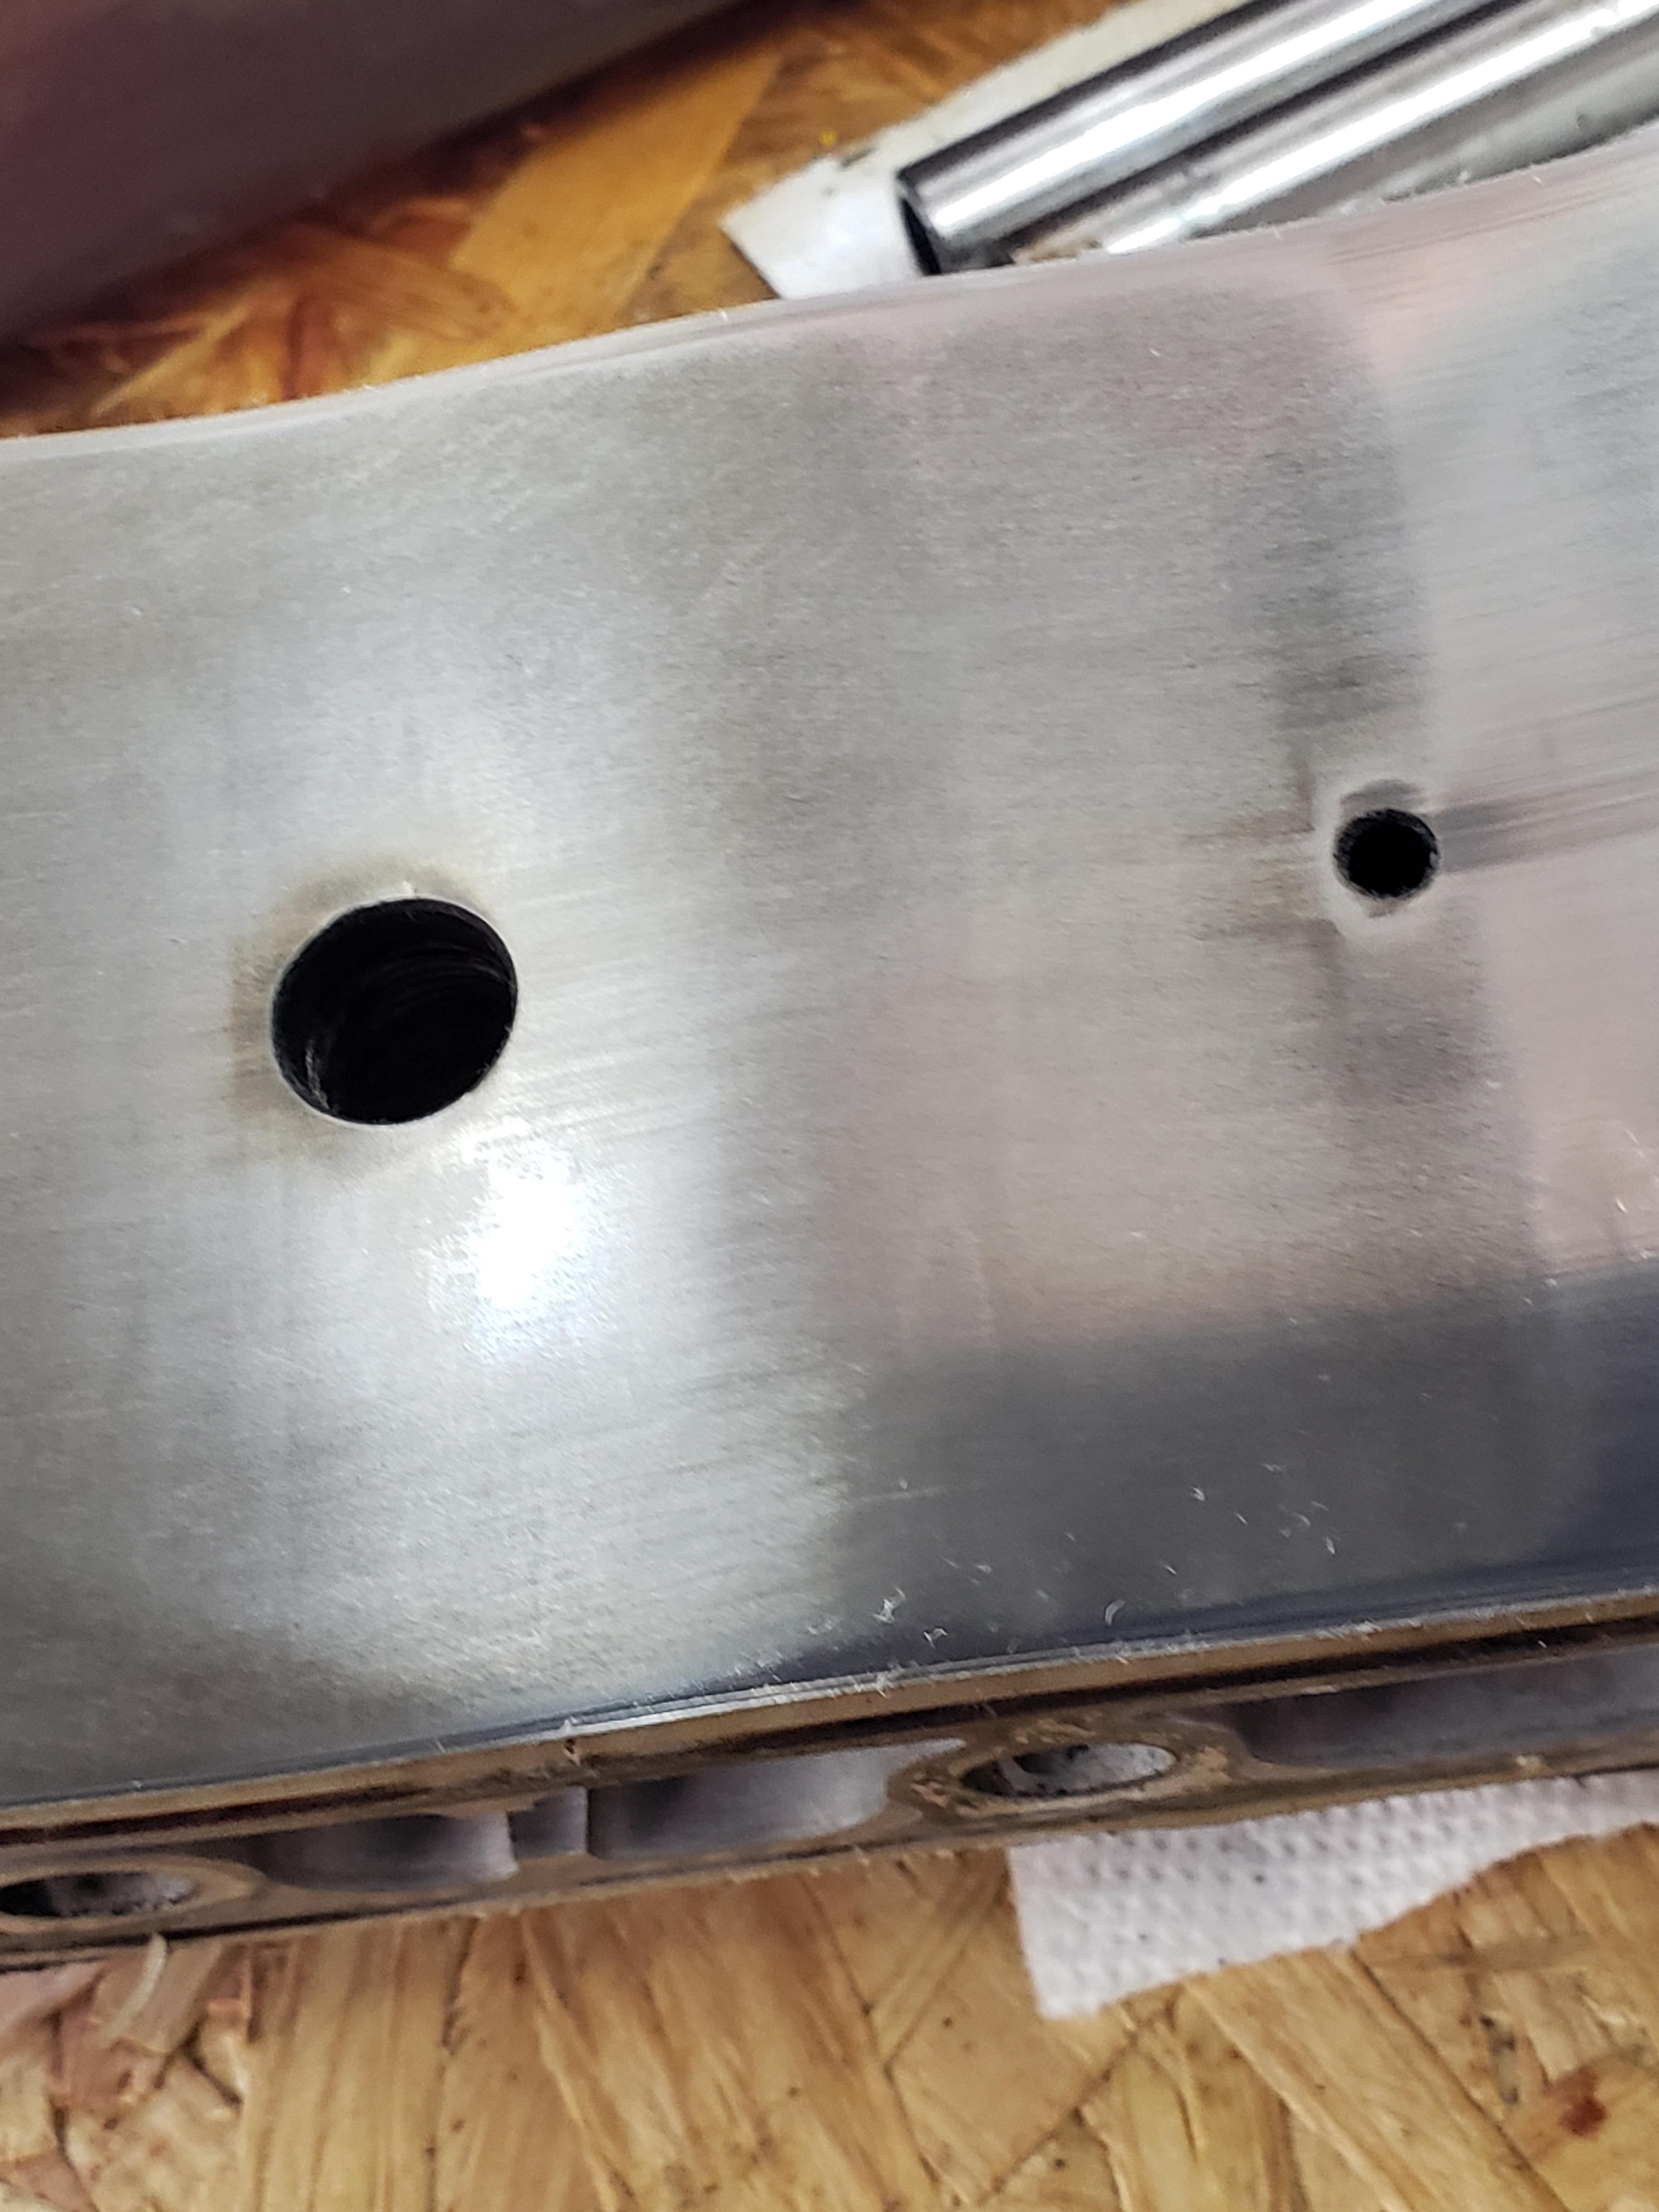
no cracks at the spark plug holes
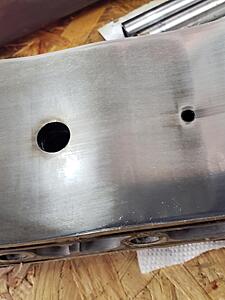
no chatter marks up top either

would love to get peoples opinions on the rotor housings.
and fixing that rust spot in the spare wheel well.

I found a couple little rust holes near the drivers side pinch rails as well. So fixed those as well. Think i'm rust free now.
but I did start doing something a little more fun...

so this is not the motor I pulled from the original RX8 show earlier. There was a guy selling an engine and trans on ebay for ridiculously cheap so i gambled and bought it. I've never taken a renesis apart before, but everything looks pretty mint. There is very little carbon buildup and the coolant passages look great. Pretty minimal wear on the irons. Still need to clean them and measure everything.
the rotor housings aren't too bad. There's the typical wear groove from the corner seal, but very minimal actual flaking. You can see it here, but i'l likely buy new housings and seals while it's all apart.

no cracks at the spark plug holes
no chatter marks up top either

would love to get peoples opinions on the rotor housings.
Thread Starter
Joined: Mar 2002
Posts: 1,726
Likes: 540
From: binghamton, ny
Yeah it's a super handy tool to have. I may be able to reproduce these engine mounts and trans mounts for interested people in the future because of it. I'm sure I'll be using it for making the exhaust pieces as well.
Senior Member
Joined: Apr 2021
Posts: 393
Likes: 70
From: GA
 . shoot me a PM and we can talk.
Thread Starter
Joined: Mar 2002
Posts: 1,726
Likes: 540
From: binghamton, ny
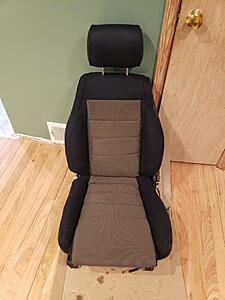
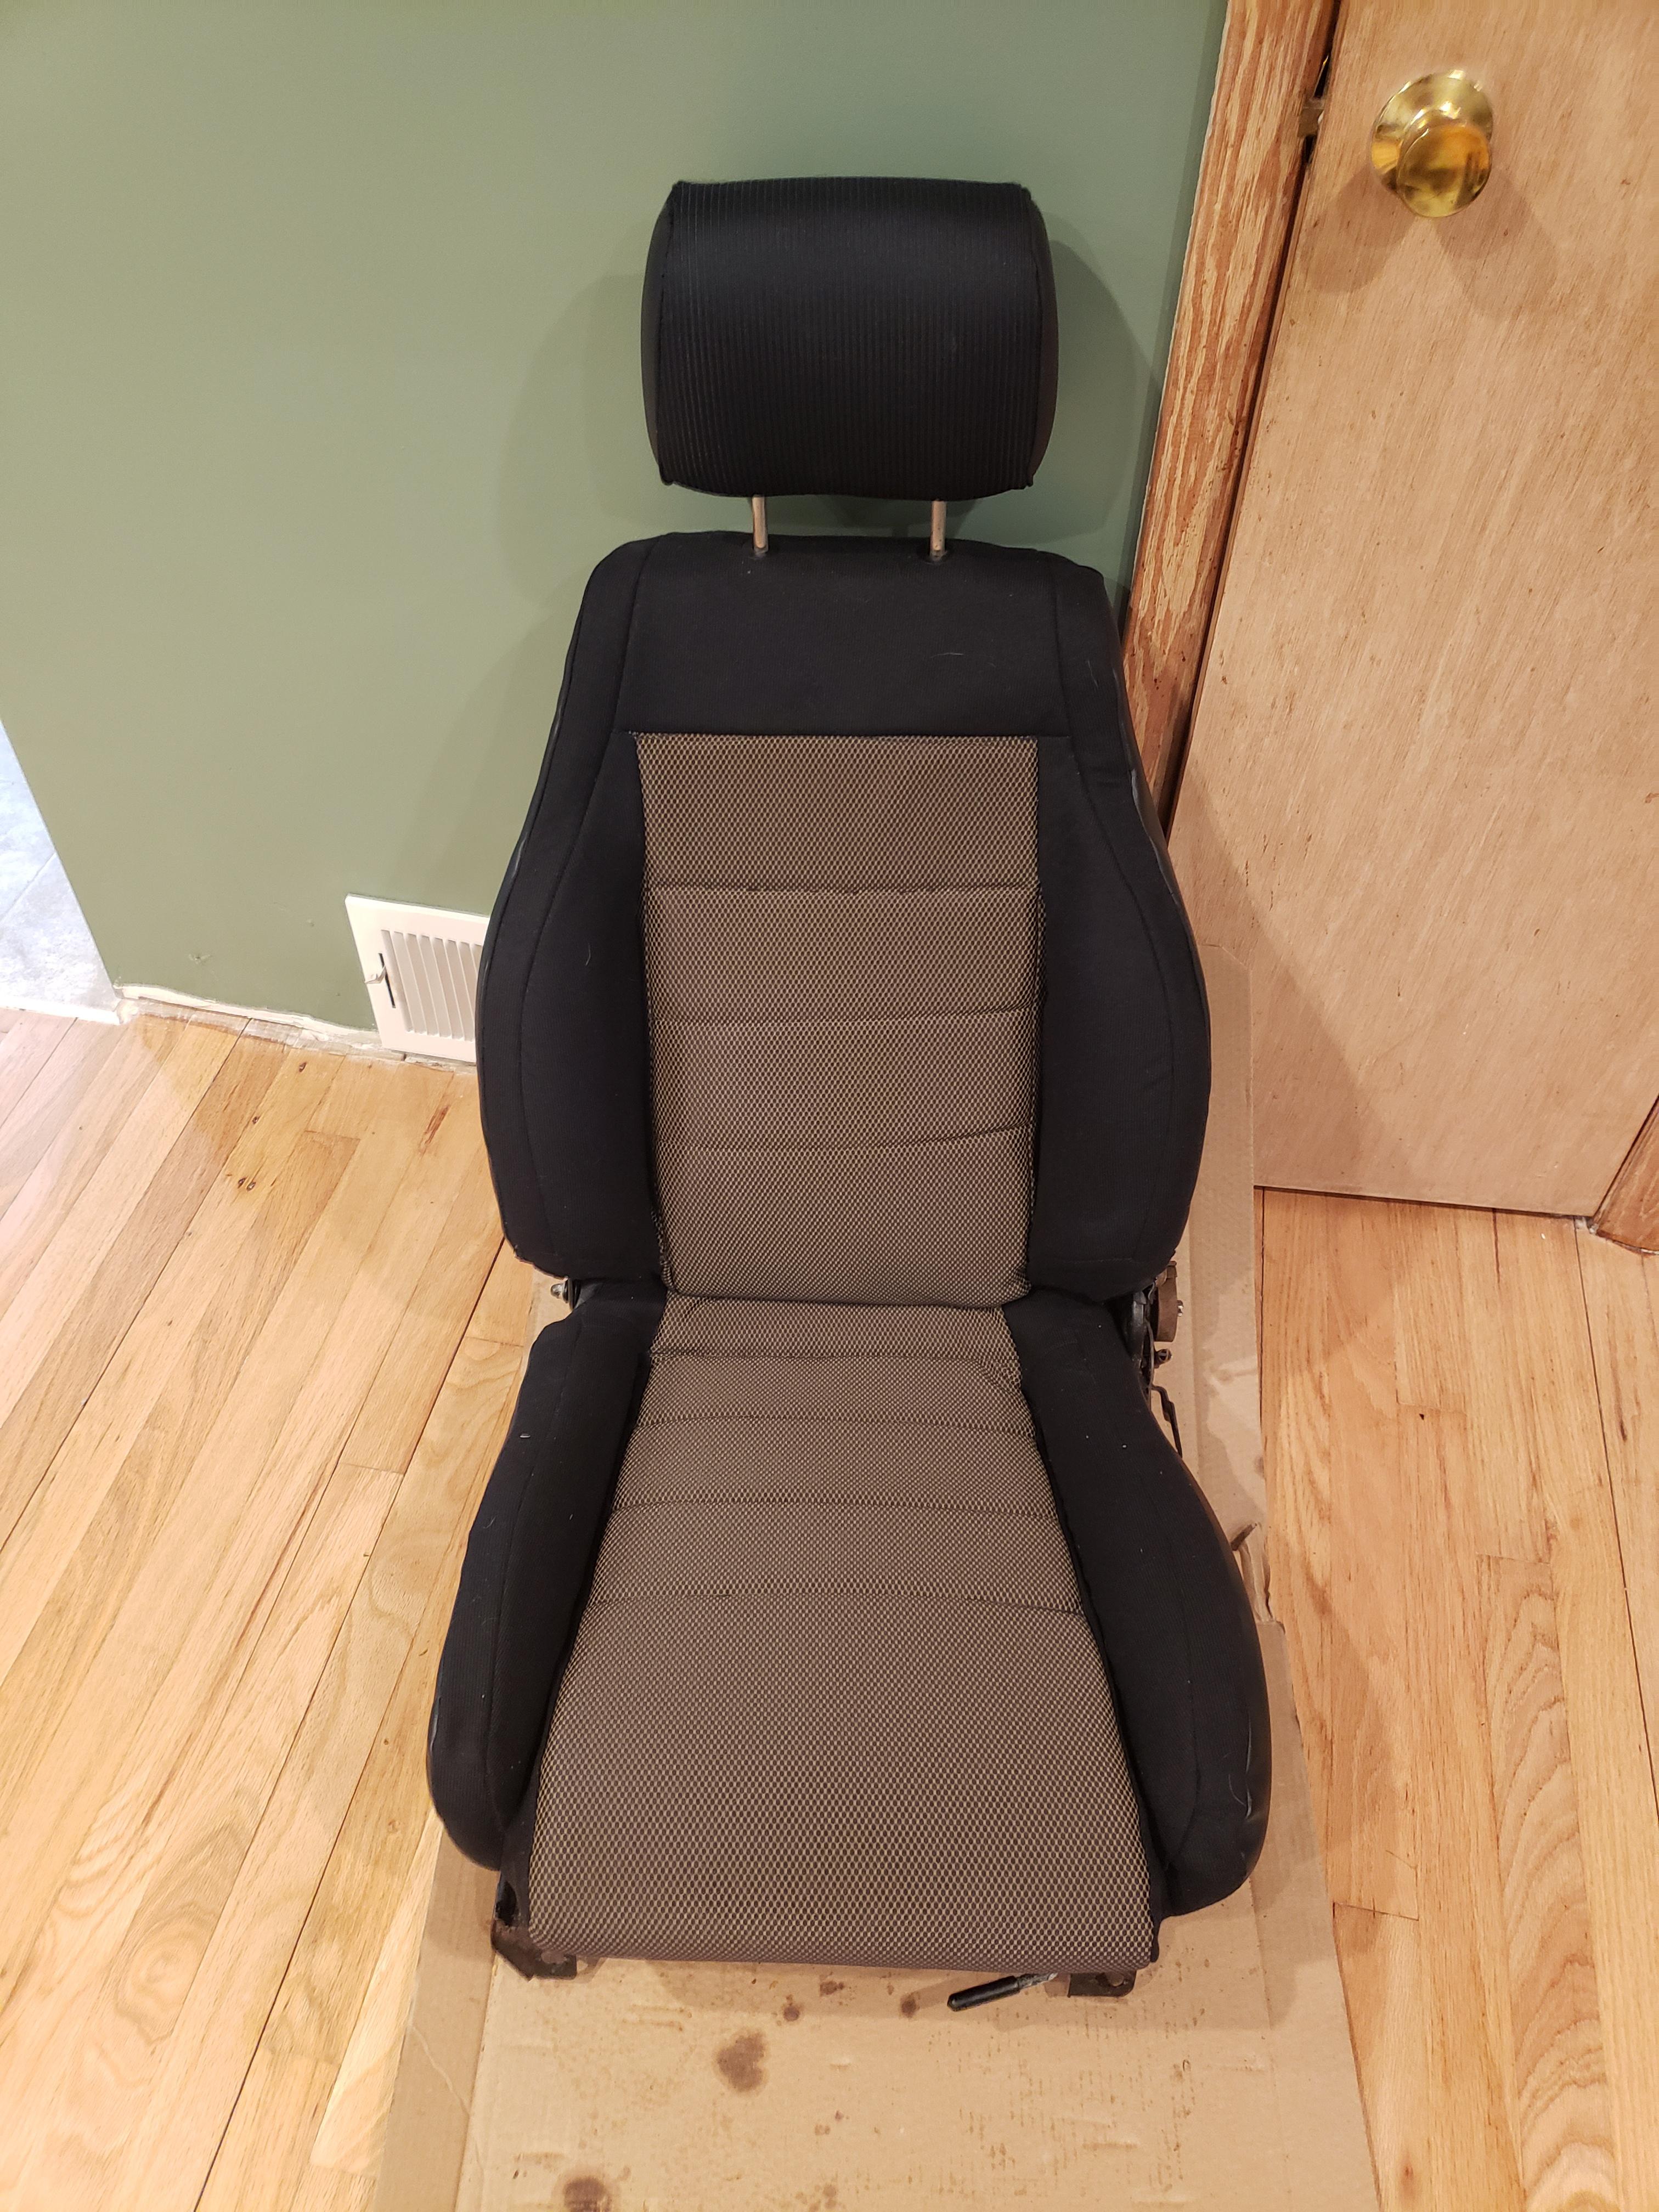
little progress done this weekend. Finally finished the first seat!! It's not perfect by any means, but it's certainly better than the ripped cover that it originally had.
also finished inspecting the irons and rotors. Worst wear was around .0005" so everything's well within spec.
just waiting for the rebuild kit and new rotor housings to show up and she's ready to go back together. Might paint the irons if i get bored. we'll see.
also finished inspecting the irons and rotors. Worst wear was around .0005" so everything's well within spec.

just waiting for the rebuild kit and new rotor housings to show up and she's ready to go back together. Might paint the irons if i get bored. we'll see.
Thread Starter
Joined: Mar 2002
Posts: 1,726
Likes: 540
From: binghamton, ny
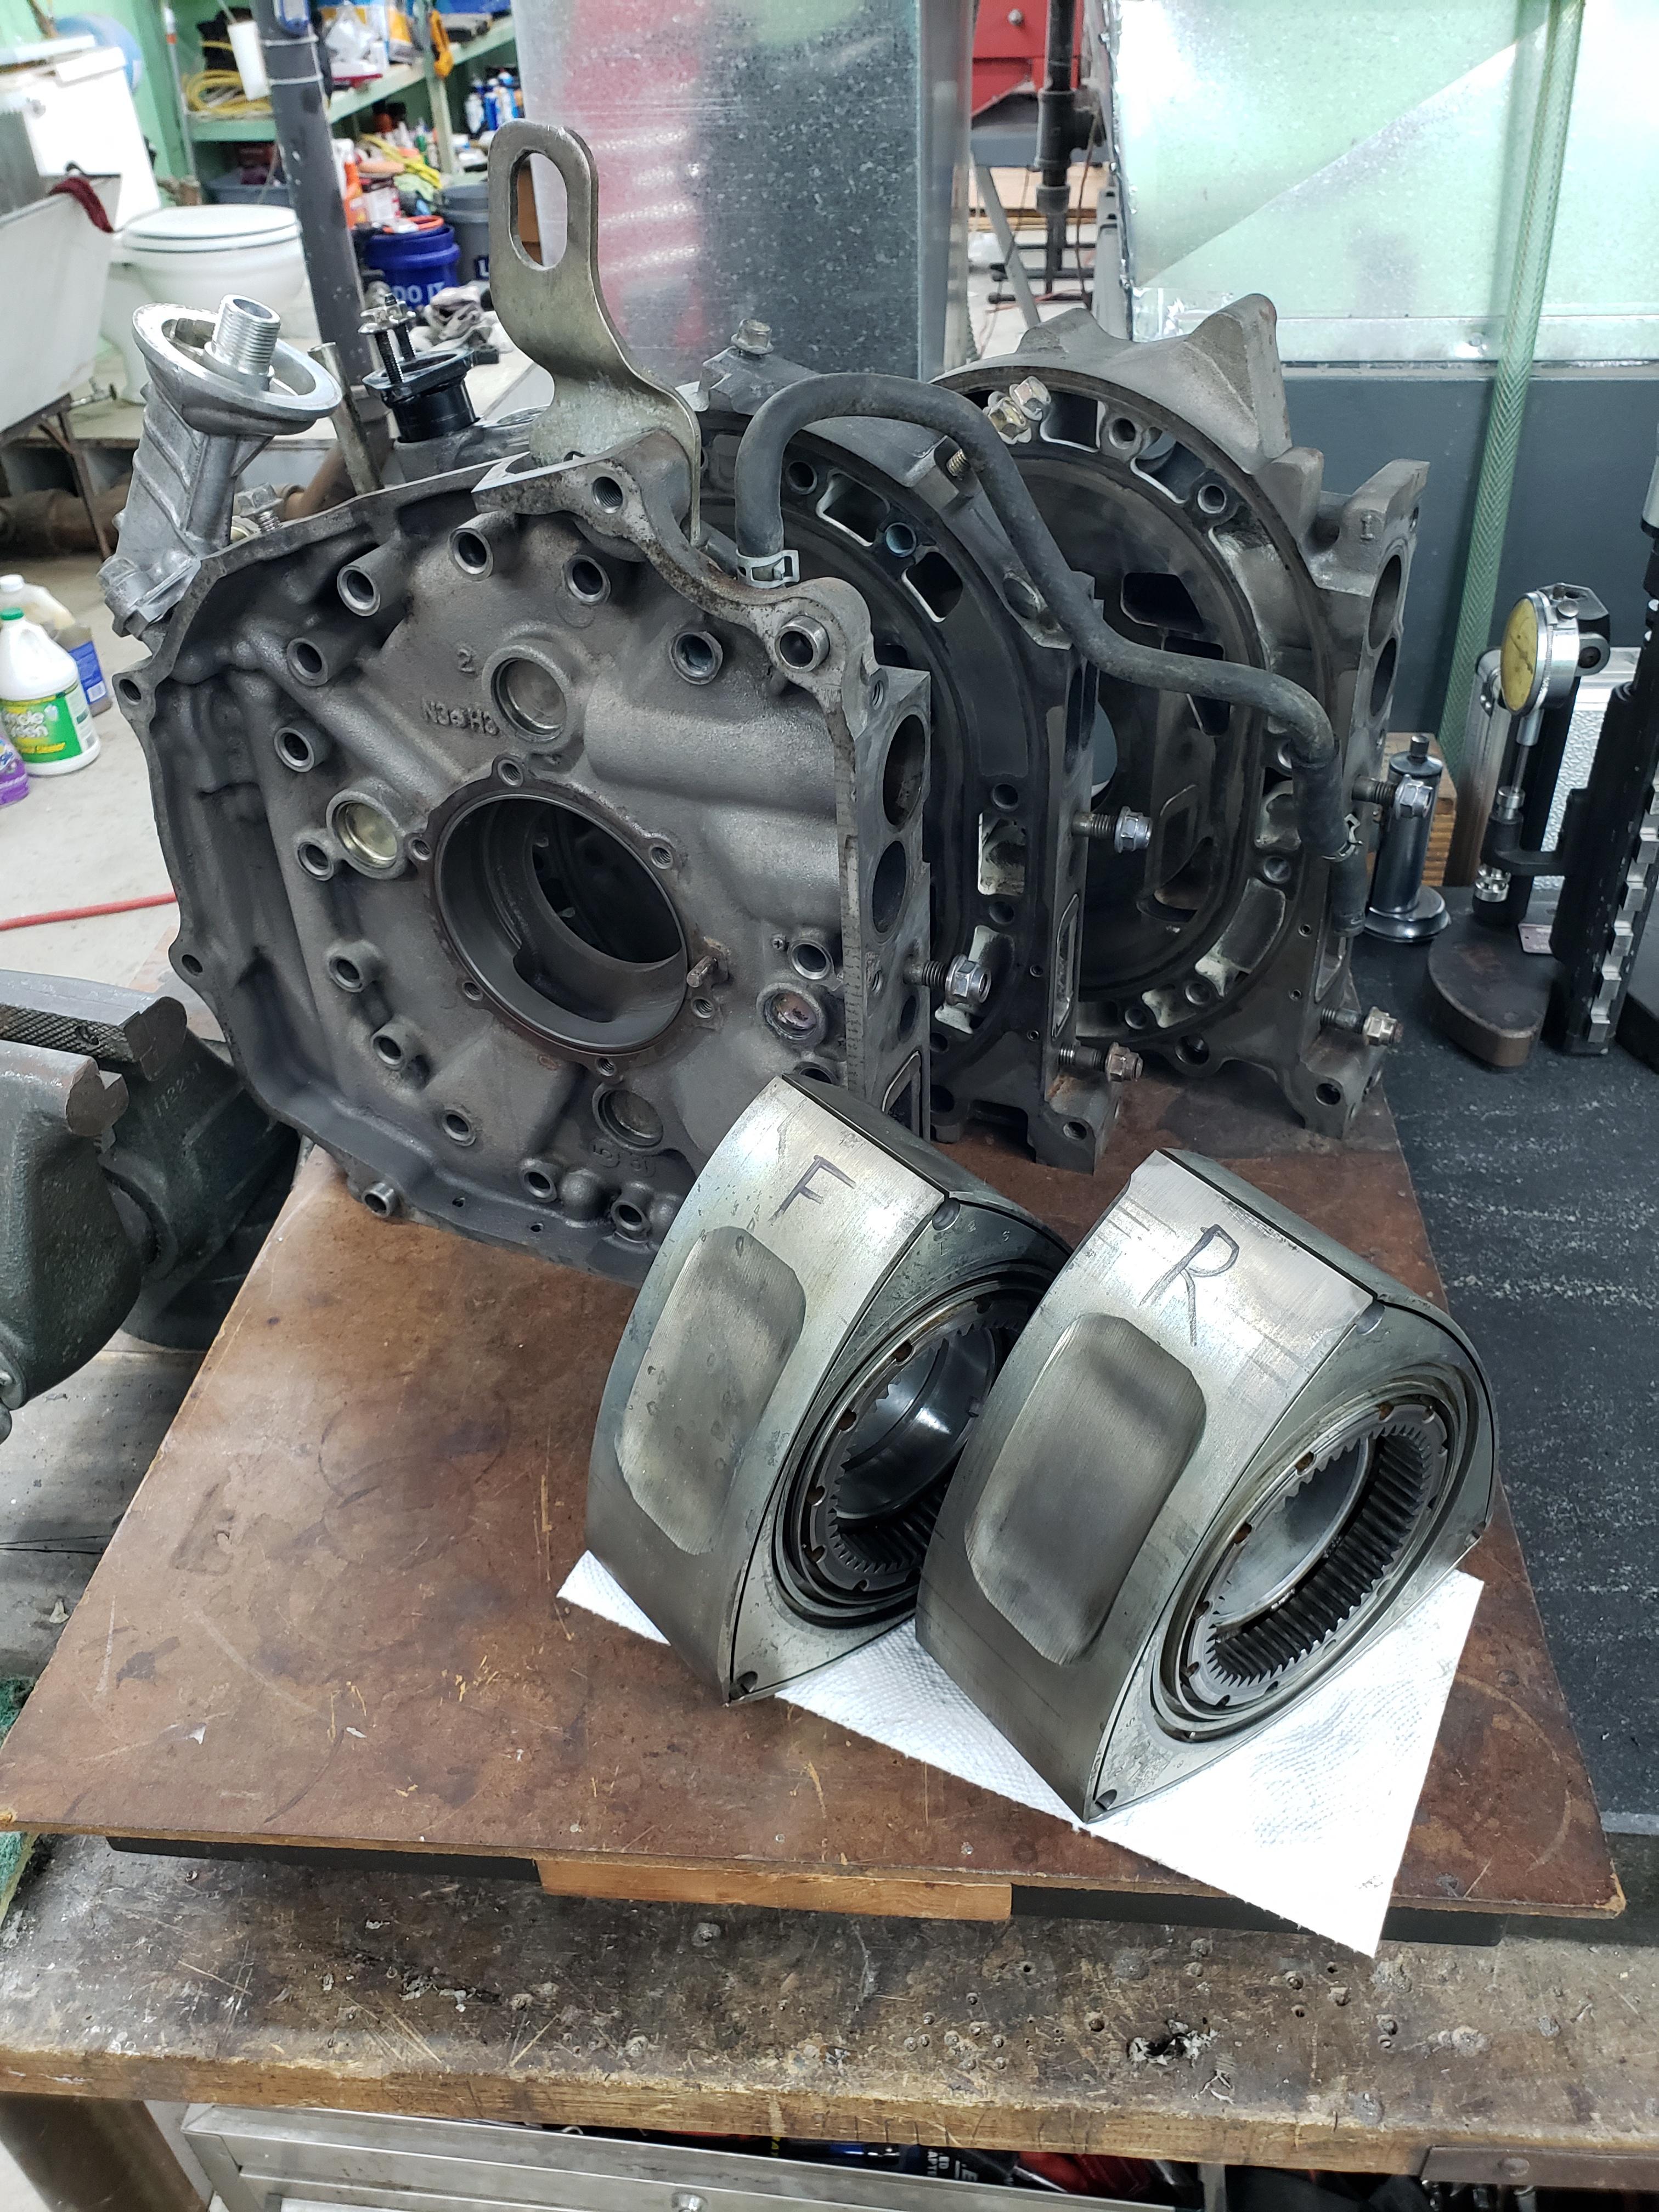
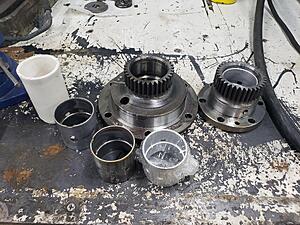
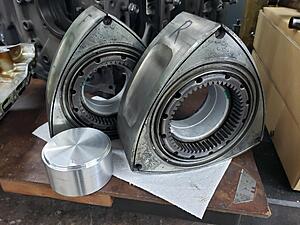
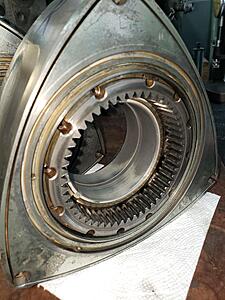
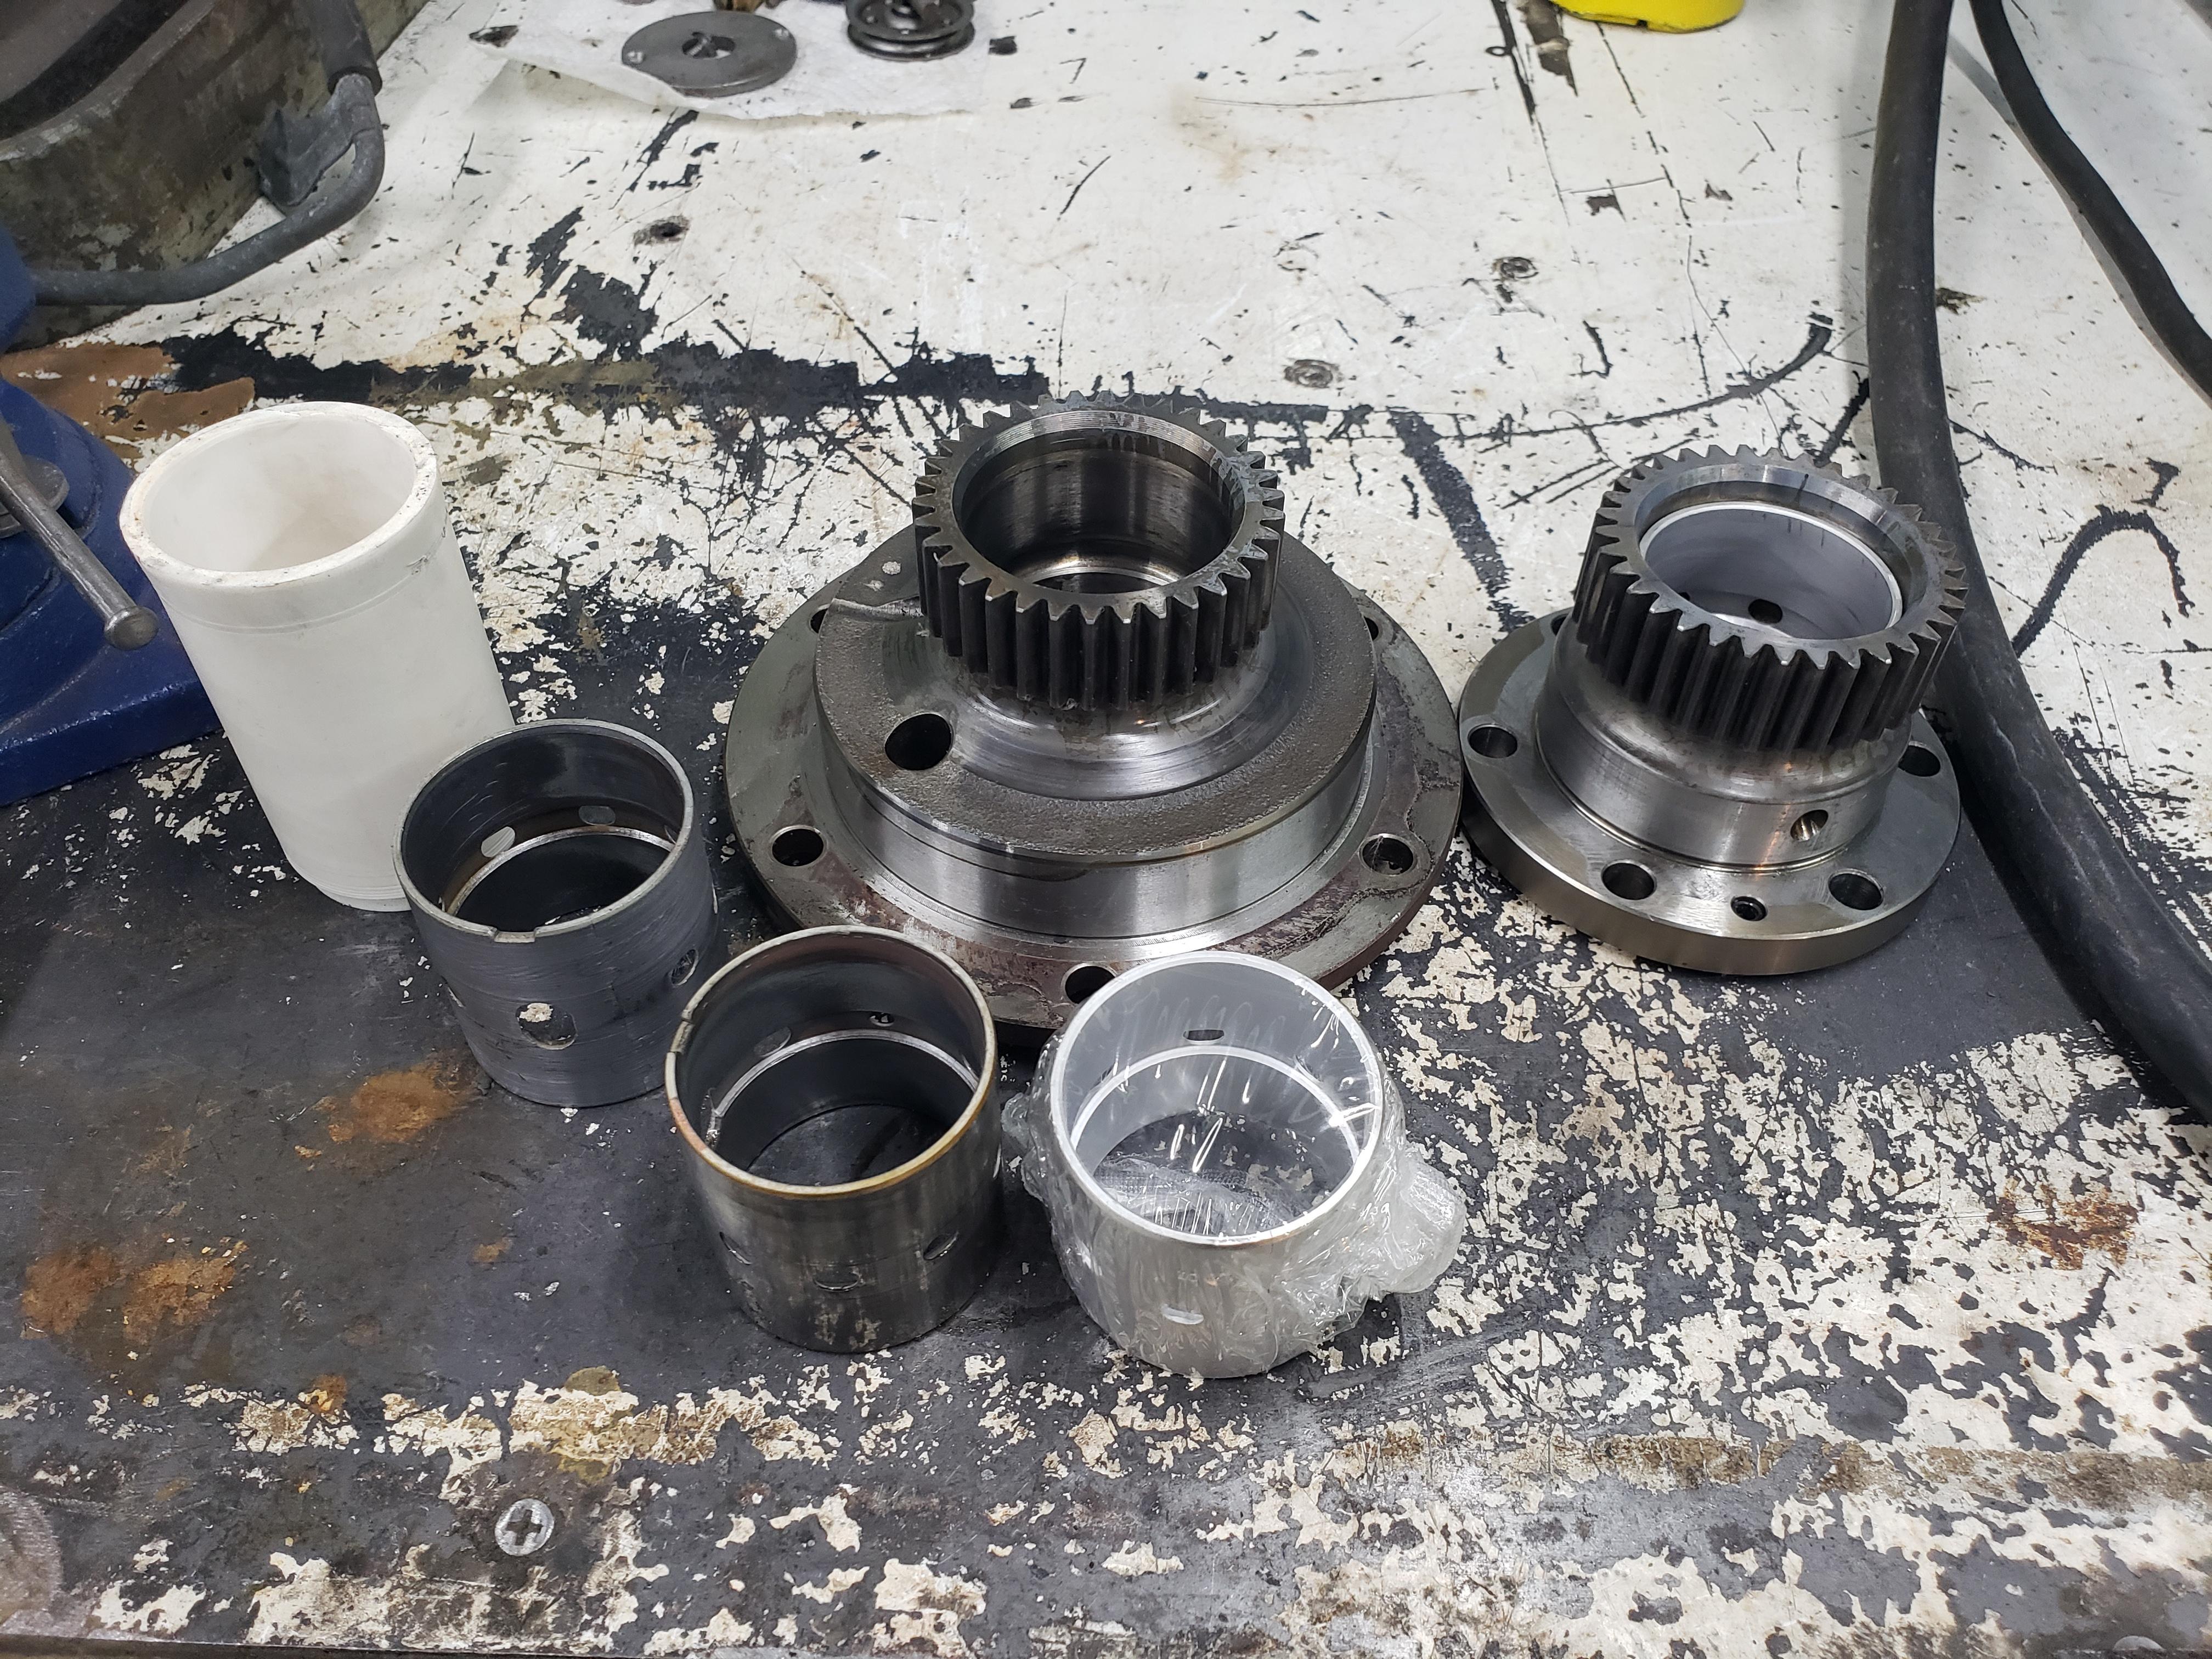
lots of progress made over the last few days. Got all the bearings swapped out on the stationary gears as well as the rotors. Yes, that's a special press tool made from PVC pipe. haha
Old bearings look like they have about had it.
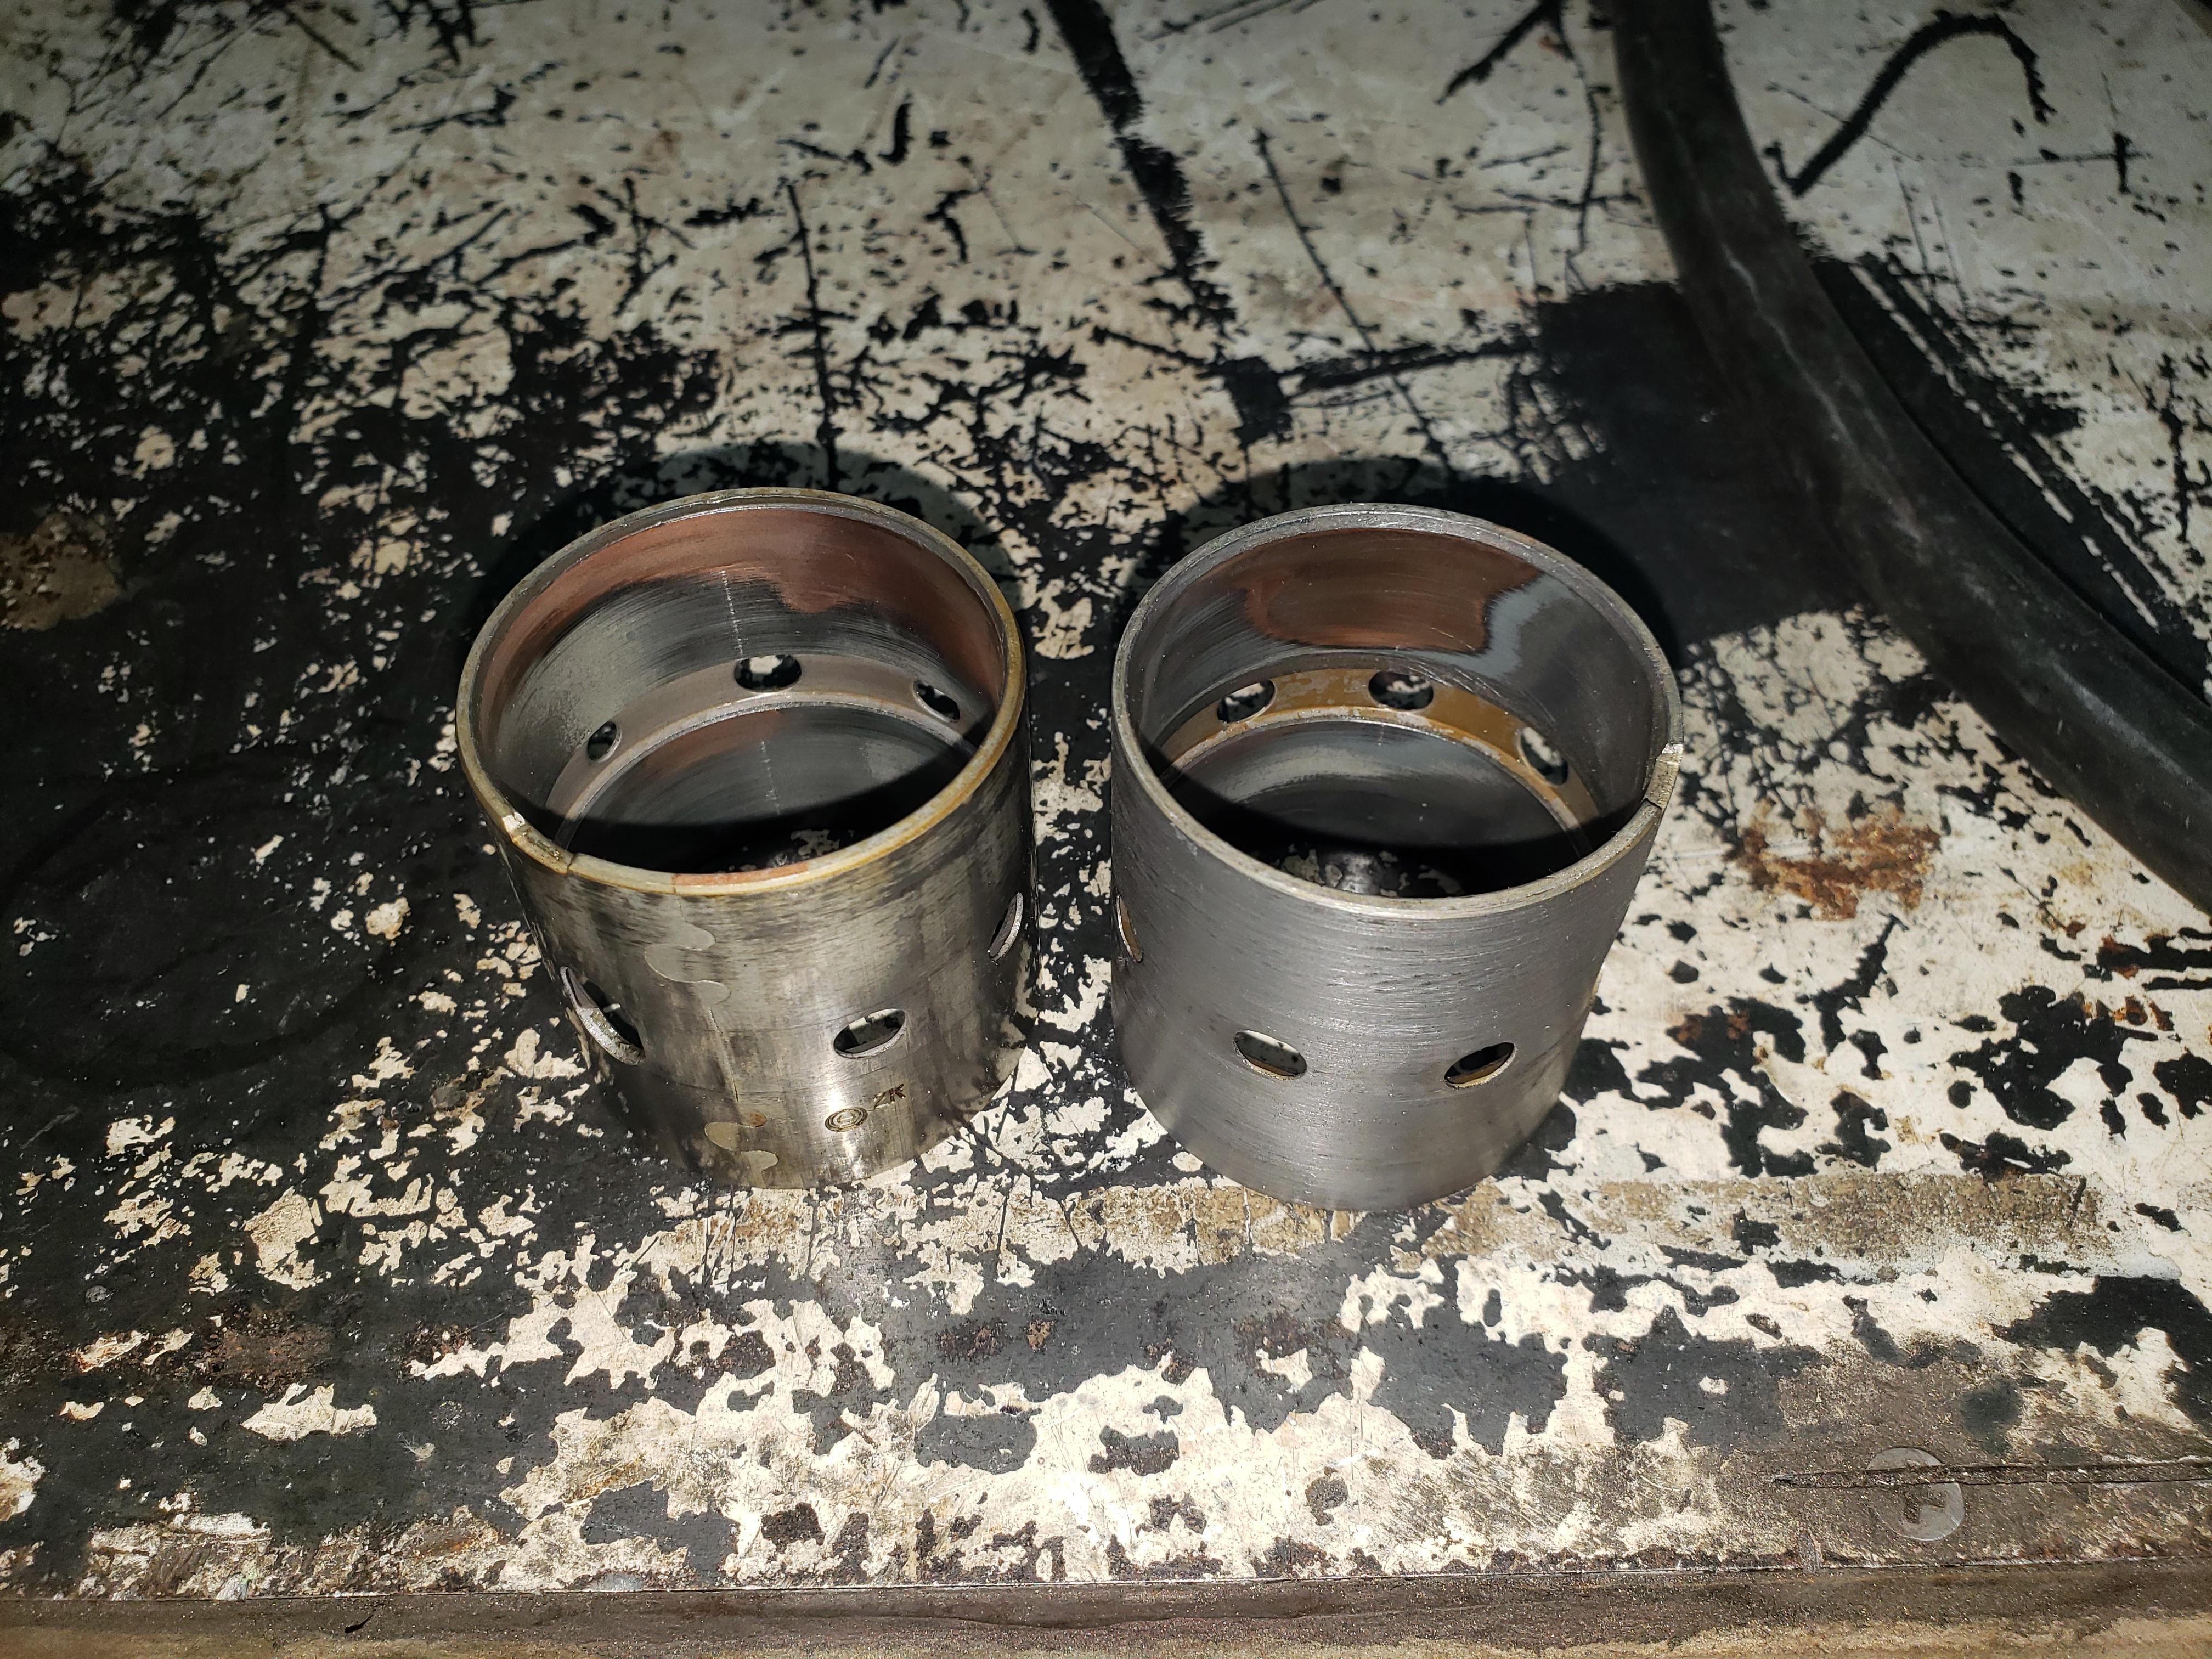
Rotor bearings are done as well. Had to make the press tool from something a bit more substantial than PVC for these guys.
Not 100% sure these NEEDED to be replaced, but for $100 it's good piece of mind. The old bearings defiantly had some wear, but not nearly as bad as the stationary bearings.
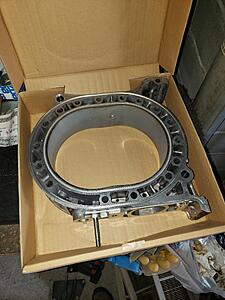
Also, my shiny new rotor housings came in! they are so clean and pretty. I've never used brand new housings on any rebuilds I've done, so i'm excited to see how this engine turns out.
Old bearings look like they have about had it.
Rotor bearings are done as well. Had to make the press tool from something a bit more substantial than PVC for these guys.

Not 100% sure these NEEDED to be replaced, but for $100 it's good piece of mind. The old bearings defiantly had some wear, but not nearly as bad as the stationary bearings.
Also, my shiny new rotor housings came in! they are so clean and pretty. I've never used brand new housings on any rebuilds I've done, so i'm excited to see how this engine turns out.

Thread Starter
Joined: Mar 2002
Posts: 1,726
Likes: 540
From: binghamton, ny
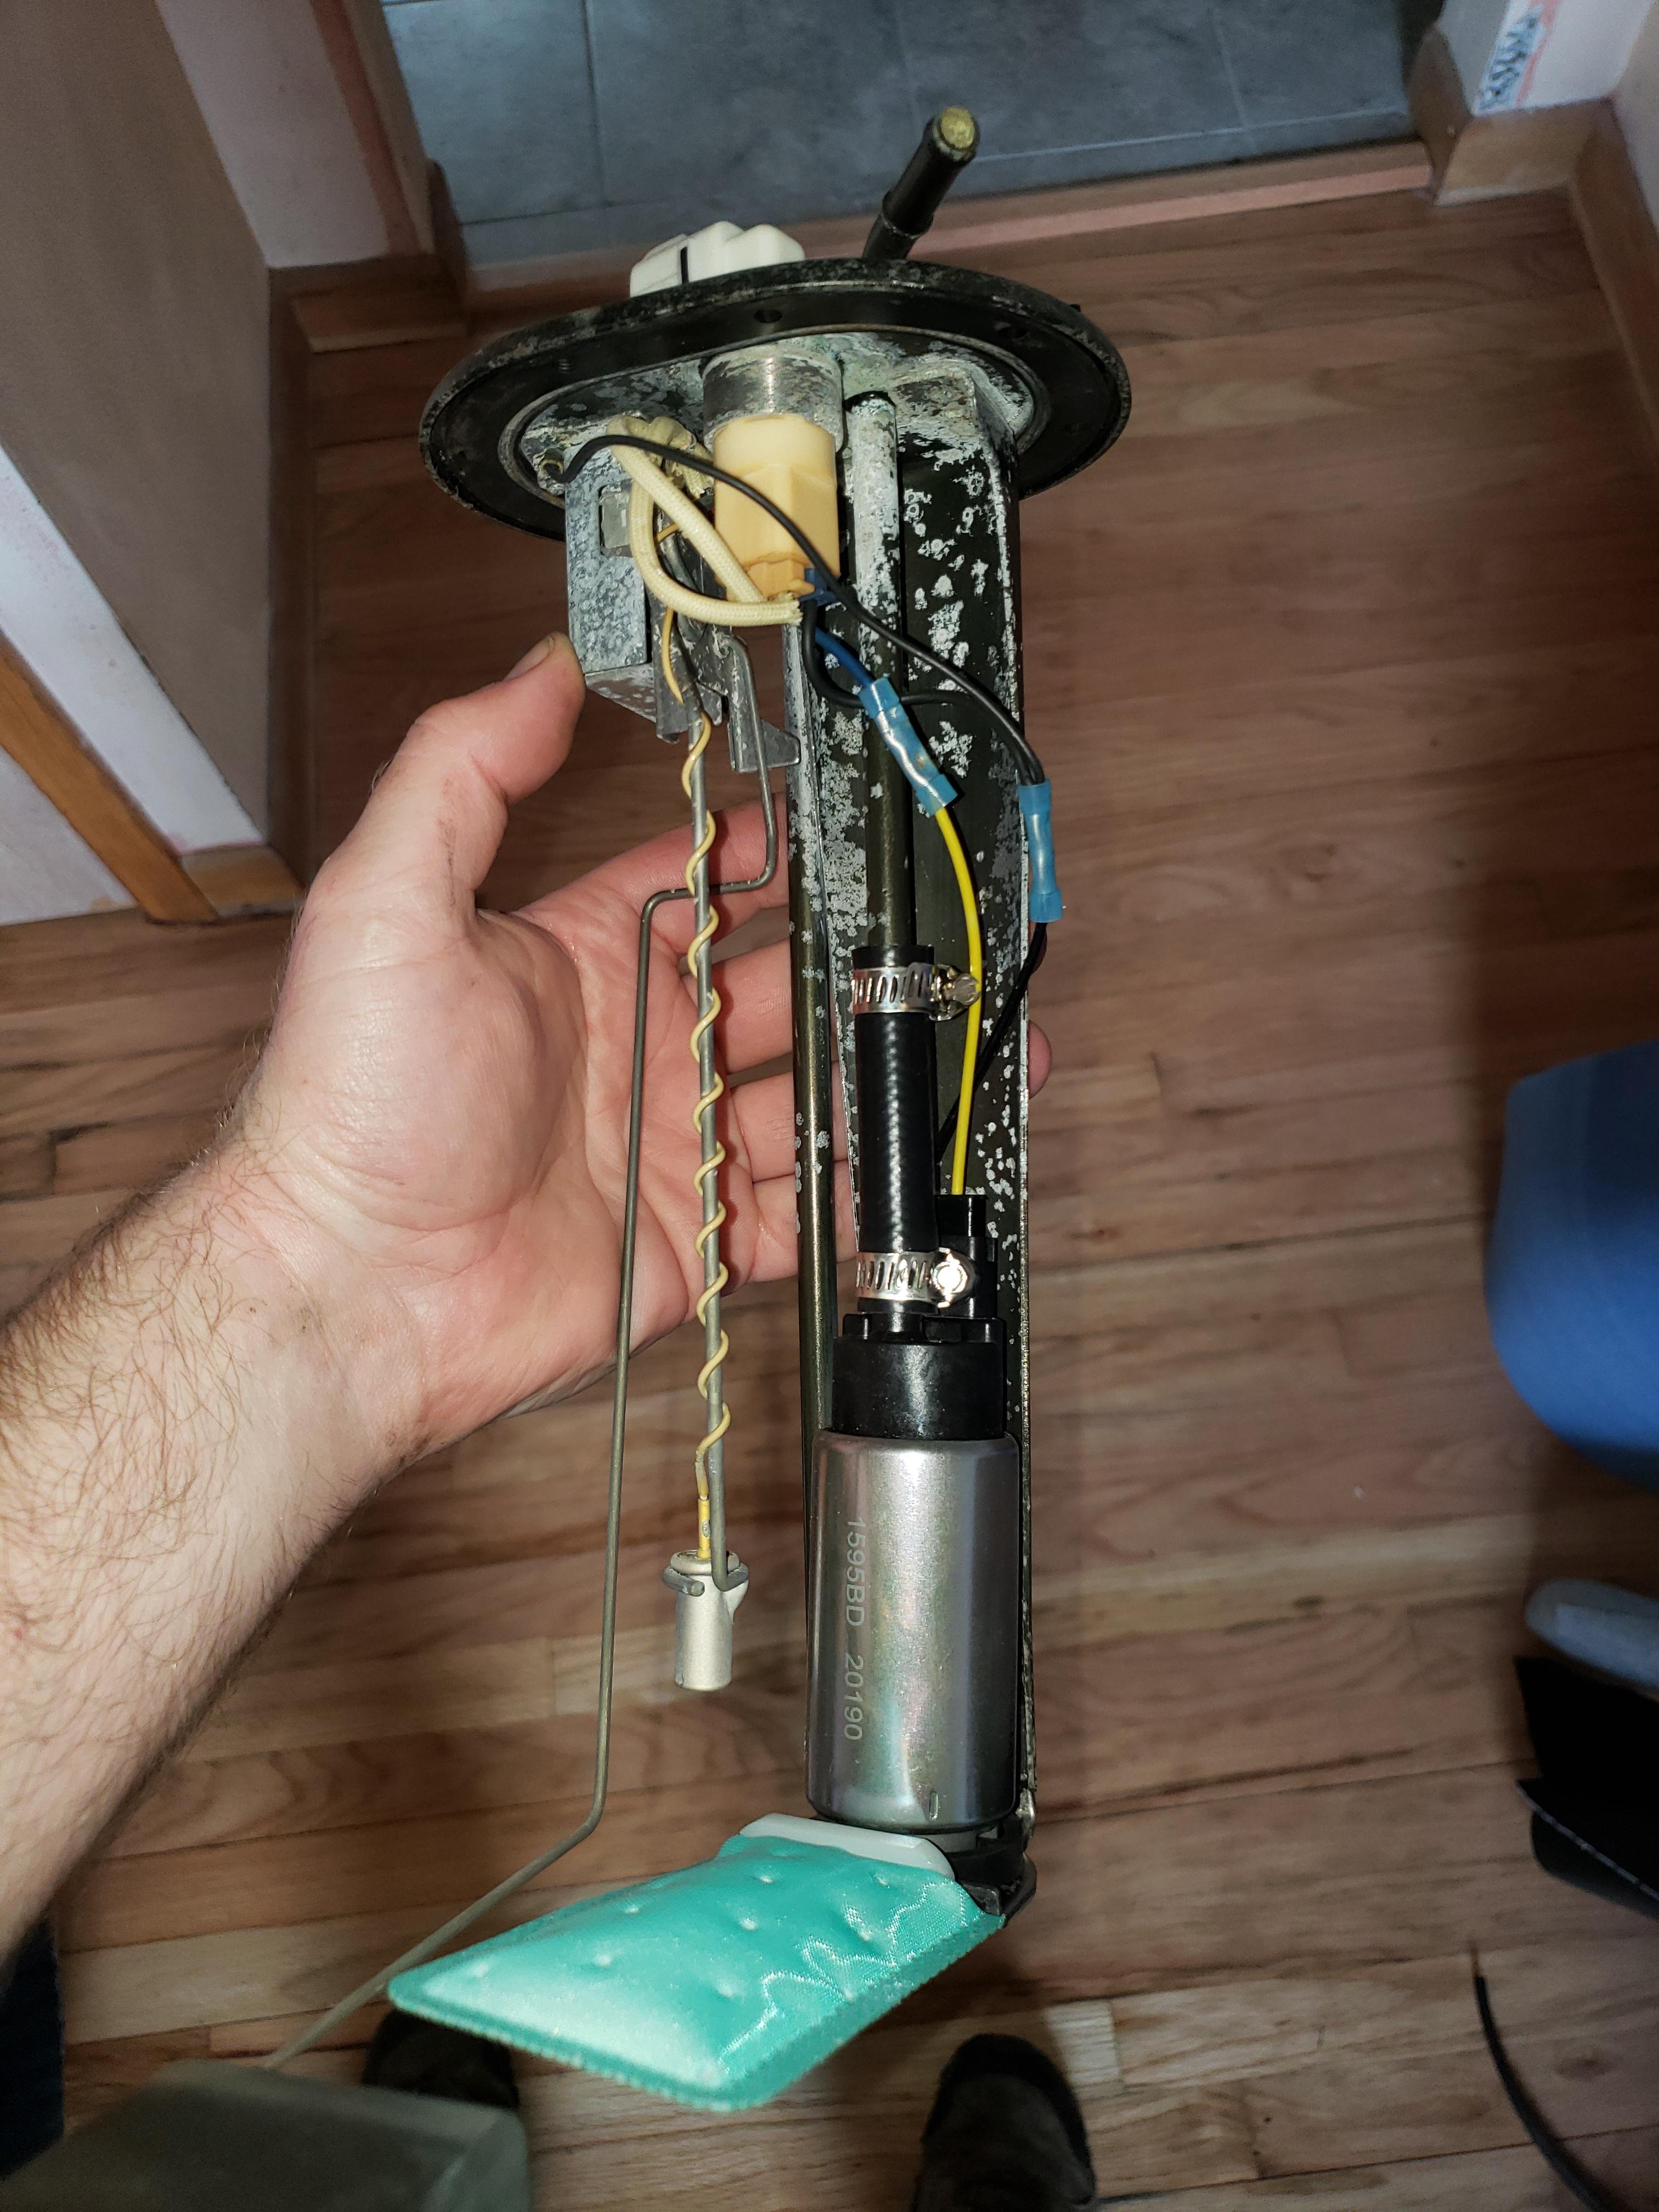
Also got the fuel pump assembly all cleaned up. I'm guessing the old pump is garbage although i didn't actually try it. I've never seen a white buildup like this on fuel components before.
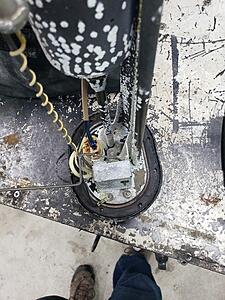
Needless to say i'm going to need more fuel than a stock FC NA fuel pump can deliver, so I upgraded to an FD pump and cleaned up the assembly the best I can. There's no white residue left, but the paint is very splotchy where is used to be.
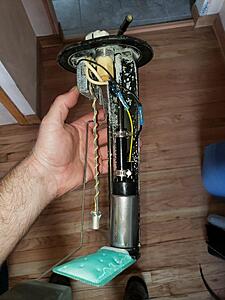
I also drained and cleaned the fuel tank so my entire fuel system is nice and clean now.
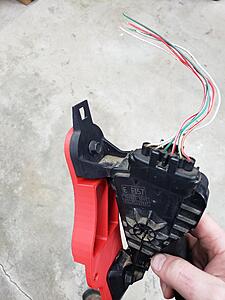
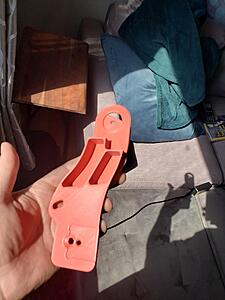
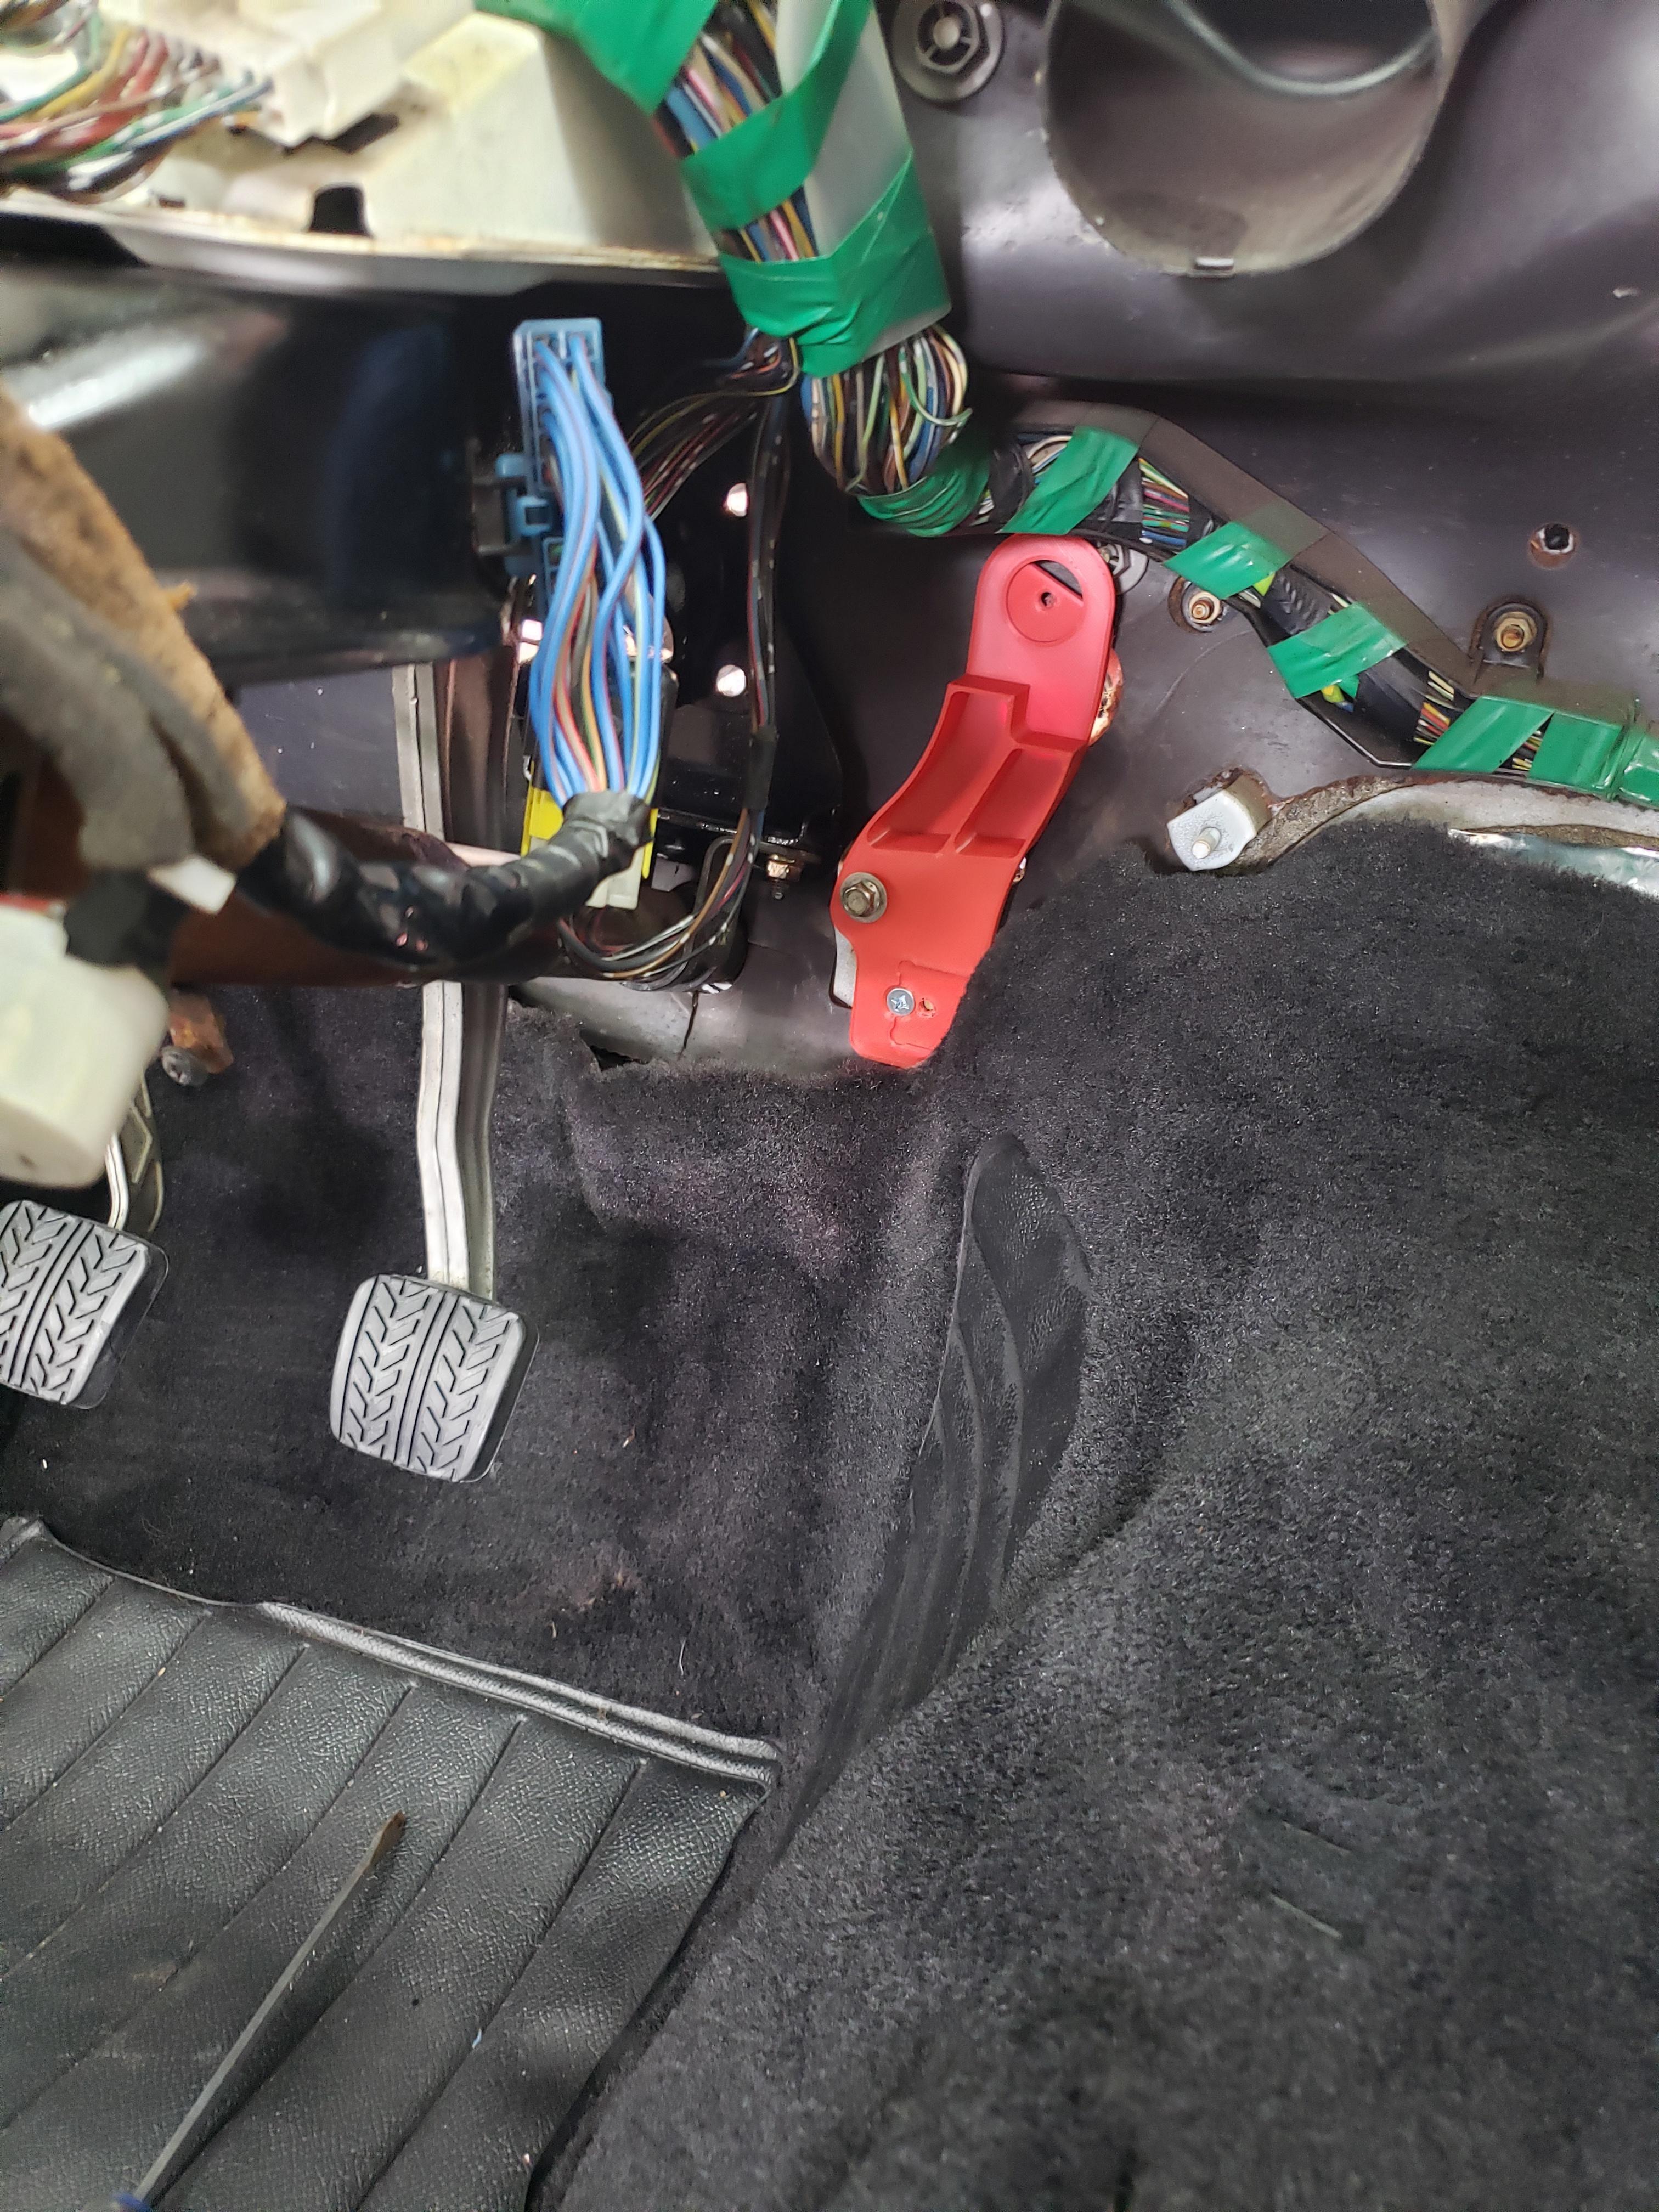
I also started putting the interior back together, which is a milestone and will be nice to get all these parts out of my house. If you remember the car used to be an automatic, so I got the new pedal assembly installed along with a shiny new clutch master cylinder. BUT even more important, the RX8 gas pedal is mocked in place. Of course the intent being to keep the original throttle by wire system controlled by the RX8 PCM. I measured my RX8 and i'm trying to mimic the pedal spacing in that. There's a little bit of adjustment in the bracket, but not much.
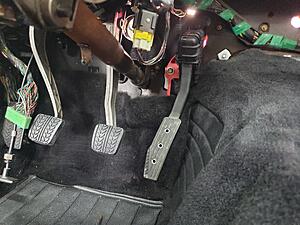
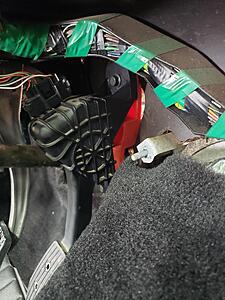
So far it's just mounted on a 3d printed bracket, but ultimately i'll machine a nice aluminum version of it. It bolts right to the original pedal assembly mounts.


Needless to say i'm going to need more fuel than a stock FC NA fuel pump can deliver, so I upgraded to an FD pump and cleaned up the assembly the best I can. There's no white residue left, but the paint is very splotchy where is used to be.
I also drained and cleaned the fuel tank so my entire fuel system is nice and clean now.
I also started putting the interior back together, which is a milestone and will be nice to get all these parts out of my house. If you remember the car used to be an automatic, so I got the new pedal assembly installed along with a shiny new clutch master cylinder. BUT even more important, the RX8 gas pedal is mocked in place. Of course the intent being to keep the original throttle by wire system controlled by the RX8 PCM. I measured my RX8 and i'm trying to mimic the pedal spacing in that. There's a little bit of adjustment in the bracket, but not much.


So far it's just mounted on a 3d printed bracket, but ultimately i'll machine a nice aluminum version of it. It bolts right to the original pedal assembly mounts.


Rotary Freak
Joined: Jul 2016
Posts: 1,838
Likes: 599
From: Beeton, Ontario
That adapter is really neat.
Prints done in ABS will hold up to in-cabin temperatures, but the aluminum is a good idea. I'd be really nervous if my gas pedal was connected with a 3D printed part.
Prints done in ABS will hold up to in-cabin temperatures, but the aluminum is a good idea. I'd be really nervous if my gas pedal was connected with a 3D printed part.
Thread Starter
Joined: Mar 2002
Posts: 1,726
Likes: 540
From: binghamton, ny
well let me get this one made, but I certainly am happy to make a few more if people want them.
Yeah, the 3d print is just a mock-up. it's a heck of a lot easier to hit print on the printer than to machine it and have it not fit. A lot cheaper too, haha.
Yeah, the 3d print is just a mock-up. it's a heck of a lot easier to hit print on the printer than to machine it and have it not fit. A lot cheaper too, haha.
Senior Member
Joined: Apr 2021
Posts: 393
Likes: 70
From: GA
Assuming it'll play nice with the haltech, I can just use the rx-8 pedal and throttle body for my NA S4
Thread Starter
Joined: Mar 2002
Posts: 1,726
Likes: 540
From: binghamton, ny