
Project: let the great turd debate begin...


Senior Member


Joined: Apr 2021
Posts: 393
Likes: 70
From: GA
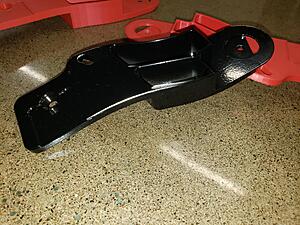
kinda what i thought. so i'll be hitting you up for that pedal bracket and a throttle body adapter as i dont think what i bought will work. wont matter any time soon anyways.
Thread Starter
Joined: Mar 2002
Posts: 1,726
Likes: 540
From: binghamton, ny
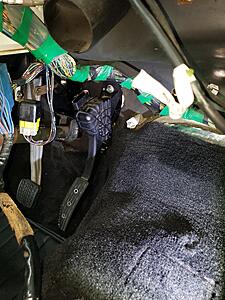
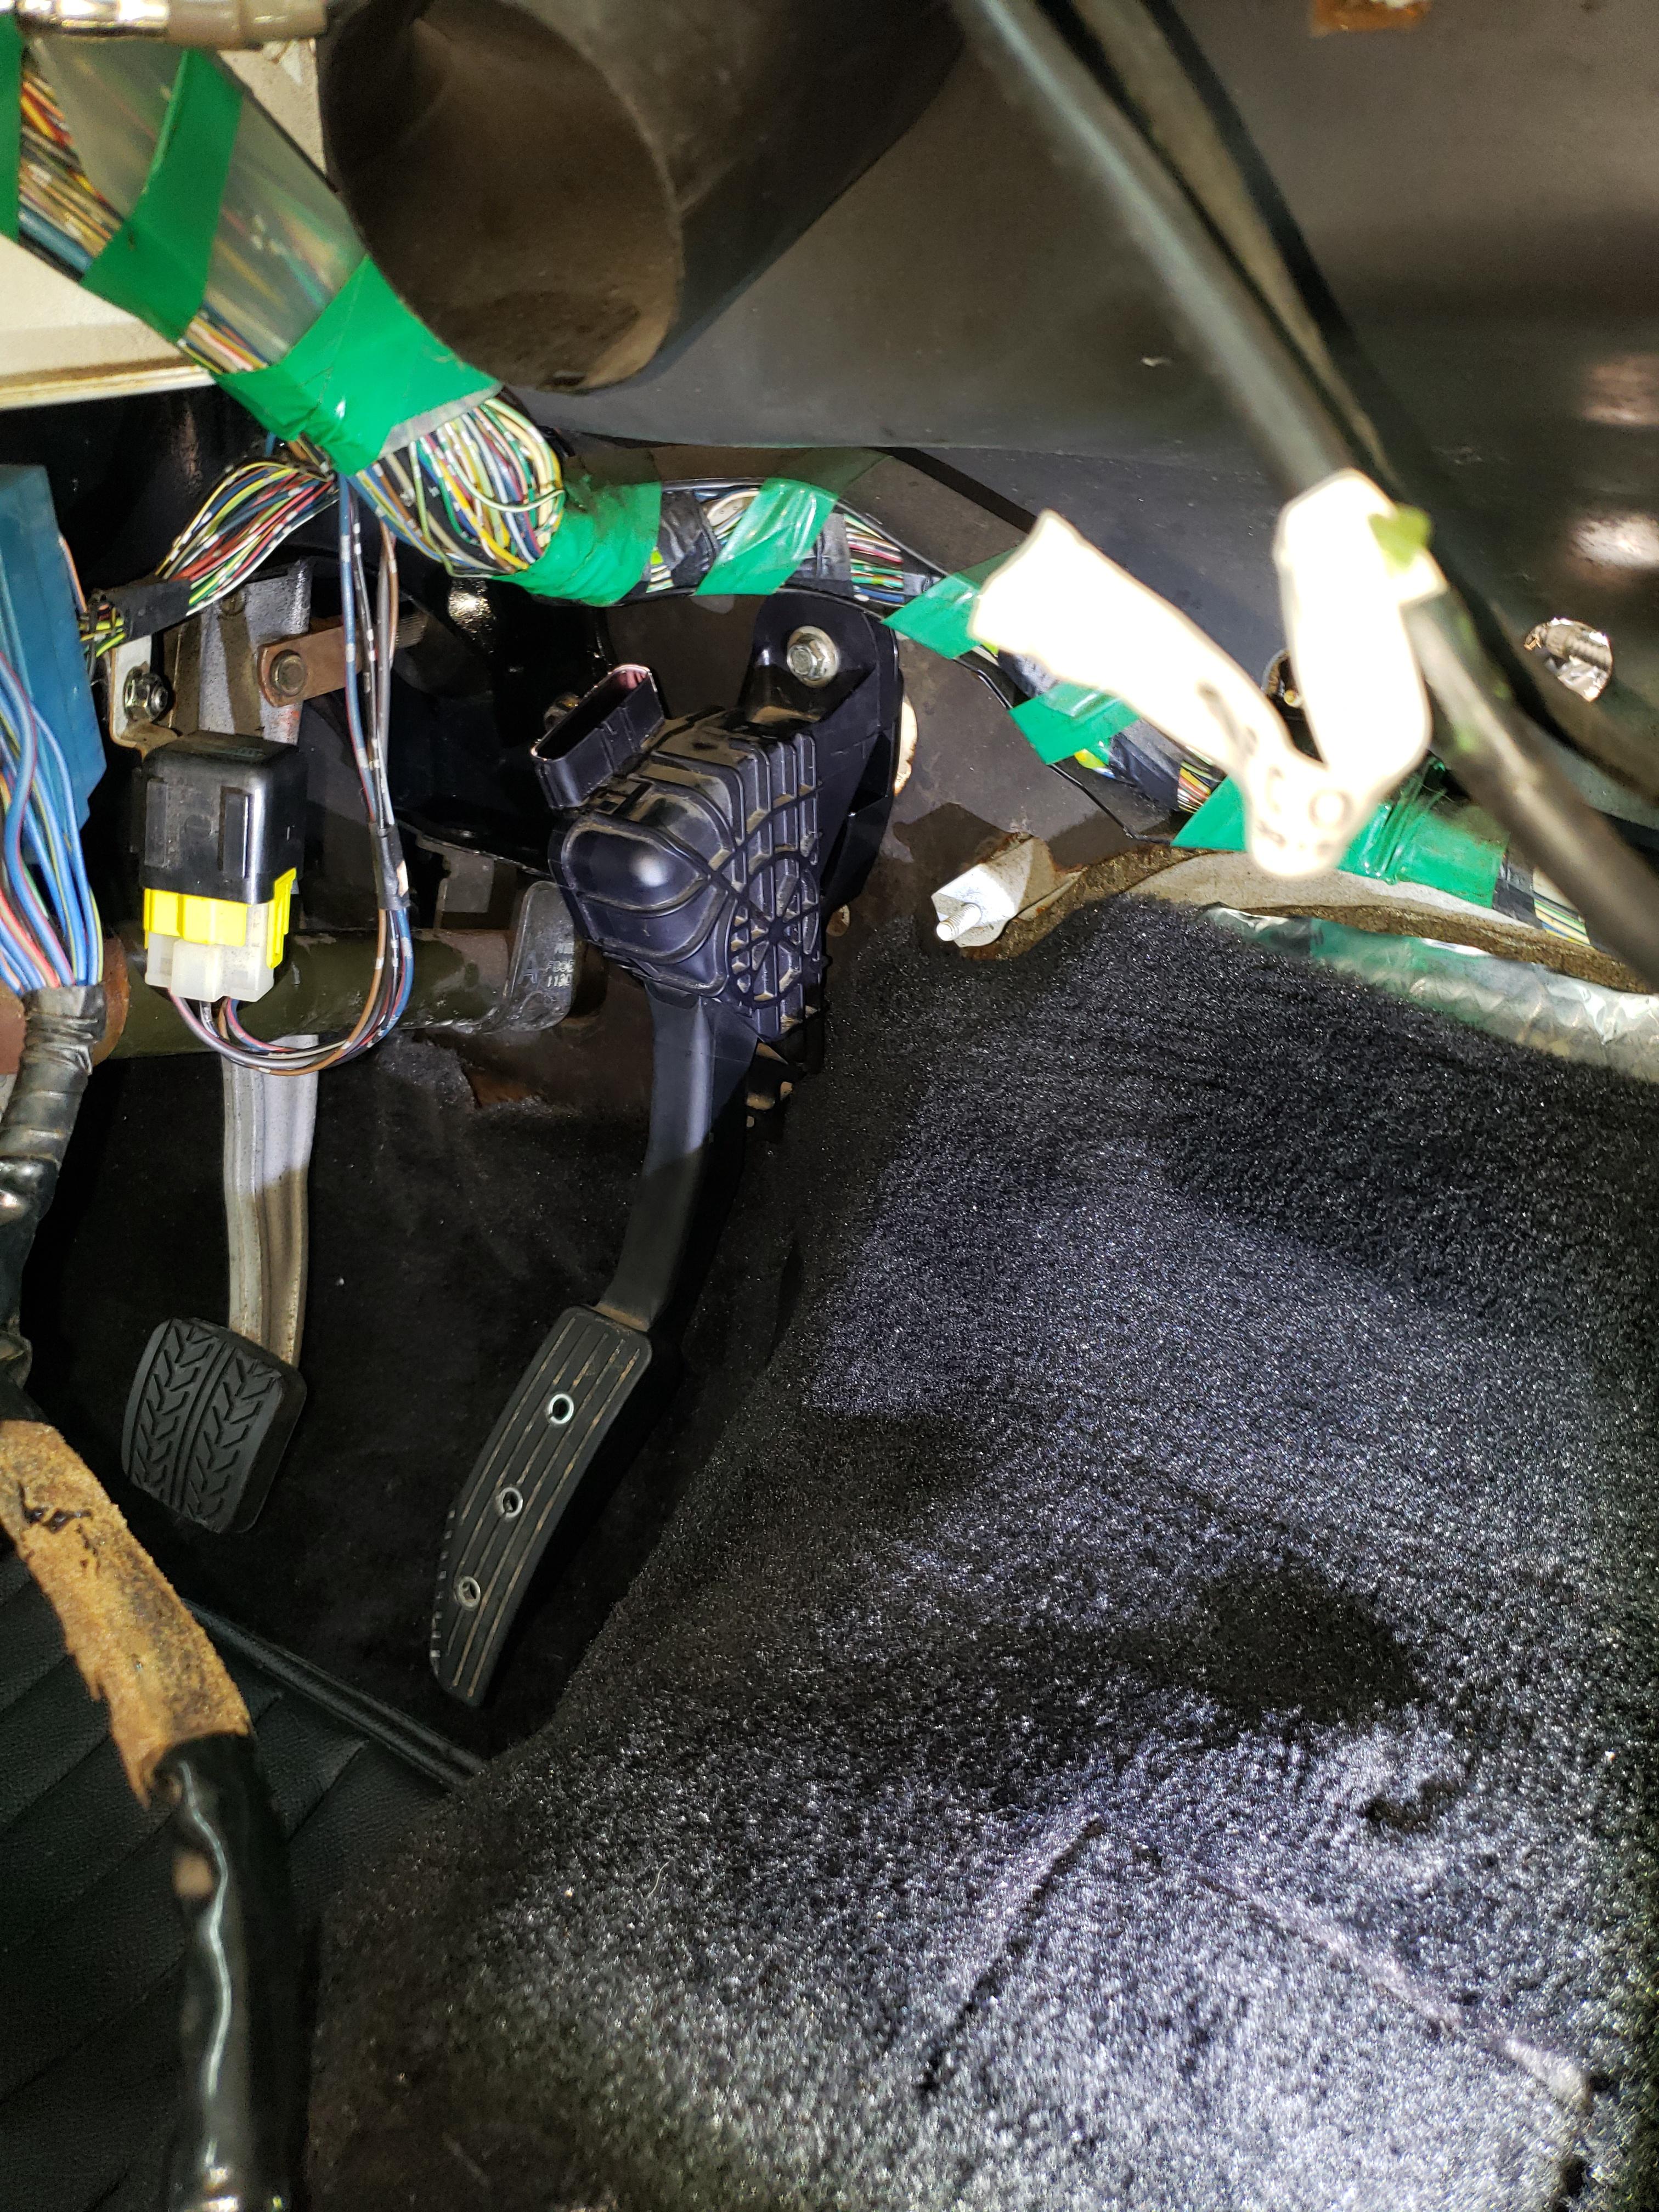
well the pedal adapter is done and works great!
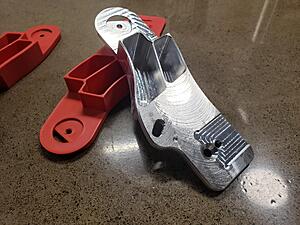
poweder coated and installed (and the carpet is back in too!):
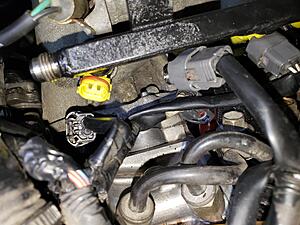
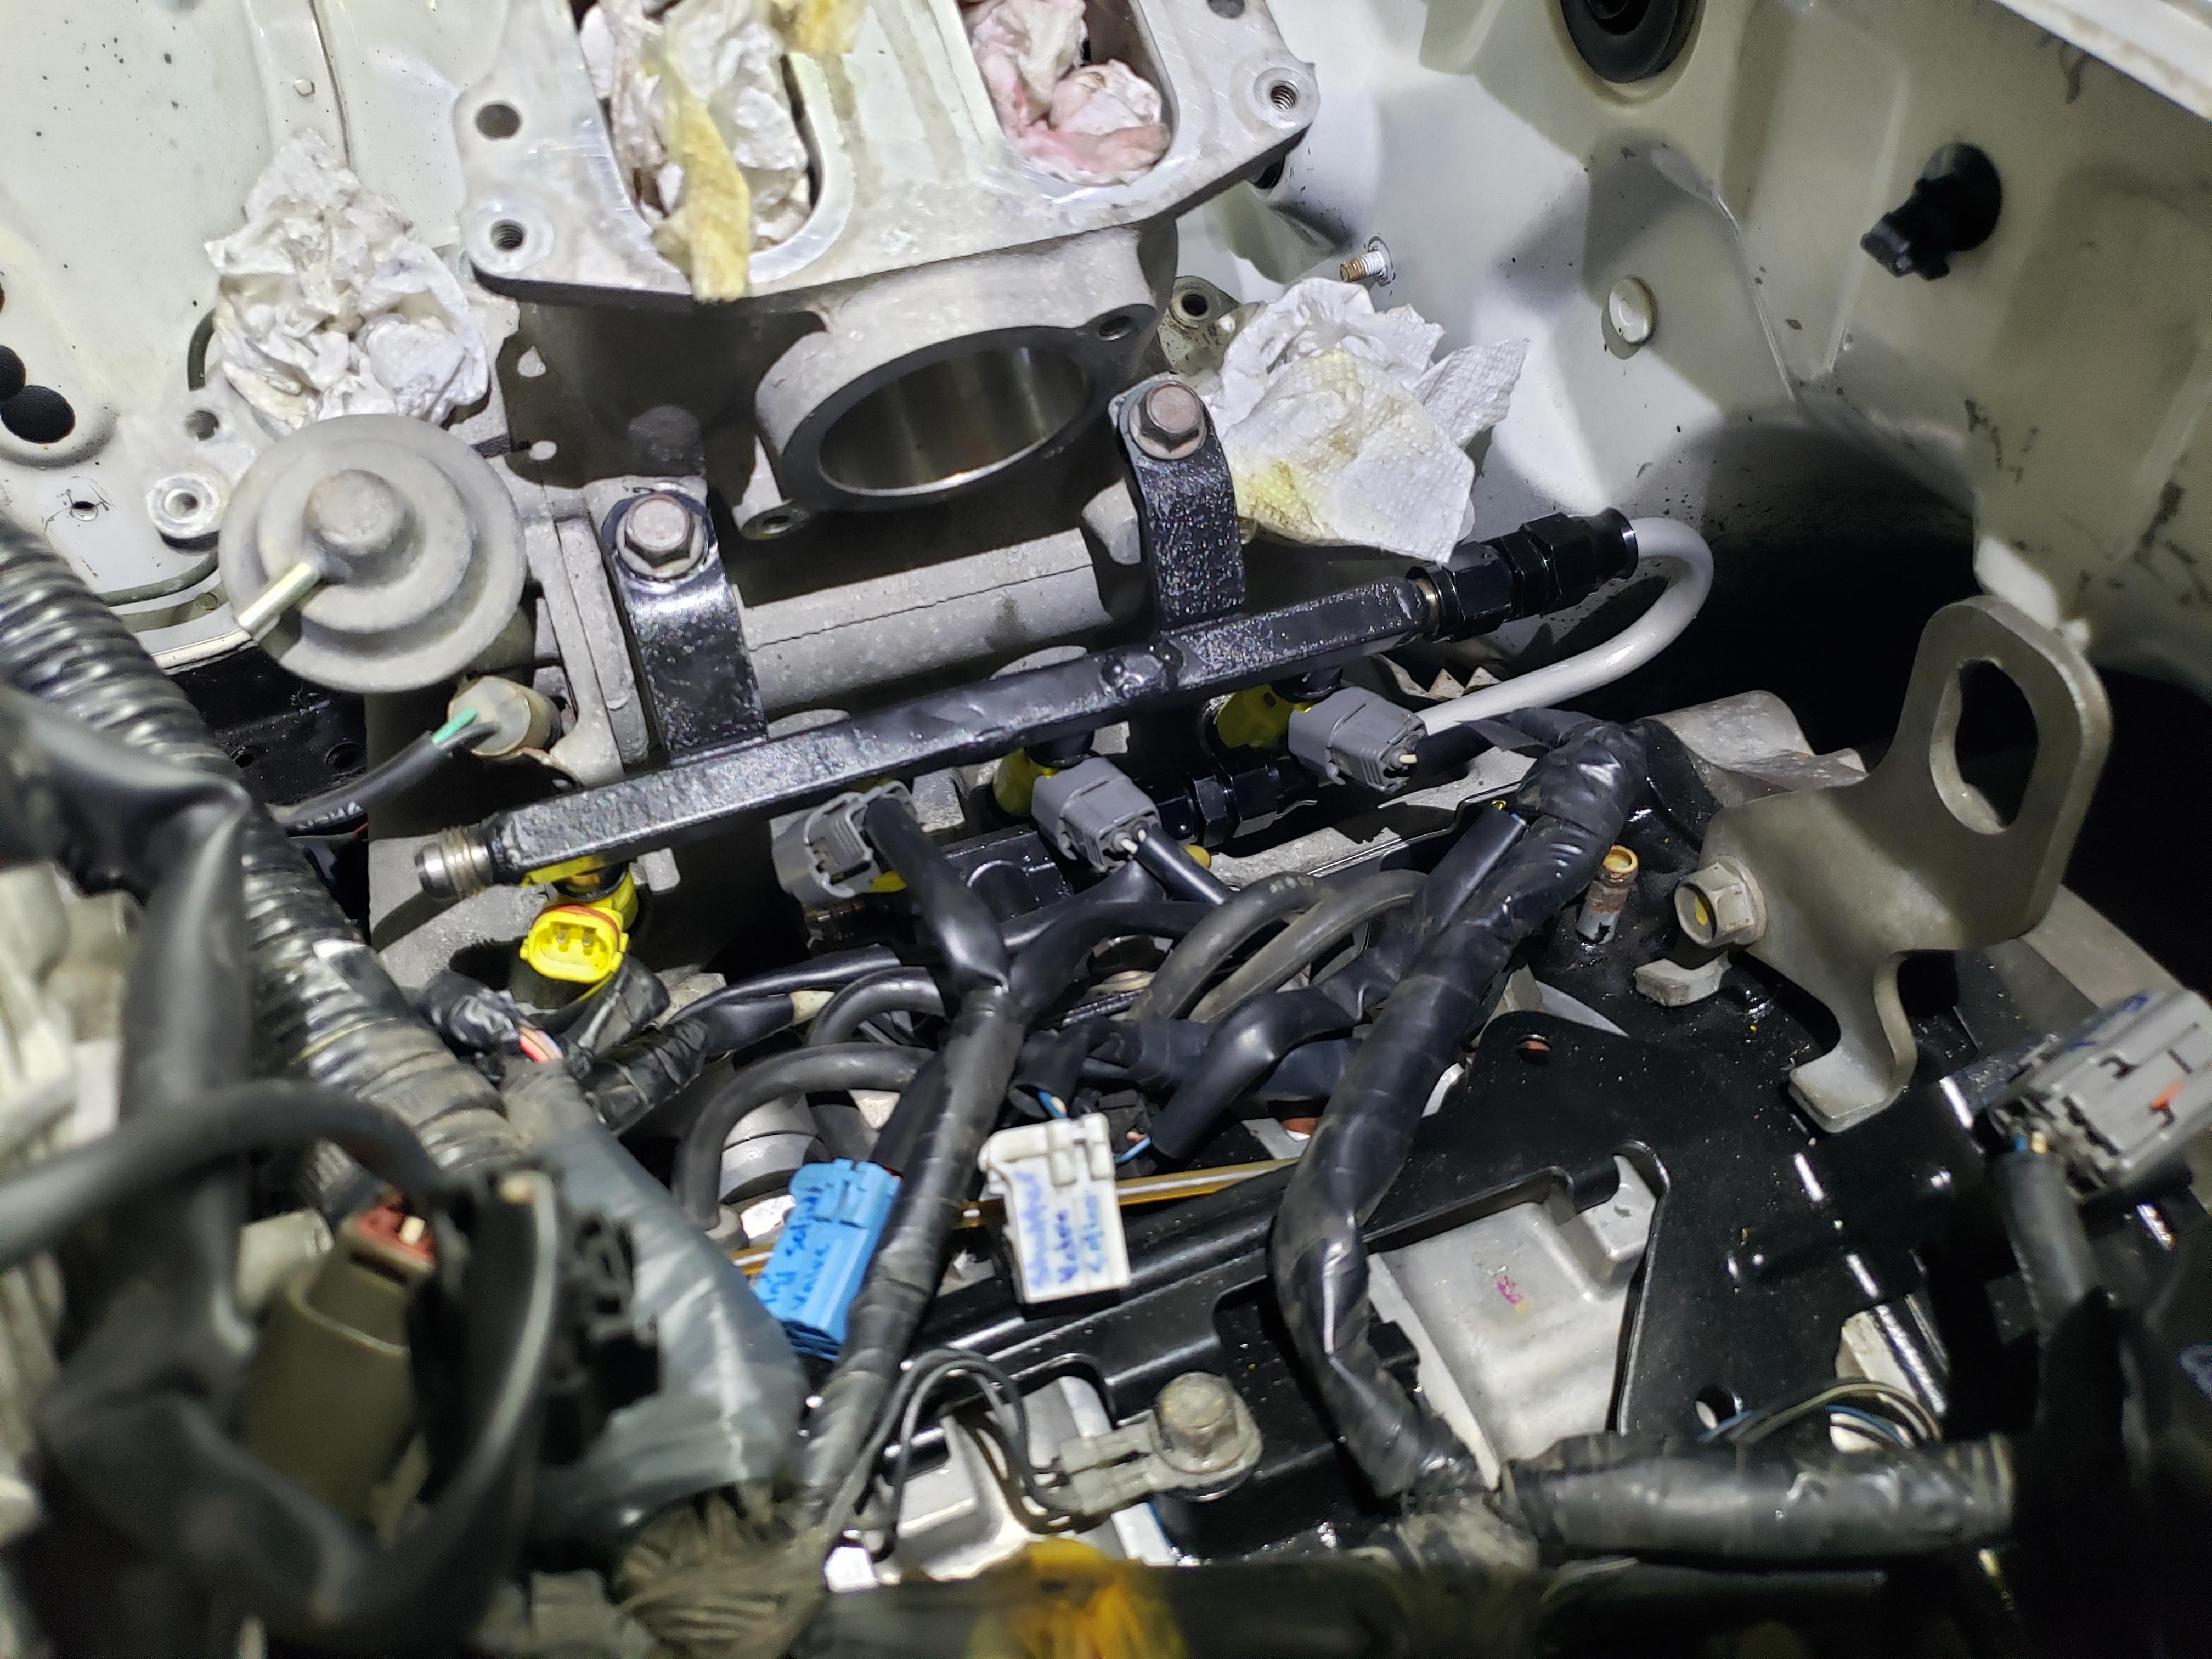
also got started on the fuel system. I made a hardline to go between the primary and secondary fuel rails.
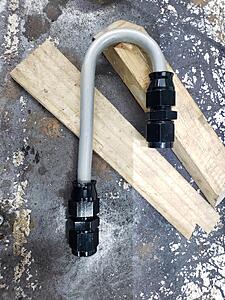
I really wanted to install it on the front side of the engine, but the water pump is in the way and it's a VERY tight fit in there. Not ideal, but i can route the soft lines to the front I guess.
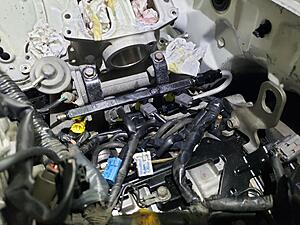
Also F$%& this little pit of despair in the lower intake manifold. there's little pockets that go under the runners and lord help you if something falls in there. I had to remove the VDI actuator and secondary fuel rails to get enough room to get my fingers down in there....

poweder coated and installed (and the carpet is back in too!):

also got started on the fuel system. I made a hardline to go between the primary and secondary fuel rails.

I really wanted to install it on the front side of the engine, but the water pump is in the way and it's a VERY tight fit in there. Not ideal, but i can route the soft lines to the front I guess.
Also F$%& this little pit of despair in the lower intake manifold. there's little pockets that go under the runners and lord help you if something falls in there. I had to remove the VDI actuator and secondary fuel rails to get enough room to get my fingers down in there....

Thread Starter
Joined: Mar 2002
Posts: 1,726
Likes: 540
From: binghamton, ny
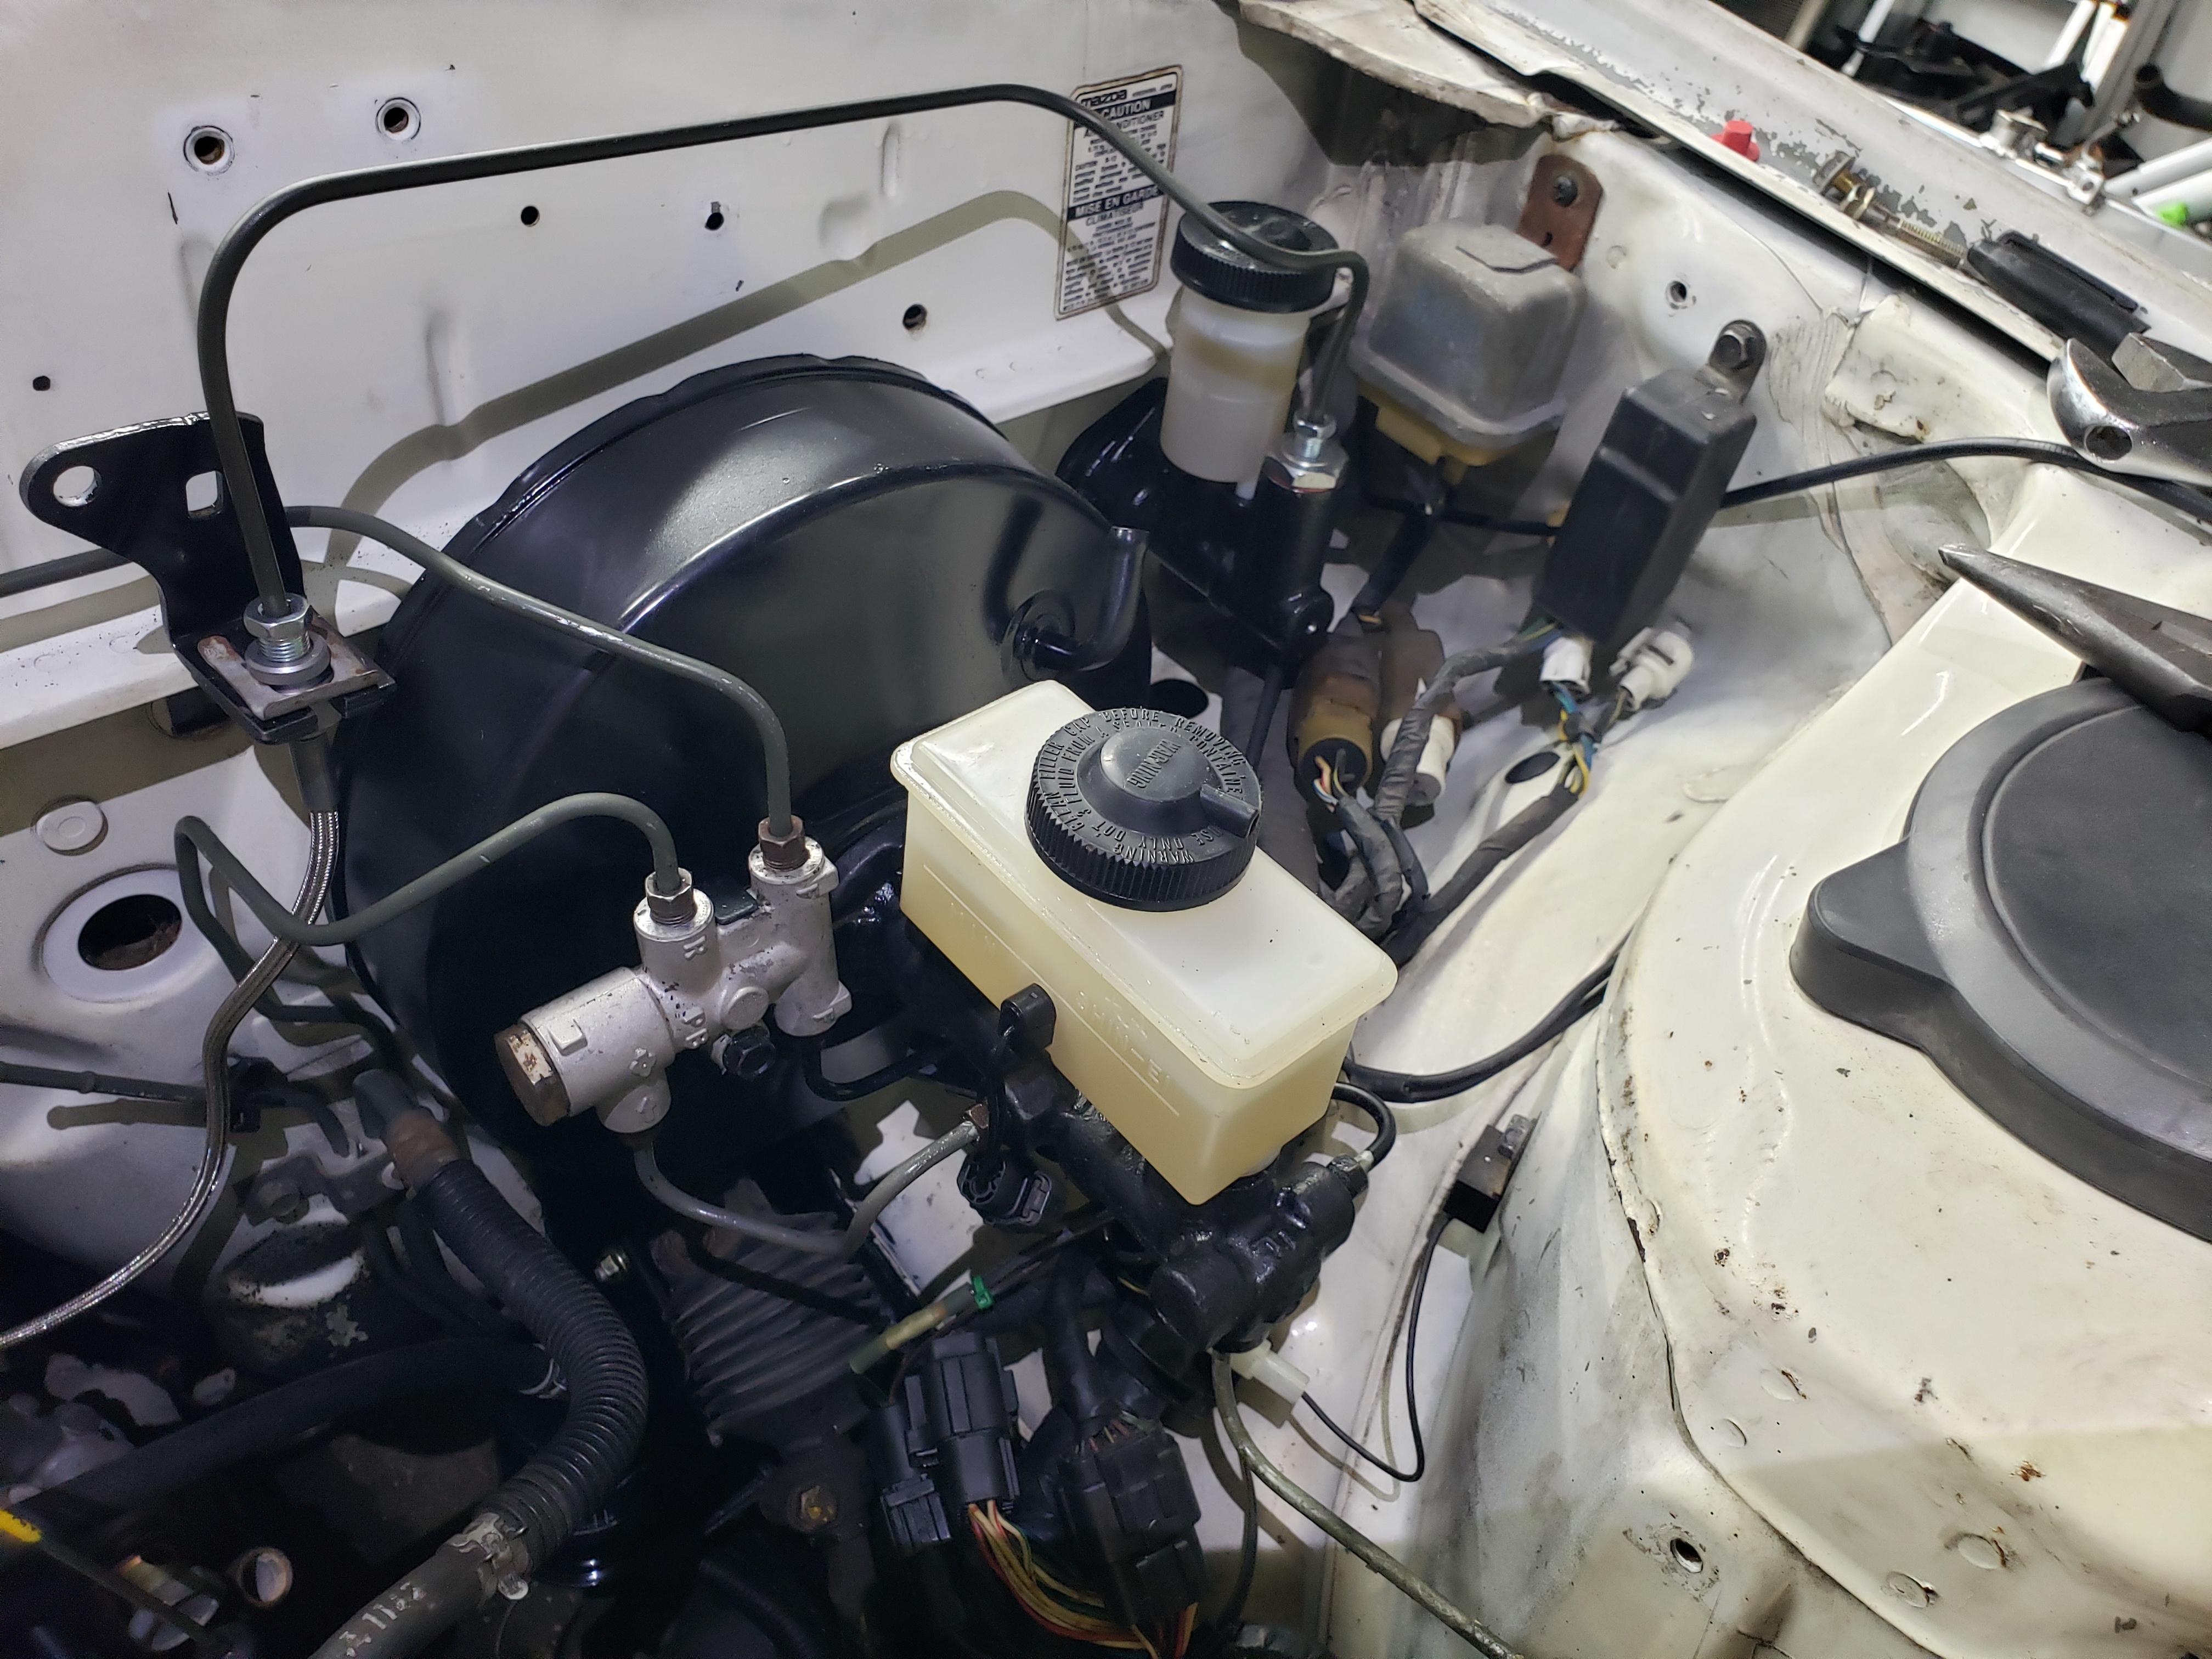
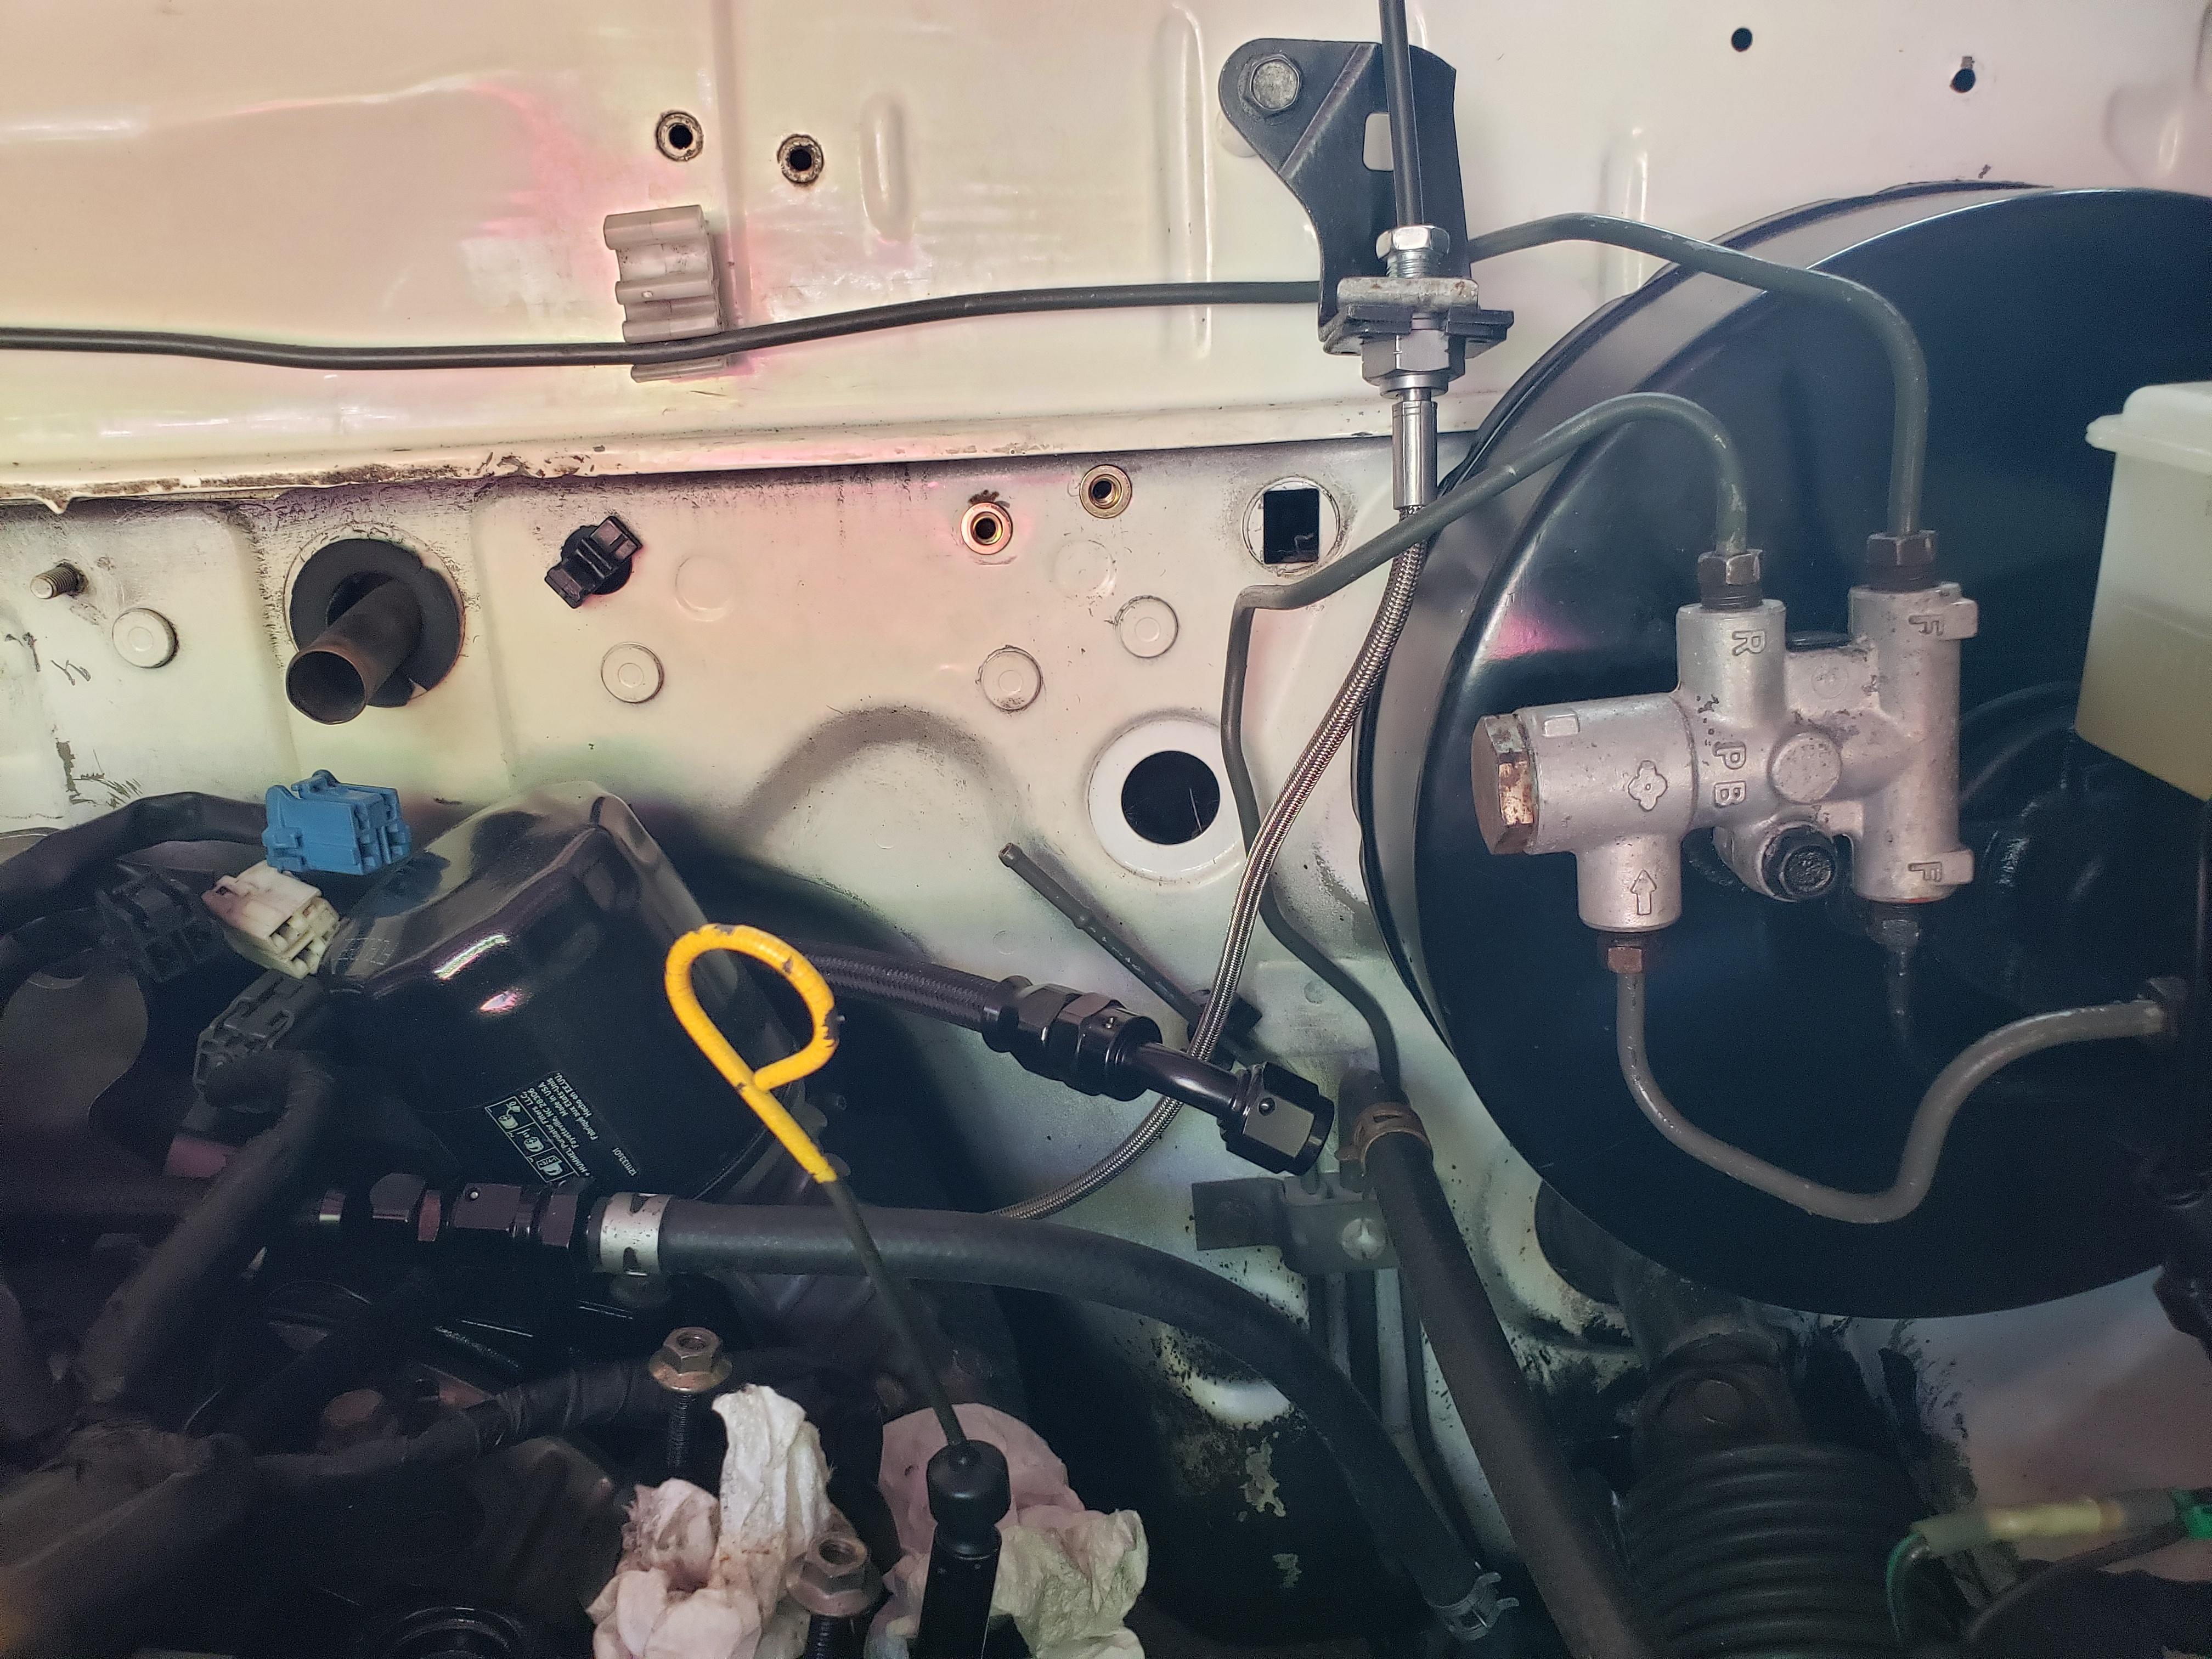
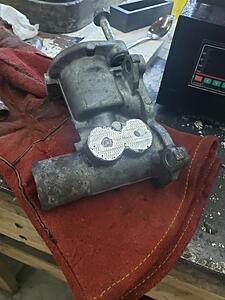
Did a few other little things too. Clutch master is installed, with a new hardline running to a new stainless flex line. Need to anchor the bracket down, but it looks pretty good. Also rebuilt the brake master cylinder and booster.


Now that my TII is done and running, I have had more time to peruse other people's builds. This is freaking fantastic. Kudos for all of the attention to details so far and I am interested to see the final result. It's looking good so far!
Thread Starter
Joined: Mar 2002
Posts: 1,726
Likes: 540
From: binghamton, ny
thanks. I'd be lying if i said your build wasn't good motivation to get another FC and restore it a bit.
Thread Starter
Joined: Mar 2002
Posts: 1,726
Likes: 540
From: binghamton, ny
What's that old saying? Anything that worth doing is worth over-doing. That's the theme of the recent progress.
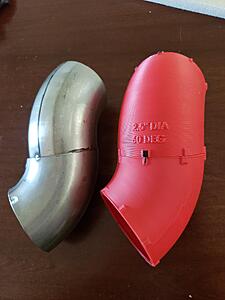
the problem....the RX8 thermostat cover is slightly out of alignment if I want to use the stock FC upper radiator hose. What an annoyance.
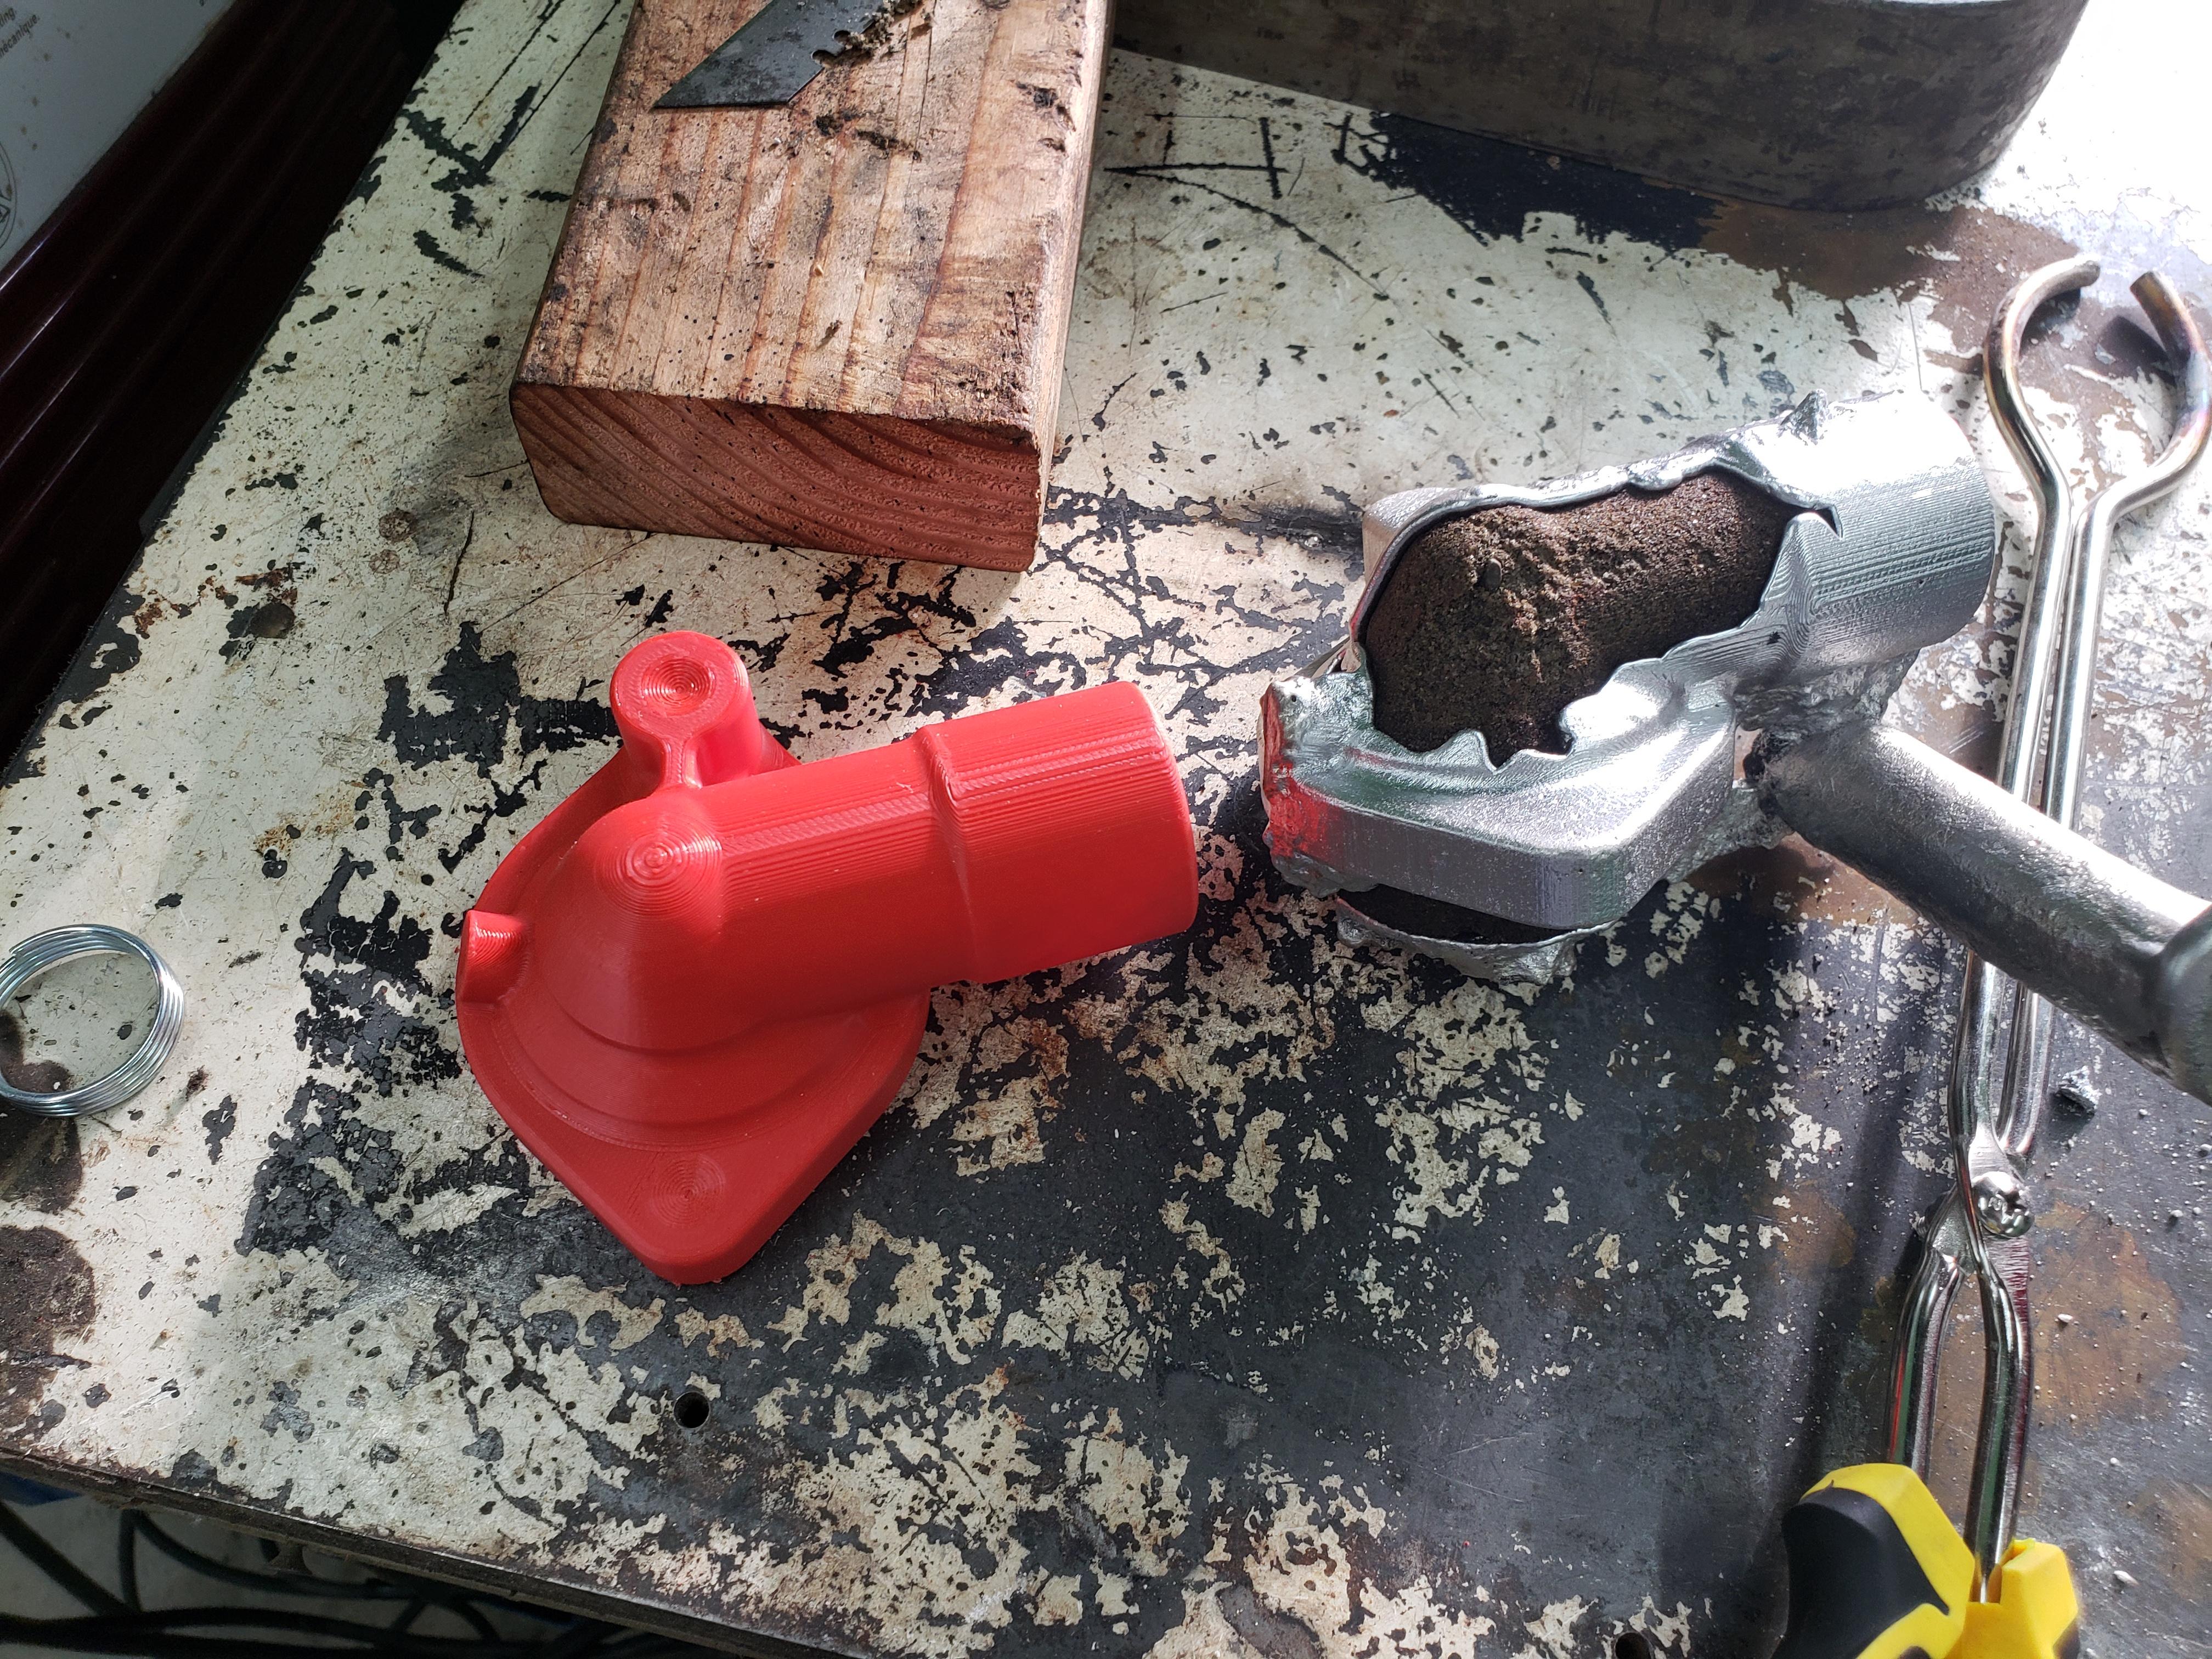
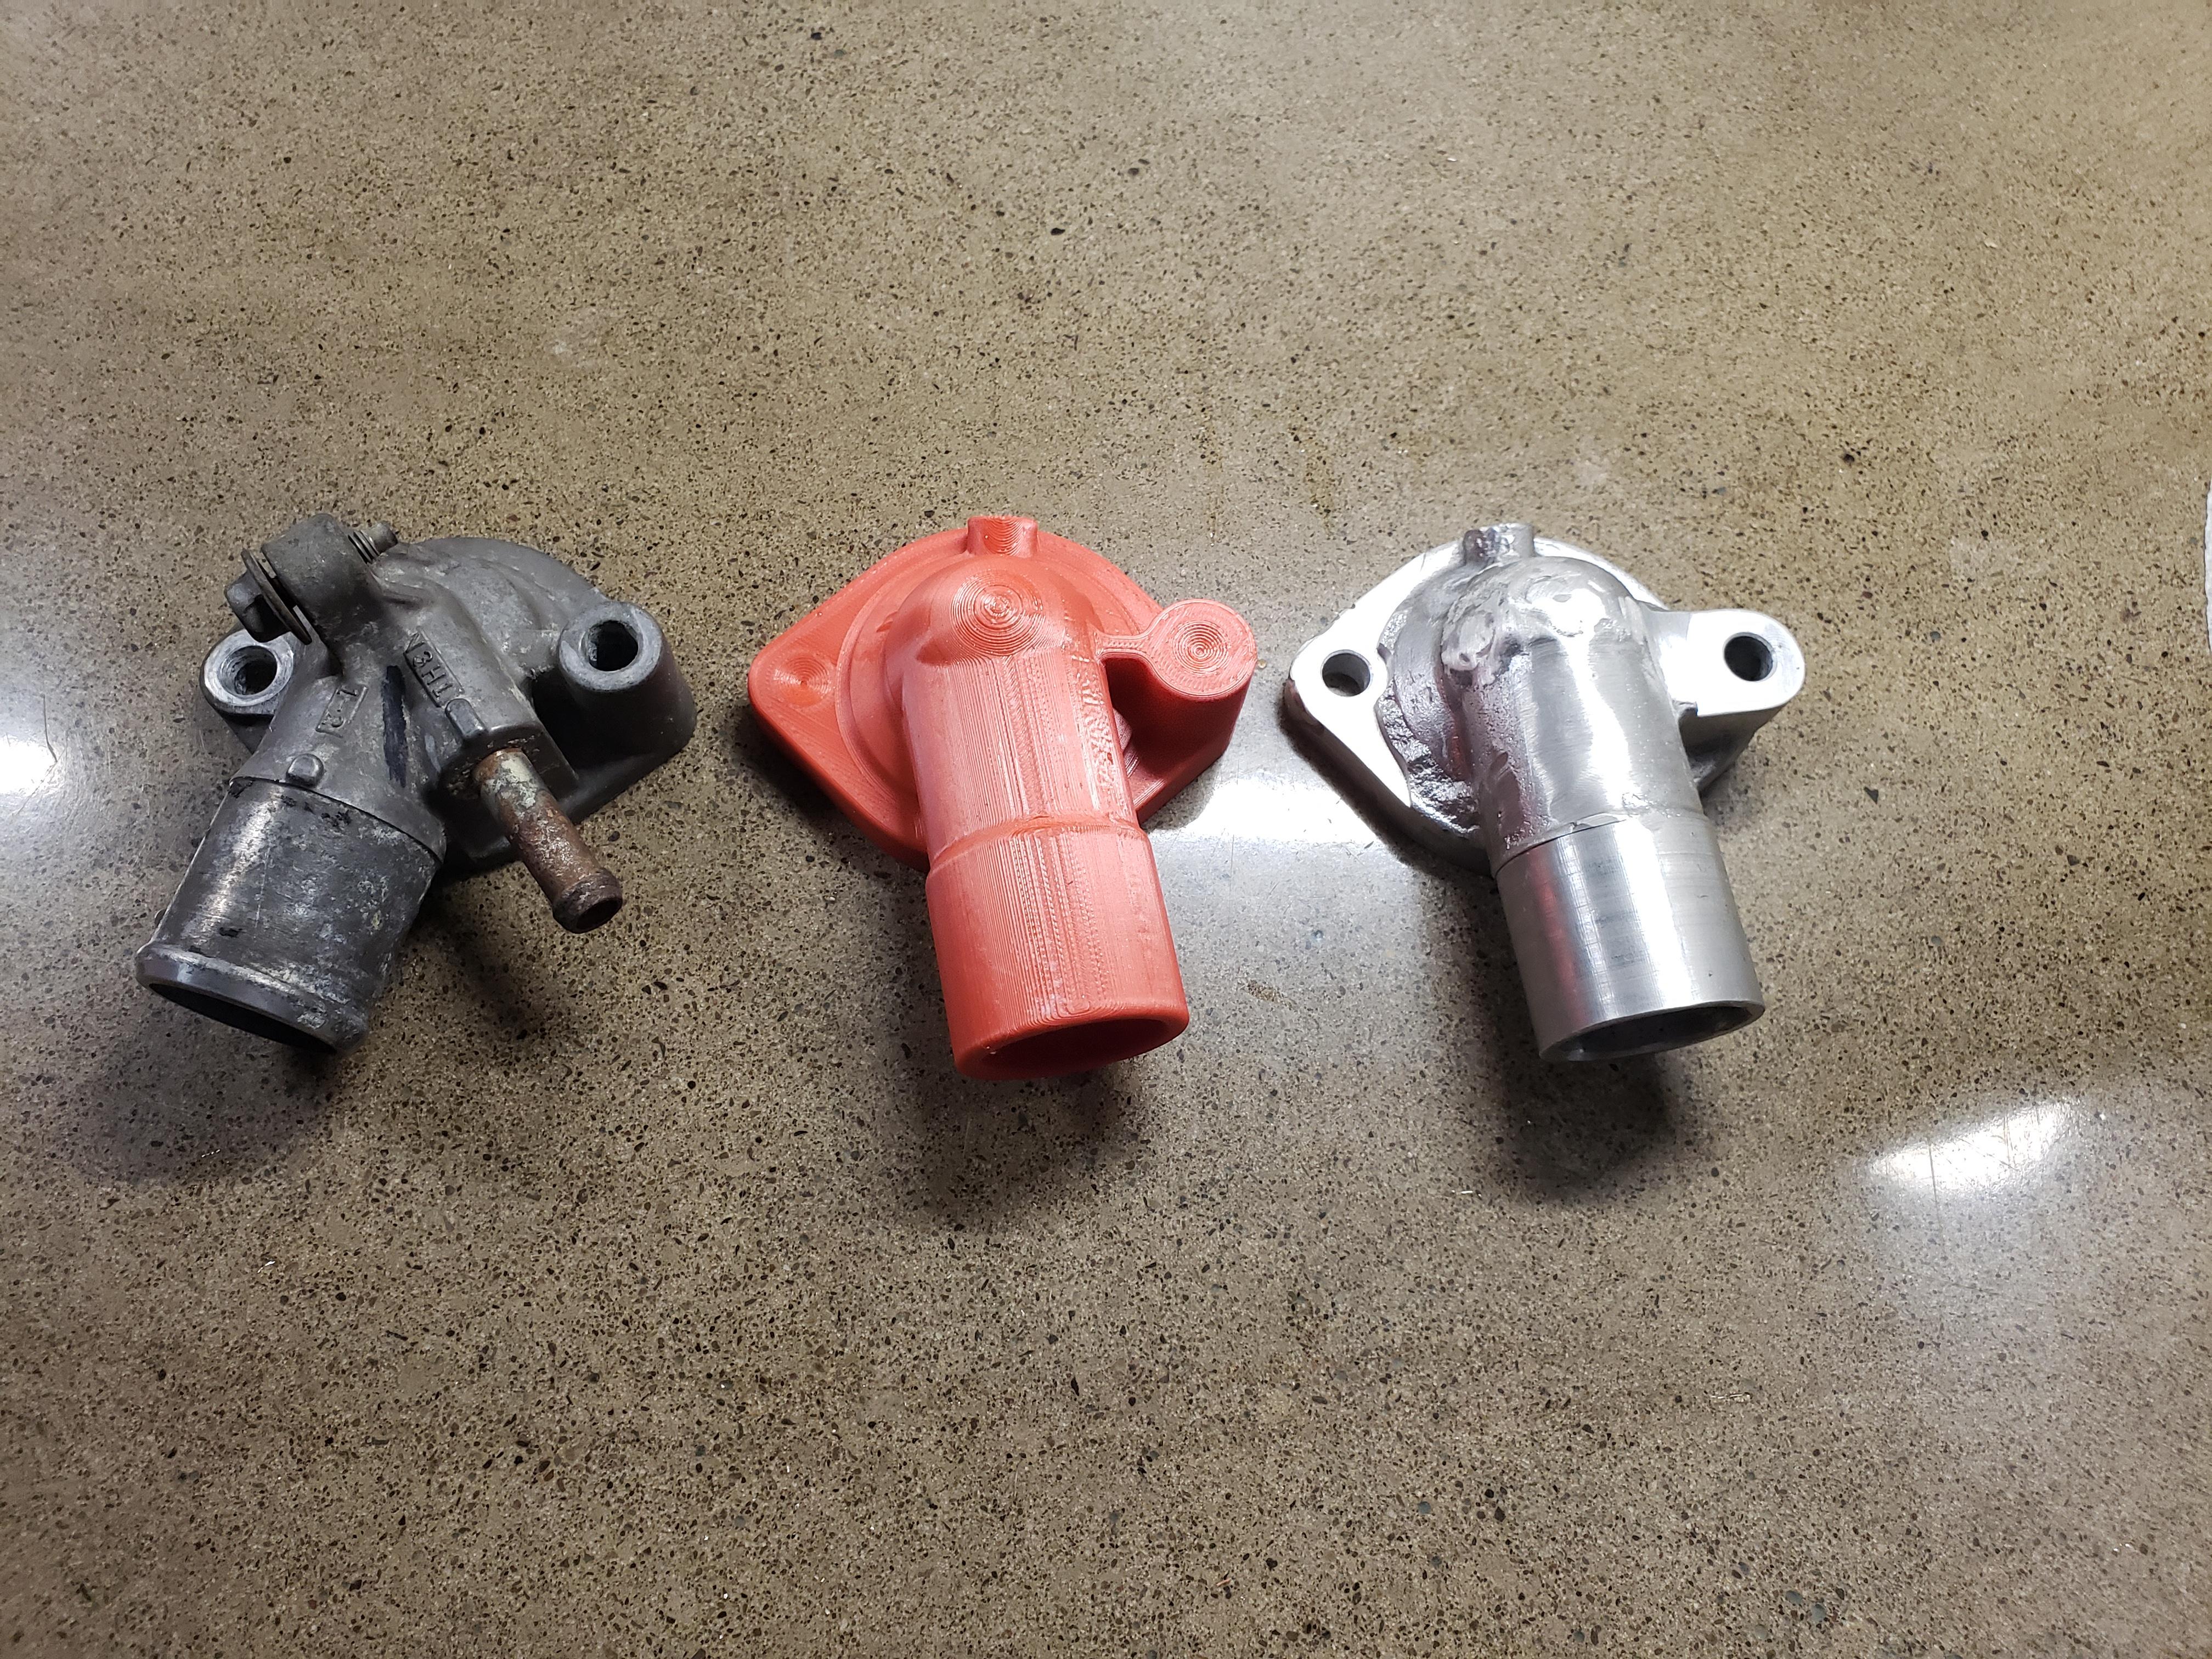
So what's a boy to do? cast your own of course. I won't bore everyone with the process, but this is the first time I've ever tried casting anything. Needless to say, the first attempt went poorly.
the second went better, but wasn't perfect by any means, but salvageable. This was sand cast and some of the sand broke out and i got a little bit of extra meat. There were a few other minor imperfections as well, but nothing the welder couldn't fix. Here's the casting right out of the sand next to the 3d printed form that's used to make the mold.

Then came the hard part, machining the casting so I could actually use it. Took some creative fixturing for sure.

all machined up, but man is it ugly. haha

Much less inconvenient and certainly worth the effort.
the problem....the RX8 thermostat cover is slightly out of alignment if I want to use the stock FC upper radiator hose. What an annoyance.

So what's a boy to do? cast your own of course. I won't bore everyone with the process, but this is the first time I've ever tried casting anything. Needless to say, the first attempt went poorly.
the second went better, but wasn't perfect by any means, but salvageable. This was sand cast and some of the sand broke out and i got a little bit of extra meat. There were a few other minor imperfections as well, but nothing the welder couldn't fix. Here's the casting right out of the sand next to the 3d printed form that's used to make the mold.

Then came the hard part, machining the casting so I could actually use it. Took some creative fixturing for sure.


all machined up, but man is it ugly. haha
Much less inconvenient and certainly worth the effort.

Thread Starter
Joined: Mar 2002
Posts: 1,726
Likes: 540
From: binghamton, ny
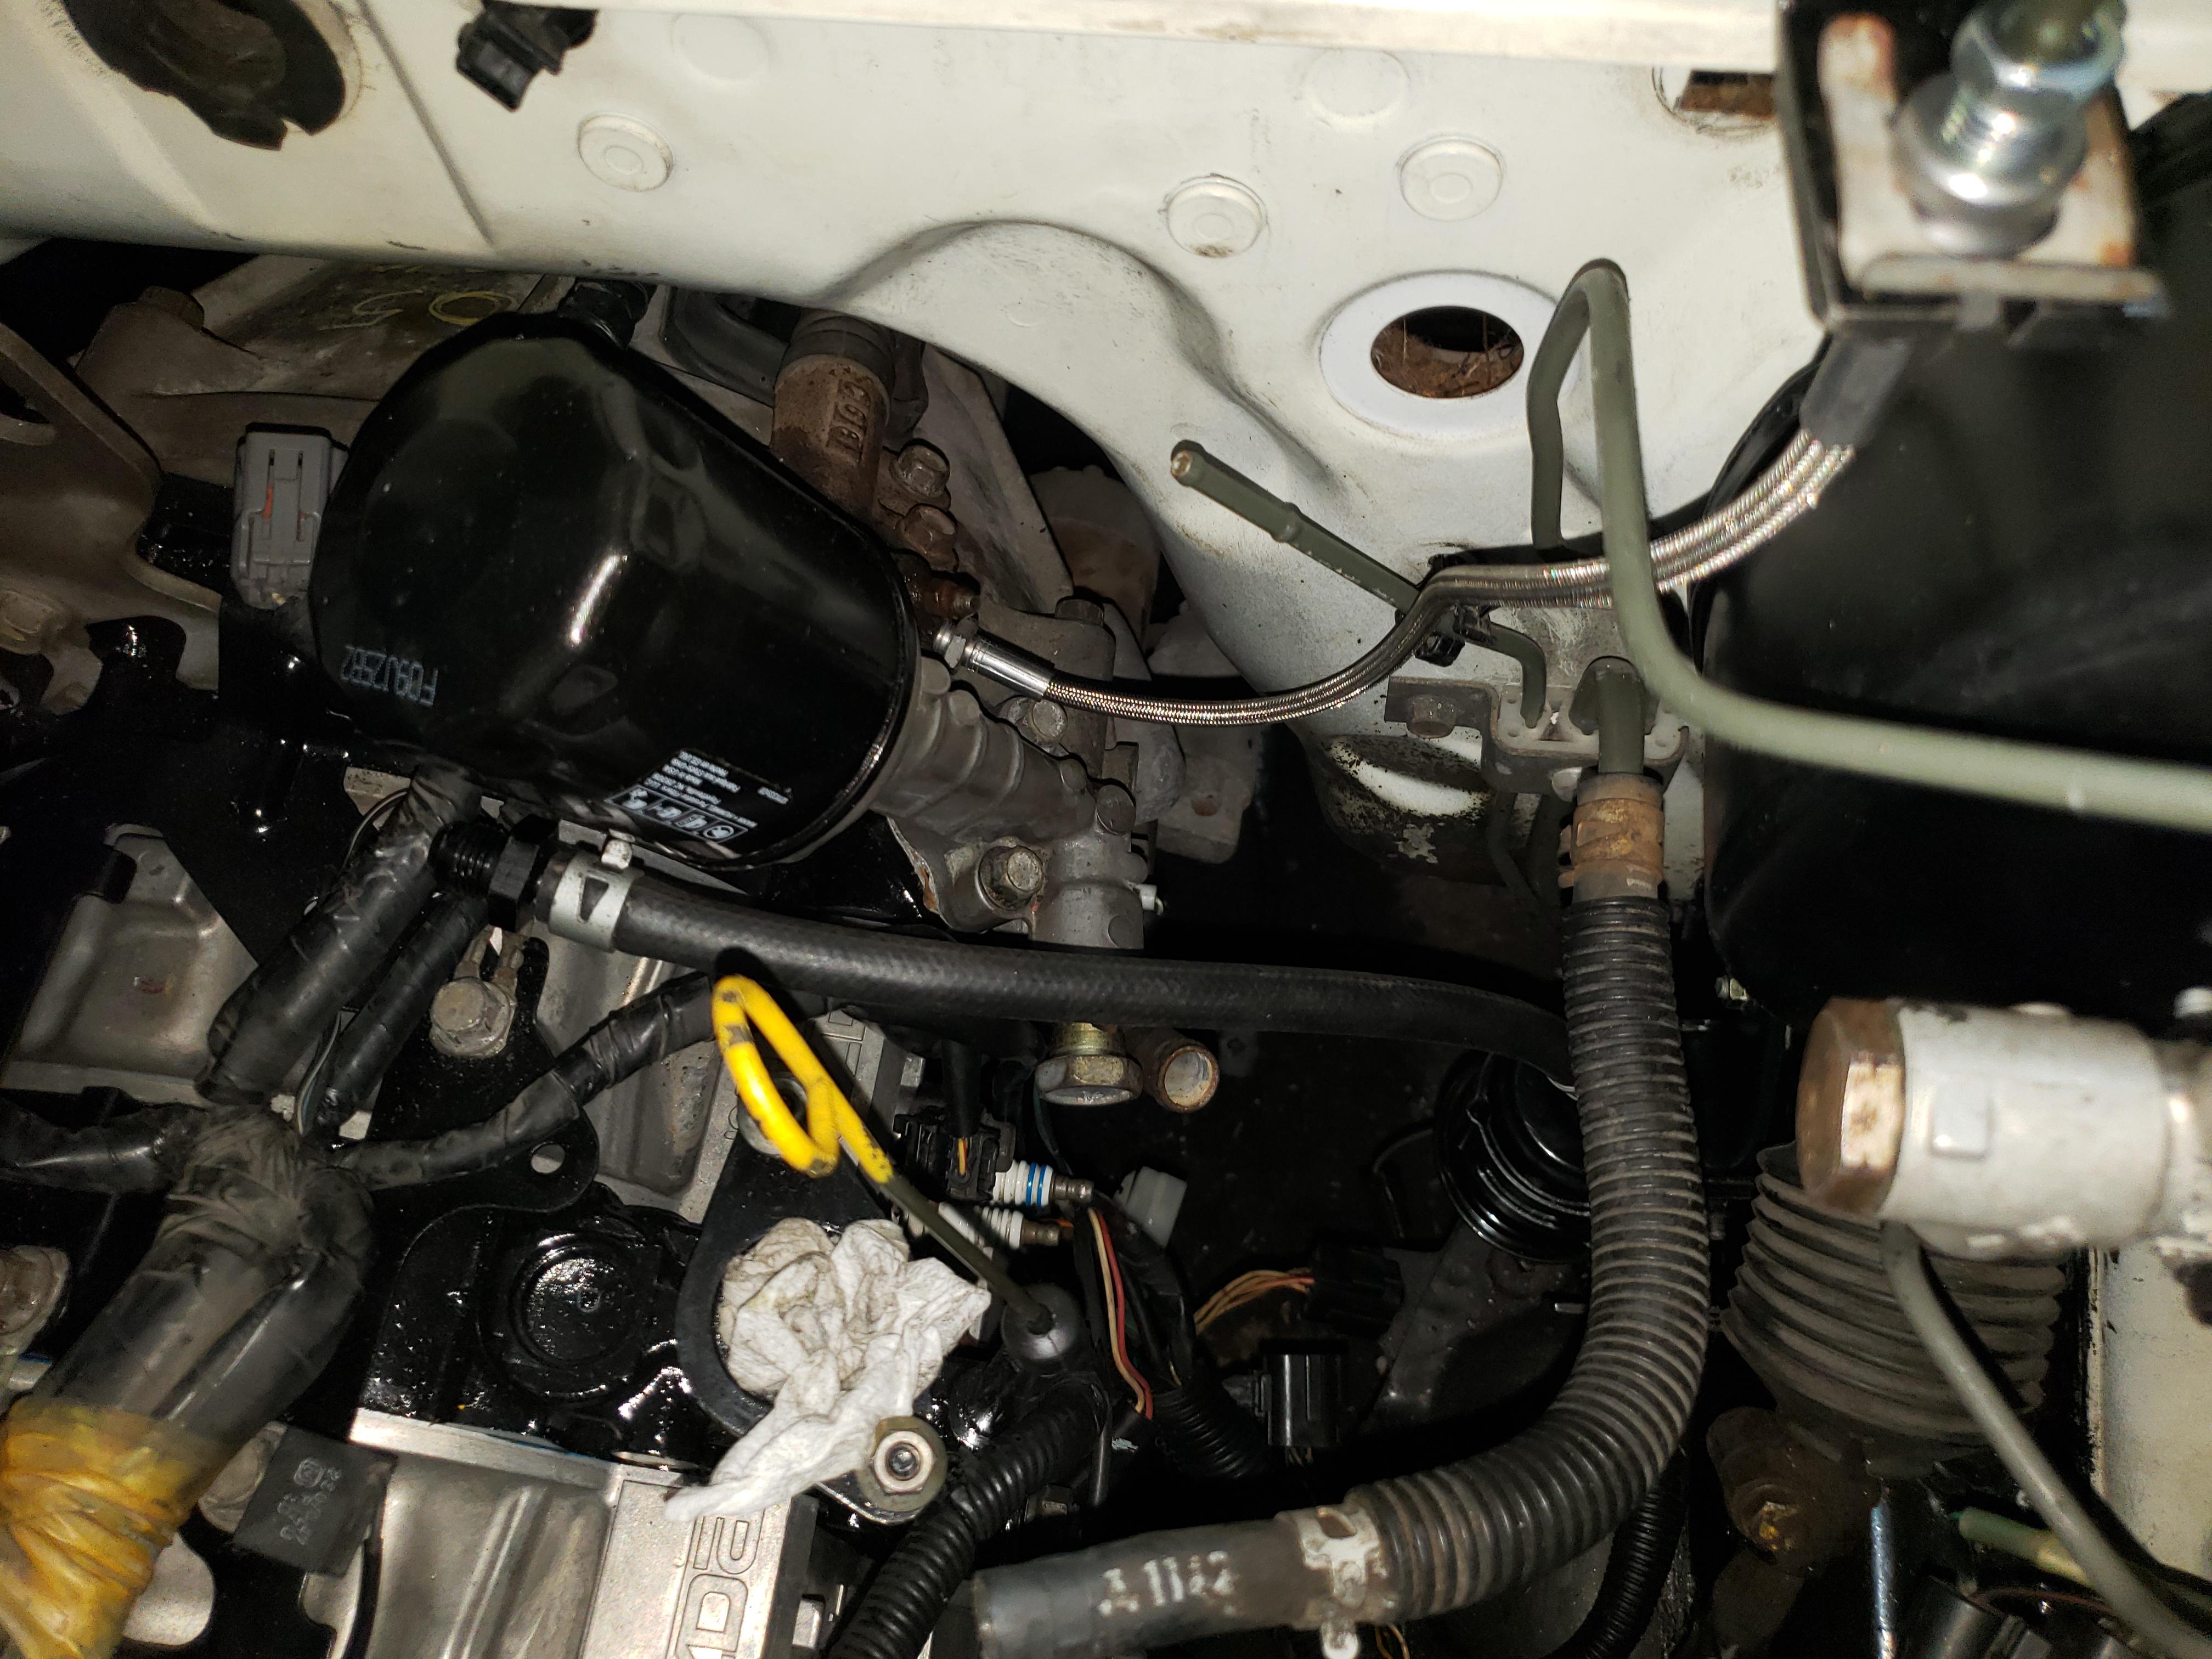
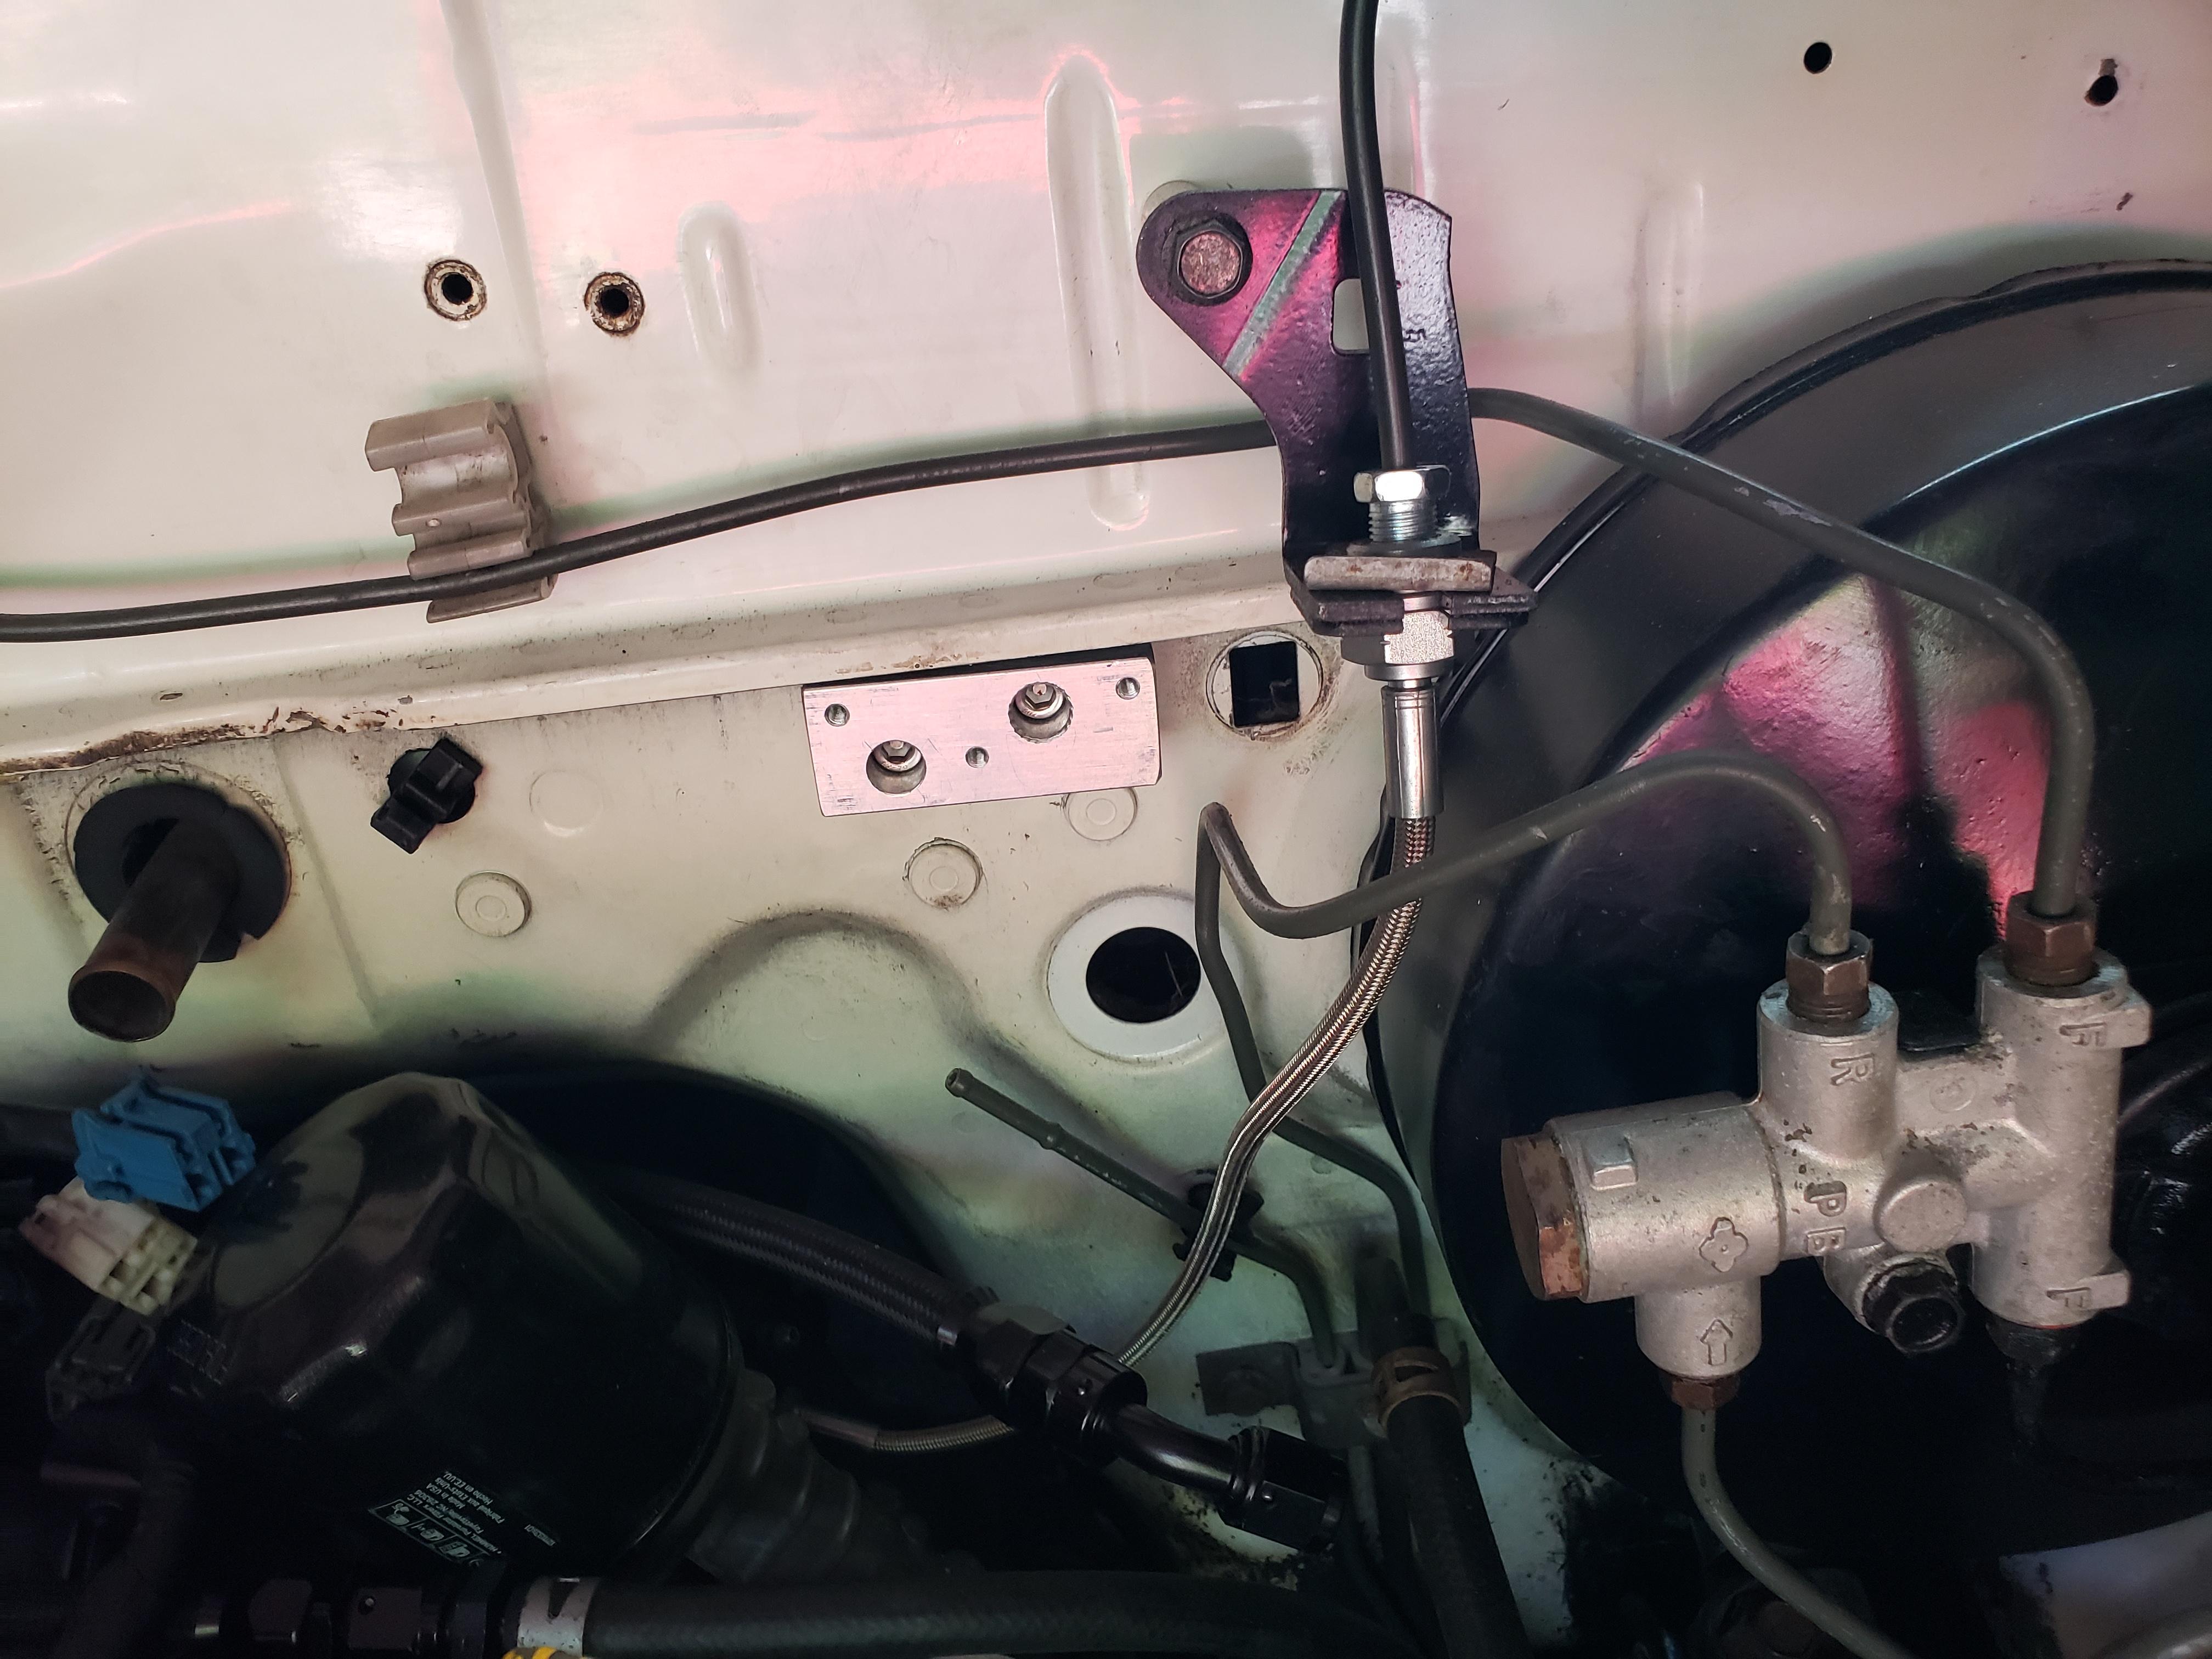
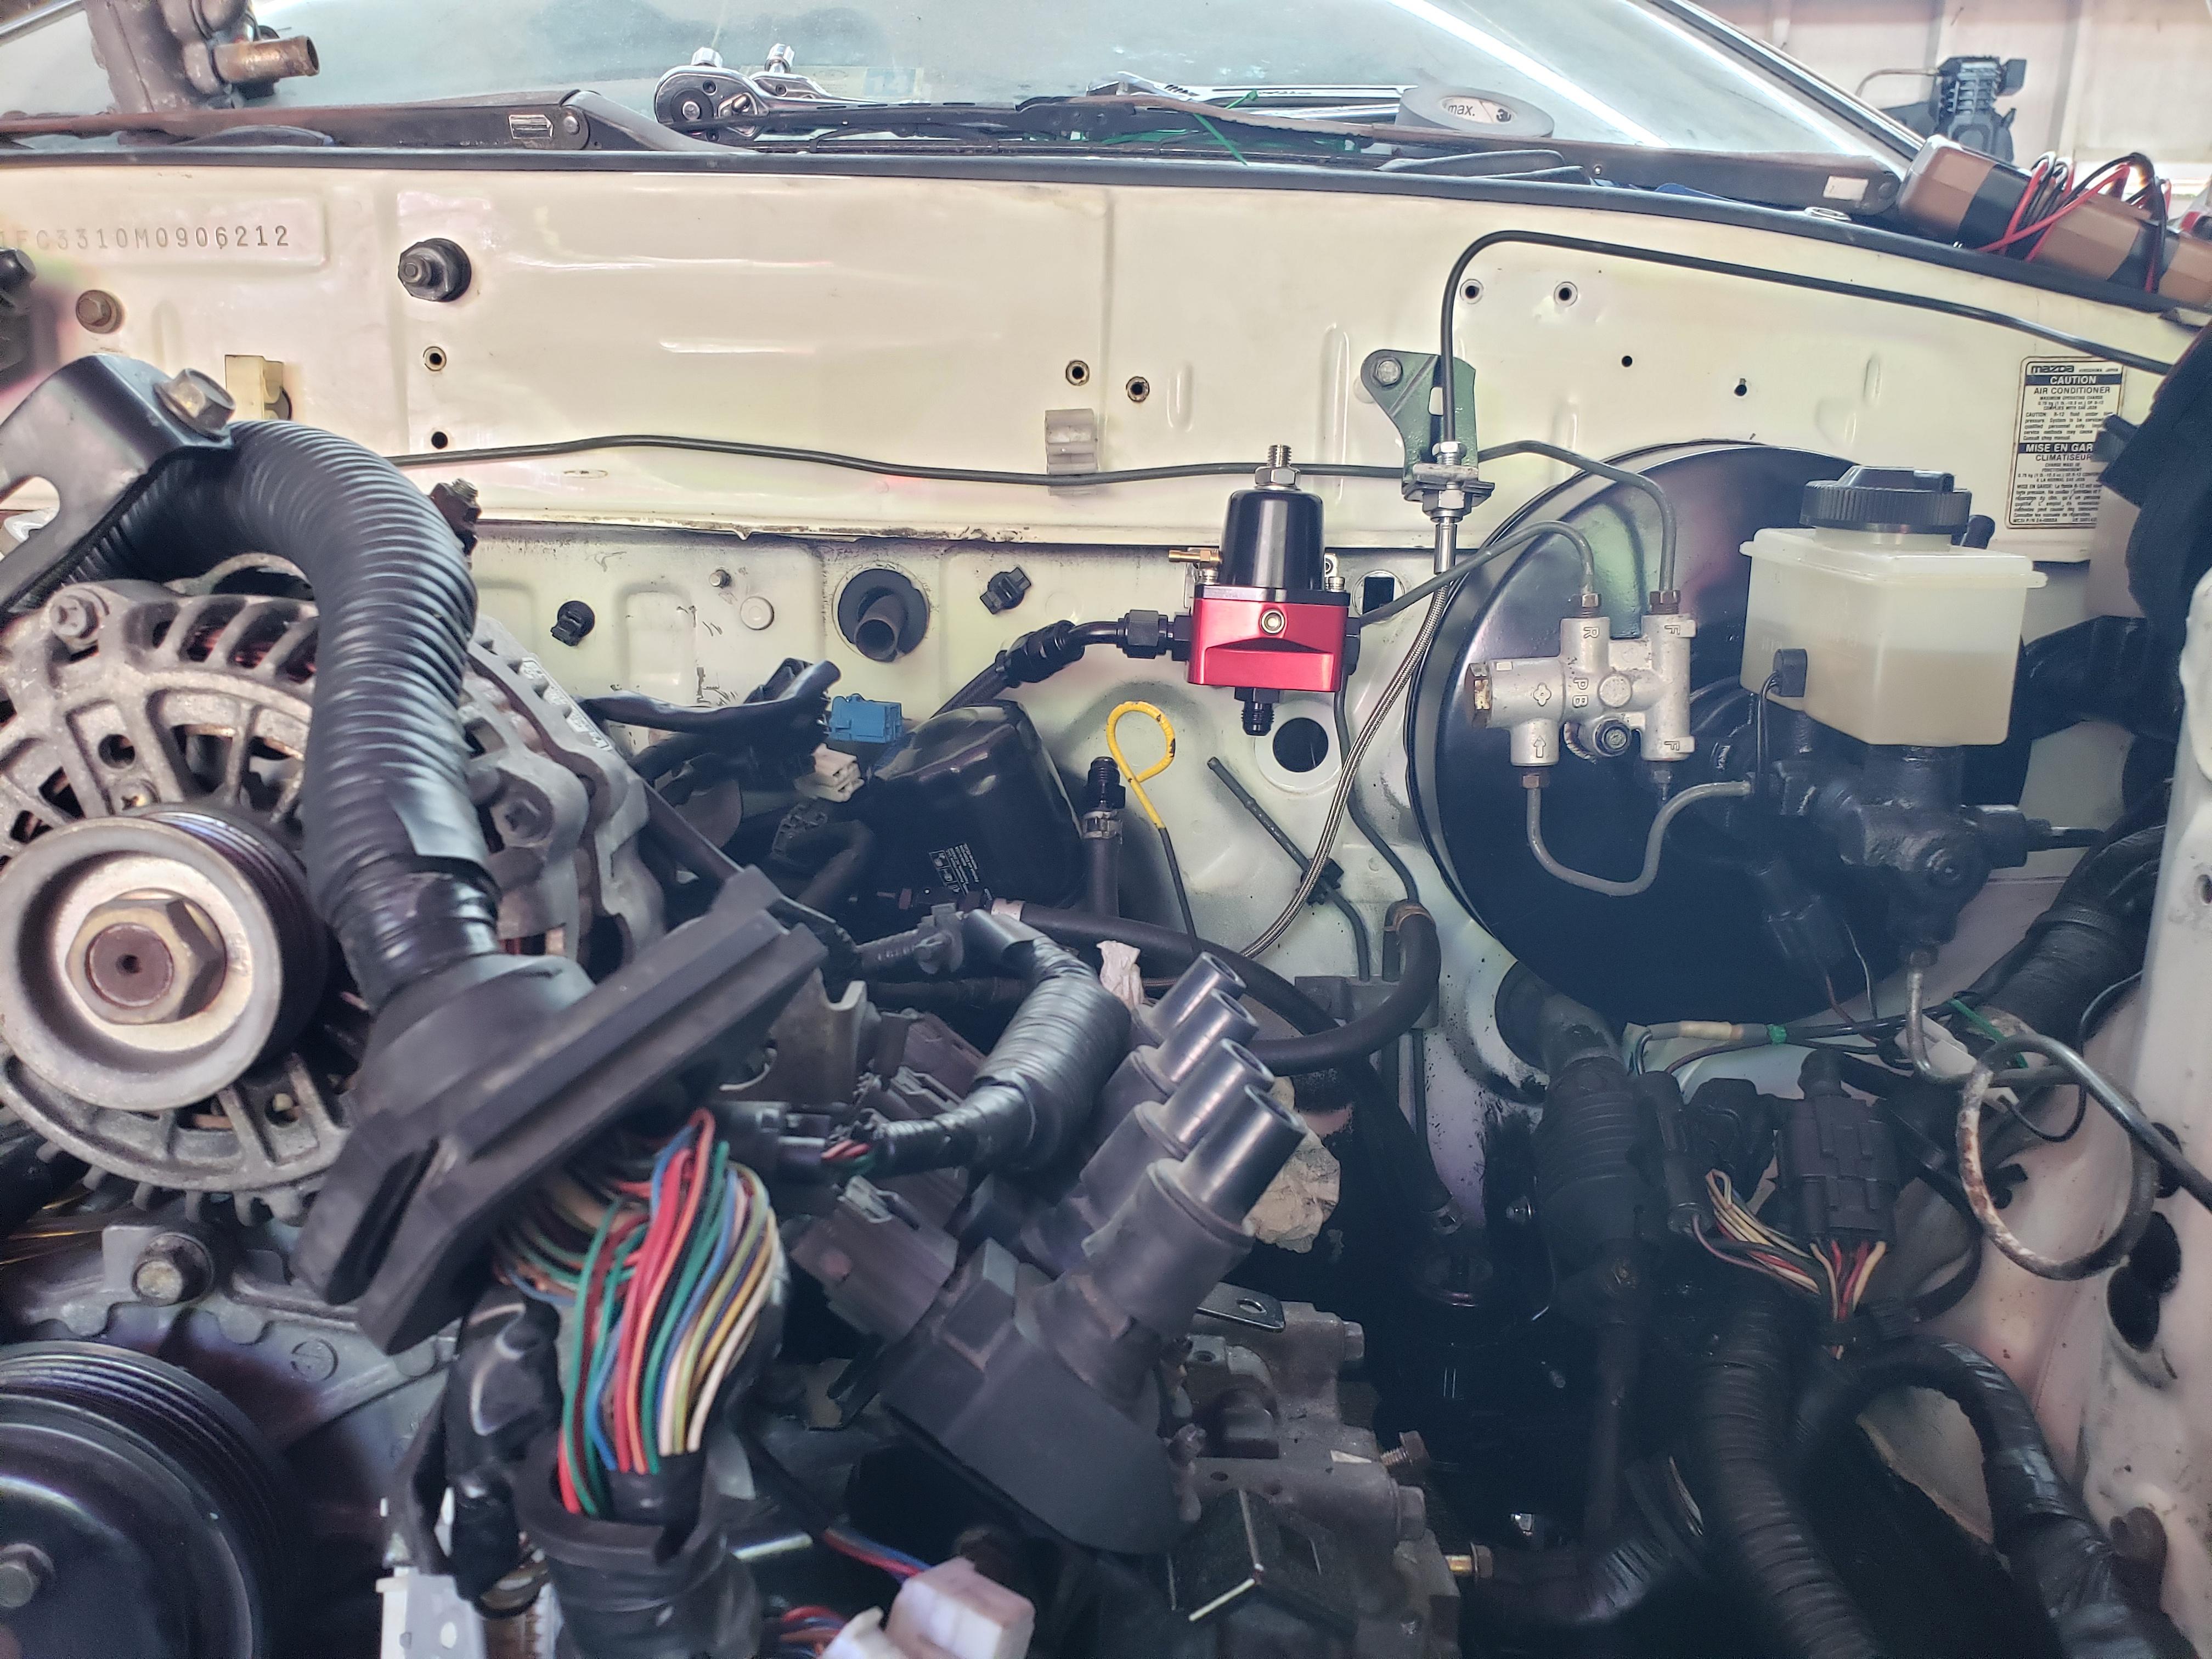
Also got the fuel regulator mounted. Waiting on 1 more fitting and the fuel system hardware will be done.
rivnuts installed in the firwall.
mounting bracket installed

FPR mounted up

rivnuts installed in the firwall.
mounting bracket installed
FPR mounted up
Last edited by need-a-t2; Jun 20, 2022 at 10:21 PM.
Thread Starter
Joined: Mar 2002
Posts: 1,726
Likes: 540
From: binghamton, ny
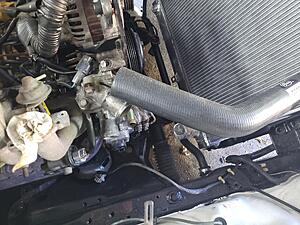
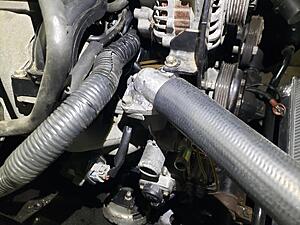
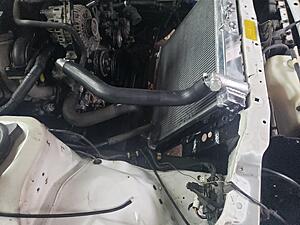
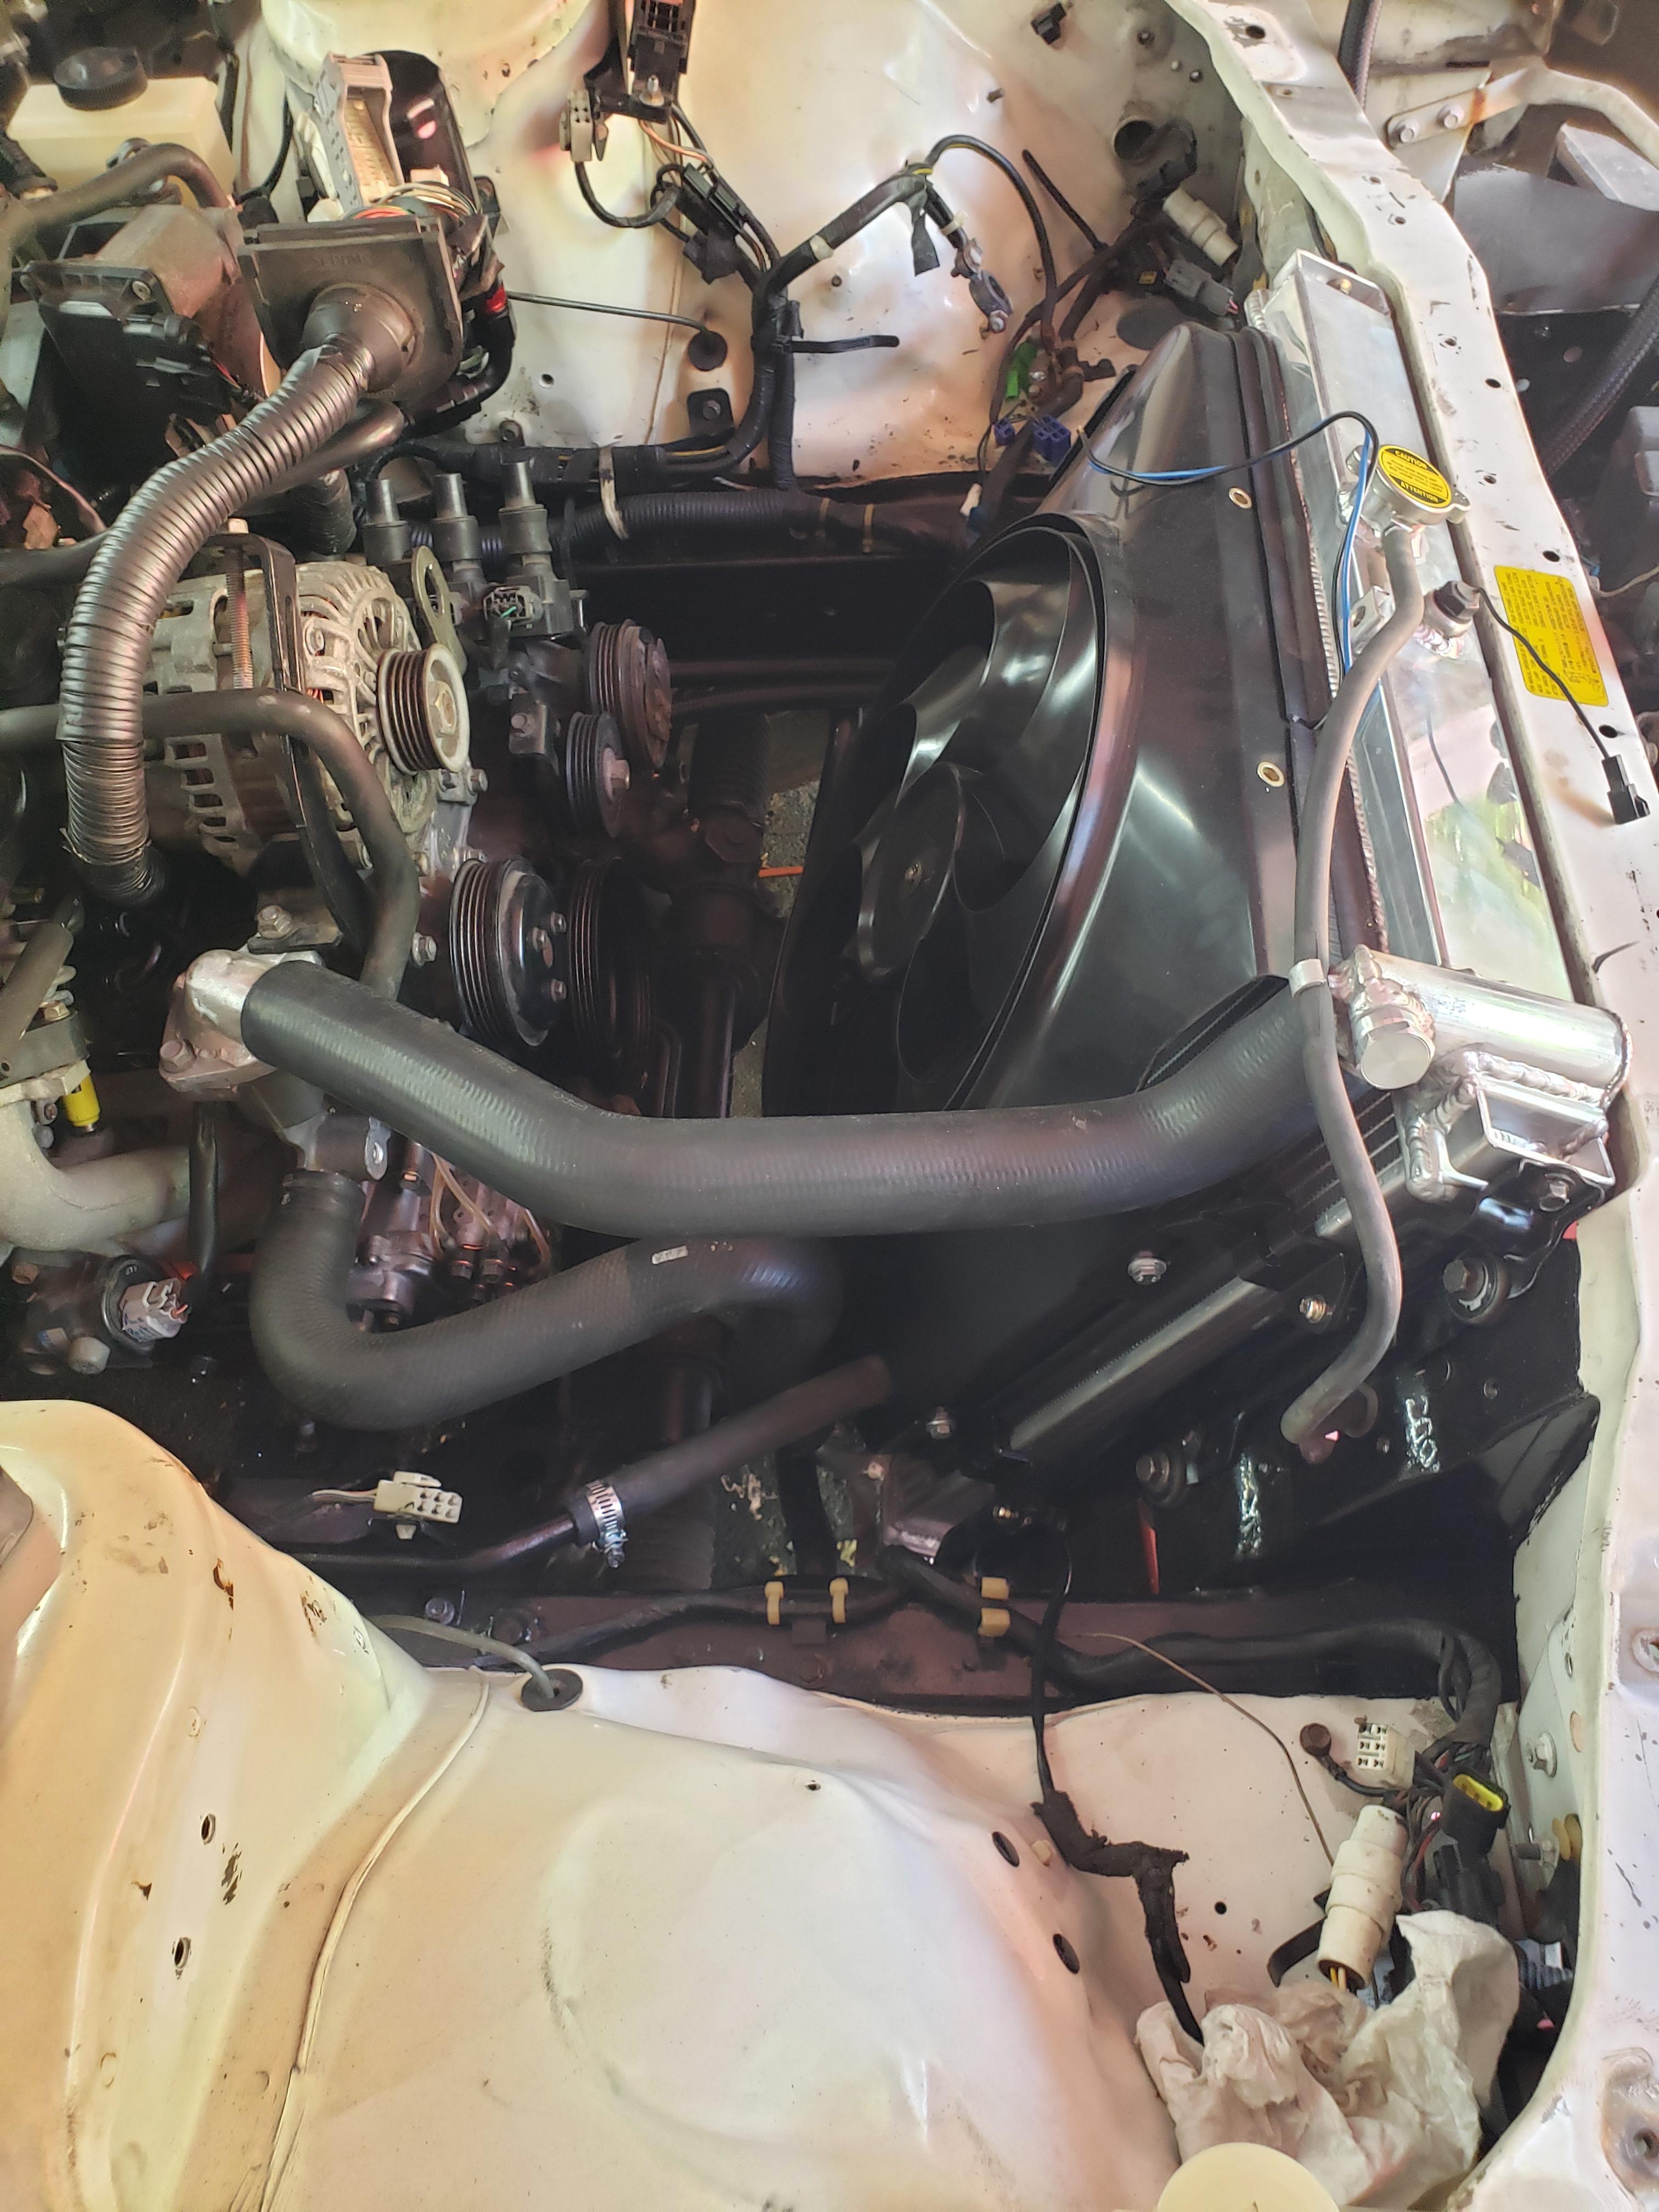
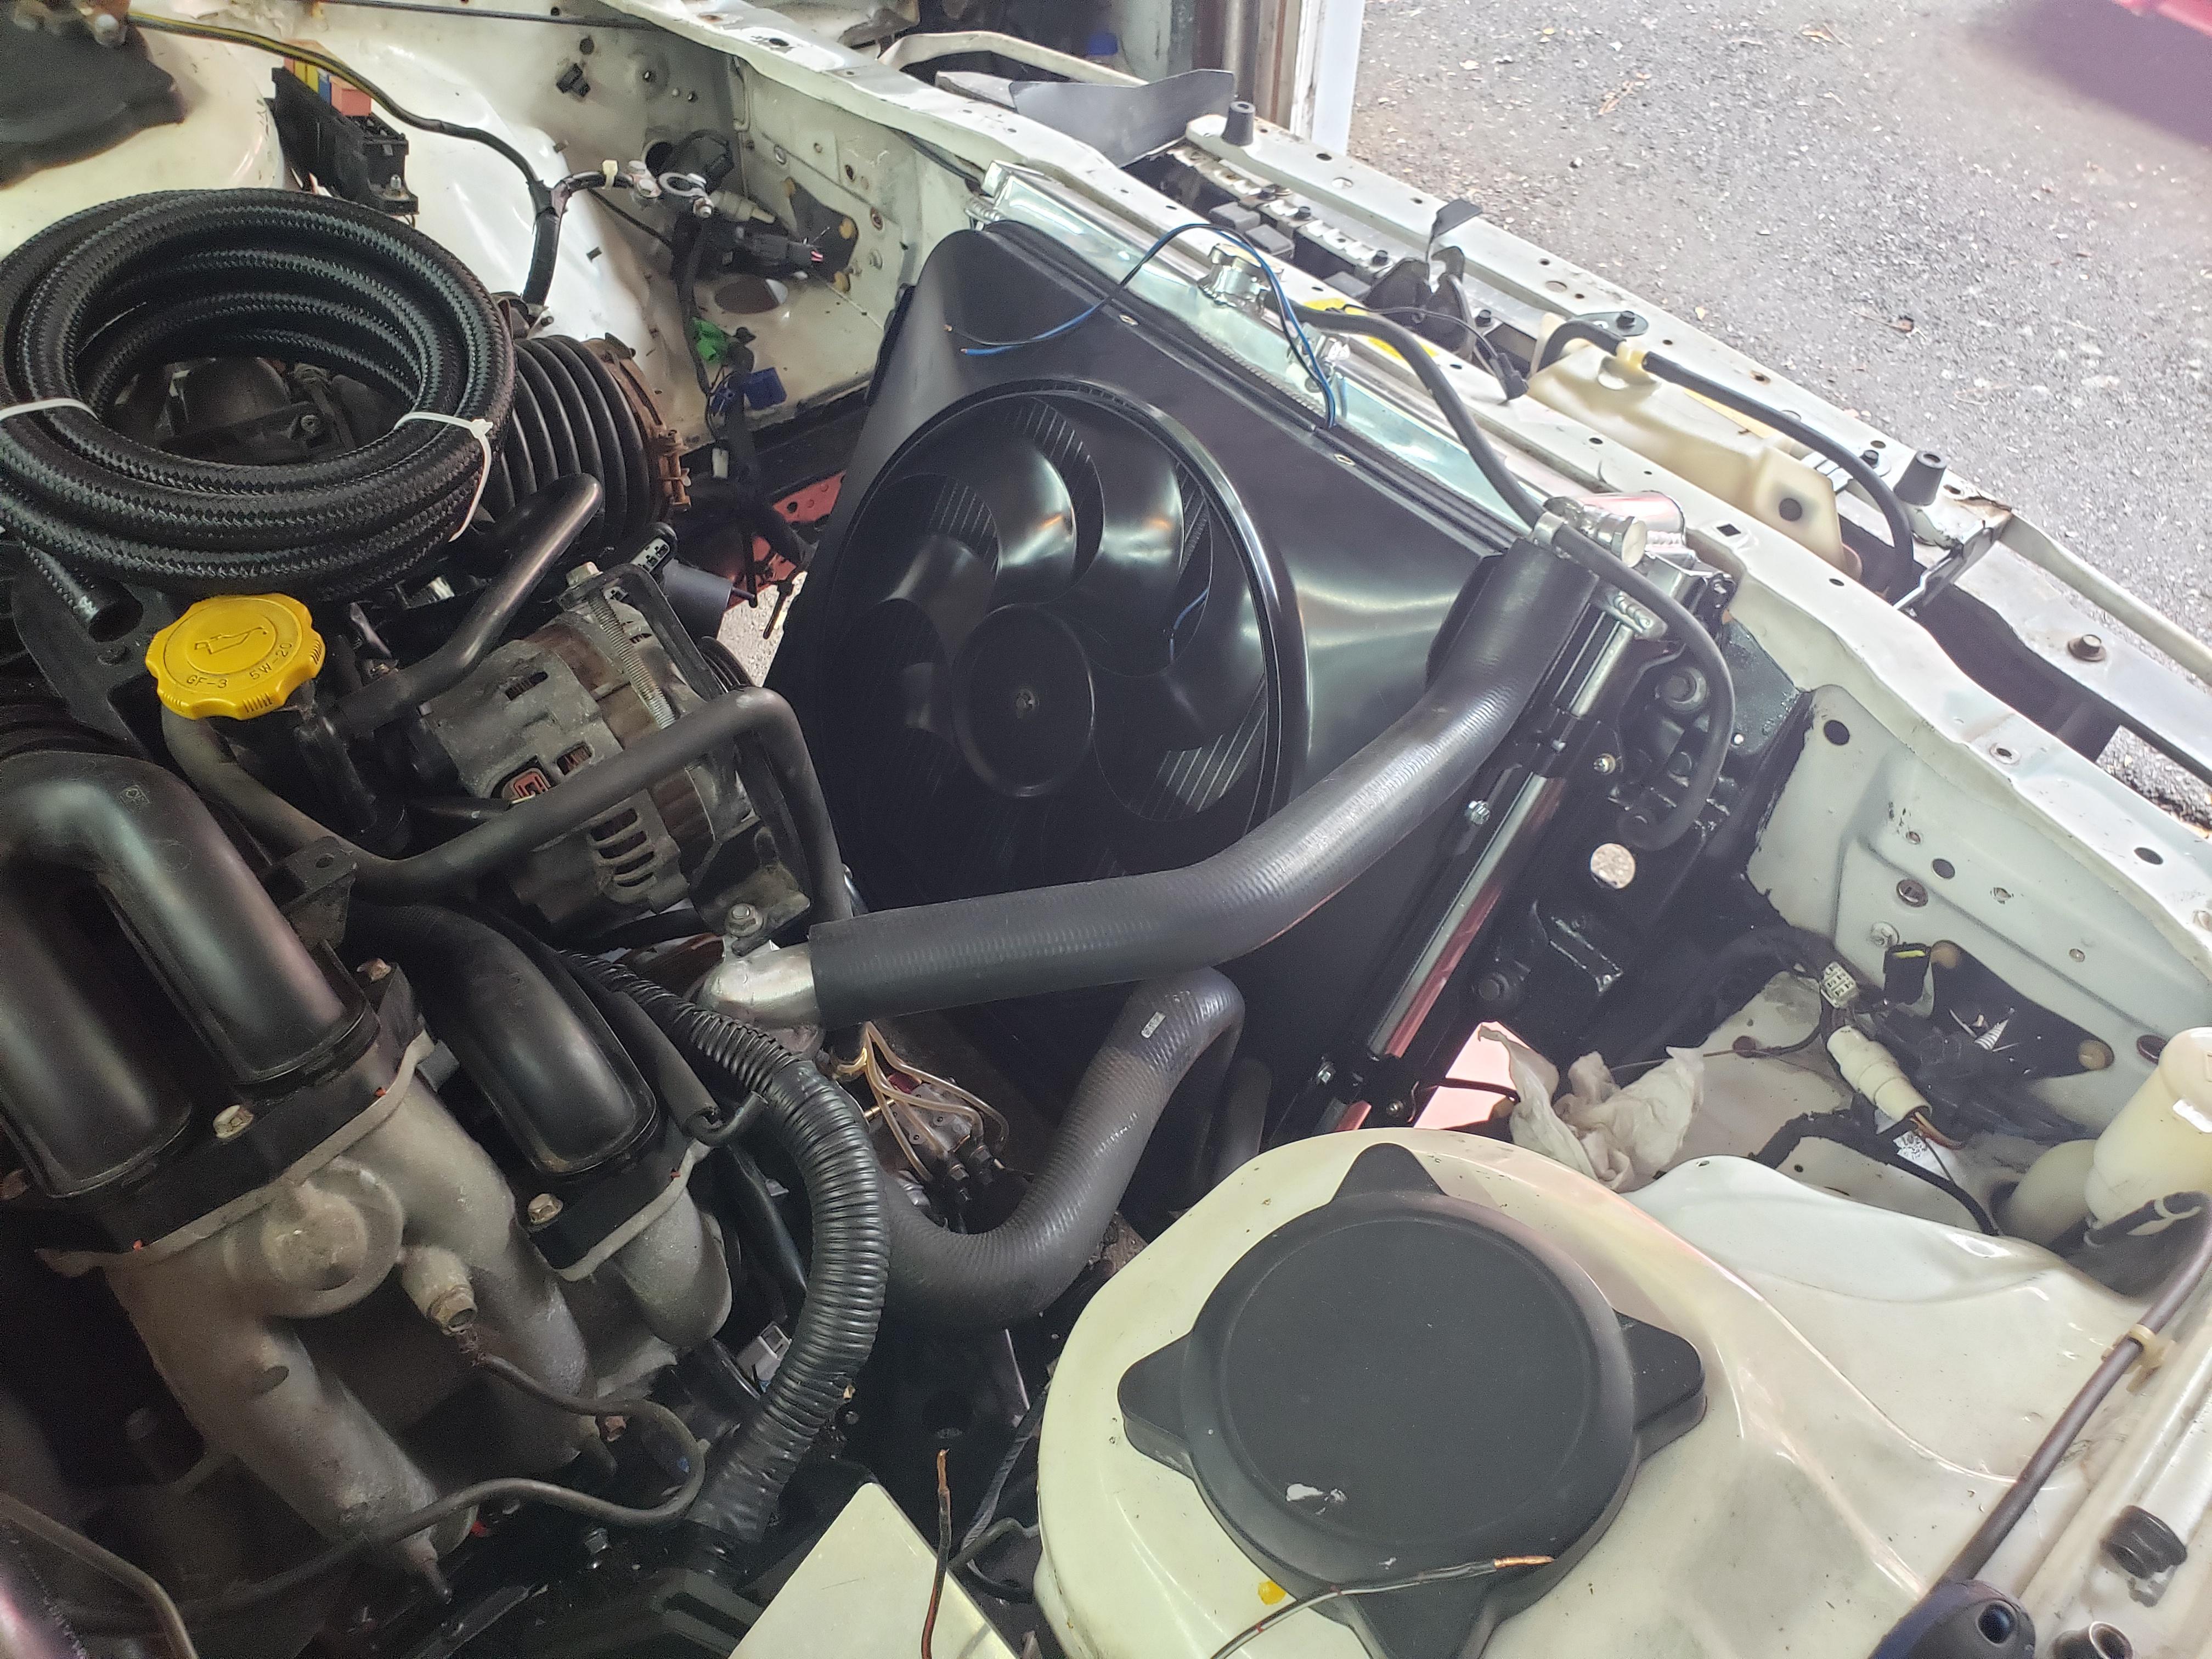
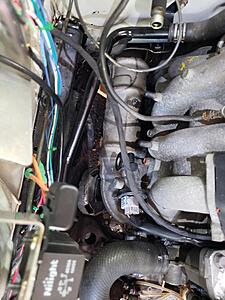
coolant system is pretty much done. I eliminated the surge tank that the RX8 has so I needed to rework the fittings that are on he thermostat housing. I had to remove the existing coolant tubes, machine some plugs and weld them in.
machined flat for cosmetic appearance:
Drilled and tapped for the throttle body coolant return and a coolant temp sensor.
Radiator installed. I'm using the stock FC upper hose and the stock RX8 lower hose.

machined flat for cosmetic appearance:

Drilled and tapped for the throttle body coolant return and a coolant temp sensor.

Radiator installed. I'm using the stock FC upper hose and the stock RX8 lower hose.

Thread Starter
Joined: Mar 2002
Posts: 1,726
Likes: 540
From: binghamton, ny
haha, I wasn't planning on blasting it right now. I may powder coat it later on down the road, but probably after I get everything running and drive it for a while.
Senior Member
Joined: Apr 2021
Posts: 393
Likes: 70
From: GA
I'm trying out "jet hot" right now. I went to change the fluids on my wife's car a few weeks back and it kinda turned into me tearing out the full exhaust and intake manifold. I had the new headers jet hot coated along with the intake manifold so I'm curious to see if it actually lowers temps in the engine bay.
Thread Starter
Joined: Mar 2002
Posts: 1,726
Likes: 540
From: binghamton, ny
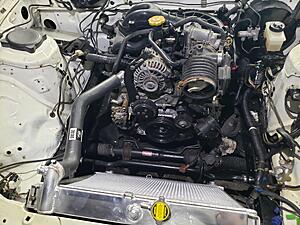
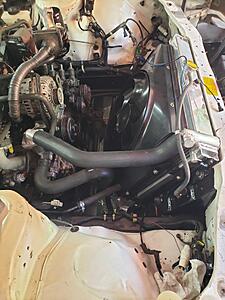
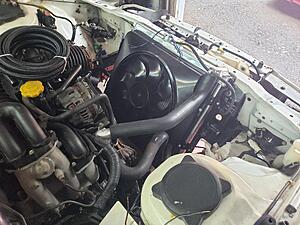
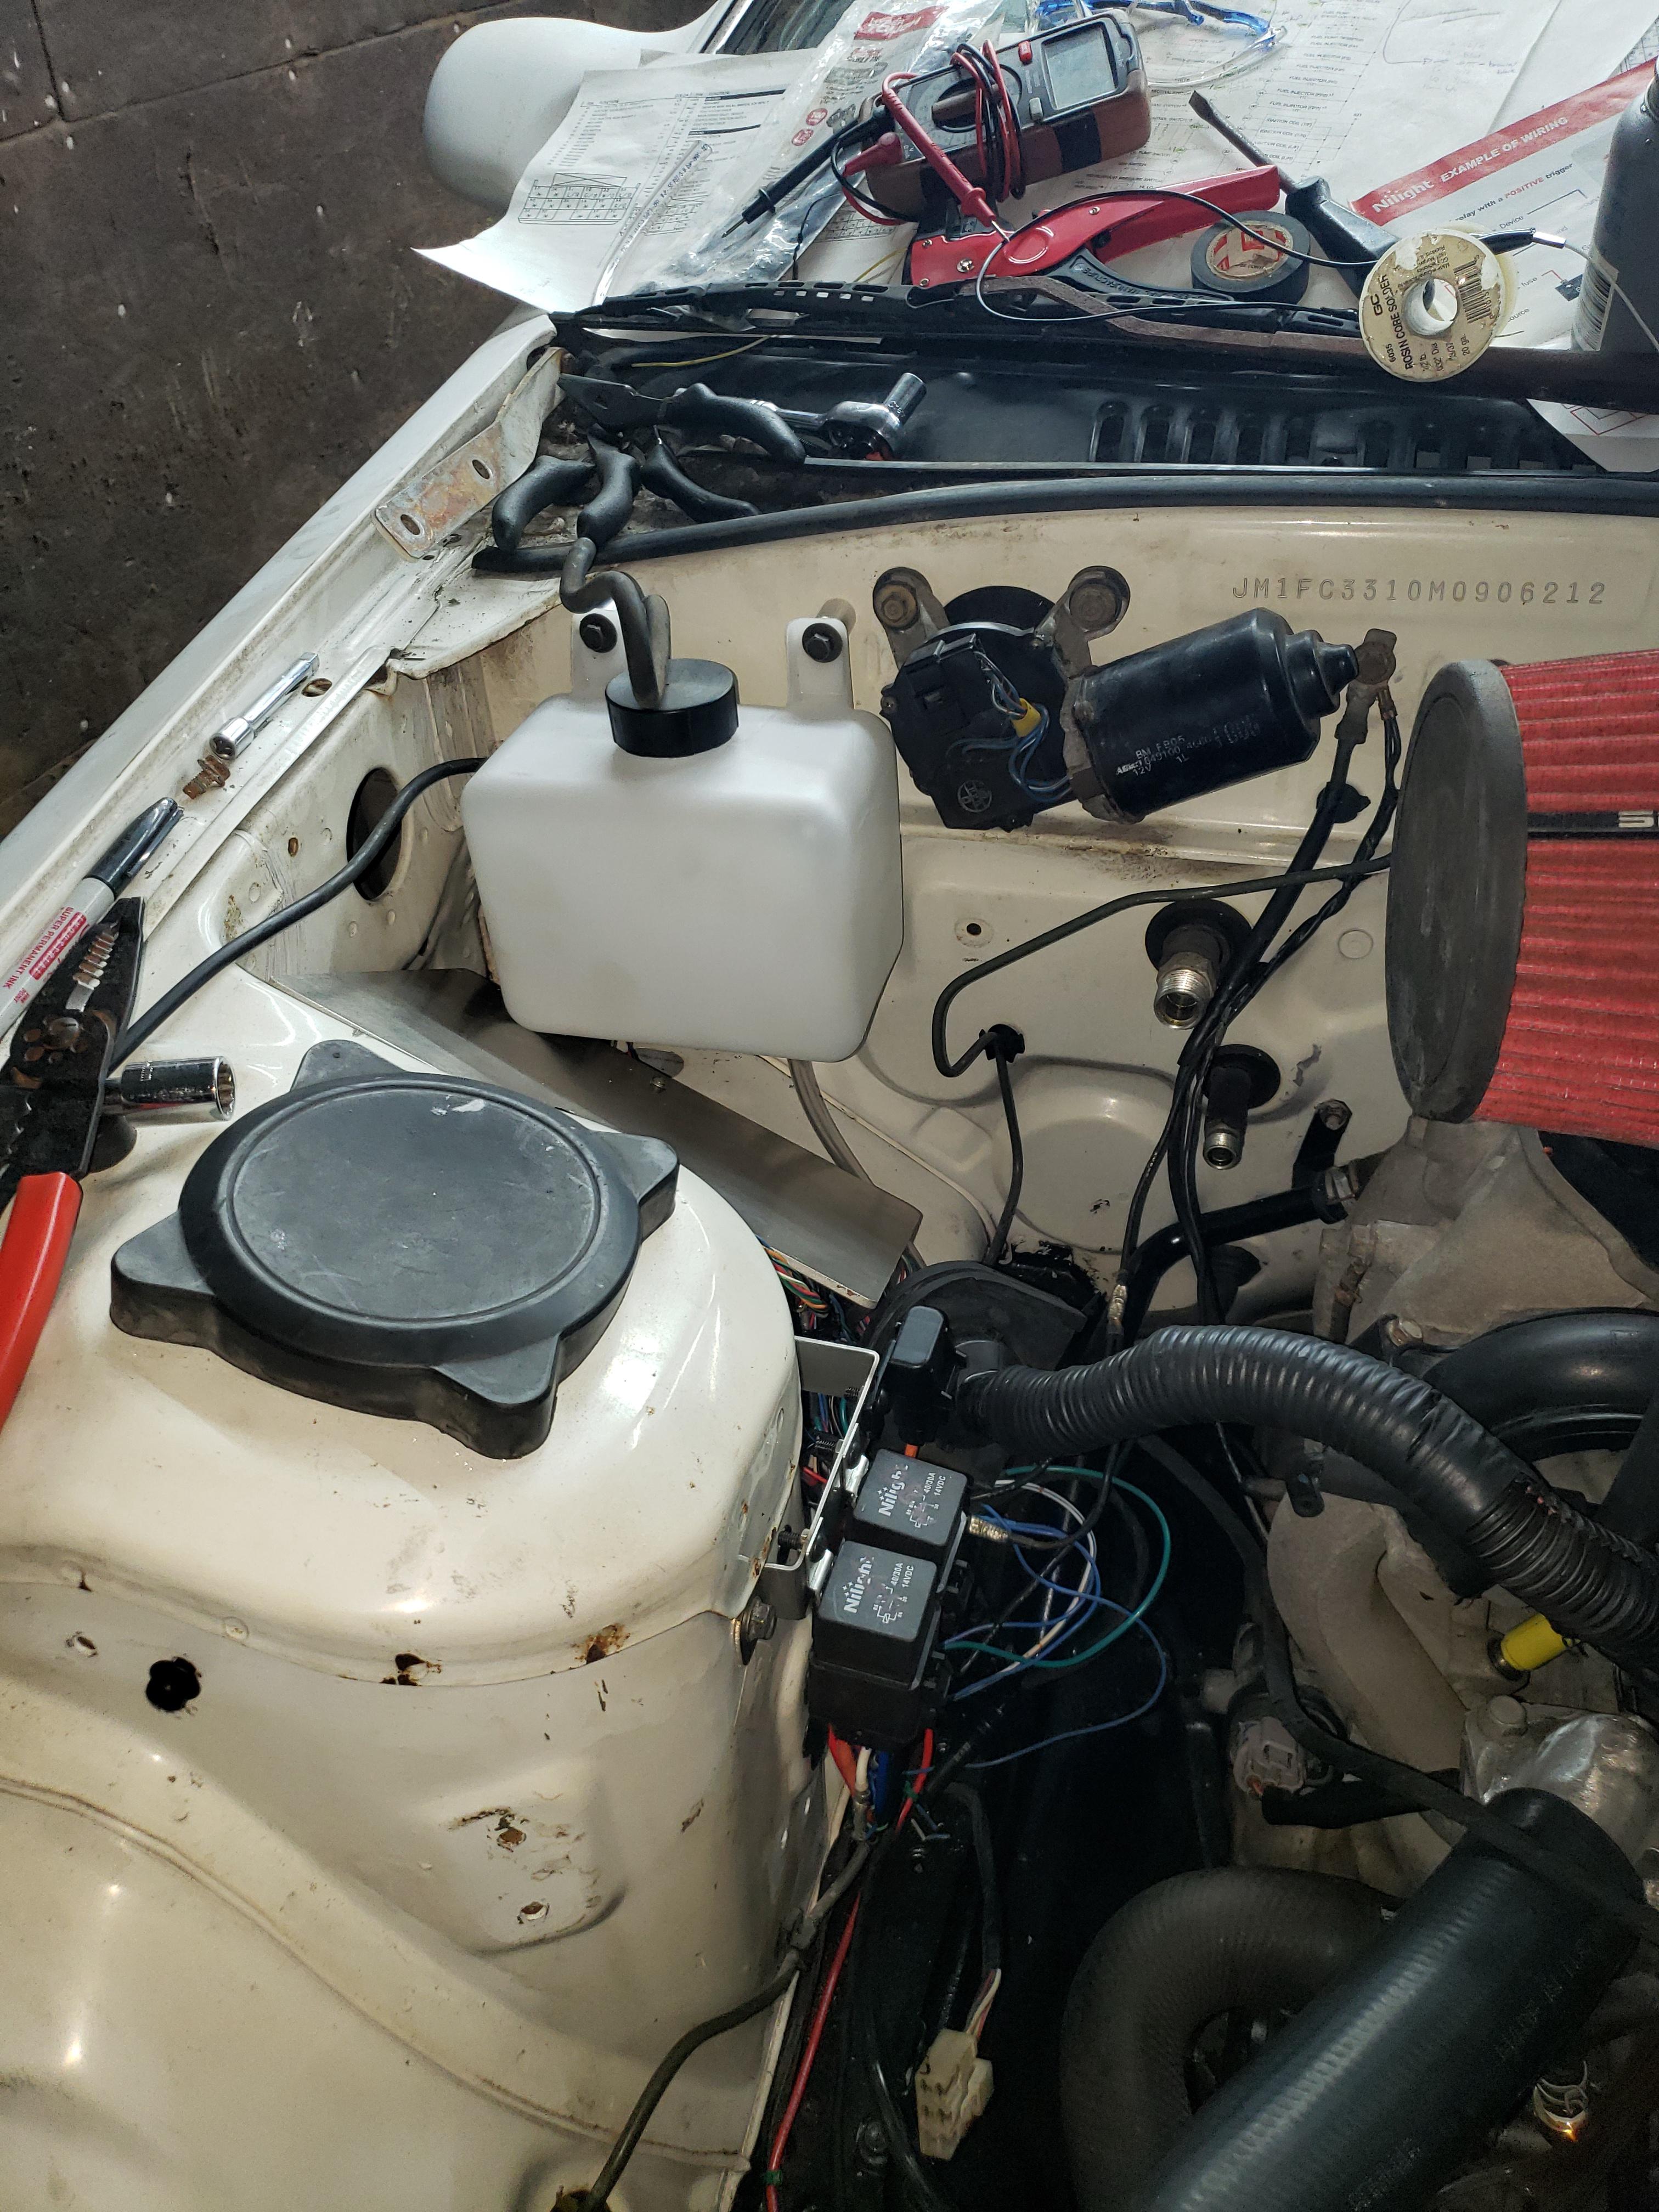
been a while since I updated this. I'm working on is slowly still. LOTs of wiring to do, which isn't too exciting to show, but I did get some fun things done. Coolant plumbing is done (heater core and all) and I got an electric fan installed.
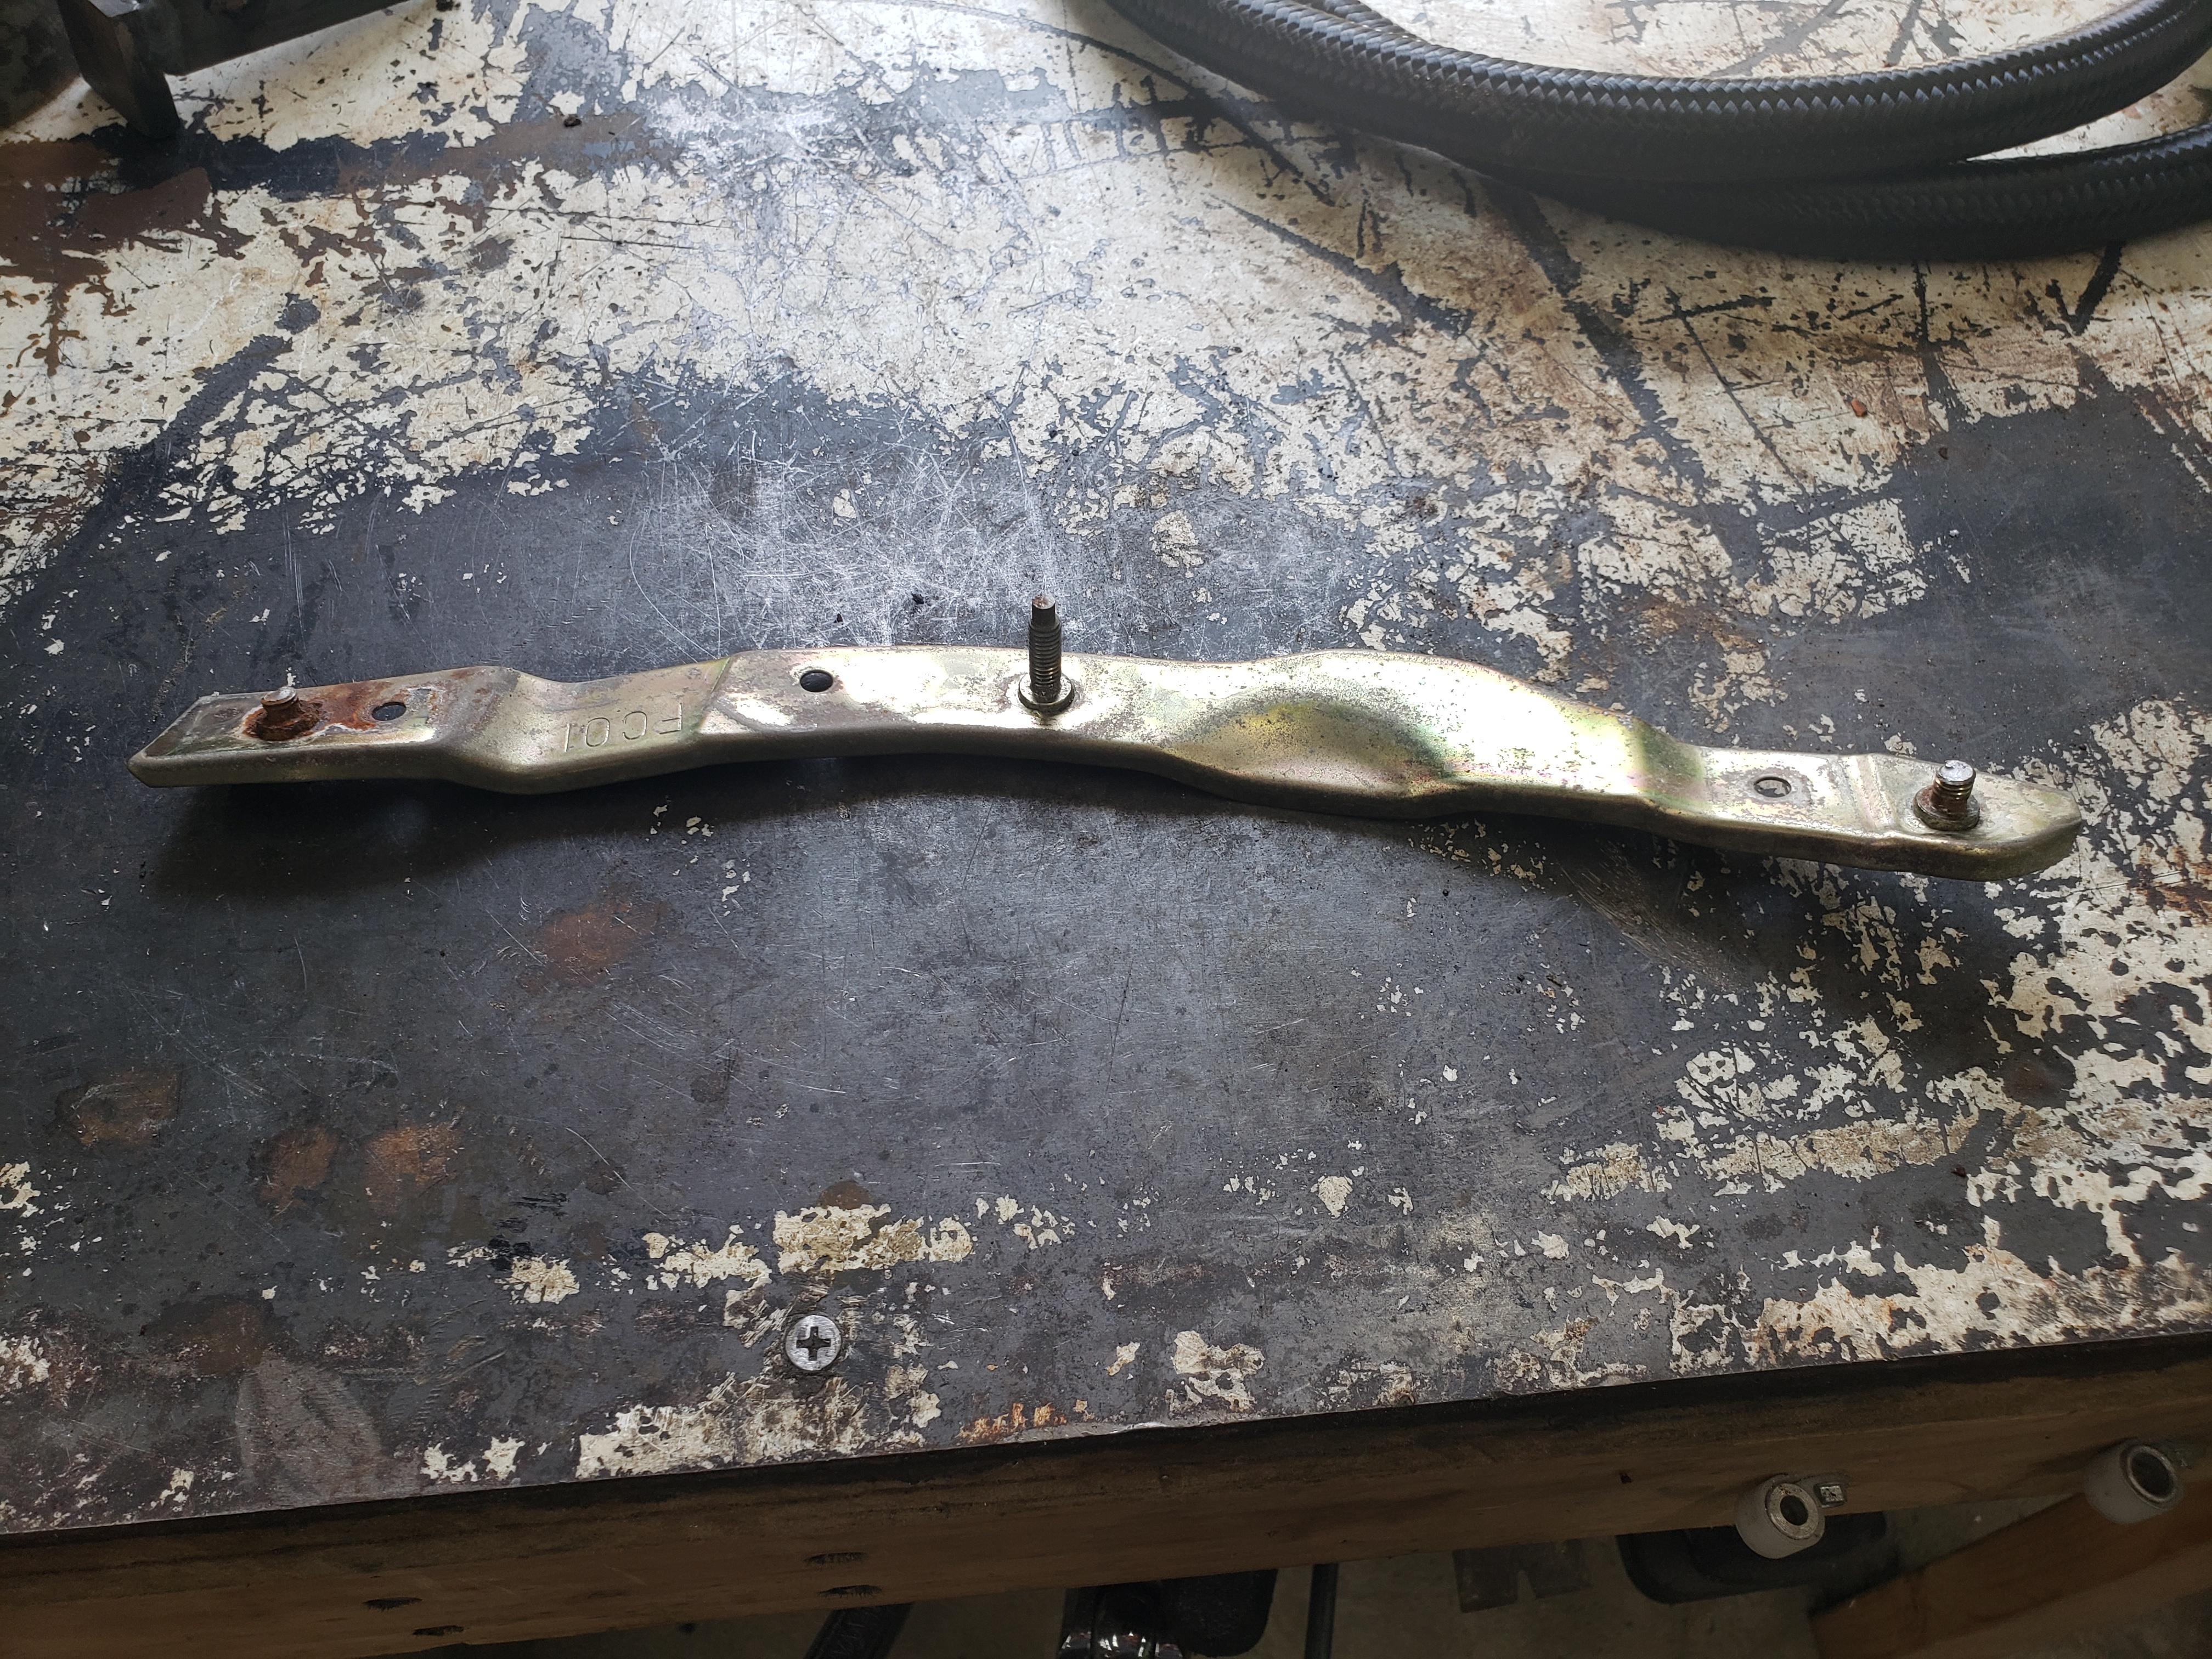
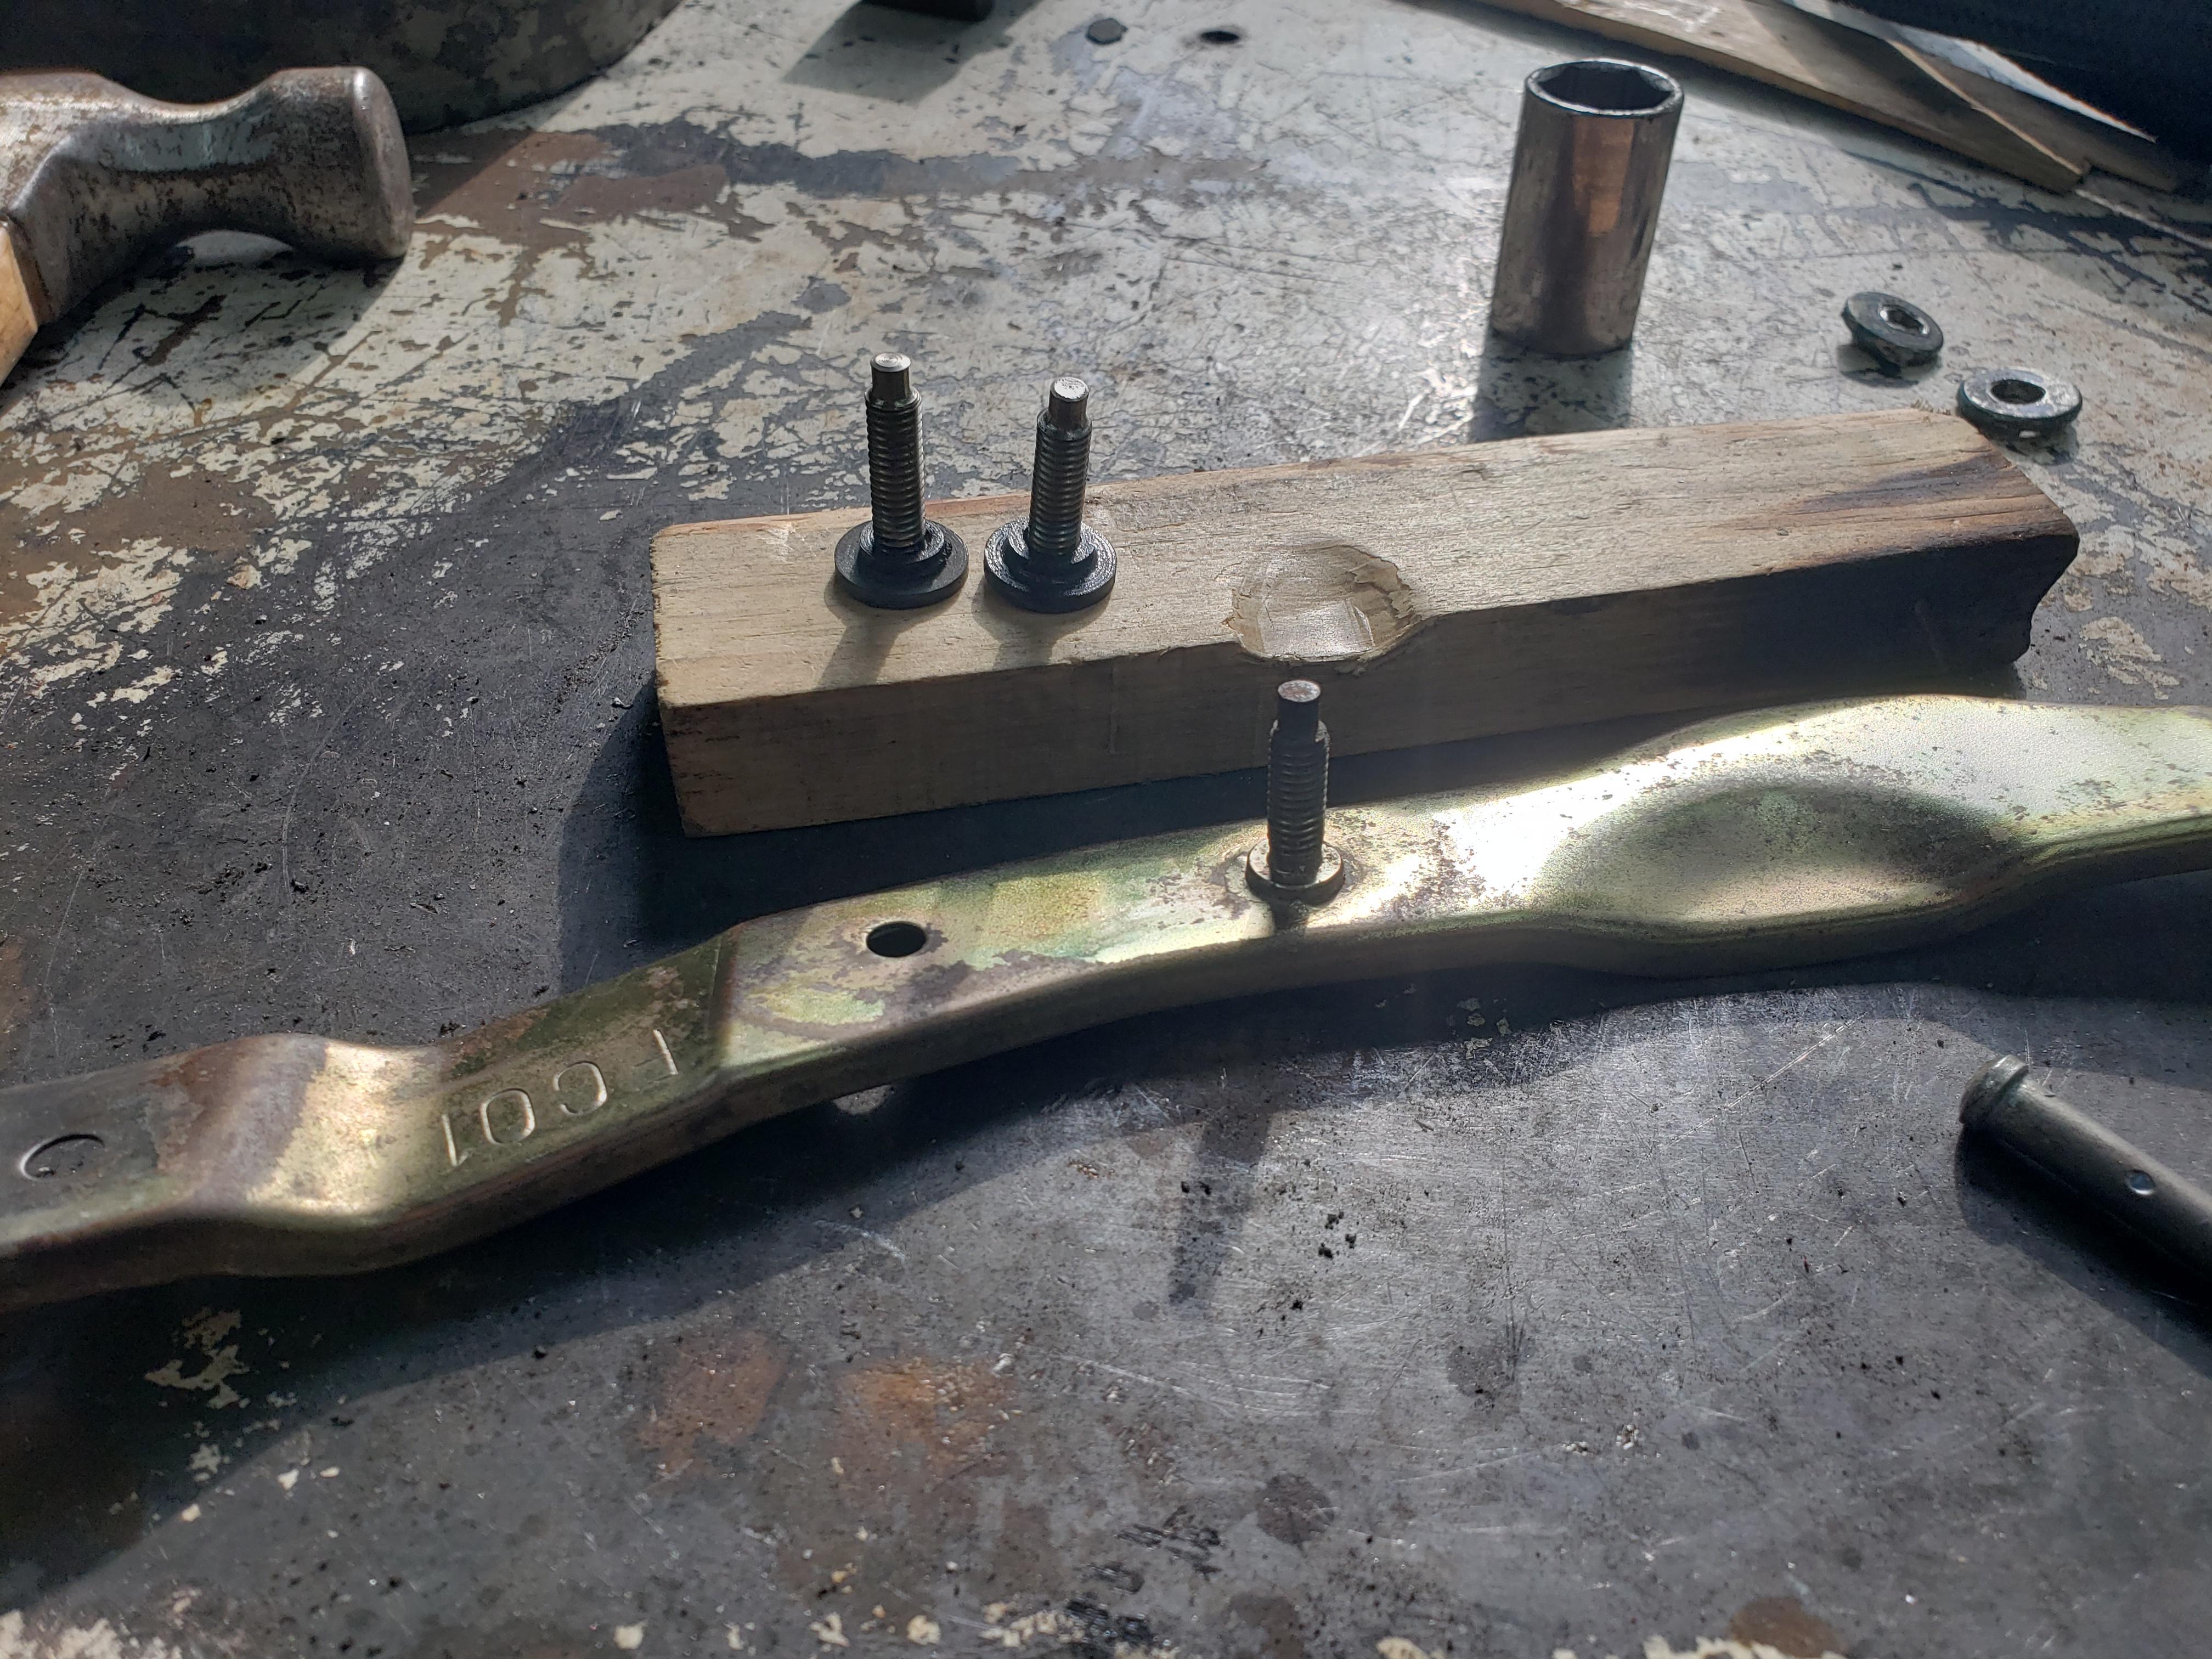
I've also been dealing with little things. I had intended to use the dual oil coolers off the RX8, so the bumper had to come off. Of course in the process a bunch of the retainer studs broke so while I wait for more fittings to come in, im dealing with that. After a (very) quick google search it doesn't appear that you can get these brackets anymore so it's time to head to the shop again. Two broken studs, a byproduct of living in the northeast.
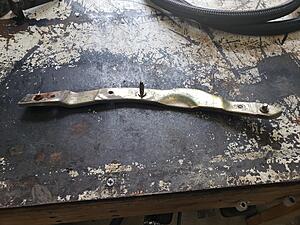
had to drill and grid out the old studs. they are pressed in and spot welded in 3 places, so they did not come out gracefully, but perseverance always wins when you have power tools. I machined new studs and welded them back into the bracket.

little paint for corrosion protection and we're back in business.

I've also been dealing with little things. I had intended to use the dual oil coolers off the RX8, so the bumper had to come off. Of course in the process a bunch of the retainer studs broke so while I wait for more fittings to come in, im dealing with that. After a (very) quick google search it doesn't appear that you can get these brackets anymore so it's time to head to the shop again. Two broken studs, a byproduct of living in the northeast.
had to drill and grid out the old studs. they are pressed in and spot welded in 3 places, so they did not come out gracefully, but perseverance always wins when you have power tools. I machined new studs and welded them back into the bracket.
little paint for corrosion protection and we're back in business.

It seems to work pretty well. I have it triggered by a Station temp switch at the water pump housing. I drove it last month during a 90* degree day in stop and go traffic and didn't notice any alarming temperature climb.
Thread Starter
Joined: Mar 2002
Posts: 1,726
Likes: 540
From: binghamton, ny
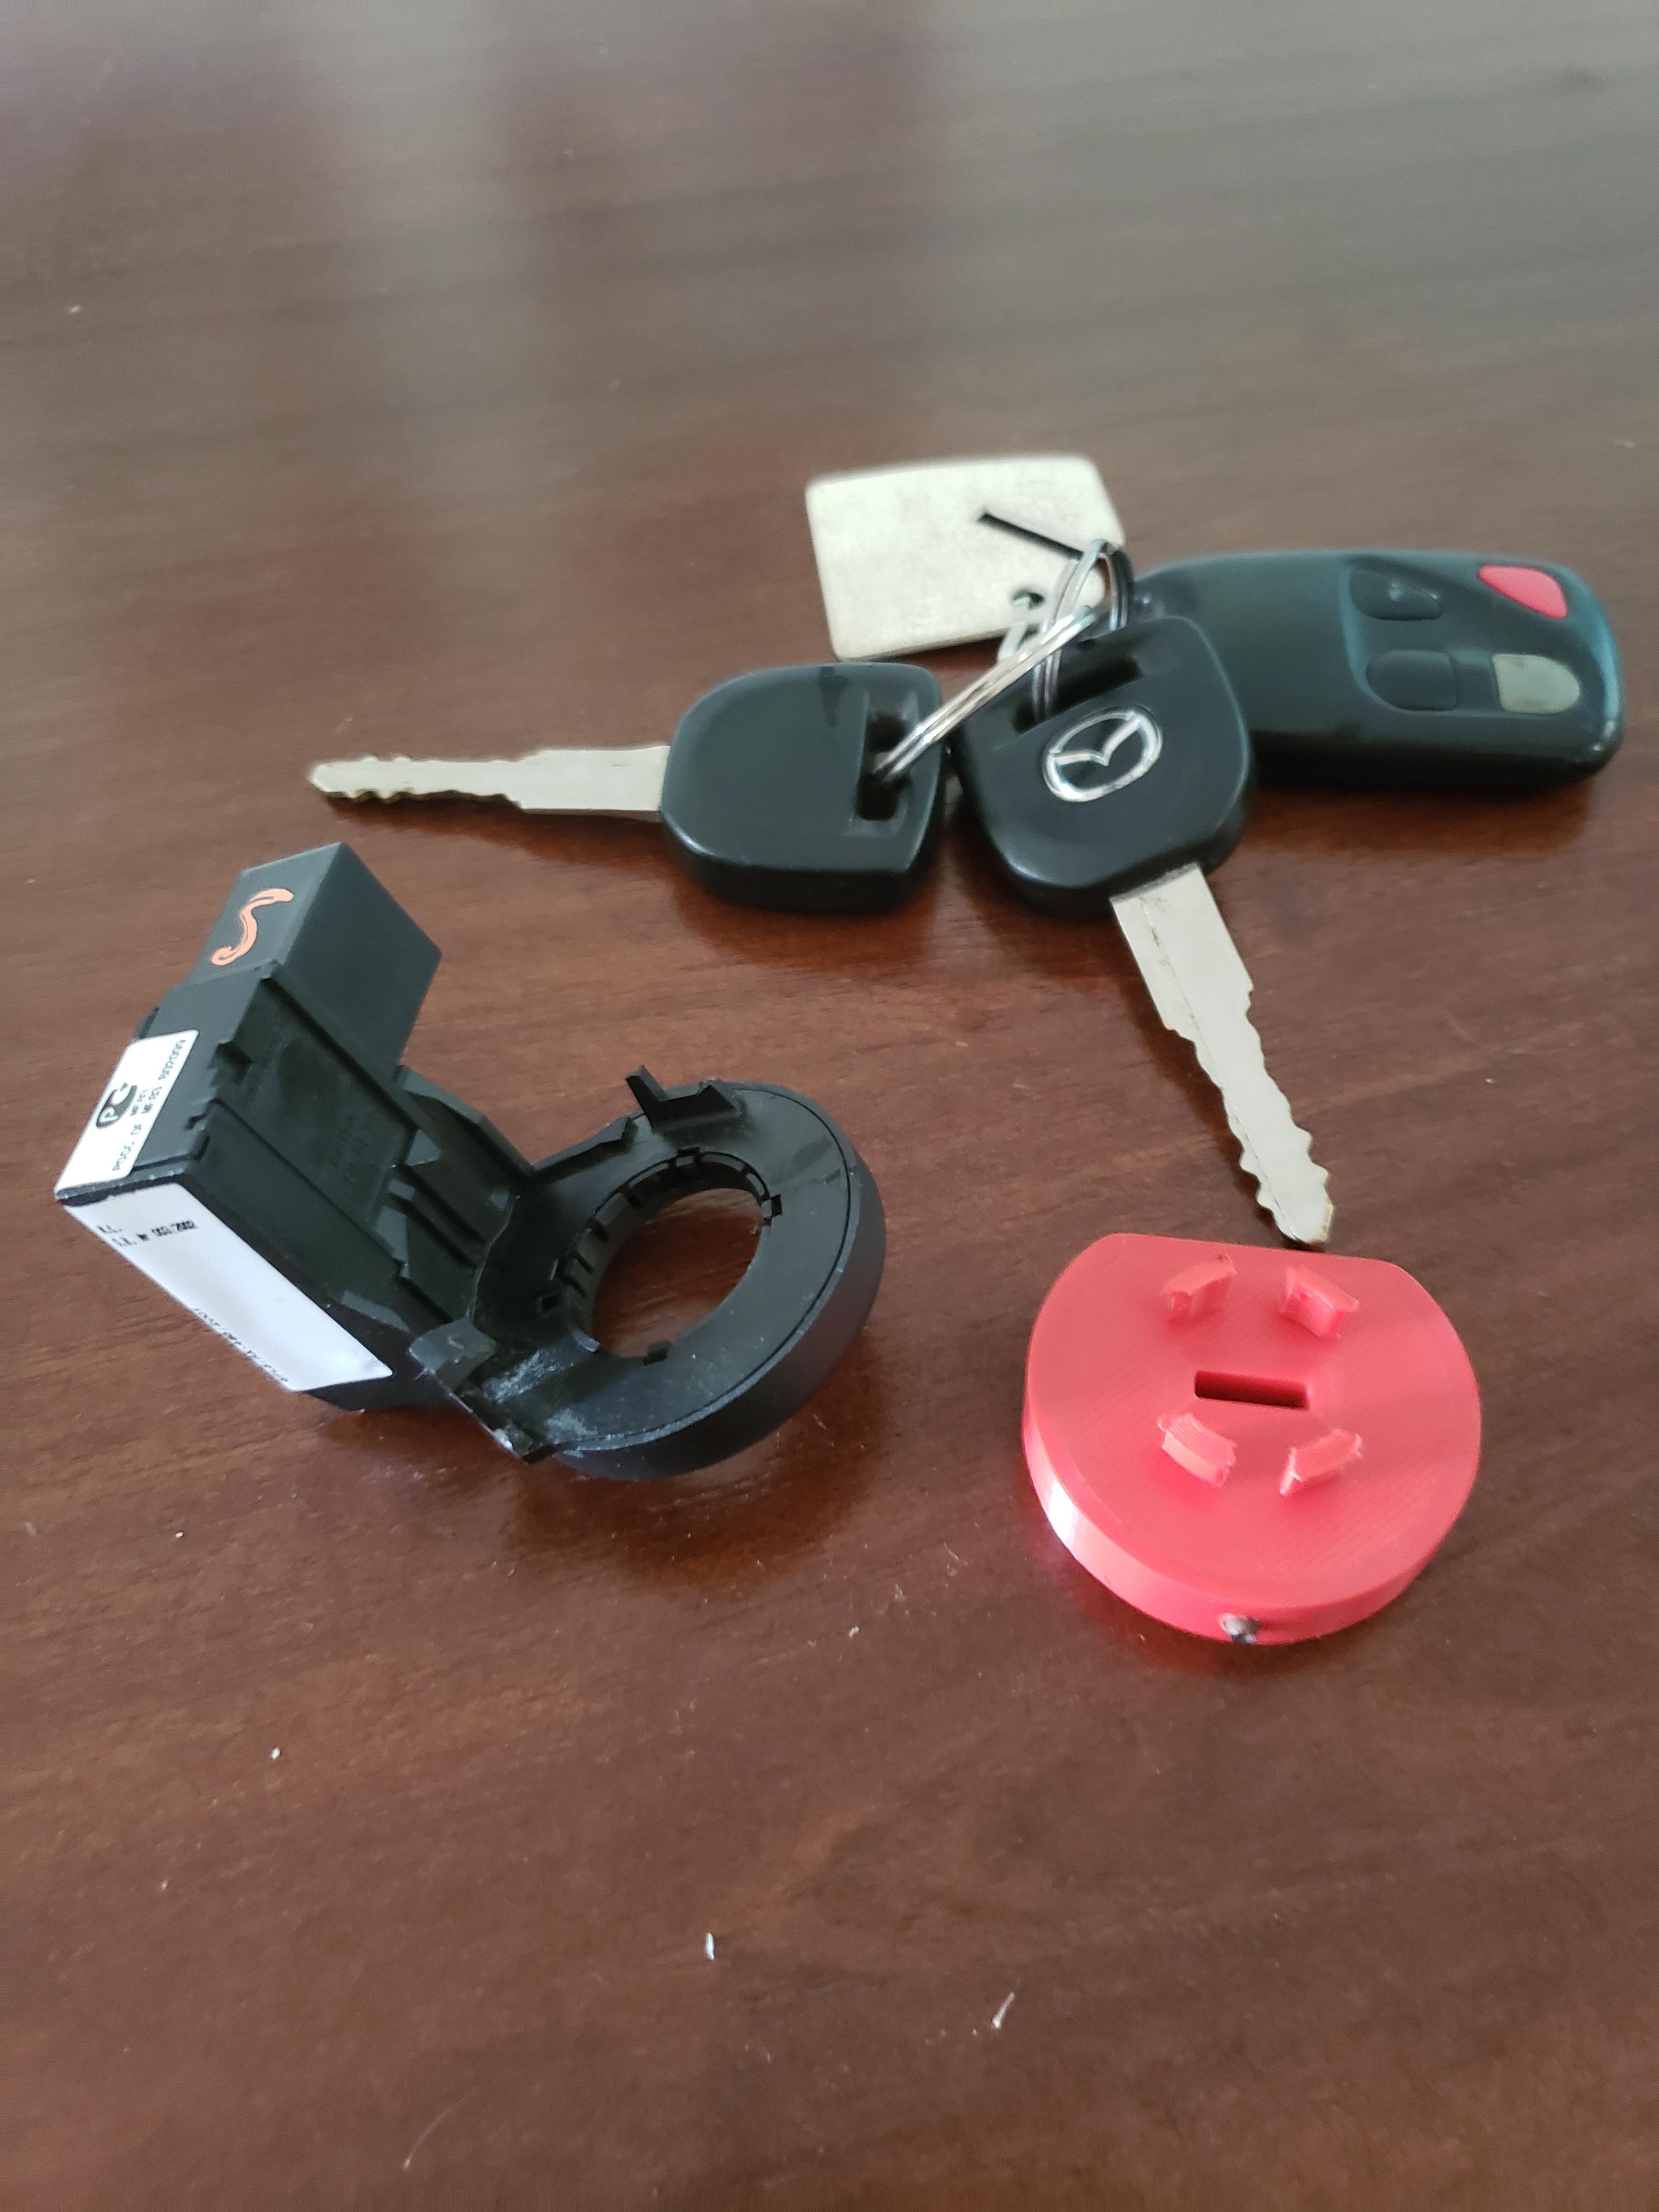
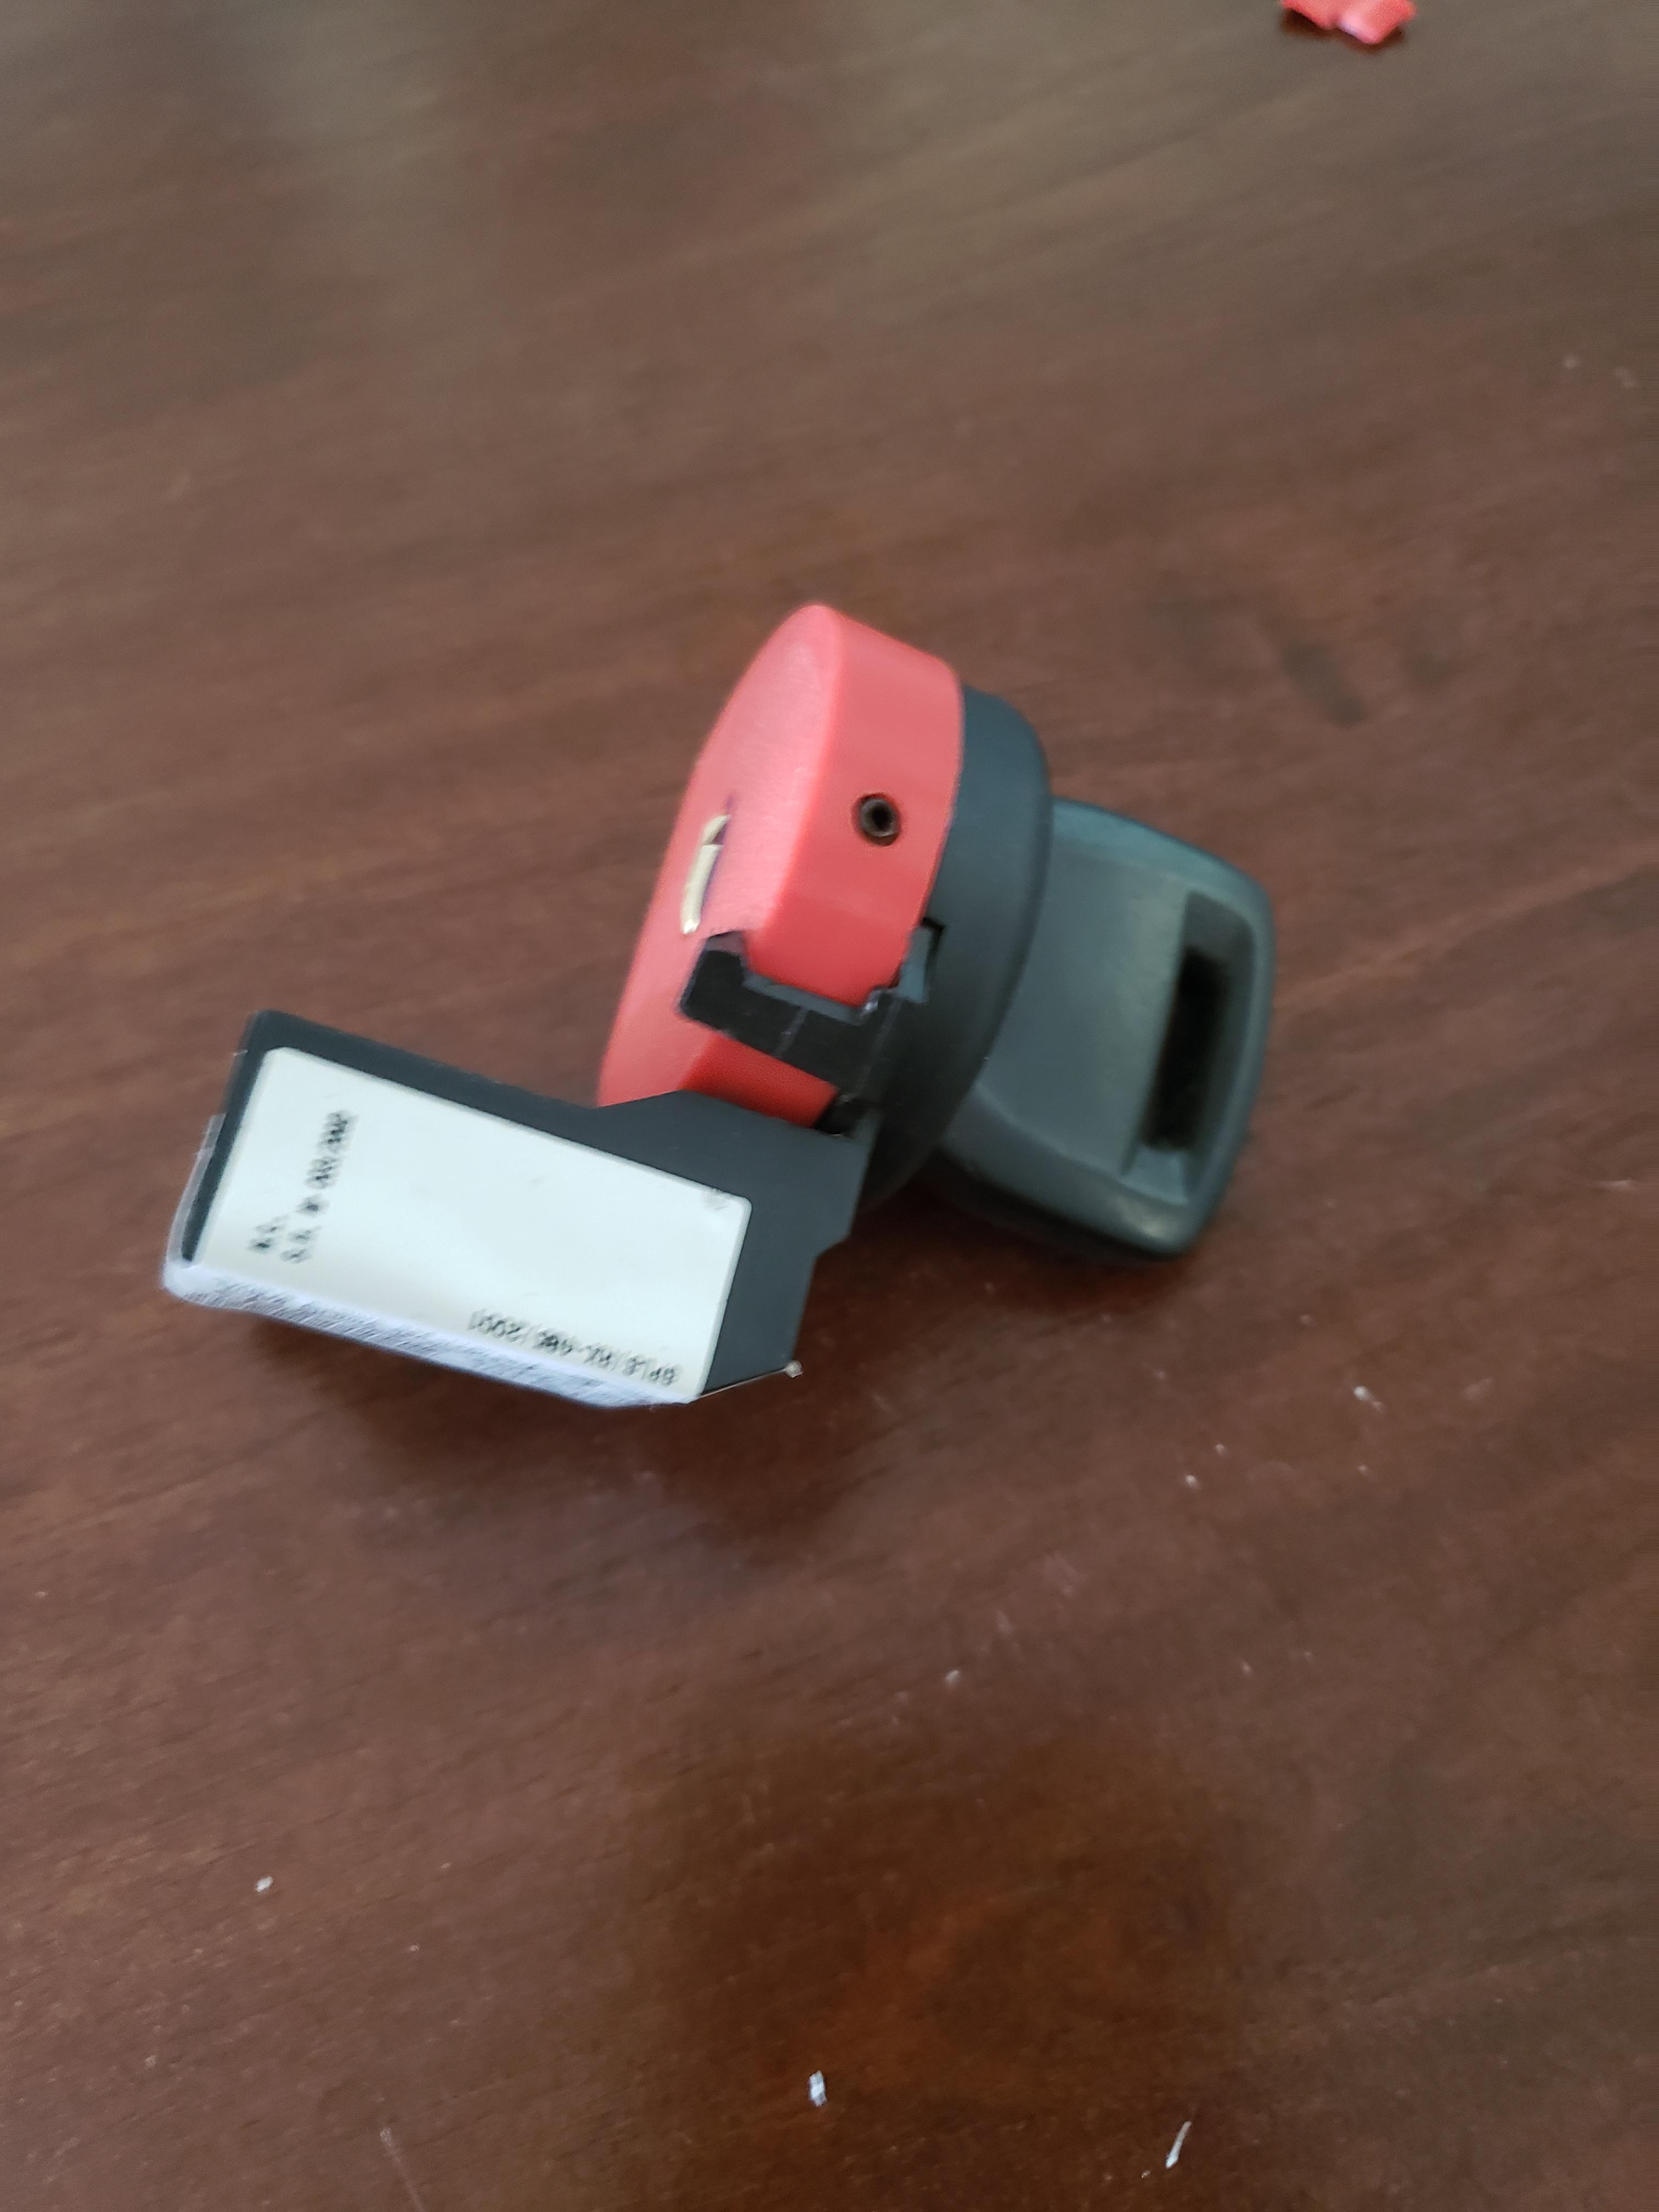
lots of work done over the last week. I'm 90% done with the wiring. I'm trying to document as much as I can in the off chance someone else is brave enough to try this, and i'll post wiring schematics once I get the car running and know everything is working. One of the things that needs to be done for the wiring is the RX8 key-less system which communicates with the PCM over the CAN bus. If the PCM does not get the proper "handshake" from the keyless control unit it won't allow the engine to run. From what I can figure in order for everything to work, you need the PCM, keyless control unit, and key all from the same vehicle as they are all coded together. I had considered trying to get an arduino to fake the CAN signals needed, but I think i'm going to try the lazy route first. I have the keyless control unit and keys from the donor RX8 still so i think i'm going to try just keeping the key in the antenna and hard wire everything together. In that spirit, i needed the key to stay with the antenna so I put the 3D printer to work.
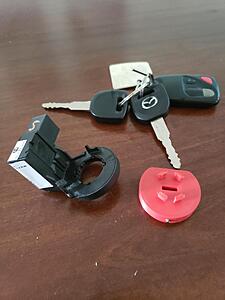
I don't actually need the key portion anymore, so it got trimmed down

Now, note that the antenna is NOT unique or coded to the PCM. In fact, the mazda6 shares the same part number so they are pretty easy to find.
I don't actually need the key portion anymore, so it got trimmed down
Now, note that the antenna is NOT unique or coded to the PCM. In fact, the mazda6 shares the same part number so they are pretty easy to find.
Thread Starter
Joined: Mar 2002
Posts: 1,726
Likes: 540
From: binghamton, ny
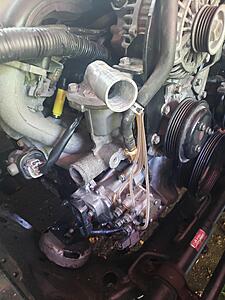
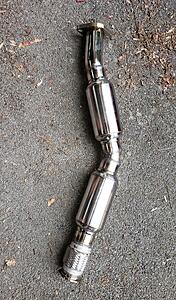
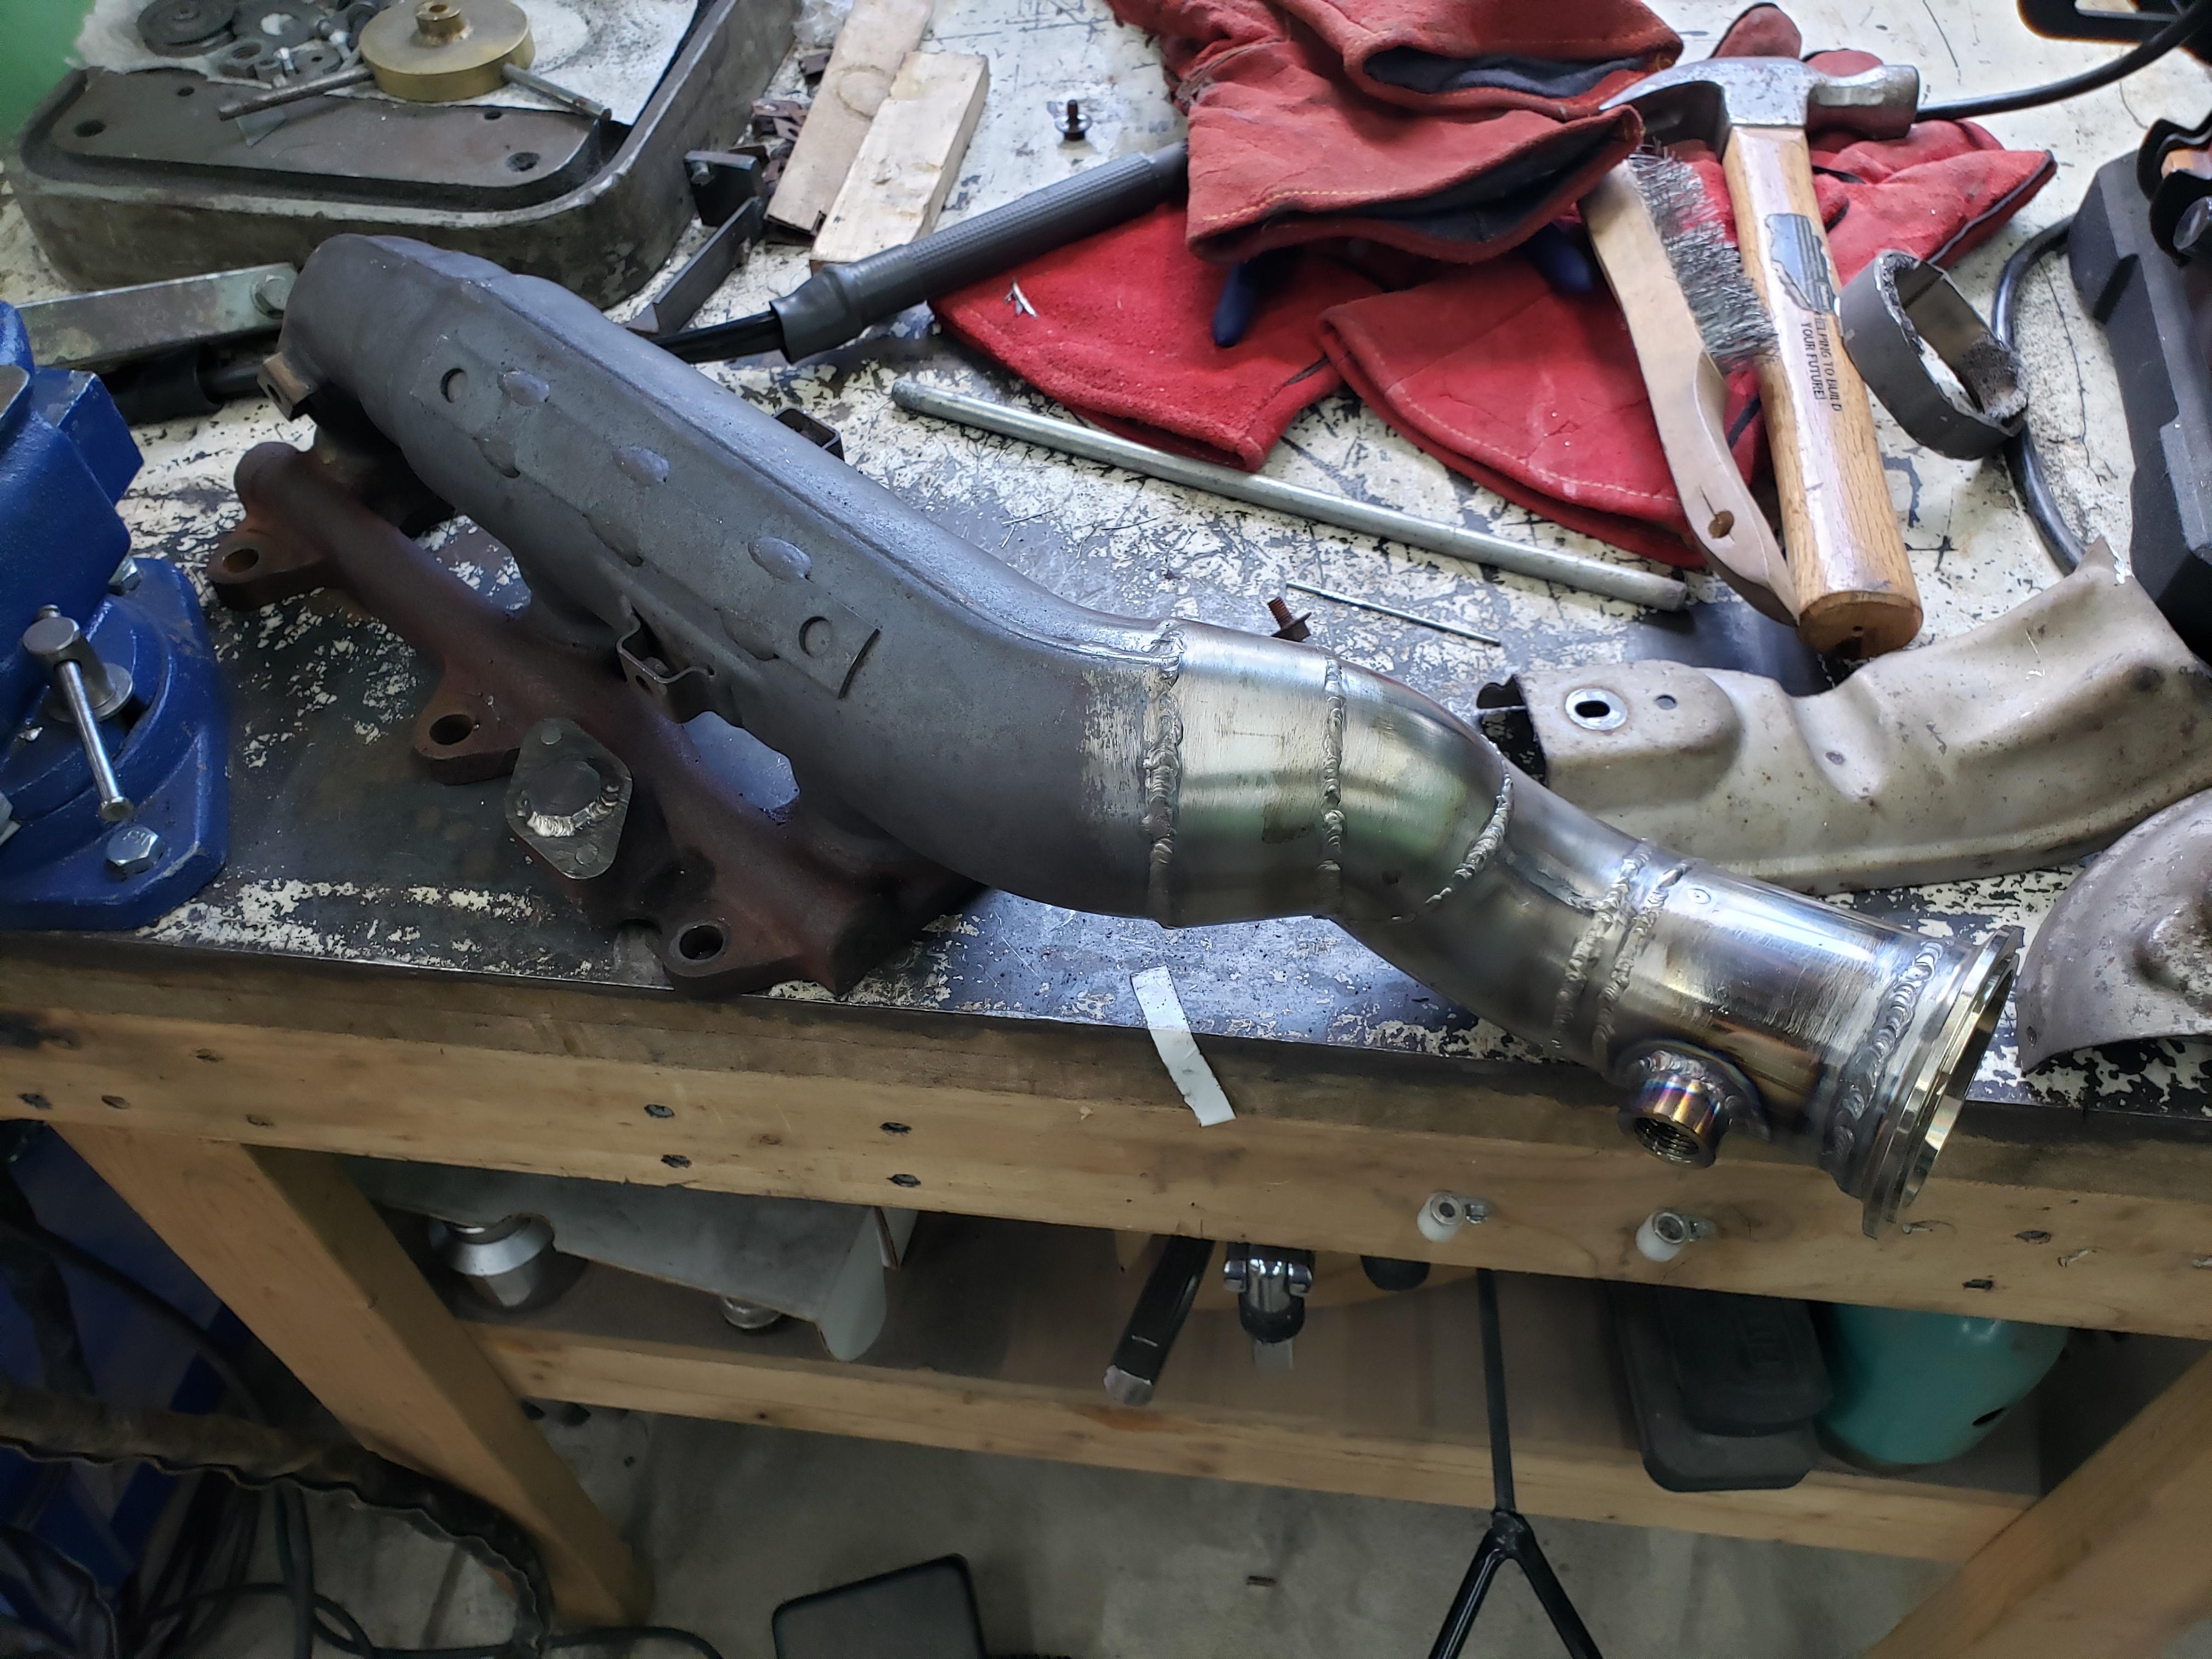
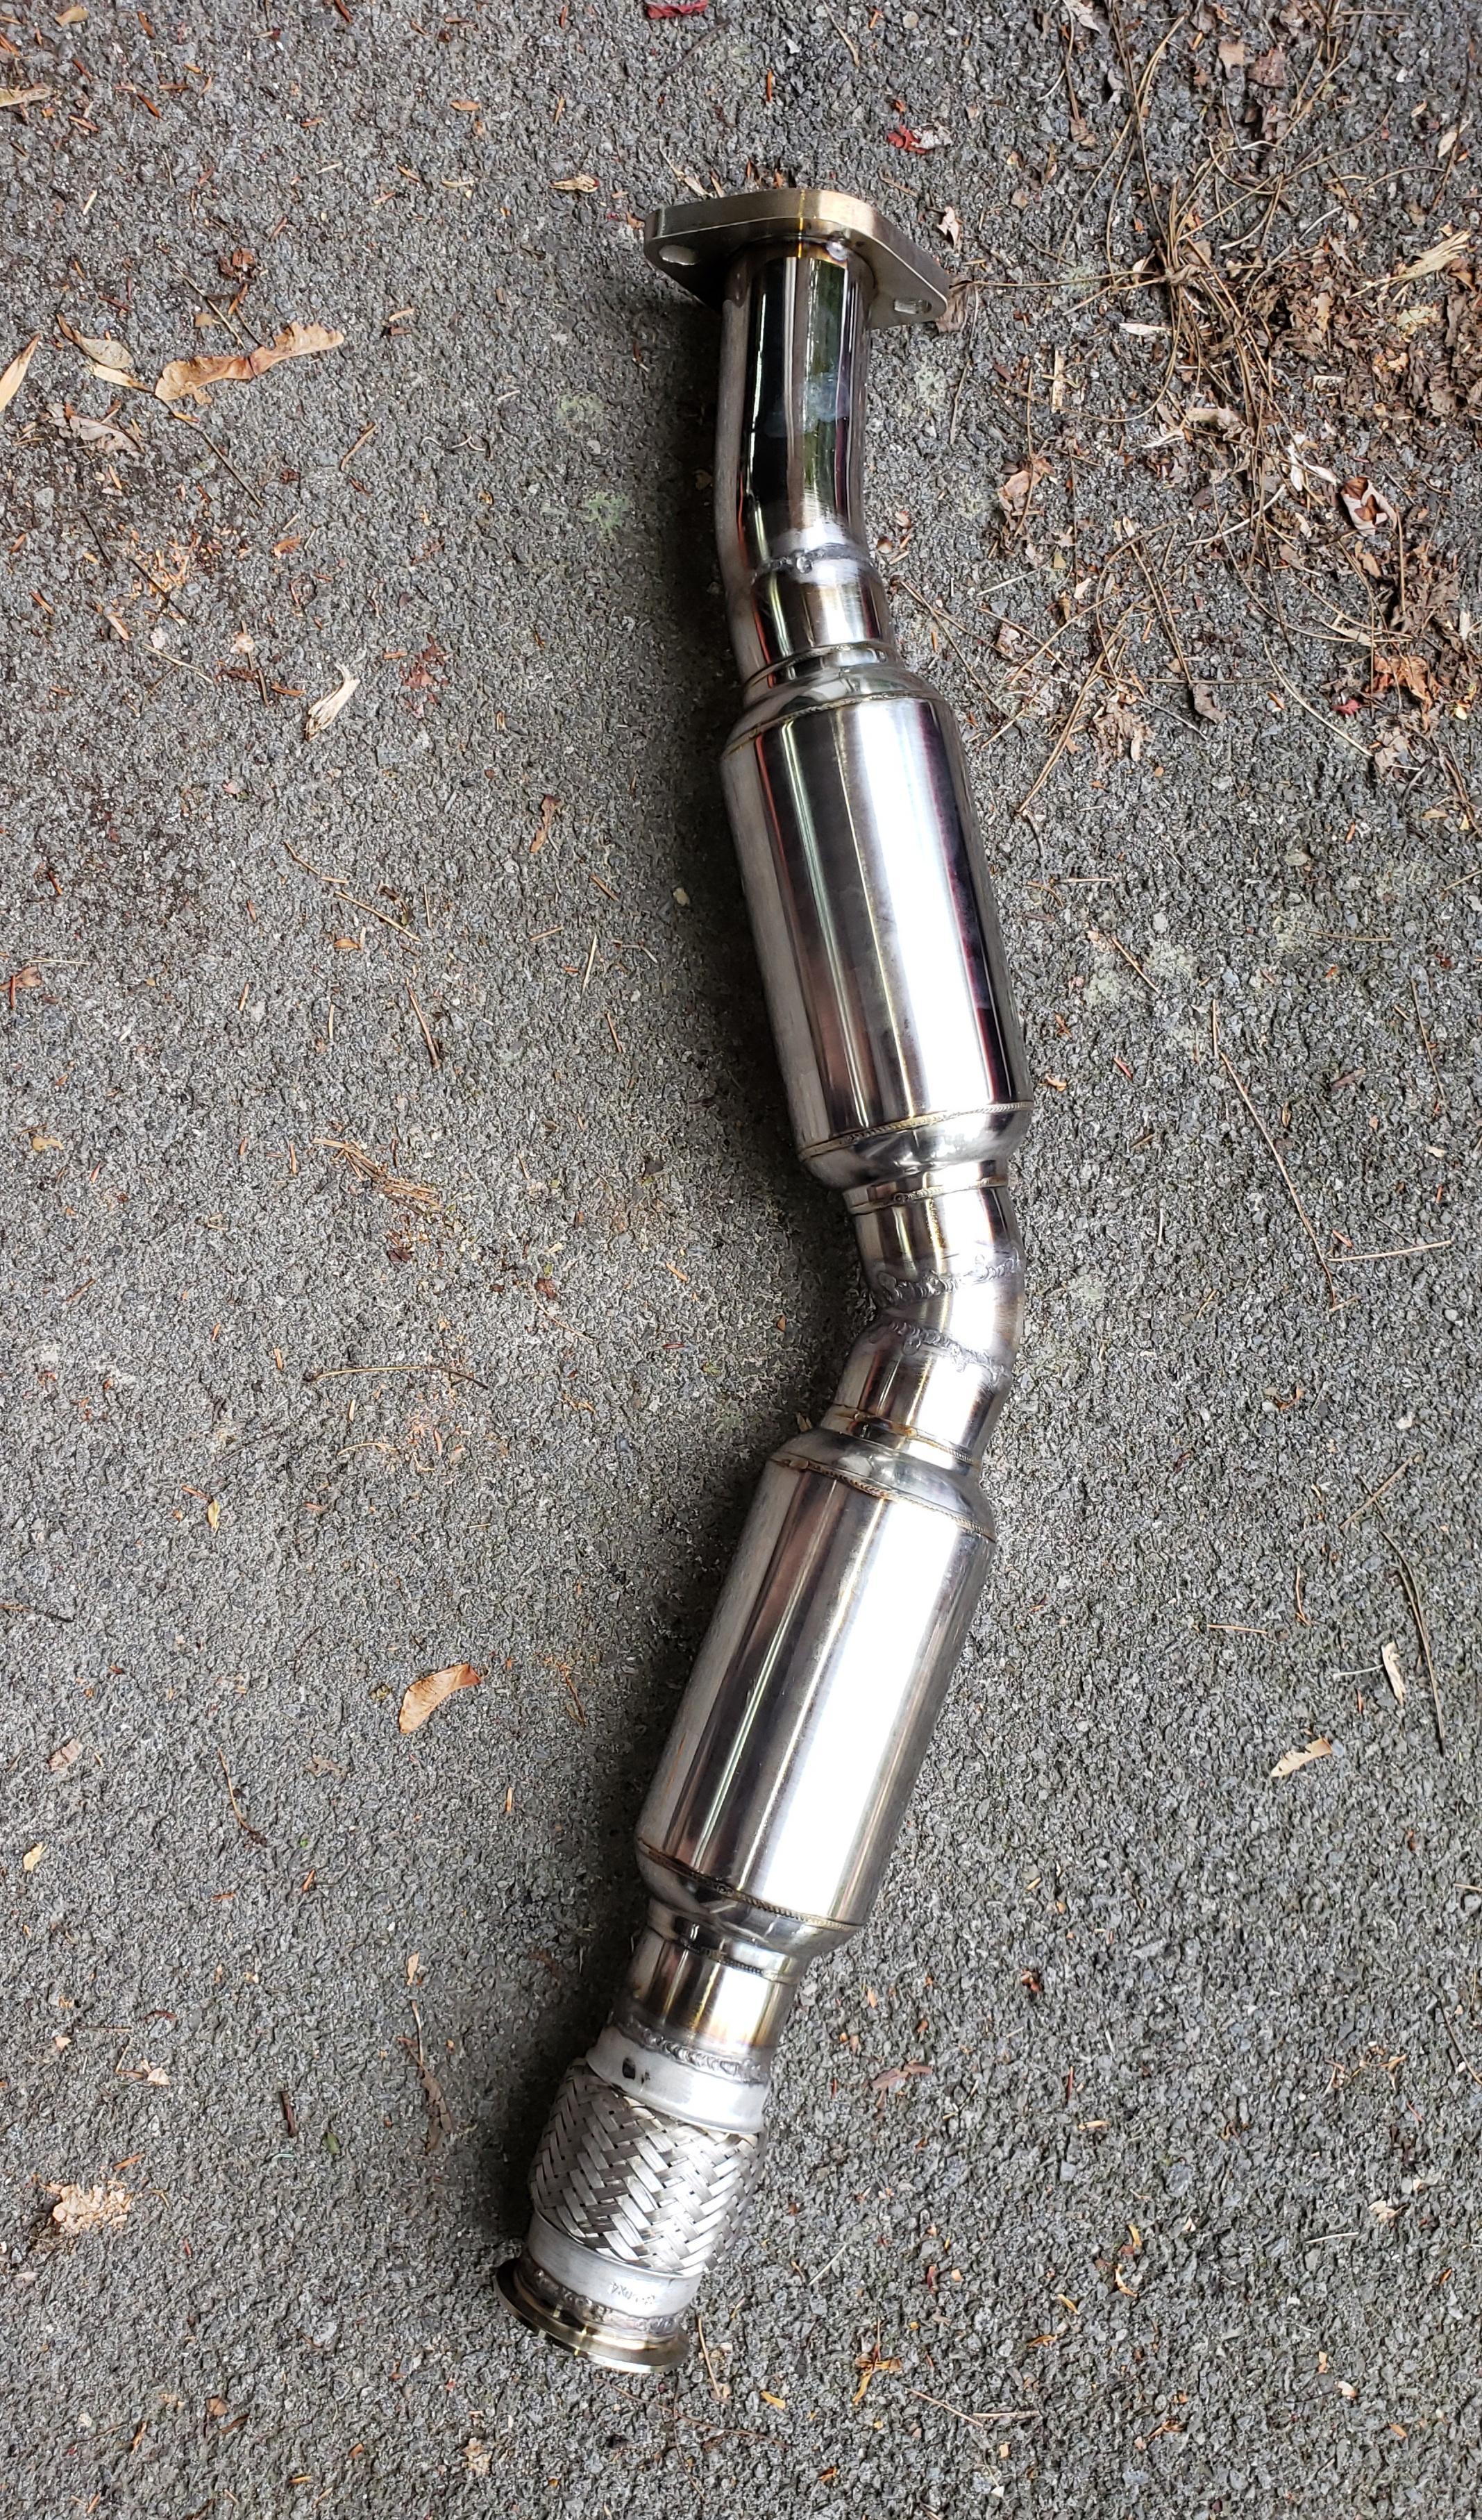
But more importantly, the thing I was dreading most is done....the exhaust. I didn't get many pictures along the way, but I'm re-using the RX8 header, which was cut down in order to clear the FC trans tunnel. The RX8 header is a little weird in that it's made of several pieces. There is a thin sheetmetal structure held inside of a much thicker stamped steel exterior. It's like inception, but for your header....This wouldn't be an issue except that the inner structure is the correct diameter (2.5") and the outer structure is significantly larger. The tubing I made connects right to the thin inner structure, but i also had to make a weird cone piece to neck down from the large stamped piece to the 2.5" stainless tubing I'm using. Also, I'm well aware that my welds aren't the prettiest thing. I'll never claim to be a welder and even my largest cup is a bit small for stainless welding. 

Also, anyone who's going to be doing any exhaust work and has a 3D printer, I would highly suggest printing these exhaust sections. They snap together and takes the guesswork out of cutting your sections.
Header modified and installed.
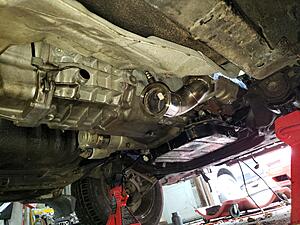
Midpipe with some cheap-o resonators that are at least packed with stainless packing.
Installed and bolted up to the catback.
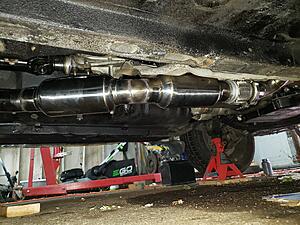
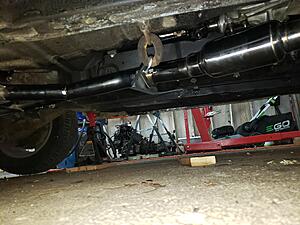
Oh, and I may have failed to mention, but i got a brand new catback as well.

Pretty excited to hear it run now, Not much left to do at this point. I need to finish the wiring, and button up some vacuum routing and fingers crossed it starts.
Also, anyone who's going to be doing any exhaust work and has a 3D printer, I would highly suggest printing these exhaust sections. They snap together and takes the guesswork out of cutting your sections.

Header modified and installed.


Midpipe with some cheap-o resonators that are at least packed with stainless packing.
Installed and bolted up to the catback.


Oh, and I may have failed to mention, but i got a brand new catback as well.

Pretty excited to hear it run now, Not much left to do at this point. I need to finish the wiring, and button up some vacuum routing and fingers crossed it starts.
Thread Starter
Joined: Mar 2002
Posts: 1,726
Likes: 540
From: binghamton, ny
Well, the PCM wiring is done and everything seems to be working so far. Fuel pump turns on and the drive by wire throttle is working as well. I still need to finish up a few wiring items like wiring up the starter, reverse lights, and the OBD2 port. I think i'm going to relocate the battery as well to give me more room for the intake filter.
I did get a few other little things done as well. Like getting the 2 stroke bottle mounted up. The bottle is a Dorman coolant reservoir (part number 603-001) that I just drilled a tiny hole in the cap. It has a nipple formed right into the bottle so it's about perfect.

running a SOHN adapter along with some premix. You can never have too much lube!

I did get a few other little things done as well. Like getting the 2 stroke bottle mounted up. The bottle is a Dorman coolant reservoir (part number 603-001) that I just drilled a tiny hole in the cap. It has a nipple formed right into the bottle so it's about perfect.
running a SOHN adapter along with some premix. You can never have too much lube!

Thread Starter
Joined: Mar 2002
Posts: 1,726
Likes: 540
From: binghamton, ny
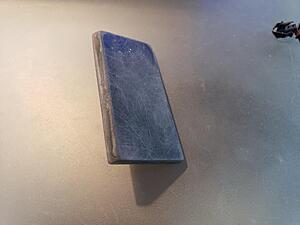
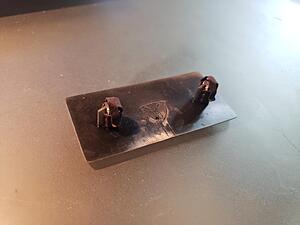
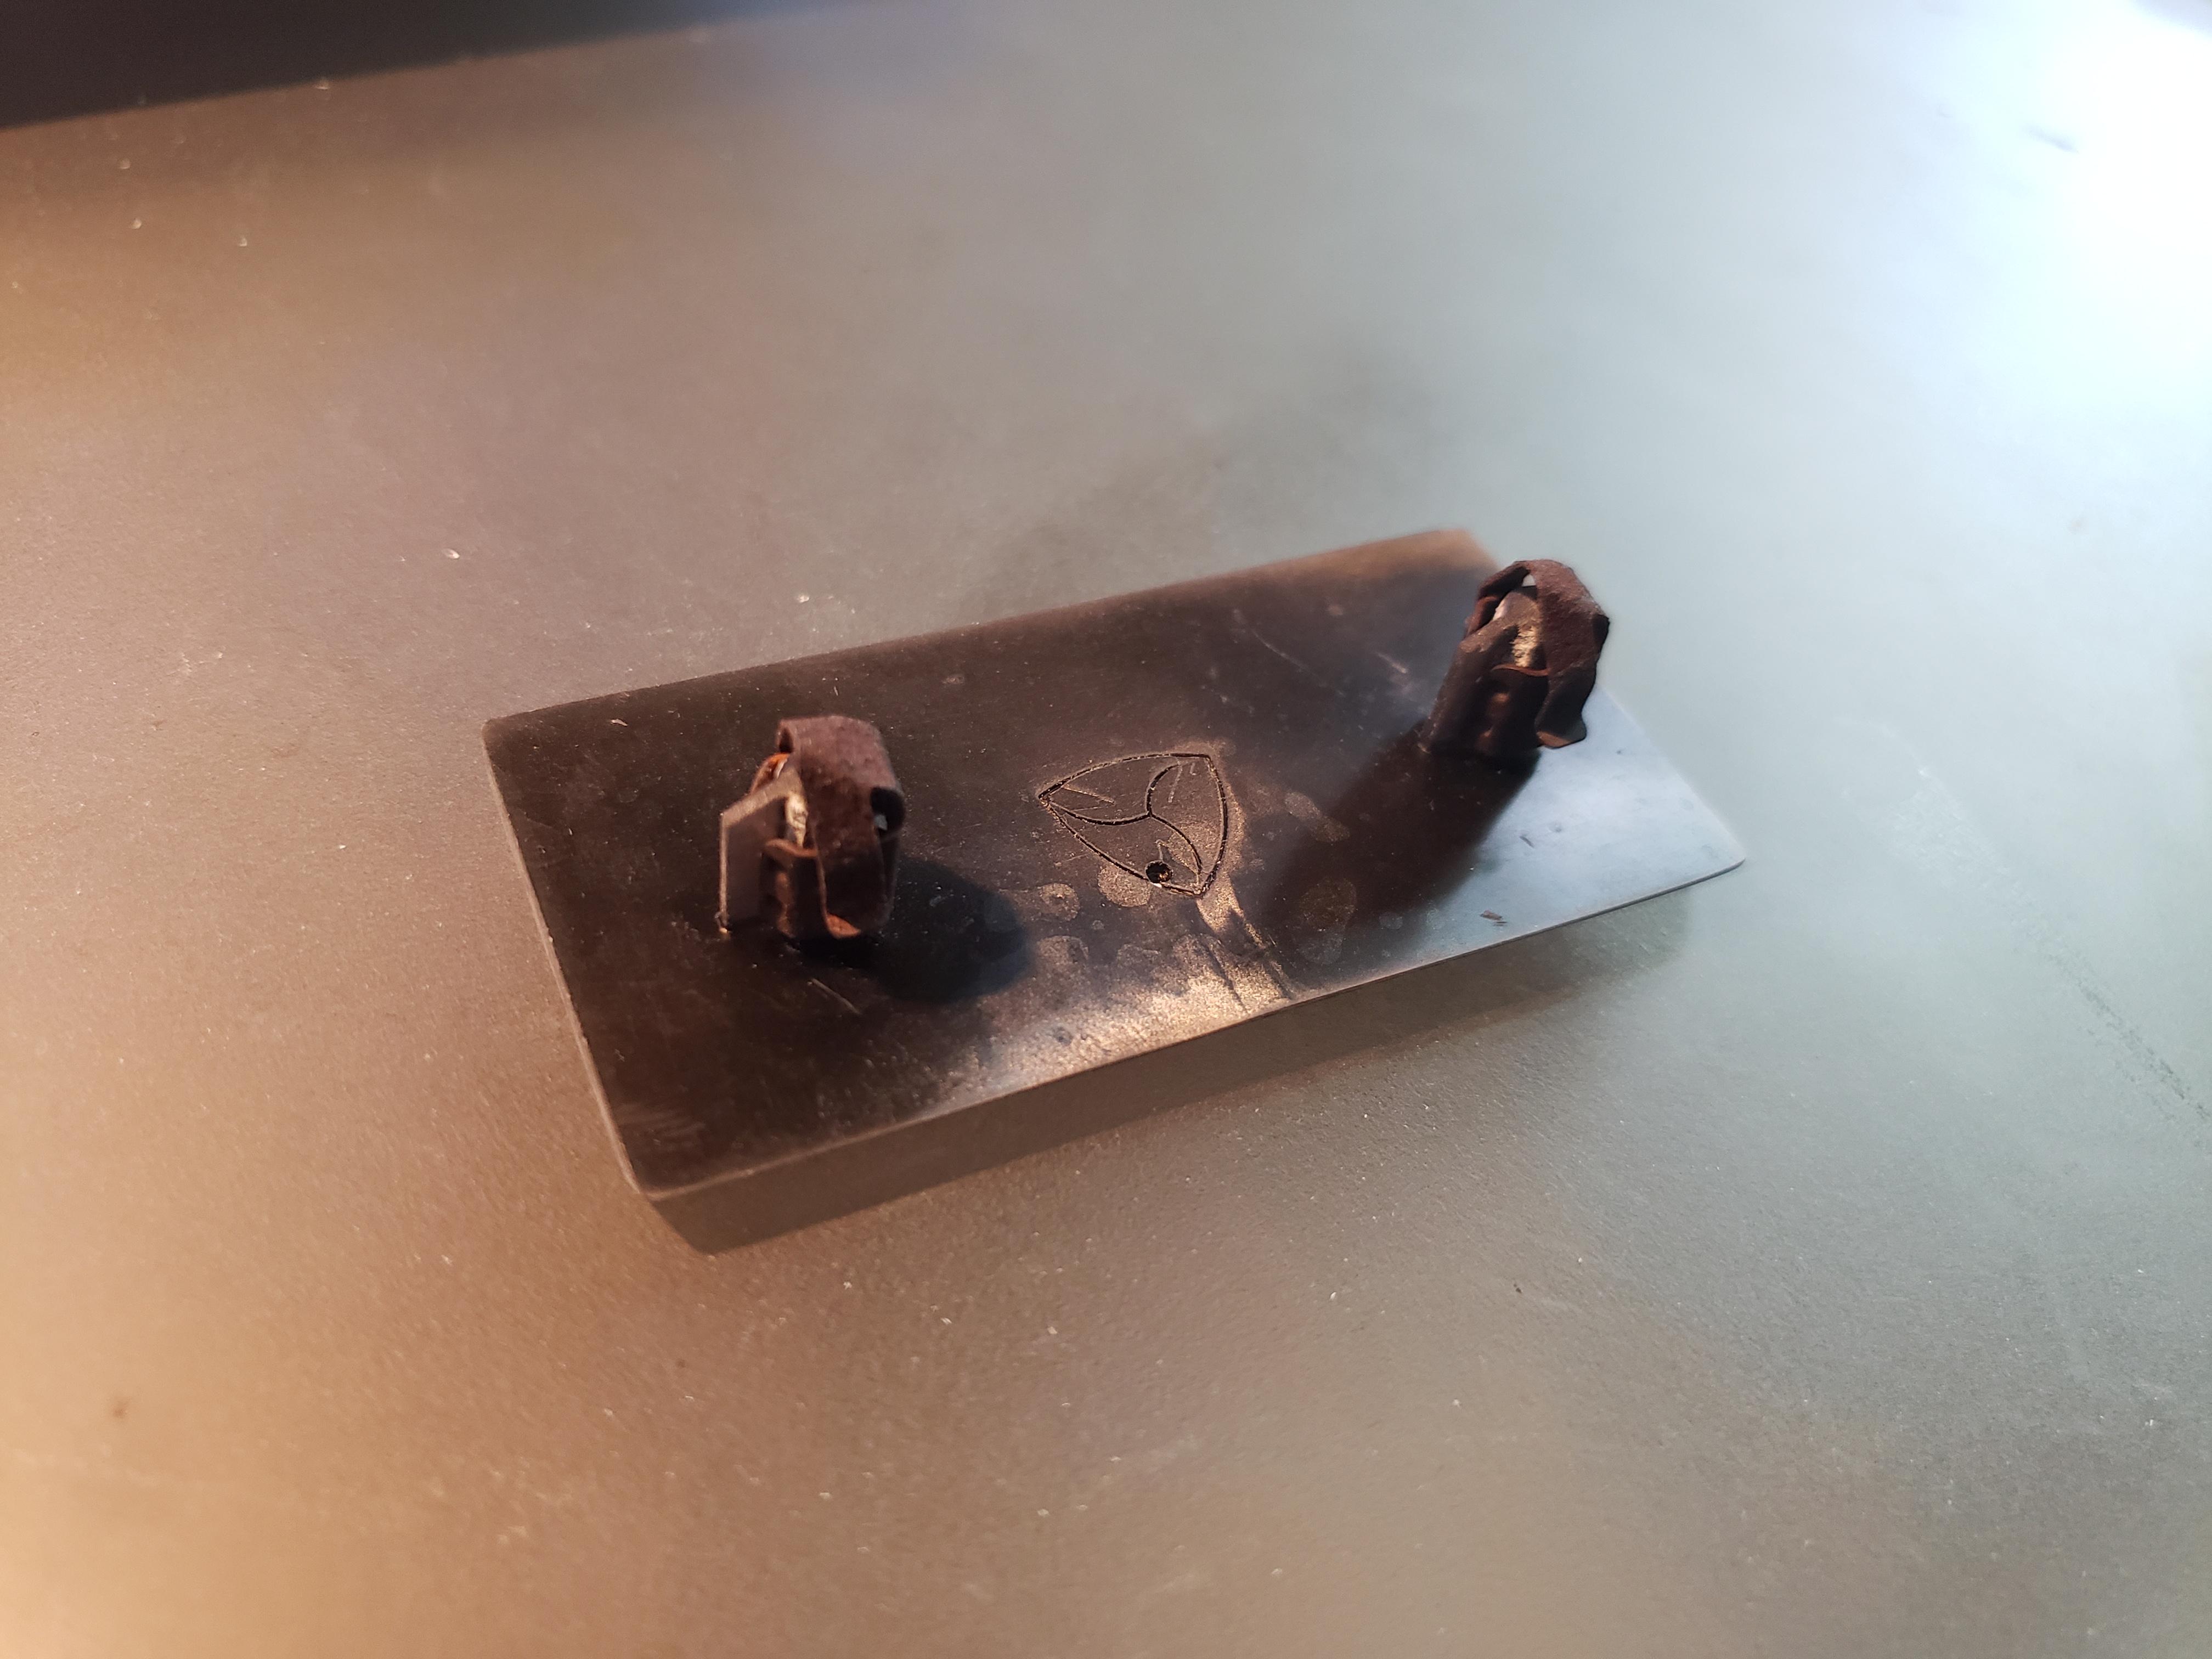
I also got a chance to make up some much needed replacement parts that are NLA. Like that little thumb stud that secures the rear carpet to the wheel well. This guy is 3D printed from a custom resin that I've made up. Fit's like a champ:


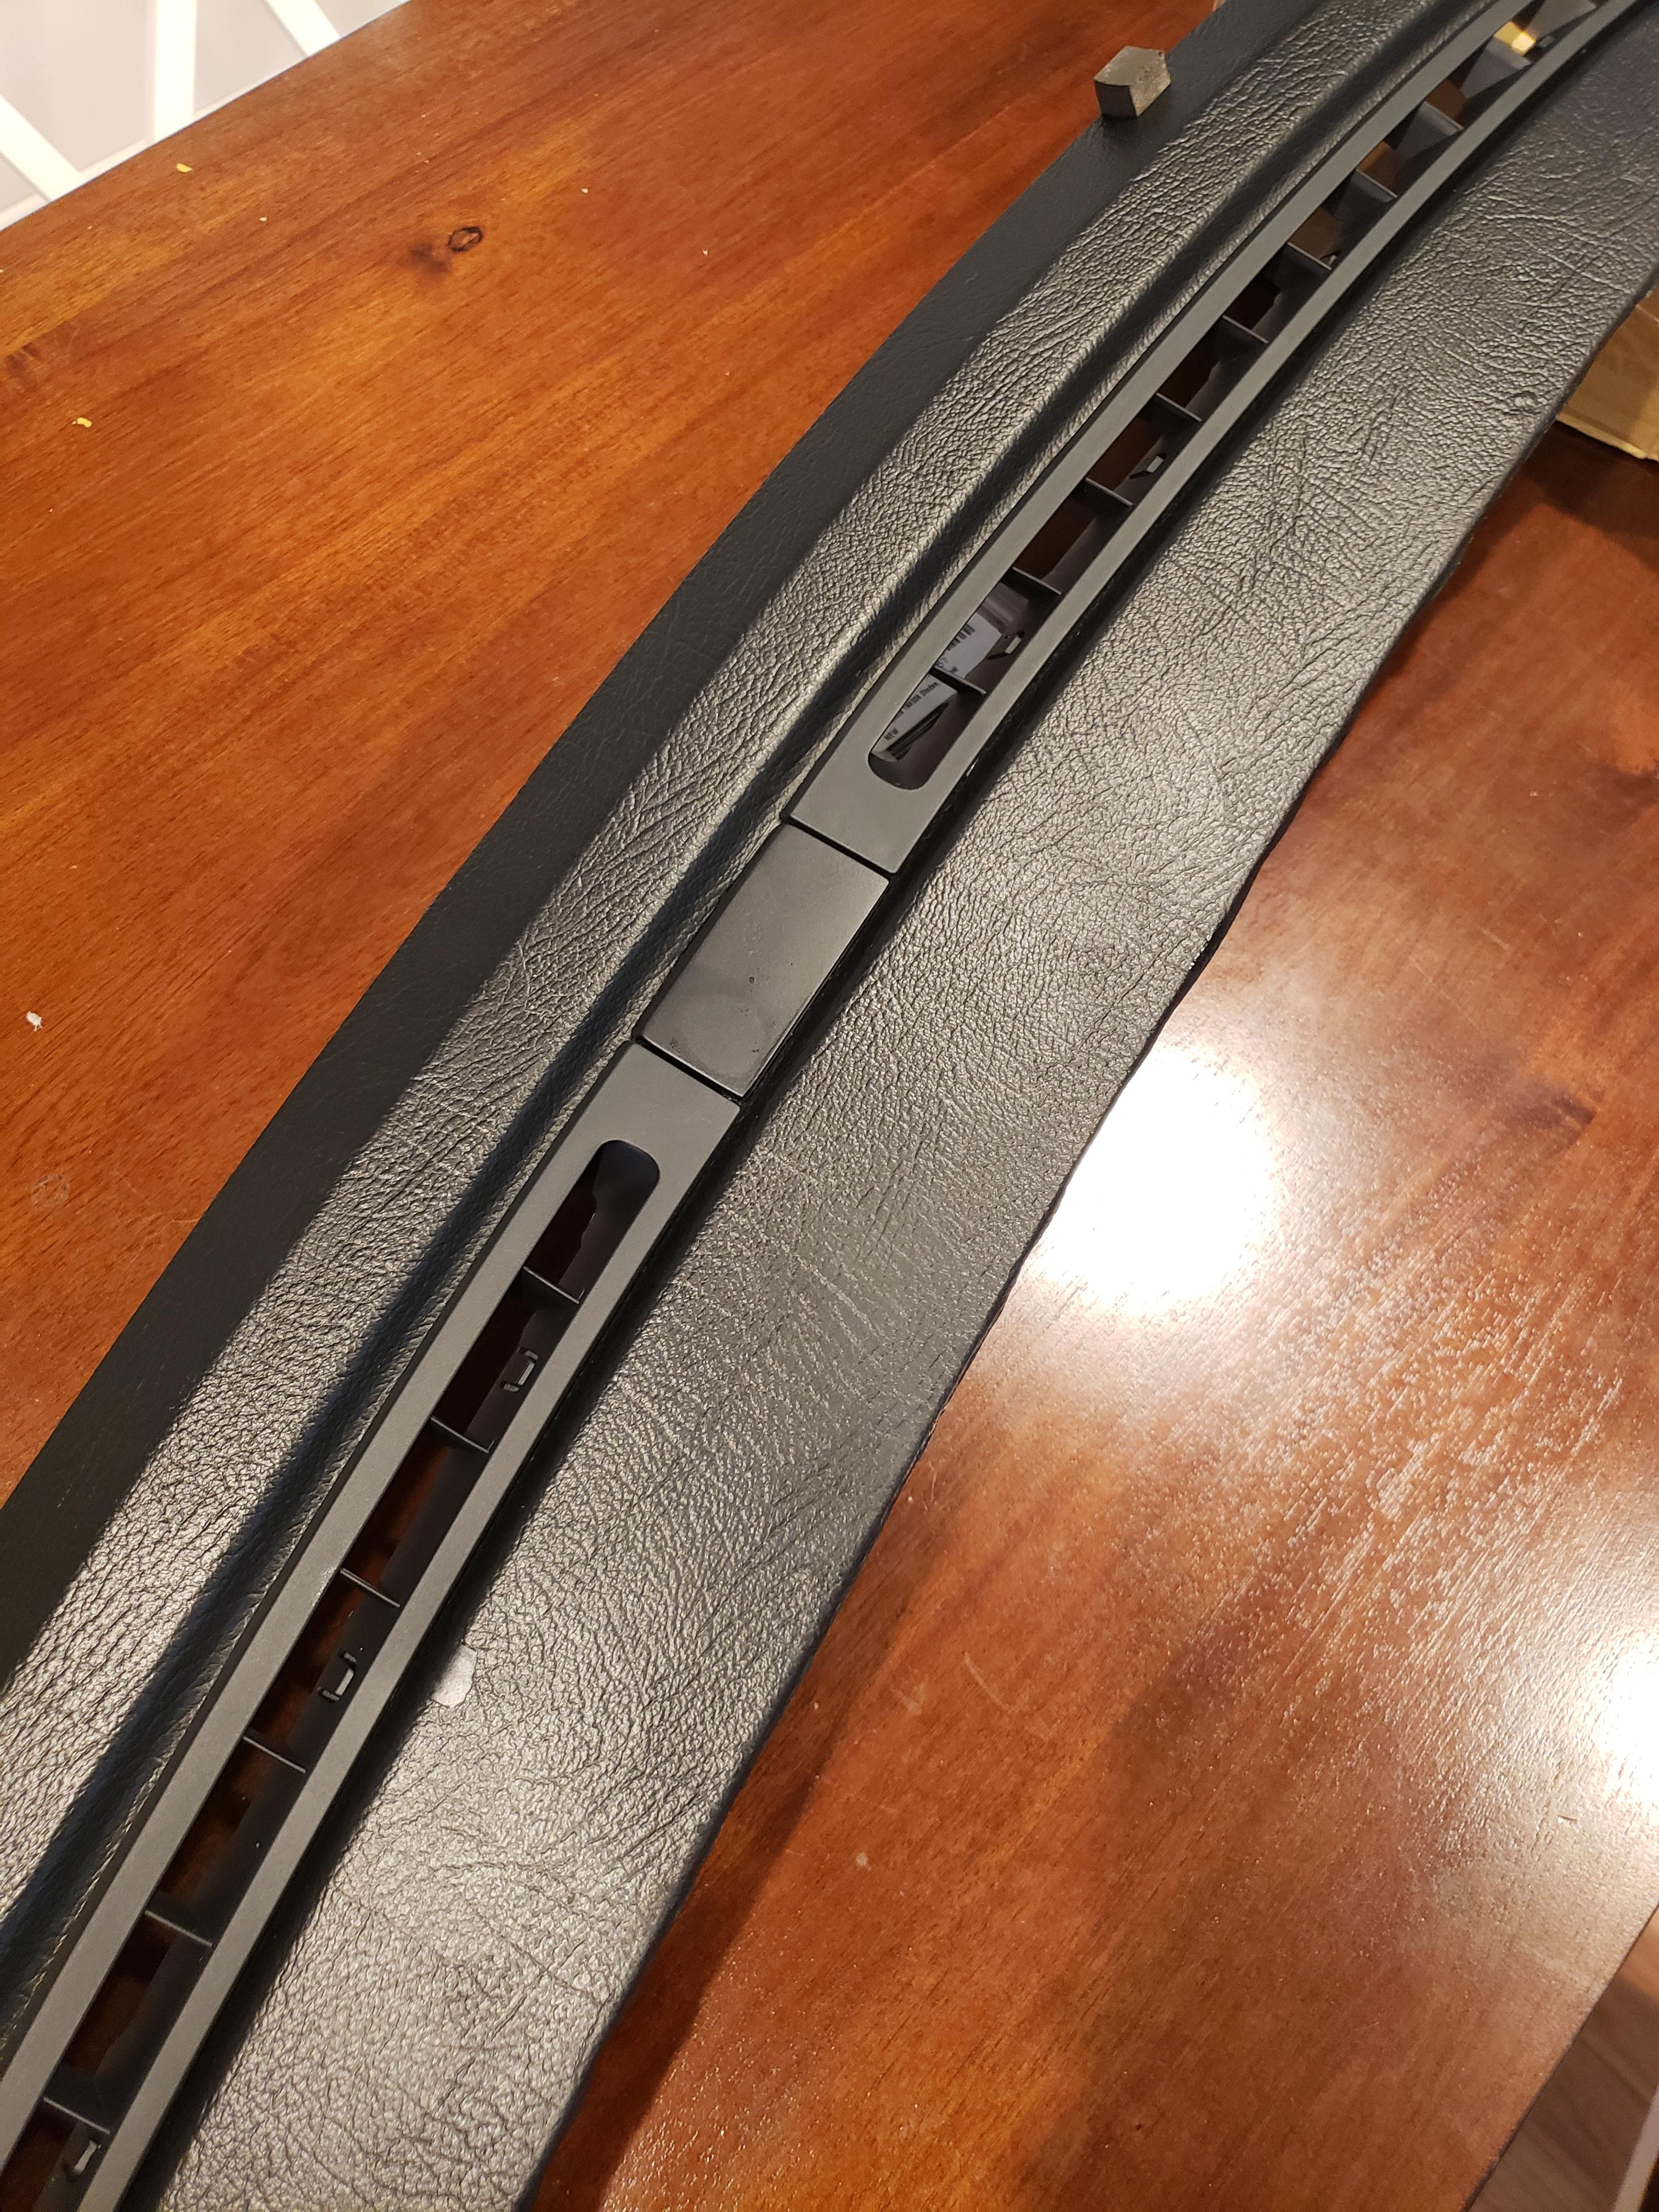
Also a new dash vent center cap modeled up and 3D printed. It uses the OEM spring clips for mounting so it fits like a glove:
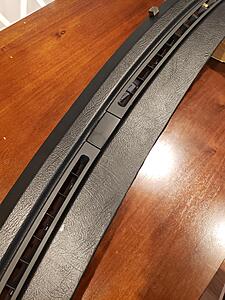
for anyone interested, both of these parts are now open source and can be printed by anyone so help yourselves!
carpet thumb stud
dash center vent cap

Also a new dash vent center cap modeled up and 3D printed. It uses the OEM spring clips for mounting so it fits like a glove:

for anyone interested, both of these parts are now open source and can be printed by anyone so help yourselves!
carpet thumb stud
dash center vent cap
Last edited by need-a-t2; Aug 19, 2022 at 08:57 PM.
Thread Starter
Joined: Mar 2002
Posts: 1,726
Likes: 540
From: binghamton, ny
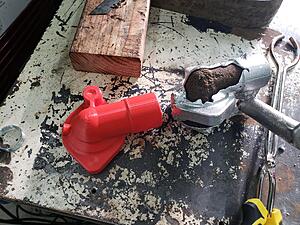
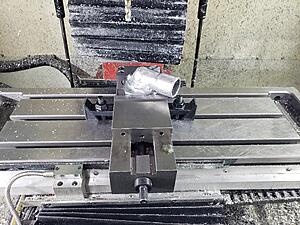
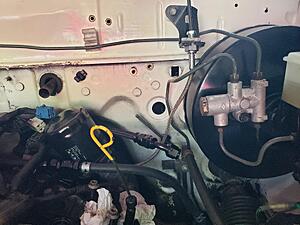
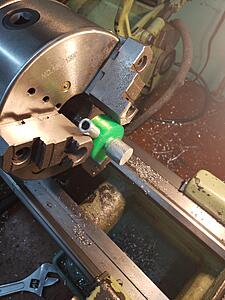
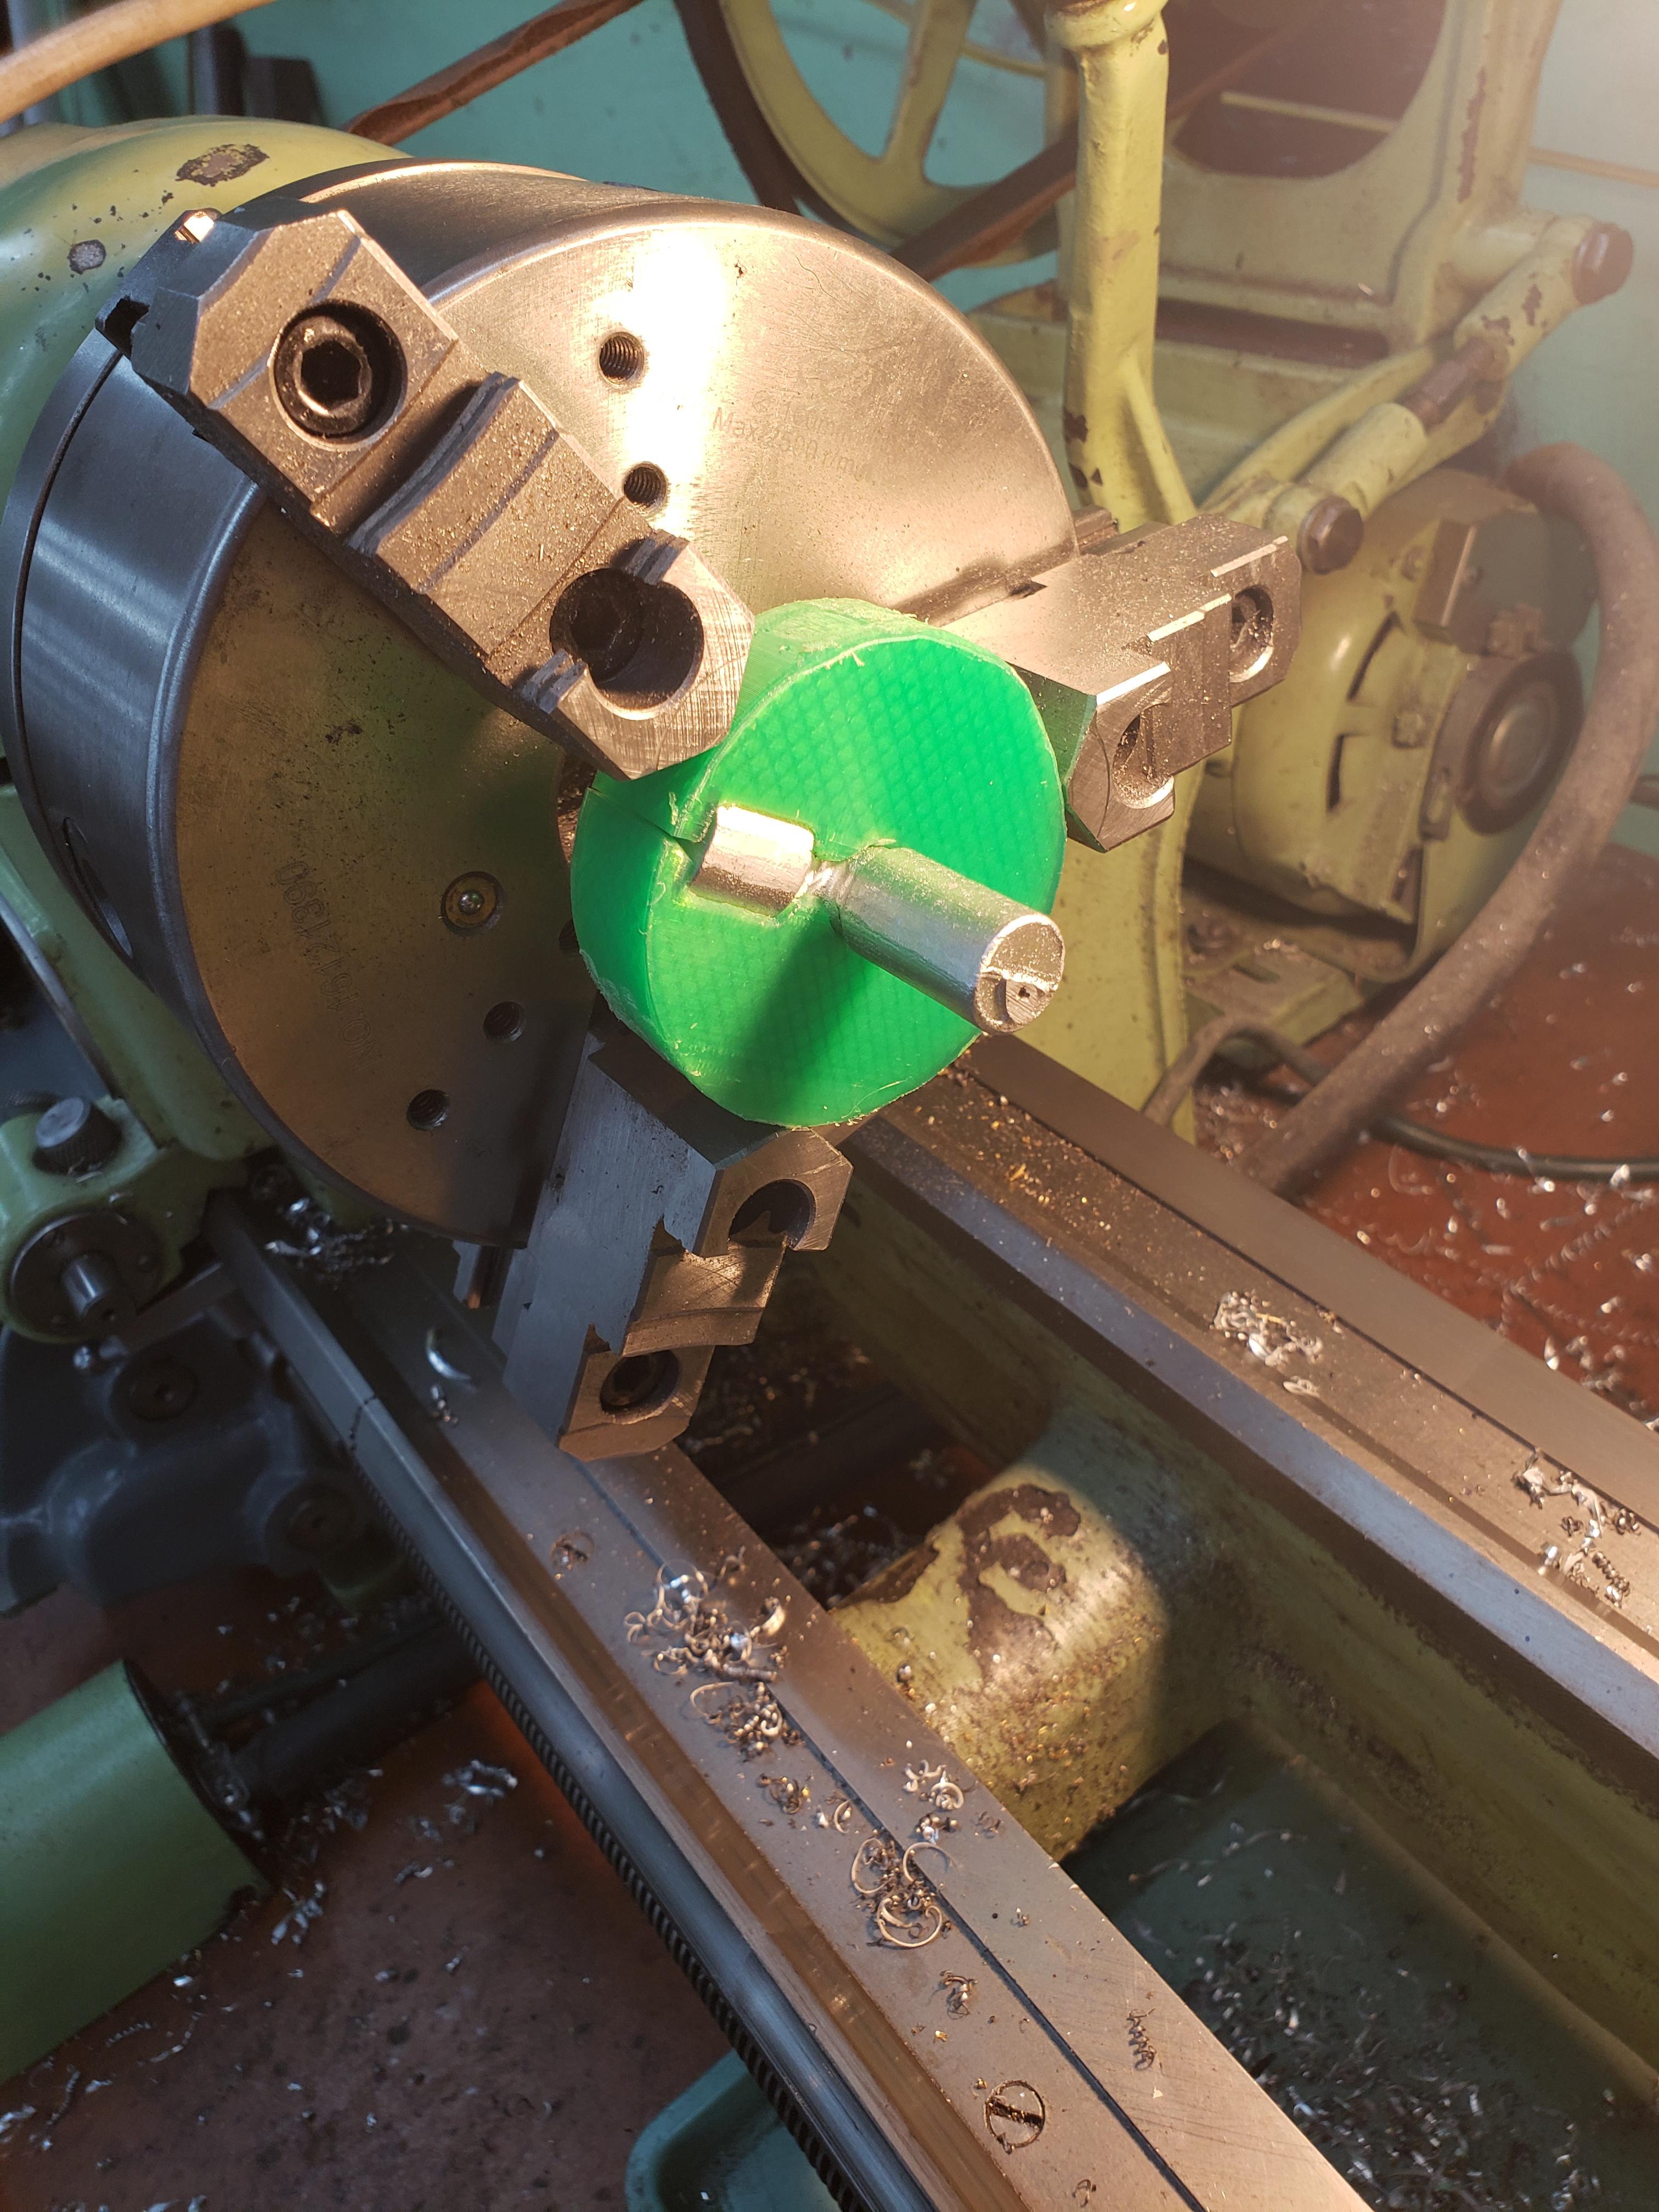
Had a moment of self reflection over the weekend and came to the epiphany that we truly live in a wonderful age of technology and I'm incredibly blessed to be able to have access to it and wonderful resources like the people on this forum. So thanks everyone who has ever helped me on this forum (and other forums)!! So what lead to this self reflection you may ask. I needed a custom fitting for my brake booster vacuum connection. I broke the original nipple on the intake manifold like an idiot, which in hindsight was a good thing as it didn't point in the direction I wanted it. I know, i know, I need to get over my OCD with making things point the "right" way. So like one does, I measured everything up, modeled it in CAD, 3D printed some molds for sand casting it, and cast it from the old RX8 motor mounts (upcycling at it's finest).

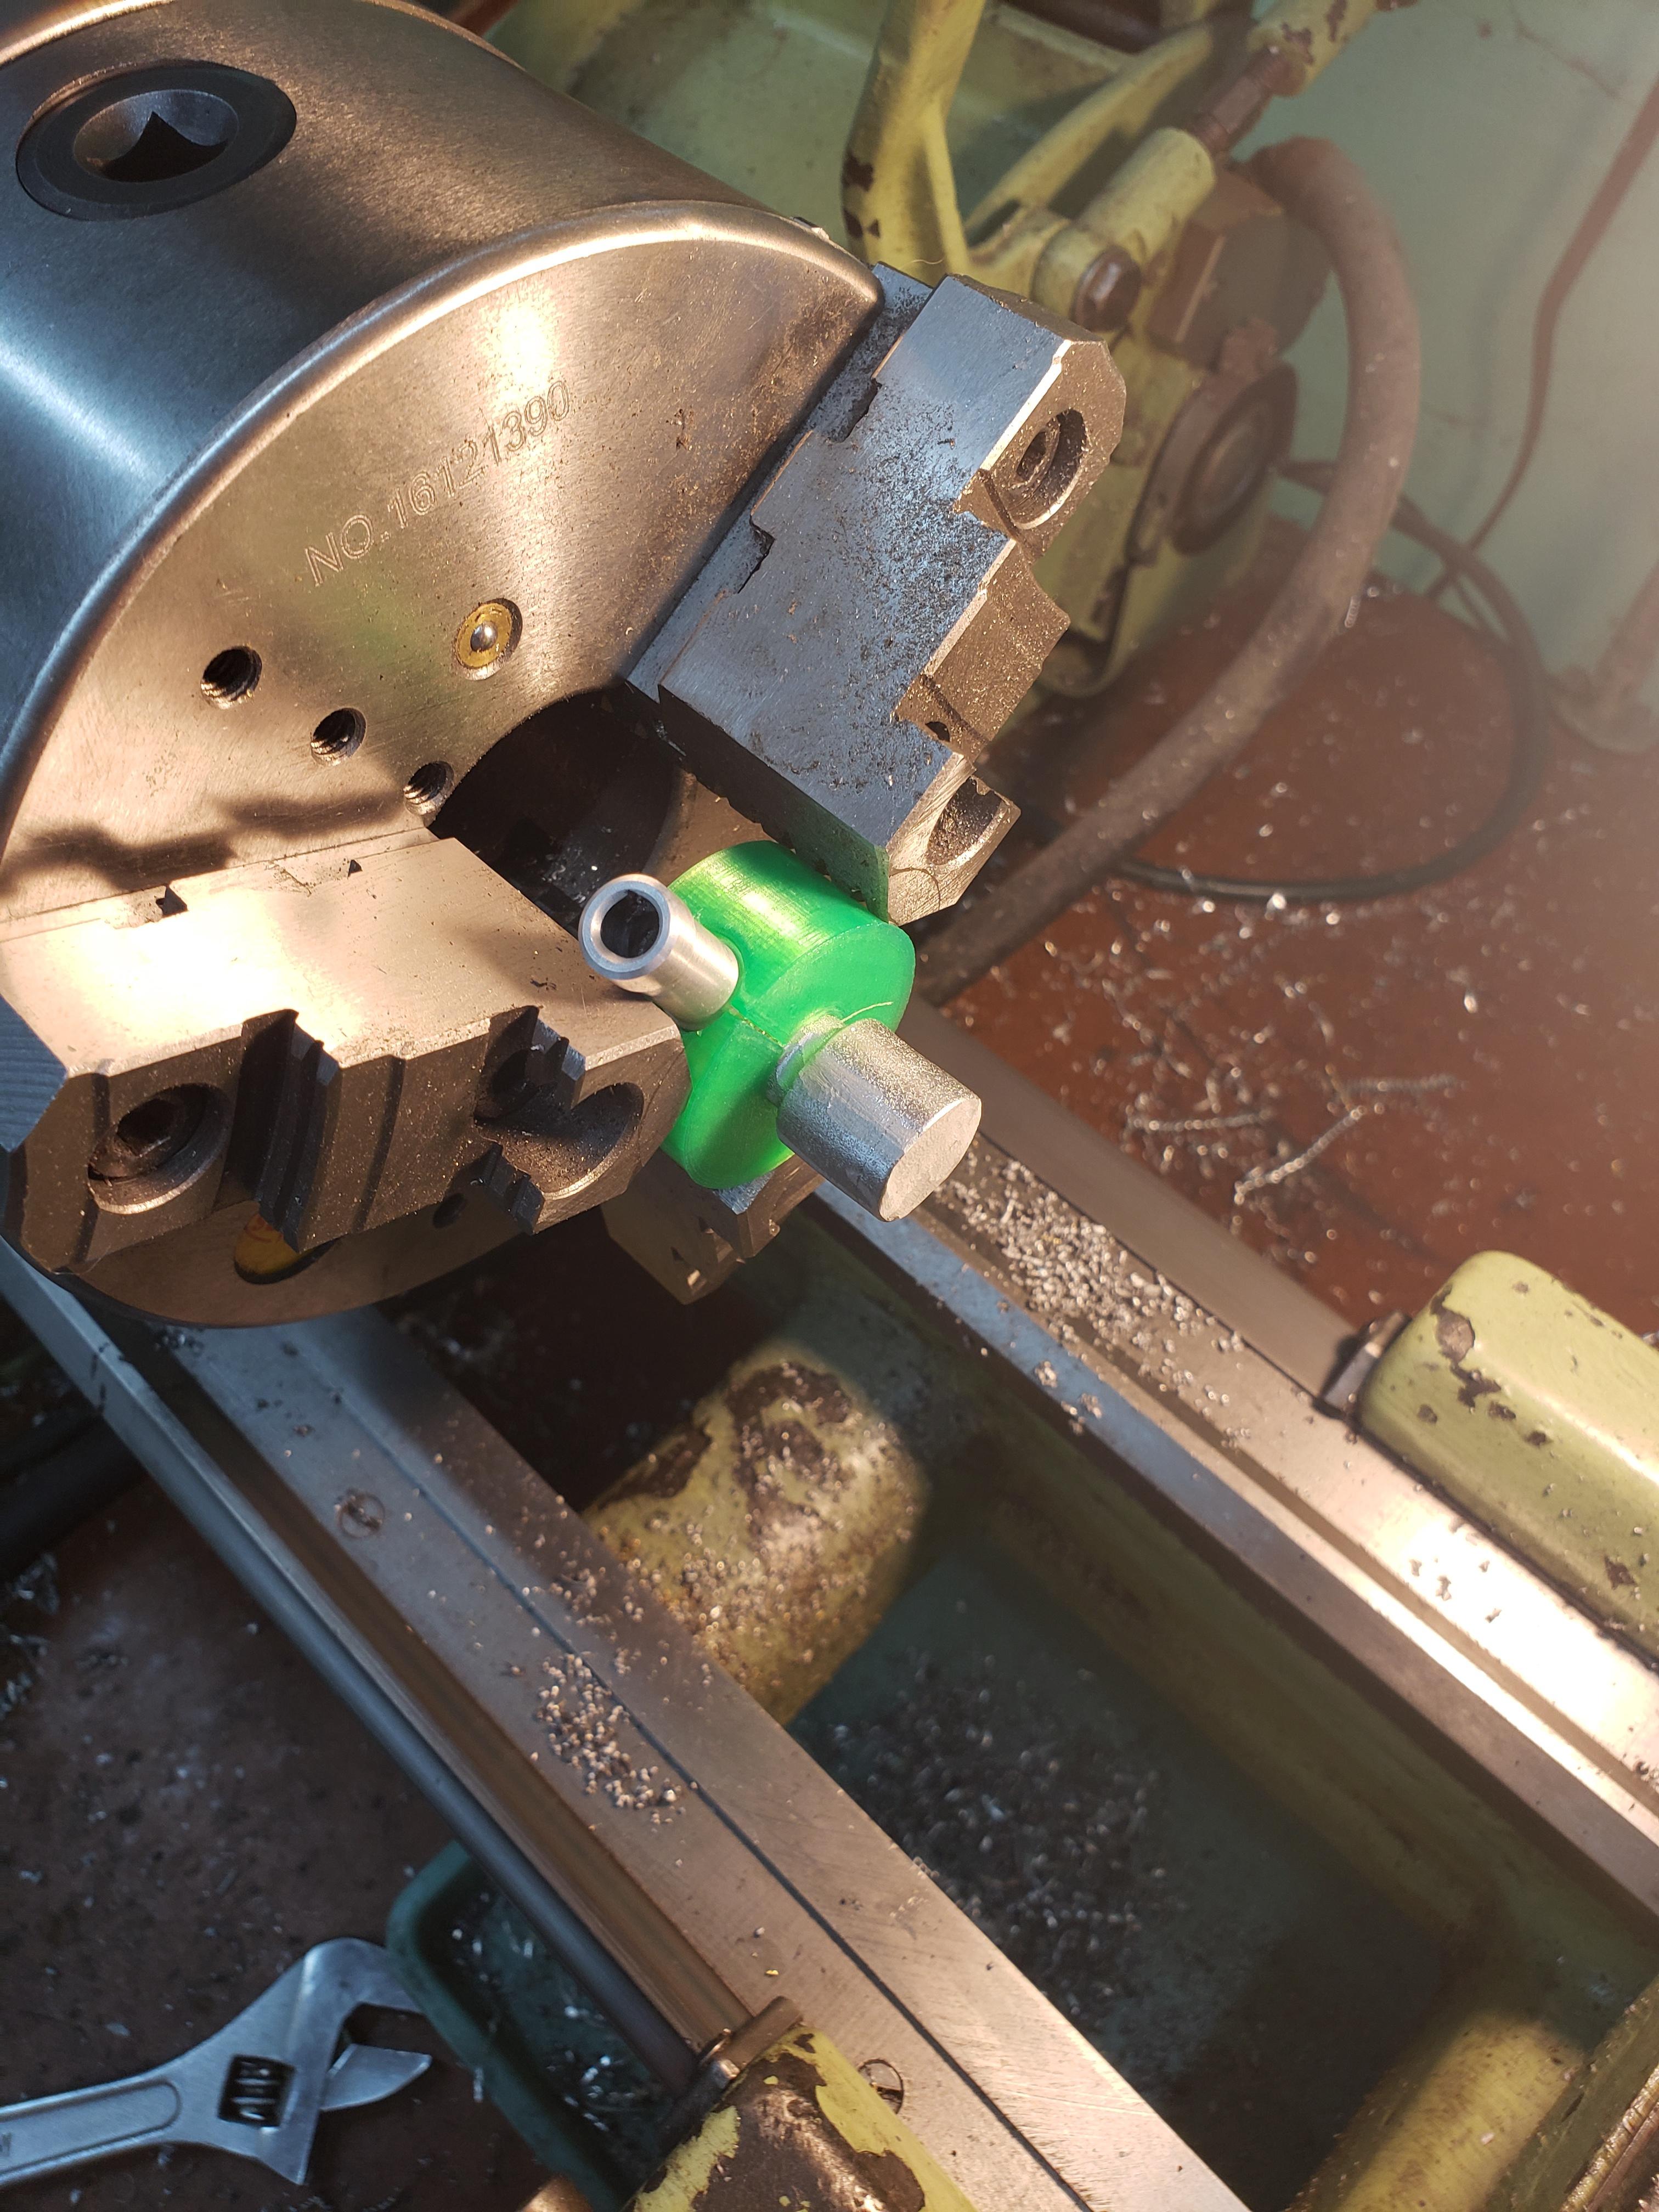
then 3d printed some custom fixtures to post machine it
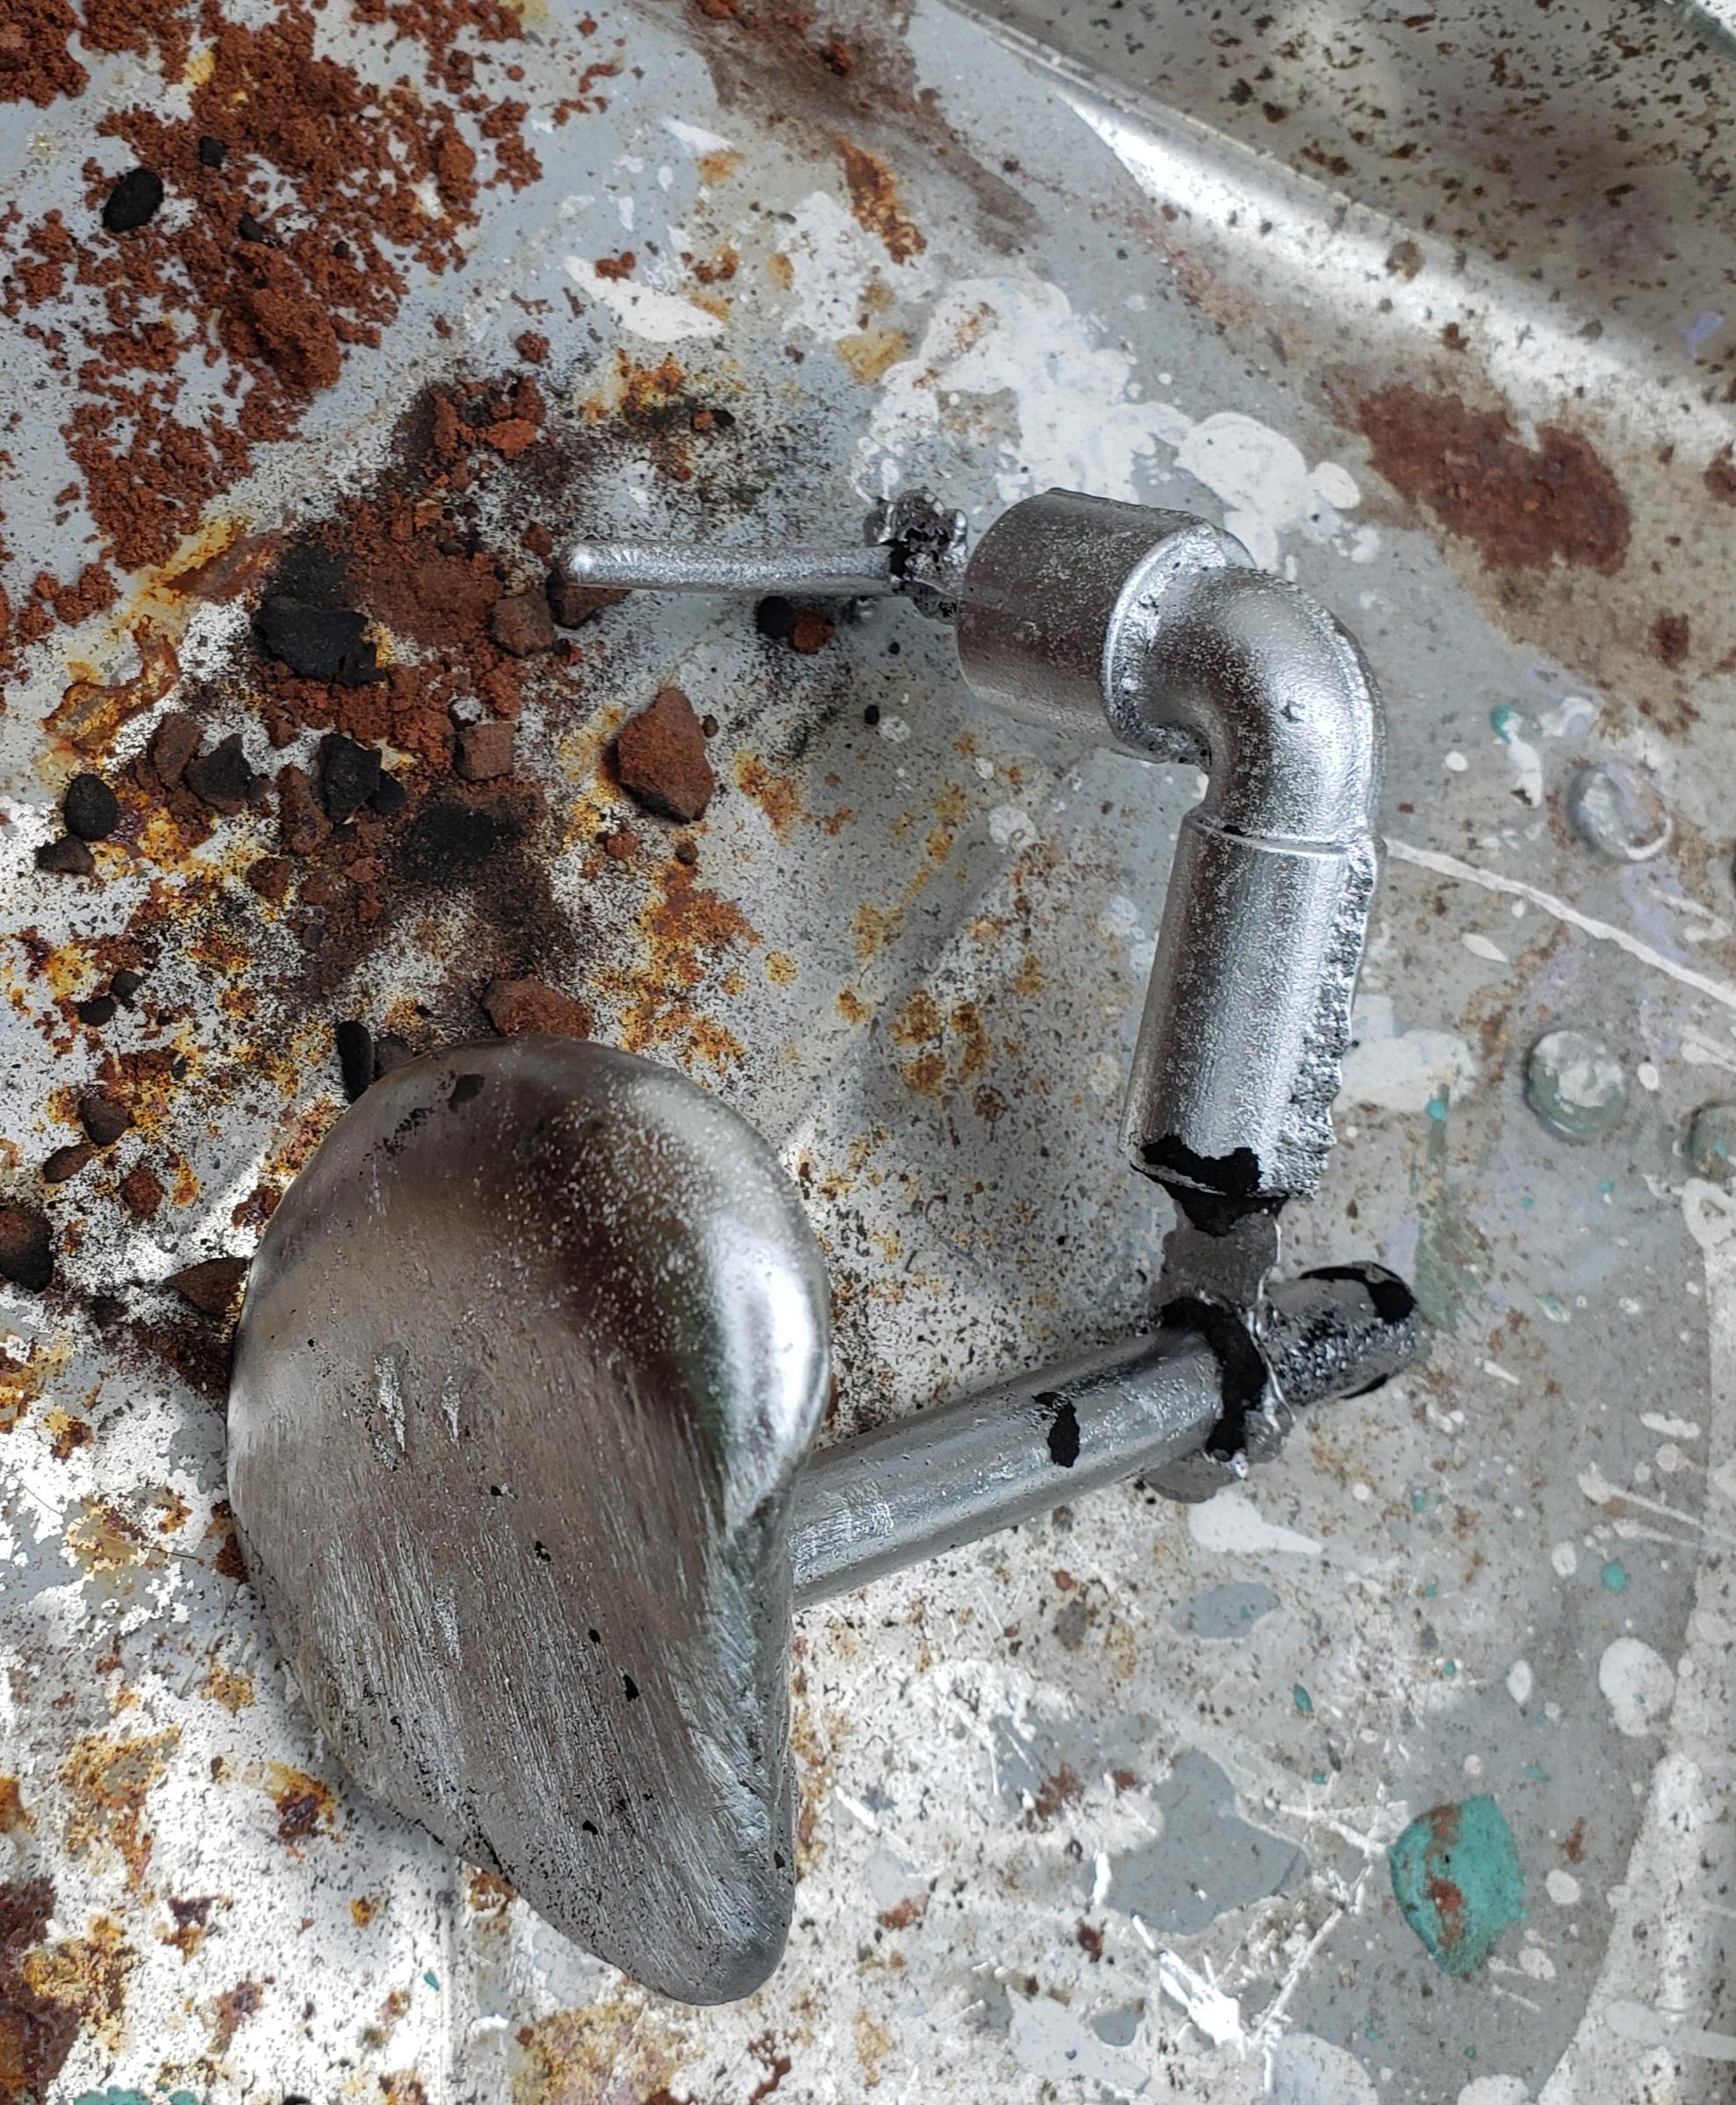
op1:

and the other side:
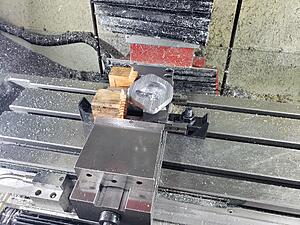
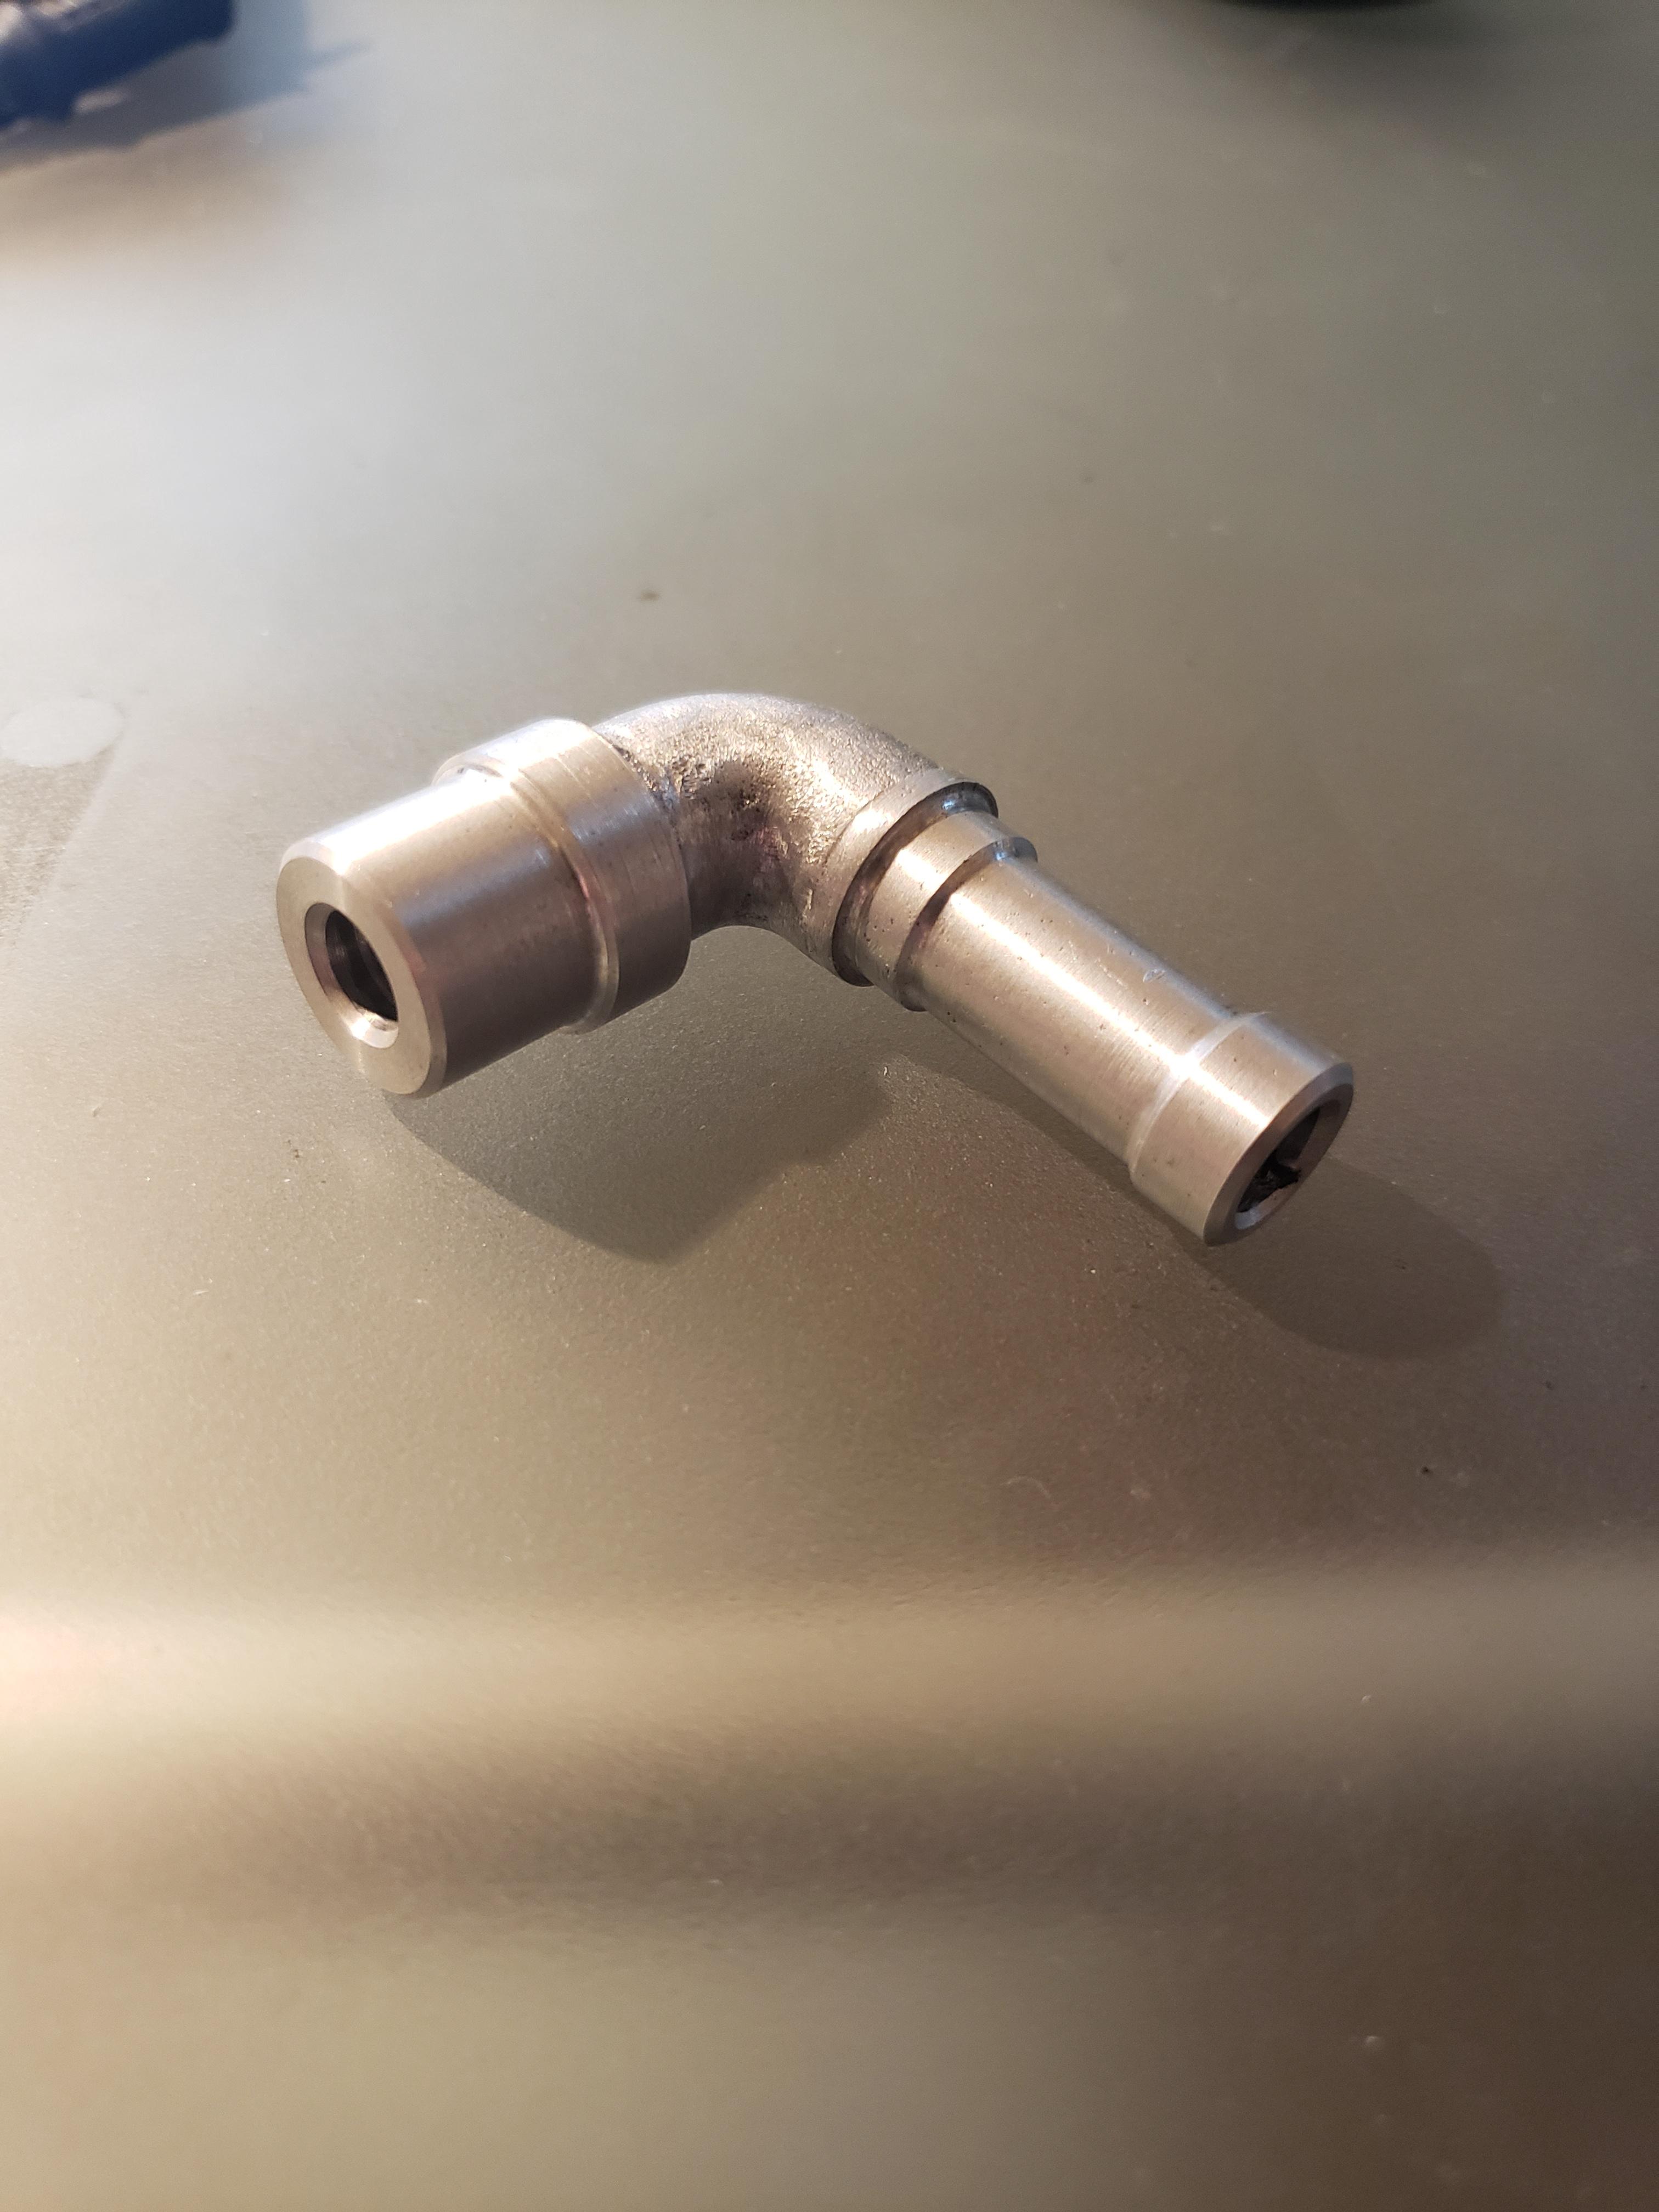
finished product:
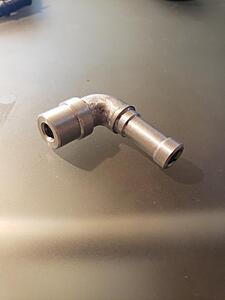
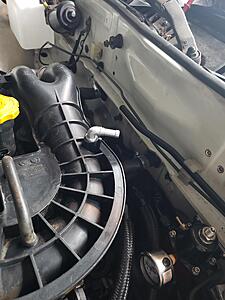
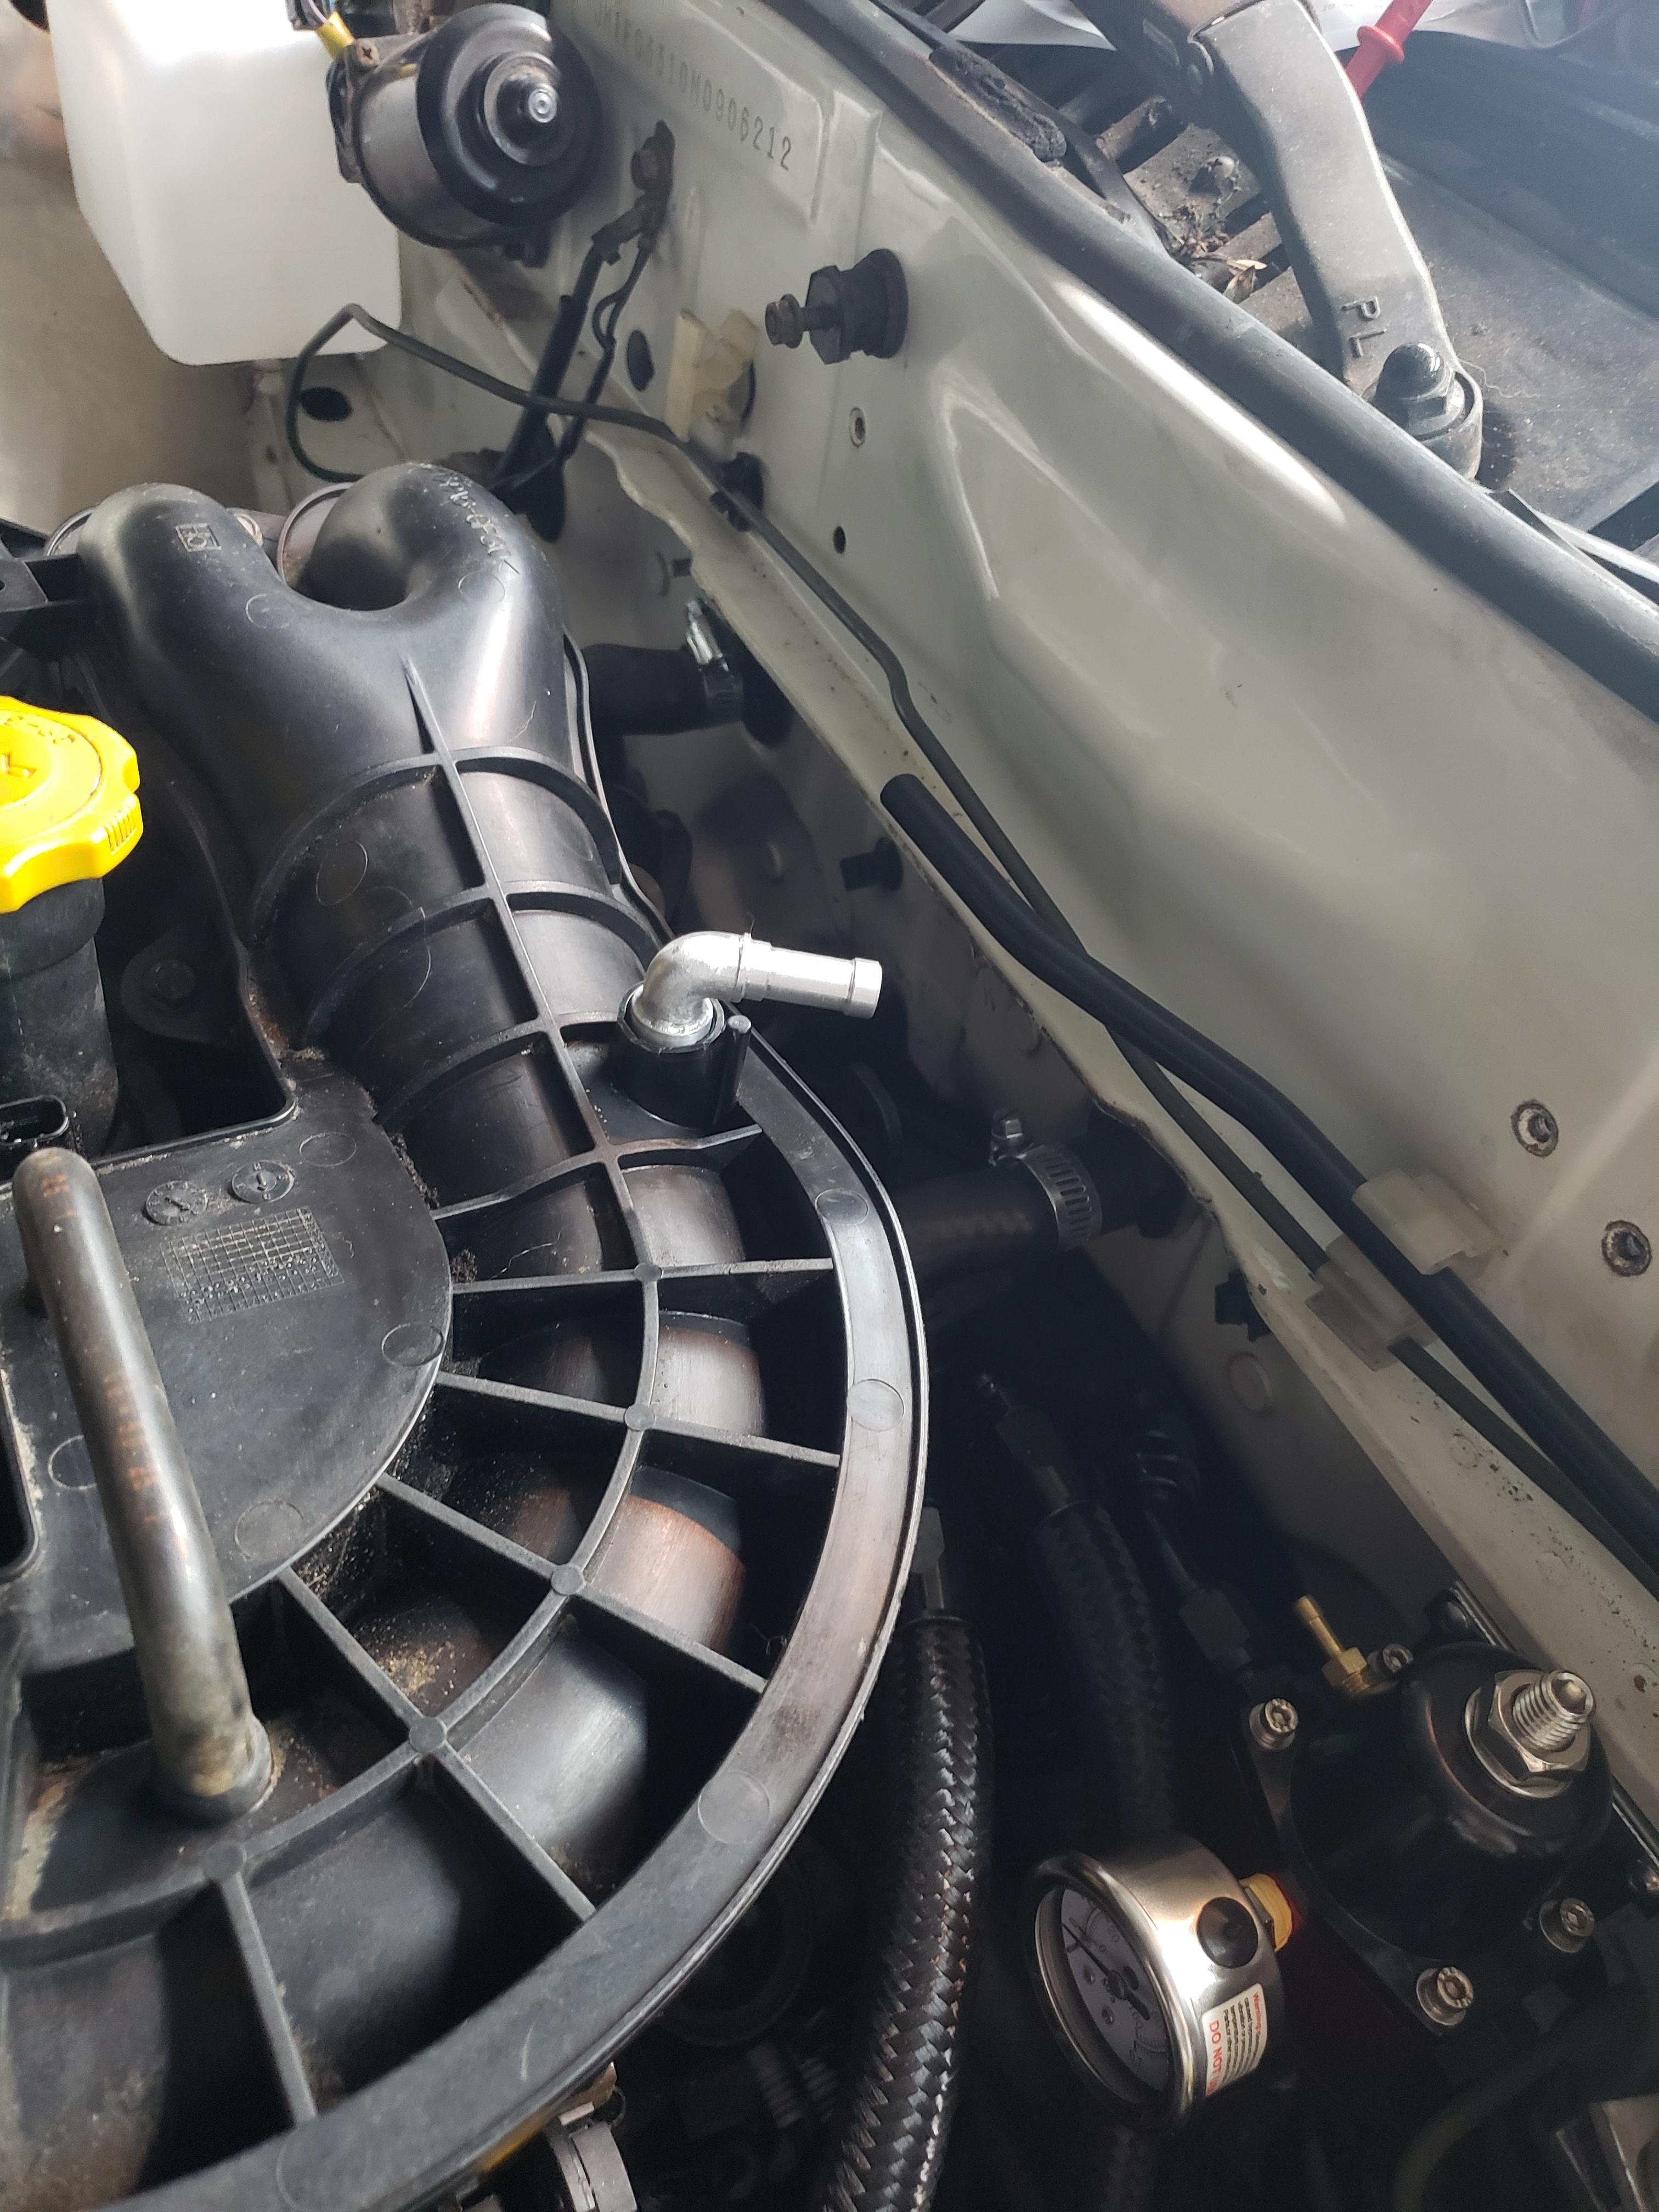
installed:
Total time to from start to finish: about 4 hours and most of that was waiting for the 3d printers to do their thing.
then 3d printed some custom fixtures to post machine it
op1:
and the other side:
finished product:
installed:
Total time to from start to finish: about 4 hours and most of that was waiting for the 3d printers to do their thing.