Naomi: Can't keep a good bitch down!
 06-08-12, 04:00 PM
#26
Now is where the hard work begins...

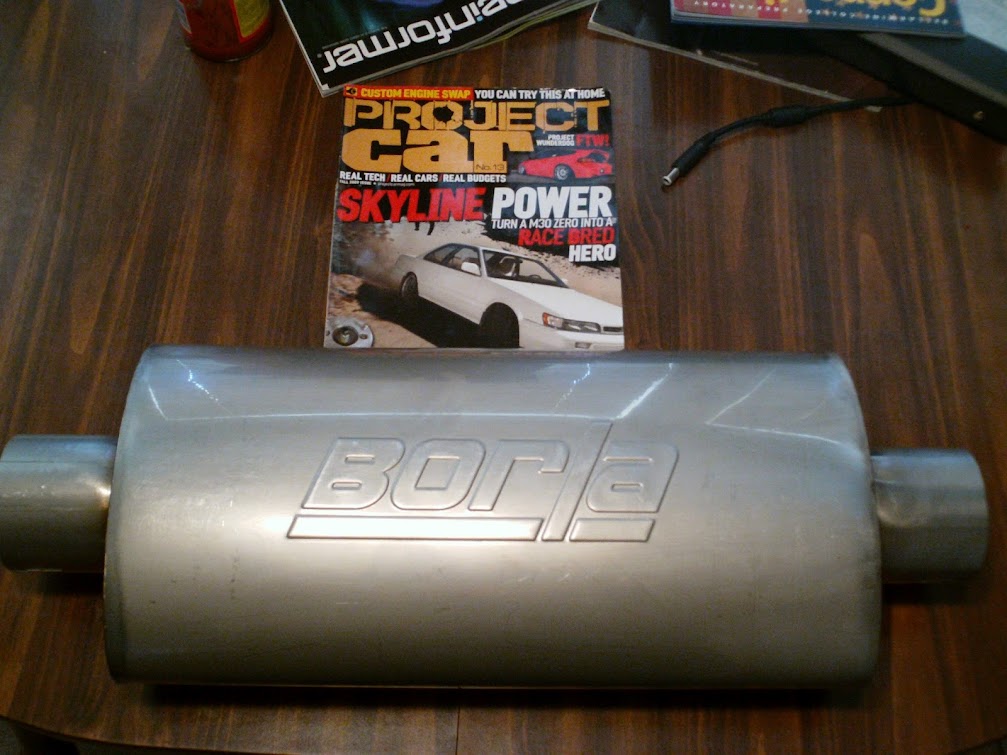
Step one: remove my once beautiful Greddy exhaust


Step two: loosen a ton of greasy stubborn botls


Notice the nice line of axle grease that my busted half shaft saw fit to decorate my undercariage with. Notice that although old the boot is not actually leaking. the grease is coming from the flange where the half shaft bolts to the output shaft on the diff...

Time to let the PB Blaster put in some work...

Step one: remove my once beautiful Greddy exhaust
Step two: loosen a ton of greasy stubborn botls
Notice the nice line of axle grease that my busted half shaft saw fit to decorate my undercariage with. Notice that although old the boot is not actually leaking. the grease is coming from the flange where the half shaft bolts to the output shaft on the diff...
Time to let the PB Blaster put in some work...
 06-09-12, 03:58 PM
#27
Back to work.
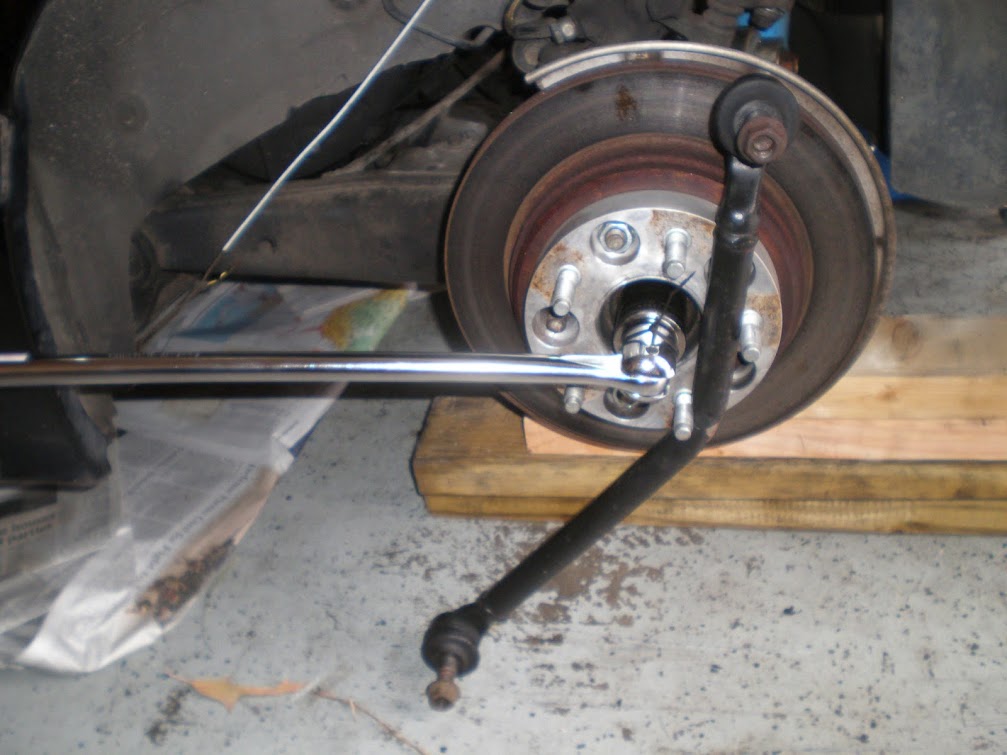
For the record, rear tension rods are NOT strong enough to use as a brace while you break loose the nuts on your axle nuts. But it had already been bent and re-straightened once so it was on the "replace" list regardless.
Marking the drive shaft flange orientation

Free at last!
Oh, what a surprise....

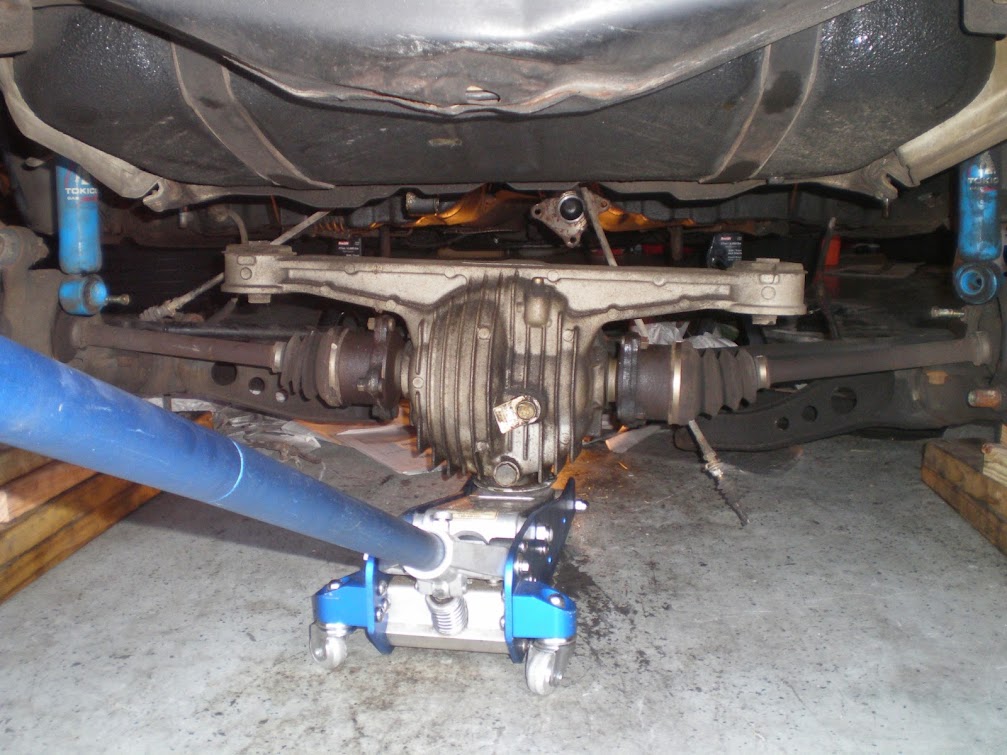
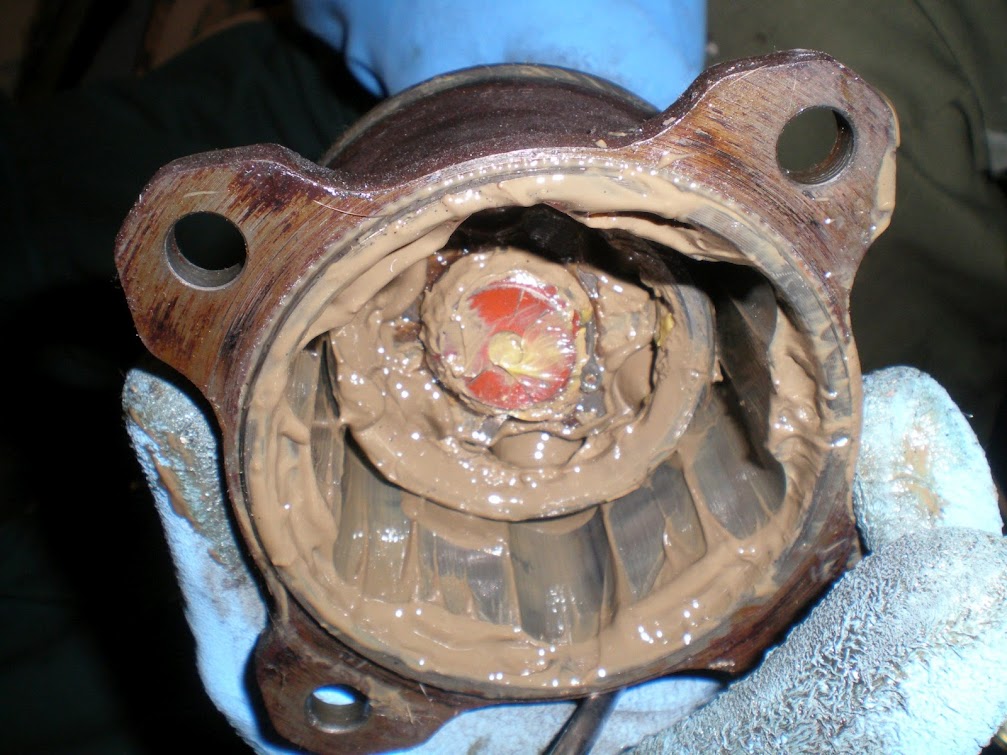
Diff was yanked and sent off to be freshened up with new seals and have the wear on the clutch plates inspected. See that cap next to the driver side axle? apparently when I was run off the road it put enough force on the axle to drive it into the cup, displacing enough grease/air to force the cap out of the backside. Since the axle was bolted to the flange it couldn't fall out so it simply allowed axle grease to be flung all over the place.....good to know.
For the record, rear tension rods are NOT strong enough to use as a brace while you break loose the nuts on your axle nuts. But it had already been bent and re-straightened once so it was on the "replace" list regardless.
Marking the drive shaft flange orientation
Free at last!
Oh, what a surprise....
Diff was yanked and sent off to be freshened up with new seals and have the wear on the clutch plates inspected. See that cap next to the driver side axle? apparently when I was run off the road it put enough force on the axle to drive it into the cup, displacing enough grease/air to force the cap out of the backside. Since the axle was bolted to the flange it couldn't fall out so it simply allowed axle grease to be flung all over the place.....good to know.


 06-13-12, 03:14 PM
#35
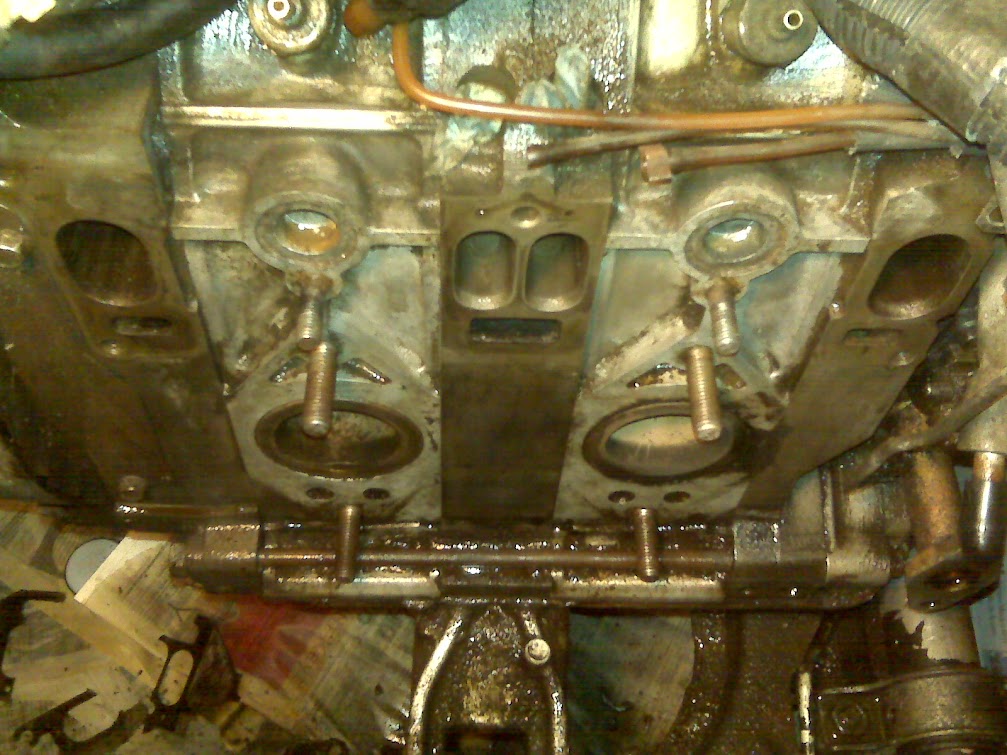
While I was in there I decided to remedy the oh so annoying coolant passage o-rings that I'd been putting off for months:
Turbo off

LIM off, lets see what we're workin with....

And here is the cause of all this strife.....Classy

Better

More awfulness

Better, not show quality, but no one well ever see this once its together
New gasket, new o-rings and enough RTV to ensure I won't be doing this again

What I DID have to do though was find some oil meter pump lines, since the ones going to the LIM were broken off during the course of this repair....one more thing on the list.
Turbo off
LIM off, lets see what we're workin with....
And here is the cause of all this strife.....Classy
Better
More awfulness
Better, not show quality, but no one well ever see this once its together
New gasket, new o-rings and enough RTV to ensure I won't be doing this again
What I DID have to do though was find some oil meter pump lines, since the ones going to the LIM were broken off during the course of this repair....one more thing on the list.
06-13-12, 06:56 PM
#36
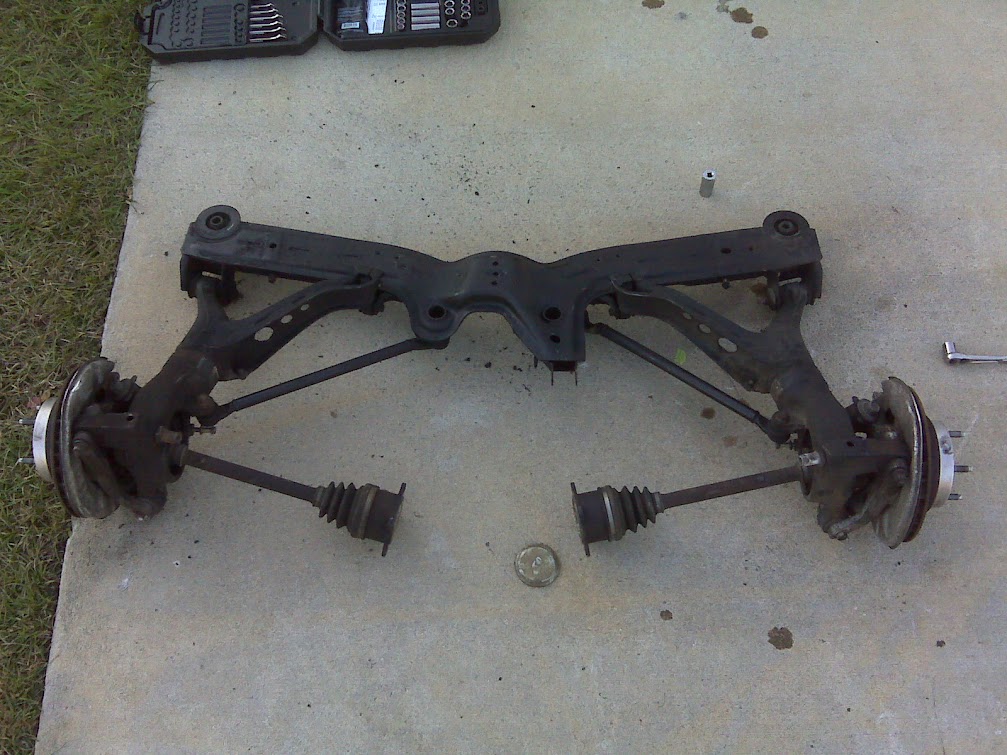
Since I had to order the OMP lines from somewhere I returned focus to the original problem(s) suspension. Some goodies arrived from MMR:
Camber adjustment links for the rear. Since I'm using these I had to retain the stock rear control arm bushings...one less thing to buy. Next to the stock link

Delrin rear diff mounts
Diff back from the shop, new output shaft seals, new pinion seal, new mazdazpeed front diff mount

Everything mocked up getting ready for install

Hoisted into its new home

Camber adjustment links for the rear. Since I'm using these I had to retain the stock rear control arm bushings...one less thing to buy. Next to the stock link
Delrin rear diff mounts
Diff back from the shop, new output shaft seals, new pinion seal, new mazdazpeed front diff mount
Everything mocked up getting ready for install
Hoisted into its new home
06-14-12, 12:11 AM
#38
Mazdatrix carries the mazda competition mounts. Just remember whatever material u get for the engine mounts, use the same for the trans mounts.
Last edited by sharingan 19; 06-14-12 at 12:17 AM. Reason: Sp
06-14-12, 11:17 AM
#39
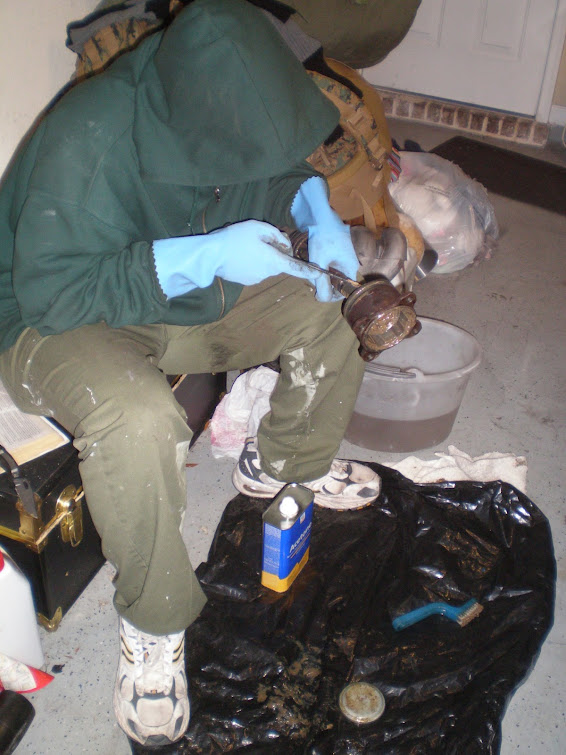
It was then time to address the half shafts.
this was the driver side shaft where the end cap was forced out...who ordered the pudding?
Step One: dissasembly There is a circular retaining clip just under the inside lip of the cup. Simply pry that out with a pick or screwdriver...
and the shaft should slide right out , and drop nasty greasy ***** in your lap....or onto your prepared work surface.

Step Two: Cleaning I don't know the best substance to clean off old axle grease in 20 degree weather, but I know what it ISN'T....Acetone. That's all my buddy had, but I ended up resorting to dish soap and a pile of paper towels.
Step Three: Reassembly Now that everything is clean, time to dirty up again with fresh grease. I went with the heaviest synthetic import specific grease I could find at the parts store, I think it was made by valvoline.
Don't forget to re-install the retaining clip

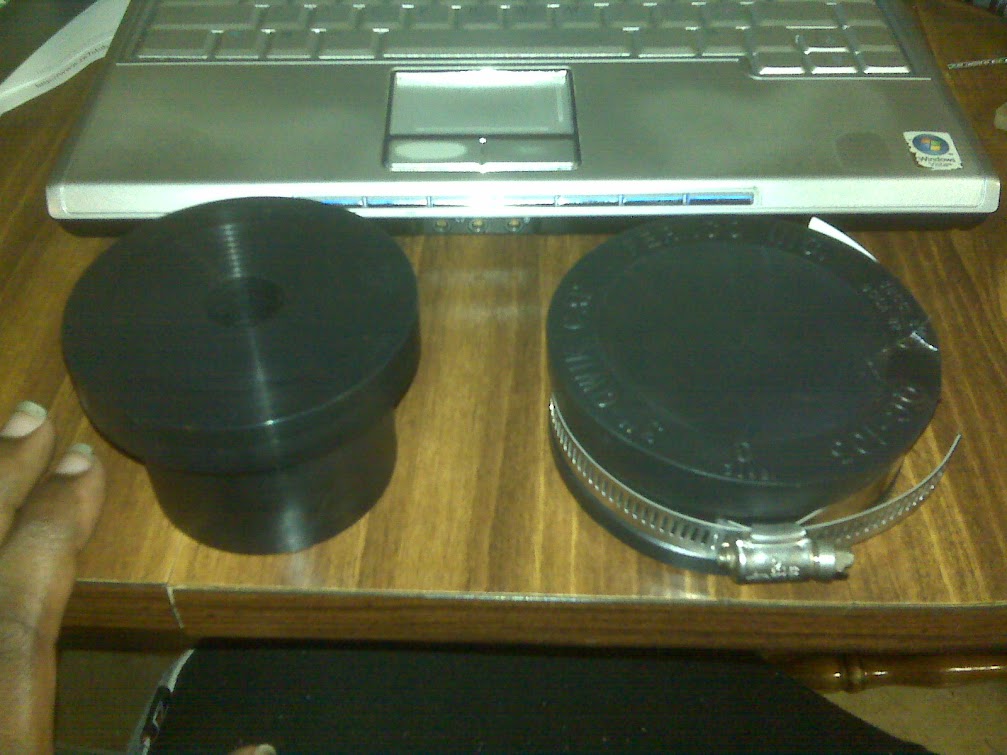
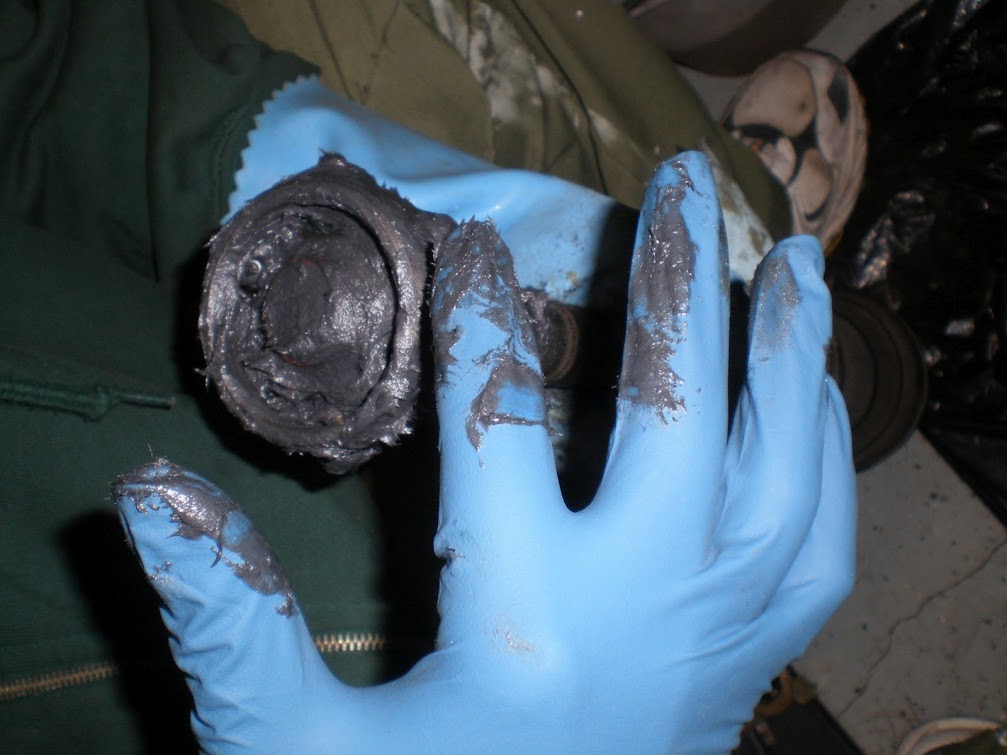
This was my "solution" for that end cap that was forced out (because i couldn't source another cup and couldn't afford a new axle). The mating surface was coated with RTV, in retrospect perhaps jb weld would have been a better option....time will tell.

(Optional) Step Four: Prep/ProtectionA little paint never hurt anybody...

this was the driver side shaft where the end cap was forced out...who ordered the pudding?
Step One: dissasembly There is a circular retaining clip just under the inside lip of the cup. Simply pry that out with a pick or screwdriver...
and the shaft should slide right out , and drop nasty greasy ***** in your lap....or onto your prepared work surface.
Step Two: Cleaning I don't know the best substance to clean off old axle grease in 20 degree weather, but I know what it ISN'T....Acetone. That's all my buddy had, but I ended up resorting to dish soap and a pile of paper towels.
Step Three: Reassembly Now that everything is clean, time to dirty up again with fresh grease. I went with the heaviest synthetic import specific grease I could find at the parts store, I think it was made by valvoline.
Don't forget to re-install the retaining clip
This was my "solution" for that end cap that was forced out (because i couldn't source another cup and couldn't afford a new axle). The mating surface was coated with RTV, in retrospect perhaps jb weld would have been a better option....time will tell.
(Optional) Step Four: Prep/ProtectionA little paint never hurt anybody...
 06-14-12, 01:25 PM
#42
Since once strut was already blown on the GC/tociko blue setup (and they don't go that low anyway) I was in the market for another suspension solution. I seriously considered keeping the GC's (especially since I got such a deal on them) but by the time I bought a full set of struts, and camber plates or RB lowering strut mounts I would have been way over budget.
Fortunately I found another great deal on a set of brand new coilovers. Apparently they were a gift from someone's GF who mistakenly got FC coils for an FD, but before they could be returned, the relationship went sour (perhaps because of...?). I sold the GC setup and was only out of pocket a a couple hundred bucks.
K-Sport Control Pros 8kg/6kg

I know the Control Pro's are pretty basic, but they are better than stockish struts and they provide camber adjustment. When my driving ability and the rest of the car exceed their capability they will be replaced, but until then I couldn't be happier
Front
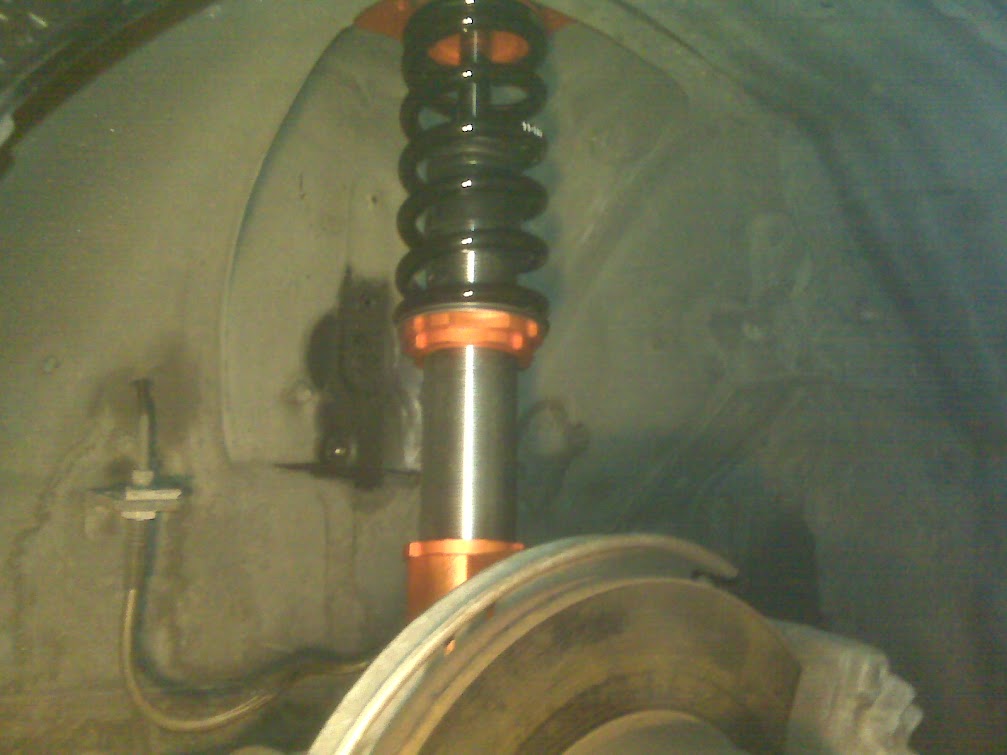
Rear


Fortunately I found another great deal on a set of brand new coilovers. Apparently they were a gift from someone's GF who mistakenly got FC coils for an FD, but before they could be returned, the relationship went sour (perhaps because of...?). I sold the GC setup and was only out of pocket a a couple hundred bucks.
K-Sport Control Pros 8kg/6kg
I know the Control Pro's are pretty basic, but they are better than stockish struts and they provide camber adjustment. When my driving ability and the rest of the car exceed their capability they will be replaced, but until then I couldn't be happier
Front
Rear
06-14-12, 02:31 PM
#43
Yes, the sub frame (and all suspension components) have been/will be painted using Rustoleum engine enamel spray paint. It looks nice and seems top hold up better than the wheel paint I was originally planning to use (because I had some left over). It was thoroughly prepped so I have no reason to believe the paint would just "decide" to flake off. I have a friend who used the same paint and didn't do half the prep and its held up fine for 3 years so far....then again we don't salt the roads in FL, so ....yeah. If I were you I would invest in some POR-15, do it once and do it right.
Mazdatrix carries the mazda competition mounts. Just remember whatever material u get for the engine mounts, use the same for the trans mounts.
Mazdatrix carries the mazda competition mounts. Just remember whatever material u get for the engine mounts, use the same for the trans mounts.

Either way I was just curious because I plan on powder coating my subframe but wanted to hear what you felt about the painting aspect of it.
thanks!
06-14-12, 02:43 PM
#44
Thats good to know for the mounts....I know Minnesota Has salt, but this is basically my garage queen....I will NOT be using it in winter ahhaha
Either way I was just curious because I plan on powder coating my subframe but wanted to hear what you felt about the painting aspect of it.
thanks!
Either way I was just curious because I plan on powder coating my subframe but wanted to hear what you felt about the painting aspect of it.
thanks!
What you need depends on your environment, future plans for the car and level of **** retentiveness. Personally paint is fine for me because
A) I live in FL
B) unless I run someone over they probably won't see it anyway
C) I plan to install spherical bushings at some point down the road so I know it will be coming out again.
06-14-12, 03:01 PM
#45
Now that she was no longer dangerous to drive, it was time to address the cosmetic aspects. First was the mirror, but as I went to install it I realized it didn't make sense to install a good mirror on a bad door, so of to the yard again...

Found this little gem, 87 sport with complete aero package woot! But the reason I came...

Probably one of the worst colors to sand to bare metal in direct sunlight, so hard to tell when you're finished,

Wire wheel got old, and I got smart. Aircraft Stripper FTW!

Silver insides would annoy me

Since the new door was manual and mine are power I had to swap out all the guts....fun

Once the inside was dry, time to paint the outside.
Note: the inside was sprayed with primer and then given a coat of rustoleum gloss black, the outside however is coated in chalk board paint.
The workspace

And the finished product...

I decided not to put the molding on for a number of reasons.
1) My S4 molding was destroyed by the nascar antics of the ford explorer
2) I plan to convert to S5 exterior anyway so its hard to justify buying s4 molding
3) Not sure how well the paint would stick to plastic especially flexible plastic
4) My door is a dammit chalk board! I doubt a trim piece will keep me from winning the concours de elegance
Found this little gem, 87 sport with complete aero package woot! But the reason I came...
Probably one of the worst colors to sand to bare metal in direct sunlight, so hard to tell when you're finished,
Wire wheel got old, and I got smart. Aircraft Stripper FTW!
Silver insides would annoy me
Since the new door was manual and mine are power I had to swap out all the guts....fun
Once the inside was dry, time to paint the outside.
Note: the inside was sprayed with primer and then given a coat of rustoleum gloss black, the outside however is coated in chalk board paint.
The workspace
And the finished product...
I decided not to put the molding on for a number of reasons.
1) My S4 molding was destroyed by the nascar antics of the ford explorer
2) I plan to convert to S5 exterior anyway so its hard to justify buying s4 molding
3) Not sure how well the paint would stick to plastic especially flexible plastic
4) My door is a dammit chalk board! I doubt a trim piece will keep me from winning the concours de elegance
06-15-12, 02:04 PM
#46
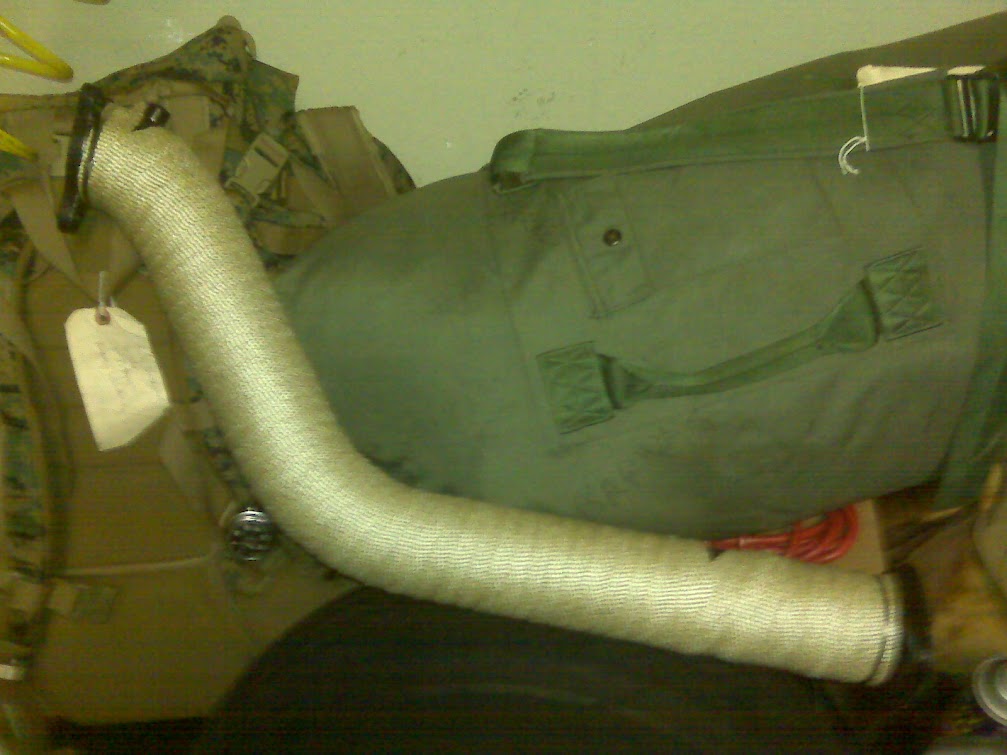
Riding around like this got load pretty quick.....and annoying a little while after that.

Enter another amazing deal, a buddy of mine sold his T2 but kept the RB exhaust because the buyer couldn't afford both. He packed it up and stored it but never actively tried to sell it. Fast forward a few years.....I happen to mention I'm in the market and he "thinks he may have a turbo-back FC exhaust he'll sell me for $250"....ok. Well turns out he lost the midpipe so I got it for $200....even better!
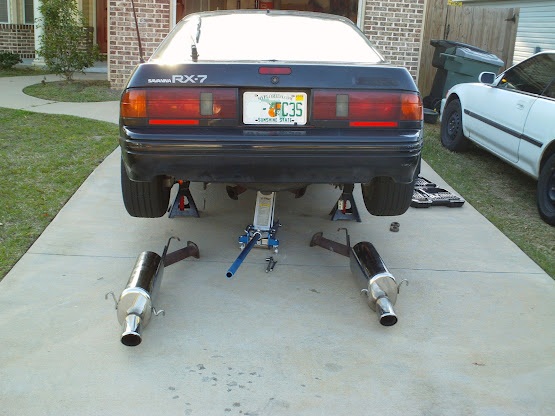
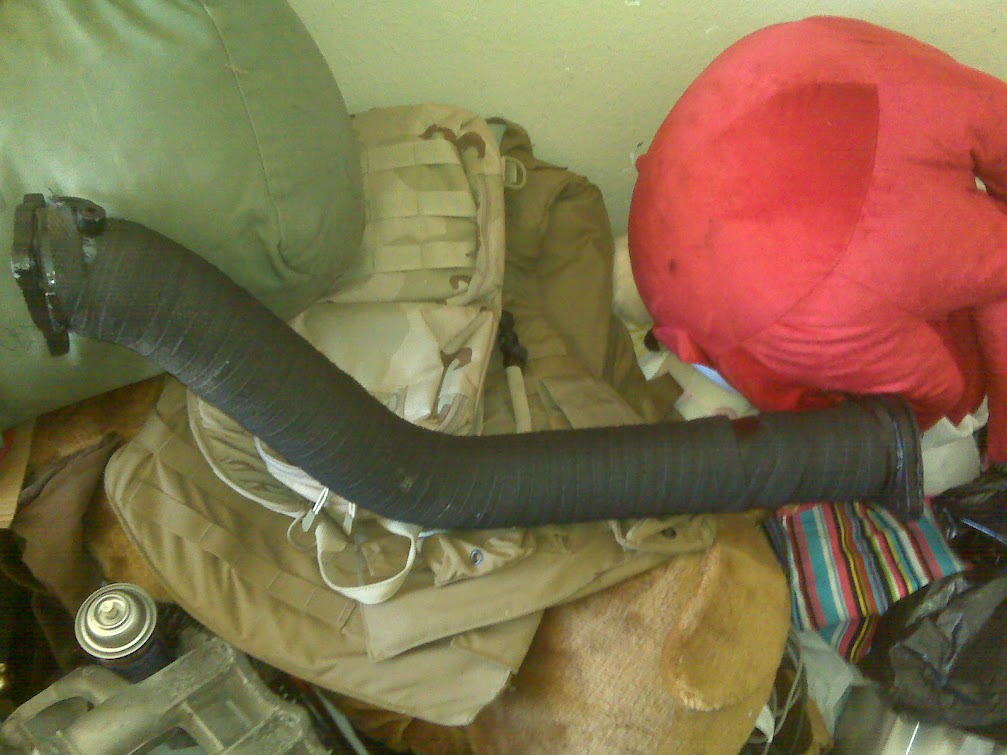
Of course not having a mid-pipe did present a small problem, but nothing that couldn't be solved with this...
As I don't weld it was off to the local muffler shop to bring it all together


Fin

Enter another amazing deal, a buddy of mine sold his T2 but kept the RB exhaust because the buyer couldn't afford both. He packed it up and stored it but never actively tried to sell it. Fast forward a few years.....I happen to mention I'm in the market and he "thinks he may have a turbo-back FC exhaust he'll sell me for $250"....ok. Well turns out he lost the midpipe so I got it for $200....even better!
Of course not having a mid-pipe did present a small problem, but nothing that couldn't be solved with this...
As I don't weld it was off to the local muffler shop to bring it all together
Fin
06-17-12, 03:15 AM
#48

Next stop was the first ever Rotorfest in Kissimmee
Full thread:
https://www.rx7club.com/se-rx-7-forum-35/rotorfest-dyno-day-car-meet-picture-thread-776699/
Full thread:
https://www.rx7club.com/se-rx-7-forum-35/rotorfest-dyno-day-car-meet-picture-thread-776699/
06-17-12, 05:04 PM
#49
Nope, at the time I figured replacing my sheared in half stock motor mounds, paralellagram trans mounts, broken front diff mount and stock rear diff mount would be a big enough improvement. I also hadn't really researched pinion snubbers at that time. Having looked into it more I realize it would have been a great opportunity to install one for cheap insurance against having to replace the diff mount again.
Oh yes, I remember quite well, it was a great event. Food , fun, and the exhaust fumes of dynoing rotarys, what wasn't to love!
Oh yes, I remember quite well, it was a great event. Food , fun, and the exhaust fumes of dynoing rotarys, what wasn't to love!
06-17-12, 05:13 PM
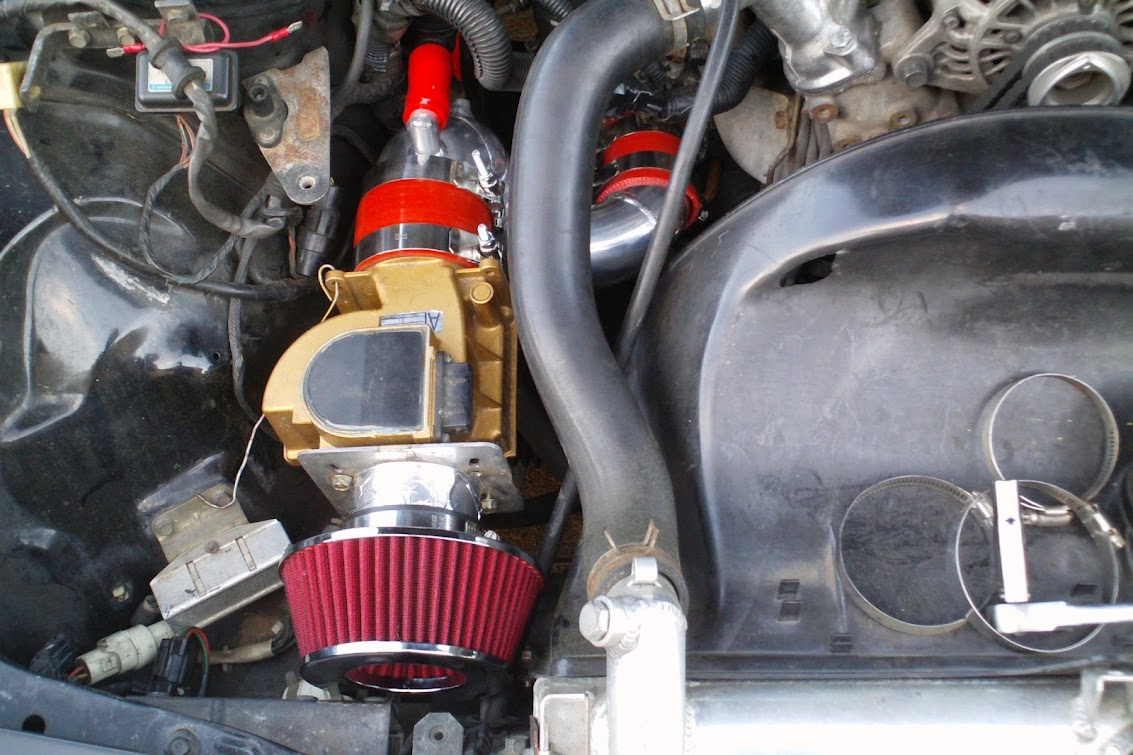
#50
The stock TID was full of cracks and beyond repair so I picked up the Corksport aluminum TID. Pretty well made piece. My only gripe was that they didn't have any black couplers at the time that I orded so i ended up with red...oh well.