
Ice Racer/Rally Rx7 build


I'm curious to see if my mazdatrix T2 to NA diff driveshaft will fit, otherwise I will go with the automatic driveshaft.
I run stock vert springs but my new front shocks will be using RB springs for some increased stiffness. I don't run front or rear sway bars.
Well today was payday so that means order up apex seals, about 375 with tax/shipping from mazda... (and that's with mazda racer discount)and they should arrive mid next week. Oil pump arrives Monday. This weekend I will focus on body work. I am iffy on replacing/painting fenders right now since winter is about to hit and getting paint to stick will be a bitch. Also not sure how to attach the bottom part of the fender to the chassis since they are all smashed and rusted. Might just kind of repair them a tad and re-attach them for winter. And worry about the body work come march when its at least in the 50s again (maybe) I will most certainty replace the front bumper I have since it is required with the new headlights. Maybe it wont look so ratty but just ratty enough for winter abuse/break in driving and ice racing...
This weekends' agenda:
1. Clearance side seals. organize seals.
2. Fiberglass/sand/primer hood.
3. Spray bomb engine bay.
4. Integrate/modify wiring for new lights.
5. Modify front bumper.
6. Create splash guard to protect bottom side of headlights from moisture.
Since this thread has kind of turned into an impromptu informative group, here is some more knowledge. This post will focus on the water pump housing. N326/N327 Is S4 rx7 and N350 is S5 rx7. You must use the pump to the corresponding pump housing. S5 has an additional water pump bolt. Both WP housings are interchangeable on the irons (even on the renesis). If you use the S4 water pump housing you have better pulley clearances so I usually stick with this one, also the thermostat housing is aluminum and is more robust. Now onto the good stuff.
Issue #1
Stock sending unit is located in the rear iron, and its garbage. Its some weird thread and there isn't enough room to drill it out and retap for 1/8 NPT for most gauges.
Issue #2
mechanical fan is for the birds, and toggle switching it is also for the birds (I'm guilty of this for a while)
Ways to correct this, modify the water pump housing. Depending on your application you may or not need the factory CLT. its about 1/4" thread. I decided to drill it out and tap it for 3/8ths" NPT for the fan thermostat switch. This switch is a 1 wire unit that will be the ground to my relay that will turn on the electric fan. (I love ground side switching) Location shown here:

The other one next to it is an S5 for reference, the flat spot on turbo models I believe is drilled and tapped for the turbo coolant line. Either way that is also a good location for sending units.
This is the back side of the WP housing, you can remove this tube but my carb has the option of being water cooled so I may utilize this outlet and run it to the carb then the outlet of the carb runs to the rear iron which has the same nipple, I think this area is used for cold start or goofy *** stock throttle body. This location works great for 1/8th NPT or oversize it to 1/4" use the adapter. I don't run an airpump so I am going to use the front boss area where the airpump bracket would cover. Use a drill press and make the area a bit more open/flat then go in and drill and tap for water temp gauge sending unit. (mine broke upon removal from old housing, also this is much cleaner than prior condition) and boom you're done!

here is a handy chart for what pipe thread v drill size required from my local hardware store:

ETA rebuild? Nov 21st
This weekends' agenda:
1. Clearance side seals. organize seals.
2. Fiberglass/sand/primer hood.
3. Spray bomb engine bay.
4. Integrate/modify wiring for new lights.
5. Modify front bumper.
6. Create splash guard to protect bottom side of headlights from moisture.
Since this thread has kind of turned into an impromptu informative group, here is some more knowledge. This post will focus on the water pump housing. N326/N327 Is S4 rx7 and N350 is S5 rx7. You must use the pump to the corresponding pump housing. S5 has an additional water pump bolt. Both WP housings are interchangeable on the irons (even on the renesis). If you use the S4 water pump housing you have better pulley clearances so I usually stick with this one, also the thermostat housing is aluminum and is more robust. Now onto the good stuff.
Issue #1
Stock sending unit is located in the rear iron, and its garbage. Its some weird thread and there isn't enough room to drill it out and retap for 1/8 NPT for most gauges.
Issue #2
mechanical fan is for the birds, and toggle switching it is also for the birds (I'm guilty of this for a while)
Ways to correct this, modify the water pump housing. Depending on your application you may or not need the factory CLT. its about 1/4" thread. I decided to drill it out and tap it for 3/8ths" NPT for the fan thermostat switch. This switch is a 1 wire unit that will be the ground to my relay that will turn on the electric fan. (I love ground side switching) Location shown here:
The other one next to it is an S5 for reference, the flat spot on turbo models I believe is drilled and tapped for the turbo coolant line. Either way that is also a good location for sending units.
This is the back side of the WP housing, you can remove this tube but my carb has the option of being water cooled so I may utilize this outlet and run it to the carb then the outlet of the carb runs to the rear iron which has the same nipple, I think this area is used for cold start or goofy *** stock throttle body. This location works great for 1/8th NPT or oversize it to 1/4" use the adapter. I don't run an airpump so I am going to use the front boss area where the airpump bracket would cover. Use a drill press and make the area a bit more open/flat then go in and drill and tap for water temp gauge sending unit. (mine broke upon removal from old housing, also this is much cleaner than prior condition) and boom you're done!
here is a handy chart for what pipe thread v drill size required from my local hardware store:
ETA rebuild? Nov 21st
Corrections:
The flat spot on the S5 waterpump housing is used for the AC fan switch? For some reason it has a secondary thermo-switch.
T2s get their coolant from the rear housing through a passage in the LIM and return it through a nipple on the bottom side of the waterpump housing.
The nipple on the water pump housing is the return from the nipple on the back of the block, this goes through the stock throttle body for the thermowax (cold idle) and through the stock BAC valve (so it doesn't freeze in winter)
I think I drilled and tapped mine to 1/4" NPT. first just to block it off, then to convert it to -6AN to become my turbo feed:
Also, be super careful if you do tap the rear iron. it's cast iron and super easy to crack. just go really slow and use lots of cutting oil...
I used a magnet to get most of the shavings out afterwards (and during)
I used a magnet to get most of the shavings out afterwards (and during)
Good eye. Its been many years since my car has been even remotely stock. Lol
I hate chassing the threads with a tap on the front iron for all the tension bolts so i neglected to do any drilling and taping there since the wp housing is aluminum and easy to work with.
I hate chassing the threads with a tap on the front iron for all the tension bolts so i neglected to do any drilling and taping there since the wp housing is aluminum and easy to work with.
Well according to my schedule, I bad at schedules. Had some hicups with parts but that should be straightened out by this weekend. Now that engine work was not progressing it let me focus on body work since for me to break the engine in, I need to commute in it and since daylight savings time I need headlights. Its allllll coming together now.
1st order of business on the body work. engine bay!

here is also kind of where I shoot myself in the foot, I am not a body mechanic I don't know paint but I do spray bomb really well. This is no exception. Some areas reacted because I used lacquer acrylic paint from duplicolor, some oil based enamels might be hidden underhood and various other stuff so some areas look funky but its all gonna get dirty soon anyways.
Photo took several cans of this stuff:

Time to go down the lacquer rabbit hole...
Lucky for me a dollar store nearby was selling this stuff on the cheap. $1.89 per can to be exact, which was good because it didnt cover worth a dick and took tons of coats and I bought out the entire supply, probably spent about 25-30 dollars on spray paint.
So I didn't have any sawhorses or stands so I grabbed stools from the old restaurant I used to work at, they just ordered some new ones in and gave me the old "beat up" ones for free.

and they work great (covered with painters tarp) I sure as **** wasn't going to make any or buy any, thats for sure.
I repaired the driver side fender and I had a minty fresh passenger side to prep. MY car was ORIGINALLY blue, these fenders were both originally red and the passenger side had certainty been repainted before.
after a few coats:

I utilized my compressor by spending about 15 bucks on a harbor freight sander and I had a bunch of 120 grit laying around still from the original burban repaint/bedliner project. so that worked out.
Here they are all primed up:

I have an rx7 for a roommate and she's kind of a douchebag, she doesn't pay me rent! In fact... she takes up my space and charges me money, what a country!

Some parts await final cleaning still before they can enter the dry/heated storage/pre assembly room/future roommate room???
ANYWHORE! back to the bodywork. Obviously the new lights required some body changes. fenders took minor trimming (unseen) the gaps for the pop up lights on the hood need to be filled and the front bumper needs to be seriously modified. Luckily I have a spare white bumper (which got cleaned, sanded and primed) and after ruining the prior bumper I had pretty good idea of measurements for hood pins and where to put what. and spare parts. Bitches love spare parts.

Obviously this is not going to work, front bumper wont mount like this and it looks jank.
Here is a close up:

a sharpie works well on what I need to trim and where, pretty close though... Normally the FTP (flash to pass) lenses or clear dummy lenses go here. Those were missing from this bumper, like most are 2nd hand these days...

Passenger side is trimmed (about 90%) and driver side is stock. Also, I made sure the rallyboobs would fit with the new holes I drilled, everything looks kosher.
Here is the teaser shot, headlight covers need trimming and the hood is only filled/sanded still needs to be primed and only the low beam/low beam function is being utilized. I mocked up the wiring diagram at work today to make this work, gonna need a fuse box from a junkyard or make my own power/relay distribution box with room for 5-7 std bosch/tyco relays. Anyone have suggestions???????

in this photo the fenders and bumper are primed FYI.
1st order of business on the body work. engine bay!
here is also kind of where I shoot myself in the foot, I am not a body mechanic I don't know paint but I do spray bomb really well. This is no exception. Some areas reacted because I used lacquer acrylic paint from duplicolor, some oil based enamels might be hidden underhood and various other stuff so some areas look funky but its all gonna get dirty soon anyways.
Photo took several cans of this stuff:
Time to go down the lacquer rabbit hole...
Lucky for me a dollar store nearby was selling this stuff on the cheap. $1.89 per can to be exact, which was good because it didnt cover worth a dick and took tons of coats and I bought out the entire supply, probably spent about 25-30 dollars on spray paint.
So I didn't have any sawhorses or stands so I grabbed stools from the old restaurant I used to work at, they just ordered some new ones in and gave me the old "beat up" ones for free.
and they work great (covered with painters tarp) I sure as **** wasn't going to make any or buy any, thats for sure.
I repaired the driver side fender and I had a minty fresh passenger side to prep. MY car was ORIGINALLY blue, these fenders were both originally red and the passenger side had certainty been repainted before.
after a few coats:
I utilized my compressor by spending about 15 bucks on a harbor freight sander and I had a bunch of 120 grit laying around still from the original burban repaint/bedliner project. so that worked out.
Here they are all primed up:
I have an rx7 for a roommate and she's kind of a douchebag, she doesn't pay me rent! In fact... she takes up my space and charges me money, what a country!
Some parts await final cleaning still before they can enter the dry/heated storage/pre assembly room/future roommate room???
ANYWHORE! back to the bodywork. Obviously the new lights required some body changes. fenders took minor trimming (unseen) the gaps for the pop up lights on the hood need to be filled and the front bumper needs to be seriously modified. Luckily I have a spare white bumper (which got cleaned, sanded and primed) and after ruining the prior bumper I had pretty good idea of measurements for hood pins and where to put what. and spare parts. Bitches love spare parts.
Obviously this is not going to work, front bumper wont mount like this and it looks jank.
Here is a close up:
a sharpie works well on what I need to trim and where, pretty close though... Normally the FTP (flash to pass) lenses or clear dummy lenses go here. Those were missing from this bumper, like most are 2nd hand these days...
Passenger side is trimmed (about 90%) and driver side is stock. Also, I made sure the rallyboobs would fit with the new holes I drilled, everything looks kosher.
Here is the teaser shot, headlight covers need trimming and the hood is only filled/sanded still needs to be primed and only the low beam/low beam function is being utilized. I mocked up the wiring diagram at work today to make this work, gonna need a fuse box from a junkyard or make my own power/relay distribution box with room for 5-7 std bosch/tyco relays. Anyone have suggestions???????
in this photo the fenders and bumper are primed FYI.
Oh herro, look what came in the mail today...

overnight parts from Japan? I don't think so jesse, week long journey from Ontario... California! Thank you mazda also they were really expensive. $55.55 each :/
This week-weekends plans? finish the hood and get a HF spray gun and hope I dont **** the paint up, never used one before. wish me luck...
I dont want to spend 60 dollars on spray paint cans and run around everywhere and with this whole enamel/acrylic/lacquer/oil/water based Im giving in and buying a quart of duplicolor's lineup of championship white, it seems to be everywhere and most whites tend to match my paint pretty well. Oh also the meijer by me is having a clearance on nearly everything automotive body related so I snagged 6 giant cans of duplicolor lacquer acrylic clear for $1.37 each
then finish engine pre cleaning and pre assembly. Stay tuned... or don't - I really don't care. its nice to have a build blog that follows how this car has progressed for my own interests
Got the headlight covers trimmed up at work (I love having access to even a small machine shop) then got them attached (rivets) to the fiberglass, seems sturdy... enough.

Yup, totally have an rx7 for a roommate...

Today I am going to get some cleaning done (house and car parts) then tomorrow is paint day!
I ran out of the duplicolor primer so I found some rustoleum which didn't have ketones in it but I think thats a propellant, it didn't say enamel so I assume its a lacquer? No idea. Lets see how it goes...

Yup, totally have an rx7 for a roommate...
Today I am going to get some cleaning done (house and car parts) then tomorrow is paint day!
I ran out of the duplicolor primer so I found some rustoleum which didn't have ketones in it but I think thats a propellant, it didn't say enamel so I assume its a lacquer? No idea. Lets see how it goes...
Yeah something like that
I was getting in over my head on this painting thing, but what I do know is spray paint so I decided to go that route. I got tired of stressing and learning autobody, aint nobody got time for that...
I turned my garage into a paint booth essentially:

After I primed everything it was time for color, went with rustoleum matte semi gloss enamel and their clearcoat.
Engine bay, both front fenders, front bumper and hood. This half of the car is a little brighter but I need to clean up the otherside to see how well it actually matches.

Thats not the only body work I made, ended up making and mounting my splash guards for the headlights to keep my electronics area clean (as possible)

Again, I have a rx7 for a roommate....

but everything is good to go! all sorts of cleaned, may get the intake manifold powdercoated so go with the franken wankel theme.
1. Front cover = ford blue
2. Water pump housing/filler neck = gold
3. Water pump = dark blue
4. Water pump pulley = artic cat green
5. Oil pan & crank pulley = black
6. Alternator pulley = anodized blue
7. intake manifold? maybe red or something...
But before that I had to do some gasket matching because this manifold is dumb but whatever...

Now whats left is rotor pre assembly and put the engine bay wiring back together. New lights means modify harness, here is a sketch of what I got to do:

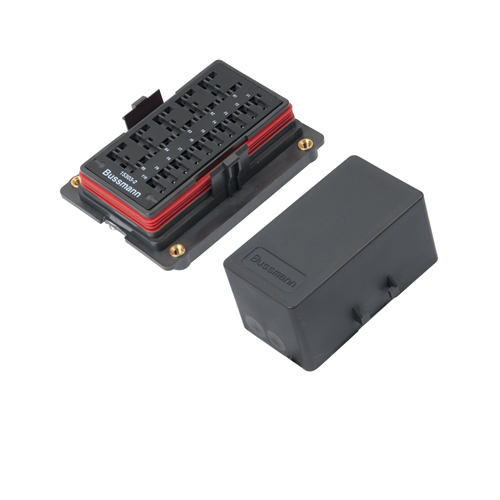
I'm debating on junkyarding a fuse box or using one of these bad boys. Essentially I need a relay box up front for the electronics.
anyways I got 5 total relays for the front harness:
1. rally ***** fogs - about 18 amps total
2. rally ***** spots - about 18 amps total
3. Headlamp Low beam - 6 amps total
4. Headlamp High Beam - 11 amps total
5. Electric fan - 10-20 amps?
but it may be too much for the unit or just at the maximum...
Thoughts?
I was getting in over my head on this painting thing, but what I do know is spray paint so I decided to go that route. I got tired of stressing and learning autobody, aint nobody got time for that...
I turned my garage into a paint booth essentially:
After I primed everything it was time for color, went with rustoleum matte semi gloss enamel and their clearcoat.
Engine bay, both front fenders, front bumper and hood. This half of the car is a little brighter but I need to clean up the otherside to see how well it actually matches.
Thats not the only body work I made, ended up making and mounting my splash guards for the headlights to keep my electronics area clean (as possible)
Again, I have a rx7 for a roommate....
but everything is good to go! all sorts of cleaned, may get the intake manifold powdercoated so go with the franken wankel theme.
1. Front cover = ford blue
2. Water pump housing/filler neck = gold
3. Water pump = dark blue
4. Water pump pulley = artic cat green
5. Oil pan & crank pulley = black
6. Alternator pulley = anodized blue
7. intake manifold? maybe red or something...
But before that I had to do some gasket matching because this manifold is dumb but whatever...
Now whats left is rotor pre assembly and put the engine bay wiring back together. New lights means modify harness, here is a sketch of what I got to do:
I'm debating on junkyarding a fuse box or using one of these bad boys. Essentially I need a relay box up front for the electronics.
anyways I got 5 total relays for the front harness:
1. rally ***** fogs - about 18 amps total
2. rally ***** spots - about 18 amps total
3. Headlamp Low beam - 6 amps total
4. Headlamp High Beam - 11 amps total
5. Electric fan - 10-20 amps?
but it may be too much for the unit or just at the maximum...
Thoughts?
Here is a better view of the splash guards. woopity do ******* da.

Also here is a shot of MOST (not all) of the cans used to do this major operation, even with the mask I think I've lost some brain cells I can't get back. Didn't help that I was drinking a lot while doing this process.

So its about that time, rotor pre assembly!!!

Cardboard comes in real handy here. draw out your rotors and sketch the markings to keep track of seal location and gaps and help record seal tolerance's.
oh but whats this...?
FSM states side seal clearance is .002-.007" and the FSM states a .016" limit. Well all of my side seals measure above but under limit. (.010-.016" or so) Once again delayed and forced to pay mazda a bunch of money for more parts since I'm this far down the rabbit hole, whats another 3-400 bucks? The larger the gap the higher the blow by and less compression.
Which brings me to my next conclusion. **** ATKINS ROTARY. I am officially tired of their crap products. I have complained about them enough but now I am 100% done with their products and will not support them or use anything from them ever again. I used these corner seals in the last build since I clearanced new side seals. (see hill climber thread) They seemed fine because I was using their apex seals (albeit still a bit tight but within use) but these DO NOT fit NEW OEM mazda apex seals, they go on crooked and the only way they fit is if you jam them in it there, the apex seals are supposed to be able to move freely without binding... which they do not. I was able to gain .004" clearance to my side seal vs using used OEM corner seals.
Observe the same side seal with 2 different corner seals, OEM vs atkins:


If you cant read the feeler gauges the OEM corner seals read .011" tolerance and the atkins reads .015"

Issues:
1. TERRIBLE apex seal to corner seal fitment
2. all the new corner seals actually measured undersized below spec
3. side seal clearance issues due this undersize.(I checked the diameter with 2 different mics and 2 different calipers so I know its not my measurement at this point since I got the same reading. )
4, about the same price as OEM corner seals
So I got **** and picked my best used 12 corner seals and recorded my measurements, these come from various engines and various running conditions and ALL measured out better and within spec.

Because of this, there was no engine assembly this weekend. So I focused on updating my suspension. Might as well attack the to do list any time I got a chance.
BEFORE:

"DURING":
AFTER:

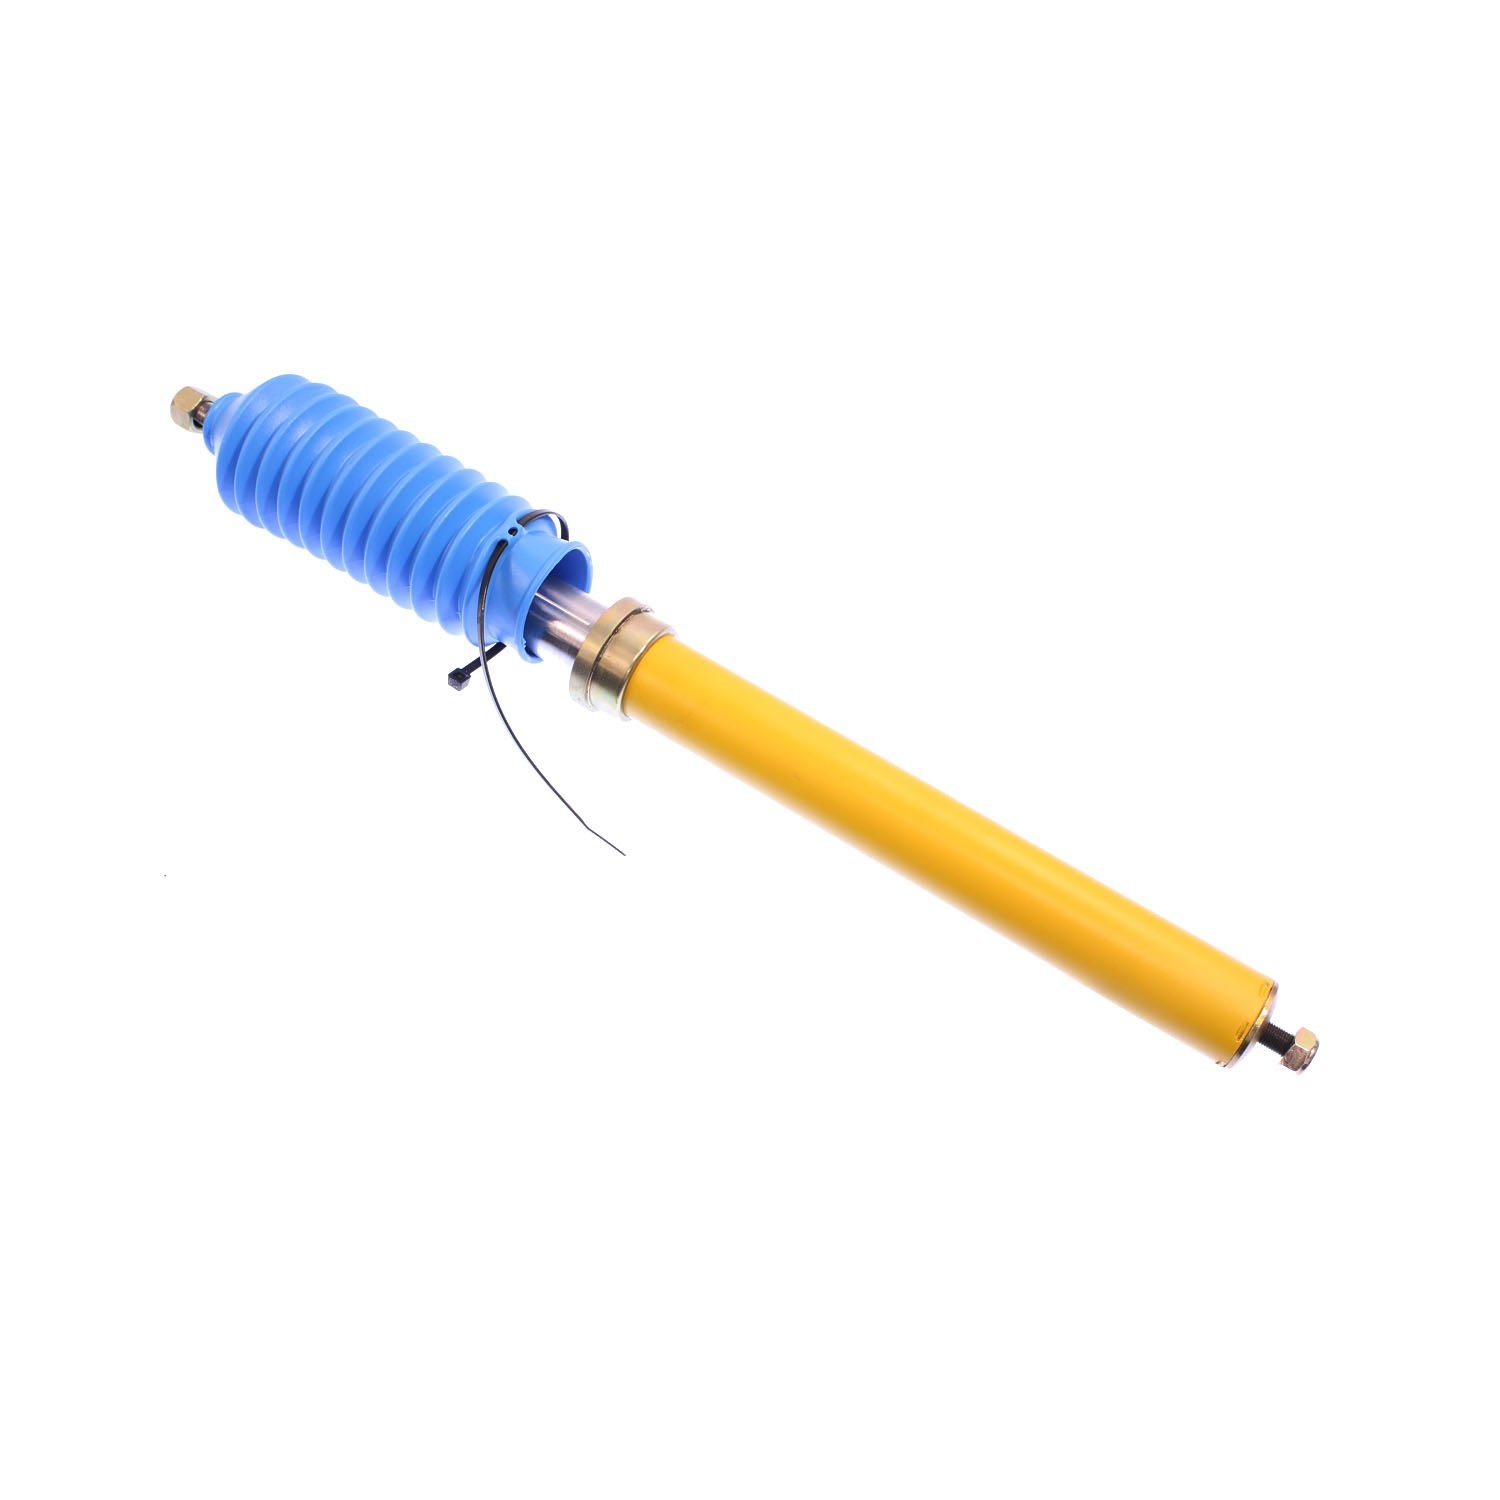
Now my rear bilsteins are matched to properly to some front bilstiens, They do not make a bolt in bilstein shock for these cars, you have to gut the tube and put an insert in which is awesome that they at least have shocks for this but now you don't see the cool bilstein yellow:
Now it sits on racing beat front springs for more ideal spring rate and new moog strut mount/bearing since the old ones were original and most certainly toast. Time to mount up the headlights for good and begin re installing the engine bay while I wait for mazda to send me corner seals and side seals. I could re use my corner seals but I figured at this rate I'm this far down, might as well. Dec 13th rallyX date is looking pretty bad to be able to make now. Granted I didn't just buy seals from mazda, forgot a gasket and got cap/rotor/plugs because proper ignition is important too.
more to come.
Also here is a shot of MOST (not all) of the cans used to do this major operation, even with the mask I think I've lost some brain cells I can't get back. Didn't help that I was drinking a lot while doing this process.
So its about that time, rotor pre assembly!!!
Cardboard comes in real handy here. draw out your rotors and sketch the markings to keep track of seal location and gaps and help record seal tolerance's.
oh but whats this...?
FSM states side seal clearance is .002-.007" and the FSM states a .016" limit. Well all of my side seals measure above but under limit. (.010-.016" or so) Once again delayed and forced to pay mazda a bunch of money for more parts since I'm this far down the rabbit hole, whats another 3-400 bucks?
The larger the gap the higher the blow by and less compression. Which brings me to my next conclusion. **** ATKINS ROTARY. I am officially tired of their crap products. I have complained about them enough but now I am 100% done with their products and will not support them or use anything from them ever again. I used these corner seals in the last build since I clearanced new side seals. (see hill climber thread) They seemed fine because I was using their apex seals (albeit still a bit tight but within use) but these DO NOT fit NEW OEM mazda apex seals, they go on crooked and the only way they fit is if you jam them in it there, the apex seals are supposed to be able to move freely without binding... which they do not. I was able to gain .004" clearance to my side seal vs using used OEM corner seals.
Observe the same side seal with 2 different corner seals, OEM vs atkins:
If you cant read the feeler gauges the OEM corner seals read .011" tolerance and the atkins reads .015"
Issues:
1. TERRIBLE apex seal to corner seal fitment
2. all the new corner seals actually measured undersized below spec
3. side seal clearance issues due this undersize.(I checked the diameter with 2 different mics and 2 different calipers so I know its not my measurement at this point since I got the same reading. )
4, about the same price as OEM corner seals
So I got **** and picked my best used 12 corner seals and recorded my measurements, these come from various engines and various running conditions and ALL measured out better and within spec.
Because of this, there was no engine assembly this weekend. So I focused on updating my suspension. Might as well attack the to do list any time I got a chance.
BEFORE:
"DURING":
AFTER:
Now my rear bilsteins are matched to properly to some front bilstiens, They do not make a bolt in bilstein shock for these cars, you have to gut the tube and put an insert in which is awesome that they at least have shocks for this but now you don't see the cool bilstein yellow:
Now it sits on racing beat front springs for more ideal spring rate and new moog strut mount/bearing since the old ones were original and most certainly toast. Time to mount up the headlights for good and begin re installing the engine bay while I wait for mazda to send me corner seals and side seals. I could re use my corner seals but I figured at this rate I'm this far down, might as well. Dec 13th rallyX date is looking pretty bad to be able to make now. Granted I didn't just buy seals from mazda, forgot a gasket and got cap/rotor/plugs because proper ignition is important too.
more to come.

All of the atkins solid corners measure about .00105" undersized for diameter.
QUOTE=TonyD89;11837344]So the Atkins corner seals are .003"-.004" undersized? Woah! IIRC the mazda spec is like .0005" clearance to the bore for the corner seal.[/QUOTE]
No let me rephrase. Sorry for the confusion.
QUOTE=TonyD89;11837344]So the Atkins corner seals are .003"-.004" undersized? Woah! IIRC the mazda spec is like .0005" clearance to the bore for the corner seal.[/QUOTE]
No let me rephrase. Sorry for the confusion.
annnnnd boom done:

There is a light at the end of the tunnel. Now we begin/continue the great re-construction of project beast mode.

Mounted my ballasts and ran some wiring, removed some old wiring, time to simplify! Also I managed to integrated my front reflex reflectors with my turn signal just because. MOAR SAFETY! (maybe)
FINAL parts arrived today ( this time I mean it )

Kind of silly they individually package the corner seals but w/e
These are FD side seals, they are a minor upgrade over the FC ones, still must be clearanced to fit. Which sucks.

but after some soothing music and some feeler gauges, it was done!

Engine assembly? Tonite? Chances look good to have it assembled and installed by the weekend.
Right now someone local has my intake manifold for powdercoating. Next week I travel for work Tuesday morning through Friday afternoon so little will get done. I must champion this weekend!
Next hot items on the list is fabbing the transmission mount wiring up the...wires and obviously engine assembly.
There is a light at the end of the tunnel. Now we begin/continue the great re-construction of project beast mode.
Mounted my ballasts and ran some wiring, removed some old wiring, time to simplify! Also I managed to integrated my front reflex reflectors with my turn signal just because. MOAR SAFETY! (maybe)
FINAL parts arrived today ( this time I mean it )
Kind of silly they individually package the corner seals but w/e
These are FD side seals, they are a minor upgrade over the FC ones, still must be clearanced to fit. Which sucks.
but after some soothing music and some feeler gauges, it was done!
Engine assembly? Tonite? Chances look good to have it assembled and installed by the weekend.
Right now someone local has my intake manifold for powdercoating. Next week I travel for work Tuesday morning through Friday afternoon so little will get done. I must champion this weekend!
Next hot items on the list is fabbing the transmission mount wiring up the...wires and obviously engine assembly.
ENGINE BUILD TIME!

So the engine is finished! Big key thing to note is the s5 NA rotors on the rx8 eccentric shaft. They also utilize the rx8 stationary gears:

These have 3 windows opposed to 1 for oiling. Way nicer for abuse. Much better oil flow.
However to run rear rx8 stat gear you have to either RTV the stat gear at the flange or machine an o-ring slot in. The rx8 rear iron has the o-ring slot whereas in the rx7 engines the o-ring slot is in the rear stat gear. I chose to get the rear stat gear machined to match rx7 condition. I hate RTV and make a mess of it. It was worth the piece of mind.
Be sure to check/set the endplay! .002" was measured. all good .0016-.0028" is spec.

Now onto RTV! I mean a mess! I mean mazda competition oil pan baffle. I also utilized banzai racing’s oil pan stud kid which came with studs and flanged nuts. They also sell a brace but I felt that this was good enough. Plus the price difference is huge between the two.

And as a treat to myself I got a BNIB oil pan. They usually rust and get nasty and have bent flanged areas which don’t seal well. This worked out good:

And with that it was time to install the waterpump assembly, I am using an FD radiator cap housing. FC ones are plastic and I have broken or warped a couple. This is all aluminum and much sturdier. Also there is no overflow so I need to use my radiator overflow with the radiator cap on my radiator. No big deal.

Since I had to buy side seals on that last post or so I also went with what I know I need which was a tune up. New OEM cap/rotor and OEM FDspark plugs (FD spark plugs are platinum, highly recommend)

Next up? Onto the clutch and transmission!
So the engine is finished! Big key thing to note is the s5 NA rotors on the rx8 eccentric shaft. They also utilize the rx8 stationary gears:
These have 3 windows opposed to 1 for oiling. Way nicer for abuse. Much better oil flow.
However to run rear rx8 stat gear you have to either RTV the stat gear at the flange or machine an o-ring slot in. The rx8 rear iron has the o-ring slot whereas in the rx7 engines the o-ring slot is in the rear stat gear. I chose to get the rear stat gear machined to match rx7 condition. I hate RTV and make a mess of it. It was worth the piece of mind.
Be sure to check/set the endplay! .002" was measured. all good .0016-.0028" is spec.
Now onto RTV! I mean a mess! I mean mazda competition oil pan baffle. I also utilized banzai racing’s oil pan stud kid which came with studs and flanged nuts. They also sell a brace but I felt that this was good enough. Plus the price difference is huge between the two.
And as a treat to myself I got a BNIB oil pan. They usually rust and get nasty and have bent flanged areas which don’t seal well. This worked out good:
And with that it was time to install the waterpump assembly, I am using an FD radiator cap housing. FC ones are plastic and I have broken or warped a couple. This is all aluminum and much sturdier. Also there is no overflow so I need to use my radiator overflow with the radiator cap on my radiator. No big deal.
Since I had to buy side seals on that last post or so I also went with what I know I need which was a tune up. New OEM cap/rotor and OEM FDspark plugs (FD spark plugs are platinum, highly recommend)
Next up? Onto the clutch and transmission!
So the clutch is carry over, I utilize my same t2 aluminum flywheel and my t2 disc but the PP I got a hold of is from an rx8 and inn better shape than my old t2 pressure plate. These parts are interchangeable.
So it went in as ace venture says “LIKE A GLOVE!”

On the old 13b blocks cant use the rx8 trans with the rx8 stock slave cylinder since it hits the oil pedestal. HOWEVER you use the slave cylinder from a 98 acura integra 1.8 GS and viola! It bolts right in and clears.

Price is 15 dollars at oreileys auto parts, part# cs2162
But to keep the angle of the slave cylinder pin flat, you have to shim it. Extra nuts to the strut bearing work great.

ALSO the stock clutch hose has too many male threads on the slave cylinder end, but it reaches no problem.

We are not home yet! Still some issues to tackle but the engine and trans are in and the engine is bolted down on its aluminum mounts:

Also to use the rx8 trans you must use the rx8 hardware for the bellhousing. the bosses on the trans are larger than the FC ones so you will never thread anything in. the rx8 starter must be used since the rx7 starter only shares the top bolt. Rx8 start is a 2Kw electric motor while the rx7 one is 1.3Kw. Good upgrade.
Here is the difference between the two transmissions. A hole must be cut. If you have an interior or stock dashboard this could be an issue, I do not so no worries:

My mazdatrix T2 driveshaft to NA diff is just a hair too long, off to get shortened! I believe for most people a stock automatic driveshaft would work fine but I need a new yoke and u joints can use some attention. The automatic driveshaft has the same output yoke as the t2 as is common on the rx8. same diameter and spline count but the shaft is about 1" shorter.

Stock transmount does not go low enough so I had to cut it up, then cut up the poly bushing from my t2 “solid” mounts.


Did a little work on mocking up the custom trans mount, stay tuned.
Big issues to overcome:
1. Correct clutch hose
2. fab trans mount
3. new shift boot/cover misc shifter hole
4. shorten and re balance driveshaft
So it went in as ace venture says “LIKE A GLOVE!”
On the old 13b blocks cant use the rx8 trans with the rx8 stock slave cylinder since it hits the oil pedestal. HOWEVER you use the slave cylinder from a 98 acura integra 1.8 GS and viola! It bolts right in and clears.
Price is 15 dollars at oreileys auto parts, part# cs2162
But to keep the angle of the slave cylinder pin flat, you have to shim it. Extra nuts to the strut bearing work great.
ALSO the stock clutch hose has too many male threads on the slave cylinder end, but it reaches no problem.
We are not home yet! Still some issues to tackle but the engine and trans are in and the engine is bolted down on its aluminum mounts:
Also to use the rx8 trans you must use the rx8 hardware for the bellhousing. the bosses on the trans are larger than the FC ones so you will never thread anything in. the rx8 starter must be used since the rx7 starter only shares the top bolt. Rx8 start is a 2Kw electric motor while the rx7 one is 1.3Kw. Good upgrade.
Here is the difference between the two transmissions. A hole must be cut. If you have an interior or stock dashboard this could be an issue, I do not so no worries:
My mazdatrix T2 driveshaft to NA diff is just a hair too long, off to get shortened! I believe for most people a stock automatic driveshaft would work fine but I need a new yoke and u joints can use some attention. The automatic driveshaft has the same output yoke as the t2 as is common on the rx8. same diameter and spline count but the shaft is about 1" shorter.
Stock transmount does not go low enough so I had to cut it up, then cut up the poly bushing from my t2 “solid” mounts.
Did a little work on mocking up the custom trans mount, stay tuned.
Big issues to overcome:
1. Correct clutch hose
2. fab trans mount
3. new shift boot/cover misc shifter hole
4. shorten and re balance driveshaft
So I have been lacking in the updates recently. Well I traveled all last week for work so that sucked, didn't get any wrenching in.
A little bit of cardboard and a little bit of thin aluminum and some patience I managed to cut up the stock bracket and mock up something I can turn into a real bracket. So here is the tacked up beast. I used 3/16ths steel. Seems sturdy right? :p

Here is the final product:

My welder friend is a bit of an artists so he put his signature on it (smoky the bear) and added some flare for me lol.
In other news, ITS ALLLLLLLLIIIIIIVVVVVEEEEEEEEE. Here is the traditional 1st start video, well 1st run. Was too busy to get the phone ready for cranking and etc.
Took some trial and error stabbing the distributor on the RB main pulley but it eventually fired right up. I let it run for about a half hour, check for leaks, only a few (minor) leaks so I'm gonna chalk that up as a win.
1. The plug I made for the factory turbo oil feed location on the front iron does not seal very well. I may be able to get away with just adding copper crush washer. Factory hardware is banjo bolt anyways for this location...
2. 16psi rad cap on radiator, 13psi cap on t-stat neck. 13psi one does not have bleed off port. Thus leak. I will have to add an overflow port on the FD rad cap housing or go to a higher pressure cap. Griffin radiators lowest PSI for their caps is 16psi :/
3. Heater core outlet to radiator - (hence the t-shirt/rag in video) the outlet on the radiator is closer to 3/4 OD and the outlet on the heater core is more like 5/8ths OD. Right now I am having trouble finding a coupler for this issue.
Other than that I started to aim the headlights and bodywork might even go on later today. All that's left then will be clutch slave line, which I might have found the solution for and should arrive when I return from visiting family for Christmas.
A little bit of cardboard and a little bit of thin aluminum and some patience I managed to cut up the stock bracket and mock up something I can turn into a real bracket. So here is the tacked up beast. I used 3/16ths steel. Seems sturdy right? :p
Here is the final product:
My welder friend is a bit of an artists so he put his signature on it (smoky the bear) and added some flare for me lol.
In other news, ITS ALLLLLLLLIIIIIIVVVVVEEEEEEEEE. Here is the traditional 1st start video, well 1st run. Was too busy to get the phone ready for cranking and etc.
Took some trial and error stabbing the distributor on the RB main pulley but it eventually fired right up. I let it run for about a half hour, check for leaks, only a few (minor) leaks so I'm gonna chalk that up as a win.
1. The plug I made for the factory turbo oil feed location on the front iron does not seal very well. I may be able to get away with just adding copper crush washer. Factory hardware is banjo bolt anyways for this location...
2. 16psi rad cap on radiator, 13psi cap on t-stat neck. 13psi one does not have bleed off port. Thus leak. I will have to add an overflow port on the FD rad cap housing or go to a higher pressure cap. Griffin radiators lowest PSI for their caps is 16psi :/
3. Heater core outlet to radiator - (hence the t-shirt/rag in video) the outlet on the radiator is closer to 3/4 OD and the outlet on the heater core is more like 5/8ths OD. Right now I am having trouble finding a coupler for this issue.
Other than that I started to aim the headlights and bodywork might even go on later today. All that's left then will be clutch slave line, which I might have found the solution for and should arrive when I return from visiting family for Christmas.

yup. all good braps here. New plugs/cap/rotor helps nice too.
My trailing coil took a dump though so it was hard to start, had an extra one laying around so I used that, all good now!
My trailing coil took a dump though so it was hard to start, had an extra one laying around so I used that, all good now!
MECP Certified Installer
Joined: Feb 2009
Posts: 3,176
Likes: 3
From: Mesquite, TX-DFW
I've been lurking in your build thread for a long time and I love the fact you turned an FC into a rally car!
I did my first road rally in my almost stock 1990 vert in February, and while fun, I came in 6 places up from last haha.
I beat all of the miatas though
I did my first road rally in my almost stock 1990 vert in February, and while fun, I came in 6 places up from last haha.
I beat all of the miatas though
Its not quite a rally car yet but its getting there! It still requires some skid plates, cage and and proper fuel/brake lines run along with some other misc safety supplies.
Well everything is hooked up and leak countermeasures are in transit:

bonus points if you can spot the continuity errors but bonus points equate to no monetary value.

Since my radiator cap is 16 psi (and cant get any lower) I had to drill and tap the FD t-stat cap housing for a line for the overflow. I could just make a block off plate for the t-stat neck but I figure mazda put this there for a reason and less pressure on the coolant system can't hurt either. So I drilled and tapped it for 1/8th's NPT, a little thread sealant and some JB weld for safety.
Since I am stuck waiting on parts and I know I got it running, I decided to mount up and get my headlights aimed.

So instead of being outside and pissing my neighbors off, by shinning lights into their house I set the wagon inside with the lights on and marked the position on the garage door as a surrogate and would compare the patterns. Sometimes I opened the door and see how good the beam looked in the distance. They are bright as ****, without the HB on either...
Next up is to cover up this huge hole from the stock shifter, ran out of time but picked up some thin aluminum and some aluminum rivets, should do the trick nicely and should I need to put a stock trans in again I can easily remove it.

Winter tires are on, exhaust has no leaks now to be gone for the holidays and patiently wait for parts to complete this. When I return it will be just fixing 3 minor leaks, cover shifter hole, trans fluid, body work install and I should be driving this by 1/1/2015!
Well everything is hooked up and leak countermeasures are in transit:
bonus points if you can spot the continuity errors but bonus points equate to no monetary value.
Since my radiator cap is 16 psi (and cant get any lower) I had to drill and tap the FD t-stat cap housing for a line for the overflow. I could just make a block off plate for the t-stat neck but I figure mazda put this there for a reason and less pressure on the coolant system can't hurt either. So I drilled and tapped it for 1/8th's NPT, a little thread sealant and some JB weld for safety.
Since I am stuck waiting on parts and I know I got it running, I decided to mount up and get my headlights aimed.
So instead of being outside and pissing my neighbors off, by shinning lights into their house I set the wagon inside with the lights on and marked the position on the garage door as a surrogate and would compare the patterns. Sometimes I opened the door and see how good the beam looked in the distance. They are bright as ****, without the HB on either...
Next up is to cover up this huge hole from the stock shifter, ran out of time but picked up some thin aluminum and some aluminum rivets, should do the trick nicely and should I need to put a stock trans in again I can easily remove it.
Winter tires are on, exhaust has no leaks now to be gone for the holidays and patiently wait for parts to complete this. When I return it will be just fixing 3 minor leaks, cover shifter hole, trans fluid, body work install and I should be driving this by 1/1/2015!
Back from the holidays! Got the leaks fixed, the barb fitting worked, turbo feed properly blocked,

I got some thin aluminum and made a block off plate, added a little RTV to act as a gasket and make less vibration and bolted it to two of the existing holes for the stock shifter bracket, made some additional ones then added 3 rivets for strength (not shown)
Clutch hydraulics came in!

Buy these 2 things and you can convert your inverted flare to -3
ta da!

a little closer

so with all that wrapped up I just need to work on my shift boot so while waiting for that dang shifter plate to come in the mail... Then just bleed the clutch and take it for a spin!


I installed the body work! I'm not really thrilled with the color, it doesn't match at all but I'm not a body work person. Might repaint the front better in the spring time for a weekend project but right now, it is what it is and it looks better than what it was.
Need to add the hood pins and trim the headlight cover on the passenger side. Passenger headlight may/will require some additional adjustment which means removal of the fender but driver side seems to be spot on.
I got some thin aluminum and made a block off plate, added a little RTV to act as a gasket and make less vibration and bolted it to two of the existing holes for the stock shifter bracket, made some additional ones then added 3 rivets for strength (not shown)
Clutch hydraulics came in!
Buy these 2 things and you can convert your inverted flare to -3
ta da!
a little closer
so with all that wrapped up I just need to work on my shift boot so while waiting for that dang shifter plate to come in the mail... Then just bleed the clutch and take it for a spin!
I installed the body work! I'm not really thrilled with the color, it doesn't match at all but I'm not a body work person. Might repaint the front better in the spring time for a weekend project but right now, it is what it is and it looks better than what it was.
Need to add the hood pins and trim the headlight cover on the passenger side. Passenger headlight may/will require some additional adjustment which means removal of the fender but driver side seems to be spot on.