When you click on links to various merchants on this site and make a purchase, this can result in this site earning a commission. Affiliate programs and affiliations include, but are not limited to, the eBay Partner Network.
Nice Progress mate & the car looks awesome!! Love the seats! I see you and I are in the same boat hey and both had a rough start to the build .... Bloody old cars are just a bit temperamental! Those coolant temps are similar to what I was getting so might follow your lead on put in a 72deg thermostat.
Good luck with the Battery relocate.. nice easy one for the holidays
Yeah mate thats it, I guess you are taking on someone elses issues really? I think with this car was, it was built a long time ago, and it hasn't been maintained and updated. It's just been kept running... But anyways, its now my problems!
Yeah the 71 thermostat was from a old ford i am pretty sure.. tridon tt215-160 - but I am thinking for track use i actually might put a 65 degree in it. Rotor's are funny and operate the best in a window!
I didn't end up doing the battery location, I ended up being too lazy and just didn't do anything to the car at all!!! Sadly. However I did enjoy it, and didn't want to pull it apart over the holidays..
I ended up letting the rego run out, as I found out the car needs a full compliance plate, since it wasn't done when it was imported. It has all paper work which is all good, but still needs a plate. And because it has all the bigger turbo etc etc i thought i mose well get it engineered - so some work to be done
Since I have a holiday coming up to Japan in a April I figured I would take my time with the car and aim to get it back on the road by October...
There is a few things I need before I get a engineers as I want "how it is" on the paperwork for street driving..
Things to do for rego.
New ECU - Microtech LT10c
New Billet coil pack
Exhaust cut up and rego ready (Will get complete new 4" exhaust after rego)
BOV removed
Eboost removed
Battery moved to boot
Half cage
New wheels - larger - width and height
This should be enough for now.
Before It gets a Engineering cert for this, I need to get a EPA test done in Sydney. So will need to wire in the new ECU and out on a trailer and drive it up to be tuned there and then go get the EPA test done. I can't get the car tuned here as the Air Density is different to where the test is done.
After this will be.
GTW3488R
Fuel system upgrade
E85 tune and just hope to god the motor holds!
So after the car ran out of rego i thought it would be easy to save a bit of cash since the car isn't running and it can sit there until I get back from Japan..
But NOOOOO never the case... I was looking around Gumtree and saw a set of TE37's come up at a pretty good price!!! I couldn't help myself...
Before
After
The plan was to sand blast them and paint them bronze.
18x9.5 +12 on the rear and 18x8.5 +30 on the front
Perfect at the front! Using filling up those fenders! Spot on!
Front clearance at the front.
+12 with a 255 tyre. I plan on running a 265 tyre.. I don't like this at all.. As I want it to sit inside the fender as i will set the car up to squat.
I love the look with the TE37 - but I needed to find different rears... and would be too hard to find the right offset for the rear that I wanted in just the pair.
Not to mention it would actually cost me more to get them cleaned up and painted... So within the same day I sold them... LOL ... and got the rims i really wanted! After doing some researching online I didn't know if they would fit going off the FC3Spro site....
but i pulled the pin and its worked out a TREAT! Really happy so far!
To to compare to the TE37! I think I made a good choice!
18x9.5 +38... Here I was worried that the +38 with the 9.5 wouldn't fit. But its perfect. It just sits inside the guard and will have heaps of room to squat! and still heaps of suspension clearance.
I was a little worried here, but its perfect! there is still about 1.5-2cm clearance to the rear control arm!
This is the front, it is a little worrying, it has clearance now but I think it its lowered its going to touch. But thats fine, it should have enough clearance for now. The point of this was for rego, so being higher is good, if its a issue when i lower it a 2mm spacer will fix it no worries!
The front is a 8.5 +32
The rear has a 68mm Dish Lip! I am super happy so far!!!!! This would have to be my first BIG purchase and what will then really feel like my build now
Eeks the fronts not so much, that is max out there is properly 1mm gap... It doesn't rub turning the wheel - but will need to test it! VERY close!
One thing marked off the list! I am pretty happy with how it looks - this is rego height currently so I will roll the guards, and lower it to just above the tyre.
Next on my list now is a Microtech LT10c with a 5" pro dash in the cluster. So I will be removing the OEM cluster.
Done, the new Microtech and bits and pieces are now ordered. Now I have just to wait for the Pro Dash to be available and ill grab it which i believe they aren't stocking for another 2-3 weeks. Picking up another cluster surround this weekend that is in better condition than my current and will get the dash mounted in the cluster.
Also took the Mazda around the block just to make sure nothing rubs, and it sounds good! Only thing I noticed on full lock the tyre rubs the inner part of the chassis, I just have to be mindful in car parks is all.
Took a few more snaps in the sun before I park it for the next few months. Very happy with how it looks in the sun!
Cluster is now out. I now have to remove the speedo cable, as the new Pro cluster comes with a GPS speedo!
Just need to figure out what is what in the loom (lights, highbeams, blinkers, fuel level) so I can wire it into the MT Pro Cluster loom. I also need to find out what the tacho runs from, I believe its the coil, but not sure where. Having I will be replacing them with LS1 coils, I need to figure that one out. One bridge at a time for now!
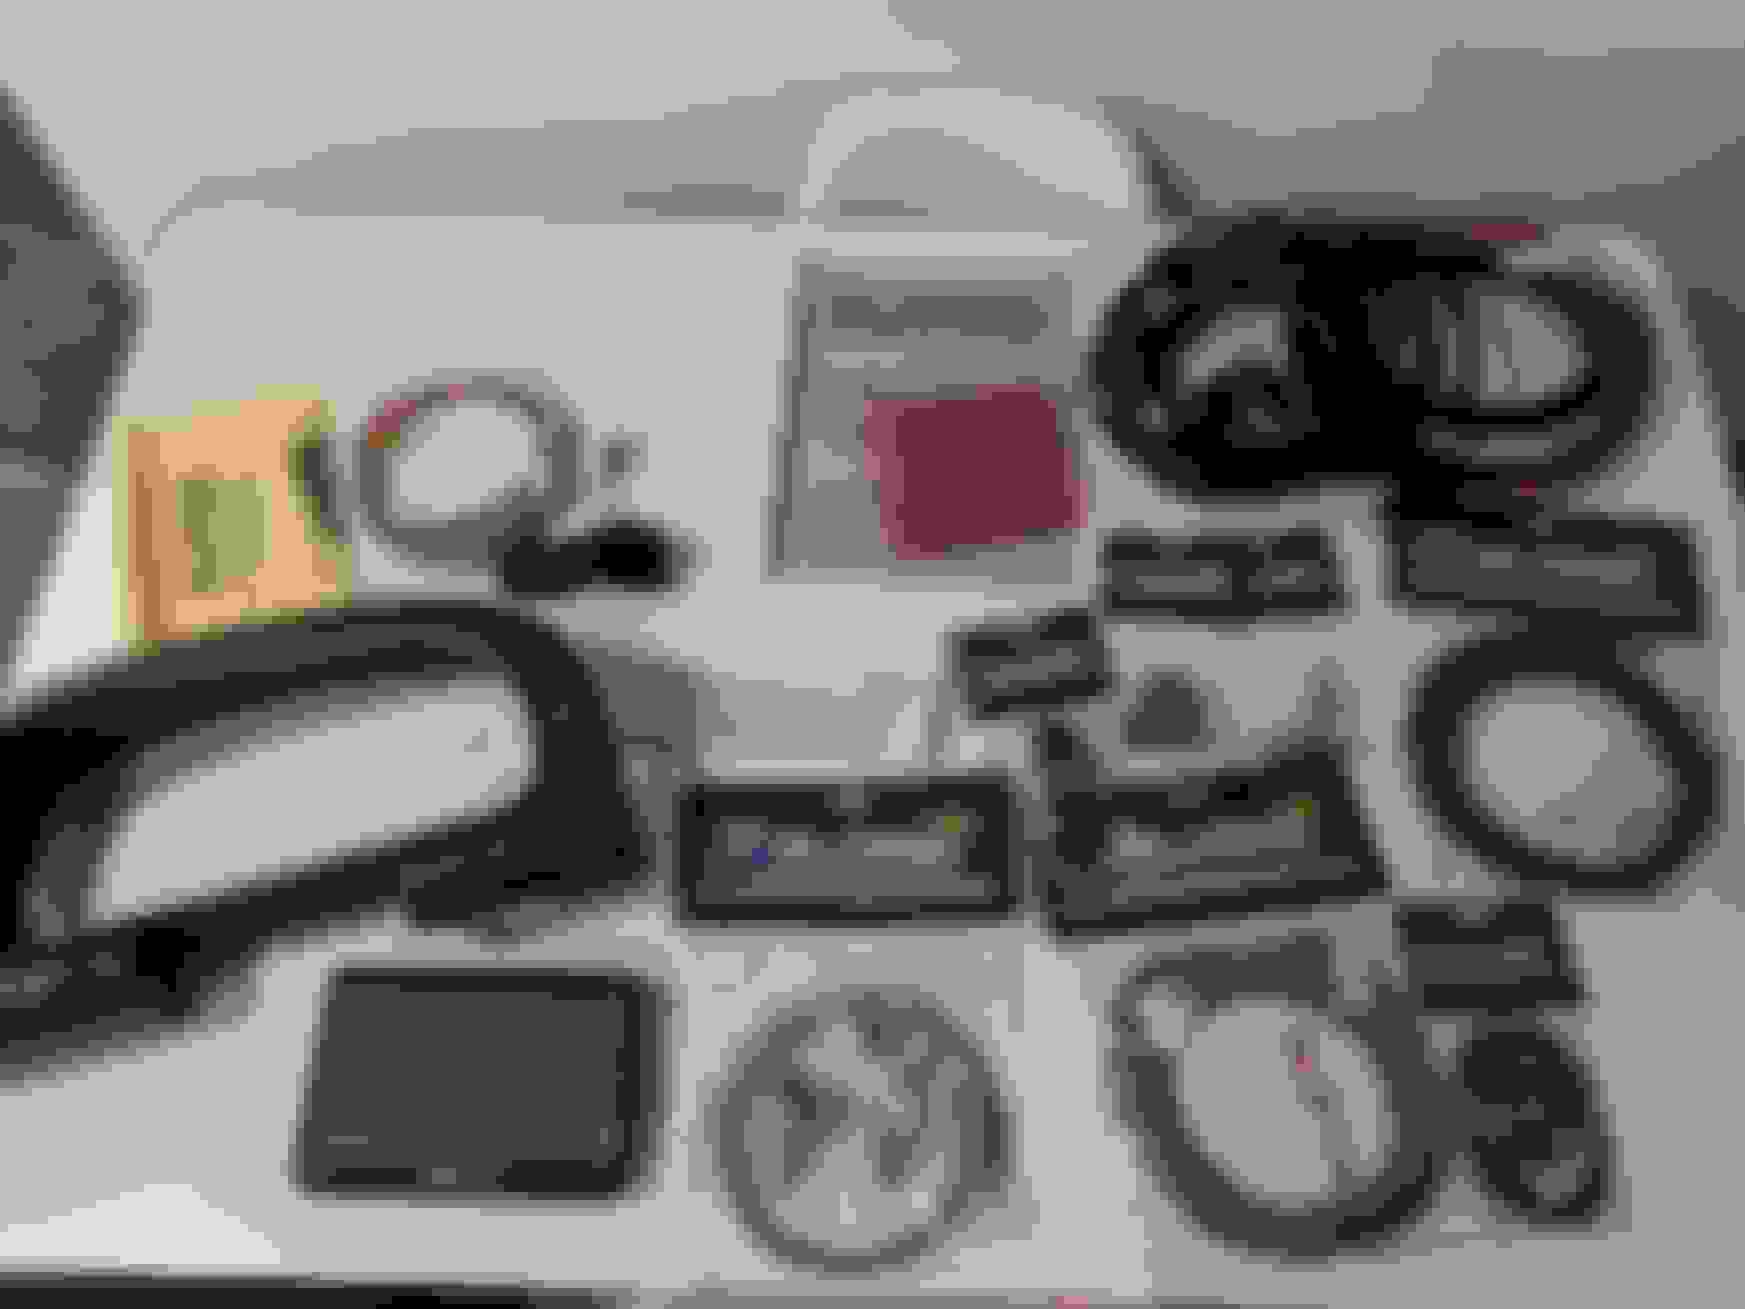
I now have my hands on the ECU and all the bits and pieces.
Only thing I forgot was the injector plugs, which I will need to order and wait for, but I can start working on it now
Here is everything i got.
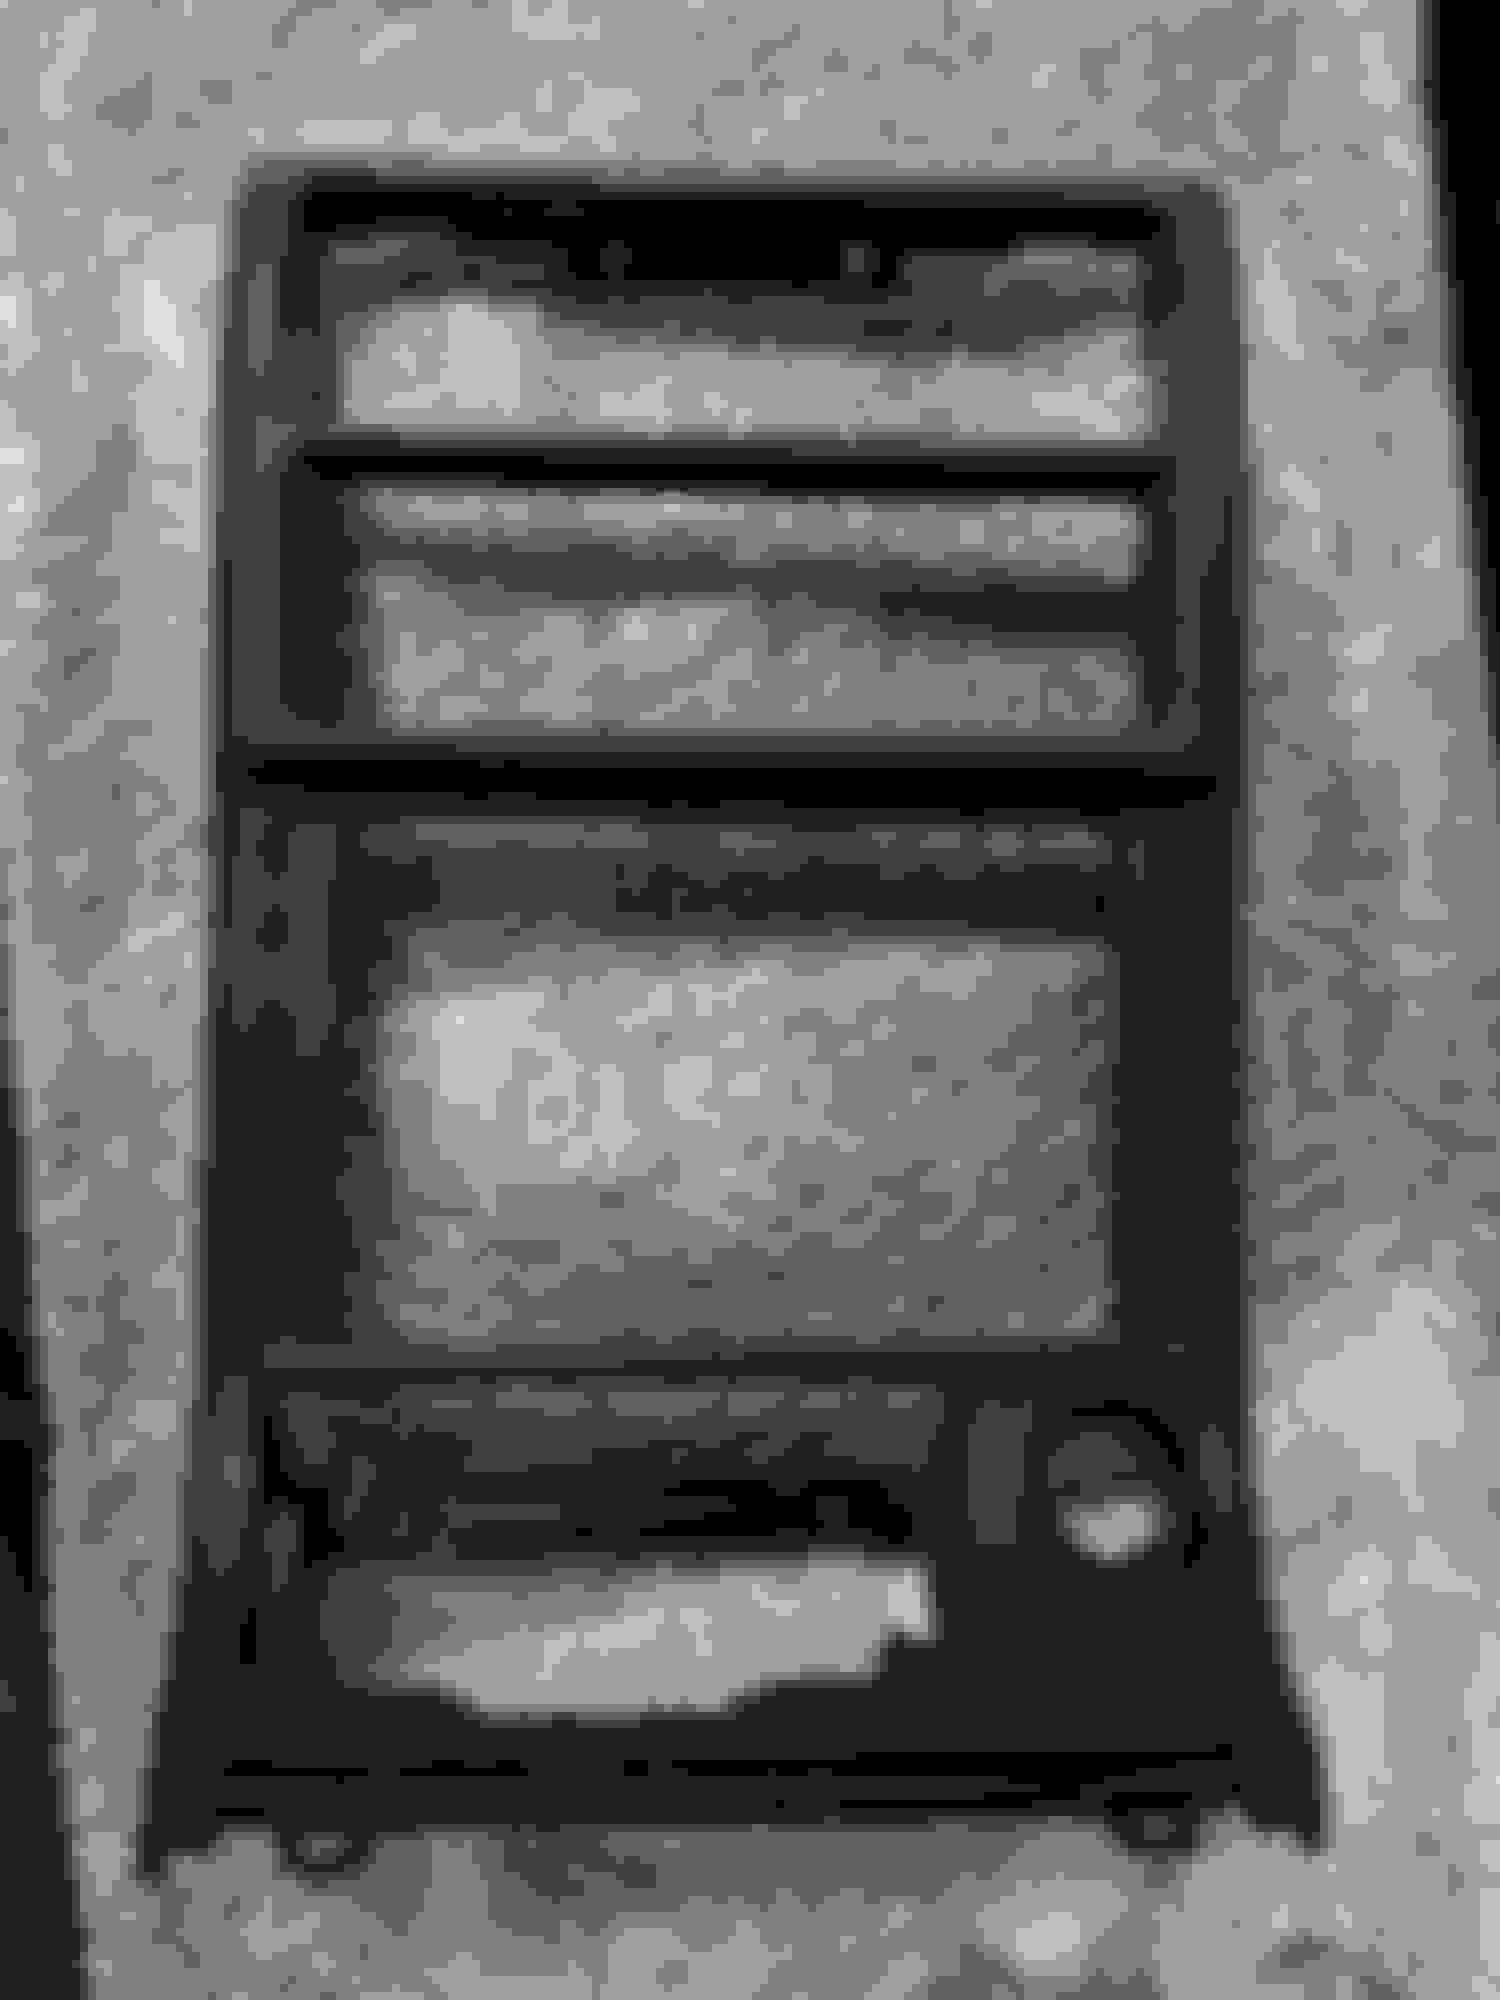
Here is the Pro Dash in the cluster. It only JUST fits! This is how it will sit, however I think I may have to get it moved forward so I can see the rev lights, I need to dummy it in the car before I deiced.
These are the coil packs I will be getting, I didn't get a x4 box as it's not needed. These come with connector's and all they need is a switch and a +12v (from the ECU) and that's it. They are capable to spark 800+ hp on E85 no problems. Also these get rid of the issues with lead's and misfires as its direct fire all built in.
Well it is time to start pulling everything out, cleaning out the old ECU.
The battery still has to be moved to the boot - during the time it's off the road it is something to be done before its turned on again. However I don't want to disconnect the battery as the alarm will also be disconnected - so need to do it in one day. While on the subject of Alarm I will also be replacing the current one with a GPS tracker built in.
Before ECU and coils pulled out.
After - looks much cleaner. Of course the IC pipe and intake needs to go back on but you can see the difference without the coils and catch can which will be replaced aswell.
Everything is out!
While I was looking for a new Stereo surround, I called guys in Sydney which had brand new ones in stock. While I was talking with them they said they had a GOOD set of Genuine Savanna Rx7 floor mats... Now these originally came with my car!!! So for $100 i had to jump on them!
So for Registration and Engineering for the larger turbo, to make my life so much easier the car needs to be switched to E85. Meaning I have to push the conversion a lot sooner than what I wanted. I keep fluffing around in getting the ECU wired, but I am holding off until I get a few other things sorted before the ECU and Dash goes in.
Anywho, for the fuel I didn't know what pumps where in the car so today I thought I would have a look. I really didn't like the wiring at the top of the hanger, and had idea's to get a custom made hanger and replicate this one with speedflow fittings up the top with x2 -8 AN feeds, and x1 -8 AN return.
I don't know how I am going to run the lines to the front, weather to combined into x1 - 10 AN all the way to the front or not. Again something I need to think about.
To my surpised there was actually two Walbro GSS341's in the tank. I really don't like how its done....
So these will get replaced with two E85 compatible fuel pumps and make sure everything is E85 ready, including the hose clamps making sure everything is stainless steel!
Spent a good number of hours slaving away under the car today... I love doing work on top and in the car, HATE getting under the car with a passion! It just makes everything so much harder!
The fuel system is completely out!!!! Injectors, Rails, Malpassi Reg, lines, all hard lines...
Getting the hard lines out was a real B!t4h!! Down the body of the car was O.K.. But as soon as you can to the diff side of things... !!!! UGGGHHHHHH!!!! I had to take of my Exhaust off just to get to it.. But that is ok because the exhaust had to come off anyway! so another one ticked off the list.
But i had to twist the hard line until it broke - this i don't care for as i wont use them again! But man... So much fuel in the lines still!!! I smell of petrol!!!
Speedo cable is out, was easy as pie!
After the fuel system was out it was time to start working on the electricals! Believe it or not but this is 27 year old spaghetti with someone butchering it = nightmare!! I had to get rid of all the tape and rubbish that was hiding these cables... Basically here all it is, the Main power from Battery to starter, power for alternator charger, the earth for the battery, reverse light switch and Ignition switch wire... which for some reason there is a random Relay there.... I have to find out why its there...
I don't know if you sorted out your custom hanger yet for the dual fuel pump but there is this one http://www.built2apex.com/product-page/fc-dual-pump-hangar-kit
I don't know if you sorted out your custom hanger yet for the dual fuel pump but there is this one Built 2 Apex
I haven't yet mate no...
I checked that out, a little too much for just a cover, and hanger I think... Looks great, but I want x3 -8AN outs...
I am going to take the hanger to a place that is currently CNC cutting my cluster insert (for the dash), and will take them the hanger and see if they can copy the hanger with some ticker 3mm aluminum for cheaper... If they can CNC machine the top, and drill the holes to match with a hanger (including the hanger) and where the fuel level should go, I should be able to mount the rest. If not, I am thinking of hacking up my current hanger... Lets see....
I will also be taking my stereo surround and just getting a off cut of Aluminum to cover the center stereo...
I do plan on putting my E85 content reader there .. I don't want flex fuel as there is some cons to doing that, however if this reader ever shows above E85 means there is water in the system and I know I will need to clean flush the system out. Just 1/2 a cup of water in 1L is enough to send the unit to read E100. So will be able to keep a eye on things
Dropped my fuel hanger off to get a custom made top CNC machined. I didn't get any updates about the Cluster back yet.. So will need to wait to hear, they might not give me a call until they are all done.. so might not be for another week or so.
But not only that some more things came in the post today!!! Only tiny things, but still made me warm and fuzzy!
Brand new Stereo Surround.... Even tho its brand knew, it still looks like its from the 90s!!!! haha it made me laugh...
But these where the main thing I was hanging for!!! I have been looking for a genuine pair of these for sooooo long! Well since I got the car back in October last year! But it just add's to the Savanna that it really is!
I can always get the stitching fixed so thats not a problem, or even remade...
Back home now! they look awesome in the car!!
Only small but just add's to it! My small touches to the car like this is making me feel like its more and more my car and my build... More stuff to come in the coming weeks!!
I have finally got the battery to the boot! It wasn't a big job, just took time to get everything sorted.
Ran the 2 gauge along the chassis rail with the brake lines..
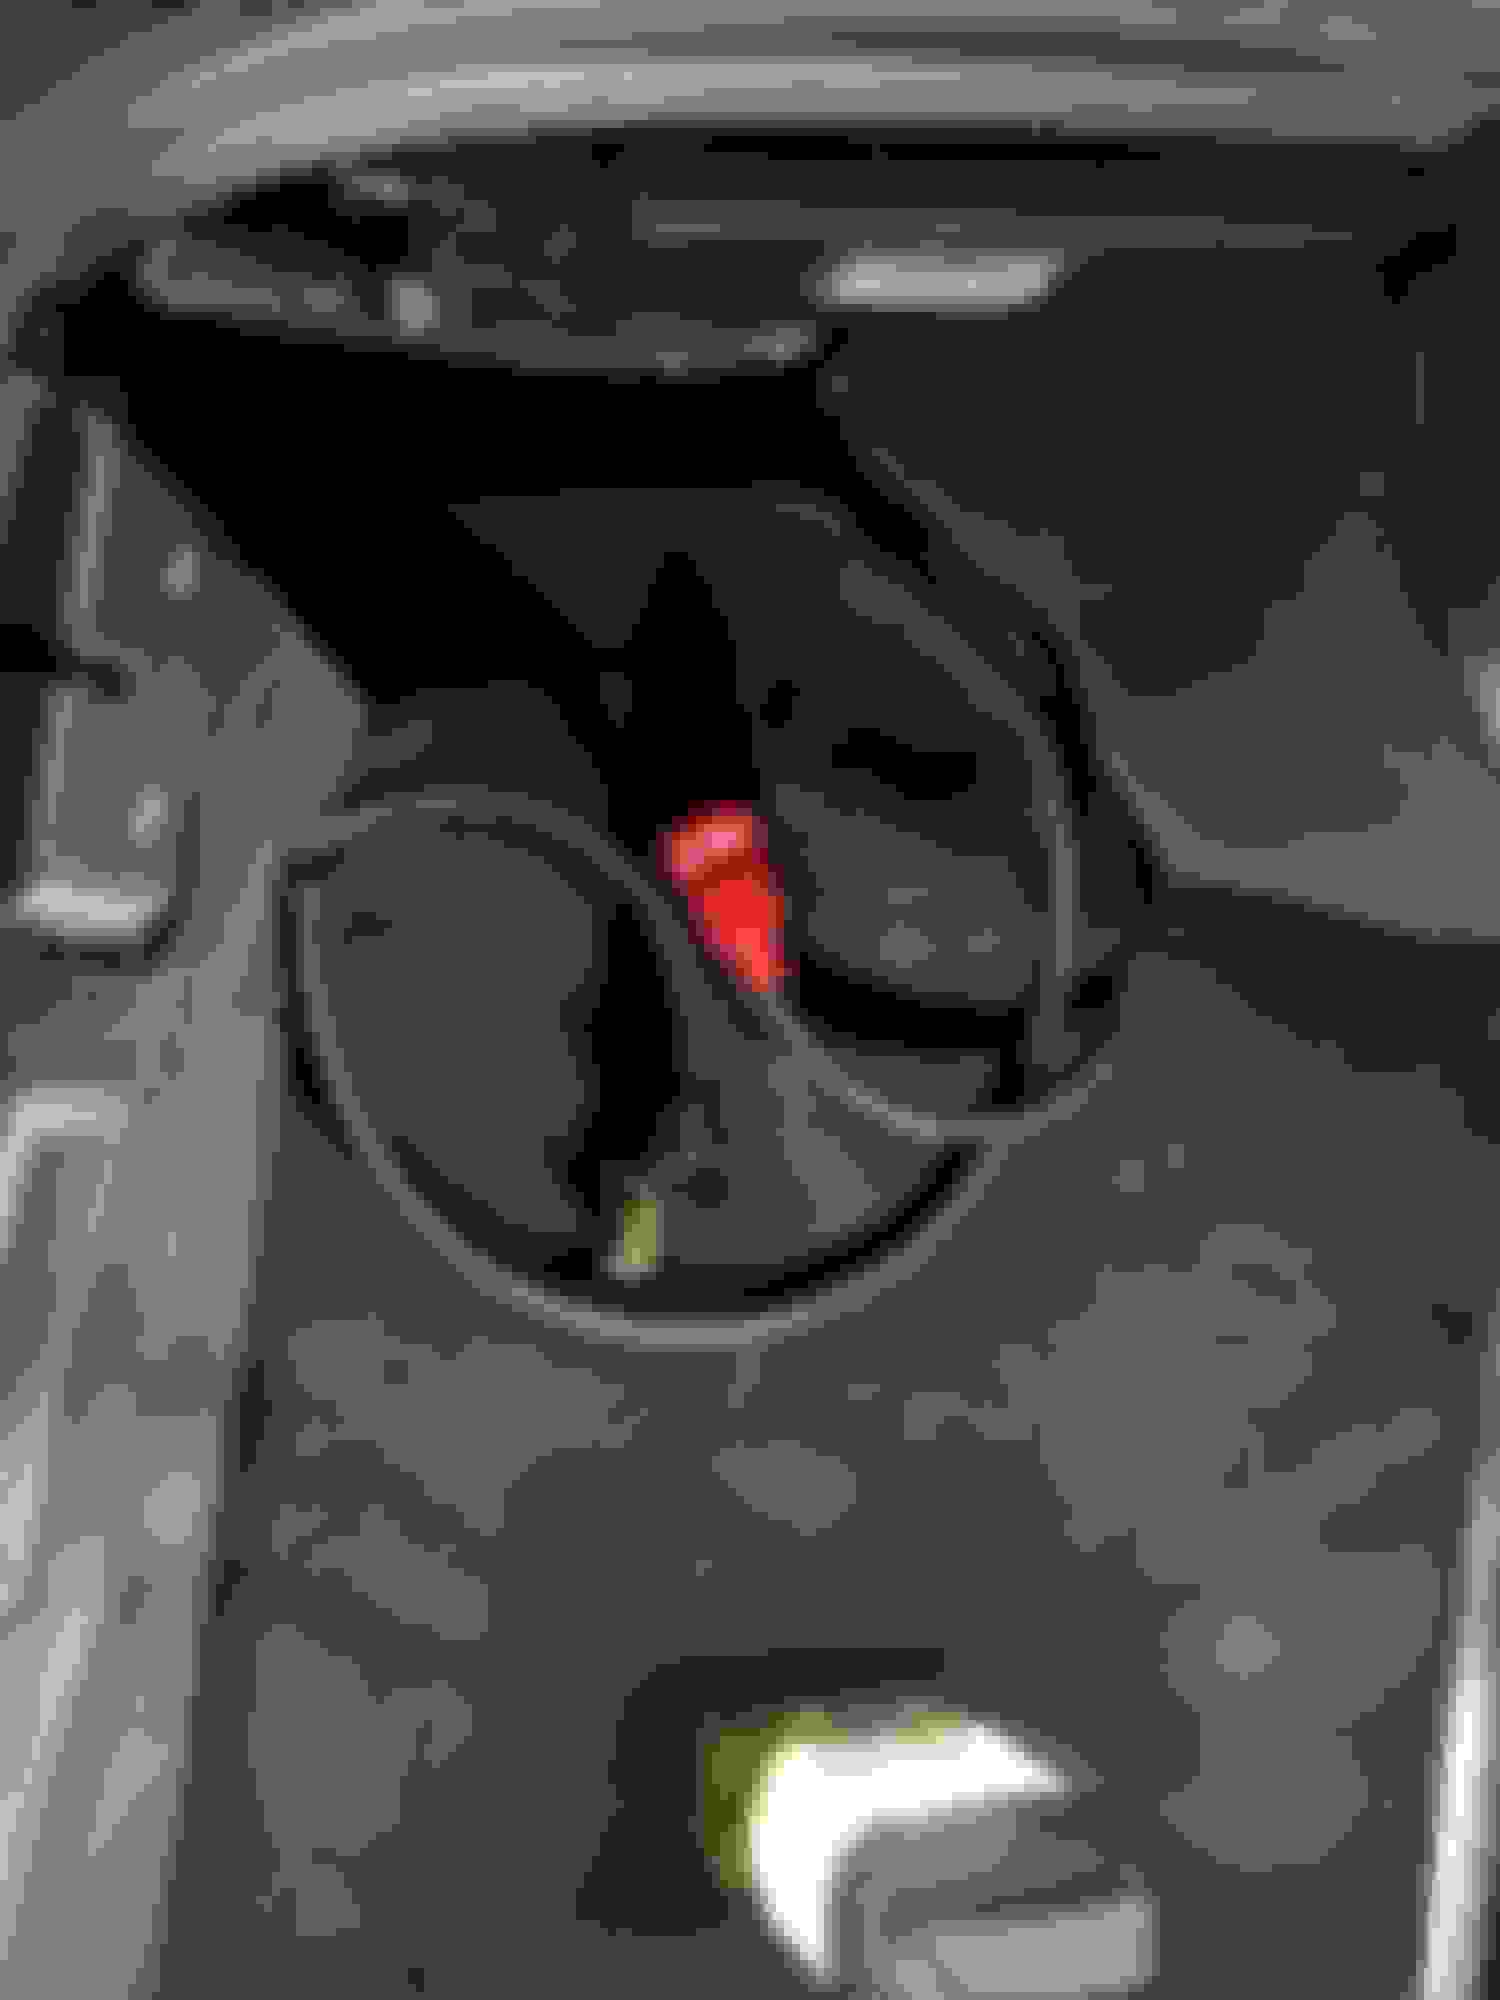
Found a spot for earthing
Easy to create your own Earthing, and Power cables
Final position... I had trouble trying to figure out where i was going to put the battery box. Of course I didn't want it on the drivers side.. and i couldn't put it any more forward because of the rear strut, and the fuel pump cover...
To make it even harder, I need to install 6mm Aluminum plate in the battery box and bolts going through the floor, I found it really hard to find a spot where I didn't have to take the fuel tank out!!!! It's all hooked up and fairly happy with where it is. It isn't 100% completed but about 90% complete now!
After the battery was moved it was time to move onto the starter/ignition/charging system. I thought it was time to clean up some wires, removed unused unnecessary wires.
So for some reason this relay ways before the the start motor (Ignition Switch) I have a feeling at some point an older starter motor switch was done and this was to fix it... Well I removed it, and it still wanted to kick so everything seems good!
It's a complete mess!!!! Before I went to work..
Removed the stock Oil Pressure sensor and replaced it with my new Microtech Pressure sensor...
So pretty much here, the White and Blue/Black is +12v and a Dash reader.
The black with red stripe is the ignition switch.
There is 4 cables that go to the gearbox, for the reverse light switch (x2) and the other two im not sure, they are doing nothing...
Cut the loom side
6pin plug.
Pretty much finished here now.. SOOO much cleaner.. Just need to run some conduit over the cables, and a bit of tape to finish it off.
Alright, so after I installed the plug I realized it was a plug I brought for my cluster and not the engine bay... Having said that it's meant to be water proof!!!
So I cut it out, and replaced it with Deutsche 6 pin plug..
I also got some idea's from a Rotary car show here in Sydney on the weekend gone, and got some idea's for my loom and covering my wiring... Some braided cable cover looked really good!!!
Well today was a exciting day... Not performance but happy for these to arrive..
I think I have bitten off more than I can chew at this rate...
I can wire a Microtech ECU but for the life of me this is just next level.. It doesn't help when the wiring diagram is absolute sh!thouse! It doesn't even tell me how to wire my dam siren! wtf? 4 wires - says connect 1 and nothing about the other three...
I at least got the old system out, put in the bonnet pin, and got the shock sensor in.. but bloody hell what a nightmare! The engine loom has NOTHING on this..
However It is powered on, and at least have two sensors working.. Just need to figure out the door locks now and.. oh yeah all the other 50 wires that are coming out of this thing.....
On the upside to this, I am 3 level's above where the car is and I have full range on my remote and can see what's going on! this is why I got this and this make me happy!!!!!
Well - let's say I have learnt a lot on alarm systems in the last few days. Without a doubt I had bitten more than I could chew...
I haven't done any Performance or mod work I have wanted to do with the days off, its all been about getting this Alarm in and working. After a full day of trying to get it to work, I HAD to do some research... I had to write things down, and see what I needed and what I didn't need.
This is how it started...
This was a MASSIVE MISTAKE!
A word of warning NEVER try install a alarm system without doing any research on it....
The Idea I wanted to test it before I go installing it permanently.
After watching some videos online and how they "should be installed" I took everything out and laid it down and went through everything I needed and didn't need.
Pretty much got success. I was having issues with the Siren as all of the videos with Viper kit had 2 wires, (power and earth) however this one had 4 wires. However successfully tested now with the door switch so happy enough to start putting it in the car. I haven't tested the remote start yet as I think the handbrake needs to be hooked up before it will work.


 .... Bloody old cars are just a bit temperamental! Those coolant temps are similar to what I was getting so might follow your lead on put in a 72deg thermostat.