When you click on links to various merchants on this site and make a purchase, this can result in this site earning a commission. Affiliate programs and affiliations include, but are not limited to, the eBay Partner Network.
Home again, and starting a flurry of work to try to get some stuff done before the fall semester starts. Last time I was deciding how to best fix the rusty, leaky fuel line, and since then I decided it was best to do it right and rerun the whole set of hardlines. So to prep for that, I took apart the whole rear end of the car today. Dropped the subframe and gas tank, pulled out the hard lines (in one piece!), and took off everything else underneath the back end in preparation for some rust-proofing and repair work while it's apart.
Overall the chassis is pretty clean. Some surface rust in areas, with a few bad patches near the frame rails. I'll be doing grinding the crud off in the next few days, then doing the full POR 15 treatment everywhere I can reach. It was surprisingly easy to get everything apart, no major issues, broken bolts, etc. Hopefully the rest of the process goes as easily as the disassembly.
The fuel tank has about a half inch layer of "goop" on the bottom. I'm not exactly sure what it is - it looks like jellified oil or something. Maybe the gas stabilizer we used reacted with the premix and caused this? Whatever it was hopelessly clogged the fuel inlet filter as well. I'm hoping the fuel pump is alright. Here's some of it we scraped off the bottom:
I'm going to try to pressure wash it out tomorrow. I've got a POR 15 resealing kit for the tank as well, so hopefully it will be in tip-top shape when I put it back in again.
I went ahead and got 3/8" hardline and -6 AN fittings to run between the tank and engine. The only normal rubber lines left will be on the feed side between the hard line and stock fuel filter... I wasn't quite ready to cough up the money for an aftermarket one. The size increase should provide plenty of headroom in case I get tired of the NA thing in the future, and hopefully help the regulator keep the pressure down at 3 psi since the return line will be a lot bigger than stock.
That's all for now... resealing and repainting things makes for a boring update, so I'm not sure when I will post again. Maybe if the new hard lines come out nice I will show them off. If anyone's still reading, thanks, and if you have any suggestions feel free to chime in.
I just did the hard lines on my FB with 3/8 feed and return. It was tedious but worth it. I used the cap and sleeve style AN fittings with a flaring tool. No leaks so far. I need to do the same on my REPU now that I have the tools for it.
I just did the hard lines on my FB with 3/8 feed and return. It was tedious but worth it. I used the cap and sleeve style AN fittings with a flaring tool. No leaks so far. I need to do the same on my REPU now that I have the tools for it.
Glad to know the effort was worth it. I got the flare/sleeve type as well, and some bulkhead fittings for each hardline termination that I can secure with brackets to keep the lines from getting twisted. The hardest part, as far as I can tell, is going to be straightening the tubing. It's pretty tough to work by hand, so I'm not sure how I'm gonna straighten the 25' roll I got. Might have to find a local shop that has a straightener and see if they'll run it through for me.
I ended up buying a straightener. Once they are straight, they aren't easy to move around.
I caved in and did the same thing, but hesitated too long and now it won't be here in time to get any tubing done before school
Did get the gas tank sealed and the rear half of the car POR 15'd (that's a verb now) though. Limited myself to the area behind the main floorpan and between the wheel wells because of time constraints. This was the worst area of degradation, except for a patch near the driver's lower seatbelt anchor point that turned out to be rusted straight through after some investigative grinding work. I coated it in POR 15 for now but will have to cut it out and weld a new section at a later date. Wheel wells themselves are in good shape, just a little dirty. They're easy enough to access if I do decide to do them later. Anyway, obligatory photos:
Interior of the tank after the POR 15 treatment. Quite chuffed with how this turned out...
Tank was in good shape on the exterior, just some rust on the seam/lip thing. Grinded the old coating off, hit it with POR 15, and will add undercoating back when it dries.
Got a Stu Kelley fuel pump hanger to match the AN upgrade. Decent value for the money, functionally will probably work as well as a more expensive unit. Have to buy a new fuel pump though, clumsy me snapped the nub off the fuel filter when taking the old filter sock off.
Spare tire well looks a lot better than it used to!
This job was so satisfying! It's going to be a pleasure to work under the car in the future.
I've been cleaning up the other stuff that goes underneath as well: the tow hooks, gas tank filler and straps, brackets for the hard lines, etc. At some point I'll also treat the front half of the car, but it's not as urgent as this area, and I wanted to do this while the subframe and gas tank had to be out anyway. I still have to bend new lines and make up the braided hoses, but mentally I've already turned to the next big project: this rusty hunk
While it's out I might as well take care of it. Based on some reading I've done, I think I'm going with the following parts:
Delrin subframe and diff bushings
Solid front diff mount
Sphericals on the LCAs
DIY adjustable camber links (dogbones) based on the Integra sway bar links
RB DTSS delete
New stock center link
The old toe links seem good, no play or wobble, so keeping them for now
New wheel bearings and some longer ARP studs while the hubs are out
That's the setup I decided on after some reading, but it can change if anyone has any suggestions.
I do have an extra diff (minus the carrier) that came with the car. The old seller claimed it's an N/A LSD, but I'm not sure how to verify since it didn't come with the stub shafts and I can't turn it by hand. I've taken a couple pictures, and I think I see what I imagine are clutch disks. Not sure though, never dealt with an LSD before. If anyone could help ID it I'd really appreciate it! Would love to throw a better diff in while the car is apart, the one in right now is definitely open.
Unfortunately (for the car), I leave for school again Saturday so I don't think anything else will get done until winter break. Hopefully I can accrue the parts I need for the subframe rebuild before then. That's all for now, thanks for tuning in!
Home again for the holidays (Merry Christmas!) and back to work on the car. I went ahead and tore the subframe apart, going to clean it up and get some new rubber while it's out. Also planning to swap the old open diff out for the S4 LSD:
S4 LSD (left) waiting for donor parts from the S5 open diff
As far as I can tell, I just have to pull the stub shafts and cradle off the old one, put new oil seals in the sides, and then reassemble everything onto the LSD. Going to trust that the clutches have some life left, but if not, I'm not really out anything.
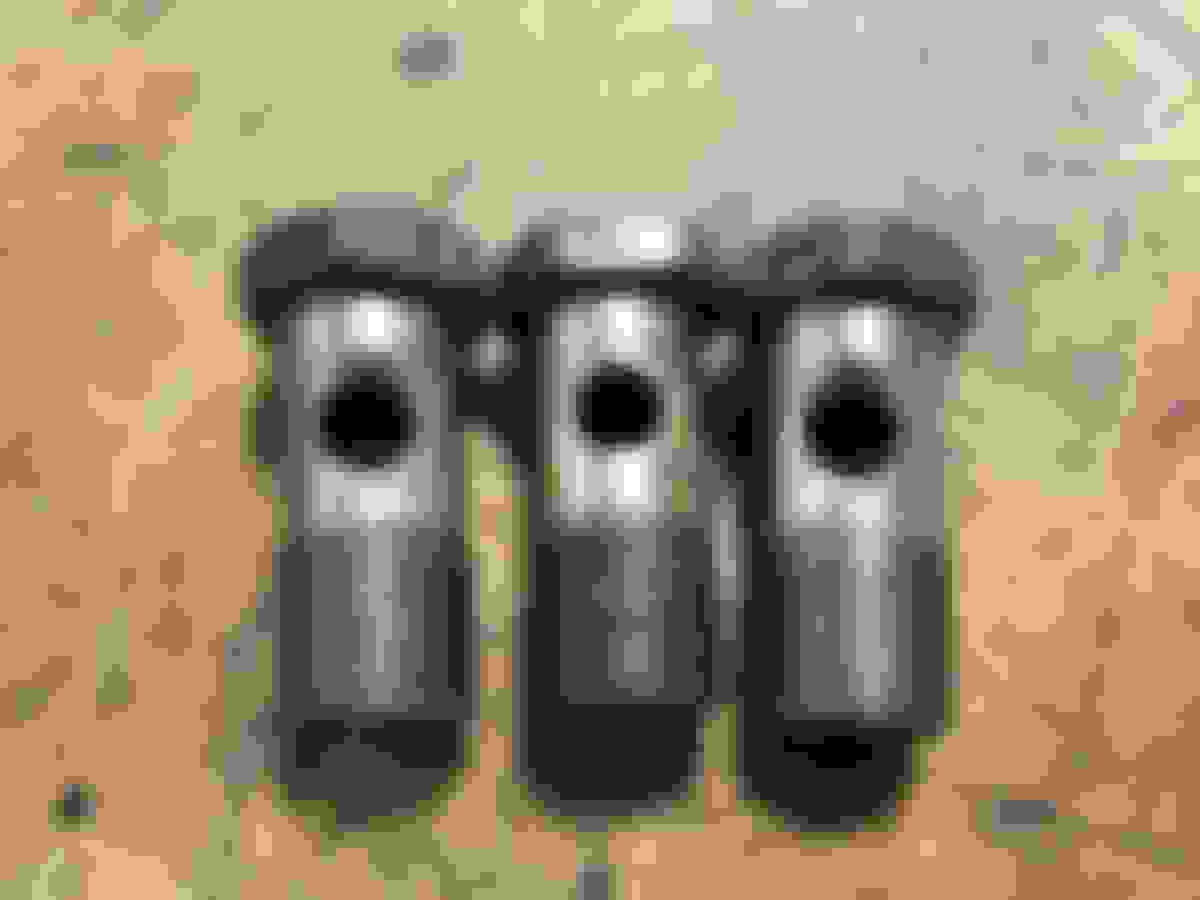
Good progress has been made on the fuel lines... the hardlines are both bent, flared, and painted/undercoated, just deciding whether to buy a new brake hardline or use the old one I made before putting them back in. The fuel pump hanger is finished up with a new Walbro 255, and the gas tank is ready to drop in:
3/8" (-6 AN) hardlines, painted/undercoated soon after this pic
Assembled hanger and harness
All buttoned up, waiting for the tank straps to be painted before putting it back in
Apart from the fuel stuff, I've just been cleaning up miscellaneous hardware like the tow hooks, exhaust hangers, fuel line clips, etc. The sub frame and LCA's are going to get the POR 15 treatment, they're pretty gross right now and I don't think normal paint would last long in the under-car enviornment. But otherwise, nothing too exciting has happened. My budget is kind of tight this year with school, so between that and my other expensive hobbies I haven't really bought anything new for the car in a while. I think it'll be about $600 in parts to finish the rear subframe, so hopefully by this summer I can get all the stuff together and get the car back on the ground.
Anyway, thanks for checking in! Questions/comments/advice welcome.
Got home yesterday and started back on the car this morning. Going to try to redo the subframe and drop the car back down before I leave again in two weeks; I'm pretty sure it's sitting on recalled Harbor Freight jack stands at the moment so I want the car back on its own feet as soon as possible
Most of the new parts are here... Level Zero diff and subframe mounts, RB DTSS deletes, DIY adjustable dogbones, ARP studs, new wheel bearings and seals, etc. Waiting on spherical LCA bearings, solid front diff mount, and solid upper hub bushing from PSM. I still have one subframe bushing and both LCA bushings to get out, then I'm going to paint it all with leftover POR 15 before it goes back together. I am planning to reuse the old center link and toe links for now, since they are still tight and are easy to replace later without dropping the whole subframe back down.
Besides the subframe there are a few other new goodies: I had the manual seatbelts rewebbed since they were super sticky. The passenger one installed fine and works beautifully but they sewed the driver's side top attachment point on the wrong way, so I have to send it back. I put together and installed a new switch panel that fills the whole radio area, and got a vented gas cap since I ditched the whole evap system and plugged the top of the tank.
Additionally during my free time this summer, I put together a dual EGT + 5 analog input board based off of an Arduino Uno that can communicate via CAN with my MS2. Planning to pick up some thermocouples to monitor EGTs and would like to track oil temp and fuel pressure as well. Will have more info on that when I get it installed.
Moving forward, I'm hoping to have the subframe and LCAs cleaned up and reassembled soon so that once the parts from PSM arrive, I can press in the bearings and throw the whole mess back in the car. Will update again once this happens.
Wrapping up my work during break, and I'm pretty happy with the progress I've made. The car is back on all four wheels and it's definitely the most complete, put-together state it's been since I've owned it, and maybe even since it blew the engine 14+ years ago. Here's how we got there:
Burning out the old LCA bushings. They were no match for the acetylene torch and air hammer.
Repainted and PBM parts pressed in
Hubs put back together with new wheel bearings and seals, RB DTSS deletes, and extended studs.
I did run into one snafu with the wheel bearings. It turns out if you don't support the inner race when you press the wheel hubs in, you can force the innards out the back and ruin the bearing. I ended up learning this the hard way and having to reorder one because of it.
The subframe partially assembled, while I was waiting for the replacement wheel bearing. I was in a rush when I got it all together and forgot to take a picture.
As a side note, the breakaway torque of the S4 LSD I put in is about 25 ft-lb. So pretty worn out but the only cost to put it in was $5 for new half shaft seals, can't really hurt anything I guess.
Back on the ground! Well almost, back to resting on the wheel dollies at least.
Installed an LRB Speed battery tray in the passenger bin while the interior was out for the seat belt repair.
The cockpit, with complete gauge pod and switch panel in the radio area.
As I mentioned above, with all this done the car is more or less put completely together. It's a big milestone and I think I am done with big projects for a while. The interior is mostly complete, the only things not in place right now are the upper B pillar panels, the kick panels, and the steering column covers. The B pillars wouldn't fit right with the manual seat belts, so I left them off for now. I tried using a spacer between the panel and the body where the bolt threaded in, but when I tightened the bolt the panel would flex and pinch the belt so it wouldn't retract. The kick panels will get put back on soon, and I have a new set of steering column pieces ready to go, I just haven't gotten around to it because of the laundry list of other things to do. My to-do list this time around had a page and a half of bullets to cross off, and about 80% of them ended up getting done so I'd say it was a success.
Other than that, the exhaust is complete and the fuel system is all buttoned up and pressure tested. The brakes are bled and seem solid, however the parking brake is out of service at the moment as I accidentally threw away the brackets that connect the cables to the calipers and am having trouble finding new ones.
I've said this many times before, and I hate to say it again because something always goes wrong, but I think the car is finally ready to start breaking in the engine and driving around. Unfortunately I'm headed back to school soon, so I'm not getting into that yet, but I will have about a month and a half off for winter break so there should be plenty of time then. I'd like to stick to small projects after that since the last 4 years have been a lot of work and I still have zero seat time to show for it, so I'm thinking I'll get coilovers if we get another stimulus check but otherwise just spend some time dialing in the carb and enjoying things. Other ideas for a few small projects in the near future include:
Removing PS rack and depowering and cleaning it up properly
Hooking up my EGT / GPIO board so I can data log exhaust and oil temps
New hatch struts... tired of propping it up with a 1x4 board
Fixing the E brake. Very important, mostly putting it here so I don't forget about it
If anyone is still reading, thanks for doing so, and I'll be back again in November!
Back home again and working on the car. After a long and arduous search I managed to locate and install some e-brake cable brackets, so the emergency stopping capabilities of the car are now in working order. I was feeling lucky and actually tried to start 'er up last week, but between the cold weather and 30 year old OEM starter, it was only cranking at 190 rpm and showed no signs of catching. I did some reading and found out that the automatic, 2 kW starter motors are compatible with the N/A nose, so I picked up a reman'd automatic starter from Autozone and swapped the noses today. All in all it was pretty simple, I was able to reuse all of the new pieces except the nose and gear mechanism.
Pre-swap: spiffy new motor and 30 year old crusty OEM junk
Mid-swap: all the guts are compatible except the noses and gear assemblies.
Post-swap: re-reman'd 2kW NA starter, and un-reman'd core to send back in.
It's supposed to be pretty cold this week, and the outer part of the garage where the car lives isn't heated, so I think I'm going to wait until it warms back up to try to start it again. In the mean time, I've come up with a project to keep myself busy. The current engine/ECU harness for the various sensors comes out of the driver foot well and snakes over the engine. It looks pretty messy, so I think I am going to redo the whole thing to tidy it up and wire in some new sensors (oil temp and fuel pressure) while I'm in there. The plan is to have it come out of the passenger side grommet, run along the firewall under the lip, and then have one branch come down under the throttle bracket to get the water temp and hall sensor, while another branch continues straight to get oil temp, oil pressure, and fuel pressure. Here's the starting point:
Astute observers will notice a few other changes. Apart from the side-mount alt, which was too cheap to pass up, the leading coil has been moved to the strut tower. The leading wires have been shortened to reflect this change, and the trailing wires will soon be redone as well. They're about 6" too long right now, as there's not really anything left for them to snake around or be supported by. Finally, I noticed that the radiator cap was actually an S4 thermostat neck filler cap, so it didn't have the spring mechanism to spill into the overflow. It was replaced with the right one shortly after the photo.
That's about it as far as new updates. It's supposed to be back in the 50s for a bit this weekend so hopefully I can get the base timing and idle jetting worked out by then. Will post again if the stars align and she starts up!
All buttoned up, waiting for the tank straps to be painted before putting it back in
my hat's off to you on this work. i love it.
quick question: where did you get the new bushes/bumpers (i don't know what they are actually called, but i mean the white foam things) for the top of the tank from?
i did my tank a few months ago, but it's not back on the car yet because i plan to drop my subframe and pretty much do all that you have done to yours.
You could try warming the battery with an electric heating pad if you have one available.
I could use the heating pad my dad uses on his back, but I doubt he'd appreciate that... the big thaw is coming tomorrow so hopefully that'll make it easier, I put a block heater on tonight to preheat the oil as well.
Originally Posted by diabolical1
my hat's off to you on this work. i love it.
quick question: where did you get the new bushes/bumpers (i don't know what they are actually called, but i mean the white foam things) for the top of the tank from?
i did my tank a few months ago, but it's not back on the car yet because i plan to drop my subframe and pretty much do all that you have done to yours.
Thanks! The bumpers (seems like a good descriptor) are actually the OEM ones, they cleaned up really well with just a pressure wash. Since I only recoated the tank seam I didn't have to peel them off. However if you had to rip yours off for some reason, I'd imagine something like this would hold up pretty well under the car:
Good luck with your subframe rebuild! Mine went a lot smoother than I thought it would, hopefully you have the same experience.
I've gotten some fun electrical stuff done in the past few days. First off, I redid the engine harness (no pics yet!) and added extra wires for a few new sensors, and my Arduino GPIO board. The AGPIO is now situated behind the switch panel, where the radio used to live. It communicates with the MS2 via CAN, and I wired in an oil temp sensor so I can pick that up on my laptop now. Additionally I ran wires for a fuel pressure sensor, as well as 2x thermocouple boards so I'll be able to data log EGTs after I get some probes.
I should be able to have a pretty good feel for what the car is doing, with all the instrumentation. Apart from that, I redid the cabling between the battery and starter as well. Previously I had just hammered on the copper lugs trying to get a sort of cold weld, but I wasn't confident in the quality of connection. I ended up cutting all the old lugs off and soldering new ones on with a propane torch, which I think is probably better electrically and more durable mechanically.
Going to try to fire it up tomorrow, hopefully the new starter and cable upgrades will make a big difference in the cranking speed, in addition to the warmer weather.
Today, the stars aligned and we got the car up and running, and settled into a nice idle around 1,400 rpm. The first few times we tried, it fought back, requiring us to play the game of covering the air horns and giving it some throttle. Eventually it caught, and we got it to settle down to an idle, but it was pretty evident that it wasn't running quite right. A quick shot of the timing light and we knew why - the leading plugs were firing ~60-70 degrees ATDC! After consulting Facebook, it seems like I had installed the trigger wheel 90* off. The instructions said to set the "missing tooth" setting in the ECU to 60* BTDC to start, so I assumed that's where the missing tooth was supposed to be with respect to the timing marks on the pulley as well. The Racing Beat main pulley I have doesn't have the same offset holes as the stock pulley, so I was able to install it that way. However, apparently it won't bolt up clocked like that with the stock pulley, and it is actually supposed to be rotated another 90* clockwise. After rotating it, the car caught pretty much right away, the idle quality was a lot better, and the timing light matched the table at about 20* BTDC. I think I'm pretty lucky that nothing exploded from the timing being so far off, but it still starts and runs fine, so I think all is well for now.
While I was taking the video, my dad set the idle mix screws, so it was running pretty well. They're about 2 turns out currently, so I might have to go up a jet size, but we will see how it behaves in the top of the idle jet range. There are a couple issues that I need to fix, most of which are pretty minor, and should only take a few hours to take care of:
The O2 and CLT signals to the MS are super wonky, bouncing around from zero reading at all to maxing out the gauges with Tuner Studio open. At one point while I was crimping the Molex connectors for the ECU patch harness, I noticed I was putting them in the crimp die backwards, and it was basically shearing all but 1-2 strands of the wire off or breaking it entirely. I thought I fixed all the ones I screwed up, but I think I must have missed these two. Should be a quick fix.
The O2 sensor itself also seems to bounce around a little, between ~11.3 and 12.3 at idle. Not sure what could be causing this, other than the idle just being a little lumpy and not getting the exact same mix down the intake on every cycle.
A small oil leak on the oil cooler line coming out of the front cover. I loosened this up a bit to put the side mount alternator on (the long bolt wouldn't clear the 45* fitting), and I guess I didn't tighten it back up enough. I gave it a little more torque tonight but will have to keep an eye on that in the future.
My laptop is having some trouble burning to the MS2. I think updating Tuner Studio messed this up, as I had never had issues previously, but now every time I try to burn a change I get a "burn page failed crc check" error. I might see if downgrading versions fixes this, otherwise I'll have to do some more digging.
The oil temperature from the GPIO is working, but noisy. I need to add in some averaging to smooth it out a bit.
Also, so I don't forget, I switched the fan output in the ECU off because the temperature readings were so bad, it was switching on and off like crazy. I need to turn it back on after I recrimp the wires.
The gauge backlights in the stock cluster don't work. The headlight and cruise switches light up, but nothing else on the dash does. Maybe a blown fuse somewhere?
Tomorrow is supposed to be warm again, so I might take it out for a spin up and down the road I live on. It'd be nice to finally get a drive in, after 4+ years of work. It also needs a wash pretty badly, and there is a bunch of random debris in the engine bay from various projects that I need to rinse out. All that's really left to do is top off the diff, I only put 1 qt in while I had it out. Hopefully it's smooth sailing from here!
Well most of the problems in the last post have been fixed. Today was in the 50s so I pulled the car out, gave it a good wash, took some photos, and put some miles on it!
Engine bay after harness re-route and a quick wash
Looking in from the hatch, I've always liked the cockpit from this angle.
Finally put some miles on the odometer. It's the first logged mile in at least 18 years!
It still looks pretty much stock on the outside. Sure doesn't sound that way though.
An unflattering photo of both myself and the car, to prove it was on the road
Surprisingly, it's not that hard at all to drive, and I'm not even used to a manual. In fact, the only stick cars I have regularly driven are my dad's diesel F350 and my girlfriend's Wrangler, neither of which suffer from lack of torque. But the car wasn't fussy, and I made it around a few of the country roads near by without stalling it out. Didn't get to go far because it doesn't have plates or insurance, but it still counts as the first drive!
Everything seemed to be going well, until I parked it back in the barn and there was a trail of oil splatter that followed me in. Somehow, one of my oil cooler lines has developed a leak right behind the alternator. How, I don't know, as they're braided stainless and haven't really ever been used before, especially not enough to cause damage. I'm going to email Stu Kelley and see if he offers any kind of warranty, but they were purchased a few years ago so who knows what the answer will be.
Otherwise, I'm excited... the brakes work, the electrical all (mostly) works, the ECU is cooperating again, it seems like most all of the issues are sorted out. I have a laundry list of small things to button up, and it's going to get cold again tomorrow, so the car is probably back in the garage again for a little bit. The next purchase will likely be coilovers this summer, and I also need to do the front suspension bushings. I have a set of S4 LCA's so I can replace the ball joints as well.
I do have one question for the crowd... my turn signals only work when the head lights are turned on. When the head lights are off, there is nothing from the turns, no click, light on the dash, etc. With the head lights on, they work normally. Looking at the FSM they don't appear to be connected at all, has anyone run into this before?
Thanks! I am a fan of your build as well, particularly all the OEM goodies you splurge on. Still working through my feelings on that shooting brake hatch, though...
Originally Posted by Jager
Again super awesome. Car seems so clean!
How does it run and drive so far? Do you like the bridge port? Is the carb treating you well?
Do tell good sir.
Again, thanks! While the build is a little unorthodox I have been trying my best to keep it from the "clapped out" designation.
Once the car is running, it runs great! Cold starts are a little tough, which could be due to any number of things; personally, my bet would be on the engine itself. It was my first time doing any sort of serious engine work, and I reused a lot of old parts (thinking of side and corner seals particularly), so it's probably not the tightest engine ever built. We can call it "race clearanced" to make me feel better. I guess this could also be due to the fuel sticking to the intake walls, since the fuel is being dumped in from the carb rather than primary injectors 1" behind the port opening, or the very late intake closing. Still, it's not overly difficult to get going and once it's warm it starts right back up.
It seems to drive pretty well too! Not that I have any sort of reference, like I alluded to above, this is my first time driving a manual sports car. I think the combination of high idle and soft Exedy OEM clutch help out a lot, with a more performance oriented clutch I think the story would be a lot different.
I do love the bridge port so far. It sounds great, which is honestly the reason my 20 year old self decided to cut the bridge in the first place. The rev limiter is set at 4k right now, so I haven't really gotten into bridge territory yet, but there don't seem to be many adverse effects down in the low-mid range. The carb is great too. I had an issue early on with the main jets leaking fuel at idle, but I swapped the 300 needle for a 200 and fixed the issue for now. I don't know if the needle valve was dirty or what - the fuel pressure is only 3.5-4 psi, it shouldn't be blowing the needle open, but I have time to figure that out before needing to tune the main circuit. Other than that, the Weber has been flawless. I think I got the idle jetting perfect the first time, it's reading in the mid 13 AFRs all the way from idle (where it bounces richer occasionally) up to 3.5k, where the soft limiter starts to kick in.
Anyway, not much in the way of updates. Waiting to hear back about the leaky oil cooler line... I did some window shopping and it would be about $140 to make up a new AN line, with a large chunk of that going to the special fitting needed to clear the frame rail at the oil cooler. I'm probably going to drain the oil and take the lines off today. While it's dry I need to take the alternator off as well, one of the bolts for the side mount bracket walked out so I'm going to locktite them all in. Also I need to tighten up the sensors in the oil pedestal, it's kind of hard to reach back there while it's on the engine.
Well, drained the cooler and pulled the lines off, not sure what happened here...
Burnt up line under a magnifying glass
Looks like something super hot landed on the line, like welding spatter or a hot electrical lead, but it's not like that happens under the hood. At the same time I feel like I would have noticed it during installation if it had come that way from the manufacturer, so who knows what happened. I haven't heard back from the guy yet so I might have to bite the bullet and buy the fittings and hose for a new line, and it's not going to be cheap.
On another note, I was digging through my parts stash looking for a fitting I thought I had gotten a while ago, and found a big bag of banjo bolts I had forgotten about:
Modified oil cooler banjos from the PO, stock in the middle
Quite a few of the banjo fittings had the openings enlarged, I can only guess to try to increase flow through the system. For a while now I've had a theory that at one point, this car was the daily of a person who also raced 7's pretty seriously. The spare parts that came with the car put me on to the idea... a set of super light (like 5 -10 lb) wheels with slicks on them, 2 spare sets of apex seals, a bunch of viton oil control rings and water jacket seals, replacement engine bearings, etc. etc. Lots of parts that you'd only keep on hand if you built a lot of engines. It would be interesting to know because I'm sure that if they were into racing they were probably active on the forum. I had actually found an old pay stub under one of the seats when I was cleaning the car when I first got it, but threw it away and forgot the name of the company. I think it was from Northern Ohio though. Anyway, finding parts like this only solidifies the theory and makes me more curious about the car's history.
Nice work. Everything looks well thought out and executed.
Are you sure those are burn marks on the hose and not oil seeping out?
Thanks! I am fairly certain they are burn marks, it looks like the strands are physically damaged, but it's hard to tell since they're so small.
Originally Posted by SirCygnus
how does the new starter start the car up?
It's an improvement but not a great one. Hopefully it'll be better in warmer weather.
Unfortunately I haven't touched the car since last December. I'm in the nitty-gritty phase of my degree and am low on free time and money. However, most of my work is simulation-based so I have some spare time once in a while waiting for them to finish up. I've been using that time to further develop the GPIO board I've been working on for a while now. It had been through a number of iterations and the circuitry ended up being spread out over several proto boards, so I decided it was time to restart from the ground up. I wanted the design to be able to accomplish five things:
Read in more sensors for things like EGTs, fuel pressure, oil temp, etc.
Exchange sensor data with the MS2 in real time
Data log important values
Spare low-level outputs
Control gauges to reduce duplicate sensors
The first item is the simplest. The Teensy board has 18 analog inputs; I am using 8, with a voltage divider to ensure that the voltage to the input pin never exceeds the maximum of 3.3V. Additionally, I have two thermocouple amplifiers to use to gather EGT data for the front and rear rotors.
The second item was the most difficult, until I found a nice Arduino/Teensy CAN BUS library developed by Mikey A. over on the MSExtra forums specifically for the MS CAN protocol, which differs slightly from the industry standard. With a few tweaks I am able to send data to all 8 additional input channels on the MS2 and see the live feed on my laptop.
The third item, data logging, is also fairly simple. The Teensy has an SD slot and a library to use it, so creating a log is a simple as writing the data received from the sensors and MS2 to a .csv file.
I added four spare ground switch outputs to control low-current needs like relays, lights, etc. I think I am going to use them to add warning lights to my center console gauge cluster, to signal things like overheating, low oil pressure, etc.
Finally, the gauges. Anyone who has done modifications to their car eventually ends up with a lot of duplicate sensors: the OEM ones to run the stock dash gauges, additional sensors for a standalone ECU, and any other aftermarket gauges as well. I think I have 3 water temperature sensors and 2 oil pressure sensors, among others. One solution would be to disable the OEM gauges or install a digital dash to replace it, neither of which appealed to me. I like the idea of having the OEM dash present and functional. Instead, I wanted to figure out a way to keep the OEM gauges and actually improve their functionality, if possible.
My test subject was an Autometer water temp gauge, which I had happened to bring with me to school. I figured if I could control the reading on it with the Teensy, I could do the OEM stuff too. My initial guess was that the reading was based on the voltage at the sensor pin; however, simply varying the voltage with a few batteries produced some odd results and the correlation of V to T didn't look right. Instead, it turns out that the reading on the gauge is proportional to the current coming out of the sensor pin, to ground. This is a little harder to work with, as I can't just use an opamp to give the voltage I need.
Instead, I need a voltage-controlled current source. A quick search on the internet revealed a pretty simple circuit, using an opamp to control the current flowing through a MOSFET. After constructing the circuit, I was able to develop a pretty nice correlation of current to temperature reading while waiting on some simulations to finish:
The test subject mid-operation
I decided I wanted four of these circuits in total, for the OEM water temp and oil pressure gauges (which I can now set to read in the middle at whatever temperature I want), as well as an aftermarket oil temp gauge and a spare for the future.
With all the circuits laid out, I was ready to start designing. Apart from the inputs/outputs above, I also wanted an on-board 5V source for the Teensy and thermocouple boards, and a dedicated fused 5V source for any powered sensors. First step was the schematic:
Then, the PCB layout, which involved a lot of head scratching:
And finally a rendering of what the board will look like with some components populated:
I ordered a set of the PCBs from a Chinese site last night, so hopefully I'll be able to assemble and test them in a few weeks. The board is small enough it should fit into the same box as I had it in before, despite the vast increase in functionality. Will update again once the boards come in and I get around to testing them.
Oh man! Thank you for this! I wanted to use my canbus from my haltech to control my stock cluster! I have a working teensy canbus gauge but I also want the stock cluster working.
Oh man! Thank you for this! I wanted to use my canbus from my haltech to control my stock cluster! I have a working teensy canbus gauge but I also want the stock cluster working.
Here's the circuit I used for the gauge controller:
I ended up using a shunt resistor value of 50R to get the voltage output from the Teensy in the right range. I also found that adding a small cap (I used 100u because that's what I had around, but you could probably go a lot smaller) on the PWM output pin was necessary to get it to work right.
If you already have your own CANBUS gauge working I assume you can probably figure the rest out, but feel free to PM me if you need more info. I would make a detailed how-to thread but I don't have access to the car at the moment to make sure it all works as planned.
Thanks! I am fairly certain they are burn marks, it looks like the strands are physically damaged, but it's hard to tell since they're so small.
looks like the sort of heat marks that come from really high current. did you get something welded on the car at some point?
many, many moons ago, i took an oil cooler to get welded and (since i didn't know better) i didn't think anything of it when the guy connected his ground to my oil cooler line. needless to say i had to replace it, but the point right now is that the marks looked similar your photo.
 08-10-19, 08:36 PM


 i love it.