Build Threads
Sponsored by:

Brandon's FC Build

Thread Tools
 
Search this Thread
 
Old 09-29-12, 09:16 PM
  #26  
Mr. Fix-it

Thread Starter
iTrader: (3)
 
Brandon Robinson's Avatar
 
Join Date: Feb 2012
Location: Texas
Posts: 181
Likes: 0
Received 0 Likes on 0 Posts
I also managed to attach a S5 TPS to a S4 throttlebody by fabbing up a simple bracket.

Name:  20120915_142818.jpg
Views: 242
Size:  239.8 KB

Name:  20120915_142833.jpg
Views: 209
Size:  213.5 KB

Last edited by Brandon Robinson; 09-29-12 at 09:40 PM.
Old 09-29-12, 09:17 PM
  #27  
Mr. Fix-it

Thread Starter
iTrader: (3)
 
Brandon Robinson's Avatar
 
Join Date: Feb 2012
Location: Texas
Posts: 181
Likes: 0
Received 0 Likes on 0 Posts
Then the new BOV HKS SSQV 3

Name:  20120929_155446.jpg
Views: 181
Size:  230.3 KB

Name:  20120929_155549.jpg
Views: 176
Size:  220.6 KB
Old 09-29-12, 09:22 PM
  #28  
Mr. Fix-it

Thread Starter
iTrader: (3)
 
Brandon Robinson's Avatar
 
Join Date: Feb 2012
Location: Texas
Posts: 181
Likes: 0
Received 0 Likes on 0 Posts
ACT 6 Puck Ceremic clutch, good for + - 500 hp

Name:  20120911_155932-1.jpg
Views: 180
Size:  176.4 KB
Old 09-29-12, 09:24 PM
  #29  
Mr. Fix-it

Thread Starter
iTrader: (3)
 
Brandon Robinson's Avatar
 
Join Date: Feb 2012
Location: Texas
Posts: 181
Likes: 0
Received 0 Likes on 0 Posts
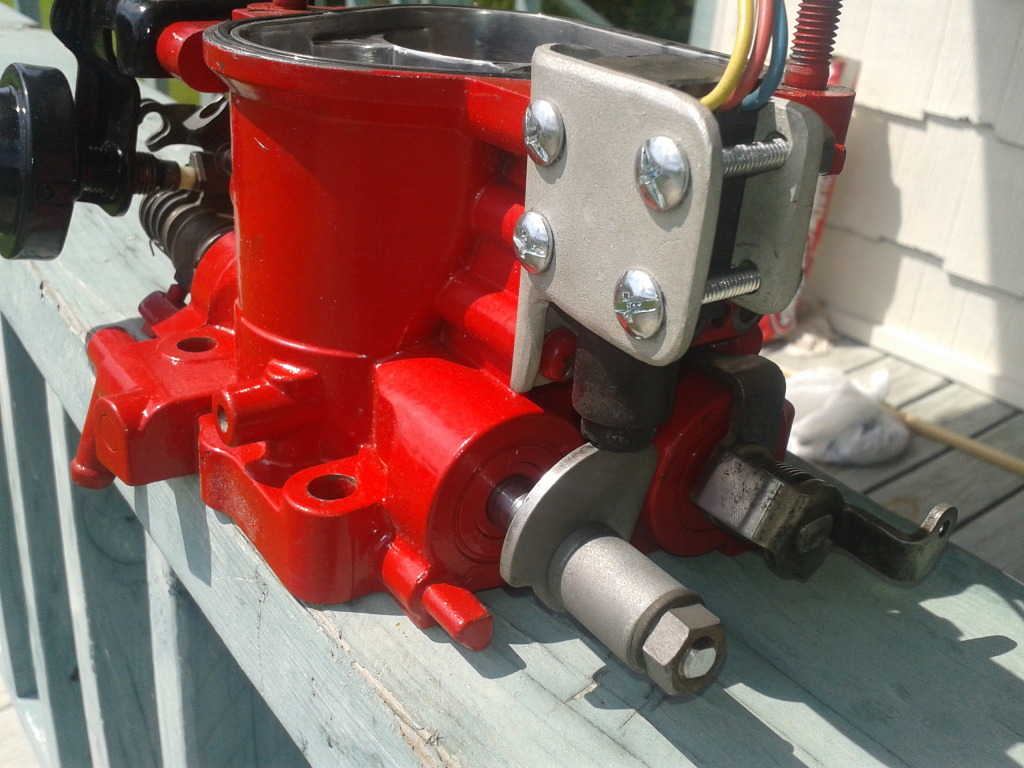
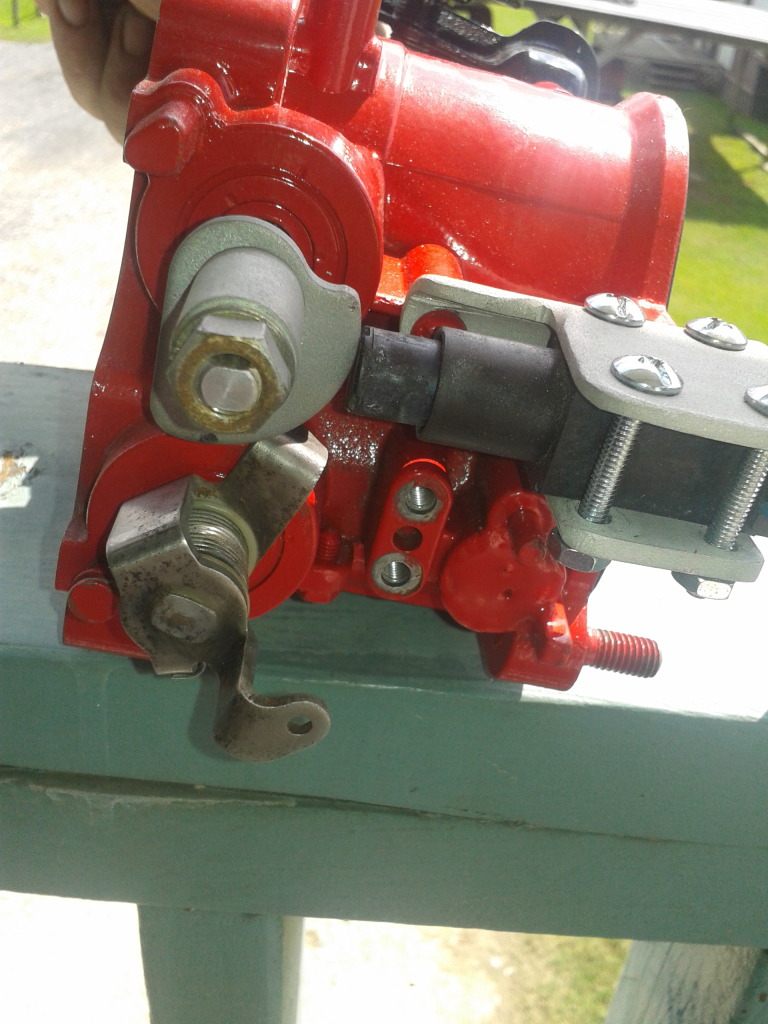
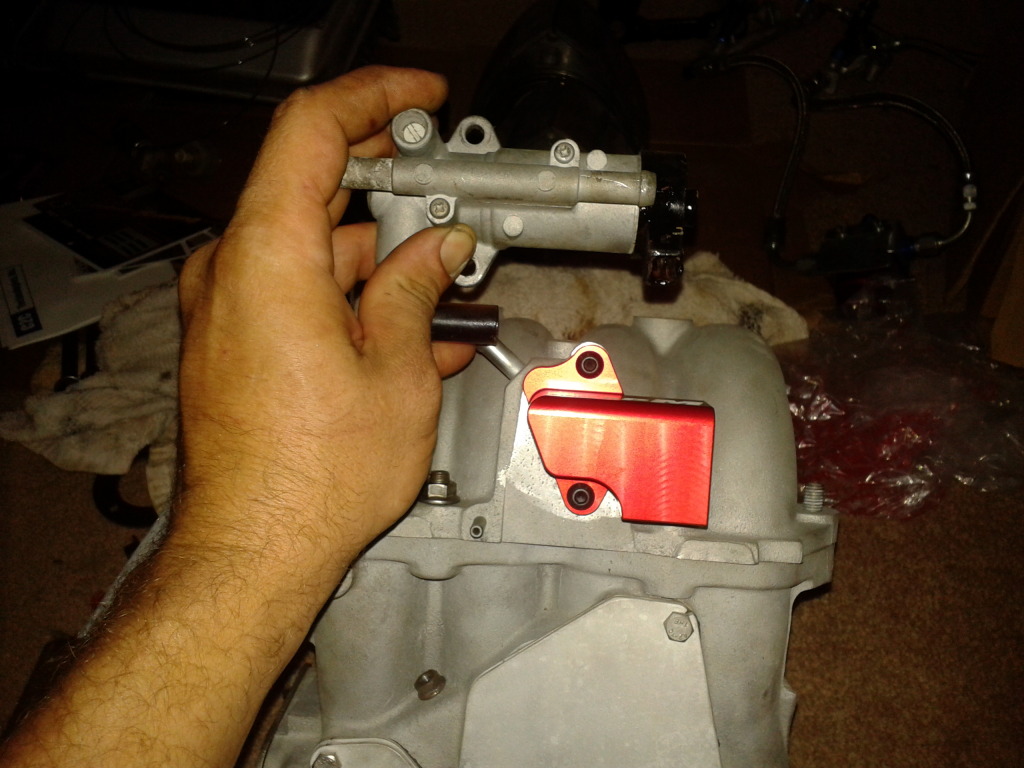
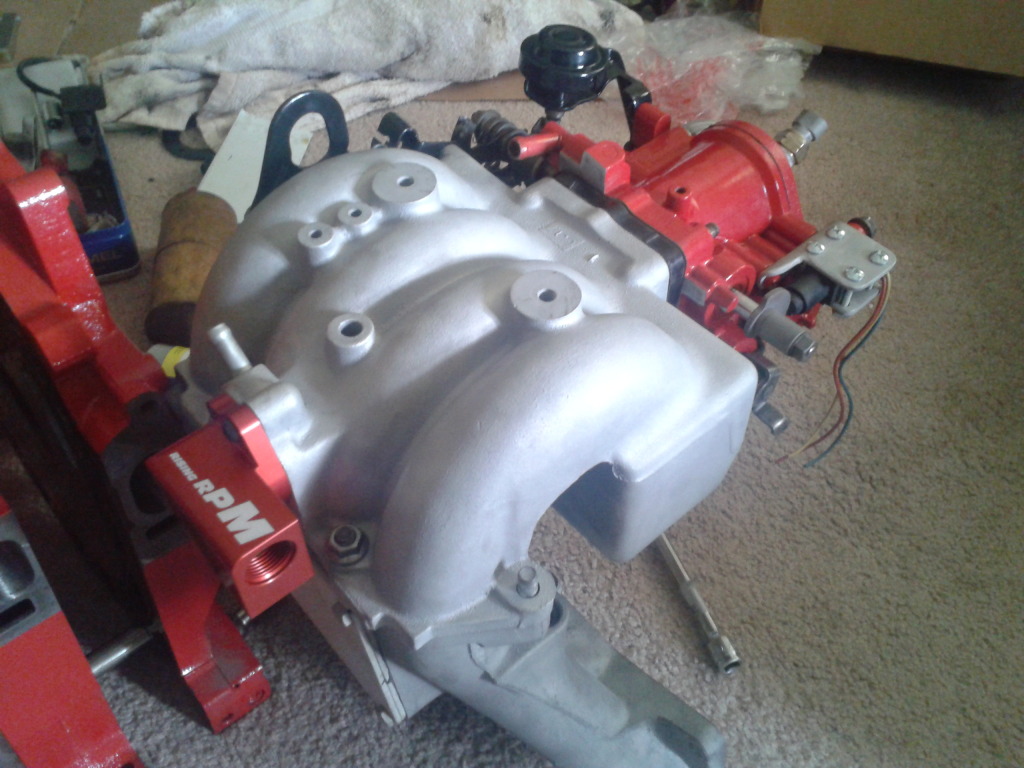
To free up a pwm on the Haltech and utilize the idle control system, Rising RPM makes a nice GM IAC to BAC Manifold. I just happen to have a spare IAC sitting around from another vehicle...

Name:  20120927_174608.jpg
Views: 190
Size:  194.3 KB

Name:  20120927_145239.jpg
Views: 271
Size:  215.0 KB
Old 09-29-12, 09:31 PM
  #30  
Mr. Fix-it

Thread Starter
iTrader: (3)
 
Brandon Robinson's Avatar
 
Join Date: Feb 2012
Location: Texas
Posts: 181
Likes: 0
Received 0 Likes on 0 Posts
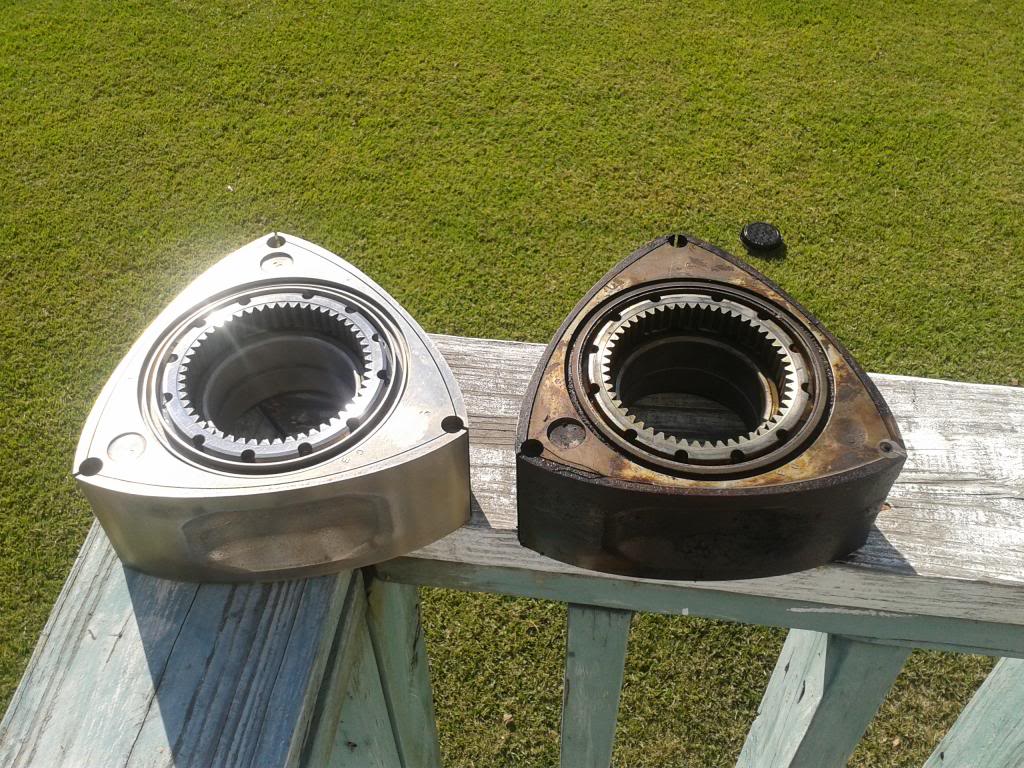
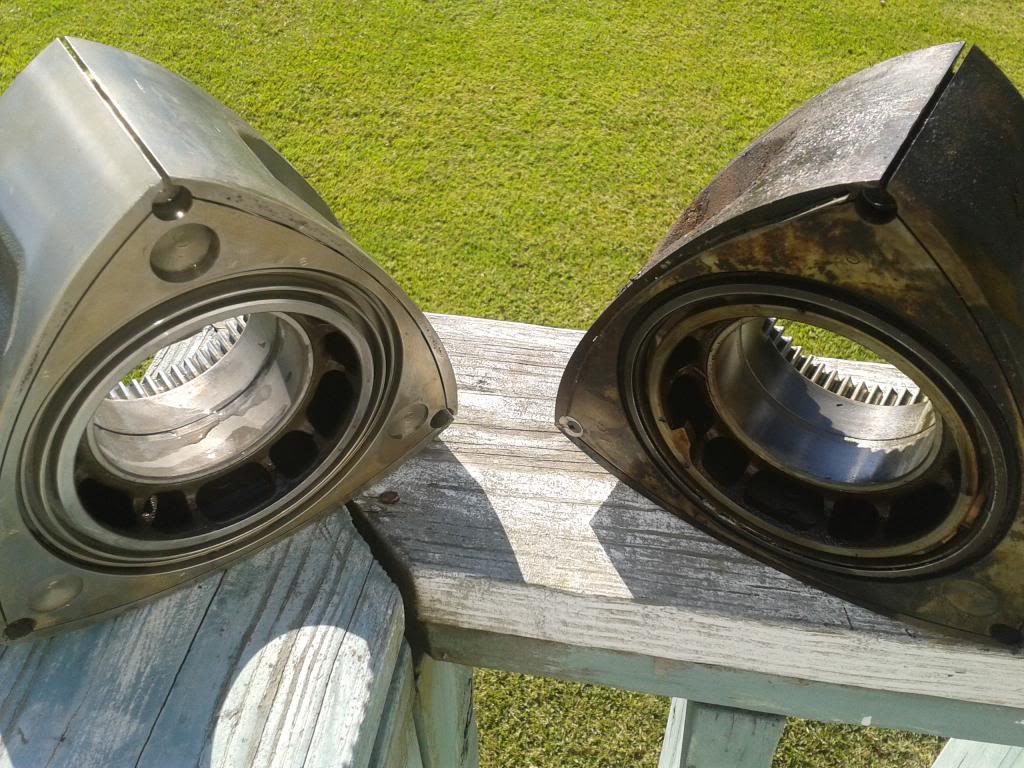
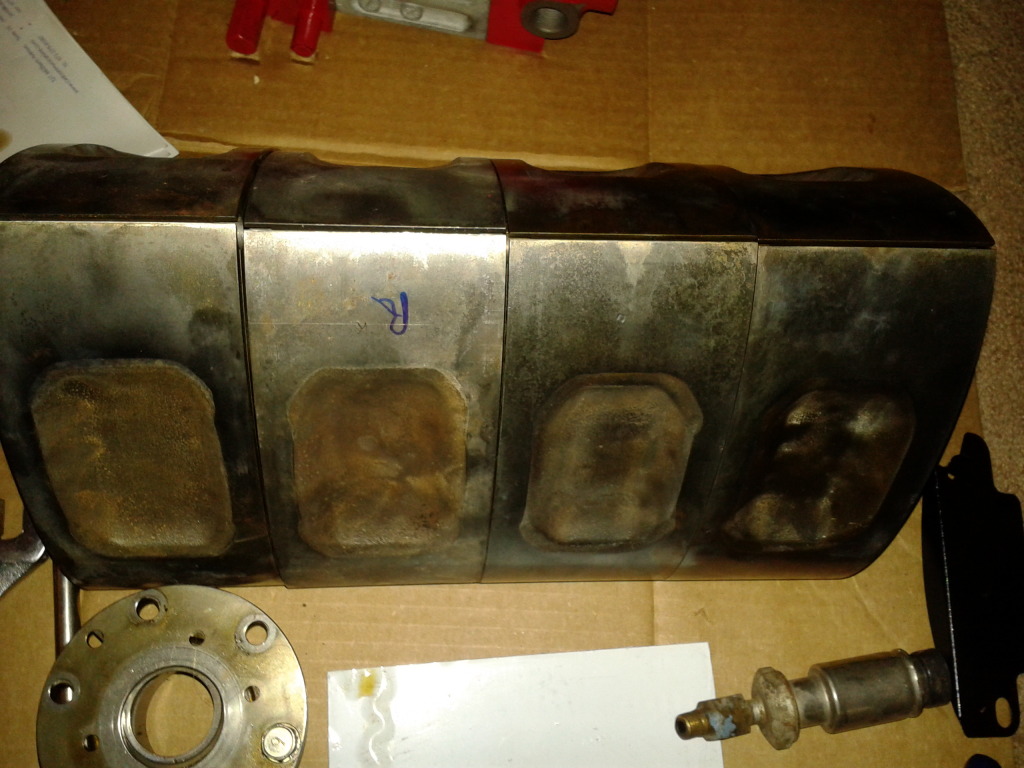
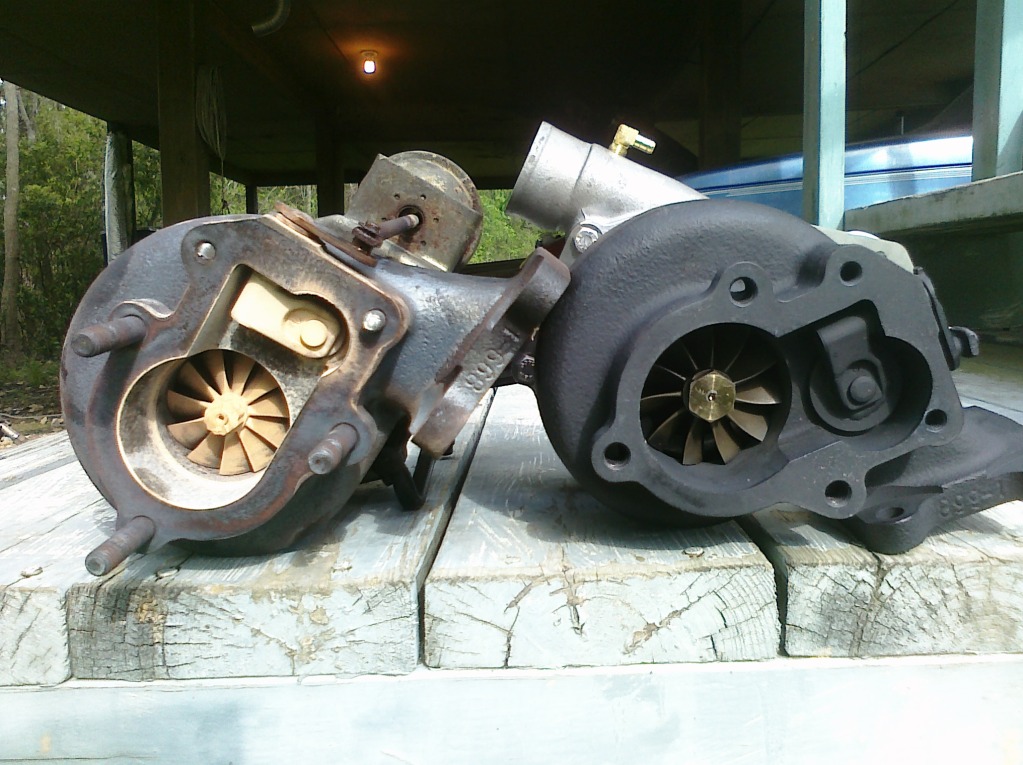
I also decided to go ahead and up the compression ratio past the S5 TII by changing the rotors out for a set of S4 N/A rotors. The 9.4 : 1 ratio will make that BNR Stage 4 spool like a beast...

Name:  20120929_212551.jpg
Views: 198
Size:  205.2 KB
Old 09-29-12, 09:42 PM
  #31  
Mr. Fix-it

Thread Starter
iTrader: (3)
 
Brandon Robinson's Avatar
 
Join Date: Feb 2012
Location: Texas
Posts: 181
Likes: 0
Received 0 Likes on 0 Posts
Performing part of the Haltech Intstall using Weather pack connectors.

Name:  20120923_112047.jpg
Views: 199
Size:  236.0 KB

Name:  20120923_112342.jpg
Views: 214
Size:  183.2 KB

Name:  20120923_113215.jpg
Views: 184
Size:  230.2 KB

Name:  20120923_111920.jpg
Views: 177
Size:  252.9 KB
Old 09-30-12, 08:02 AM
  #32  
T2 Duo!
iTrader: (6)
 
tuscanidream's Avatar
 
Join Date: Oct 2010
Location: RI/CT
Posts: 1,665
Likes: 0
Received 3 Likes on 3 Posts
Looks nice! How did you get your rotor housings and front cover so clean looking?!
Old 09-30-12, 08:15 AM
  #33  
Rotary Enthusiast

iTrader: (9)
 
R-X-R's Avatar
 
Join Date: Jun 2011
Location: Syracuse,NY
Posts: 805
Received 4 Likes on 4 Posts
everything looking good. lot of info for me to steal .

off topic. what is the BOV that make Chu CHu Chu sound mostly on supras
Old 09-30-12, 12:23 PM
  #34  
Mr. Fix-it

Thread Starter
iTrader: (3)
 
Brandon Robinson's Avatar
 
Join Date: Feb 2012
Location: Texas
Posts: 181
Likes: 0
Received 0 Likes on 0 Posts
Thumbs up

Originally Posted by tuscanidream
Looks nice! How did you get your rotor housings and front cover so clean looking?!
Sand Blaster (white bucket on stand in the back), but first I dipped everything in a tub of simple green full concentrate for 24 hours. I hear pine sol works great also.

Name:  20120812_125744.jpg
Views: 189
Size:  341.7 KB
Old 09-30-12, 12:29 PM
  #35  
Mr. Fix-it

Thread Starter
iTrader: (3)
 
Brandon Robinson's Avatar
 
Join Date: Feb 2012
Location: Texas
Posts: 181
Likes: 0
Received 0 Likes on 0 Posts
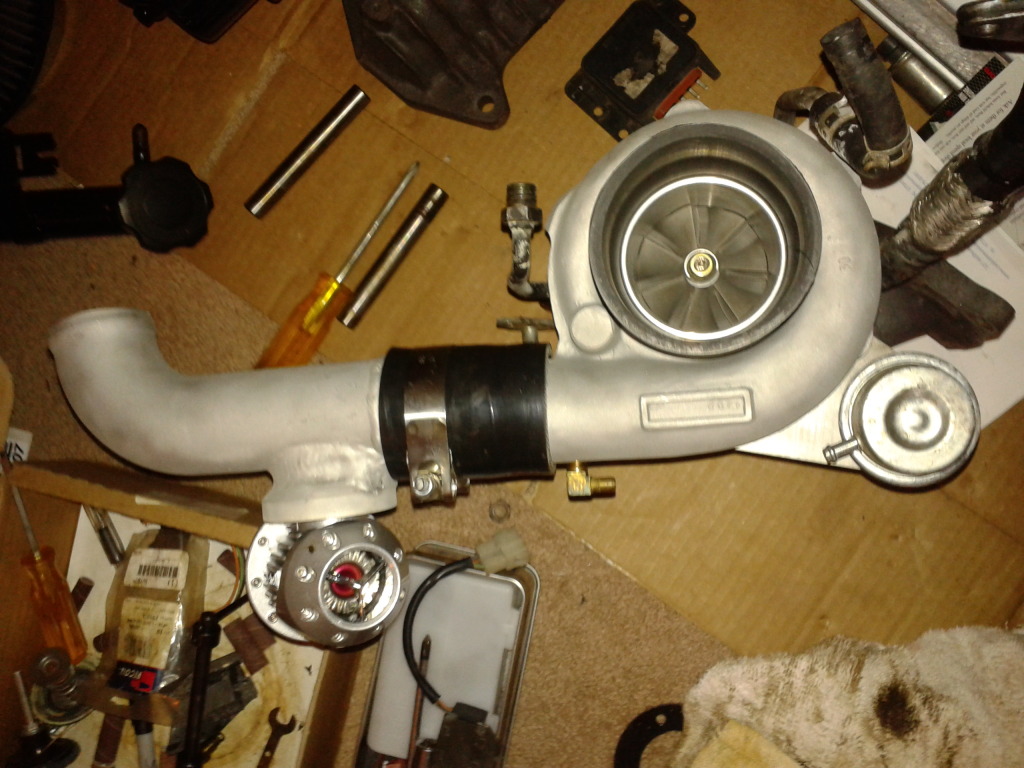
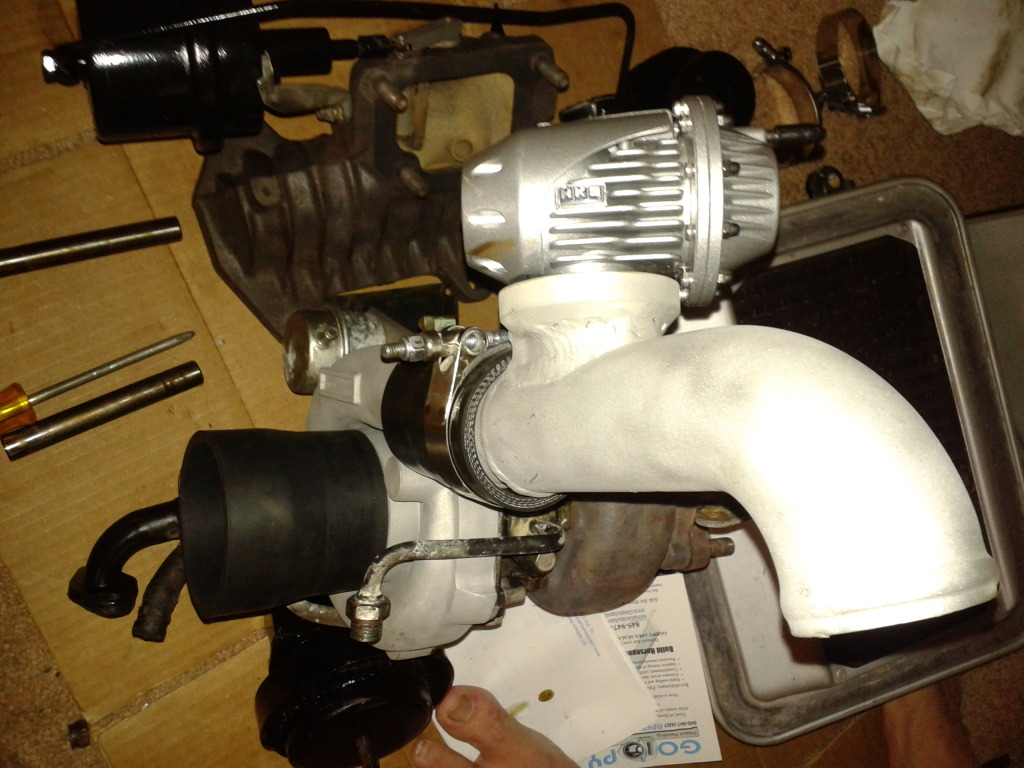
The HKS SSQV 3 I have has changeable inserts that make different sounds when they discharge. The one I have installed now is a chirp followed by a whoosh.

Old 09-30-12, 12:33 PM
  #36  
Mr. Fix-it

Thread Starter
iTrader: (3)
 
Brandon Robinson's Avatar
 
Join Date: Feb 2012
Location: Texas
Posts: 181
Likes: 0
Received 0 Likes on 0 Posts
Originally Posted by vrracing
Not everyone has access to CNC machines! Here is a commercial one for the RX8 and another concept one for the FC that came up when I ran the Google search I listed.
Thats pretty sweet looking, it may take some time the write the cnc to run one though.
Old 10-01-12, 07:08 PM
  #37  
Rotary Enthusiast

iTrader: (9)
 
R-X-R's Avatar
 
Join Date: Jun 2011
Location: Syracuse,NY
Posts: 805
Received 4 Likes on 4 Posts
i am talking about the bov at 4.50 on this vid

Old 10-01-12, 07:38 PM
  #38  
Mr. Fix-it

Thread Starter
iTrader: (3)
 
Brandon Robinson's Avatar
 
Join Date: Feb 2012
Location: Texas
Posts: 181
Likes: 0
Received 0 Likes on 0 Posts
Thumbs down

Originally Posted by R-X-R
i am talking about the bov at 4.50 on this vid

Ultimate Turbo and Blow Off Valve Sounds Part 3 - YouTube
That is compressor surge called flutterdump from not having a large enough BOV or a poorly tuned BOV... When he let off the trottle the compressed air is bouncing off the throttle body back at the compressor and actually spinning the turbo backwards. That is very bad for the turbo and the engine.
Old 10-01-12, 07:47 PM
  #39  
Mr. Fix-it

Thread Starter
iTrader: (3)
 
Brandon Robinson's Avatar
 
Join Date: Feb 2012
Location: Texas
Posts: 181
Likes: 0
Received 0 Likes on 0 Posts
You can see this happening further down at 5.06 on your vid, that type of surge is caused by not having a large enough wastegate. The wastegate is not allowing enough exhaust to bypass the tubine causing the turbo to overboost the motor. S4 rx7's are notorious at doing this when removing the cats and installing a downpipe on the stock turbo. That is one of the main reasons i went with the BNR turbo. Bryan tweaks the wastegate early on his S4 builds.

Name:  PRE_2012-03-18-164354.jpg
Views: 268
Size:  237.4 KB

I would bet money that this guy is running a stock turbo with no bov, a boost controller cranked wayyyy to high with an turbo back exhaust.
Old 10-01-12, 07:52 PM
  #40  
Mr. Fix-it

Thread Starter
iTrader: (3)
 
Brandon Robinson's Avatar
 
Join Date: Feb 2012
Location: Texas
Posts: 181
Likes: 0
Received 0 Likes on 0 Posts
Read the comments.

Old 10-04-12, 09:20 PM
  #41  
Mr. Fix-it

Thread Starter
iTrader: (3)
 
Brandon Robinson's Avatar
 
Join Date: Feb 2012
Location: Texas
Posts: 181
Likes: 0
Received 0 Likes on 0 Posts
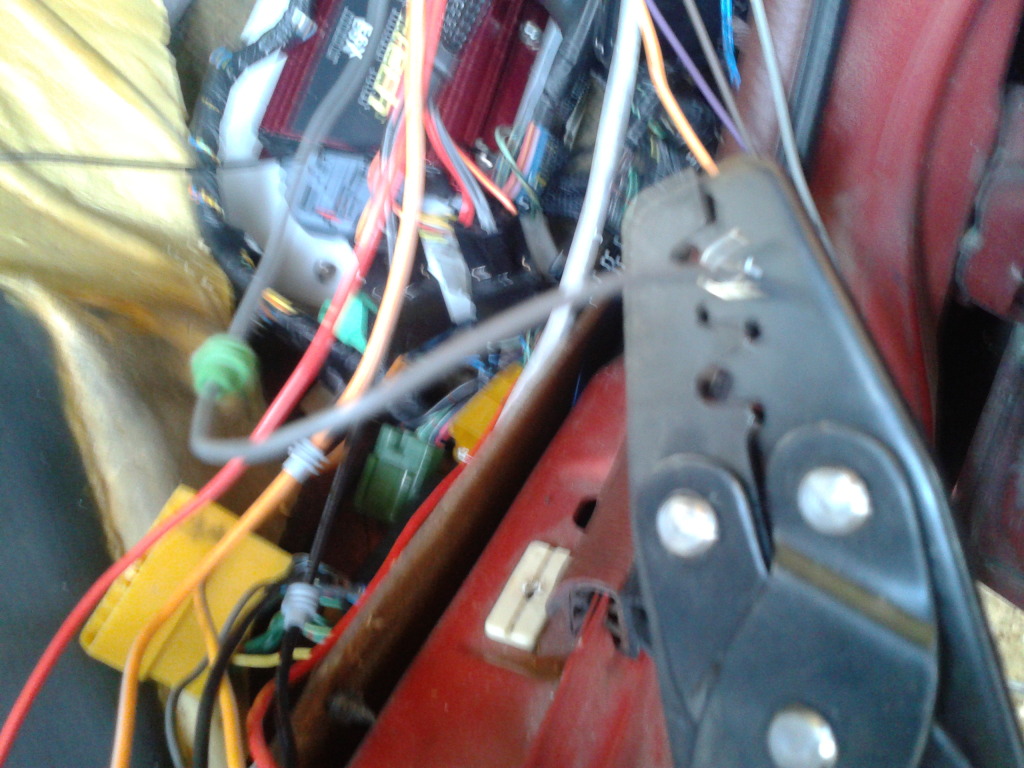
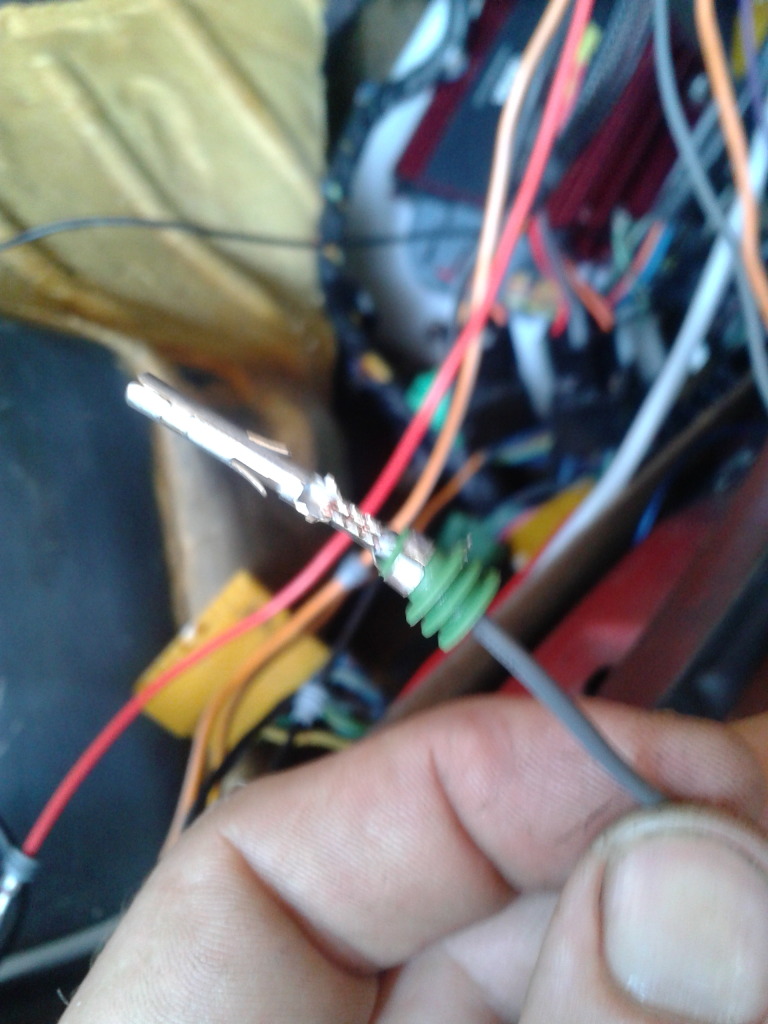
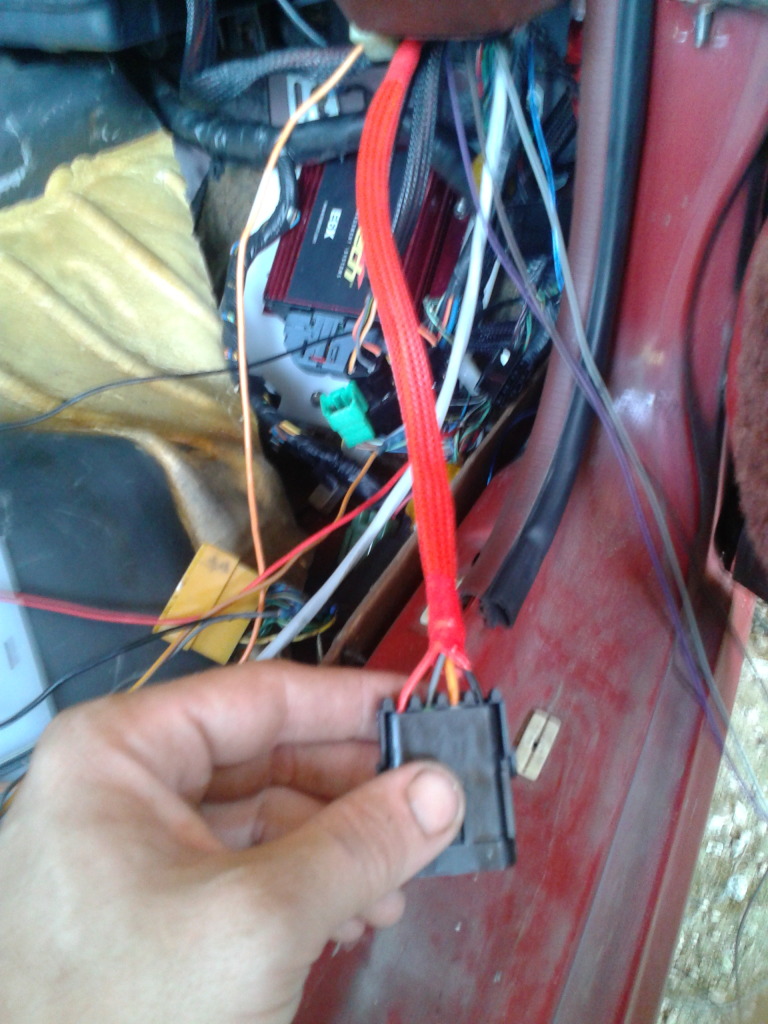
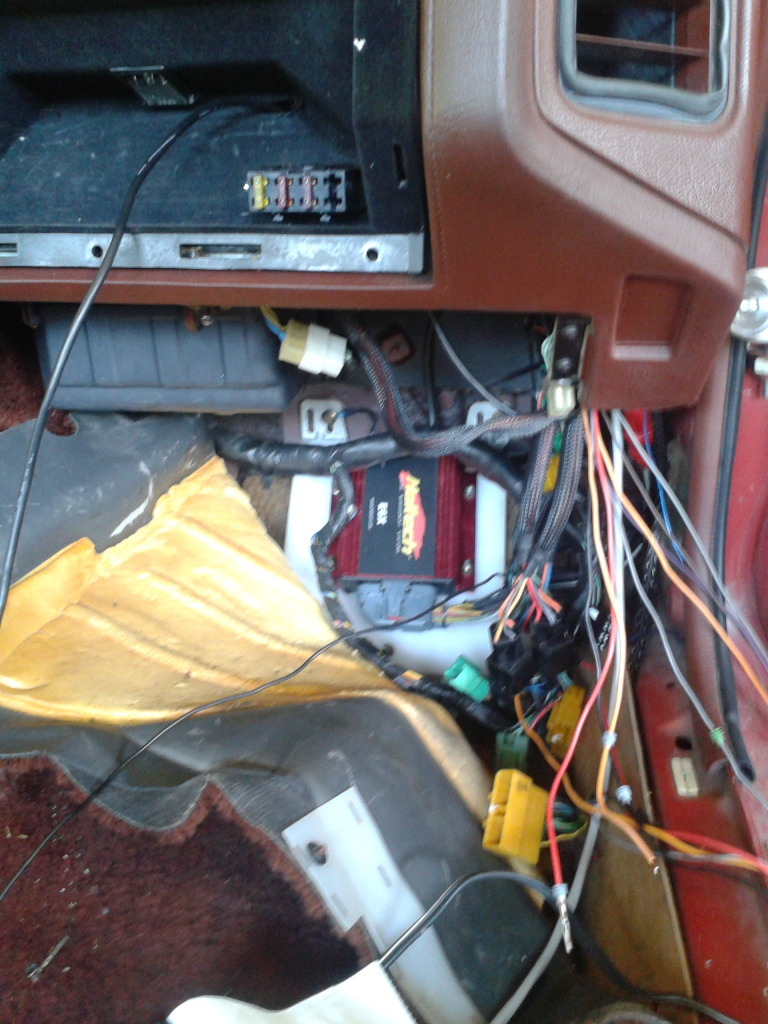
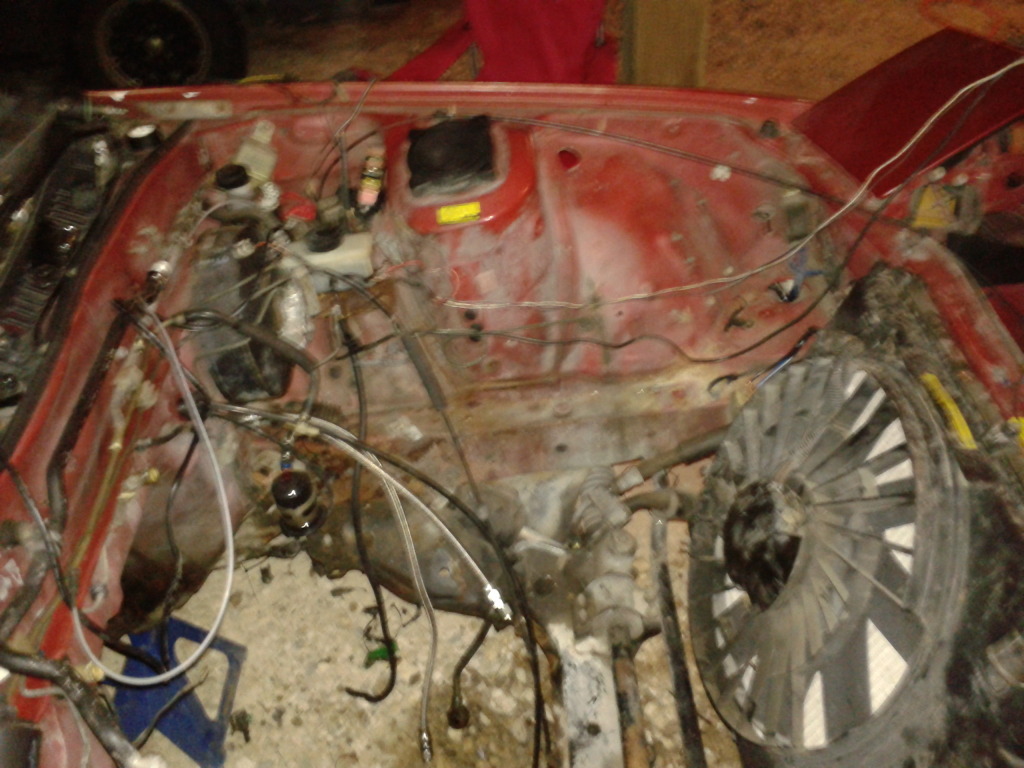
I finished the wire tuck and moved all of the relays and fuses to the area by the brake booster. I also have relocated the battery behind the passenger seat for better weight distribution. Pulled an e-fan out of a 97' Mercury Villager and it is perfect. Has a three wire one for “High” speed and one for “Low” speed a four and five pin relay and two temp switches will drive it perfectly. Next is removal of all the engine bay components and blasting the whole thing. A fresh coat of paint and a sweet looking engine plus no clutter. I cant wait to see it when its done...
Old 10-04-12, 09:20 PM
  #42  
Mr. Fix-it

Thread Starter
iTrader: (3)
 
Brandon Robinson's Avatar
 
Join Date: Feb 2012
Location: Texas
Posts: 181
Likes: 0
Received 0 Likes on 0 Posts
Name:  20121004_193239.jpg
Views: 187
Size:  229.6 KB
Old 10-05-12, 09:46 PM
  #43  
Mr. Fix-it

Thread Starter
iTrader: (3)
 
Brandon Robinson's Avatar
 
Join Date: Feb 2012
Location: Texas
Posts: 181
Likes: 0
Received 0 Likes on 0 Posts
The bellmouth showed up today and it fit perfectly. Plus I get to reuse my K&N from the first build.
Old 10-05-12, 09:48 PM
  #44  
Mr. Fix-it

Thread Starter
iTrader: (3)
 
Brandon Robinson's Avatar
 
Join Date: Feb 2012
Location: Texas
Posts: 181
Likes: 0
Received 0 Likes on 0 Posts
Name:  20121005_182541-1.jpg
Views: 189
Size:  188.8 KB

Name:  20121005_182533.jpg
Views: 171
Size:  215.2 KB

Name:  20121005_182558-1.jpg
Views: 194
Size:  214.4 KB
Old 10-11-12, 07:59 PM
  #45  
Junior Member
 
wawxd4's Avatar
 
Join Date: Sep 2012
Location: Cincinnati, OH
Posts: 6
Likes: 0
Received 0 Likes on 0 Posts
Great looking car

Great looking car
Old 10-12-12, 07:33 AM
  #46  
Psalms 37**25

 
rotaryB-2000's Avatar
 
Join Date: Jan 2007
Location: Garnerville N.Y
Posts: 866
Received 0 Likes on 0 Posts
Make sure you clean the sand blasted parts really well..Sand gets in all the cracks and crevices..
Old 10-12-12, 08:04 AM
  #47  
Senior Member
iTrader: (1)
 
88fc3sT2's Avatar
 
Join Date: Jun 2012
Location: Fort Lauderdale
Posts: 470
Likes: 0
Received 0 Likes on 0 Posts
You're going to be running the Velocity Stack and the K&N at the same time or what? Got a little confused on that.
Old 10-12-12, 06:49 PM
  #48  
Mr. Fix-it

Thread Starter
iTrader: (3)
 
Brandon Robinson's Avatar
 
Join Date: Feb 2012
Location: Texas
Posts: 181
Likes: 0
Received 0 Likes on 0 Posts
Originally Posted by 88fc3sT2
You're going to be running the Velocity Stack and the K&N at the same time or what? Got a little confused on that.
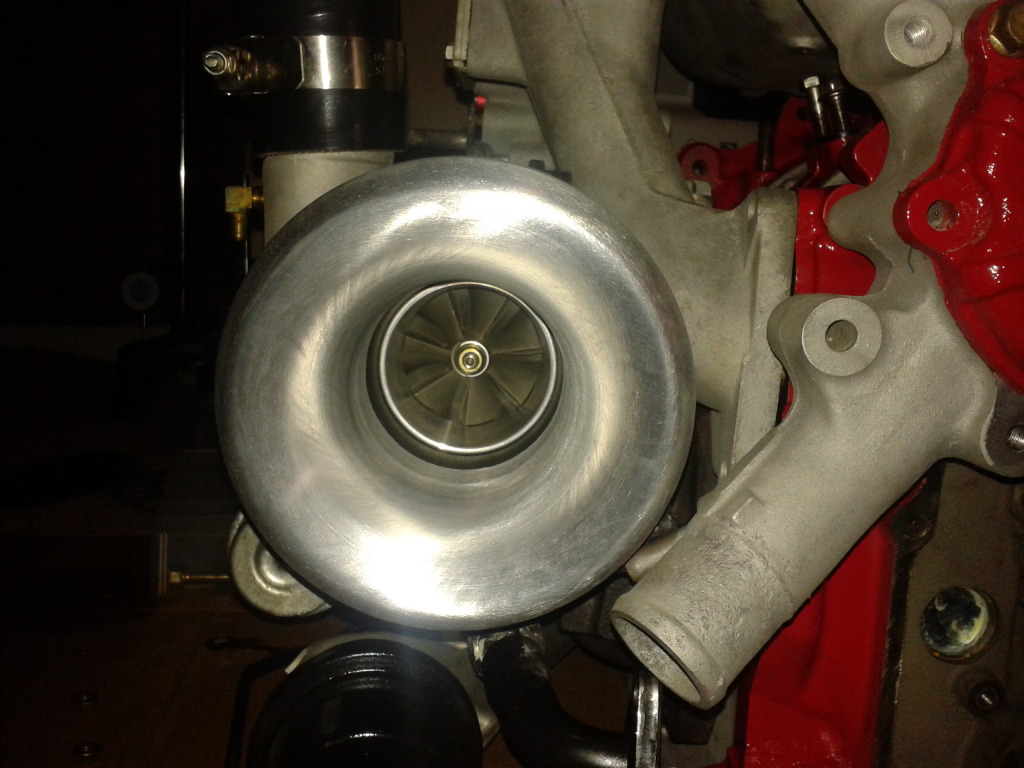
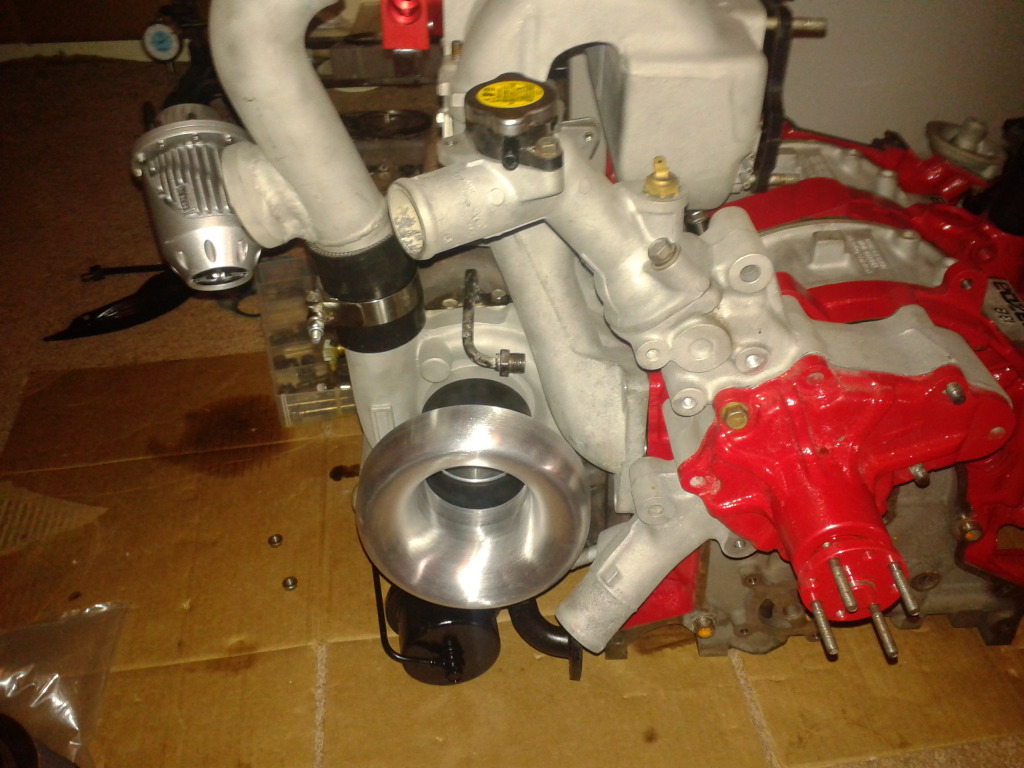
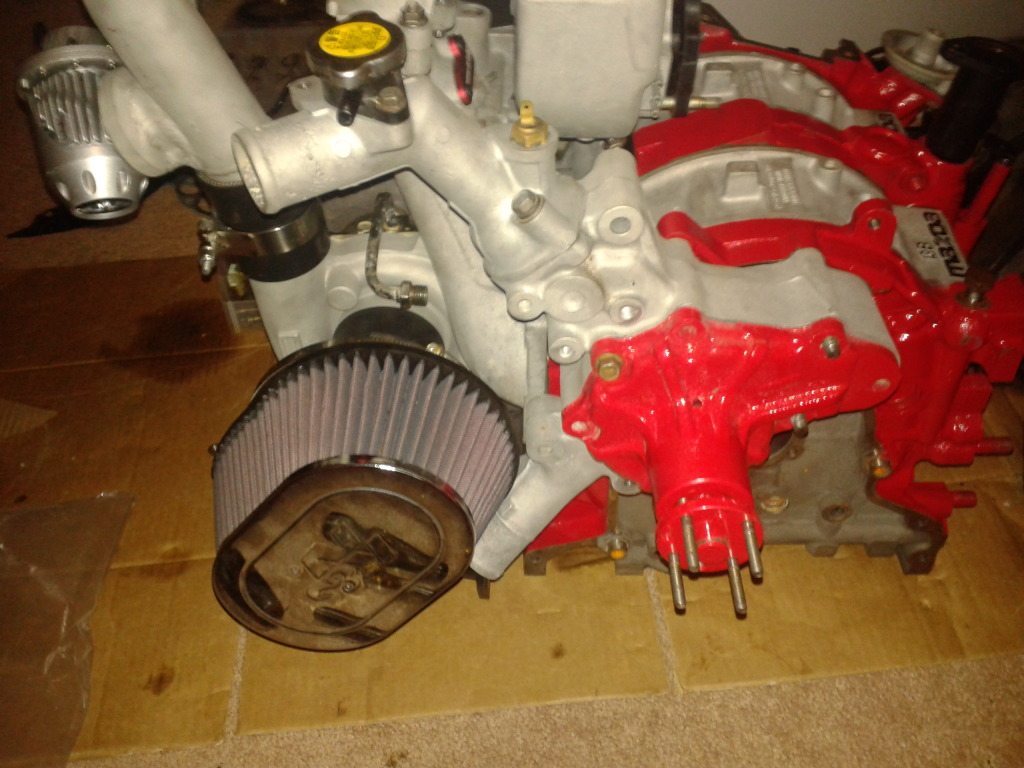
I am going to run both at the same time except for track days and I may still run the filter. The velocity stack will still do its job even with the filter on it.
Old 10-12-12, 06:52 PM
  #49  
Mr. Fix-it

Thread Starter
iTrader: (3)
 
Brandon Robinson's Avatar
 
Join Date: Feb 2012
Location: Texas
Posts: 181
Likes: 0
Received 0 Likes on 0 Posts
Thumbs up

Originally Posted by rotaryB-2000
Make sure you clean the sand blasted parts really well..Sand gets in all the cracks and crevices..
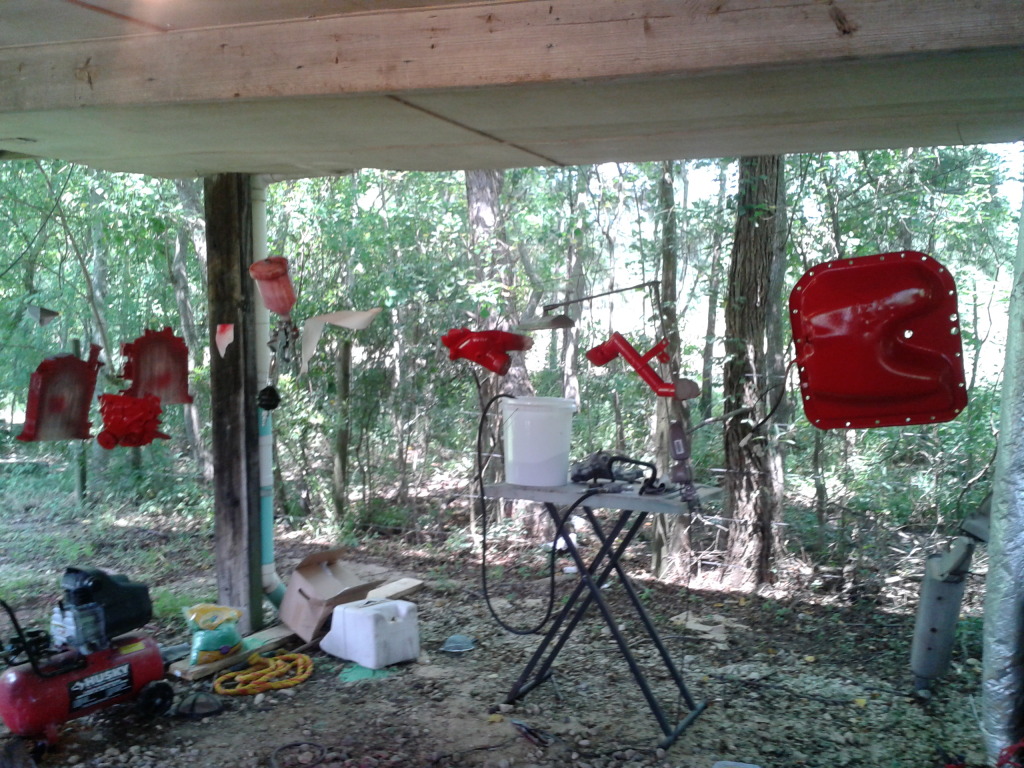
The parts where all dipped in degreaser, pressure washed and blown down with air before they made it into the clean room. I plan on a second wash down before final assembly just to be sure I didn't miss anything.
Old 10-13-12, 11:34 PM
  #50  
Mr. Fix-it

Thread Starter
iTrader: (3)
 
Brandon Robinson's Avatar
 
Join Date: Feb 2012
Location: Texas
Posts: 181
Likes: 0
Received 0 Likes on 0 Posts
Finally collected a pair of S4 N/A Rotors and cleaned them up. Some before and after shots.

Name:  20121011_154712_zpse3882d44.jpg
Views: 198
Size:  177.1 KB

Name:  20121011_154730_zps74607cb9.jpg
Views: 183
Size:  145.6 KB


Quick Reply: Brandon's FC Build


All times are GMT -5. The time now is 11:49 AM.