
All the braps...ok maybe not all, but a lot for sure...

Thread Starter


Joined: Mar 2002
Posts: 1,727
Likes: 541
From: binghamton, ny
All the braps...ok maybe not all, but a lot for sure...
Taking on yet another project before I finish the last because that's always a smart life choice....Any ways, I enjoy documenting my projects so I'm back with more fun. If you' have been following along, my last project was swapping a MSP engine into a super clean S5 FC shell, and I forgot how much I like working on cars as a hobby and have been reinvigorated by the success I had on that project. So I decided to crank it up a notch and when I saw some "mechanics special" 20Bs pop up for sale on Facebook, I knew what I had to do. These engines were listed as having some type of undisclosed issue and were sold as-is for about half the price of other 20Bs currently on the market. Feeling fairly confident I could fix most issues past a broken e-shaft, I rolled the dice and purchased one. Fast forward several weeks it show up at my doorstep...Came complete with everything including the coil packs which is fairly rare. But everything looked to be in good condition. The harness was all intact, and the plugs weren't super crispy from years of heat exposure.
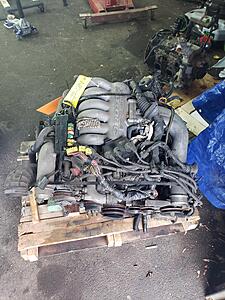

The engine spun fine, no seized bearings or broken apex seals jamming the works up. Seemed to make compression on all faces as well. The yellow tag on the motor had compression #s on the back of it.
R1: 86, 83, 87....Ok, not stellar but not terrible
R2: 89, 90, 90...Little better, but still not superb
R3: 93, 49, 87....welp, there's your problem....
For those who are not aware, having low compression on one face of a rotor is fairly indicative of a side seal or corner seal failure. So I prepared myself for the likely hood of having a trashed iron. Rotor 3 is the rear rotor, so at least I wasn't looking at having to replace the super expensive thick iron quite yet.
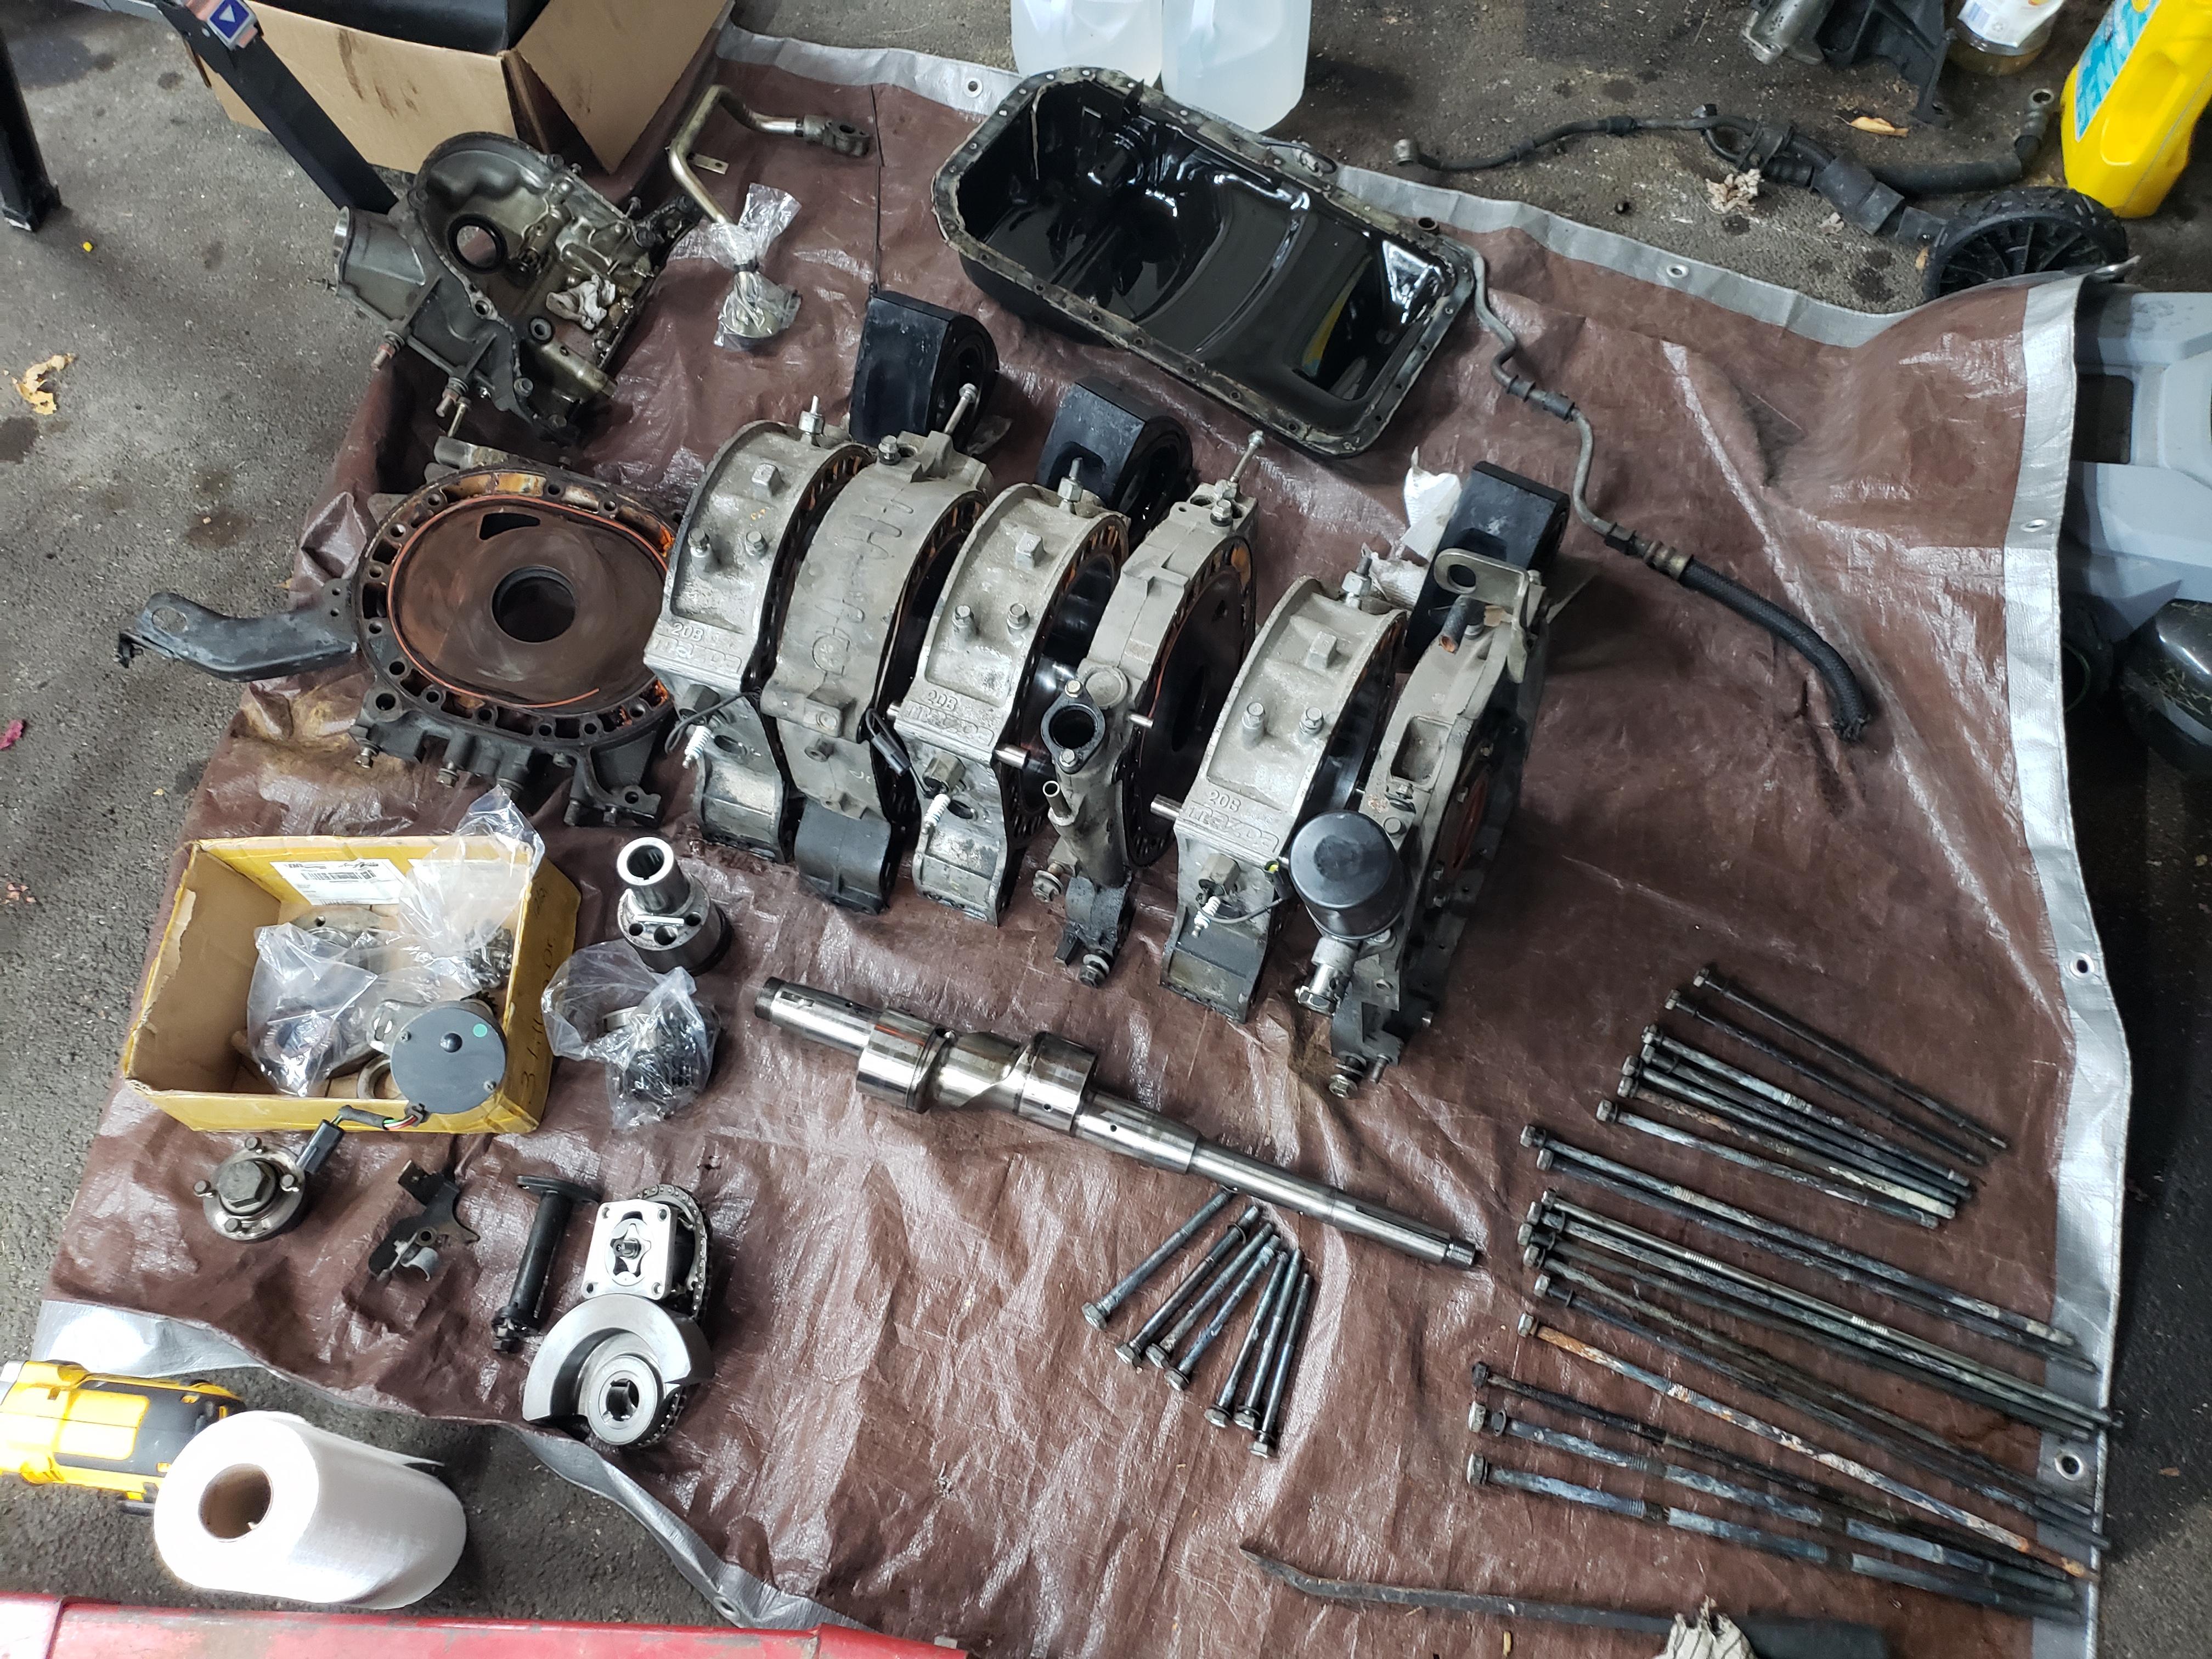
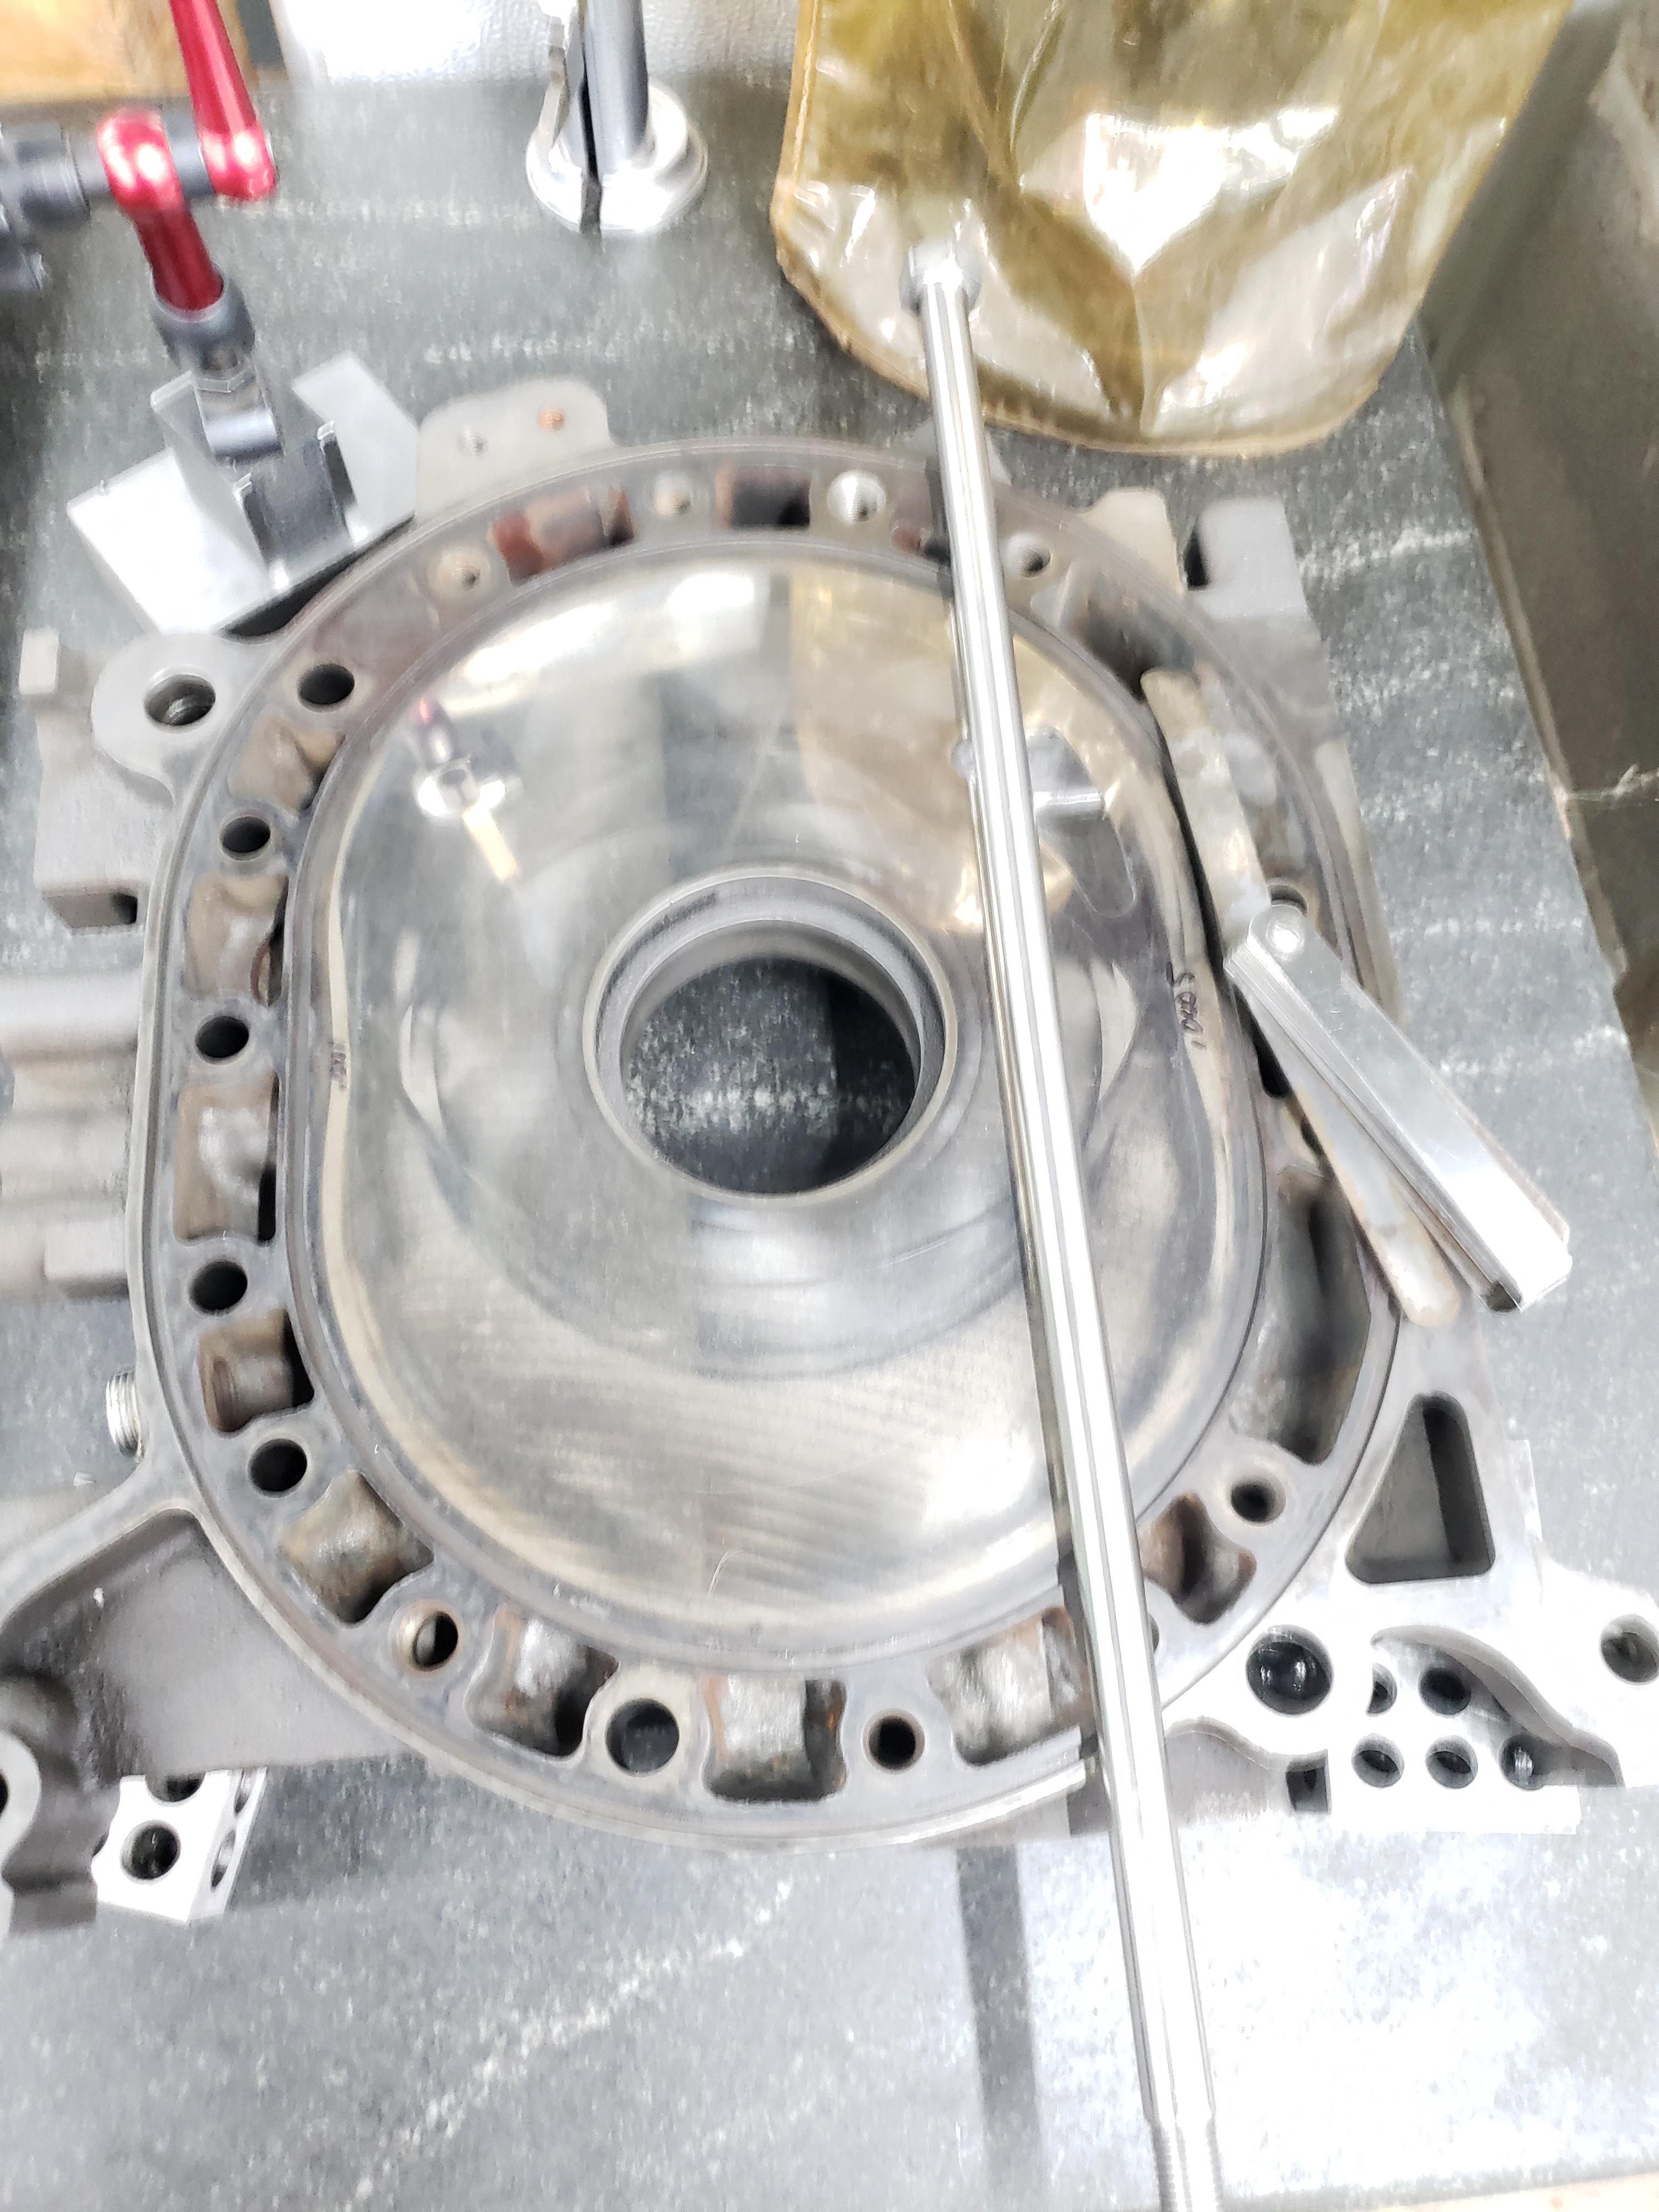
About a week later I got the time to open her up and find what carnage lied in wait for me. I've never taken apart a 20B, so this was a learning experience for me. I started at the front rotor (R1), then turned it over and worked from the back side in until it was in lots of pieces

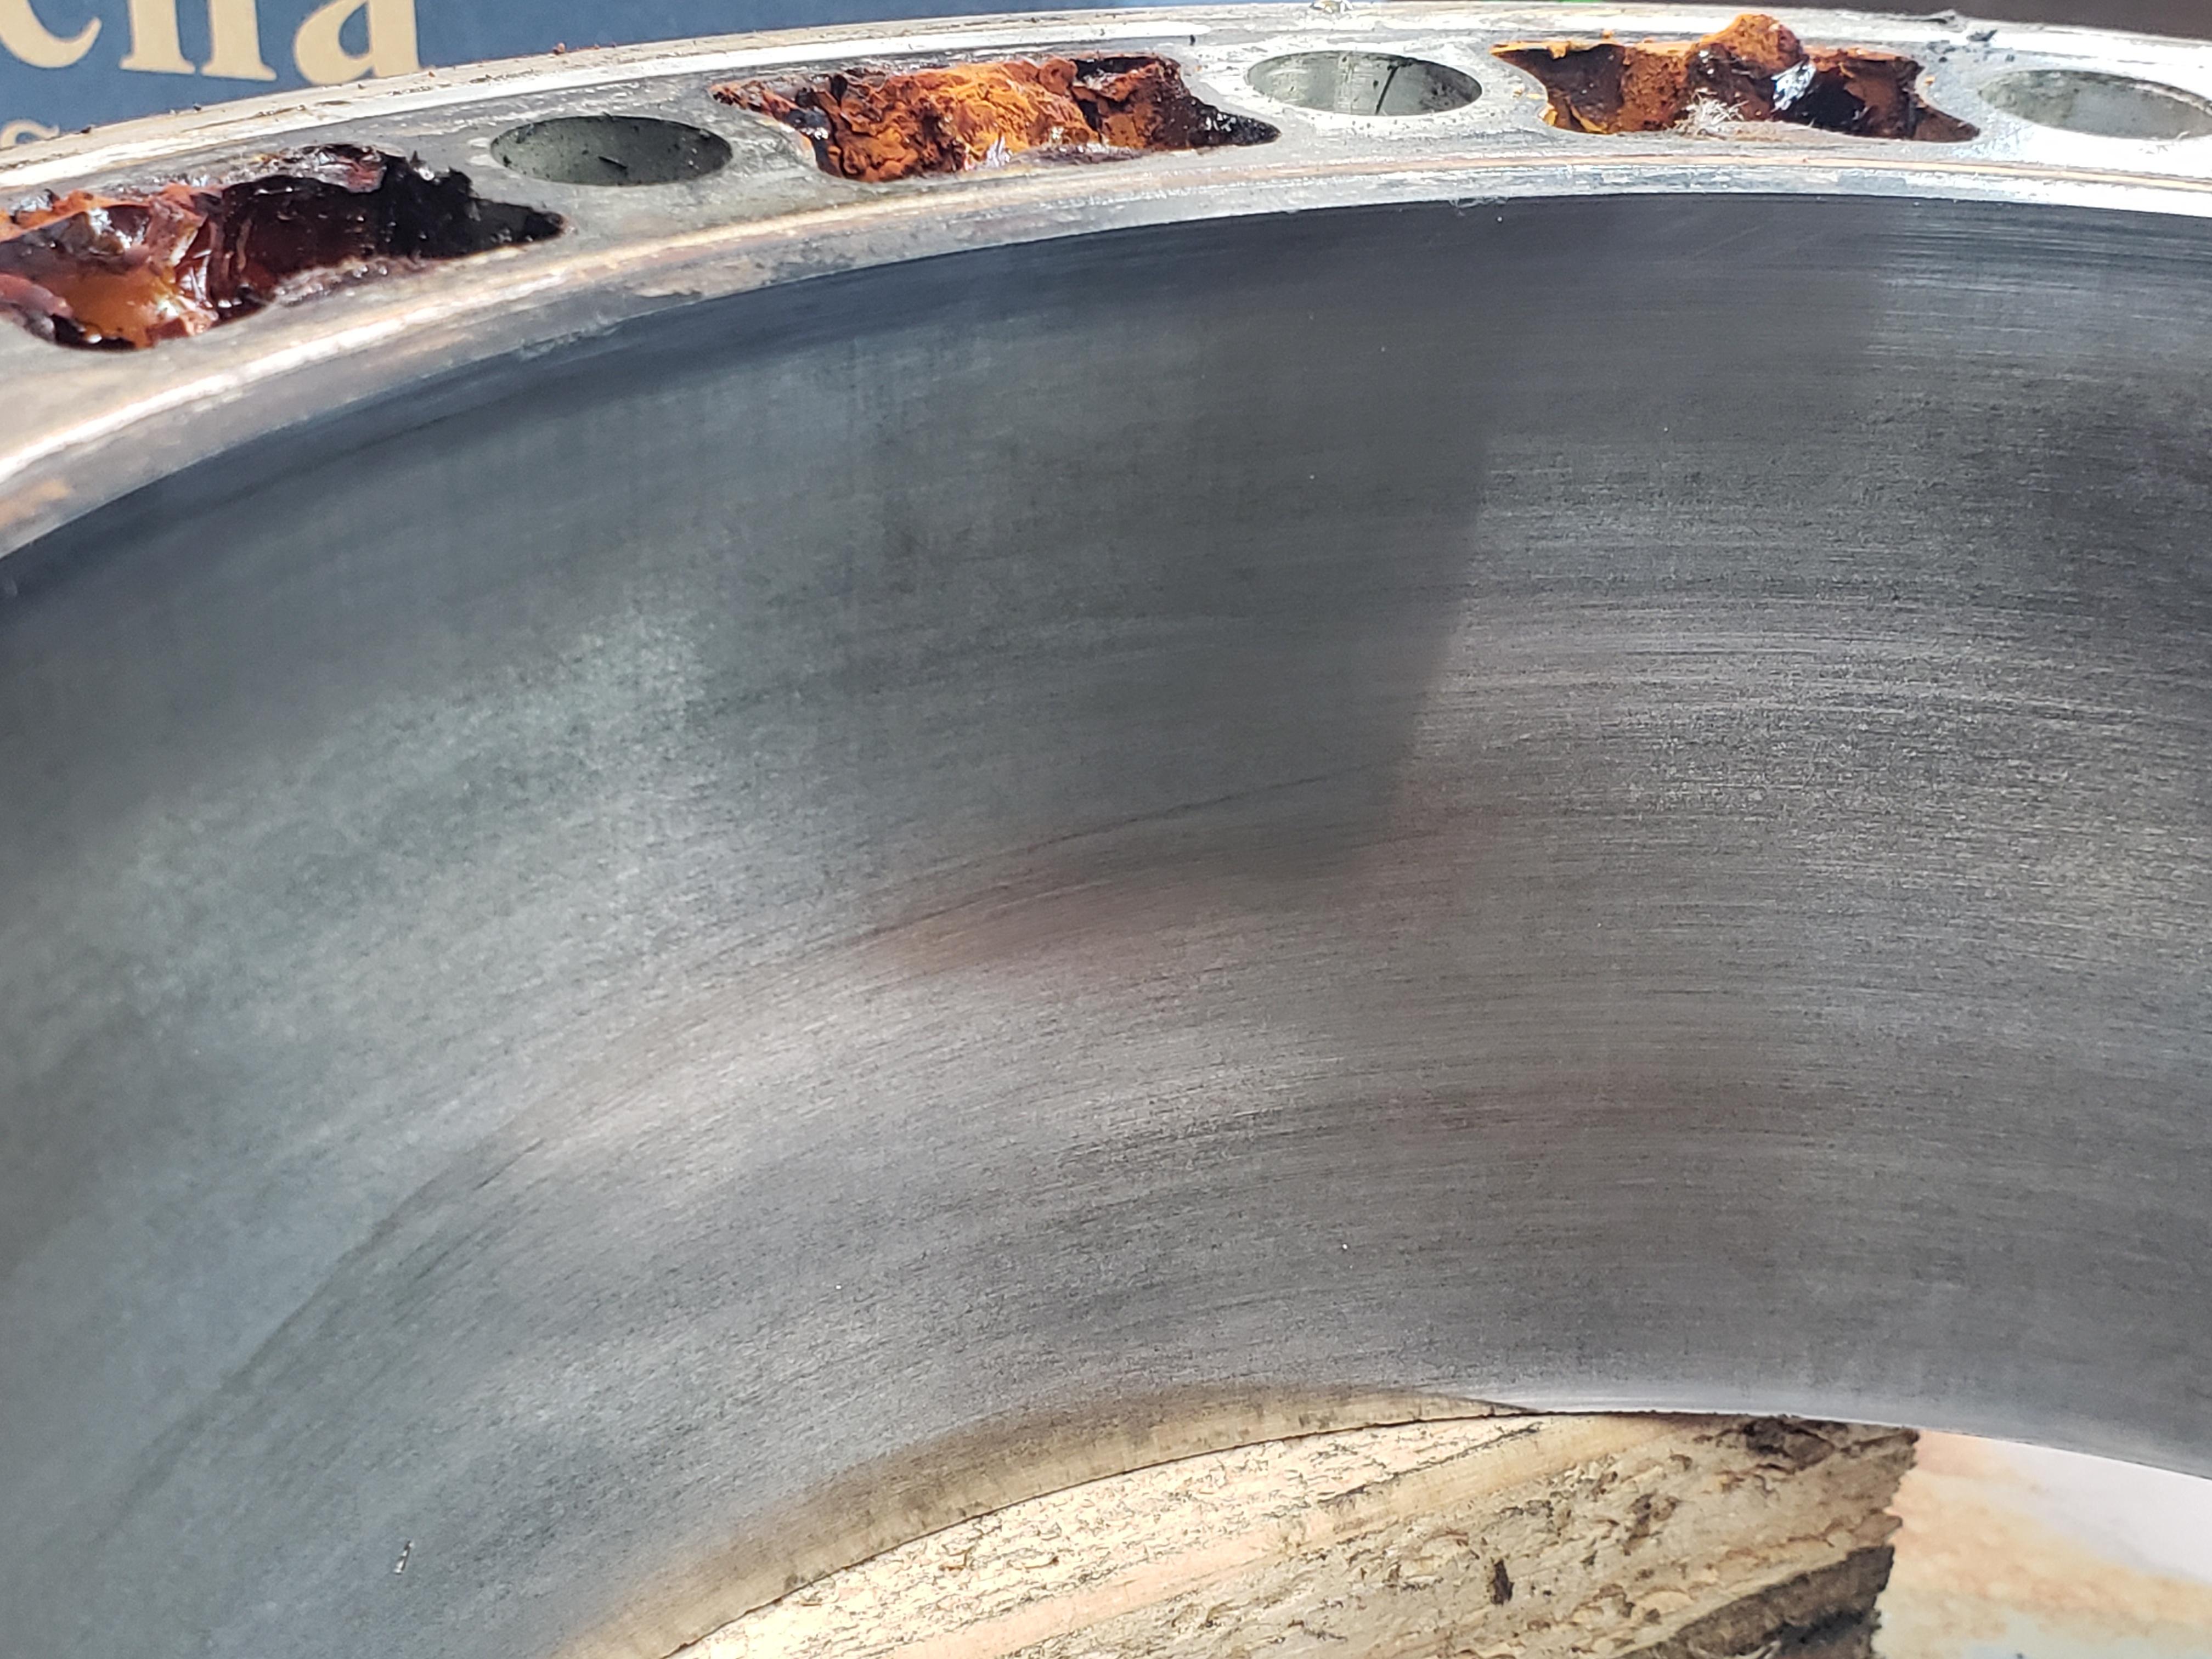
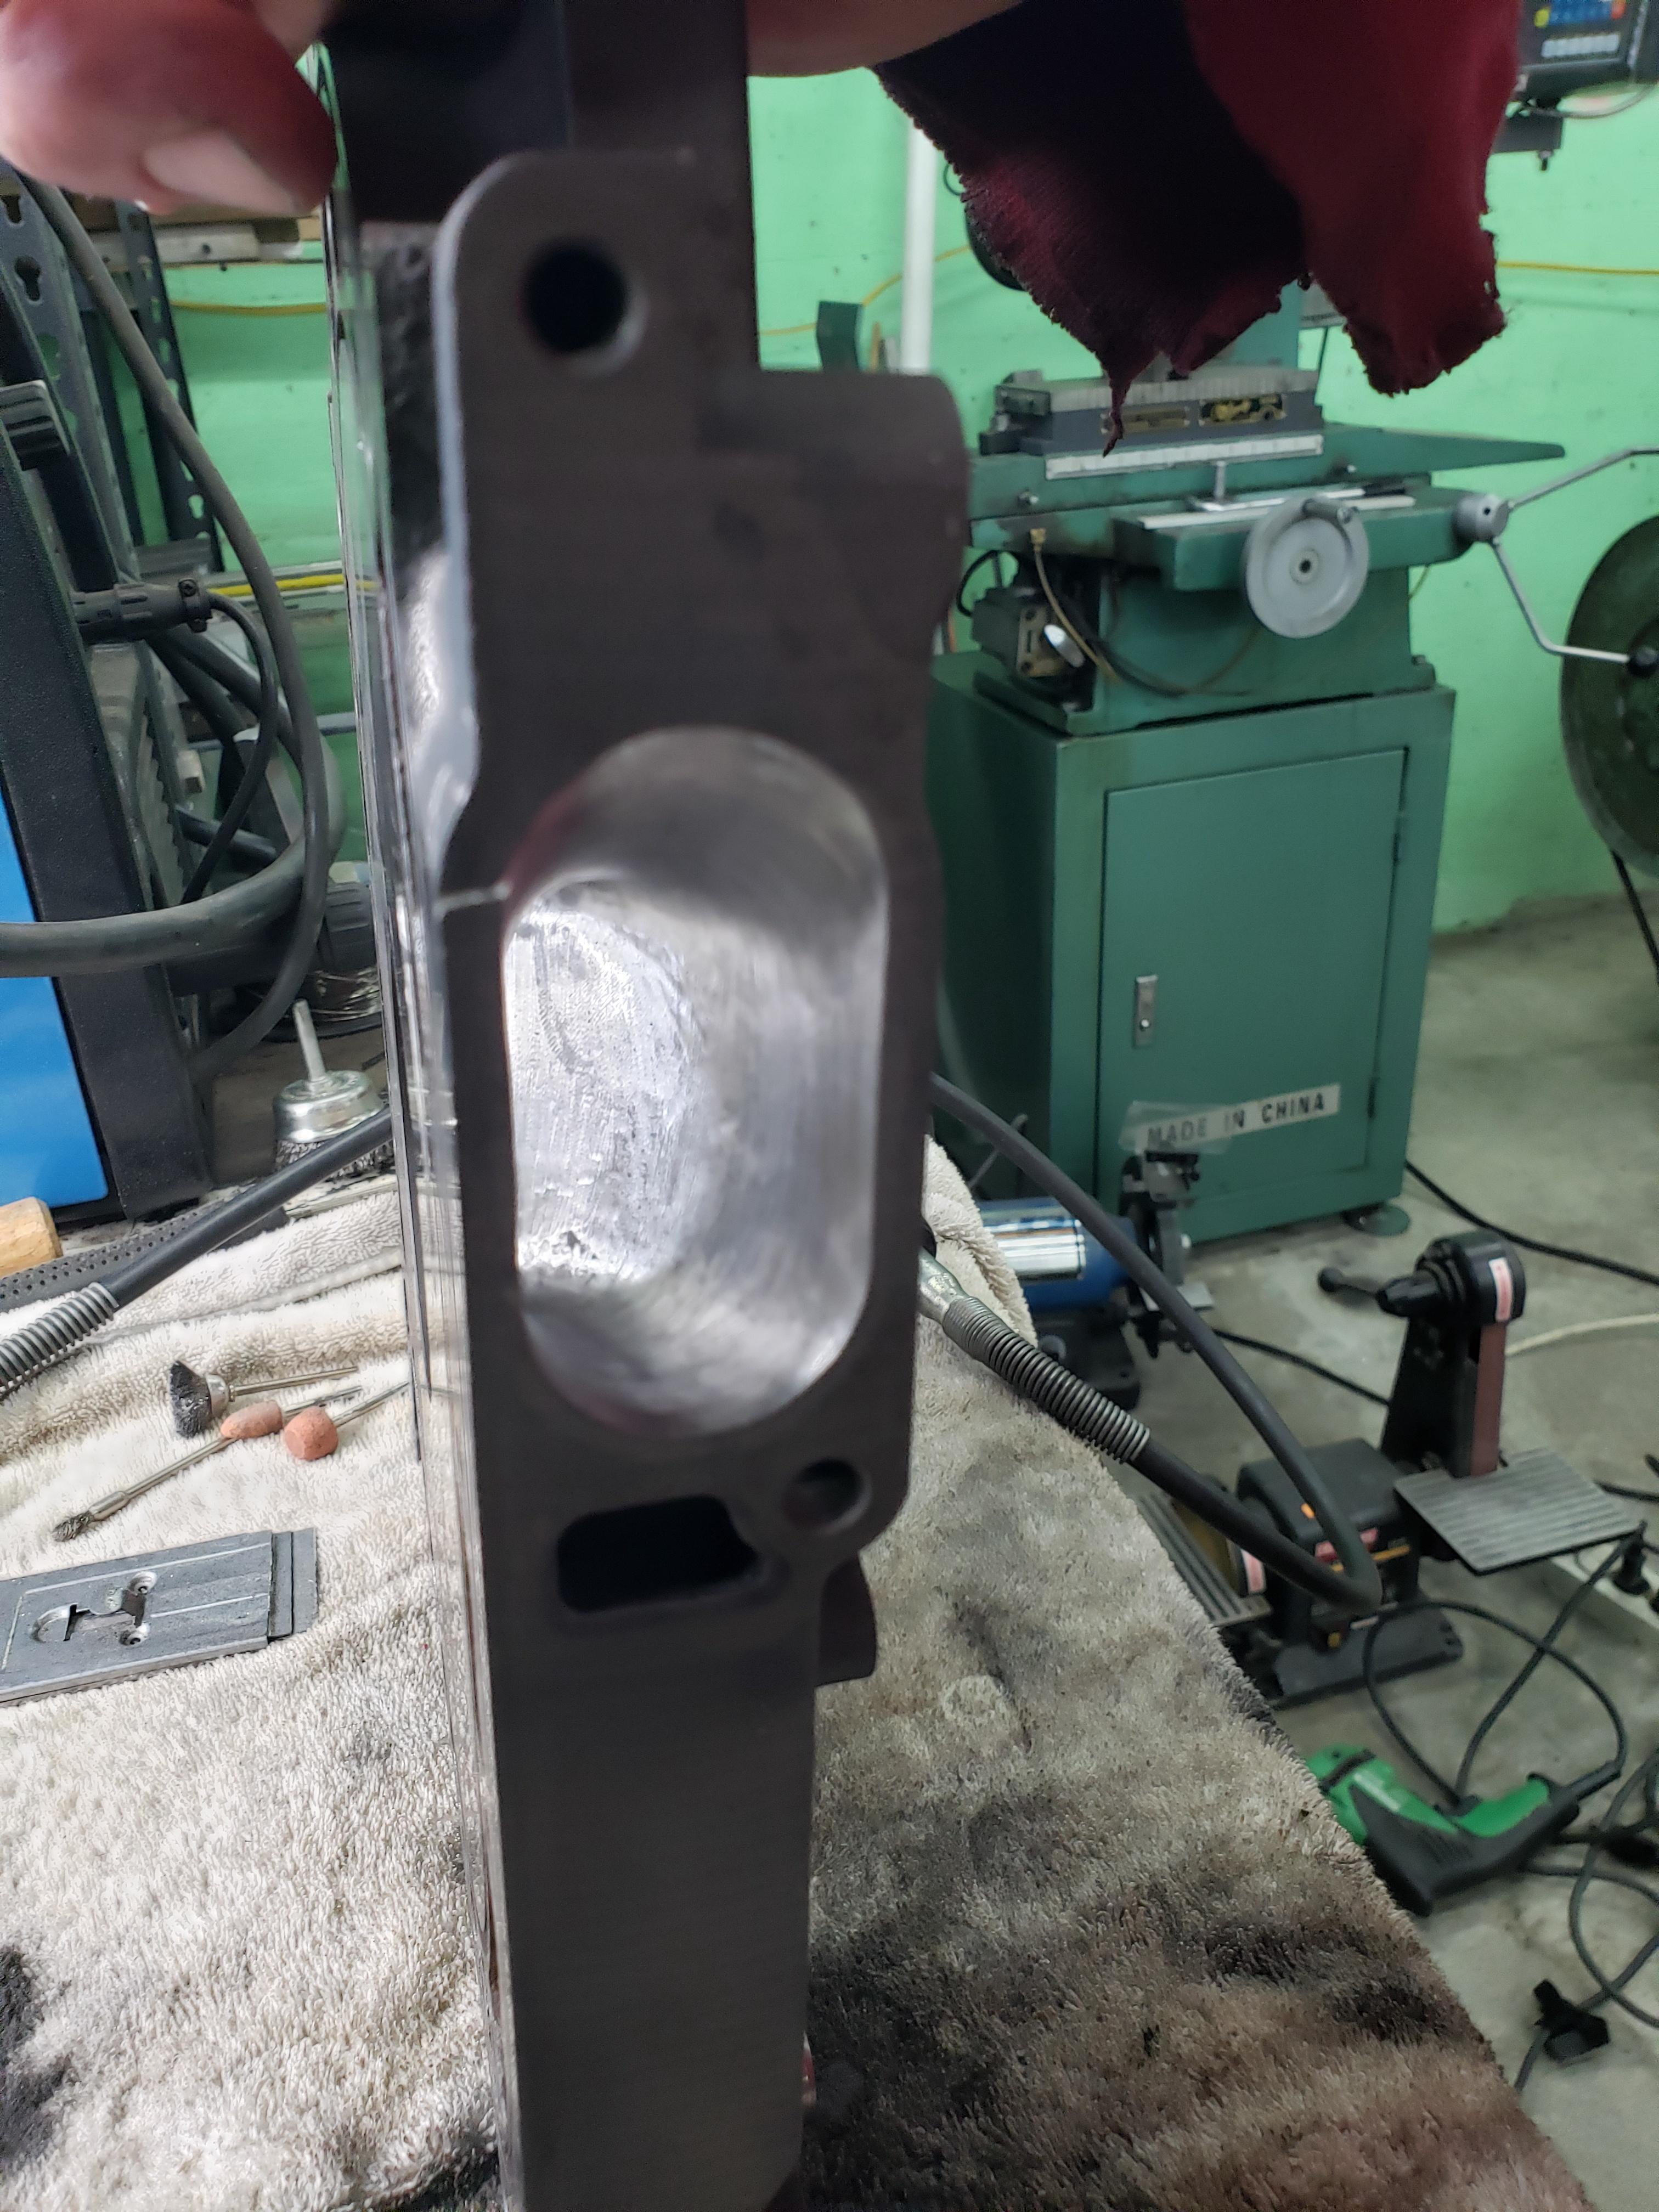
So what's the diagnosis? There is a LOT of carbon buildup on the rotor faces. There's a bunch of oil on the turbo intake pipes as well, so I'm guessing either the turbo oils seals are shot, or the PCV valve has failed. Any ways, this carbon buildup seems to have caused one side seal and one corner seal on R3 to stick in the down position. The side seal was stuck fairly well and took a bit of persuasion to come out, but it did, and in 1 piece even.
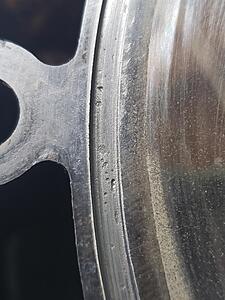
After seeing the carbon on the front rotor, I was pretty convinced I'd see some rotor housing damage as well from carbon flaking off and getting pushed around the engine. Nope, all the rotor housings look great! very minimal chrome flaking in the typical area, and no cracks near the spark plugs holes, and no chatter marks


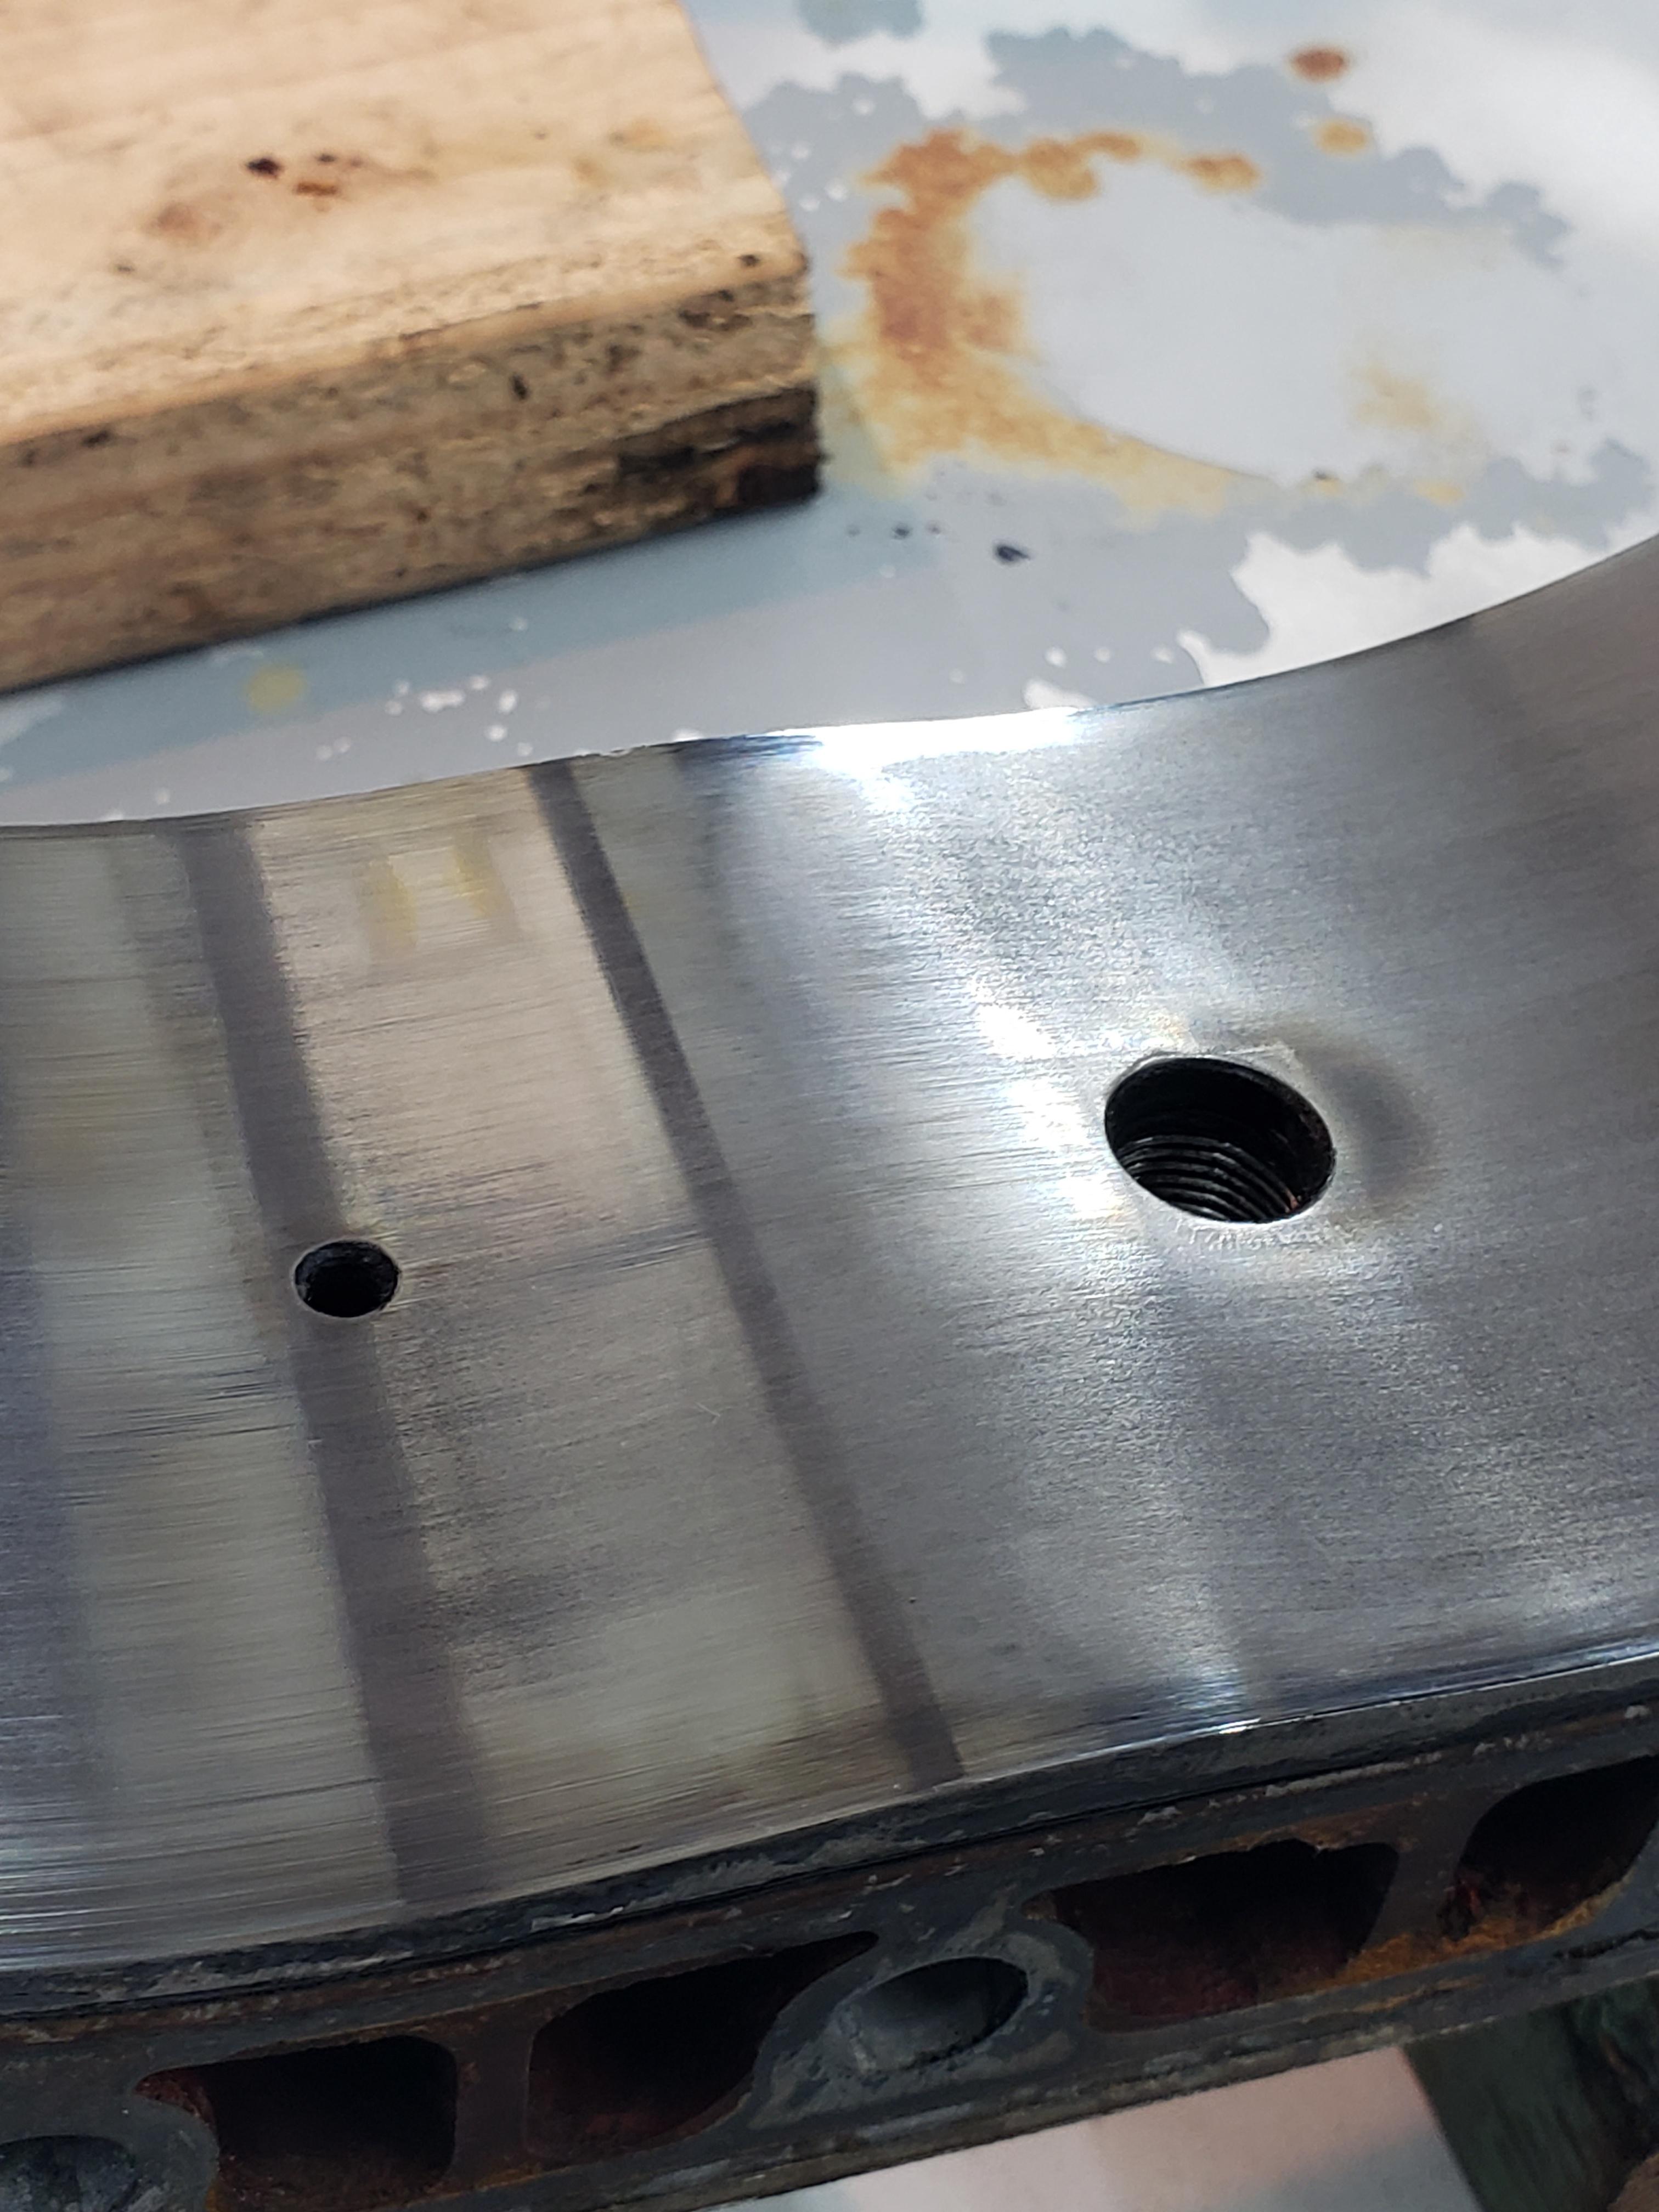
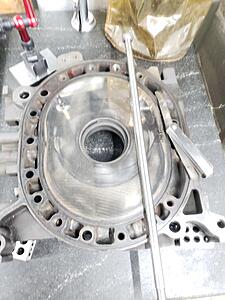
So what about the irons? From a preliminary look, they look great as well. I need to clean everything up and inspect everything per the FSM, but I can still see factory lapping marks on them.

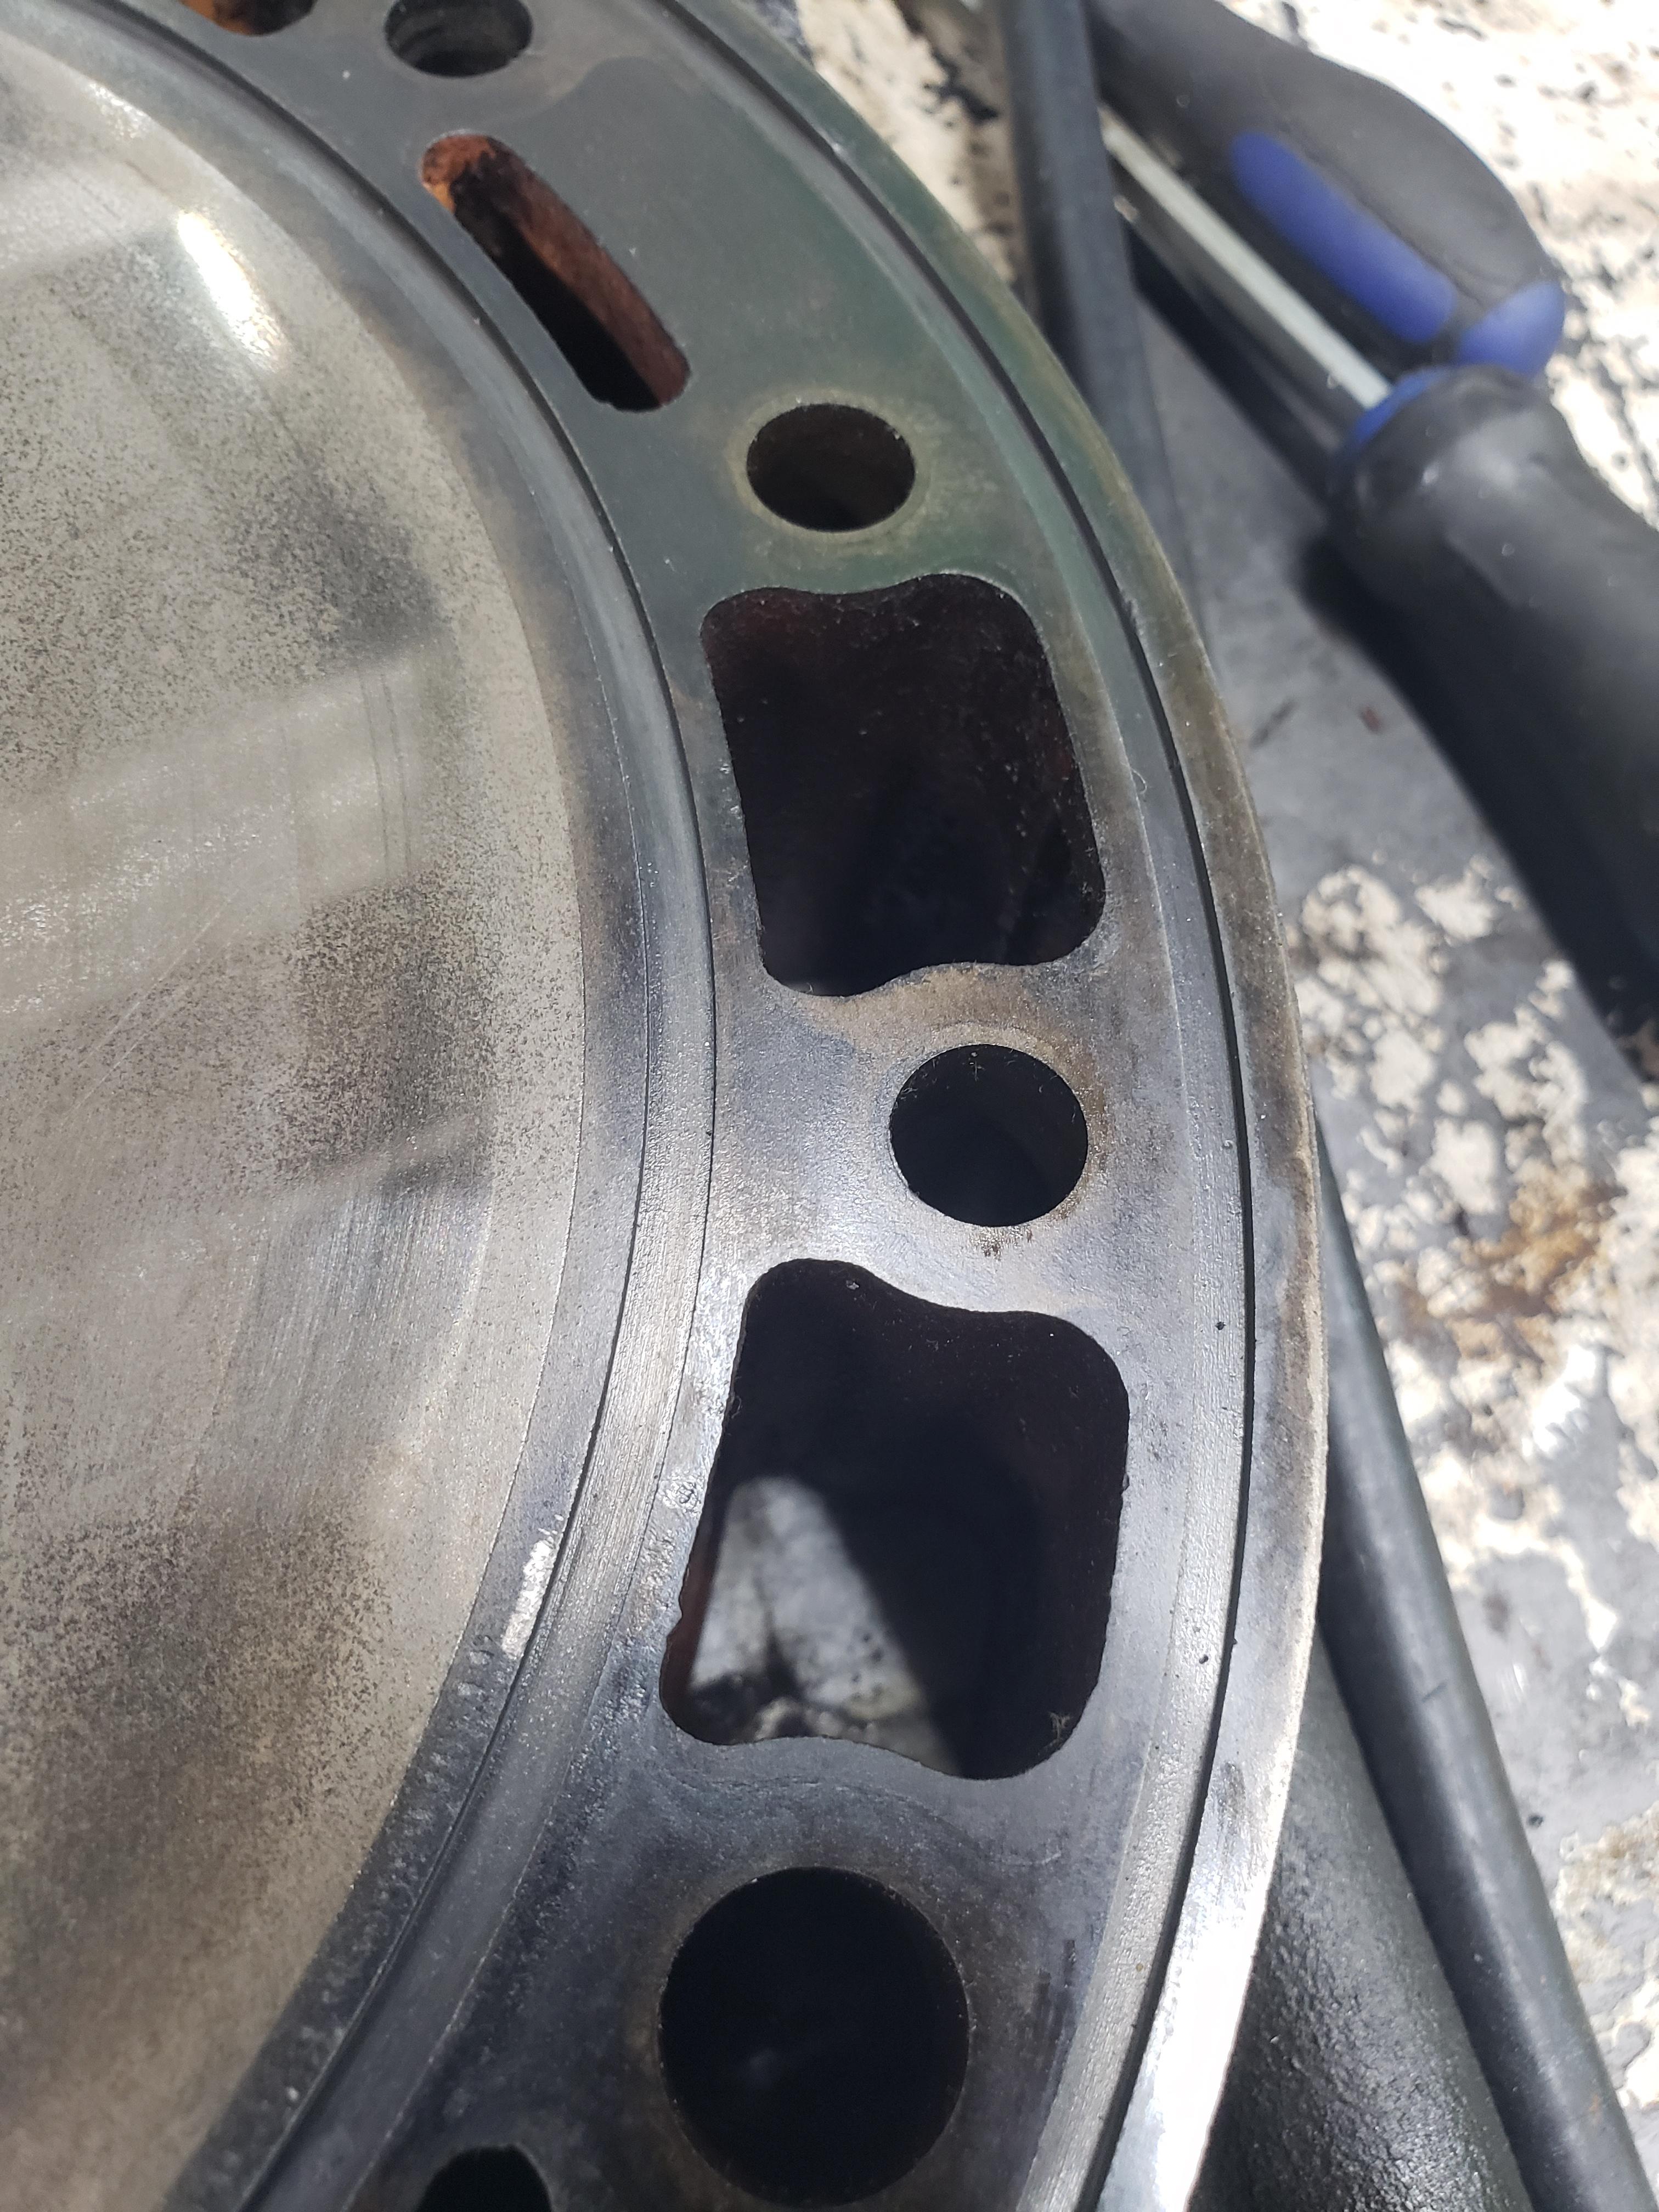
There is a LOT of gunk in the coolant passages, but the oring glands look solid, and I don't see any evidence of corrosion.

So I'm fairly hopeful at this point I can re-use most everything, but stay tuned to find out if I'm super lucky or completely boned...

The engine spun fine, no seized bearings or broken apex seals jamming the works up. Seemed to make compression on all faces as well. The yellow tag on the motor had compression #s on the back of it.
R1: 86, 83, 87....Ok, not stellar but not terrible
R2: 89, 90, 90...Little better, but still not superb
R3: 93, 49, 87....welp, there's your problem....
For those who are not aware, having low compression on one face of a rotor is fairly indicative of a side seal or corner seal failure. So I prepared myself for the likely hood of having a trashed iron. Rotor 3 is the rear rotor, so at least I wasn't looking at having to replace the super expensive thick iron quite yet.
About a week later I got the time to open her up and find what carnage lied in wait for me. I've never taken apart a 20B, so this was a learning experience for me. I started at the front rotor (R1), then turned it over and worked from the back side in until it was in lots of pieces
So what's the diagnosis? There is a LOT of carbon buildup on the rotor faces. There's a bunch of oil on the turbo intake pipes as well, so I'm guessing either the turbo oils seals are shot, or the PCV valve has failed. Any ways, this carbon buildup seems to have caused one side seal and one corner seal on R3 to stick in the down position. The side seal was stuck fairly well and took a bit of persuasion to come out, but it did, and in 1 piece even.

After seeing the carbon on the front rotor, I was pretty convinced I'd see some rotor housing damage as well from carbon flaking off and getting pushed around the engine. Nope, all the rotor housings look great! very minimal chrome flaking in the typical area, and no cracks near the spark plugs holes, and no chatter marks
So what about the irons? From a preliminary look, they look great as well. I need to clean everything up and inspect everything per the FSM, but I can still see factory lapping marks on them.
There is a LOT of gunk in the coolant passages, but the oring glands look solid, and I don't see any evidence of corrosion.
So I'm fairly hopeful at this point I can re-use most everything, but stay tuned to find out if I'm super lucky or completely boned...
Thread Starter
Joined: Mar 2002
Posts: 1,727
Likes: 541
From: binghamton, ny
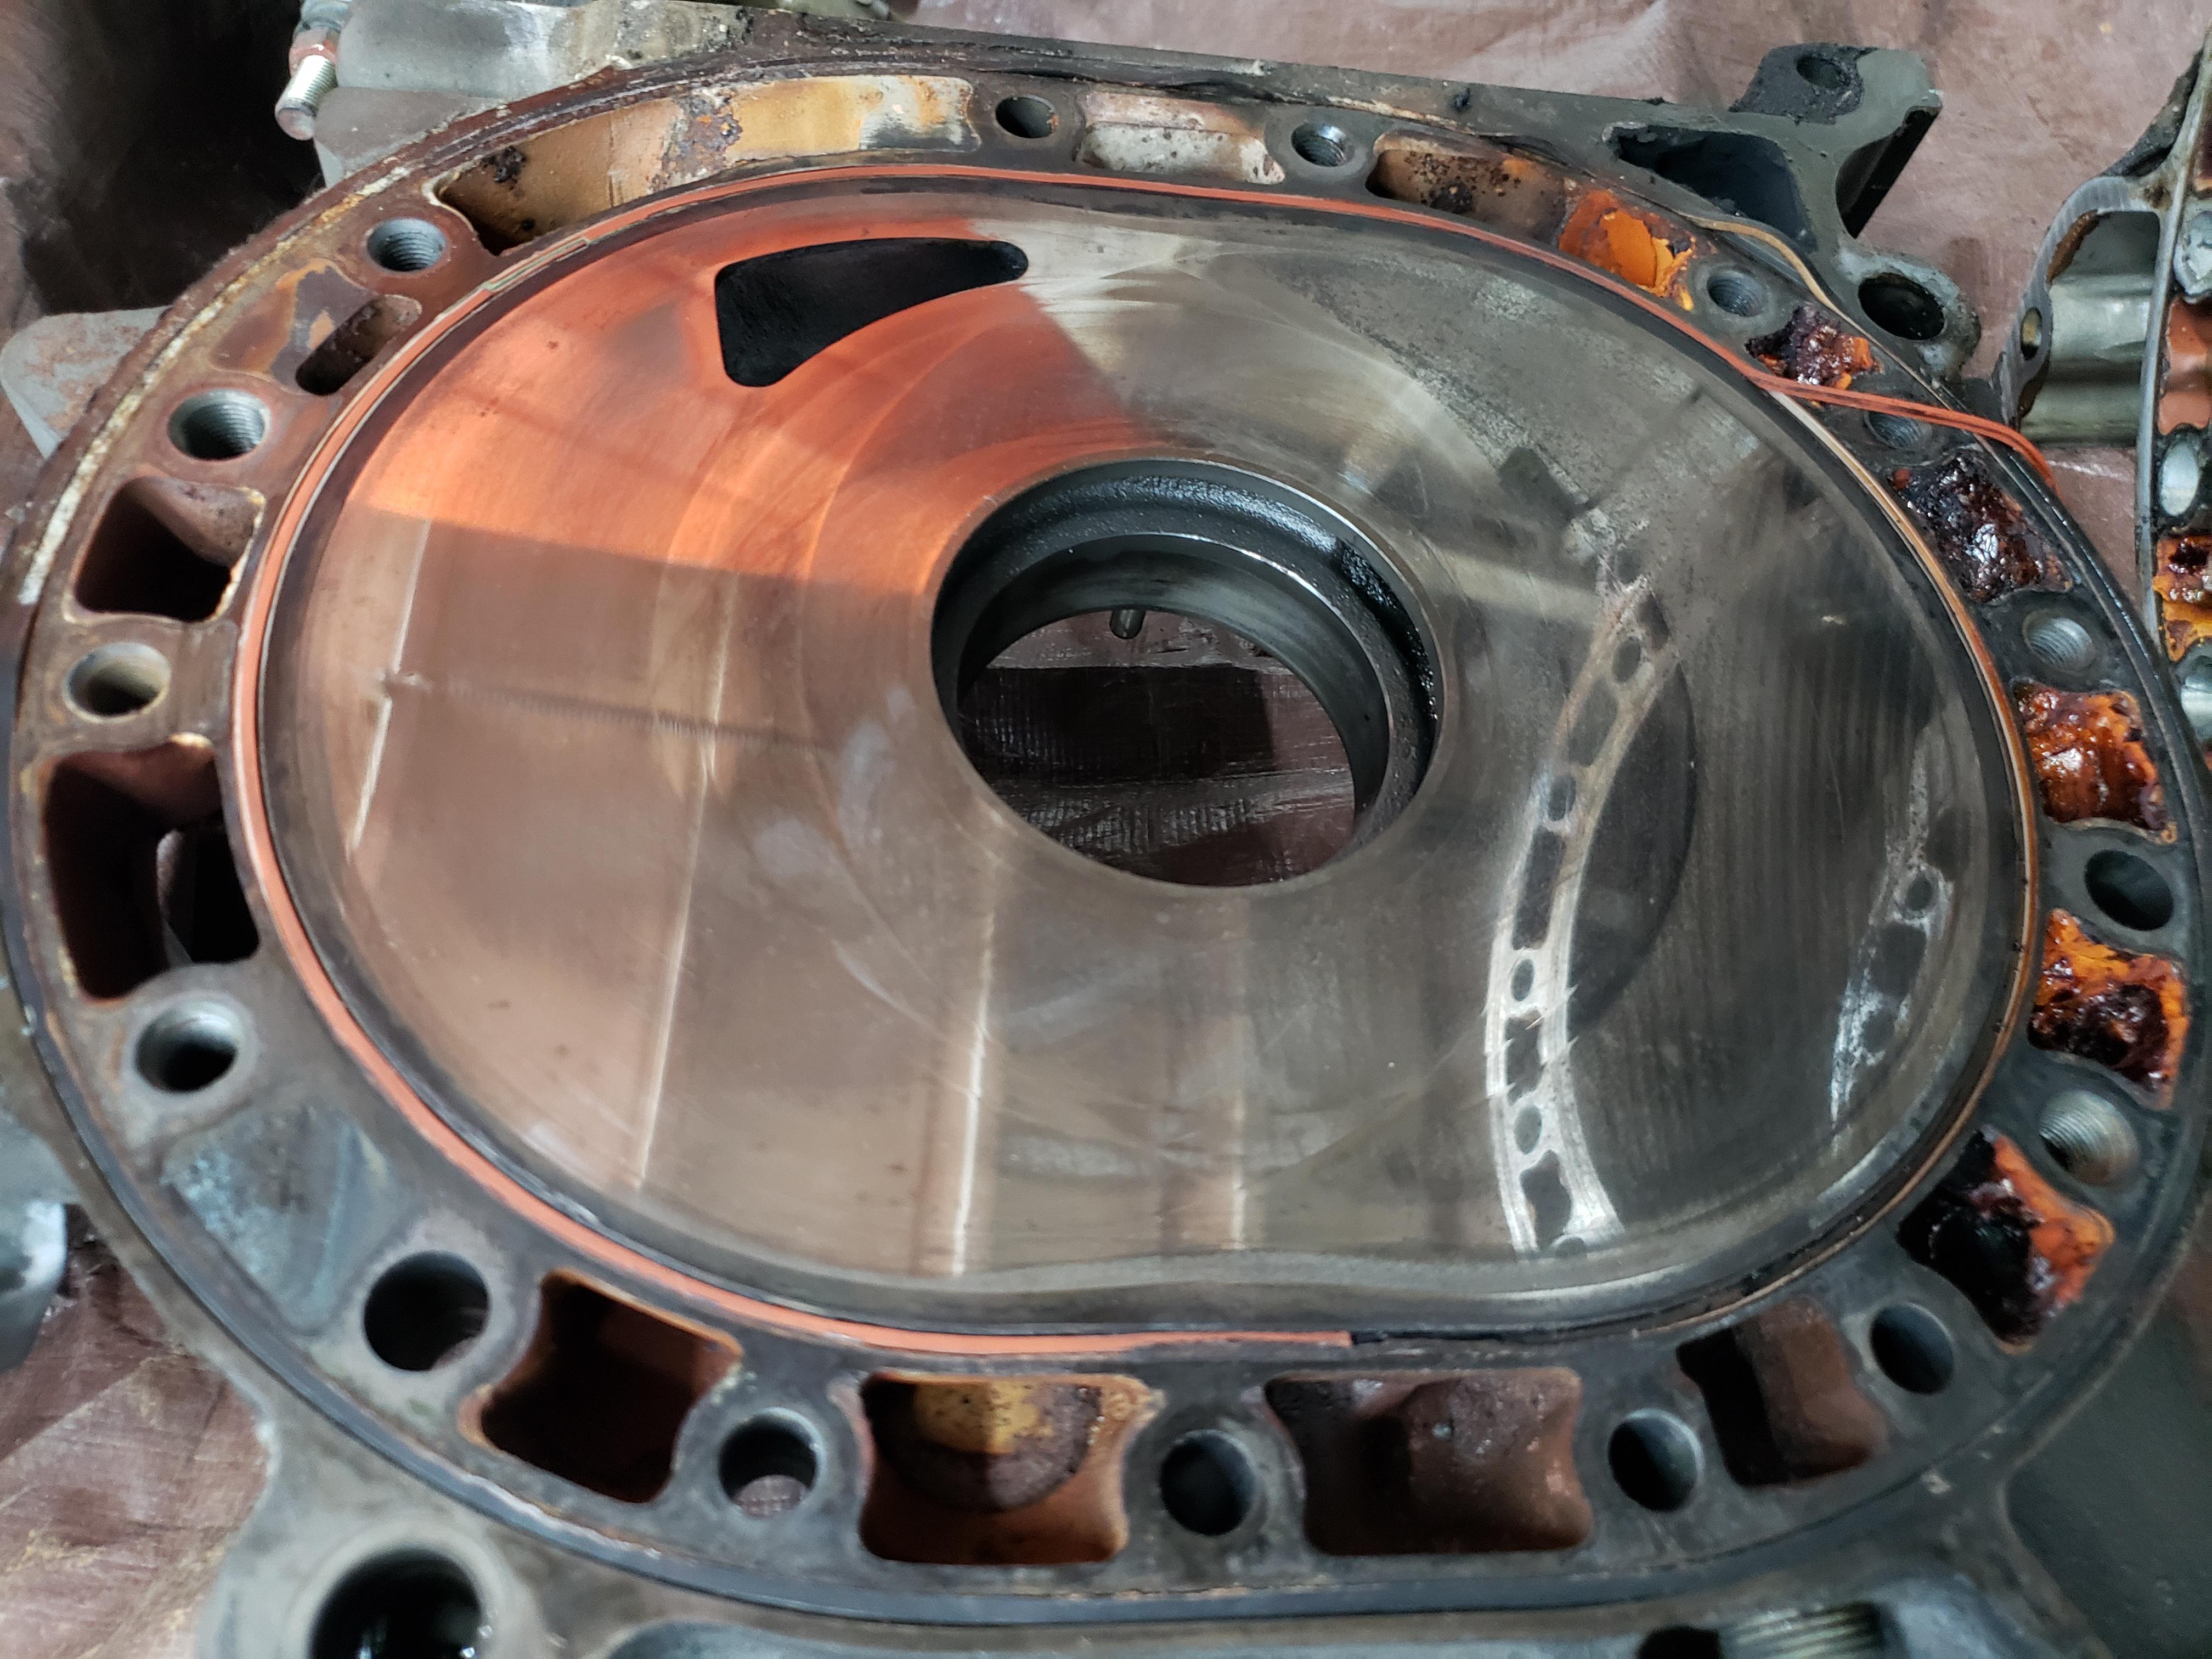
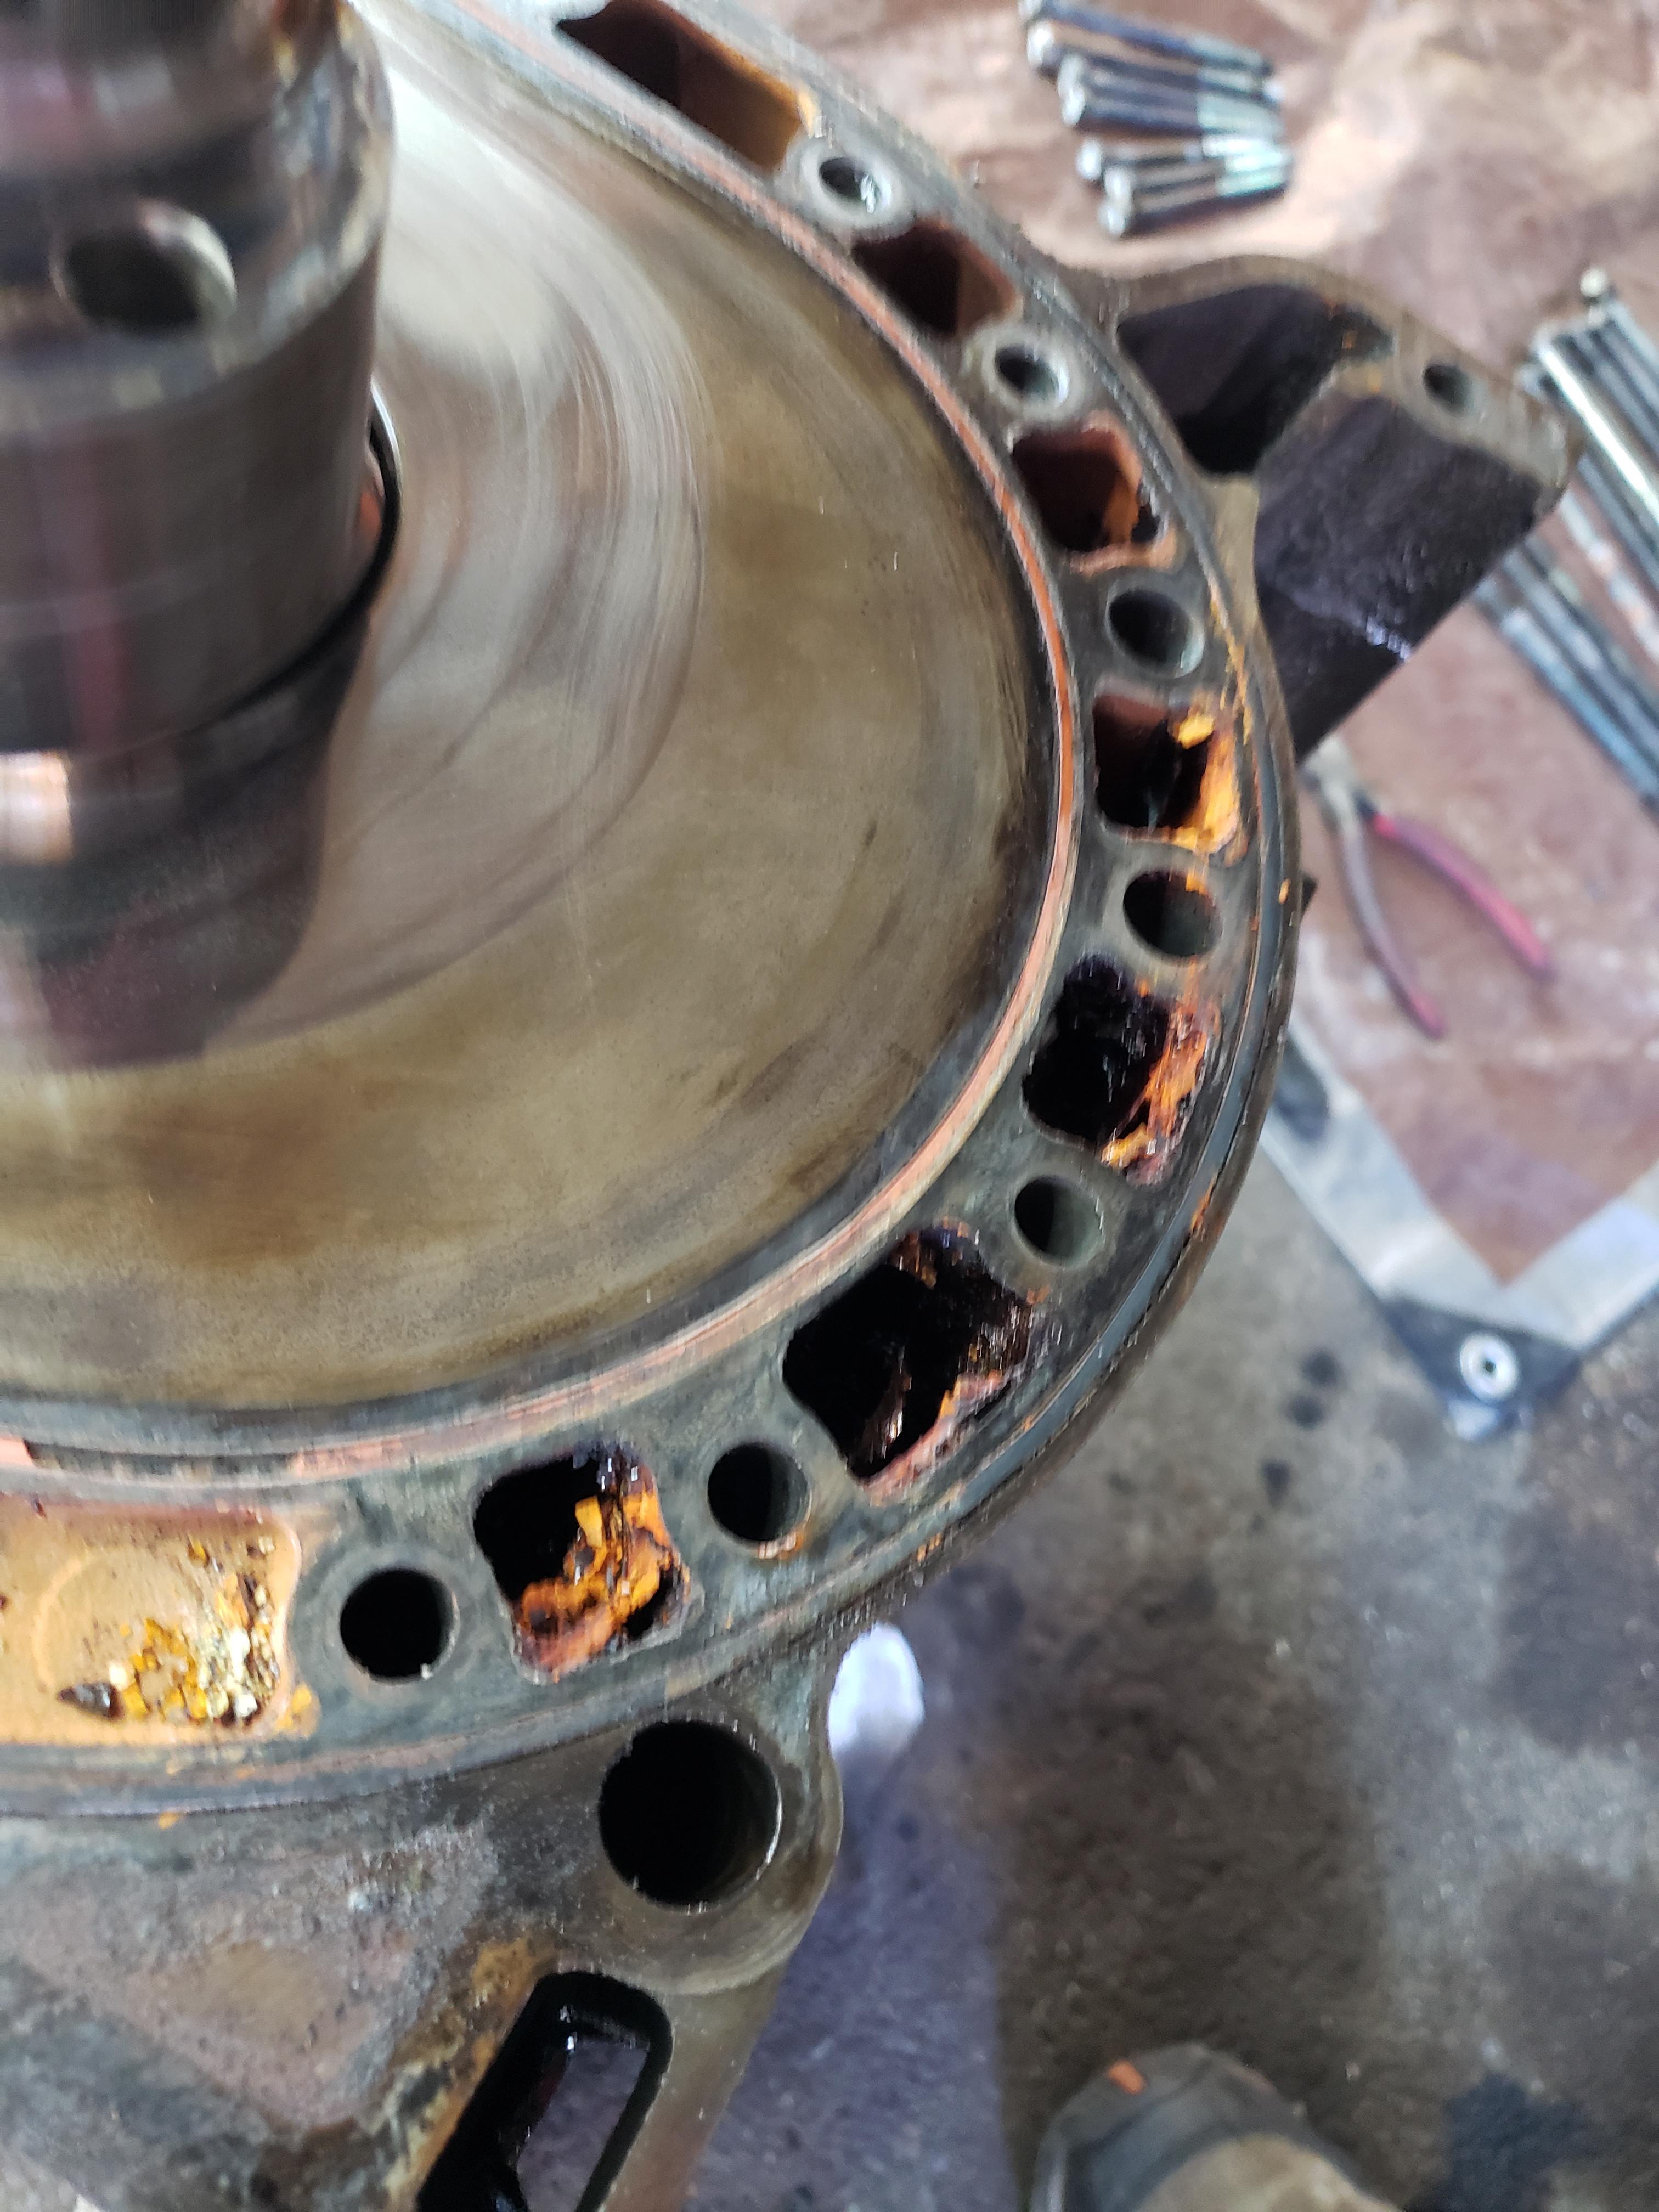
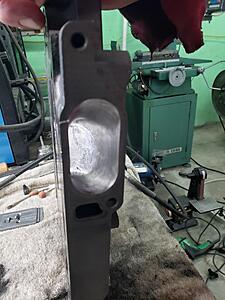
still lots of cleaning to do, but preliminarily the irons look good. Coolant glands are mostly pristine.

Very minor pitting on the intermediate housing, but nothing that'll hold up the works. Honestly with all the gunk in the passages I was expecting worse.
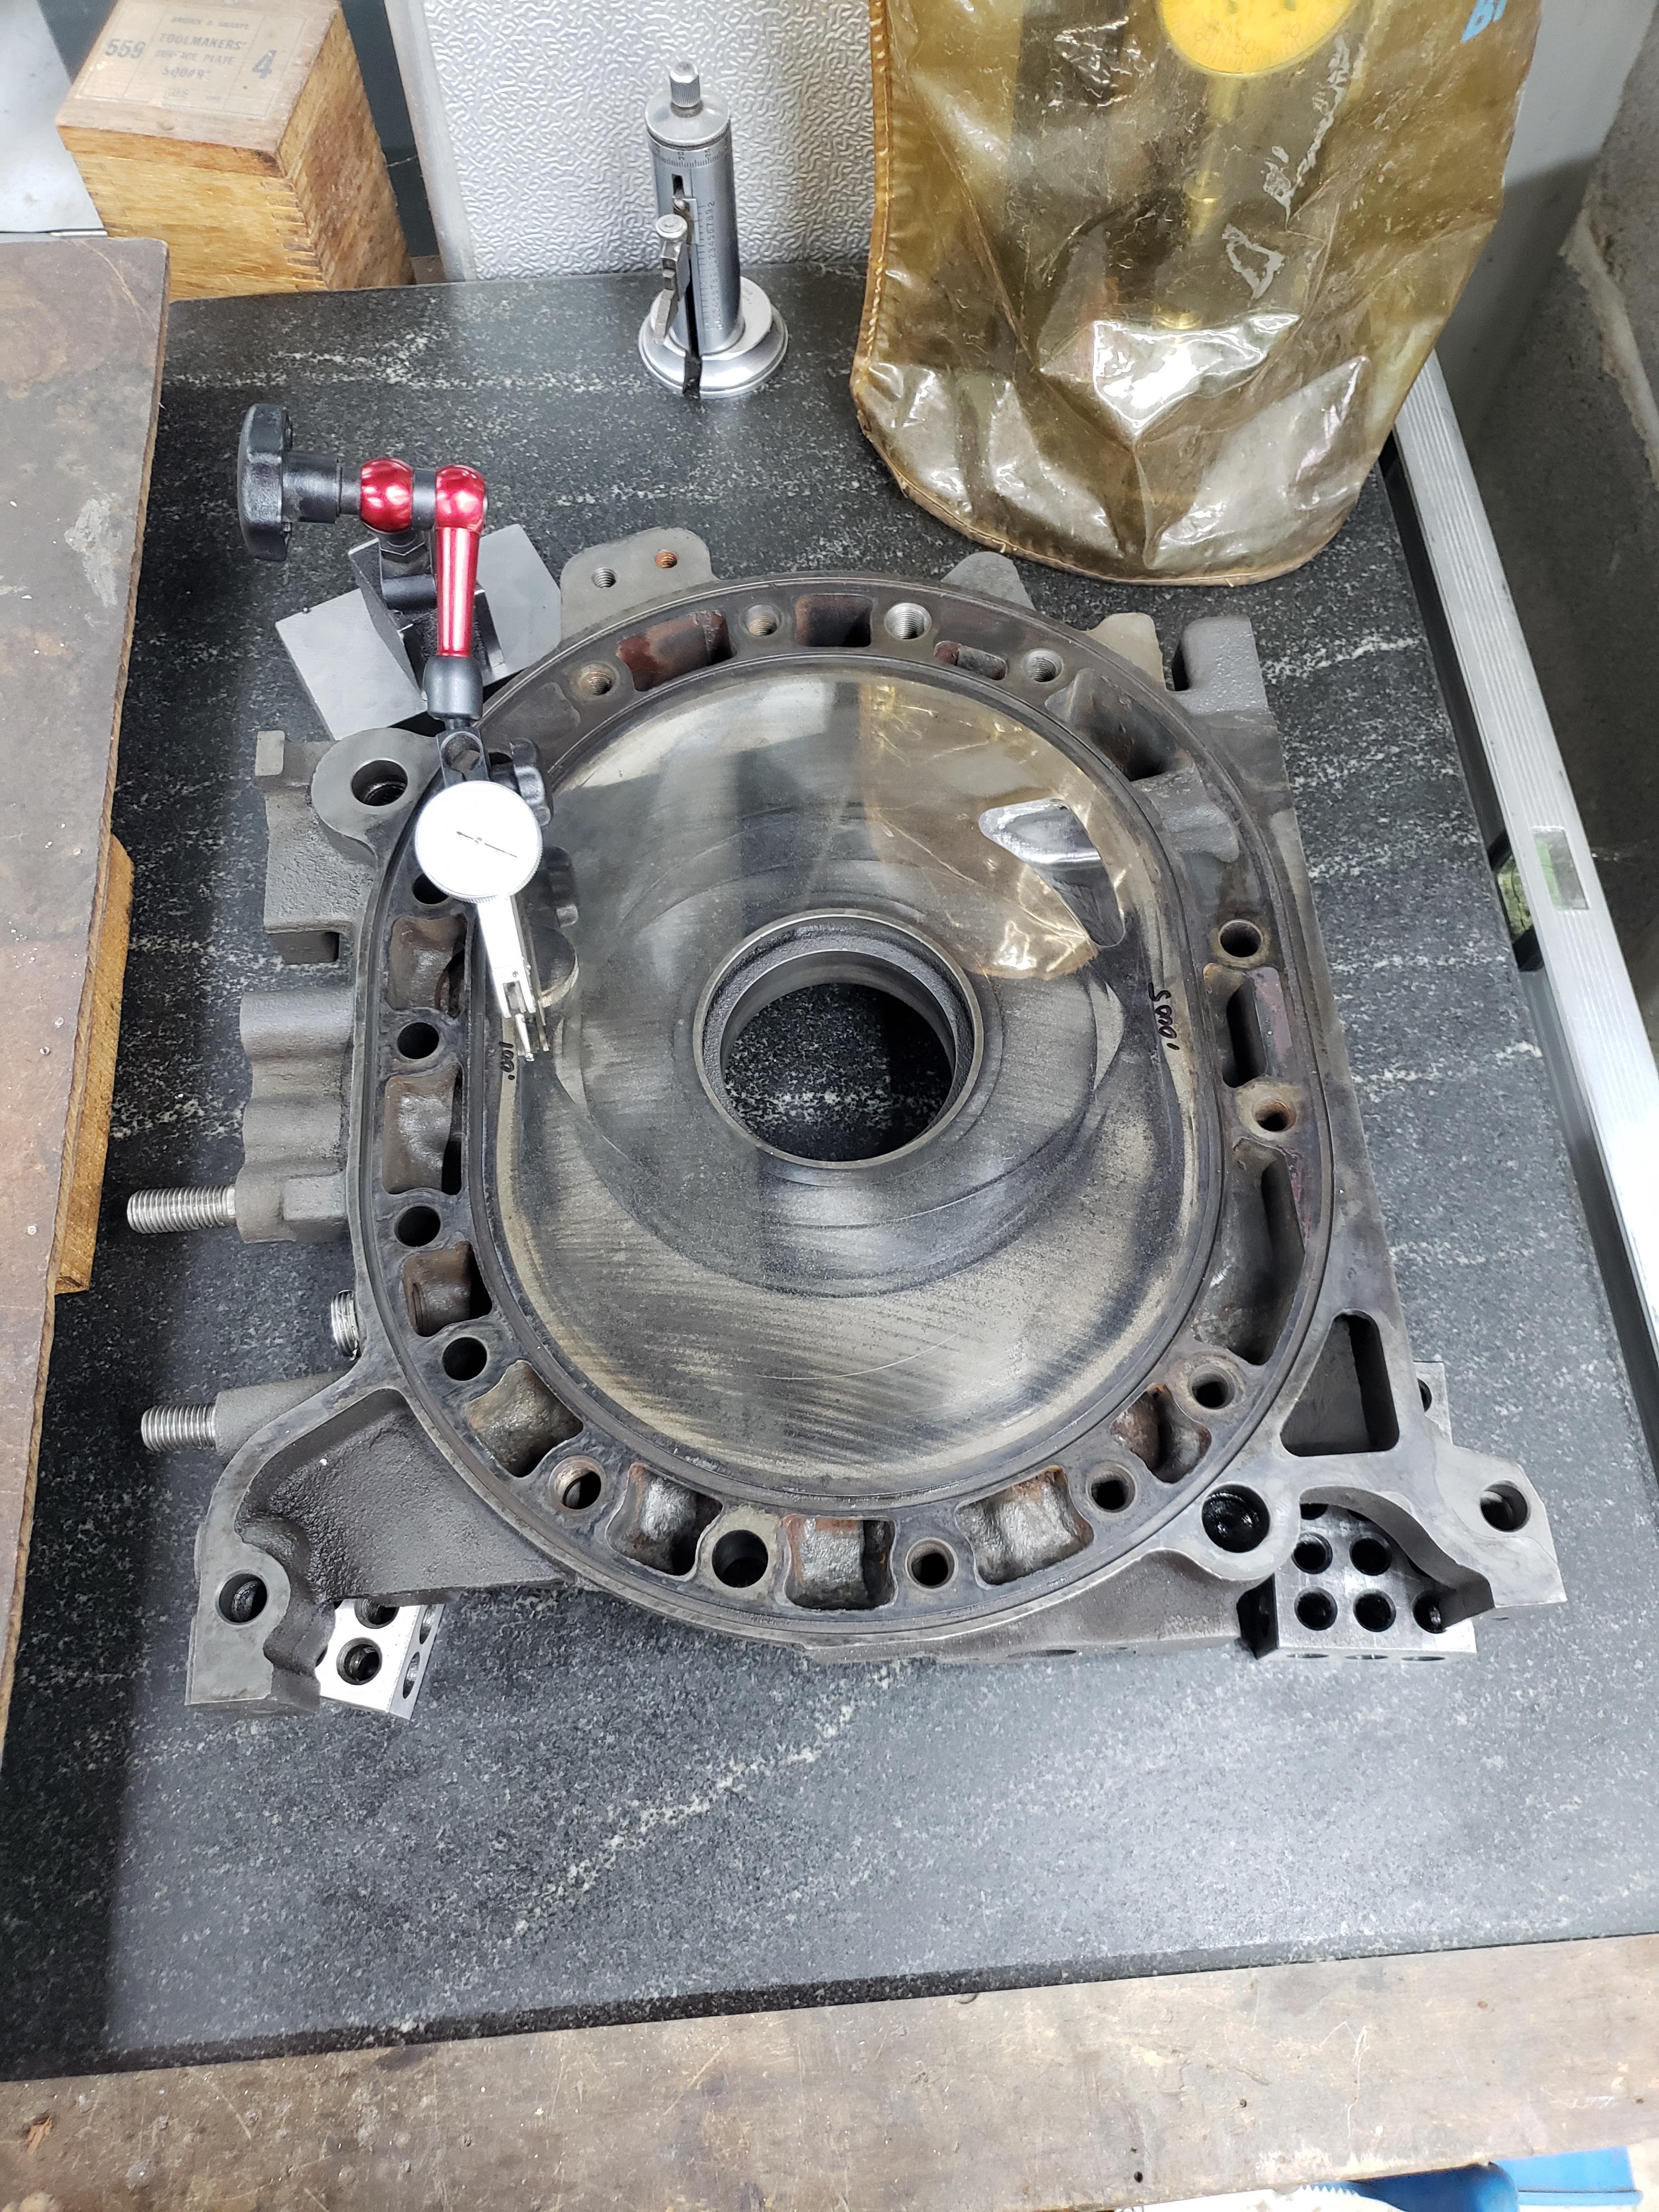
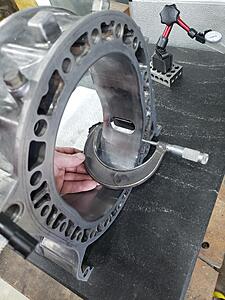
Also started looking at the housing wear. Worst I could find so far is only .0005" where the side seal rides.
Very minor pitting on the intermediate housing, but nothing that'll hold up the works. Honestly with all the gunk in the passages I was expecting worse.

Also started looking at the housing wear. Worst I could find so far is only .0005" where the side seal rides.
Thread Starter
Joined: Mar 2002
Posts: 1,727
Likes: 541
From: binghamton, ny
Well, the verdict is in on the irons at least. Looks like I am good for rebuild! The coolant passages cleaned up really well, and despite all the gunk that was in them, show no major corrosion issues. Also, for anyone looking to clean irons the lazy way, I soaked these in a tub of drain cleaner (sodium hydroxid, aka lye), and they came out nearly free of all grease. I still had to wire wheel all the coolant gunk out, but it sure beat scrubbing irons for hours.

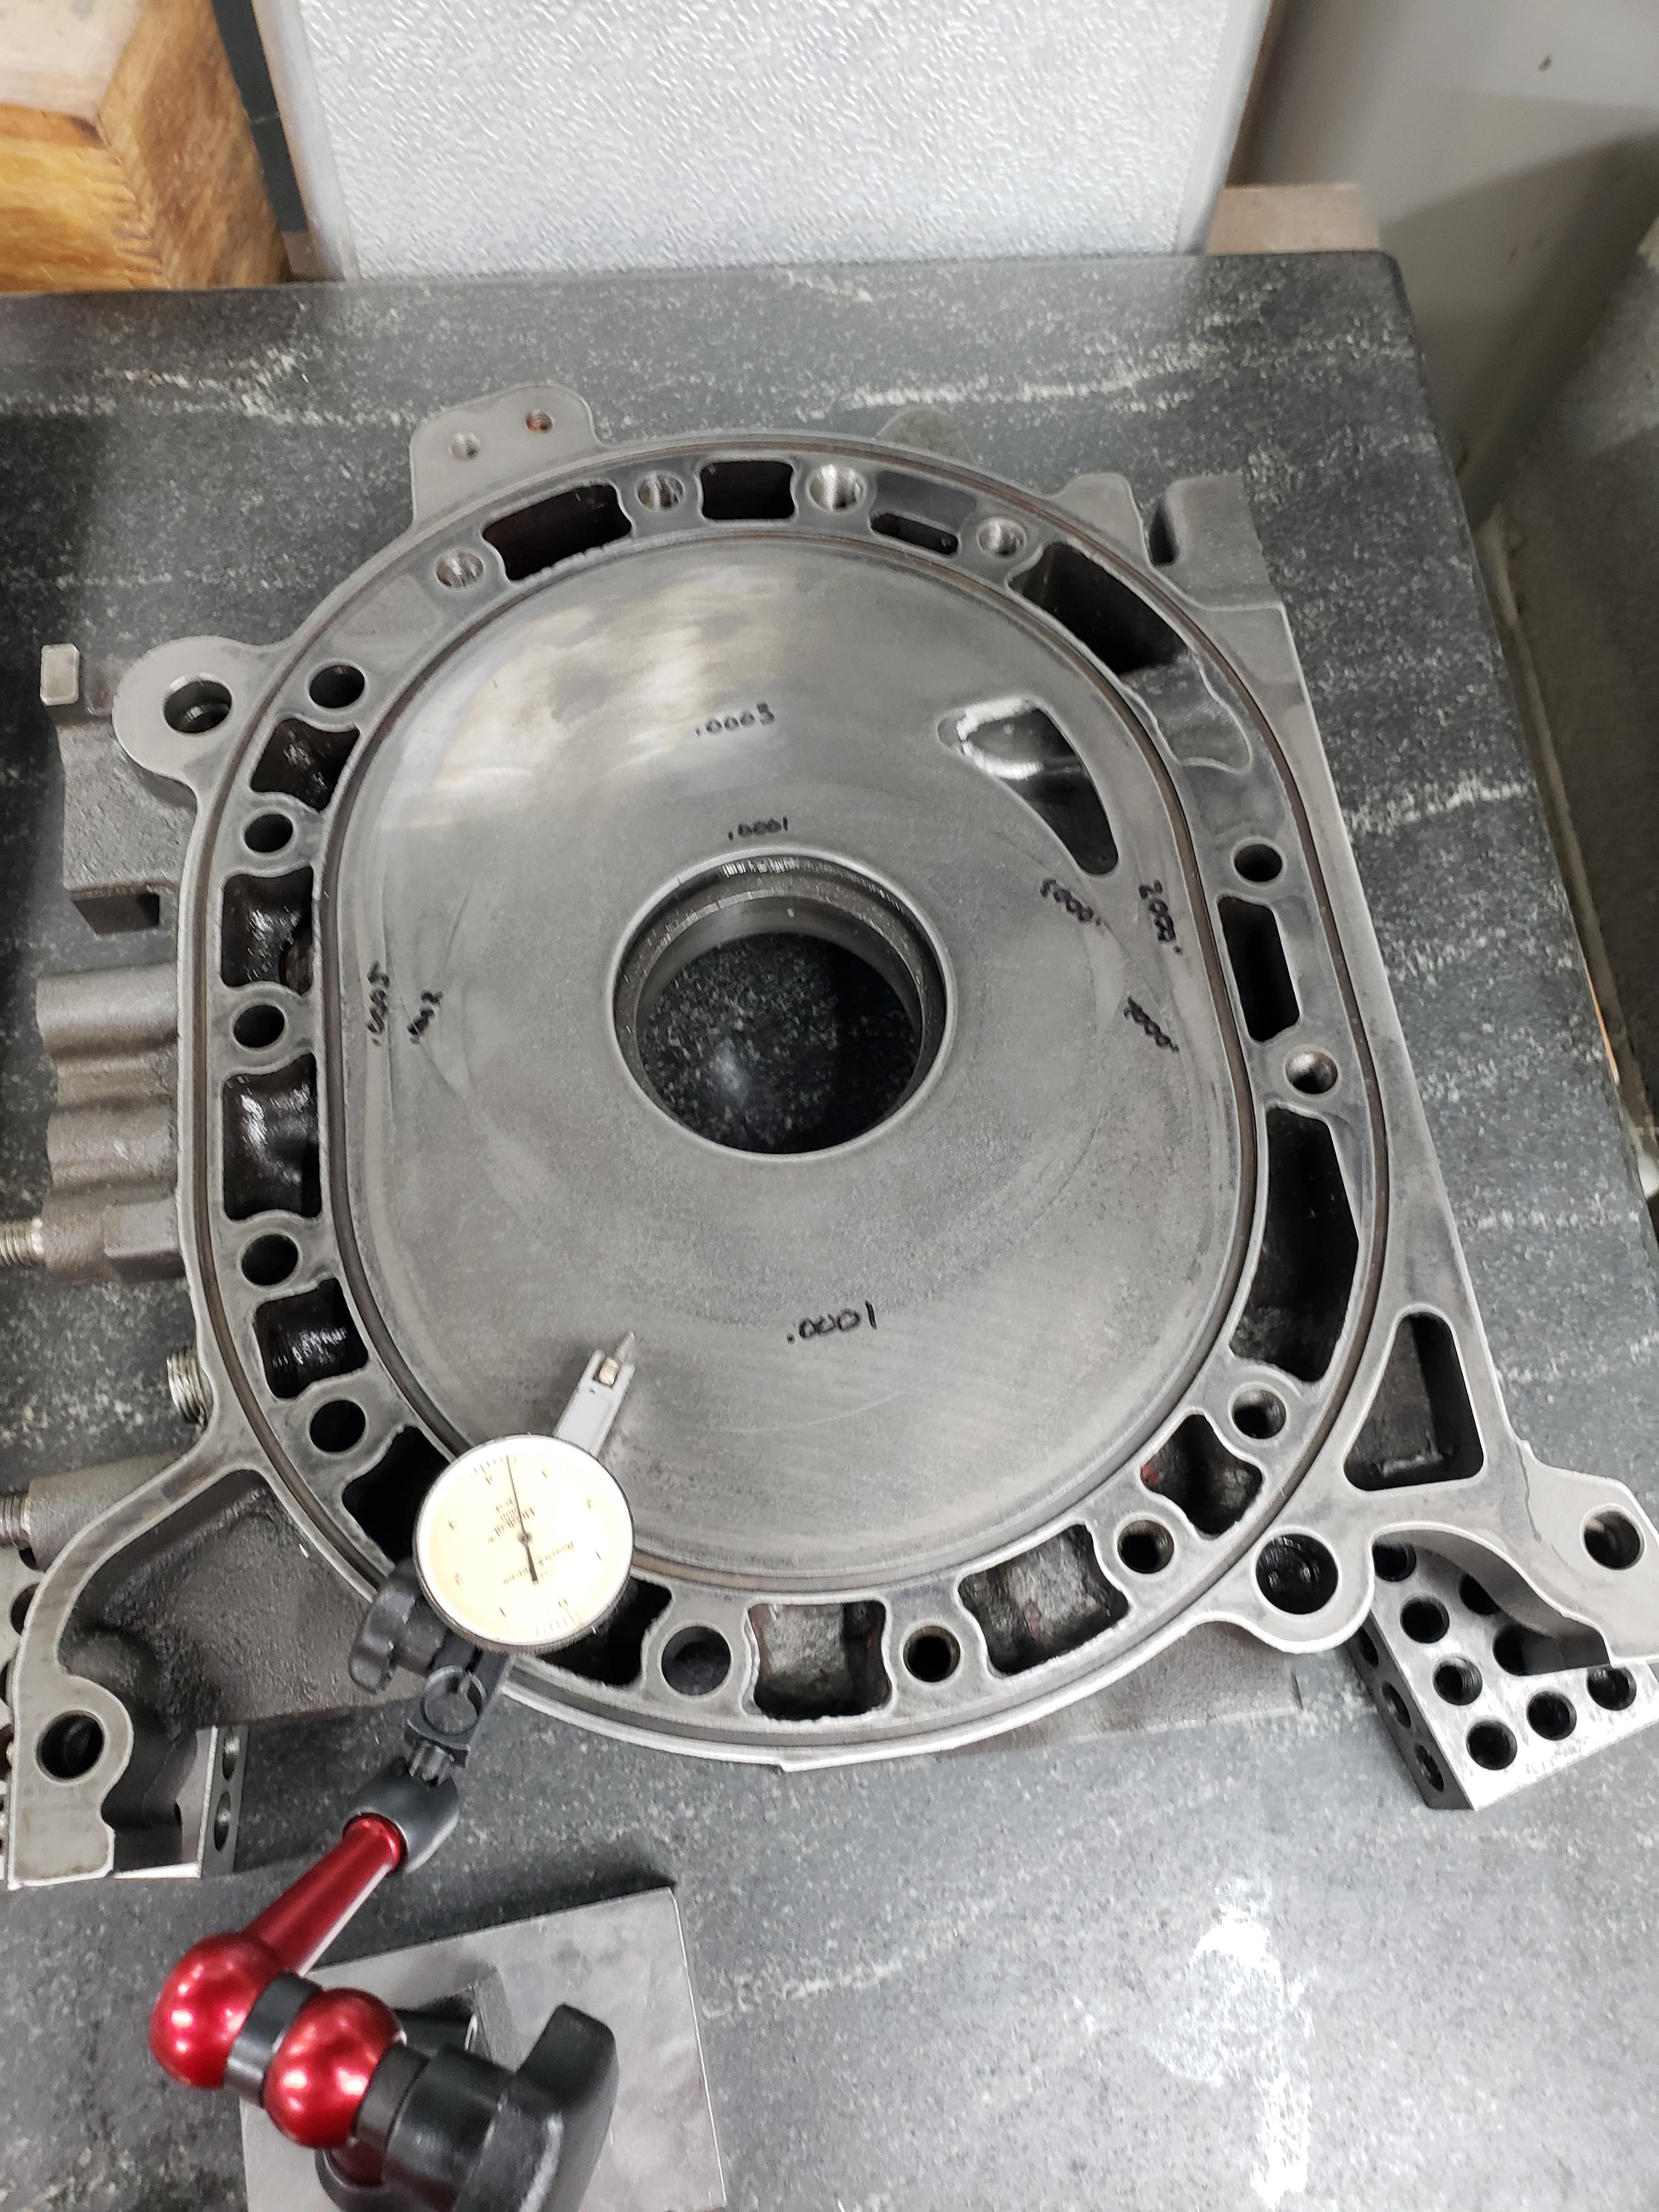
All the irons were measured per the S5 FSM, and passed with FLYING colors. The highest wear is of course where the side seal and oil control ring rides, and the worst iron still only had a .001" of wear.
but most surfaces only had a few thenths of wear, which is incredably good.
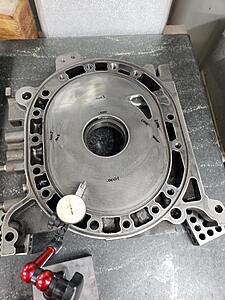
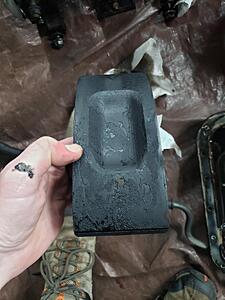
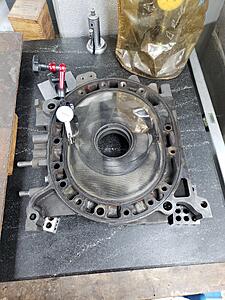
And the biggest concern I had was flatness. Not a single problem on any of the plates. (sorry for the crappy picture...)
While I was getting the irons ready, I also clenaed up the intake passages. I dind't make any port timing changes, just cleaned up the castings a bit. These cosmo ports are fairly large already.
Next up, clean and inspect the rotor housings and e-shaft.

All the irons were measured per the S5 FSM, and passed with FLYING colors. The highest wear is of course where the side seal and oil control ring rides, and the worst iron still only had a .001" of wear.
but most surfaces only had a few thenths of wear, which is incredably good.
And the biggest concern I had was flatness. Not a single problem on any of the plates. (sorry for the crappy picture...)
While I was getting the irons ready, I also clenaed up the intake passages. I dind't make any port timing changes, just cleaned up the castings a bit. These cosmo ports are fairly large already.
Next up, clean and inspect the rotor housings and e-shaft.

Thread Starter
Joined: Mar 2002
Posts: 1,727
Likes: 541
From: binghamton, ny
so funny you say that, becasue that was the driving force behind wanting a 20B. I have no need for 500HP, and you'll never use that on the street anyways. Current plans are to keep the twins in sequentail operation, so i'll be relatively low HP for a 20B build, and well within the realm of a well tuned 13B....but the sound and torque are what I require....haha
Joined: Mar 2001
Posts: 31,857
Likes: 3,243
From: https://www2.mazda.com/en/100th/
so funny you say that, becasue that was the driving force behind wanting a 20B. I have no need for 500HP, and you'll never use that on the street anyways. Current plans are to keep the twins in sequentail operation, so i'll be relatively low HP for a 20B build, and well within the realm of a well tuned 13B....but the sound and torque are what I require....haha
8psi on the twins is like the hand of god pushing you in the seat though!
Thread Starter
Joined: Mar 2002
Posts: 1,727
Likes: 541
From: binghamton, ny
They do for sure. I keep flopping back and forth if I want to put the effort into making a turbo manifold and run a smaller turbo like a GT35R. It would be a lot simpler, but like you mention, these things have great power even at stock boost levels, so I’m not sure it's worth the investment. Realistically I'm going to drive this car like a little old lady 90% of the time, so the stock turbos (assuming they are good still) will likely be sufficient for me.
What ECU did you use for your engine?
What ECU did you use for your engine?
Trending Topics
Joined: Mar 2001
Posts: 31,857
Likes: 3,243
From: https://www2.mazda.com/en/100th/
They do for sure. I keep flopping back and forth if I want to put the effort into making a turbo manifold and run a smaller turbo like a GT35R. It would be a lot simpler, but like you mention, these things have great power even at stock boost levels, so I�m not sure it's worth the investment. Realistically I'm going to drive this car like a little old lady 90% of the time, so the stock turbos (assuming they are good still) will likely be sufficient for me.
What ECU did you use for your engine?
What ECU did you use for your engine?
i would have had to make the harness, in 2001 you couldn't buy all the connectors, so i bought an E6K that did alright considering. then when the E11 came out i put one of those in, which was better when it worked. project ended when i was facing having to buy a third ecu just to drive the thing. i put about 8k miles on it, it went to Sevenstock twice, no three times? this is 2004? so its back to the 13B-T.
those are Mustang Bullitt wheels

Thread Starter
Joined: Mar 2002
Posts: 1,727
Likes: 541
From: binghamton, ny
what was the issue with the E11?
If I had the stock ECU, I'd seriously consider that as an option just to get it up and running. Did you ever drive it on the stock ECU, and did it freak out when it couldn't find any of the AT related sensors?
If I had the stock ECU, I'd seriously consider that as an option just to get it up and running. Did you ever drive it on the stock ECU, and did it freak out when it couldn't find any of the AT related sensors?
Joined: Mar 2001
Posts: 31,857
Likes: 3,243
From: https://www2.mazda.com/en/100th/
i never drove mine with the stock ecu, but my friend did one where we got to drive it up and down the street. another friend of mine got a front clip, and got the clip running with no codes, and then swapped it all into a B2600 pickup, and THAT ran better than any other 20B i've ever seen. the look on peoples face was pretty good, cause they see an 80's Mazda pickup with the camper shell, and think they can go around it, and then it just disappears


Thread Starter
Joined: Mar 2002
Posts: 1,727
Likes: 541
From: binghamton, ny
So far, yes. Rotors look good, irons look good, and all the bearings except the rear stationary gear look great. I'm still cleaning up the rotor housings, but preliminarily by eye they look to be in decent shape. I still need to check runout on the shaft as well, although I have yet to come acrost a firm number that I should be looking for.
Thread Starter
Joined: Mar 2002
Posts: 1,727
Likes: 541
From: binghamton, ny
Minor updates:
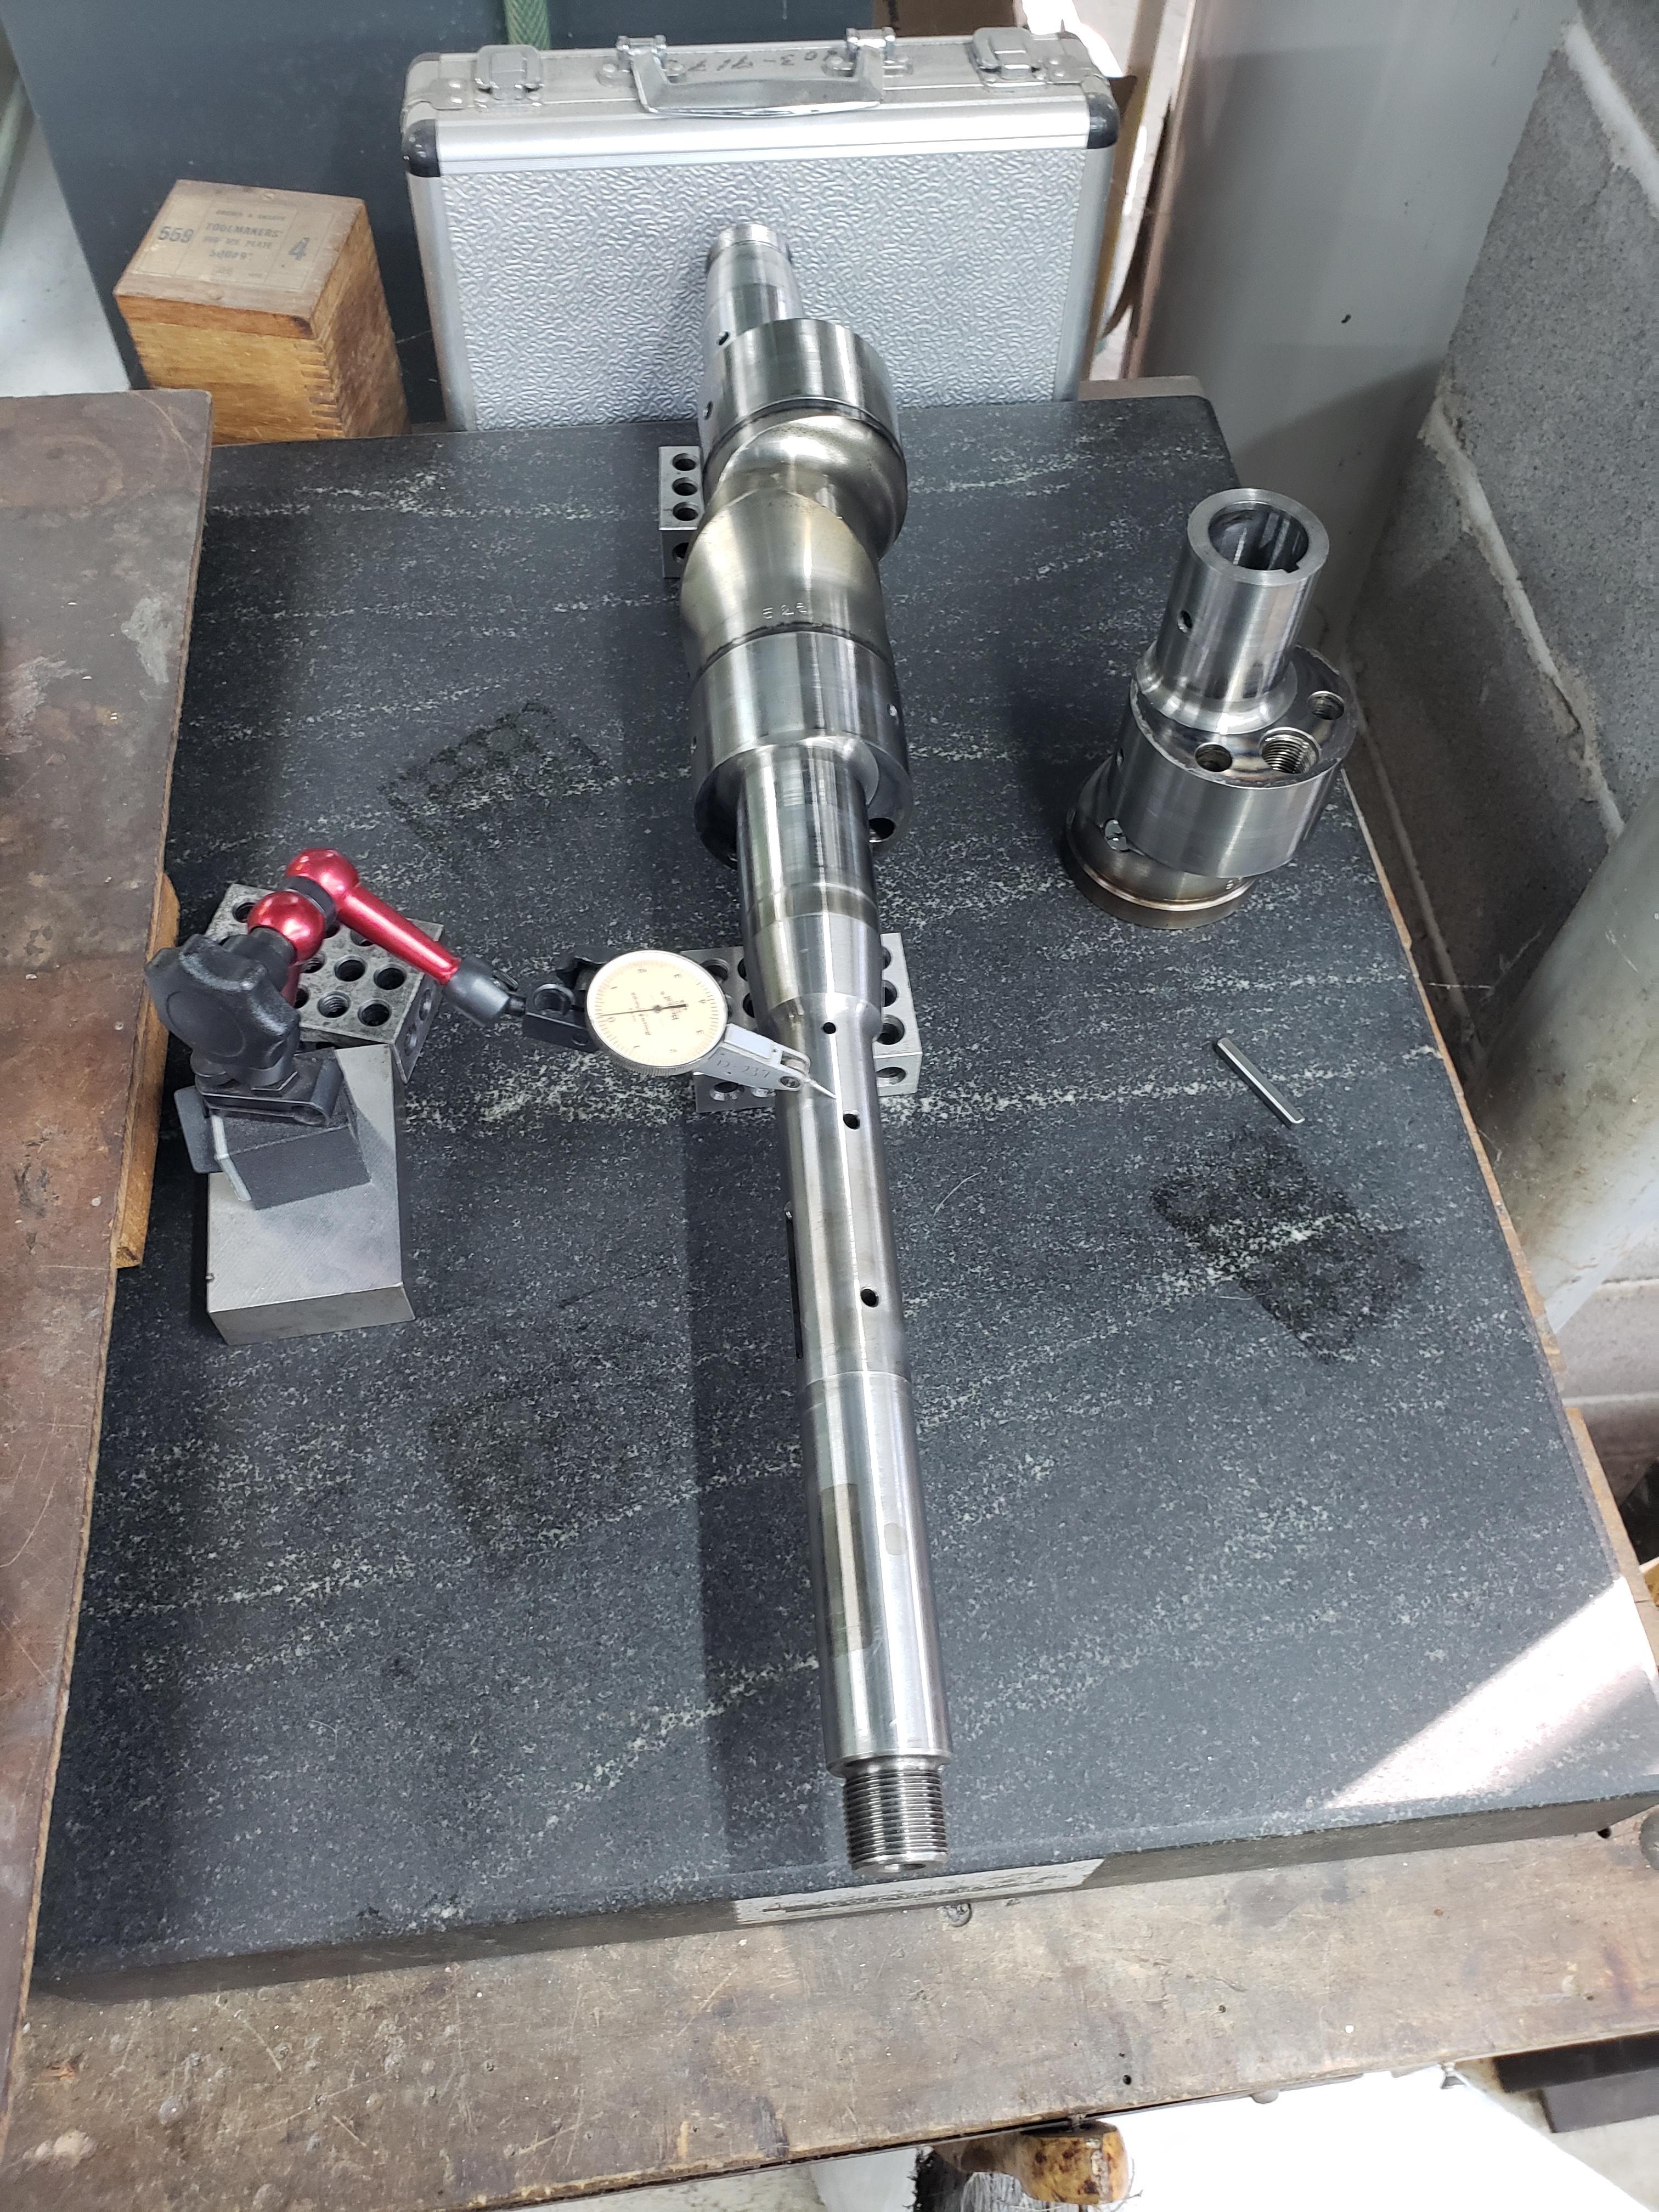
shaft is inspected. Runout of the shaft where the bearing would ride is around .005". No idea if that's good or not, but I'm rolling with it.

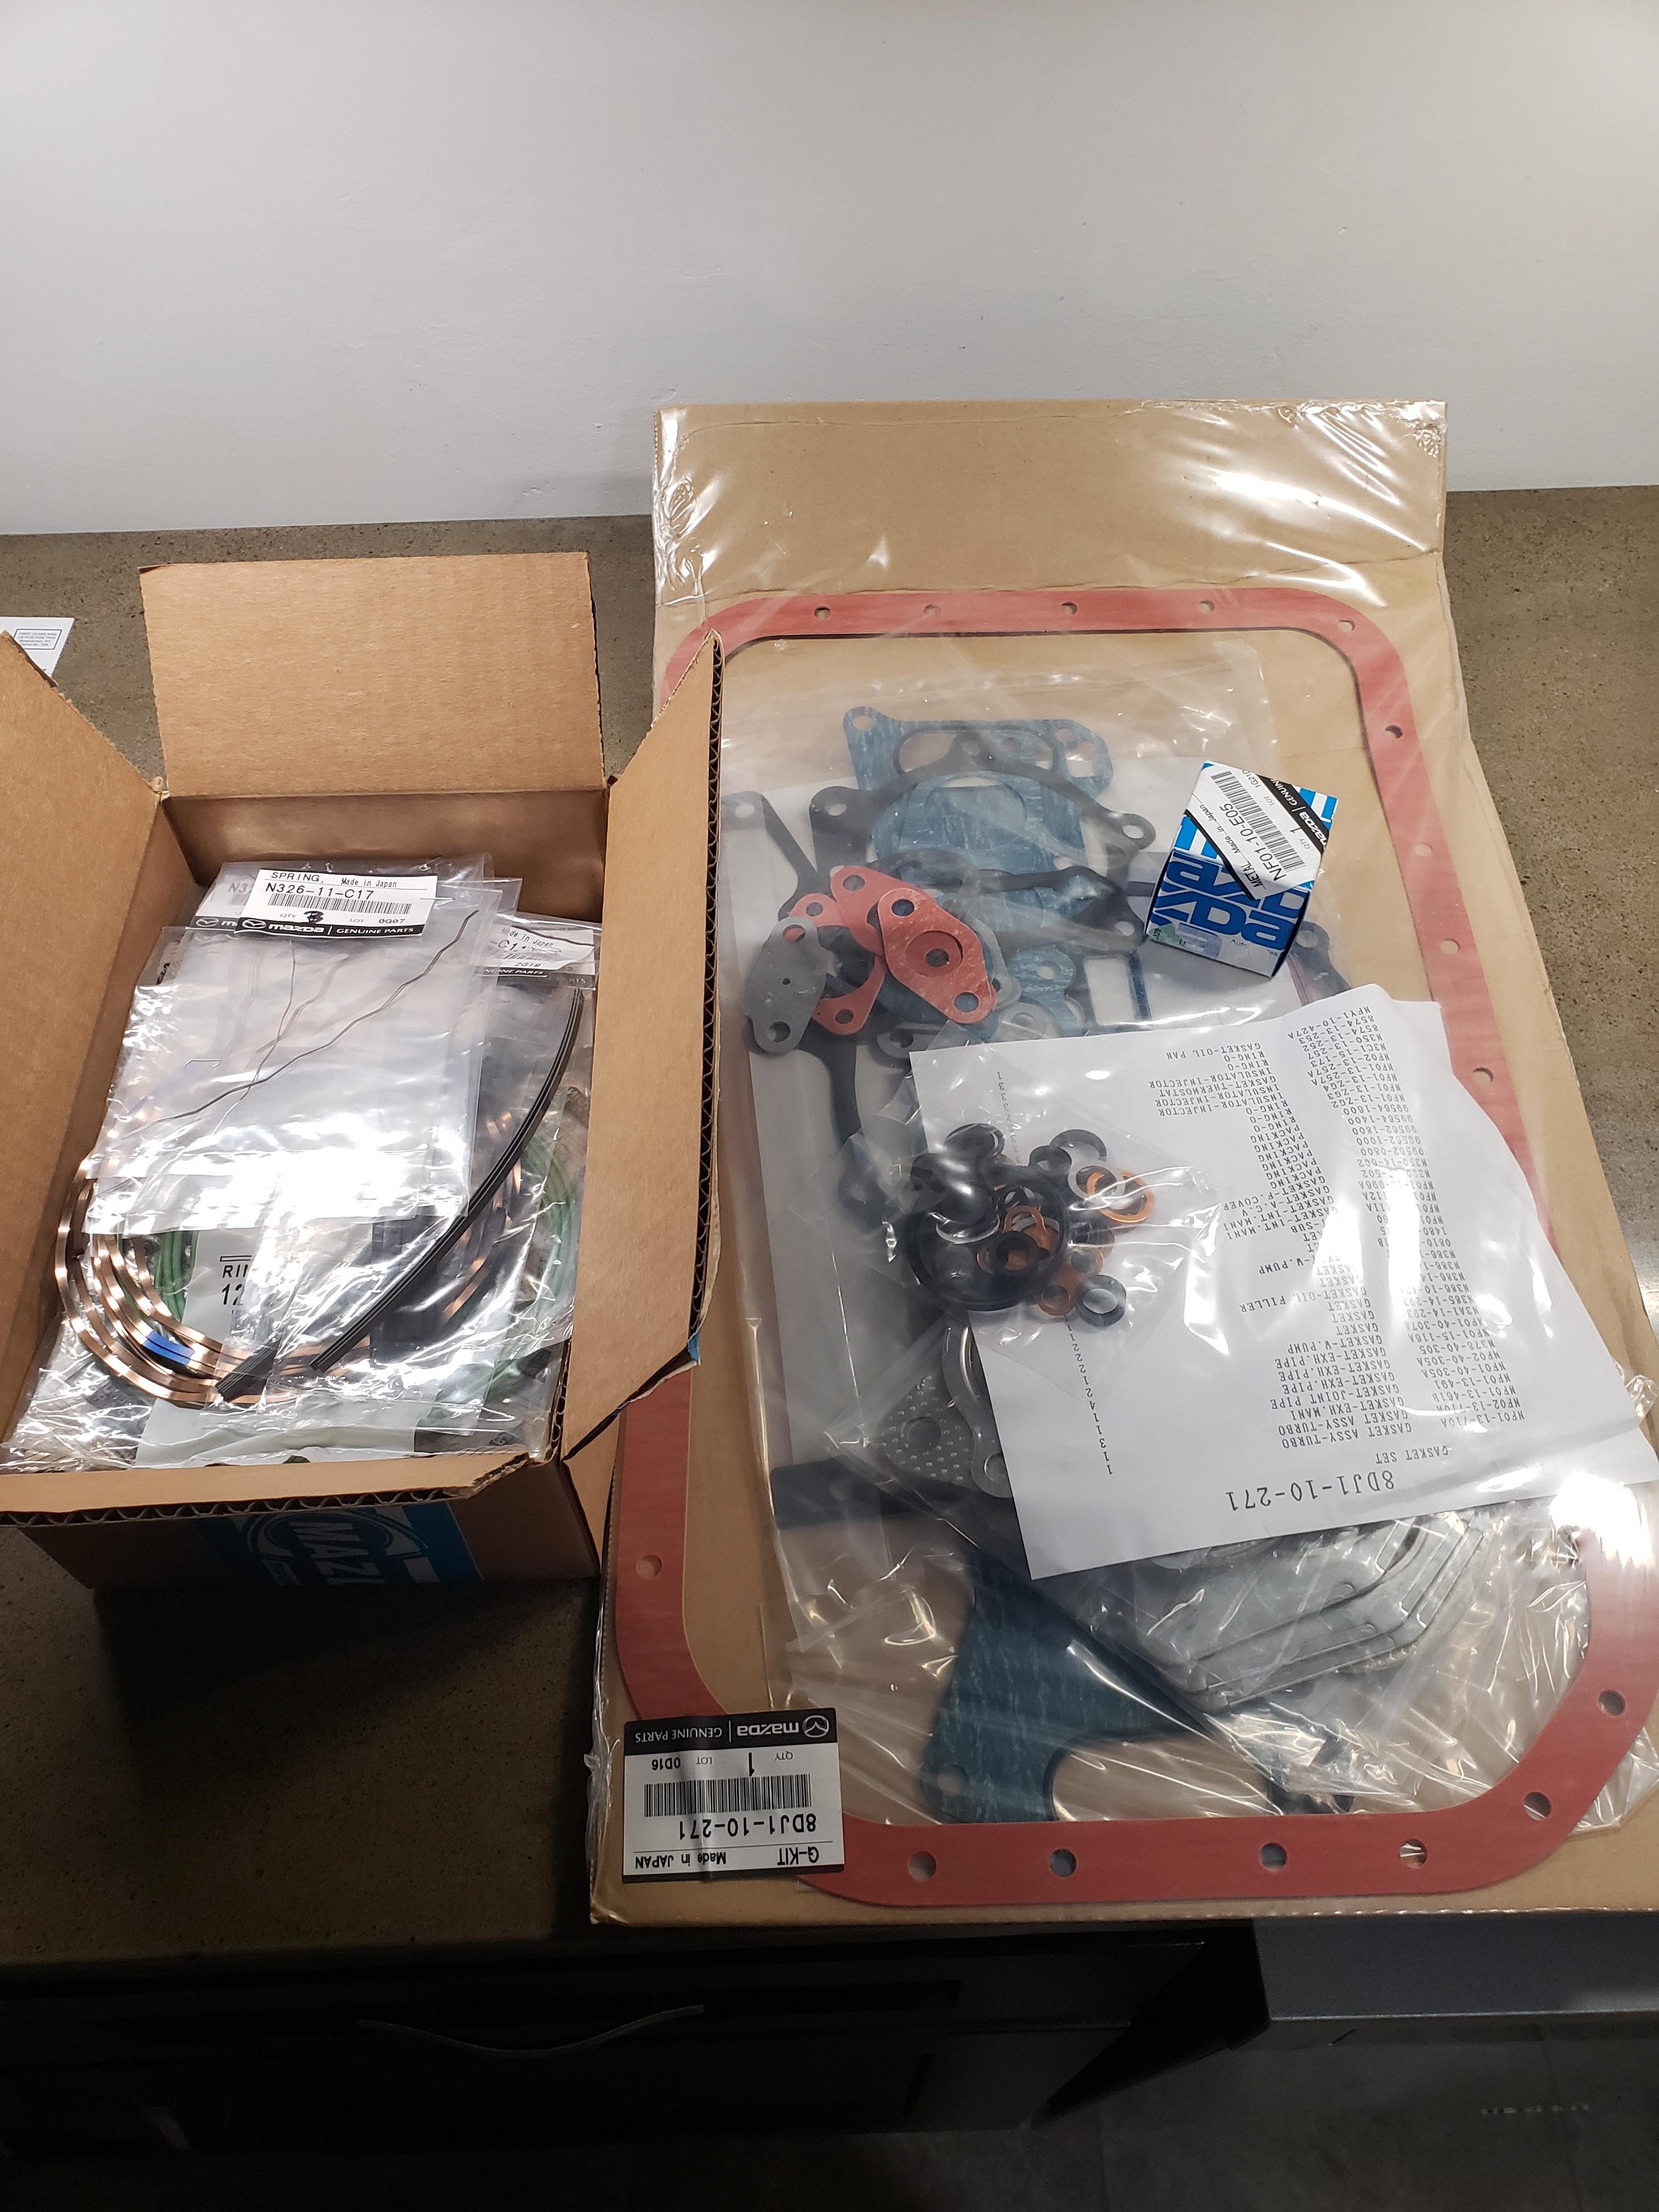
Also, rebuild kits came in today. I decided to replace the rear stationary bearing while I'm at it.

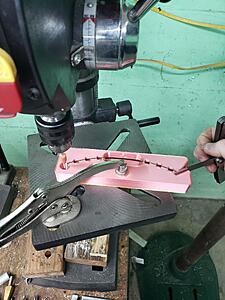
time to start grinding side seals I suppose. I did make up this handy fixture to assist in the process. If anyone wants it, it's a free download on thingiverse.
It was outrageously cold out over the weekend, so I decided to start mocking up the ignition system. 3d printers are a staple in my prototyping. Going with AEM smart coils. Seems to be pretty much everyone's recommendation. Oh yeah...painted the irons too...
shaft is inspected. Runout of the shaft where the bearing would ride is around .005". No idea if that's good or not, but I'm rolling with it.
Also, rebuild kits came in today. I decided to replace the rear stationary bearing while I'm at it.
time to start grinding side seals I suppose. I did make up this handy fixture to assist in the process. If anyone wants it, it's a free download on thingiverse.

It was outrageously cold out over the weekend, so I decided to start mocking up the ignition system. 3d printers are a staple in my prototyping. Going with AEM smart coils. Seems to be pretty much everyone's recommendation. Oh yeah...painted the irons too...

Last edited by need-a-t2; Feb 6, 2023 at 09:44 PM.
Thread Starter
Joined: Mar 2002
Posts: 1,727
Likes: 541
From: binghamton, ny
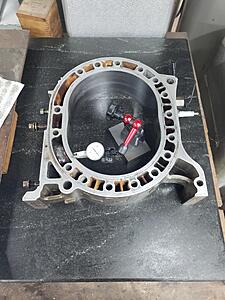
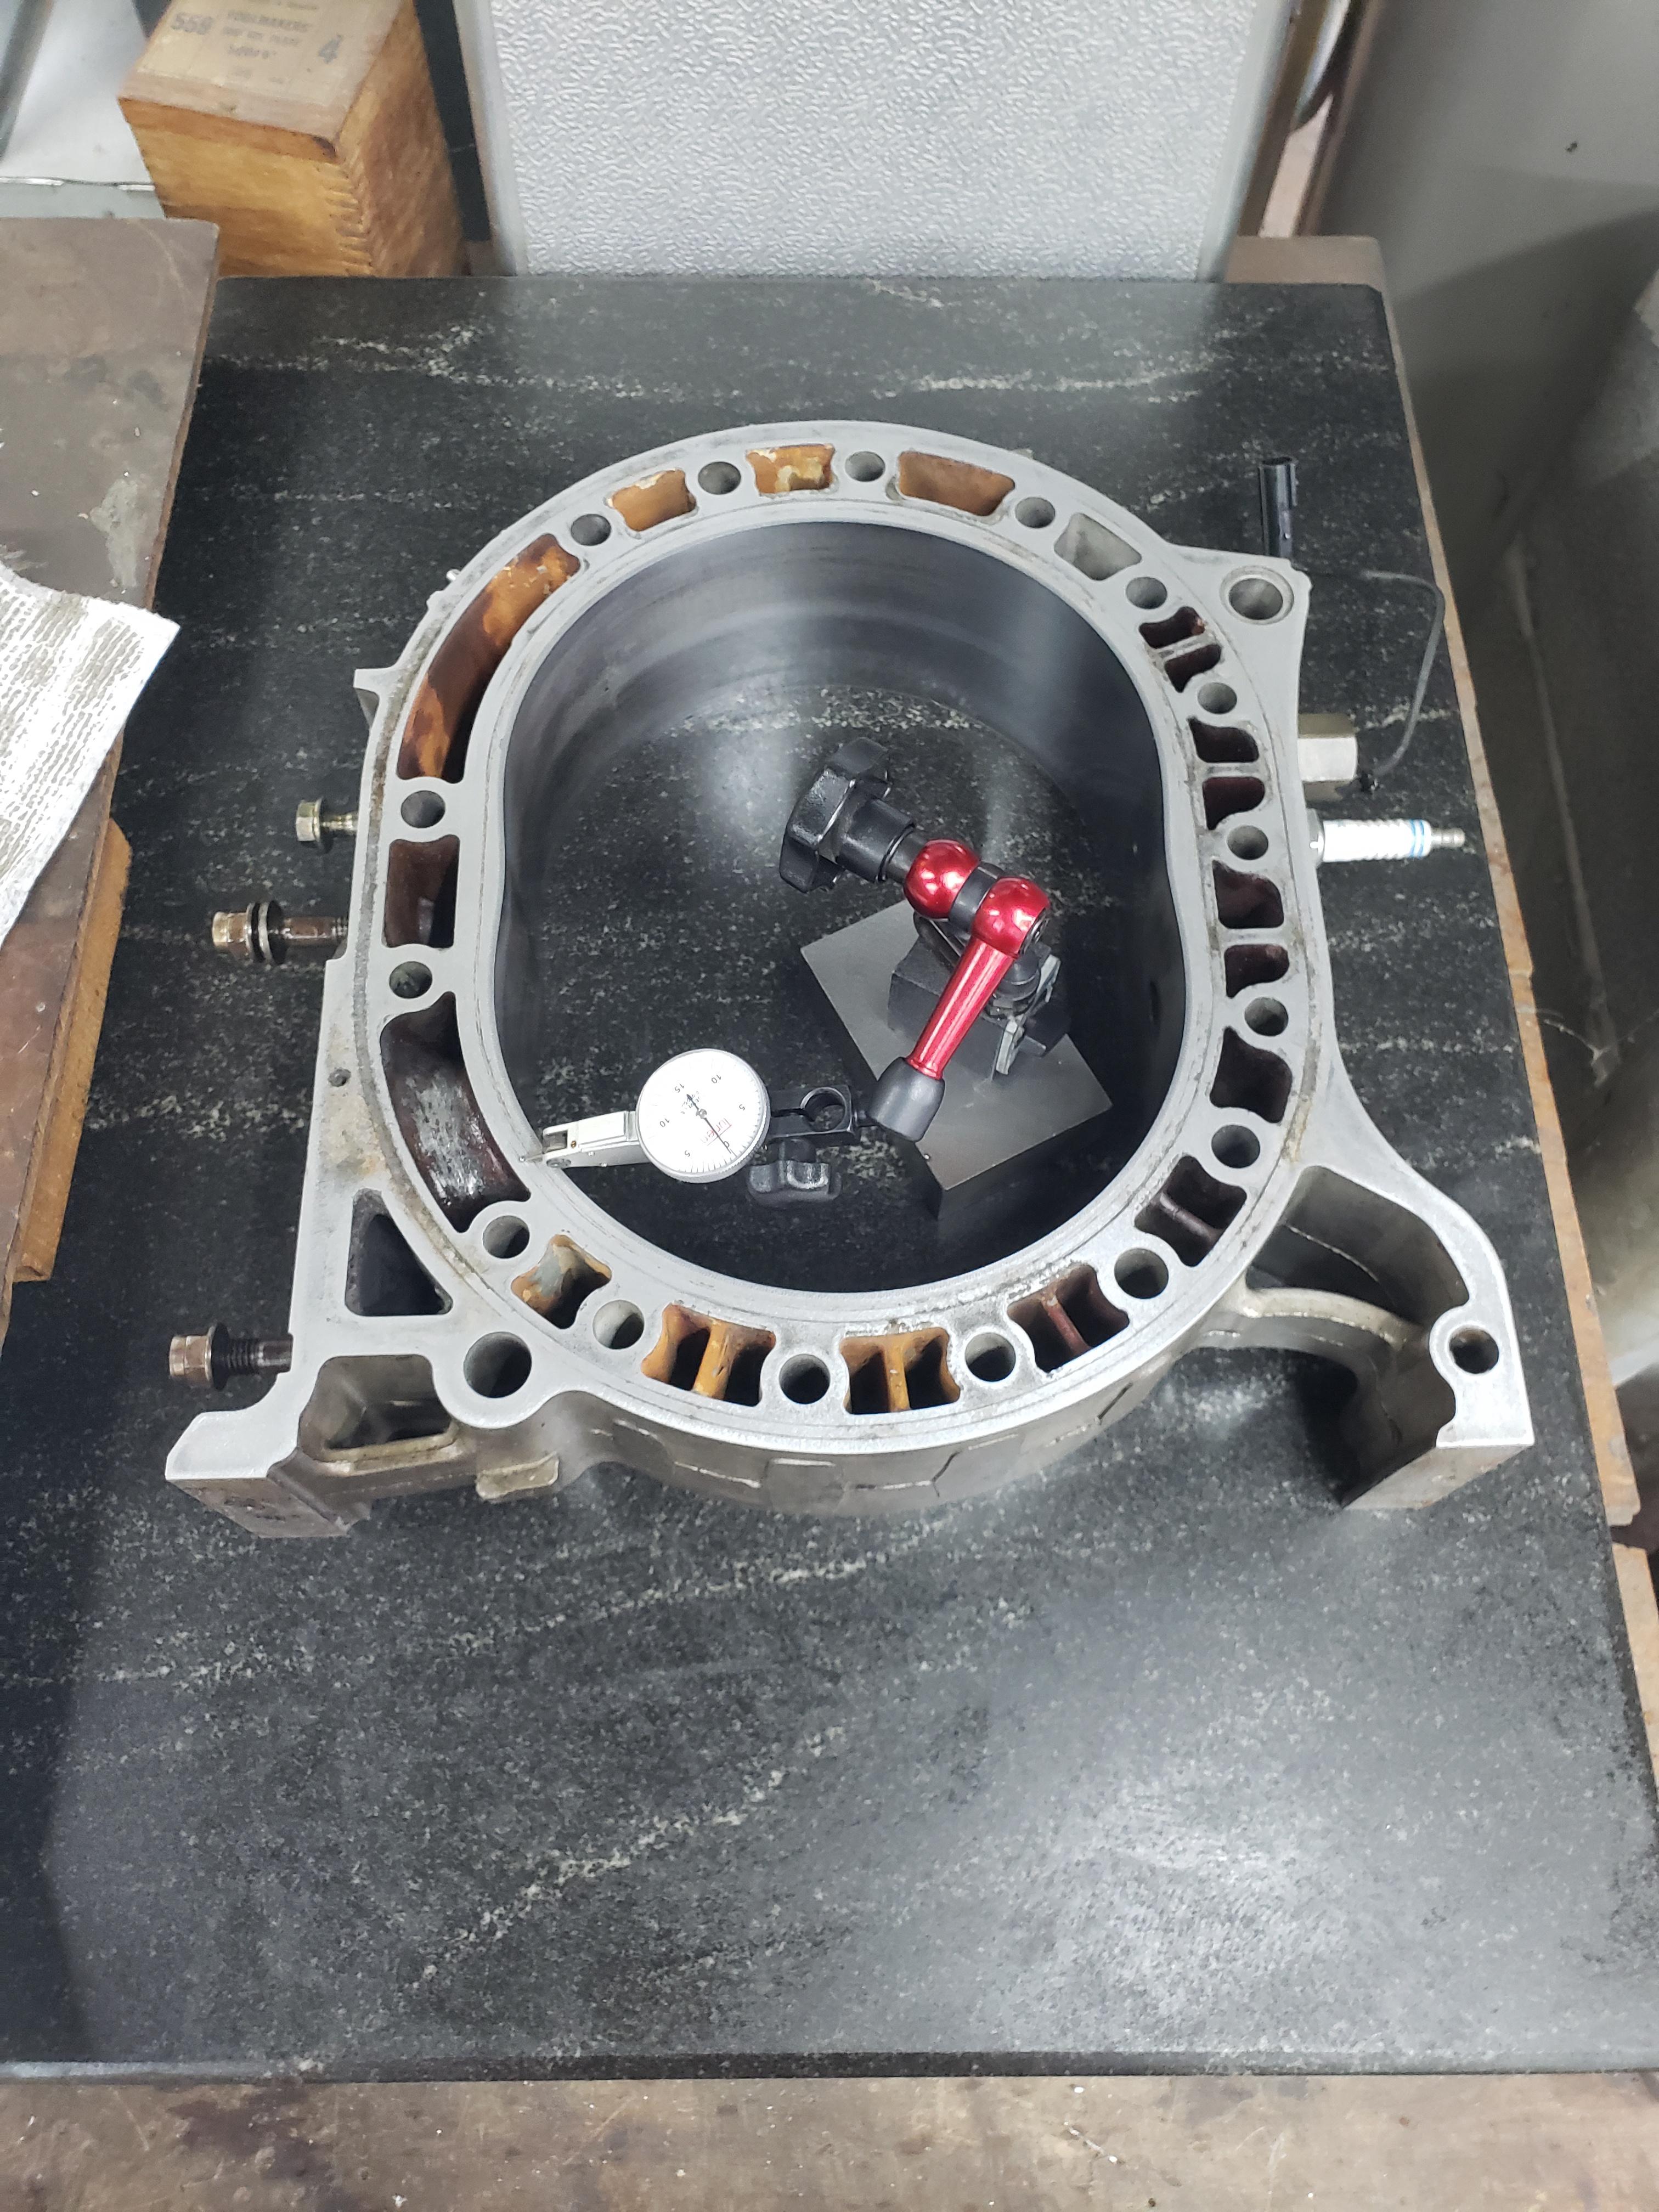
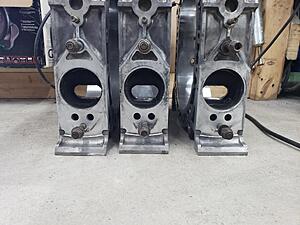
Well everything is officially cleaned and inspected. Finally got the rotor housings inspected. Everything looks great. Less than .002 difference in thicknesses in all the rotor housings
Everything is nice and flat and parallel as well. All the housings were within .0015"
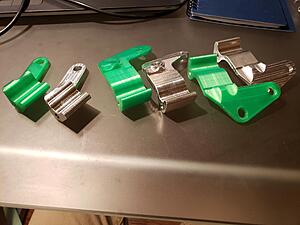
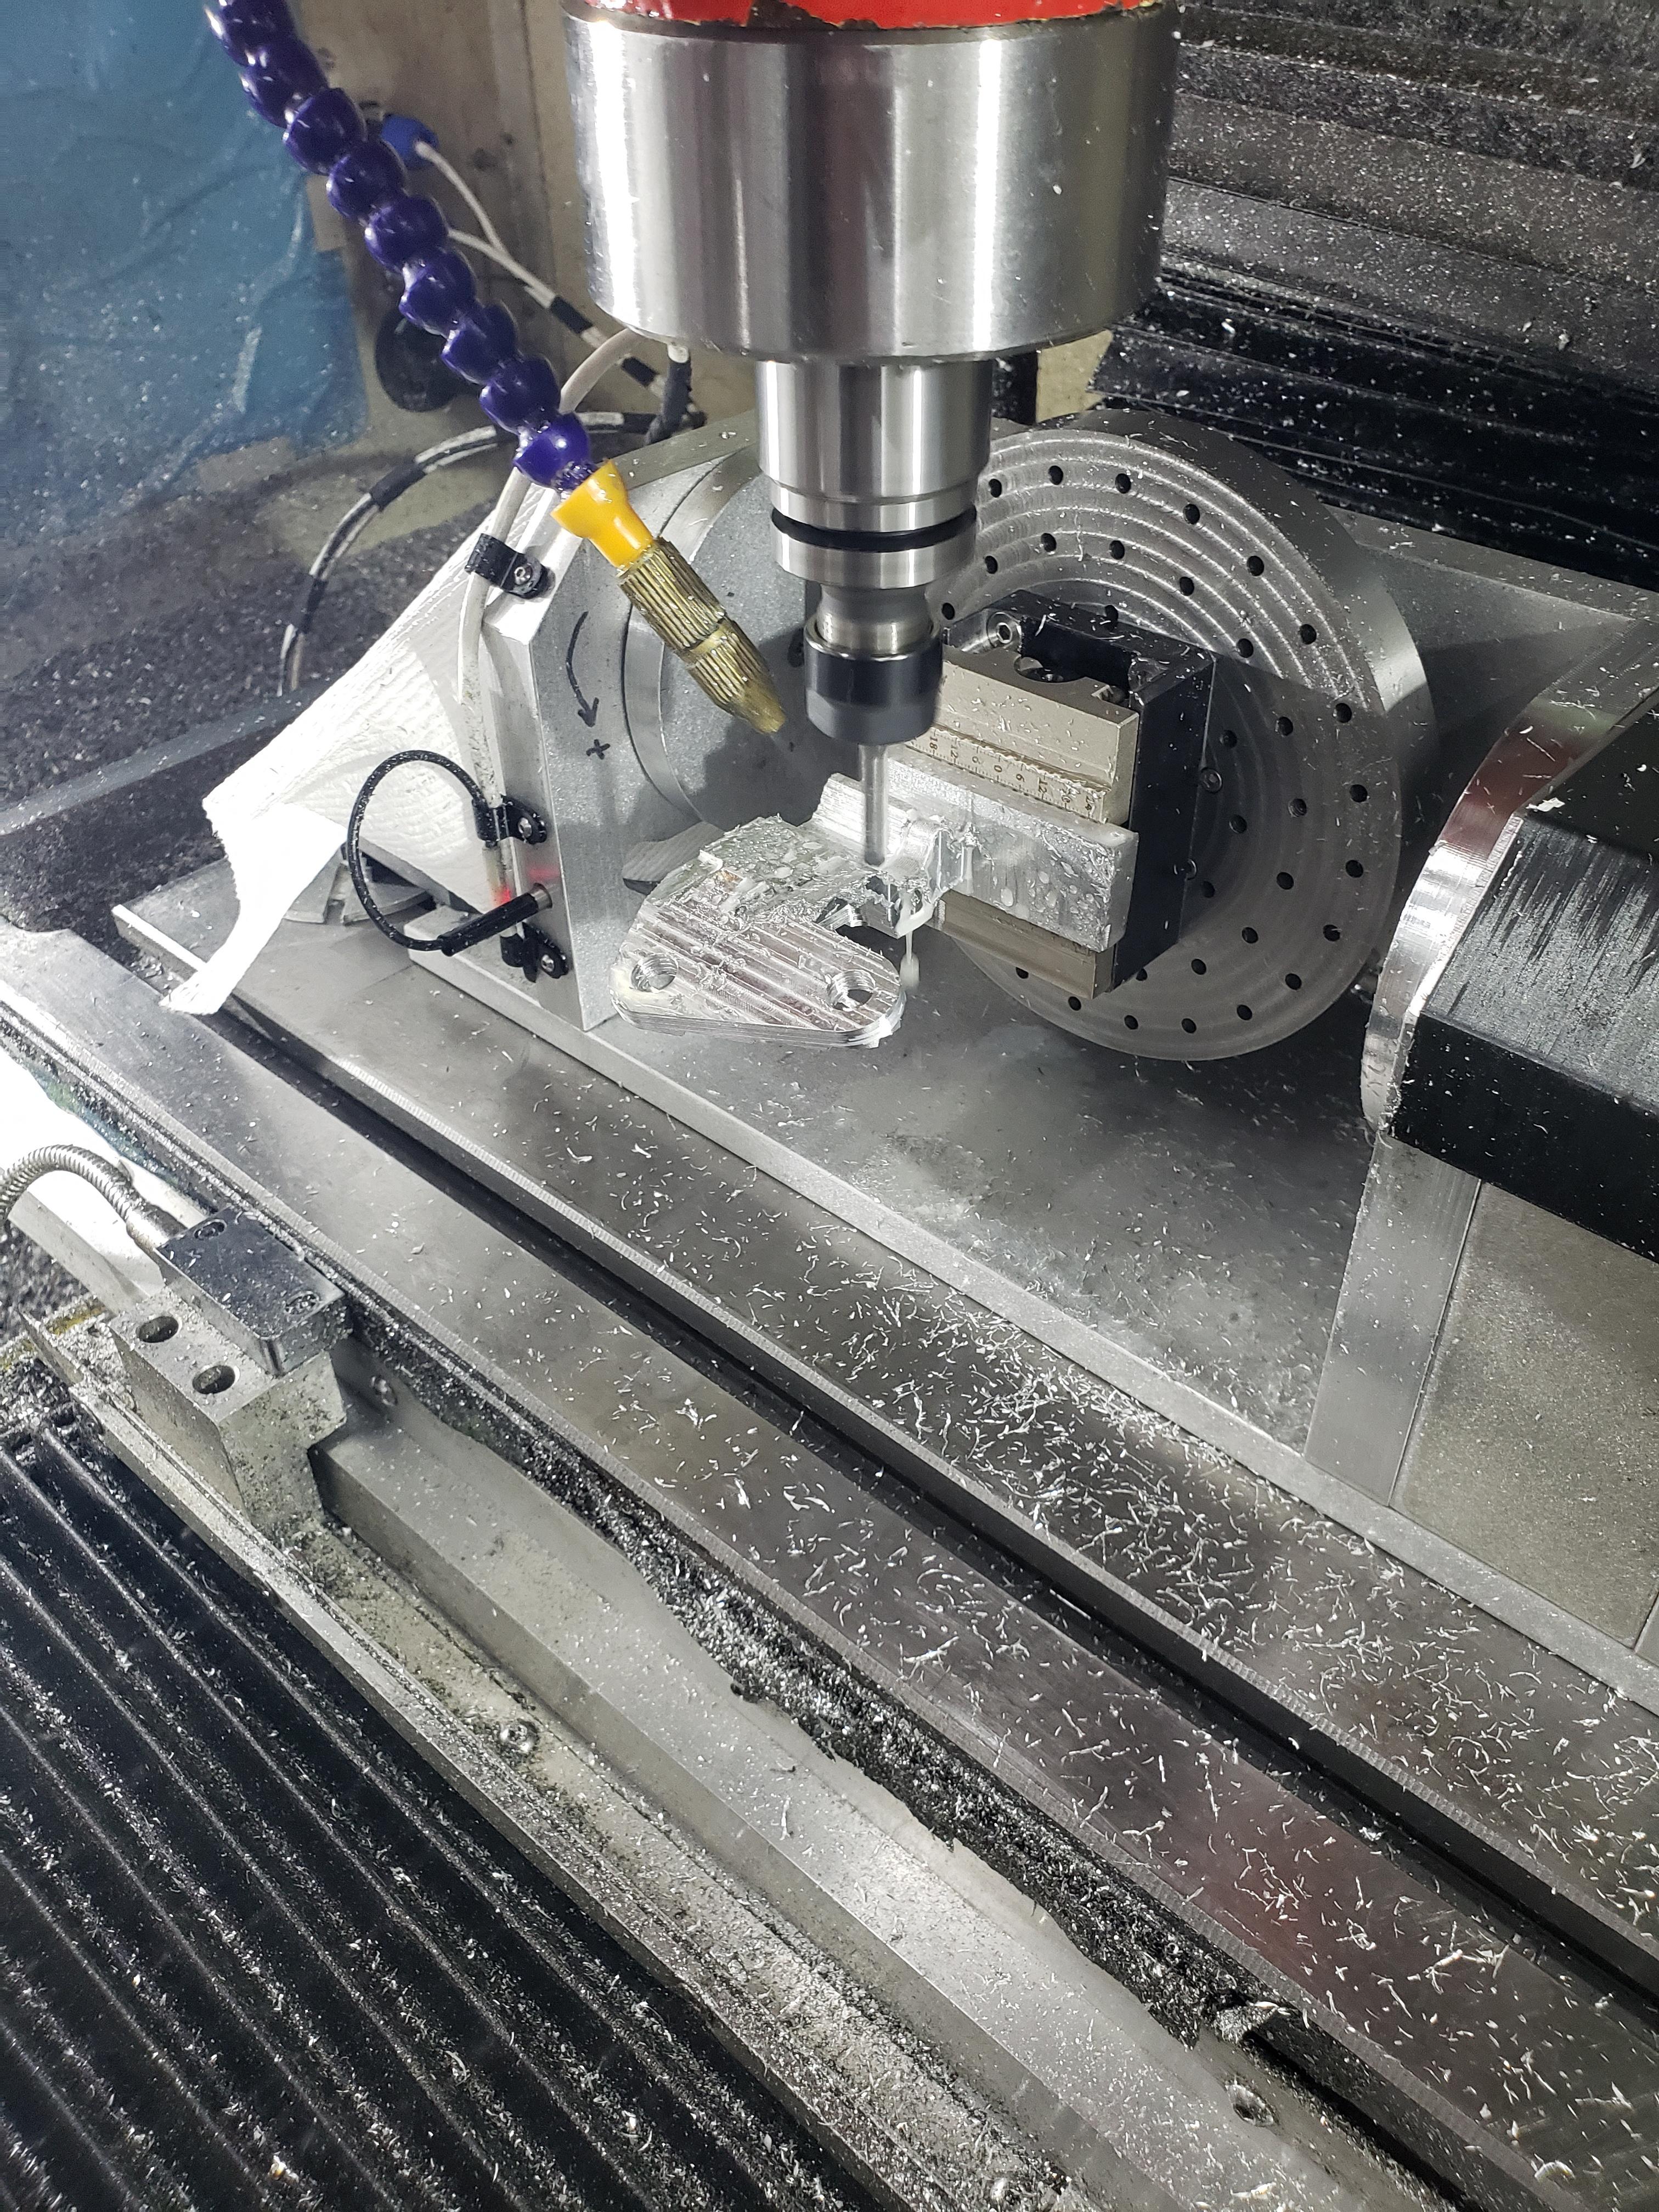
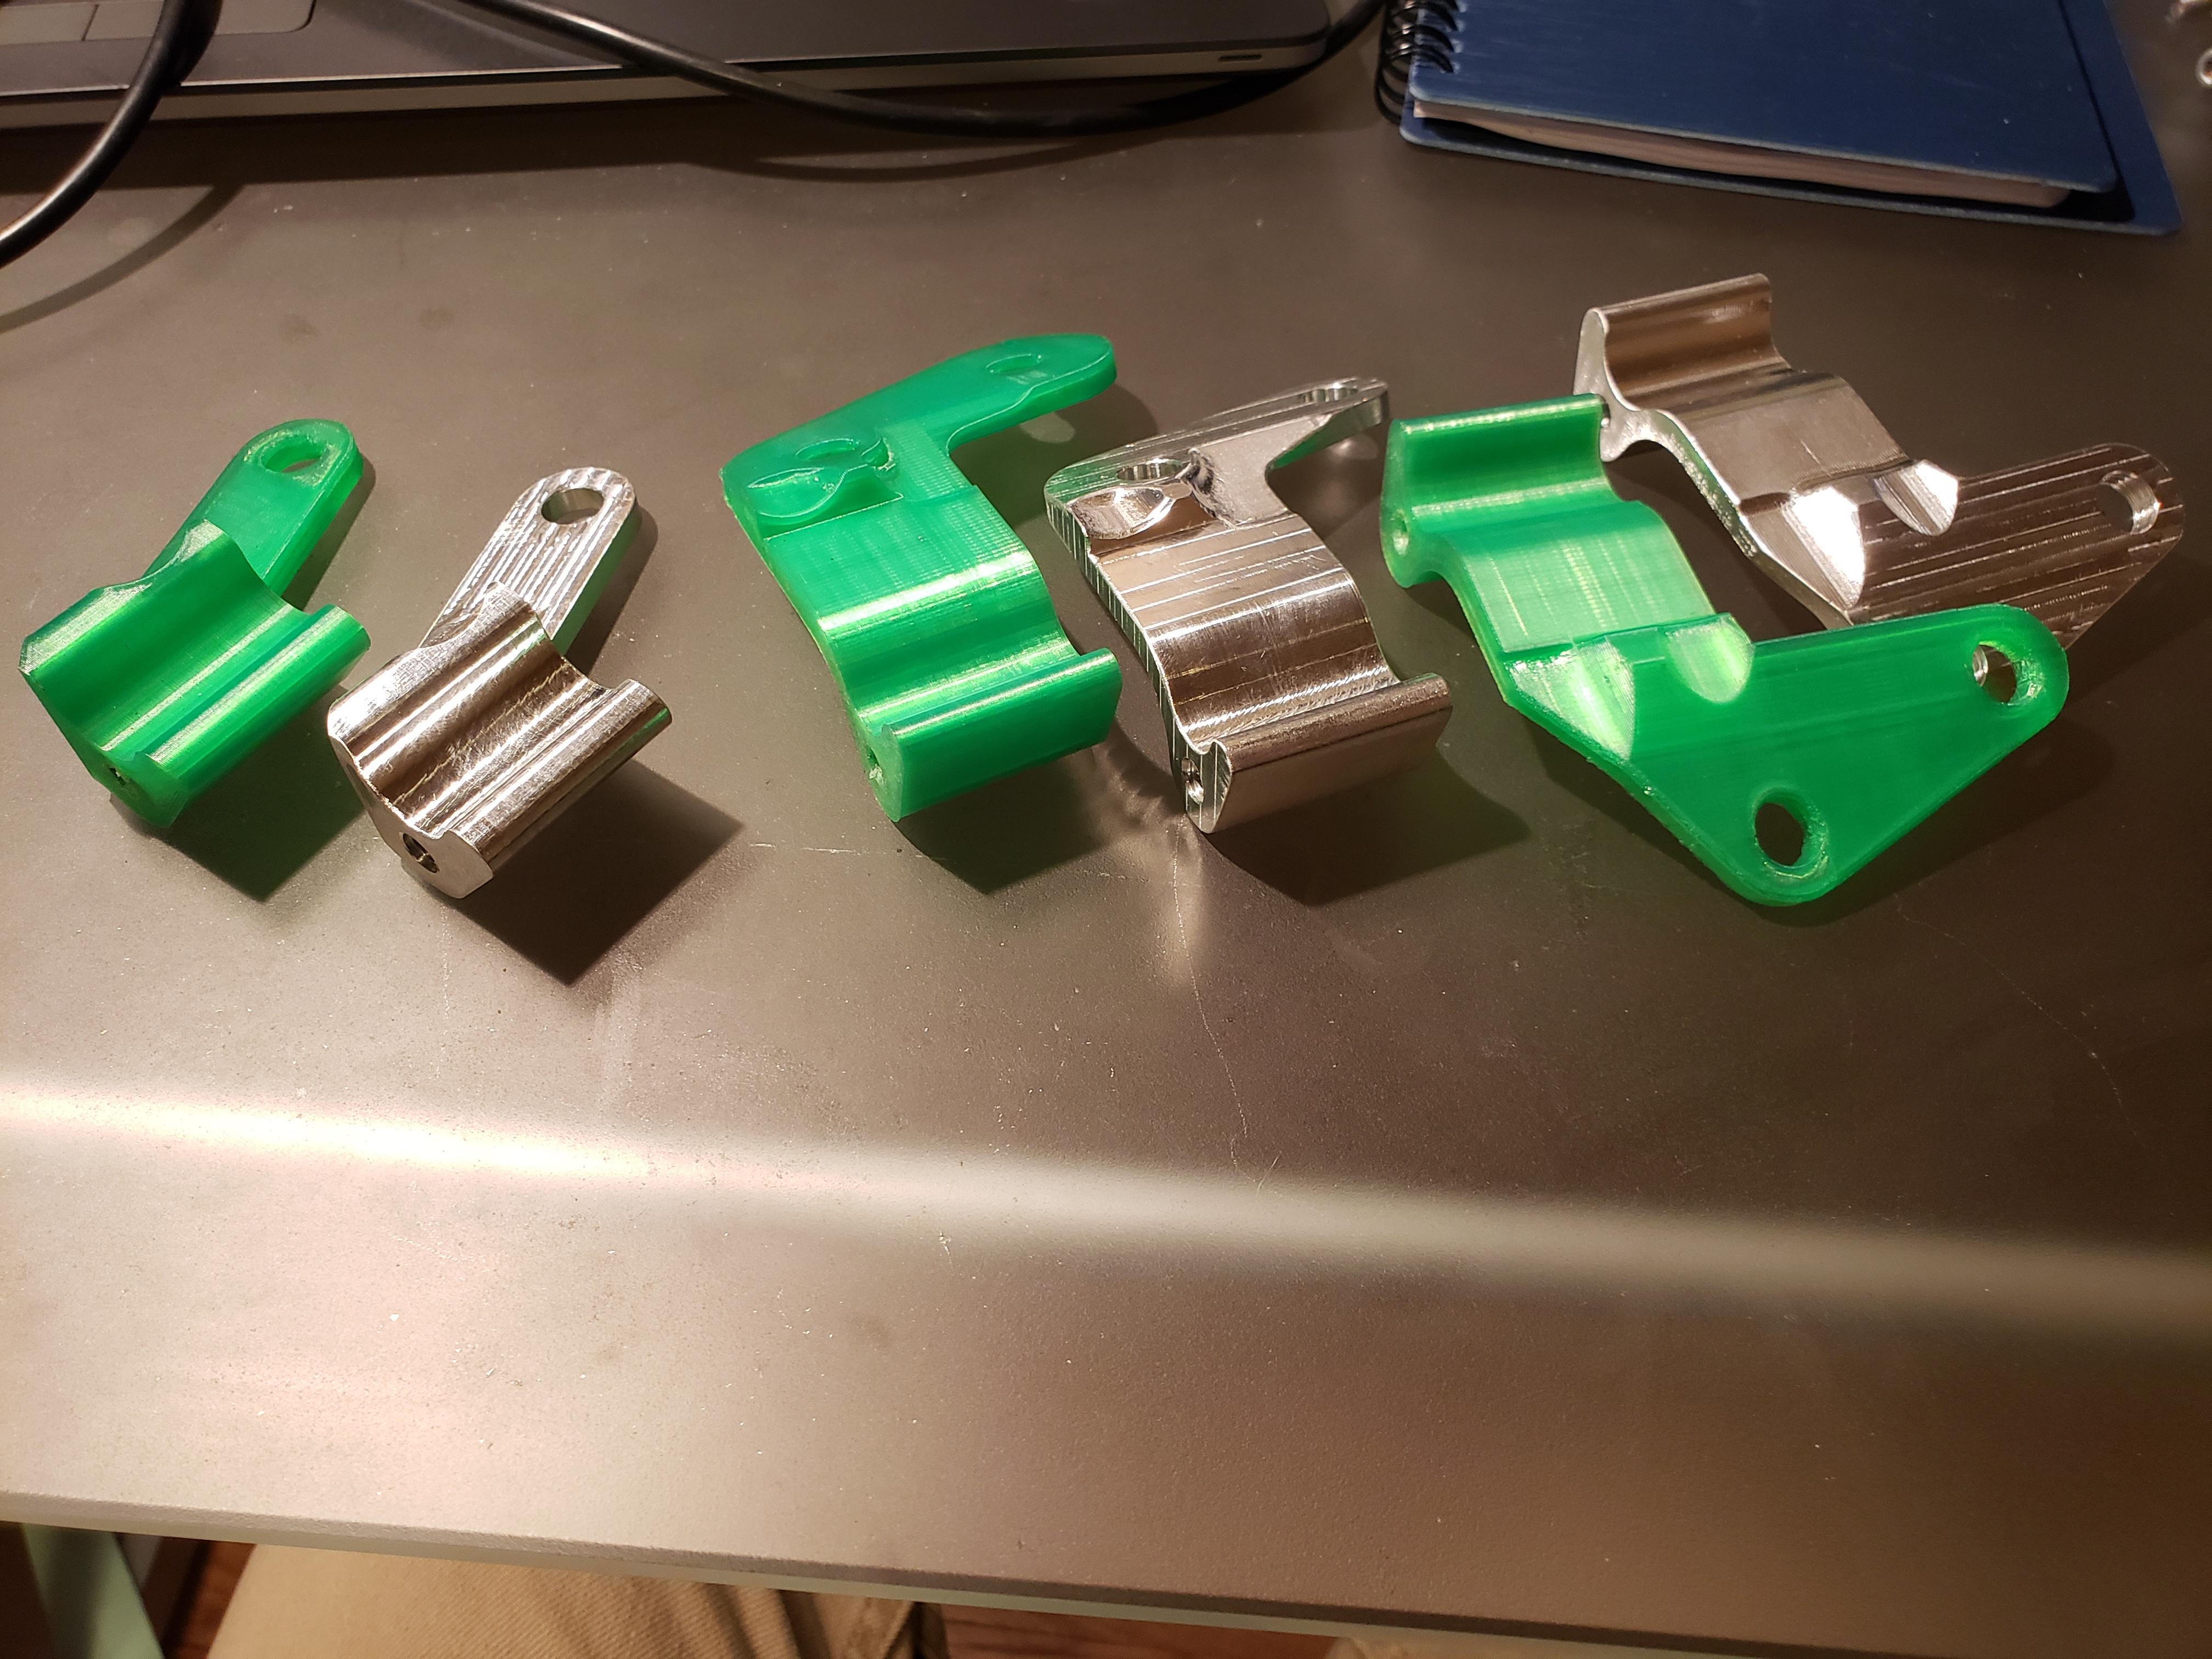
I've also spent a lot of time finishing an addition to my CNC mill. I made a 5 axis trunnion table. while not a necessity for anything, it was going to be helpful for making the ignition mounts as they are a bit funky.
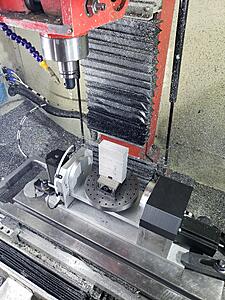
the ignition mounts were a good first project.


From plastic to metal!

Everything is nice and flat and parallel as well. All the housings were within .0015"
I've also spent a lot of time finishing an addition to my CNC mill. I made a 5 axis trunnion table. while not a necessity for anything, it was going to be helpful for making the ignition mounts as they are a bit funky.

the ignition mounts were a good first project.
From plastic to metal!

Good luck with build, you can find my 20B FC build here
https://rotarycarclub.com/rotary_for...ad.php?t=12529
https://rotarycarclub.com/rotary_for...ad.php?t=12529
Thread Starter
Joined: Mar 2002
Posts: 1,727
Likes: 541
From: binghamton, ny
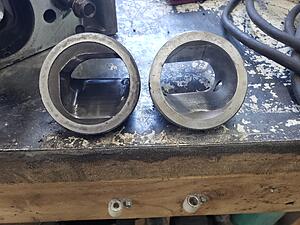
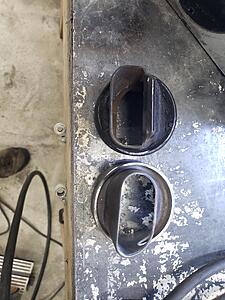
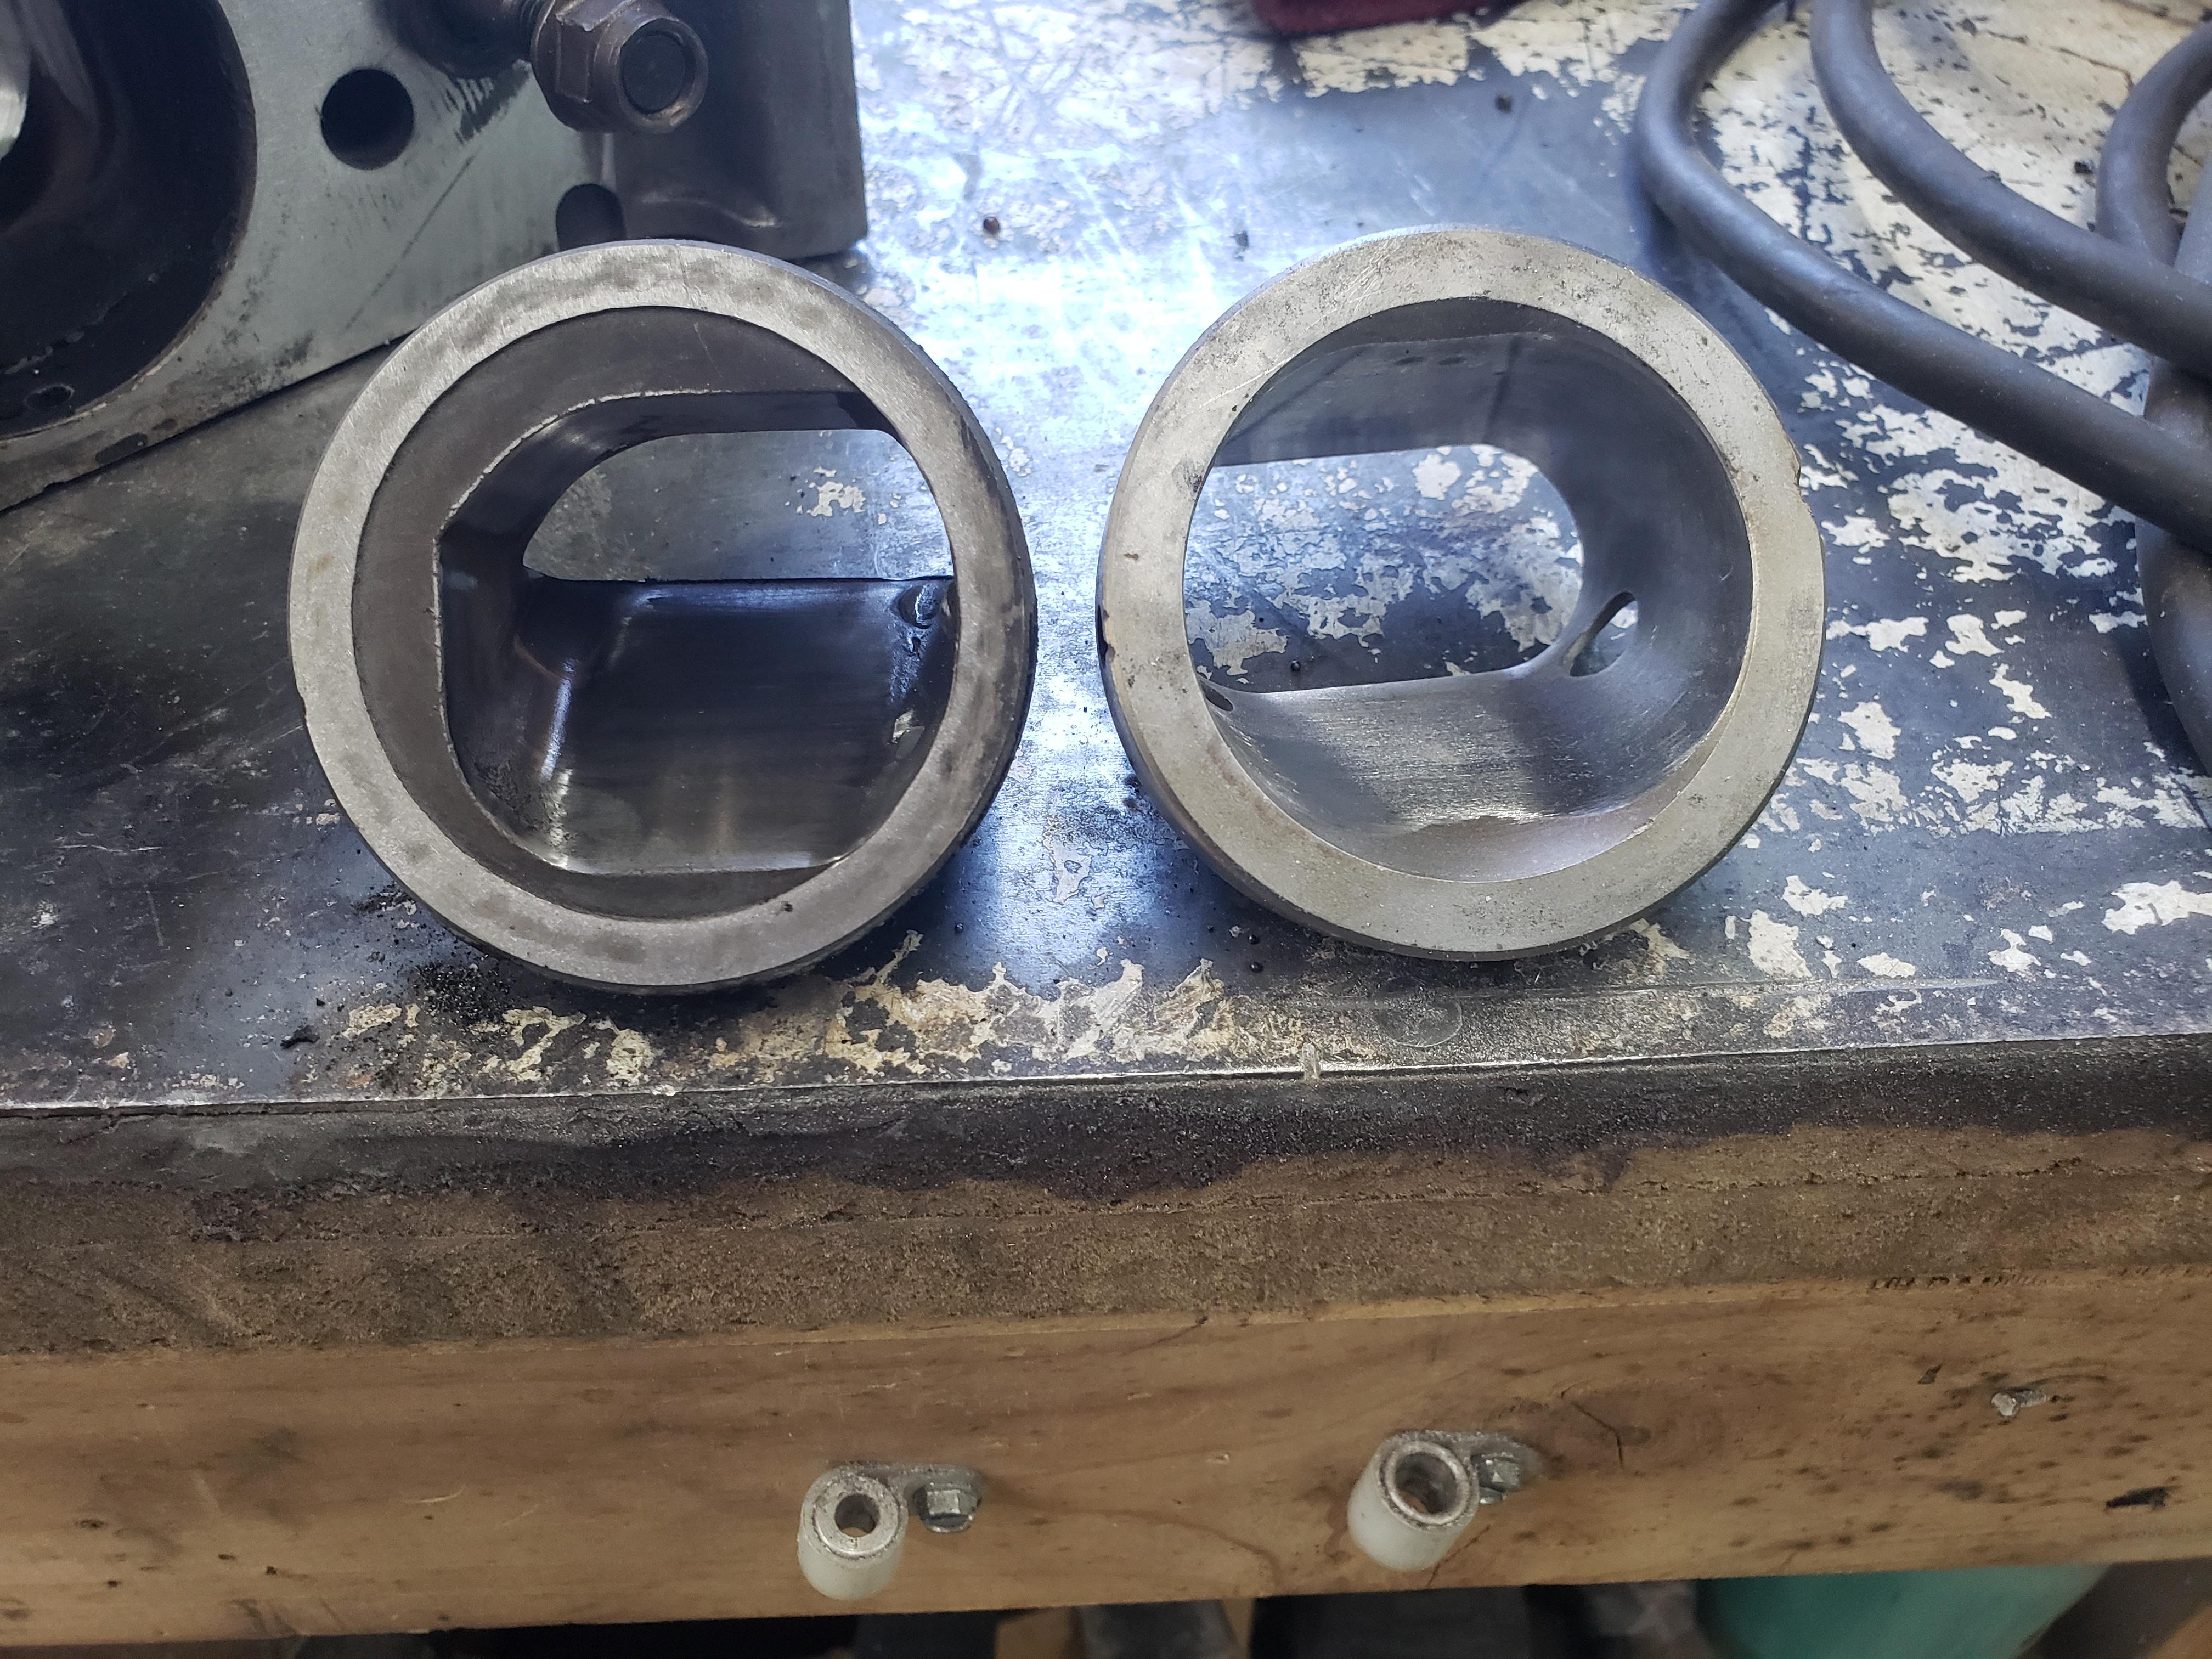
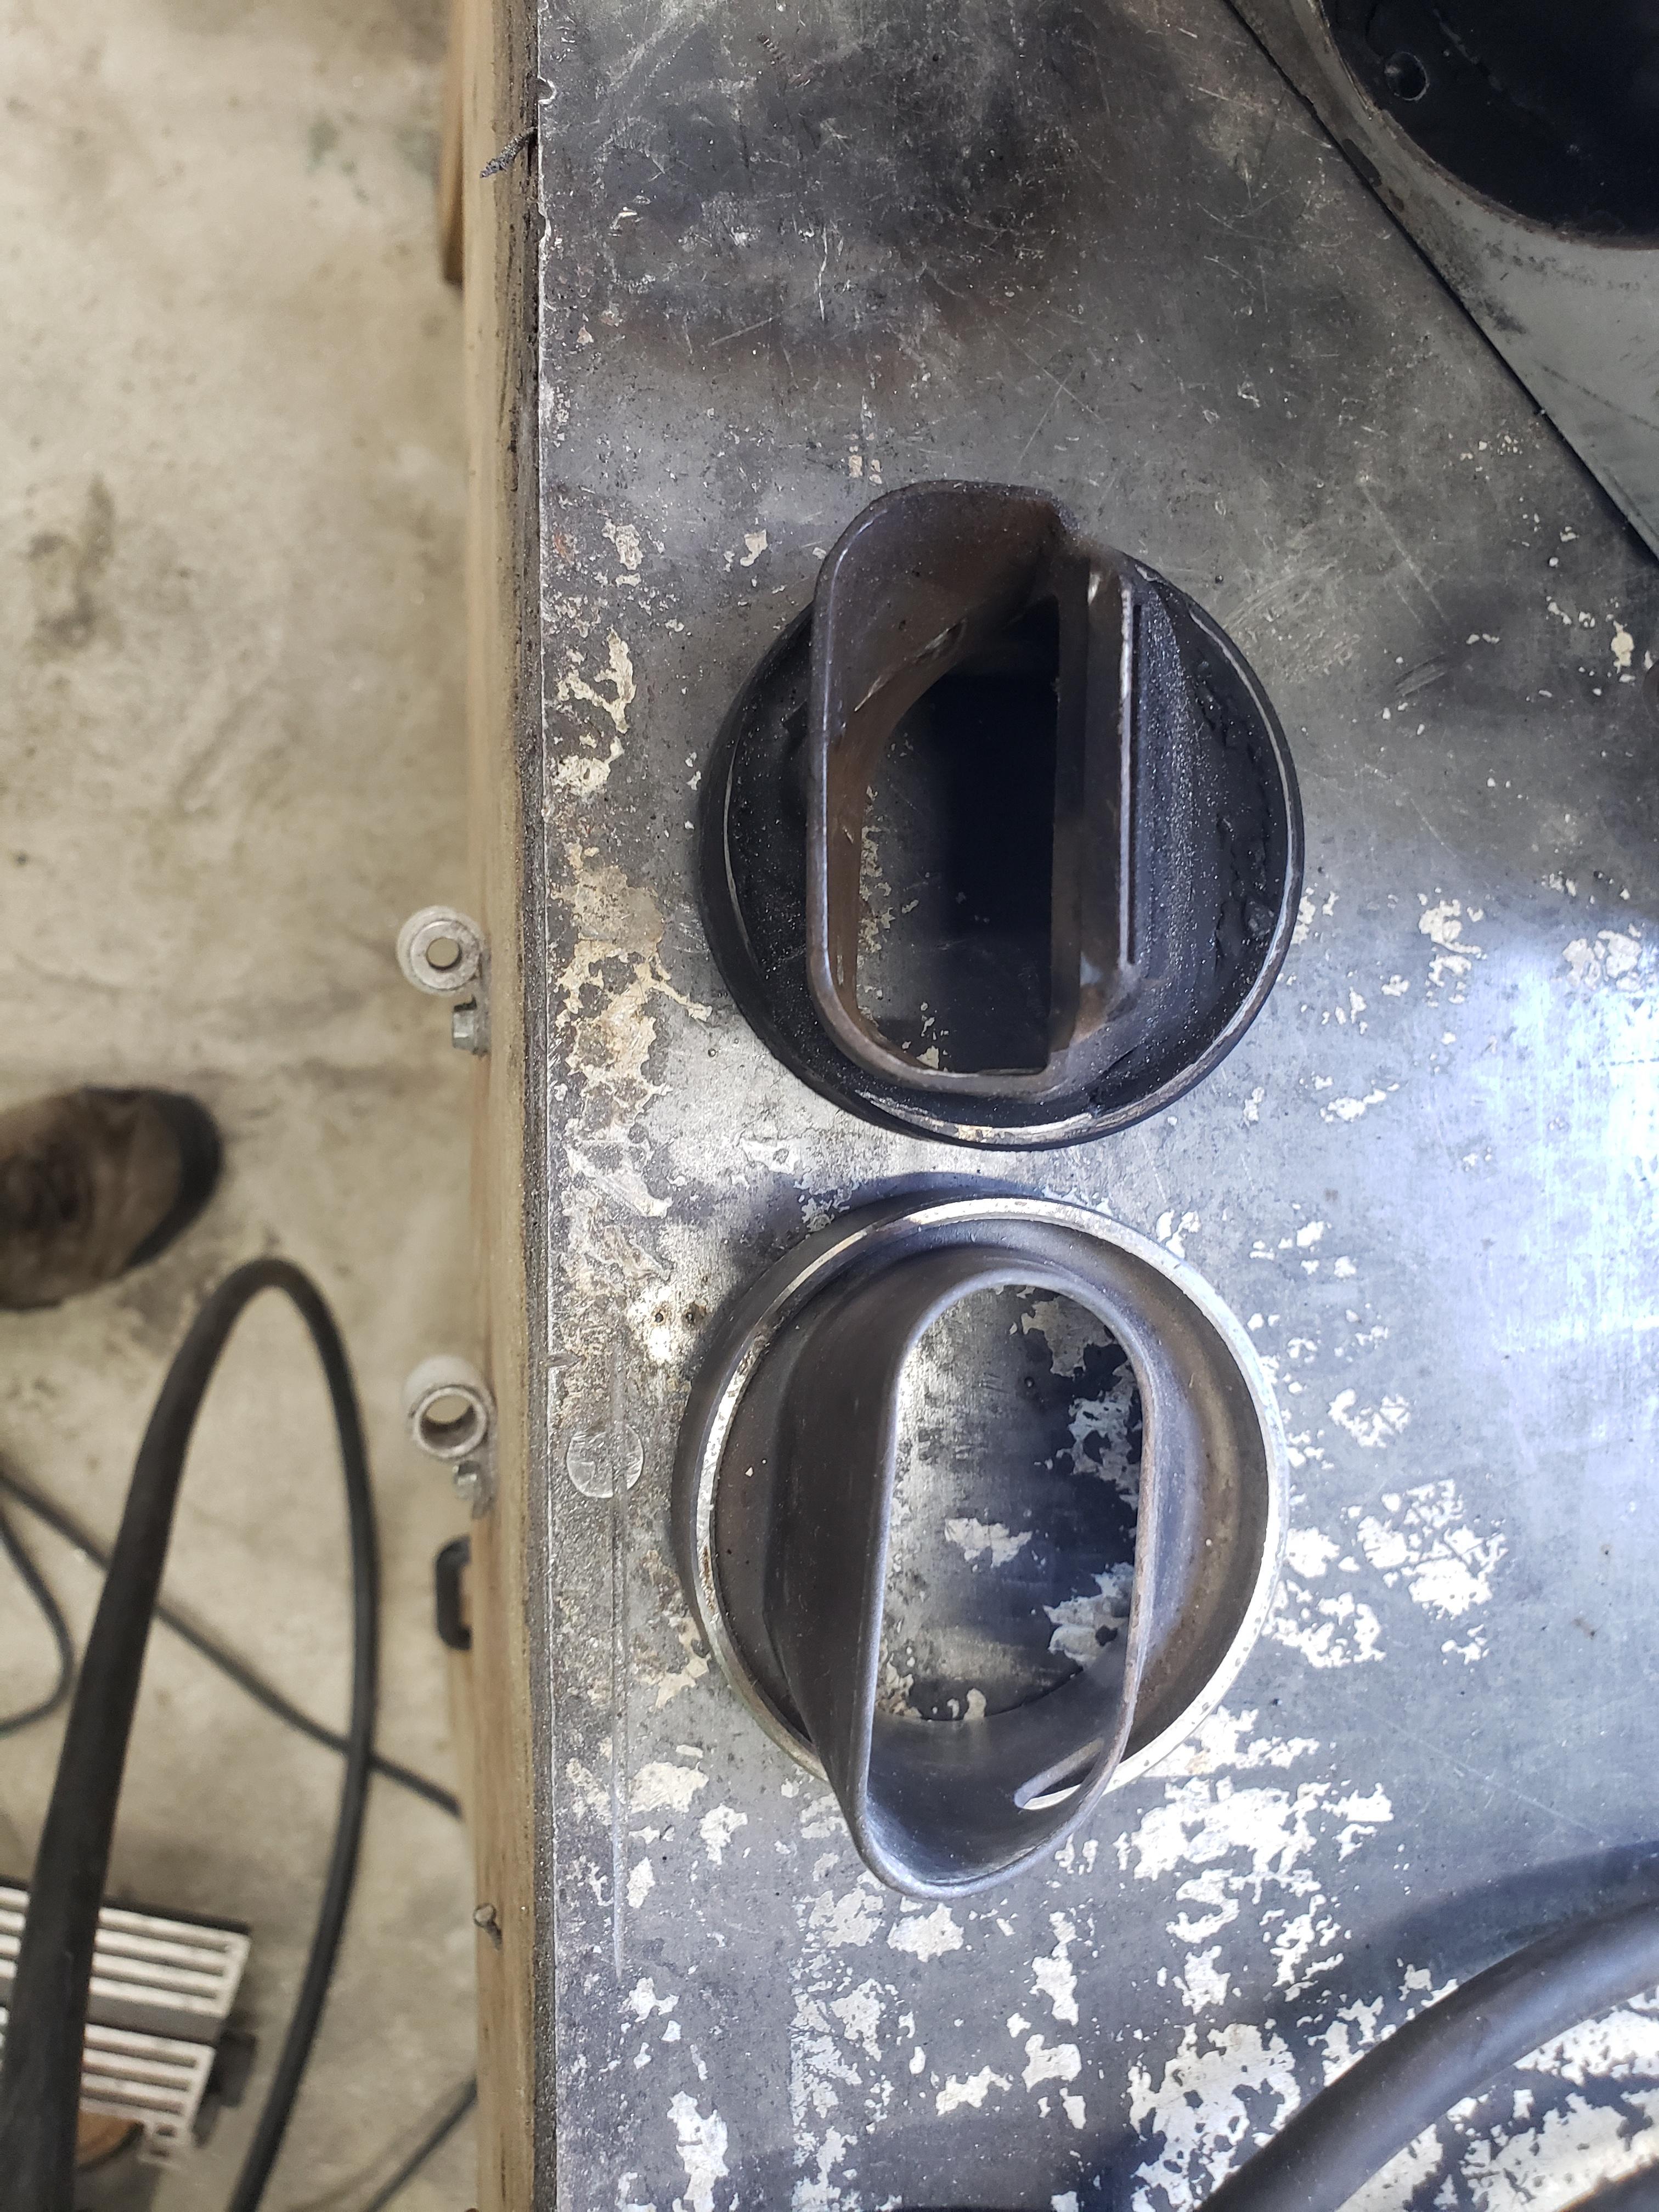
making incremental progress. While I have no desire to "build" this engine, I feel that the exhaust sleeves are a point of needless restriction, and I got a pretty good deal on some T2 sleeves so I opted to swap them out. I don't know if there is a better way to take out these roll pins that hold the exhaust sleeves in, but this was my approach to removing them. a quick little weld bead built up to the point where you can get some vice grips on them.
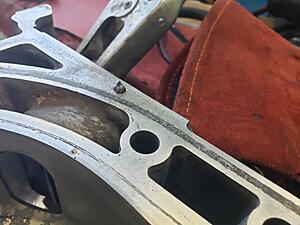
once locked on, they pull right out.
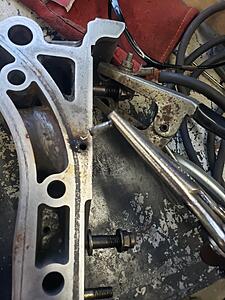
made quick work of it
20B sleeve compared to a T2

once locked on, they pull right out.

made quick work of it

20B sleeve compared to a T2
Thread Starter
Joined: Mar 2002
Posts: 1,727
Likes: 541
From: binghamton, ny
well folk, this project thread is pretty much dead. Not because i'm not building the 20b, but because I sold the chassis it was goin in, and got something different for it.

For anyone wanting to watch progress, I'll be continuing the build in the FD section HERE
For anyone wanting to watch progress, I'll be continuing the build in the FD section HERE
Thread Starter
Joined: Mar 2002
Posts: 1,727
Likes: 541
From: binghamton, ny


Thread
Thread Starter
Forum
Replies
Last Post
WondrousBread
2nd Generation Specific (1986-1992)
0
Jun 3, 2020 05:06 PM
Burnin_streets
2nd Generation Specific (1986-1992)
14
Jul 30, 2008 03:30 PM
Wankel7
2nd Generation Specific (1986-1992)
91
Jan 25, 2005 04:26 PM