4-Rotor FC Build

 02-26-14, 08:31 PM
#1527
Senior Member
Some pictures of what I've been up to:
First up, an oil filter pedestal adapter. This gives me something where I can mount an oil line, and it also holds the oil pressure and oil temperature sensors.

Here it's mounted on the engine, this also shows the coils in their position:

First up, an oil filter pedestal adapter. This gives me something where I can mount an oil line, and it also holds the oil pressure and oil temperature sensors.
Here it's mounted on the engine, this also shows the coils in their position:

-All the ones currently available are quite ugly, yours ROCKS!
2) What is the make/application of that sending unit that is installed on it in that second pic? And is it the oil-pressure or other? One last question, will it fit the stock location?
Thanks John! LOVE IT!!
03-10-14, 06:32 PM
#1533
Just putting some stuff in there, Loads of room to work with 

Then I thought about adding a heatshield between the exhaust and the intake runners, so I did

Didn't take long to make and mount, and it's nothing fancy, just some 2mm aluminium sheet, but I think it will help.
Got a nice box with ecu and wiring stuff in today, so I can start making the engine wiring loom
Then I thought about adding a heatshield between the exhaust and the intake runners, so I did
Didn't take long to make and mount, and it's nothing fancy, just some 2mm aluminium sheet, but I think it will help.
Got a nice box with ecu and wiring stuff in today, so I can start making the engine wiring loom
03-17-14, 07:05 PM
#1536
Yeah me neither!
More work has been done, a little bit in here:

But I spend most of my time underneath the car, the driveshaft, diff and axles are in place, and so is the exhaust and the mufflers and stuff. Then I started messing with the interior, the stock steering wheel wasn't really cutting it, so I got a sparco one but it didn't fit the stock hub. I probably could have bought an adapter somewhere but wheres the fun in that? So I modified the stock one, stock horn still works :-)

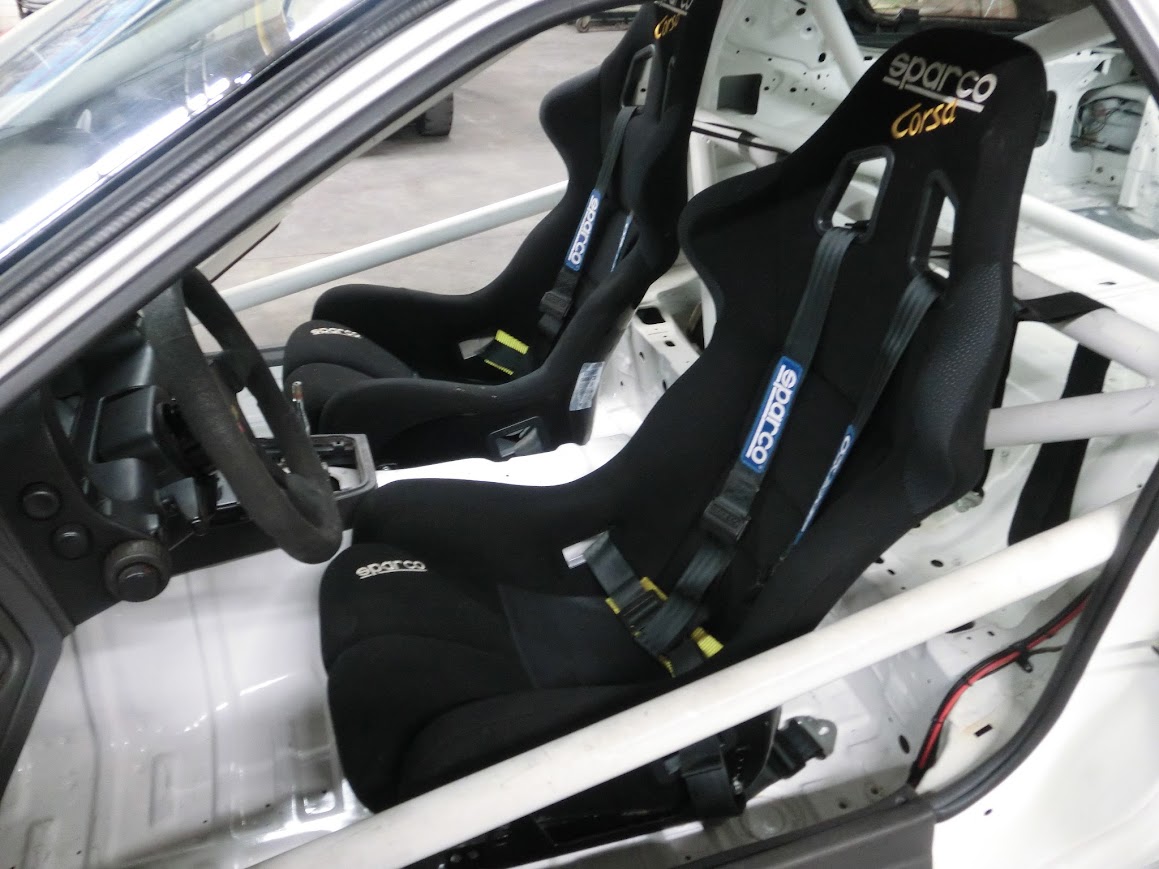
Also got another pair of seats :-), I had a set of red sparco sprint seats, but the red on white made the interior a bit too pimperish for me so I sold those and found a nice set of sparco corsa's. They are a perfect fit for me, and I think they fit the car better. Downside is that they mount on the sides instead of on the bottom like the sprint's, which meant I had to make new seat mounts. I tried making mounts that included adjustable seat rails, but I couldn't get the seats low enough with them so in the end I just made fixed mounts with multiple bolt holes. The seats are only a few mm's from touching the floor, so I won't hit the rollcage with my head all the time.
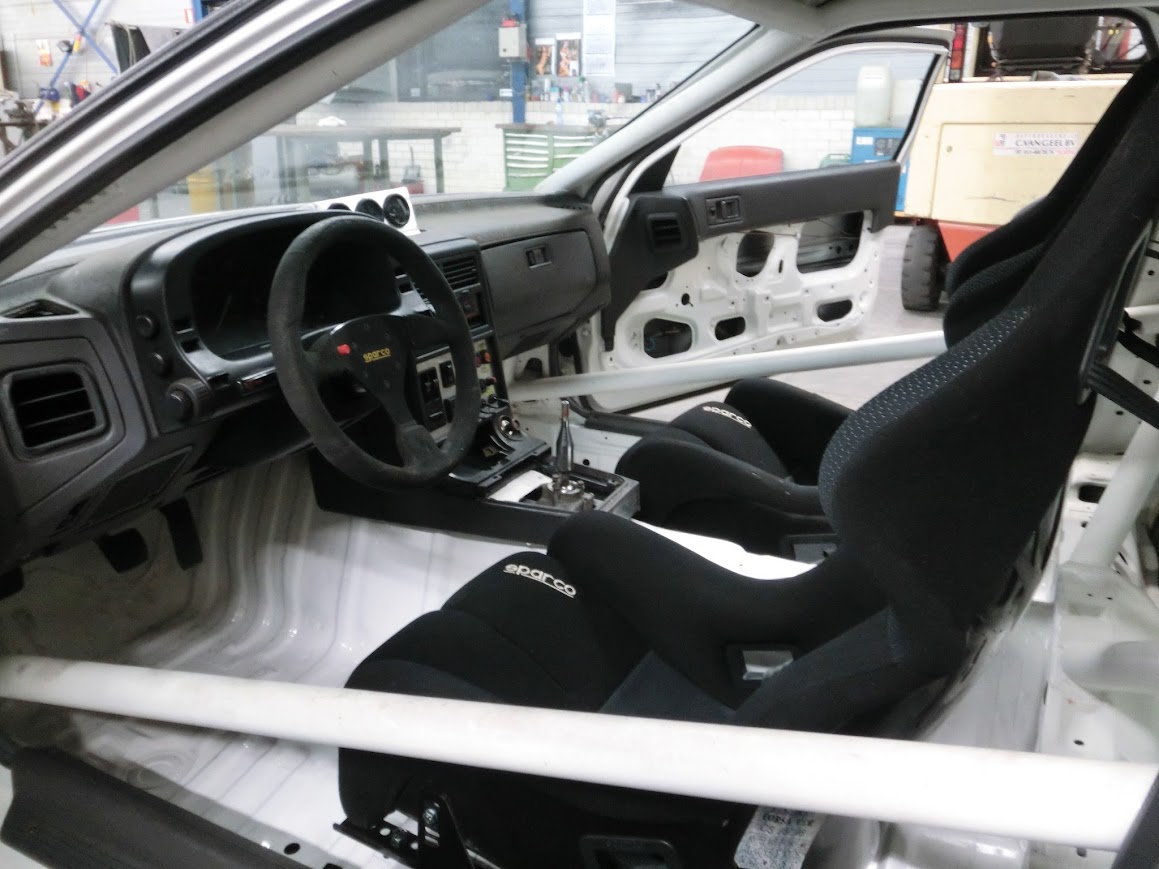
That's it for now, next up is finishing the cooling system, finishing the fuel system, and the oil system, and the engine electrics!
More work has been done, a little bit in here:
But I spend most of my time underneath the car, the driveshaft, diff and axles are in place, and so is the exhaust and the mufflers and stuff. Then I started messing with the interior, the stock steering wheel wasn't really cutting it, so I got a sparco one but it didn't fit the stock hub. I probably could have bought an adapter somewhere but wheres the fun in that? So I modified the stock one, stock horn still works :-)
Also got another pair of seats :-), I had a set of red sparco sprint seats, but the red on white made the interior a bit too pimperish for me so I sold those and found a nice set of sparco corsa's. They are a perfect fit for me, and I think they fit the car better. Downside is that they mount on the sides instead of on the bottom like the sprint's, which meant I had to make new seat mounts. I tried making mounts that included adjustable seat rails, but I couldn't get the seats low enough with them so in the end I just made fixed mounts with multiple bolt holes. The seats are only a few mm's from touching the floor, so I won't hit the rollcage with my head all the time.
That's it for now, next up is finishing the cooling system, finishing the fuel system, and the oil system, and the engine electrics!

 03-21-14, 12:20 PM
#1540
Junior Member
Join Date: Apr 2012
Location: France
Posts: 2
Likes: 0
Received 0 Likes
on
0 Posts
very nice work John !
Just one point about your thermal insulation screen,
take care there is no thermal bridge with the inlet pipes
if not you risk to have the wrong effect
all the best
Michel from France
Just one point about your thermal insulation screen,
take care there is no thermal bridge with the inlet pipes
if not you risk to have the wrong effect
all the best
Michel from France
03-23-14, 12:30 PM
#1541
Cooling system, check!
I had to connect the engine with the radiator, but with that huge aluminium vent I had to get a bit creative. After some messing with radiator hoses I just got some 38mm alloy intercooler pipes and welded some pieces together. Came out better than expected

Next up, wiring!
I started doing some stuff in the back, Made a battery box that sits in the spare wheel well, and added a battery. The starting system isn't really special or anything so far, just the stock starter and an easy to get battery that was slim enough to fit in the spare wheel well. I'm not sure if this can get the beast cranked over well enough but I'm going to try this first and find out. I heard about adding another battery and hooking them up in series so the starter get's 24V's during starting, which might be worth looking into if this fails, but I'll cross that bridge when I get there. Oh, also added a killswitch where the keyslot for the hatch was.

Couldn't finish the wiring in the back because I didn't have any beefy 0-AWG wire lying around, so I got started on the engine wiring stuff that still needs doing. This is the plate that sits in the passangers footwell, it holds a controller for the LSU 4.9 lambda sensor, the megasquirt which I fitted into a rugged waterproof case, and the relay for the alternator. Already added the wires that go between the ECU and the chassis (power, ground, fuel pump relay, cooling relay, tacho ect.), now I need to add the wires that will go to the engine

I had to connect the engine with the radiator, but with that huge aluminium vent I had to get a bit creative. After some messing with radiator hoses I just got some 38mm alloy intercooler pipes and welded some pieces together. Came out better than expected
Next up, wiring!
I started doing some stuff in the back, Made a battery box that sits in the spare wheel well, and added a battery. The starting system isn't really special or anything so far, just the stock starter and an easy to get battery that was slim enough to fit in the spare wheel well. I'm not sure if this can get the beast cranked over well enough but I'm going to try this first and find out. I heard about adding another battery and hooking them up in series so the starter get's 24V's during starting, which might be worth looking into if this fails, but I'll cross that bridge when I get there. Oh, also added a killswitch where the keyslot for the hatch was.
Couldn't finish the wiring in the back because I didn't have any beefy 0-AWG wire lying around, so I got started on the engine wiring stuff that still needs doing. This is the plate that sits in the passangers footwell, it holds a controller for the LSU 4.9 lambda sensor, the megasquirt which I fitted into a rugged waterproof case, and the relay for the alternator. Already added the wires that go between the ECU and the chassis (power, ground, fuel pump relay, cooling relay, tacho ect.), now I need to add the wires that will go to the engine


 03-25-14, 05:59 AM
#1548
Junior Member

Join Date: Mar 2014
Location: Co.
Posts: 37
Likes: 0
Received 0 Likes
on
0 Posts
I so wish I had your skills at this stuff. I'm just learning to tear down, rebuild, and not be terrified of a rotary lol. Great build and can't wait to see and hear it run.
03-25-14, 06:04 AM
#1549
Exhaust Manifold Leak
adding a batterey in parallel will not do much as the starter with 1.2 kW only draws slightly over 100A at 12v lets say with on battery you will see 10v during cranking and with 2 aroudn 11-11.3v which is only about 10% increase in starter power.
with 2 in series you will see around 20v during cranking which is about 100% increase
