
1988 Rx7 Fc Sr20 Truck build!

Thread Starter
Full Member
Joined: Sep 2012
Posts: 204
Likes: 0
From: Tacoma, Wa
1988 Rx7 Fc Sr20 Truck build!
This my rx7 sr'd truck that im currently building and here is its build thread! Hope u guys enjoy
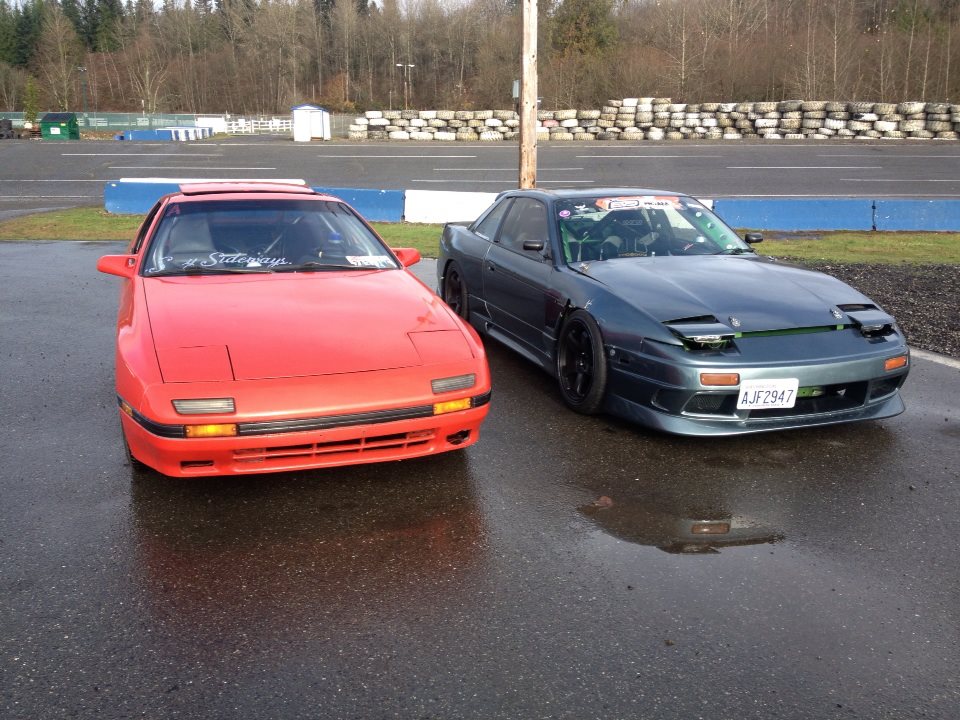
Alright so it all started when i had this blue sr'd hatch right here below! Learned how to drift in it pretty much and one day at EVD i hit the 3/8ths wall. Had some broken suspension pieces a broken core support and various other things..
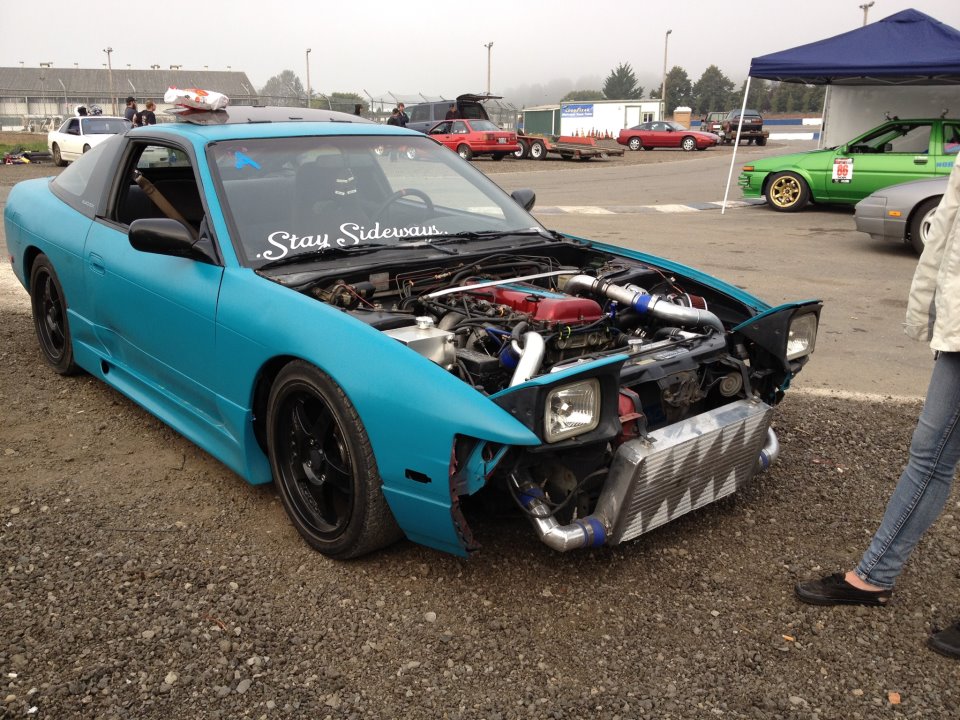
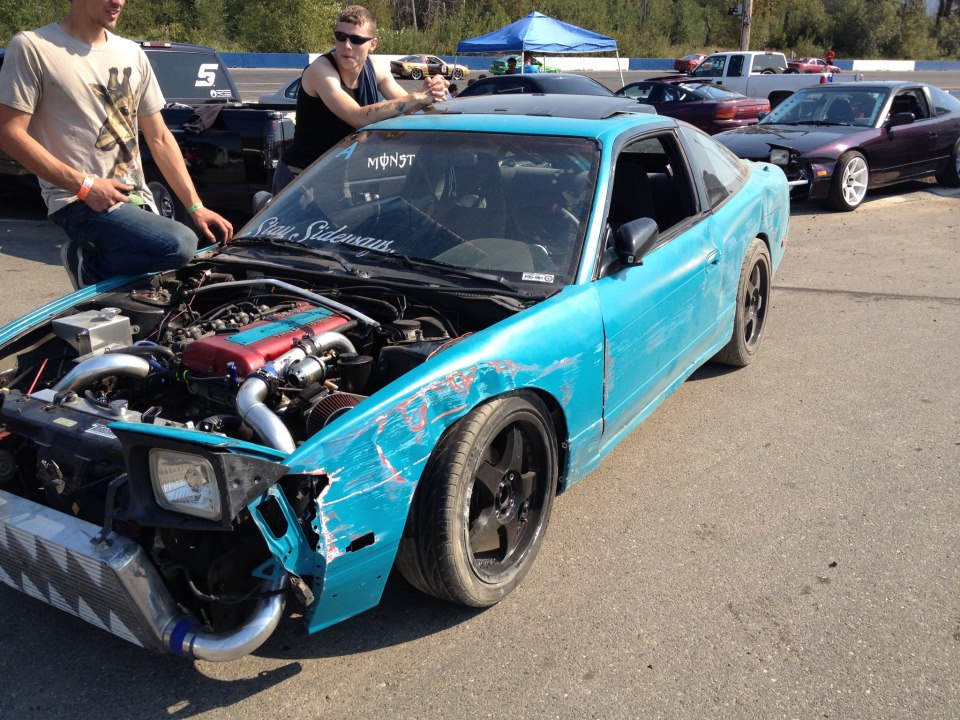
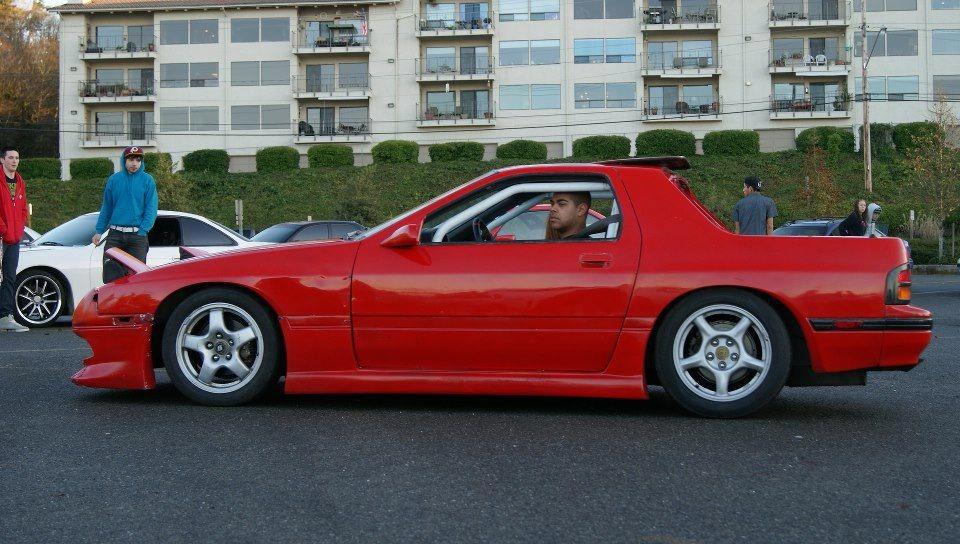
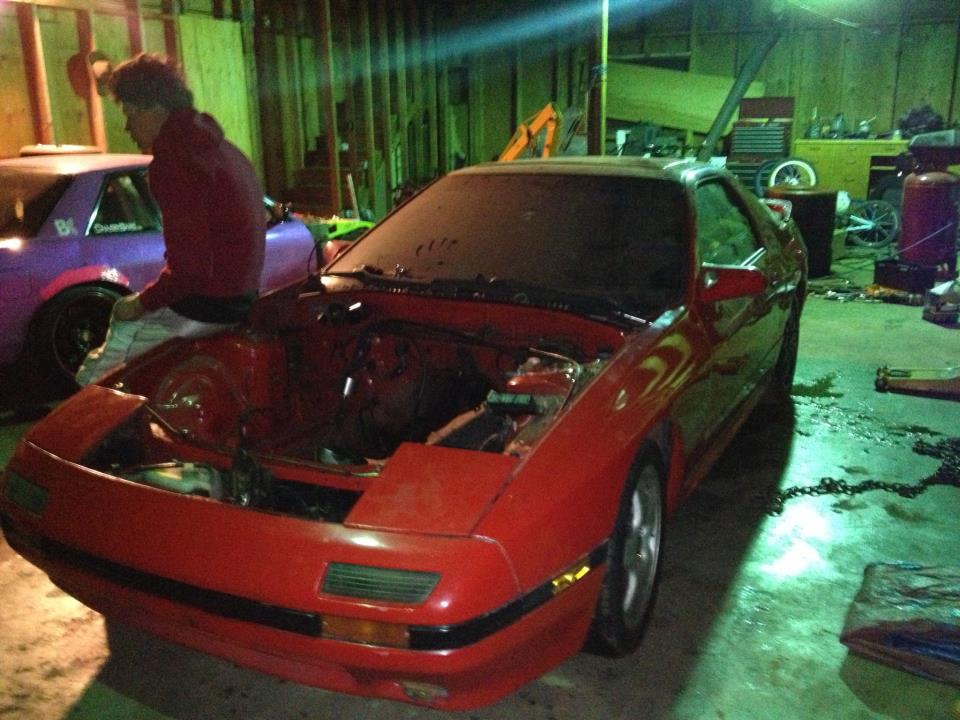
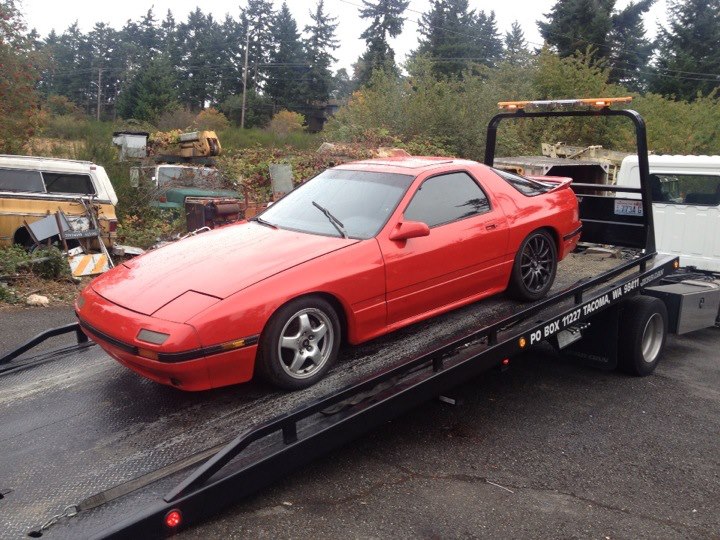
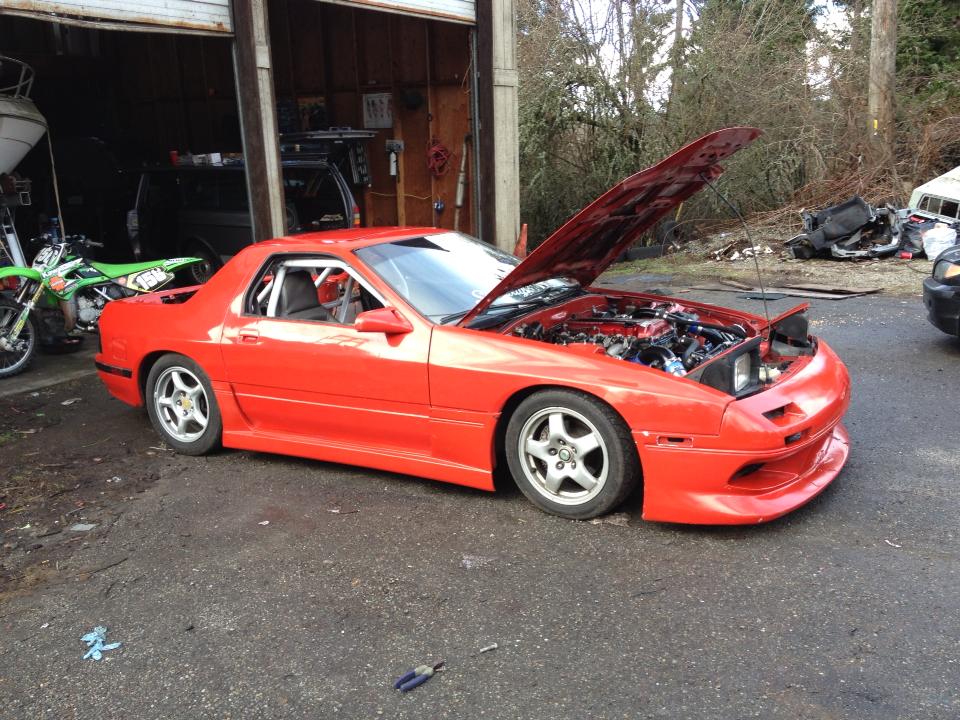
It was fully fixable, but i was getting tired of having 240's as that one was my 3rd one in 2 years. So pulled the SR, sold the good stuff, and sold the shell. Ended up getting a really good deal on a 88 Rx7 Fc that was setup with custom mounts for sr, coils, bolt in cage, Keezers old sr driveshaft, and his welded diff. Here is how it looked the day i got it
Alright so it all started when i had this blue sr'd hatch right here below! Learned how to drift in it pretty much and one day at EVD i hit the 3/8ths wall. Had some broken suspension pieces a broken core support and various other things..
It was fully fixable, but i was getting tired of having 240's as that one was my 3rd one in 2 years. So pulled the SR, sold the good stuff, and sold the shell. Ended up getting a really good deal on a 88 Rx7 Fc that was setup with custom mounts for sr, coils, bolt in cage, Keezers old sr driveshaft, and his welded diff. Here is how it looked the day i got it
Thread Starter
Full Member
Joined: Sep 2012
Posts: 204
Likes: 0
From: Tacoma, Wa
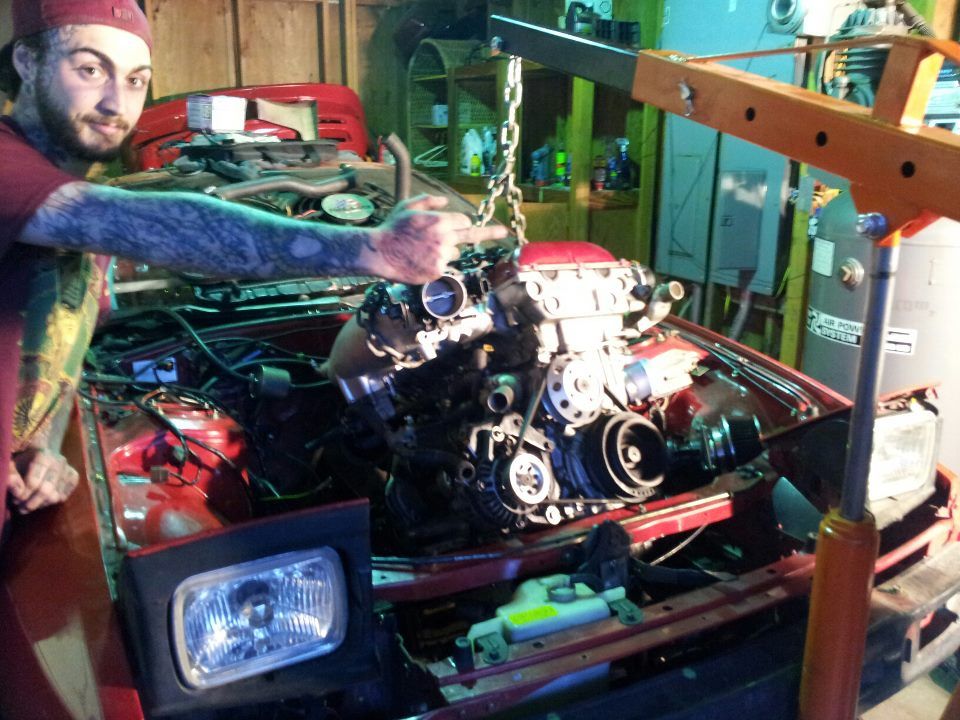
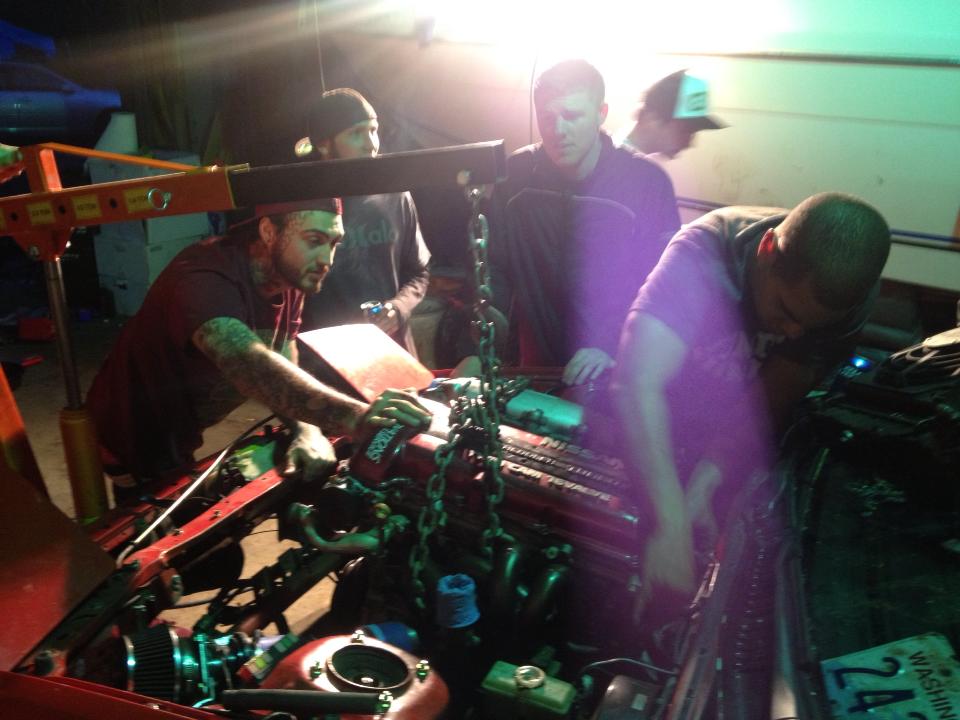
And in about a week i started getting to work on it. Got the sr in and bolted in which was harder then i thought lol as the engine just felt awkward getting in there but after half a day it was in! Well the easy part was done lol

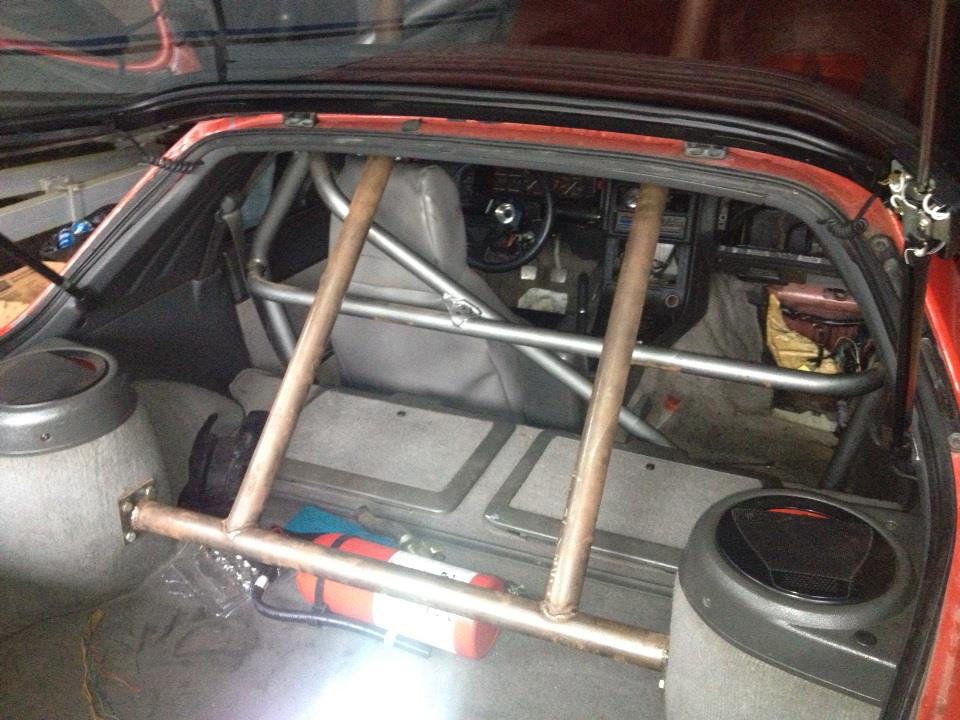
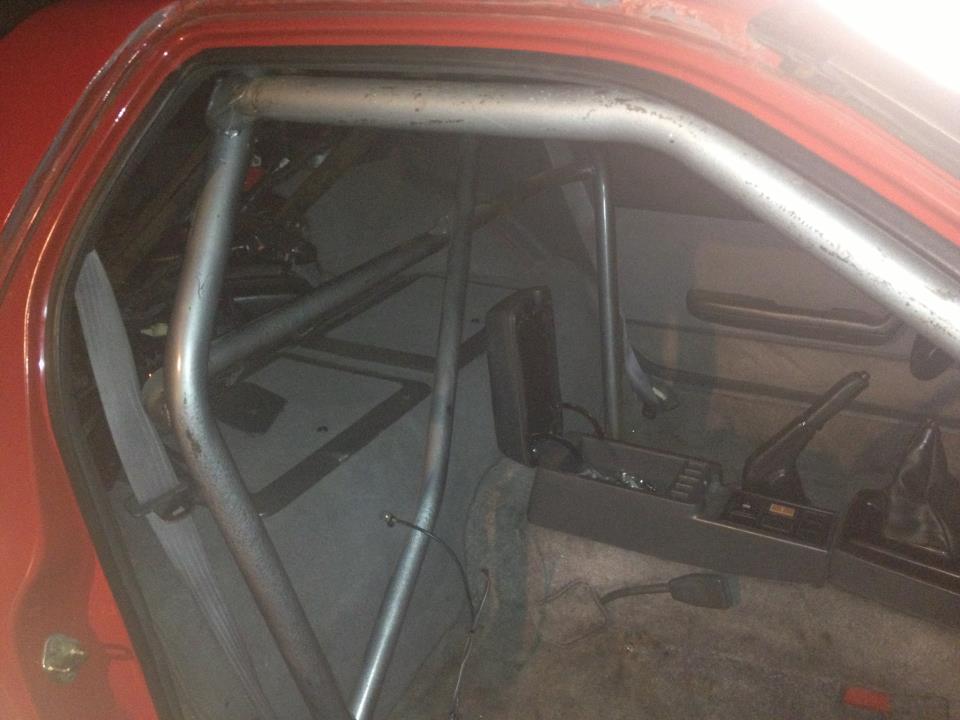
And also was bored and put the cage in, a steering wheel, and shift ****
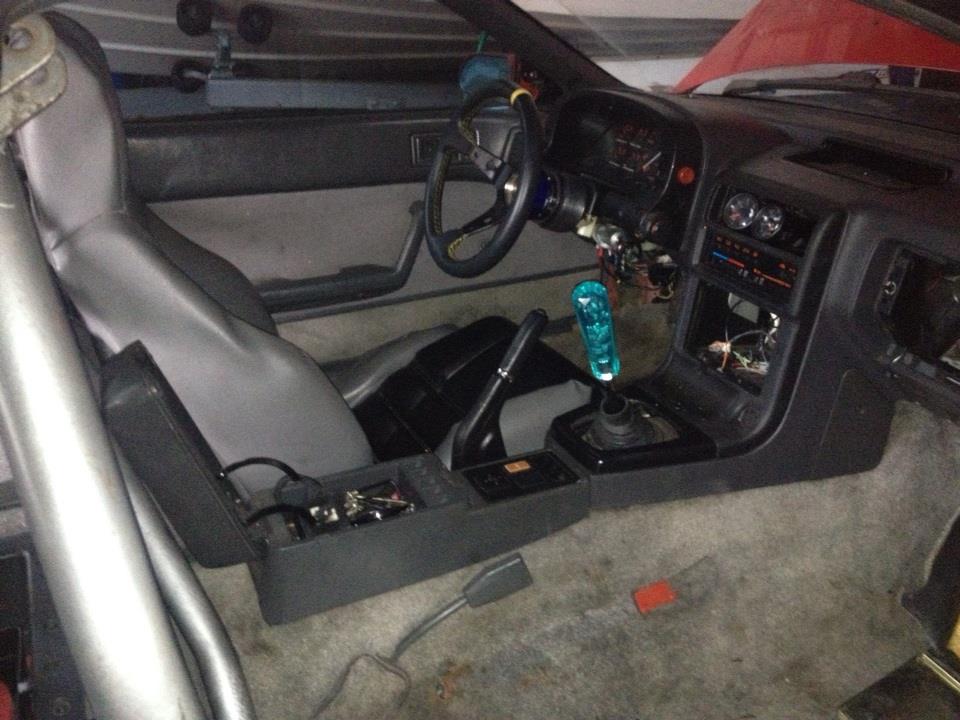
And also was bored and put the cage in, a steering wheel, and shift ****
Thread Starter
Full Member
Joined: Sep 2012
Posts: 204
Likes: 0
From: Tacoma, Wa
Then came the time to get my intercooler, piping, radiator, and electric fans all sorted sorted out. I ended up getting a xs power intercooler that would work with my setup and used a stock rx7 radiator along with some FAL dual electric fans from my old s13.
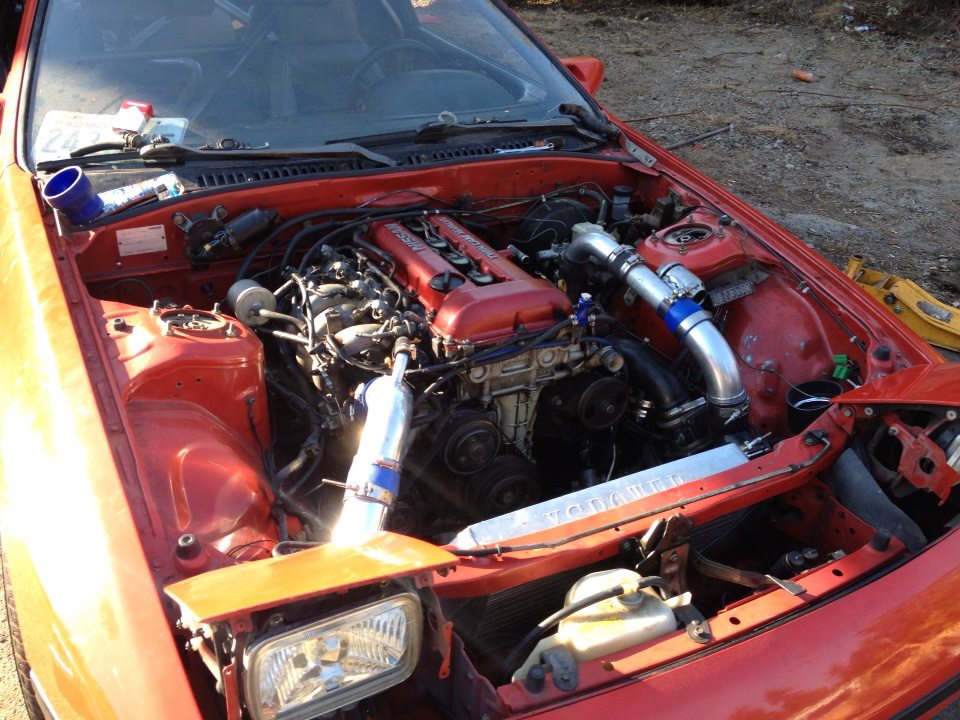
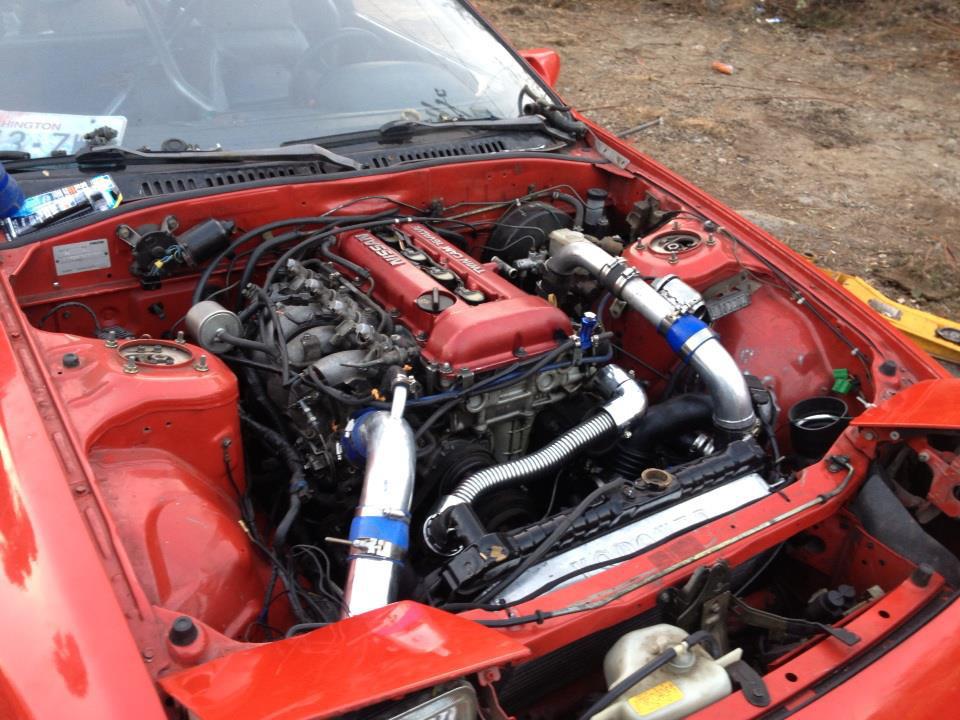
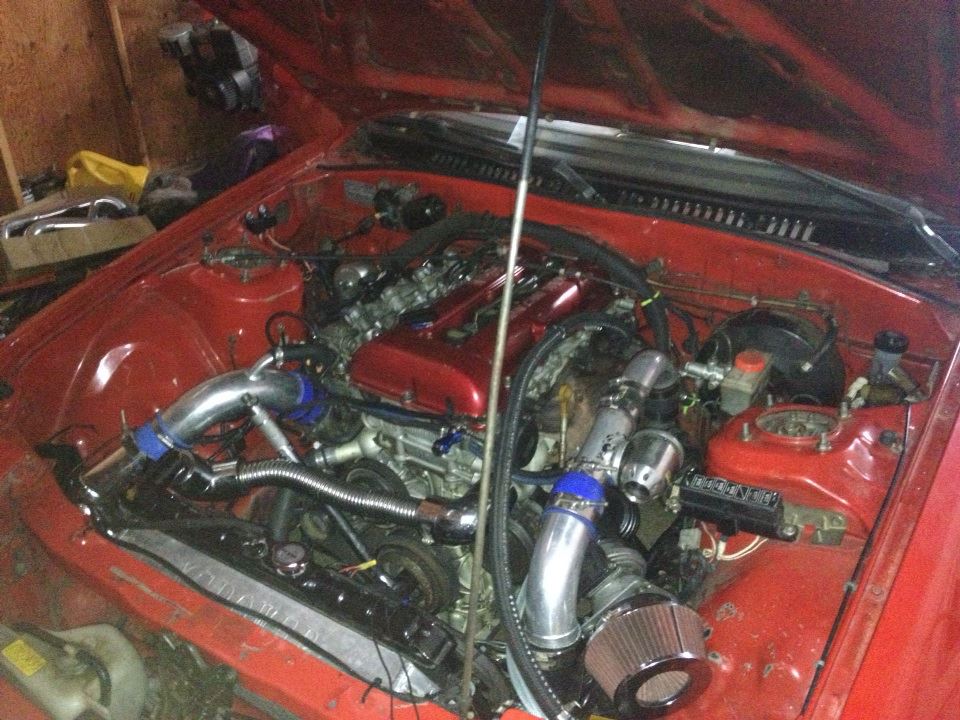
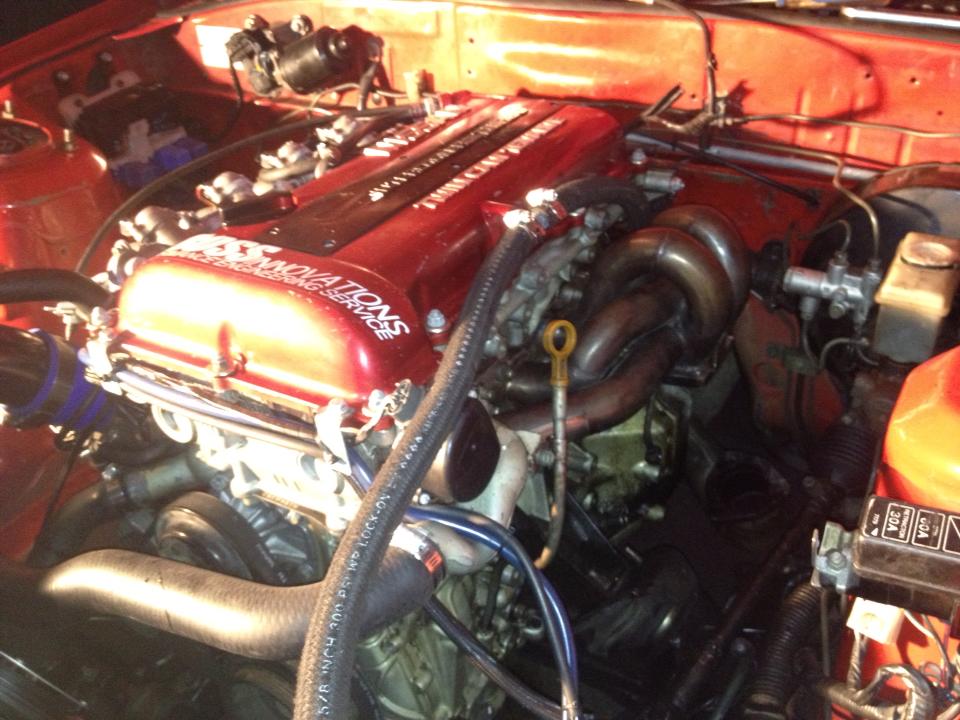
And then off to the shop BOSS Innovations to get my swap looking more clean, tucked, wired, and all ready to run!
And then off to the shop BOSS Innovations to get my swap looking more clean, tucked, wired, and all ready to run!
Thread Starter
Full Member
Joined: Sep 2012
Posts: 204
Likes: 0
From: Tacoma, Wa
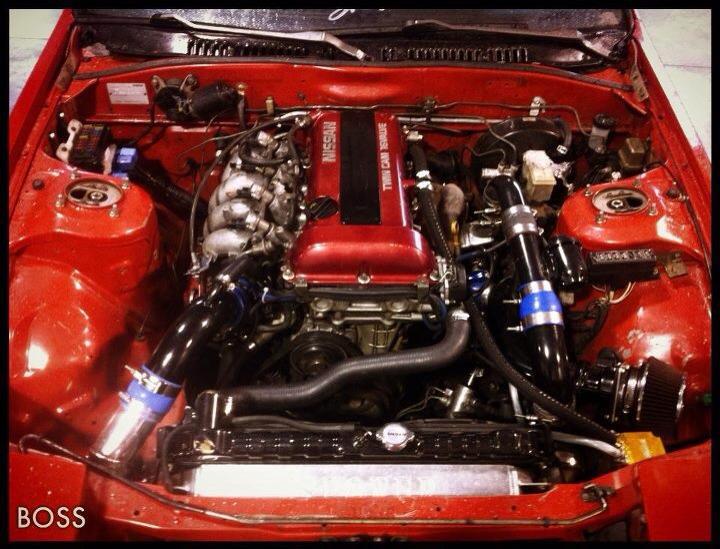
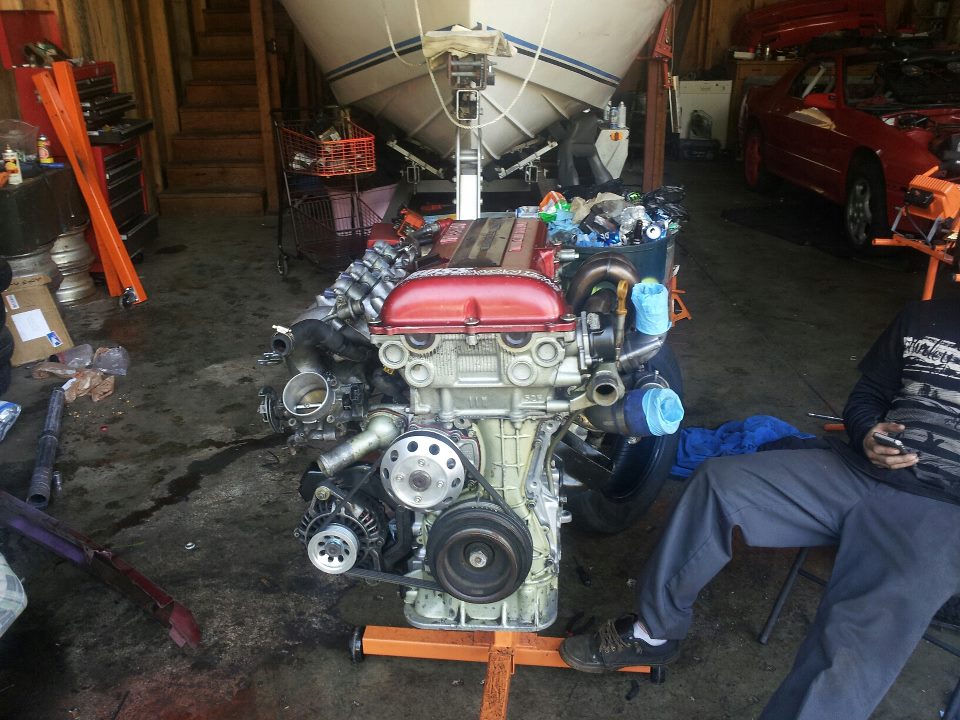
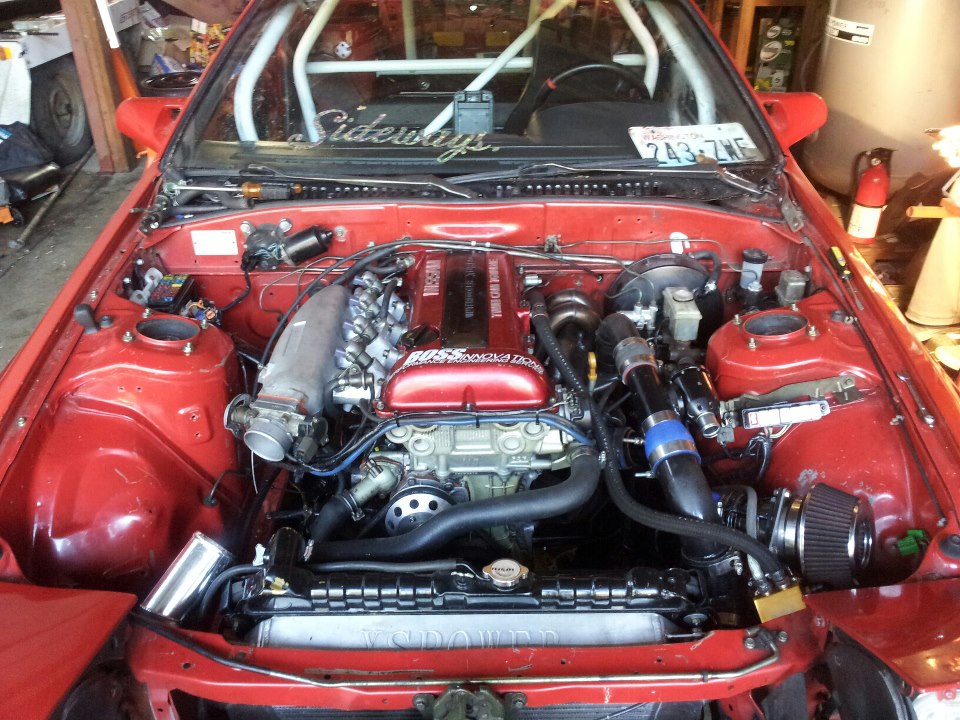
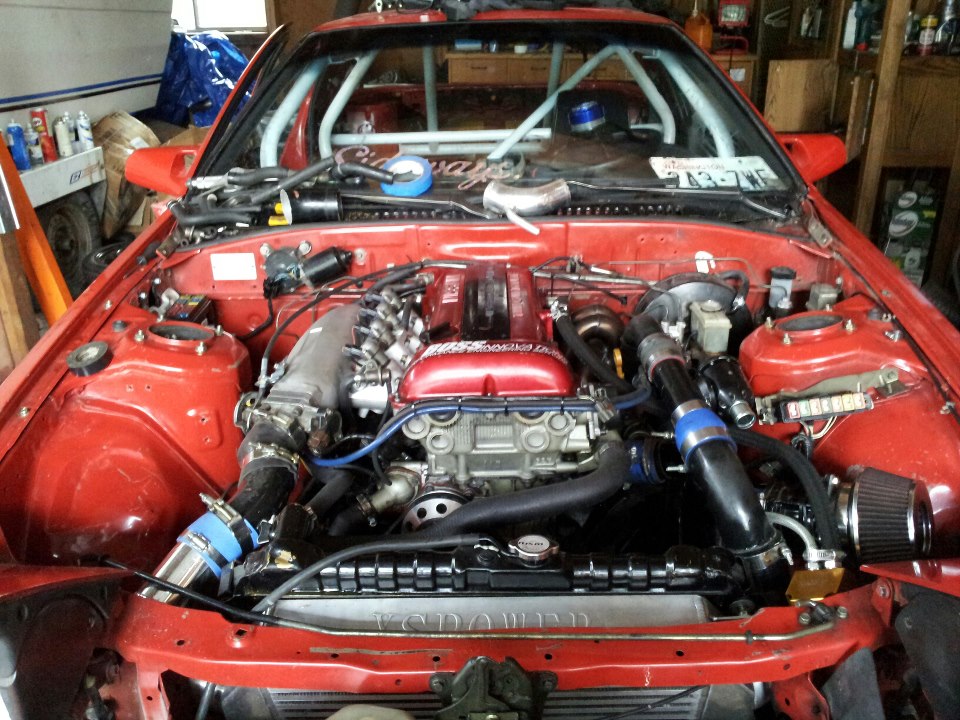
Got the car back from BOSS and it was perfect! Swap was cleaned up to look amazing and everything was running good although my t25 was on its way out lol. They had re-ran my fuel lines above the tranny so that they werent running so close to the turbo mani and above the engine, did a full wire tuck, did a custom hard intake, did a custom fuse box in the engine bar, made custom brackets for everything, and even mounted the ecu in the glove compartment! Needless to say it was pretty baller!
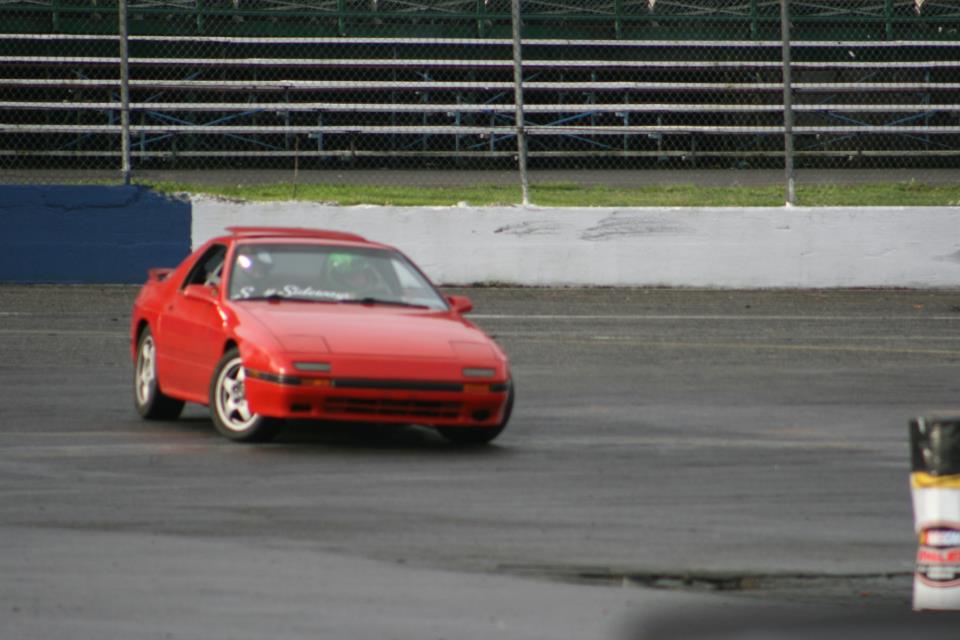
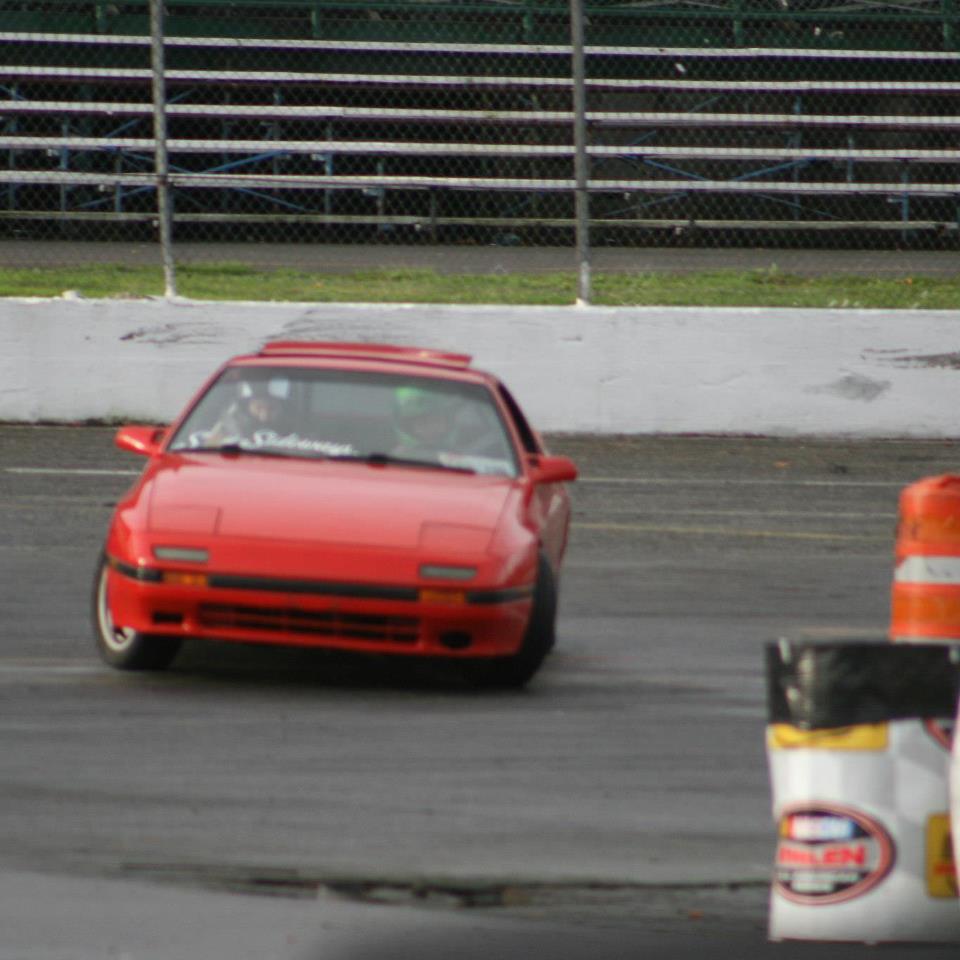
So the next weekend i took it out for a evd event! Did drift school/Open Drift and my instructor was actually Kory Keezer which was pretty cool. Had some fun at evd but by 9pm that night 10 hours of drifting had caught up with me and i blew my little t25 haha! Had tons of fun though and actually was able to drive home and get on the hunt for a turbo.
So the next weekend i took it out for a evd event! Did drift school/Open Drift and my instructor was actually Kory Keezer which was pretty cool. Had some fun at evd but by 9pm that night 10 hours of drifting had caught up with me and i blew my little t25 haha! Had tons of fun though and actually was able to drive home and get on the hunt for a turbo.
Thread Starter
Full Member
Joined: Sep 2012
Posts: 204
Likes: 0
From: Tacoma, Wa
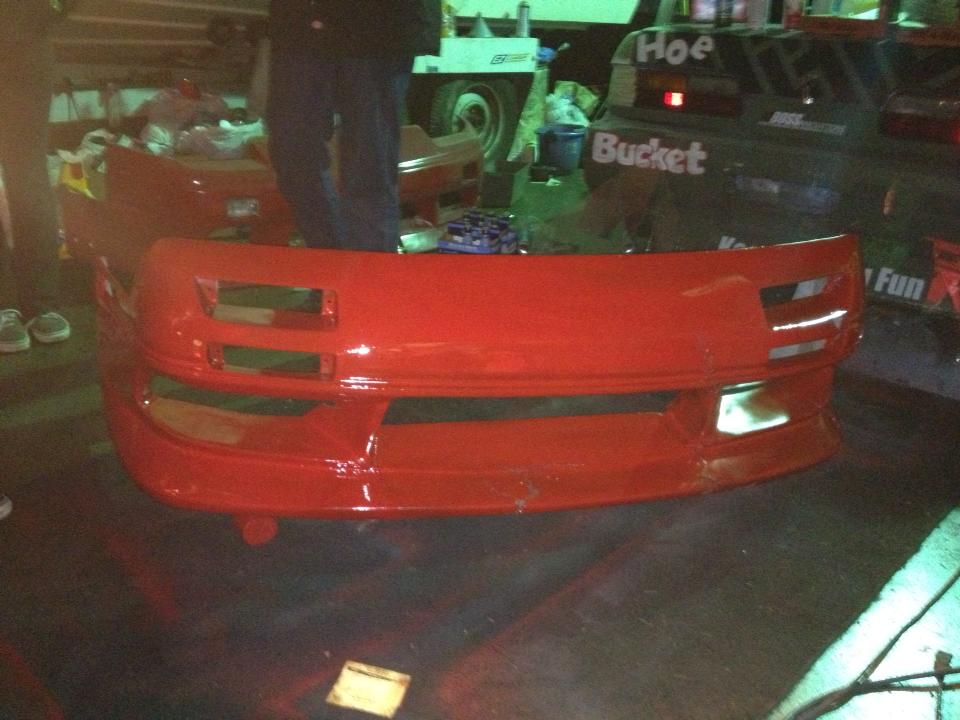
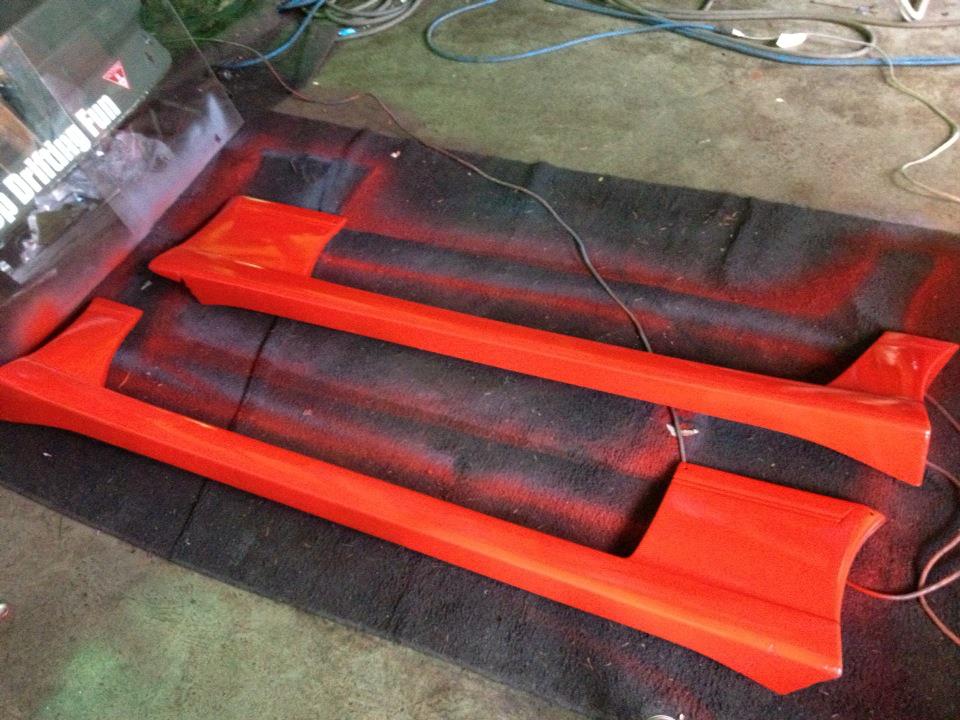
Alright so next step was picking up a turbo and some aero. I actually ended up getting another t-25 from a friend for $50 so i threw that on as well as picking up a turbo manifold too. Also picked up Kory Keezers old aero off his SR fc which seemed suiting to me, which were Origin Front and Gp sports sides.
Thread Starter
Full Member
Joined: Sep 2012
Posts: 204
Likes: 0
From: Tacoma, Wa
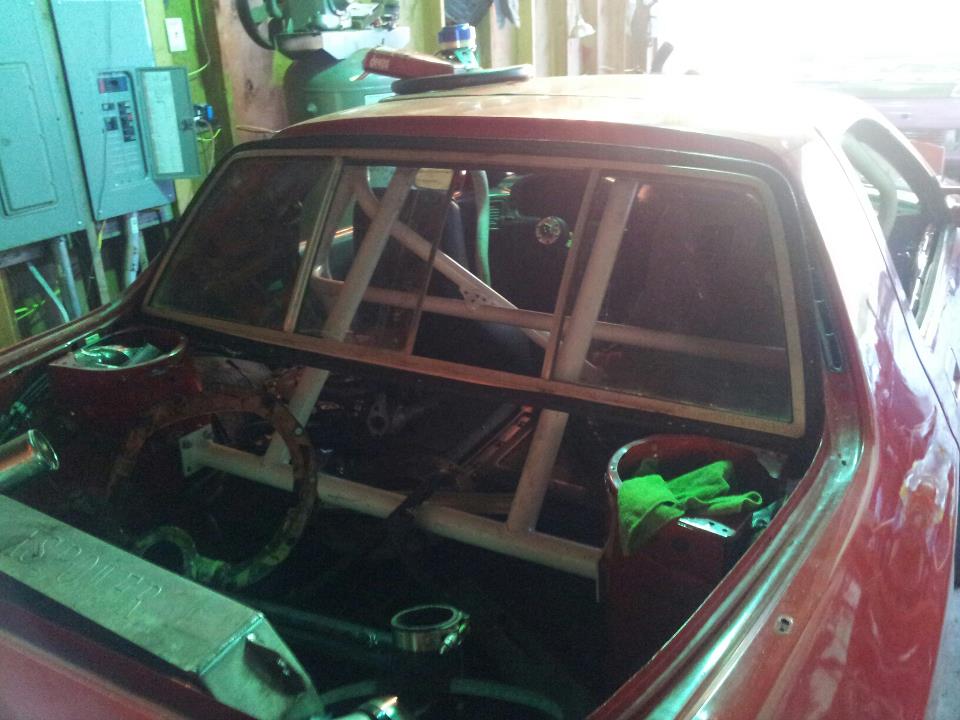
Well started doing a truck conversion since my current hatch wouldnt lock cause the cable was broken and the key hole in back was too and it was getting stupid annoying to crawl in the back through my cage too latch it.. so off it came!
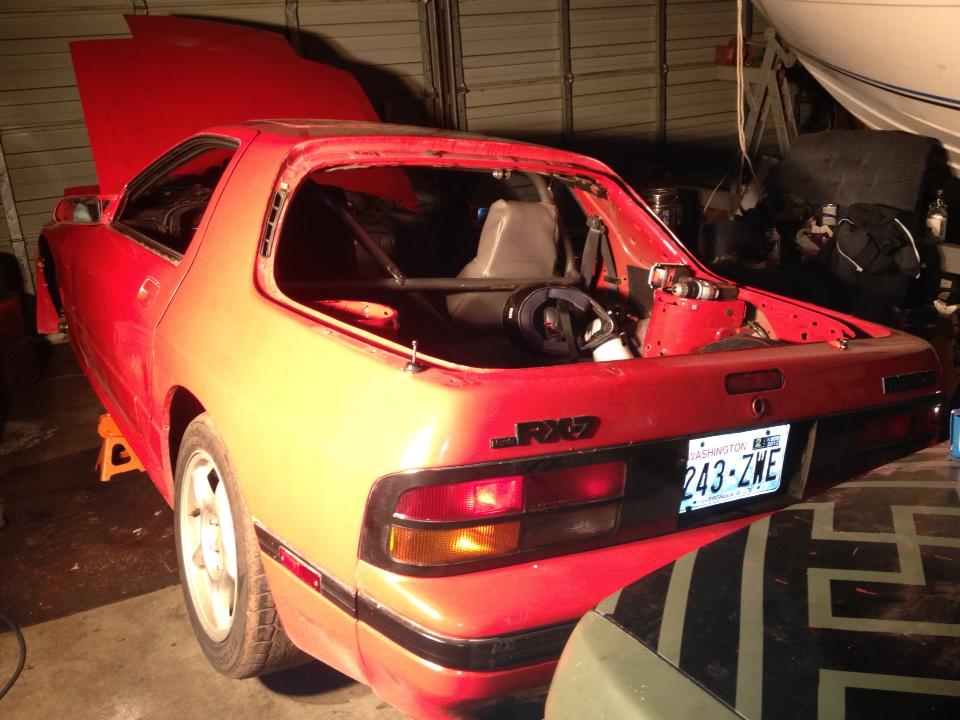
So after the hatch was off i ended up removing all unnecessary crap.. carpets, latches, broken cables, and plastics. I went and bought some outdoor rubber matting for the truck bed and cut it out to fit and a big thing of sheet metal to start some fab work! Also got bored and painted my cage white lol Then took to it to a meet.
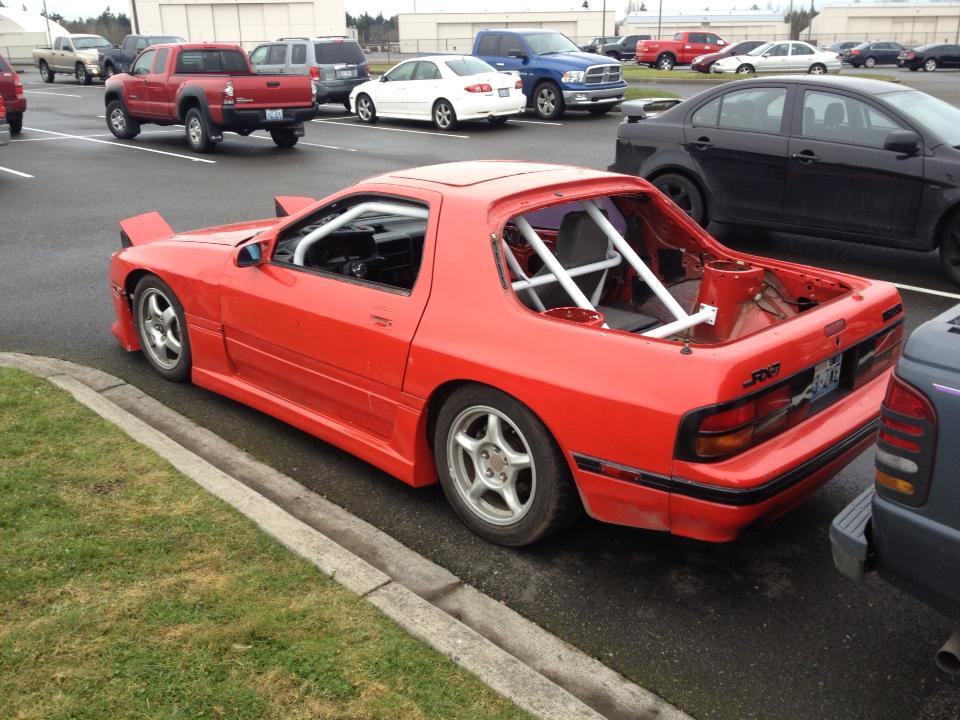
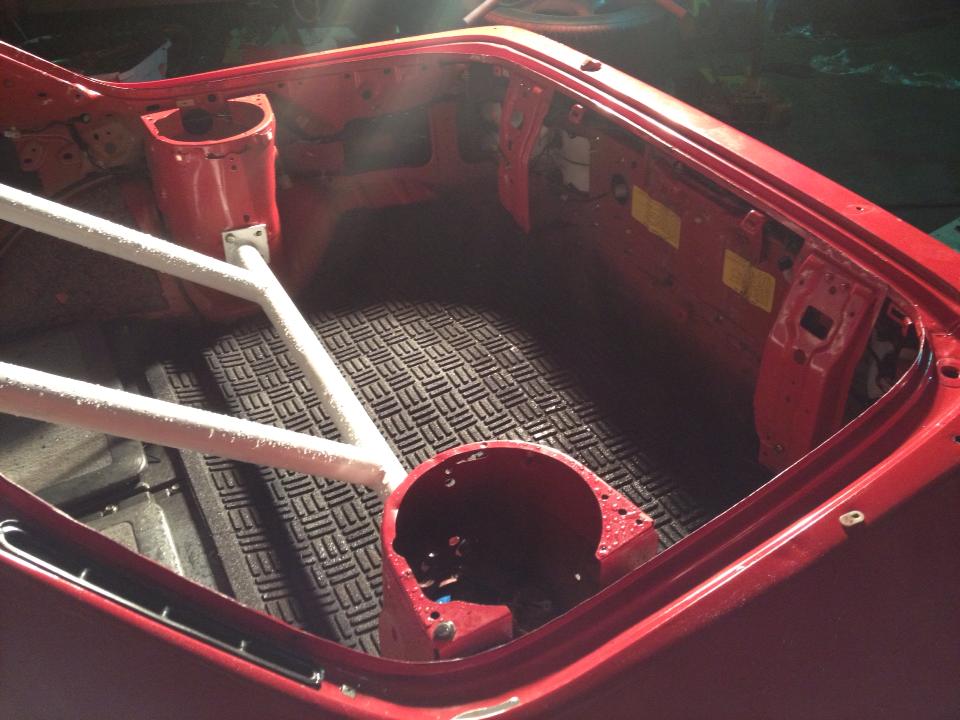
So after the hatch was off i ended up removing all unnecessary crap.. carpets, latches, broken cables, and plastics. I went and bought some outdoor rubber matting for the truck bed and cut it out to fit and a big thing of sheet metal to start some fab work! Also got bored and painted my cage white lol Then took to it to a meet.
Thread Starter
Full Member
Joined: Sep 2012
Posts: 204
Likes: 0
From: Tacoma, Wa
Next step was to cut the top of the strut towers off and start fabbing up the sheet metal to work until...... ROD KNOCK! Did some spirited driving the night before and ended up with a rod knock.. I mean i knew it was inevitable. Had the motor for about a year and had daily drove it in my 240, went to 5 events in all, and beat the living crap out of it the whole time lol. So i was proud that it had lasted this long anyways! So where im at right now is getting ready to fully build the bottom end and i cant wait! Waiting for next week to start buying parts and get on the build. For right now im picking up arp head studs(already have cosworth gasket), acl main and rod race bearings, stock rods, and some weisco or supertech 86.5 mm pistons
Trending Topics
Thread Starter
Full Member
Joined: Sep 2012
Posts: 204
Likes: 0
From: Tacoma, Wa
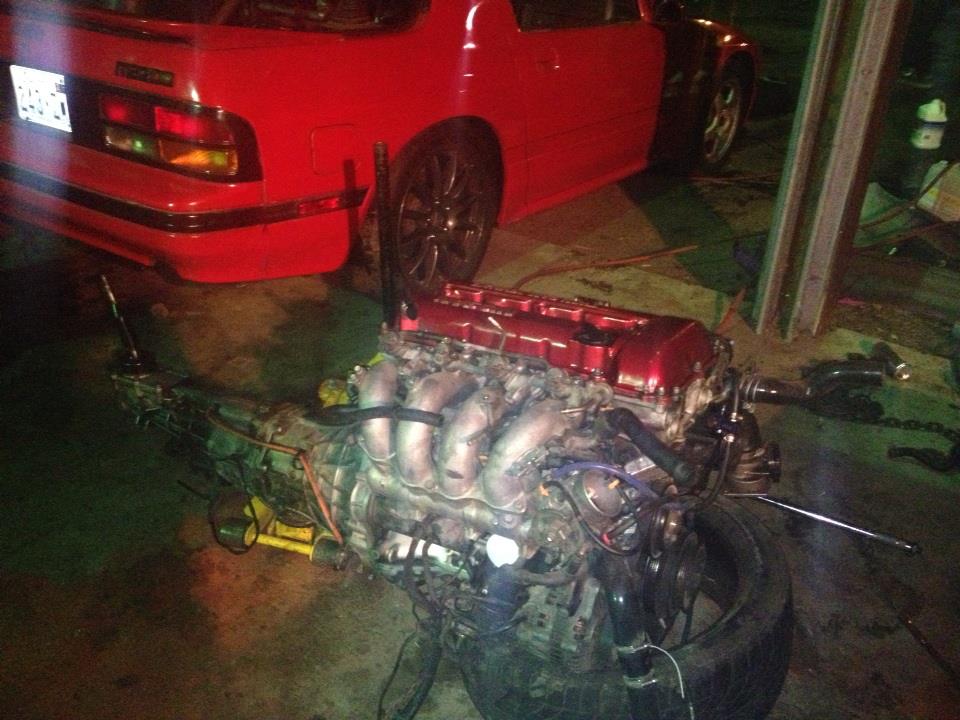
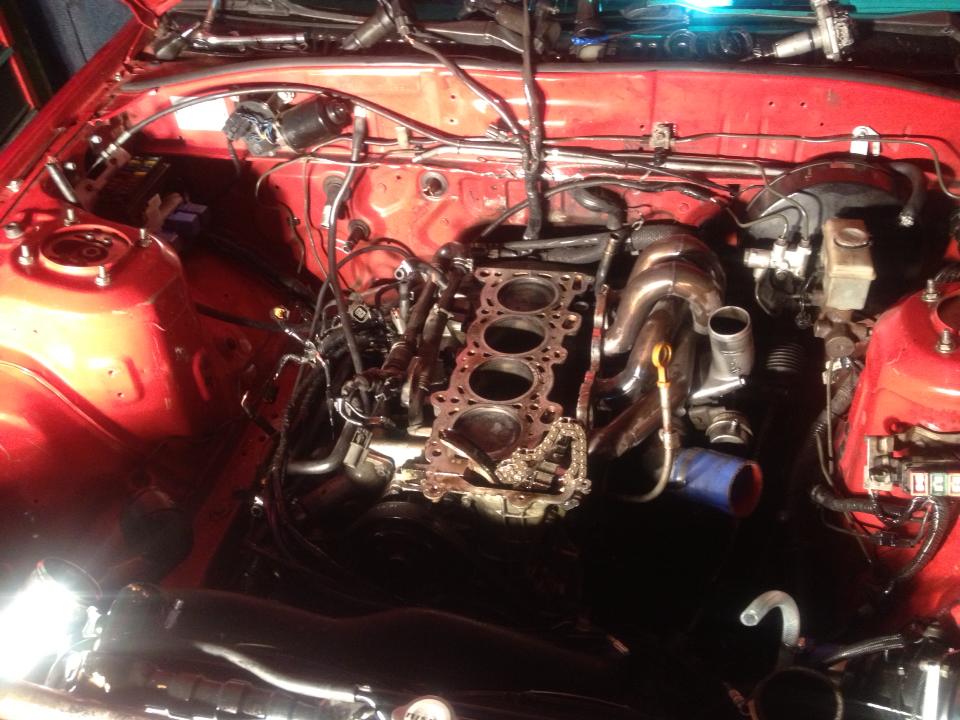
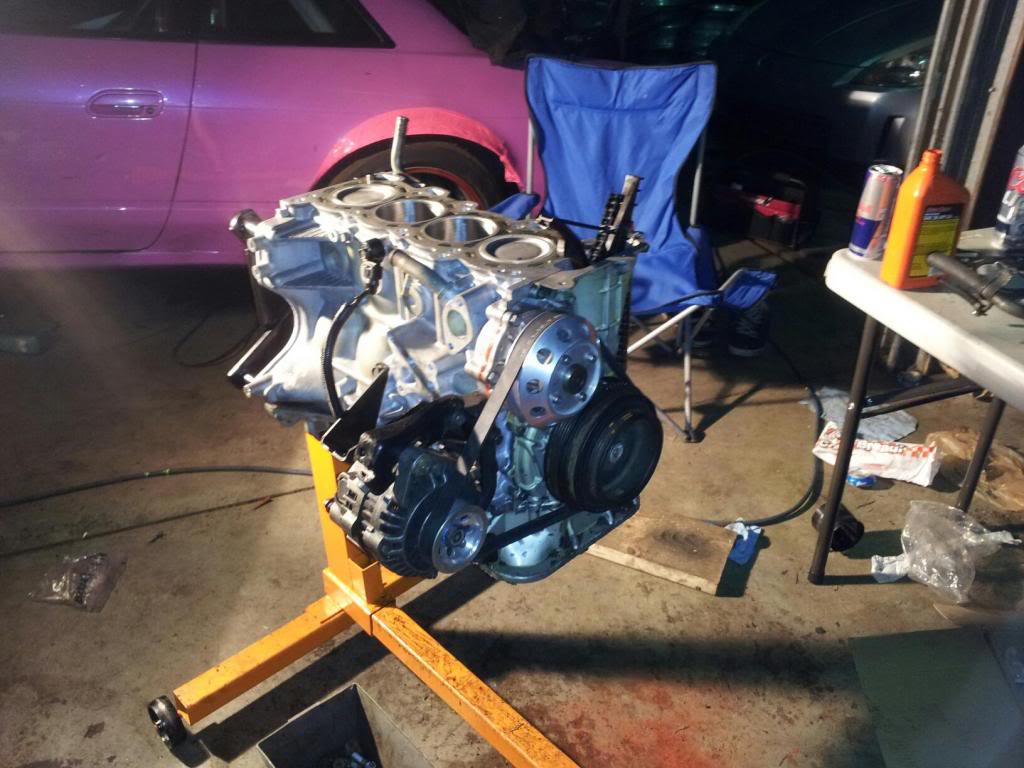
So on to the rebuild now! Pulled the engine and started pulling it all apart and low and behold i found out why my motor got the rod knock... Broken oil pickup was the culprit.. Sucked cause it was such a small part that did it, but not too bad since I have a reason to fully build my motor now lol
Thread Starter
Full Member
Joined: Sep 2012
Posts: 204
Likes: 0
From: Tacoma, Wa
Got all my rebuild parts in and block with crank was sent to pacific engines for machine work. Getting a hone, bore .20 over, hot tank, and have my crank balanced. Also ended up getting all the rebuild parts ordered. So my bottom end will be something like this:
Wiesco 86.5 mm pistons
Eagle forged rods
Arp rod bolts
Arp main bolts
Arp head studs
Acl main and rod bearings
s14 oil pickup
All new seals
New timing chain kit
Wiesco 86.5 mm pistons
Eagle forged rods
Arp rod bolts
Arp main bolts
Arp head studs
Acl main and rod bearings
s14 oil pickup
All new seals
New timing chain kit
Thread Starter
Full Member
Joined: Sep 2012
Posts: 204
Likes: 0
From: Tacoma, Wa
Alright so motor should be back from the the engine shop this upcoming week and i have all my rebuild parts ready to go in! And in the meantime of being bored and waiting for my motor back from the engine shop. I had a friend that had an old yota window and now im just trying to come up with ideas as to how to incorporate it into the truck conversion. lol small idea here from the pic but im sure as time goes on things will change
Thread Starter
Full Member
Joined: Sep 2012
Posts: 204
Likes: 0
From: Tacoma, Wa
Alright so got around to fully gutting my car and getting rid of all the nasty carpet and dry icing it up to get rid of the sound deadening stuff. Stuff came off easy as hell with the dry ice and became pretty fun too when a hammer was involved lol
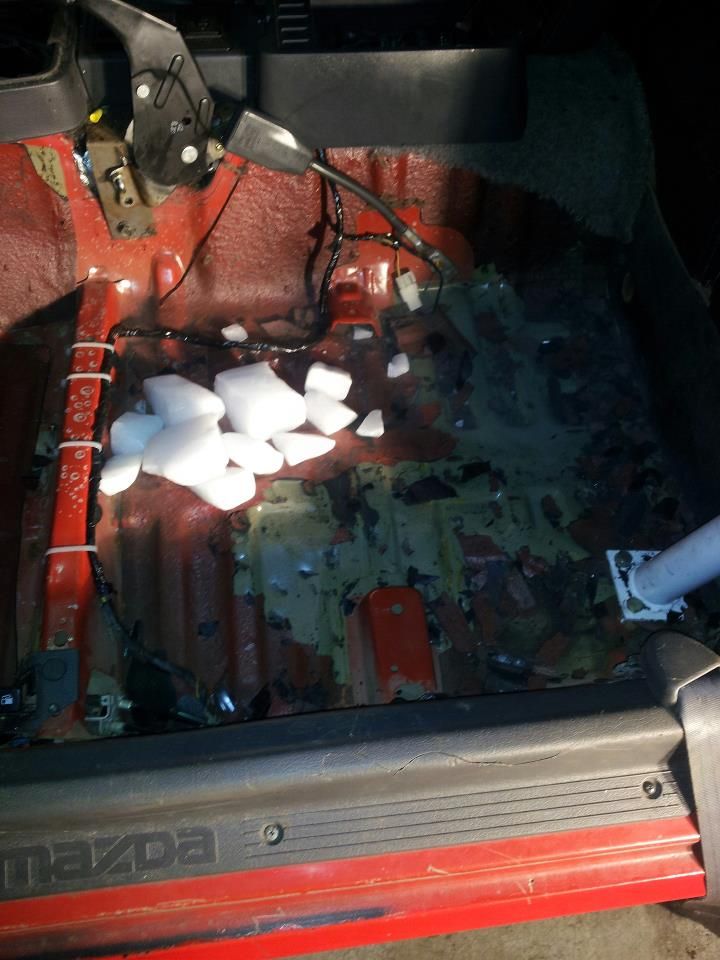
And after it was all gone.. stuff seriously weighed a good amount by how heavy my shop vac became lol
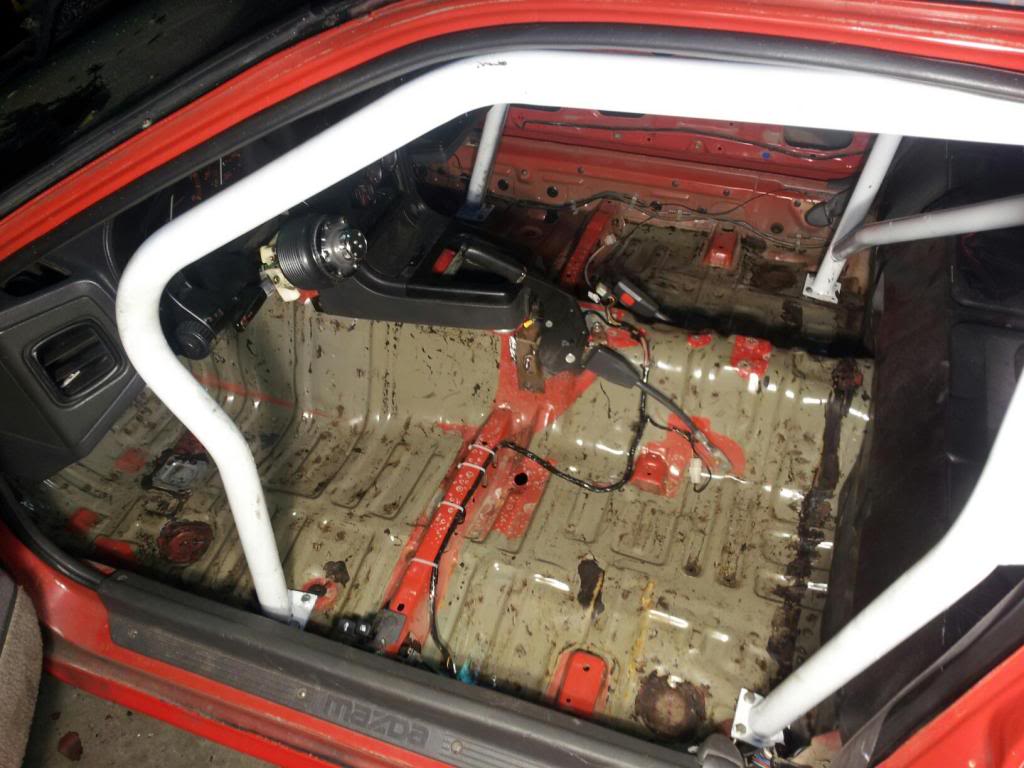
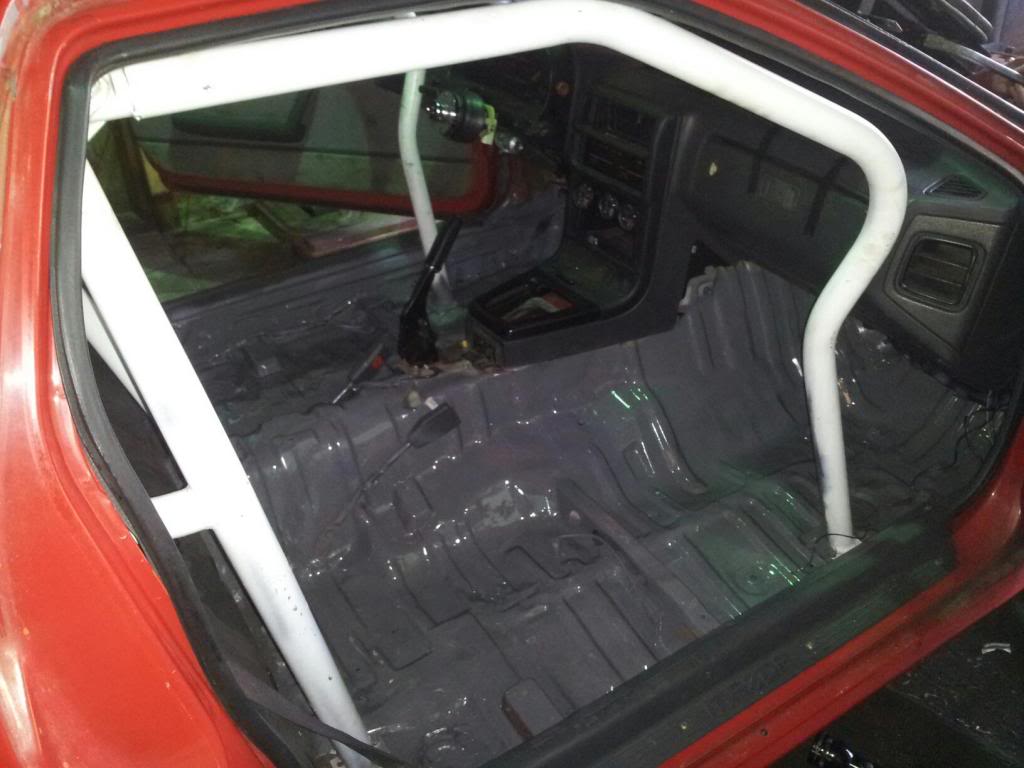
Now my original plan was to paint it red like the car but after laying some primer down i actually liked the gray color and it just so happened that i had 2 cans of dark grey gloss paint.. So painted it and really liked how it turned out!
And after it was all gone.. stuff seriously weighed a good amount by how heavy my shop vac became lol
Now my original plan was to paint it red like the car but after laying some primer down i actually liked the gray color and it just so happened that i had 2 cans of dark grey gloss paint.. So painted it and really liked how it turned out!
Thread Starter
Full Member
Joined: Sep 2012
Posts: 204
Likes: 0
From: Tacoma, Wa
And then i got my bottom end back and it was all nice, clean, and fancy. So with some help from my friends we got the whole rotatiing assembly, pistons, bearings, and rods in. And i spent the better half of the day putting most of the pieces back on.
Thread Starter
Full Member
Joined: Sep 2012
Posts: 204
Likes: 0
From: Tacoma, Wa
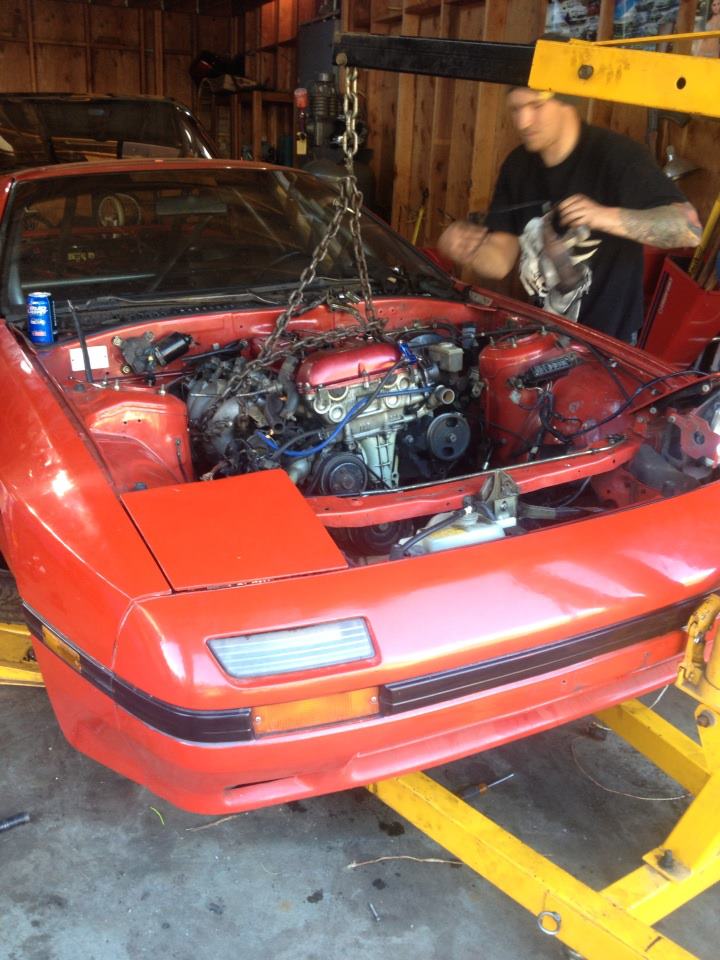
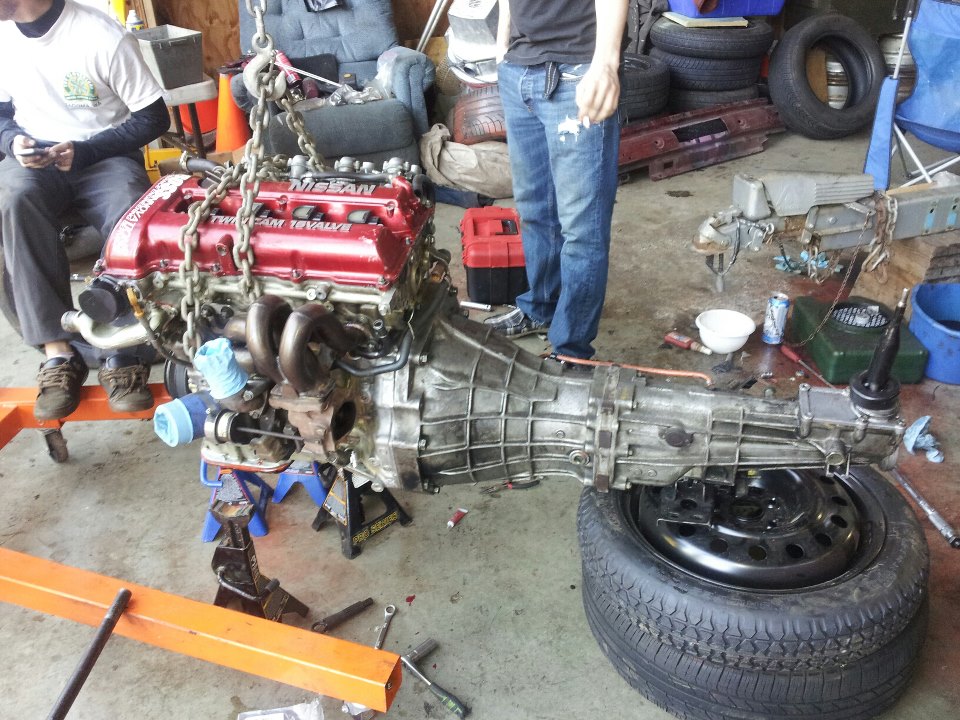
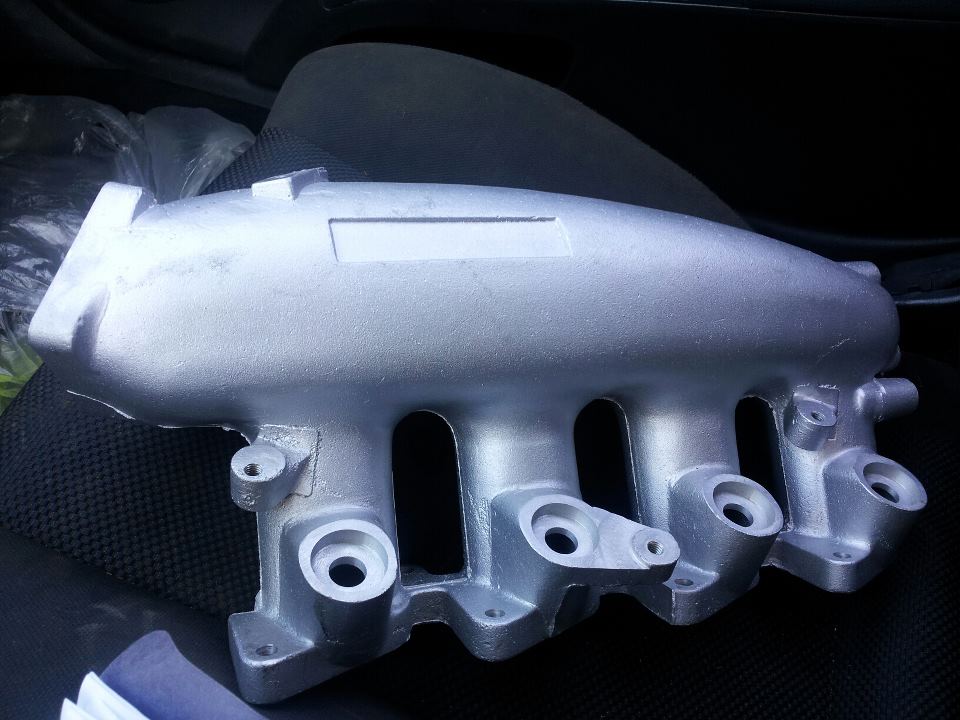
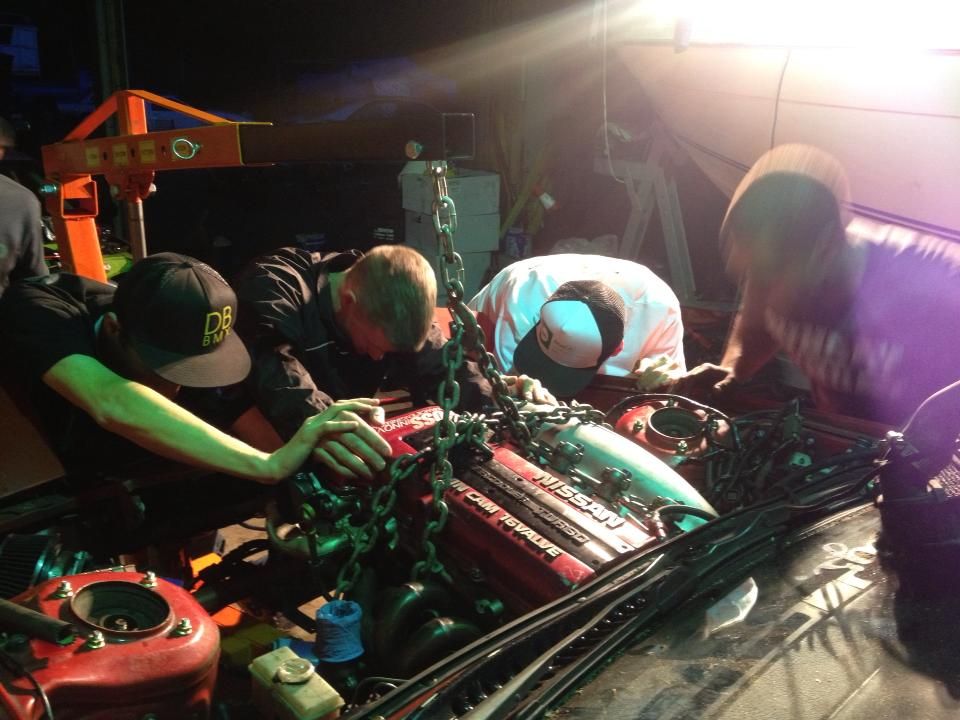
Well picked up a cheap isis manifold for a good deal before i dropped my motor in and then came the fun 3 hour task of putting this motor in. The motor sits so far back in the fc that its pretty damn difficult to get it in, but with some friends and alot of time we did it without any big problems. Just alot of picking the motor up and down to get it to fit on the mounts. Hopefully it will be running by tomorrow.. and as for today I have to hook up the wiring harness, piping, etc etc
Thread Starter
Full Member
Joined: Sep 2012
Posts: 204
Likes: 0
From: Tacoma, Wa
Well got the engine mostly back together and most of the harness on besides the injector plugs. Turns out since my old setup was tucked. The wires were cut and made to fit only the stock intake manifold so when i went to plug them in 2 of them were too short.. LOL so tomorrow have to lengthen those wires as well as figure out how to make a new cold pipe for this manifold and a new throttle cable bracket. Other then that hopefully tomorrow is the day i start it!!


Thread Starter
Full Member
Joined: Sep 2012
Posts: 204
Likes: 0
From: Tacoma, Wa
My plans are to cut towers down to where the strut attaches to the car since they are pretty much just some sort of cover. And for the glass setup, im still deciding.. lol at first i was just gonna cut a piece of plexiglass out and mount it in there but now im getting different ideas which involve puting a yota window back there. Still not set on that though.. Ill figure it out when the time comes lol
Thread Starter
Full Member
Joined: Sep 2012
Posts: 204
Likes: 0
From: Tacoma, Wa
Alright so got the motor started and running and even drove down the street a bit lol. Car is running a little rough though which im sure is cause of the numerous boost leaks i most likely have lol. Also after getting it running and idling on its own found out my HKS bov was broken:/ the diaprham inside broke off its mounting piece so now im running no BOV. Hopefully in the next couple days i get the kinks worked out and it starts running correctly so i can start breaking in the motor correctly.
My short little trip round the block in it lol
https://www.facebook.com/photo.php?v=521347134573801
My short little trip round the block in it lol
https://www.facebook.com/photo.php?v=521347134573801

Thread Starter
Full Member
Joined: Sep 2012
Posts: 204
Likes: 0
From: Tacoma, Wa
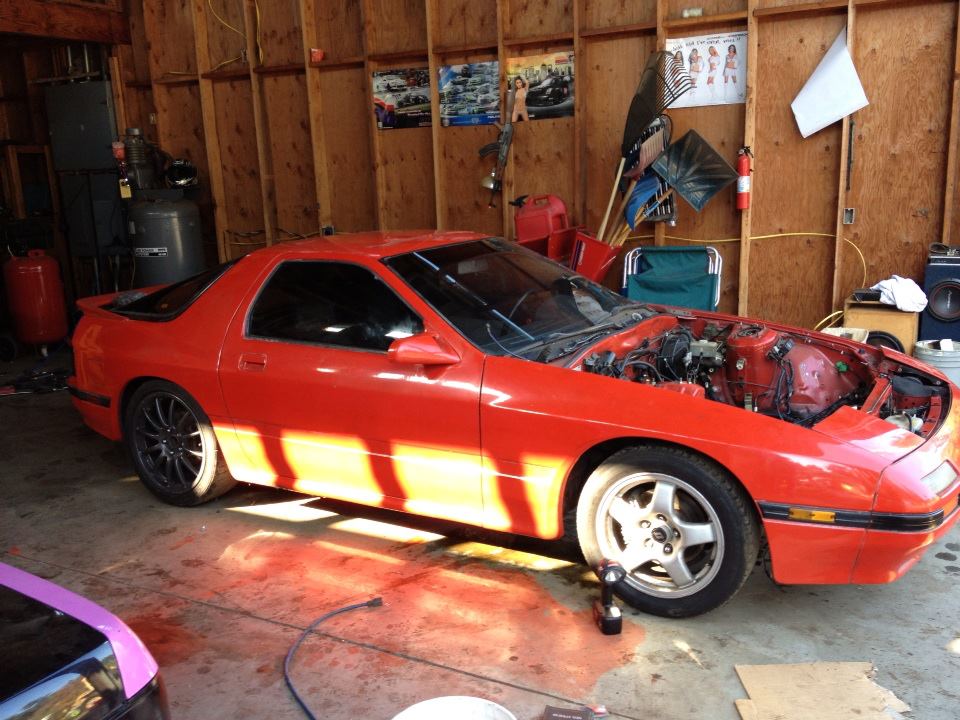
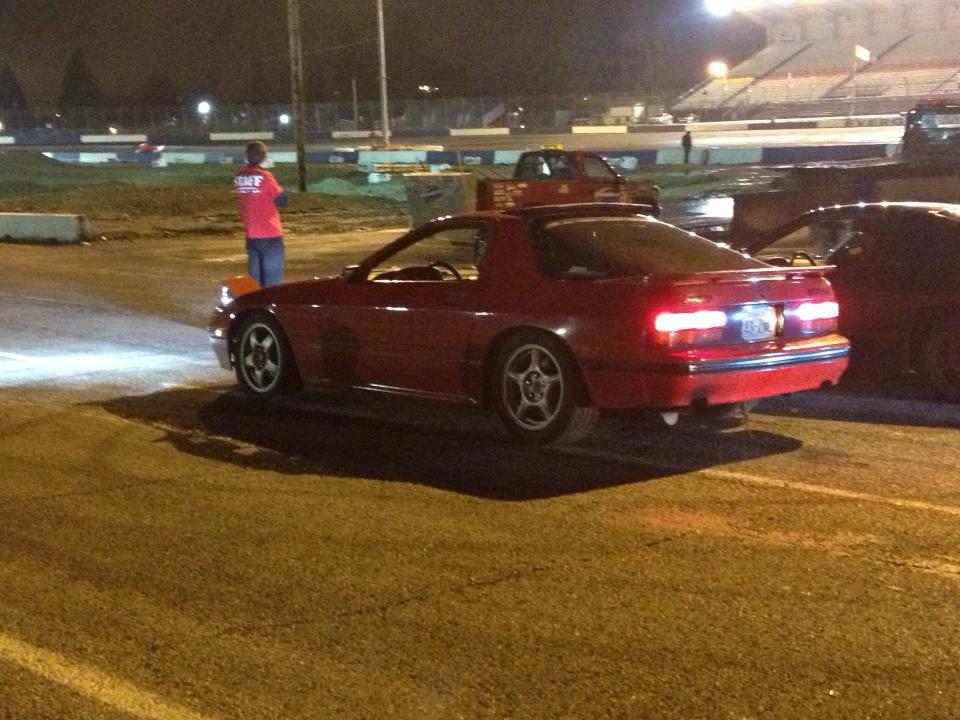
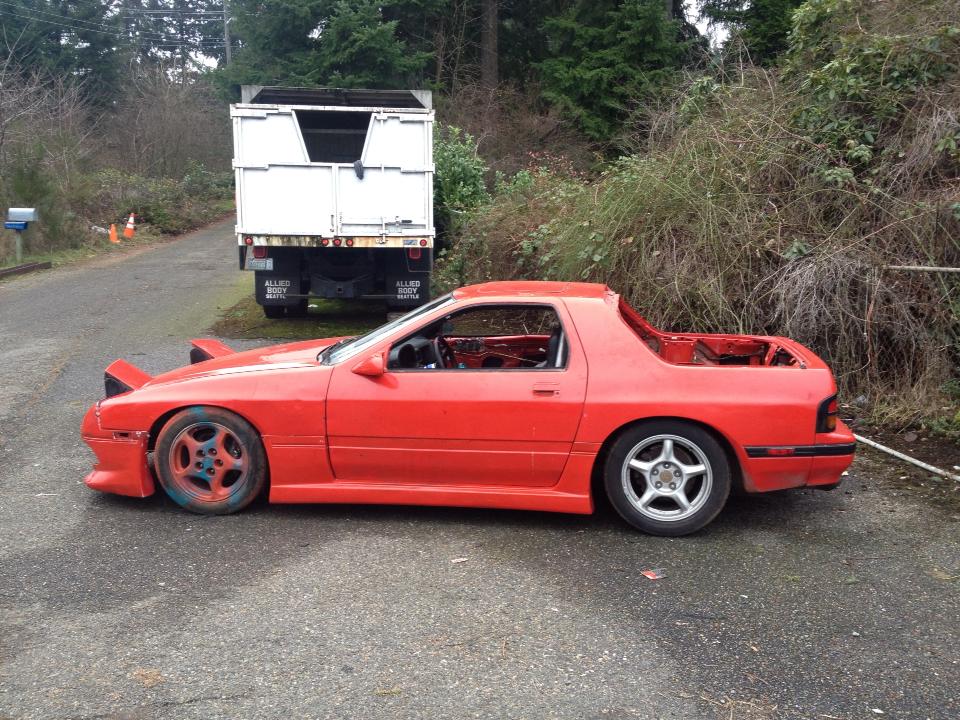
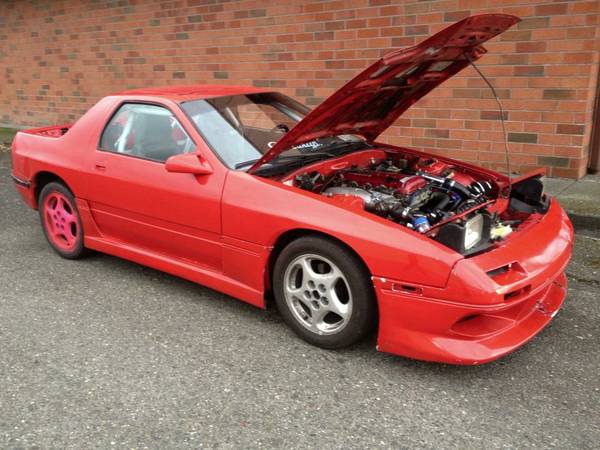
HAHAHA^ So literally after driving it for 30 miles. I parked it and then replaced a broken hot pipe and now it wont start.. Literally killing me since i deploy on sunday for 6 months and i still cant figure it out.. but today im going to start shooting multiple wires, Since im getting spark and fuel and have redone timing like a hundred times.. but still wont start. Heres how the POS sits today and on stock suspension since i sold my old tein coils a couple weeks ago
Thread Starter
Full Member
Joined: Sep 2012
Posts: 204
Likes: 0
From: Tacoma, Wa
So i worked day in and out trying to figure out why the car randomly stopped running. I did timing like a 100 times but 90% of the time the injectors wouldnt fire when i started cranking the motor hence y it didnt start.. Well i ended up not meeting my deadline of last sunday since i deployed to afghanistan that day. Luckily my friend kept troubleshooting it. And after wiggling some wired around and messing with my wiring harness it seems like that was the culprit. So rather then finding exactly which wire it is, im just going to buy a brand new harness and he said he would wire it in. Also my old harness was all messed up in places and wires were cracking all over the place on it. So probably wont have many updates for the next 6 months lol But i have plenty of time to research what im truly going to do with the car and im thinking of throwing the hatch back on not doing the truck conversion.. Its cool and all but its going to be alot of work to make it all work and im having new ideas of what to do with a hatch on it
i have plenty of time to research what im truly going to do with the car and im thinking of throwing the hatch back on not doing the truck conversion.. Its cool and all but its going to be alot of work to make it all work and im having new ideas of what to do with a hatch on it

And the 1967 Ford Mach2 show/concept car...

There was a company making replacement FC hatch structures that somewhat duplicated the Fords look and I was amazed to actually see one in my local junkyard.
It had much longer and more pronounced buttresses (more like a Jag XJ) than the Ford, the result of which was the interior was much darker and claustrophobic. The rear window was right behind your head and visibility out the back and sides was awful.
It was easily twice as heavy as a standard FC hatch, the fiberglass probably 1/4" thick, so very beefy but not particularly well made. It mounted and latched just like stock but I can't imagine what sort of struts could lift and support it.
I thought the piece was hideous and the bulk/weight made it impractical to harvest, so I let it go. In hindsight, it was probably worth grabbing, purely for the rarity value. Someone would want it just because no one else had one...
This (awful) solution to the problem you face perfectly illustrates what I think is the biggest roadblock to a successful conclusion...not committing to the conversion seriously and early enough.
With your hatch removed it's easy to see how beefed up the chassis must be to frame the giant opening, essentially the same problem faced when designing a convertible from a coupe. Even worse, because of it's size, the piece that fills this opening (in this case, the glass hatch) must also be heavily structured...basically, there is a lot of metal used to define one opening.
So delete the opening.
The Ford has no trunk lid, neither did the Opel GT.
Most projects similar to yours (not many actually) are reversible, my approach is not.
This isn't a bolt in proposition, I want the whole thing skinned in sheetmetal and welded in.
Ideally you would source the rear window from the junkyard- Sawzall out the whole structure (say 4" from the glass) and you have an easily replaceable OEM quality part/fit that doesn't look like you robbed it from a pickup truck (looking at you, Lotus). Preferably the glass has some curve to it...the FC walks a fine line between angular and curvy, if everything you do behind the doors is flat/straight, the balance is lost.
Depending on how you do it (for instance, it'd be easy to build in a roll hoop/semi-cage if you wanted), I'd guess you'd lose 75-100 lbs...all from up high and far back (note that you also get to delete a lot of ancillary stuff like hinges, latches, lift supports, etc)...just where you'd want to lose weight if you could.
I think any lesser approach (bolting something in) is inevitably going to be too heavy- both visually and structurally.
No small task.
Thread Starter
Full Member
Joined: Sep 2012
Posts: 204
Likes: 0
From: Tacoma, Wa
Ya definitely is not easy lol at first i thought it would be and it was exciting plus the though of having a truck bed was awesome cause i could fit so many drift spares and tools in there when i headed to the track. But id rather focus more on suspension and other things so that it actually drifts better. Drifting is all about being different so i though the truck thing would be awesome, but i guess having a sr'd rx7 is different enough for now lol