1987 FC3S GXL Turbo Swap Build Thread
 04-23-14, 10:46 PM
#1
Senior Member
Thread Starter
1987 FC3S GXL Turbo Swap Build Thread
Starting a new thread due to errors in my original thread. I will begin moving the content now because I have made a lot of progress which I need to update on here.
So I started off with an intro in the Canadian forum but I want am going to have future posts in here for my build thread. Previous link is below:
New project 1987 RX7 GXL - RX7Club.com
As a quick sum up I purchased this car in October in order to learn how to do an engine swap to the turbo 13b. After a few months of research I decided to stick with the 13b but was very tempted to do the 13b-rew swap. After pricing it out and since I'm trying to get an engine in and running ASAP I stuck with the 13b to avoid excess complications.
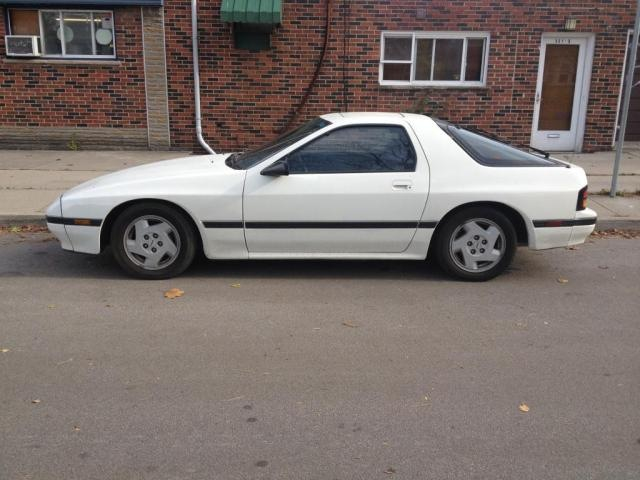
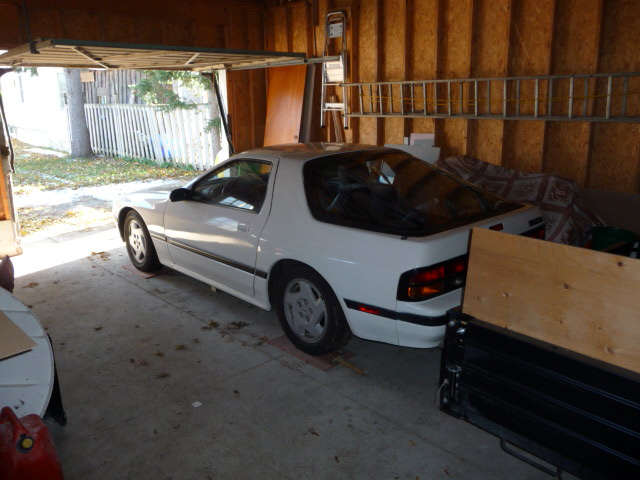
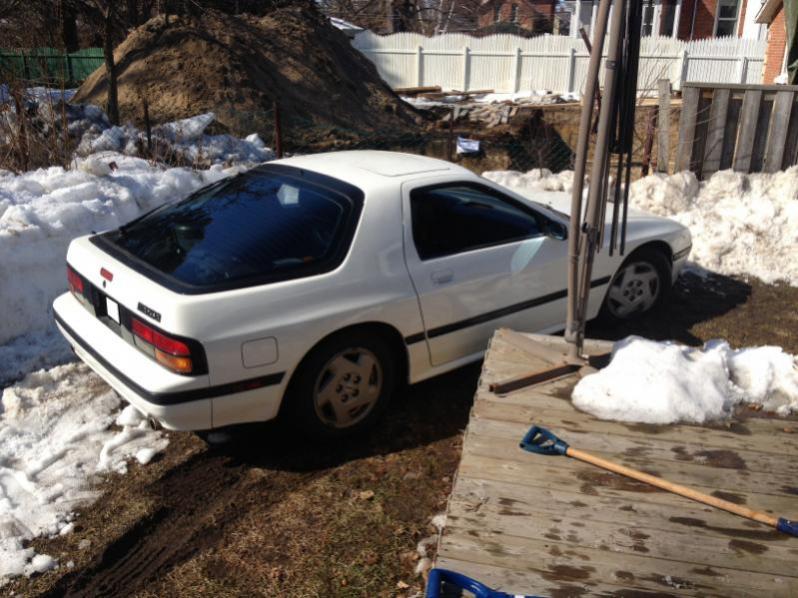
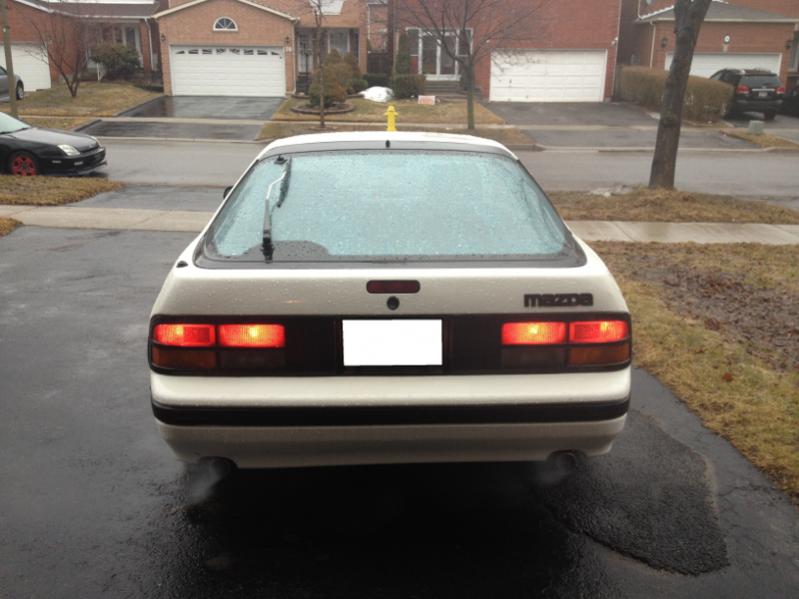
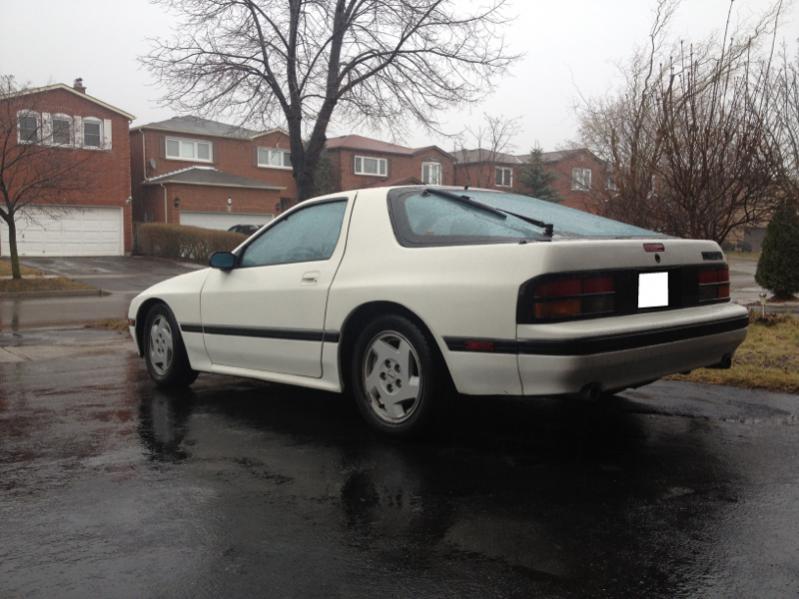
The car has 82,000 kms and is an 87 GXL. Body is in good shape, appears to have been repainted. Seems to be in sound running condition though that is sortof irrelevant as I'm pulling the engine anyways. One strut is leaking which ill replace soon with coils and there seems to be some bondo repair on the frame rails. There is a small rust hole in the frame that I gotta take a look at again when I get it back. I stored the car for the winter in November to keep in as good condition as possible while I worked on tracking down some parts. Muffler seems to be new and car is currently very quiet. Interior is clean.
As far as experience leading up to this project goes, the furthest I've done is suspension work and body painting. I have a decent wiring background and a strong mechanical interest. I've studied automotive engineering and taken apart an engine and tranny in school to check for component wear but that was as a class. Always loved the fc and am excited to this car home and get to work! Just need the weather to participate with me.
So far my guides have been this forum, rotaryresurrection and fc3spro.
So I started off with an intro in the Canadian forum but I want am going to have future posts in here for my build thread. Previous link is below:
New project 1987 RX7 GXL - RX7Club.com
As a quick sum up I purchased this car in October in order to learn how to do an engine swap to the turbo 13b. After a few months of research I decided to stick with the 13b but was very tempted to do the 13b-rew swap. After pricing it out and since I'm trying to get an engine in and running ASAP I stuck with the 13b to avoid excess complications.
The car has 82,000 kms and is an 87 GXL. Body is in good shape, appears to have been repainted. Seems to be in sound running condition though that is sortof irrelevant as I'm pulling the engine anyways. One strut is leaking which ill replace soon with coils and there seems to be some bondo repair on the frame rails. There is a small rust hole in the frame that I gotta take a look at again when I get it back. I stored the car for the winter in November to keep in as good condition as possible while I worked on tracking down some parts. Muffler seems to be new and car is currently very quiet. Interior is clean.
As far as experience leading up to this project goes, the furthest I've done is suspension work and body painting. I have a decent wiring background and a strong mechanical interest. I've studied automotive engineering and taken apart an engine and tranny in school to check for component wear but that was as a class. Always loved the fc and am excited to this car home and get to work! Just need the weather to participate with me.
So far my guides have been this forum, rotaryresurrection and fc3spro.

 04-23-14, 10:54 PM
#2
Senior Member
Thread Starter
I have to update a couple of items to cover the last few months so the dates will be a bit off.
The shifter was wobbly as hell when I got the car so I changed that quick before storing. Inside there were no bushings left as expected.
For Christmas got a Haynes manual, new mats, and new wipers. Battery is new as of 2013 so don't need that but the battery box is missing and battery is basically floating around in the engine bay. I'll work on that later. Also did a coolant flush before storing because who knew how long its been.
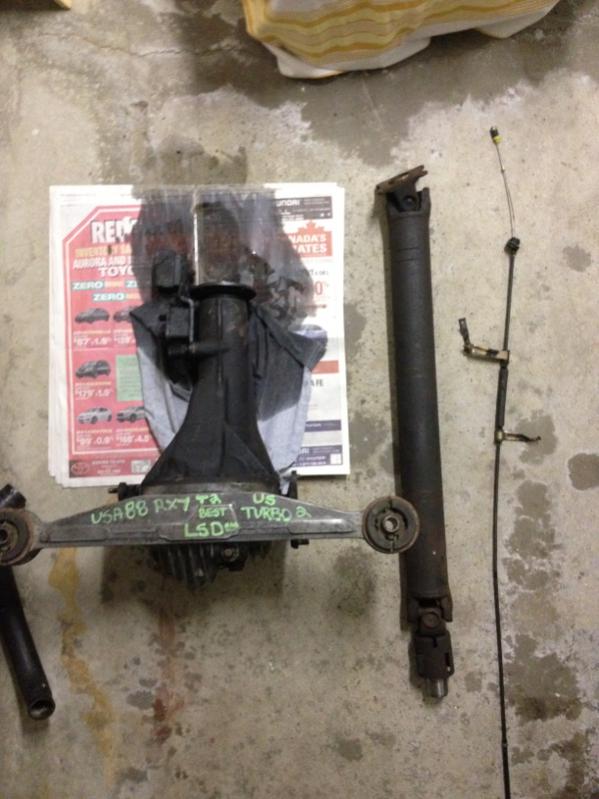
I was excited that the car has an LSD but that ended up not being advantageous as I originally thought as I need to pull the whole drivetrain including diff halfshafts and driveshaft for the swap anyway.
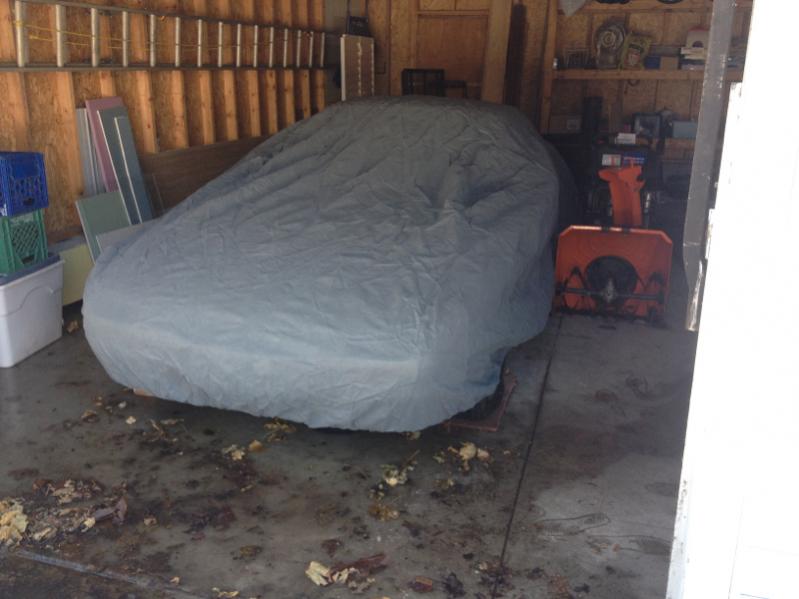
For storage pulled the battery and bought a car cover though its stored in a garage. Cleaned inside and out beforehand. When I got the car the stereo was hanging out of the dash (one of the powered motor flip face ones) but a simple fuse was the solution. Wiper light idiot light is on though all the other lights dont seem to be responding. I pulled the cluster and tested it all the lights work must be the CPU or solder connections. That can be dealt with later. Also, in terms of the wiper light I was surprised when the car had three wiper fluid reservoirs haha not something I'm used to with my prelude. I filled the one in the trunk, the one for the front windshield and then the headlight washer reservoir. But then I noticed it was puddling under the car and I looked like an idiot because the headlight one has a leak so no wonder the light is on.
The shifter was wobbly as hell when I got the car so I changed that quick before storing. Inside there were no bushings left as expected.
For Christmas got a Haynes manual, new mats, and new wipers. Battery is new as of 2013 so don't need that but the battery box is missing and battery is basically floating around in the engine bay. I'll work on that later. Also did a coolant flush before storing because who knew how long its been.
I was excited that the car has an LSD but that ended up not being advantageous as I originally thought as I need to pull the whole drivetrain including diff halfshafts and driveshaft for the swap anyway.
For storage pulled the battery and bought a car cover though its stored in a garage. Cleaned inside and out beforehand. When I got the car the stereo was hanging out of the dash (one of the powered motor flip face ones) but a simple fuse was the solution. Wiper light idiot light is on though all the other lights dont seem to be responding. I pulled the cluster and tested it all the lights work must be the CPU or solder connections. That can be dealt with later. Also, in terms of the wiper light I was surprised when the car had three wiper fluid reservoirs haha not something I'm used to with my prelude. I filled the one in the trunk, the one for the front windshield and then the headlight washer reservoir. But then I noticed it was puddling under the car and I looked like an idiot because the headlight one has a leak so no wonder the light is on.
04-23-14, 10:56 PM
#3
Senior Member
Thread Starter
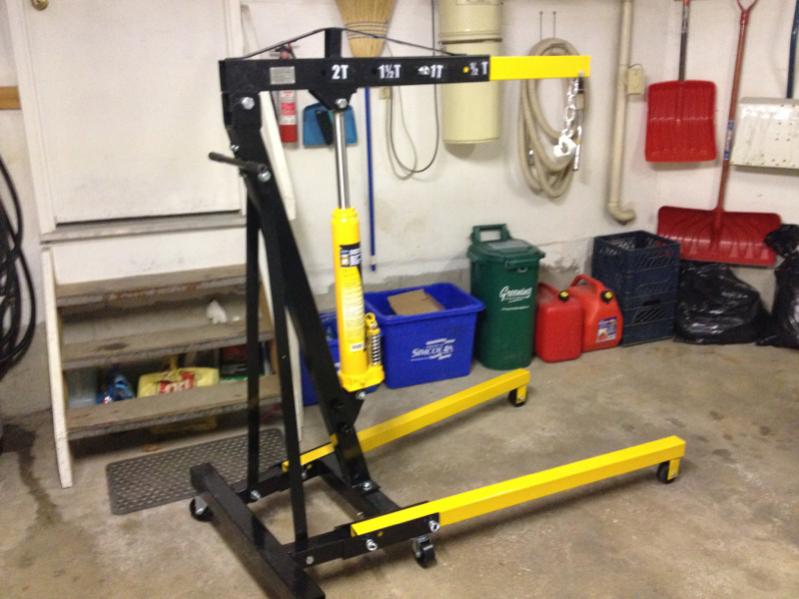
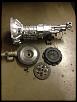
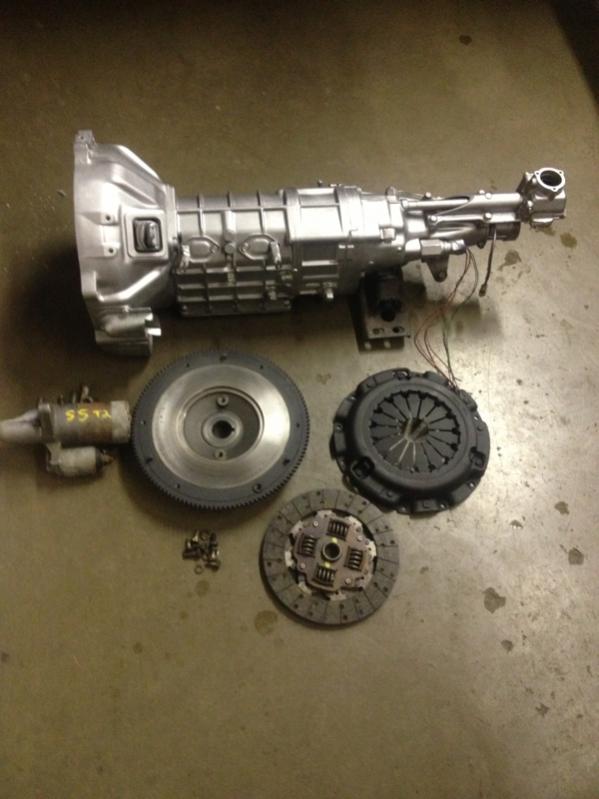
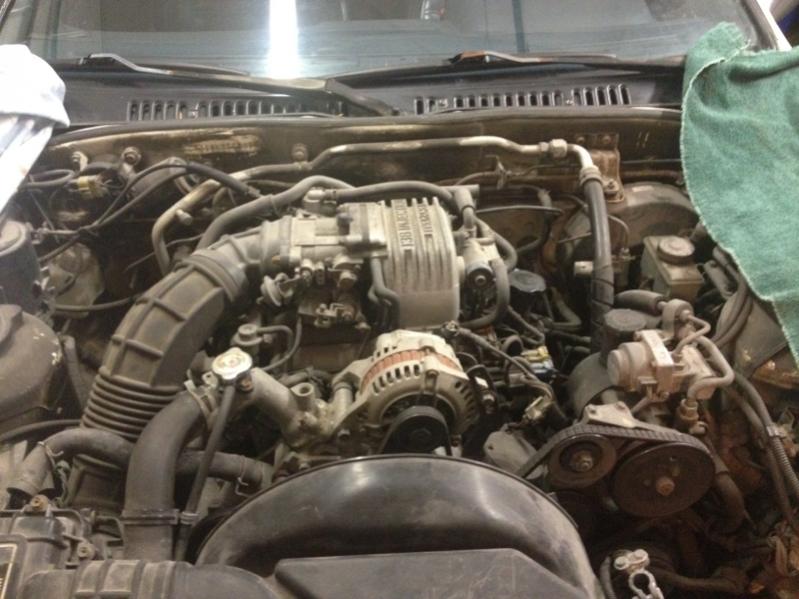
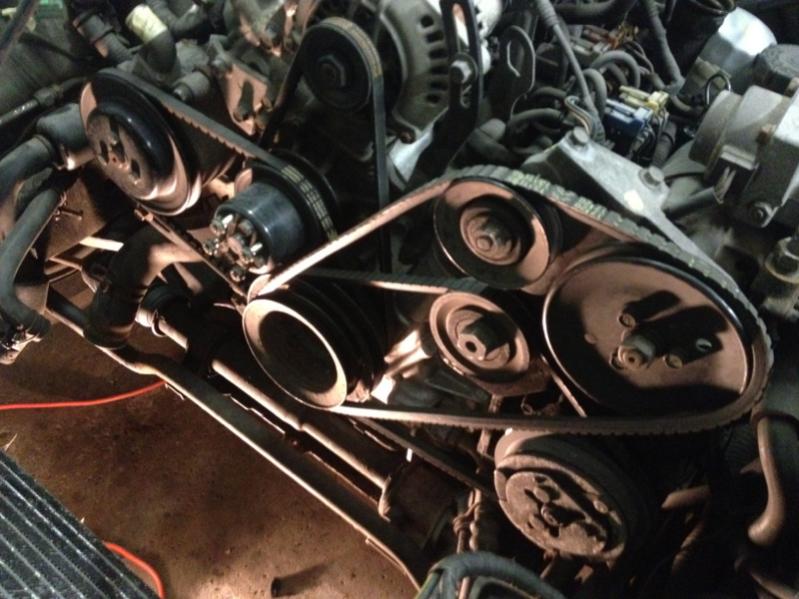
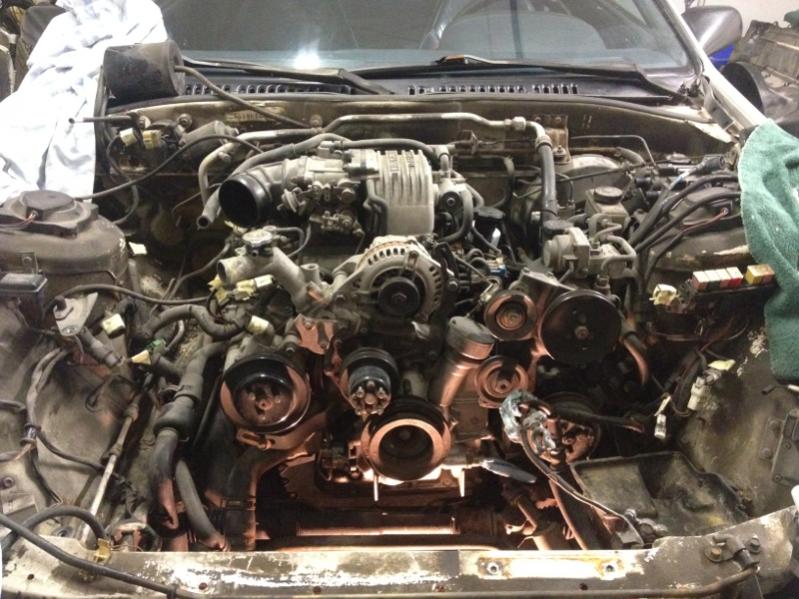
Started my new Job in January upon graduation and started to save money for parts. After a couple months researching I Finally got my engine last week had to pick up an engine hoist that day in order to unload the engine upon delivery. It an s5 rebuilt block with s4 external parts. 332 usdm ecu. Also got turbo tranny, driveshaft , and diff but I'm having a lot of trouble finding turbo halfshafts. Anyone let me know if you know where I can find some. Will post engine pics soon. Looks to be in good condition very excited hoping the weather will clear up so I can get my car back to my house from its storage. Need to save up a bit more money before I can purchase coilovers.
04-23-14, 10:58 PM
#4
Senior Member
Thread Starter
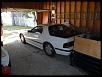
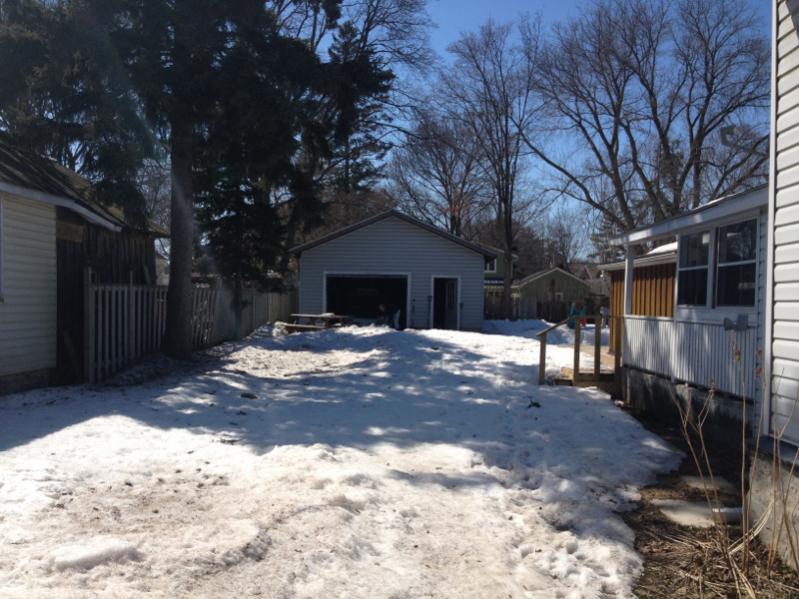
The problem with getting the car out of storage is that its in a garage behind a house and I'd have to drive the car along the lawn about thirty feet to get it out but the lawn is covered in about two feet of frozen snow. So although the roads here are for the most part clear I think I'd struggle even getting the garage door to swing out and up.
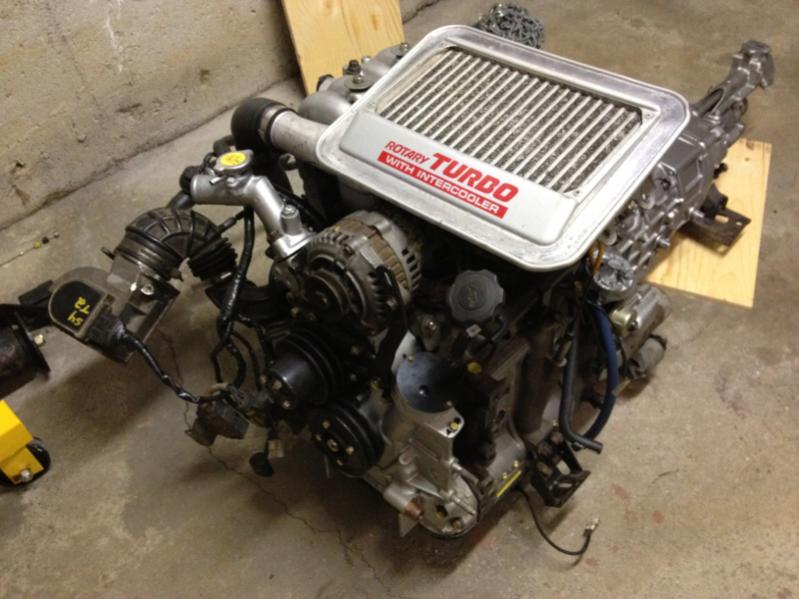
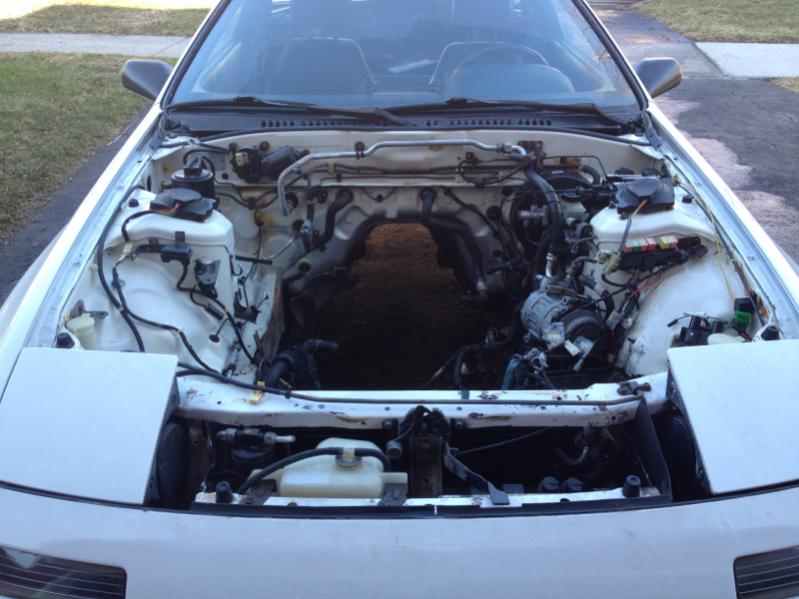
Engine photos:
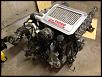
Still need to get the half shafts, turbo hood, new thermostat, turbo fuel pump, exhaust or custom exhaust piping kit/muffler. And then the basics, spark plugs, wires, fluids, probably should replace the brake and clutch master cylinders.. Engine mount bushings.. coilovers..

Engine photos:
Still need to get the half shafts, turbo hood, new thermostat, turbo fuel pump, exhaust or custom exhaust piping kit/muffler. And then the basics, spark plugs, wires, fluids, probably should replace the brake and clutch master cylinders.. Engine mount bushings.. coilovers..
04-23-14, 10:59 PM
#5
Senior Member
Thread Starter
I need to fix my photos so that they display properly because I'm posting this on my phone but if you open them in a new tab you can view them in full. I'll fix it on my comp soon sorry
04-23-14, 10:59 PM
#6
Senior Member
Thread Starter
I'm trying really hard to stay away from any visual work on the car and focus only on getting the engine in and running for now (regardless of how badly I'd like some s5 tail lights). Engine upgrades can come later I barely have enough money to get the engine in as it is haha. In and running with new suspension is the short term goal.
04-23-14, 11:00 PM
#7
Senior Member
Thread Starter
Emissions removed and block off plates already applied to the engine. I'm going to need to transfer a couple of parts from my current engine that are missing but most components already included.
Things like thermostat, speed sensor, reverse light/ neutral sensor, potentially alternator depending on the condition of mine cant remember all need to be swapped
Need to buy new mounts, spark wires, drop in k&n filter, master brake and clutch cylinder can't remember if I mentioned them before. Still need halfshafts that's still an issue and good. Don't think I have the funds to switch to fmic for now.
Not sure if I'm Gona go full custom exhaust and like an apexi n1 muffler or pick up an eBay exhaust just to get the car running. I know itd have to be replaced pretty quickly and it'd probably sound like crap but I won't even be able to start the engine until I have some sort of down pipe on there. Just thoughts for now.
Trending Topics
04-23-14, 11:02 PM
#9
Senior Member
Thread Starter
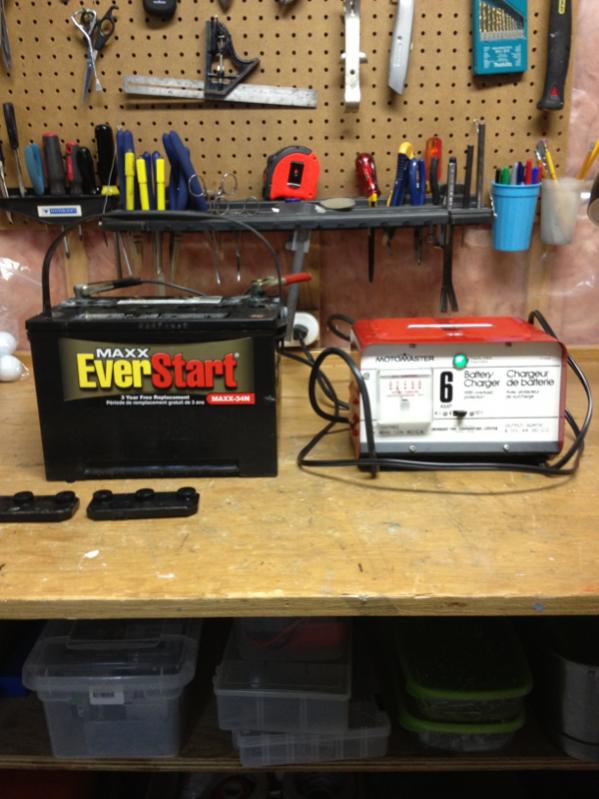

Charging up the battery today in anticipation for getting the car on Wednesday. Using a battery charger from 1970s! Hasn't been used since my dad had his motorcycle. Keeping watch for fires..
04-23-14, 11:05 PM
#10
Senior Member
Thread Starter
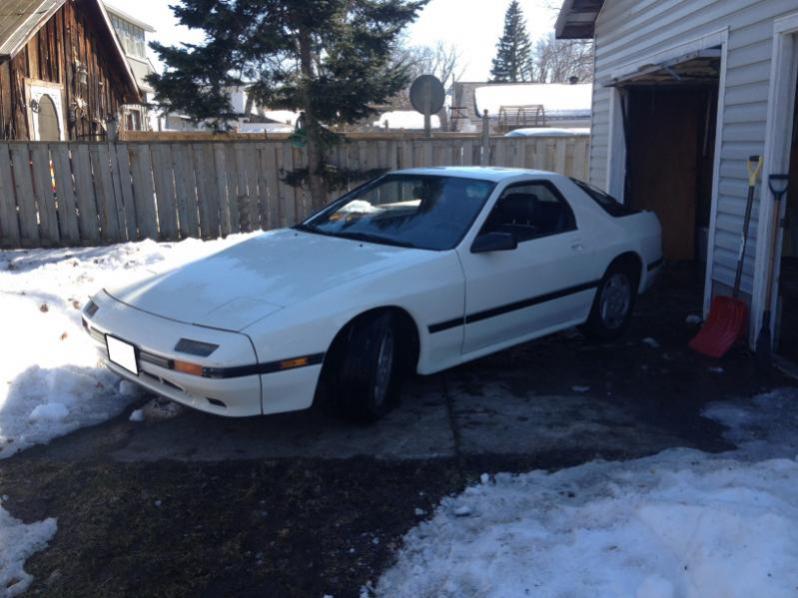
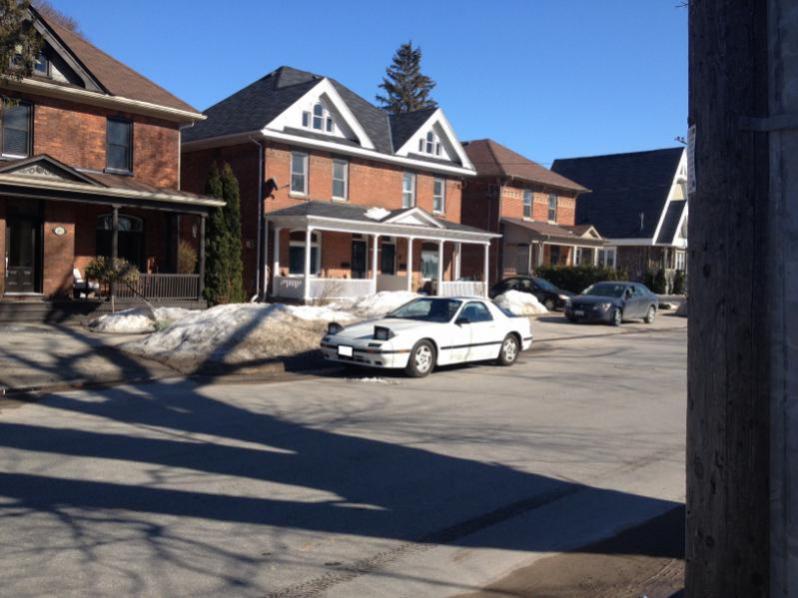
Went yesterday to go bring the rx7 out of storage. The car started right away which was a nice surprise. Isn't too much of a benefit though since I'm pulling that whole drivetrain anyway. There was quite a bit more snow left than expected! It was about 1.5-2 feet of frozen snow the whole way.
Decided to go around the back of the house and into the driveway since the path was already there it just had to be widened.
Decided to go around the back of the house and into the driveway since the path was already there it just had to be widened.
04-23-14, 11:12 PM
#11
Senior Member
Thread Starter
That ended up being extremely hectic. Got into a situation where the I had about a 4 inch gap, the back left wheel was on a chunk of ice and the front was stuck in mud. Suddenly the car fell off the ice block and slid into the deck.
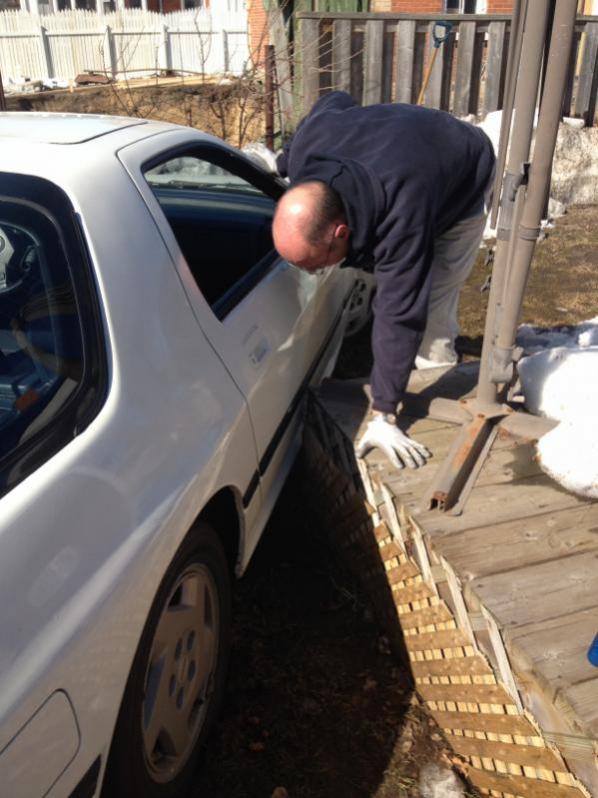
LUCKILY there was no damage. Eventually finally got it pushed around the tight turn.
Finally got the car free after some pushing from my dad and a neighbor as well as shoving some plywood and carpets under the tires.
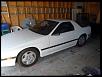
Brought it home to my house, I forgot how wobbly the suspension is! Definitely need a new suspension setup ASAP. Anyways it's good to finally have it available to work on, hopefully I can find some time to get started.
04-23-14, 11:13 PM
#12
Senior Member
Thread Starter
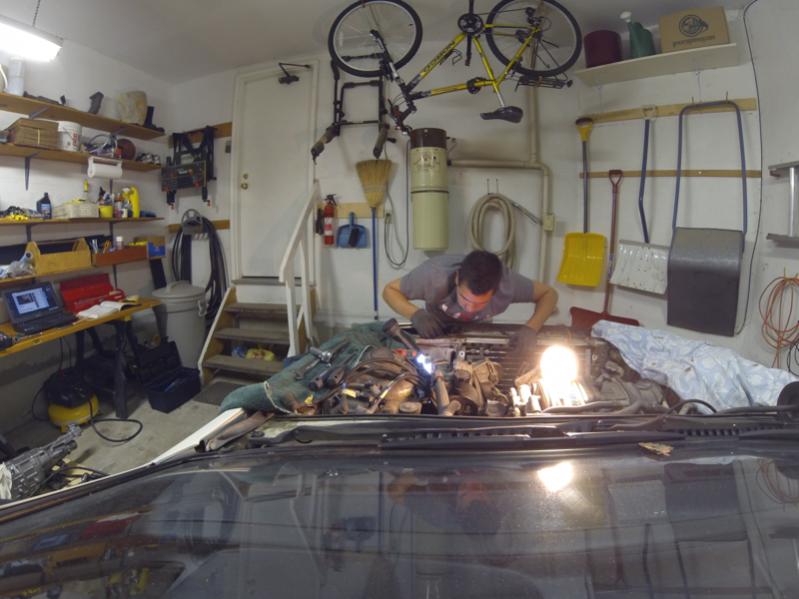
Okay that marks the end of the thread moving and where I left off. Now I can begin updating what I've done in the last three weeks. I've been using a GoPro to document all my work so I will be uploading lots of progress pictures from there
 04-24-14, 12:09 AM
#14
Senior Member
Thread Starter
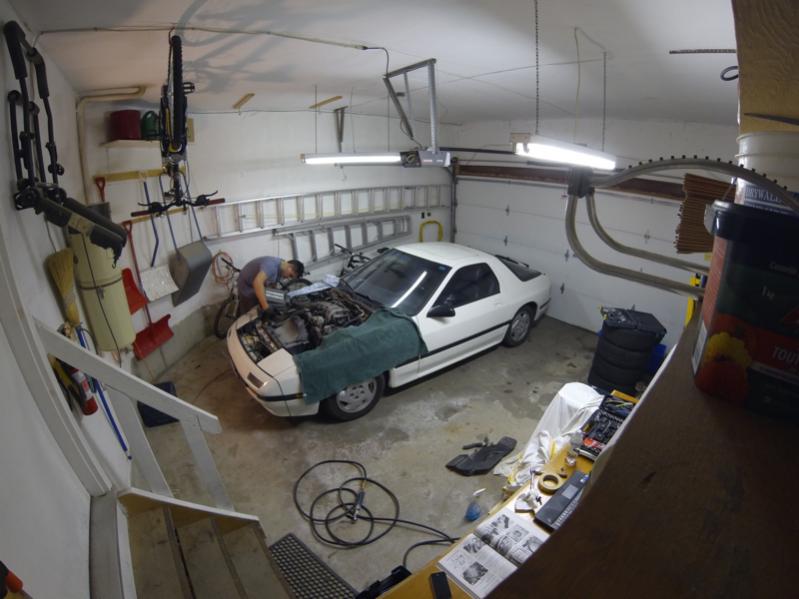
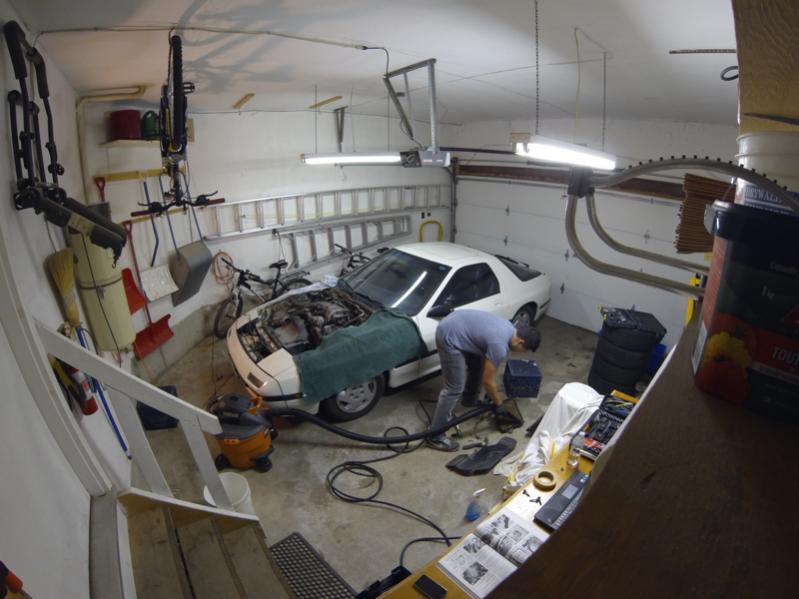
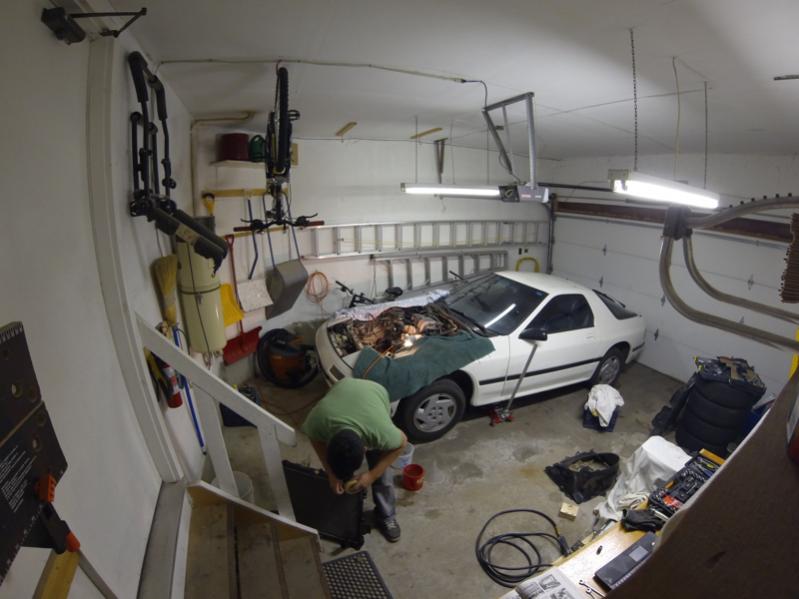
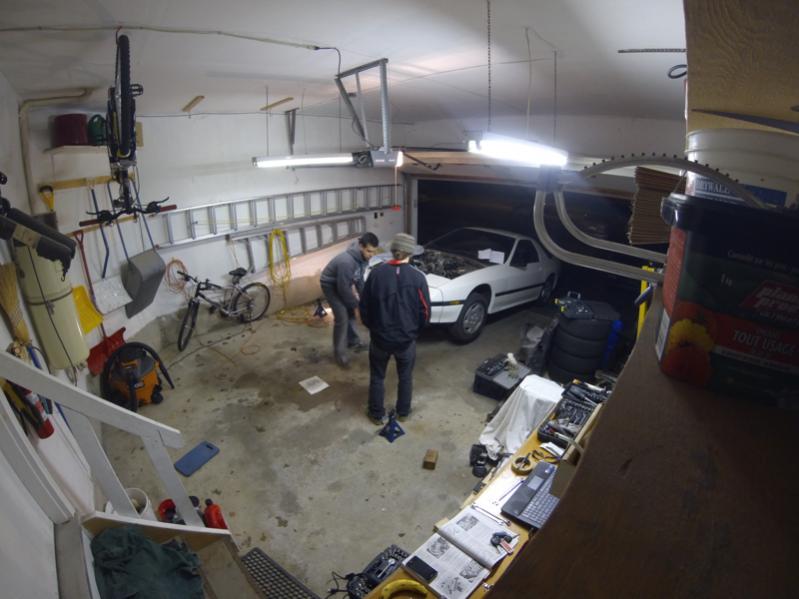
DAY 1
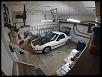
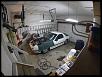
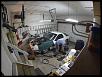
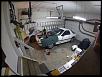
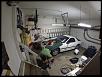
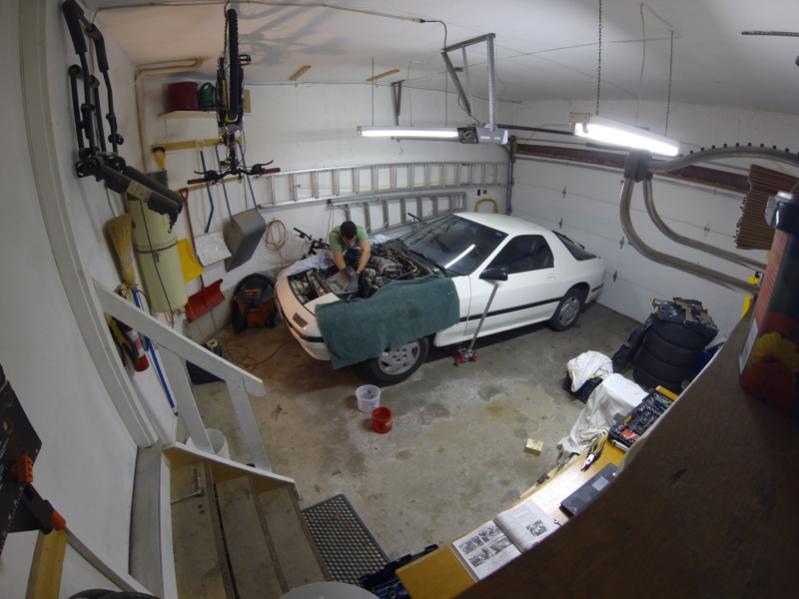
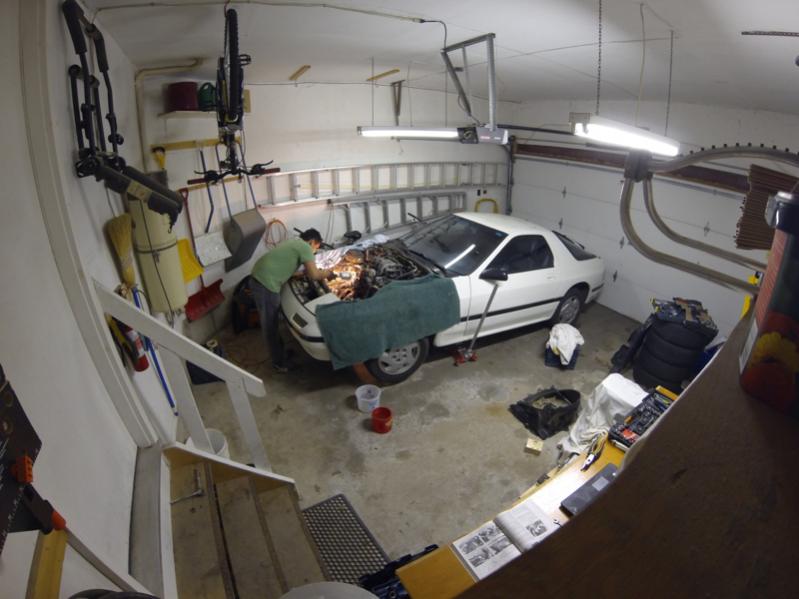
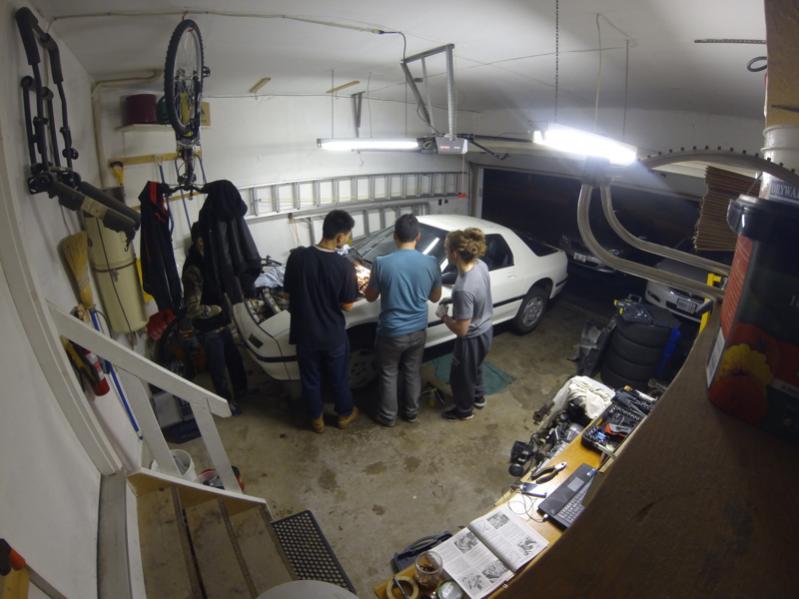
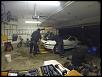
First day consisted mostly of getting the garage setup as usually our cars are parked in there so I had to get all my tools up from the basement and get a good workspace going
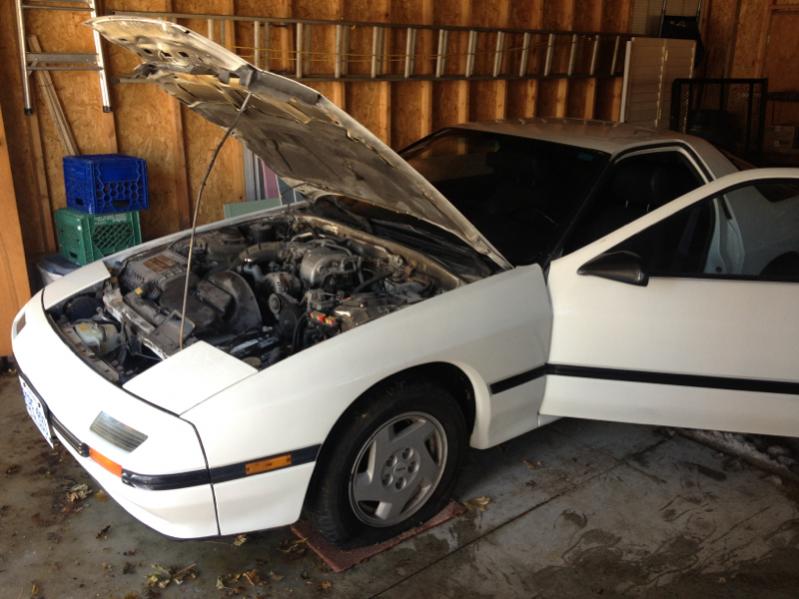
I got to work removing the hood which kinda sucked on my own but I didn't want to ask for help on the first step!
Next I went to the trunk and removed the liner around the fuel pump to the fuel pump connector. I ran the car and then disconnected the fuel pump and let it go until it stalled to remove the fuel line pressure. Then I removed the battery and assembled the trunk liner back together so that it wouldn't get all folded and creased.
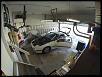
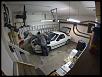
First day consisted mostly of getting the garage setup as usually our cars are parked in there so I had to get all my tools up from the basement and get a good workspace going
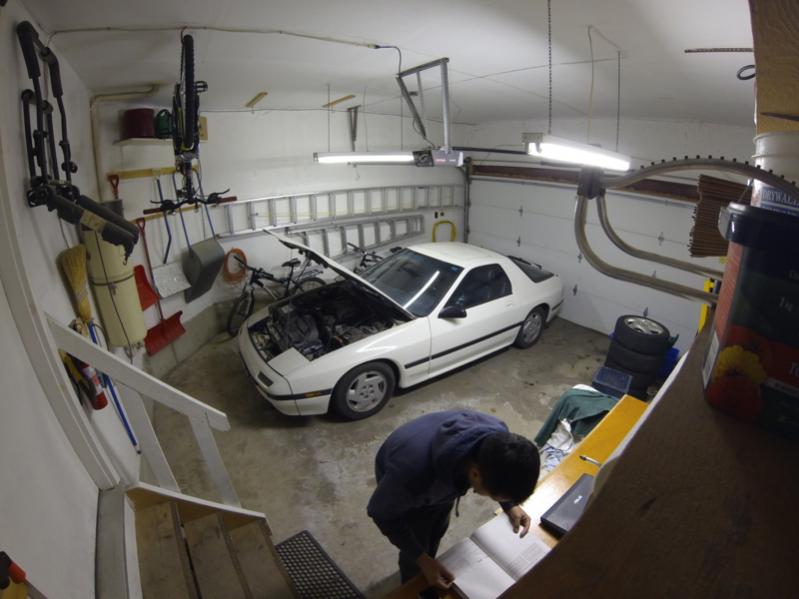
I got to work removing the hood which kinda sucked on my own but I didn't want to ask for help on the first step!
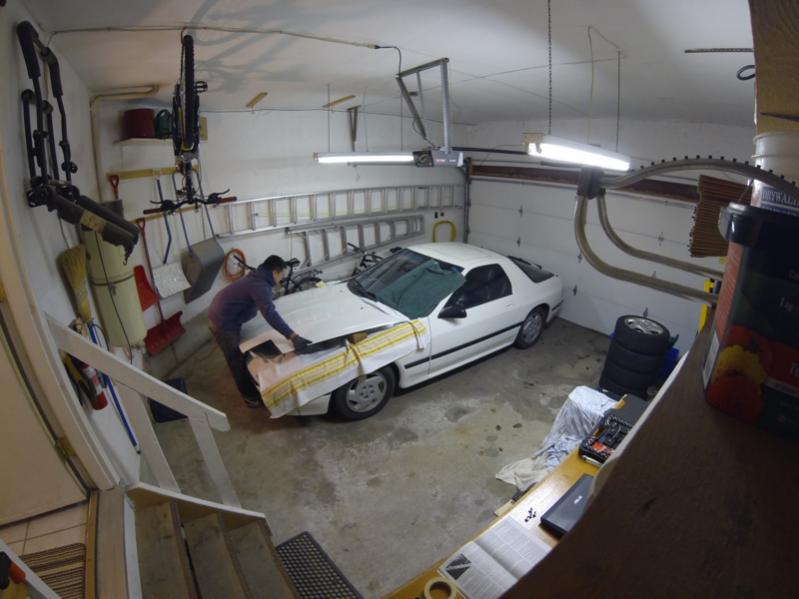
Next I went to the trunk and removed the liner around the fuel pump to the fuel pump connector. I ran the car and then disconnected the fuel pump and let it go until it stalled to remove the fuel line pressure. Then I removed the battery and assembled the trunk liner back together so that it wouldn't get all folded and creased.
 04-24-14, 12:13 AM
#15
Senior Member
Thread Starter
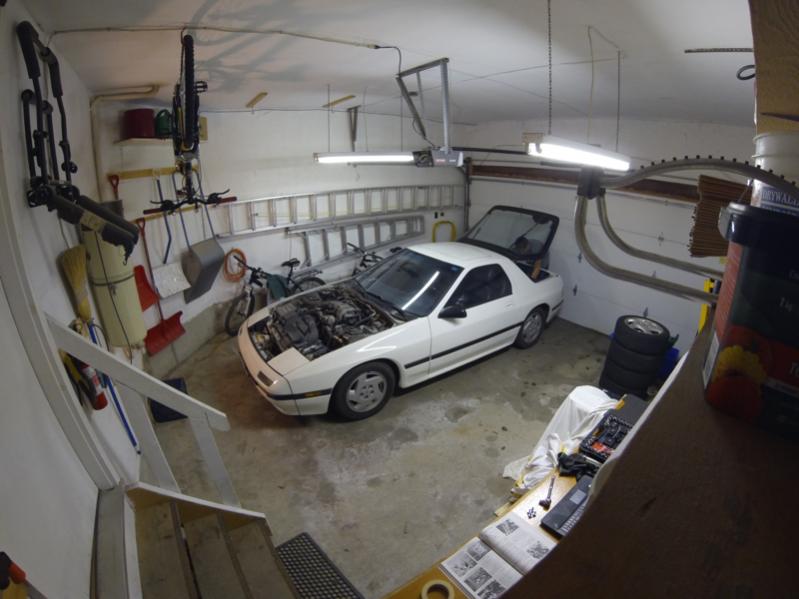
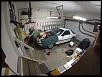
DAY 2
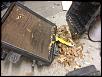
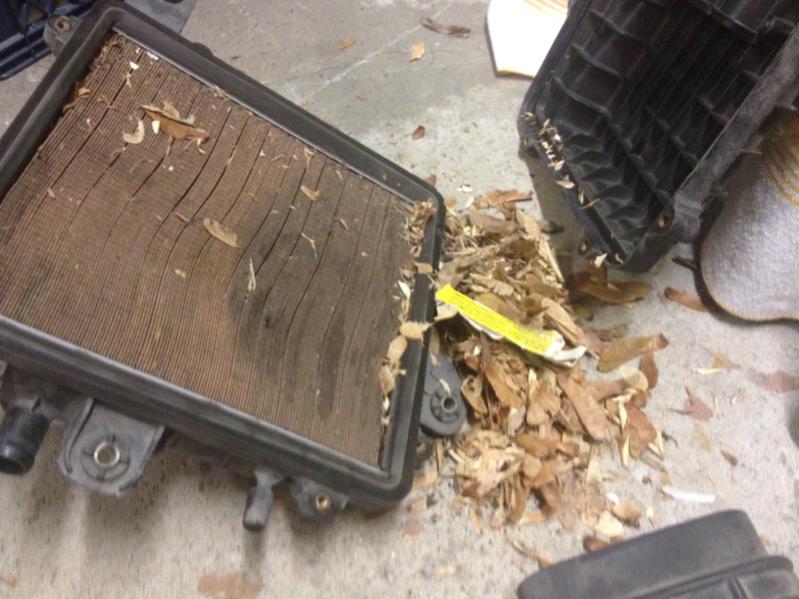
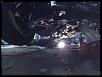
I removed the airbox, air pump hose, and air duct for intake. Had to vacuum up some leaves and debris from the engine bay around that area.
When I opened up the air intake filter I was surprised that it was FULL of leaves!! It literally burst open with debris when I pried it apart. It's a good thing I'm getting a new air filter as it was probably struggling for air
 04-24-14, 12:23 AM
#16
Senior Member
Thread Starter
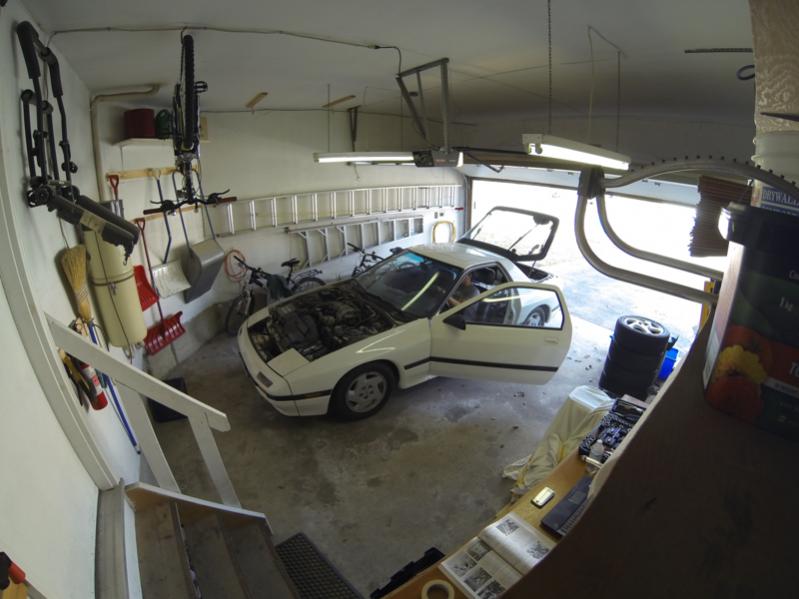
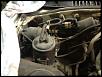
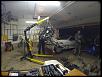
DAY 3
I began removing the fan then the shroud
Next I drained the coolant and disconnected the radiator hoses, radiator fan switch (which broke), and heater hose.
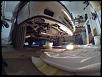
Then I removed the radiator
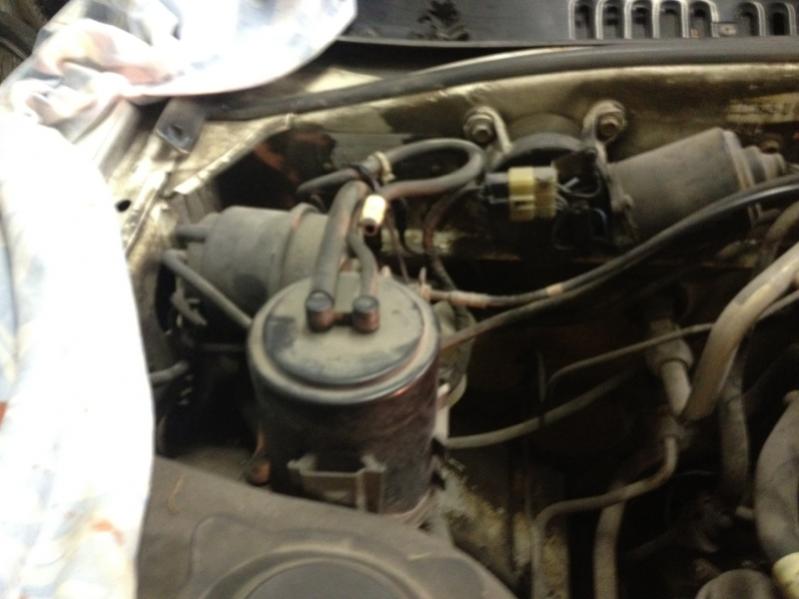
And removed the cruise control, sub zero fluid, and put the charcoal canister aside
picture I just found of the debris in the intake LOL
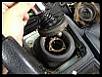
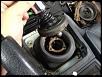
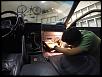
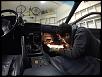
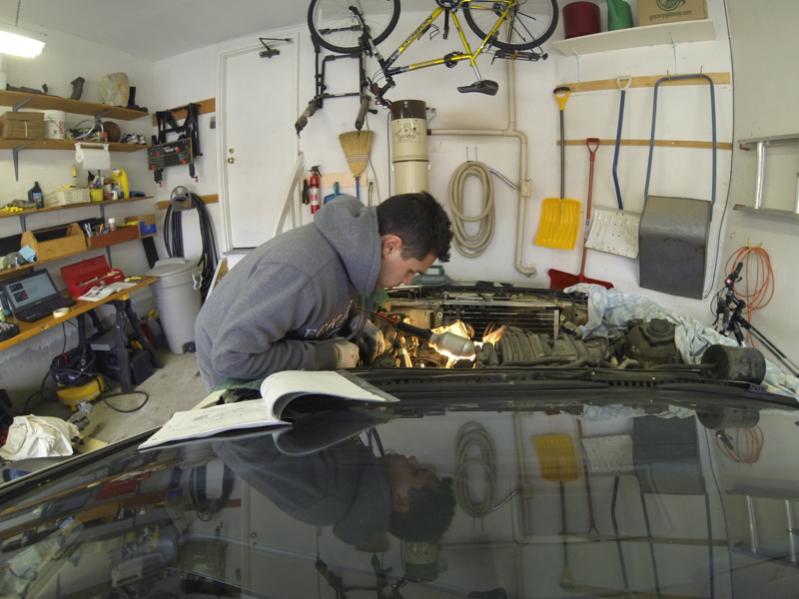
I disconnected some sensors on the passenger side of the vehicle and labelled them up but realized later that these don't need to be detached since the harness will stay connected when the engine is removed anyway.
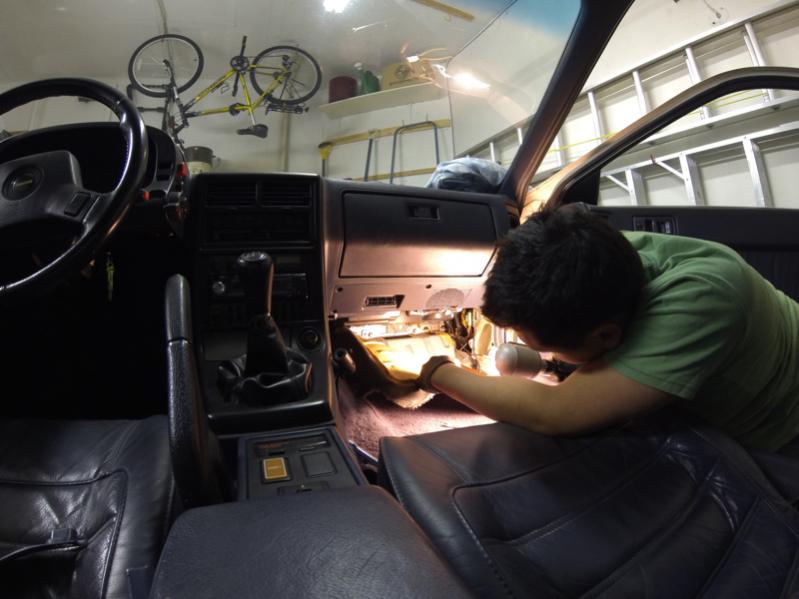
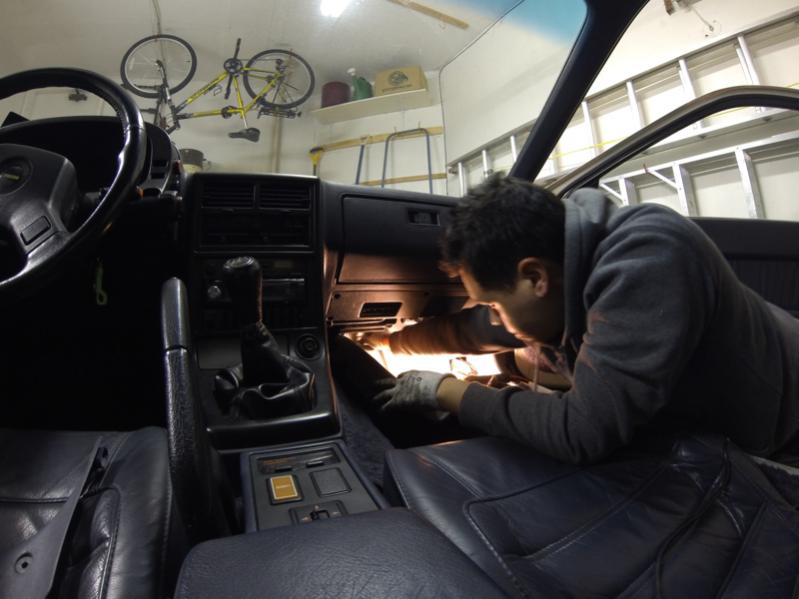
Attempted to pull back the passenger carpet to get to the ecu but had a hard time trying not to ruin the interior trim or carpet so I eventually gave up for the evening.
I began removing the fan then the shroud
Next I drained the coolant and disconnected the radiator hoses, radiator fan switch (which broke), and heater hose.
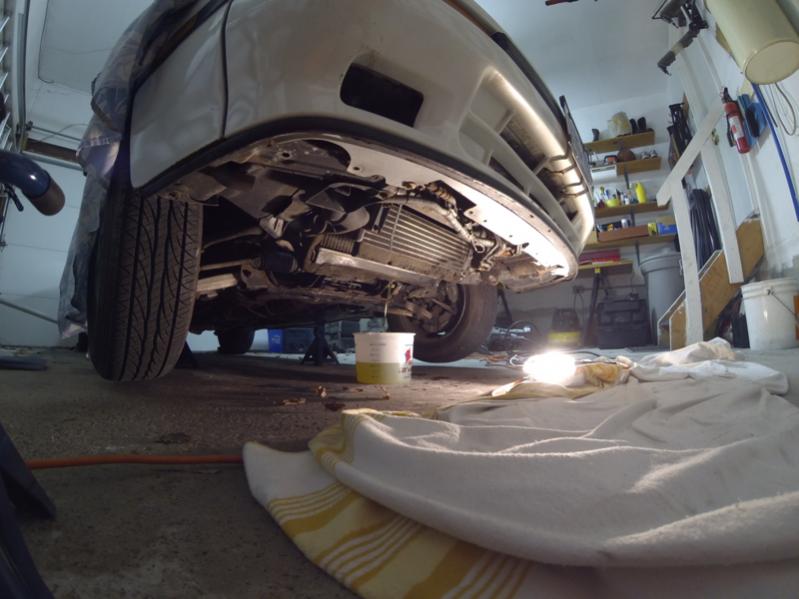
Then I removed the radiator
And removed the cruise control, sub zero fluid, and put the charcoal canister aside
picture I just found of the debris in the intake LOL
I disconnected some sensors on the passenger side of the vehicle and labelled them up but realized later that these don't need to be detached since the harness will stay connected when the engine is removed anyway.
Attempted to pull back the passenger carpet to get to the ecu but had a hard time trying not to ruin the interior trim or carpet so I eventually gave up for the evening.
 04-24-14, 12:27 AM
#17
Senior Member
Thread Starter
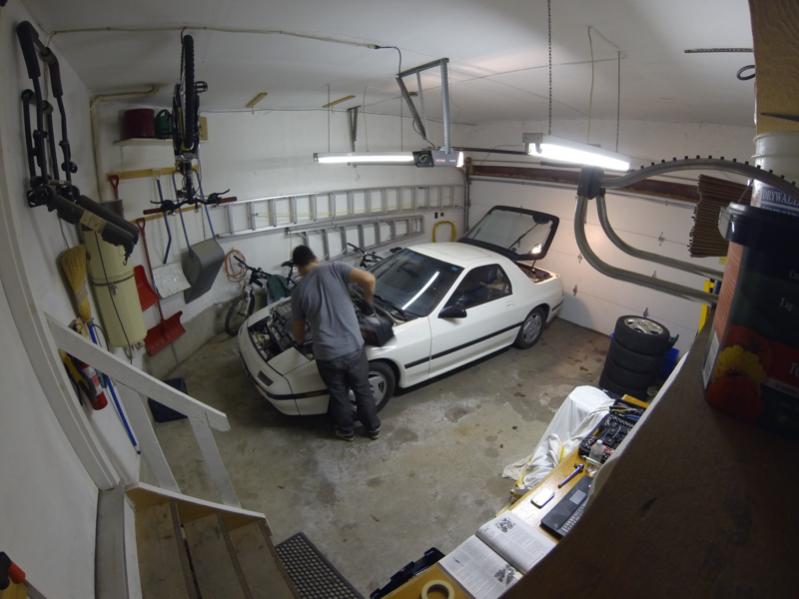
DAY 5?
Somewhere in my photo organization i got confused and labelled this as day 5 but I think it was the second half of another day.
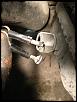
My buddy came by and we went to work releasing the tensioned and removing the belts.

We also attempted to remove the power steering but I guess we were both so tired that we never figured out where the bolts were. Could have been the lighting too, not sure.
(I later realized they are behind the pulley, but that's another day)
Somewhere in my photo organization i got confused and labelled this as day 5 but I think it was the second half of another day.
My buddy came by and we went to work releasing the tensioned and removing the belts.
We also attempted to remove the power steering but I guess we were both so tired that we never figured out where the bolts were. Could have been the lighting too, not sure.
(I later realized they are behind the pulley, but that's another day)
04-24-14, 12:34 AM
#18
Senior Member
Thread Starter
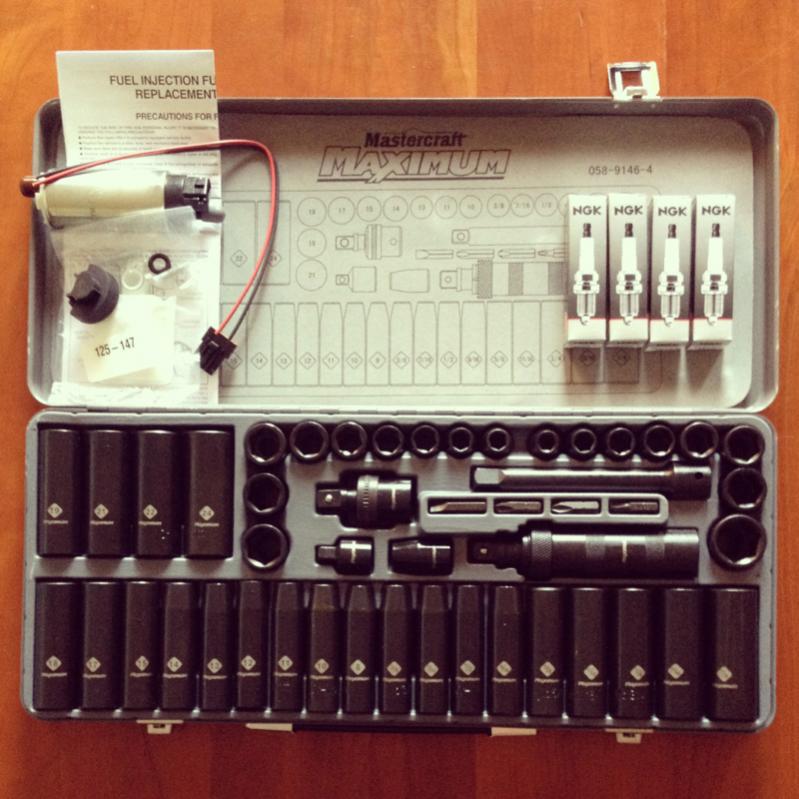
My girlfriend gave me an impact socket set, ngk spark plugs and a walbro 255lph fuel pump for my birthday which was sick!
Attachment 530770
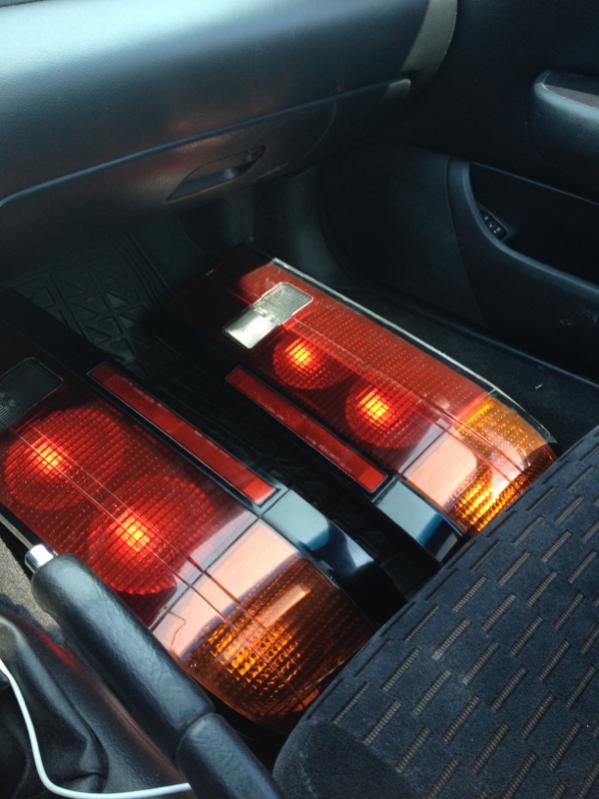
I also picked up some s5 tails!
Attachment 530771
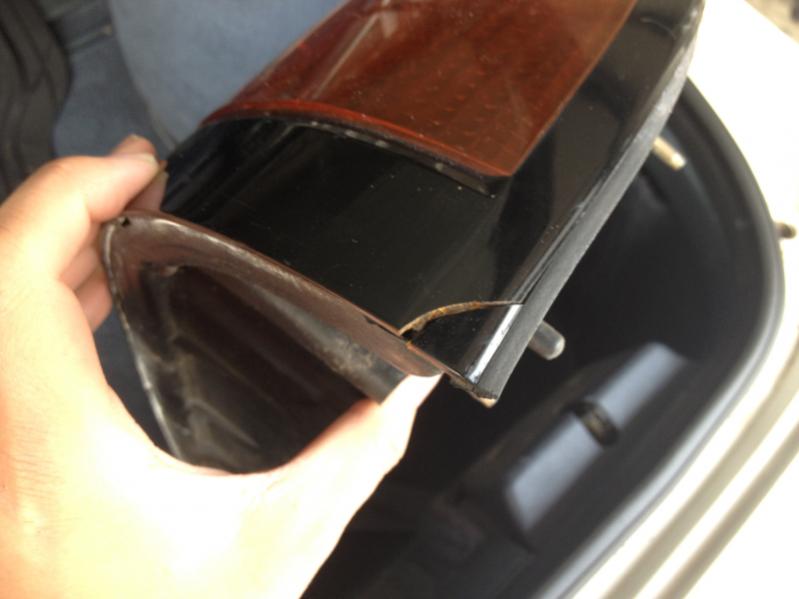
But then as I was maneouvering them in my car so that they wouldn't sit face down, the edge of one caught on the under dash of my prelude and cracked the corner! : (
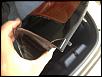
So shitty. Anyways I superglued it back and wiped the excess with a razor blade. It's fixed but I'm still sad that i broke perfectly good tails after wanting them for so long
Attachment 530770
I also picked up some s5 tails!
Attachment 530771
But then as I was maneouvering them in my car so that they wouldn't sit face down, the edge of one caught on the under dash of my prelude and cracked the corner! : (
So shitty. Anyways I superglued it back and wiped the excess with a razor blade. It's fixed but I'm still sad that i broke perfectly good tails after wanting them for so long
 04-24-14, 12:38 AM
#20
Senior Member
Thread Starter
DAY5 REAL
I figured out that the pulley on the power steering had to be removed in order to access the bolts behind it. However as I didn't have an impact gun I shoved a screwdriver through the pulley to prevent it from spinning and torqued the bolt with a breaker bar. This unfortunately bent the pulley a bit but I think it's minor enough.
Disconnected the connectors and drained the fluid and removed the power steering. Also disconnected the ac compressor bolts but just let it hang there for now.
04-24-14, 06:28 AM
#21
Senior Member
Thread Starter
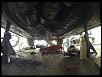
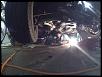
DAY 6
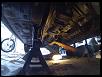
Disconnected the connectors from the drivers side, brake vacuum hose, heater return hose, oil pump connections and so on. My friend dropped by to borrow a tool and helped out to remove the fuel lines. Previously I had thought that I had drained all of the coolant but when I unplugged the heater hose I was unprepared for how much coolant came out.
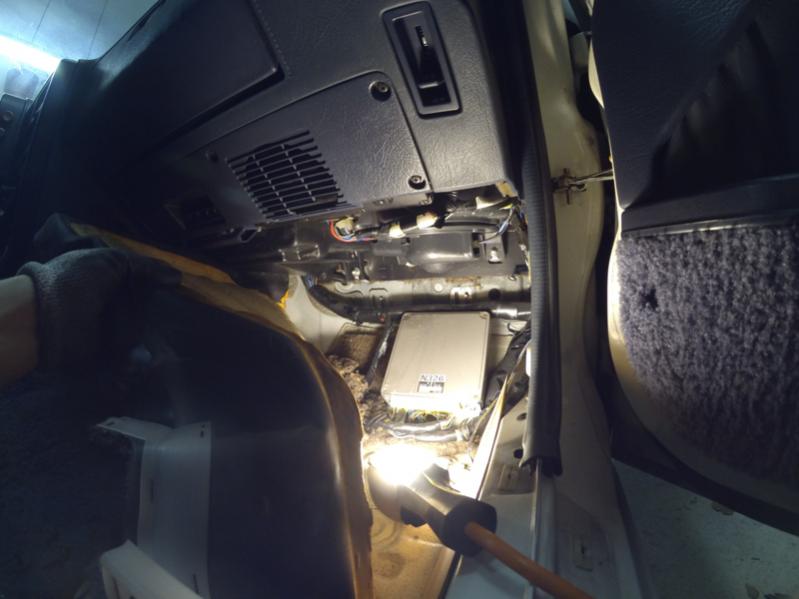
I decided to give the ecu another try and managed to get it exposed enough to remove the kick panel covering it and disconnect the engine harness.
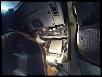
My friend came back after his dinner and he helped to guide the engine harness out of the car from the inside while I maneuvered it from the bay side.
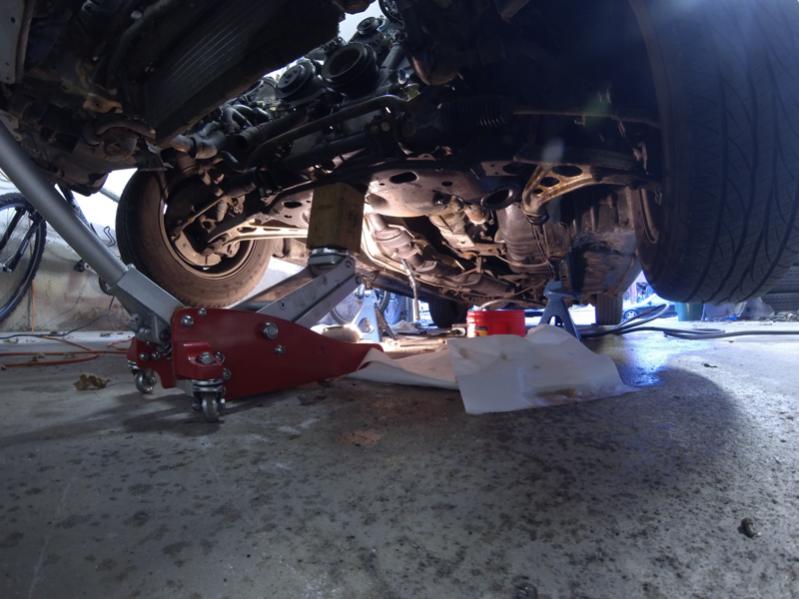
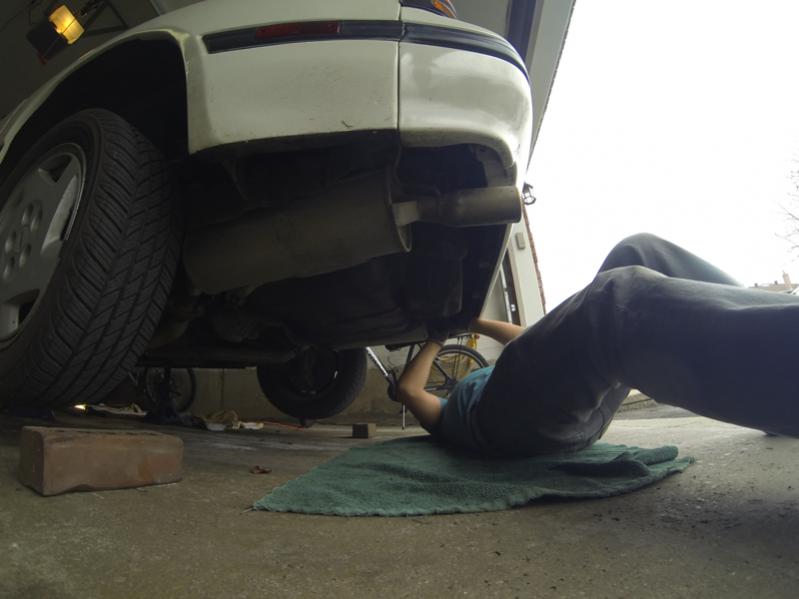
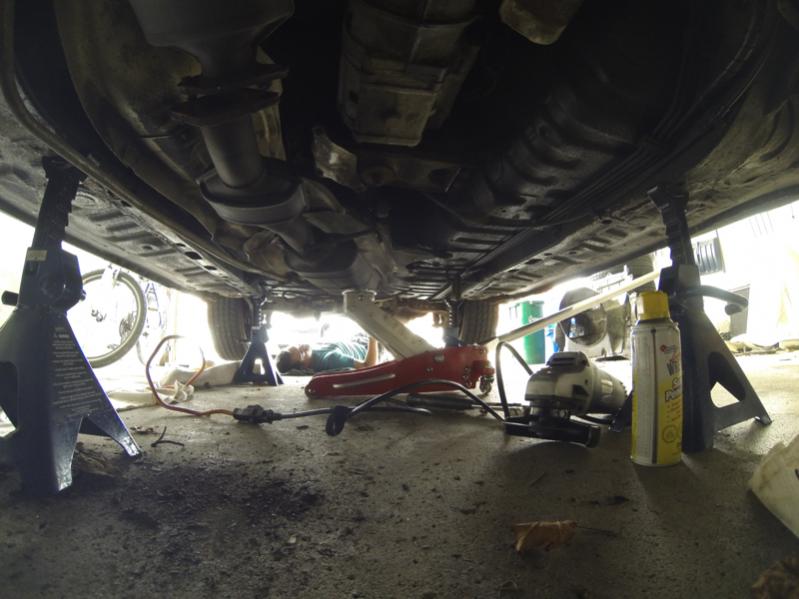
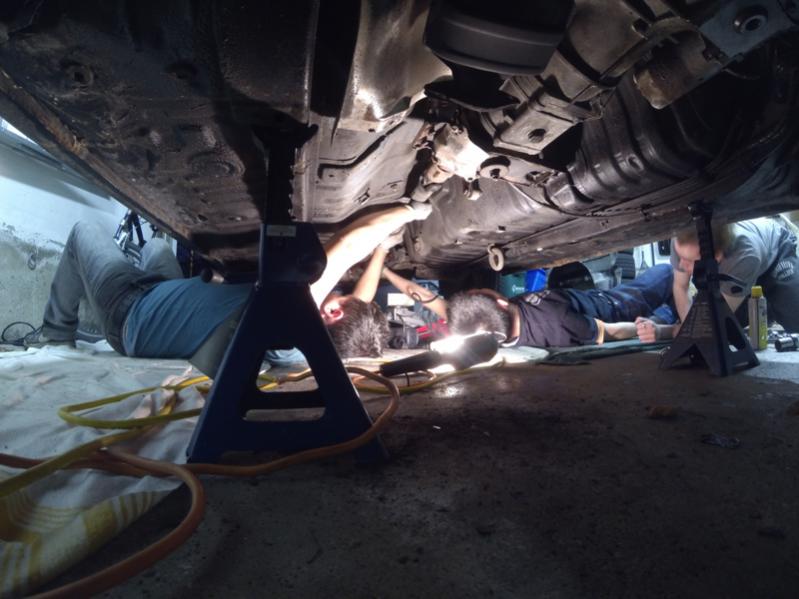
We then went to work disconnecting the exhaust and decided to try between the pre cat 2 and the cat. Without an impact gun this proved to be very difficult. The problem is I have an impact tool set but my compressor is just a pancake one and cannot run it. A 60 or 80L compressor is in my plans for the future but right now is not in my budget.
In order to do this, my buddy laid under the passengers side of the car and guided the socket, while I laid under the other side of the car and cranked the breaker bar. This took about 25 minutes on the worn out bolts it was terrible.
Disconnected the connectors from the drivers side, brake vacuum hose, heater return hose, oil pump connections and so on. My friend dropped by to borrow a tool and helped out to remove the fuel lines. Previously I had thought that I had drained all of the coolant but when I unplugged the heater hose I was unprepared for how much coolant came out.
I decided to give the ecu another try and managed to get it exposed enough to remove the kick panel covering it and disconnect the engine harness.
My friend came back after his dinner and he helped to guide the engine harness out of the car from the inside while I maneuvered it from the bay side.
We then went to work disconnecting the exhaust and decided to try between the pre cat 2 and the cat. Without an impact gun this proved to be very difficult. The problem is I have an impact tool set but my compressor is just a pancake one and cannot run it. A 60 or 80L compressor is in my plans for the future but right now is not in my budget.
In order to do this, my buddy laid under the passengers side of the car and guided the socket, while I laid under the other side of the car and cranked the breaker bar. This took about 25 minutes on the worn out bolts it was terrible.
 04-24-14, 07:57 AM
#23
Senior Member
Thread Starter
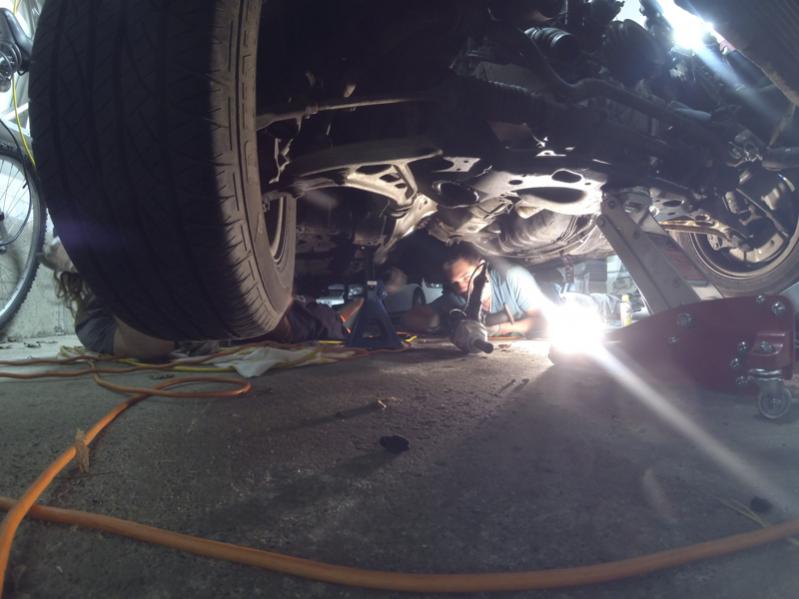
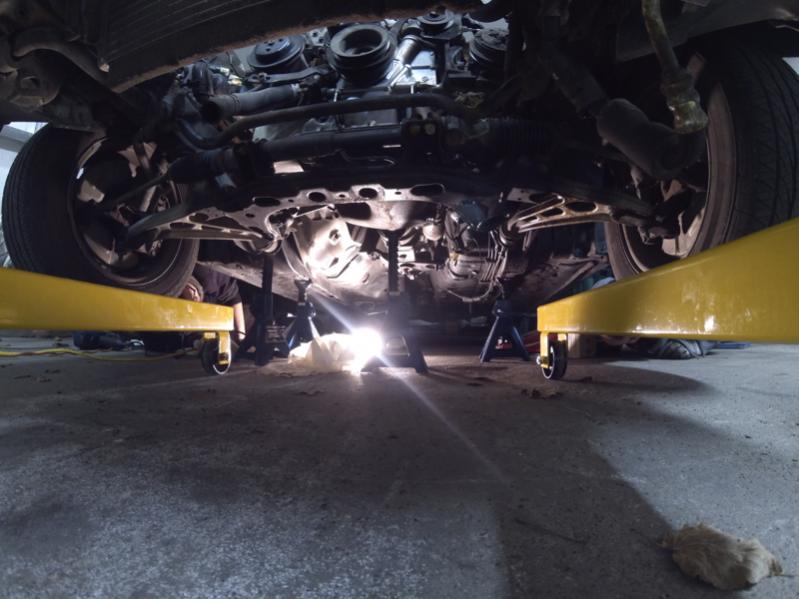
DAY 7
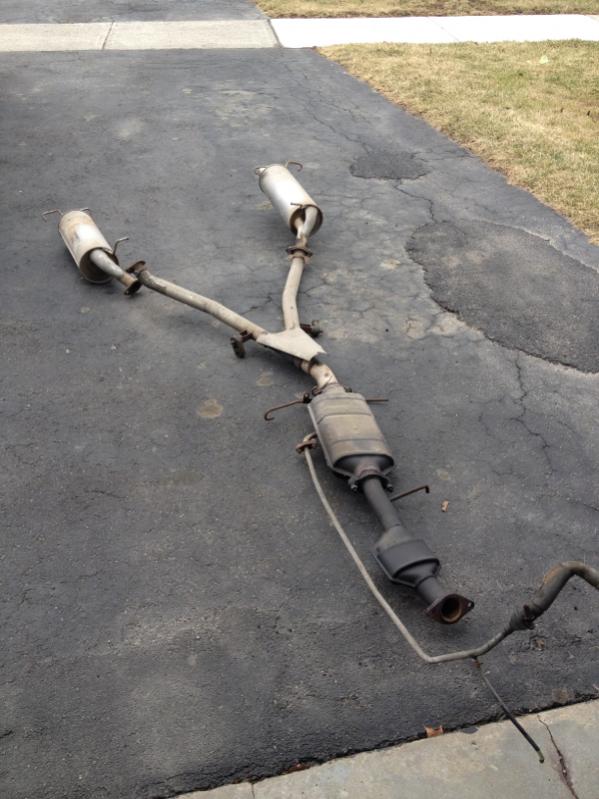
Went to work removing the full exhaust starting from the first pre cat. Attempted to get it off all in one go by undoing all of the exhaust hangers.
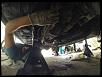
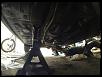
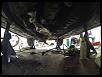
That turned out to be fairly tricky and I ended up cutting one Exhaust hanger and removing one muffler in order to get the system off.

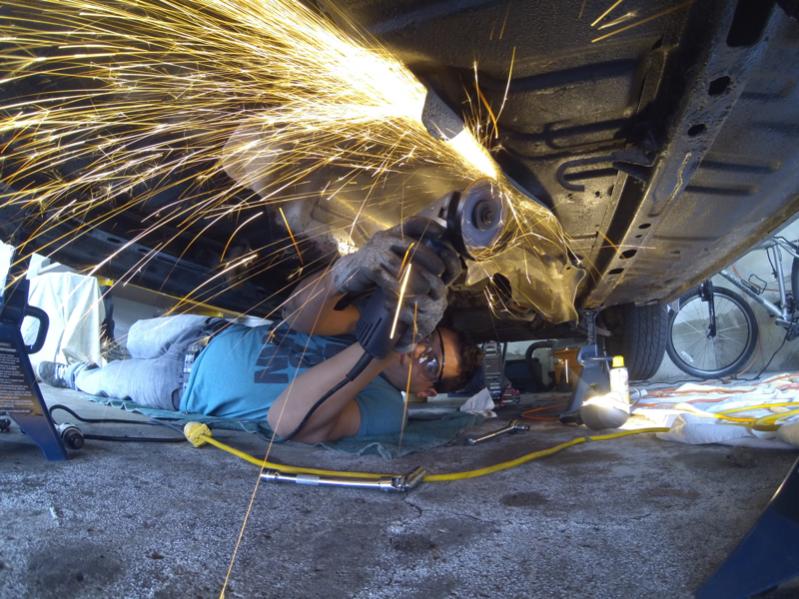
Next I went at removing the heat shielding above the exhaust so that I could get to the driveshaft
Majority of the heat shield bolts were very rusty and I ended up having to cut two of them off. I will have to deal with reattach ment later.
Then I drained the tranny fluid
Later that evening another friend came over and brought a plug in impact gun with him which was great. With that we were able to remove the driveshaft and the remaining pre cat in 5 minutes. This is comparable with the 30 minutes my other friend and I spent cranking an exhaust bolt with the breaker bar.
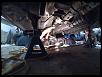
Lastly we removed the clutch slave cylinder from the top of the tranny. The only thing left for the next day was to remove the tranny sensors and then start pulling the engine!
Went to work removing the full exhaust starting from the first pre cat. Attempted to get it off all in one go by undoing all of the exhaust hangers.


That turned out to be fairly tricky and I ended up cutting one Exhaust hanger and removing one muffler in order to get the system off.
Next I went at removing the heat shielding above the exhaust so that I could get to the driveshaft
Majority of the heat shield bolts were very rusty and I ended up having to cut two of them off. I will have to deal with reattach ment later.
Then I drained the tranny fluid
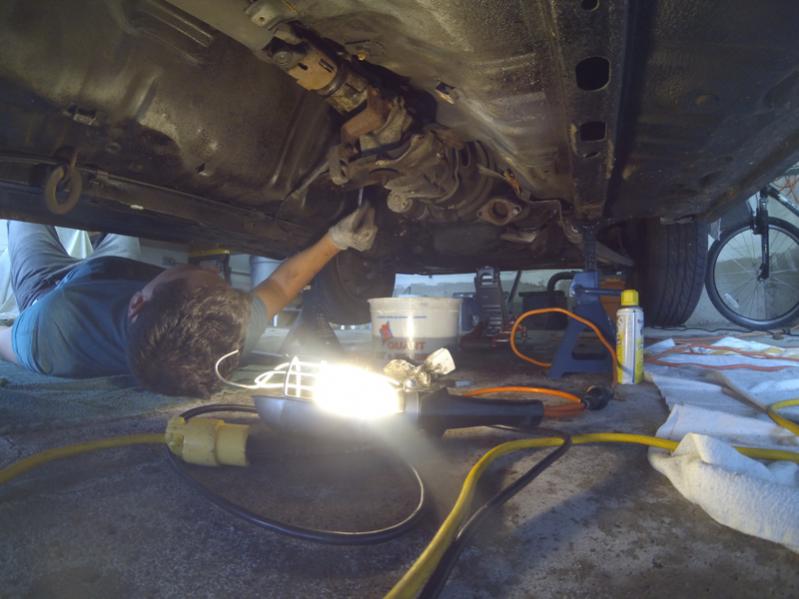
Later that evening another friend came over and brought a plug in impact gun with him which was great. With that we were able to remove the driveshaft and the remaining pre cat in 5 minutes. This is comparable with the 30 minutes my other friend and I spent cranking an exhaust bolt with the breaker bar.
Lastly we removed the clutch slave cylinder from the top of the tranny. The only thing left for the next day was to remove the tranny sensors and then start pulling the engine!
 04-26-14, 12:52 PM
#24
Senior Member
Thread Starter
DAY 8
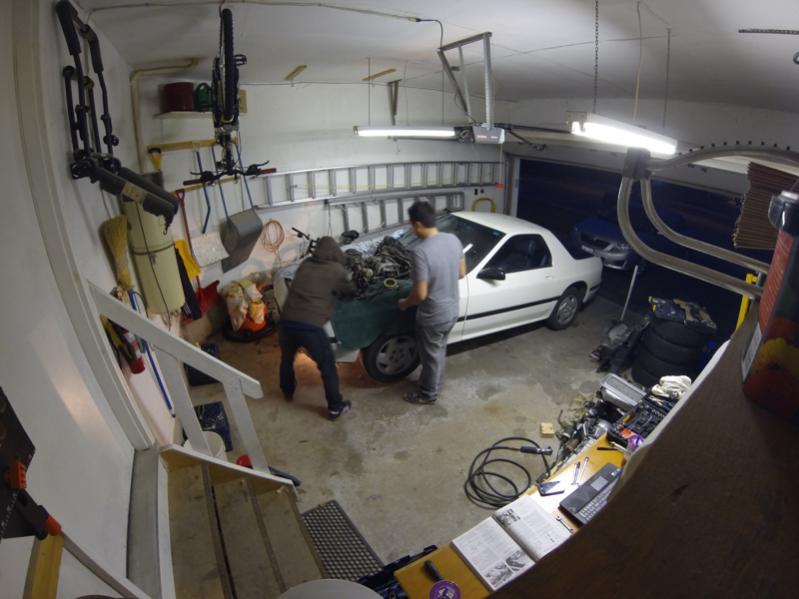
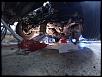
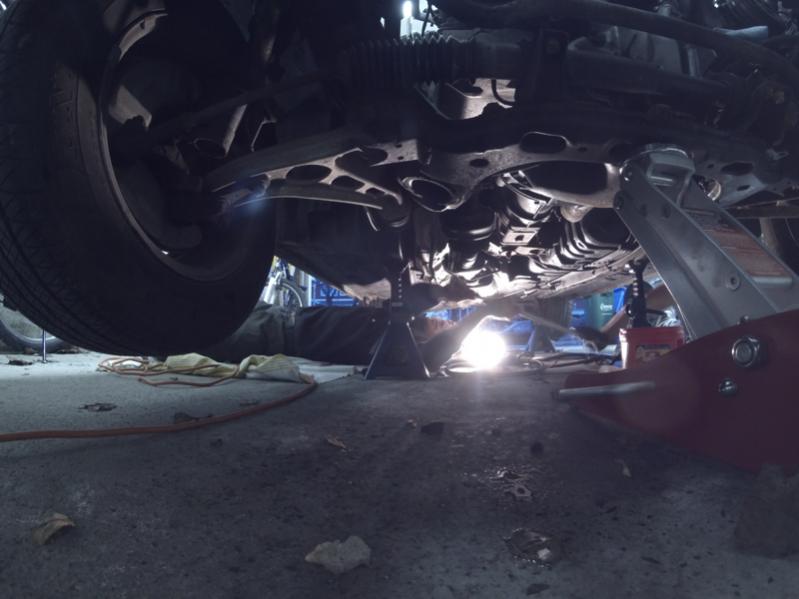
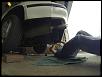
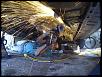
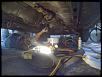
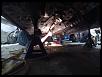
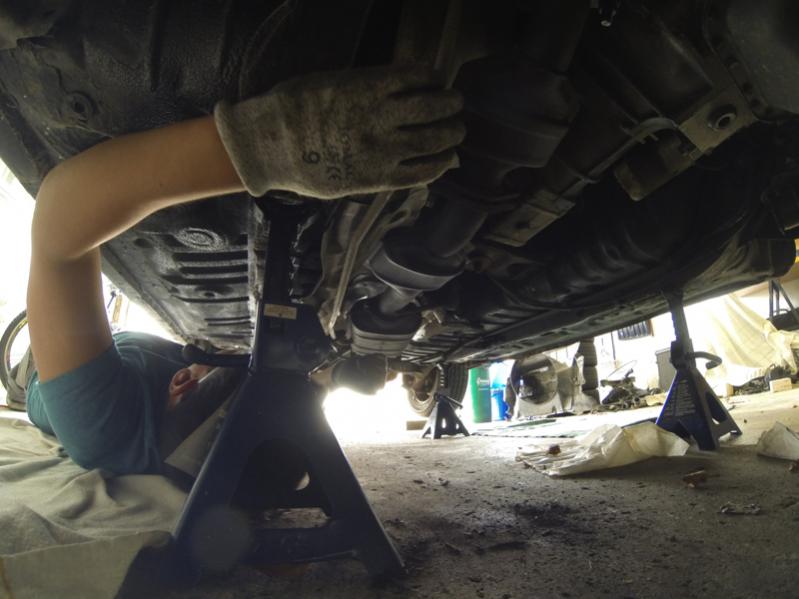
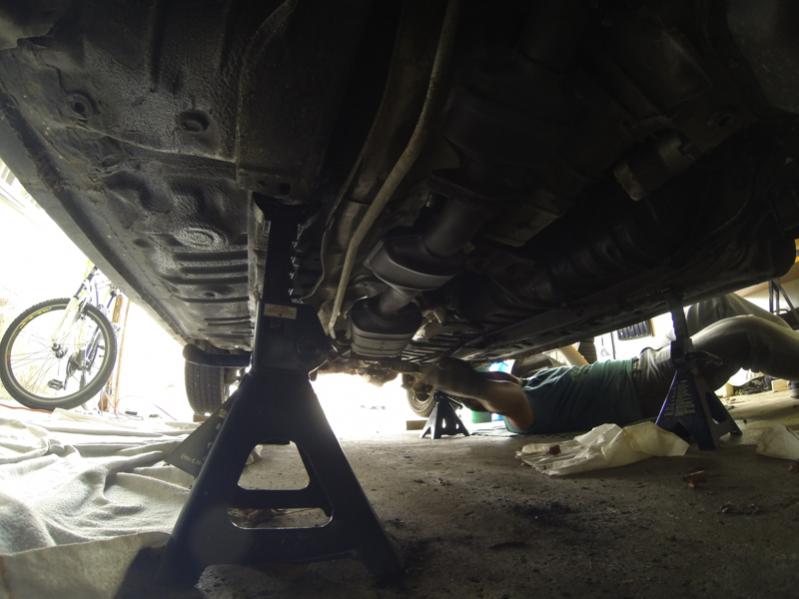
Removed the remaining sensor connections on the tranny and it was finally time to pull the engine.
It was time to roll the car out of the garage so that we could get the engine hoist in front of it on the flat garage floor

Got the engine hoist Hooked up with a chain to the two engine mounts.
Disconnected the transmission mounting bolts while keeping a jack and stands below it to keep it from suddenly dropping.

After that took off the engine mounting bolts and tried to raise up the engine but it was super difficult to maneuver. I should have taken the bumper off the front of the car because the lift kept pulling into the car since the engine was at a further distance than the farthest reach of the arm. Eventually I went under the car and pulled down on the transmission so that the shifter area would clear the inside of the car. From there it was pretty much all good.
First time engine pulling went pretty well!
Removed the remaining sensor connections on the tranny and it was finally time to pull the engine.
It was time to roll the car out of the garage so that we could get the engine hoist in front of it on the flat garage floor
Got the engine hoist Hooked up with a chain to the two engine mounts.

Disconnected the transmission mounting bolts while keeping a jack and stands below it to keep it from suddenly dropping.
After that took off the engine mounting bolts and tried to raise up the engine but it was super difficult to maneuver. I should have taken the bumper off the front of the car because the lift kept pulling into the car since the engine was at a further distance than the farthest reach of the arm. Eventually I went under the car and pulled down on the transmission so that the shifter area would clear the inside of the car. From there it was pretty much all good.
First time engine pulling went pretty well!
04-26-14, 01:00 PM
#25
Senior Member
Thread Starter
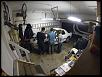
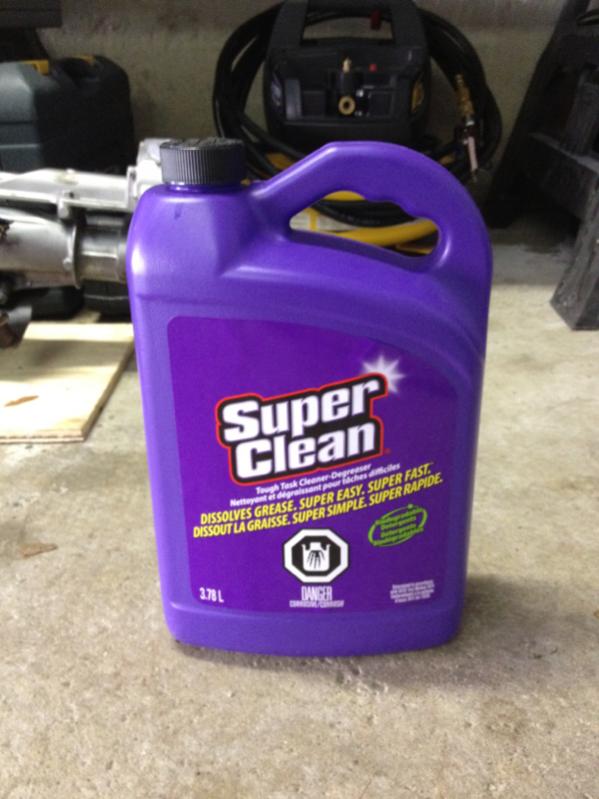
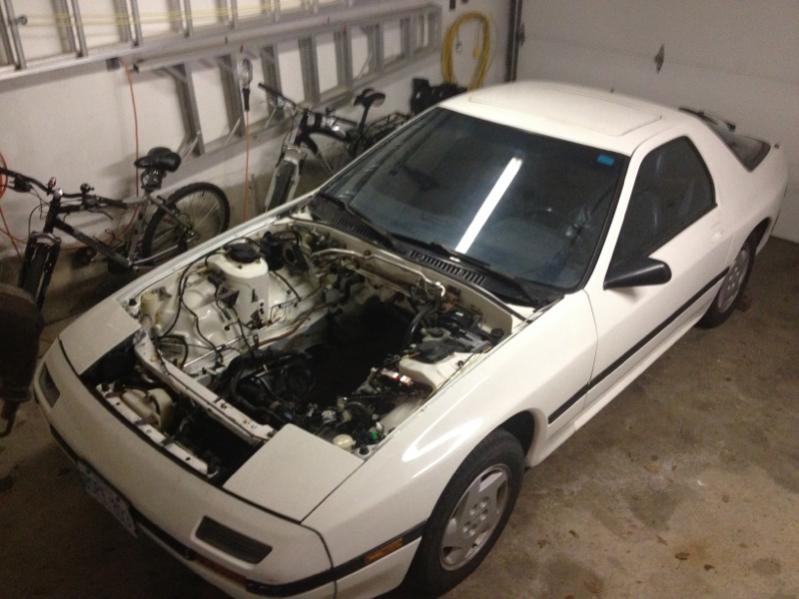
Engine Bay Degreasing
Now that the engine was out I wanted to clean up all of that grease coating all over the engine bay. I used some Super Clean cleaner and degreaser, a pressure washer, and a wire brush.
Before picture
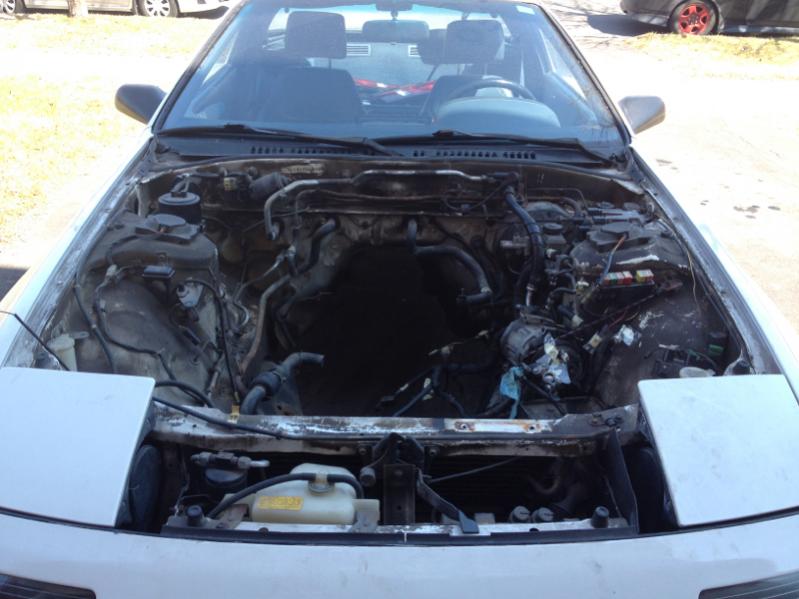
After picture
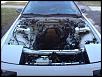
All ready for the new engine

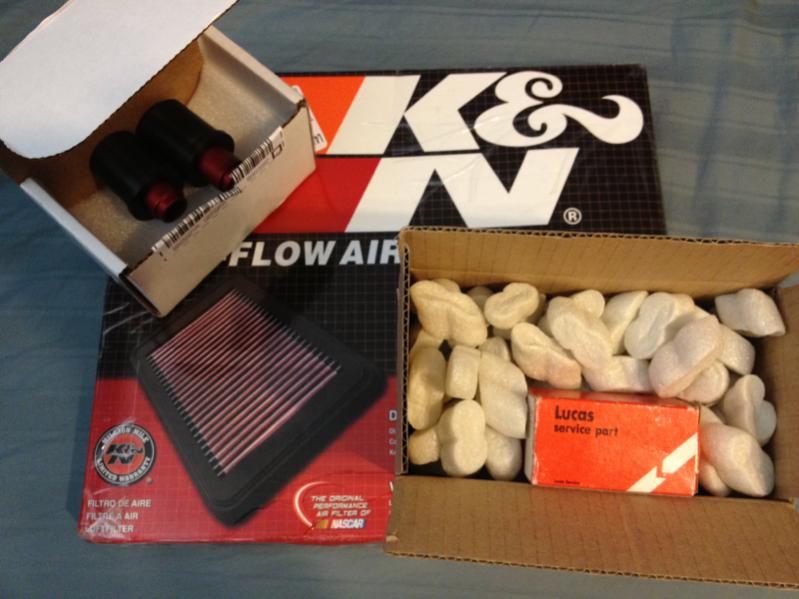
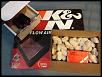
Also, I got some more parts in. The radiator fan switch which I broke, DTSS eliminator bushings, and a k&n drop in filter from my sister for my birthday.
Now that the engine was out I wanted to clean up all of that grease coating all over the engine bay. I used some Super Clean cleaner and degreaser, a pressure washer, and a wire brush.
Before picture
After picture
All ready for the new engine
Also, I got some more parts in. The radiator fan switch which I broke, DTSS eliminator bushings, and a k&n drop in filter from my sister for my birthday.