1987 FC3S GXL Turbo Swap Build Thread
 07-04-14, 12:28 AM
#51
Senior Member
Thread Starter
Can anyone who has watched my video on Vimeo that I posted just a couple links up comment on the first starting? Does it sound like it was misfiring? Should I have been able to get it to idle longer than about ten seconds?
Here it is again: http://vimeo.com/m/98889437
I've read the rebuild info on rotary resurrection saying that it wont want to idle but I'm just curious how anyone thought it went compared to their own experiences?
Thanks in advance
Here it is again: http://vimeo.com/m/98889437
I've read the rebuild info on rotary resurrection saying that it wont want to idle but I'm just curious how anyone thought it went compared to their own experiences?
Thanks in advance
 07-11-14, 11:16 PM
#52
Senior Member
Thread Starter
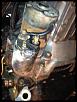
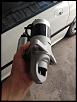
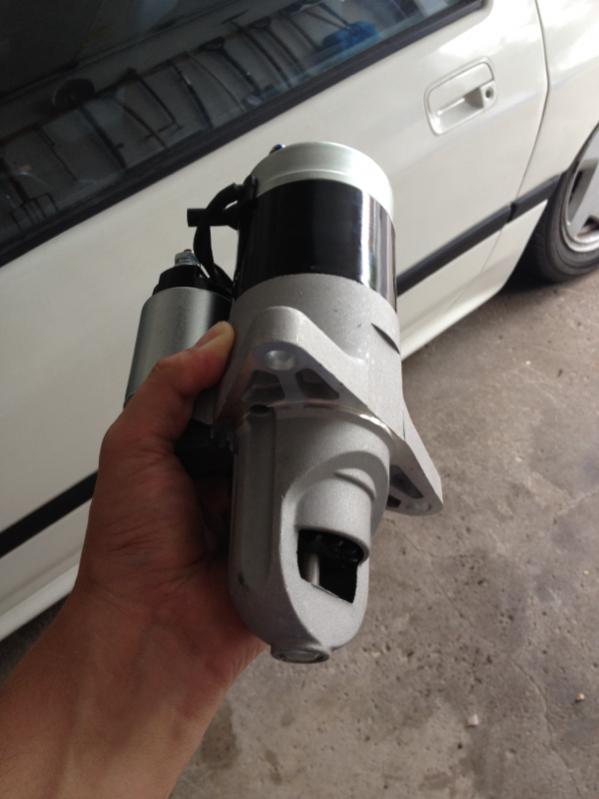
Got my new starter in the mail and went to work removing the burnt one. The boot that has the positive wire from the battery had completely melted through and so the side of the starter was all black. I tried to buy a new boot but couldnt find one so I just wrapped it with many layers of electrical tape. Hopefully it doesn't happen again?
Hooked up the battery and it was no longer shorting out. Was able to start the car again which was sick! Such a dope sound with only a Downpipe haha the whole neighbourhood probably knew that I got my car started again. But lots of oil pouring down from unknown locations.

Hooked up the battery and it was no longer shorting out. Was able to start the car again which was sick! Such a dope sound with only a Downpipe haha the whole neighbourhood probably knew that I got my car started again. But lots of oil pouring down from unknown locations.
07-12-14, 10:15 AM
#53
Make sure you have no intake leaks after the AFM. The same thing happened to me the other day when I first started my Turbo swap in my vert. I had removed the stock bypass valve and the vac lines and forgot to plug the holes. It would start then immediately die. Taped up the holes as a temp fix and it started and idled just fine.
07-13-14, 11:15 AM
#54
Senior Member
Thread Starter
Make sure you have no intake leaks after the AFM. The same thing happened to me the other day when I first started my Turbo swap in my vert. I had removed the stock bypass valve and the vac lines and forgot to plug the holes. It would start then immediately die. Taped up the holes as a temp fix and it started and idled just fine.
07-13-14, 11:34 AM
#55
Senior Member
Thread Starter
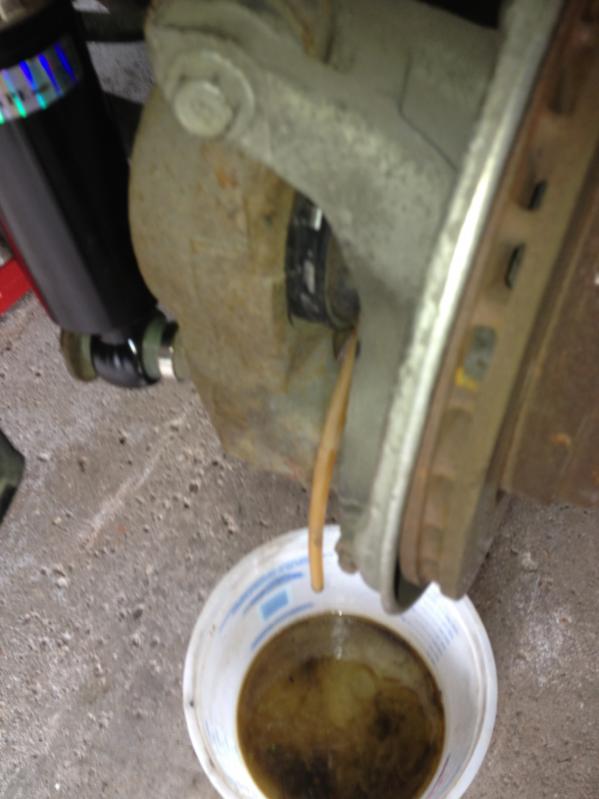
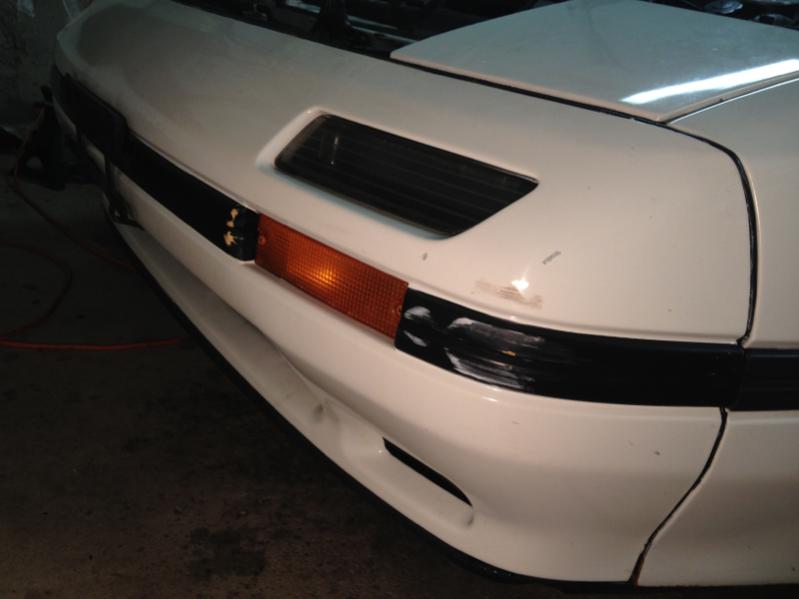
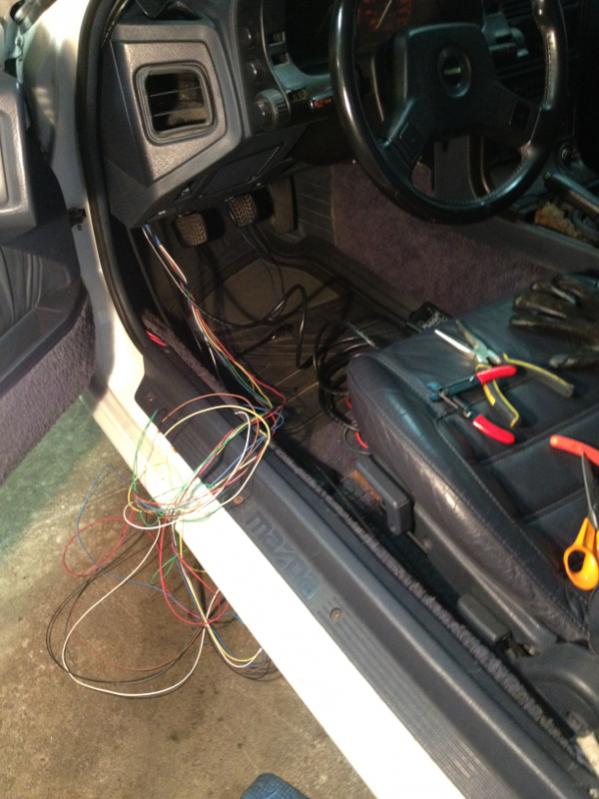
The other day my buddy and I bled all the brakes because it was never done after we replaced the master cylinder a while ago. Never bled brakes before so it was something new. Also because when I removed the subframe I of course had to unhook the brake lines and so there was a lot of air. By the last wheel though I noticed a small leak coming from the bottom of the brake master cylinder very slowly I guess it only showed up when we were putting all that pressure on it. I know I saw it leaking before and I tightened it but I think I gotta do it again and use some Teflon tape this time. Can't remember what the line leads to but it's the large 17mm nut with a sensor.
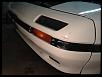
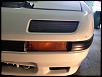
After that we got around to swapping in the S5 tails. I have to say cutting out the section for the s5 license plate light went horribly as I'm not too good with an angle grinder. I recommend making a square cut out instead of trying to make a circular cutout if you're not good at it like me. Luckily no one will ever be able to see that under the taillights. I also had to use some cutters to trim the corner of my tails and my license plate mount where they make contact in order to make them fit.
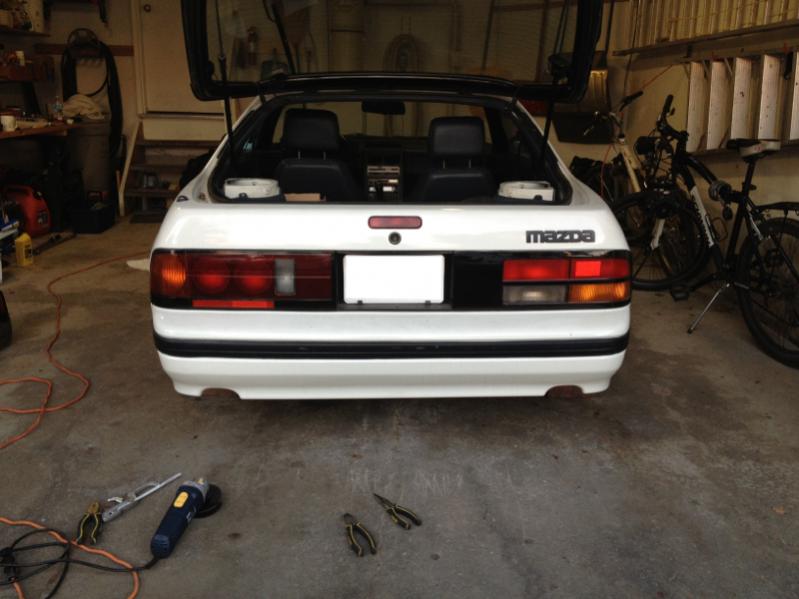
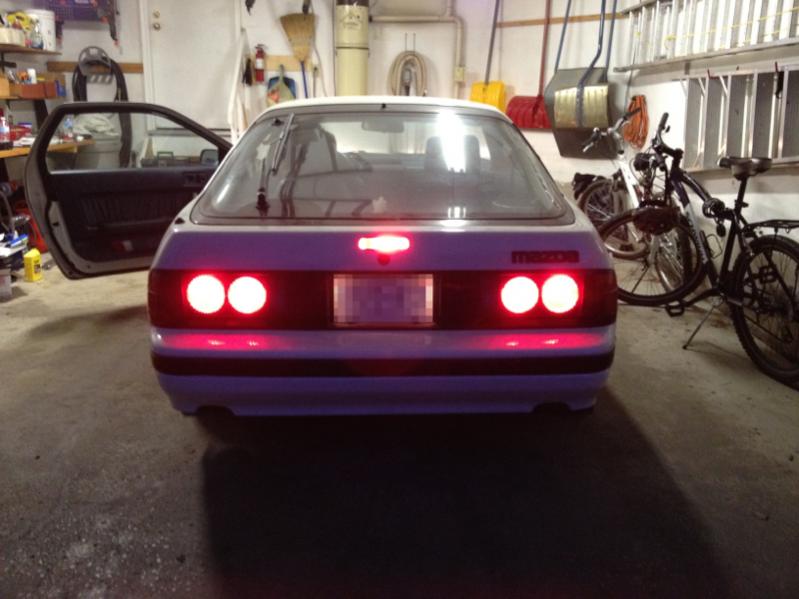
The good thing is that all of the lights still work and my new reverse light sensor and extended transmission wiring also works. That reminds me that I still need to solder in a new connector for the 5th gear sensor. I may try and diagnose some of the problems today if I'm not helping my buddy build a sub box.
 07-14-14, 01:11 AM
#56
Senior Member
Thread Starter
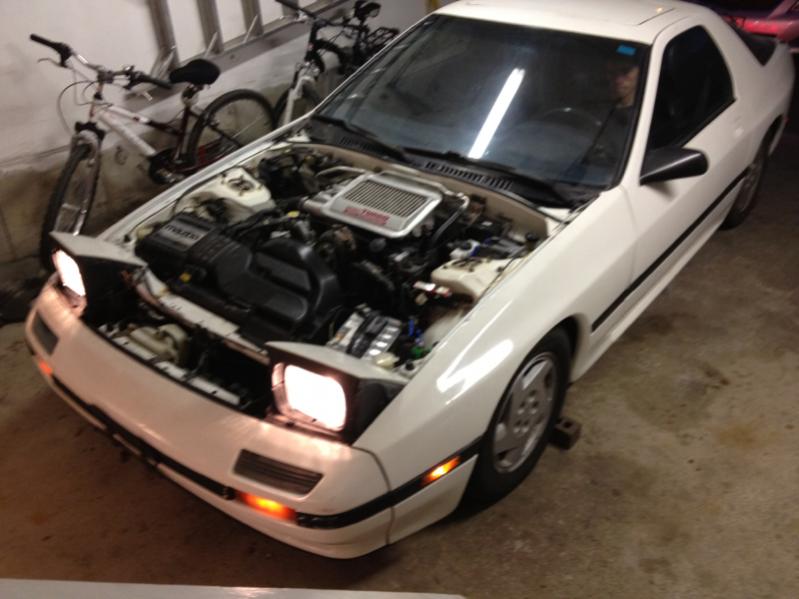
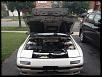
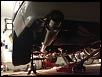
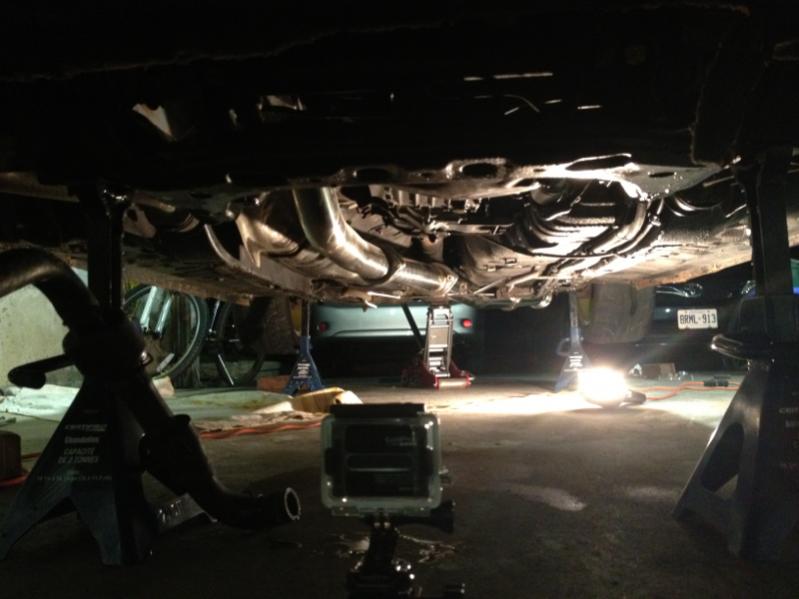
I found the oil leak it's coming from the oil feed or return line (not sure which is which) for the turbo, the larger one which bolts on with two bolts to the oil pump / block. Even with the engine running only for a few seconds (as the AFM was not hooked up) oil was streaming down. I don't have time to fix the problem this weekend but hopefully I can check it out next weekend.
I hope it's just a matter of the bolts not being fully tightened and not a stripped bolt issue. Im planning to just remove it and clean it up and apply some ultra gray. I really hope that's the only leak it's hard to tell as it drips down onto the subframe and then leaks on all sides.
I hope it's just a matter of the bolts not being fully tightened and not a stripped bolt issue. Im planning to just remove it and clean it up and apply some ultra gray. I really hope that's the only leak it's hard to tell as it drips down onto the subframe and then leaks on all sides.
07-21-14, 05:37 PM
#57
Senior Member
Thread Starter
Tore apart my engine bay again to get at the oil leak and I also found a coolant leak from the water pump so I had to reseal up 4 sections by the Time I was done putting It back together
The oil leak is fixed but unfortunately the next day I found a small coolant leak still existing
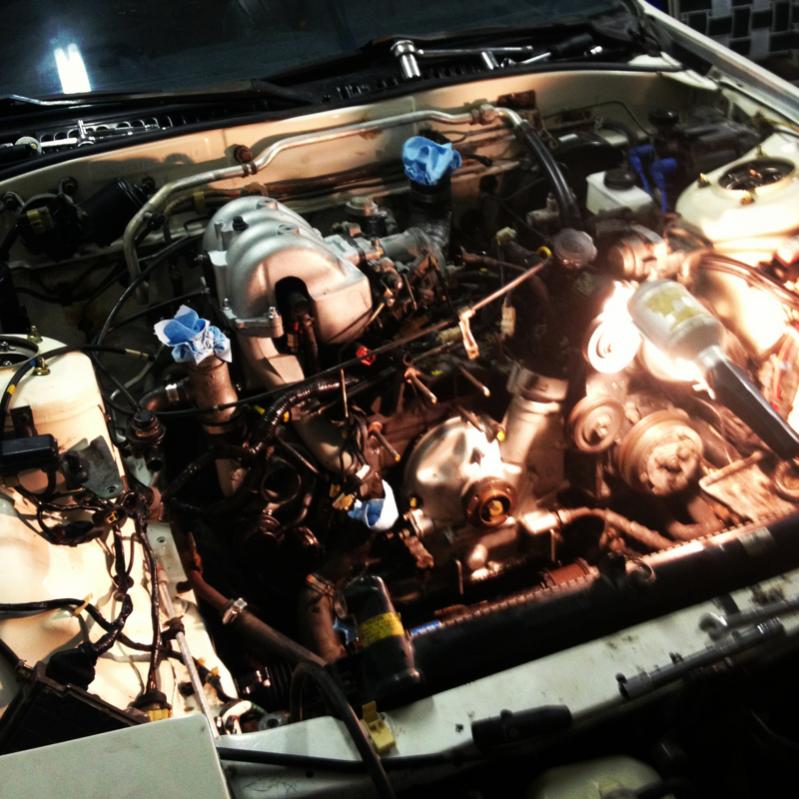
The oil leak is fixed but unfortunately the next day I found a small coolant leak still existing
07-21-14, 05:42 PM
#58
Senior Member
Thread Starter
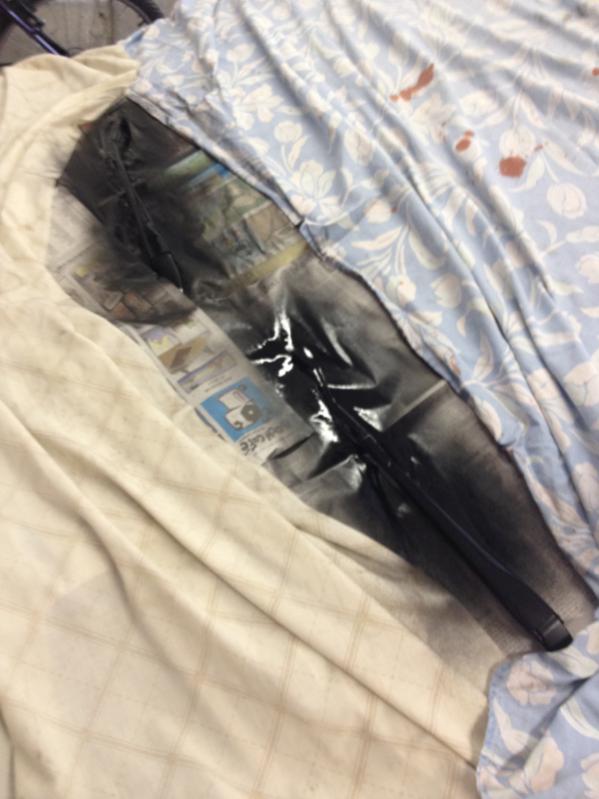
Went to work repainting some yellow paint on my front left trim using trim paint which I used before on my prelude window sills and had really good results with
Can never have too much protection from overspray

Got carried away and started repainting the wiper arms because all the paint had worn away
Worked out really well definitely recommend to anyone looking to repaint their trim. I have to repaint all the sections of trim on my car later because they all have white overspray from the previous owner. I only had one leftover can to work with. I'll post a photo of the can later in case anyone is interested
Can never have too much protection from overspray
Got carried away and started repainting the wiper arms because all the paint had worn away
Worked out really well definitely recommend to anyone looking to repaint their trim. I have to repaint all the sections of trim on my car later because they all have white overspray from the previous owner. I only had one leftover can to work with. I'll post a photo of the can later in case anyone is interested
07-21-14, 05:45 PM
#59
Senior Member
Thread Starter
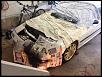
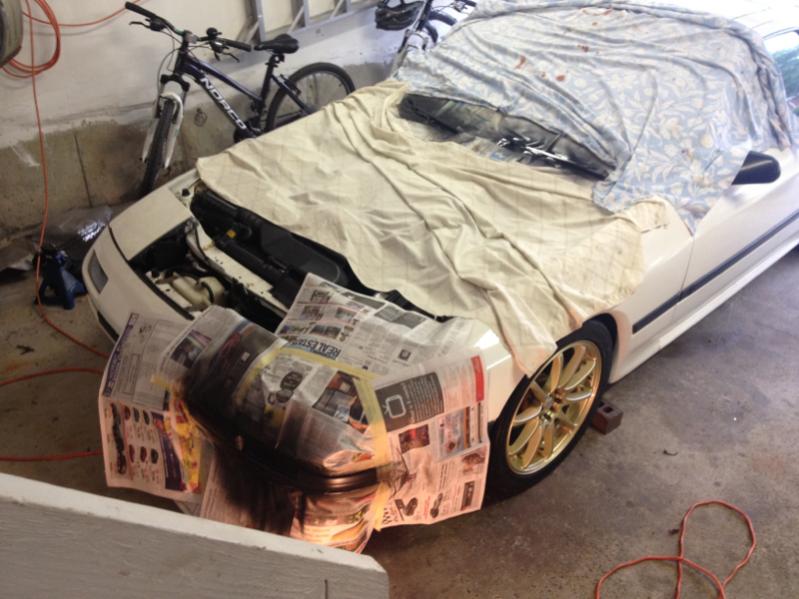
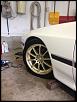
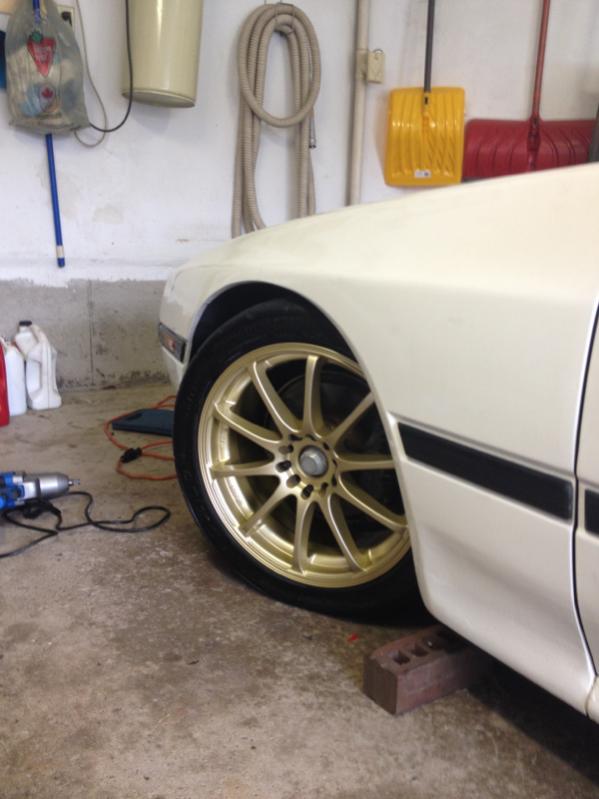
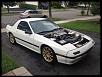
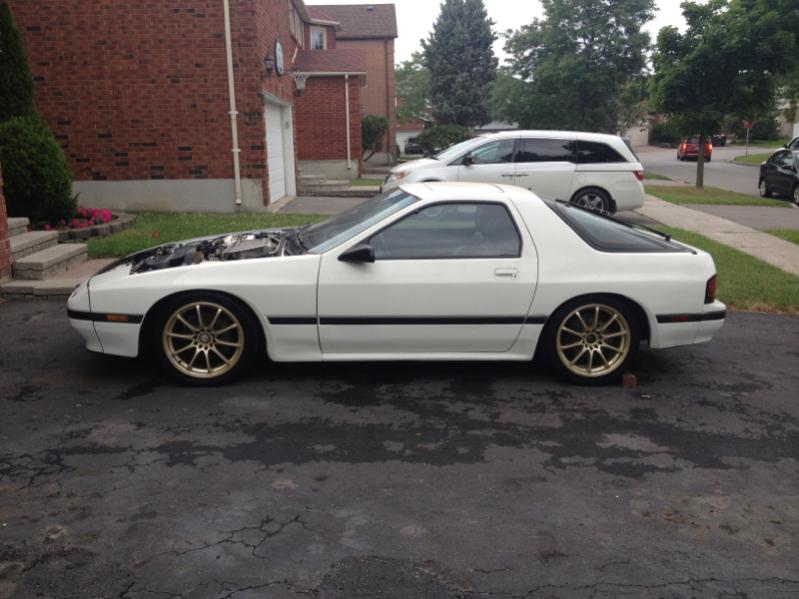
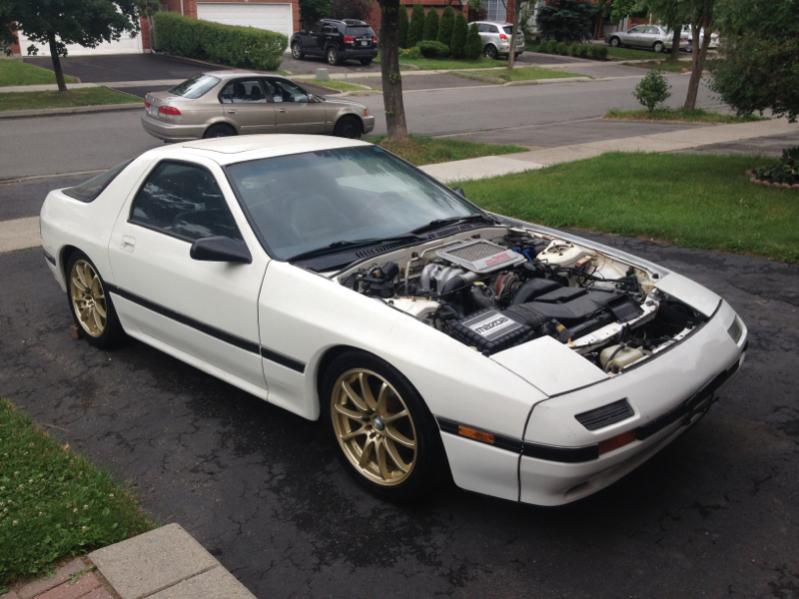
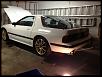
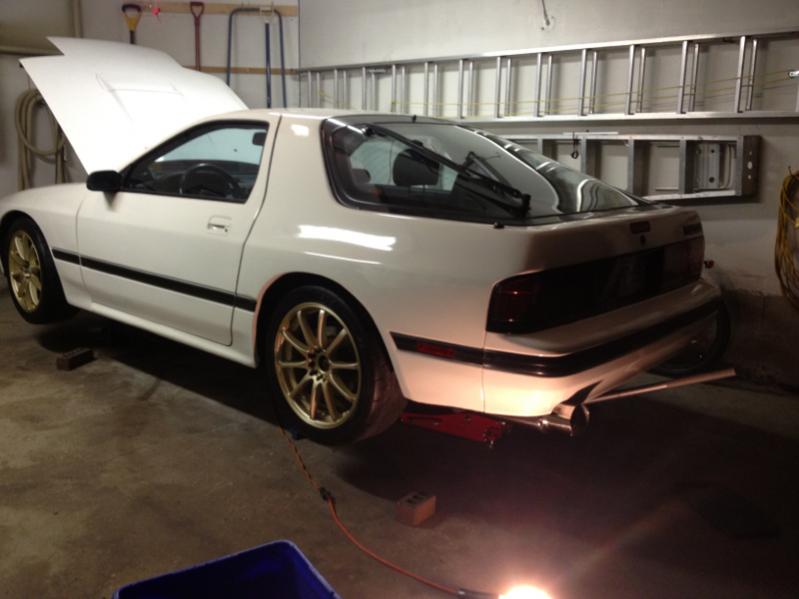
As you probably saw from the last post I installed my konig feathers on the rx7. Just had to run out and buy some new 73.1-60.1 mm hub centric rings to get them to fit.
I didn't really want to use them at first for this car but since I already have them I may as well throw them on.

I didn't really want to use them at first for this car but since I already have them I may as well throw them on.

 07-21-14, 05:46 PM
#60
Rotary Enthusiast
iTrader: (1)

Join Date: Nov 2012
Location: bloomington, mn
Posts: 1,100
Likes: 0
Received 0 Likes
on
0 Posts
that license plate bezel becomes much easier with a dremel and the proper cutting wheel. I am glad you went ahead and put the S5 tails on your car. As I said before we are twins in color and year, just that now you have braaaap psssshhh and I just have brap. I have been considering putting my S5 tails on my car and swapping my other FC back to S4... but idk.... If I did it I would also bring the Tii wing over as well, and my car is too clean to be drilling holes into to mount a wing to.
EDIT: GODAMNIT! you took my idea straight from my brain!! I was planning on running gold wheels of some sort. Now I know I made the right decision. looks great.
EDIT: GODAMNIT! you took my idea straight from my brain!! I was planning on running gold wheels of some sort. Now I know I made the right decision. looks great.
07-21-14, 06:02 PM
#61
Senior Member
Thread Starter
Started to wire up the AEM failsafe gauge though I don't have a bung welded into my Downpipe for it yet and I don't want to use the o2 sensor location because it's way to close to the manifold.
The customization software is pretty sick but I don't plan on using the failsafe feature right away. I just want to be able to monitor the afr and boost pressure. I had some poor photos from my phone of the program actually hooked to the gauge but since I'm away all I can upload is screen shots of the program while it's disconnected.


I ordered an a-pillar gauge pod for an fc rx7 a little while ago and it doesn't even match up properly though it's supposed to?? Maybe I'm doing it wrong. I tries mounting on the passenger side too incase it's a JDM model but it doesn't seem to sit well there either? Either way I'll still be using it
The customization software is pretty sick but I don't plan on using the failsafe feature right away. I just want to be able to monitor the afr and boost pressure. I had some poor photos from my phone of the program actually hooked to the gauge but since I'm away all I can upload is screen shots of the program while it's disconnected.
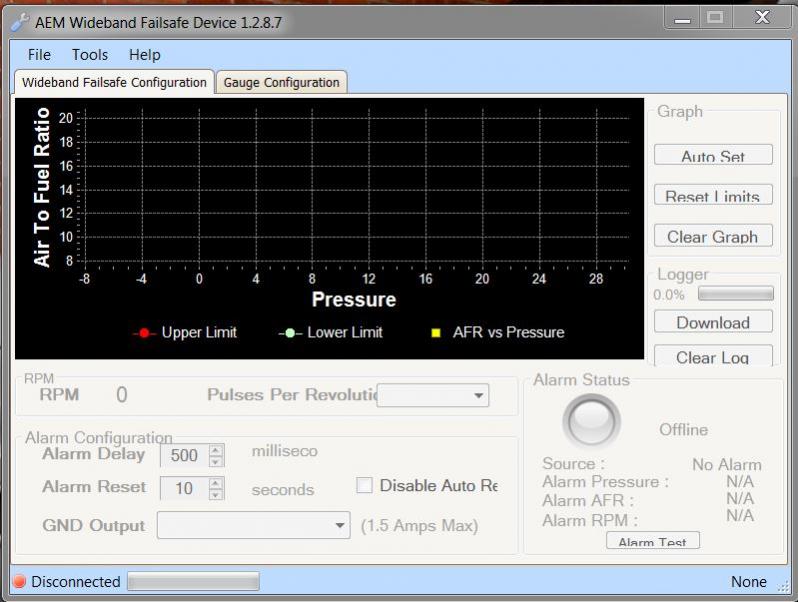
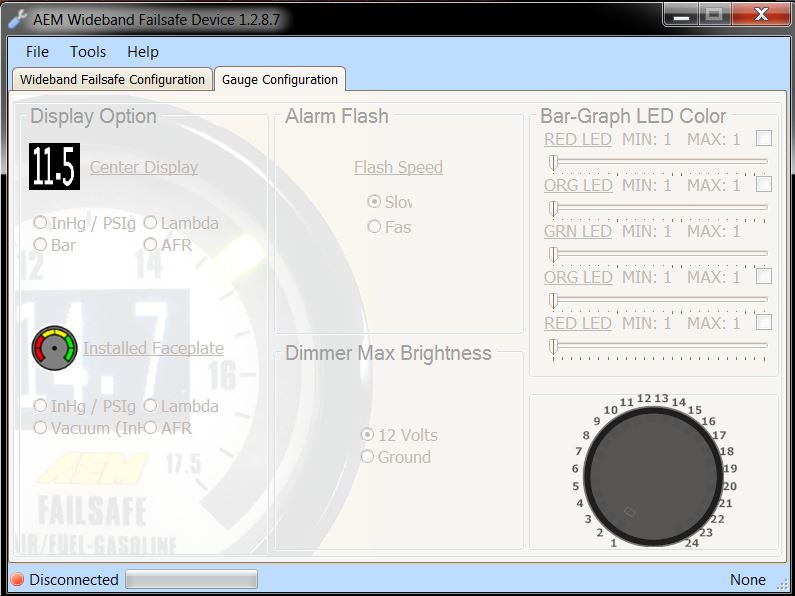
I ordered an a-pillar gauge pod for an fc rx7 a little while ago and it doesn't even match up properly though it's supposed to?? Maybe I'm doing it wrong. I tries mounting on the passenger side too incase it's a JDM model but it doesn't seem to sit well there either? Either way I'll still be using it
 07-21-14, 06:07 PM
#62
Senior Member
Thread Starter
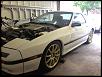
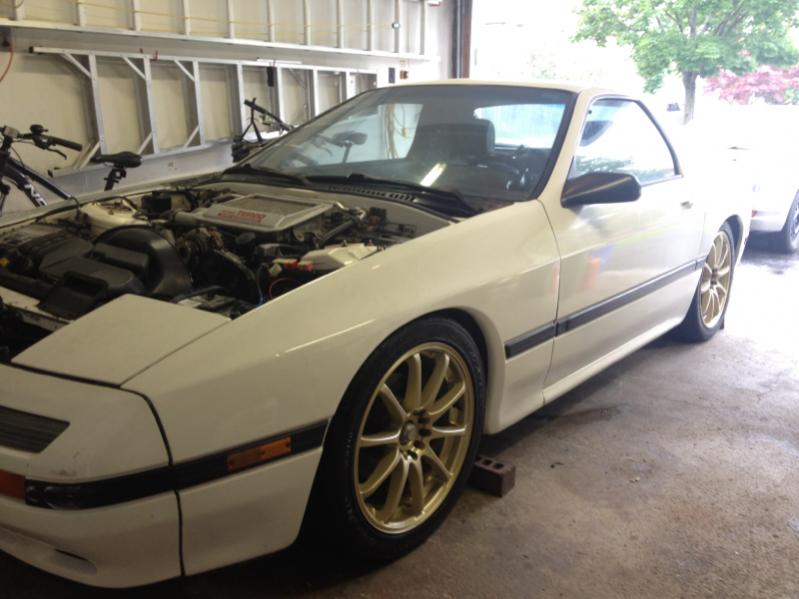
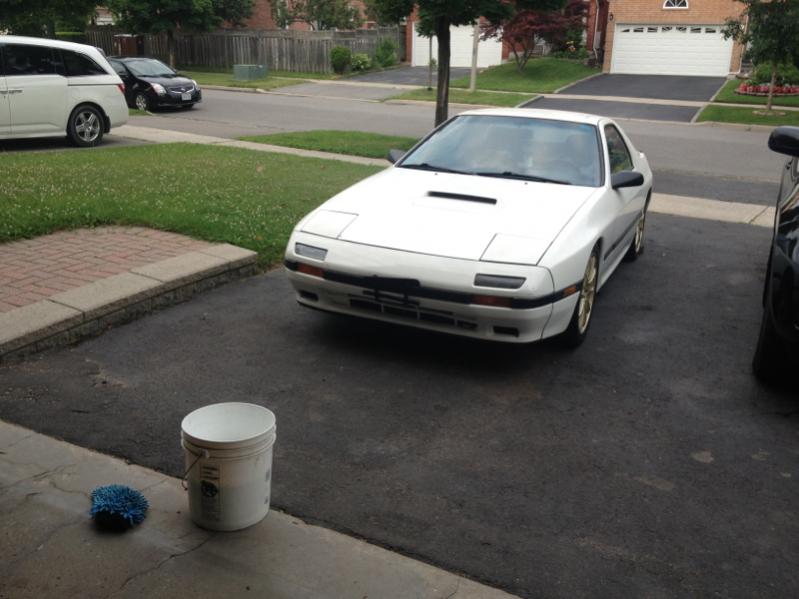
Rolled the car out for the first time since I cleaned the engine bay a couple of month ago so that I could wash it. It was bugging me how much dust was accumulating
I also bolted up the hood that I unbent and it actually looks ago besides some wrinkling and the missing paint. Also since its from a 10th ae rx7 the white is different from mine and makes the rest of the car look bland haha.
Literally gearing up for the first car wash ever haha

I also bolted up the hood that I unbent and it actually looks ago besides some wrinkling and the missing paint. Also since its from a 10th ae rx7 the white is different from mine and makes the rest of the car look bland haha.

Literally gearing up for the first car wash ever haha
 07-21-14, 06:09 PM
#63
Senior Member
Thread Starter
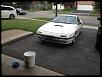
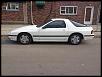
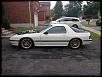
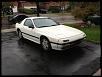
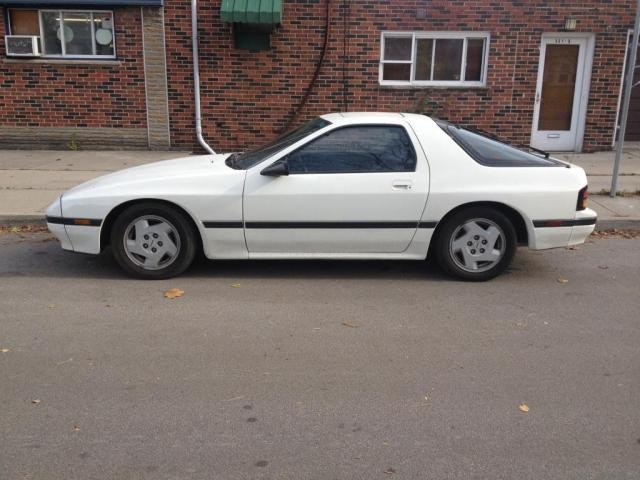
Comparison shots from the car when I bought it in November till now. It's sad because the last two photos show my totalled prelude which was my previous project vs my new beater Acura. The gold rims are really starting to grow on me now.

 07-21-14, 06:14 PM
#64
Senior Member
Thread Starter
that license plate bezel becomes much easier with a dremel and the proper cutting wheel. I am glad you went ahead and put the S5 tails on your car. As I said before we are twins in color and year, just that now you have braaaap psssshhh and I just have brap. I have been considering putting my S5 tails on my car and swapping my other FC back to S4... but idk.... If I did it I would also bring the Tii wing over as well, and my car is too clean to be drilling holes into to mount a wing to.
EDIT: GODAMNIT! you took my idea straight from my brain!! I was planning on running gold wheels of some sort. Now I know I made the right decision. looks great.
EDIT: GODAMNIT! you took my idea straight from my brain!! I was planning on running gold wheels of some sort. Now I know I made the right decision. looks great.
Haha and the gold rims I already had and don't really want to get rid of them because they were a gift so I just bolted them on since I don't have a budget for new rims. They're really starting to grow on me now. A few months ago I photoshopped them on just to see how it looked and I thought it looked terrible but it looks a lot better in real life.
Also I really don't have brap pshhh right now Lool I have no exhaust and a misfiring engine so it's just the loudest beast and scares the hell out of me at fear of another fire. Then after about ten seconds it dies lol
07-21-14, 06:55 PM
#65
Rotary Enthusiast
iTrader: (1)
Join Date: Nov 2012
Location: bloomington, mn
Posts: 1,100
Likes: 0
Received 0 Likes
on
0 Posts
The lights can be made to fit better with a channle lock pliers bending back the metal on the car itself inwards ever so slightly. I was reffering to the actual black plastic garnish that goes between the lights and plate area. I could be mistaking the whole thing as I am nearly 2 whiskeys deep now.
And yes, Twins to the max!

never mind the pony tank air compressor in the back. Was its first time on the ground in 20 years. I trust nothing until 200 miles are put on this thing.
Sorry for thread jack. You have certainly made serious progress in short time.
Edit: The only difference is I have 17502 miles less than you on my ODO. (53833km total on my ODO)
And yes, Twins to the max!
never mind the pony tank air compressor in the back. Was its first time on the ground in 20 years. I trust nothing until 200 miles are put on this thing.
Sorry for thread jack. You have certainly made serious progress in short time.
Edit: The only difference is I have 17502 miles less than you on my ODO. (53833km total on my ODO)
07-21-14, 08:46 PM
#66
Senior Member
Thread Starter
The lights can be made to fit better with a channle lock pliers bending back the metal on the car itself inwards ever so slightly. I was reffering to the actual black plastic garnish that goes between the lights and plate area. I could be mistaking the whole thing as I am nearly 2 whiskeys deep now.
And yes, Twins to the max!
never mind the pony tank air compressor in the back. Was its first time on the ground in 20 years. I trust nothing until 200 miles are put on this thing.
Sorry for thread jack. You have certainly made serious progress in short time.
Edit: The only difference is I have 17502 miles less than you on my ODO. (53833km total on my ODO)
07-22-14, 12:58 PM
#68
Senior Member
Thread Starter
Ohh yeah I opened it on my computer, sick man and damn your sunroof actually works! When you push the buttons on mine you can hear the motor running but the previous owner sealed it shut I guess due to leaks, that's a future project for me.
07-23-14, 11:43 PM
#69
Senior Member
Thread Starter
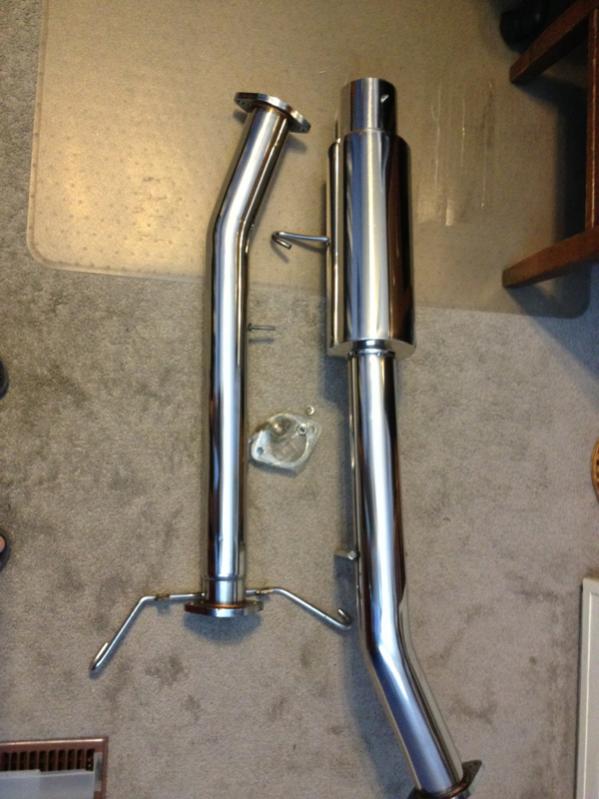
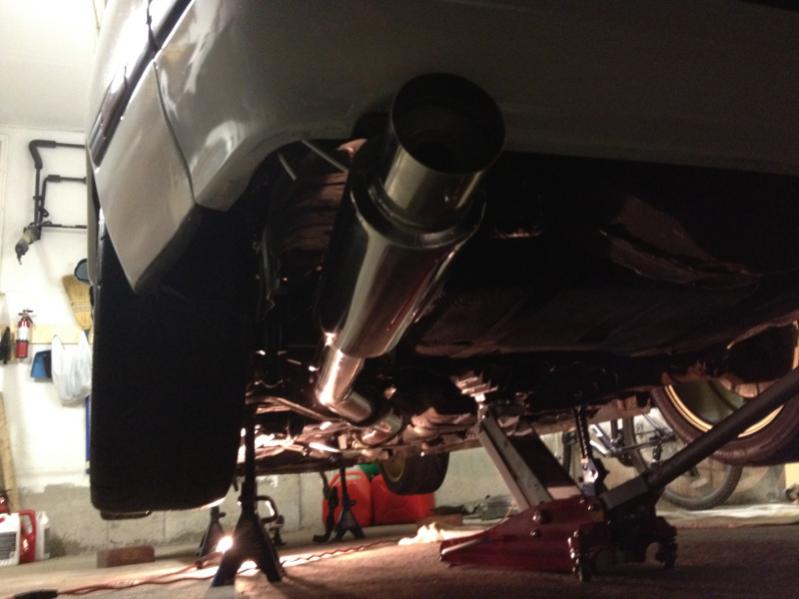
My Catback came in the mail today! 3 inch straight pipe with a 4 inch tip. eBay exhaust. I figured might as well since I've already got an eBay Downpipe and midpipe and I am pretty tight on cash over the last few months.
I've read reviews that its going to rust like crazy or the mufflers going to burn out but I can always get a new muffler welded on later and I am only summer driving this car. Can't wait to get it on and see how the car runs. But first I need to install the new trailing coil to stop the misfiring. Never had an aftermarket exhaust before so I'm excited.
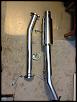
I've read reviews that its going to rust like crazy or the mufflers going to burn out but I can always get a new muffler welded on later and I am only summer driving this car. Can't wait to get it on and see how the car runs. But first I need to install the new trailing coil to stop the misfiring. Never had an aftermarket exhaust before so I'm excited.
 07-31-14, 12:56 AM
#70
Senior Member
Thread Starter
I started to make a video compiling the 6000 still photos taken on the GoPro over the last four months and it's sooo sick to watch. It's nice to sit here without having to do any work and remember all the really tough times throughout the project. When it's done I'll post it up somewhere and share the link. However since the whole thing took so long the video is currently at 20 minutes for 85 % of the footage. But if I made it any faster itd just be a blur. Cant wait to get it all done !
08-01-14, 03:17 AM
#71
Senior Member
Thread Starter
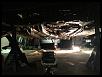
Exhaust installed! Looks dope but I still gotta see it with the car on the ground and actually hear it running. Gotta say I really really hated stretching those exhaust mounting rubber rings made the whole process take way longer than I thought it would. I pulled the Downpipe off because I need to have the wideband sensor welded into it today.
I also installed the trailing ignition coil but it was way too late at light to start the car to test it I'll check it tomorrow hopefully no more misfiring issue.
I also installed the trailing ignition coil but it was way too late at light to start the car to test it I'll check it tomorrow hopefully no more misfiring issue.
 08-03-14, 11:33 AM
#73
Senior Member
Thread Starter
08-05-14, 12:21 AM
#75
Senior Member
Thread Starter
Haha those plans are in my mind but maybe next year. I'm having too much trouble trying to get the engine to idle right now and I'm worried as end up summer is approaching.