
The 10th AE Chronicles

Thread Starter
RX-7 Old Timer
Joined: Jul 2004
Posts: 321
Likes: 10
From: Ann Arbor, MI
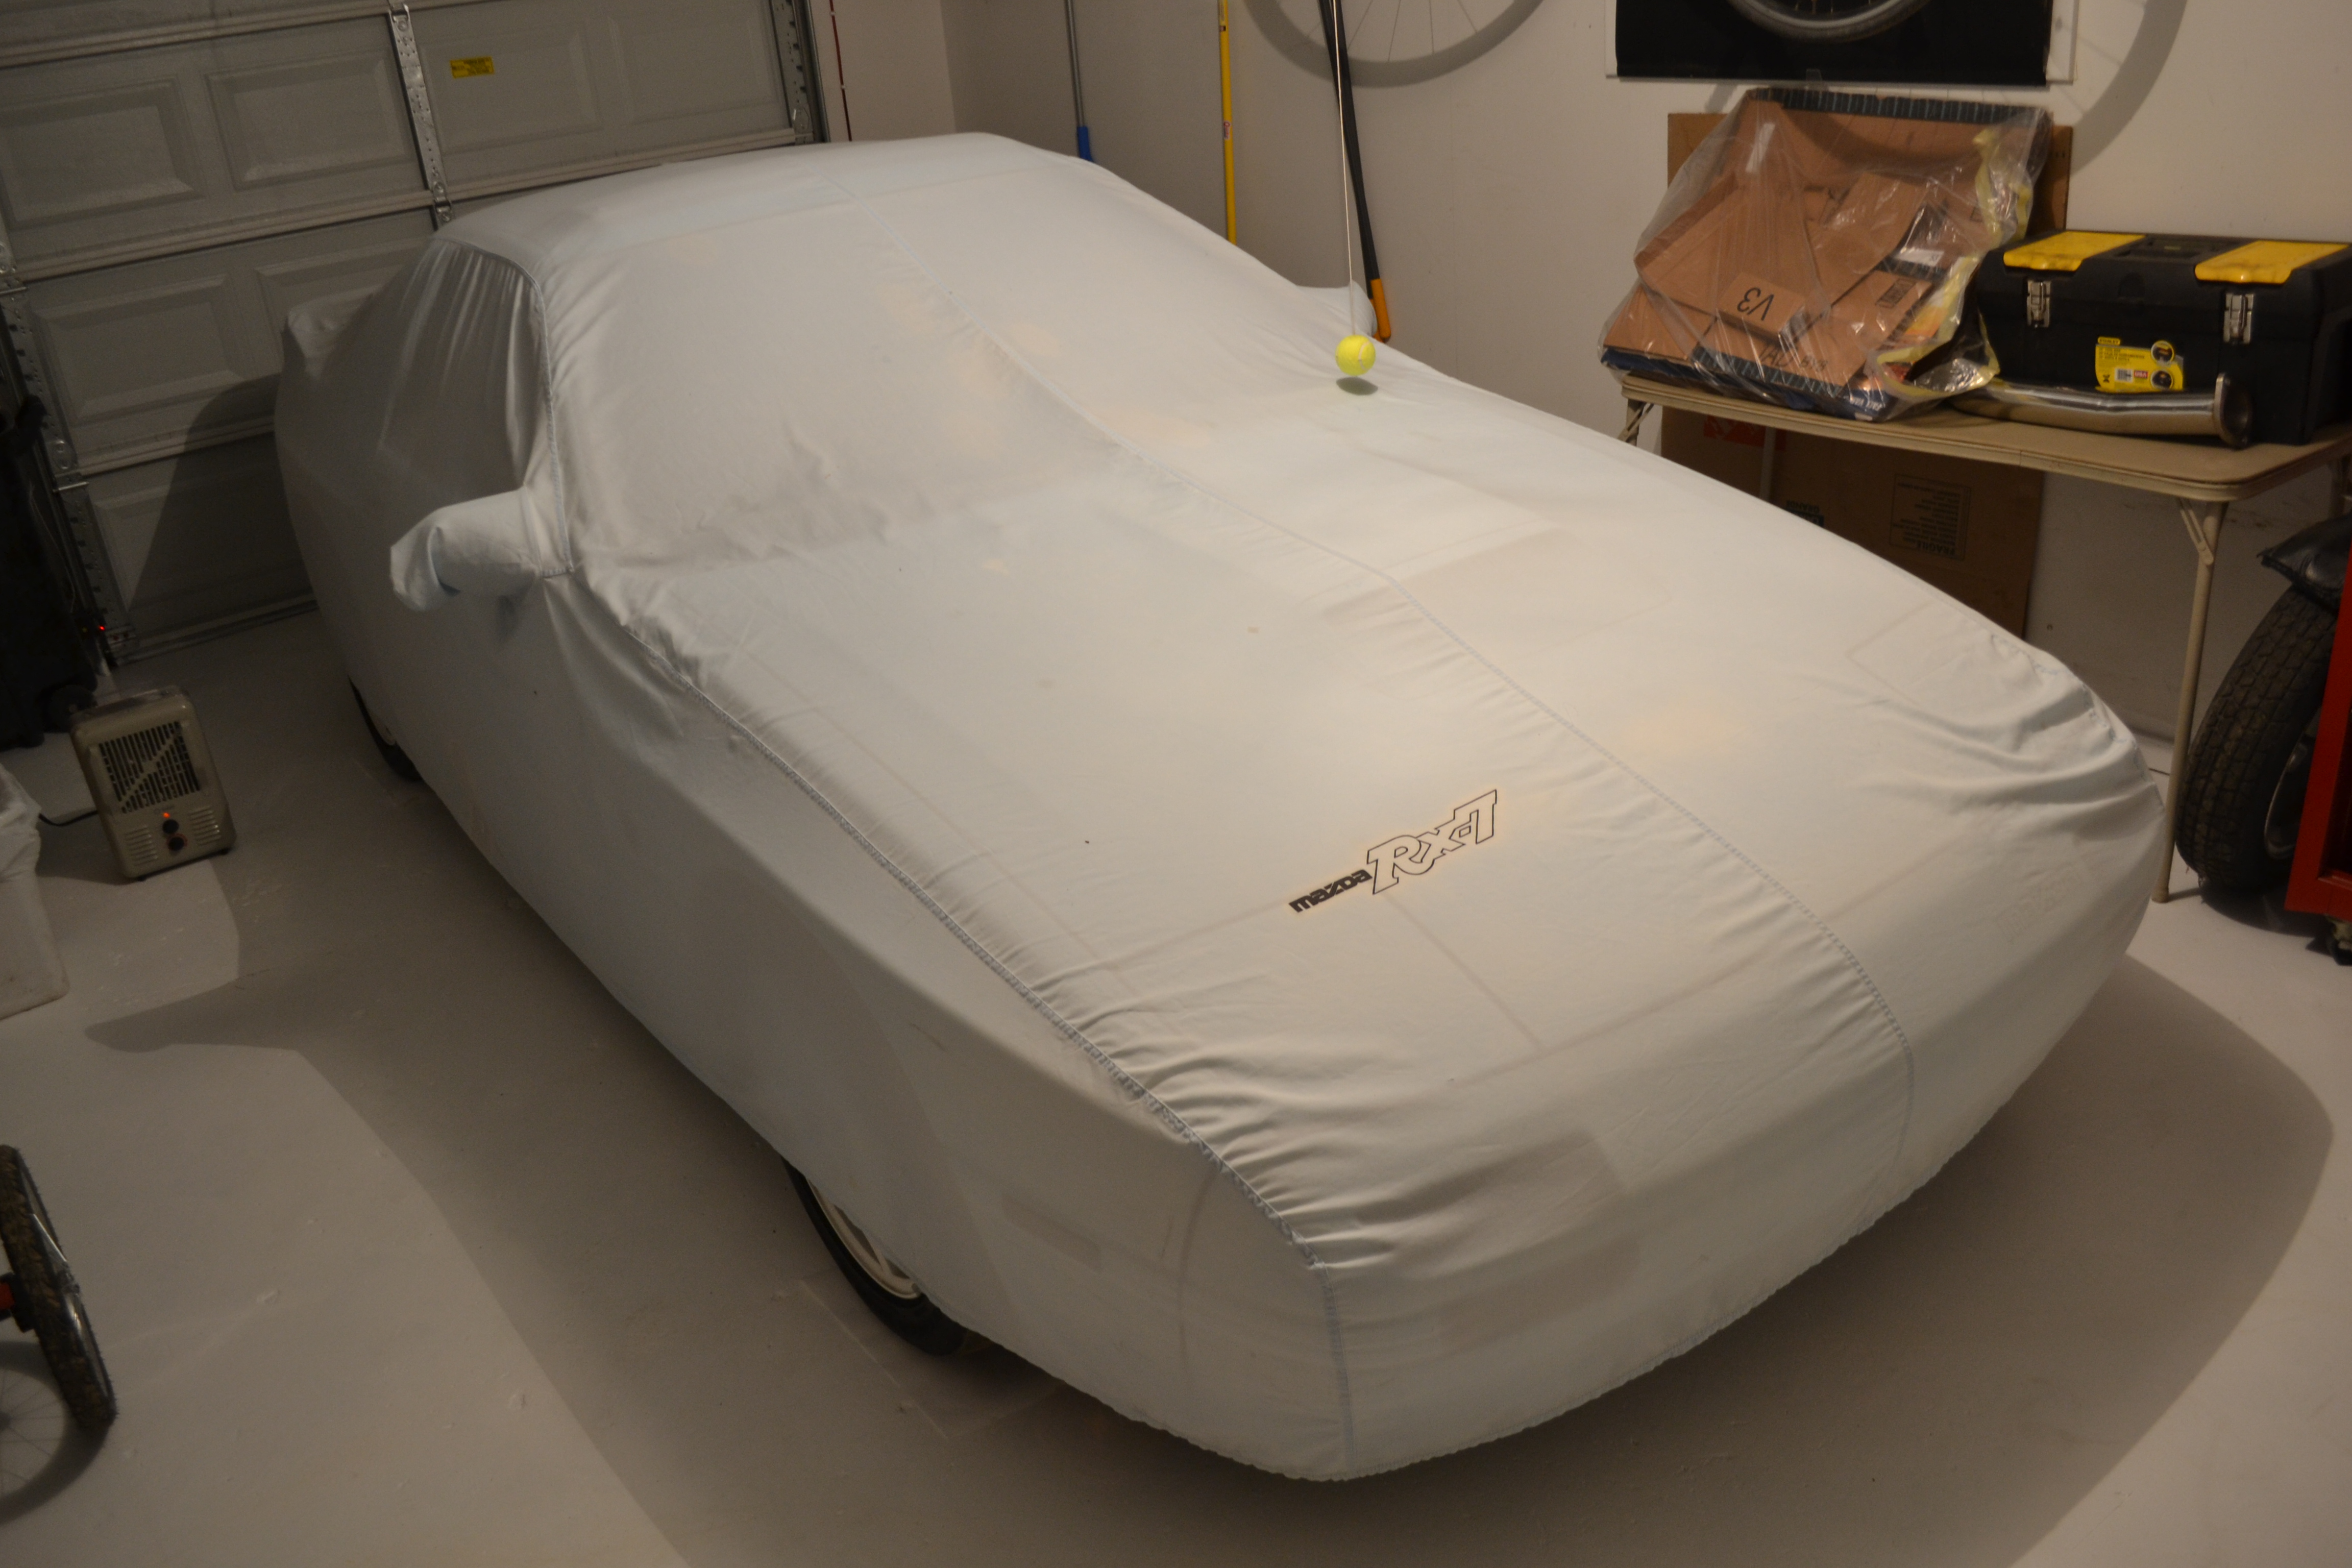
What's under that car sweater?

A turbo FC, of course.

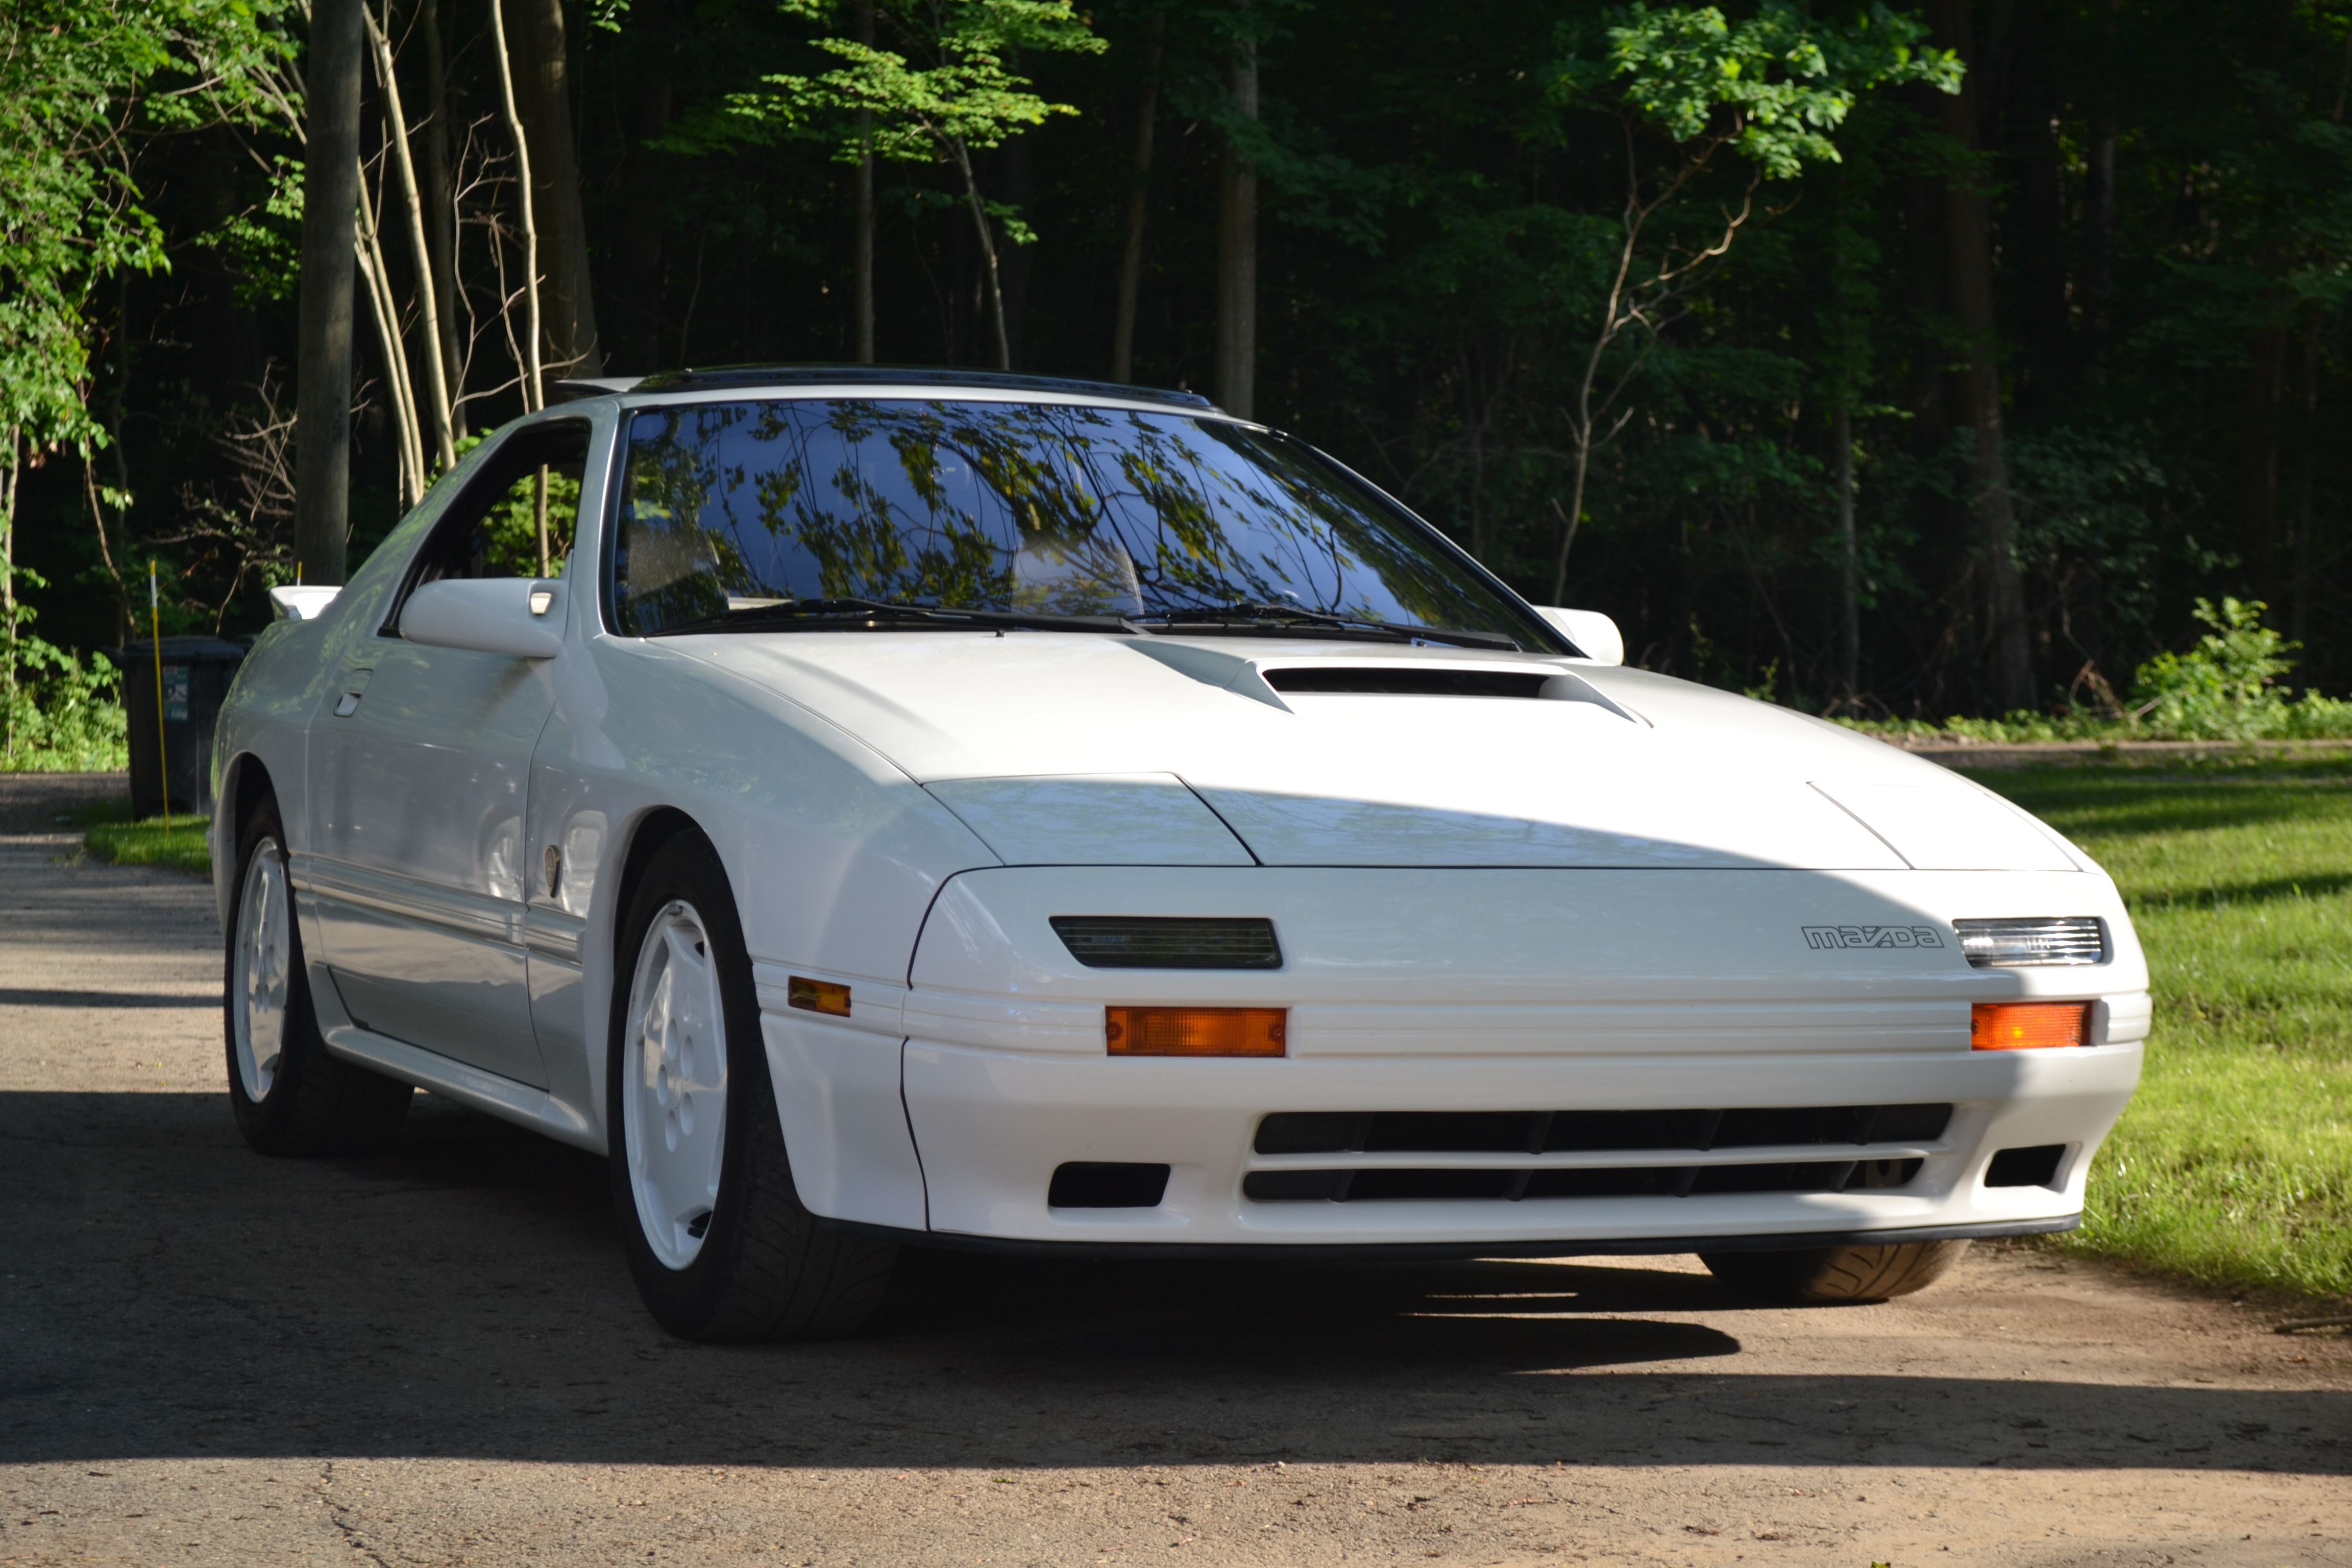
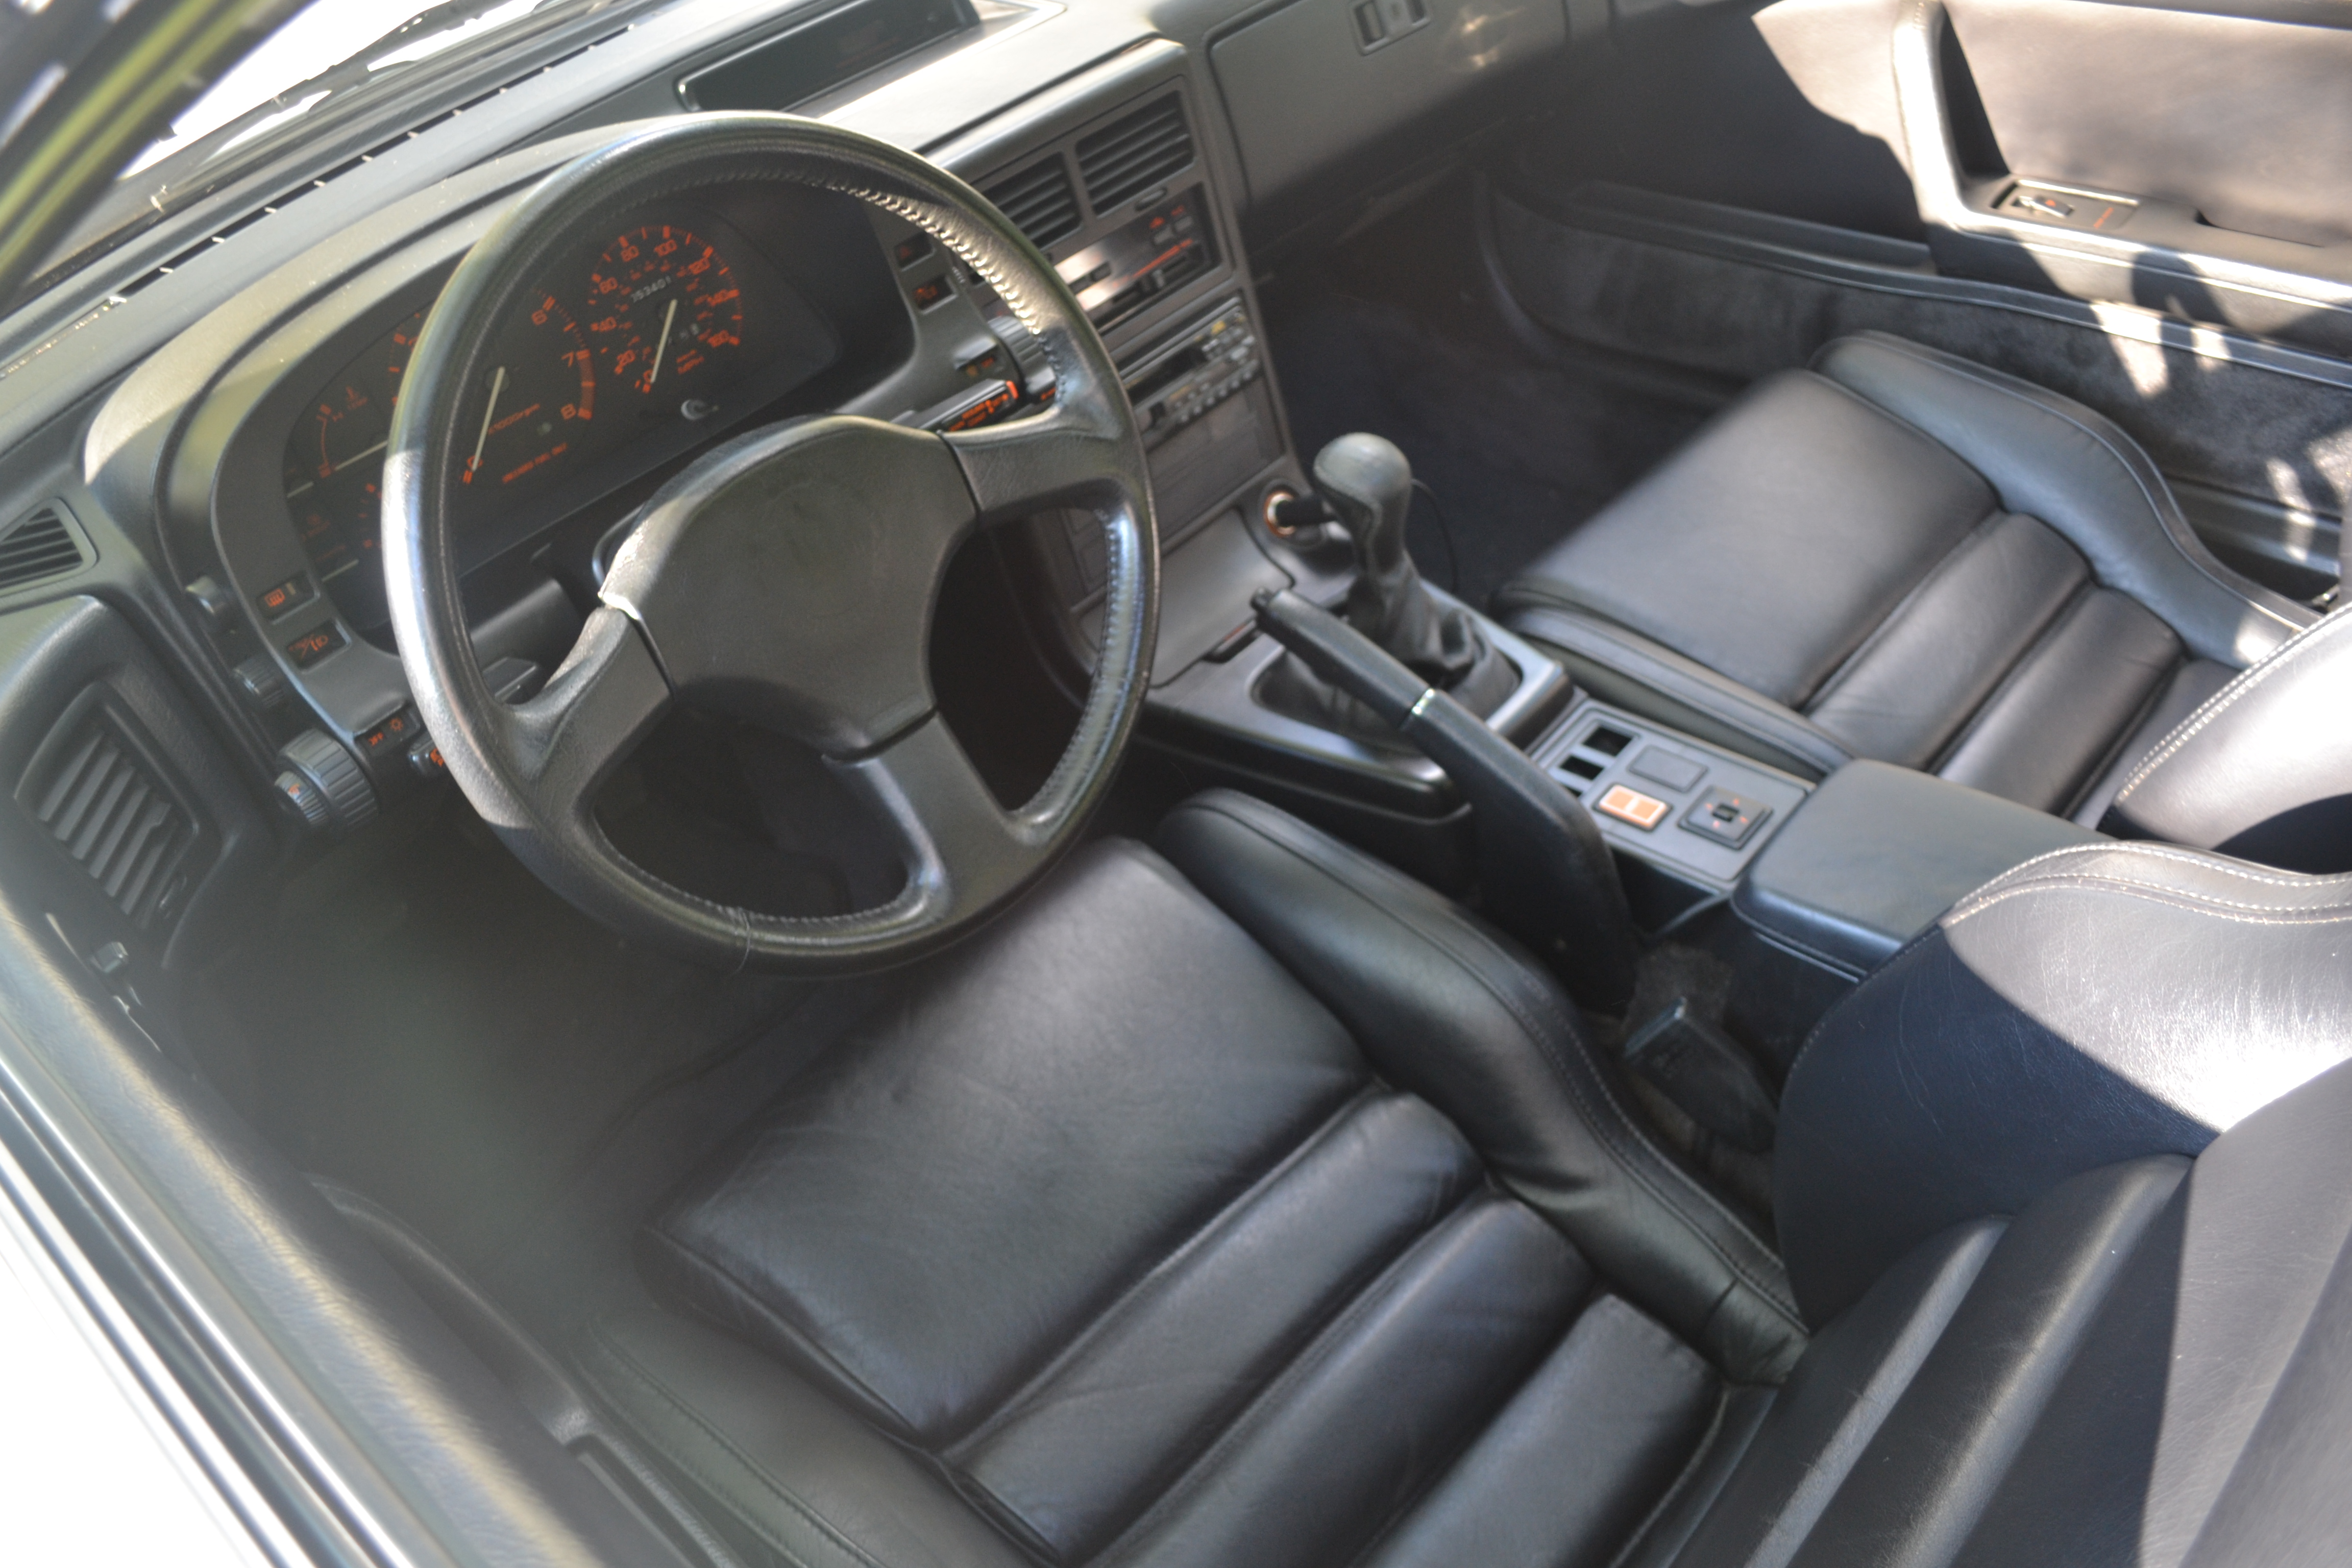
Here is what I'll be altering.

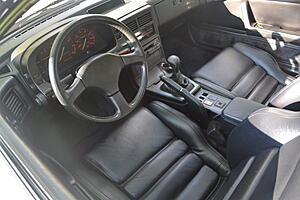
1988 10th AE, 53K miles.
I've had this car for seven years, and it has been great. Very tight, smooth, and easy to drive. It's a time capsule. The only modifications are Eibach springs, K&N filter, and a 90's Clarion 6-disc changer.
I've always had plans for a turbo build, and now is the time.
Goals:
-About 300 tractable WHP
-Exploit the great factory parts, engineering, and validation when possible
-Keep things mostly stock looking and feeling
-Don't mess up a 10th AE
On to the build...
A turbo FC, of course.

Here is what I'll be altering.
1988 10th AE, 53K miles.
I've had this car for seven years, and it has been great. Very tight, smooth, and easy to drive. It's a time capsule. The only modifications are Eibach springs, K&N filter, and a 90's Clarion 6-disc changer.
I've always had plans for a turbo build, and now is the time.
Goals:
-About 300 tractable WHP
-Exploit the great factory parts, engineering, and validation when possible
-Keep things mostly stock looking and feeling
-Don't mess up a 10th AE
On to the build...
Thread Starter
RX-7 Old Timer
Joined: Jul 2004
Posts: 321
Likes: 10
From: Ann Arbor, MI
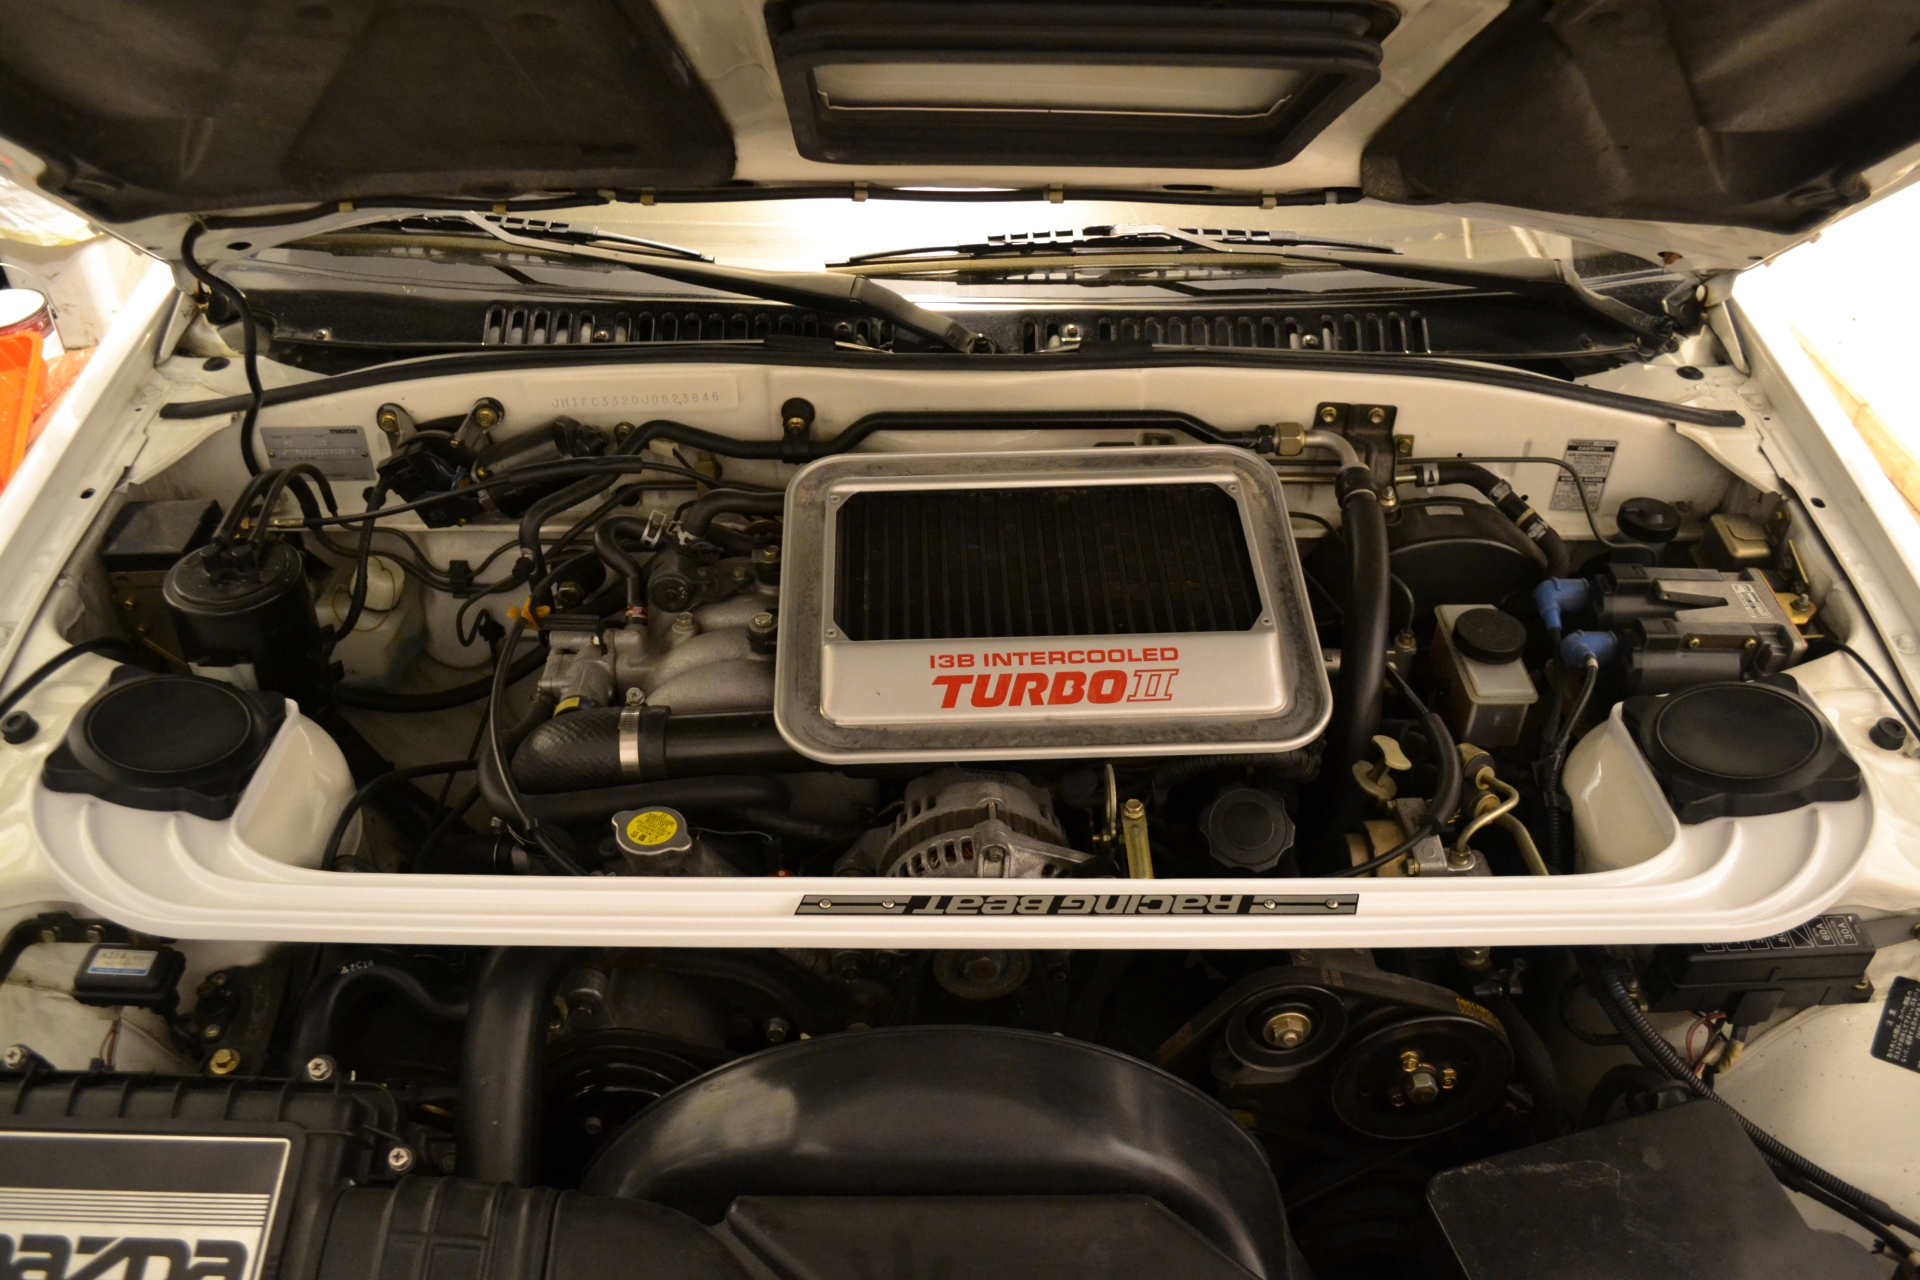
First thing "done" is the strut brace. This part took about two years to find, and it had three coats of paint on it, and a peeling plaque. Now it's back from the powdercoater, plus new hardware, and a refinished plaque. Time for a test fit.
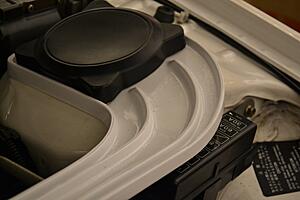
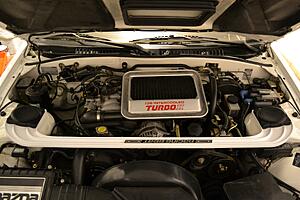
Unfortunately, it makes the hood difficult to close. Might require some trimming of the hood insulation.

Unfortunately, it makes the hood difficult to close. Might require some trimming of the hood insulation.


Trending Topics


Thread Starter
RX-7 Old Timer
Joined: Jul 2004
Posts: 321
Likes: 10
From: Ann Arbor, MI
Joined: Aug 2002
Posts: 2,614
Likes: 31
From: Freeland, MI
wow, I was just being a dink when I said that too LOL, talk about luck. Gonna be a mobile party supplier?
that would be one BITCHIN 10thAE, be a hit at all the car shows
or are you gonna put the keg in the back for the winter for extra traction weight?
Than mount this to the roof of the car so when you get in it you can have yourself a beverage?

Thread Starter
RX-7 Old Timer
Joined: Jul 2004
Posts: 321
Likes: 10
From: Ann Arbor, MI
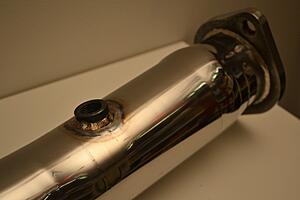
Some pipes need finishing, of course.
Thanks for the bung, Weldcraft! Because last time I welded, it looked like a pile of BBs. This is in a 3" Corksport downpipe.
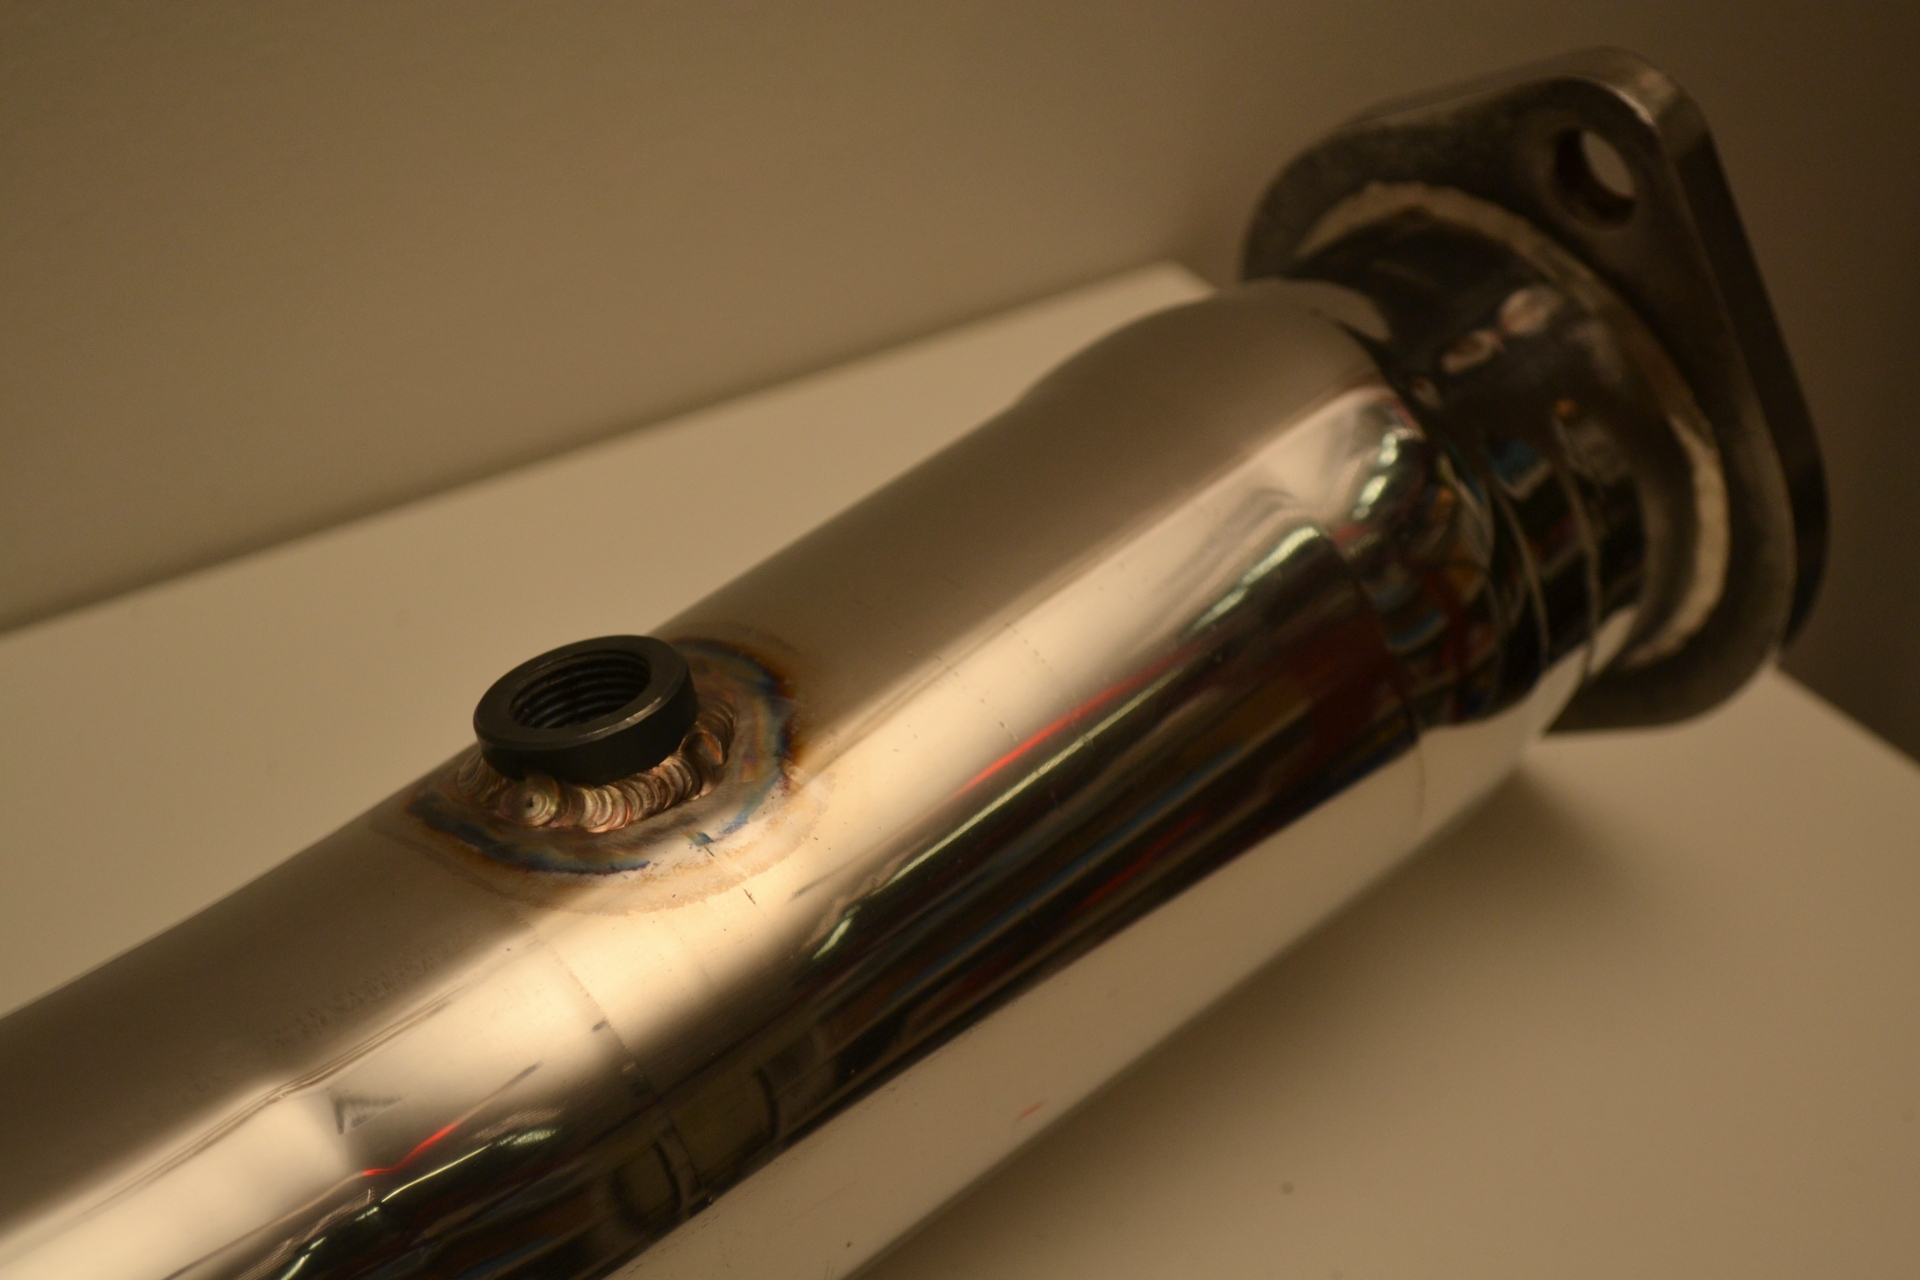
Next pipe.
It took a while, but I found a Corksport TID to build on. It needs an atomizing jet, but those bungs are way too deep for the jet. I've never run a tap before, but I think it worked. I stopped halfway through to practice on some plastic. It bites alright. With some sealant, it should be good.

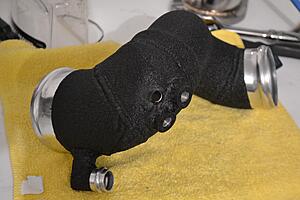
The polished look will give away my stealthy build, so it's time for some VHT Wrinkle paint. 3 thick coats, heat gun, and magic forms. Now it fits the engine bay.
Thanks for the bung, Weldcraft! Because last time I welded, it looked like a pile of BBs. This is in a 3" Corksport downpipe.
Next pipe.
It took a while, but I found a Corksport TID to build on. It needs an atomizing jet, but those bungs are way too deep for the jet. I've never run a tap before, but I think it worked. I stopped halfway through to practice on some plastic. It bites alright. With some sealant, it should be good.

The polished look will give away my stealthy build, so it's time for some VHT Wrinkle paint. 3 thick coats, heat gun, and magic forms. Now it fits the engine bay.

Last edited by ColinShark; Nov 18, 2015 at 08:28 PM.
Thread Starter
RX-7 Old Timer
Joined: Jul 2004
Posts: 321
Likes: 10
From: Ann Arbor, MI
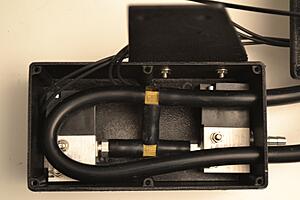
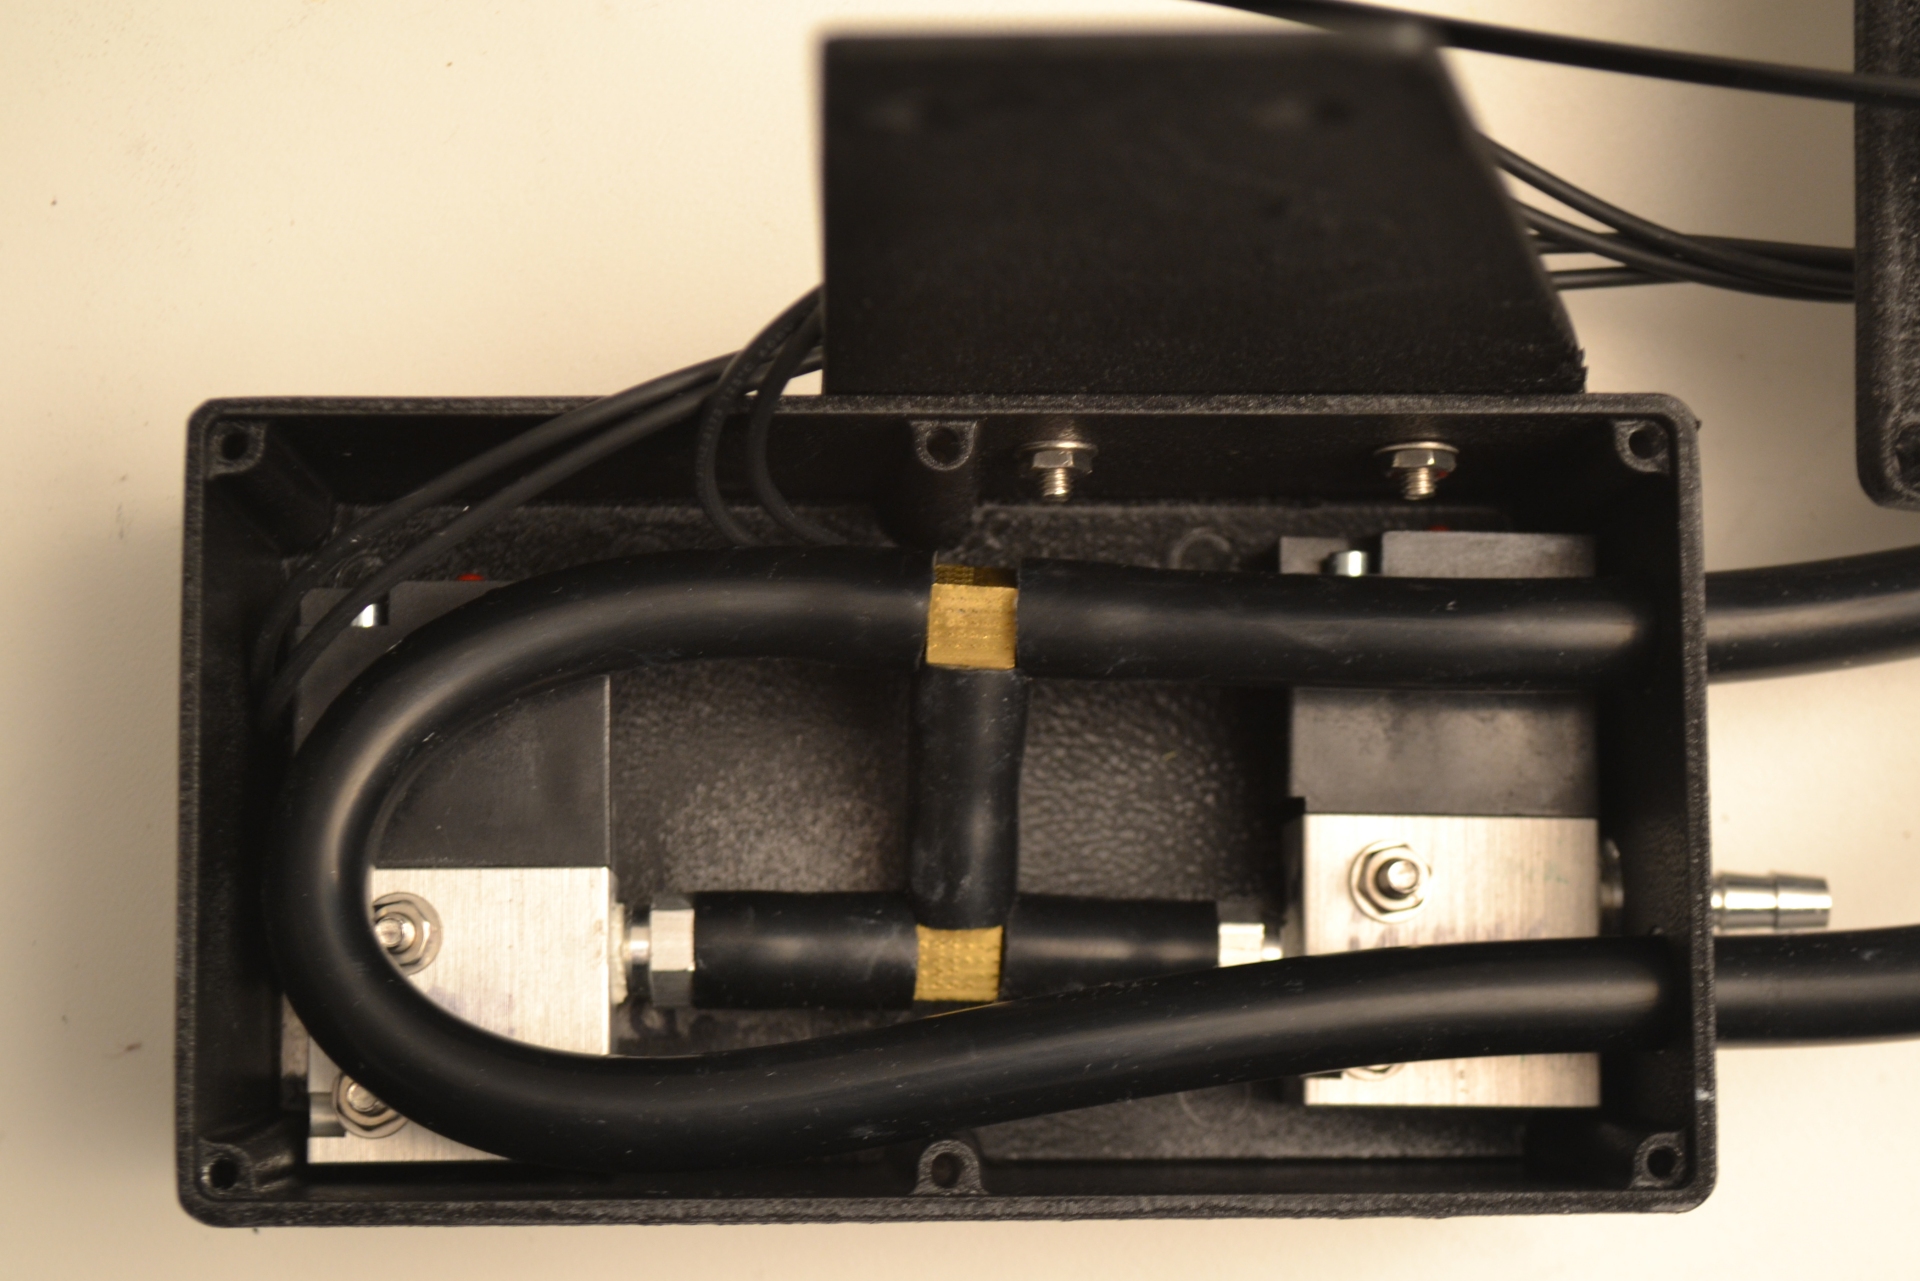
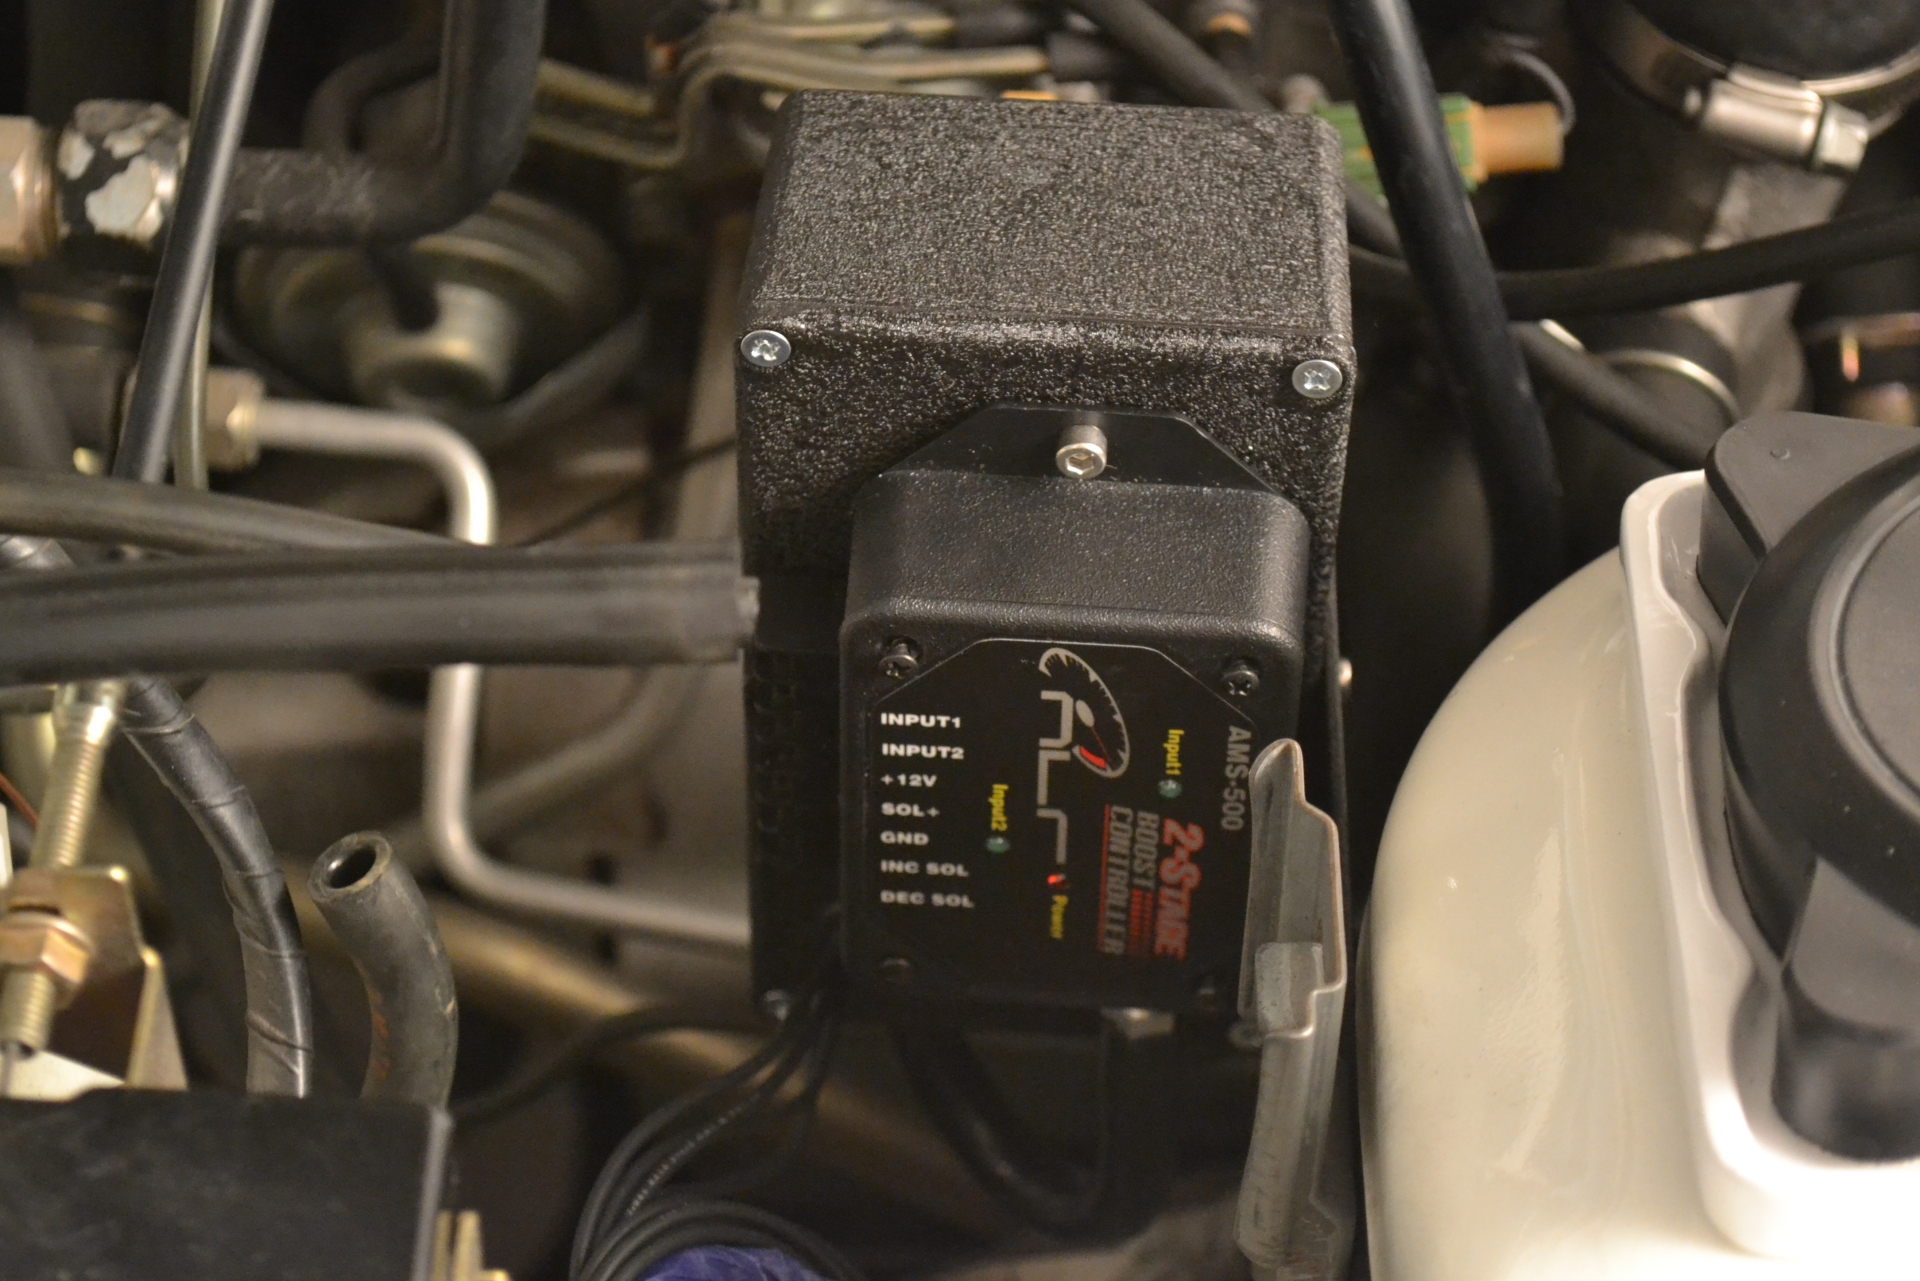
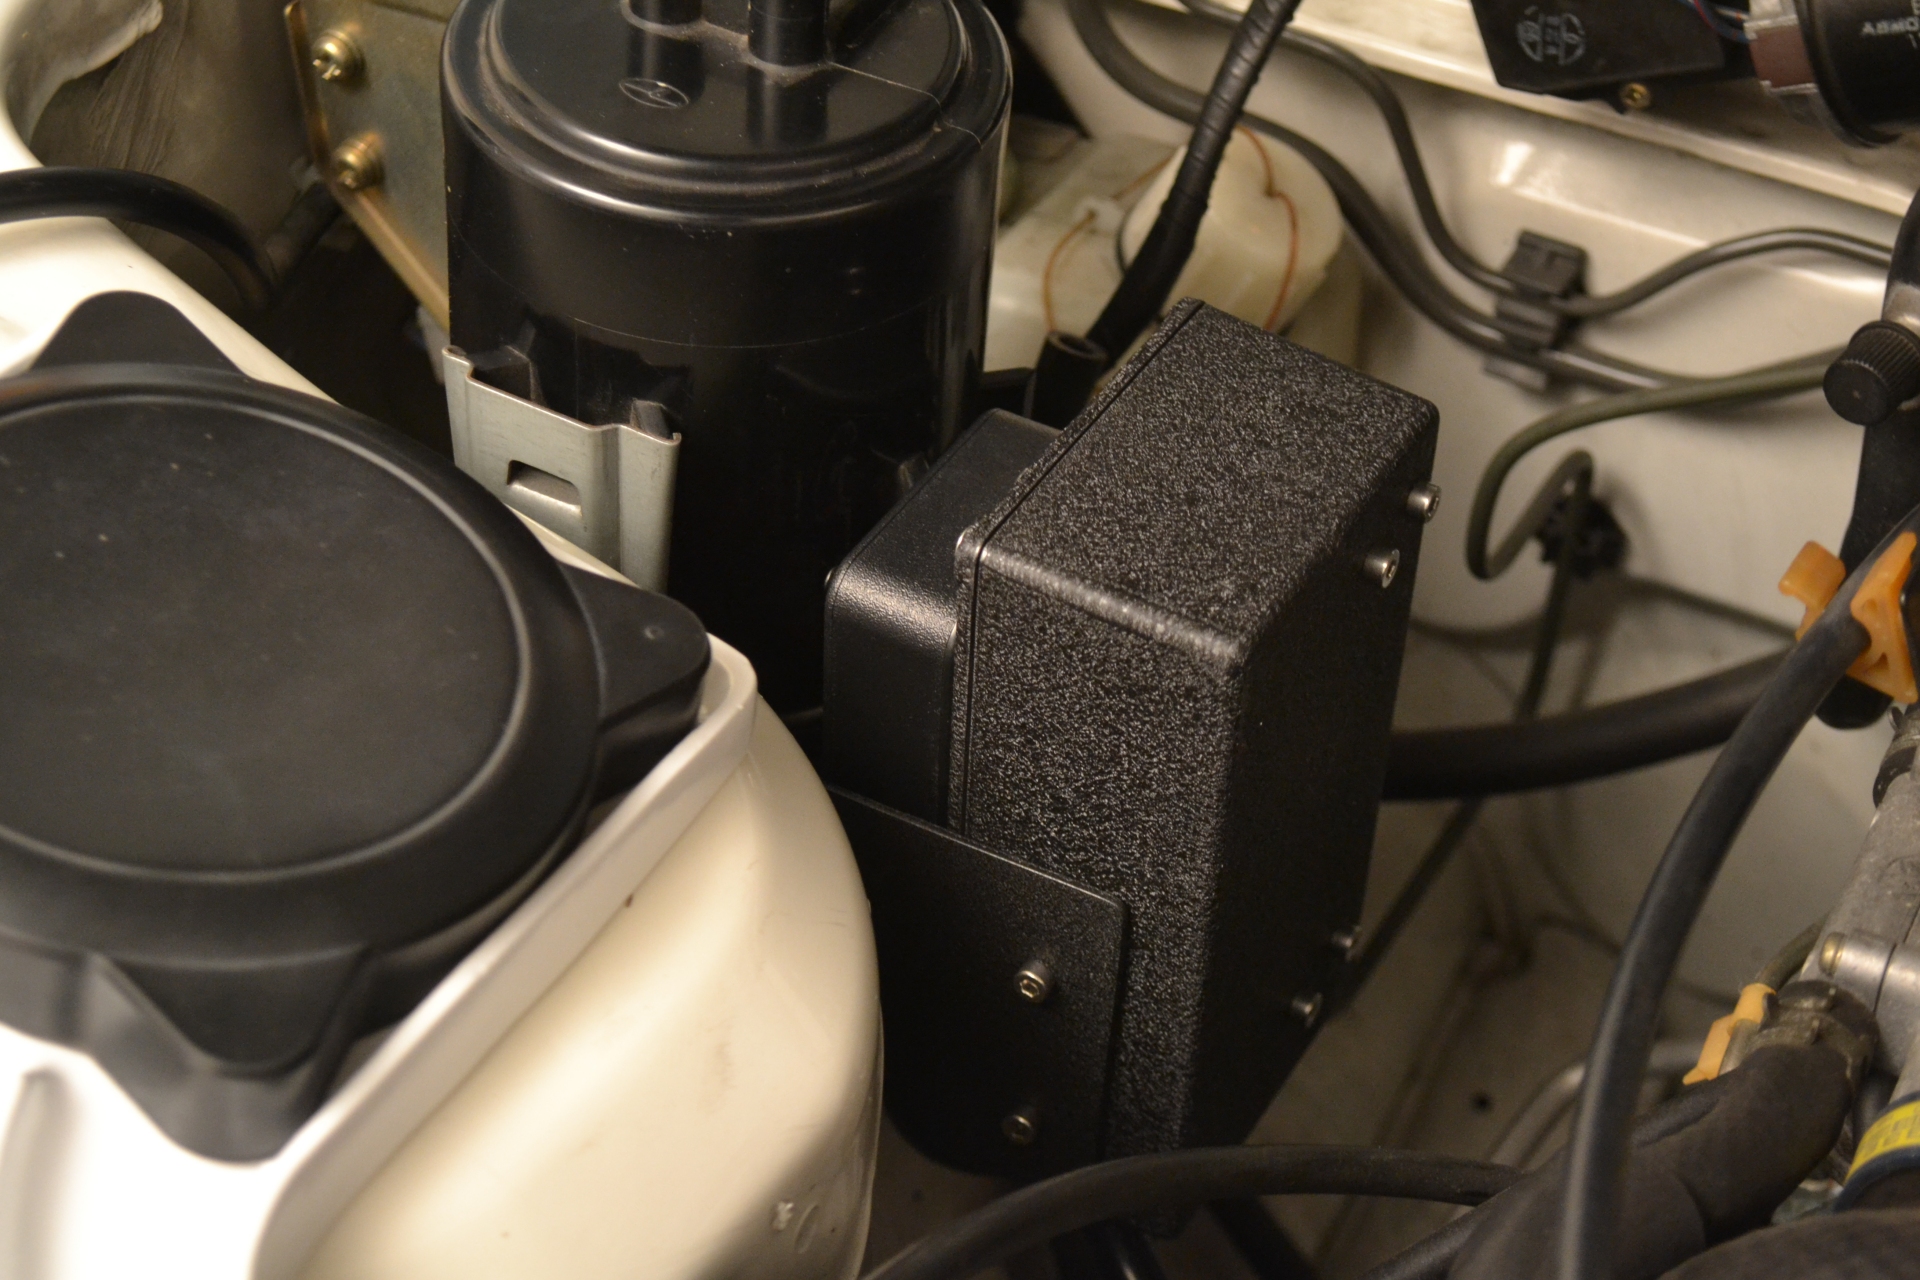
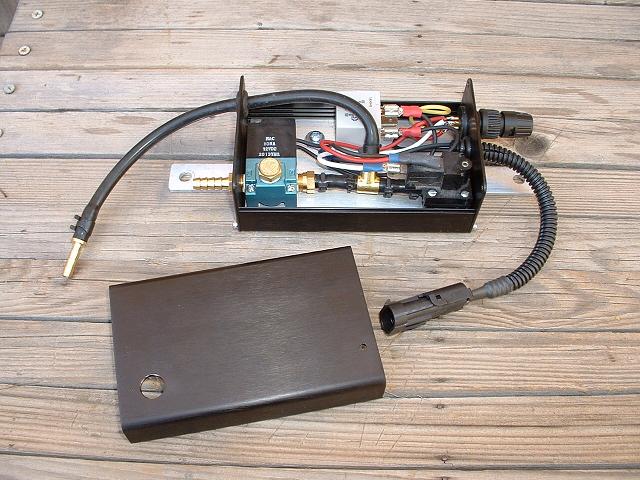
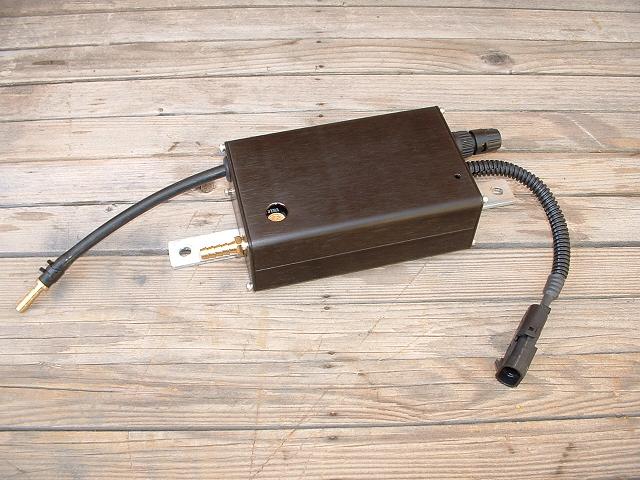
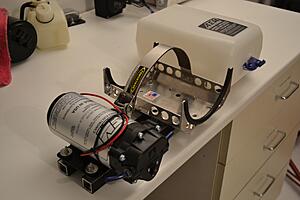
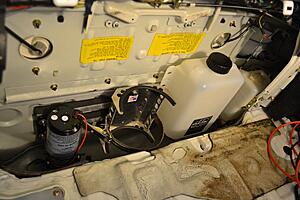
I made this home for the boost controller to keep things tidy and protect it from heat and dust. The AMS-500 has two actuators and is capable of controlling from a CO2 source.
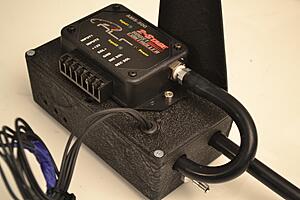
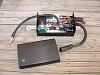
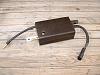
I wanted the controller inside, but this was what I could find on Amazon, in aluminum ( )
Also fabricated a small bracket to hold it where the charcoal canister goes. I was going to ditch the canister, but I realized a small bracket could hold it in a good place.

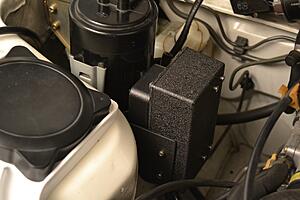
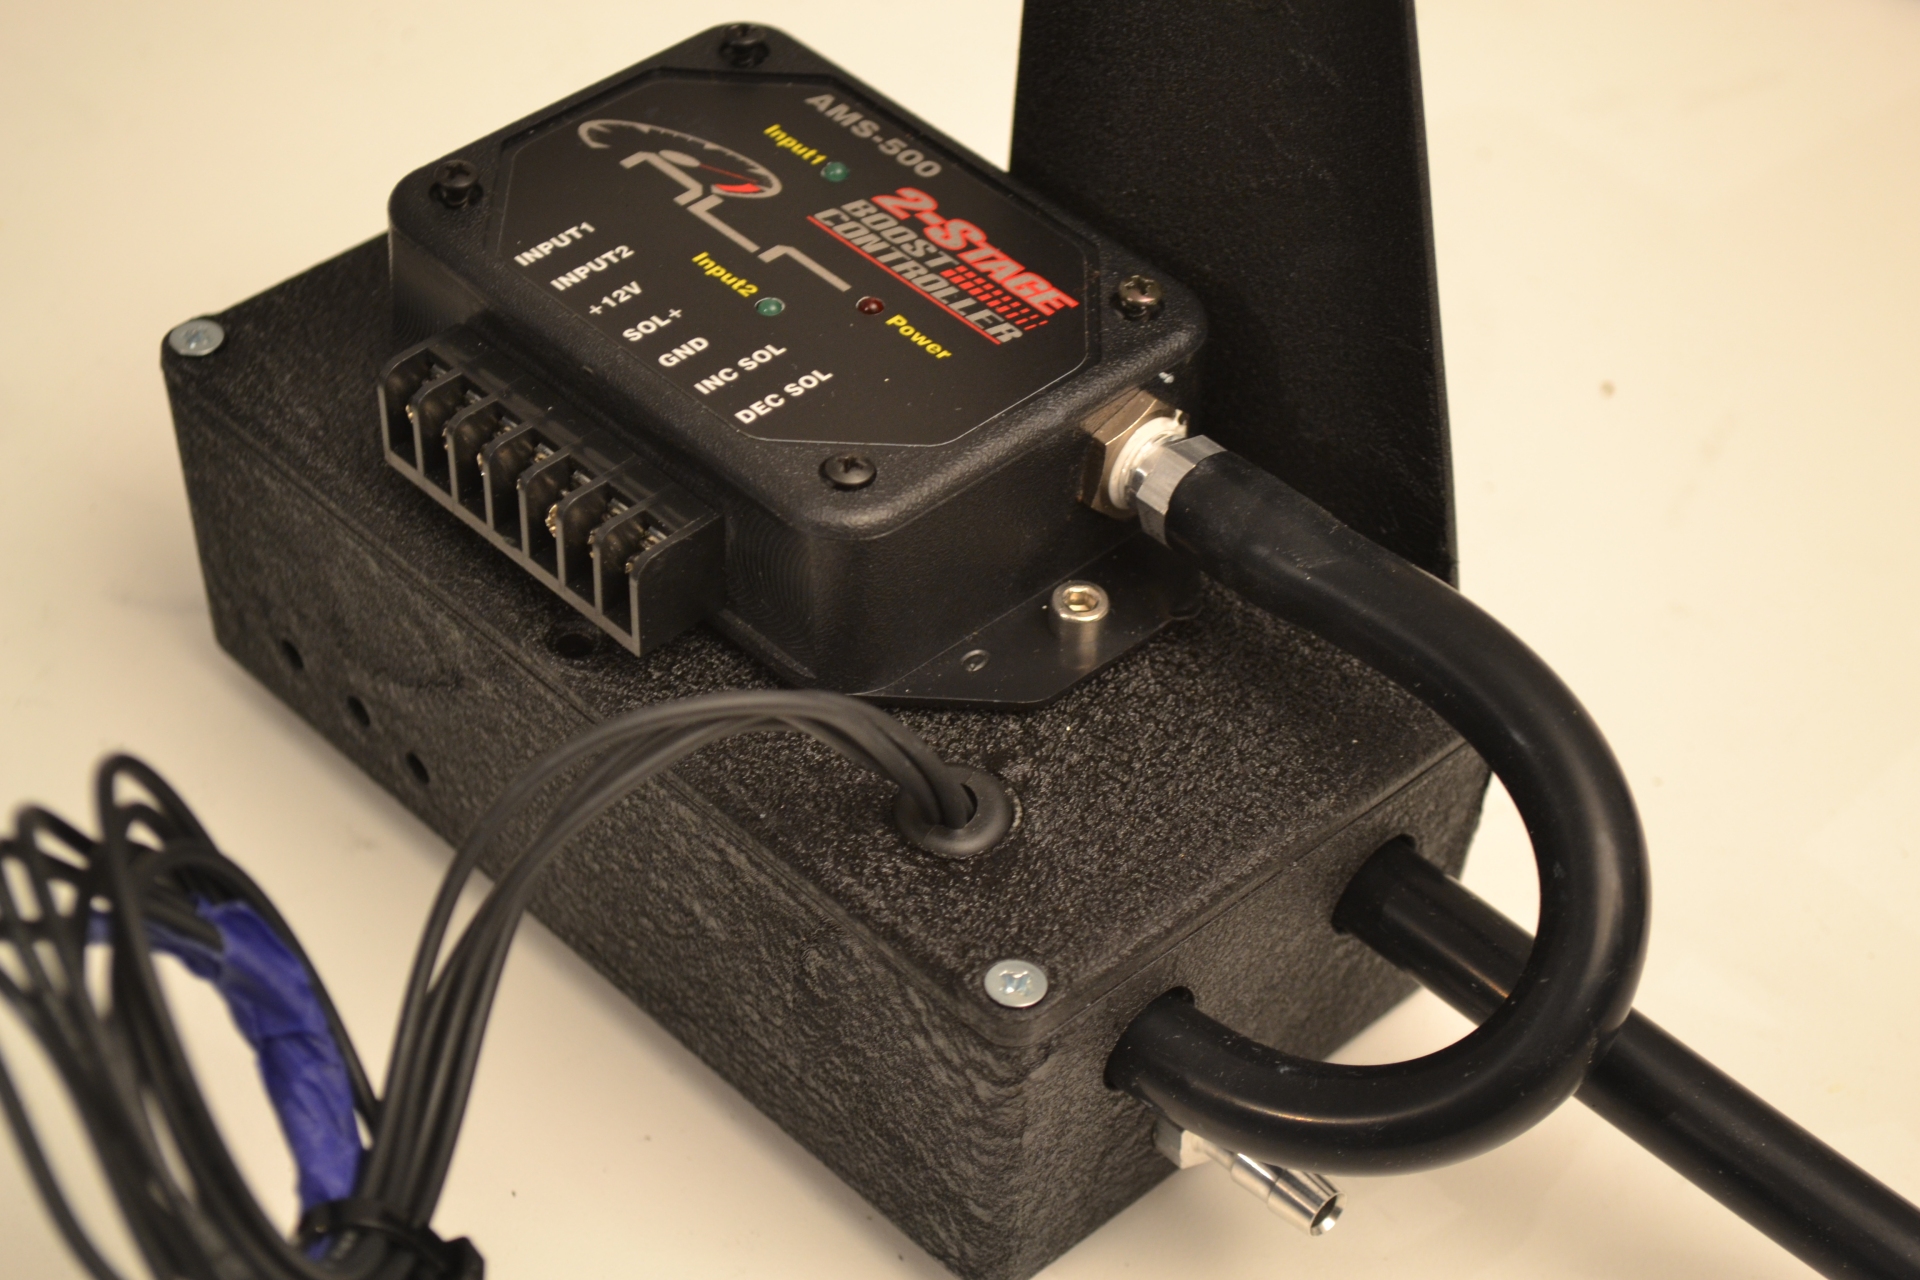
I wanted the controller inside, but this was what I could find on Amazon, in aluminum ( )
Also fabricated a small bracket to hold it where the charcoal canister goes. I was going to ditch the canister, but I realized a small bracket could hold it in a good place.
About the wrinkle paint...
I find the heatgun useful for places where part thickness changes but even better is preheating the part (in the oven at LO) and then, if possible, continue to heat as the paint is applied. For example, when I painted a valve cover I had a halogen work light pointing up into it (bastard's like a mini-sun) as I painted the top.
You can use much less paint as the heat accelerates the wrinkling and the thinner coats wrinkle more evenly and don't clog up details as much.
I like wrinkle paint, good choice.


(Terraplane)
Joined: Apr 2005
Posts: 345
Likes: 13
From: Arizona desert, where the terraplanes roam.
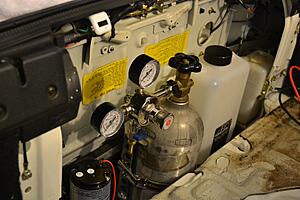
Boost Black Box
Yep,
Boost control solenoid.
WI Pressure switch.
Boost solenoid cutout relay. Triggered by AEM WI injection gauge.
Panel mount connector.
Water tank level warning to AEM WI gauge.
Boost control solenoid.
WI Pressure switch.
Boost solenoid cutout relay. Triggered by AEM WI injection gauge.
Panel mount connector.
Water tank level warning to AEM WI gauge.
Thread Starter
RX-7 Old Timer
Joined: Jul 2004
Posts: 321
Likes: 10
From: Ann Arbor, MI
Yep,
Boost control solenoid.
WI Pressure switch.
Boost solenoid cutout relay. Triggered by AEM WI injection gauge.
Panel mount connector.
Water tank level warning to AEM WI gauge.
Attachment 569522
Attachment 569523
Boost control solenoid.
WI Pressure switch.
Boost solenoid cutout relay. Triggered by AEM WI injection gauge.
Panel mount connector.
Water tank level warning to AEM WI gauge.
Attachment 569522
Attachment 569523
Thread Starter
RX-7 Old Timer
Joined: Jul 2004
Posts: 321
Likes: 10
From: Ann Arbor, MI
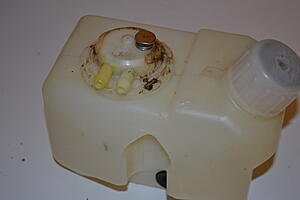
Ehhh... So I had this secret plan of using the Cold Start Assist tank for mechanical methanol injection. The main trick is making it hold boost, so I endeavored to seal it up.
Using a soldering iron, and some HPDE sheet for filler, it was easy to fill a couple screw holes. Everything was going decent, until I tried to fill the 2mm gap around the metering valve (top thingy) with the help of a torch and it ignited. It still leaks.
More on methanol later.
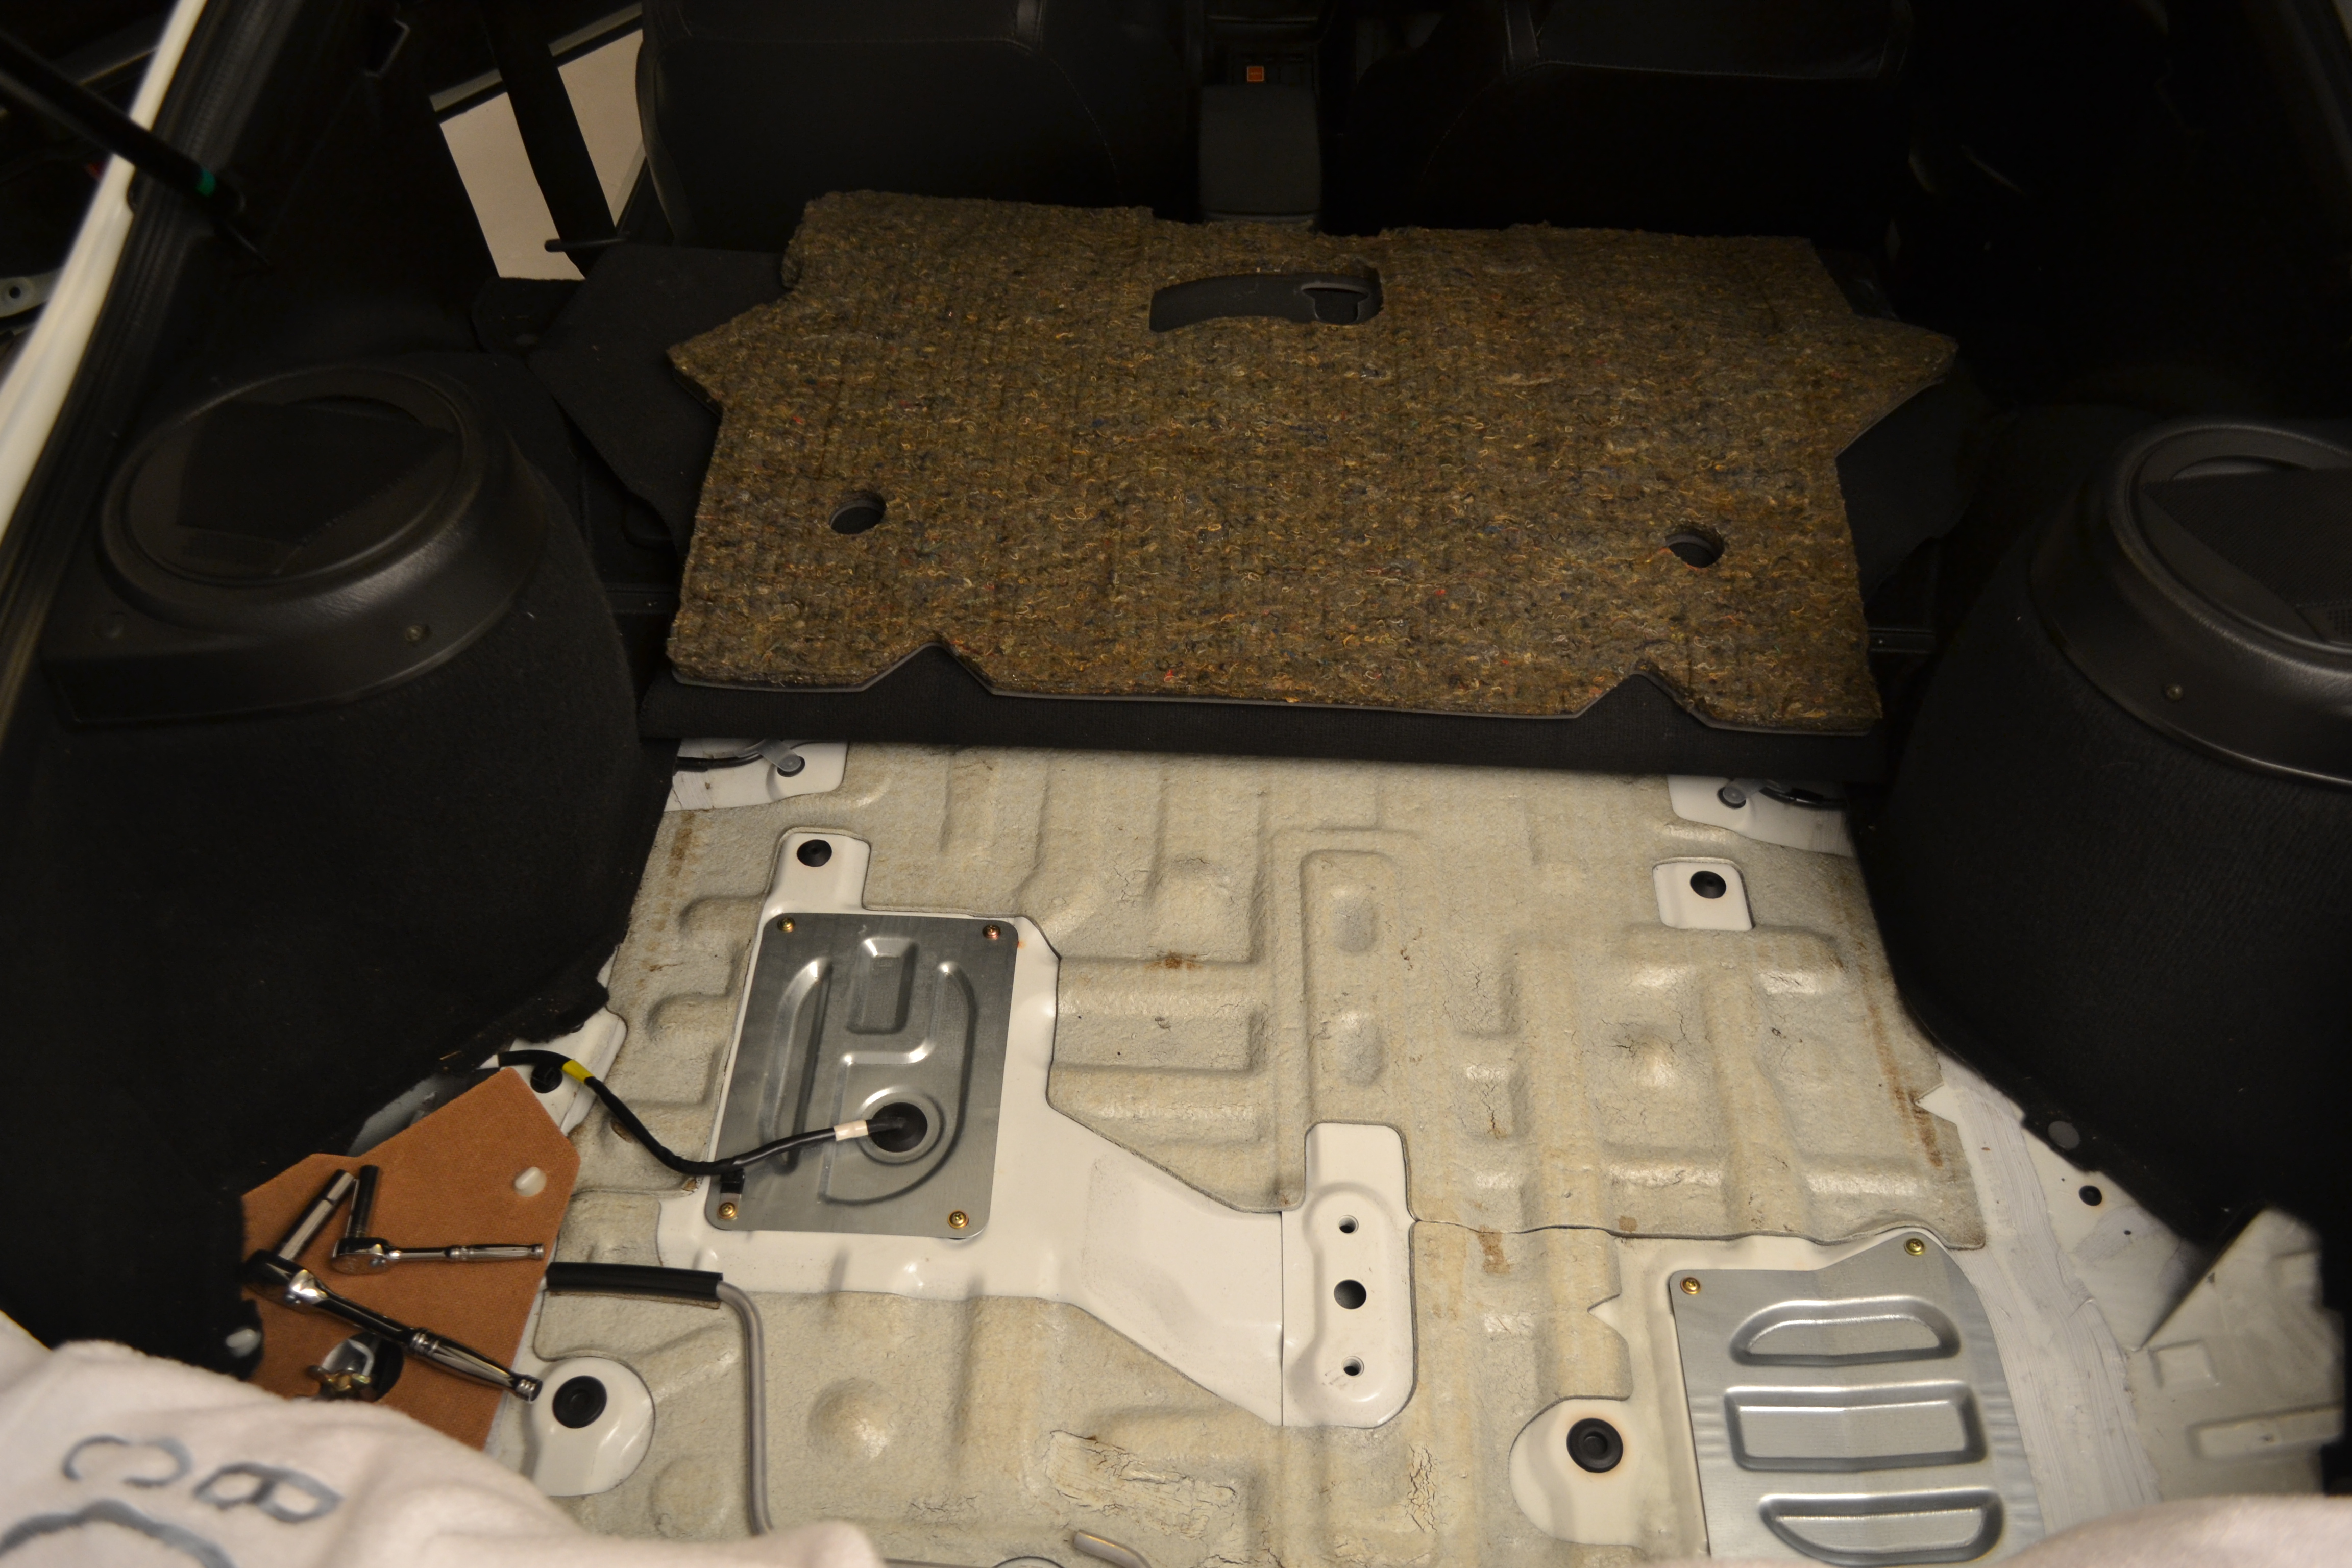
Hola, trunk.
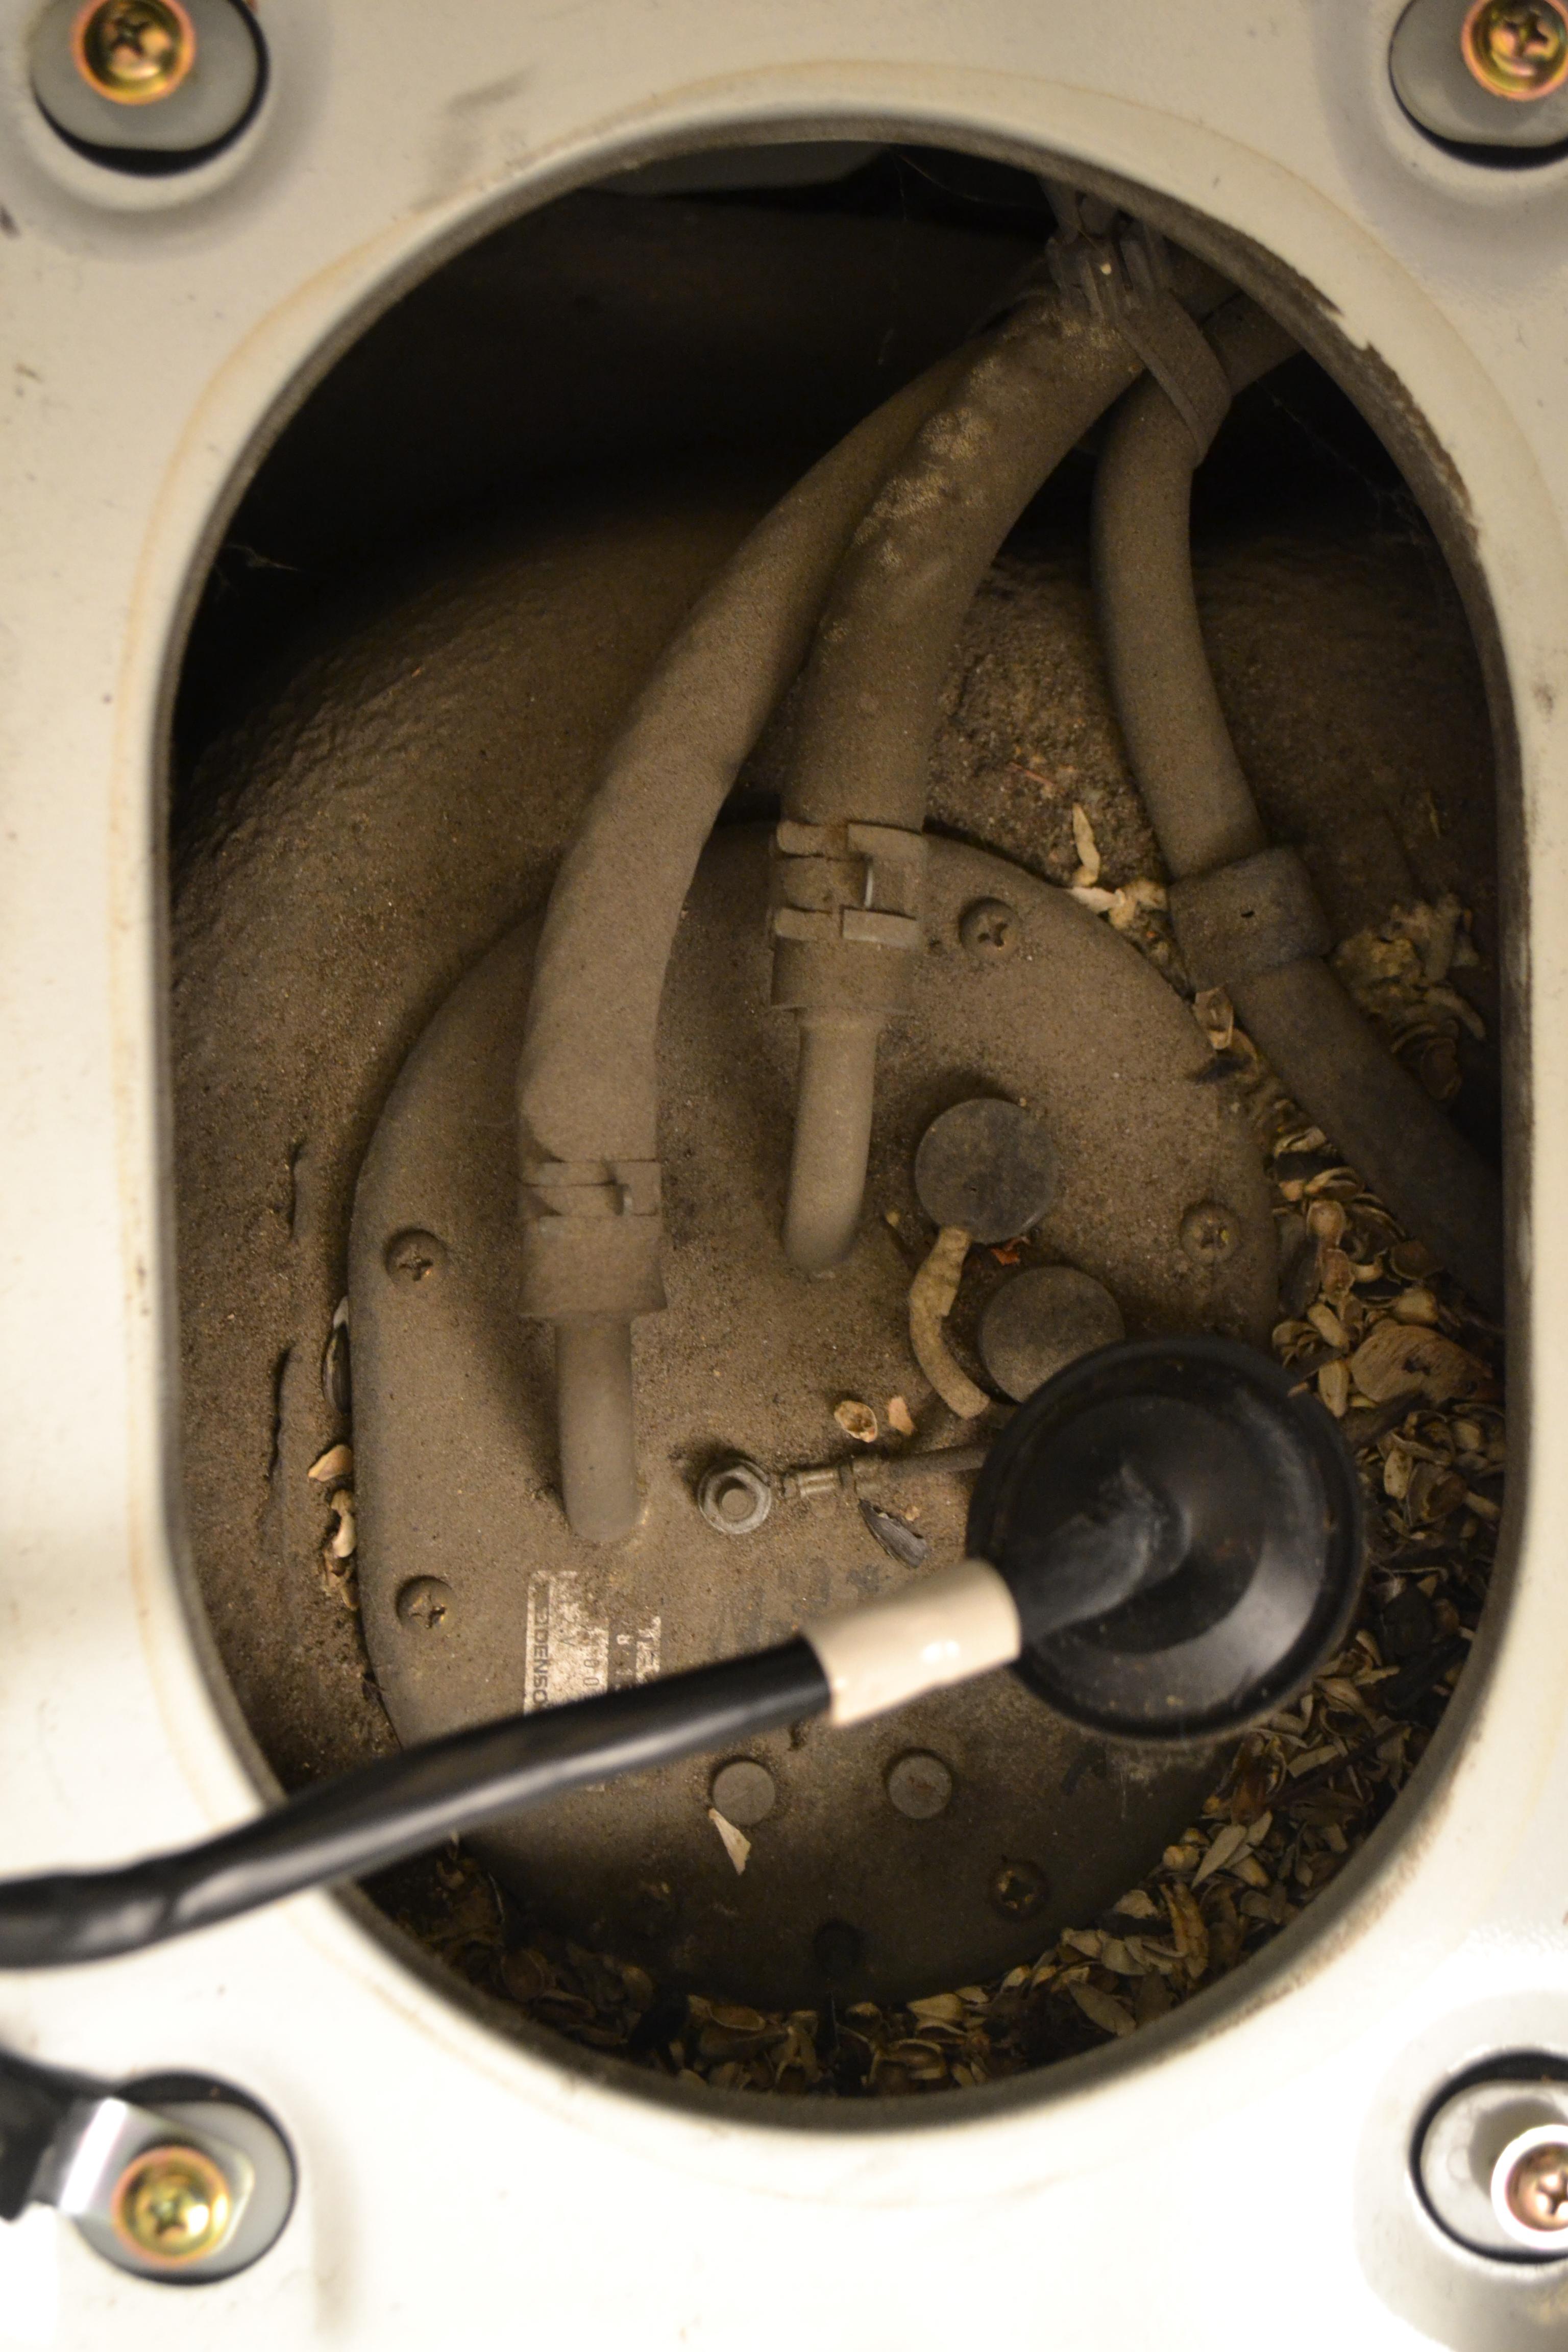
Why chipmunks

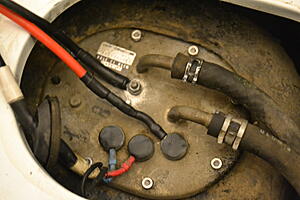
The tank was very clean and the stock pump looks great. Thankfully, the bulkhead screws only had a few inch pounds on them, and came out easily.
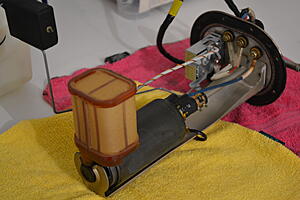
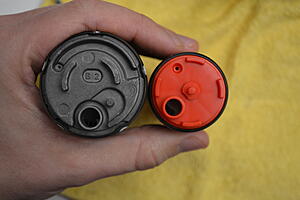
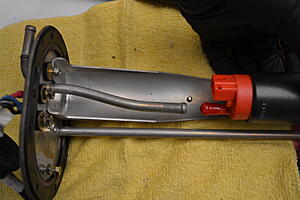
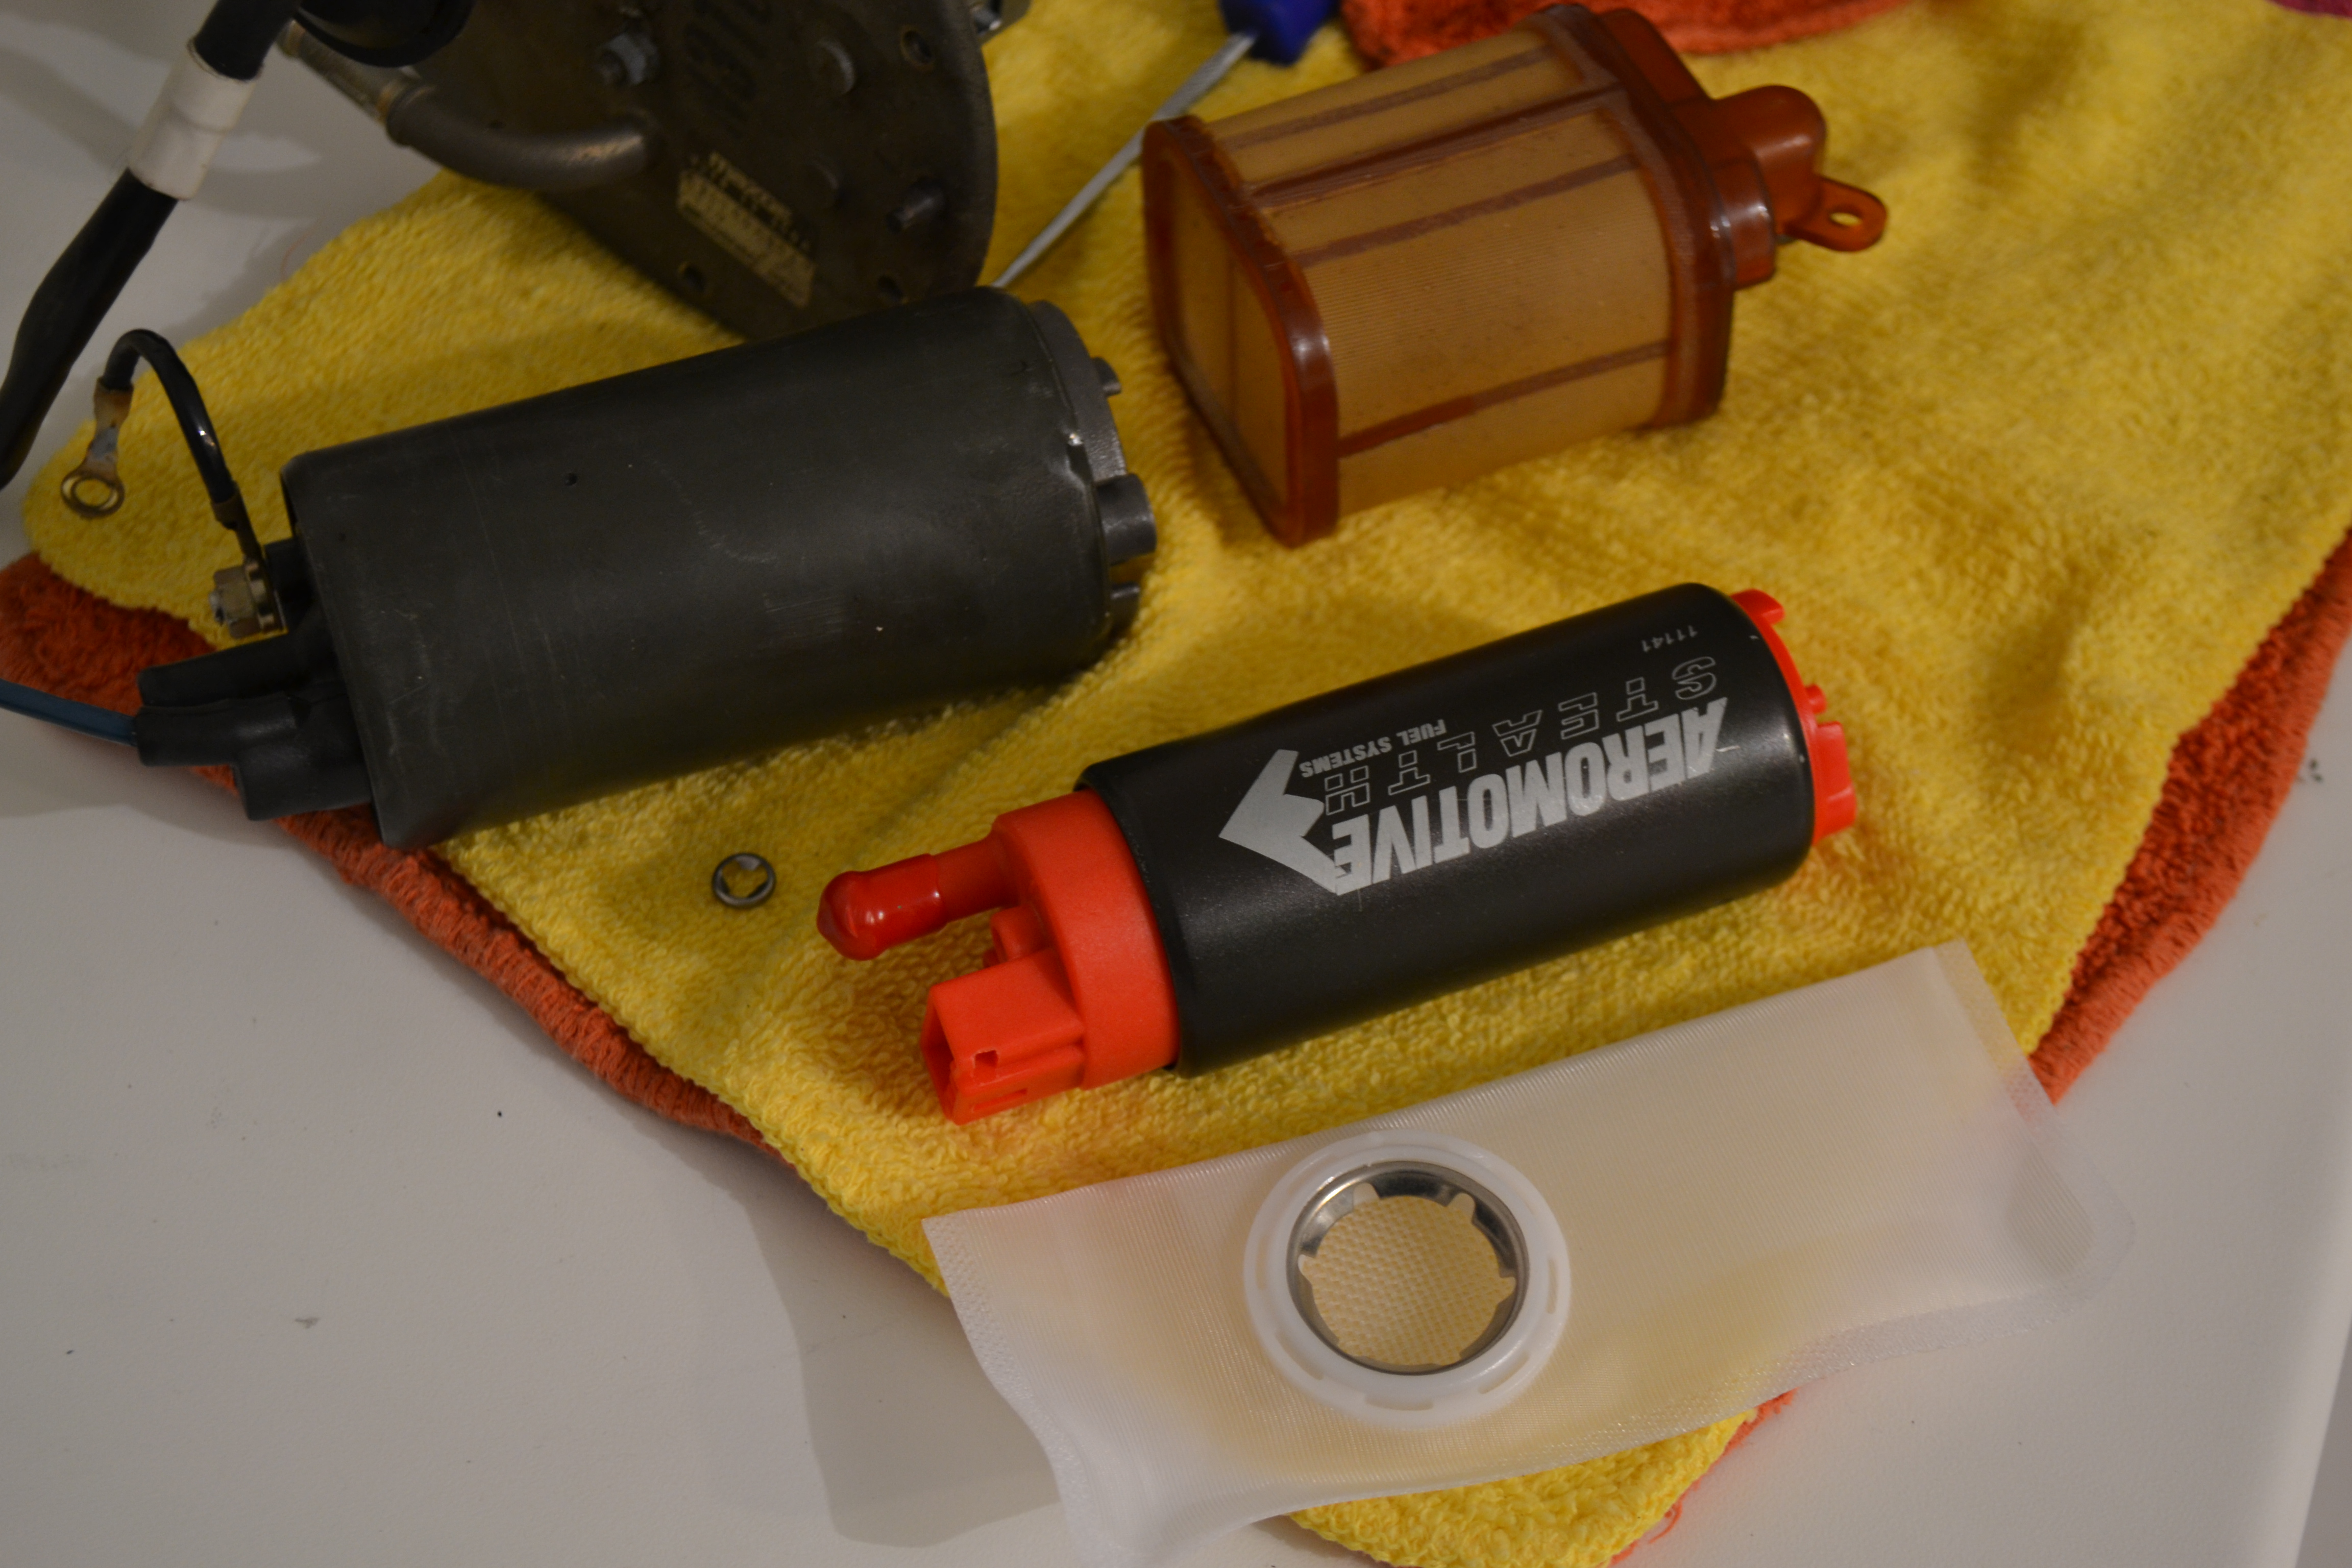
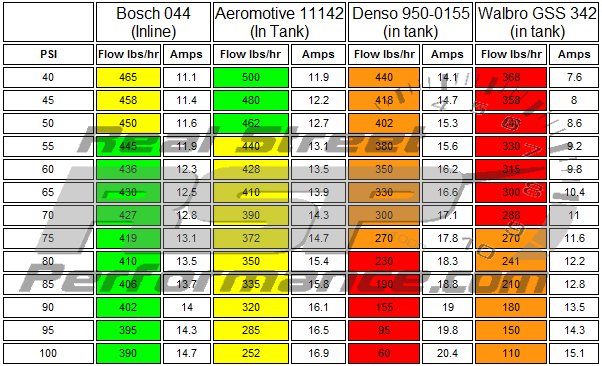
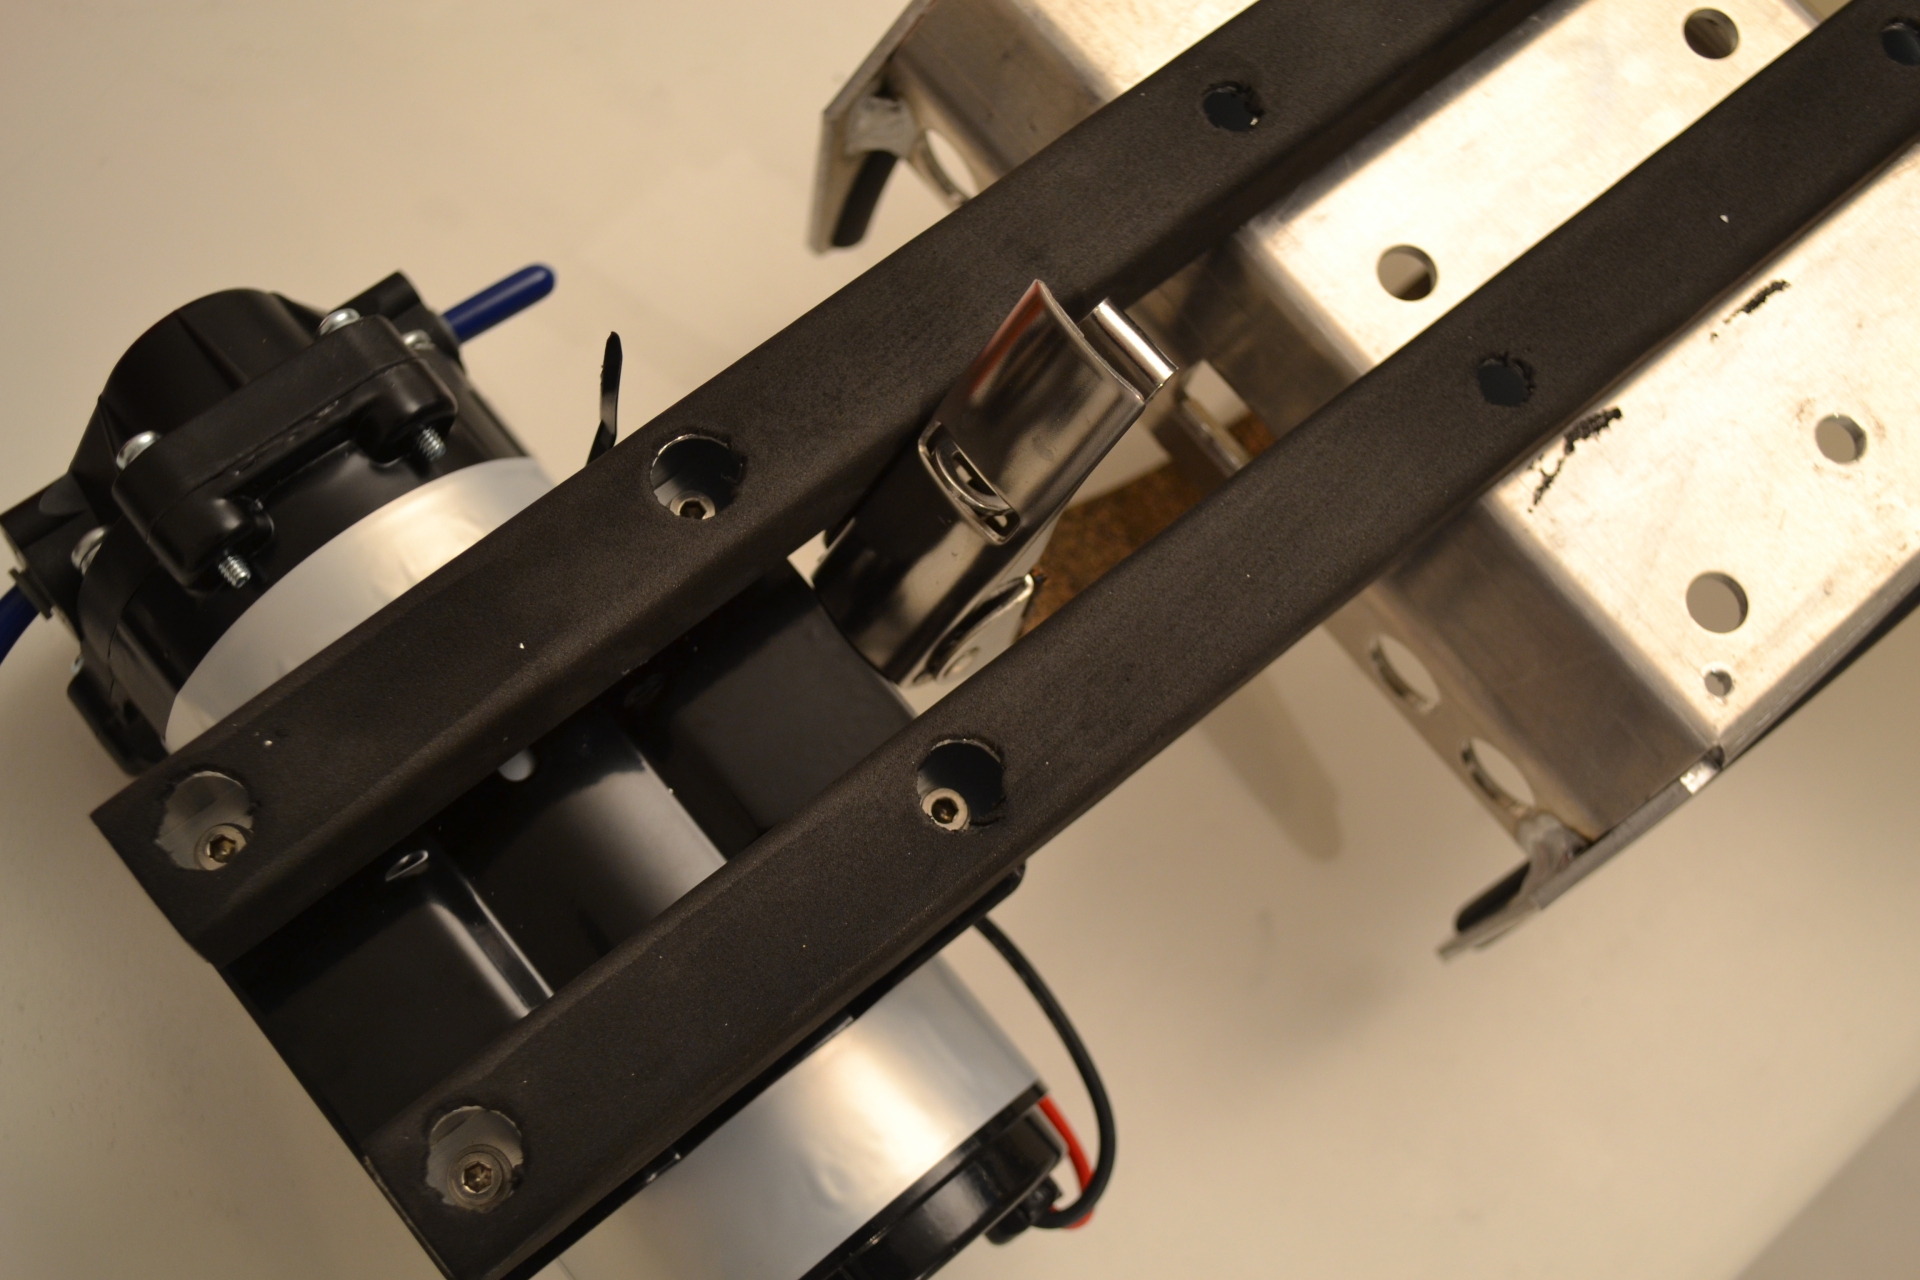
New Aeromotive 340 Stealth pump. For the price and performance, this seemed like a clear pick.


The body is smaller than stock, but it retains some of the stock-style interfaces.
I was able to re-use the stock filter box, which resists collapse, unlike any flat sock.

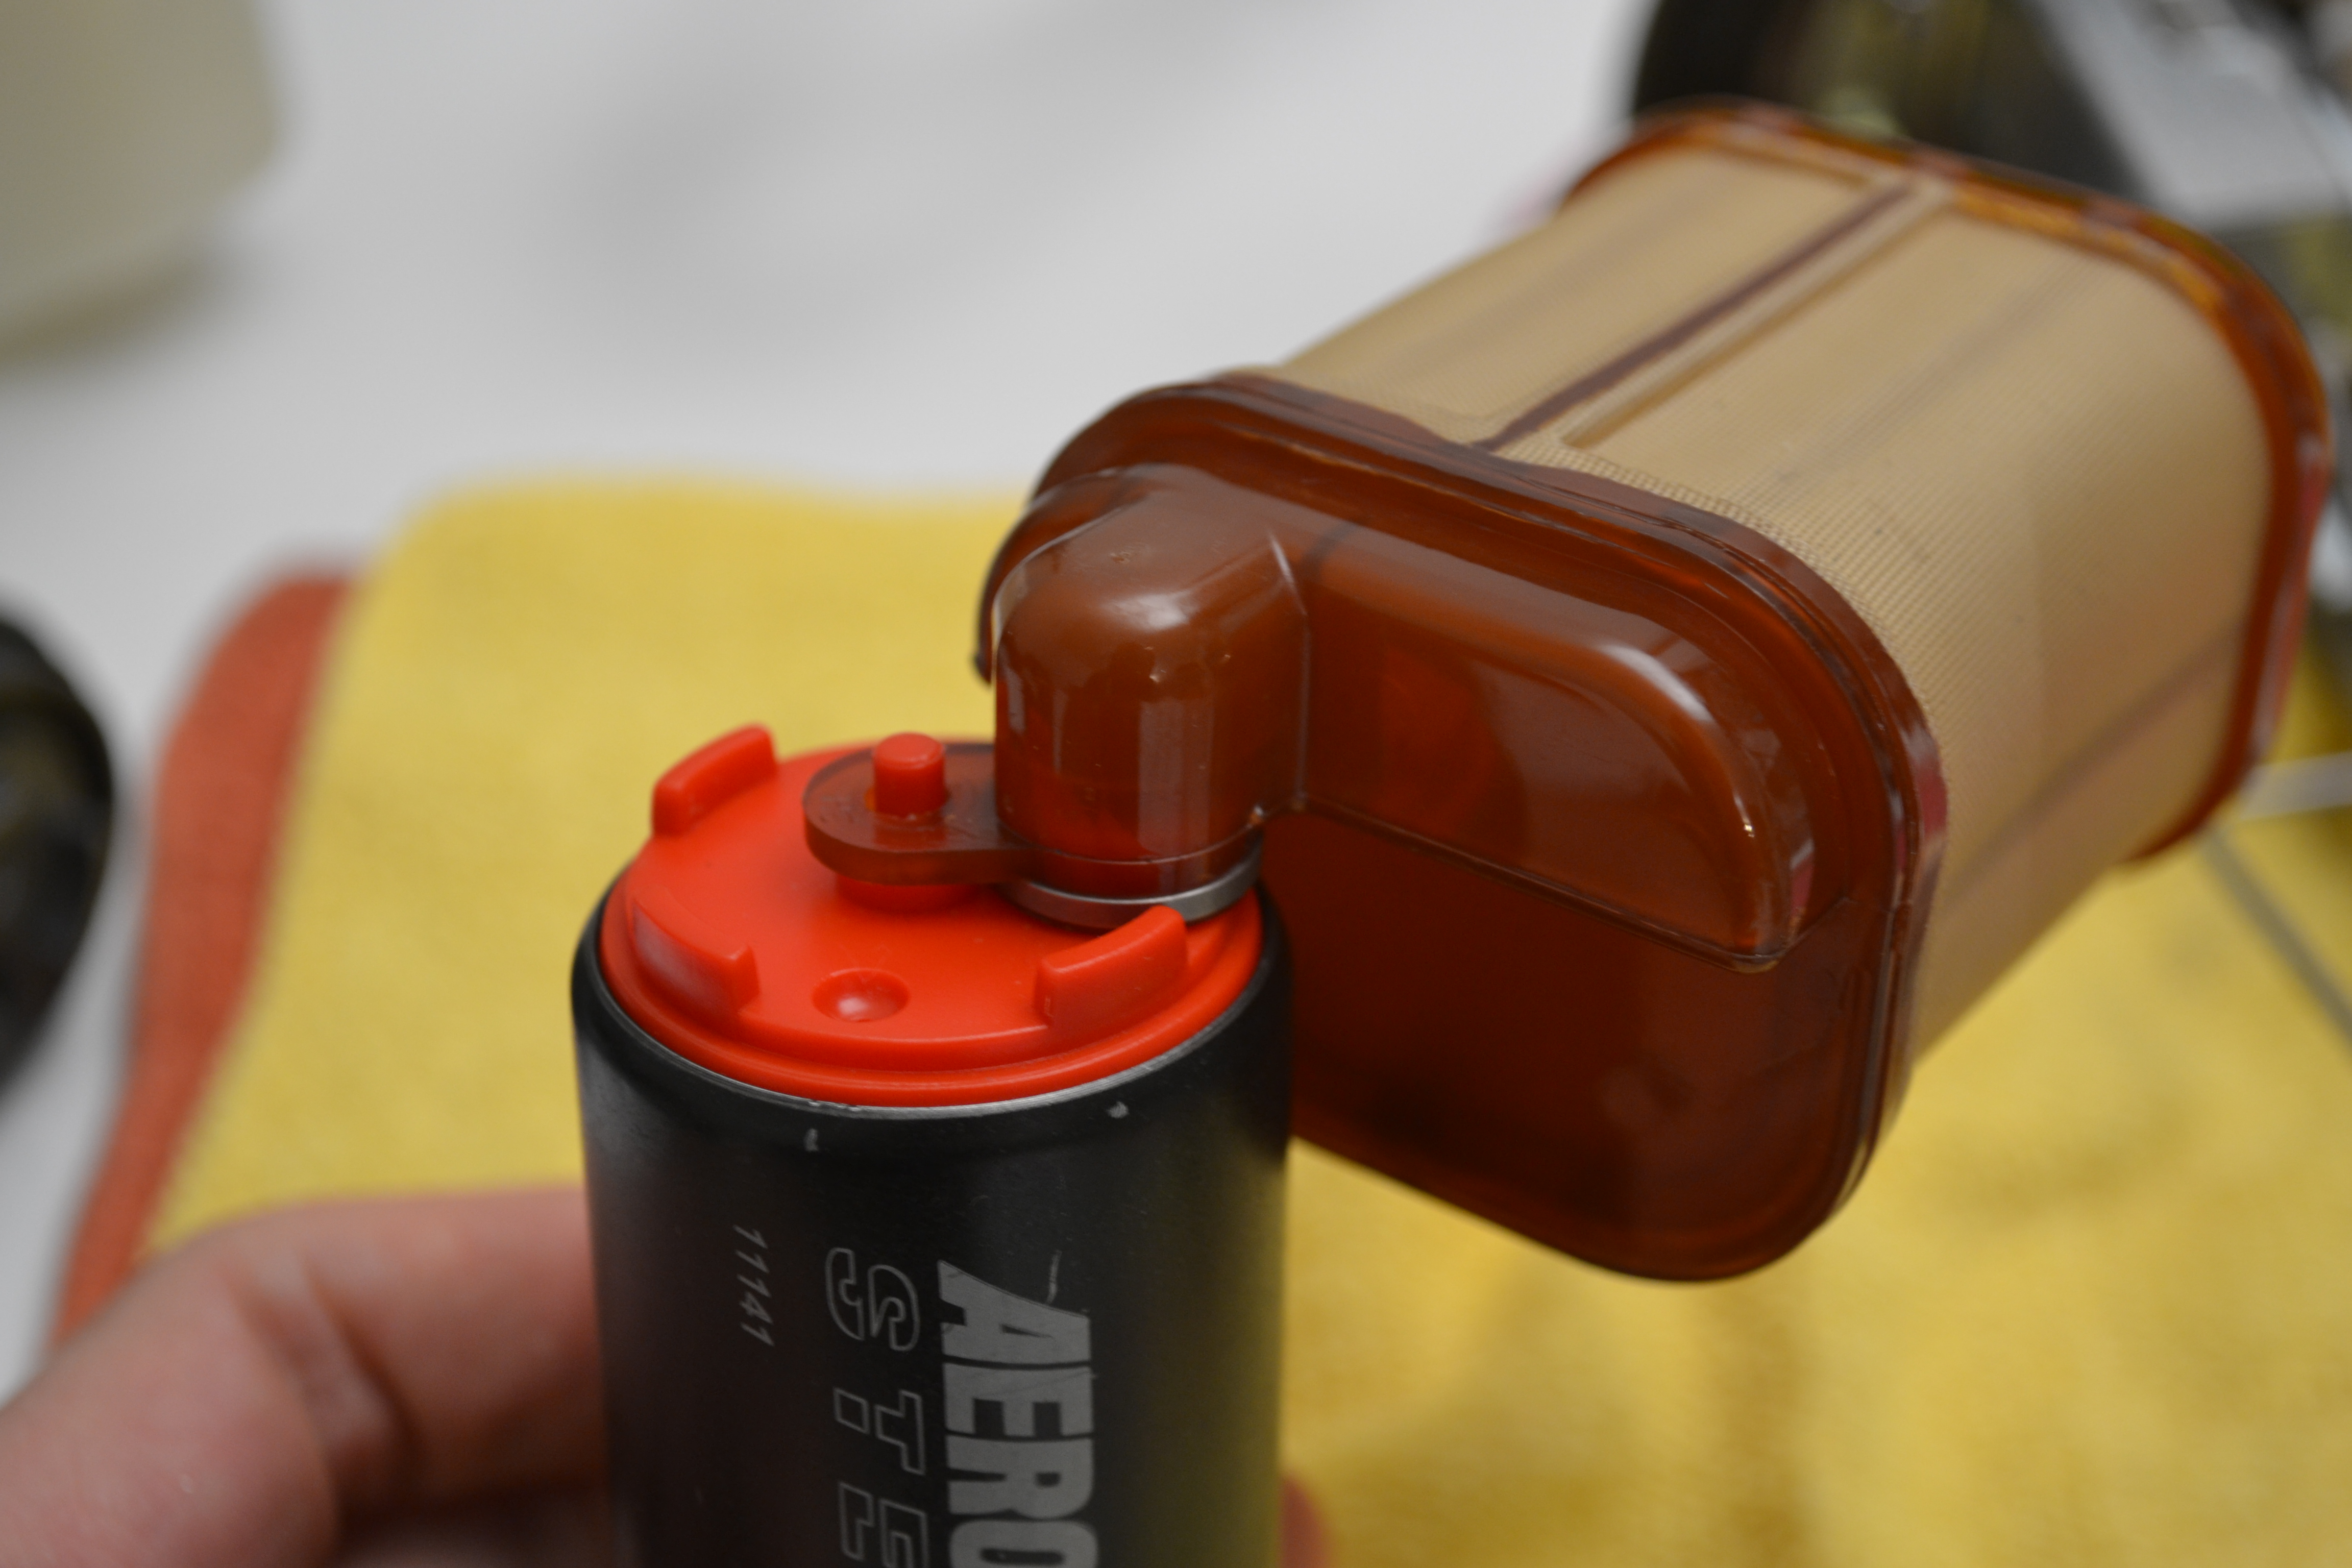
The base of the pump snugs into the rubber base of the assembly. That's good, but the main difficulty of fitment is the offset fuel hard line.
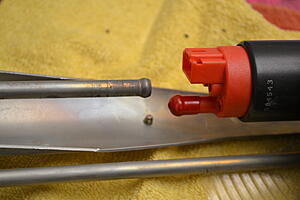
Nothing a pipe can't fix. I'm not averse to bending this car, when strictly necessary.
Using a soldering iron, and some HPDE sheet for filler, it was easy to fill a couple screw holes. Everything was going decent, until I tried to fill the 2mm gap around the metering valve (top thingy) with the help of a torch and it ignited. It still leaks.
More on methanol later.

Hola, trunk.
Why chipmunks
The tank was very clean and the stock pump looks great. Thankfully, the bulkhead screws only had a few inch pounds on them, and came out easily.

New Aeromotive 340 Stealth pump. For the price and performance, this seemed like a clear pick.
The body is smaller than stock, but it retains some of the stock-style interfaces.

I was able to re-use the stock filter box, which resists collapse, unlike any flat sock.
The base of the pump snugs into the rubber base of the assembly. That's good, but the main difficulty of fitment is the offset fuel hard line.

Nothing a pipe can't fix. I'm not averse to bending this car, when strictly necessary.

Thread Starter
RX-7 Old Timer
Joined: Jul 2004
Posts: 321
Likes: 10
From: Ann Arbor, MI
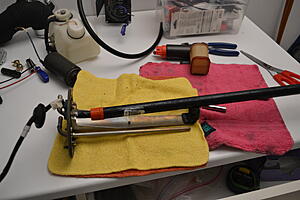
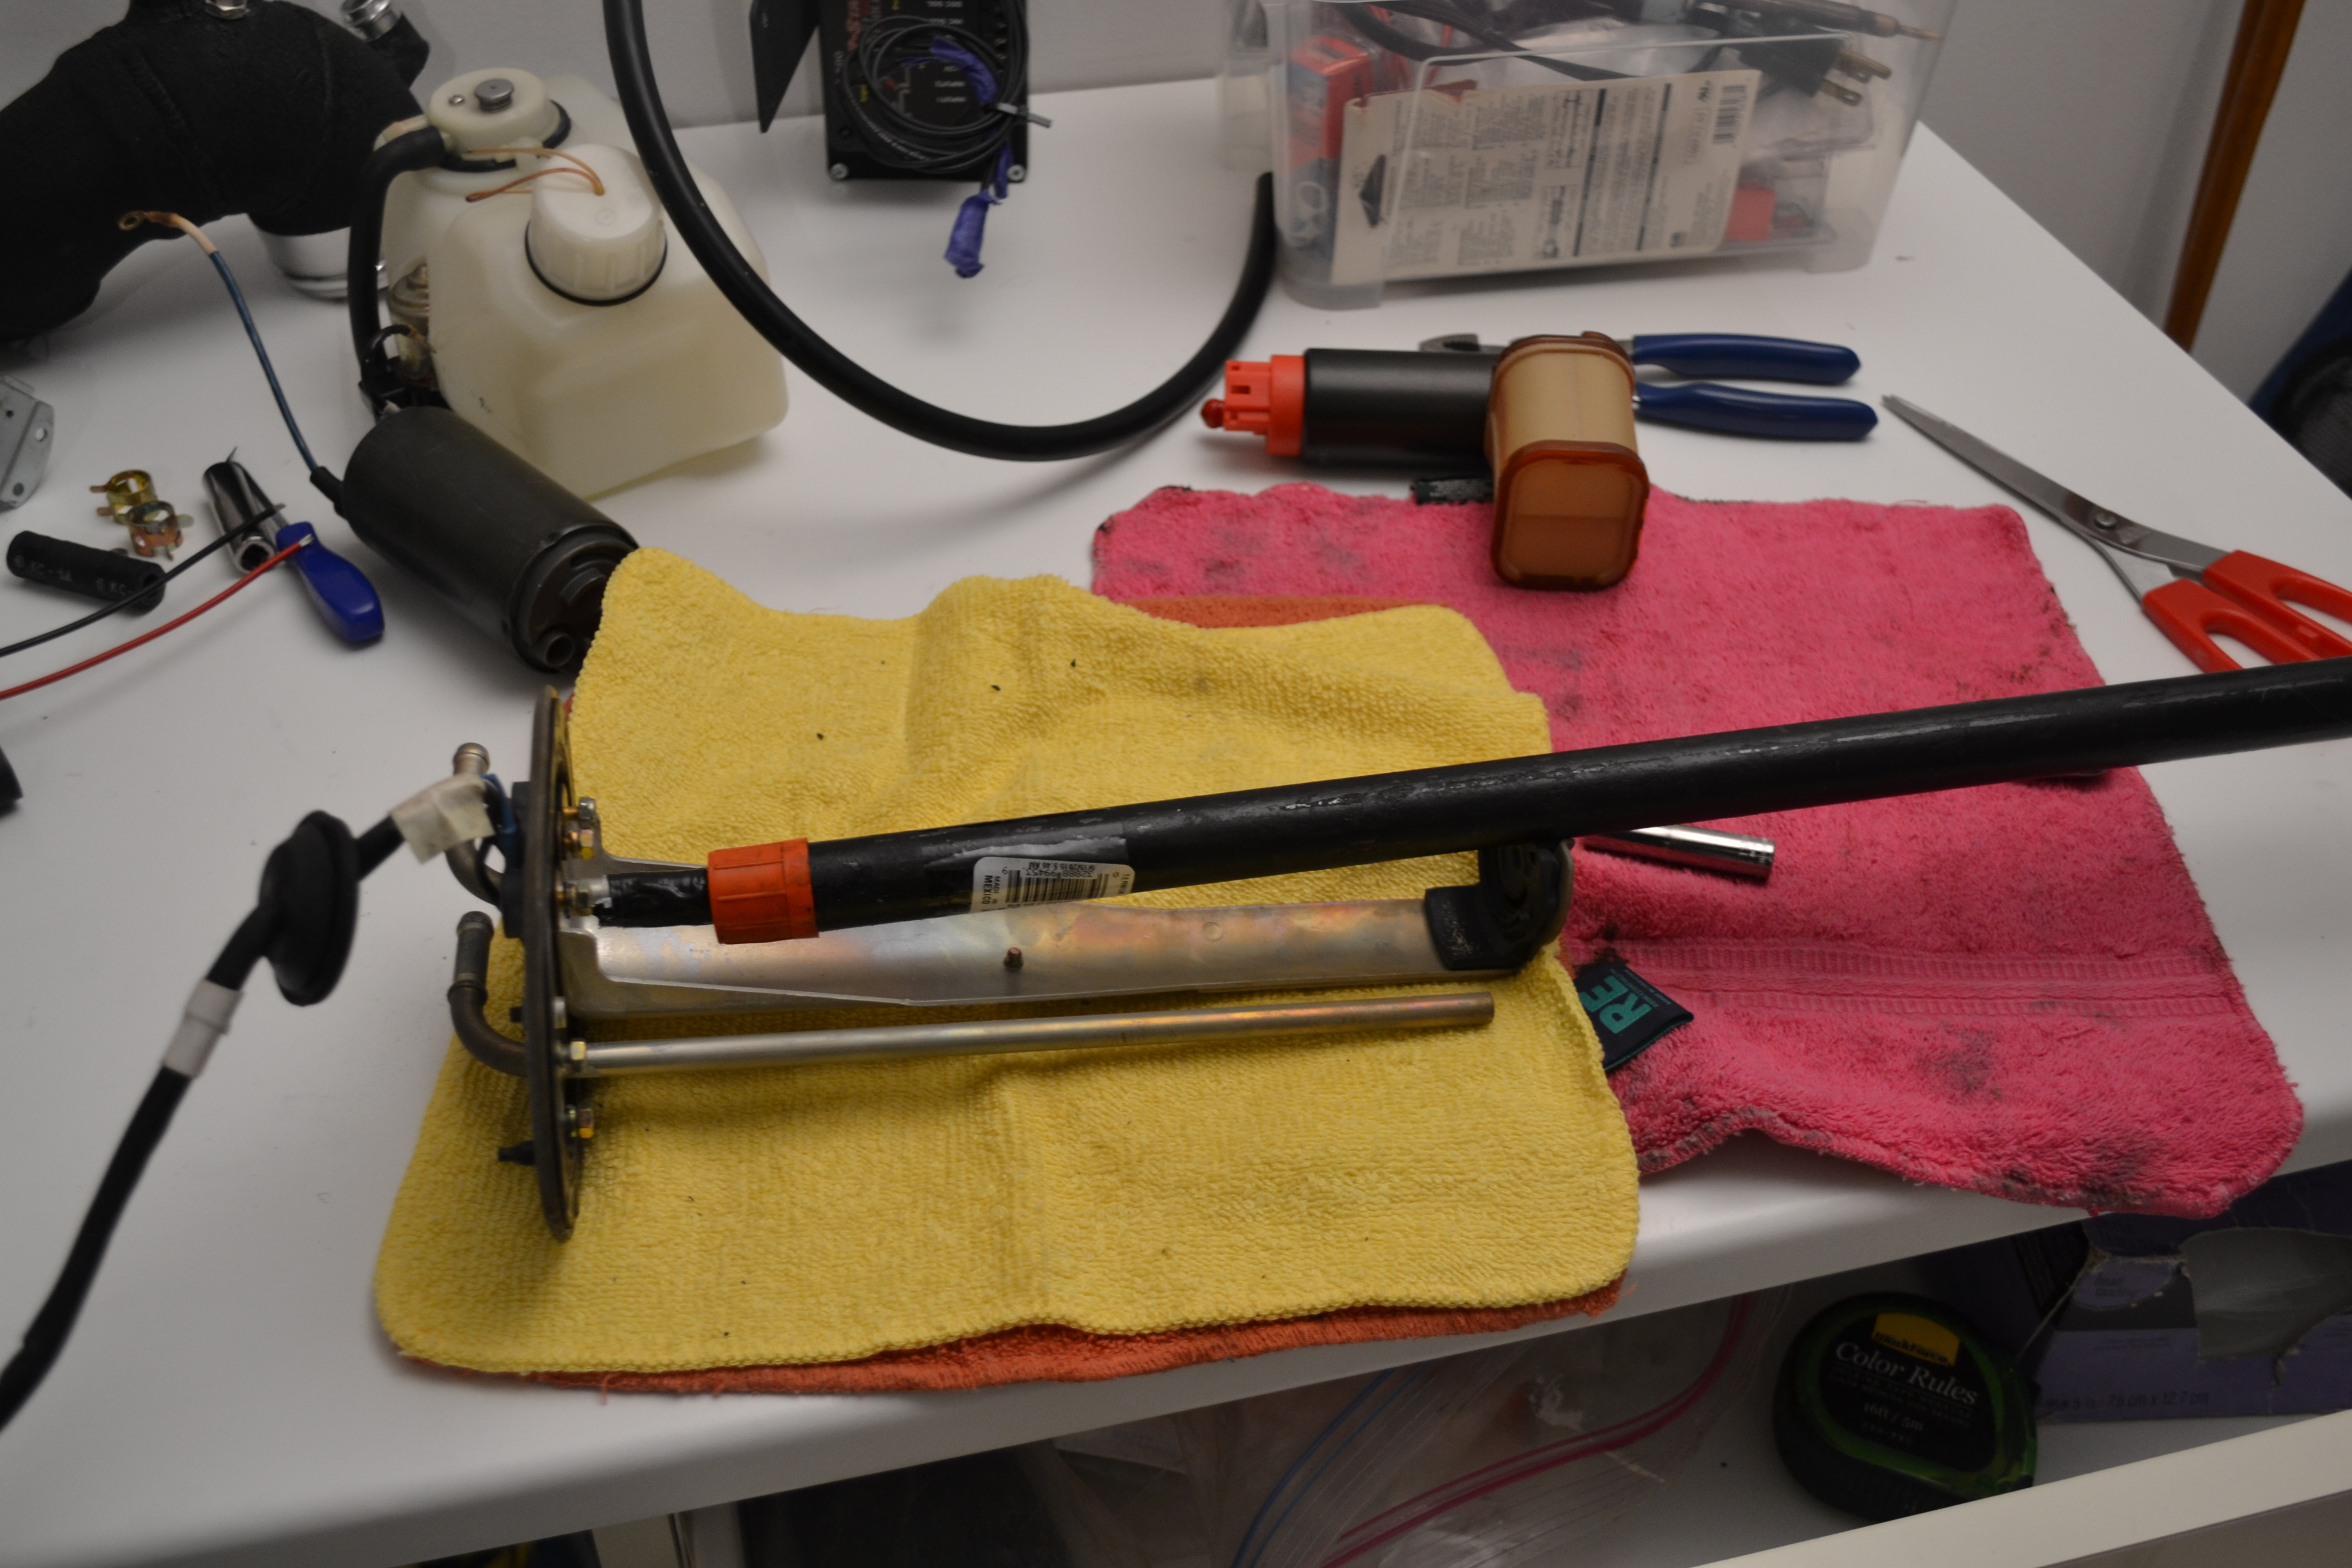
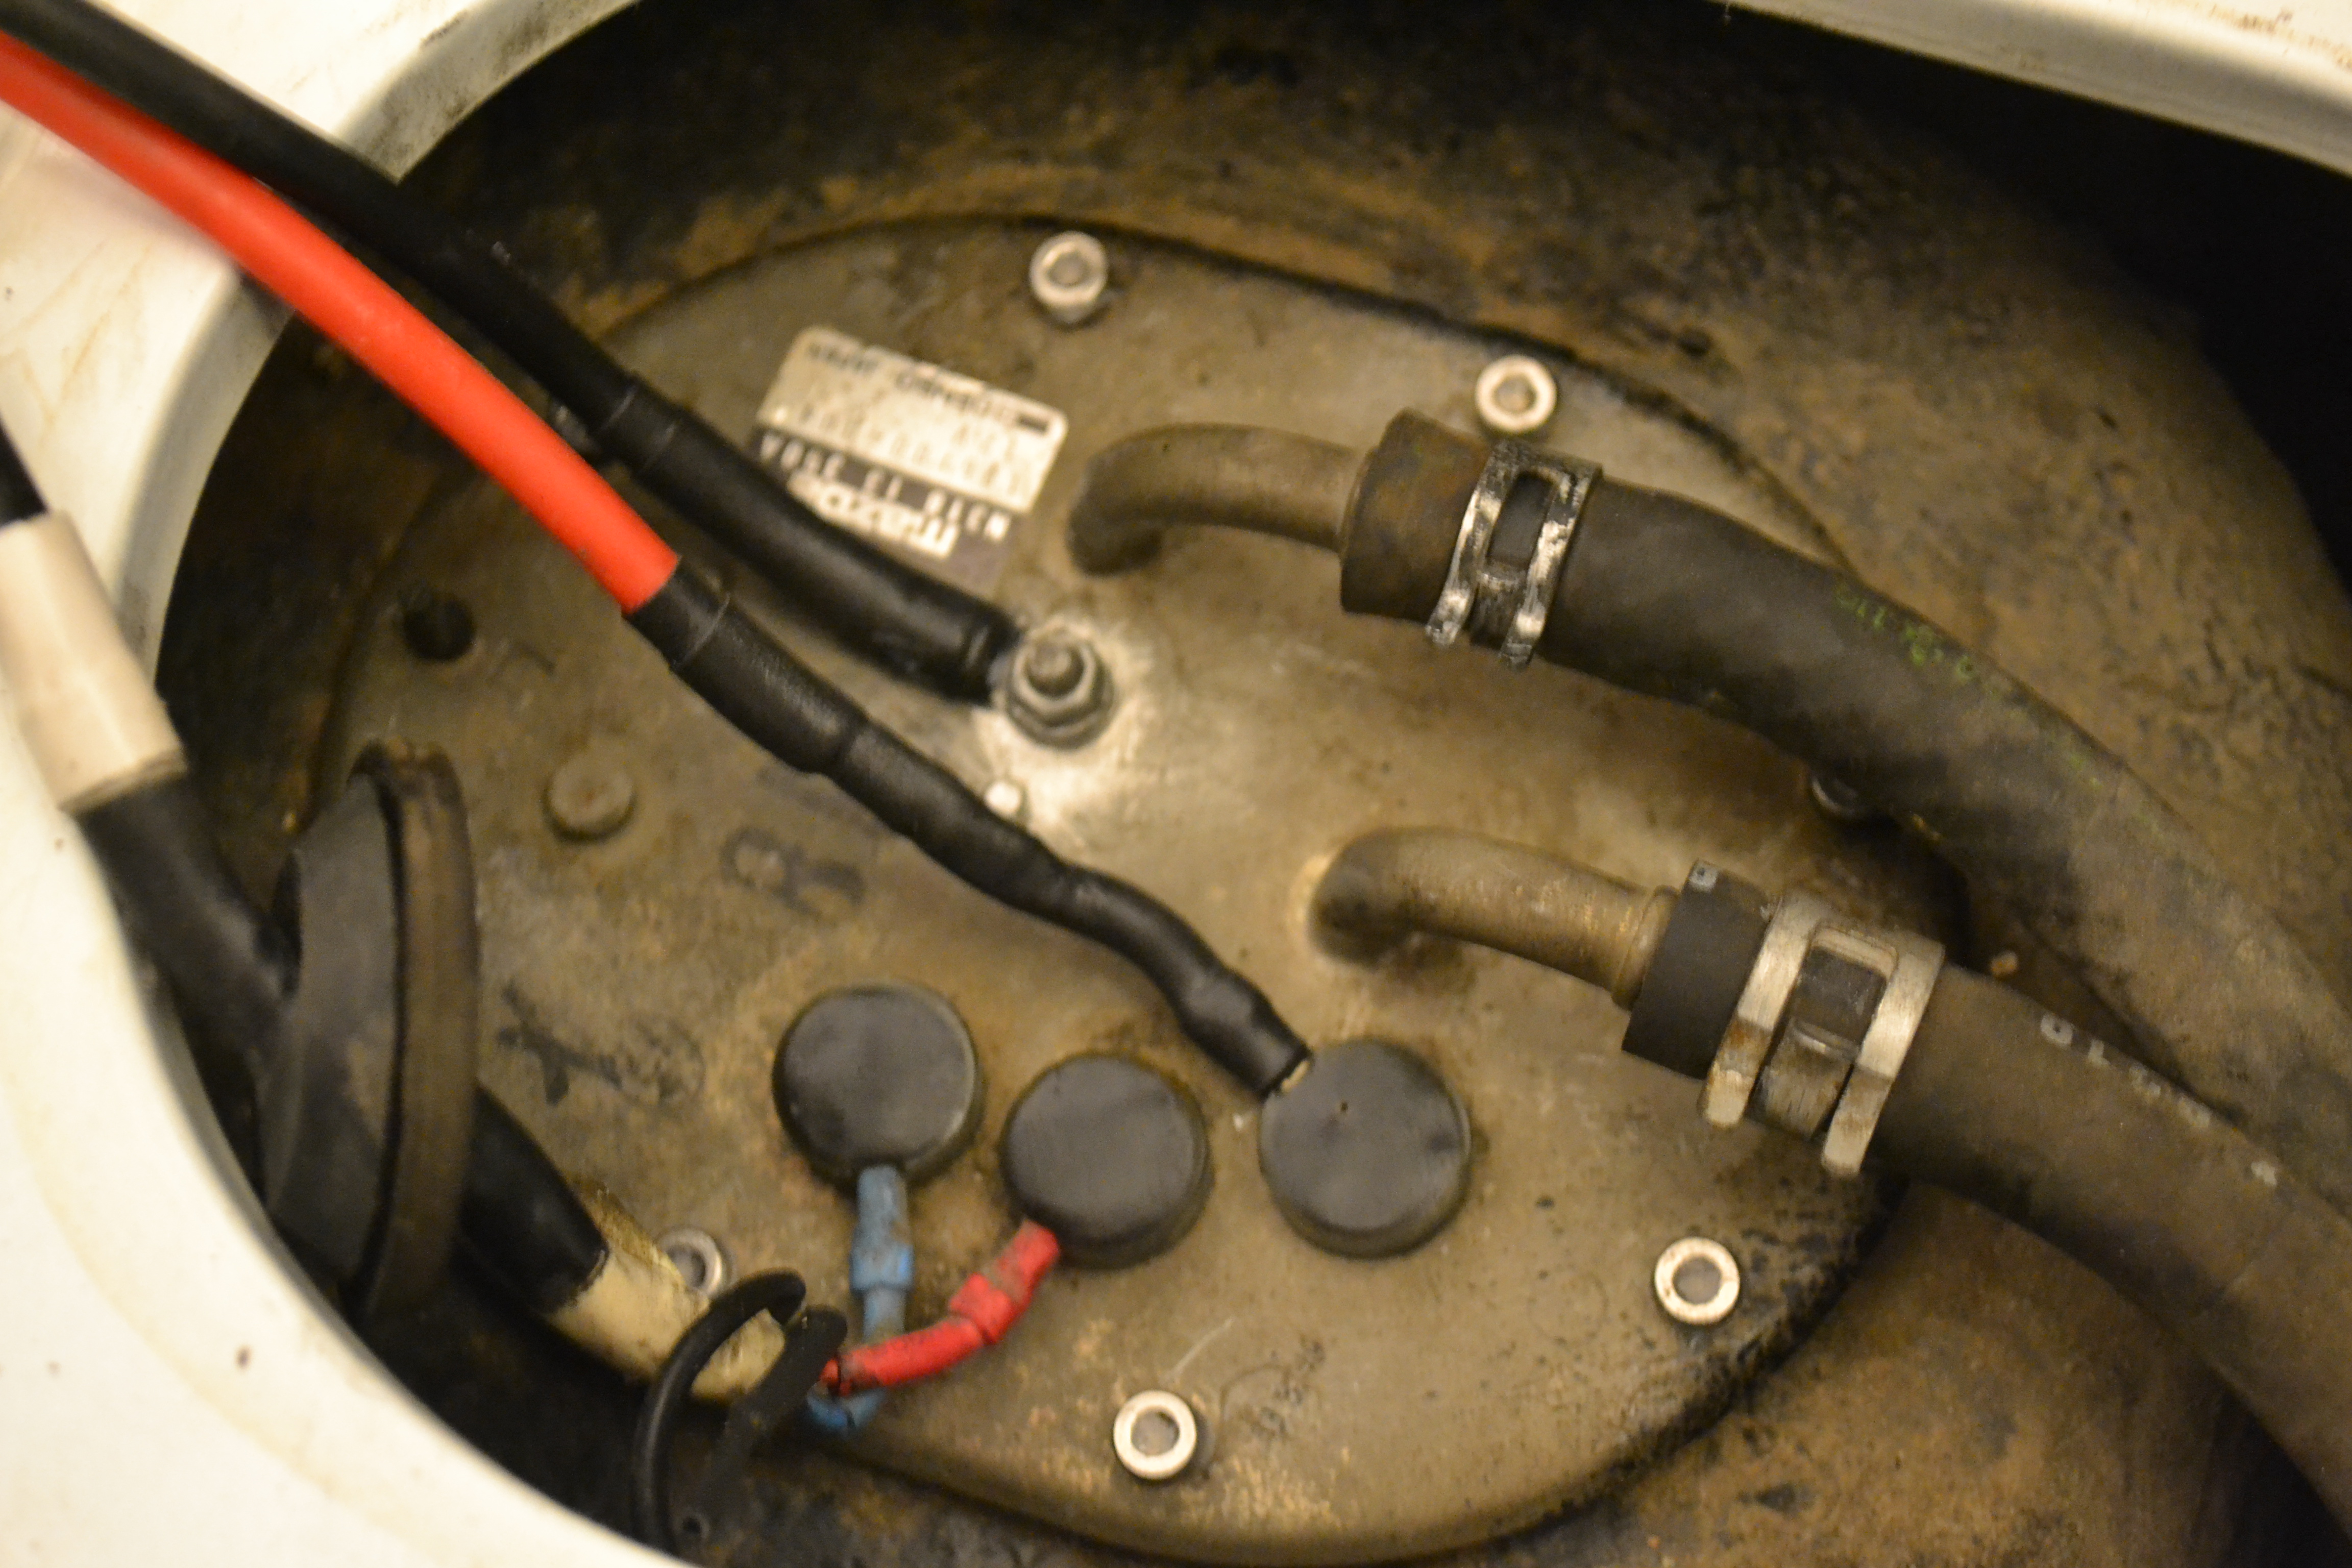
I finished the assembly with 10 gauge wiring down to the motor connector tabs. I sourced chemical/diesel resistant wire and shrink wrap from McMaster Carr. The terminals are unshielded, crimp style.
I chose to retain the stock ground (grounds to the frame) and the stock positive bulkhead connector stud.
Back in. I had some leftover M4-0.7 x 8mm stainless screws, so I used them to replace the bulkhead screws.
I chose to retain the stock ground (grounds to the frame) and the stock positive bulkhead connector stud.

Back in. I had some leftover M4-0.7 x 8mm stainless screws, so I used them to replace the bulkhead screws.
Thread Starter
RX-7 Old Timer
Joined: Jul 2004
Posts: 321
Likes: 10
From: Ann Arbor, MI
Thanks! Some further reading on the topic: https://www.fastenal.com/content/fed...0Corrosion.pdf
My combo causes a "marginal" increases corrosion at the base metal according to their chart. I think I'm comfortable just keeping an eye on them for now. I greased the crap out of them, and the car doesn't usually see weather of any kind.
My combo causes a "marginal" increases corrosion at the base metal according to their chart. I think I'm comfortable just keeping an eye on them for now. I greased the crap out of them, and the car doesn't usually see weather of any kind.
Thread Starter
RX-7 Old Timer
Joined: Jul 2004
Posts: 321
Likes: 10
From: Ann Arbor, MI
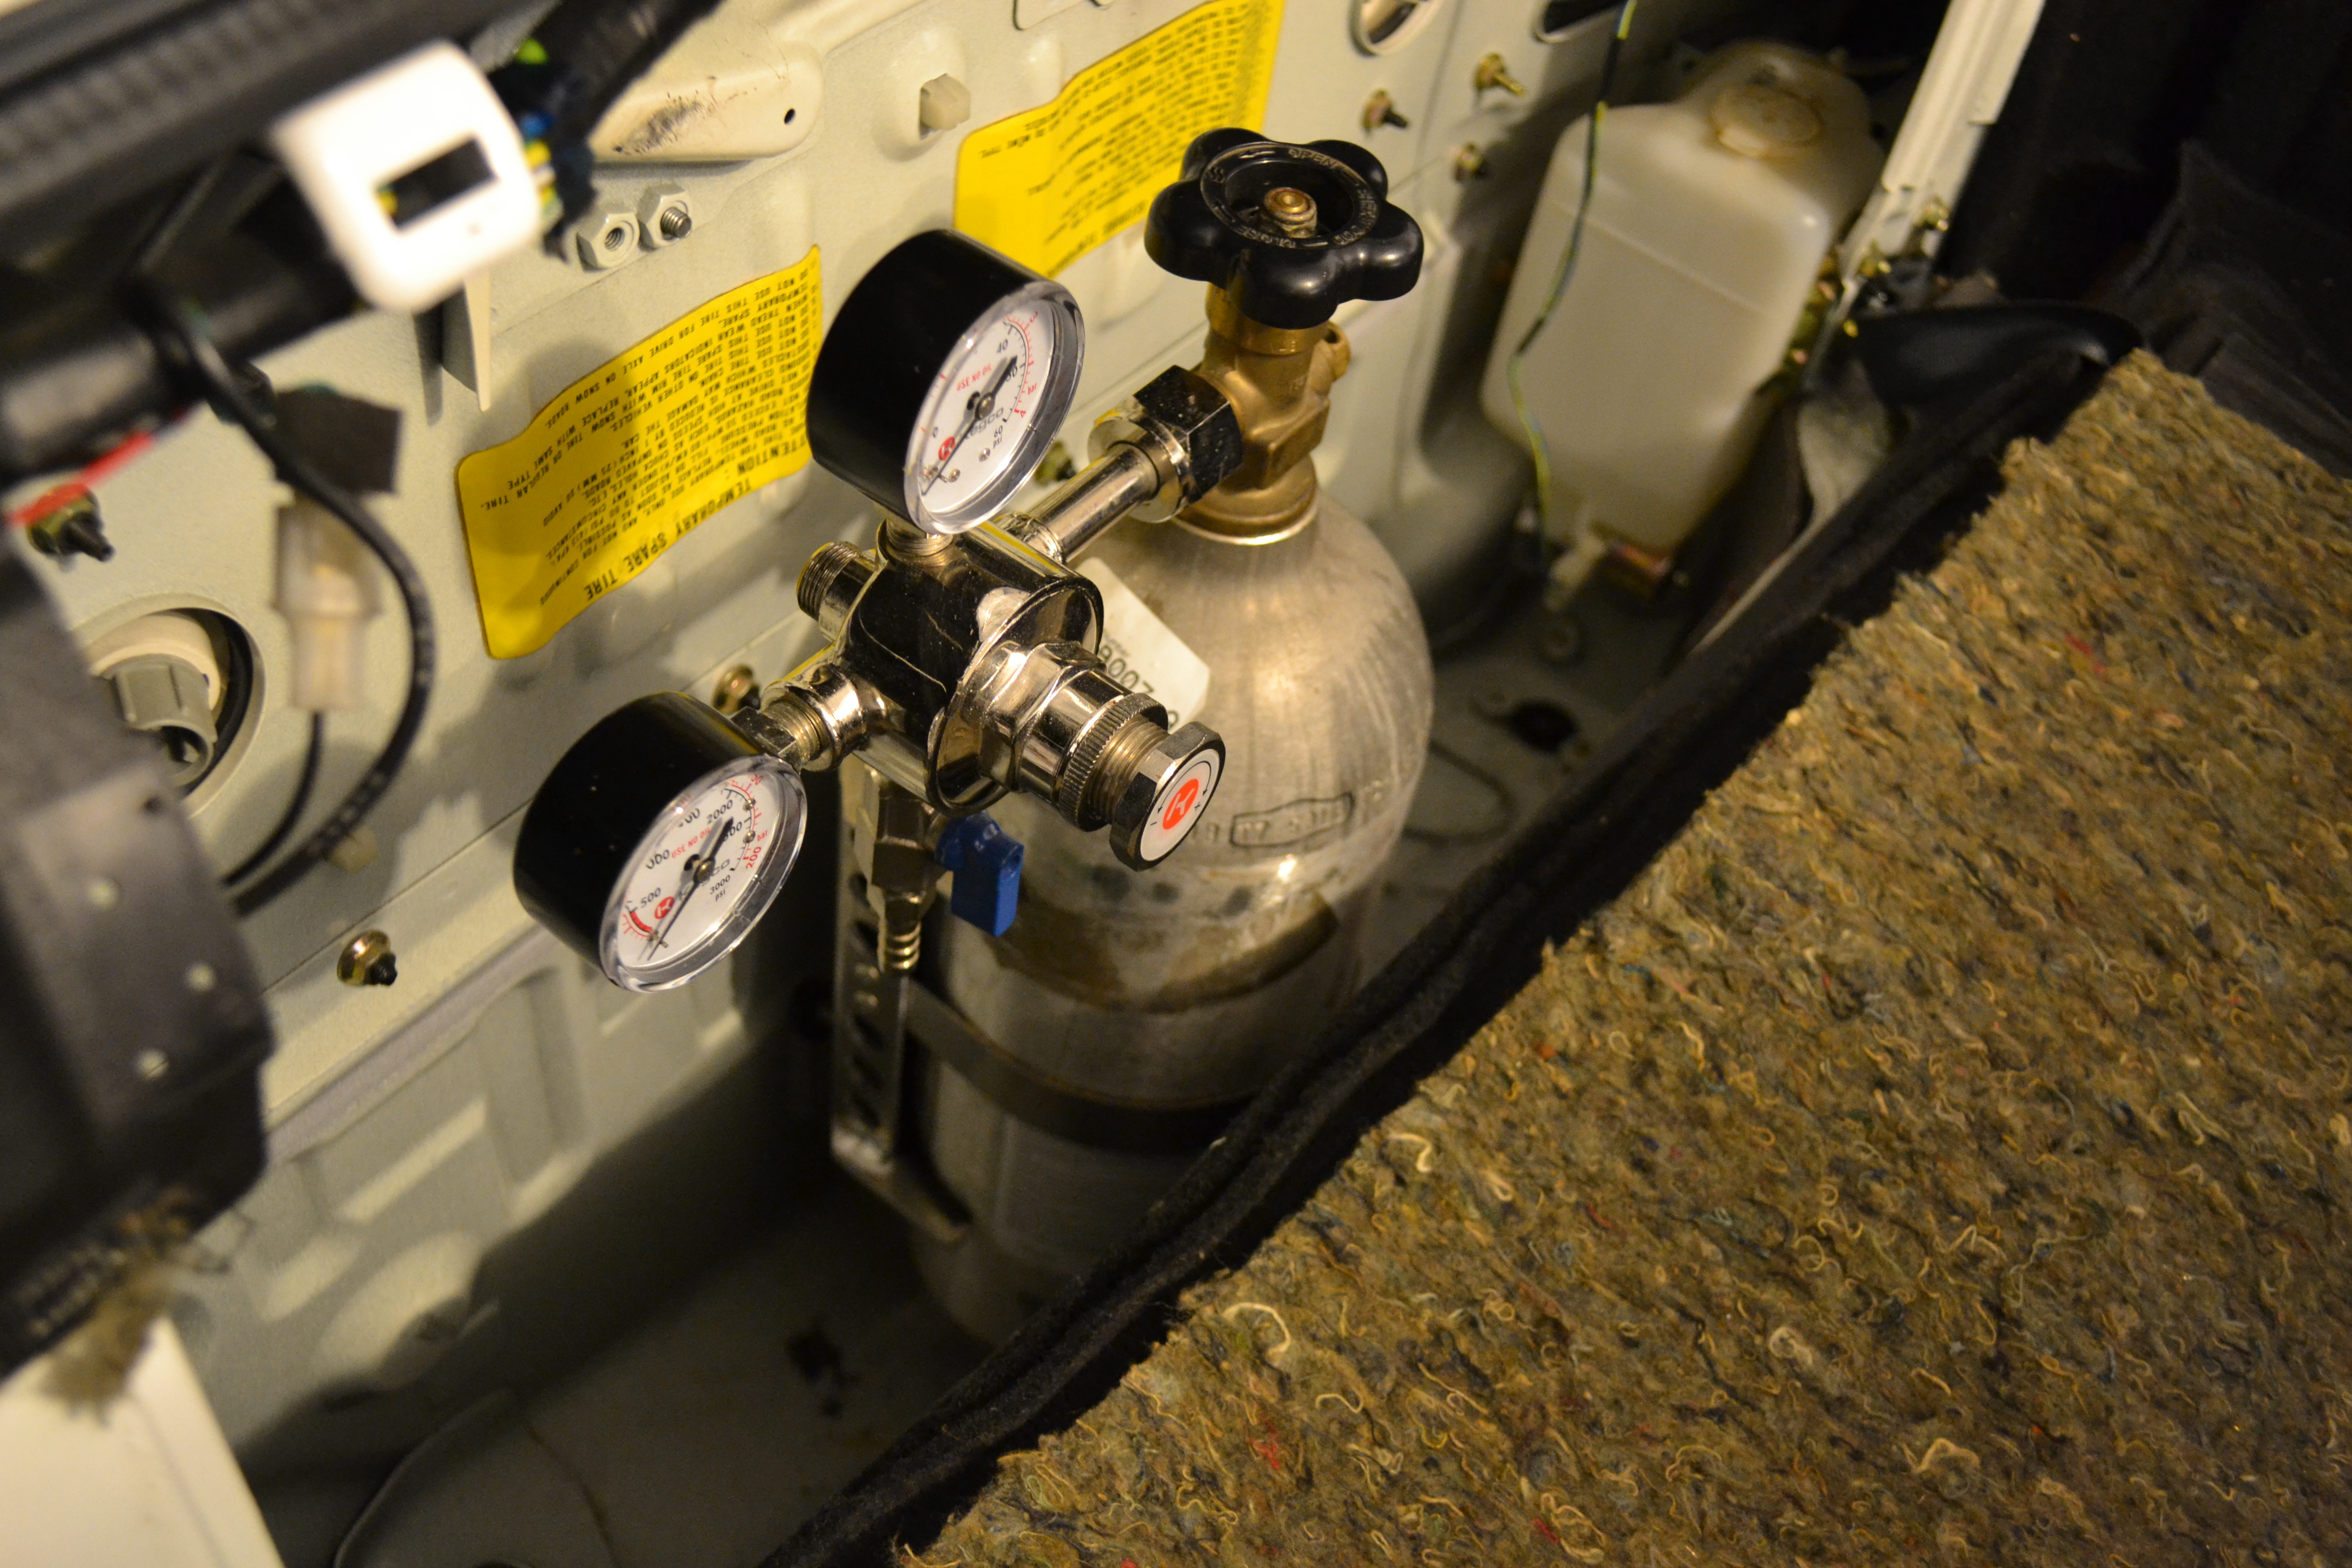
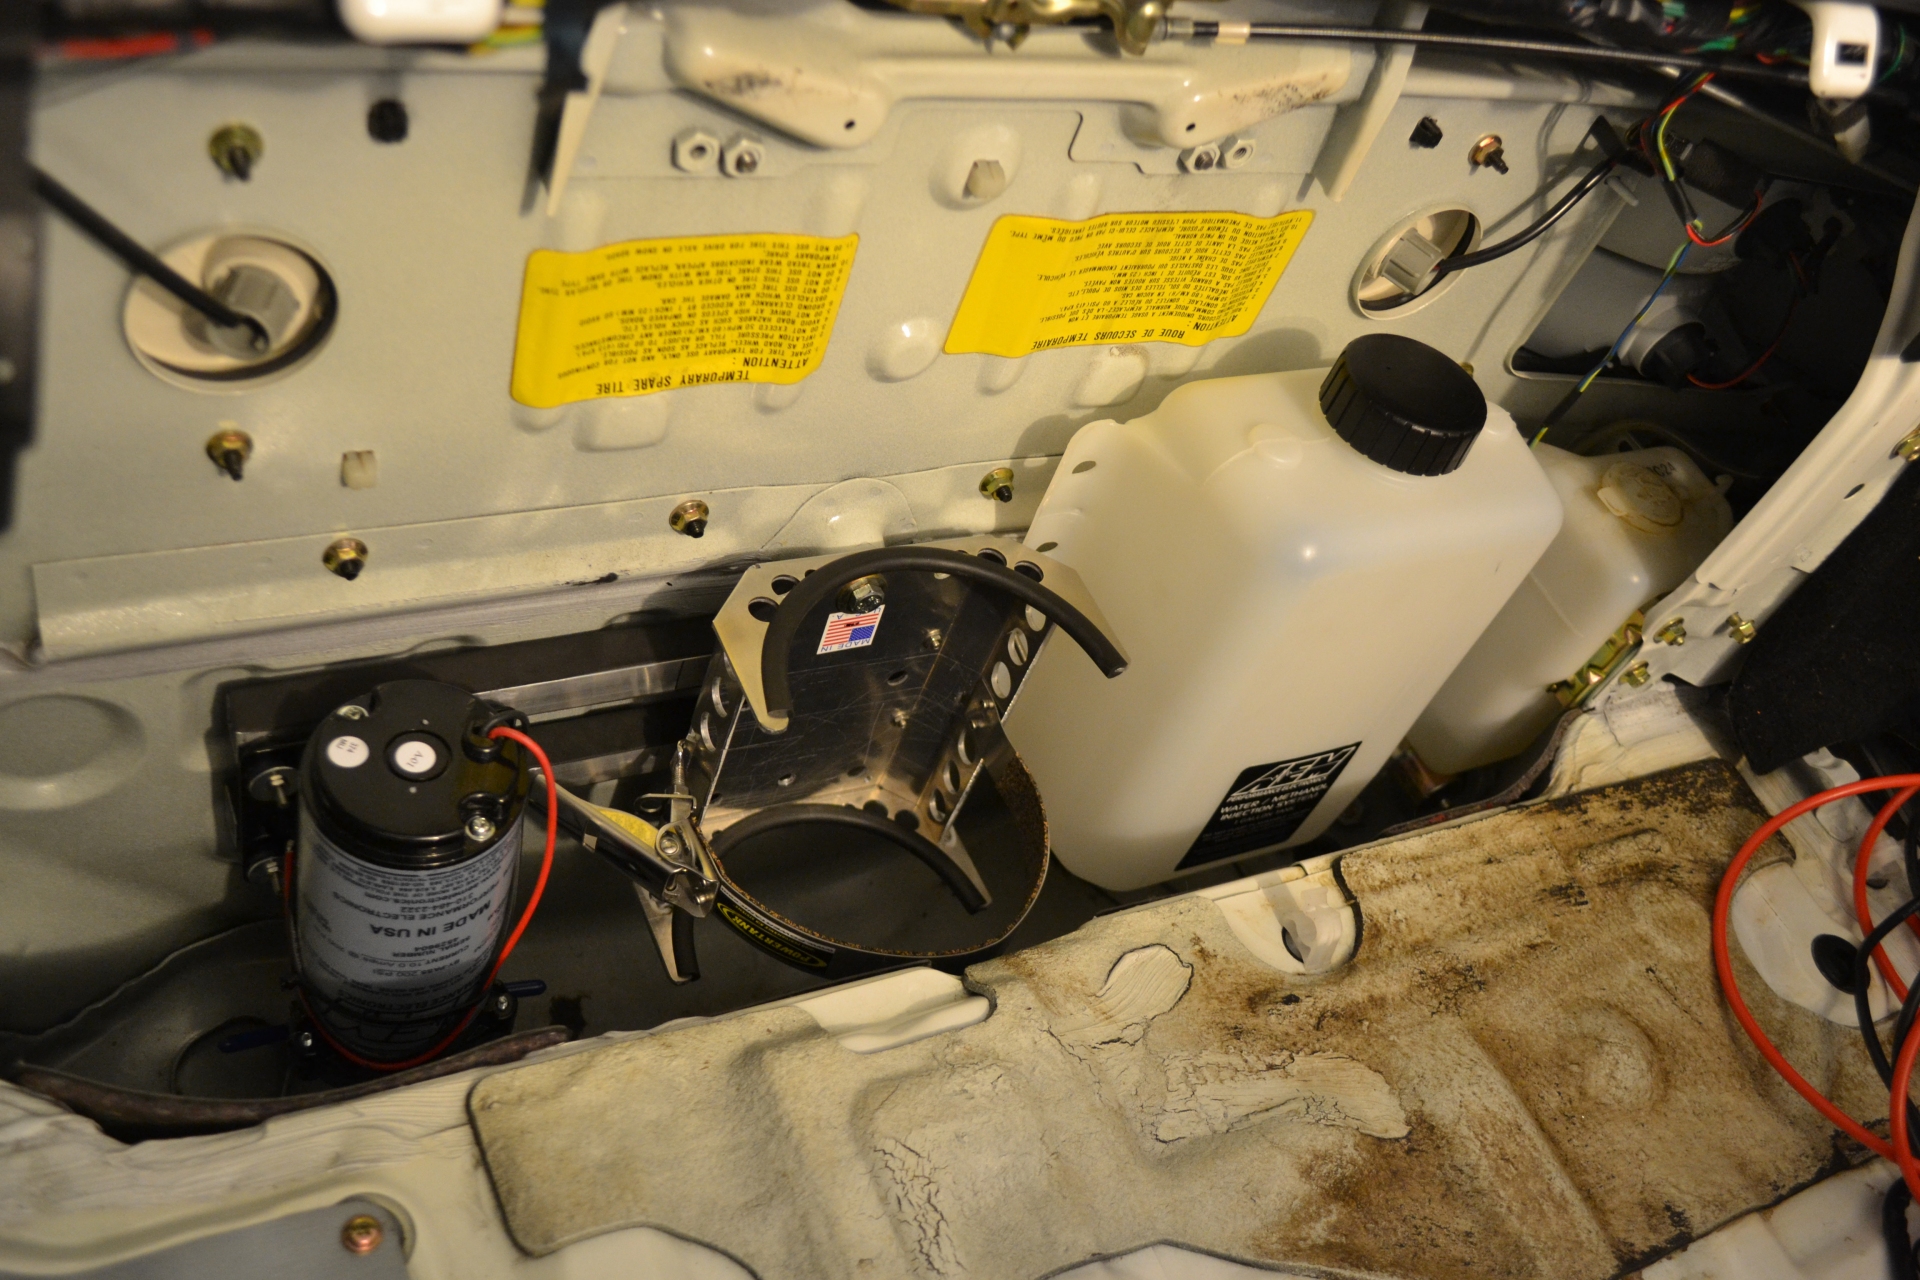
After the cold start assist tank fail, I guess I will be pumping my methanol. See AEM kit, 30-3300 with progressive boost-based controller.
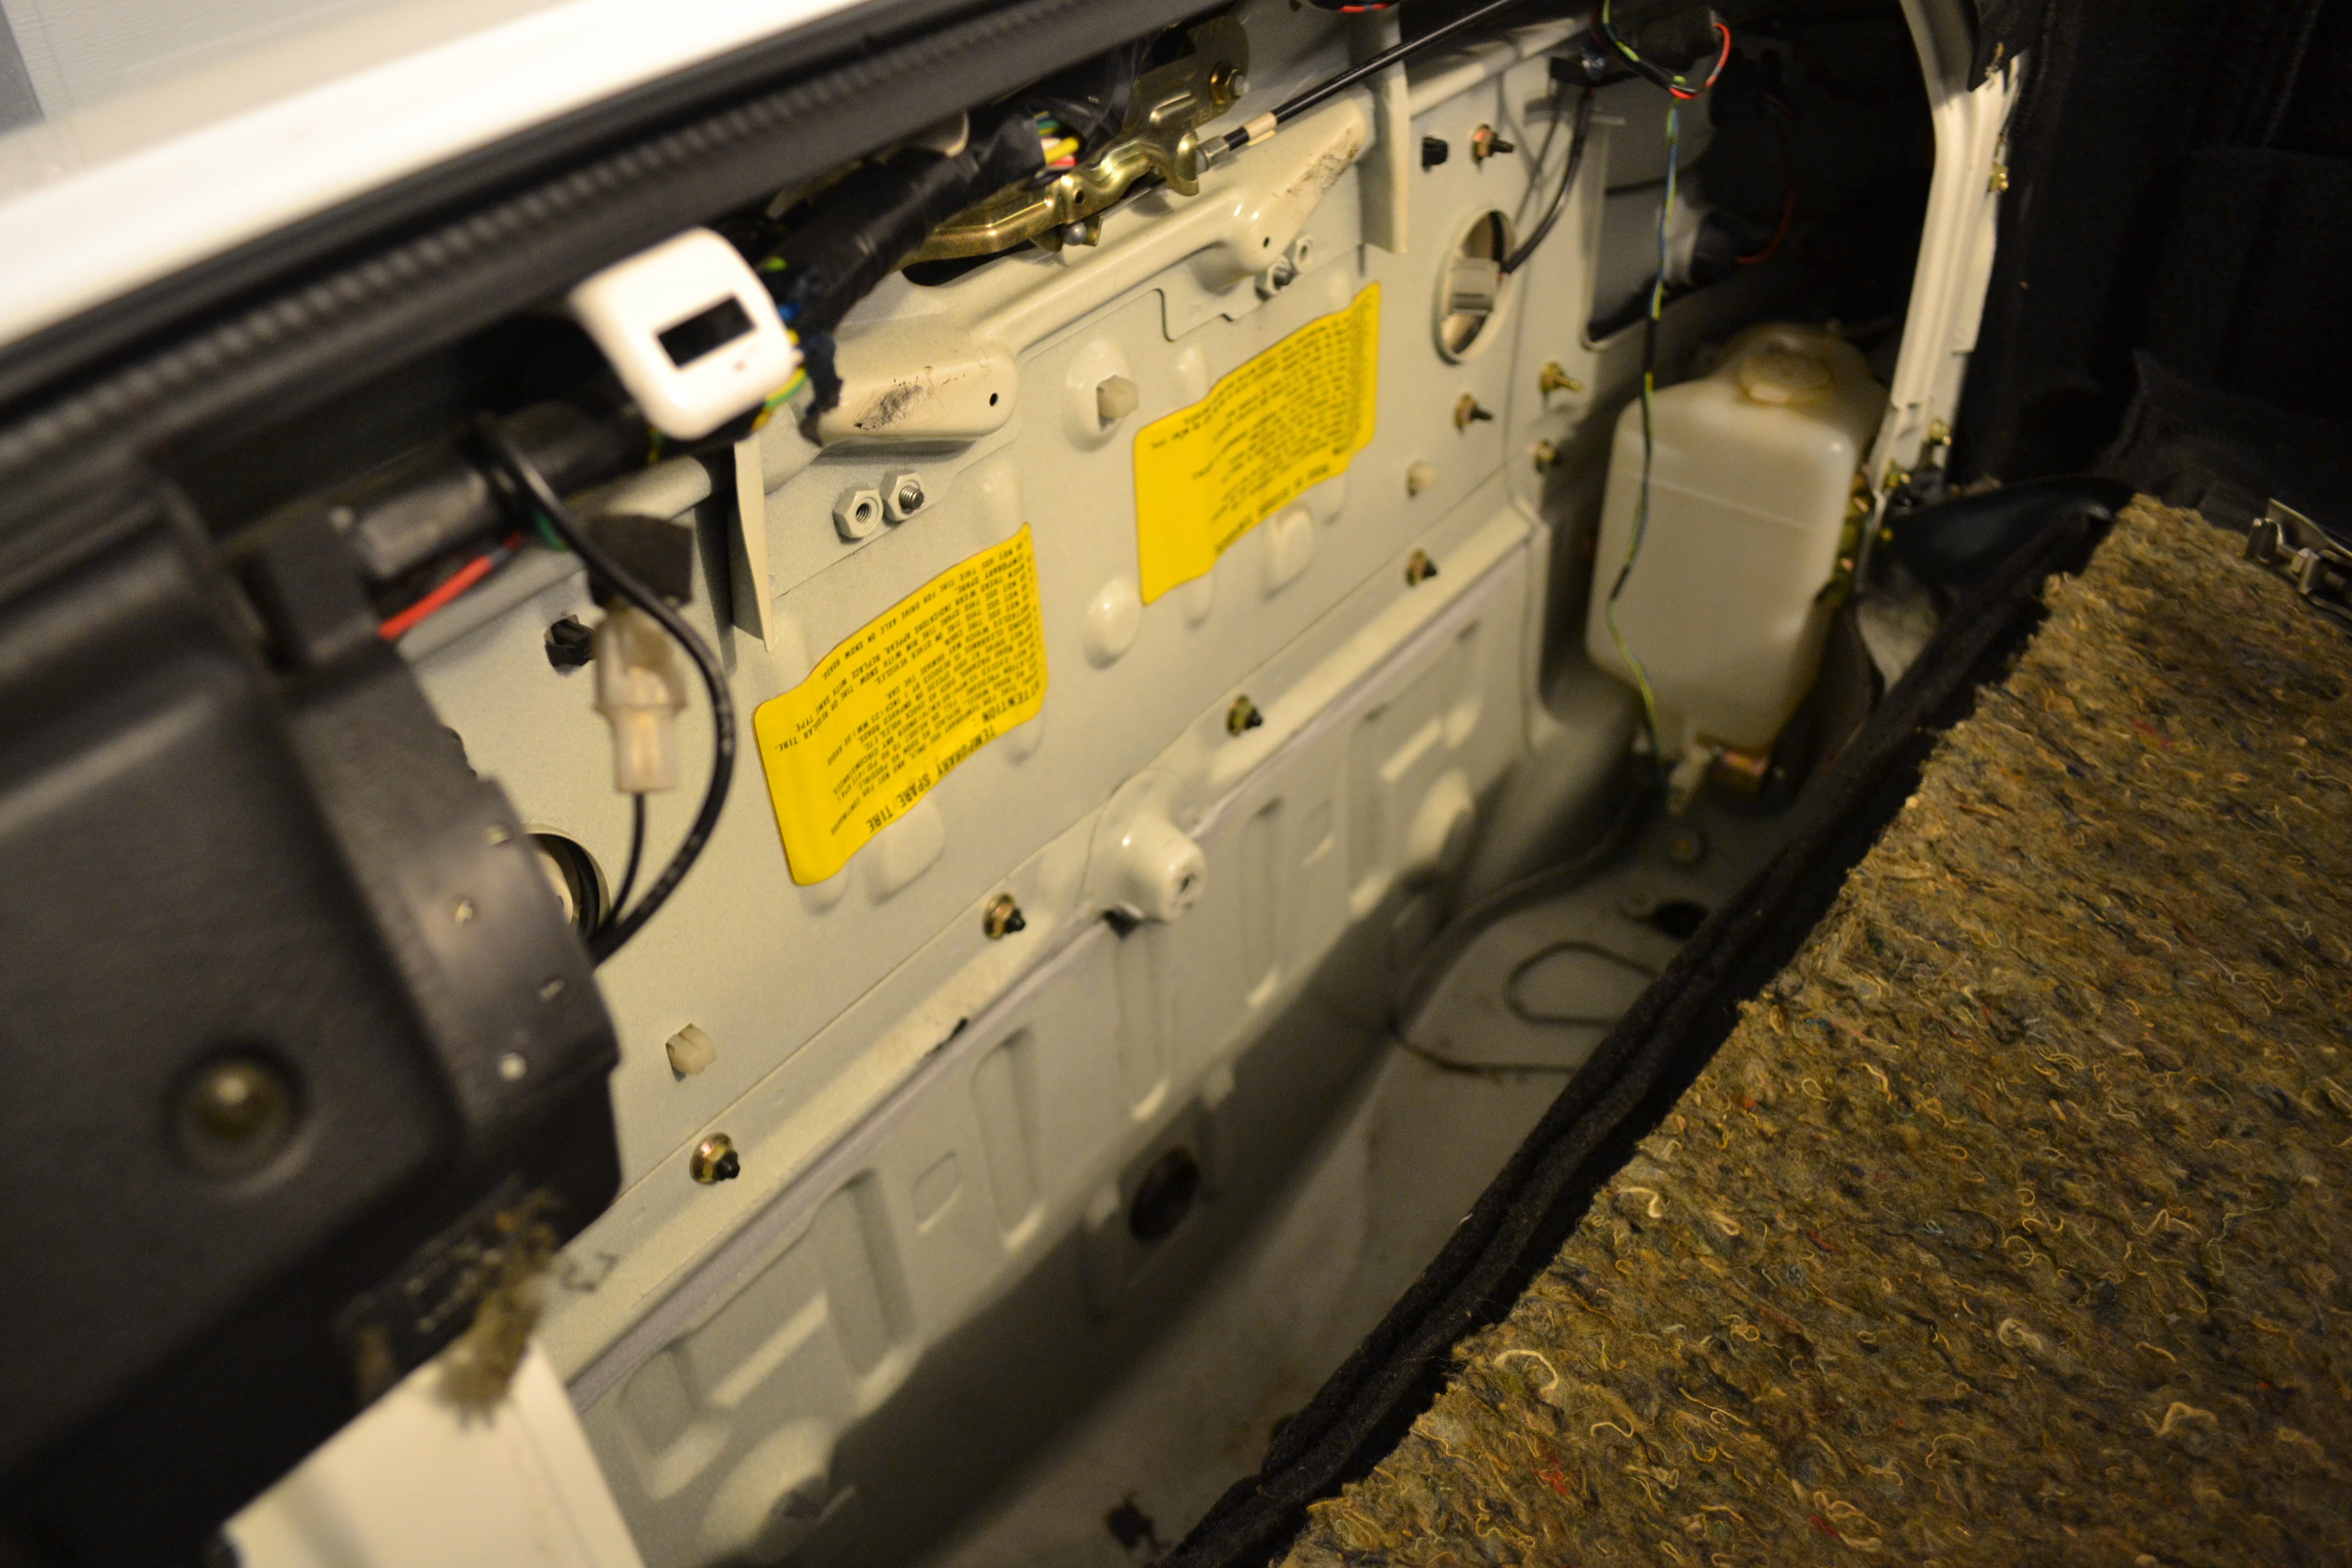
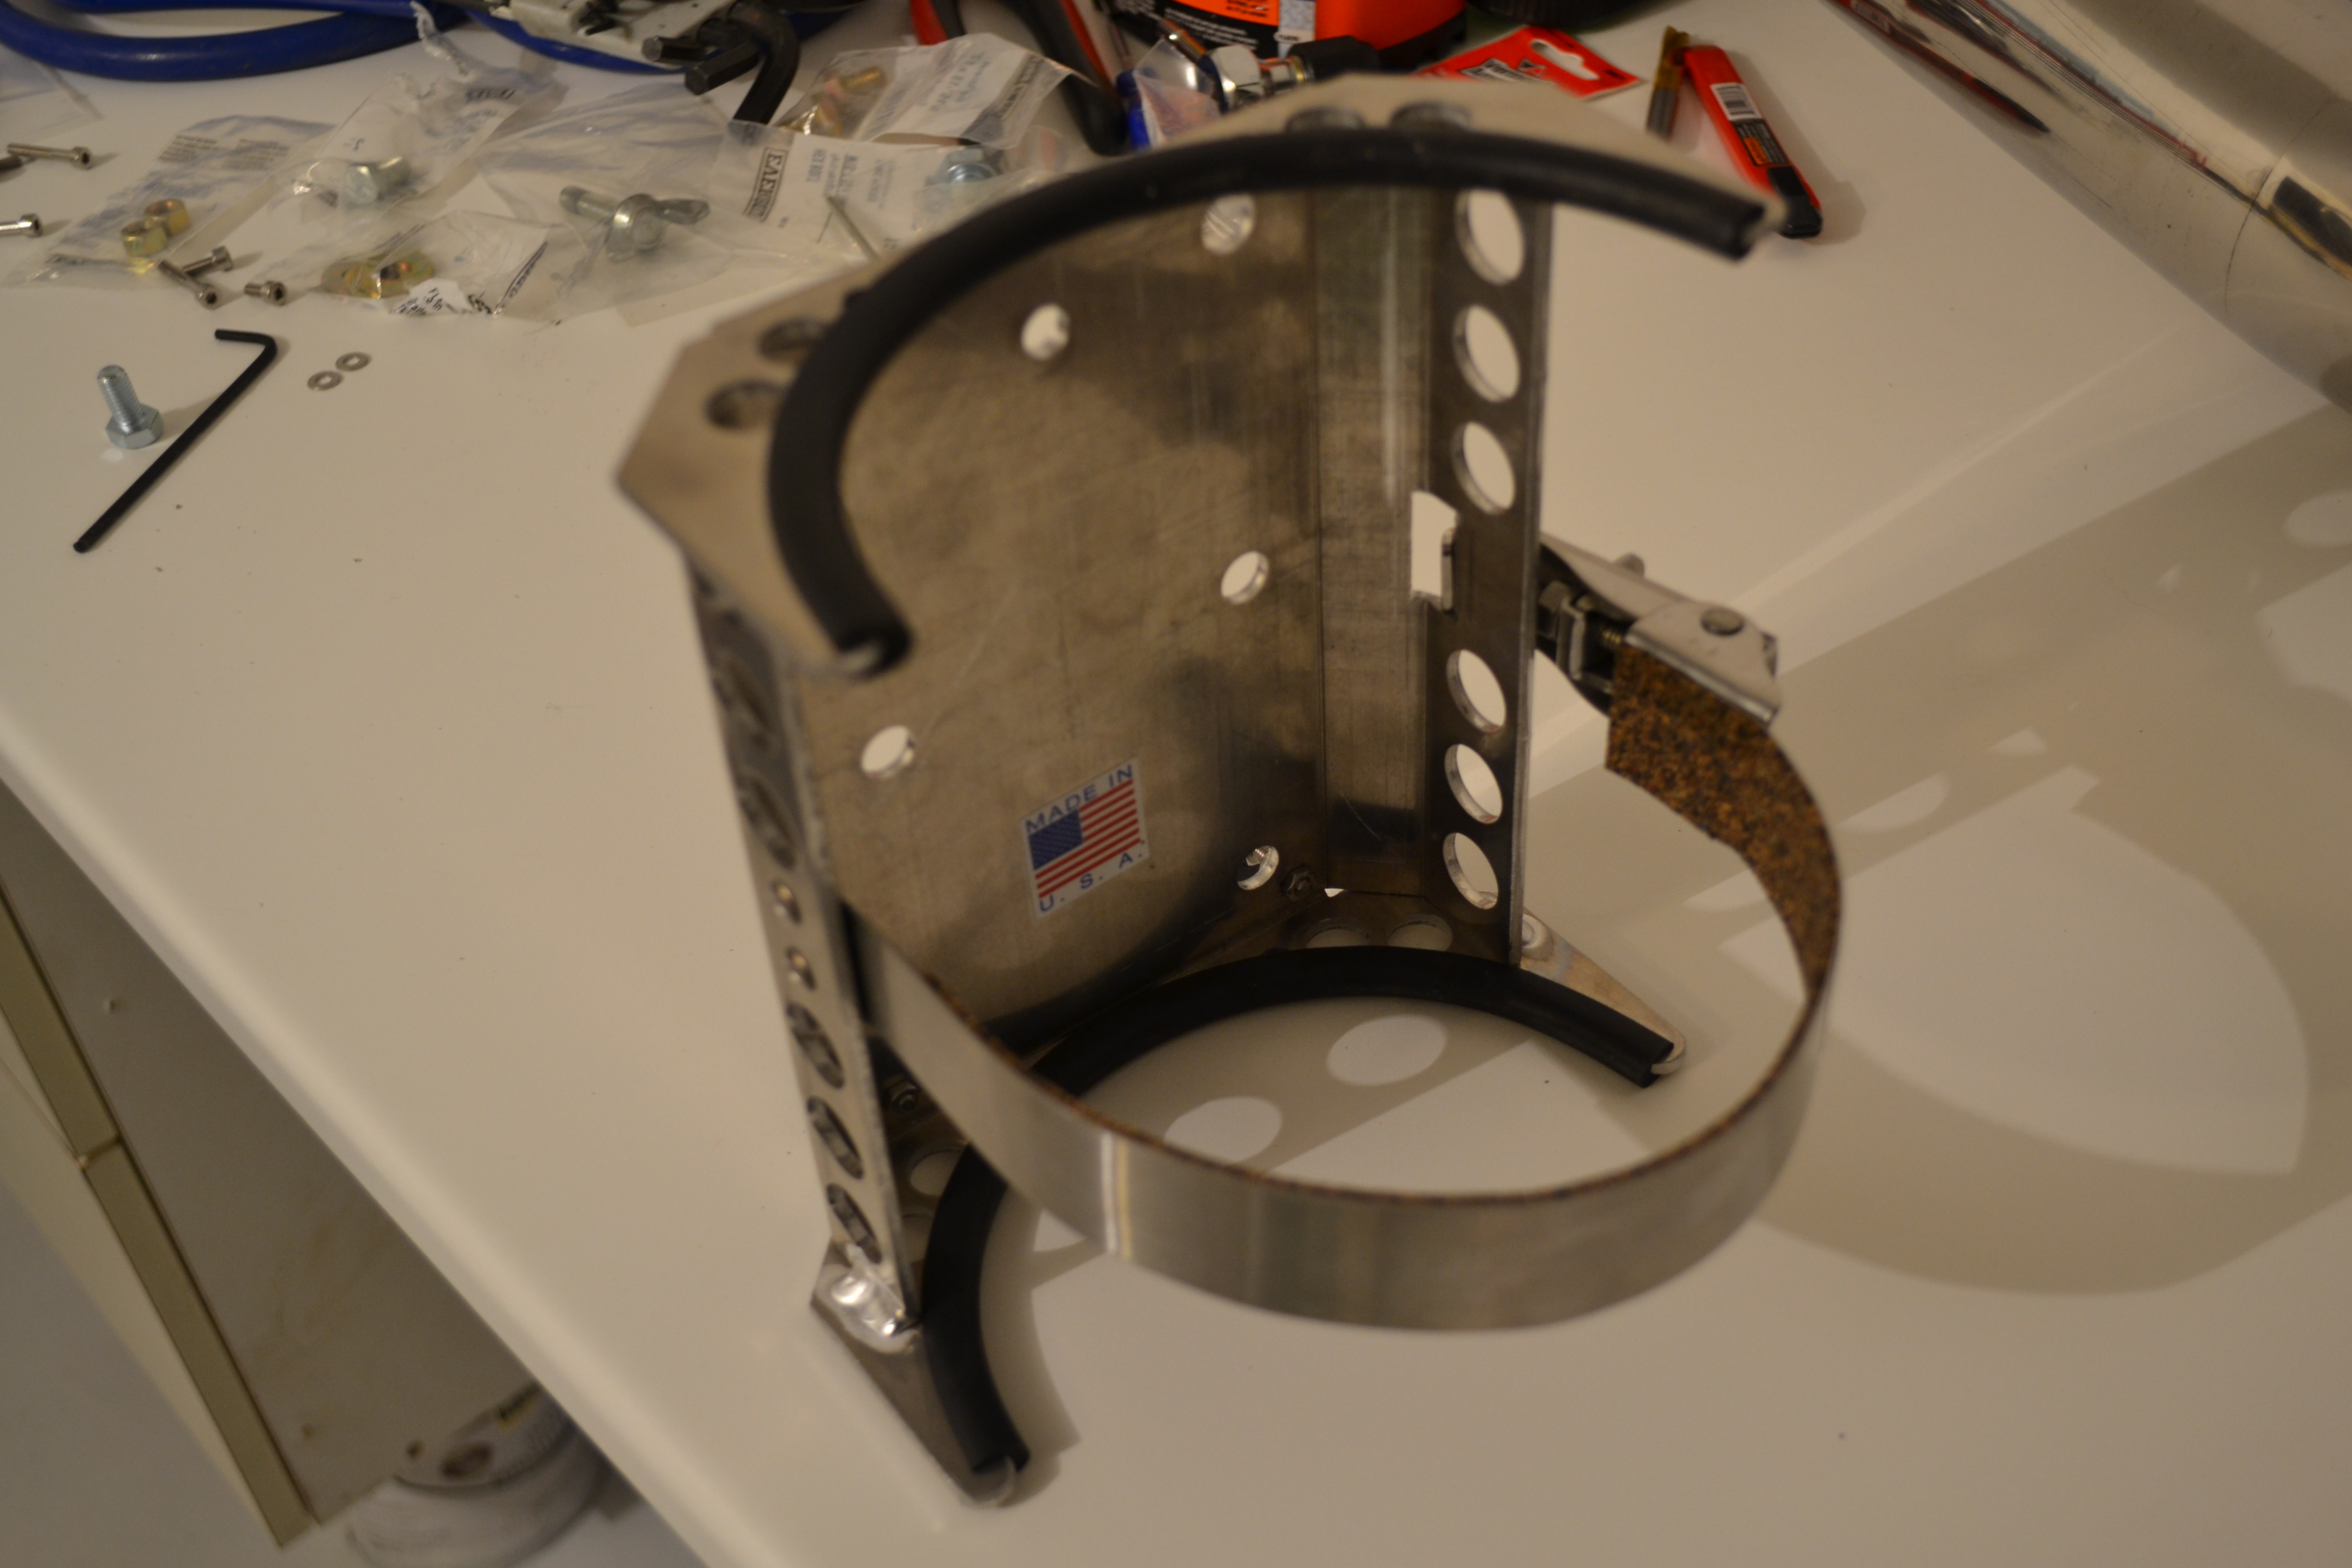
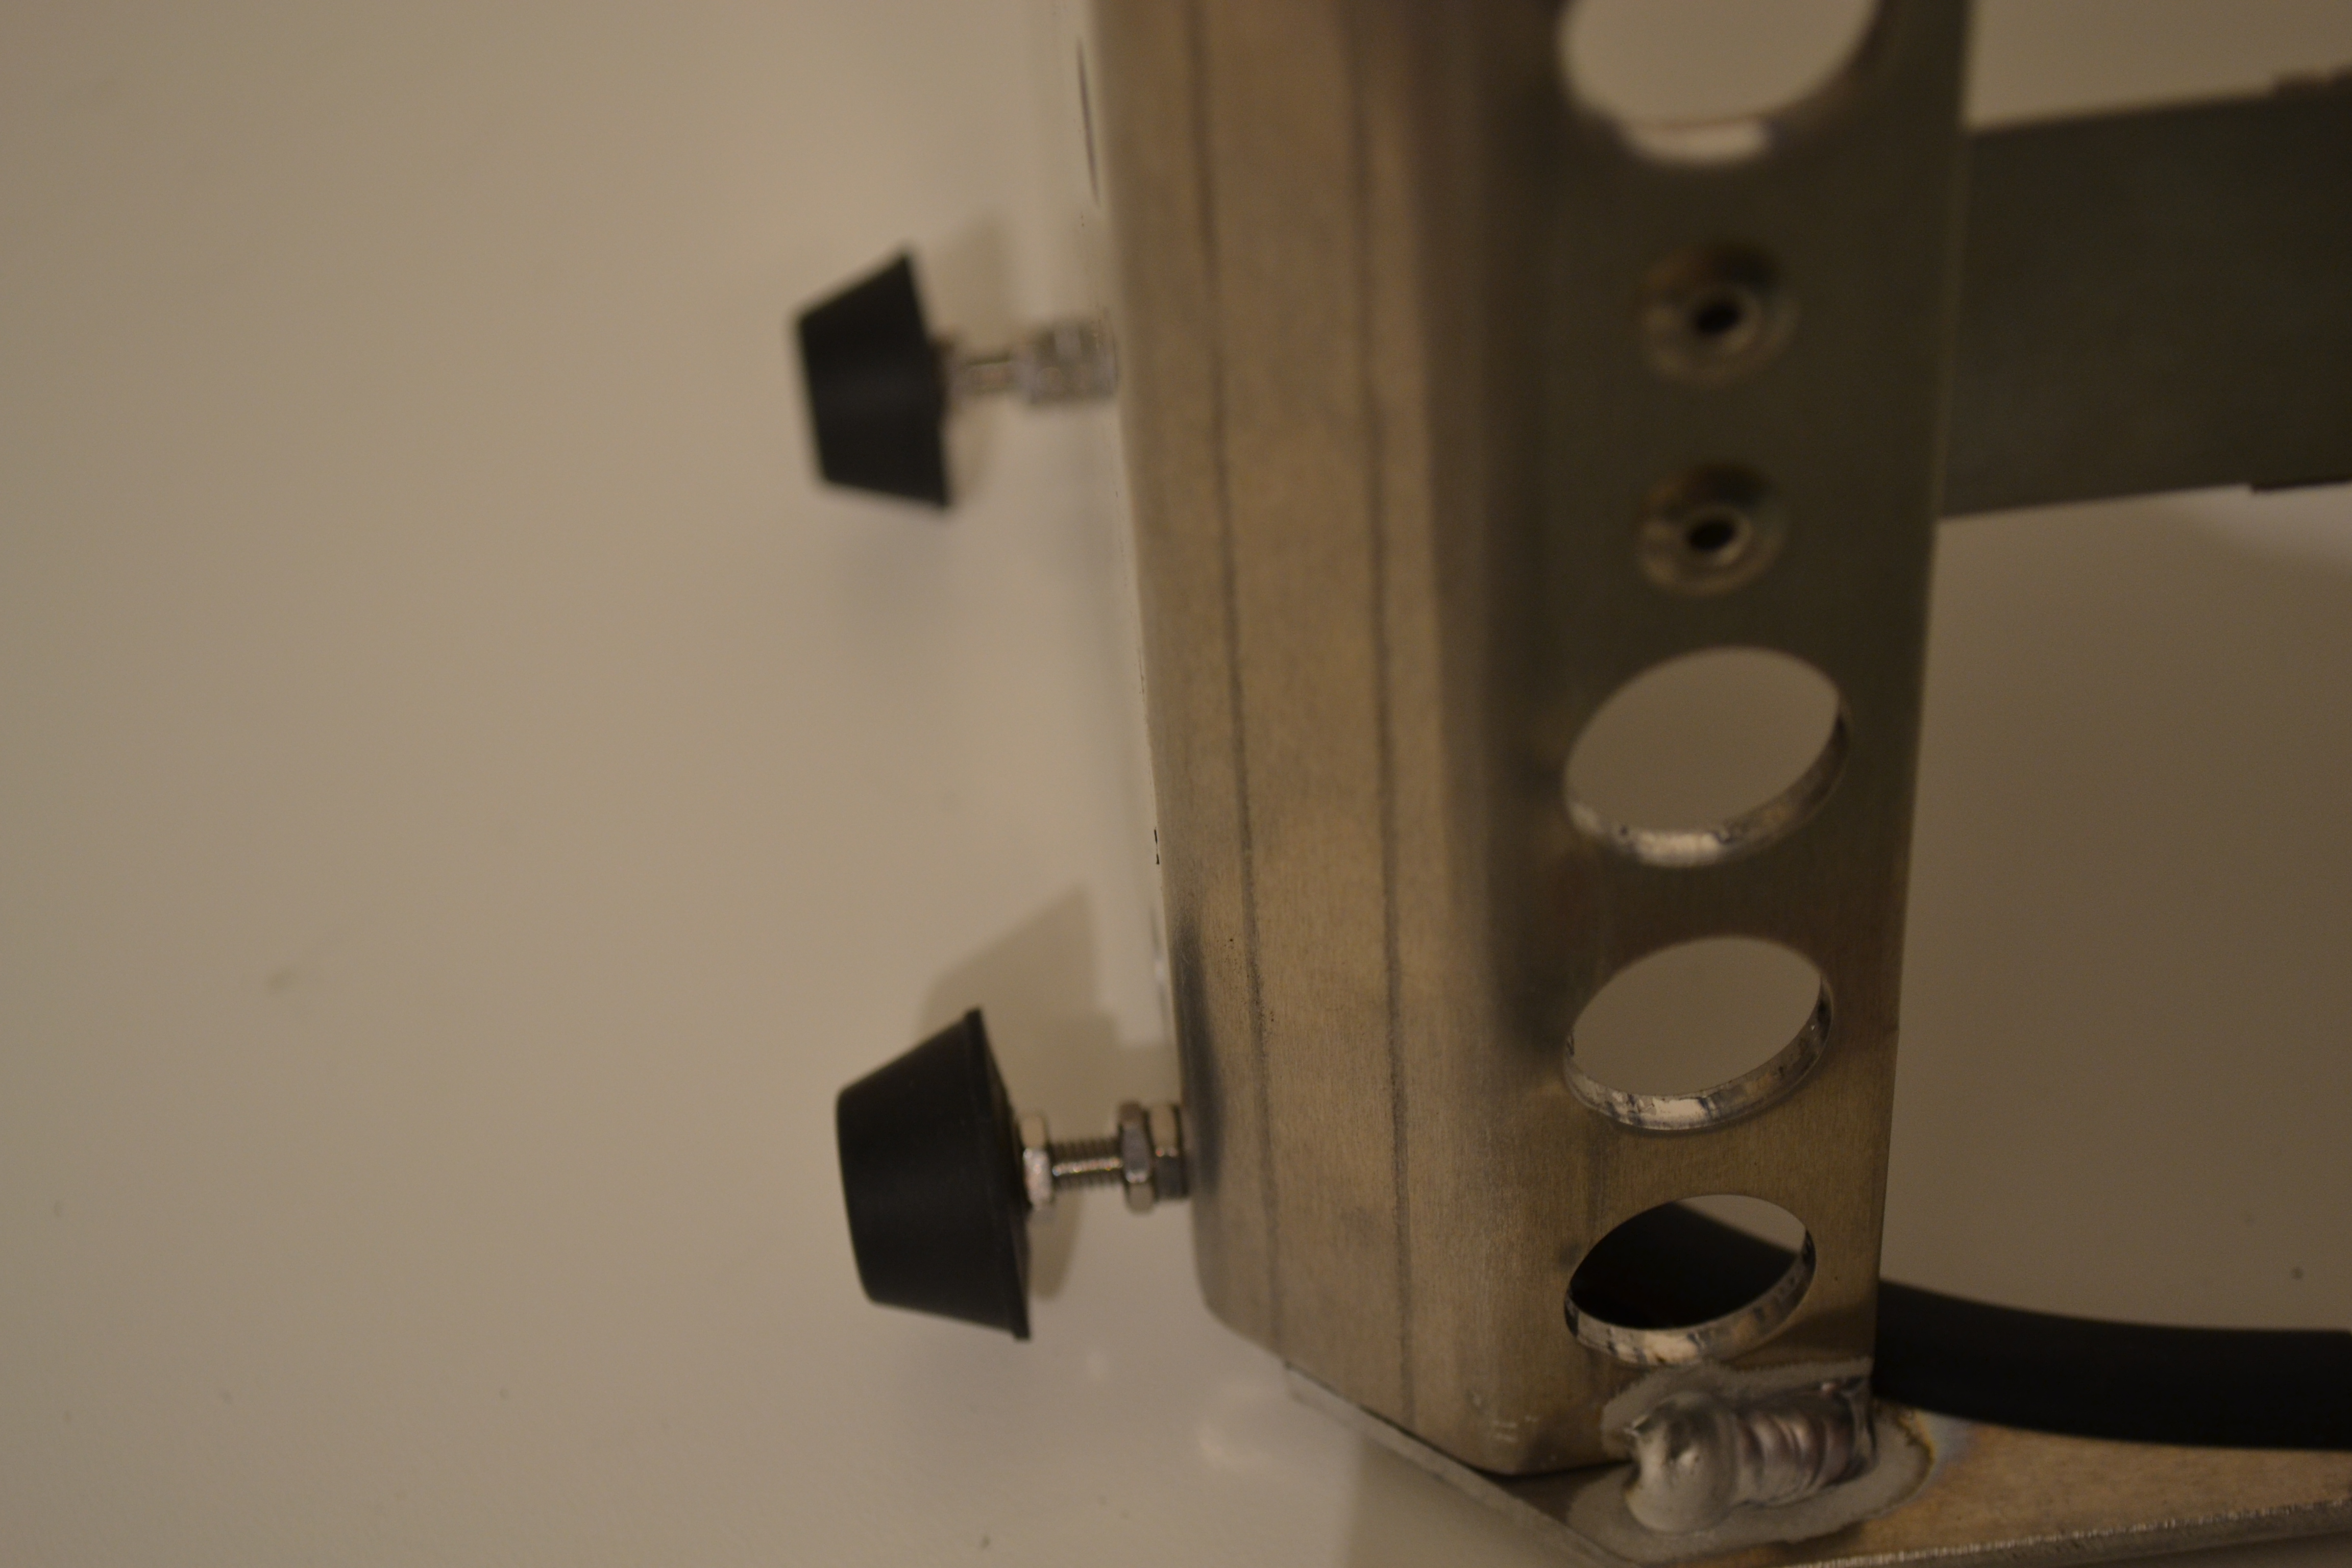
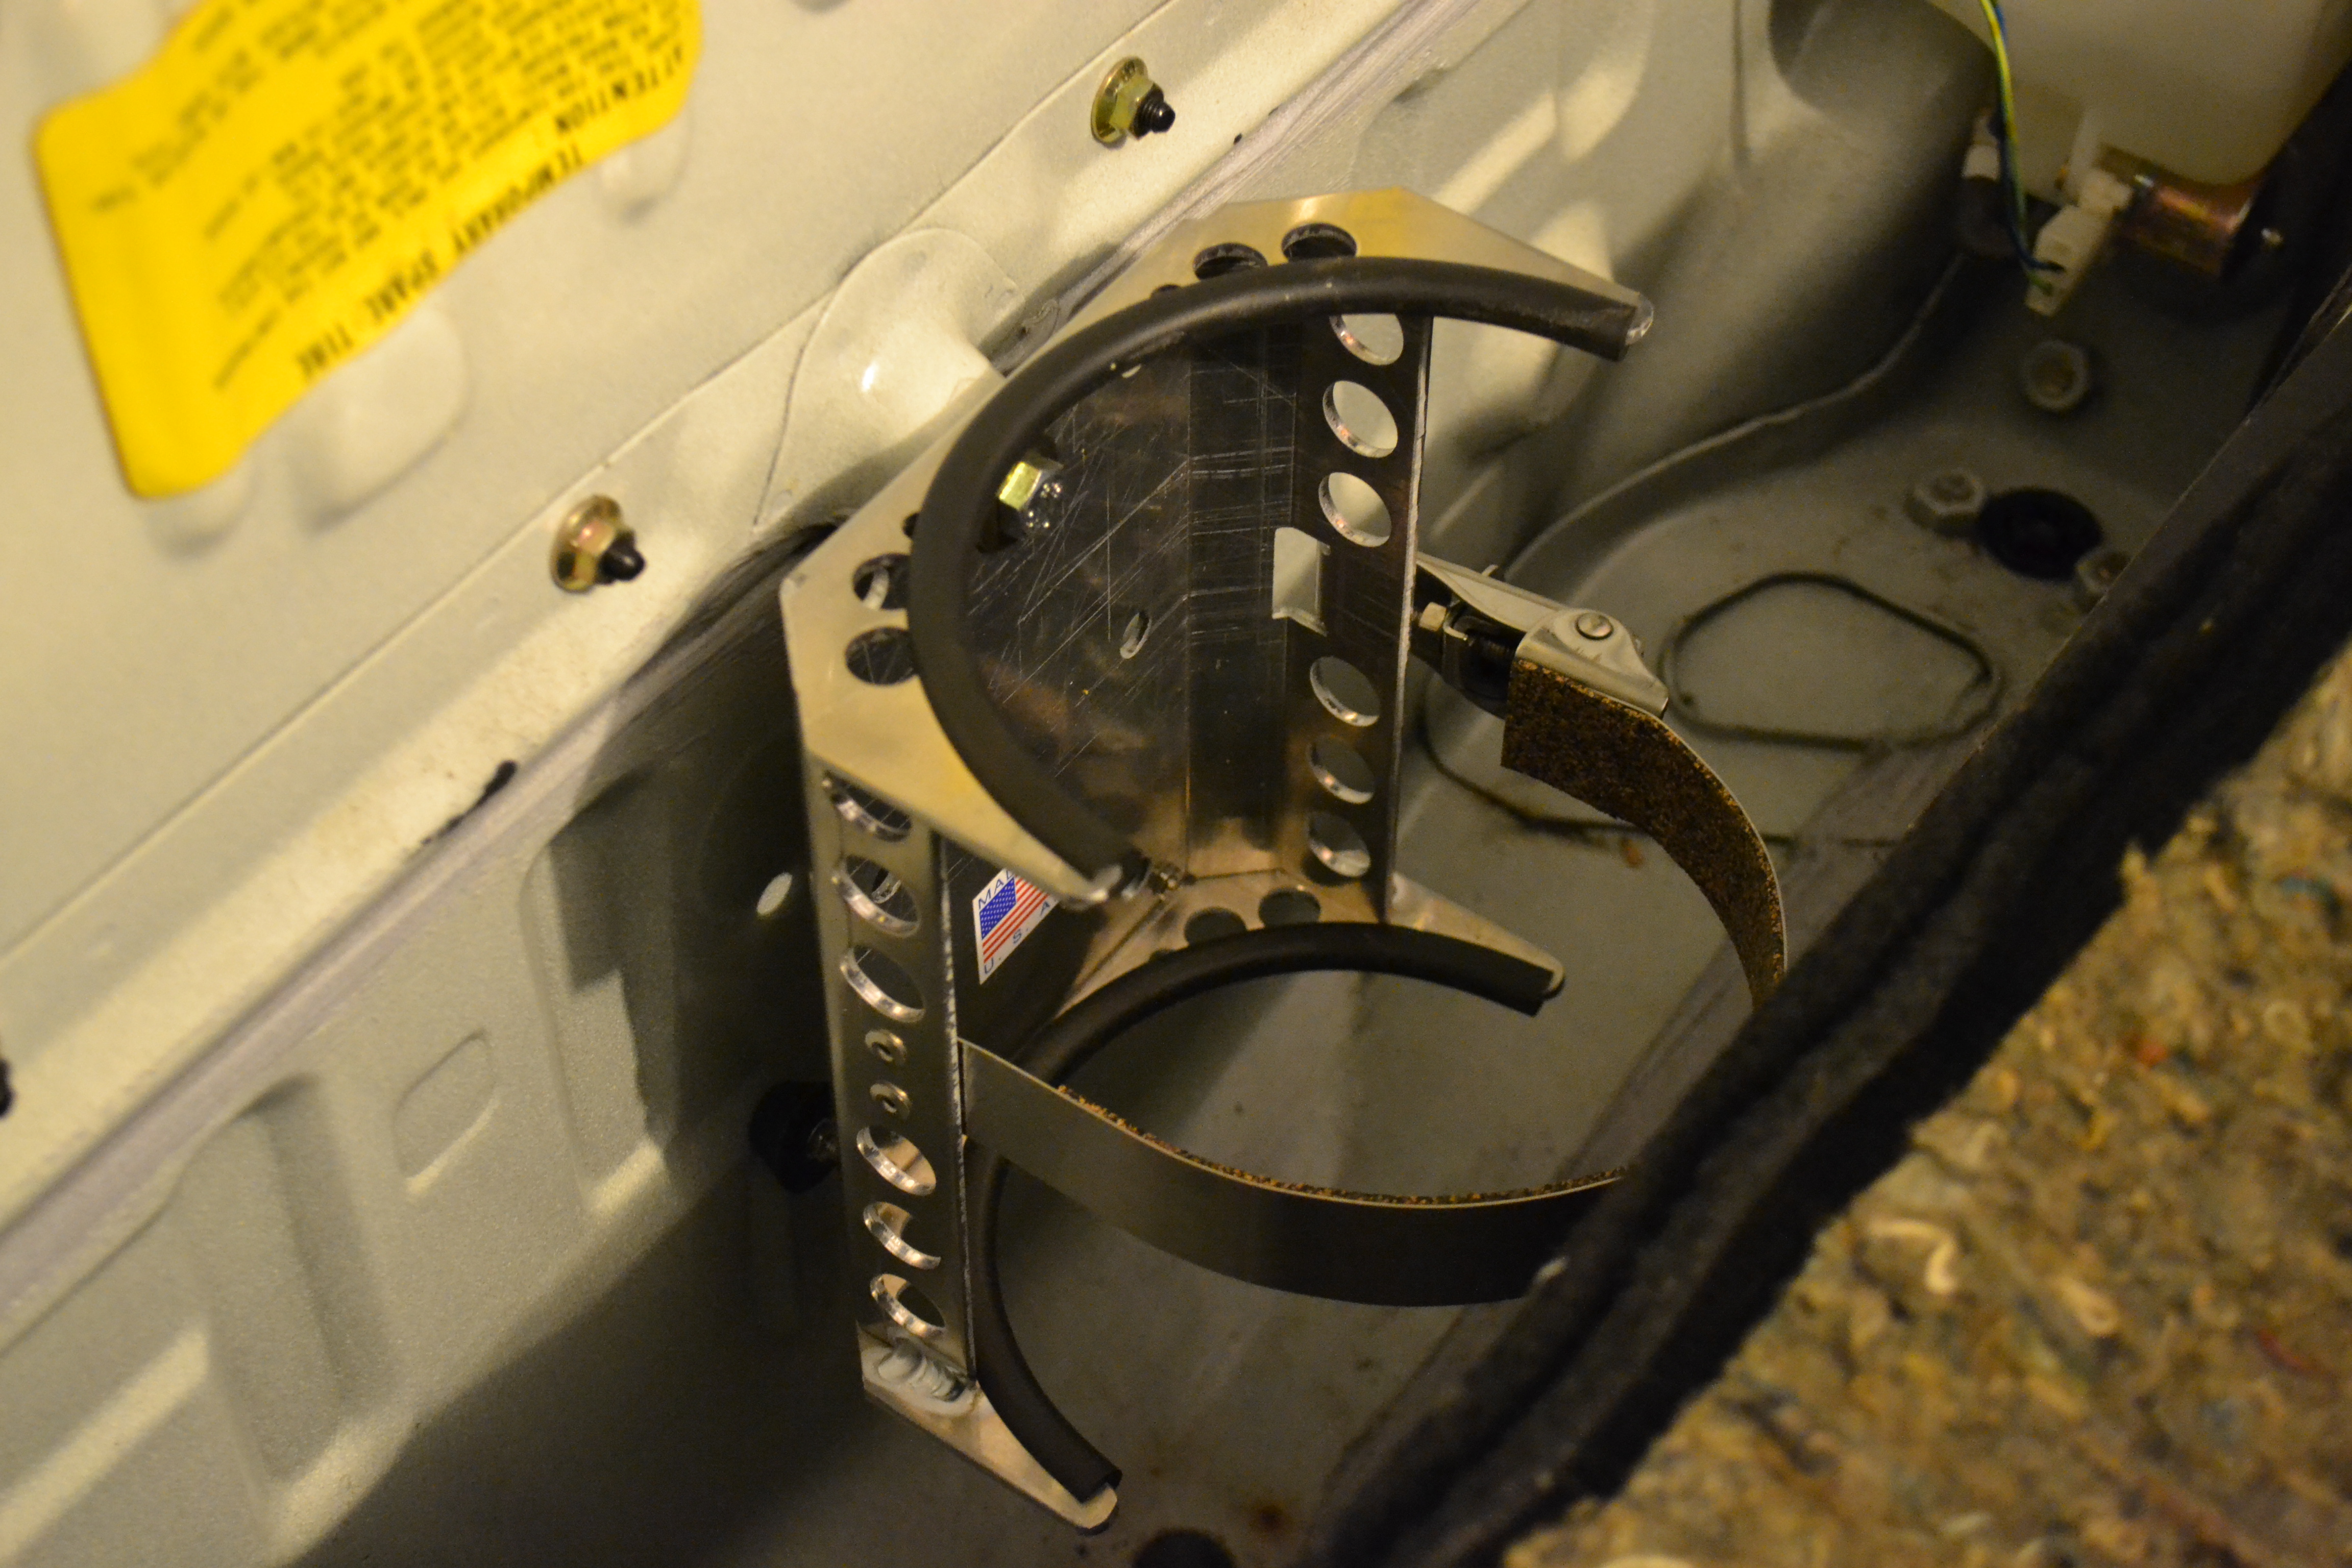
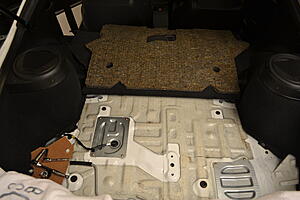
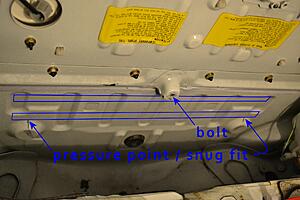
I sat in the hatch for hours trying to come up with a way to not drill the car and get the new equipment mounted in the spare tire well. My solution conists of the existing tank mount + 20mm square aluminum tubing + lots of careful measuring, and I like the result.
The material on the tubing is adhesive foam sheet.

The assembly snugs up against the two circular protrusions, and against the back wall. It's all very rigid once the top bolt is tightened. I recommend this solution, and the central tank mount could be replaced with a simple aluminum plate.
I sat in the hatch for hours trying to come up with a way to not drill the car and get the new equipment mounted in the spare tire well. My solution conists of the existing tank mount + 20mm square aluminum tubing + lots of careful measuring, and I like the result.

The material on the tubing is adhesive foam sheet.
The assembly snugs up against the two circular protrusions, and against the back wall. It's all very rigid once the top bolt is tightened. I recommend this solution, and the central tank mount could be replaced with a simple aluminum plate.


Looks great. I went a little different route. https://www.rx7club.com/auxiliary-in...ank-ai-718694/

