Widebody Turbo Swap - My Dream FB Build is Finally Happening!
 04-19-15, 07:22 PM
#226
I didn't realize anyone on here actually gave a **** about the value of their builds when they were completed lol. I thought it was kinda common knowledge that these cars aren't, and most likely never will be, worth much of anything. Other than the very low mileage SE and SA examples as mentioned above. To me that's part of the appeal, the fact that you can build one without spending an arm and a leg, and if done right you're left with a small, good handling car that can keep up with or pass most modern cars.
Back to the budgeting comments - Honestly to me, there is only one budget when doing a project and it is made up of both time and money, they're that interdependent. The big difference between building a car for yourself, and working with a team on a $20+ million system upgrade (it's as boring as it sounds) is that you don't have bosses breathing down your neck for "deliverables" and sign off dates and what not, it's all for you. Just figure it'll take you an extra 6 months to finish it and just work on making it as perfect as you can
Back to the budgeting comments - Honestly to me, there is only one budget when doing a project and it is made up of both time and money, they're that interdependent. The big difference between building a car for yourself, and working with a team on a $20+ million system upgrade (it's as boring as it sounds) is that you don't have bosses breathing down your neck for "deliverables" and sign off dates and what not, it's all for you. Just figure it'll take you an extra 6 months to finish it and just work on making it as perfect as you can
I know what you mean about the budgeting, it's up to your personal tastes and styles on what you want to put into the car.
This is what keeps me up at night, the knowledge that no matter how much I put into the car it'll still be worth at most a few thousand dollars. No matter how many tens of thousands I poured into this, I'll only get out what someone is willing to pay for it. So it's up to me to prioritize what I want to put into the car, and what I want to get out of it in the end.
have to agree here. everyone who mods their cars should know that they'll never get 100% return (u'd be lucky to get 50% return even). that doesn't mean u have an unlimited budget though so spend smartly, have fun during the build process, and enjoy the end result (if ever we get to it). for me, it's a hobby that takes my mind off work and the everyday stresses of life so i don't mind spending a little to keep me sane...or i could pay a shrink, but i'd rather not =)
 04-20-15, 03:07 PM
#227
Yep, it's a therapy of sorts. The argument about whether one should "invest" in a car since they won't get it back when they sell it cracks me up because those same people will go out and spend a bunch of money on beer and/or other consumables - you get nothing back when you're done with that stuff! Life is short, just build the car if you want to build the car - don't spend all your time worrying.
Obviously if you spend SO much money and time on it that other aspects of life start to suffer then it might be time to take it down a few notches
Obviously if you spend SO much money and time on it that other aspects of life start to suffer then it might be time to take it down a few notches
 04-23-15, 07:43 PM
#229
Yep, it's a therapy of sorts. The argument about whether one should "invest" in a car since they won't get it back when they sell it cracks me up because those same people will go out and spend a bunch of money on beer and/or other consumables - you get nothing back when you're done with that stuff! Life is short, just build the car if you want to build the car - don't spend all your time worrying.
Obviously if you spend SO much money and time on it that other aspects of life start to suffer then it might be time to take it down a few notches
Obviously if you spend SO much money and time on it that other aspects of life start to suffer then it might be time to take it down a few notches


 04-23-15, 08:13 PM
#232
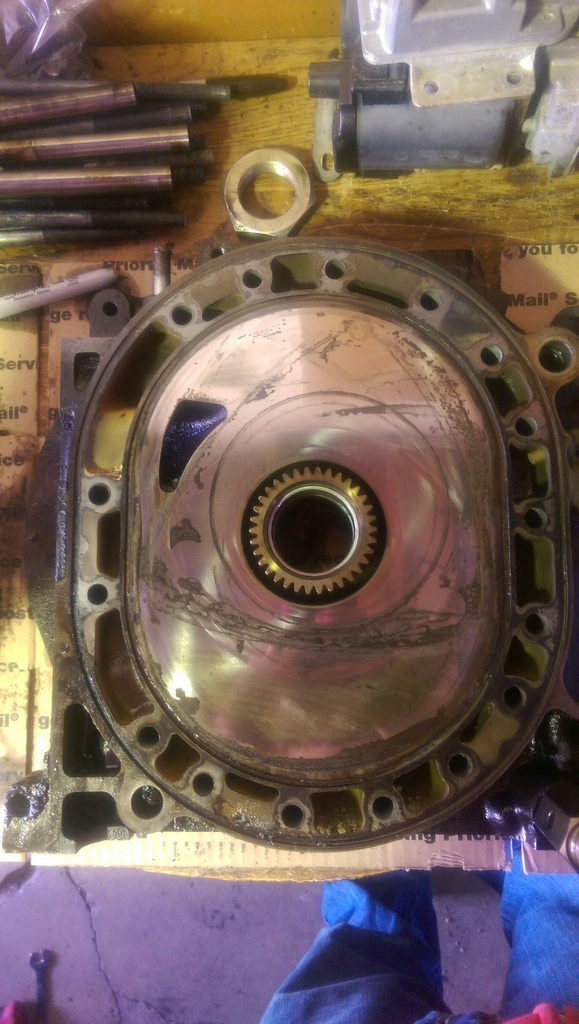
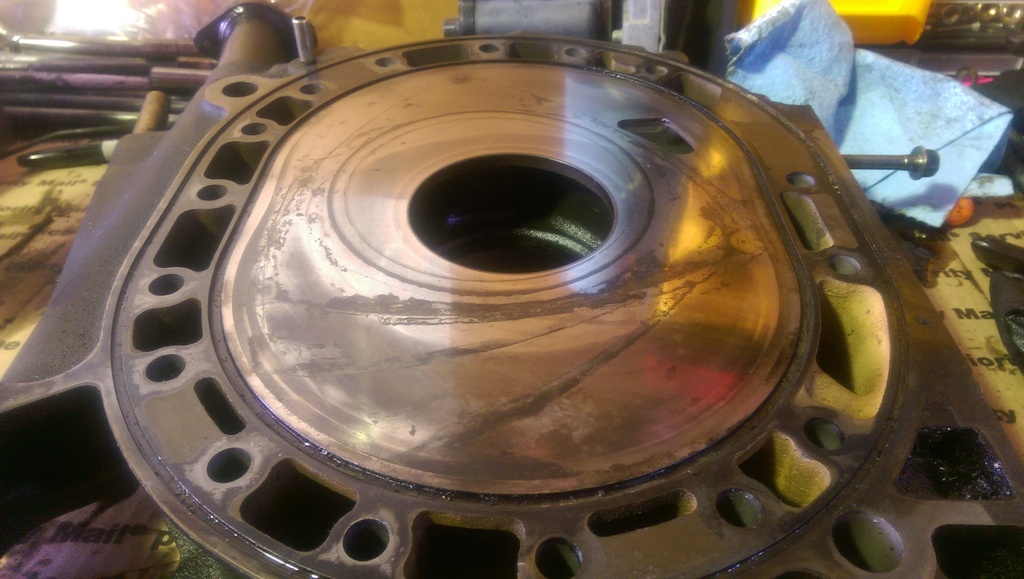
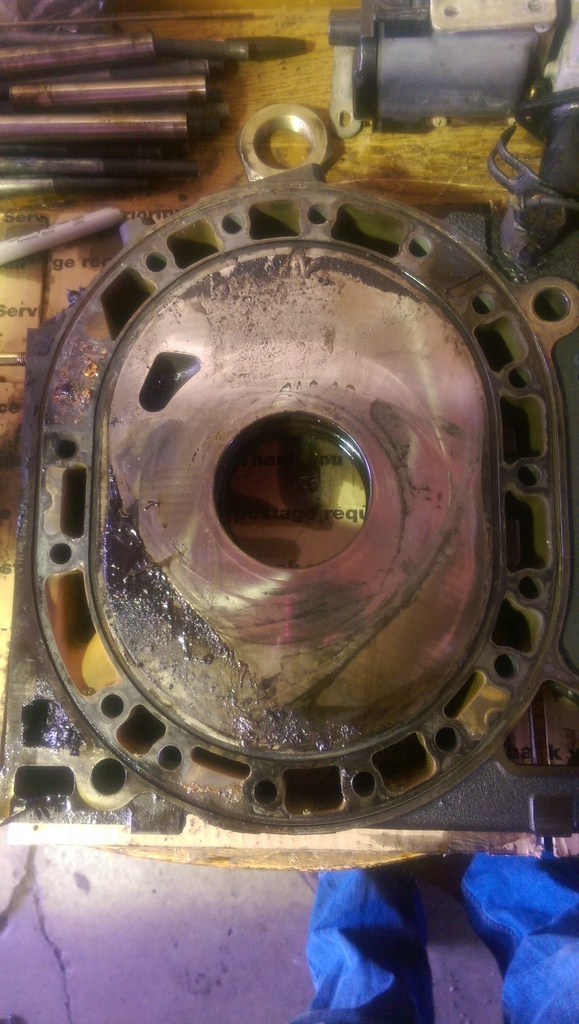
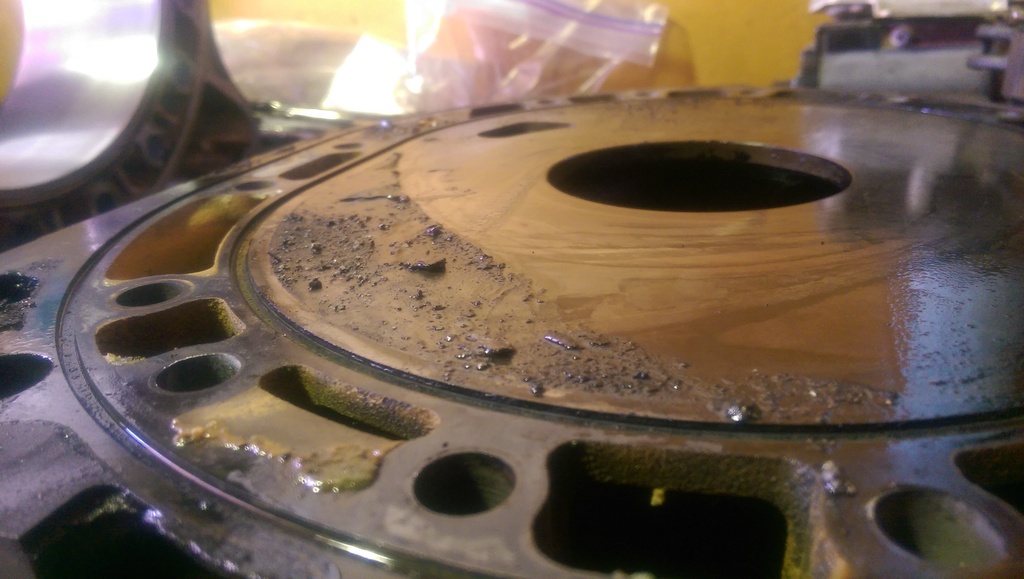
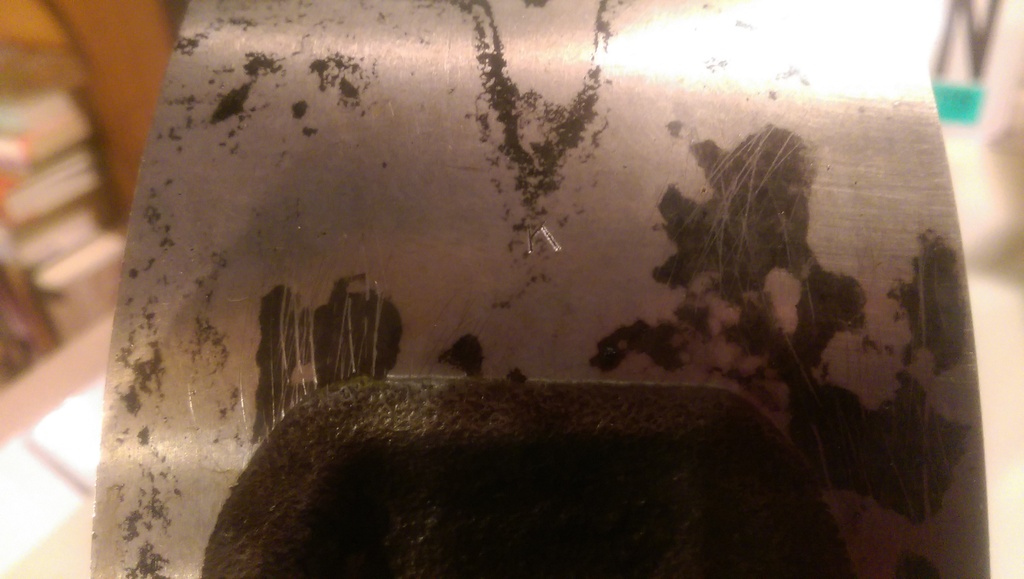
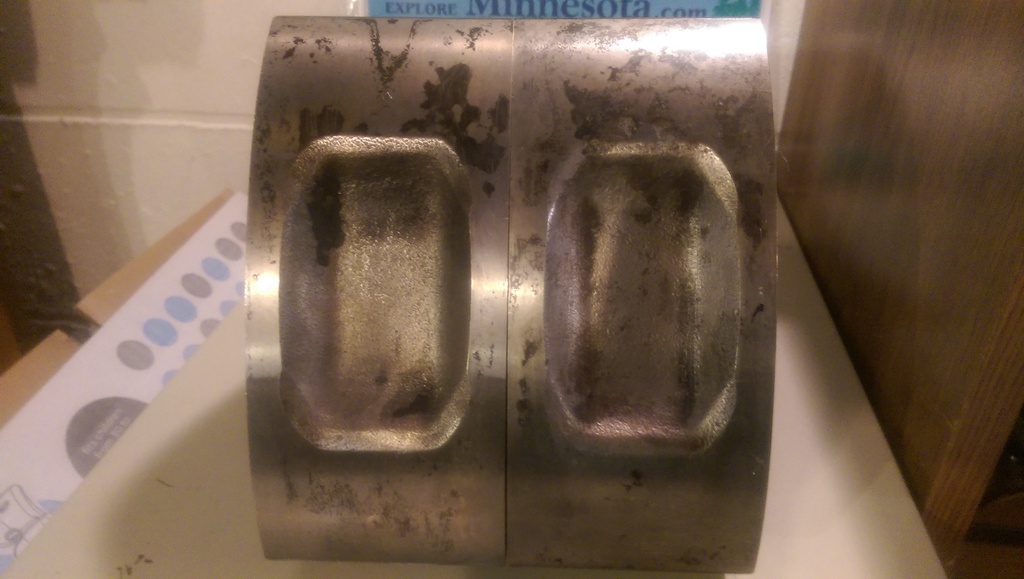
Rear and Center iron surfaces
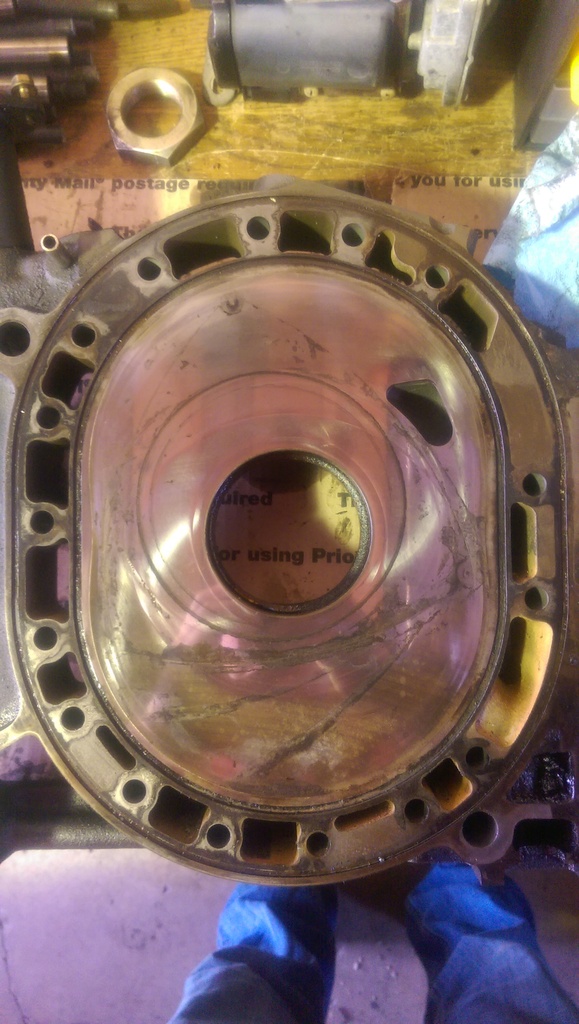
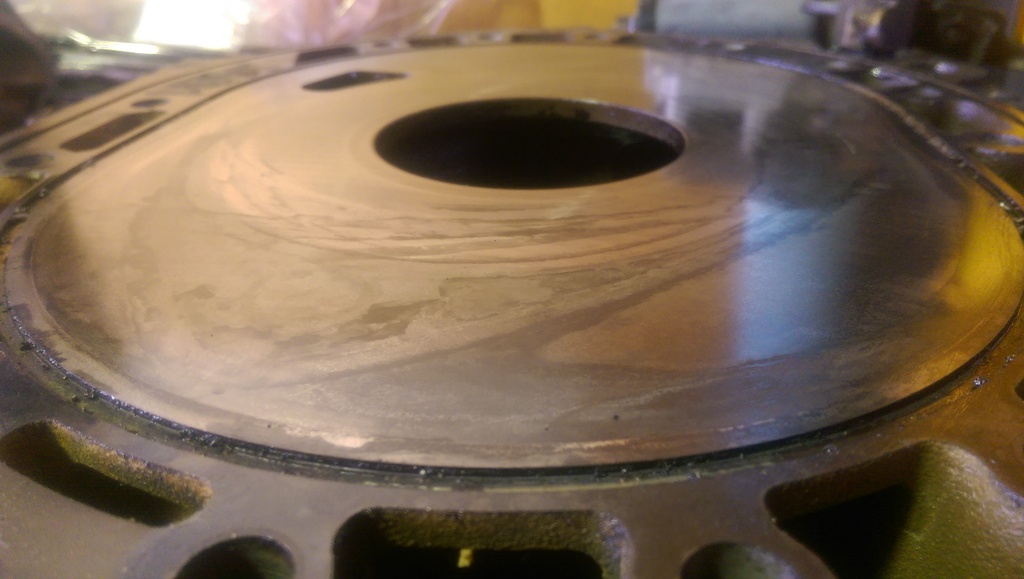
Rear iron surface
Rear iron surface
Rear iron surface
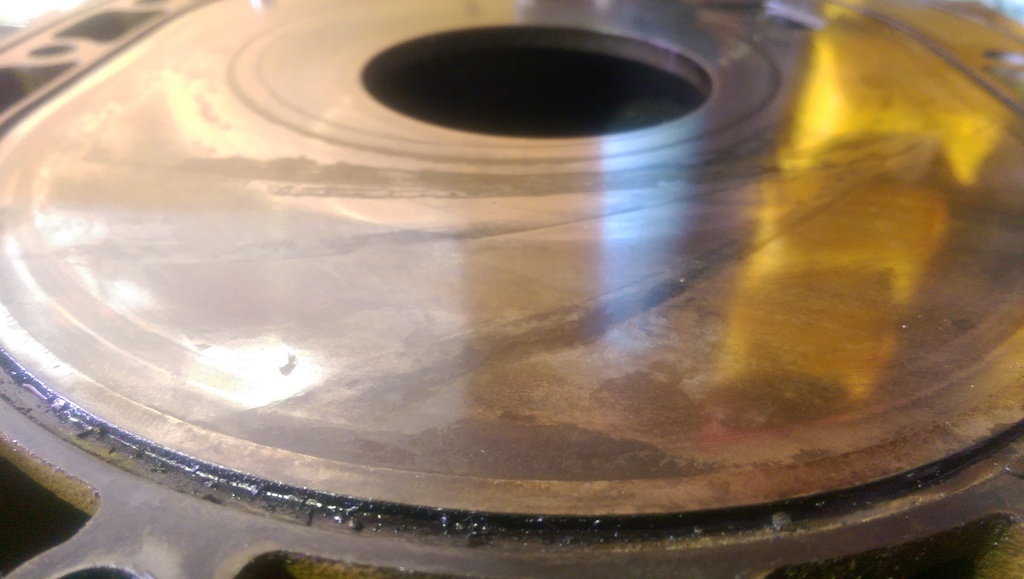
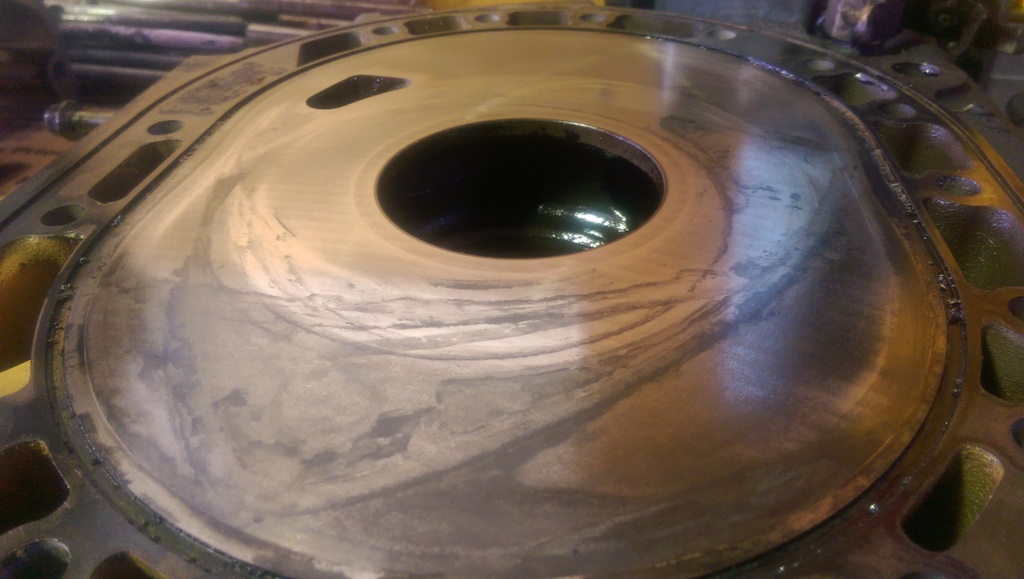
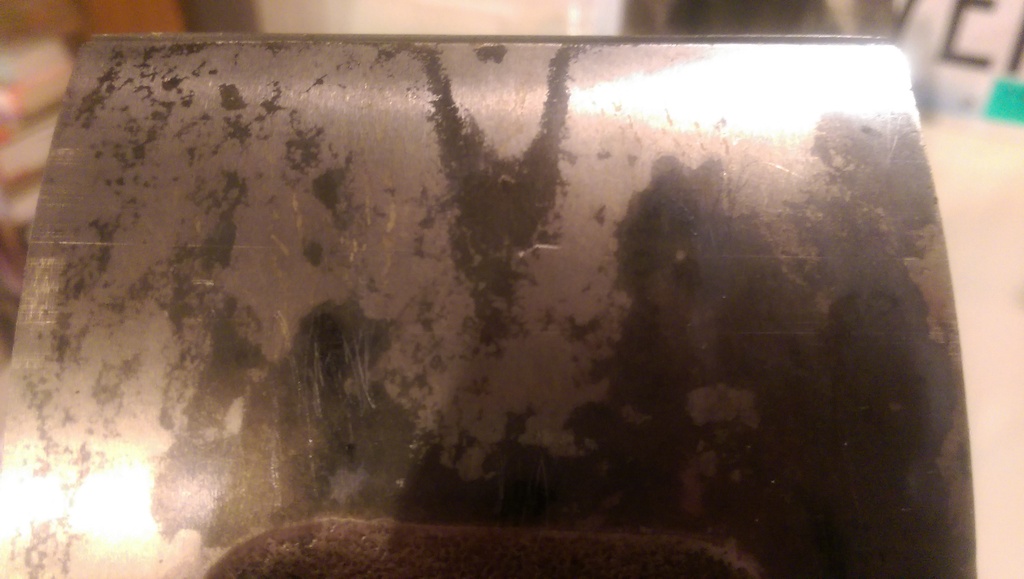
Center Rear iron surface
Center Rear iron surface
Center Rear iron surface
Center Rear iron surface
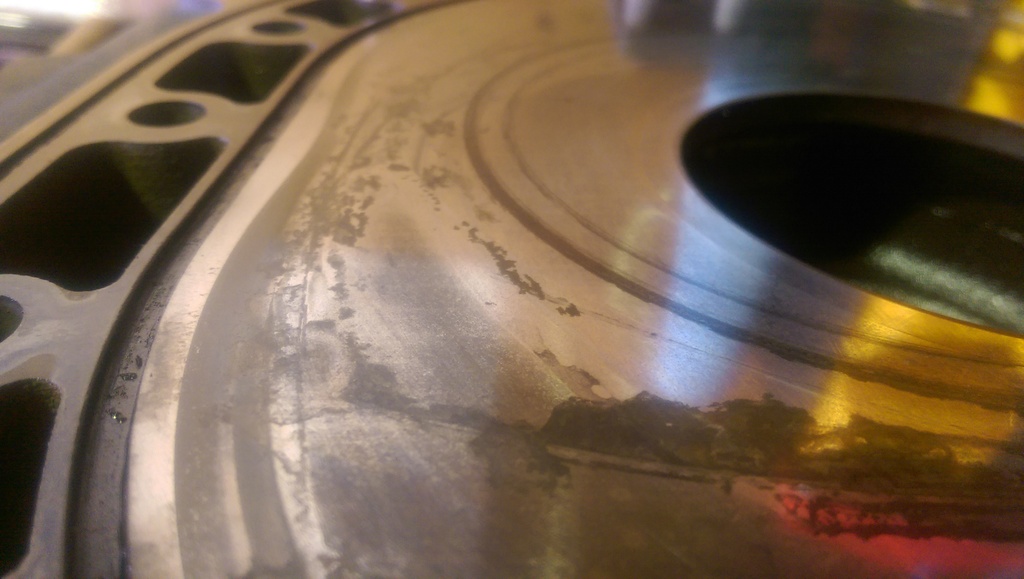
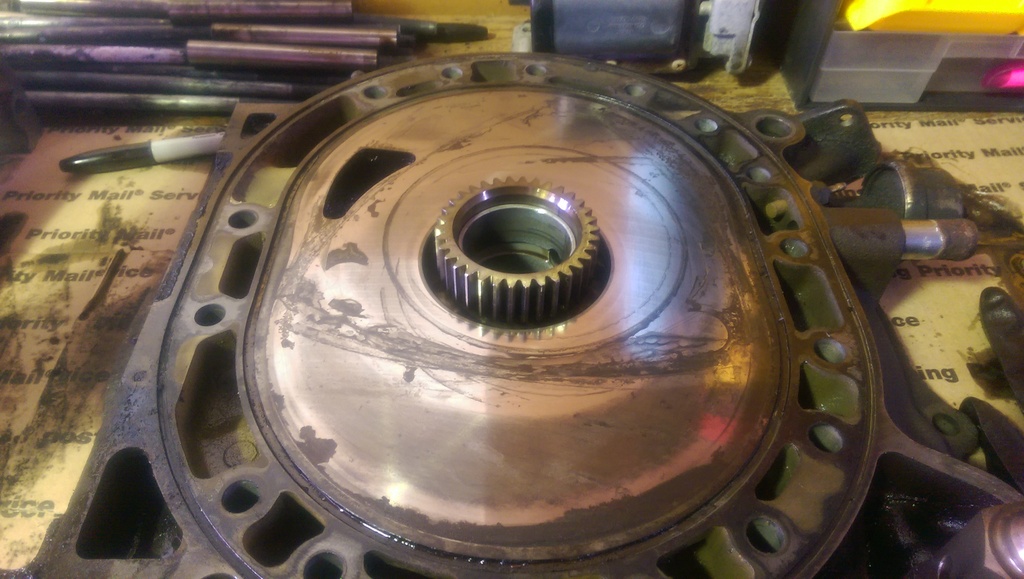
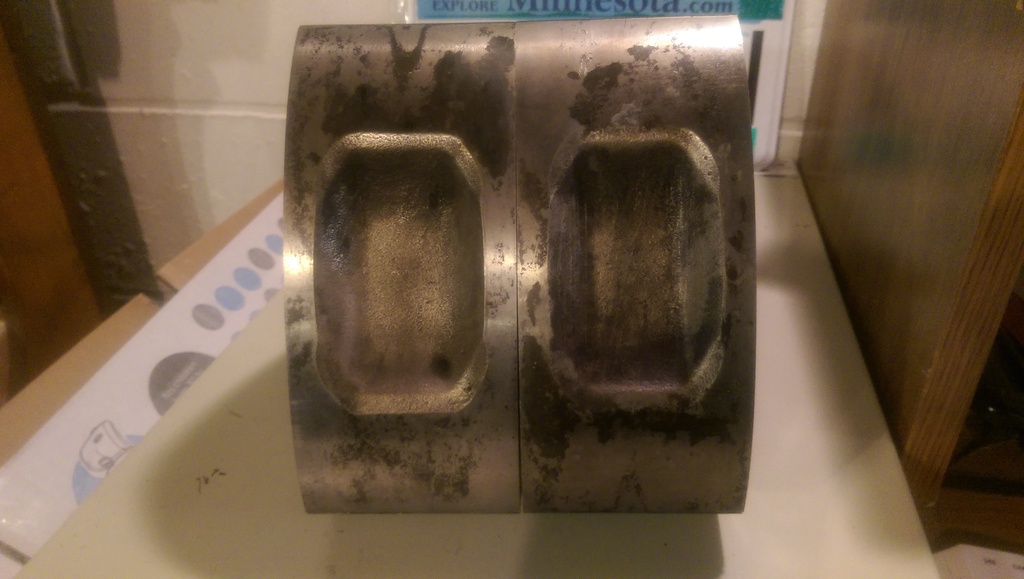
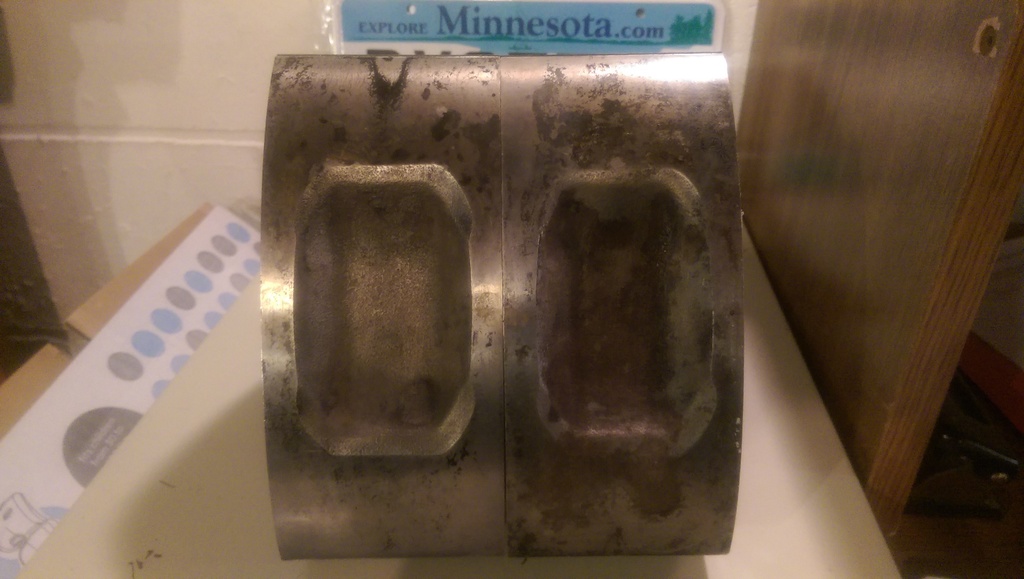
Center Front iron surface
Center Front iron surface
Center Front iron surface
Center Front iron surface

Rear iron surface

Rear iron surface

Center Rear iron surface

Center Rear iron surface

Center Rear iron surface

Center Rear iron surface

Center Front iron surface

Center Front iron surface

Center Front iron surface

Center Front iron surface


 04-24-15, 10:22 AM
#236
Full Member
Join Date: Aug 2013
Location: Trinidad & Tobago
Posts: 178
Likes: 0
Received 0 Likes
on
0 Posts
rear housing looks like a apex seal got loose and tore it up, has some dings and chrome flake.. i would replace both and have the plates resurfaced using a lathe or lapping
04-25-15, 05:33 PM
#237
Dont lap. It isnt cost efficient. I would buy at least a new rear housing, its trash. Feel for step wear in the irons. If you feel any significant dips (there will be some, just try to decide if it significant or not) buy a new set. They are relatively cheap.
Rear rotor may be trash as well if a seal cracked.
Rear rotor may be trash as well if a seal cracked.
04-27-15, 09:50 AM
#238
Thank you NCross! Lapping went obsolete as soon as the first nitrided iron rolled off the production line. When was that? 1979? or '78 maybe?
The underlying iron on all nitrided plates is softer than the earlier 74-78. This means early irons can be lapped several times until they are so short the intake manifold won't fit anymore. But all 1979 and later shouldn't be lapped because the iron is so soft you can scratch it with a ball point pen. Or any tool accidentally drug across the surface. What does that say to you about side seals? Oil seals? Corner seals? Ever seen the extreme wear/damage to oil seals after tearing down a lapped engine? Ever seen the smoke on startup? Even on low mile lapped engines? When you do, you realize every shop that recommends lapping should be run out of business. A local shop called Hayes Rotary used to lap irons all the time and collected a lot of money over the years. They're no longer in business and I think we as a community are a lot better off.
So, Dream, please get rid of any thoughts of lapping. It belongs in the "failed or flawed concept" bin like ATF in any internal combustion engine, or a 6 port with all 6 ports open all the time. Just because lots of people still do it, doesn't mean it's the right thing to do.
The underlying iron on all nitrided plates is softer than the earlier 74-78. This means early irons can be lapped several times until they are so short the intake manifold won't fit anymore.
But all 1979 and later shouldn't be lapped because the iron is so soft you can scratch it with a ball point pen. Or any tool accidentally drug across the surface. What does that say to you about side seals? Oil seals? Corner seals? Ever seen the extreme wear/damage to oil seals after tearing down a lapped engine? Ever seen the smoke on startup? Even on low mile lapped engines? When you do, you realize every shop that recommends lapping should be run out of business. A local shop called Hayes Rotary used to lap irons all the time and collected a lot of money over the years. They're no longer in business and I think we as a community are a lot better off.So, Dream, please get rid of any thoughts of lapping. It belongs in the "failed or flawed concept" bin like ATF in any internal combustion engine, or a 6 port with all 6 ports open all the time. Just because lots of people still do it, doesn't mean it's the right thing to do.
04-27-15, 09:57 AM
#239
Moderator
iTrader: (3)
Join Date: Mar 2001
Location: https://www2.mazda.com/en/100th/
Posts: 30,847
Received 2,606 Likes
on
1,849 Posts
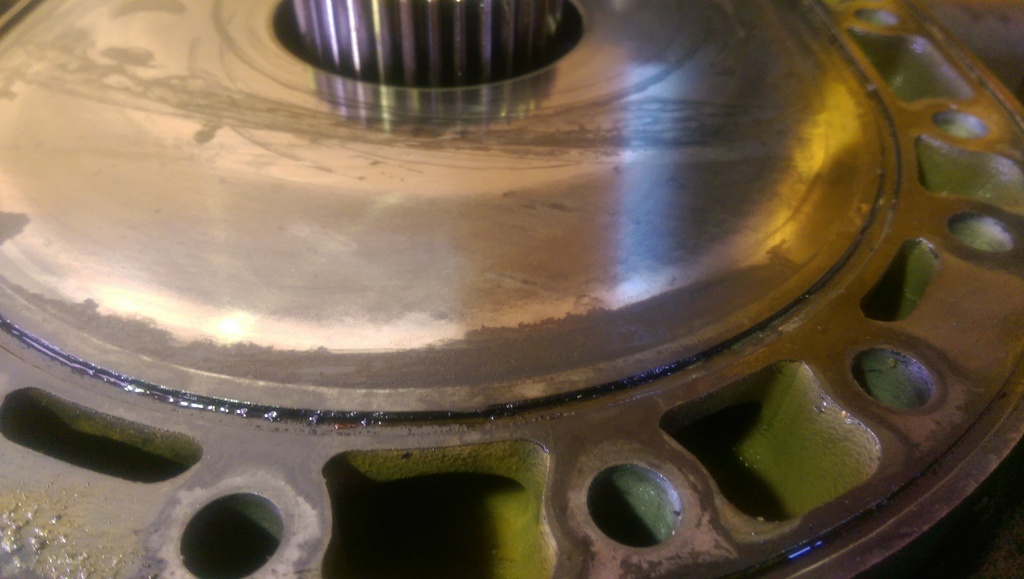
i think those irons will clean up. you can see it sat with a dead water seal, so its a good thing you pulled it apart!
i'd sell that front rotor housing, and just buy a pair of new ones, they really run better with new parts
i'd sell that front rotor housing, and just buy a pair of new ones, they really run better with new parts
 04-29-15, 01:33 PM
#240
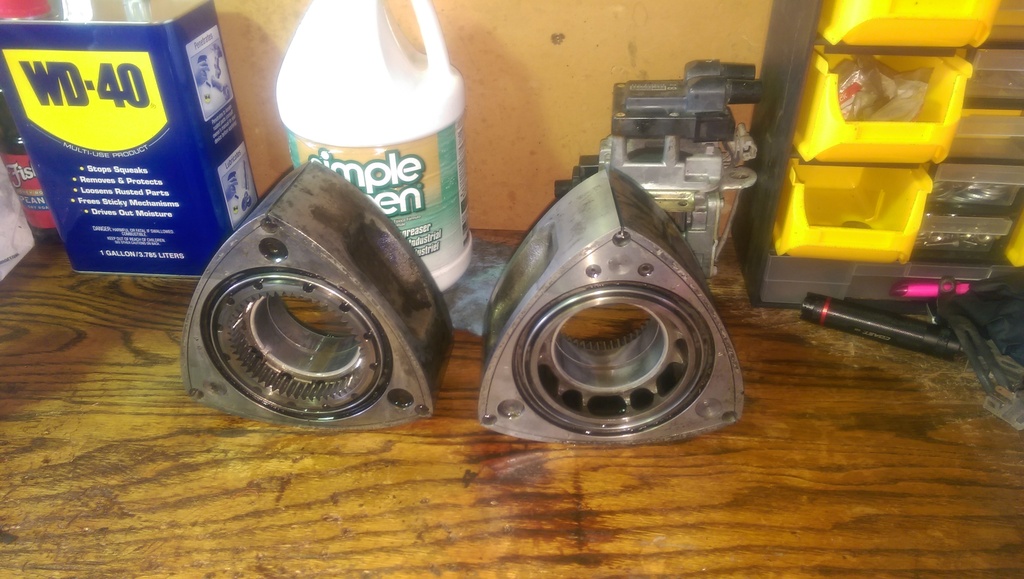
I soaked the rotors in a mixture of Simple Green and water mixed to about a 1:10 ratio (1 Simple Green/10 Water) for 5 days to break up the carbon and ease in the cleanup.
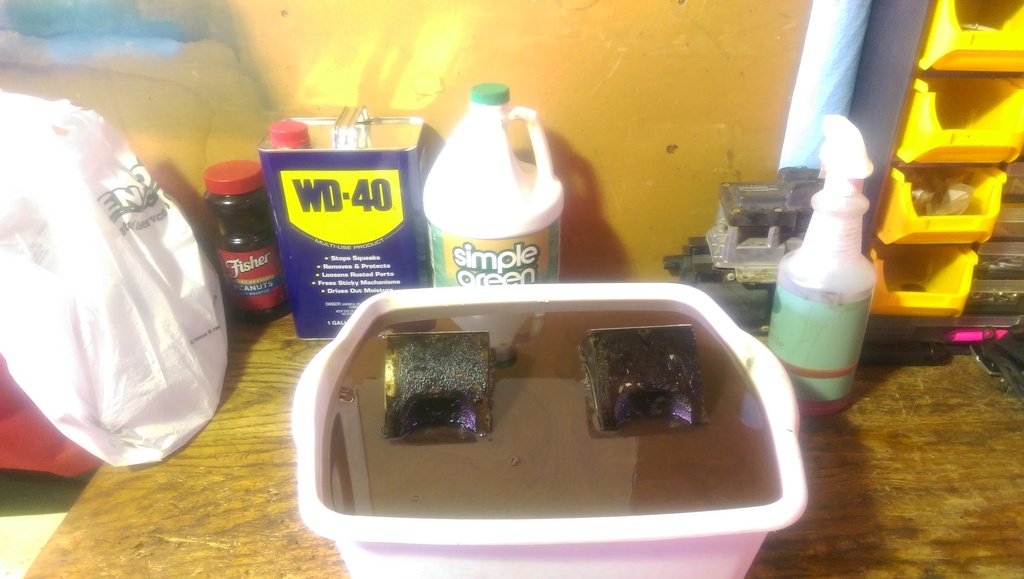
They came out looking mighty fine after some scrubbing while still in the mixture:
Markings on the front of one of the rotors:
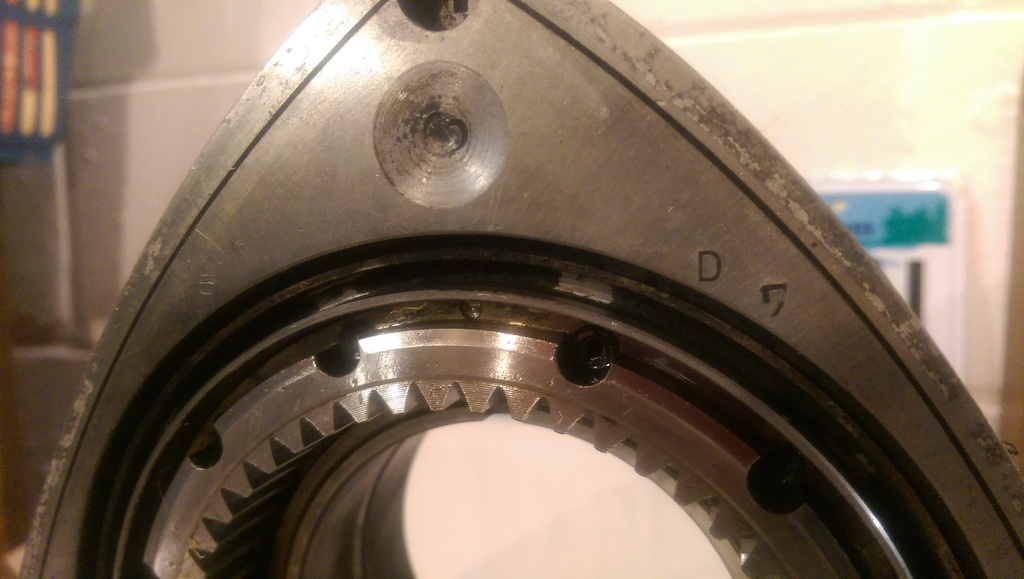
Markings on the other rotor:
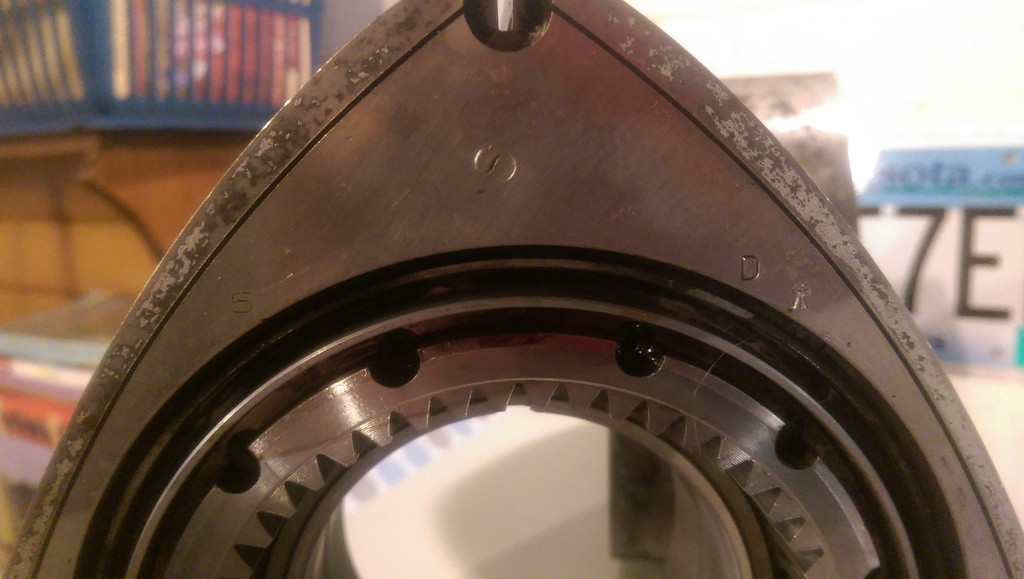
"H" on one of the rotor faces:
"K" on one of the rotor faces:
"Y" on one of the rotor faces:
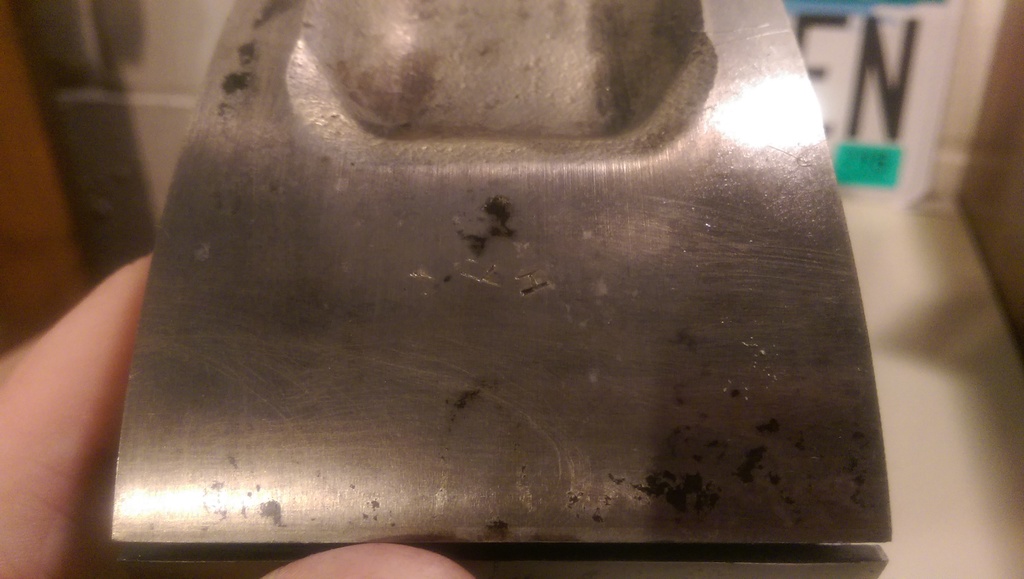
You can notice some damage to the rotor on the right here on the top:
2nd of the 3 faces of both of the rotors:
Final faces of both rotors:

They came out looking mighty fine after some scrubbing while still in the mixture:

Markings on the front of one of the rotors:

Markings on the other rotor:

"H" on one of the rotor faces:

"K" on one of the rotor faces:

"Y" on one of the rotor faces:

You can notice some damage to the rotor on the right here on the top:

2nd of the 3 faces of both of the rotors:

Final faces of both rotors:
 04-29-15, 01:35 PM
#241
There is a little bit of damage to one of the rotor faces here:

The rest of the faces of the rotors appear to be alright, apex seal grooves seem to be ok, it's mainly that damaged spot that I'm worried about.
I guess I'm not sure what the specific consequences of running a rotor with some slight face damage would be - anyone care to elaborate?


The rest of the faces of the rotors appear to be alright, apex seal grooves seem to be ok, it's mainly that damaged spot that I'm worried about.
I guess I'm not sure what the specific consequences of running a rotor with some slight face damage would be - anyone care to elaborate?
04-29-15, 02:05 PM
#242
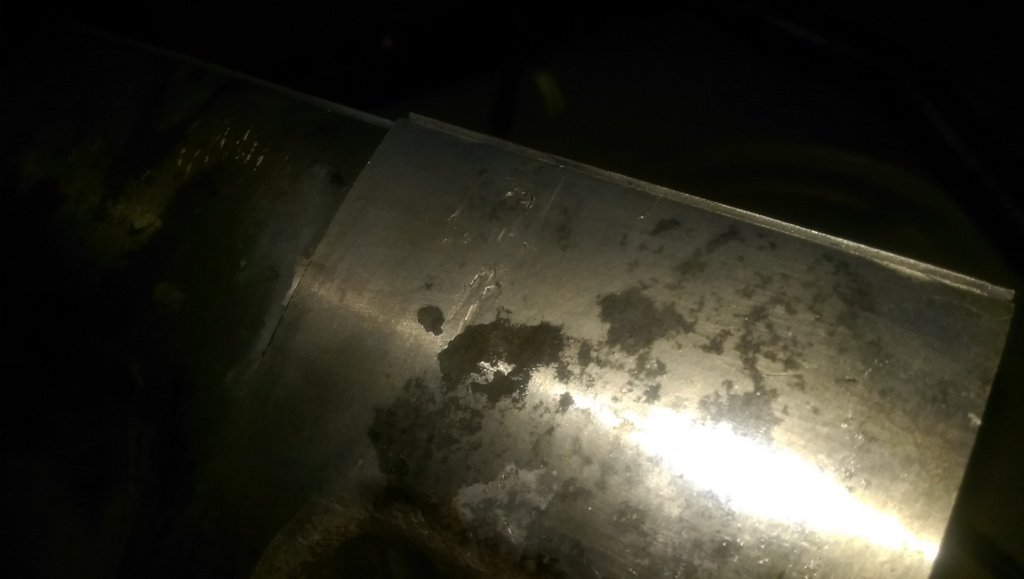
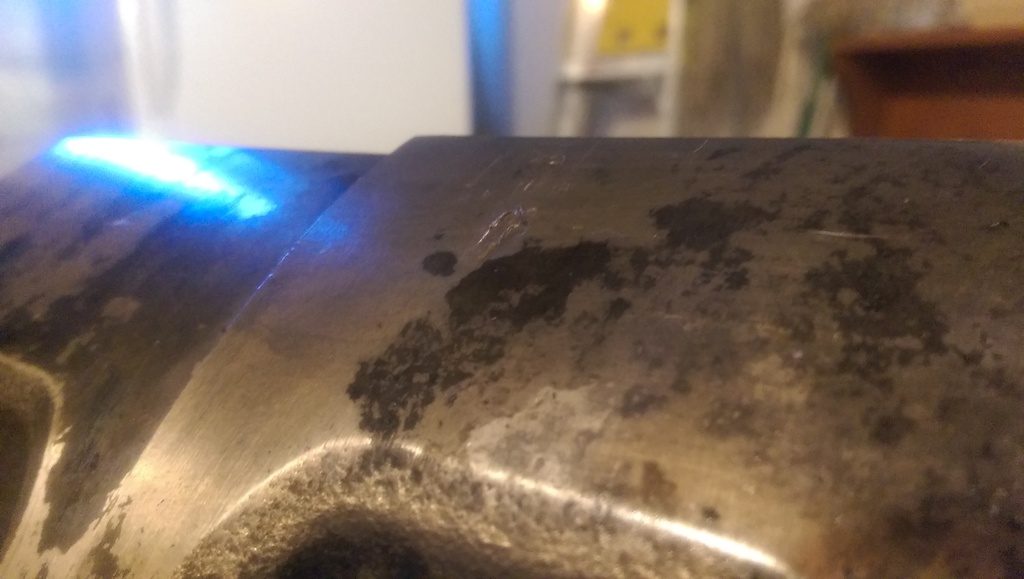
This motor could be slapped back together and would run - I do believe that. The slight chatter in the rear housing near the exhaust port would be a big concern for me. The surface corrosion on the irons would be the biggest issue though and I believe I can remedy that, I'll expound on that in a minute.
I agree, the chatter near the exhaust port seems like a clear indicator that something got loose in there and tore it up. I'll extrapolate on the irons in just a minute.
The irons actually felt really good to me - I've had 3 12a's apart this year and only one of them had really good irons. The irons from this engine are very comparable to those perfect 12a ones so I do believe that they can be reused easily.
I showed the damage to one of the rotors in the last post - would this be from the loose part in the motor and could explain the chatter marks in the rear housing?
I believe I remember you or someone else talking about the nitrided irons and I did some research on what this process entails. The nitride coating, whether Chromium or Titanium, is only 3 micrometers (or 0.0001") thick from the first Googled company to show up. So like you say - a ballpoint pen could scratch the iron to an unusable state. So don't worry, these irons will not be sent off to be lapped.
I believe it had a bad water seal as well - the irons don't have missing coolant passages and there is a lot of nasty corrosion on the irons which would have been caused by a coolant leak of one sort or another.
The front rotor housing could be reused pretty easily I believe, the rear would have to be resurfaced - and if I was going to do one rotor housing resurfacing I'd just do both of them for the $300 asking price. So maybe selling the front housing off and buying a new set is the best option right now.
MAZDATRIX Pricing:
Rotor Housings:
$625.22---13B 86-88 TURBO FRNT---10-B100-N332
$554.63---13B 86-88 TURBO REAR---10-B50B-N332
$1,179.85
Irons:
$454.01---86-88 RX7 TURBO FRNT---10-C00D-N318
$509.71---87-92 RX7 TURBO CENT---10-D00C-N370
$408.01---86-88 RX7 TURBO REAR---10-C50C-N318
$1,371.73
Rotors:
$759.13---13B 86-88 TURBO---11-B10A-N3Y2
$759.13---13B 86-88 TURBO---11-B10A-N3Y2
$1,518.26
So I guess my idea right now is to do the following:
Rotor Housings - sell off the front housing and buy two good used ones in a part out or resurface both of the ones I have for $300 and run those.
Irons - use some extremely fine sandpaper or a metal finishing brillow pad with some WD-40 as lubricant and clean off the corrosion, these should be reusable.
Rotors - wait and see what the dire effects of running a rotor with a small scar is. If it's not catastrophic I may just run both rotors I have now.
Keep in mind that I just surpassed 21 1/2 years old a few weeks ago, I'm in college now and for the next few years, I can only really work in the summers full time and I'm going to try for 20hrs/wk next school year, and can't run myself completely broke doing this build (which I've done too good of a job at lately). I'm texting 82transam right now and he brought up how you guys have full time jobs and incomes to support your rotary hobbies which is something that I lack right now. Once I'm out of school and get into the career field I want I hopefully won't have to worry as much about the cost of the engine build in my future. This car won't be out of the garage in a running and driving state for at least another 12 months so I have some time to save up and get everything dialed in correctly - the engine is my main concern right now. I'm going to learn how to do my own body work this summer to the car, repaint it, get the chassis at 100% before really tearing into the engine. This is mainly because the engine will be the most expensive part of the build and that the body work will be easier to do in the summer and fall when it's warmer out. The heating system in there is just a bullet heater and propane spot heater right now - so all body work has to be done this summer so I'm not freezing out there putting on cold paint next winter.
I have the following questions for you rotary guru's:
1. What are the consequences of running a rotor with a small scar like mine?
2. What's the verdict on resurfacing rotor housings - yay or nay (experience would be a helpful insight - I've read up on it quite a bit)?
Dont lap. It isnt cost efficient. I would buy at least a new rear housing, its trash. Feel for step wear in the irons. If you feel any significant dips (there will be some, just try to decide if it significant or not) buy a new set. They are relatively cheap.
Rear rotor may be trash as well if a seal cracked.
Rear rotor may be trash as well if a seal cracked.
I showed the damage to one of the rotors in the last post - would this be from the loose part in the motor and could explain the chatter marks in the rear housing?
Thank you NCross! Lapping went obsolete as soon as the first nitrided iron rolled off the production line. When was that? 1979? or '78 maybe?
The underlying iron on all nitrided plates is softer than the earlier 74-78. This means early irons can be lapped several times until they are so short the intake manifold won't fit anymore. But all 1979 and later shouldn't be lapped because the iron is so soft you can scratch it with a ball point pen. Or any tool accidentally drug across the surface. What does that say to you about side seals? Oil seals? Corner seals? Ever seen the extreme wear/damage to oil seals after tearing down a lapped engine? Ever seen the smoke on startup? Even on low mile lapped engines? When you do, you realize every shop that recommends lapping should be run out of business. A local shop called Hayes Rotary used to lap irons all the time and collected a lot of money over the years. They're no longer in business and I think we as a community are a lot better off.
So, Dream, please get rid of any thoughts of lapping. It belongs in the "failed or flawed concept" bin like ATF in any internal combustion engine, or a 6 port with all 6 ports open all the time. Just because lots of people still do it, doesn't mean it's the right thing to do.
The underlying iron on all nitrided plates is softer than the earlier 74-78. This means early irons can be lapped several times until they are so short the intake manifold won't fit anymore.
But all 1979 and later shouldn't be lapped because the iron is so soft you can scratch it with a ball point pen. Or any tool accidentally drug across the surface. What does that say to you about side seals? Oil seals? Corner seals? Ever seen the extreme wear/damage to oil seals after tearing down a lapped engine? Ever seen the smoke on startup? Even on low mile lapped engines? When you do, you realize every shop that recommends lapping should be run out of business. A local shop called Hayes Rotary used to lap irons all the time and collected a lot of money over the years. They're no longer in business and I think we as a community are a lot better off.So, Dream, please get rid of any thoughts of lapping. It belongs in the "failed or flawed concept" bin like ATF in any internal combustion engine, or a 6 port with all 6 ports open all the time. Just because lots of people still do it, doesn't mean it's the right thing to do.
The front rotor housing could be reused pretty easily I believe, the rear would have to be resurfaced - and if I was going to do one rotor housing resurfacing I'd just do both of them for the $300 asking price. So maybe selling the front housing off and buying a new set is the best option right now.
MAZDATRIX Pricing:
Rotor Housings:
$625.22---13B 86-88 TURBO FRNT---10-B100-N332
$554.63---13B 86-88 TURBO REAR---10-B50B-N332
$1,179.85
Irons:
$454.01---86-88 RX7 TURBO FRNT---10-C00D-N318
$509.71---87-92 RX7 TURBO CENT---10-D00C-N370
$408.01---86-88 RX7 TURBO REAR---10-C50C-N318
$1,371.73
Rotors:
$759.13---13B 86-88 TURBO---11-B10A-N3Y2
$759.13---13B 86-88 TURBO---11-B10A-N3Y2
$1,518.26
So I guess my idea right now is to do the following:
Rotor Housings - sell off the front housing and buy two good used ones in a part out or resurface both of the ones I have for $300 and run those.
Irons - use some extremely fine sandpaper or a metal finishing brillow pad with some WD-40 as lubricant and clean off the corrosion, these should be reusable.
Rotors - wait and see what the dire effects of running a rotor with a small scar is. If it's not catastrophic I may just run both rotors I have now.
Keep in mind that I just surpassed 21 1/2 years old a few weeks ago, I'm in college now and for the next few years, I can only really work in the summers full time and I'm going to try for 20hrs/wk next school year, and can't run myself completely broke doing this build (which I've done too good of a job at lately). I'm texting 82transam right now and he brought up how you guys have full time jobs and incomes to support your rotary hobbies which is something that I lack right now. Once I'm out of school and get into the career field I want I hopefully won't have to worry as much about the cost of the engine build in my future. This car won't be out of the garage in a running and driving state for at least another 12 months so I have some time to save up and get everything dialed in correctly - the engine is my main concern right now. I'm going to learn how to do my own body work this summer to the car, repaint it, get the chassis at 100% before really tearing into the engine. This is mainly because the engine will be the most expensive part of the build and that the body work will be easier to do in the summer and fall when it's warmer out. The heating system in there is just a bullet heater and propane spot heater right now - so all body work has to be done this summer so I'm not freezing out there putting on cold paint next winter.
I have the following questions for you rotary guru's:
1. What are the consequences of running a rotor with a small scar like mine?
2. What's the verdict on resurfacing rotor housings - yay or nay (experience would be a helpful insight - I've read up on it quite a bit)?
04-29-15, 02:32 PM
#243
That marking doesn't took too bad.
I've seen people use way worse condition rotors. Unless, however, you want to buy my s6 rotors and have them balance lol.
Alternatively, I have a s4 t2 rotor in good condition if you want to buy it for $40.
I have a step-wear tool if you need to measure the irons as well as all sorts of other goodies a buddy of mine picked up for me from pineapple when he was there.
Make sure the coolant passages don't have breaks/cracks/etc.
04-30-15, 11:58 AM
#245
1. The mark is fine. Test it with a flat file for any high spots.
2. You could probably use the rear housing without resurfacing. Use a sharpie to mark them, then a file or box cutter blade to test for high spots. Then use a dremel with a small grinding stone to get rid of them.
2. You could probably use the rear housing without resurfacing. Use a sharpie to mark them, then a file or box cutter blade to test for high spots. Then use a dremel with a small grinding stone to get rid of them.
04-30-15, 11:39 PM
#246
That marking doesn't took too bad.
I've seen people use way worse condition rotors. Unless, however, you want to buy my s6 rotors and have them balance lol.
Alternatively, I have a s4 t2 rotor in good condition if you want to buy it for $40.
I have a step-wear tool if you need to measure the irons as well as all sorts of other goodies a buddy of mine picked up for me from pineapple when he was there.
Make sure the coolant passages don't have breaks/cracks/etc.
I've seen people use way worse condition rotors. Unless, however, you want to buy my s6 rotors and have them balance lol.
Alternatively, I have a s4 t2 rotor in good condition if you want to buy it for $40.
I have a step-wear tool if you need to measure the irons as well as all sorts of other goodies a buddy of mine picked up for me from pineapple when he was there.
Make sure the coolant passages don't have breaks/cracks/etc.
1. The mark is fine. Test it with a flat file for any high spots.
2. You could probably use the rear housing without resurfacing. Use a sharpie to mark them, then a file or box cutter blade to test for high spots. Then use a dremel with a small grinding stone to get rid of them.
2. You could probably use the rear housing without resurfacing. Use a sharpie to mark them, then a file or box cutter blade to test for high spots. Then use a dremel with a small grinding stone to get rid of them.
Well, today I finally met up with a local guy who was trying to sell his Innovate MTX-L setup since he wasn't going to be using it anymore.


I got that setup for $40!!! The O2 sensor hasn't even been used yet! I'm super stoked for that, saved me like $150 on a gauge.
I went and helped a buddy get into an FB tonight, took a photo opportunity back at the house getting him some of my spare parts.


I tried to trick the fiance into thinking I picked up another FB, but she's too smart for my games anymore

 05-01-15, 11:30 PM
#248
Yeah, he's got 2 of the 3 gens - FC would round it out for him! I'd love to get an FC for a winter car next year

I was cleaning out the garage today and decided to take on a project involving cleaning as well.
TII transmission before, hasn't been properly clean since it came out of the factory almost 30 years ago now.

Pulled the bell housing and tail shaft off of the trans in order to clean them better and do the shifter rod modification.

I found this shim out of place between the bell housing and gear case - does it need to be there and replaced when I put it back together?

If you look closely at the bolt in the western position (left side from this angle) you can see where that shim slid up and was crushed in that weird pattern.

Transmission all separated and cleaned up really well. The center gear section could use some more cleaning that I may do, still not sure if I'll do it or not yet though.

Bell housing looks absolutely awesome though, so glad I spent the time on it today.
 05-01-15, 11:40 PM
#249
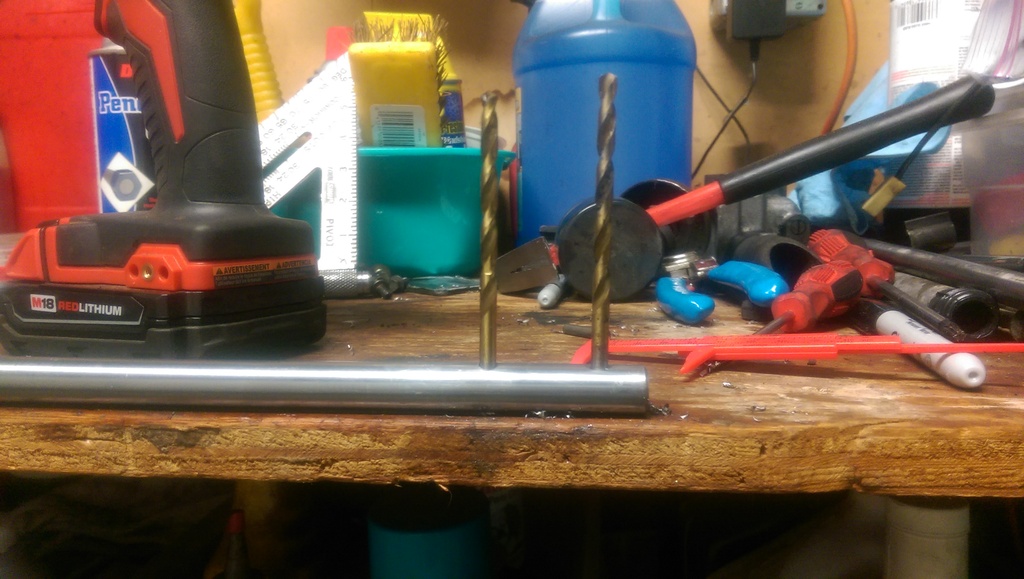
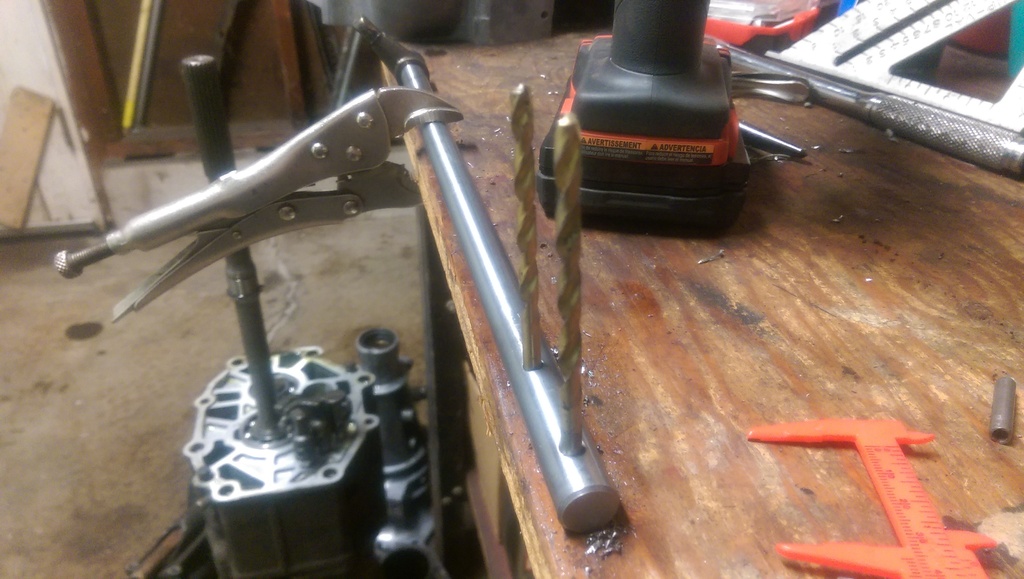
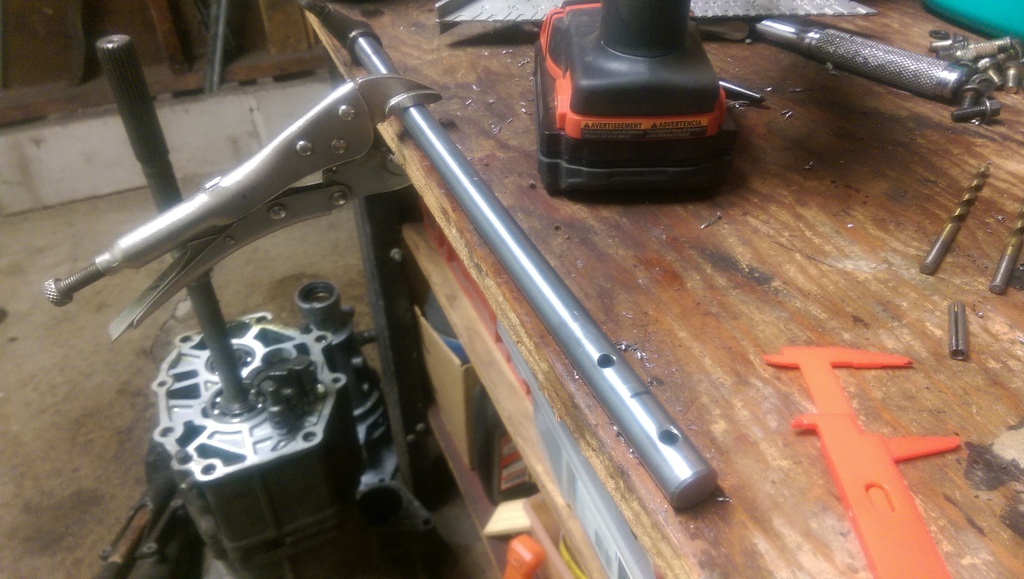
Turbo II shifter rod modification getting started.
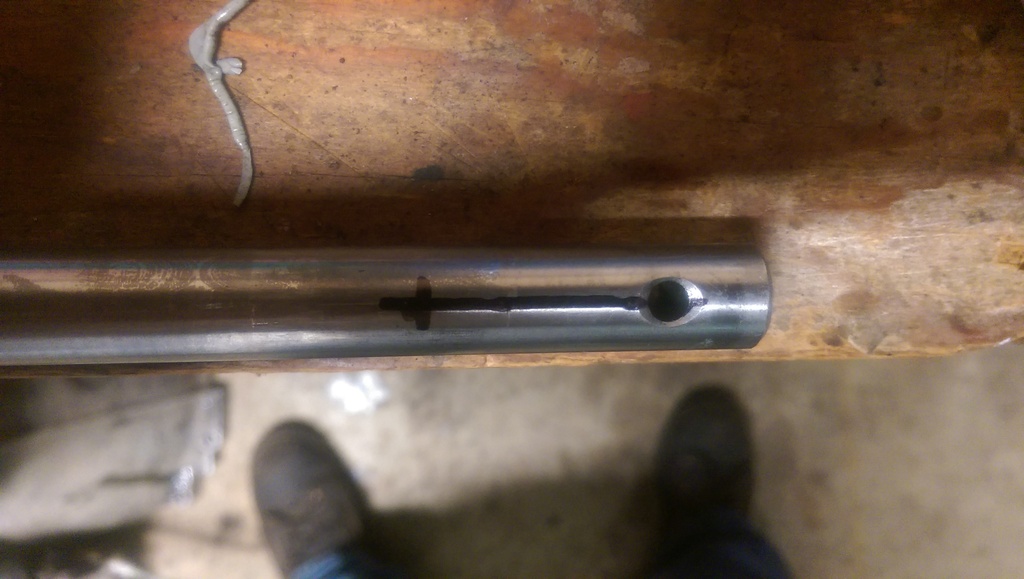
Need to move the hole 30mm further forward and chop the rod off 30mm up there too.
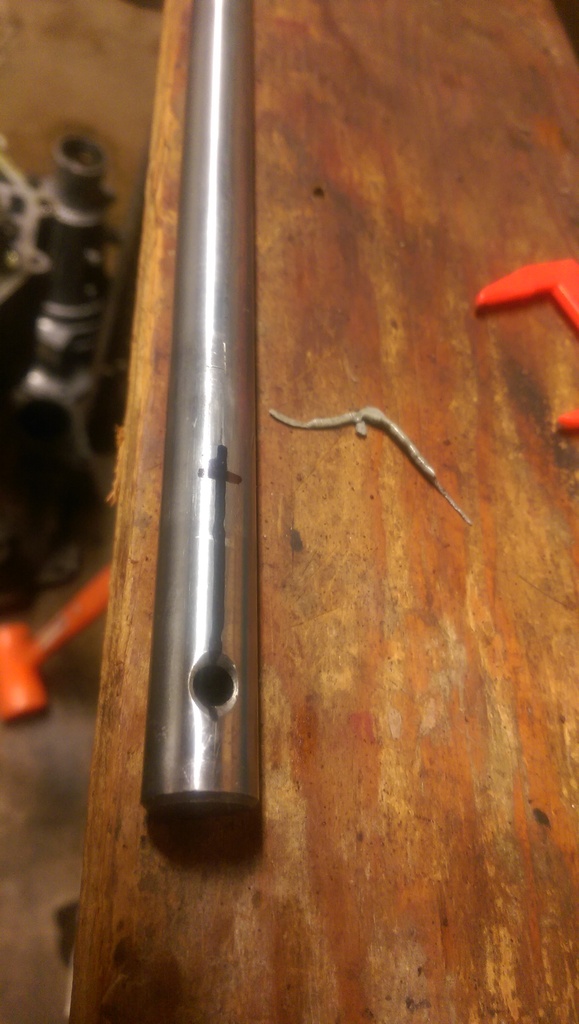
Drilled it by hand.
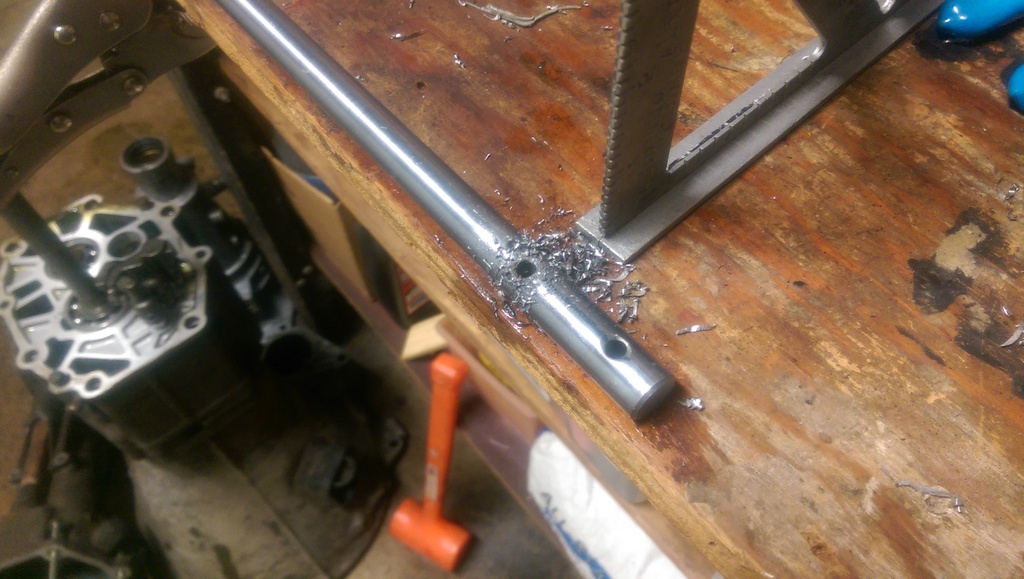
It's hard to see, but it's pretty close to where it should be I believe.

Need to move the hole 30mm further forward and chop the rod off 30mm up there too.

Drilled it by hand.

It's hard to see, but it's pretty close to where it should be I believe.


 05-02-15, 04:05 PM
#250
Moderator
iTrader: (3)
Join Date: Mar 2001
Location: https://www2.mazda.com/en/100th/
Posts: 30,847
Received 2,606 Likes
on
1,849 Posts