When you click on links to various merchants on this site and make a purchase, this can result in this site earning a commission. Affiliate programs and affiliations include, but are not limited to, the eBay Partner Network.
I appreciate that man! I'll need some parts done soon. I really need my own sand blasting equipment so I can clean up the parts I end up painting or that get powder coated.
Austin, harbor freight sells some media blasting equipment. I can recommend their gravity fed handheld gun (the one with the 20oz hopper). It works well for smaller parts, but make sure to keep the moisture down or it will clog. For $20 its hard to argue, and I've run at least 100 pounds of sand through the thing. They also have larger tanks and even cabinets but I cant comment on the quality of those... They are from Harbor so you get what you pay for haha. I've got what I believe is a 40LB blaster setup on permanent loan from a family member if you catch my drift, I've done an entire ATV frame with that. My uncle bought it from either harbor or northern tool and it works well enough, but the valve on the gun is broken which really sucks. It's a messy process but totally worth it, the end products come out really well
Austin, harbor freight sells some media blasting equipment. I can recommend their gravity fed handheld gun (the one with the 20oz hopper). It works well for smaller parts, but make sure to keep the moisture down or it will clog. For $20 its hard to argue, and I've run at least 100 pounds of sand through the thing. They also have larger tanks and even cabinets but I cant comment on the quality of those... They are from Harbor so you get what you pay for haha. I've got what I believe is a 40LB blaster setup on permanent loan from a family member if you catch my drift, I've done an entire ATV frame with that. My uncle bought it from either harbor or northern tool and it works well enough, but the valve on the gun is broken which really sucks. It's a messy process but totally worth it, the end products come out really well
There blast cabinet isn't bad, I have one, the only thing is you need to hook up a shop vac, or something else to draw the air out, or after 1 minute of use, you won't be able to see.I also have one of the hand held ones like fb or die was describing, it actually works really good. If you want it it's yours, just pay for shipping.
Also how much sound deadening mat did you use to do the back of your car
If your going through all this work of striping and painting parts, it really is worth it to powder coat them.
When I first started out, I had a cheap 20 gallon air compressor and a sand blast gun that was just the gun and a pickup hose. You placed the pickup in a 5 gallon bucket of sand. I got some cheap sand at a gravel place. I had to shift the sand with a window screen shifter I made because the sand partials where too big and would get stuck in the gun. I did the blasting on my driveway so I could sweep it up, shift it, and start over again. Those where not fun days.
I now have a cheap HP blast cabinet with a nice gun along with an 80 gallon 220 volt compressor. For powder coating, I have a dual voltage Eastwood gun and use a home oven.
Wow, thanks for all the responses guys! Just you wait till I do a HUGE picture/progress update after I respond
Originally Posted by Broke_A_Baller
I guess I should have been more specific.
Powder coat whatever you can (I.e. Brake parts/subframe/crossmember). Hell you could even do that bell housing :p.
Hvlp the rear glass cover thing.
I gotcha man, I know I really should have, and should continue powder coating more stuff.
Originally Posted by FBorDie
Austin, harbor freight sells some media blasting equipment. I can recommend their gravity fed handheld gun (the one with the 20oz hopper). It works well for smaller parts, but make sure to keep the moisture down or it will clog. For $20 its hard to argue, and I've run at least 100 pounds of sand through the thing. They also have larger tanks and even cabinets but I cant comment on the quality of those... They are from Harbor so you get what you pay for haha. I've got what I believe is a 40LB blaster setup on permanent loan from a family member if you catch my drift, I've done an entire ATV frame with that. My uncle bought it from either harbor or northern tool and it works well enough, but the valve on the gun is broken which really sucks. It's a messy process but totally worth it, the end products come out really well
I love HF, I'm always buying something from there at one time or another. I'll have to consider it more heavily on your recommendation!
Originally Posted by erick31876
There blast cabinet isn't bad, I have one, the only thing is you need to hook up a shop vac, or something else to draw the air out, or after 1 minute of use, you won't be able to see.I also have one of the hand held ones like fb or die was describing, it actually works really good. If you want it it's yours, just pay for shipping.
Also how much sound deadening mat did you use to do the back of your car
Thanks for the advice! I never would have thought of hooking up a Shop Vac to help with air circulation, good tip there. I'll just go out and get a new setup instead of paying you for shipping - the way they rape ya on shipping costs nowadays I'd be better off buying a new one Thanks for the offer though, it's greatly appreciated!
Originally Posted by KansasCityREPU
If your going through all this work of striping and painting parts, it really is worth it to powder coat them.
When I first started out, I had a cheap 20 gallon air compressor and a sand blast gun that was just the gun and a pickup hose. You placed the pickup in a 5 gallon bucket of sand. I got some cheap sand at a gravel place. I had to shift the sand with a window screen shifter I made because the sand partials where too big and would get stuck in the gun. I did the blasting on my driveway so I could sweep it up, shift it, and start over again. Those where not fun days.
I now have a cheap HP blast cabinet with a nice gun along with an 80 gallon 220 volt compressor. For powder coating, I have a dual voltage Eastwood gun and use a home oven.
I know I should have coated more parts, it was stupid of me not too. It's just that I had easy access to paint and thought it would be the easier/better route. If I ever get around to it I'll go back through and sandblast and powder coat more parts. I've got a cheap HF 21gal air compressor that you can see if you go back in the build thread a bit. It just doesn't flow enough CFM (5.8 at 40psi, 4,7 at 90psi) to hold its own. First I'd get the blasting equipment, then I would need to upgrade the air compressor soon after.
Your coating setup sounds amazing! I hope to eventually get there someday. With this new job I'm definitely making more money than ever, so that'll help me out.
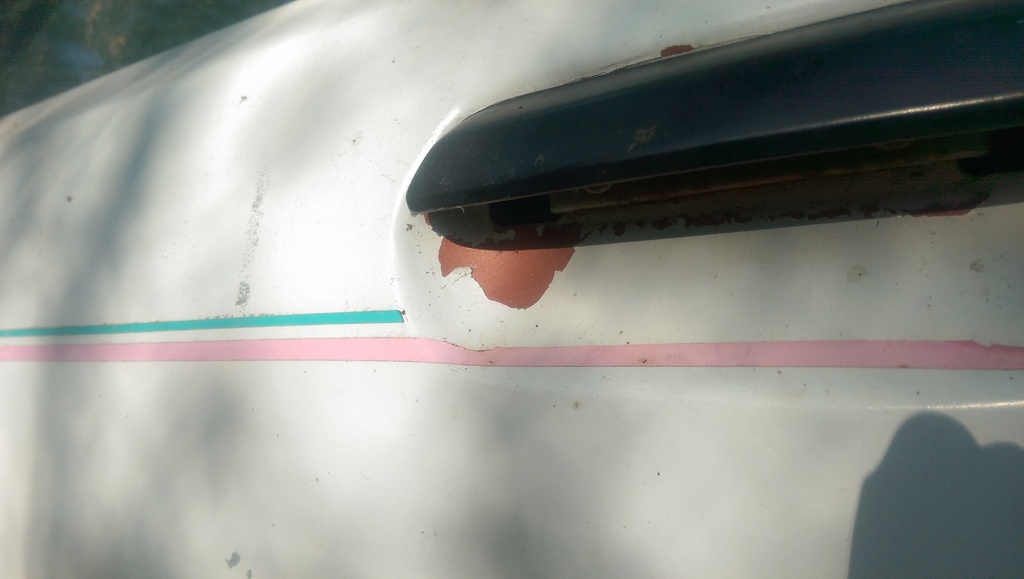
Secondary spot on the box that is damaged, I assume this is where the incident occurred.
Look at that apex seal slot!
Look at that apex seal slot!
Look at that apex seal slot!
Look at that apex seal slot!
I ordered that rotor from turbo_dave here on the forum and he sent me pictures of each rotor face before he shipped it out. It arrived like that, isn't that insane! It must have dropped onto a super hard surface (guessing concrete) from a pretty decent height to cause that much damage. He's one of the best sellers I've ever dealt with on here and sent me a refund instantly - I'd recommend him any day of the week! https://www.rx7club.com/2nd-generati...irons-1086224/
That's his post if you guys need anything!
Wow...that person that shipped that rotor needs to have some classes on how to properly package a rotor.
I always bubble wrap my rotors multiple times. Then I place bubble wrap on the bottom. Then I place the rotor in the box and place packaging material all around the rotor and on top. By the time I'm done and it's all boxed up the rotor has no movement even if I were to aggressively shake it. Dang noobs :p jk.
Also, my good sir, if you paid anymore than $40 for that rotor I'll slap you (not really, but yeah) because I had two s4 t2 rotors I sold for $80 to a guy earlier this week.
Last edited by Broke_A_Baller; 07-18-15 at 09:34 PM.
I use my $10 4in grinder (from HF) all the time and has been easily the best purchase I've ever made.
Too bad about the rotor. If I was to ever ship one, I think I would build a small box for it.
Yeah, a small box inside another box would have been a good idea. Ah well, another one for a display piece
Originally Posted by Broke_A_Baller
Wow...that person that shipped that rotor needs to have some classes on how to properly package a rotor.
I always bubble wrap my rotors multiple times. Then I place bubble wrap on the bottom. Then I place the rotor in the box and place packaging material all around the rotor and on top. By the time I'm done and it's all boxed up the rotor has no movement even if I were to aggressively shake it. Dang noobs :p jk.
He's a good guy, and it wasn't shipped badly. It was just that it was dropped so hard on the worst part possible.
Also, my good sir, if you paid anymore than $40 for that rotor I'll slap you (not really, but yeah) because I had two s4 t2 rotors I sold for $80 to a guy earlier this week.
That's normally how I pack stuff too. Ah well, it's not a huge deal. You had some S4 TII rotors that matched?! Ugh. I'll have to text you a parts list
Originally Posted by needspartsnow
Daaamn, sexy epsilon fitment. I like it even w/out the widebody. Does this mean we're about to get to the good stuff soon? (motor work)
I love the fitment of those wheels, no doubt about it.
Unfortunately no, I won't be getting to engine work next. Maybe some small stuff but no building or new parts for a while.
I'm picking something else up on Sunday if everything works out...
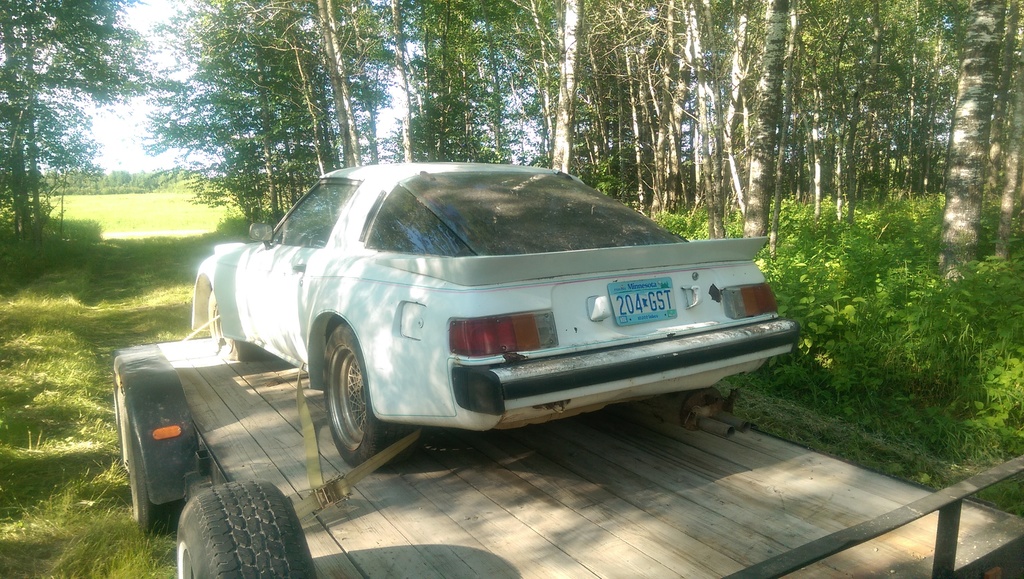
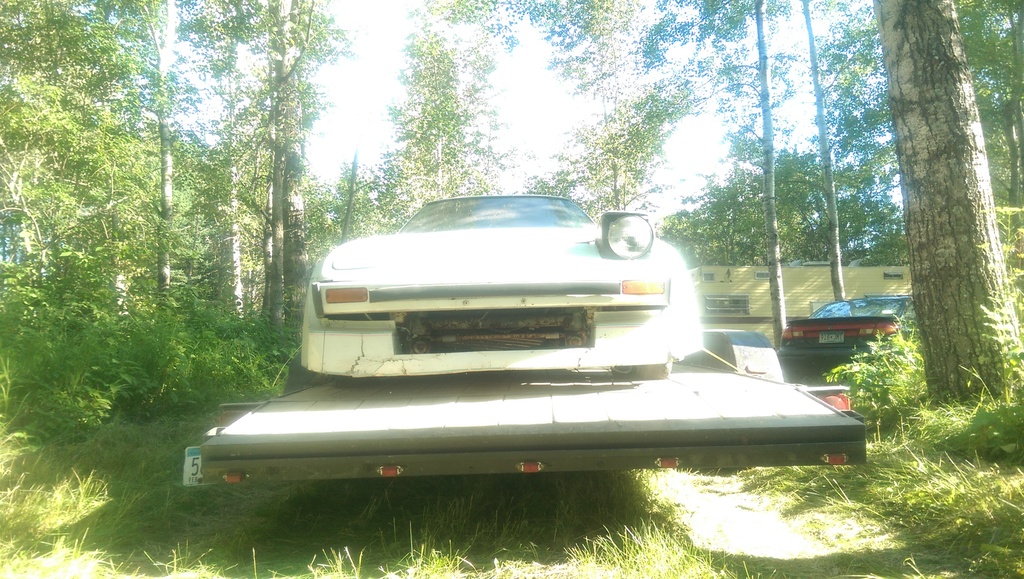
So I picked this up yesterday, this is the big surprise
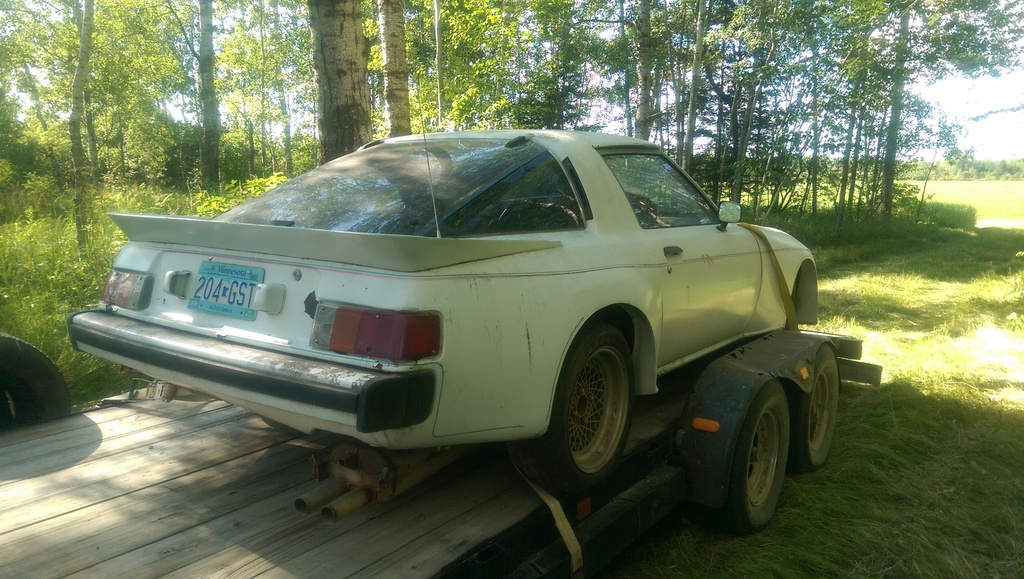
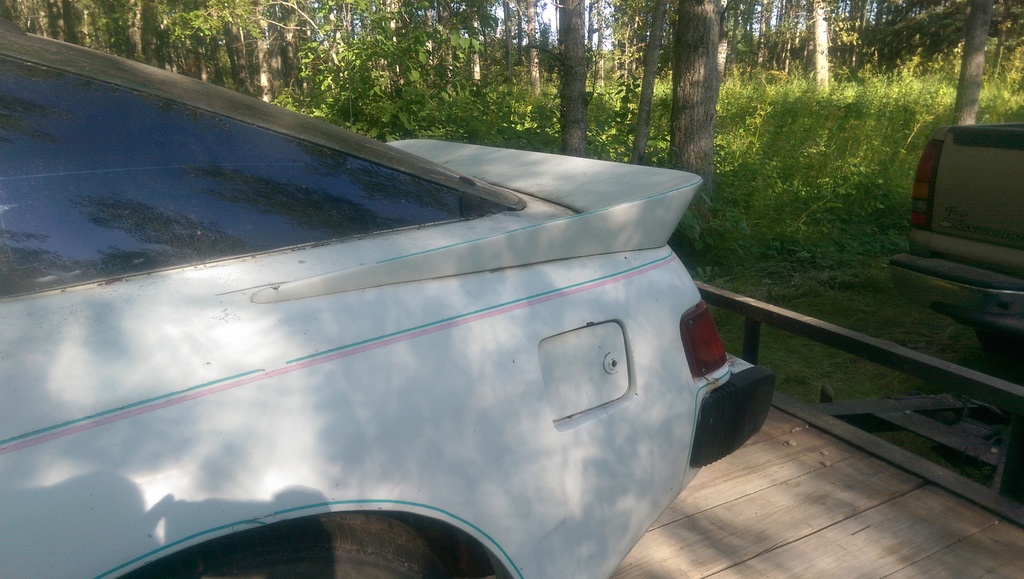
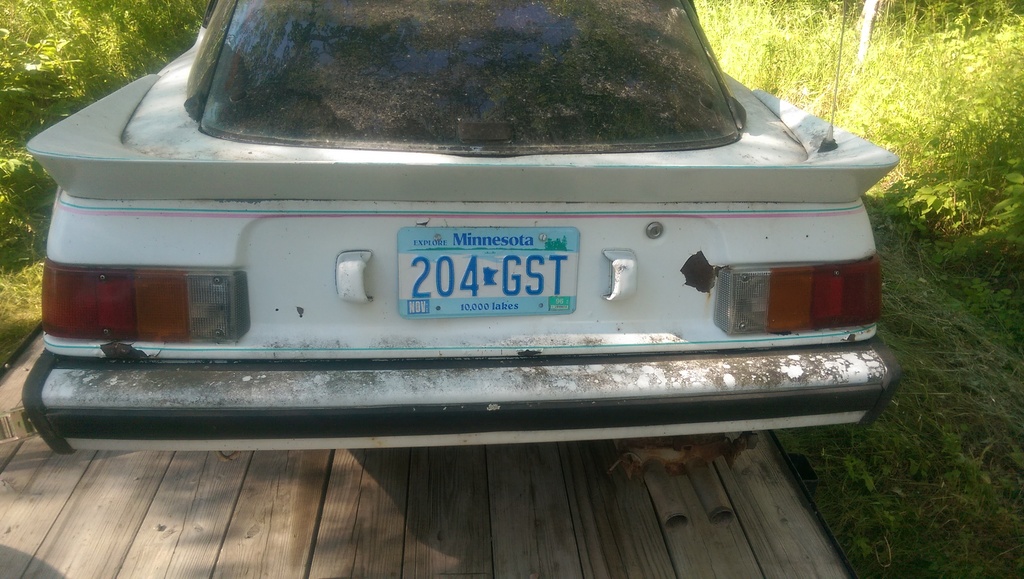
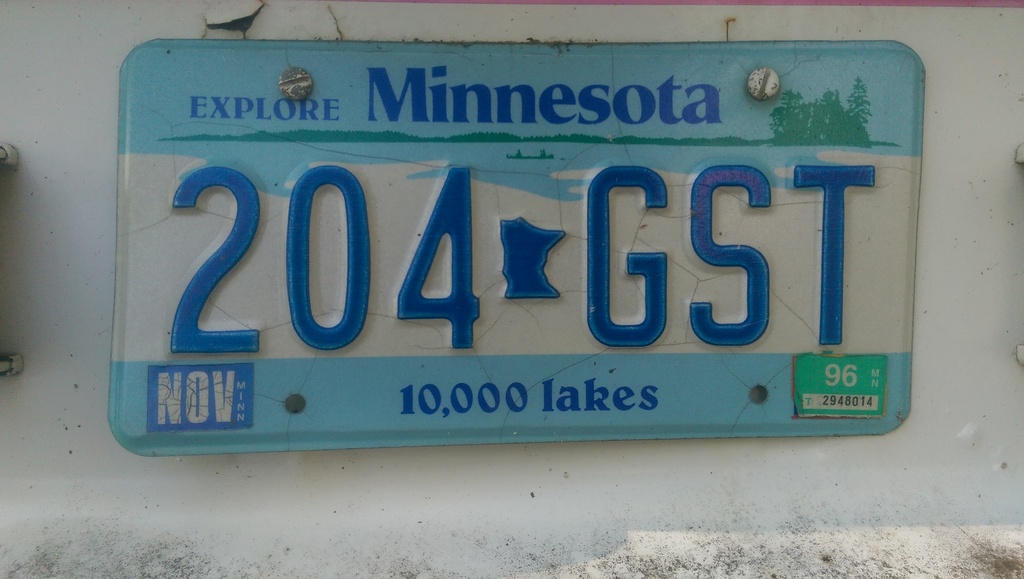
Rear end of the car
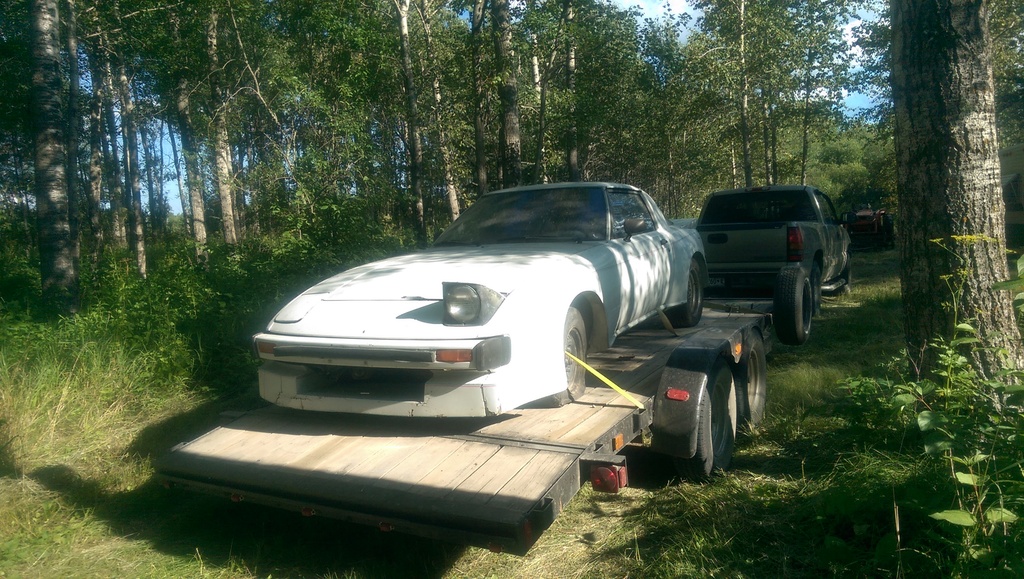
Front end of the car
Some sort of snowflake-looking wheels that I don't recognize - any ideas?
Nice small one-piece rear wing.
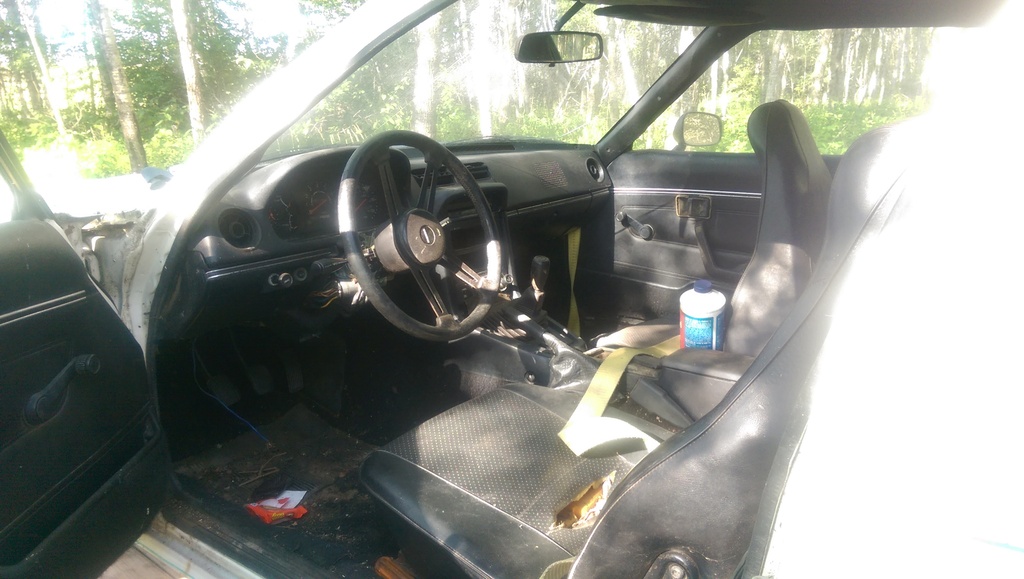
It's in pretty good shape for having sat for 20 years!
Tabs were last renewed for the 1995-1996 year. Here in MN we buy our tabs before they expire, so this person would have bought tabs in November 1995 in order to drive the car for the next year, to 1996. So this car has most likely sat for the last 20 years.
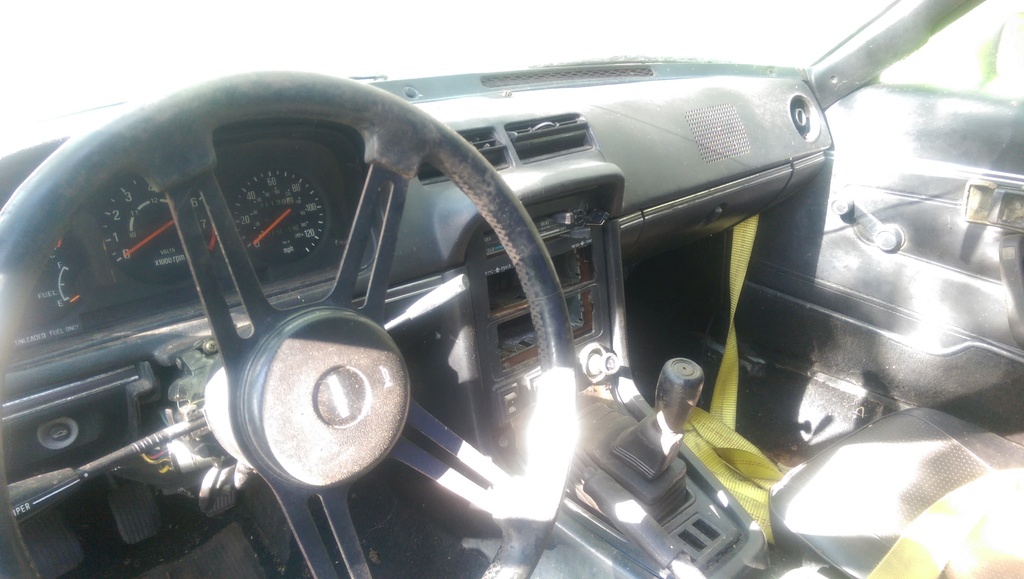
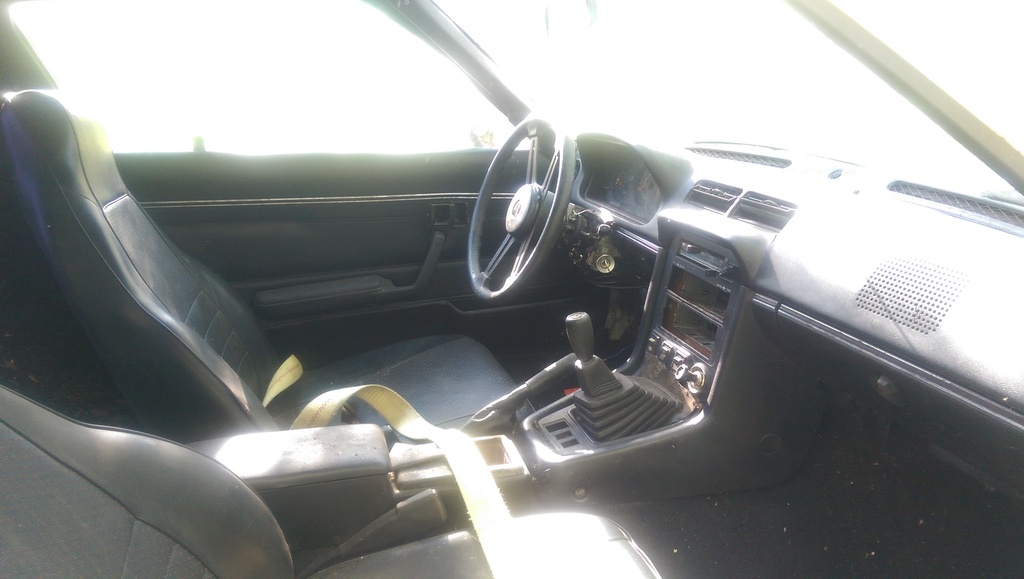
The interior is in pretty good shape for having sat for so long!
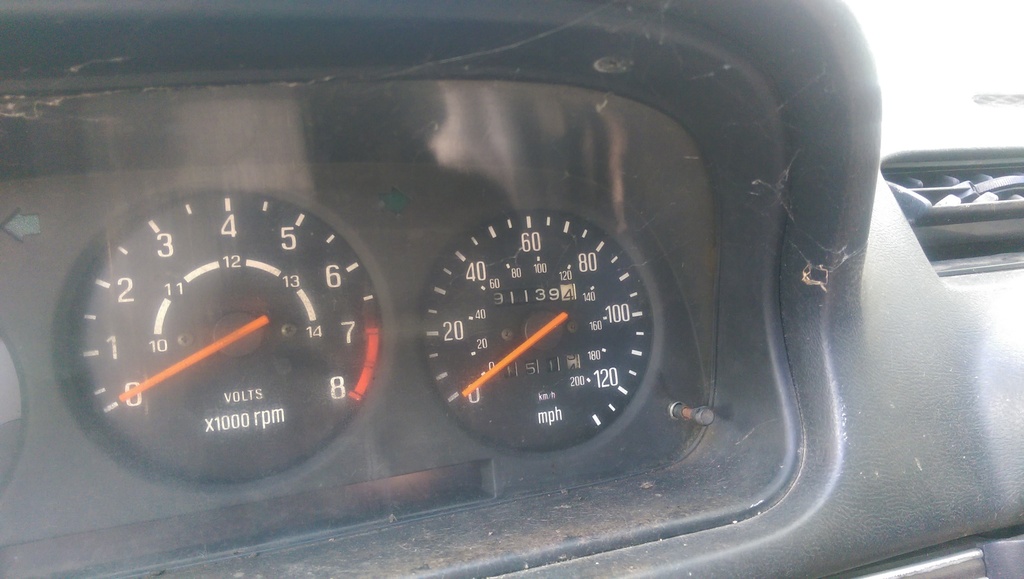
91,139 miles on this old gem, and I believe it.
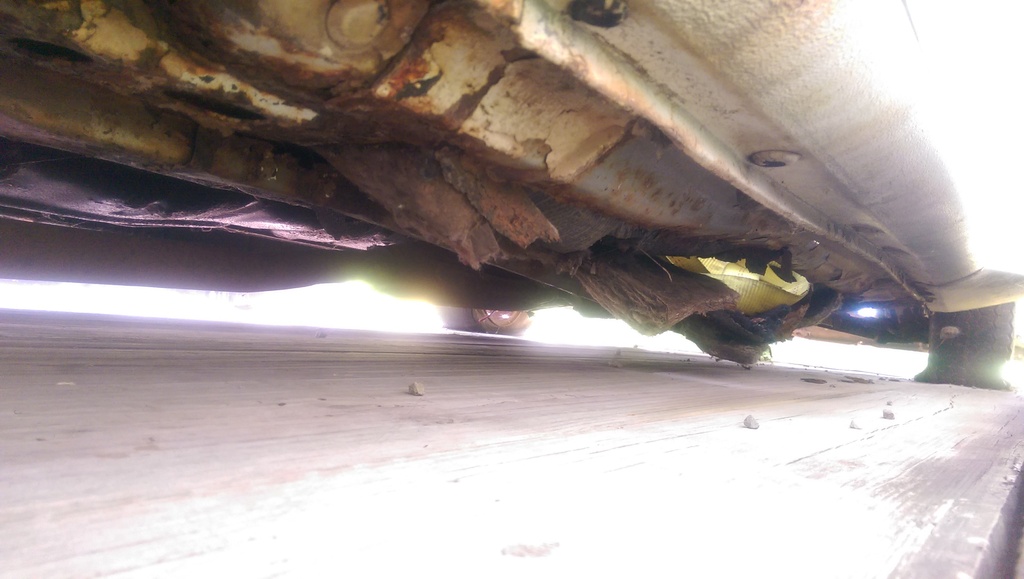
The whole floorboard on the passenger side is totally gone, as well as the frame rail. That yellow spot you see is part of the strap holding the car on the trailer. It's beyond repair so it'll need to get scrapped after every good part is removed from the car.
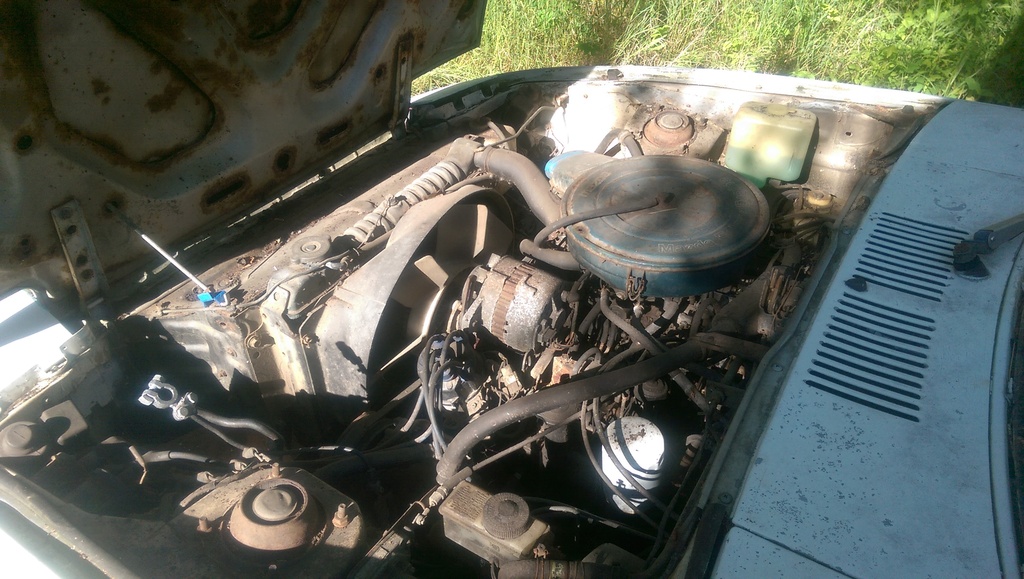
Poor, old, abused, misused and sad example of a 12a motor.
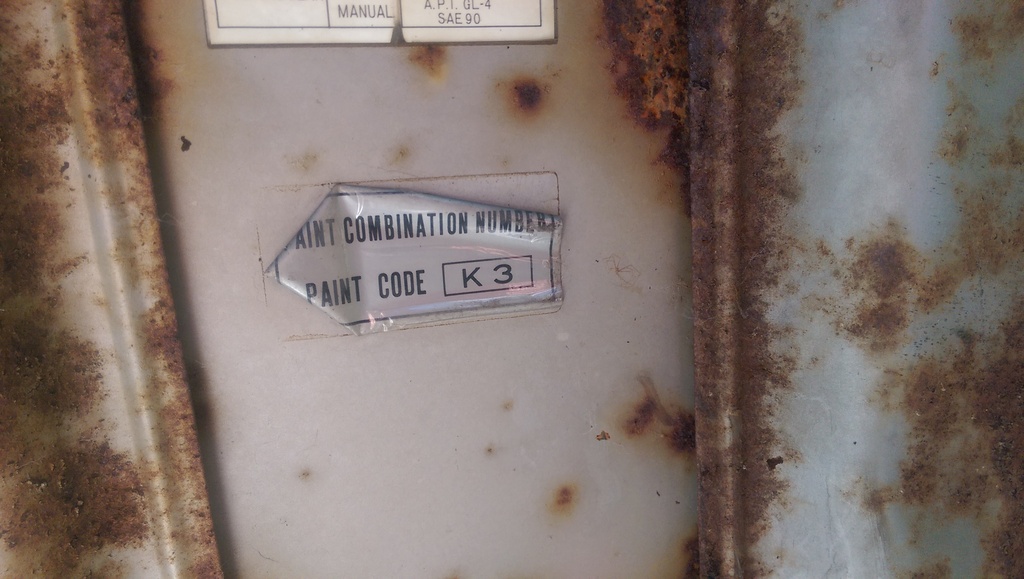
Paint code on the hood, which is not the same as the paint on the door.
You can see the bronze color on the door here, I'm guessing this is the original body color.
Wow! Nice find - too bad it's so far gone... K3 is sunbeam silver metallic. What serial number is it??
The interior DOES look nice. If you have any bits to sell from there, I'll take dibs on the center console surround - the piece that goes from the right of the steering wheel around the center dash - if it's in good shape... As you can see, mine is a bit broken on the drivers side.
I predicted this when you mentioned you were picking something else up...
So what's the plan now Austin?
The plan has just changed, update with pics incoming
Originally Posted by erick31876
Nice find
Thanks man!
Originally Posted by woodmv
Wow! Nice find - too bad it's so far gone... K3 is sunbeam silver metallic. What serial number is it??
I'll post the VIN later. On Facebook I was told it was manufactured in October of 78, so an earlier build.
Originally Posted by woodmv
The interior DOES look nice. If you have any bits to sell from there, I'll take dibs on the center console surround - the piece that goes from the right of the steering wheel around the center dash - if it's in good shape... As you can see, mine is a bit broken on the drivers side.
If the car ends up getting parted out (most likely scenario right now) I'll keep that in mind! Maybe send me a PM when you get the chance
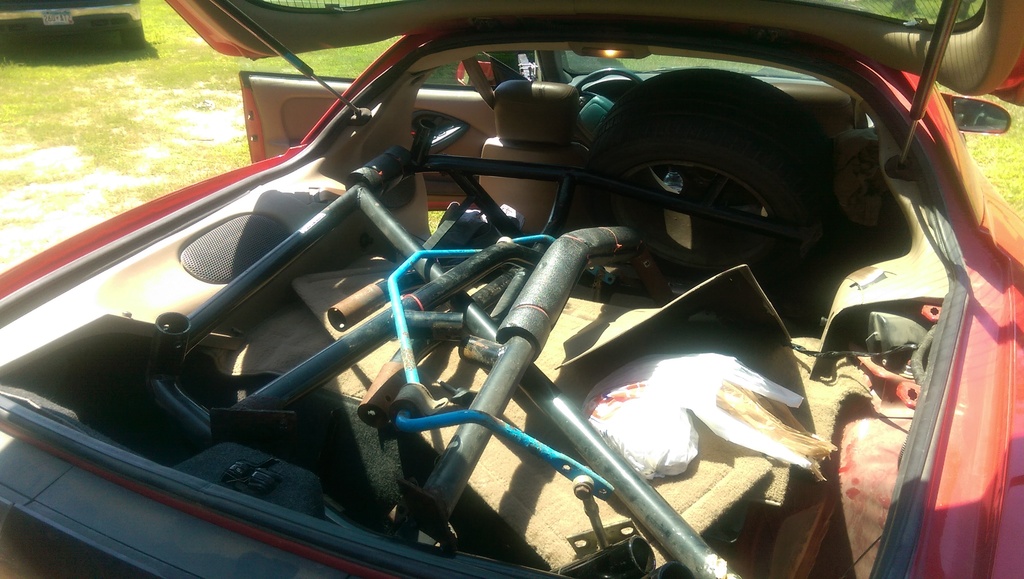
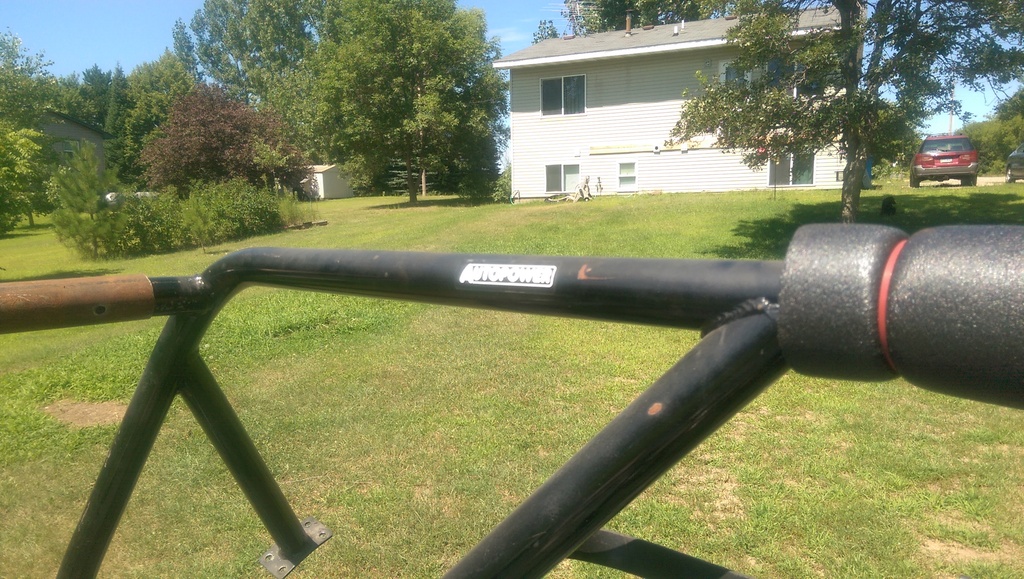
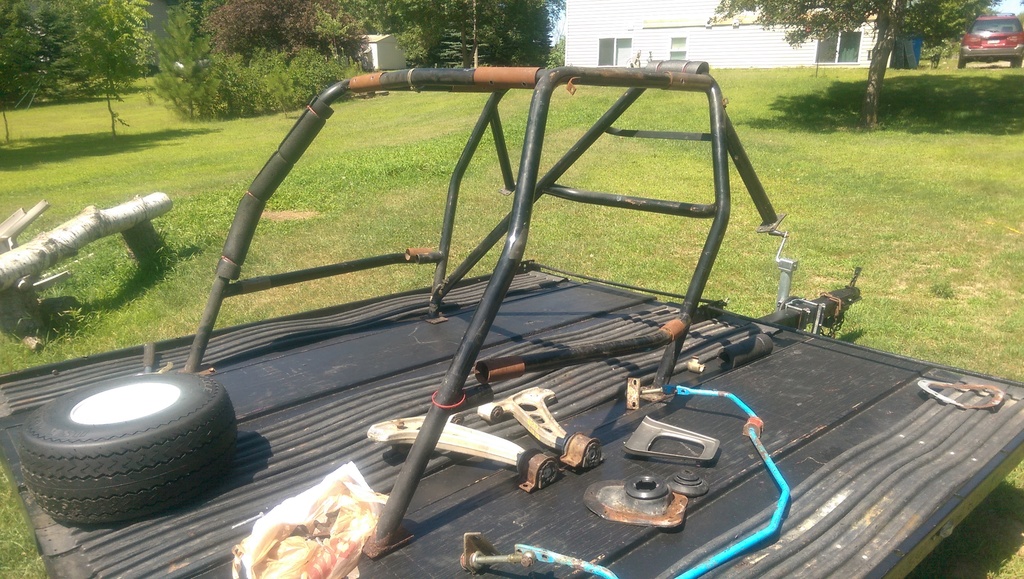
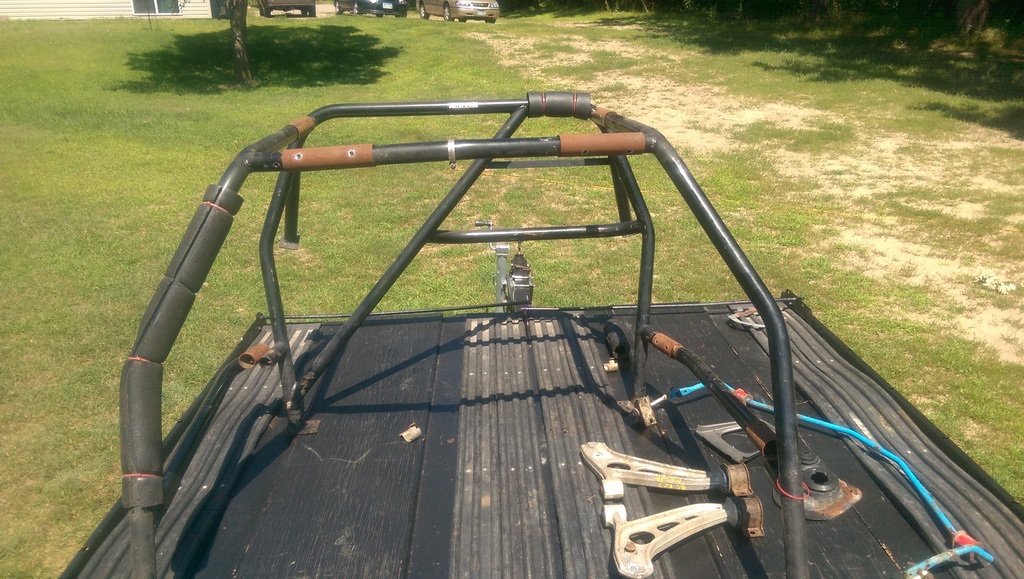
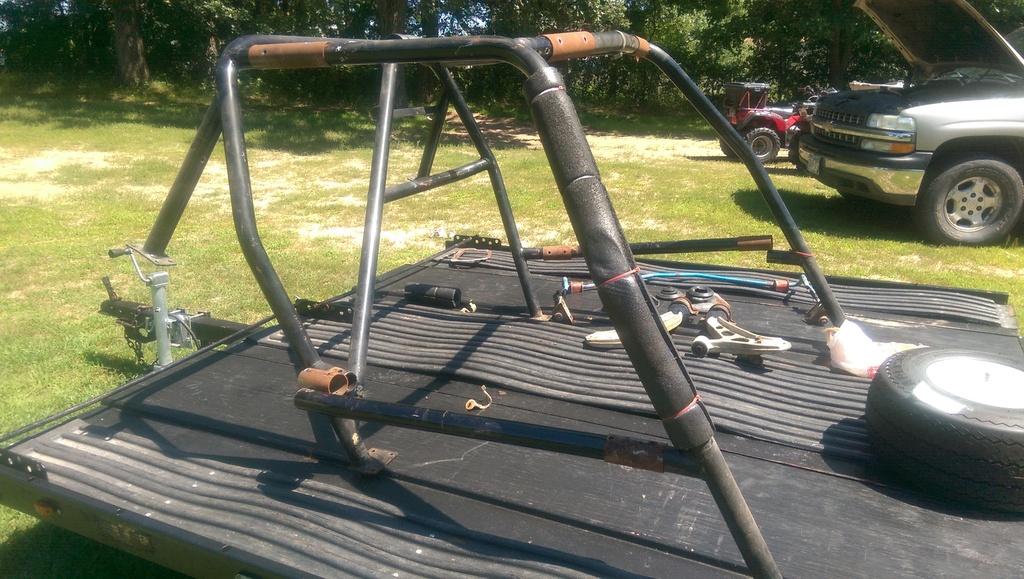
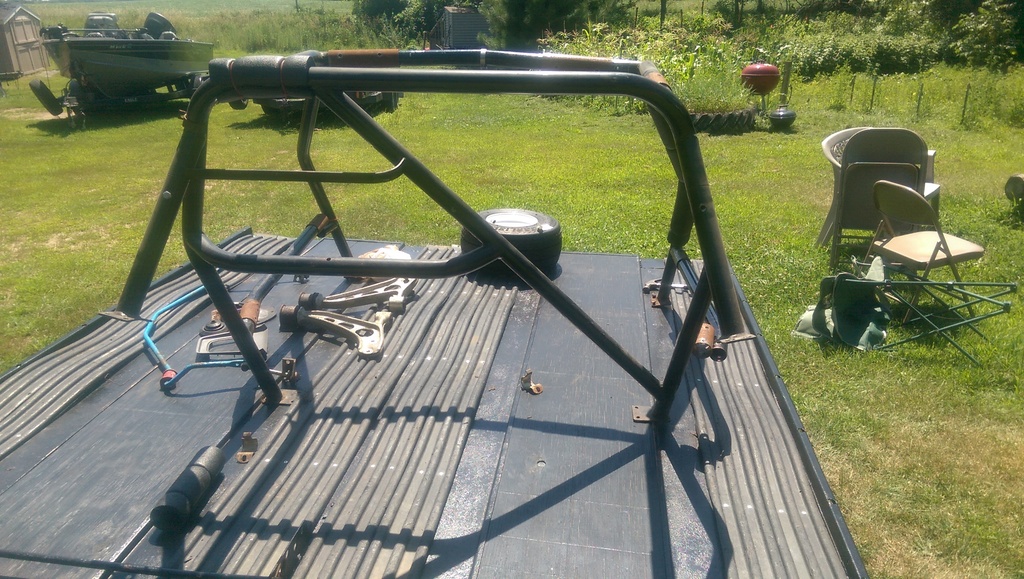
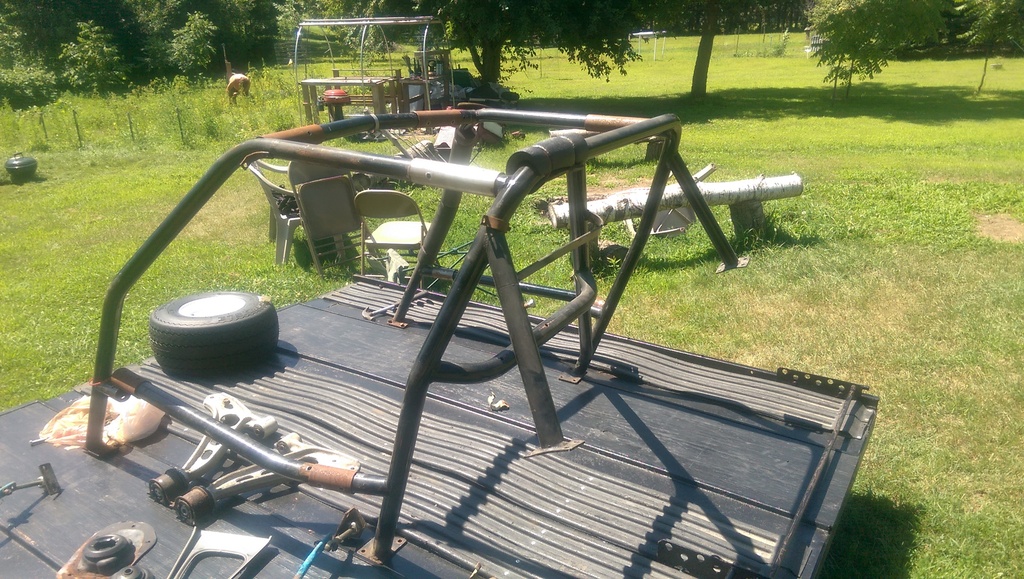
That auto power cage looks similar to my fd auto power cage. Runs about 5-650 used.
You get all the mounting hardware with it or the plates? If not I'm assuming you'll be welding it in?
I got the mounting hardware and plates as well. I will probably have to re-weld one of the mounts on the end of the pipe that braces the driver's side pipe to the floor with a new replacement since the one on there now is rusted through almost. Water must have pooled there and caused it to corrode - the rest of the cage is in pretty great condition. I won't be welding it in right away, I'll bolt it in first and go from there.
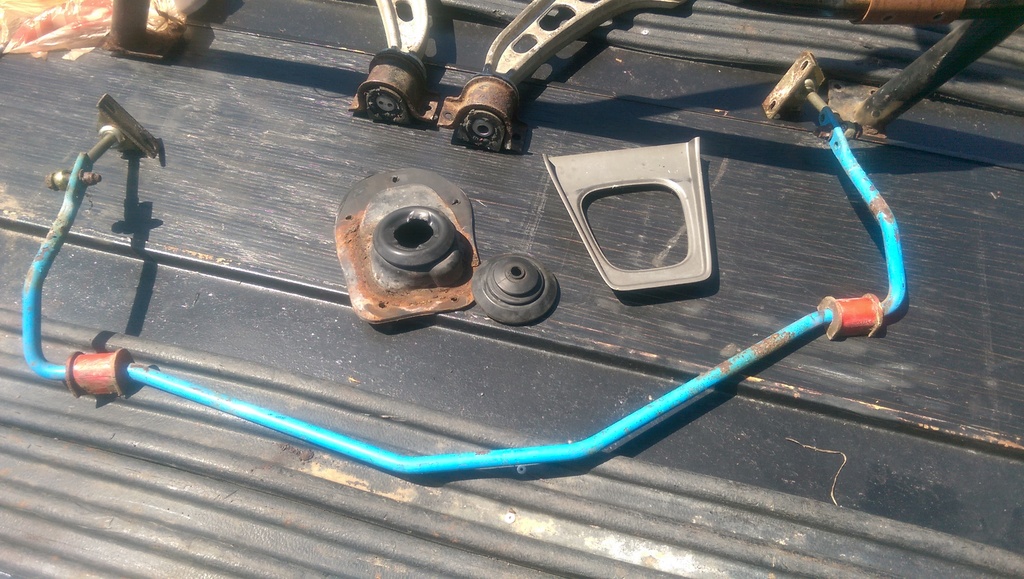
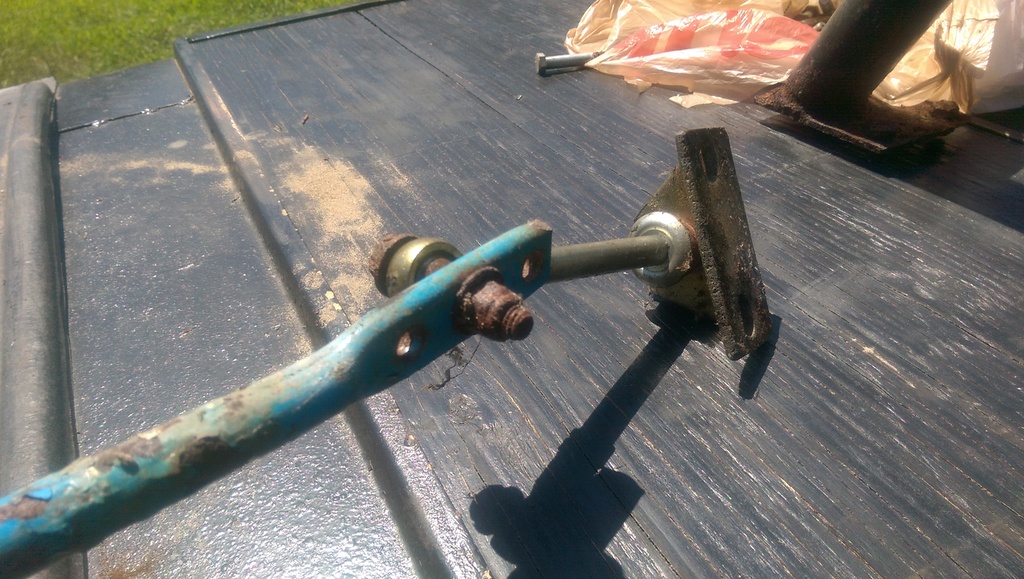
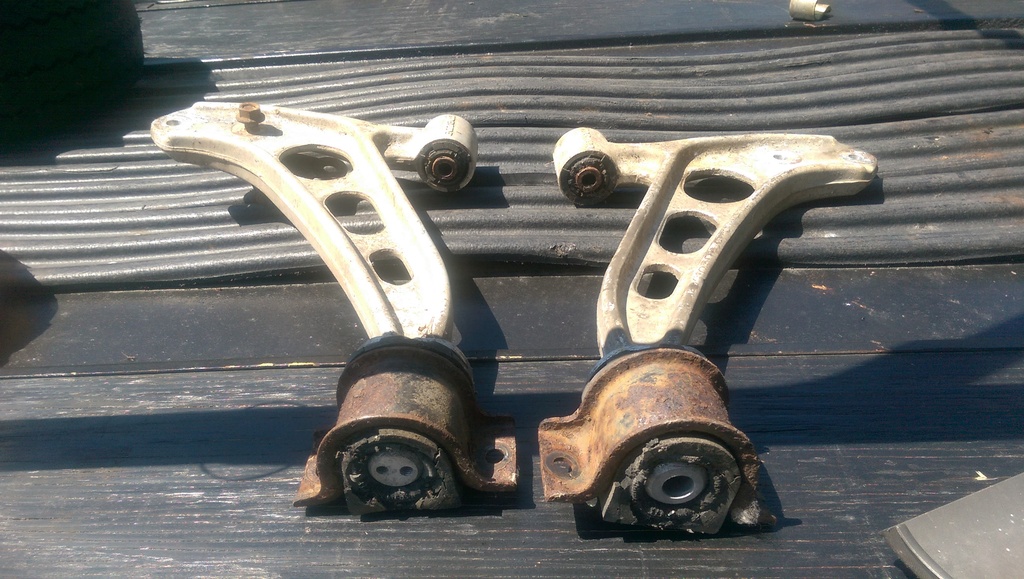
I spent some time tearing apart the FC front end parts that I bought in order to get ready for the subframe swap.
Huge pile of suspension parts I have around - 2 sets of FC fronts, one FC rear, GSL-SE fronts and some rear springs for FB's.
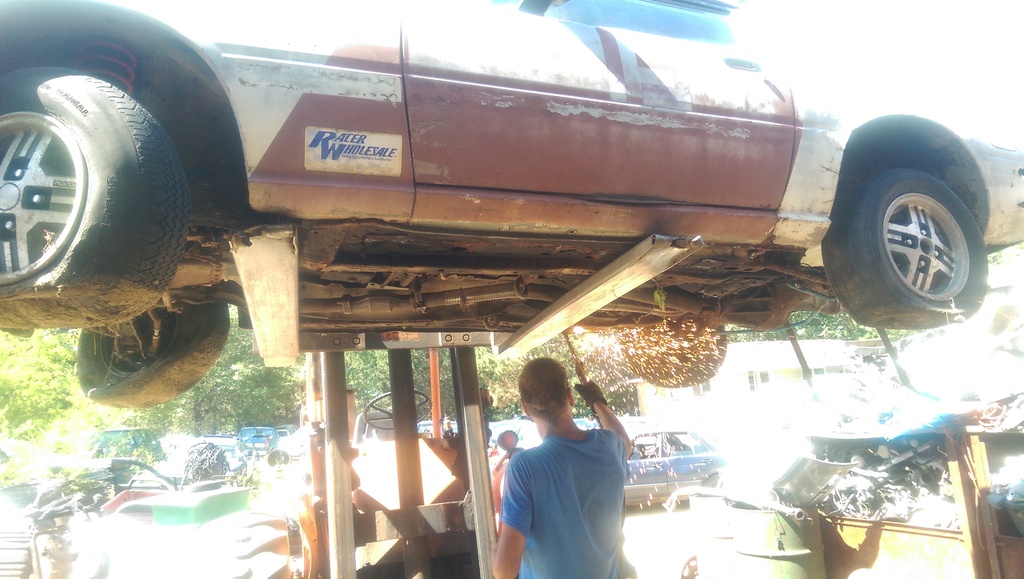
The stupid bolt for the caliper got stuck in the spindle so I had to cut off the spindle in order to save the caliper.
I had to break one of the rotors in half in order to remove it.
Refurbishing the FC calipers now, still have two long bolts stuck in the caliper that also had its bolt stuck to the spindle. That side must have sat outside and really corroded together.
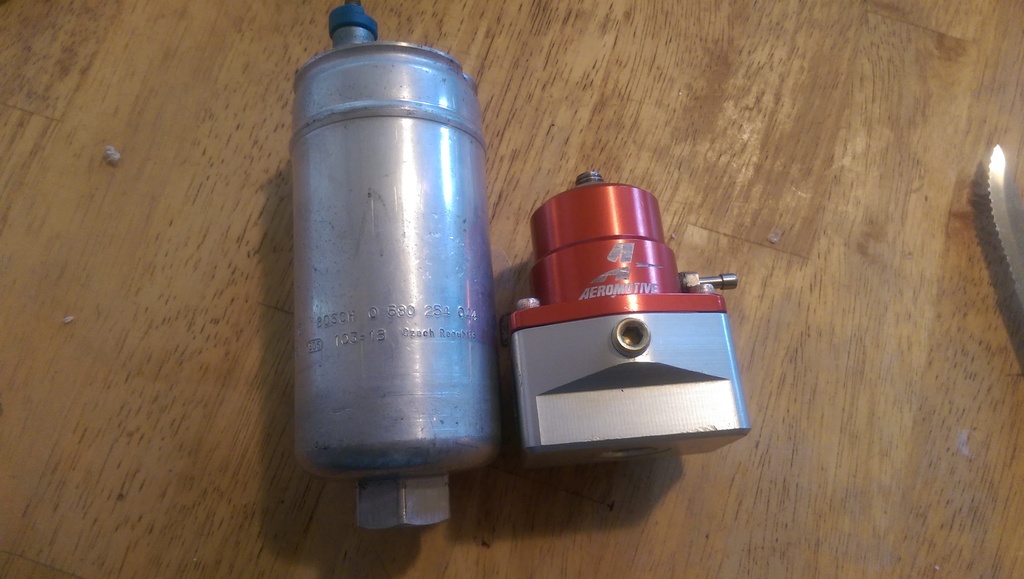
Well...I just built my dream fuel system for my car. This all stemmed from a killer deal I got on Facebook for a Bosch 044 and Aeromotive A1000-6 Bypass EFI Fuel Pressure Regulator for $250 shipped. I figured since this build is along the lines of the "go big or go home" mentality, I might as well make it so I never have to touch the fuel system again. By shopping around for parts and getting the best deal on each component I know that I easily saved $100-200 on this setup, probably more than that even if I had wanted to have every fitting match (brand name-wise). I went with an entirely black fitting setup with silver stainless steel line that I plan on doing something kinda cool to...
Picture of the 044 and Aeromotive FPR I got from a guy on Facebook:
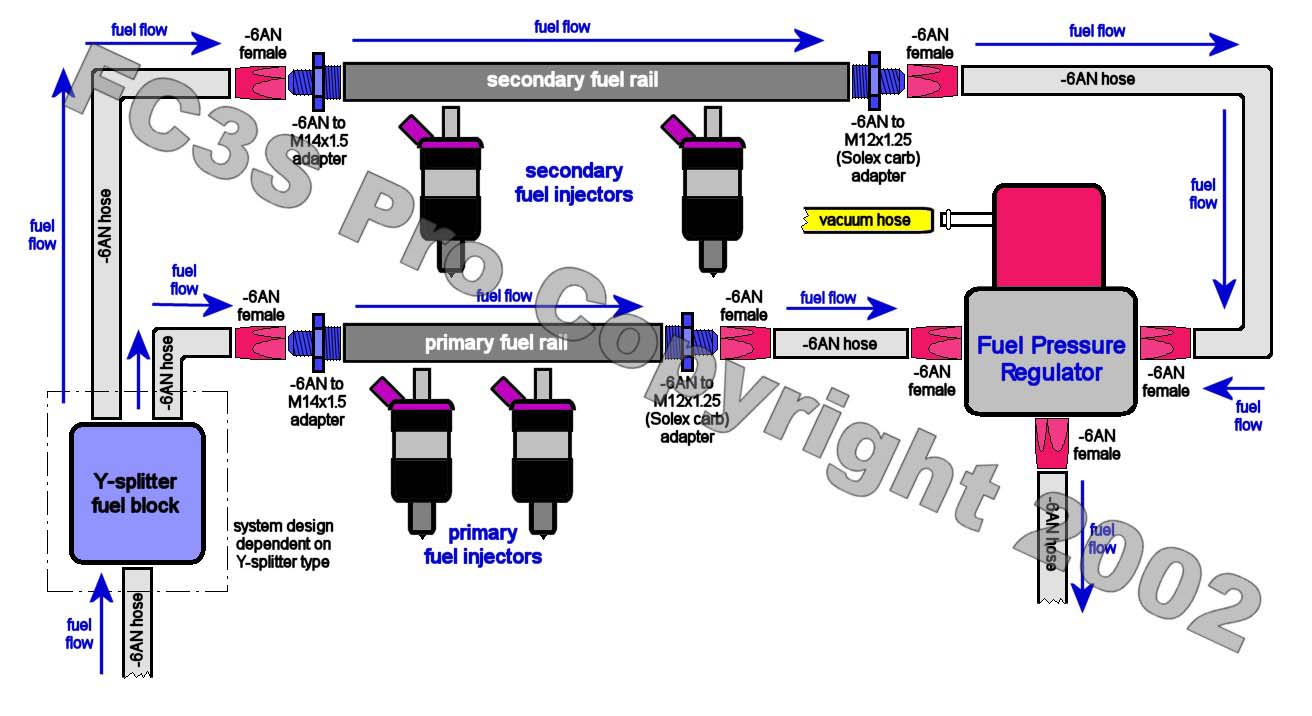
The fuel feed setup is based on this setup from FC3SPRO:
Now, if you were to purchase a new Bosch 044 and Aeromotive FPR:
$163.97 - Aeromotive FPR A1000-6 - Summit
$194.99 - Bosch 044 Fuel Pump - MAP I have to support the local MN businesses, and MAP is one of them! TOTAL ALL NEW PARTS(without shipping/handling or tax)
$645.59
So right there I can see I already saved over $100 compared to buying new, when the pump and regulator I bought were only run for about 500 miles. Shows that it pays to shop around for parts!
Directional plan of the fuel system: FEED
Fuel tank pickup
3/8" EFI rubber fuel line
3/8" barb to AN-6 Female
AN-6 Male In/Out 40mic Fuel Filter
AN-6 Female/Female Coupler
Bosch Adapter to AN-6 Male
Bosch 044 Fuel Pump (on mouning bracket)
Bosch Adapter to AN-6 Male
3/8" Hard line to AN-6 Female
3/8" Aluminum Fuel Line
3/8" Hard Line to AN-6 Female
Fuel Y-block AN-6 Male Outlets
2 AN-6 Female Hose Ends
2 AN-6 Lines towards Fuel Rails
2 120deg Swivel Hose End
2 M14x1.5 to AN-6 Male Adapters with Crush Washers
Fuel Rails
2 M12x1.25 to AN-6 Male Adapters with Crush Washers
2 AN-6 Female Hose Ends
2 AN-6 Lines towards Aeromotive FPR
2 AN-6 Female Hose Ends
Aeromotive A1000-6 FPR (w/0-100psi Fuel Gauge)
2 AN-6 Straight Cut O-ring to AN-6 Male
RETURN
Aeromotive FPR Return Port
AN-6 Straight Cut O-ring to AN-6 Male
AN-6 Female to 3/8" Hard Line Adapter
3/8" Aluminum Fuel Line
Flared end of the aluminum fuel line
Rubber fuel line to return on fuel pickup
Hopefully I can get around to building this awesome system sometime this week - I'm super stoked!
So I have to give you advice based upon what I encountered while going off of another persons design and my real life setup :p.
I would recommend (now that you already ordered everything it's semi-pointless) putting your fuel pressure regulator where you plan on running it and then start designing your fuel system around that (an fittings and line wise). The lines and filter from the tank up to the bay are one thing, but where you place that fpr is going to be a make or break point for fittings you already ordered.
Moreover, for the fd at least, there is a minimum of 10' for the return line. The delivery line to the "Y" is also ~10'.
The issue I had when purchasing the fittings before outlining or designing the system in MY bay was that I had or didn't have all the fittings and was obligated to purchase new fittings (wasting more $$$).
also, make sure your lines do not slip down or whatever when youre installing the fittings. Many people just put them on and don't consider they may slip down a bit then have leaky fuel lines.
Anywho, good luck with the system. I have an hose cutters and wrenches and vice bracket if you want to borrow them.
Austin, u using a 40 micron filter before the pump or after? If after, I believe you may want to go a little smaller like a 10 micron filter as that large of a particle could damage injectors. I assume you will be mounting it internally with a sock but if not and using the 40 micron filter before the pump, that may be too restrictive. I'm planning on externally mounting my pump and using a 100 micron filter before and a 10 micron filter after.

 07-14-15, 10:07 PM


 Thanks for the offer though, it's greatly appreciated!