
Project Resurrection: Running Log

Thread Starter
Joined: Jun 2008
Posts: 8,376
Likes: 28
From: Chino Hills, CA
It was pushing up towards a quart every 200 miles or so.
I took the manifolds off last night, and the interesting thing is that there is no sign of oil wetness in the exhaust ports at all. Bone dry, and coated with a powdery whitish deposit. The rear rotor port has a much heavier layer of these deposits, which I believe are fuel ash.
The post-shutdown flood I've been fighting for so long, since it is driven by the rear carb bowl, necessarily impacts the rear rotor chamber much more heavily. So it makes sense that there's be more burnt-fuel deposition in the rear port. I'm betting the rear rotor faces wll have quite a lot of these deposits, too.
Weird, though - - at this point, it doesn't look like your typical oil-eater engine. Exterior showed no signs of leaking, and thus far combustion looks to have been hot and clean, if maybe a bit rich. Only other exit point for oil is out the crankcase vent... but that would lead back into the carb, and so into the combustion chambers.
Real curious to see what's up inside the engine. I hope I don't end up with another mystery.
I'll see about posting up the first batch of 80 or so procedure pics tonight.
Yeah a qt every 200 is quite a bit, very strange though that everything isn't jet black/coated with oil after that though...
Your car is definatly possessed by something with all the mysteries you have lol.
Your car is definatly possessed by something with all the mysteries you have lol.
Thread Starter
Joined: Jun 2008
Posts: 8,376
Likes: 28
From: Chino Hills, CA
Day 1275
Had other things on the plate last night; it was my first day back at work after a long vacation, and the evening seemed about 20 minutes long, so nothing really got done.
Current state of disassembly:
Images of exhaust ports: Rear, then Front (Engine is upside down on stand; deposits heaviest at top of ports):
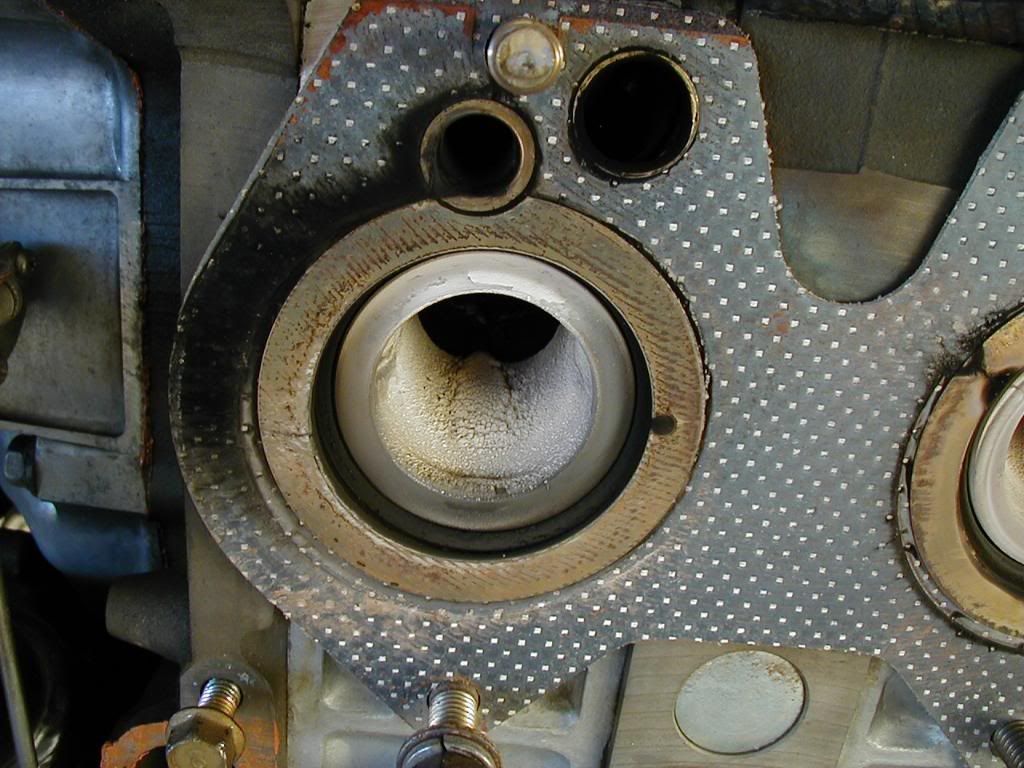

You can see the deposit buildup on the rear port clearly; hard, white, rock-like material. Almost no carbon.
Looks like a I had a tiny bit of an exhaust leak to the rear judging from the soot patterns, though I never noticed it.
I'll be doing the removal & teardown sequence in a separate thread in the tech section as a how-to, & will link it here. 88 pictures so far.
With a little luck, I'll be cracking open the keg either tonight or tomorrow. I have to clear the workbench of removed parts and get them organized first.
Had other things on the plate last night; it was my first day back at work after a long vacation, and the evening seemed about 20 minutes long, so nothing really got done.
Current state of disassembly:
Images of exhaust ports: Rear, then Front (Engine is upside down on stand; deposits heaviest at top of ports):
You can see the deposit buildup on the rear port clearly; hard, white, rock-like material. Almost no carbon.
Looks like a I had a tiny bit of an exhaust leak to the rear judging from the soot patterns, though I never noticed it.
I'll be doing the removal & teardown sequence in a separate thread in the tech section as a how-to, & will link it here. 88 pictures so far.
With a little luck, I'll be cracking open the keg either tonight or tomorrow. I have to clear the workbench of removed parts and get them organized first.
Thread Starter
Joined: Jun 2008
Posts: 8,376
Likes: 28
From: Chino Hills, CA
Day 1276
Got the final teardown done tonight. Oil hardrings, especially the outers, showing significant wear. Heavy black deposits on the rotors. Softrings examined so far look to be in excellent shape. Like brand-new.
Rotor housings thus far look fine, thankfully. Got some stepped wear on the sides, mainly the front chamber, but haven't measured yet - may well be in spec. Have to run the dial over them yet.
Corner seals still have the rubber plugs intact. Apexes & such eyeball OK, still need to measure. Bearings look OK to the eye.
I'll know more after I finish with cleaning and measuring, but at this point it looks like nearly everything is OK & useable except the oil hardrings.
Excess oil ring wear would explain the high oil consumption, which in turn explains the barbecue-like deposits on the rotor faces, which then were burned white in the exhaust by the mighty Thermal Reactor...
My theory is excess fuel washing off the oil film, leading to heavy oil seal wear. Looks like the OMP saved the apex, side, and corner seals, but I have yet to measure them.
The motor does have almost 9 years on it... but not very many thousand miles. Something was causing accelerated oil seal wear, & I'm not sure what, yet.


regarding the thermal reactor, it may be best to take it to a machine shop and have them run it over a belt sander and resurface the flange area to a perfectly flat surface.
accelerated wear could be caused by gas entering the oil via flooding or an improperly tuned carb, weak ignition system or overall low compression etc. i wouldn't mind seeing pics of the internals. are you finding even wear on each housing, rotor, and seals?
accelerated wear could be caused by gas entering the oil via flooding or an improperly tuned carb, weak ignition system or overall low compression etc. i wouldn't mind seeing pics of the internals. are you finding even wear on each housing, rotor, and seals?
Thread Starter
Joined: Jun 2008
Posts: 8,376
Likes: 28
From: Chino Hills, CA
Here's a few; I'll be starting detailed inspection of parts tonight:
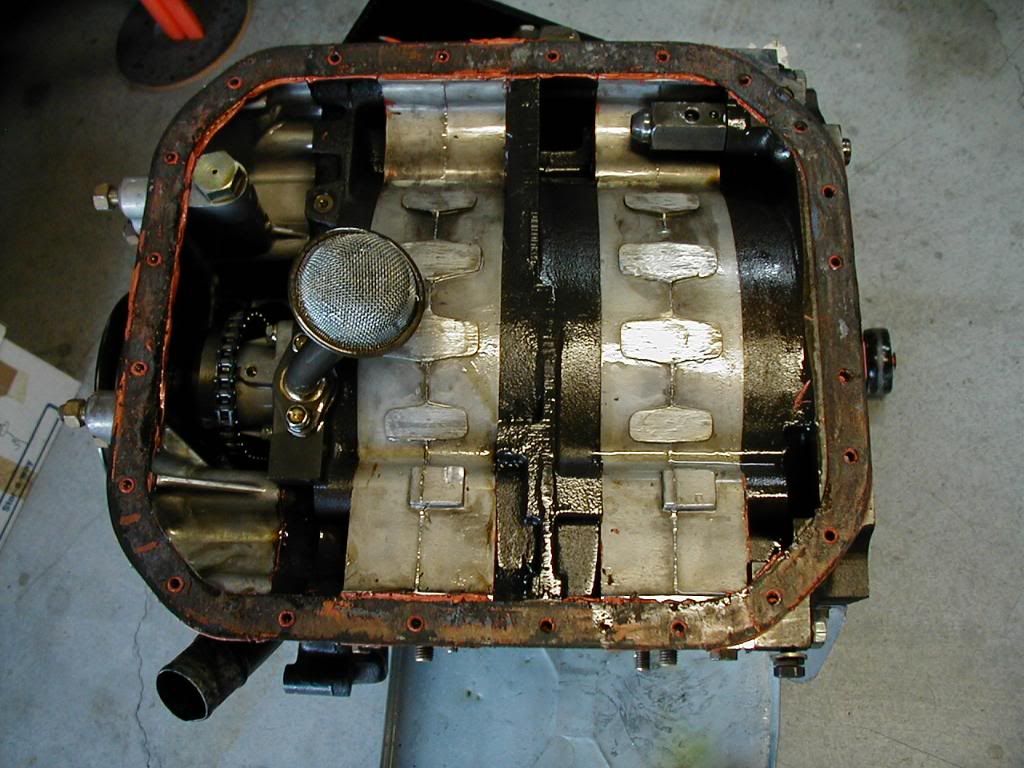
Rear chamber opened:

Rear iron:


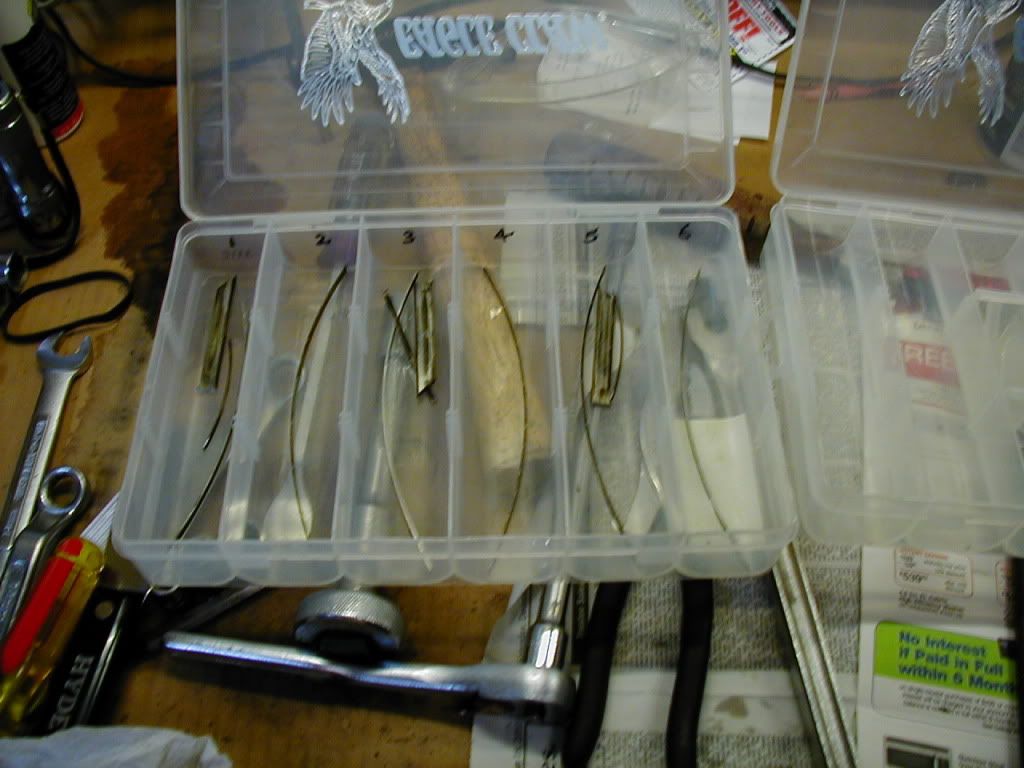
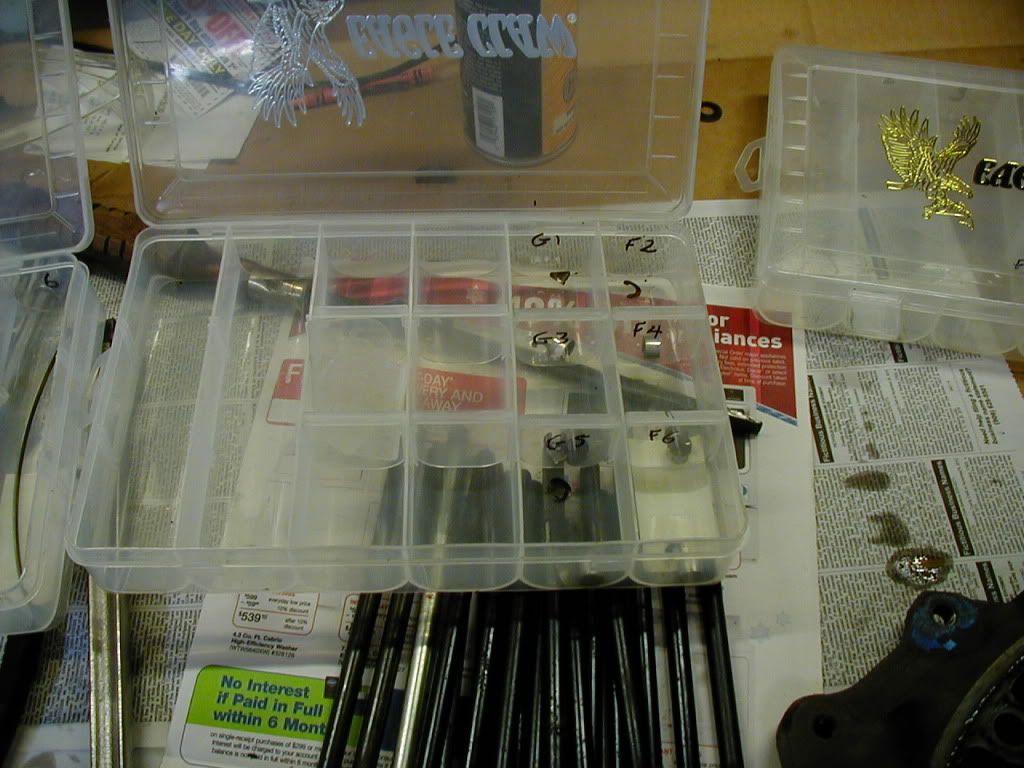
My seal-sorting strategy:
Rotor; both about the same level of crapped-up-edness:

Fast eyeball measurements made last night show the oil hardring friction faces worn to as much as 2mm width on the worst ones. Spec is <=0.5mm.
There goes about $300 just there.
Rear chamber opened:
Rear iron:
My seal-sorting strategy:
Rotor; both about the same level of crapped-up-edness:
Fast eyeball measurements made last night show the oil hardring friction faces worn to as much as 2mm width on the worst ones. Spec is <=0.5mm.
There goes about $300 just there.
Thread Starter
Joined: Jun 2008
Posts: 8,376
Likes: 28
From: Chino Hills, CA
Day 1277
Yep; all 8 oil hardseals are worn beyond spec. A couple are close, but still out of tolerance.
I need to clean the rotors before I can properly check most of the other seals, but cursory inspection seems to show the apex and corner seals showing no gross wear. Even the rubber corner-seal plugs look fresh.
Good news so far:
Rotor housings are still pristine, and mic'ed widths are still nominal. Good thing I'd cracked the engine when I did, as the carbon build-up on the rotors was beginning to rub the rotor housing face.
End housings checked thus far are within limits. Worst wear, strangely, is in the front end housing. That one may need to go, but at least there's nothing particularly 'special' about the front housings.
Bearings look good thus far, as does the eccentric. I'll need to get run-out checked, but I don't anticipate a problem.
More cleaning and measuring tomorrow. Hopefully I'll have my whole shopping list together before Monday.
Clearly, it's time to resolve my carb problems once and for all.
Here's a few; I'll be starting detailed inspection of parts tonight:
Rear chamber opened:
Rear iron:
My seal-sorting strategy:
Rotor; both about the same level of crapped-up-edness:
Fast eyeball measurements made last night show the oil hardring friction faces worn to as much as 2mm width on the worst ones. Spec is <=0.5mm.
There goes about $300 just there.
Rear chamber opened:
Rear iron:
My seal-sorting strategy:
Rotor; both about the same level of crapped-up-edness:
Fast eyeball measurements made last night show the oil hardring friction faces worn to as much as 2mm width on the worst ones. Spec is <=0.5mm.
There goes about $300 just there.
When I rebuilt her, everything looked great but the hard oil rings.
I had about 2 mm surface area on the worst ones as well.
I theorize what happens is that with the wide sealing surface, the seal "hydroplanes" on the side housing and causes oil to leak by. When you think you are helping by adding thicker oil, the thick oil only exaserbates the problem!
The only was to really correct this problem is to replace the hard rings.... good bye $300!!!
Thread Starter
Joined: Jun 2008
Posts: 8,376
Likes: 28
From: Chino Hills, CA
Jim, you're right... I was hoping it would just be bad softrings, but it is what it is.
Further good news, the apex and side seals check out fine, and the rear and mid plates are within specs after careful checking. still have to go thru the corners and the rotors themselves, but I need to clean the rotors first.
The front plate is gone to excess step wear, nearly 0.005 in. at the worst spot. Luckily, a low mileage one was available right when I needed it, so I'm covered there.
Still have the main bearings to go through, but thus far there's nothing internal to the engine that could have been causing the excess o-ring wear. Only explanation is oil dilution and film loss due to recurrent flooding.
So, the carb has to get resolved. And I need to go thru the vent system end to end again with a fine-toothed eyeball. Finally time to drop the tank and do hoses, I guess, just to be sure all is as open as it should be.
Thread Starter
Joined: Jun 2008
Posts: 8,376
Likes: 28
From: Chino Hills, CA
 Doing so; up to about 120 in numbered sequence thus far. I haven't taken time to annotate them yet, but here's the Photobucket album URL if you want to look:
http://smg.photobucket.com/albums/v2...ine%20Removal/
Or this may be the excuse to finally buy a grinder/bufer of my own. Finding a place to put it is the tough bit. As you know, I'm storage- & workspace-challenged in my garage.
Doing so; up to about 120 in numbered sequence thus far. I haven't taken time to annotate them yet, but here's the Photobucket album URL if you want to look:http://smg.photobucket.com/albums/v2...ine%20Removal/
I may take you up on that, especailly when it comes time to buff out the front cover and housings. Rotors I'm paranoid about, and usually do by hand.
Or this may be the excuse to finally buy a grinder/bufer of my own. Finding a place to put it is the tough bit. As you know, I'm storage- & workspace-challenged in my garage.
Thread Starter
Joined: Jun 2008
Posts: 8,376
Likes: 28
From: Chino Hills, CA
Day 1279
Finished checking most of the hard seals today; all the rest are in fine shape, nice tight clearances, no problems with wear or minimum protrusions.
Only the oil seals are heavily worn... which is odd. They get the best lubrication of any seal, and they were replaced at the same time all the other hard seals were.
Being closest to the center of the rotor, they also have the lowest sliding speed and shortest distance travelled of any of the seals.
Curious.
Thanks much, Jim, but I've got the rotors pretty well cleaned up now, by stint of a couple hours' scrubbing with brass and stainless brushes, scraping with a gasket remover, and soaking in Gunk Foamy Engine Bright. Amazing amount of crud came off:
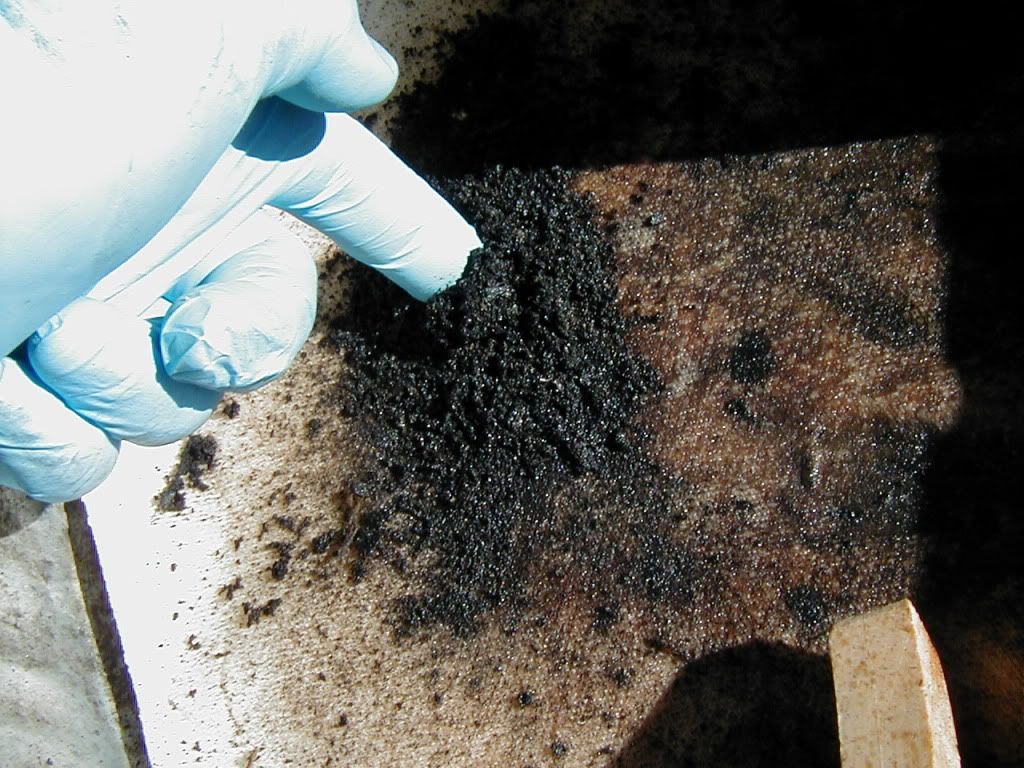
Probably the most tedious cleaning job is getting carbon off the corner seal springs. They're in too good a shape to just replace, but man they are a pain to scrape.
Tomorrow I need to start ordering parts I know will need replacing. Already have an OEM gasket kit ready to go.
It'll take about a week for my replacement front housing to show up, so now I will carry on cleaning the rotor and side housings that I'll be using again, as well as all the accessory parts - - oil pump and such.
Need to mic out the bearings, too. Oil pressure was good before teardown, so they should be OK.
Onward engine janitorial services!
Finished checking most of the hard seals today; all the rest are in fine shape, nice tight clearances, no problems with wear or minimum protrusions.
Only the oil seals are heavily worn... which is odd. They get the best lubrication of any seal, and they were replaced at the same time all the other hard seals were.
Being closest to the center of the rotor, they also have the lowest sliding speed and shortest distance travelled of any of the seals.
Curious.
Probably the most tedious cleaning job is getting carbon off the corner seal springs. They're in too good a shape to just replace, but man they are a pain to scrape.
Tomorrow I need to start ordering parts I know will need replacing. Already have an OEM gasket kit ready to go.
It'll take about a week for my replacement front housing to show up, so now I will carry on cleaning the rotor and side housings that I'll be using again, as well as all the accessory parts - - oil pump and such.
Need to mic out the bearings, too. Oil pressure was good before teardown, so they should be OK.
Onward engine janitorial services!


Joined: Mar 2001
Posts: 31,851
Likes: 3,238
From: https://www2.mazda.com/en/100th/
that engine actually looks quite good! the side of the rotors are very clean, so there isn't much blowby. these engines can be weird, i pulled the throttle body off my convertible FC the other day to adjust the thermowax, and a bunch of oil came out. why i have no idea, car doesn't smoke, and doesn't seem to be using oil, but yet there was a bunch in the intake....
so your engine, toasted oil control rings (i remember those used to be $80 a set!) the FC's do that when the thermopellet fails, and the rotors don't get any cooling spray. i wouldn't have thought about this at all, but Jeff20B brought it up for his engine. what about the Eshaft oil squirters? there is a ball and spring under the um bolty thing, maybe those are not right? the spring is probably a $0.50 part, which means it'll be $15....
if its really rich or really hot, the oil film will fail, so just a thought
Thread Starter
Joined: Jun 2008
Posts: 8,376
Likes: 28
From: Chino Hills, CA
Yeah, as of today I'm $350 lighter after picking up four sets of oil hard rings. Tax in there, too, you know.
I know for sure it wasn't hot in any general sense - - both OEM water and aftermarket oil temp gauges at the low end of normal all the time, even mid-summer.
I do know it was getting frequent floods due to my Mystery #1 Post-shutdown flood.
It's just odd that the oil rings would show so much wear while the other rotor seals are virtually new in dimension. Seems like if it was solely flood-induced film disruption, it would have hit the side and corner seals too, since they travel farther, move faster, and are out in the combustion area where a flood would have most influence.
Squirters... haven't checked them yet. This e-shaft was factory-new on my last rebuild, and the journals look good, but I still need to open the oil jets and check them out. Good call, though.
Thankfully, I don't have the thermopellet to worry about.
Thread Starter
Joined: Jun 2008
Posts: 8,376
Likes: 28
From: Chino Hills, CA
Day 1281
Last night was mainly more parts cleaning, nothing spectacular or unexpected. I did disassemble the oil jets on the eccentric, and each properly consisted of the jet, the spring, and the check ball, all of which are in bright unworn condition.
I ran some light oil through the shaft bore, to make sure it's not plugged by anything. Once I've pulled the pilot bearing (which I really should have done while the engine was assembled, dammit) I may extract the rear plug so I can punch the bore with a cleaning swab. Or I may decide to leave well enough alone, and just run some solvent through it at pressure.
Good news today; My oil soft rings all pass muster, and are in prime shape to be re-used. That's $140 (for Mazda OEM; not willing to chance it on Atkins' $40 self-sourced rings) not needing to be spent.
Also ordered from Rock Auto new pilot bearing and seal, Throw-out bearing... and a Pitman arm, as I plan on swapping my (original, rather loose) steering gearbox out with a newer and tighter one I've had parked on the workbench for several years. Can't get any easier than doing it with the entire engine removed.
I know the Pitman arm is original to the car, so I'm just replacing it rather than wasting time yanking the old one.
Thread Starter
Joined: Jun 2008
Posts: 8,376
Likes: 28
From: Chino Hills, CA
Day 1290
Main and rotor bearings and e-shaft journals all checked out OK, with near-identical 0.002" clearances. That's the good news.
At first, I thought the oil pump, however, is a different story. The allowed clearance between the outer rotors and the pump housing is 0.003". Mine are at 0.006".
In a parallel project, I'm refurbing the steering gearbox I plan to swap in while the engine's out. I can't find ANY tool with which to get the 68mm(!) locknut off, though. Neither my pipe wrench nor my 24" channel-locks can budge it, and nothing else I have even comes close to spanning it. I don't want to chew it up with a chisel as I plan to re-use it, and the idea of having to spend $100+ for a wrench that size to use one time is offending me.
It's soaking in PB Blaster right now.
I've removed the side cover, sector shaft and adjuster, thus far - - it's interesting to see how these go together at last, as the pictures in the official FSM copy I have are damn-near illegible.
Essentially, the quality of the entire steering unit depends on the degree of wear between the round head of the adjuster screw, a hardened shim it passes through, and the top surface of the sector shaft. Once they wear more than a couple thousandths there's no way to eliminate steering wheel slop.
The screw & shim were never offered by Mazda as replacement parts, even though replacing them is easy, and would rejuvinate many a sloppy box. Pictures to follow.
Thread Starter
Joined: Jun 2008
Posts: 8,376
Likes: 28
From: Chino Hills, CA
Hold the phone, here: I was using pump clearance numbers for a 12.5mm 12A pump... I wonder if the 13B pump tolerance is different?
A little more research in the 85 FSM (thank you again, Sgt Fox!) reveals that allowed clearance on the 13B pump is... huh?
The book cites "Standard clearance: 0.20mm ~ 0.25mm (0.0079 ~ 0.098 in) Clearance limit: 0.30mm (0.0118 in) "
There's something not right about those inch dimensions, folks. The 'limit' is 9 times SMALLER than the large 'standard' number.
Math (mm / 25.4 = in) says:
0.20mm = 0.00787 (0.0079) inches
0.25mm = 0.00984 (0.0098) inches
0.30mm = 0.01181 (0.0118) inches
Mazda flubbed the conversion on the second number.
Which goes to show; ALWAYS check inch numbers in translated manuals! (Or work in MM, heh)
My pump is actually on the low end of the standard number; rather than worn out, it's in its prime! Another $200 saved!
Joined: Mar 2001
Posts: 31,851
Likes: 3,238
From: https://www2.mazda.com/en/100th/
Day 1290
Main and rotor bearings and e-shaft journals all checked out OK, with near-identical 0.002" clearances. That's the good news.
At first, I thought the oil pump, however, is a different story. The allowed clearance between the outer rotors and the pump housing is 0.003". Mine are at 0.006".
In a parallel project, I'm refurbing the steering gearbox I plan to swap in while the engine's out. I can't find ANY tool with which to get the 68mm(!) locknut off, though. Neither my pipe wrench nor my 24" channel-locks can budge it, and nothing else I have even comes close to spanning it. I don't want to chew it up with a chisel as I plan to re-use it, and the idea of having to spend $100+ for a wrench that size to use one time is offending me.
It's soaking in PB Blaster right now.
I've removed the side cover, sector shaft and adjuster, thus far - - it's interesting to see how these go together at last, as the pictures in the official FSM copy I have are damn-near illegible.
Essentially, the quality of the entire steering unit depends on the degree of wear between the round head of the adjuster screw, a hardened shim it passes through, and the top surface of the sector shaft. Once they wear more than a couple thousandths there's no way to eliminate steering wheel slop.
The screw & shim were never offered by Mazda as replacement parts, even though replacing them is easy, and would rejuvinate many a sloppy box. Pictures to follow.
Main and rotor bearings and e-shaft journals all checked out OK, with near-identical 0.002" clearances. That's the good news.
At first, I thought the oil pump, however, is a different story. The allowed clearance between the outer rotors and the pump housing is 0.003". Mine are at 0.006".
In a parallel project, I'm refurbing the steering gearbox I plan to swap in while the engine's out. I can't find ANY tool with which to get the 68mm(!) locknut off, though. Neither my pipe wrench nor my 24" channel-locks can budge it, and nothing else I have even comes close to spanning it. I don't want to chew it up with a chisel as I plan to re-use it, and the idea of having to spend $100+ for a wrench that size to use one time is offending me.
It's soaking in PB Blaster right now.
I've removed the side cover, sector shaft and adjuster, thus far - - it's interesting to see how these go together at last, as the pictures in the official FSM copy I have are damn-near illegible.
Essentially, the quality of the entire steering unit depends on the degree of wear between the round head of the adjuster screw, a hardened shim it passes through, and the top surface of the sector shaft. Once they wear more than a couple thousandths there's no way to eliminate steering wheel slop.
The screw & shim were never offered by Mazda as replacement parts, even though replacing them is easy, and would rejuvinate many a sloppy box. Pictures to follow.
i think for the nut on the column they had some sort of spanner like you see for the cheap coil over things?
oh and in the triumph world they fix the steering box thing by putting a preload spring on the adjuster screw somehow. i bet something similar would be possible on the Rx