
My TII FB Adventure...


Thread Starter
Junior Member
Joined: Nov 2012
Posts: 28
Likes: 0
From: Blytheville, AR
!!! WOW...sorry for the giant pictures! I will upload them somewhere who has thumbnails and cut the load time down!!!
Hello all! I have been lurking for a while and have been "working" on my FB in the background for over a year now. I add the sarcastic quotes around "working" since it has mostly been unbolting everything and stripping it down for paint. It has been quite an adventure so far since the car was dropped into my stop by a friend who moved away. The original white 85 GSLSE that my friend traded for had a TII engine swap and quite a few other parts...you will see why I say original later... Around the same time we also found another GSLSE, which was pretty much stock other than lower springs and an "interesting" header setup (pictures to come). He toyed around with the turbo car some and planned to paint it...until he got another job 2000mi away and I inherited (read bought) both cars.
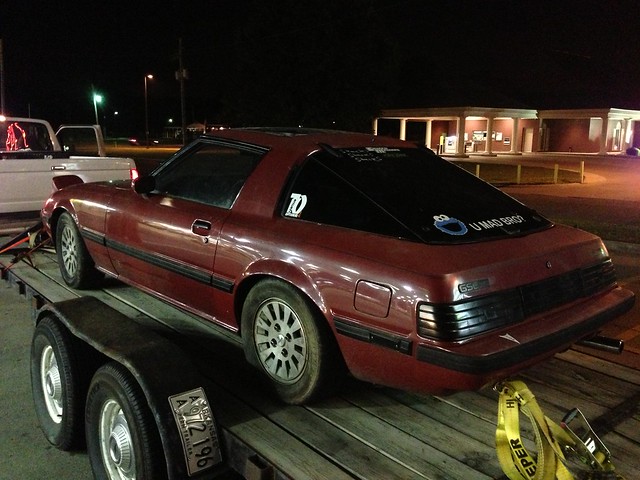
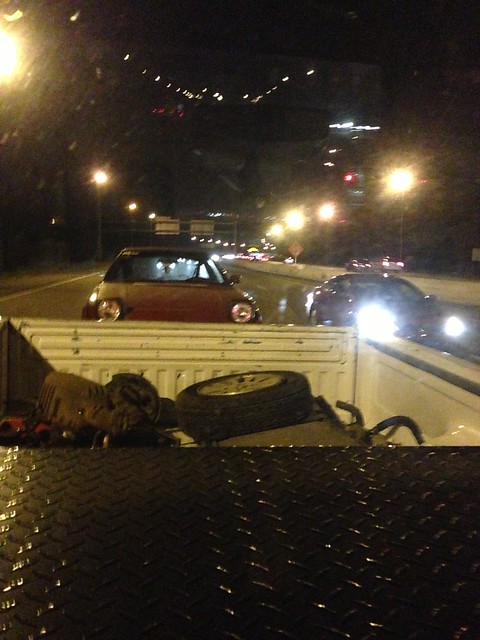
Here is the red car headed up from Memphis...
We got some baller stickers with it...
It ran like...poop...so we adjusted the TPS and fixed about 12 vacuum leaks. Ran like a dream...until this happened...
...and...
Probably why it was cheap...
Anyway...my buddy Zac traded a motorcycle for the white GSLSE which has/had the TII engine, Kia Sonata third member, MicroTech LT10...etc.
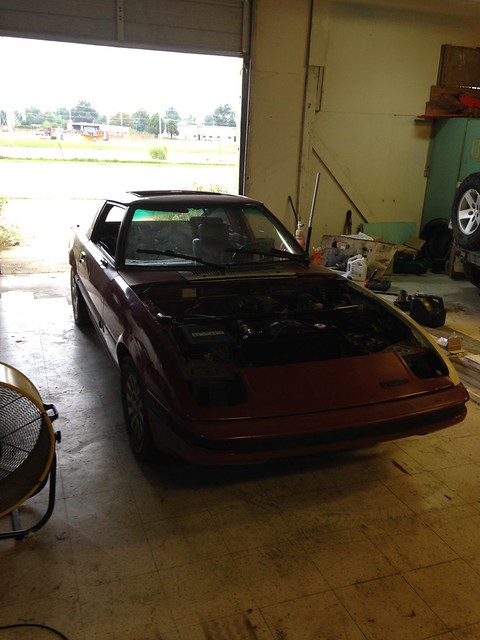
So once I got a hold of the car my OCD kicked in and I started taking it apart...it needed some interior TLC and what I thought was a few things under the hood...
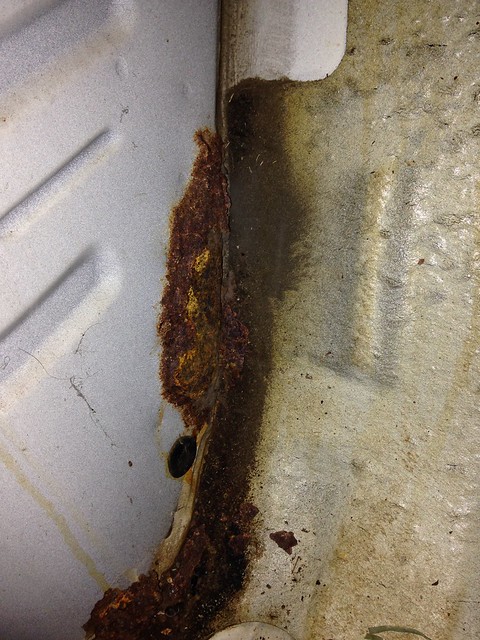
Nope...rust...lots of rust...
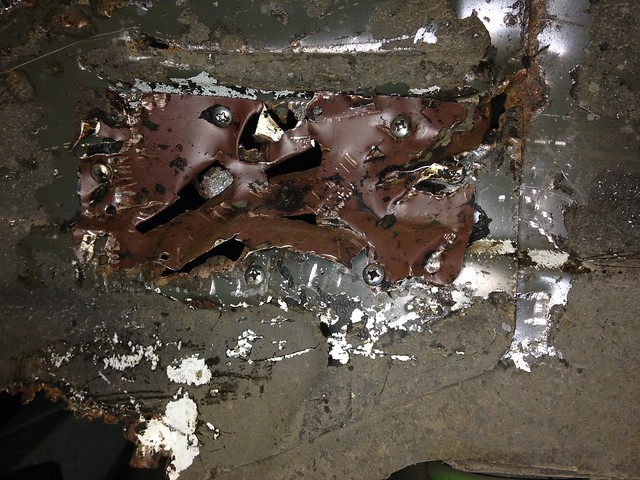
More...rust... And some interesting patchwork of tar and aluminum house siding.
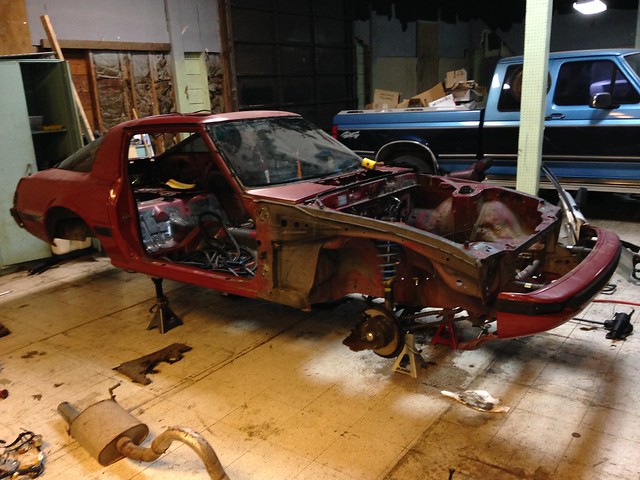
Soooo...I found a lot more rust... It may have been in a lake at some point... Rocker panels, sunroof trim holders...floors have holes...etc...etc... After a good cry in the corner of the shop I decided to swap all the go/turn fast parts into the red one. It couldn't be worse...right?
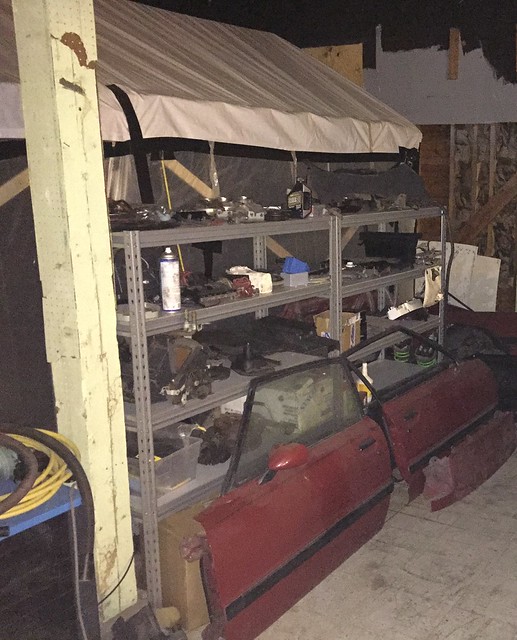
Well, I was lucky and it was in great shape with almost no rust! WOOOHOOO! So I stripped all the stuff out of both...and put it on shelves in little baggies...
I didn't take any pictures of the white car tear down...I was sad and just ripped it all out in a weekend.
Anyway...I quite a bit more progress to post...which I hope to get to posting this week.
Hello all! I have been lurking for a while and have been "working" on my FB in the background for over a year now. I add the sarcastic quotes around "working" since it has mostly been unbolting everything and stripping it down for paint. It has been quite an adventure so far since the car was dropped into my stop by a friend who moved away. The original white 85 GSLSE that my friend traded for had a TII engine swap and quite a few other parts...you will see why I say original later... Around the same time we also found another GSLSE, which was pretty much stock other than lower springs and an "interesting" header setup (pictures to come). He toyed around with the turbo car some and planned to paint it...until he got another job 2000mi away and I inherited (read bought) both cars.
Here is the red car headed up from Memphis...
We got some baller stickers with it...
It ran like...poop...so we adjusted the TPS and fixed about 12 vacuum leaks. Ran like a dream...until this happened...
...and...
Probably why it was cheap...
Anyway...my buddy Zac traded a motorcycle for the white GSLSE which has/had the TII engine, Kia Sonata third member, MicroTech LT10...etc.
So once I got a hold of the car my OCD kicked in and I started taking it apart...it needed some interior TLC and what I thought was a few things under the hood...
Nope...rust...lots of rust...
More...rust... And some interesting patchwork of tar and aluminum house siding.
Soooo...I found a lot more rust... It may have been in a lake at some point... Rocker panels, sunroof trim holders...floors have holes...etc...etc... After a good cry in the corner of the shop I decided to swap all the go/turn fast parts into the red one. It couldn't be worse...right?
Well, I was lucky and it was in great shape with almost no rust! WOOOHOOO! So I stripped all the stuff out of both...and put it on shelves in little baggies...
I didn't take any pictures of the white car tear down...I was sad and just ripped it all out in a weekend.
Anyway...I quite a bit more progress to post...which I hope to get to posting this week.
Last edited by Dingus; Feb 10, 2015 at 10:27 PM. Reason: Giant PICTURES!
Yeah, your pics are way too big! Maybe you can cut them down to like 640x480?
If you're not showing any specific details, a small pic is better than a large one.
And if you are trying to show details, a zoomed in or rather 1:1 ratio is best so
there is no loss in quality. Just take a 640x480 crop to your giant pic and go from
there. That's what I do for showing important details and load times are super quick.
Do you have any ok or decent picture editing software? You gotta have
something. Even cheap or limited optioned works. No need for higher end stuff
like photoshop and such.
Thread Starter
Junior Member
Joined: Nov 2012
Posts: 28
Likes: 0
From: Blytheville, AR
Yep...Im in the process of uploading them to Flickr but I have a crap-ton of pictures. I am going to pull all the picture off for now until I get them manageable. Thanks for the pointers!
Edit: Any decent open source picture editing software out there? I used to use GIMP in Linux but I haven't done much picture stuff since...
Edit: Any decent open source picture editing software out there? I used to use GIMP in Linux but I haven't done much picture stuff since...
Last edited by Dingus; Feb 10, 2015 at 10:29 PM.
Thread Starter
Junior Member
Joined: Nov 2012
Posts: 28
Likes: 0
From: Blytheville, AR
Well...I didnt get the photos uploaded in time to still edit the original post. So here are the pictures and hopefully subsequent post wont be so disjointed.
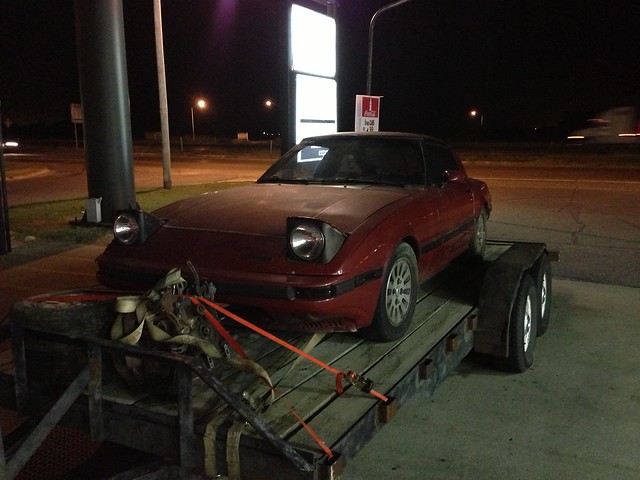
Red car on the way home...

The ugly...after we blew up the red car's tranny...

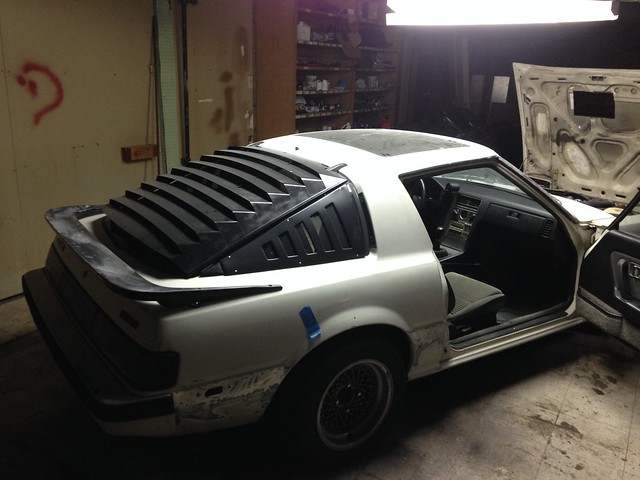
The white GSLSE...
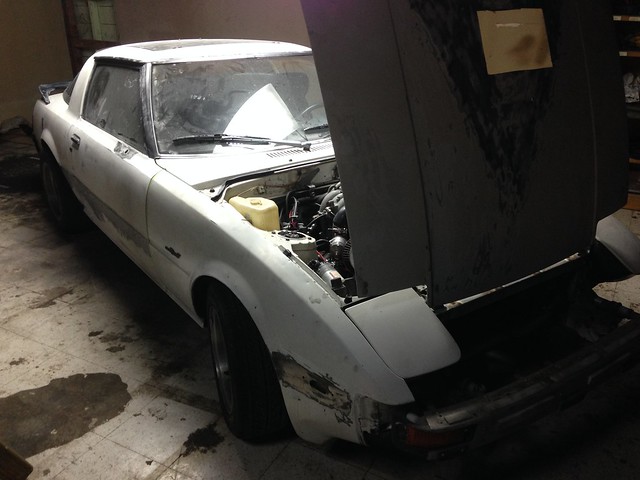
Red car on the way home...
The ugly...after we blew up the red car's tranny...
The white GSLSE...


Thread Starter
Junior Member
Joined: Nov 2012
Posts: 28
Likes: 0
From: Blytheville, AR
Paint "Booth"...
I have been working mainly on getting the car ready to paint. I am one of the OCD types who like to do everything himself...even if it costs more, blows my timeline and ends up looking like crap. So I made a spray "tent"...
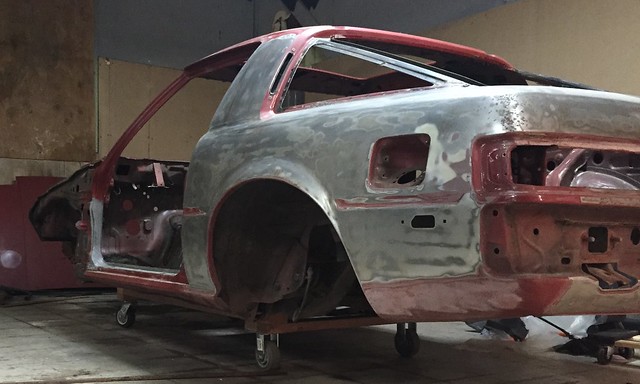
Started sanding the body...
Figured I needed a place to paint...
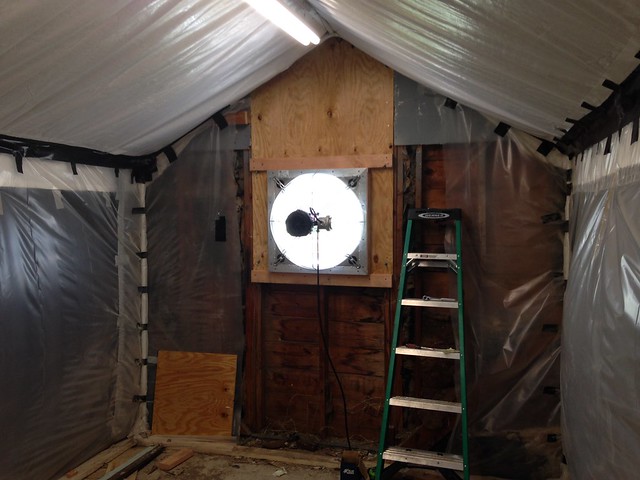
Got a HF 10ftx20ft tent on sale and added some 4mil plastic sides. Added the lights and tested the car would fit and I could move around the thing...
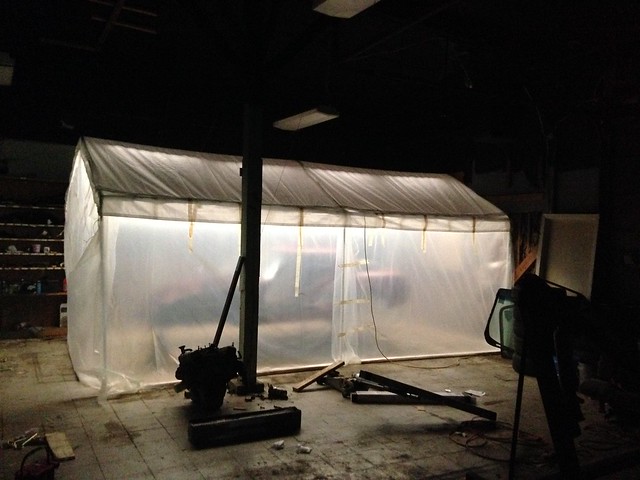
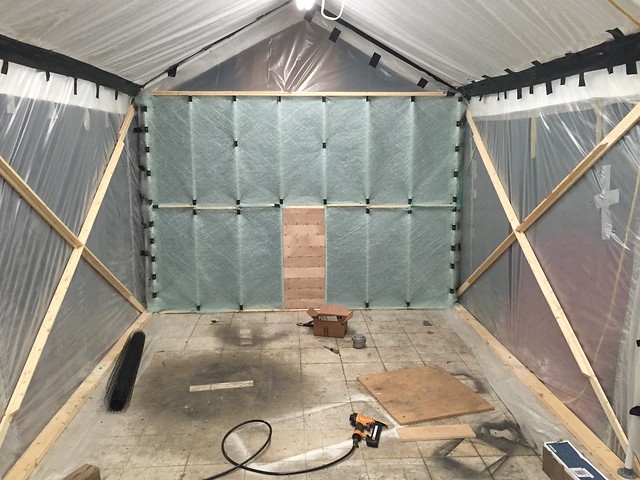
I added some doors and lagged the stuff to the floor. Also used about 5 rolls of the 3" wide Gorilla Tape to seal everything...that stuff is insanely sticky!
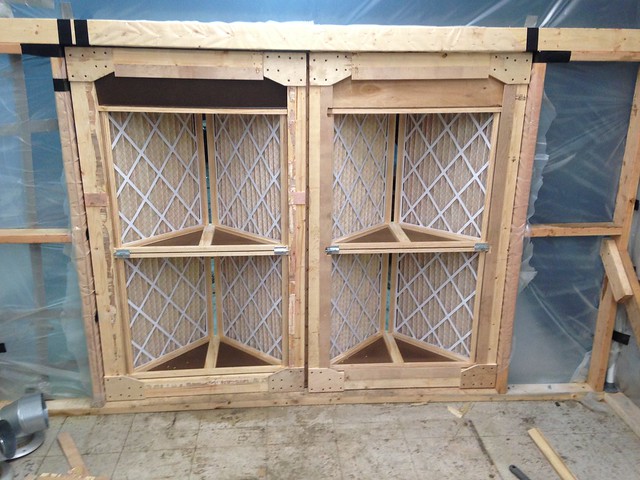
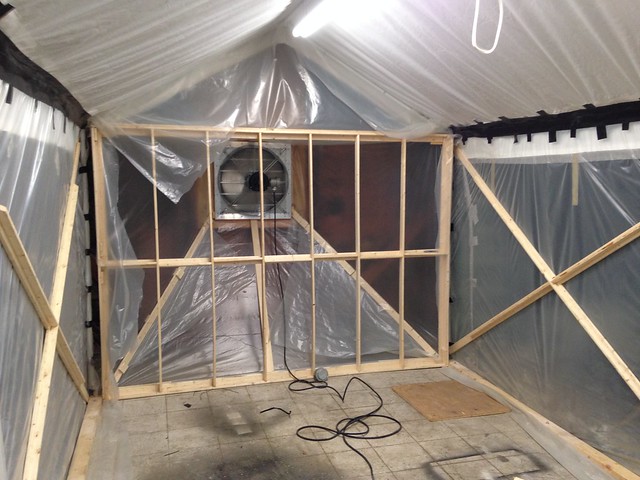
I did some calcs on flow rates for some inlet filters and made these frames...not measurable pressure drop with the fan running! I did enclose the ends...
I had some other fan in the hole...and someone at work said "arn't you afraid it will blow up?!"...well now I am. So I saved up and got this totally enclosed fan...5500CFM!
I decided I needed more room and the fan stuck out into the space too much...so I had to "unlag" the 2x4s from the ground and move the tent back by 3 ft. Then relag all the stuff to the floor...lots of holes...
Fan installed with the plastic frame up to it...
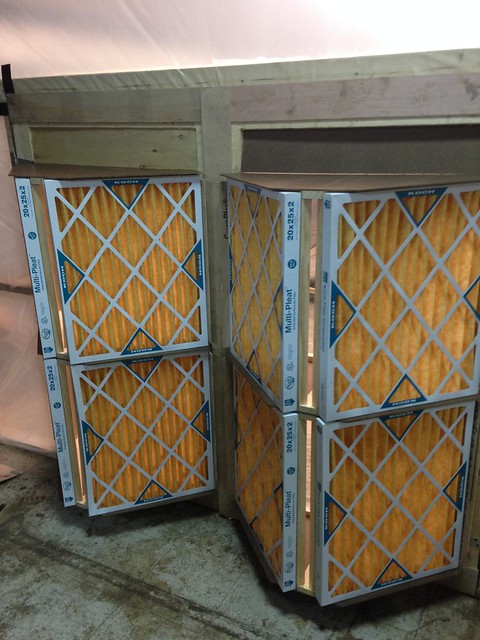
Here is the plastic grid stuff I got to hold the paint arrestor...hope the solvent in the paint doesnt eat it...
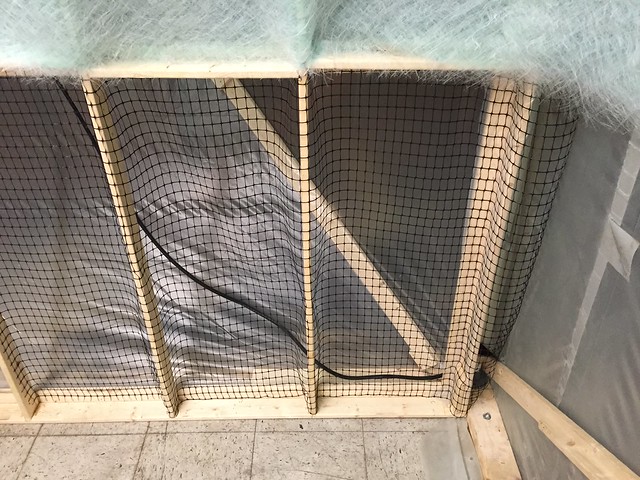
Paint arrestor grid and capture material:
I still have to cover the lights...
Started sanding the body...
Figured I needed a place to paint...
Got a HF 10ftx20ft tent on sale and added some 4mil plastic sides. Added the lights and tested the car would fit and I could move around the thing...
I added some doors and lagged the stuff to the floor. Also used about 5 rolls of the 3" wide Gorilla Tape to seal everything...that stuff is insanely sticky!
I did some calcs on flow rates for some inlet filters and made these frames...not measurable pressure drop with the fan running! I did enclose the ends...
I had some other fan in the hole...and someone at work said "arn't you afraid it will blow up?!"...well now I am. So I saved up and got this totally enclosed fan...5500CFM!
I decided I needed more room and the fan stuck out into the space too much...so I had to "unlag" the 2x4s from the ground and move the tent back by 3 ft. Then relag all the stuff to the floor...lots of holes...
Fan installed with the plastic frame up to it...
Here is the plastic grid stuff I got to hold the paint arrestor...hope the solvent in the paint doesnt eat it...
Paint arrestor grid and capture material:
I still have to cover the lights...
Trending Topics
Thread Starter
Junior Member
Joined: Nov 2012
Posts: 28
Likes: 0
From: Blytheville, AR
Yep, I sure have! I live and work in a small town with nothing really to do....SOOO I spend a lot of time working on the car. I have more stuff to post later...since ReSpeed stopped selling big-brake kits and I missed the recent group buy I made my own stuff. More pictures tonight...
Thread Starter
Junior Member
Joined: Nov 2012
Posts: 28
Likes: 0
From: Blytheville, AR
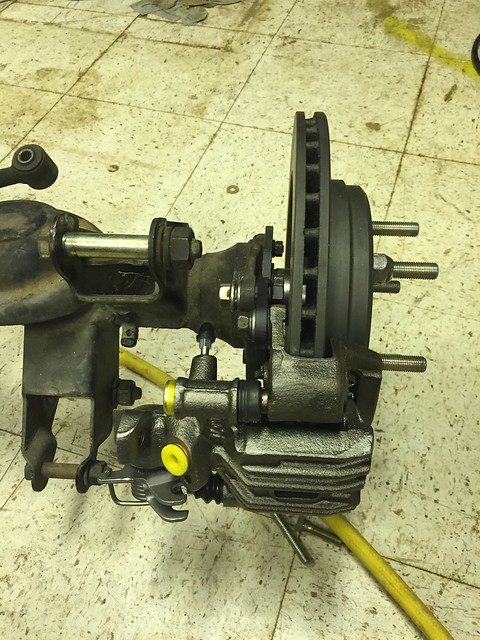
FC Big Brakes part one...
I missed the recent group buy for the big brake kit. I already bought the FC hubs off ebay and picked up the front and rear rotors a while back. So once I finally got the spray tent done and it is too cold to spray anything I decided to focus on the front brakes and installing the Ground Control coilover kit (I have questions but will probably post another thread for that...).
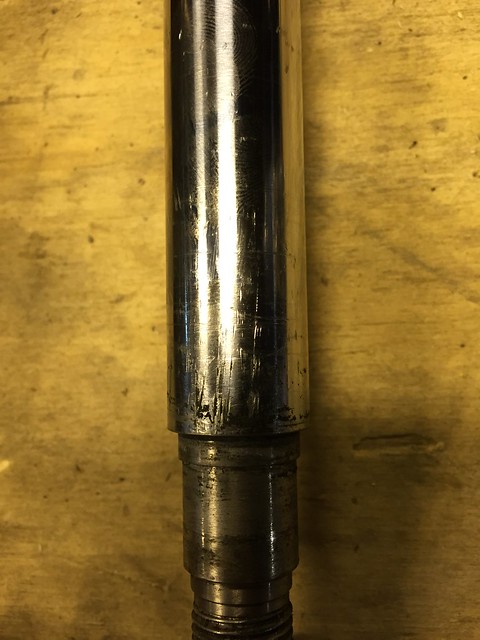
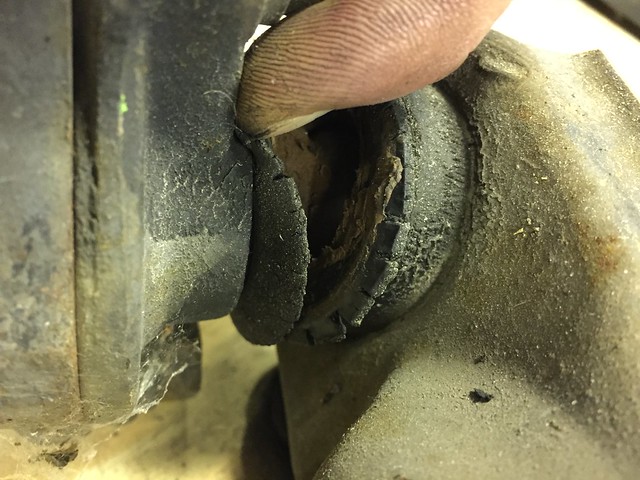
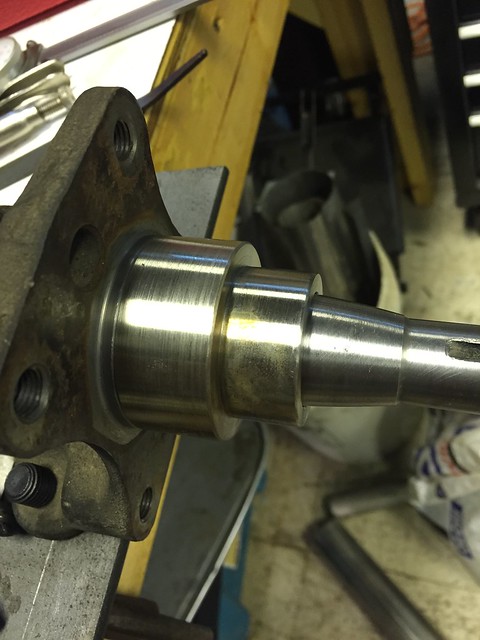
I stripped the front shock tube/spindle thing down. I found some saddening things the previous owner did to the nice Tokiko shocks and ruined ball joint(s). Had a bit of a pity party and moved on...

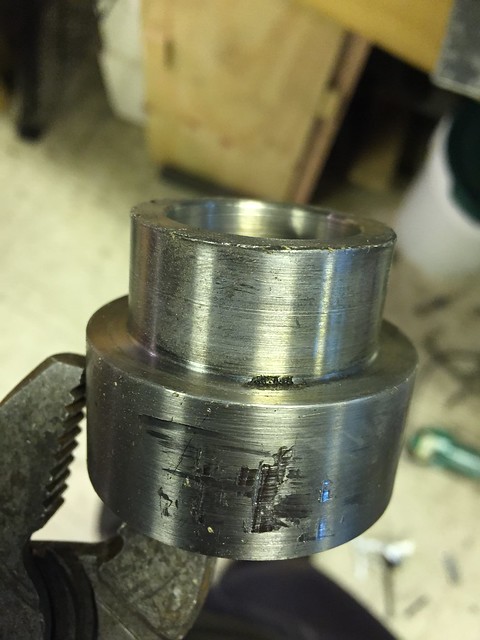
So I got to work on the hub spacer since I figured that would be the hardest part. I talked to some machinist at work and they were fairly noncommittal about what to use...I heard "cold rolled" in their mutterings so I ordered some 1018. I work in a sheet steel mill and asked some metallurgists too but they didn't seem to know or want to give me an answer.
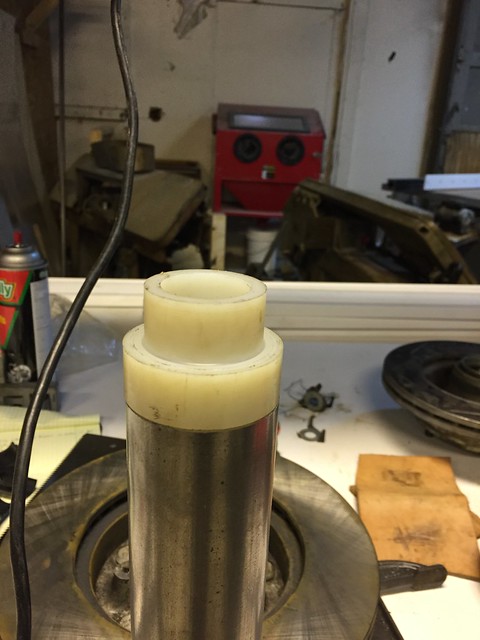
Before I got to work and screwed up my new steel I made a test piece out of some nylon stock I had...tested the fit of the hub. Worked pretty well!
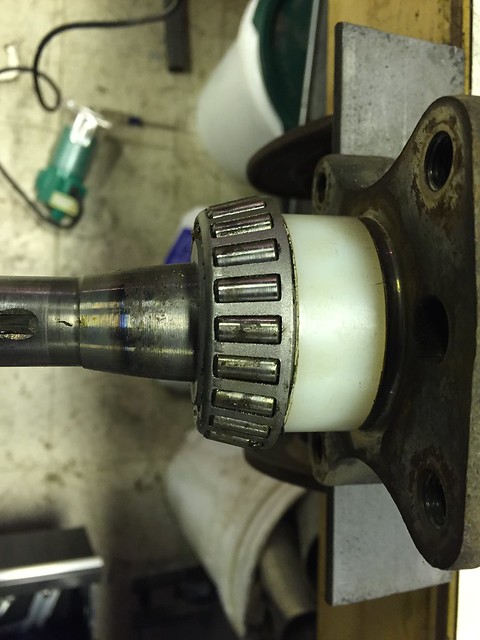
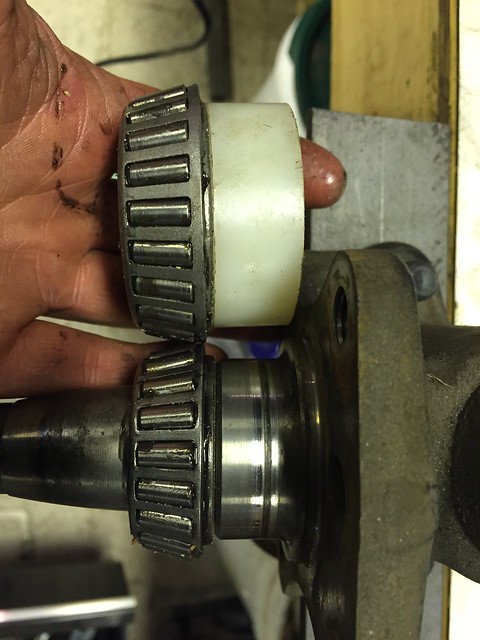
Old bearing vs new "learn my mistakes on cheap stuff" spacer:

Test spacer on top of the new steel bar:
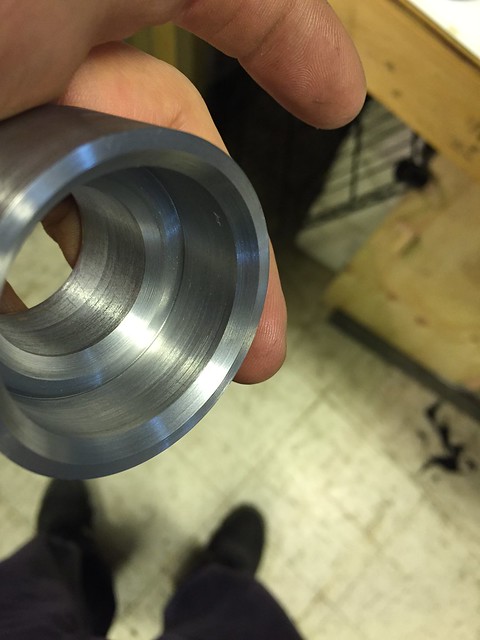
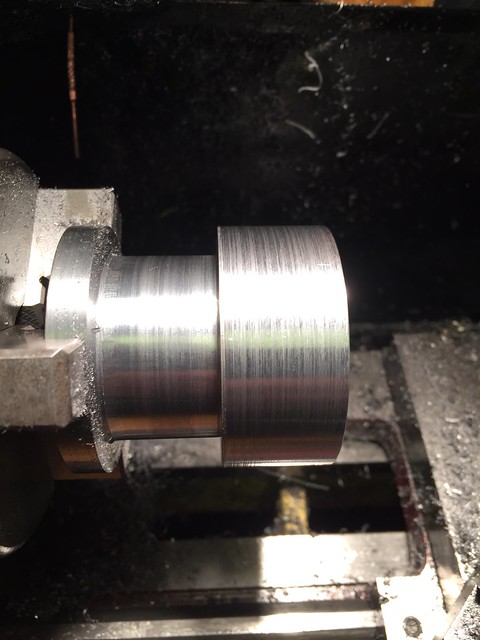
So I have a cheap china special lathe made by Sieg; it does the job most of the time and does pretty well now after I lapped in all the ways and slides. I also have some carbide tooling which helps too. But even at that I spent the better part of an entire weekend (Friday after work until 12am, Saturday all day and Sunday until 11:30PM making these da*n things). The first one went great! I calculated what an interference fit would be (okay I googled it...) and just made the thing running between the spindle bolted to the bench and the lathe. Went quite well! I was happy!

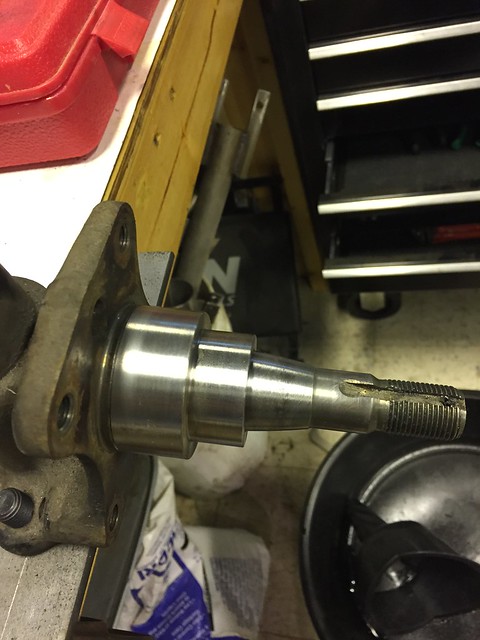
I heat that bad boy up with the propane torch and it slides right on...cools a second and is solid! Wooo Hoo! I win.
I stripped the front shock tube/spindle thing down. I found some saddening things the previous owner did to the nice Tokiko shocks and ruined ball joint(s). Had a bit of a pity party and moved on...
So I got to work on the hub spacer since I figured that would be the hardest part. I talked to some machinist at work and they were fairly noncommittal about what to use...I heard "cold rolled" in their mutterings so I ordered some 1018. I work in a sheet steel mill and asked some metallurgists too but they didn't seem to know or want to give me an answer.
Before I got to work and screwed up my new steel I made a test piece out of some nylon stock I had...tested the fit of the hub. Worked pretty well!
Old bearing vs new "learn my mistakes on cheap stuff" spacer:
Test spacer on top of the new steel bar:
So I have a cheap china special lathe made by Sieg; it does the job most of the time and does pretty well now after I lapped in all the ways and slides. I also have some carbide tooling which helps too. But even at that I spent the better part of an entire weekend (Friday after work until 12am, Saturday all day and Sunday until 11:30PM making these da*n things). The first one went great! I calculated what an interference fit would be (okay I googled it...) and just made the thing running between the spindle bolted to the bench and the lathe. Went quite well! I was happy!
I heat that bad boy up with the propane torch and it slides right on...cools a second and is solid! Wooo Hoo! I win.
Thread Starter
Junior Member
Joined: Nov 2012
Posts: 28
Likes: 0
From: Blytheville, AR
FC Hub Swap Part 2
So I make the second one... I must have displeased the car gods...this one did not go so well. I did hit all my numbers (ie it was like a 1.5 to 2 mil interference fit) but it froze half way on the spindle! I dont have any pictures...I was freaking out! I managed to pry the thing off...
So I measure it again and there is one bore that is a bit tight. That must be it right...? Sure...so I make a third one. Same thing. Stuck half way on and it is a PITA to get off the spindle.
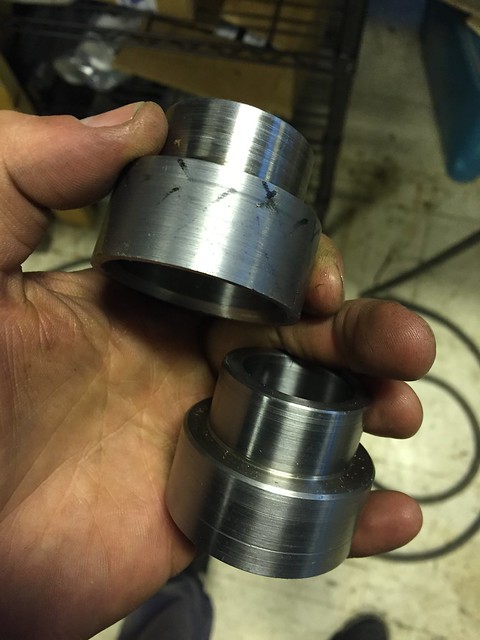
Now I have a pair of screwed up spacers and 14 hours of my life I wont ever get back. SOOOO...I go home and have a beer or 3 and think about what I have done...
Get up Sunday...I think a bit more about how I made the first spacer compared to the second and third. I think I didnt ever move the first one in the chuck when I bored the two concentric bores. Which makes sense...the lathe chuck isn't perfect. I get to the shop and check it with a dial indicator. The two bores are over 0.008" off center. Weelll....ding ding ding. That must be it.
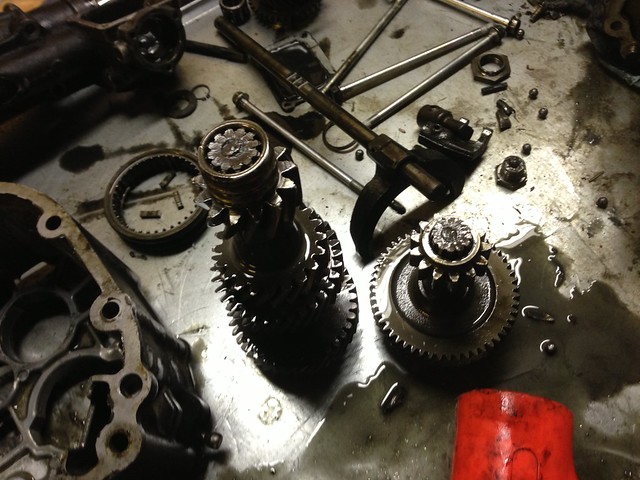
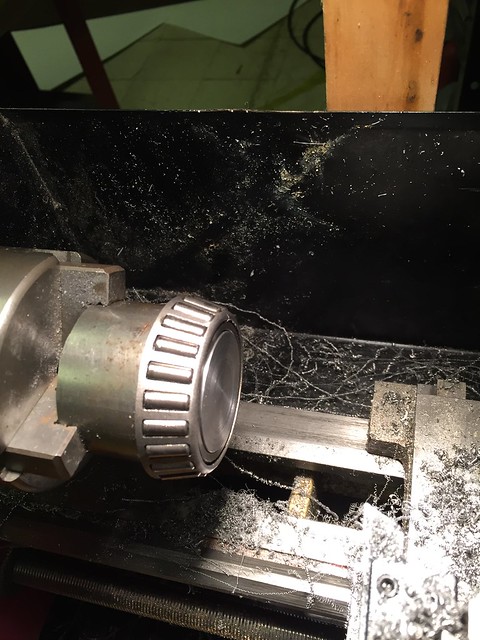
I take a break and change the bearing in my FC hubs. Mazda was nice enough to make this nearly impossible...thanks! So I decided that the Al will expand more than the steel so I set the spare hub on the heater...outer races fall out! I win!

Got that done quickly...back to the lathe.
This time I cut the new piece of steel and chuck it only once. There is a bit of scrap but well it is better than the two other scrap spacers!

This time it works great! Just like the first one!

I made a mess...
I prop up the brake caliper and think of all the stopping I will be able to do!

Time to work on some caliper brackets...
So I measure it again and there is one bore that is a bit tight. That must be it right...? Sure...so I make a third one. Same thing. Stuck half way on and it is a PITA to get off the spindle.
Now I have a pair of screwed up spacers and 14 hours of my life I wont ever get back. SOOOO...I go home and have a beer or 3 and think about what I have done...
Get up Sunday...I think a bit more about how I made the first spacer compared to the second and third. I think I didnt ever move the first one in the chuck when I bored the two concentric bores. Which makes sense...the lathe chuck isn't perfect. I get to the shop and check it with a dial indicator. The two bores are over 0.008" off center. Weelll....ding ding ding. That must be it.
I take a break and change the bearing in my FC hubs. Mazda was nice enough to make this nearly impossible...thanks! So I decided that the Al will expand more than the steel so I set the spare hub on the heater...outer races fall out! I win!
Got that done quickly...back to the lathe.
This time I cut the new piece of steel and chuck it only once. There is a bit of scrap but well it is better than the two other scrap spacers!
This time it works great! Just like the first one!
I made a mess...
I prop up the brake caliper and think of all the stopping I will be able to do!
Time to work on some caliper brackets...
Thread Starter
Junior Member
Joined: Nov 2012
Posts: 28
Likes: 0
From: Blytheville, AR
FC Brakes Part C
I have access to SolidWorks at work. It is also nice that they let an Electrical folk like myself access to it. So I measure 100 things and make a model.

I also made a fairly crappy CNC router in college during one summer. I know...it is nice. So I blast it out of some 3/16 hard board.

Well...my attention to detail pays off! I mismeasured...twice. AND cut the wrong file twice. So I now have several wrong test templates to match my spacers...

So I think I am pretty close!


Im going to cut it out of some 1/4" lexan or something else to test fit since...well go figure...the 3/16" hardboard isn't stiff enough. Oh and with the holes in the right spot...
Eventually I am going to have this waterjet cut out of some 1/4" 6061 aluminum plate eventually...some places around the steel mill will do it on the cheap if you bring your own stuff. I kinda want to integrate the dust shield, cooling ducts and the hub grease seal runner into this bracket. We will see...
I also made a fairly crappy CNC router in college during one summer. I know...it is nice. So I blast it out of some 3/16 hard board.
Well...my attention to detail pays off! I mismeasured...twice. AND cut the wrong file twice. So I now have several wrong test templates to match my spacers...
So I think I am pretty close!
Im going to cut it out of some 1/4" lexan or something else to test fit since...well go figure...the 3/16" hardboard isn't stiff enough. Oh and with the holes in the right spot...
Eventually I am going to have this waterjet cut out of some 1/4" 6061 aluminum plate eventually...some places around the steel mill will do it on the cheap if you bring your own stuff. I kinda want to integrate the dust shield, cooling ducts and the hub grease seal runner into this bracket. We will see...
Thread Starter
Junior Member
Joined: Nov 2012
Posts: 28
Likes: 0
From: Blytheville, AR
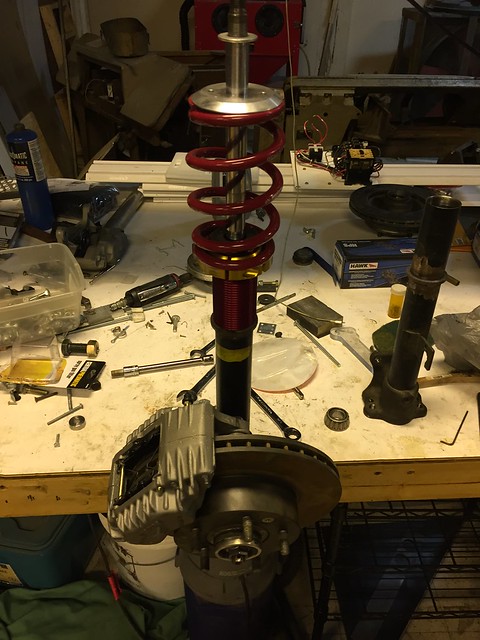
Installed the GC coilover...
I managed to get it all welded last night before my feet froze and I had to go home.
I used the two rings to space the ring out and protect the Al sleeve...not thinking that I only had two of them.

Clamped the tube to the welding table...

One side I ground the stock perch welds off completely...so I added a few large beads around the radius.

Used my new arbor plates to get the thing level and keep pressure on it while I welded...
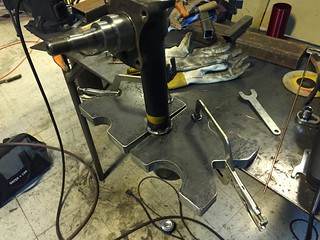
Done...I didnt get them at the same height (off by about 1mm) but this should only effect my sleep at night and not the coilover performance...
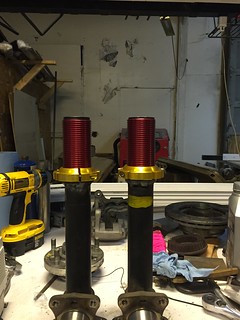
Now Im going to have them powder coated or just etch-pimer/enamel paint...
I used the two rings to space the ring out and protect the Al sleeve...not thinking that I only had two of them.
Clamped the tube to the welding table...
One side I ground the stock perch welds off completely...so I added a few large beads around the radius.
Used my new arbor plates to get the thing level and keep pressure on it while I welded...
Done...I didnt get them at the same height (off by about 1mm) but this should only effect my sleep at night and not the coilover performance...
Now Im going to have them powder coated or just etch-pimer/enamel paint...
Thread Starter
Junior Member
Joined: Nov 2012
Posts: 28
Likes: 0
From: Blytheville, AR
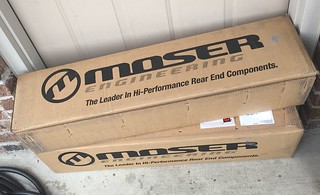
Good thinks come in the mail! I UPS'ed my stock GSL-SE to Moser two weeks ago tuesday, they got them Thursday, made the axles Friday and Monday and mailed them back to me Tuesday! AWESOME!
Now to find some wheels...I am thinking Enkei RPF1. I have read that with the Ground Control coilovers I can get fairly wide wheels up front but don't know what offset or width...well and dont know about the rear either. I have some ZG fender flairs but dont know if they are going to be right...OH THE DECISIONS...
Now to find some wheels...I am thinking Enkei RPF1. I have read that with the Ground Control coilovers I can get fairly wide wheels up front but don't know what offset or width...well and dont know about the rear either. I have some ZG fender flairs but dont know if they are going to be right...OH THE DECISIONS...
Full Member
Joined: Aug 2013
Posts: 178
Likes: 0
From: Trinidad & Tobago
Enjoyed reading.. Nice shop you work in to play around like that. I would go nuts myself and try to fab everything myself too
What LSD are you using with the moser axles? Stock or swapping out to a Kaaz or something?
What LSD are you using with the moser axles? Stock or swapping out to a Kaaz or something?
Thread Starter
Junior Member
Joined: Nov 2012
Posts: 28
Likes: 0
From: Blytheville, AR
Thanks for checking out my build and for the kind words! I really like your car! What body kit is that?! I really dig the widebody FB cars!
The shop space is about the only thing that is good about this area...cheap and lots of it! And well the SCCA coming to town a couple times a year is nice too!
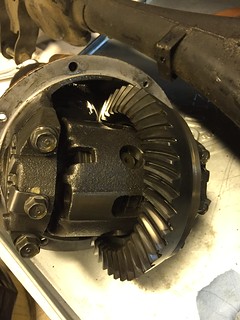
I am going to stick with the stock LSD for now. It was supposedly rebuilt with the thicker shims and a Sonata (EDIT: Sportage) ring and pinion right before my buddy bought it. When I opened it up to make sure it wasn't nearing failure everything looked brand new and barely broken in! When it dies I'll probably swap a KAAZ or something else. The main reason for the Moser was to go 5x4.5 for my front hub swap. I was going to keep the 4x4.5 rear but couldnt find matching wheels I liked in both PCD and widths...so I figured I'd just buy axles once (fingers crossed anyway...) in the pattern I needed after reading a bit about redrilling them. Or I did see that I could send them to Moser for plug/redrilling...but once you pay shipping both ways and for the service it was nearly the cost of one new axle.
And well probably the T3 rearend stuff too...But I have to...get...car...rolling.....
EDIT: AHH...I found your build thread! You made some FAST progress! And I love the Mariah body kit!
The shop space is about the only thing that is good about this area...cheap and lots of it! And well the SCCA coming to town a couple times a year is nice too!
I am going to stick with the stock LSD for now. It was supposedly rebuilt with the thicker shims and a Sonata (EDIT: Sportage) ring and pinion right before my buddy bought it. When I opened it up to make sure it wasn't nearing failure everything looked brand new and barely broken in! When it dies I'll probably swap a KAAZ or something else. The main reason for the Moser was to go 5x4.5 for my front hub swap. I was going to keep the 4x4.5 rear but couldnt find matching wheels I liked in both PCD and widths...so I figured I'd just buy axles once (fingers crossed anyway...) in the pattern I needed after reading a bit about redrilling them. Or I did see that I could send them to Moser for plug/redrilling...but once you pay shipping both ways and for the service it was nearly the cost of one new axle.
And well probably the T3 rearend stuff too...But I have to...get...car...rolling.....
EDIT: AHH...I found your build thread! You made some FAST progress! And I love the Mariah body kit!

Thread Starter
Junior Member
Joined: Nov 2012
Posts: 28
Likes: 0
From: Blytheville, AR
Well after looking at Wizbang's write up on another forum I am thinking maybe I don't have the Sportage third-member and/or ring/pinion......humm...
Last edited by Dingus; Feb 23, 2015 at 08:43 PM. Reason: I spell like a child...
Full Member
Joined: Aug 2013
Posts: 178
Likes: 0
From: Trinidad & Tobago
Thanks bro.. I'm rather impatient and my savings account is now a victim with this car 
I have heard the Kia sportage front LSD and ring gear works on our LSD. Also that the miata LSD guts will work.
I have been thinking of running the Kaaz miata LSD with moser 5 lug axles myself. Have to do some more research myself as I have a 82 GSL. Slightly diff axles etc
Keep up the good work.
I have heard the Kia sportage front LSD and ring gear works on our LSD. Also that the miata LSD guts will work.
I have been thinking of running the Kaaz miata LSD with moser 5 lug axles myself. Have to do some more research myself as I have a 82 GSL. Slightly diff axles etc
Keep up the good work.
Thread Starter
Junior Member
Joined: Nov 2012
Posts: 28
Likes: 0
From: Blytheville, AR
Yeah I have been looking around at the different rear-end options and the third-member I have doesn't look like a Sportage one. I will have to brave the cold (10F here) to check it out tomorrow...take some picture and maybe get it all sealed back up. Probably have to move it to little office and start the heater... I am not totally sure what this car has and doesn't since I got it 2nd hand from my buddy; does not serve my "need to know" personality.


I'm impressed not only with your machine skills but that paint booth you fabbed up is pretty SWEET! I wish I had the space - I think I could learn to paint in something like that. Awesome thread. Looking forward to following this one.
Thread Starter
Junior Member
Joined: Nov 2012
Posts: 28
Likes: 0
From: Blytheville, AR
Thanks for the compliment! I am originally a wood working hobbyist so making things out of wood like the paint booth comes naturally! I dont know if I can paint yet...that might be quite the adventure...
Thread Starter
Junior Member
Joined: Nov 2012
Posts: 28
Likes: 0
From: Blytheville, AR
I have made a bit of progress...at least buying things.
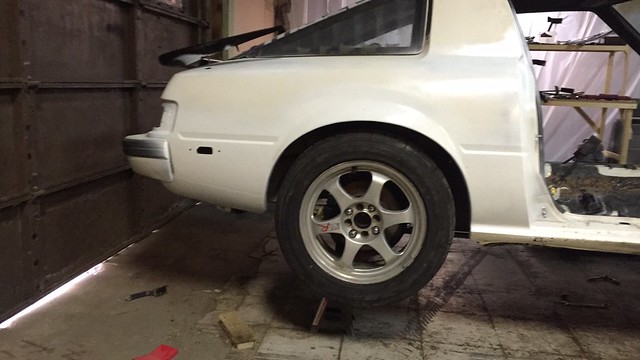
New wheels...just bought the rears until I decide if I have to have the IMSA body kit...

The link is really close to not fitting...
Couldnt help myself...had to put the axle back in to admire the wheels. The car body is still on a dolly thing so it is a bit high.
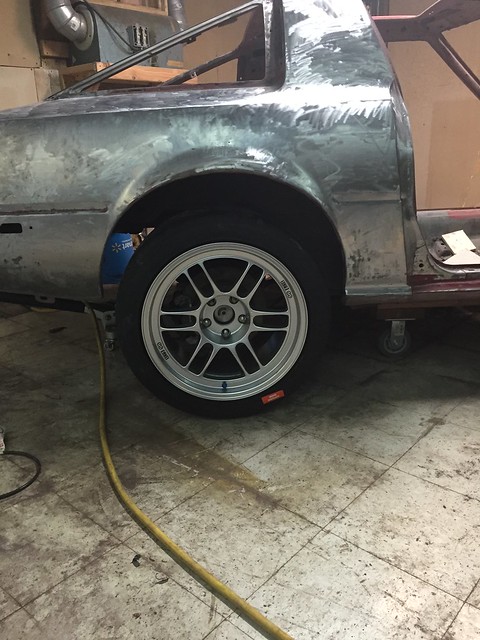
Must. Cut. Fenders.
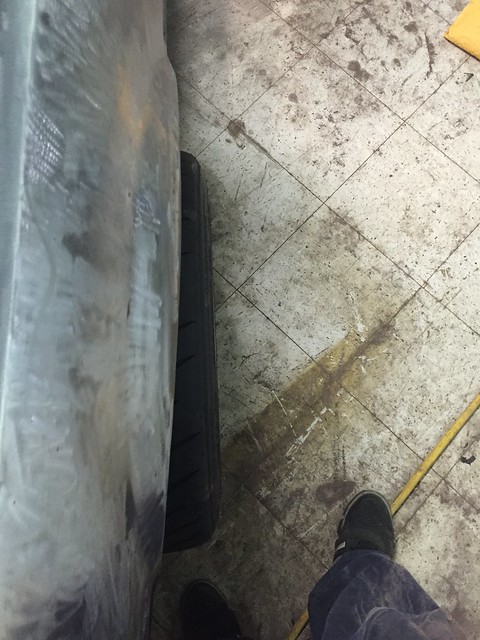
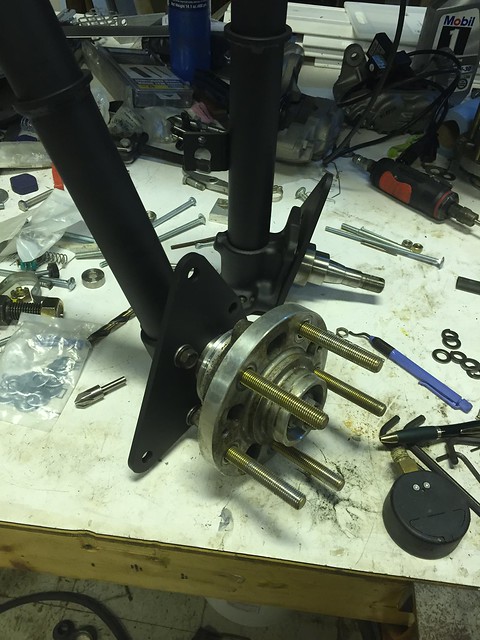
Got my brackets for the front and rear brakes done and painted.
Put the front together with the brakes and everything.
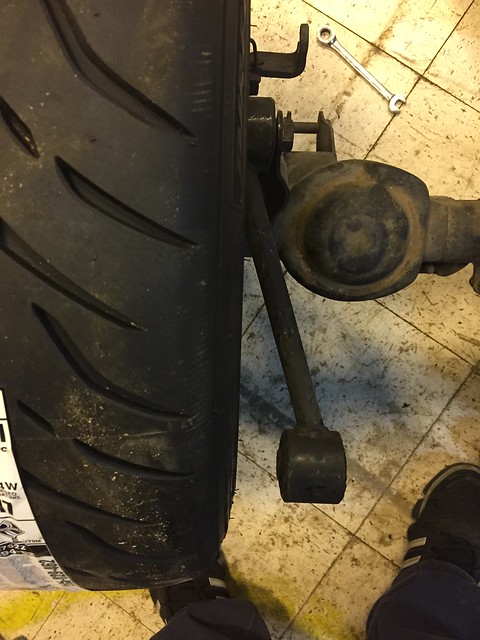
Got the rear all together!
New studs...
New wheels...just bought the rears until I decide if I have to have the IMSA body kit...
The link is really close to not fitting...
Couldnt help myself...had to put the axle back in to admire the wheels. The car body is still on a dolly thing so it is a bit high.
Must. Cut. Fenders.
Got my brackets for the front and rear brakes done and painted.
Put the front together with the brakes and everything.
Got the rear all together!
New studs...
Thread Starter
Junior Member
Joined: Nov 2012
Posts: 28
Likes: 0
From: Blytheville, AR
Bate-and-switch...
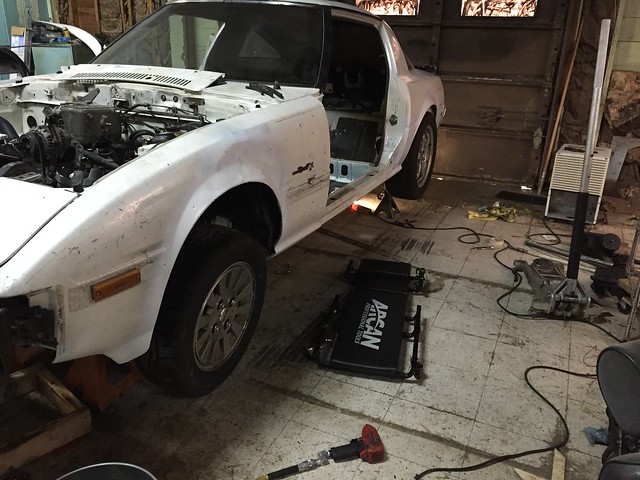
So I decided I needed to get the white POS out of my shop and running.
Ended up putting the Falken tires from my/our LeMons car on the back and bought 195/60R14 Falkens to match up front.
Classy!
I hate distributors. So I swapped in the FC coils from the turbo car and a CAS for a MS swap. Gonna do LS1 coils + igniters or something for the turbo car I guess... Still have to figure out where to mount them...
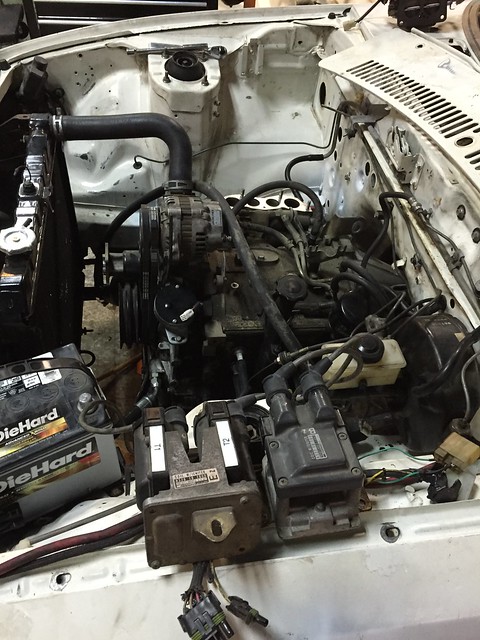
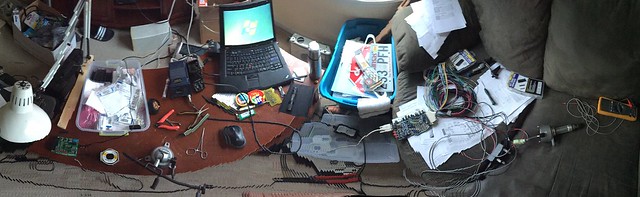
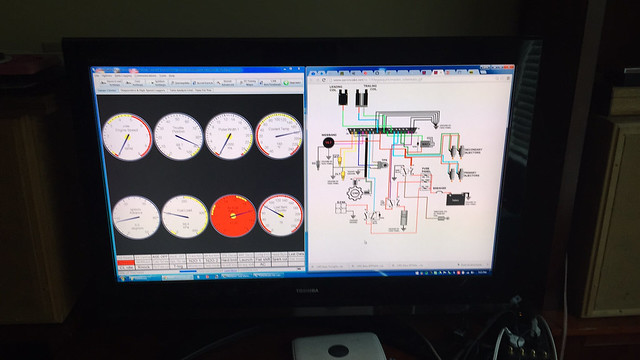
I was given this MSII...I wasnt sure the build quality and had to add the second VR circuit...so I just went through the entire MS and AaronCake (THANK YOU A 1000x) guide to make sure it was good. Found some stuff and got it running.
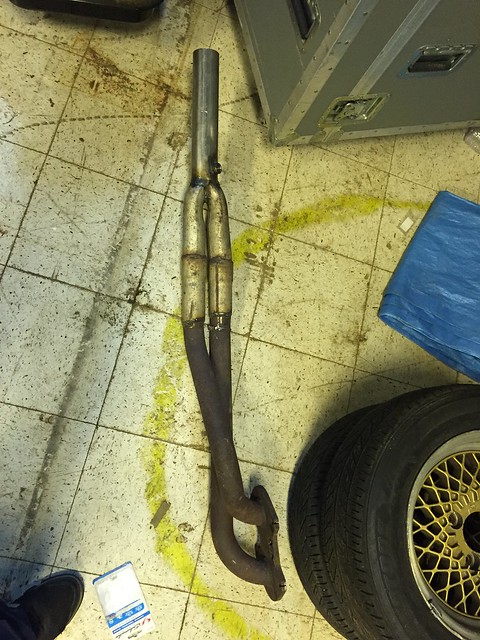
Had to fix the hideous exhaust. Ordered some el-cheapo V-Band clamps since the entire exhaust had one flange...the header flange. Uuuhhhh...what? And not to mention the awful "merge collector". Now it is better...still hacked together but not bad. I was so mad at it I forgot to take a picture of the original. Lets just say it was 2 auto store 45deg bends not cut like you see below... Why you hack the Racing Beat flange off the thing and weld this nonsense onto the headers is beyond me.
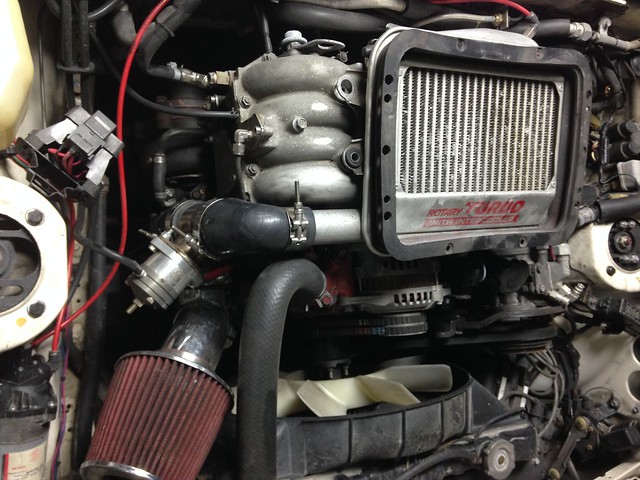
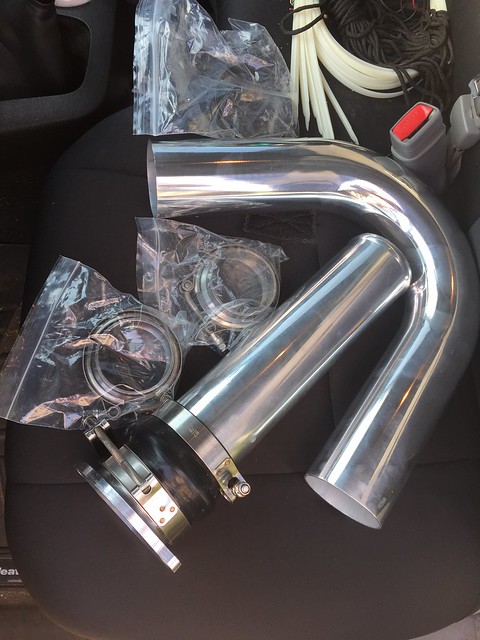
First shot at an intake...I dont like it. So I ordered the aluminim mandrel bends and am going to make a real one.
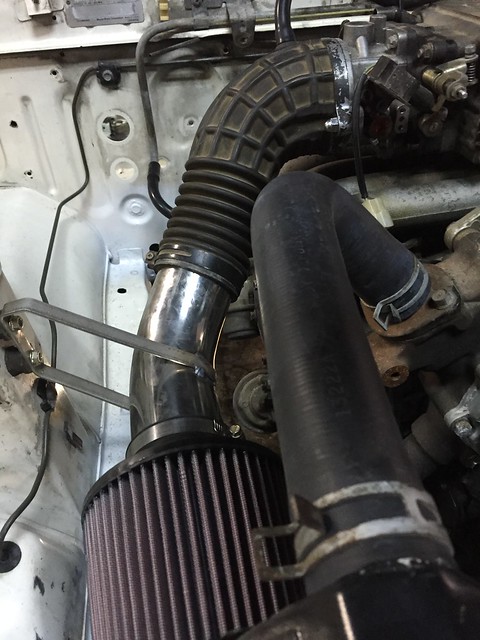
It is nice having someone who runs a machine shop...this is the intake throttle body adapter.

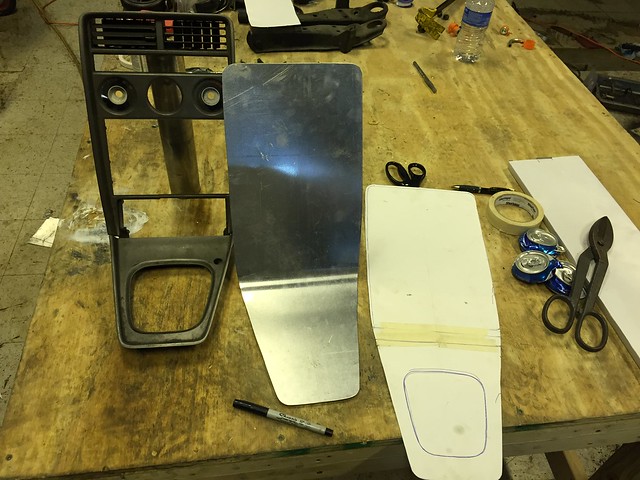
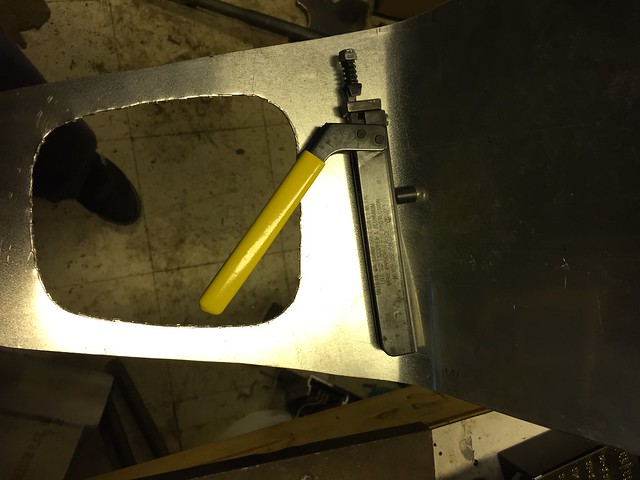
And the new dash insert...gotta have somewhere to mount all my switches! A bit of CAD (cardboard aided design) and a s**t ton of hand nibbling. My arms hurt.
Ended up putting the Falken tires from my/our LeMons car on the back and bought 195/60R14 Falkens to match up front.
Classy!
I hate distributors. So I swapped in the FC coils from the turbo car and a CAS for a MS swap. Gonna do LS1 coils + igniters or something for the turbo car I guess... Still have to figure out where to mount them...
I was given this MSII...I wasnt sure the build quality and had to add the second VR circuit...so I just went through the entire MS and AaronCake (THANK YOU A 1000x) guide to make sure it was good. Found some stuff and got it running.
Had to fix the hideous exhaust. Ordered some el-cheapo V-Band clamps since the entire exhaust had one flange...the header flange. Uuuhhhh...what? And not to mention the awful "merge collector". Now it is better...still hacked together but not bad. I was so mad at it I forgot to take a picture of the original. Lets just say it was 2 auto store 45deg bends not cut like you see below... Why you hack the Racing Beat flange off the thing and weld this nonsense onto the headers is beyond me.
First shot at an intake...I dont like it. So I ordered the aluminim mandrel bends and am going to make a real one.
It is nice having someone who runs a machine shop...this is the intake throttle body adapter.
And the new dash insert...gotta have somewhere to mount all my switches! A bit of CAD (cardboard aided design) and a s**t ton of hand nibbling. My arms hurt.
Last edited by Dingus; Aug 7, 2015 at 05:51 PM.