
My 83 GS "pandafb" gets restored - Again! (lots of rust/metal work)

Thread Starter
Joined: Feb 2002
Posts: 8,389
Likes: 120
From: North Jersey
From what I've read, Daytona Blue was a 79 only color and seems to be quite rare. I've only seen a few pictures on here (13x's is Daytona Blue as far as I know) and it looks good. Dark, but not too dark. My only concern is that it's a metallic color. I have shot metallics before, but only for repairs, not a whole car. Prep work is more critical than solid colors, and if you get a run forget it, you have to sand it down and start over... Fun


Thread Starter
Joined: Feb 2002
Posts: 8,389
Likes: 120
From: North Jersey
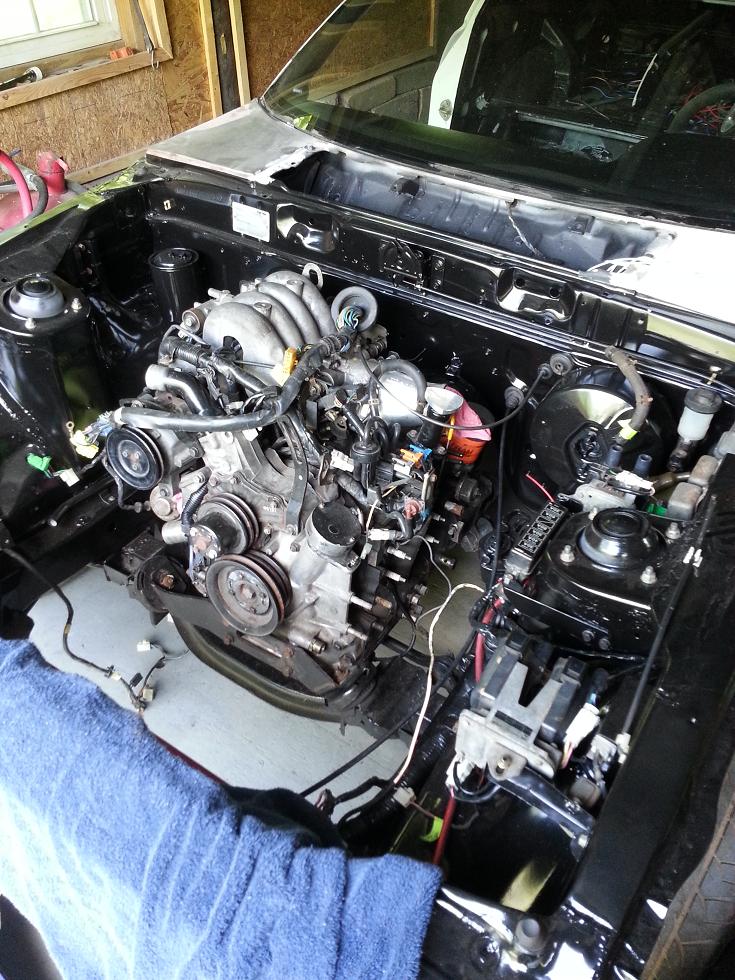
Only have one picture, but I got the engine in over the weekend and am now slowly hooking everything up. I still need to finish fabbing up the exhaust and modding the gas tank for the FC fuel pump, but this thing is starting to look like something - finally!
Still a long way to go... ugh
Still a long way to go... ugh
Thread Starter
Joined: Feb 2002
Posts: 8,389
Likes: 120
From: North Jersey
I'll have to take more pics of all the "little" things I've done on/around the engine.
Besides the obvious SE front cover and oil pan and obligatory new intake gaskets, injector o rings etc, here's a quick list of subtle custom things I did before dropping the engine in -
-Made custom cable linkage to actuate SE/S4 mechanical OMP from S5 throttle body
-Made new omp lines
-Modded the oil filler so it is just a straight piece, no need for it to clear the non-existent top mount IC
-Changed throttle linkage on TB to use FC NA or FB throttle cable (FB cable is a bit too long and looks sloppy, will have to get an NA FC one sometime soon)
-Removed thermal wax/warmup linkages from the TB (never had much luck getting that whole mess to work correctly, easier just to ditch it lol)
I still have a few other things to make/mod - I/C Piping, finish my air intake, and change the fitting for the brake booster vaccum (on the LIM) since right now it's pointing straight at the coolant return pipe so that won't work lol.
I picked up a used driveshaft off a guy who had a T2 swapped FB so hopefully that fits without any issues.
Lots of work to go, but it's starting to look like something at least
Wow man, inspiring! I gotta say I'm sooo stoked you're (mostly) done with all the rusto repairs and body work - thats gotta be the hardest part of the whole shebang, no?
Would be for me, anyways.
Would be for me, anyways.
Thread Starter
Joined: Feb 2002
Posts: 8,389
Likes: 120
From: North Jersey
It's the most time consuming part that's for sure. It is nice to now have a solid foundation to put all this stuff on, real happy I was able to stick it out and finish all that work (there were a few times where I wondered why I was bothering and just wanted to find another shell lol). The body work that's needed to be done before painting it shouldn't take all that long, some of it's done already anyway.
I know exactly what you mean about the solid foundation. When I had my whole interior out and was patching just the small rust spots I had, I realized that wow, this car has given 30 years of service, and now that its patched, it good for at least 30 more!
Once the hard work is done, it maintenance and upkeep from there.
Or total modification.
Once the hard work is done, it maintenance and upkeep from there.
Or total modification.
Thread Starter
Joined: Feb 2002
Posts: 8,389
Likes: 120
From: North Jersey
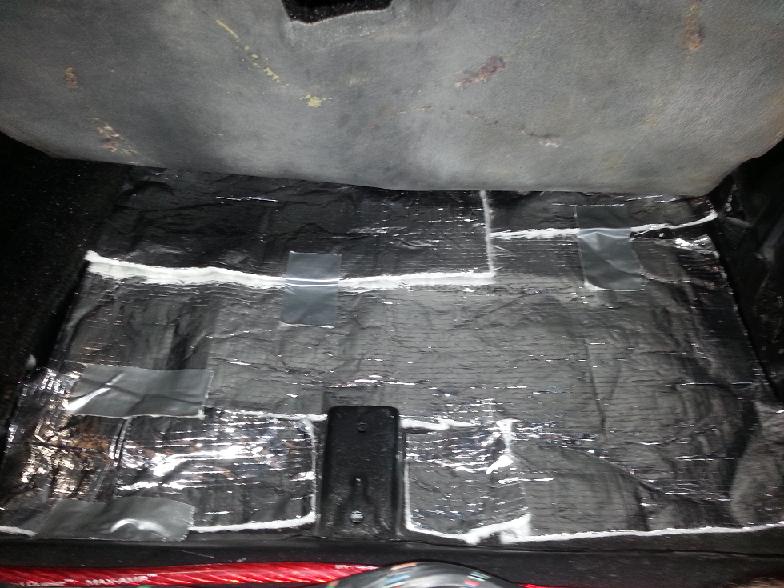
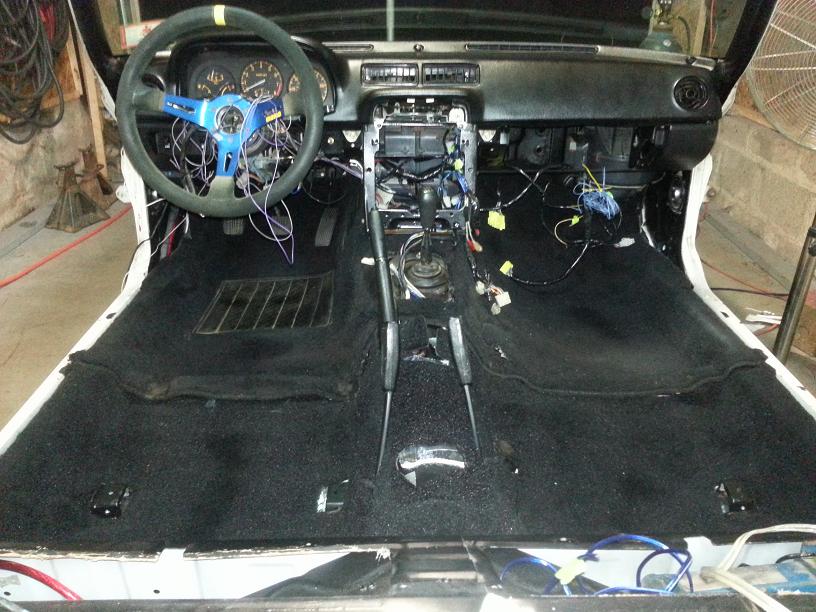
More progress. Installed the last of my fiberglass insulation in the passenger area last night. I forget where I bought it from but it's for both heat and noise (it just lays in the car, not a stick on like dynamat) and I used it on my other FB, had enough left to do this car, but only barely since mice got into the box and chewed half of it all to hell... Had enough for the driver and passenger toe board areas, but the areas under/behind the seat I had to piece together like a patchwork quilt lol. Don't mind the duct tape, it's just there to keep the pieces in line while I installed the carpet. The weight of the carpet etc keeps it all in place nicely.
I actually got farther than these pics suggest, the seats are in as is the hatch carpet. I'm planning to reinstall most of the interior before painting since I have to mask off the hatch/door openings anyway, so no reason to leave it out.
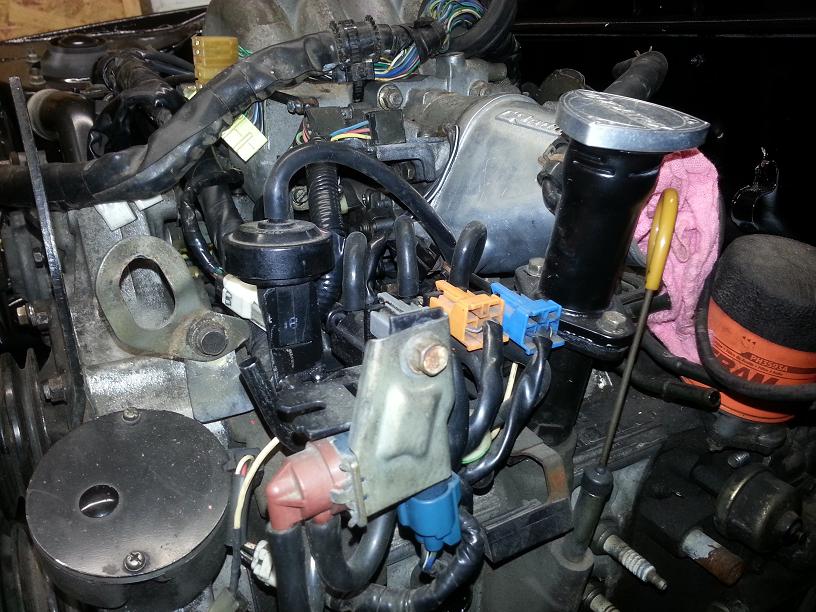
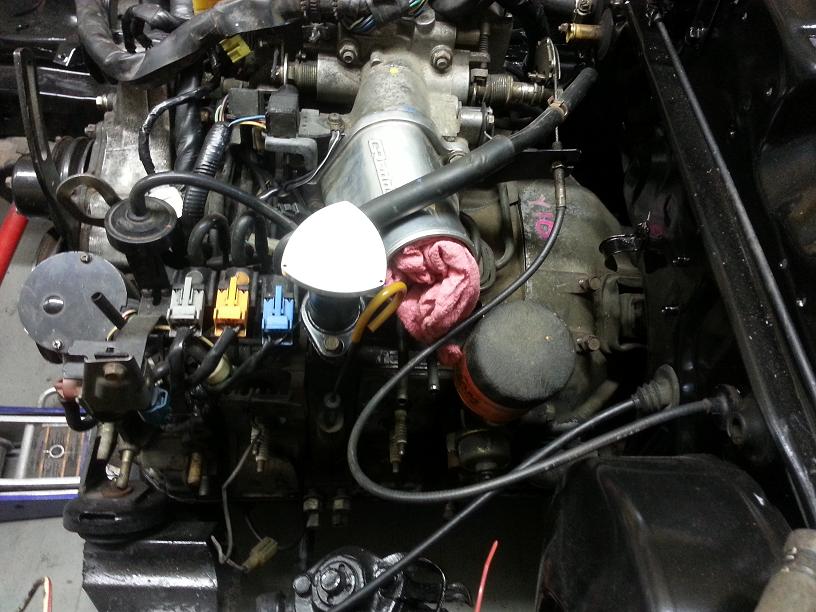
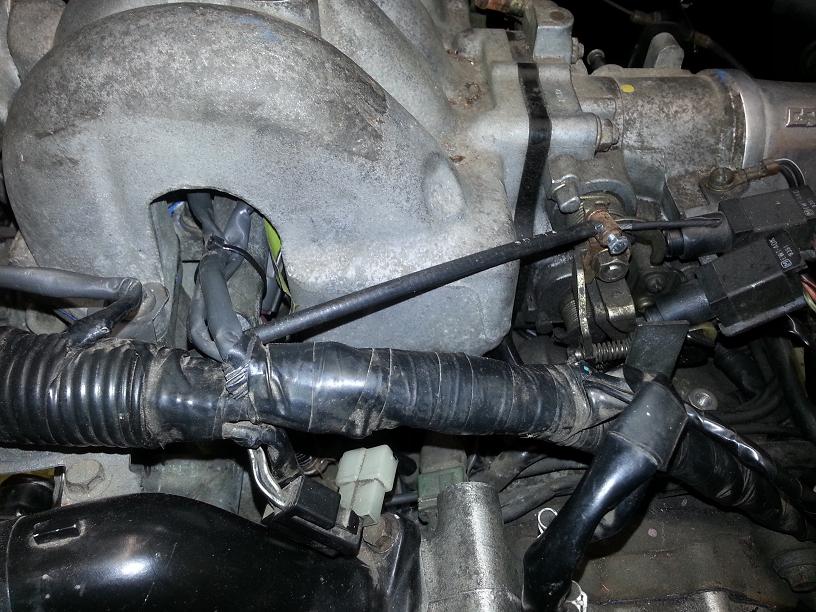
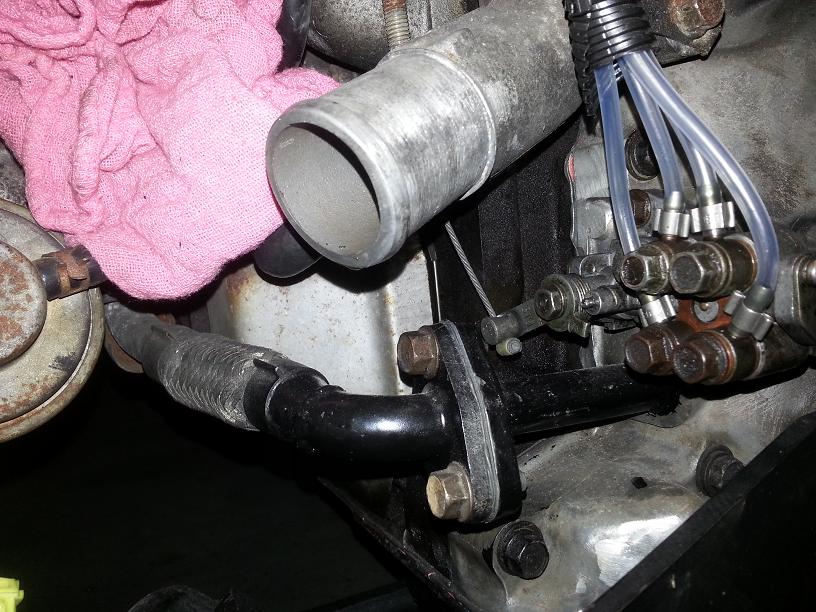
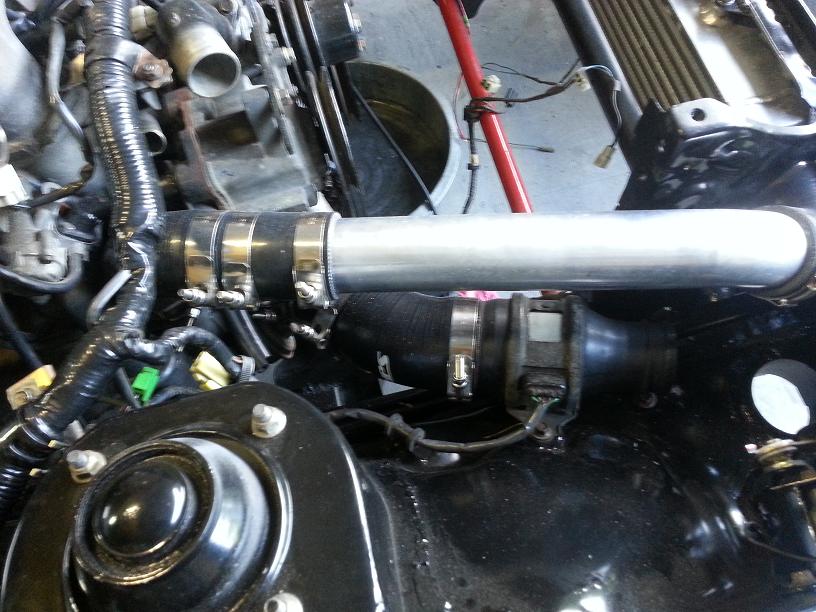
Got a few shots of my engine mods. You can see the new omp lines, as well as the cable actuator for the mechanical omp. It's just a FB throttle cable with one end cut off, fished through the hole on the omp, then routed up to the TB. I made simple brackets using some of those rubber bolt down clamps (similar to what holds the wiring down in the engine bay, just smaller) to hold the cable in place. For the TB side I just took the arm off a spare OMP and put it on the throttle shaft in place of a washer that was there (there are a lot of random spacers and washers on the throttle shaft) It worked out that it wedges the arm in between the TPS arms. Kinda hard to explain, but should make sense if you look at the pic and/or your engine... I drilled and tapped a 4mm hole in the side of the arm so I could use a small bolt to hold the cable in place (since the end is now gone) Once I know for sure this all works I plan to clean it up and make it look a bit neater (trim the ends, put a bushing of sorts on the omp side so the cable fits more snugly in the hole etc) but for now it should work good You can see how I did the turbo oil drain too, just some pipe threads in the front cover and a few flanges and welds and voila. Should work fine.
You'll see what I did with the oil filler, much cleaner and easier to fill than the stock piece, While I was at it I moved the purge valve (that round plastic thing with 3 lines going to it) over next to the solenoid rack. It normally goes right where that Greddy TB elbow needs to go, and that was a convenient spot for it.
The FB throttle cable is way too long for my setup. Will definitely need to pick up a NA FC cable.
Oh and for those of you who love to see super clean detailed engines, please keep the comments to yourself I know it's dirty and old looking and I don't care :p
Slowly getting there.
I actually got farther than these pics suggest, the seats are in as is the hatch carpet. I'm planning to reinstall most of the interior before painting since I have to mask off the hatch/door openings anyway, so no reason to leave it out.
Got a few shots of my engine mods. You can see the new omp lines, as well as the cable actuator for the mechanical omp. It's just a FB throttle cable with one end cut off, fished through the hole on the omp, then routed up to the TB. I made simple brackets using some of those rubber bolt down clamps (similar to what holds the wiring down in the engine bay, just smaller) to hold the cable in place. For the TB side I just took the arm off a spare OMP and put it on the throttle shaft in place of a washer that was there (there are a lot of random spacers and washers on the throttle shaft) It worked out that it wedges the arm in between the TPS arms. Kinda hard to explain, but should make sense if you look at the pic and/or your engine... I drilled and tapped a 4mm hole in the side of the arm so I could use a small bolt to hold the cable in place (since the end is now gone) Once I know for sure this all works I plan to clean it up and make it look a bit neater (trim the ends, put a bushing of sorts on the omp side so the cable fits more snugly in the hole etc) but for now it should work good
You can see how I did the turbo oil drain too, just some pipe threads in the front cover and a few flanges and welds and voila. Should work fine.You'll see what I did with the oil filler, much cleaner and easier to fill than the stock piece, While I was at it I moved the purge valve (that round plastic thing with 3 lines going to it) over next to the solenoid rack. It normally goes right where that Greddy TB elbow needs to go, and that was a convenient spot for it.
The FB throttle cable is way too long for my setup. Will definitely need to pick up a NA FC cable.
Oh and for those of you who love to see super clean detailed engines, please keep the comments to yourself
I know it's dirty and old looking and I don't care :pSlowly getting there.
Thread Starter
Joined: Feb 2002
Posts: 8,389
Likes: 120
From: North Jersey
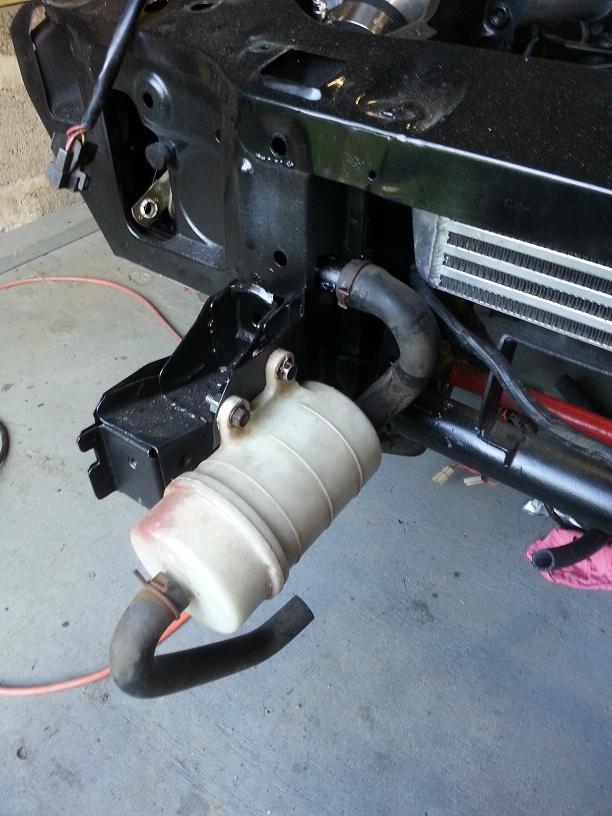
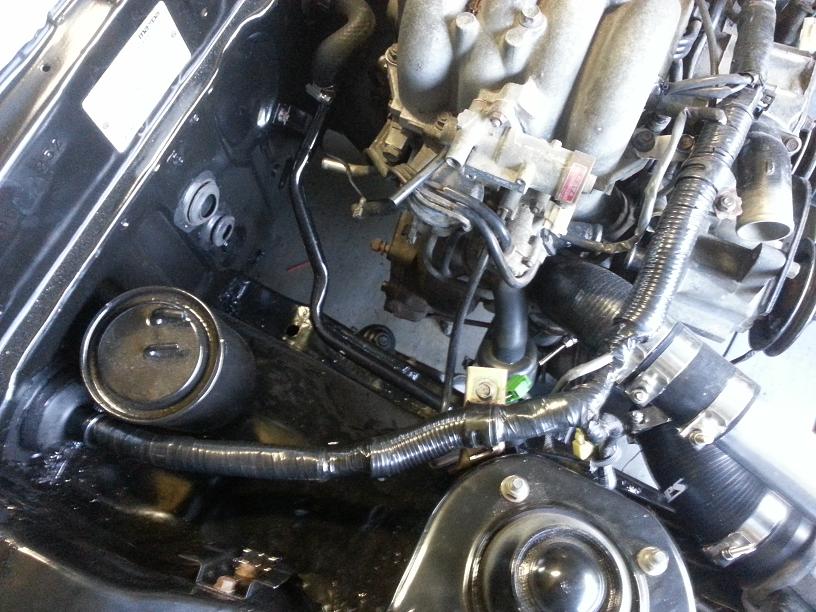
Was in the 90's and humid as hell last week so progress was slow, but steady. I have the relief silencer in and hooked up (basically a muffler for the ACV). Instead of using the FC's rubber hose (which doesn't fit the FB very well given the way I mounted this thing) I made a metal hardline out of some steel tubing. It's hard to see in any of the pics, but it came out pretty good, and yes the bumper will fit on there with the silencer, I test fit it before making the mount
Got the hot side of the I/C piping, as well as the air intake all setup and basically done. Also got the engine wiring routed and bolted down to the strut tower, came out pretty good. Yesterday I also took the time to replace the headlight motor plugs with some weatherpacks to clean things up - plus the stock ones were corroded to hell.
You can see the "cold air" intake setup i'll be using. The filter will mount directly to the MAF, but I put a 3" tube in the inner fender below the filter, a hose will go on that and route over into the opening in the bumper. That will draw in ambient air and still keep the filter protected from rain etc.
That's about it for now, this is taking forever...


I have to say, I am at the point where I need to consider cutting out the rust in my 79. I have many of the same areas you did in the floors and the wheel wells and I'm interested to see if I can do it. Zero experience and no tools, but I'm willing to try it and excited now that I've read and re-read your thread here. 
Thread Starter
Joined: Feb 2002
Posts: 8,389
Likes: 120
From: North Jersey
I'm glad I've inspired you! A angle grinder/cutoff wheel and decent MIG welder will be your work horses with this. If you had just those two tools you could get most of what I accomplished done. Best way to learn is just dive in and give it a shot!
Thread Starter
Joined: Feb 2002
Posts: 8,389
Likes: 120
From: North Jersey
I did, but not nearly as much as I had expected to. It's definitely handy, but you could get the similar results with cheaper/more common tools if you don't mind spending a bit more time. I found myself using the small air body saw (basically a mini sawzall) that I got at Harbor Freight quite a bit. It's really good for making precise cuts in tight spaces.
Obviously the more tools you have at your disposal the better off you are, but the tools are only as good as the person using them. As the old saying goes "a poor craftsman always blames his tools" or something like that..
Having said all that, the plasma cutter is one of the more fun tools I've used recently. The amount of energy that thing has is almost scary, and it's just a little baby one!
Thread Starter
Joined: Feb 2002
Posts: 8,389
Likes: 120
From: North Jersey
Time for a long overdue update. Because of a slew of family medical problems I was dealing with in August I didn't get much time to work on this, and when I did it was a hour here or an hour there - and I didn't take many pics along the way. Anyway, things are getting back to normal and it's full steam ahead on this.
Where the car stands:
-The T2 swap is complete and running very well - engine fired up within 10 seconds of cranking after sitting since Spring 2011
-The interior is 80% reinstalled
-Body work is well underway
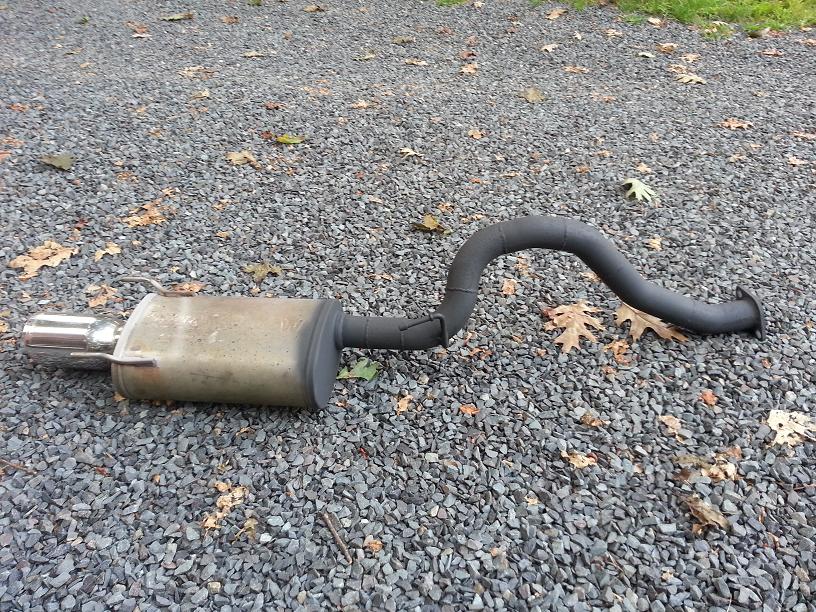
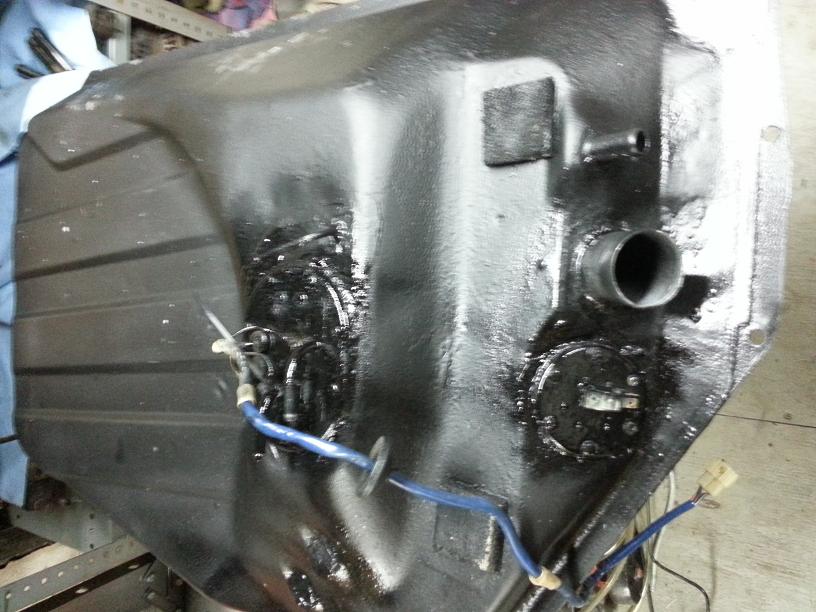
Again, apologies for the lack of pics (and the horrendously crappy looking engine pic lol) but I did manage to get a shot of the modified gas tank before installation, as well as the exhaust I made for it. The exhaust is actually a Magnaflow catback that was on my 94 Accord for 6 years. When I scrapped that car last winter I kept the catback knowing I could use pieces of it for this. I chopped it all up, and after many hours of cutting and welding, recutting, re welding and more test fitting I got an over the axle pipe that fits almost as well as the RB muffler I had on there. Best of all, besides my time I only have about $20 into the exhaust (some flanges and gaskets lol) Not pictured is the resonator (off the same system) catco cat (leftover from the FC I had this engine in a few years back) and Corksport downpipe (again, leftover from the FC) but it all fits very well. Best of all, it sounds awesome. Not too loud, but not as quiet as the RB I have on my other FB. Exactly what I was looking for.
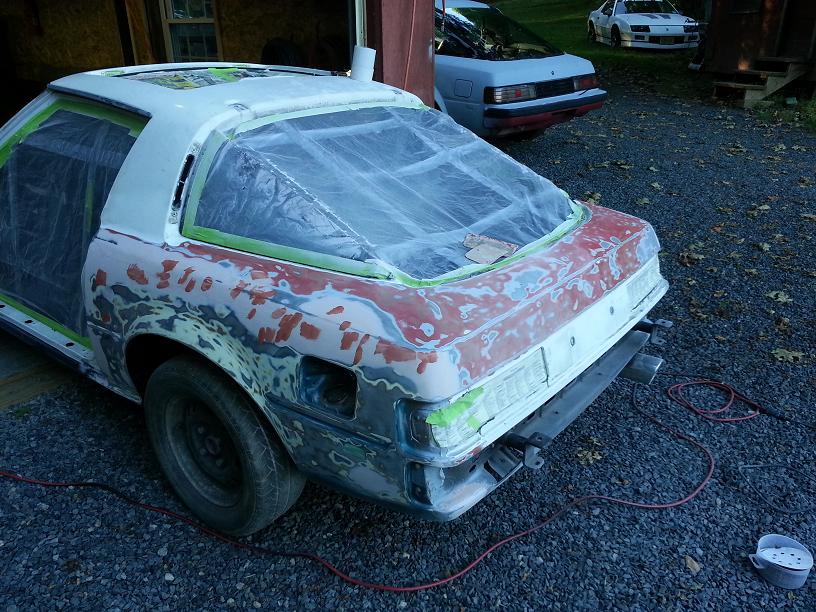
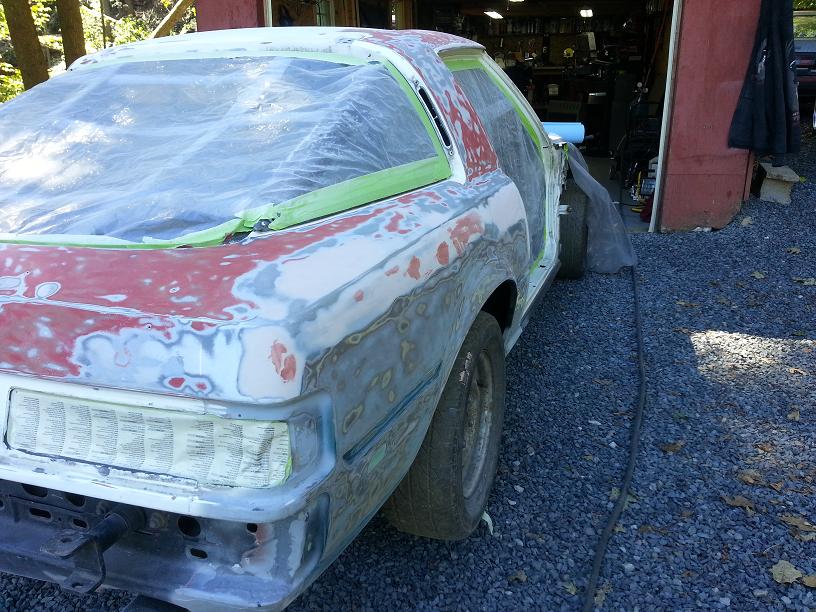
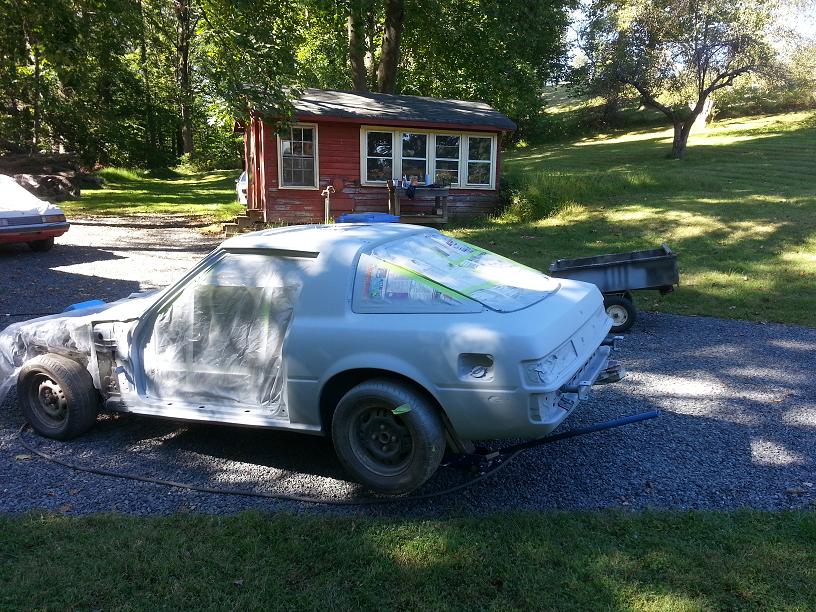
Body work: I took the last 2 days off with hopes of having the body in paint, but sanding all of my previous paintjob, as well as the prior owners body work, took longer than expected. In the end though by the end of yesterday I got the shell in primer. Next step is to fix a few spots along the driver side quarter panel (where I welded it in) that has a slight wave, fill a few pin holes, block it down and lay another coat of primer down. Once that is wet sanded, then it's time for paint. Ironically enough I ran out of primer lol so I won't be painting till next weekend. That's ok though since I still have lots of work to do on the doors etc.
Looks like my goal of having this done by my Wedding (11/9) isn't going to happen, but that's ok
Anyway, here are some pics.

Where the car stands:
-The T2 swap is complete and running very well - engine fired up within 10 seconds of cranking after sitting since Spring 2011
-The interior is 80% reinstalled
-Body work is well underway
Again, apologies for the lack of pics (and the horrendously crappy looking engine pic lol) but I did manage to get a shot of the modified gas tank before installation, as well as the exhaust I made for it. The exhaust is actually a Magnaflow catback that was on my 94 Accord for 6 years. When I scrapped that car last winter I kept the catback knowing I could use pieces of it for this. I chopped it all up, and after many hours of cutting and welding, recutting, re welding and more test fitting I got an over the axle pipe that fits almost as well as the RB muffler I had on there. Best of all, besides my time I only have about $20 into the exhaust (some flanges and gaskets lol) Not pictured is the resonator (off the same system) catco cat (leftover from the FC I had this engine in a few years back) and Corksport downpipe (again, leftover from the FC) but it all fits very well. Best of all, it sounds awesome. Not too loud, but not as quiet as the RB I have on my other FB. Exactly what I was looking for.
Body work: I took the last 2 days off with hopes of having the body in paint, but sanding all of my previous paintjob, as well as the prior owners body work, took longer than expected. In the end though by the end of yesterday I got the shell in primer. Next step is to fix a few spots along the driver side quarter panel (where I welded it in) that has a slight wave, fill a few pin holes, block it down and lay another coat of primer down. Once that is wet sanded, then it's time for paint. Ironically enough I ran out of primer lol so I won't be painting till next weekend. That's ok though since I still have lots of work to do on the doors etc.
Looks like my goal of having this done by my Wedding (11/9) isn't going to happen, but that's ok
Anyway, here are some pics.
Last edited by 82transam; Sep 20, 2013 at 08:51 AM.
Thread Starter
Joined: Feb 2002
Posts: 8,389
Likes: 120
From: North Jersey
Yeah there's still some of the original paint under there. No need to strip it all off that's for sure. I still have a good set of Sumitomo HTR200's on a set of plus wheels so I'll be using them until the tires are shot. No sense in letting them sit around and dry rot since you can't get them anymore....
Once those are worn I might go with the 83 LE wheels or just swap to a more common lug pattern who knows. I know how that flared 85 sitting in the background that needs work. It never ends!
Once those are worn I might go with the 83 LE wheels or just swap to a more common lug pattern who knows. I know how that flared 85 sitting in the background that needs work. It never ends!
yeah, the 13" tires are getting harder and harder to find, may as well use them up. i like the LE wheels, that's for sure!! they would look awesome with your color choice!
Airflow is my life
Joined: Aug 2002
Posts: 6,736
Likes: 2
From: Orlando, Fl