My 83 GS "pandafb" gets restored - Again! (lots of rust/metal work)
 04-23-13, 02:15 PM
#51
Thanks!
Iotus - the amount of rust on that thing is absurd. I'm not sure i'd even go that far (then again who knows lol) I guess that's what happens to a tropical car that gets salty damp air on it 24/7... At least the East Coast cars get a break once winter is over....
 05-20-13, 08:20 AM
#52
Another "useless without pics" post from me 
Life has been pulling me all different directions lately, but I have managed to get the inside of the car scuffed/cleaned and sealed up with truck bed liner. The bed liner does a good job to dampening noise and really sealing everything up in the event that a door/window leaks and some water gets in - it won't damage the metal. On top of that it's cheap and easy to apply lol.
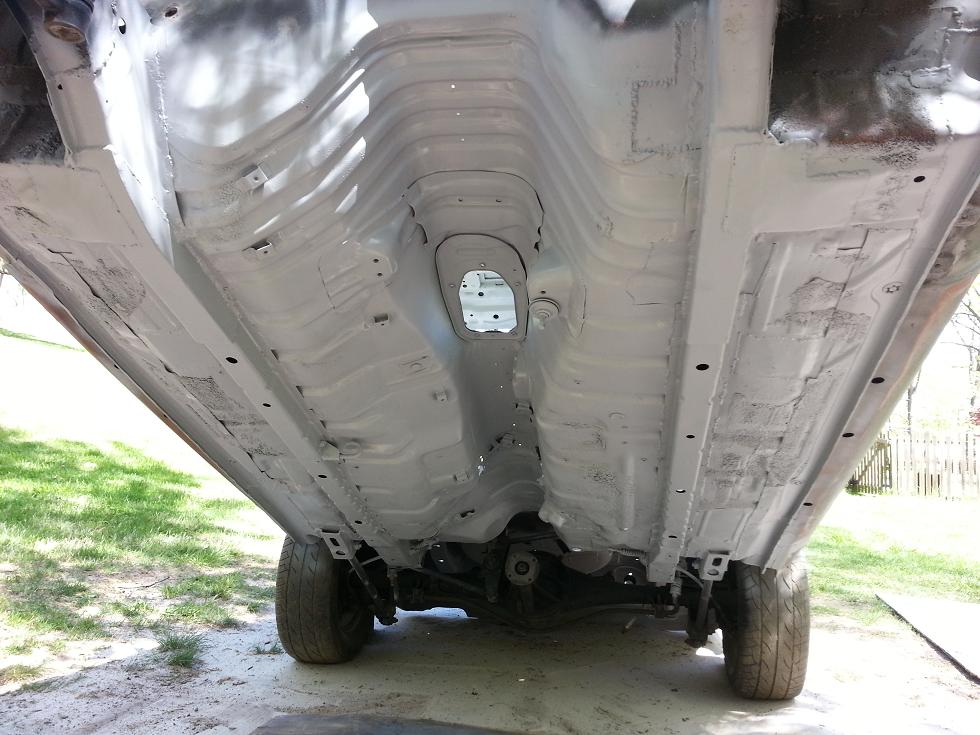
Also got the whole underside of the car sandblasted and sealed up with good primer and undercoating. It's nasty messy work, but it's the only way to fly. Now all the surface rust that remained is gone and should be solid for years to come.
This weeks task is to finish cleaning and sanding the engine bay so I can paint it. Once the engine bay is painted then I'll start putting some of the major parts back into the car like wiring, engine, pedals etc. Then it's on to doing bodywork and paint... I hope... This is taking longer than I wanted it to...
Life has been pulling me all different directions lately, but I have managed to get the inside of the car scuffed/cleaned and sealed up with truck bed liner. The bed liner does a good job to dampening noise and really sealing everything up in the event that a door/window leaks and some water gets in - it won't damage the metal. On top of that it's cheap and easy to apply lol.
Also got the whole underside of the car sandblasted and sealed up with good primer and undercoating. It's nasty messy work, but it's the only way to fly. Now all the surface rust that remained is gone and should be solid for years to come.
This weeks task is to finish cleaning and sanding the engine bay so I can paint it. Once the engine bay is painted then I'll start putting some of the major parts back into the car like wiring, engine, pedals etc. Then it's on to doing bodywork and paint... I hope... This is taking longer than I wanted it to...
05-20-13, 08:27 AM
#53
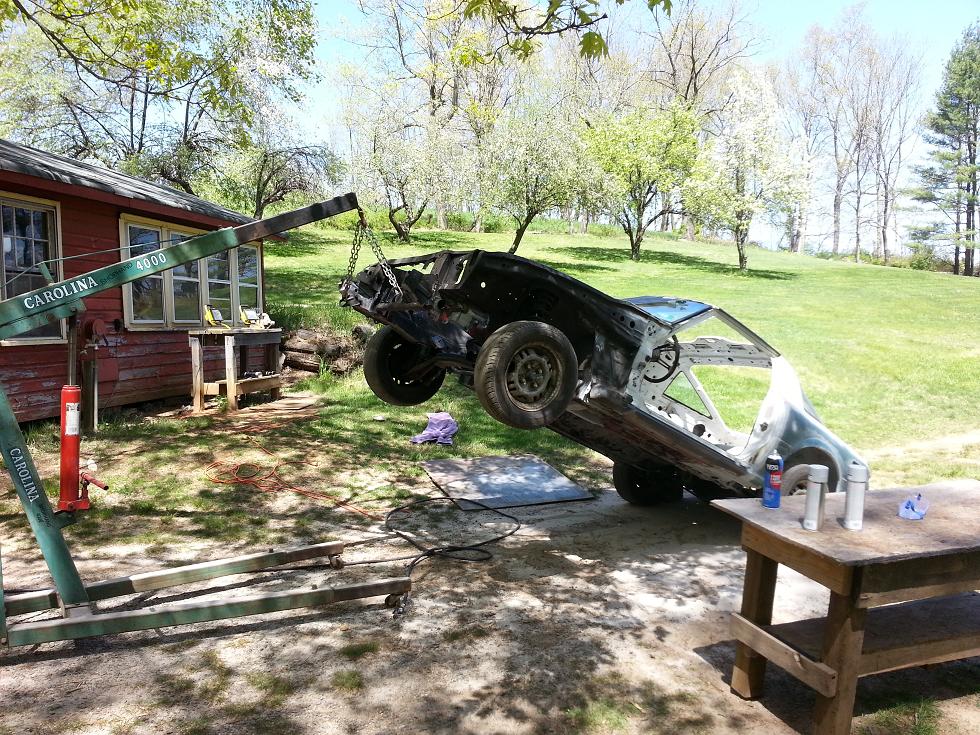
Here's two pics for your entertainment. To give better access for sandblasting I lifted the shell up with my engine crane. Since the only things on the car right now are the glass and suspension it doesn't weigh much of anything. Also another pic showing the underside after priming. Haven't been taking many pics, but after primer all the seams/welds got a good coat of seam sealer (3m stuff, real good) then it all got topped with a ton of undercoating (again 3m)
Slowly getting there..
Slowly getting there..
05-20-13, 11:28 AM
#54
Moderator
iTrader: (3)
Join Date: Mar 2001
Location: https://www2.mazda.com/en/100th/
Posts: 30,826
Received 2,594 Likes
on
1,842 Posts
that is a good way to do the bottom of the car!
 05-20-13, 10:30 PM
#57
I saw rotisserie somewhere for like $800 without powder coat. I really don't think I could make one for that. Something about engine stands don't sound too safe. I guess 'modified' it'd work. But I got some 4x4 jack stands. It got the car high enough to put the complete subframe engine/trans under the car.
05-21-13, 08:51 AM
#58
Yeah there are a few places that sell cheap rotisserie's I could look at. The allure of the engine stand version though is that when you're done, you have 2 engine stands to use Plus I already have 2 heavy duty engine stands so I would just need some square tube... I think if you put some "outriggers" sticking out the side of the stand just above the floor it would keep the risk of it falling over if it started to lean... We'll see how it goes. I don't plan on needed it for quite a while after this damn thing is done lol.
The engine crane method worked better than I thought and gave all sorts of easy access, might just continue to do that...
Plus I already have 2 heavy duty engine stands so I would just need some square tube... I think if you put some "outriggers" sticking out the side of the stand just above the floor it would keep the risk of it falling over if it started to lean... We'll see how it goes. I don't plan on needed it for quite a while after this damn thing is done lol.The engine crane method worked better than I thought and gave all sorts of easy access, might just continue to do that...
05-22-13, 09:31 AM
#59
Making more progress. Got most of the shitty old spray paint (from my 2004/2005 build) that was chipping off in the engine bay sanded off and cleaned up. Set up a quick "curtain" in my shop to keep the overspray from getting everywhere and primed the engine bay last night. Hoping to lay down some gloss black tonight. The strut tops are getting replaced so I didn't care that they got paint on them, and the cross memeber needs a new coat of truck bed liner so again I wasn't too concerned about overspray there either.
When I go to paint the outside of the car i'll obviously take a lot more precautions and set up a proper "booth" in the shop....
I'm keeping the budget tight on this one so the primer and paint for the engine bay is good old rustolium thinned out with acetone and shot out of my hvlp gun. Lays down real nice and covers well. Did a bunch of stuff on other projects with this previously and it's holding up well. Not bad for $30 at Lowes (and i'll have a bunch left over lol)
Once the engine bay is good and cured I can start putting this thing back together. I'm planning to put the engine/trans, wiring, pedals, brake lines etc all in the car before painting the shell. Less chance of scratching it when moving around/in the car putting things together...
Slowly getting there...
05-22-13, 09:38 AM
#60
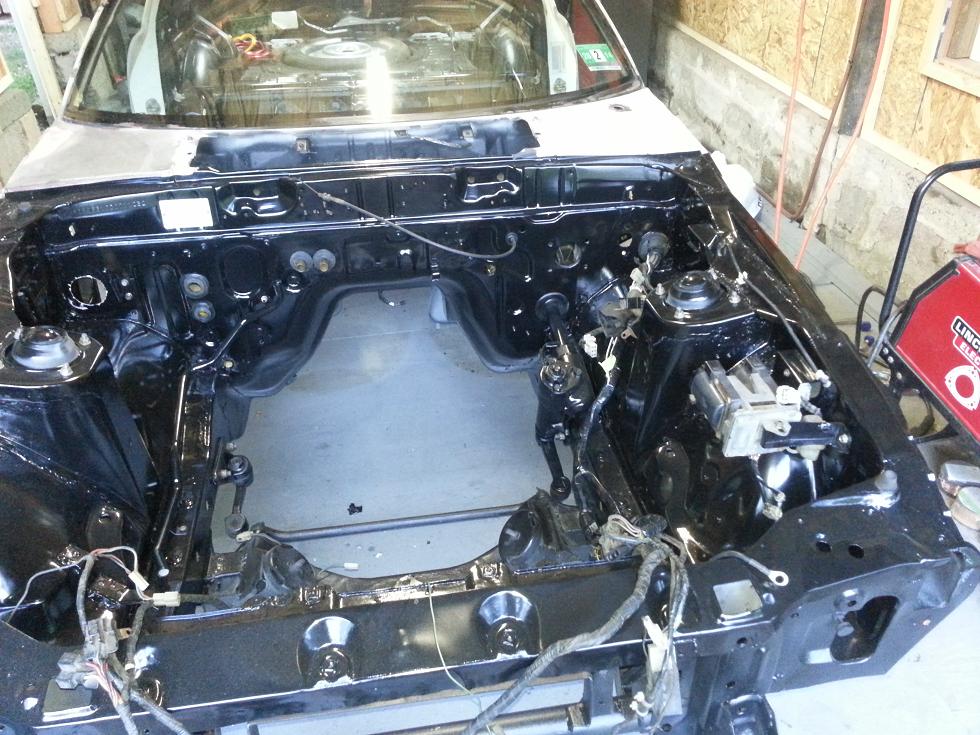
Oh, few more things I wanted to note. Before priming all the seams got 3m seam sealer applied. When I seam welded the car previously I skipped that step and definitely paid for it with some extra rust to fix this time around. Only took 30-40 mins to properly apply it to the whole engine bay so it was definitely worth the time.
You can also see (sort of) some of the patches in the engine bay above, both corners where the inner fender meets the firewall were rotted out, and around the idler arm was pretty bad too. There were some other smaller patches needed as well (not surprising). y
The brackets in front of the driver strut tower are for the FC leading and trailing coil packs, and the fuel pump resistor/injector relay. The bracket in front of the passenger tower is for the AFM. Not visible in that pic is small pipe of 3" pipe I welded into the inner fender, in front of the AFM bracket (kinda next to where the headlight motor goes) I'll be attaching a flex pipe to this and routing it over to the opening in the nose as a source of cooler air for the air filter. Not expecting huge gains from it, but turbo engine bays get nice and hot, figured it couldn't hurt... I'll get a better pic of that side once the black is painted.
05-28-13, 07:59 AM
#68
Thanks guys! Didn't get as much done this weekend as I wanted to since I had some BBQ's to go to and ended up spending most of yesterday putting A/C back in my other FB (what a pain in the *** lol)
I did manage to get the engine bay painted though. I'm very happy with the results, especially given that it's like $15 worth of materials (and I didn't even use it all) from Lowes lol. Now that the bay in painted I can start getting things put back together. Hoping to have a good chunk of the engine bay (with exception of the engine itself) back in the car by next weekend. We'll see how that goes...
Anyway, here's a few pics.
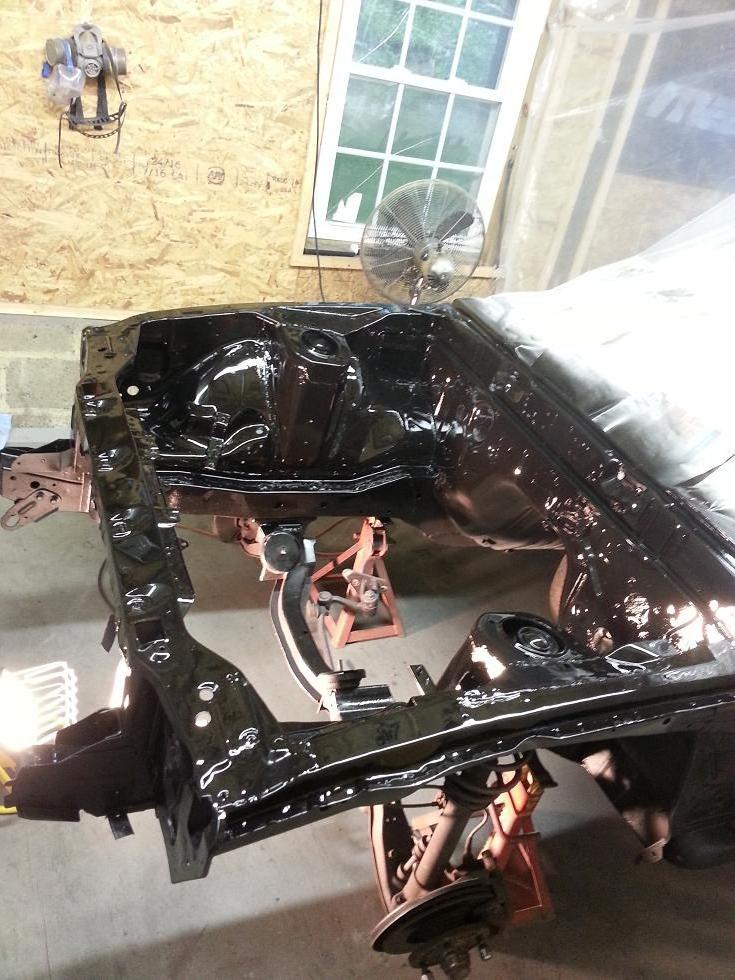
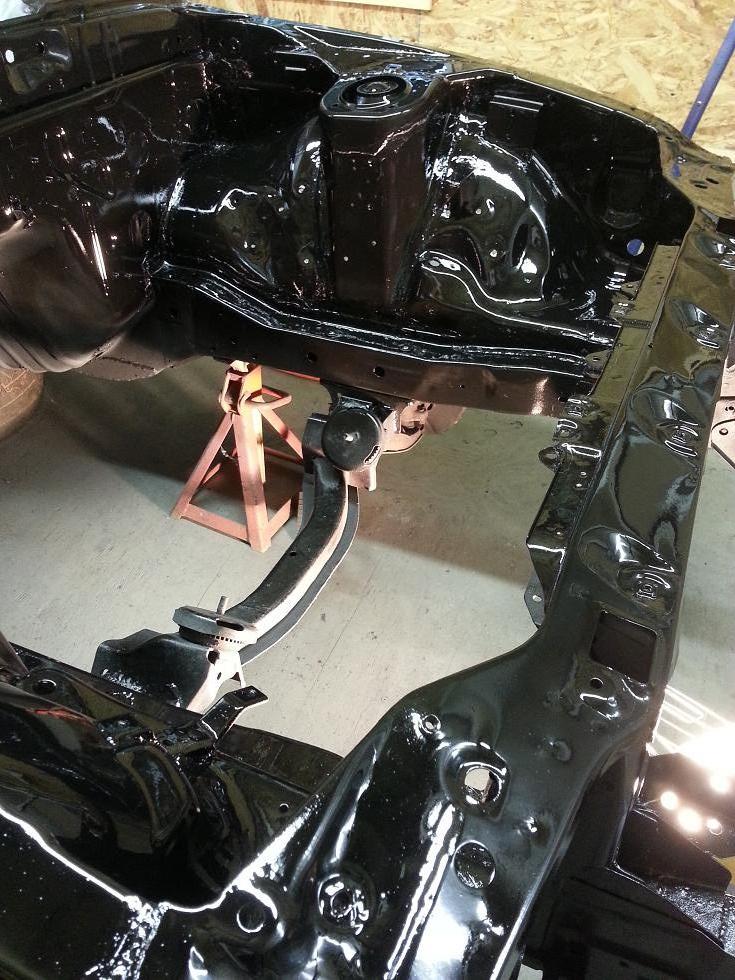
06-10-13, 09:38 AM
#71
Thanks guys
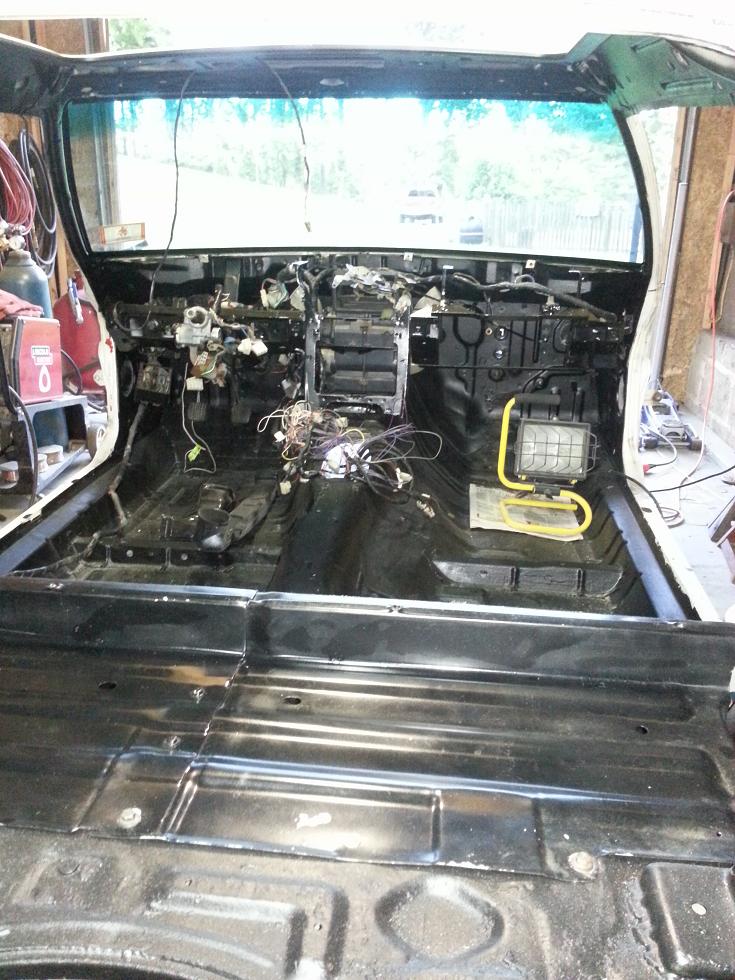
Made some decent progress yesterday on the car. The FB wiring harness is now back in the car although not completely routed as you can see by the mess of crap in the pics lol. Still need to finish routing and clipping it down in the engine bay, and i need to redo the wiring for my stereo and gauges since that's kinda a mess. Not sure why I rushed through that part of the build back in 2005, but I'm usually the type to make a nice clean harness. I'll be sure to do that this time.
Battery is in, along with it's wires and the bin frame. I'm hoping to get all of the FB wiring finished up this week so I can start making the FC swap harness and get that all routed. Once that's done i'll put the rest of the HVAC in and the dash pad etc.
I'll probably leave the carpets out until after it's painted - one less thing to worry about getting dirty and having to clean twice lol.
Slowly getting there....
06-10-13, 01:45 PM
#74
Thanks
I'm just glad to be at the stage where parts are going back on the car, rather than coming off lol.
Still much to do, but I actually went and bought paint on Friday so hopefully I'll be to a point of actually painting it before the end of June. Paint is a single stage PPG Urethane. A9 Daytona Blue is what I went with. I've never seen that color in person so hopefully I like it as much on the car as I do sitting in the paint can lol