
My 79 "barn find" project


Ah! Thanks for clearing that up for me Jerry! Makes me wish I had the original paperwork.
Just checked the 80 engine I had and in addtion to the engine number, it has another number stamped on the flat spot nearest the drivers side just a few inches from the engine number. Mine doesn't have that second number. Wonder what it's for. Any ideas?


Just checked the 80 engine I had and in addtion to the engine number, it has another number stamped on the flat spot nearest the drivers side just a few inches from the engine number. Mine doesn't have that second number. Wonder what it's for. Any ideas?
Disassembled the 80 engine
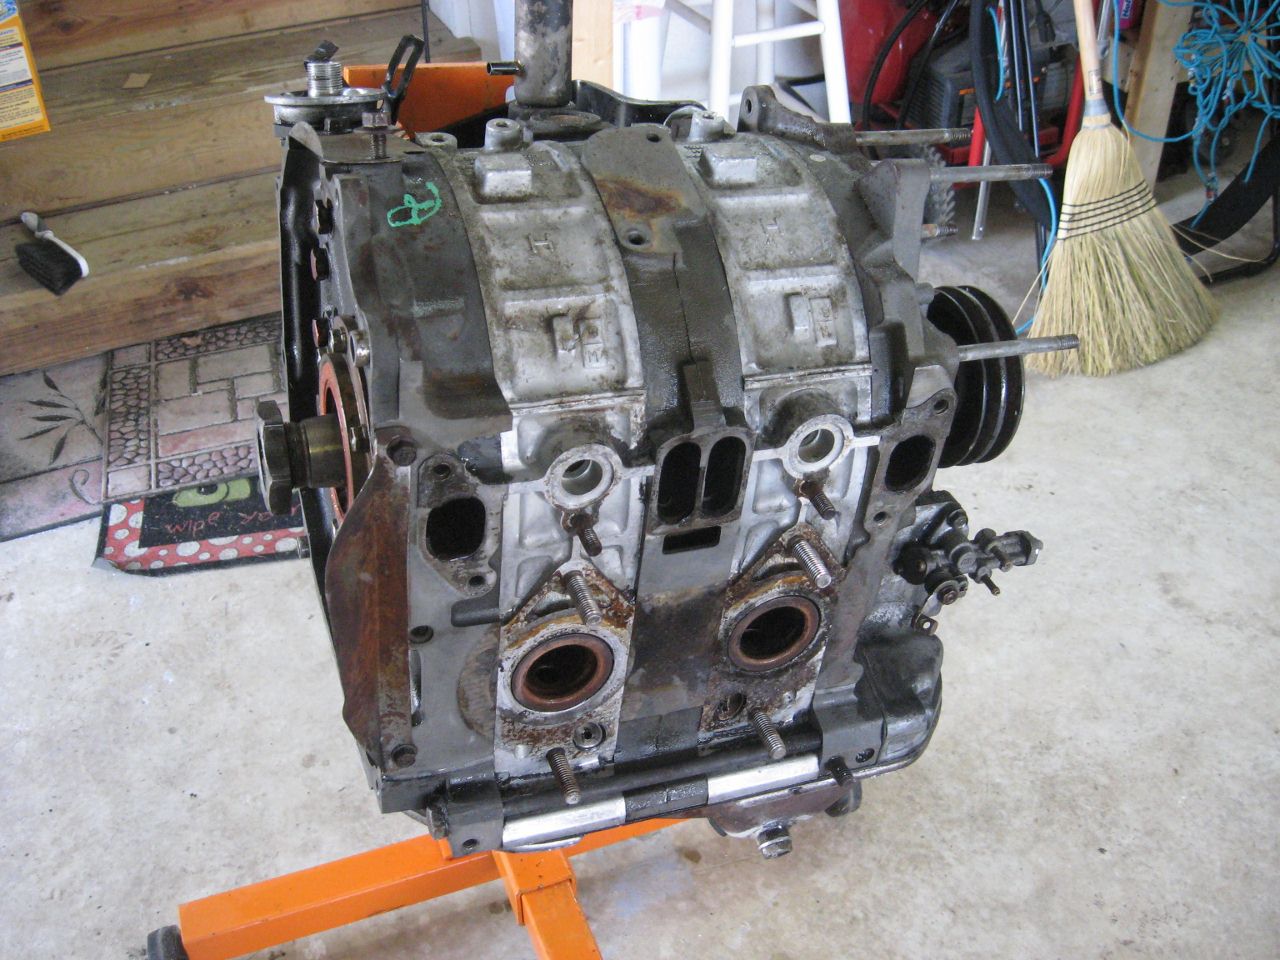
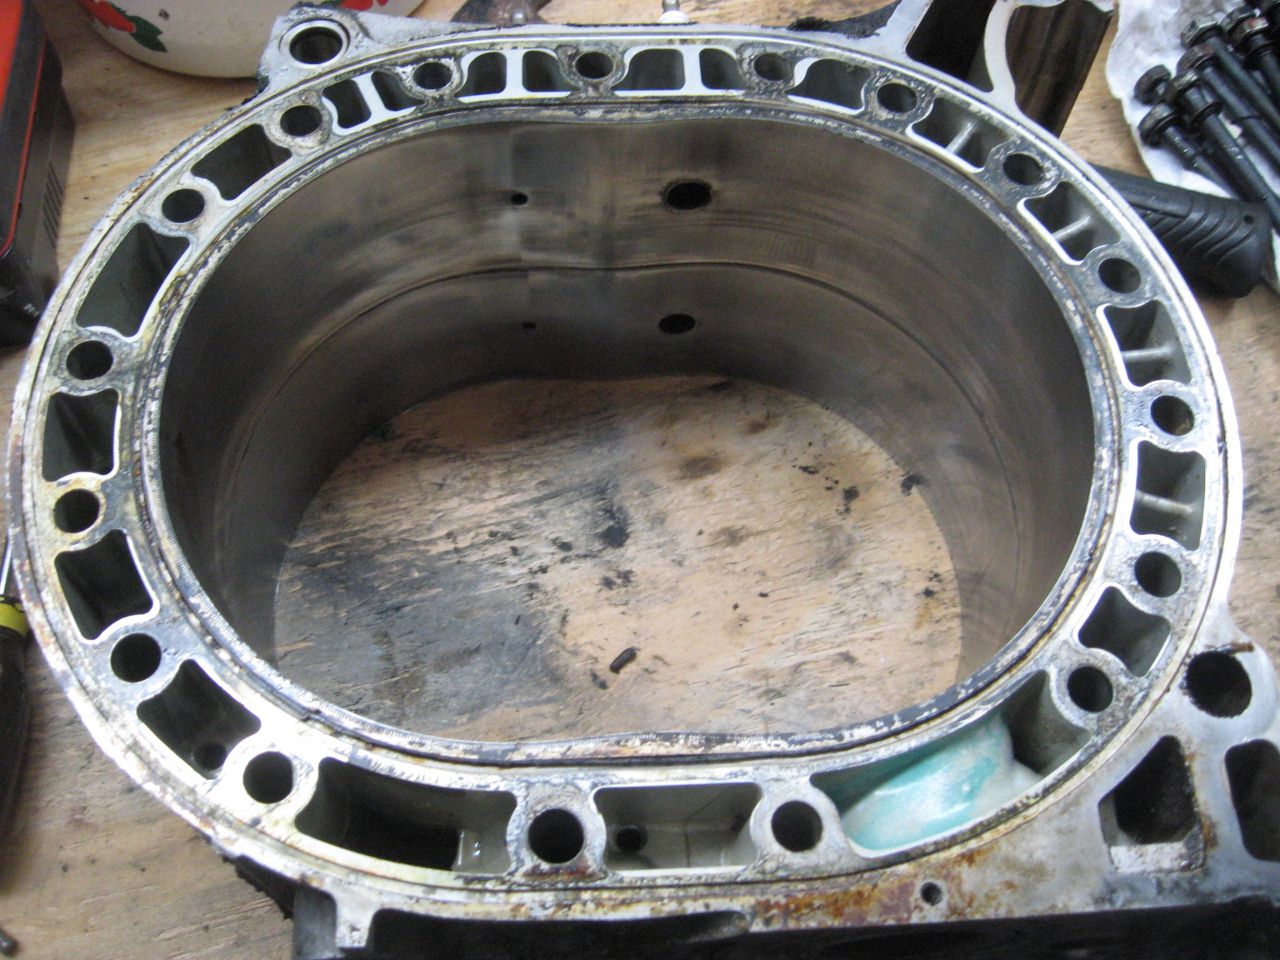
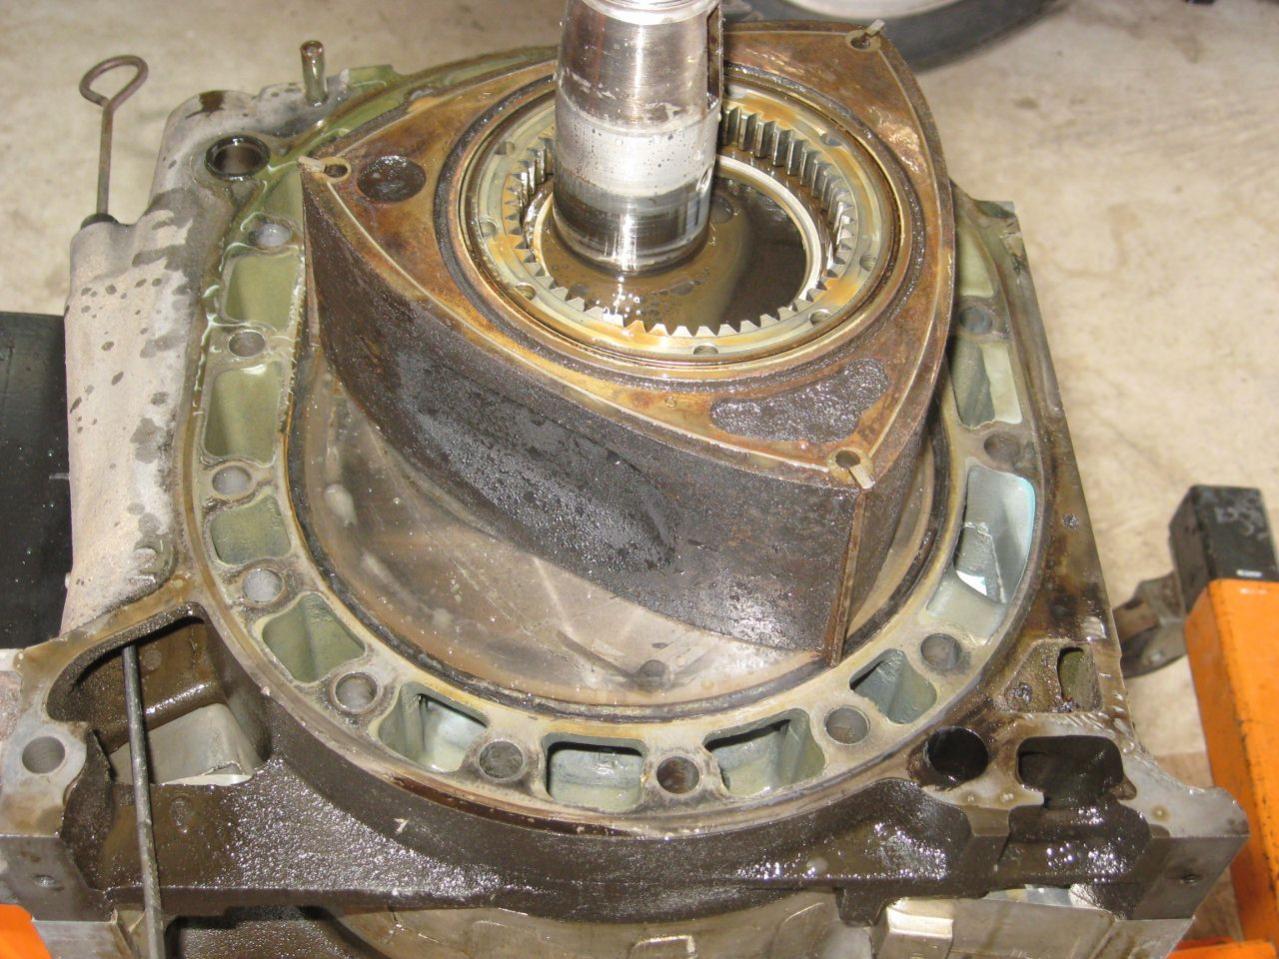
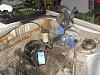
And boy was it SWEET. I think it may have had a recent rebuild. This is what I had to start with:
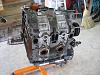
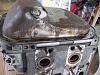
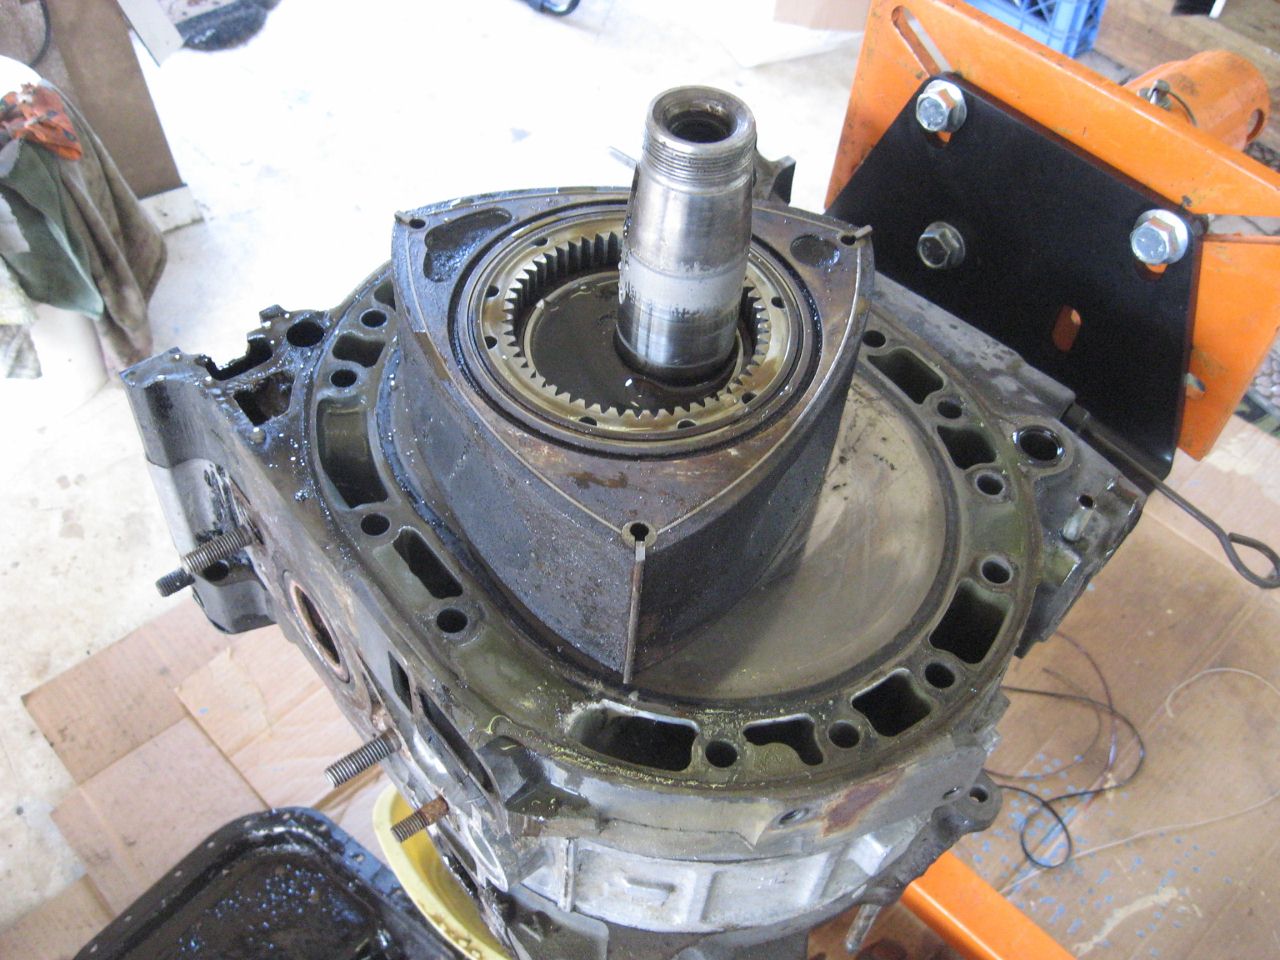
Not bad... I used a can of gunk and scrubbed it down pretty good, and I'm glad I did. Cleaned it up really well. Take a look at that funny oil pan. It has no lip on either side. Never seen one like that before. Hmmmm....
I took out the oil pan bolts and tapped it with my hand and it literally slid off the bottom of the engine. The gasket stayed with the pan and not a single piece of it stuck to the bottom of the engine. Never had that happen before. Cool.
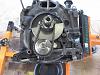
Flipped it over and took off the OMP and the front cover. Same as the oil pan, the front cover came off clean and the gasket stayed intact on the front cover! Wow. The inside of the front cover looked like new. Prolly not unexpected since that side stays nice and oily, so it should right? Then I started taking off the oil pump and the front end stuff. Wow. It all looked like new. A lot cleaner than the things I took out of my 79! I get excited thinking this thing could have had a recent rebuild!
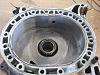
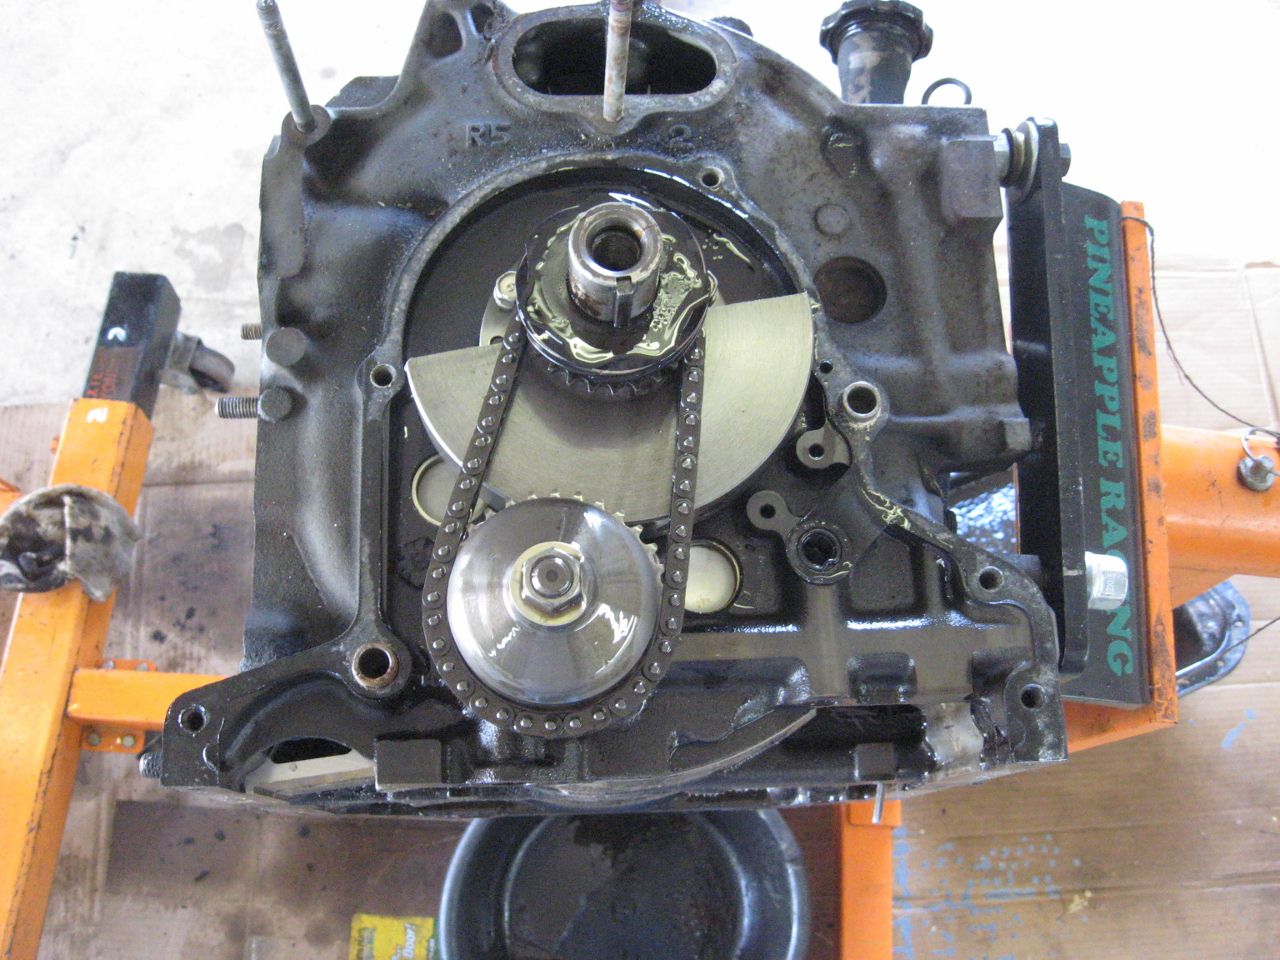
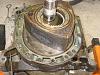
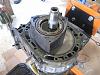
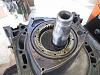
Then I get into taking out the main bolts. The giveaway to a possible recent rebuild is the paint on the heads of the bolts. Most were red, but a few were green. Then I take off the back plate and the rear housing came off with it (dowel pin was stuck in the rear housing - no big deal). The seals all stayed on the rotors, and OMG, the rubber o-rings on the housings didn't split and fall apart. They were still stretchy! Almost like new. WOW. I'll bet this thing did have a recent rebuild!
The one thing that causes me concern though is the burned oil marking on the eccentric shaft. Hmmm... Looks like it got hot. Not sure if this is normal or if it's bad, and how bad.... Any ideas?

OH! And the mid plate is a "Y" plate. It is just a bit different than my 79 "R5" plate. Weird thing tho is that the front plate of the 80 is an "R5", but the mid plate and rear plate are both "Y". Not sure what to make of that...
Not bad... I used a can of gunk and scrubbed it down pretty good, and I'm glad I did. Cleaned it up really well. Take a look at that funny oil pan. It has no lip on either side. Never seen one like that before. Hmmmm....

I took out the oil pan bolts and tapped it with my hand and it literally slid off the bottom of the engine. The gasket stayed with the pan and not a single piece of it stuck to the bottom of the engine. Never had that happen before. Cool.
Flipped it over and took off the OMP and the front cover. Same as the oil pan, the front cover came off clean and the gasket stayed intact on the front cover! Wow. The inside of the front cover looked like new. Prolly not unexpected since that side stays nice and oily, so it should right? Then I started taking off the oil pump and the front end stuff. Wow. It all looked like new. A lot cleaner than the things I took out of my 79! I get excited thinking this thing could have had a recent rebuild!
Then I get into taking out the main bolts. The giveaway to a possible recent rebuild is the paint on the heads of the bolts. Most were red, but a few were green. Then I take off the back plate and the rear housing came off with it (dowel pin was stuck in the rear housing - no big deal). The seals all stayed on the rotors, and OMG, the rubber o-rings on the housings didn't split and fall apart. They were still stretchy! Almost like new. WOW. I'll bet this thing did have a recent rebuild!
The one thing that causes me concern though is the burned oil marking on the eccentric shaft. Hmmm... Looks like it got hot. Not sure if this is normal or if it's bad, and how bad.... Any ideas?

OH! And the mid plate is a "Y" plate. It is just a bit different than my 79 "R5" plate. Weird thing tho is that the front plate of the 80 is an "R5", but the mid plate and rear plate are both "Y". Not sure what to make of that...
Last edited by woodmv; Feb 10, 2013 at 06:26 PM.
Maybe NOT so fresh a rebuild and I'm an idiot!!
I wanted to take the seals out of the rotors before I commented on them but they were very carbonized. Makes me wonder if the 80 engine was rebuilt and then ran rich and became over carbonized?
Here's pics of the rotors:
See what I mean? Lots of carbon build up.
So, I decide I have to clean these up and see if I can use any of the seals. In today's economy we all need to save as much jack as we can right? Well, here's the old me - impatient. The corner seals and side seals looked like nice tight fits, and they were. The corner seals came out ok, but the side seals were STUCK. Smh..
Well as I said, the old me came out tonight and tried to get those seals out and, I'm ashamed and embarassed to say it, two of the side seals broke. ARGH!!!!
To make matters worse, I was trying to force one of the broken pieces out of the rotor and damaged the groove. I. Am. An IDIOT!!
Couldn't get two of the o-ring seals off the rotors either, so the sensible me decided to give up and soak the rotors in cleaning solution for a few days to loosen up the carbon. Man I could kick myself.
Well, I feel like I have gotten my confession off my chest - just waiting for my punishment from the Rotary gods...
Here's pics of the rotors:

See what I mean? Lots of carbon build up.
So, I decide I have to clean these up and see if I can use any of the seals. In today's economy we all need to save as much jack as we can right? Well, here's the old me - impatient. The corner seals and side seals looked like nice tight fits, and they were. The corner seals came out ok, but the side seals were STUCK. Smh..
Well as I said, the old me came out tonight and tried to get those seals out and, I'm ashamed and embarassed to say it, two of the side seals broke. ARGH!!!!
To make matters worse, I was trying to force one of the broken pieces out of the rotor and damaged the groove. I. Am. An IDIOT!!
Couldn't get two of the o-ring seals off the rotors either, so the sensible me decided to give up and soak the rotors in cleaning solution for a few days to loosen up the carbon. Man I could kick myself.
Well, I feel like I have gotten my confession off my chest - just waiting for my punishment from the Rotary gods...

Got some work done today
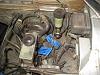
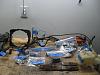
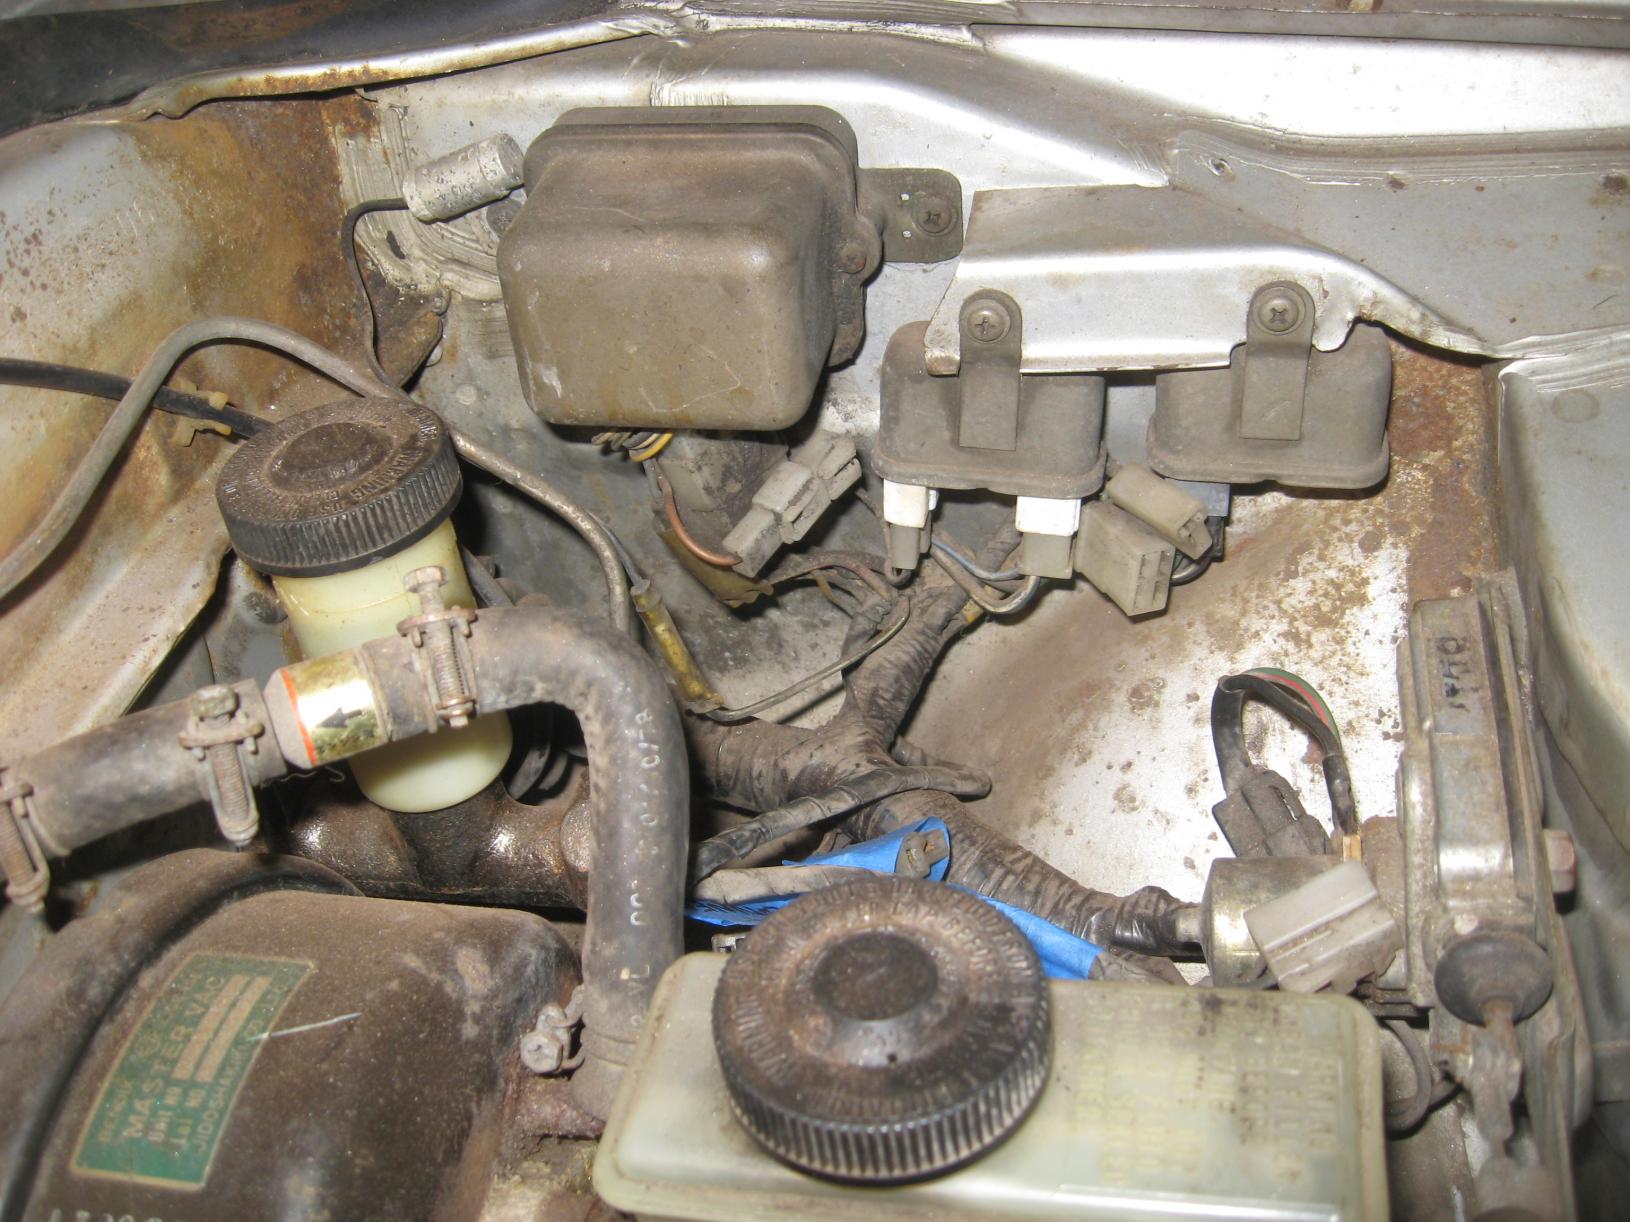
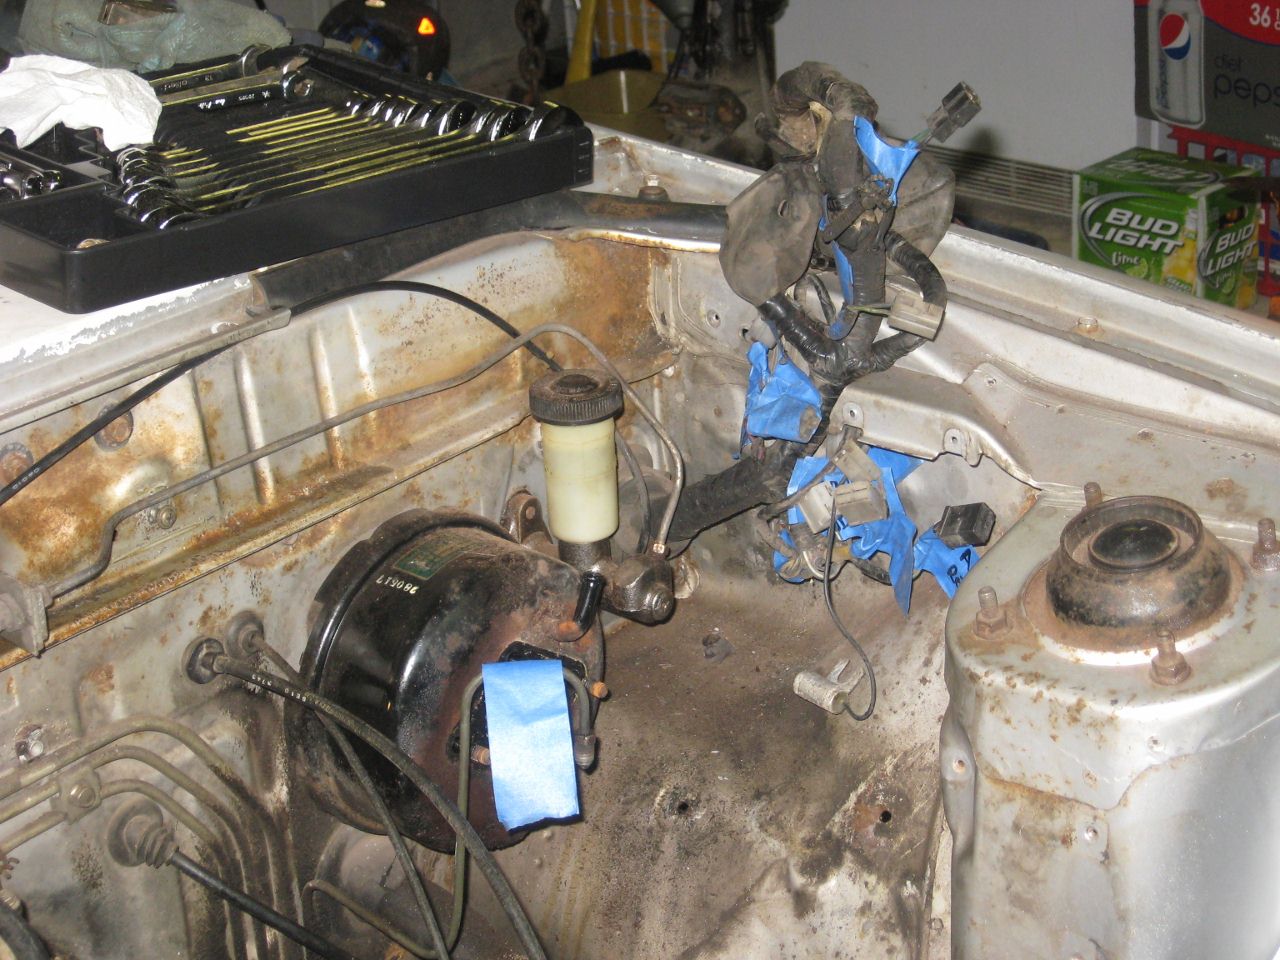
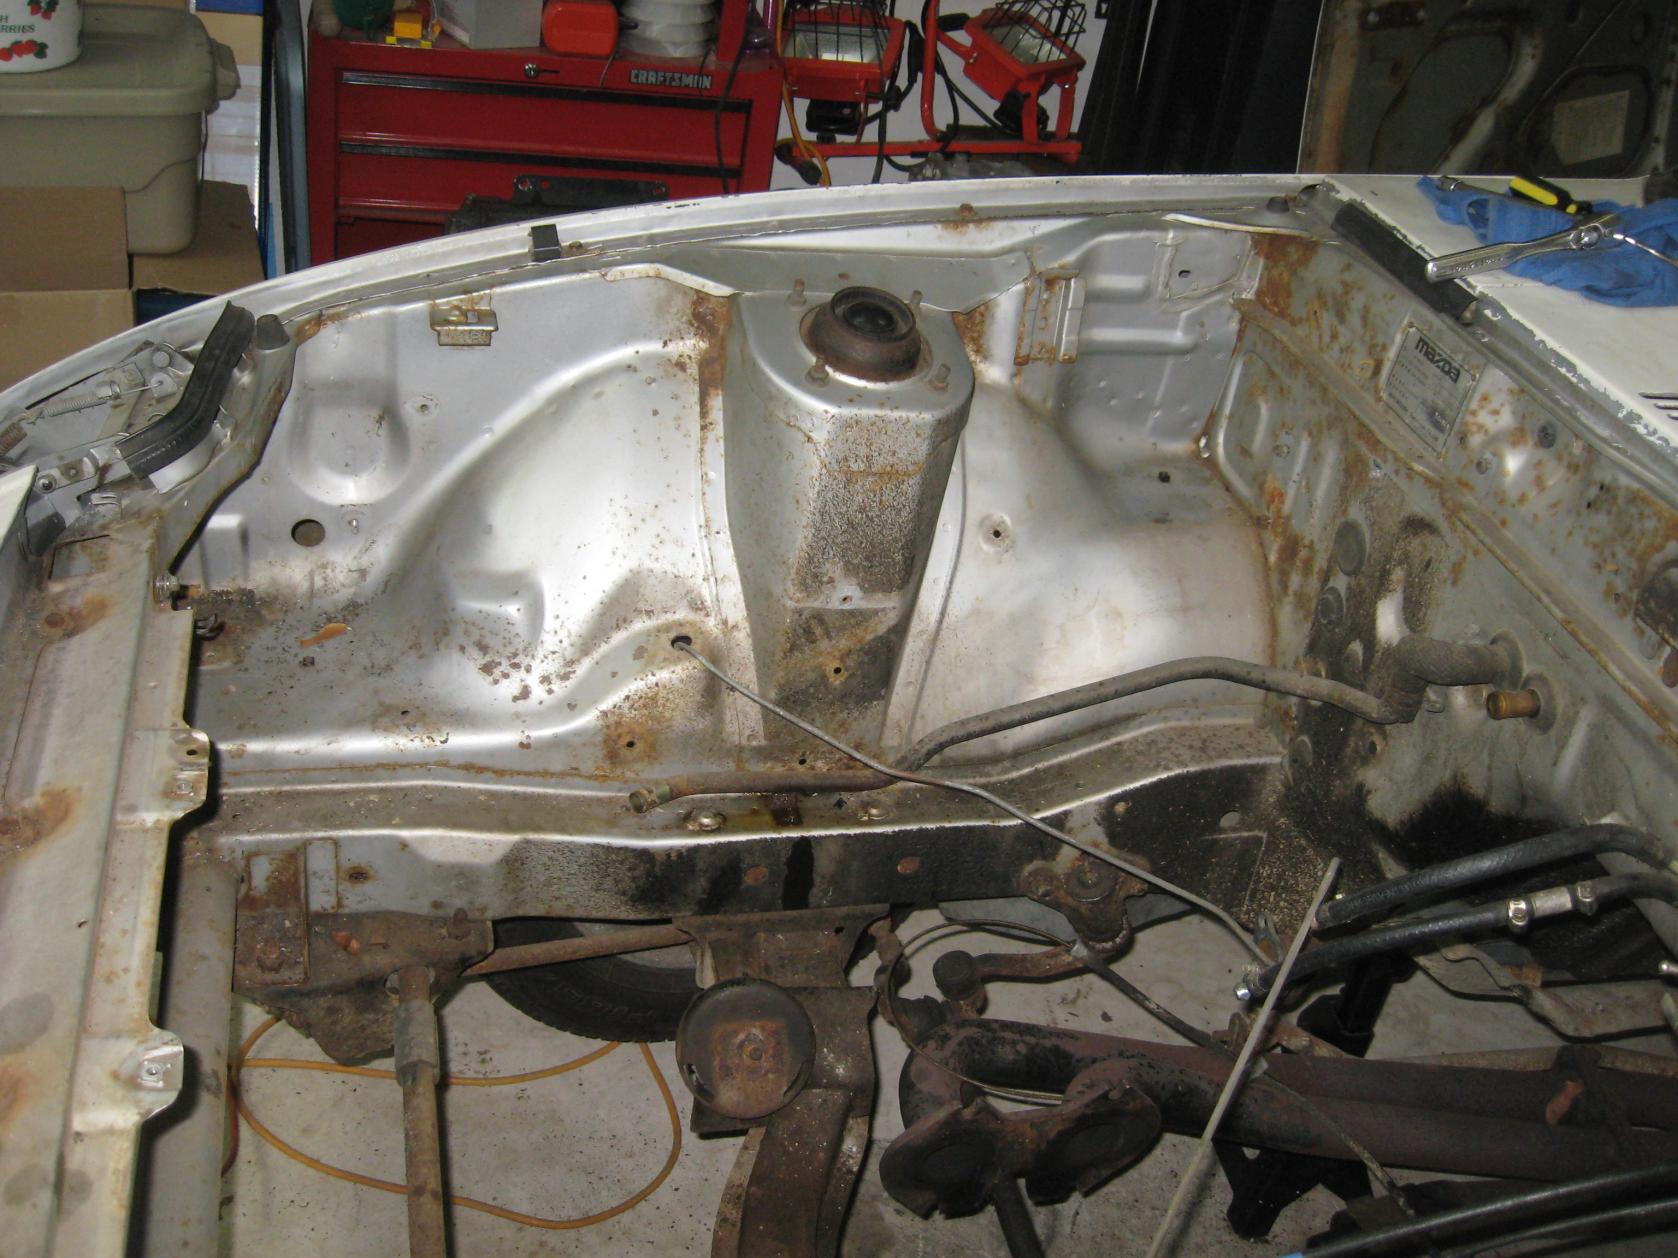
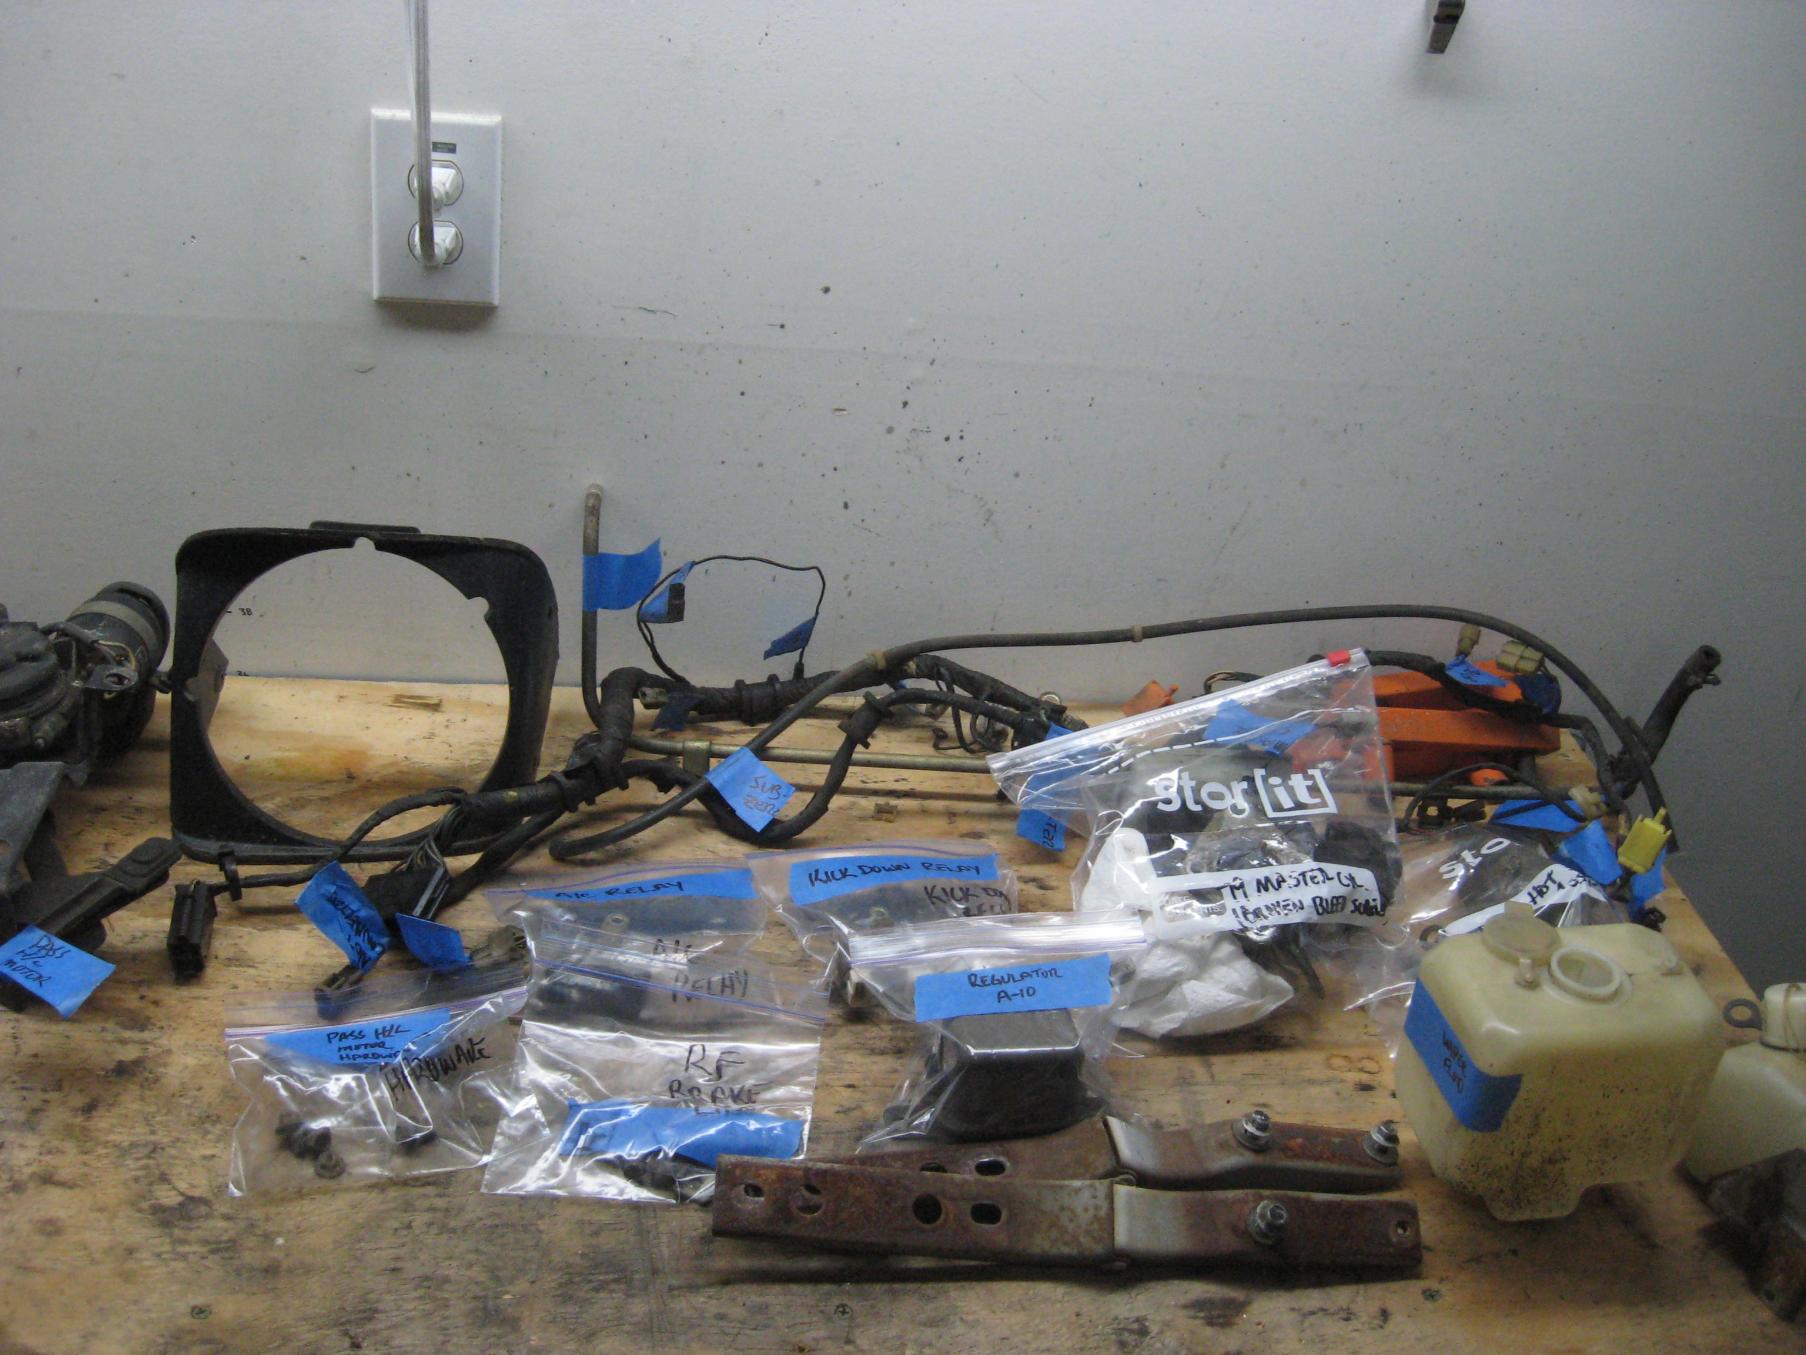
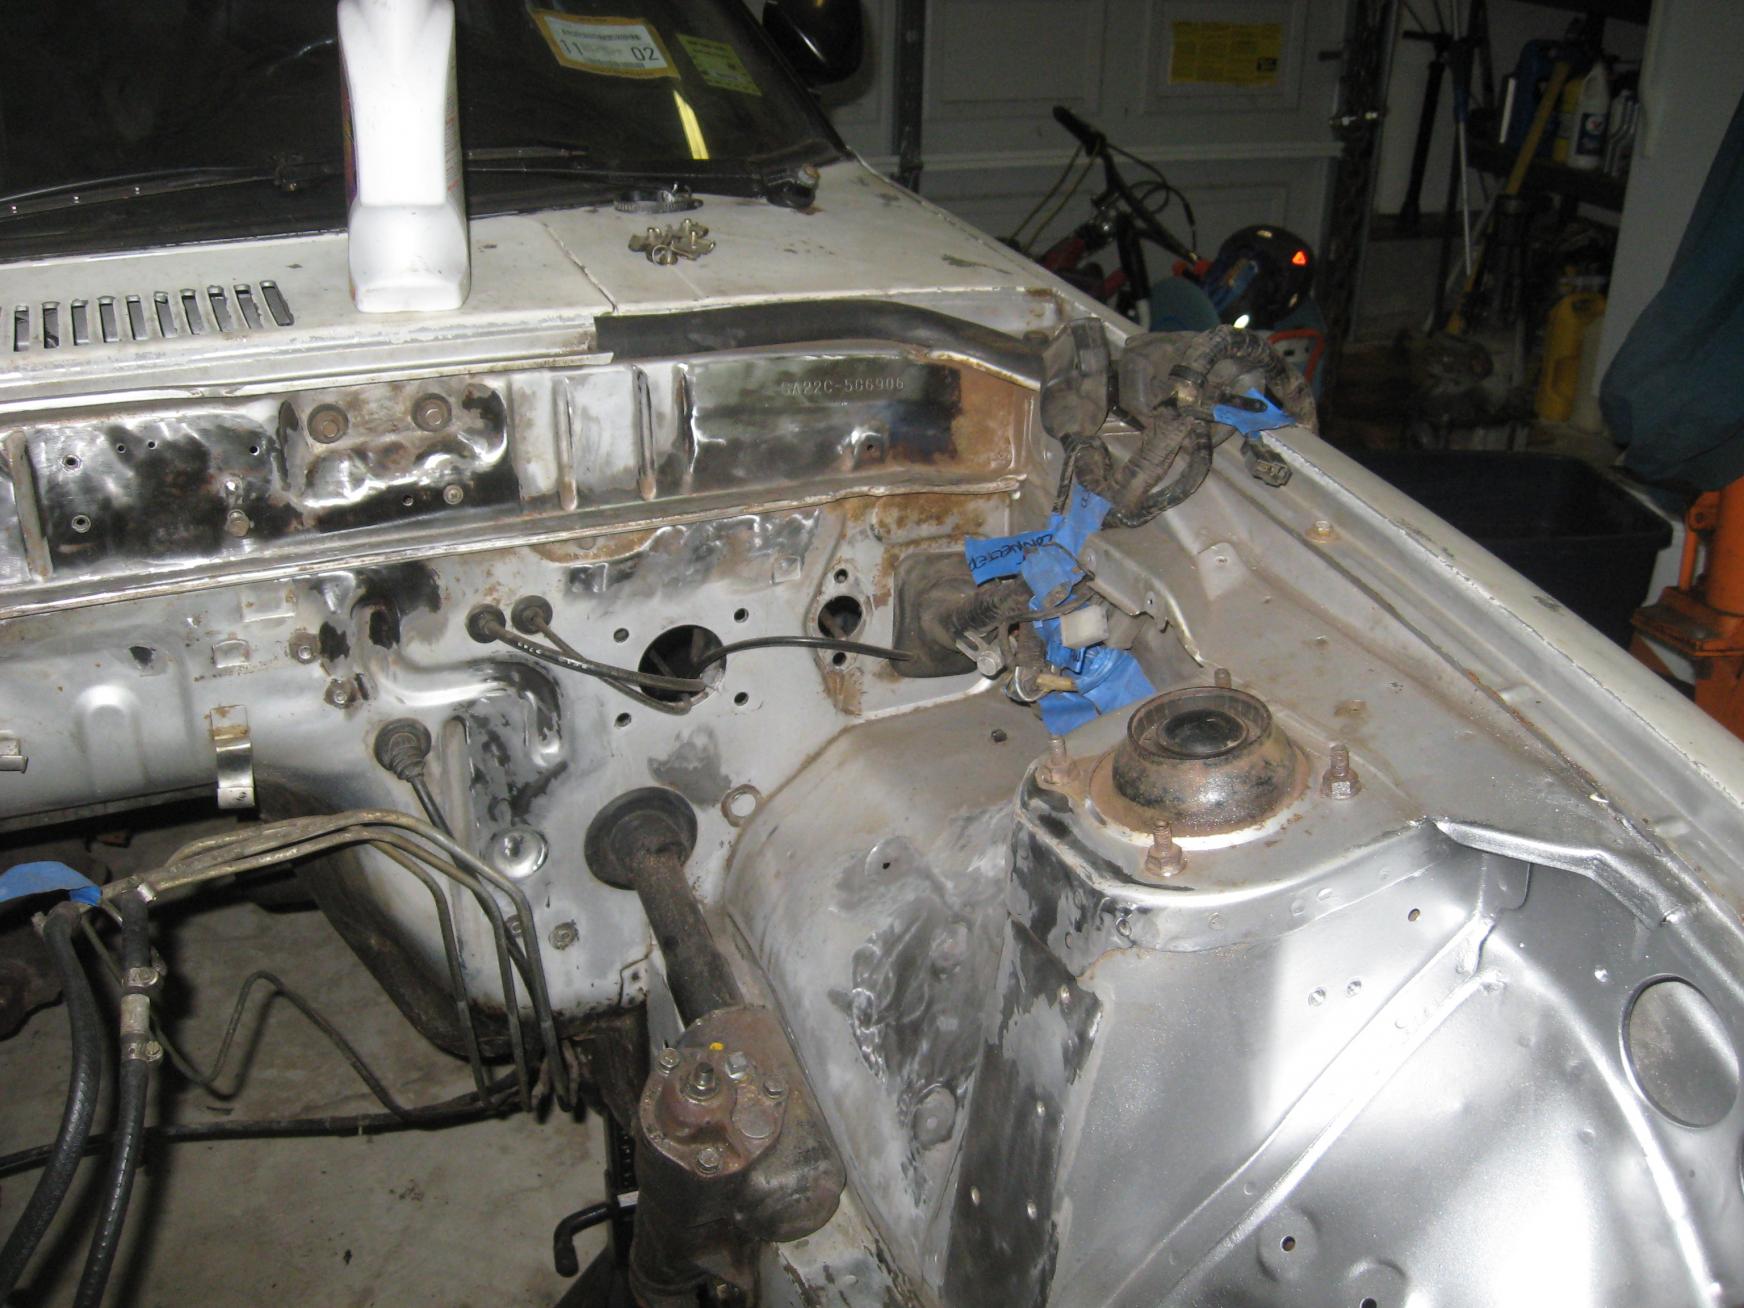
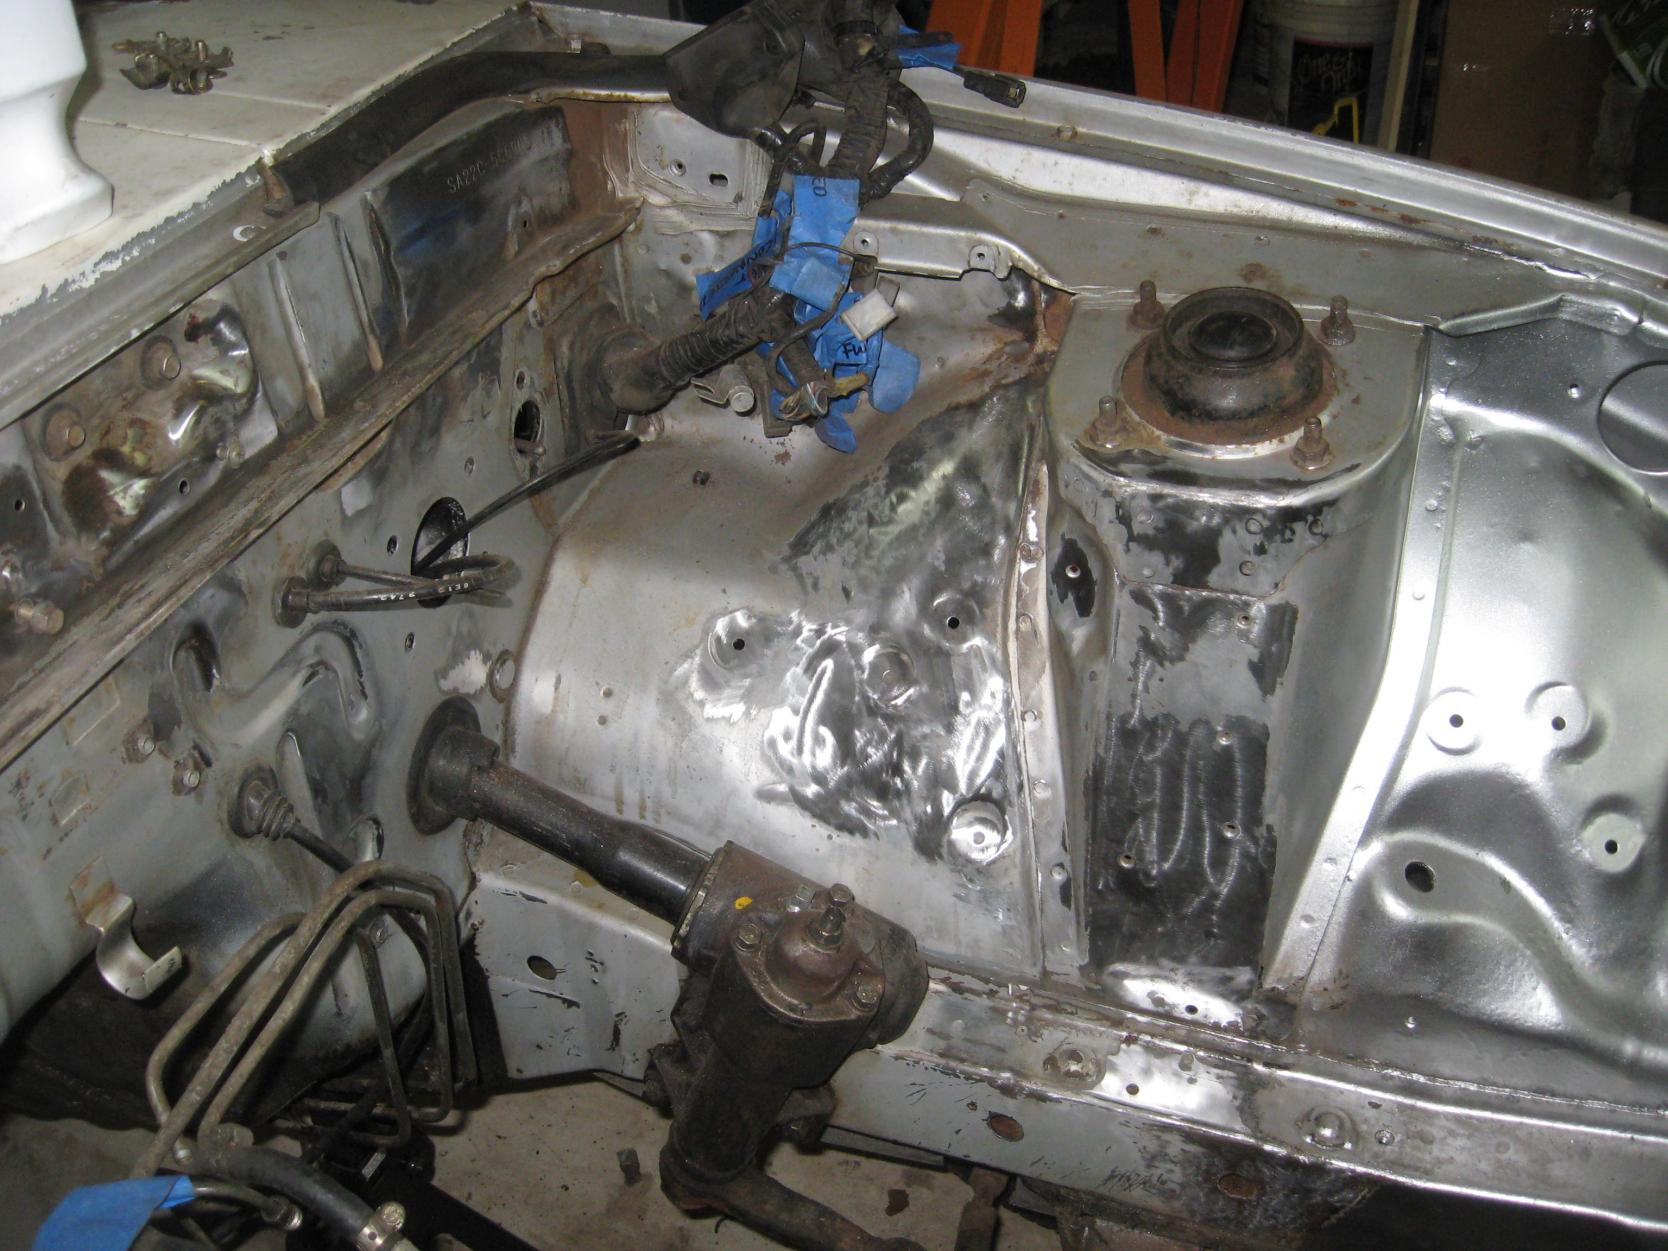
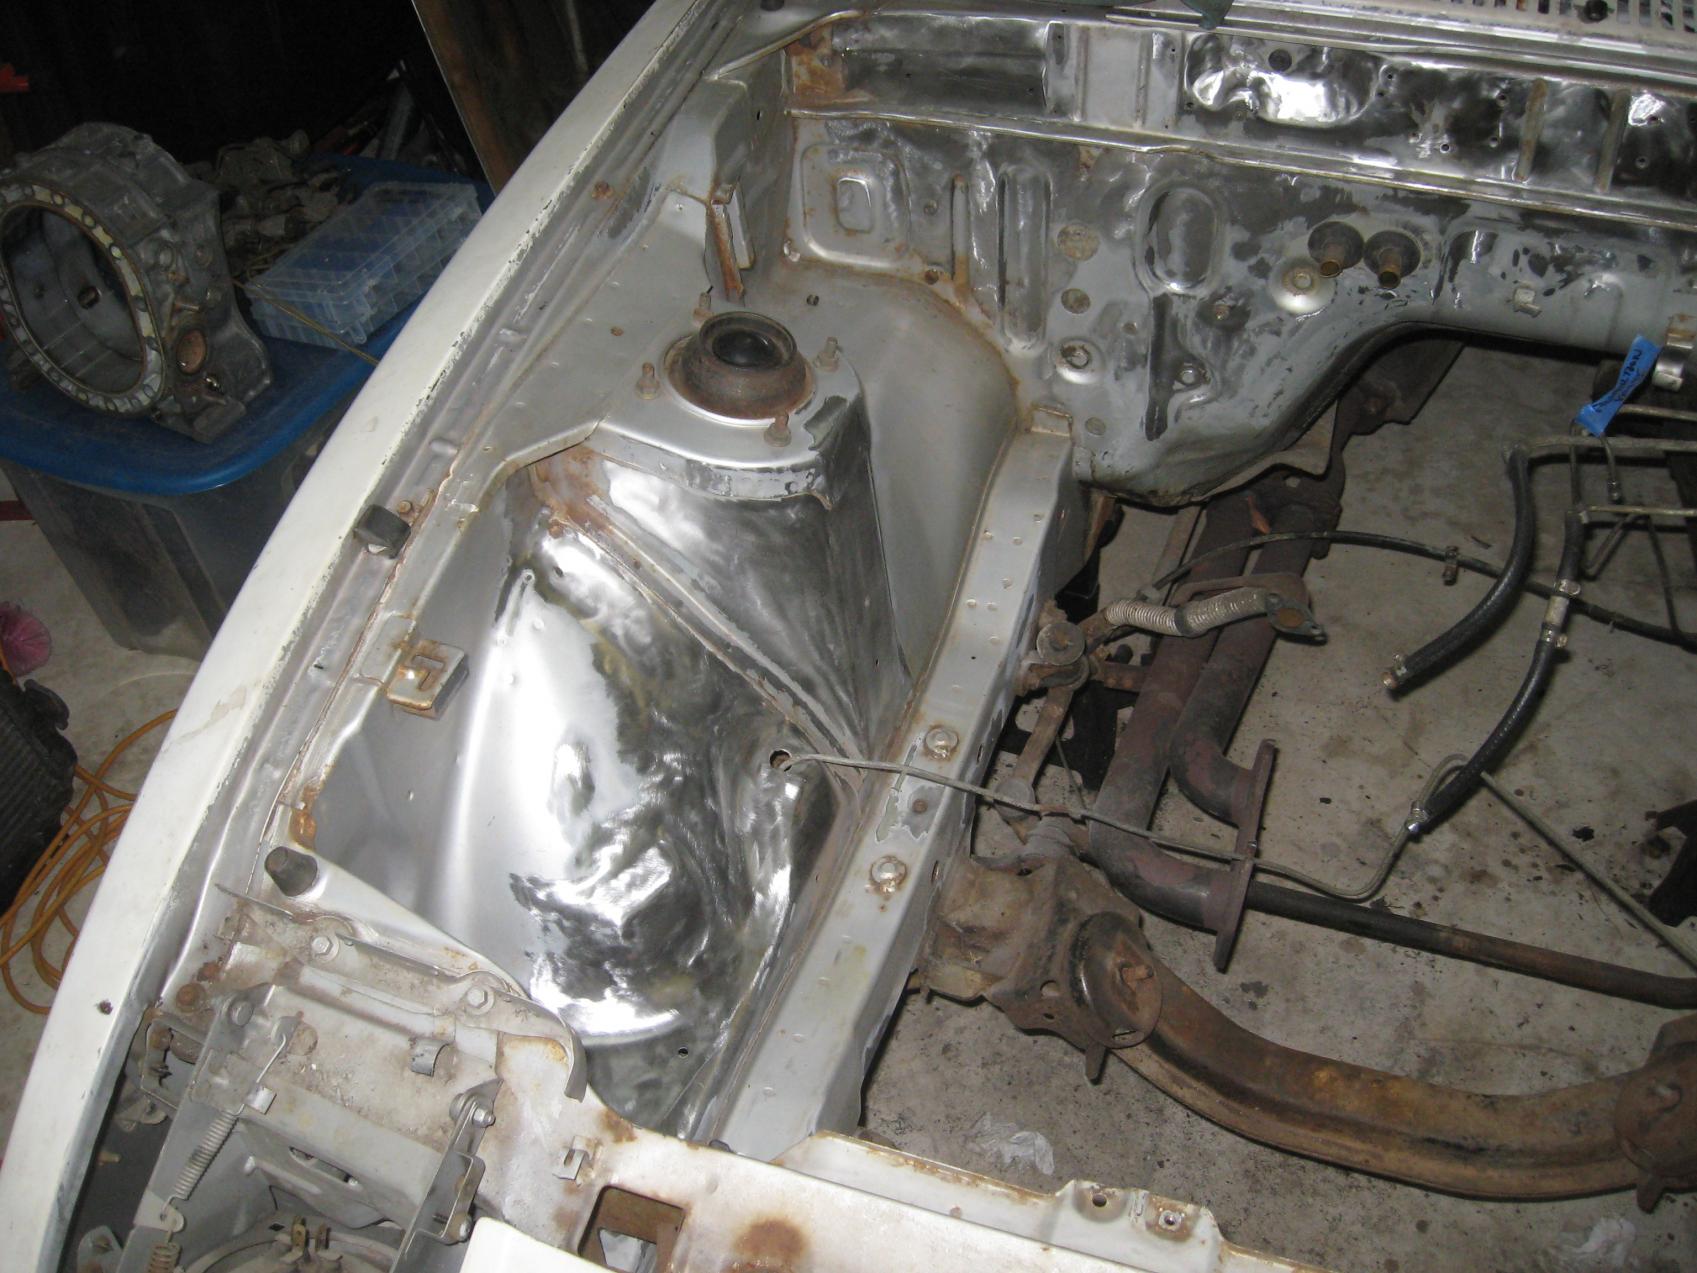
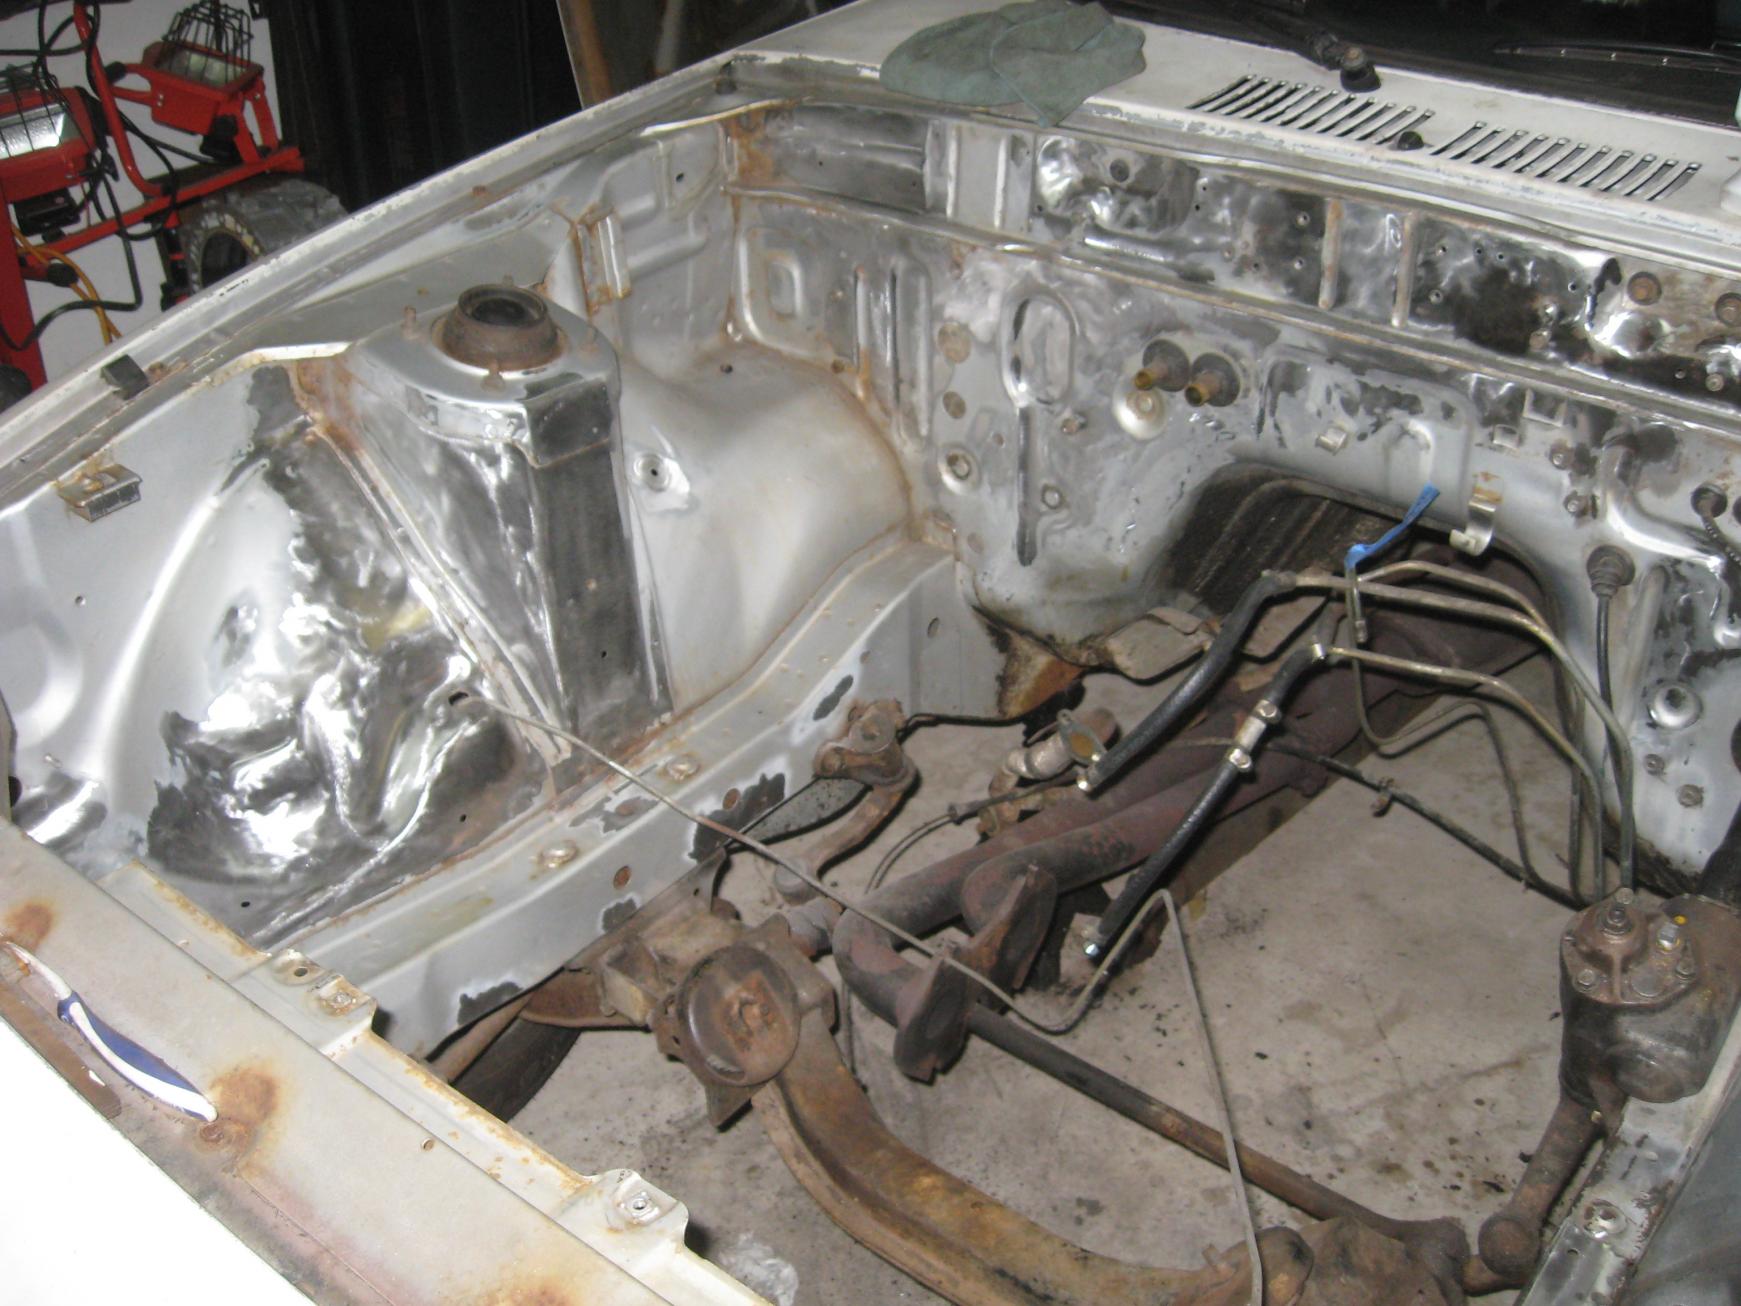
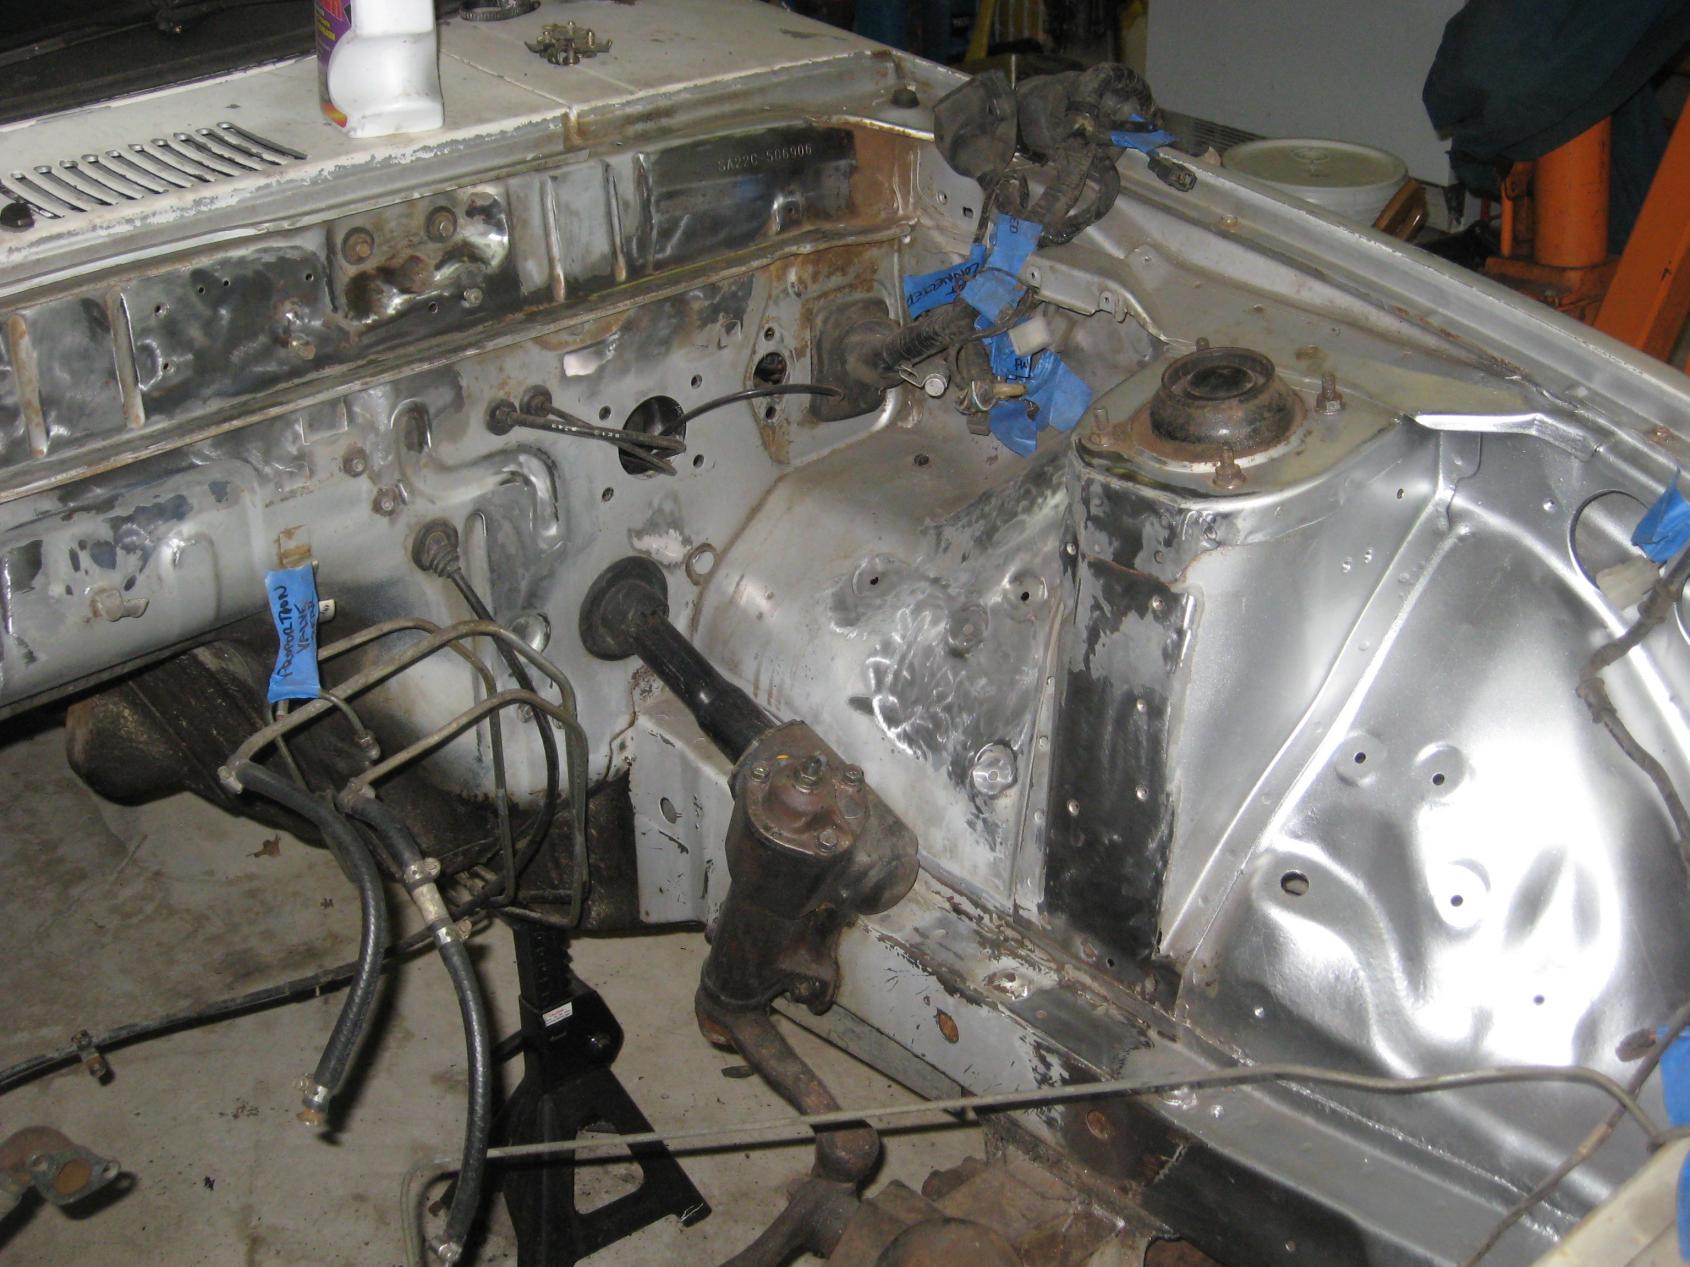
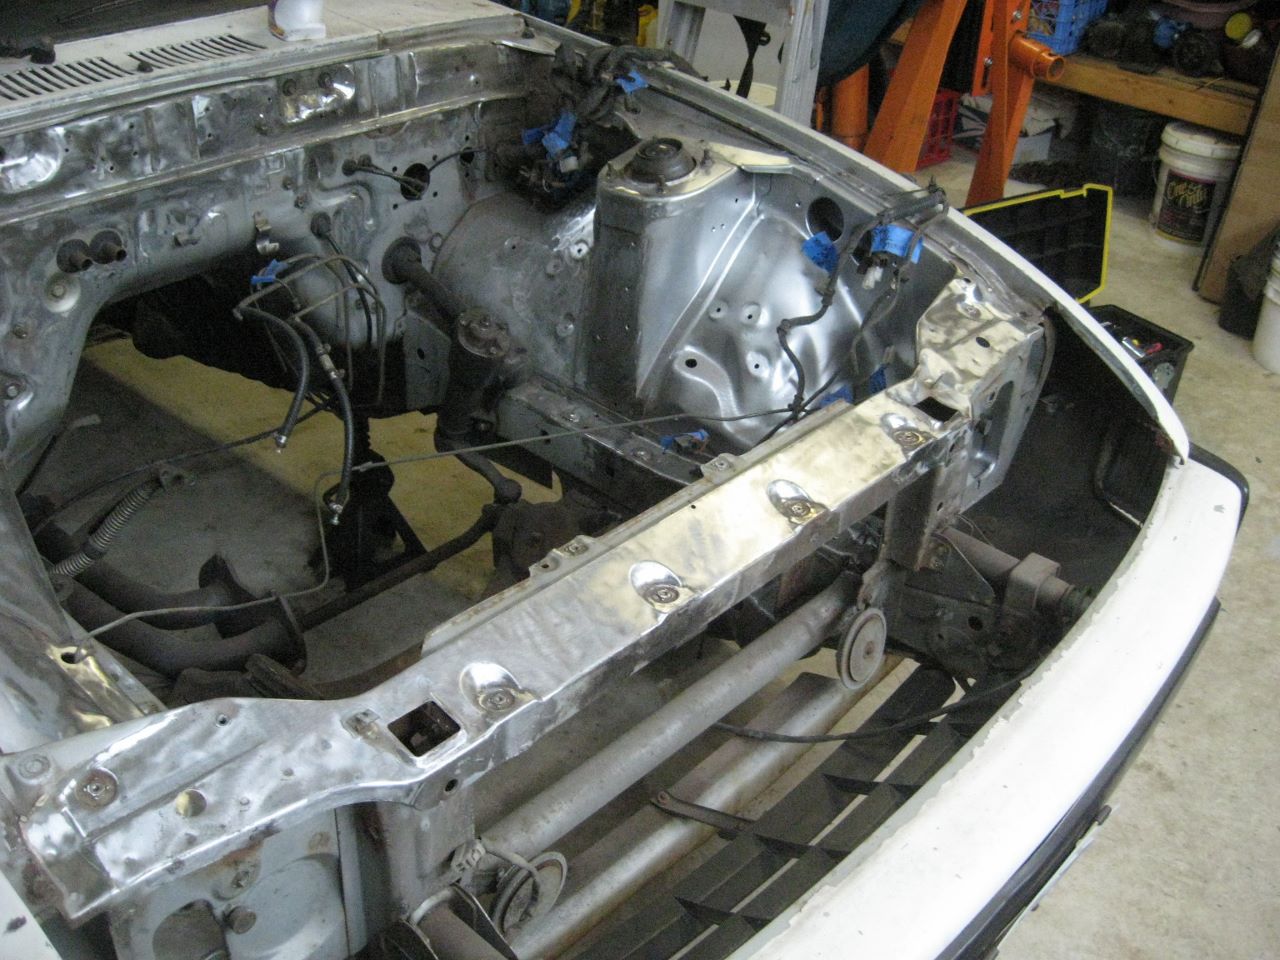
Finally getting back to taking things outta the engine bay and disconnecting the wiring harness. This is what I started with in the drivers corner of the engine bay...
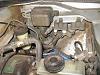
Still have to take out the brake booster and the clutch master to finally gain complete access to that corner, but pretty much everything else is gone! I read on another post that the SA's wiring harness cannot be disconnected at the firewall like the FBs can. That's too bad because it would make working in that area and working on the wiring harness so much easier. As it is I took off the two pieces of wiring harness and was left with a bunch of parts that I took out as you can see in the last pic. Got lots to clean up!

Can't wait for warmer weather so I can actually start painting some stuff. I've got the irons I want to use all cleaned up and finally decided on a color.
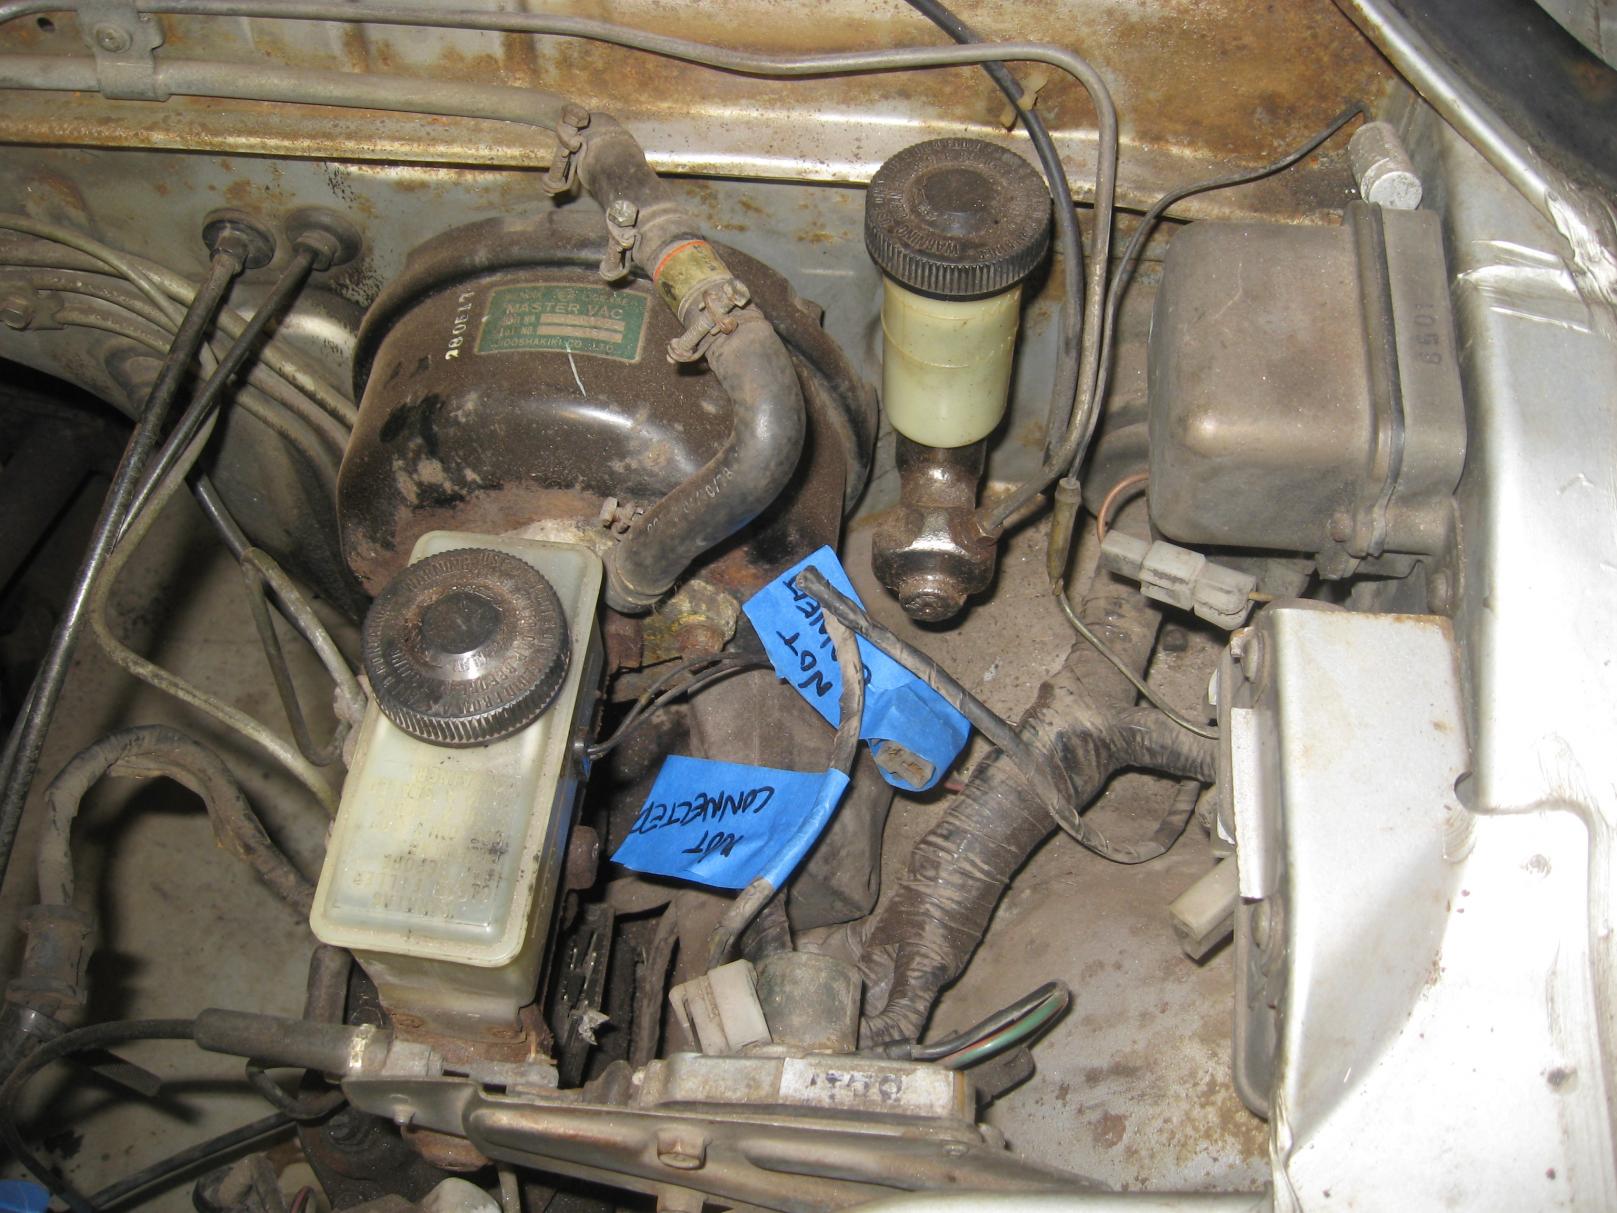
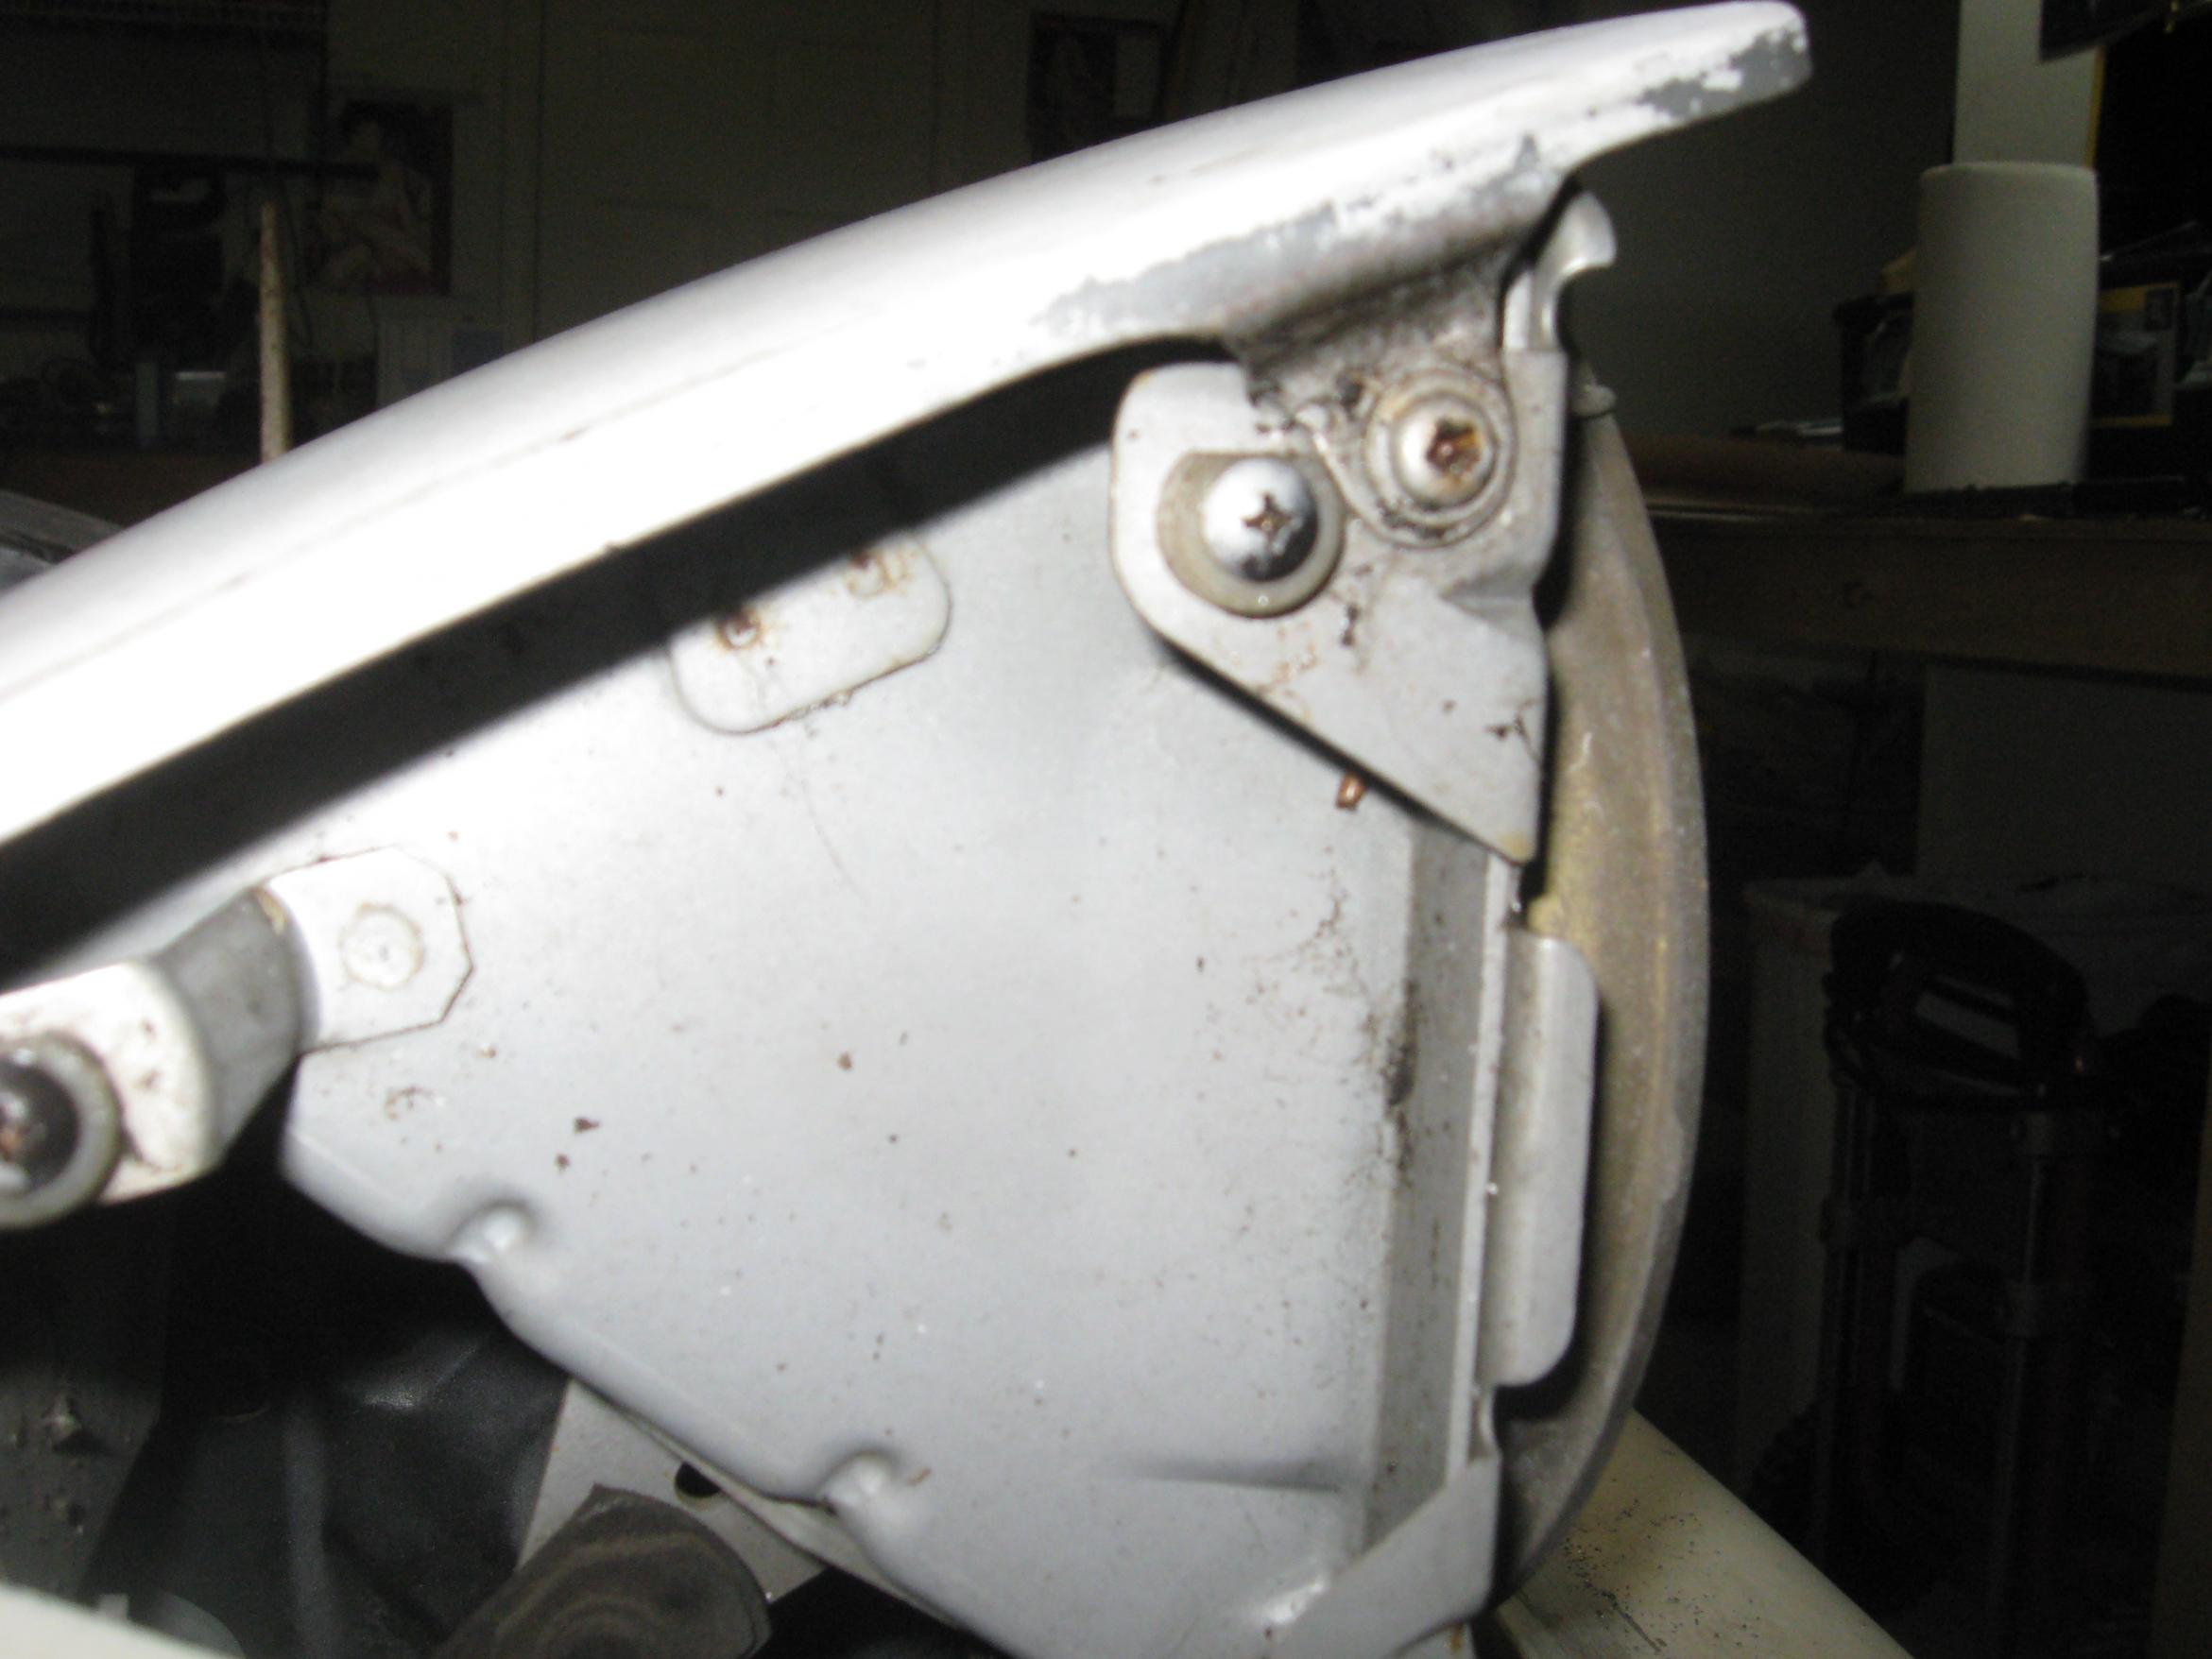
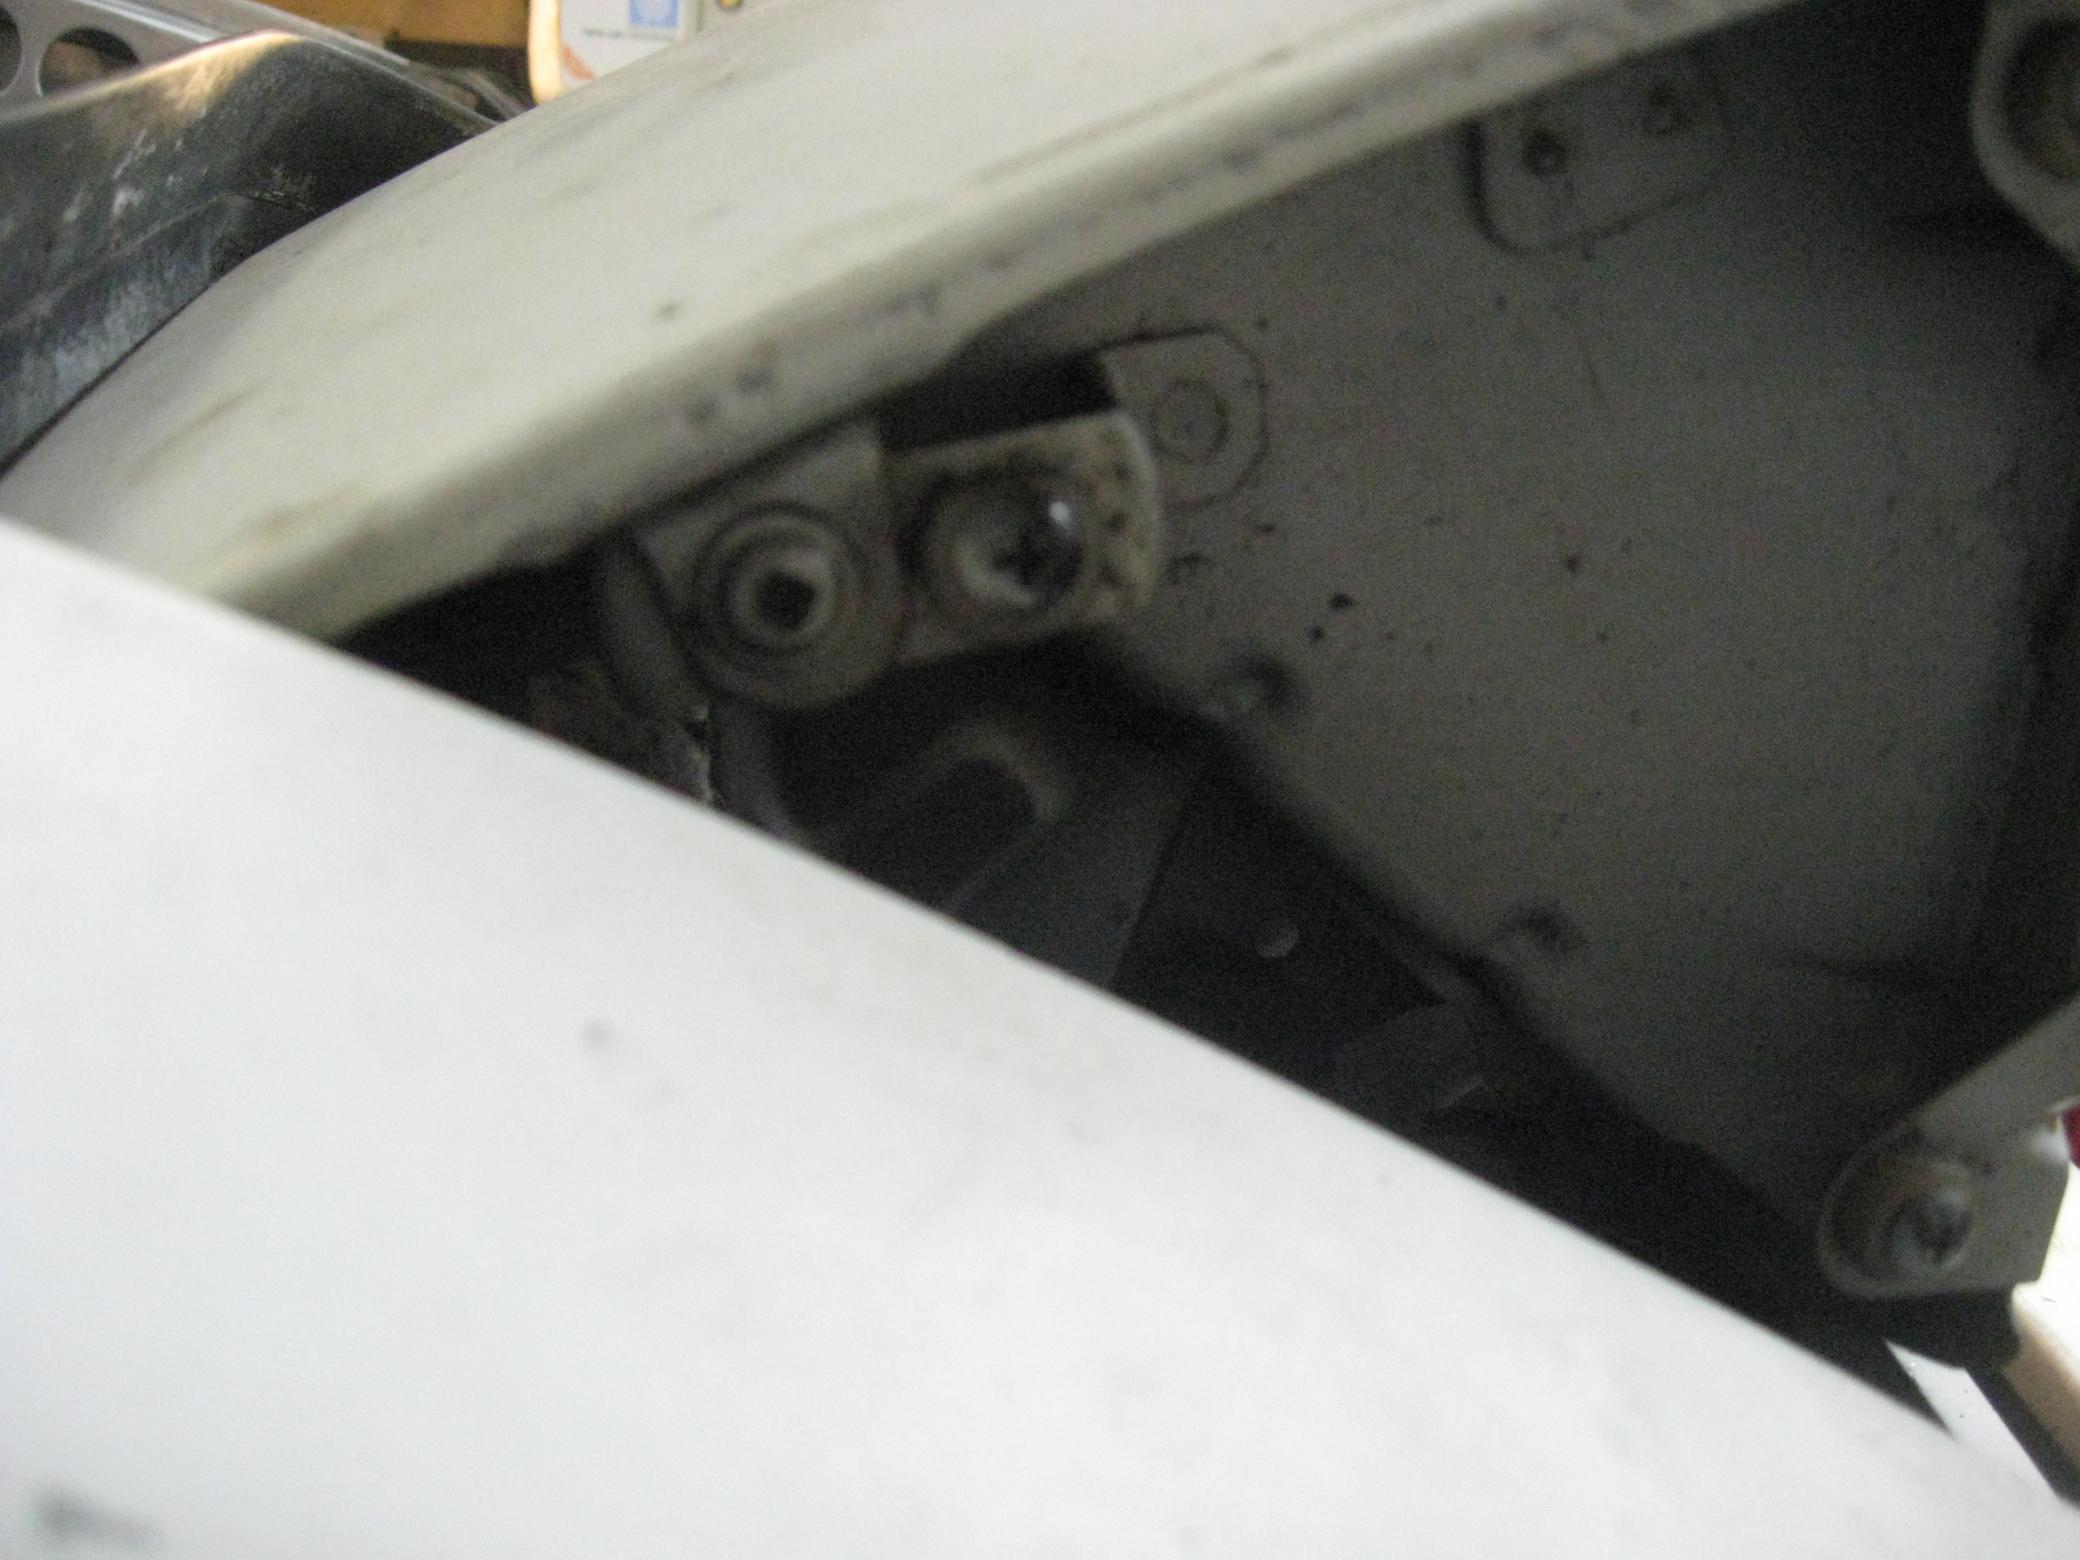
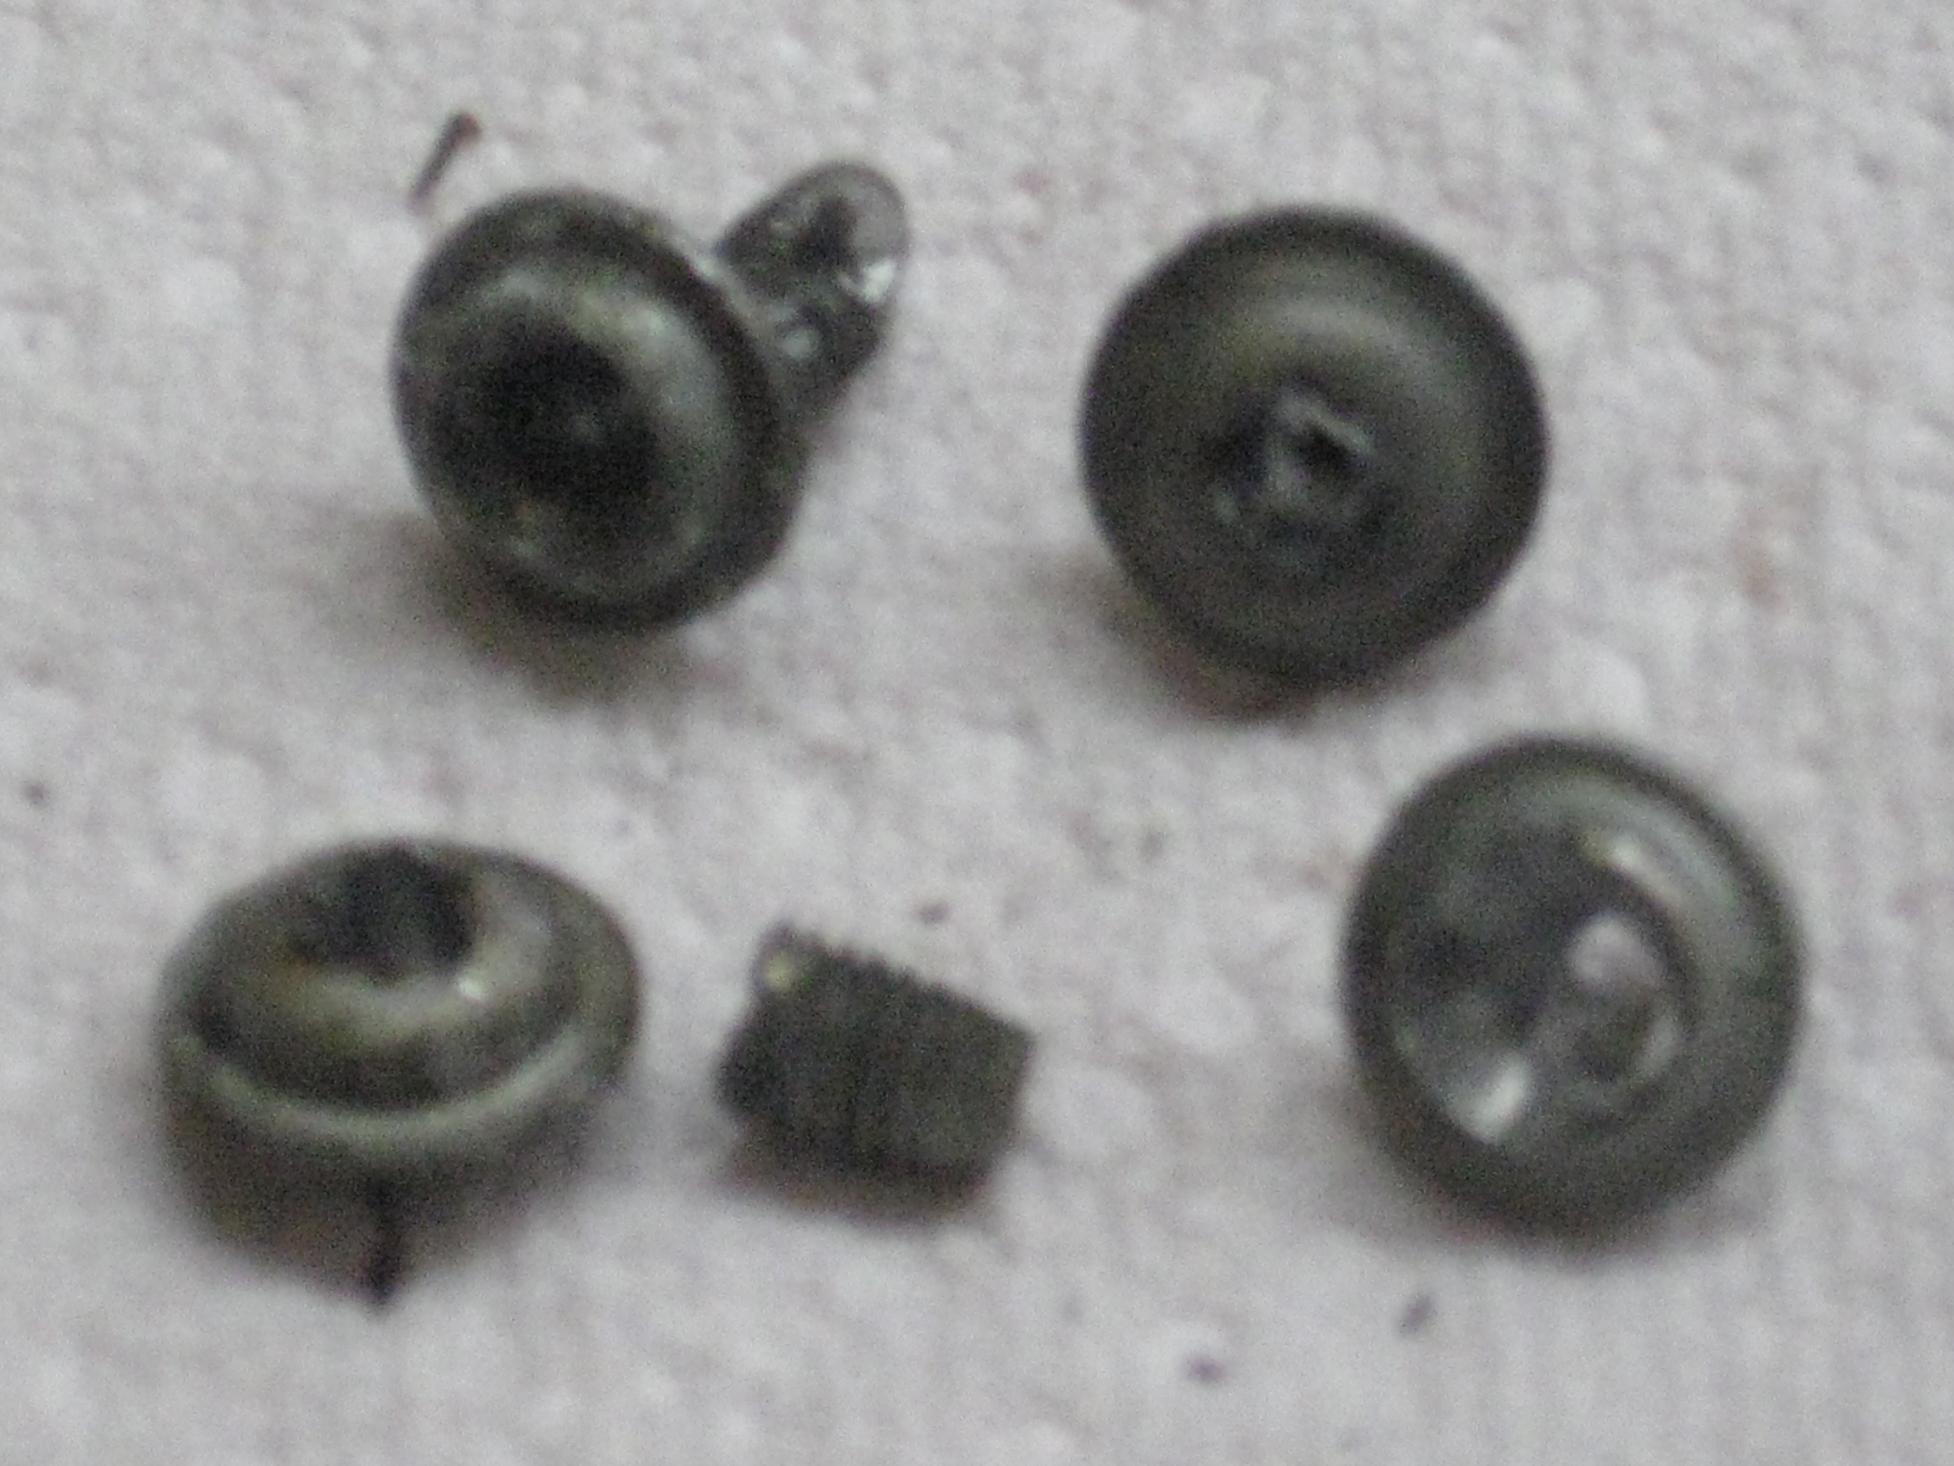
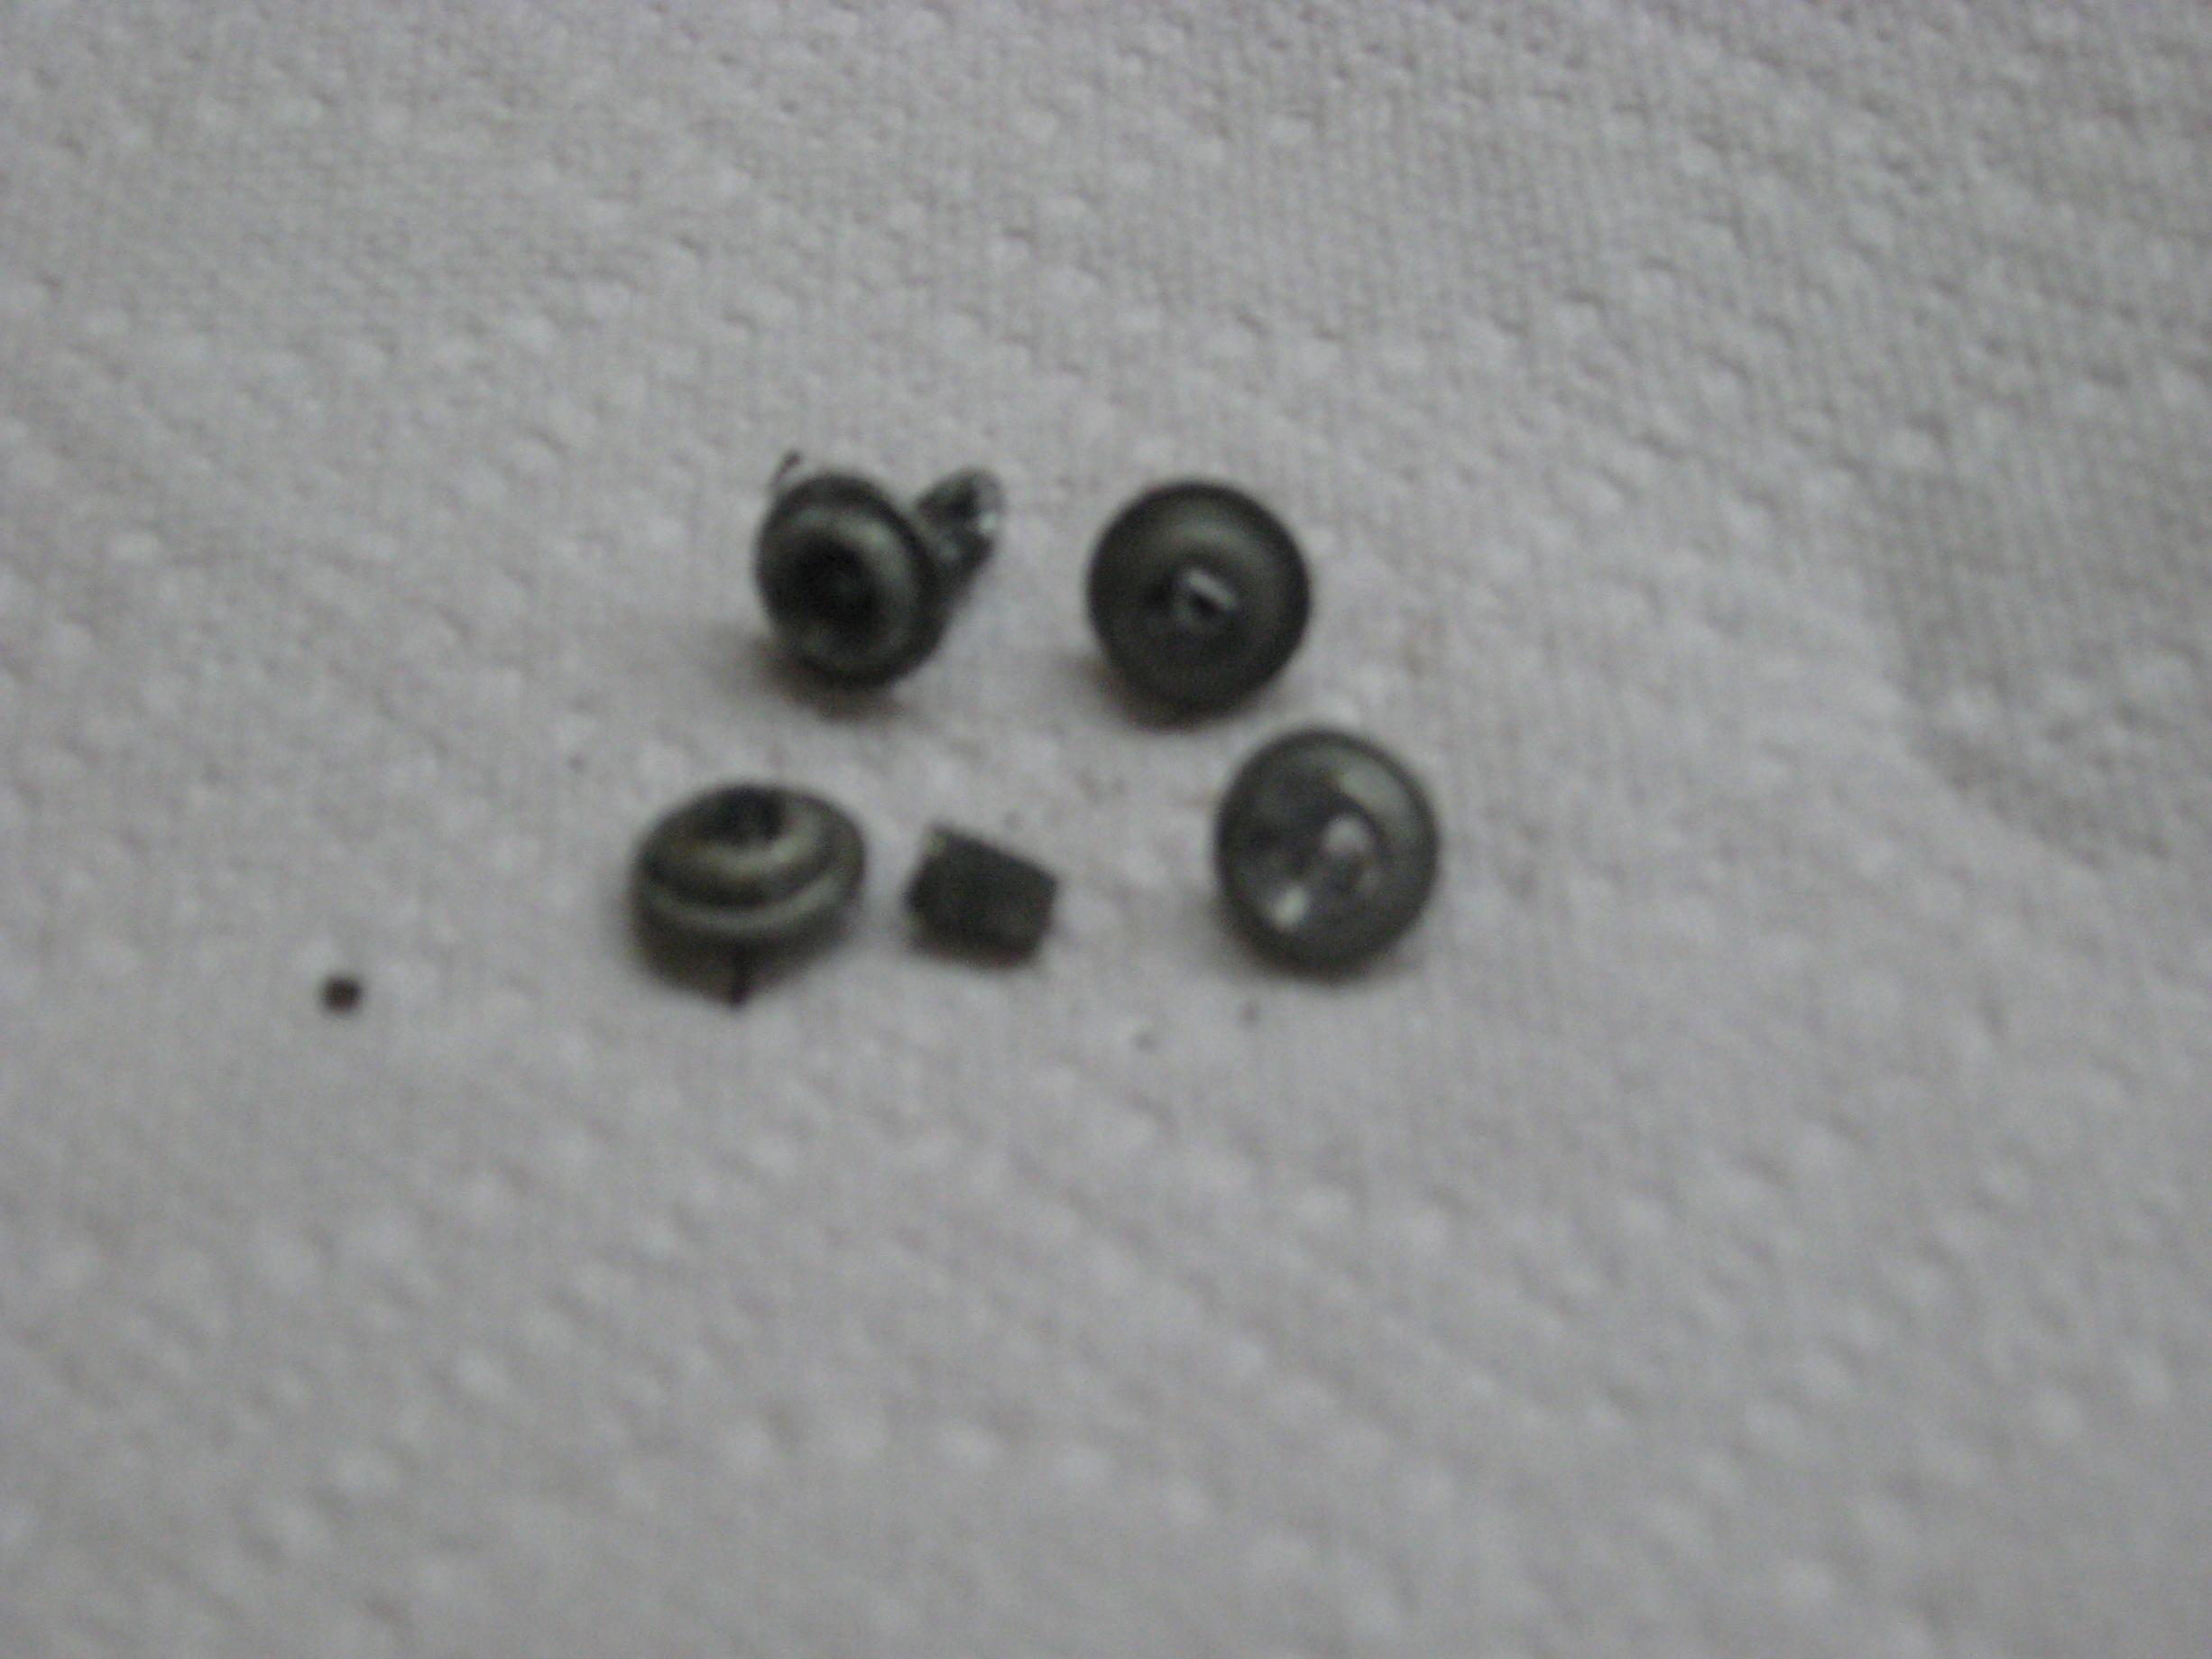
I did find myself taking it slow when I had to take the passenger headlight cover off. Someone had stripped all four screws that hold it in place. Soooooo, I got out my easy outs, and they didn't work, then eventually drilled the screws out. Had no choice! To make it more challenging, the hood hinge was in the way, so out they came. Sorry for the grainy pics everyone, I need a new camera. I have just a little pos that I've had for about 5 or 6 years now.
I wanted to take the seals out of the rotors before I commented on them but they were very carbonized. Makes me wonder if the 80 engine was rebuilt and then ran rich and became over carbonized?
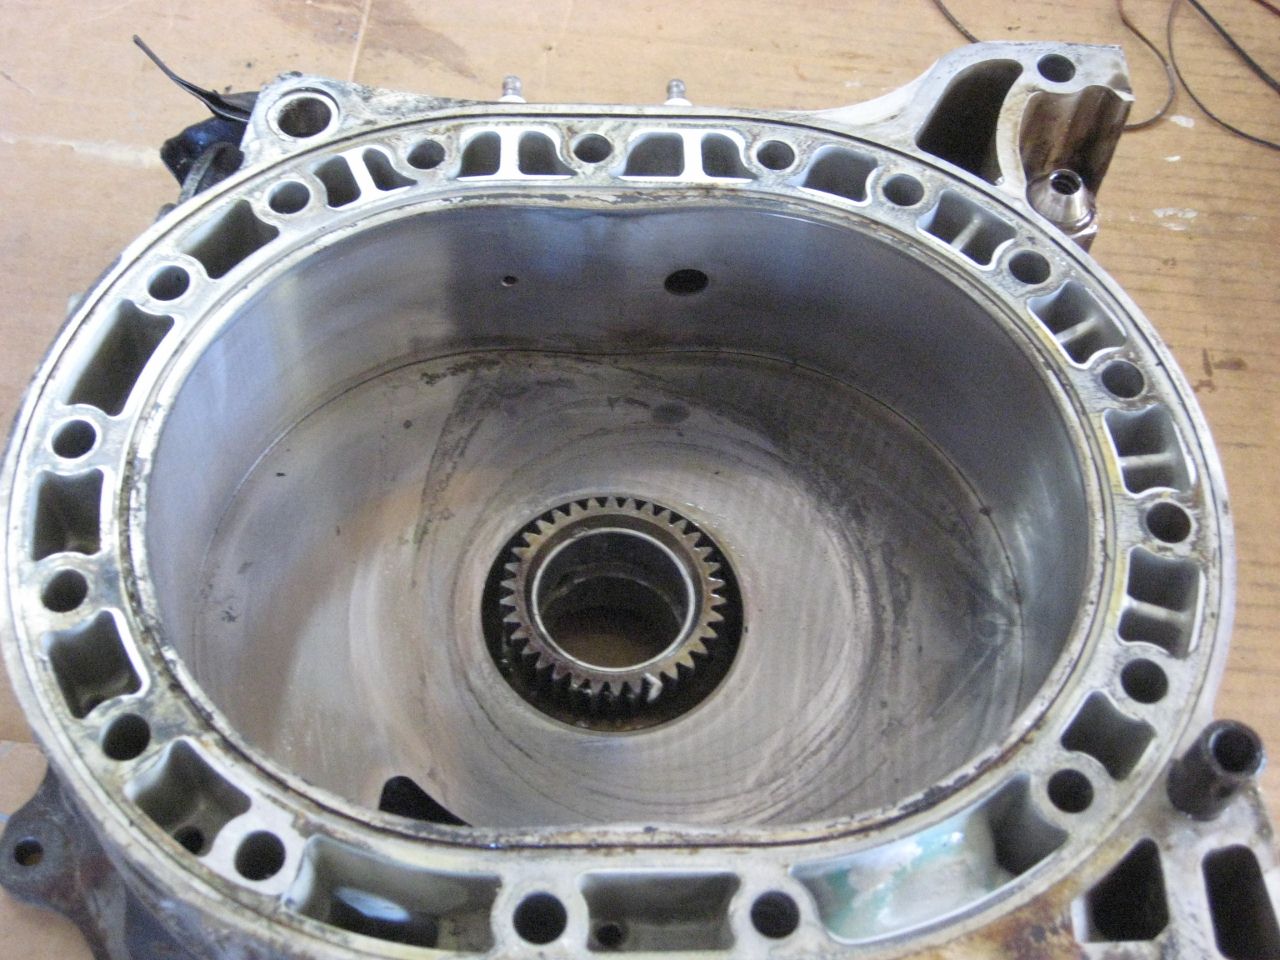
Here's pics of the rotors:
Attachment 489713
Attachment 489714
Attachment 489715
See what I mean? Lots of carbon build up.
So, I decide I have to clean these up and see if I can use any of the seals. In today's economy we all need to save as much jack as we can right? Well, here's the old me - impatient. The corner seals and side seals looked like nice tight fits, and they were. The corner seals came out ok, but the side seals were STUCK. Smh..
Well as I said, the old me came out tonight and tried to get those seals out and, I'm ashamed and embarassed to say it, two of the side seals broke. ARGH!!!!
To make matters worse, I was trying to force one of the broken pieces out of the rotor and damaged the groove. I. Am. An IDIOT!!
Couldn't get two of the o-ring seals off the rotors either, so the sensible me decided to give up and soak the rotors in cleaning solution for a few days to loosen up the carbon. Man I could kick myself.
Well, I feel like I have gotten my confession off my chest - just waiting for my punishment from the Rotary gods...
Make damn sure the side seals can move freely when you put it back together... That was one of my first mistakes. If they get stuck then you'll fry your oil control rings on the first run and blow smoke everywhere; then you have to build it again...
The oil control rings from the 80 engine were in pretty good shape, but I don't think I'm gonna reuse them. Something about reusing rubber/perishable gaskets and seals doesn't sound right.
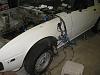
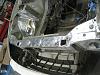
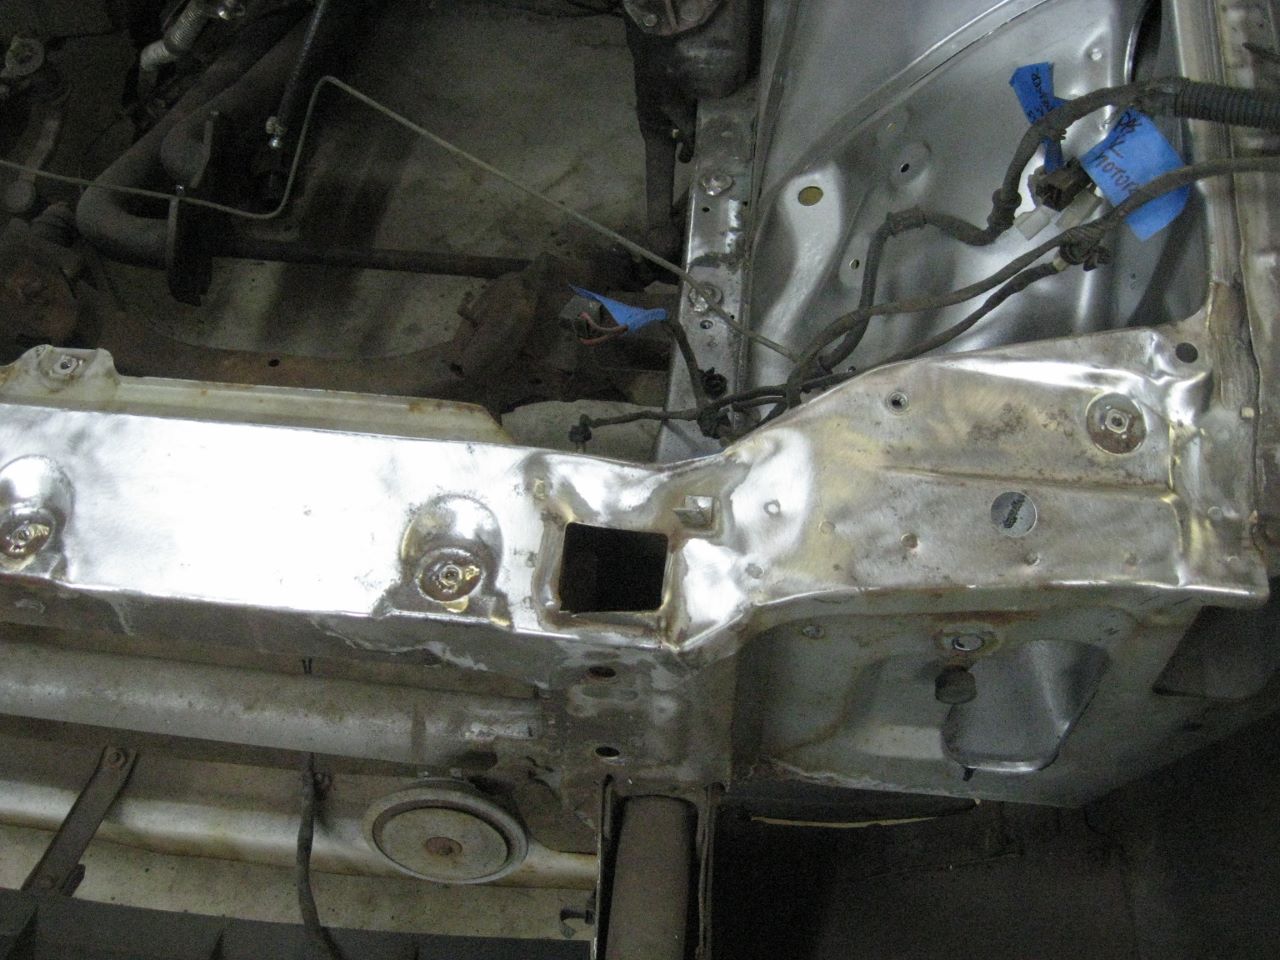
So I had some progress this weekend, and man getting after that rust is like opening up pandoras box. It seemed to get worse and worse. The more I sanded, the more I found. I ended up stripping bare quite a bit more than I thought I would. I'd start by hitting the obvious surface rust and then as I ground the area I could see other rust WITHIN the paint that hadn't broken through. UGH.
I found a couple of small holes in the frame on the passenger side that were hidden by the black tar-like undercoating. I see when I look at the pic that the inside of the frame is pretty rusty too. Hope that isn't a big issue. Check this out:
I remember seeing on Aaron Cake's Cosmo video that he used kerosene to take that stuff off, but I used a paint thinner. Just spread it on one small area at a time, let it soak, added more, let it soak, and rubbed it with a toothbrush and was able to quite easily take that stuff off. Of course I scraped a bit here and there, but paint thinner worked great to get that stuff off. I used some steel wool and paint thinner and it made those hard fuel lines look new.
Still have quite a bit of work to do to really make it right, and of course I haven't yet attacked the issue with a dremel yet but I will. I've pretty much gotten all of the areas I can with my drill and sanding discs. All the other areas I need to use the dremel on. I have to put in an order for some POR-15 and get this baby sealed up before the bare metal really starts to rust over again.
More of the same...
Haven't had a lot of time in the last month to do much with Dad's baby. He came by for a few days and really seemed to like the progress so far.
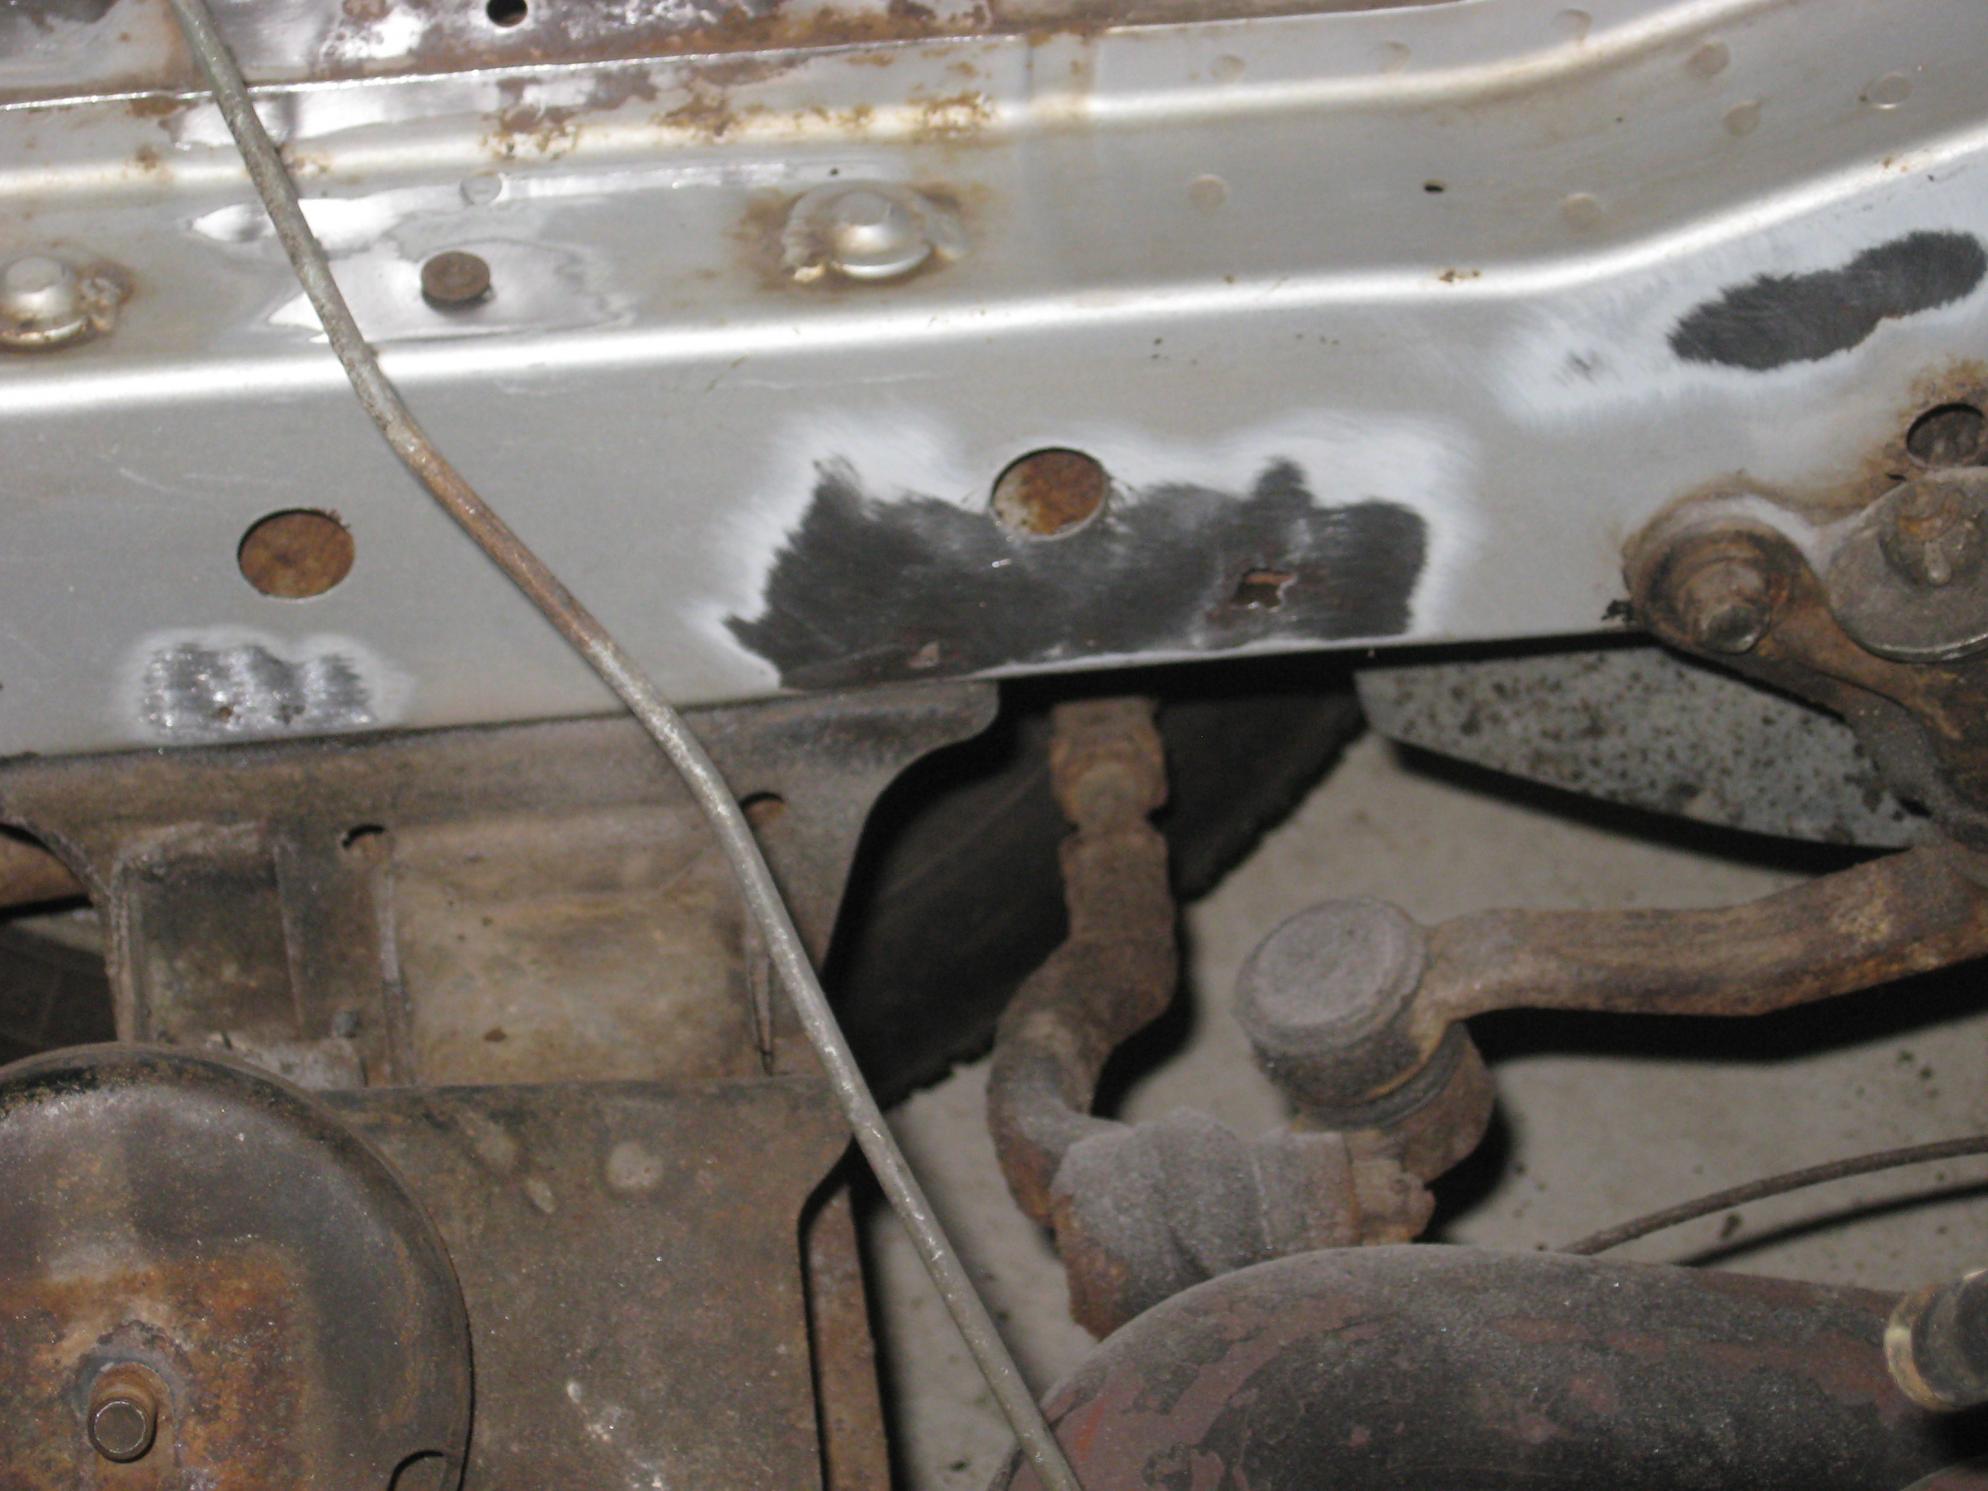
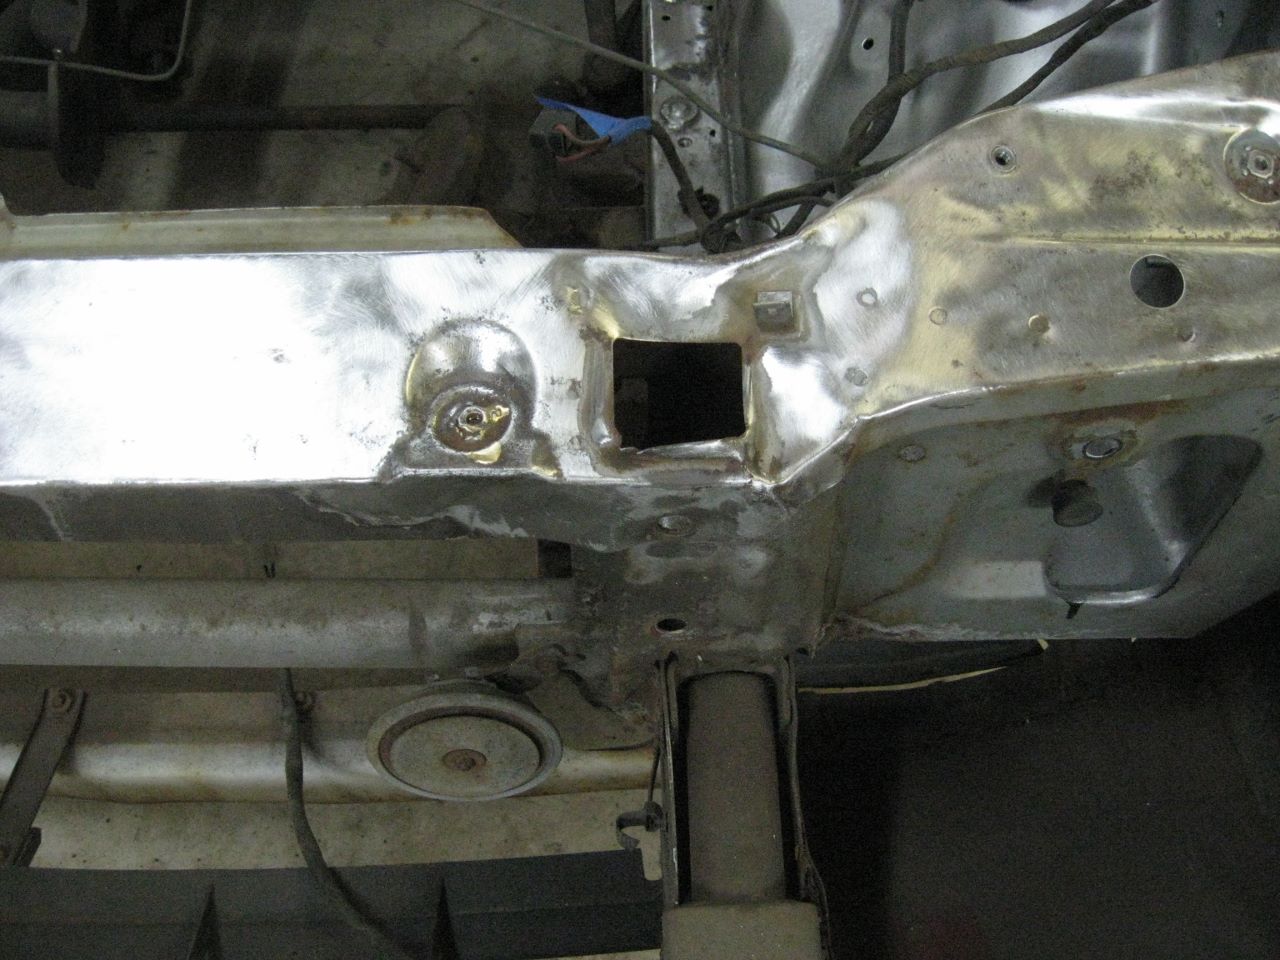
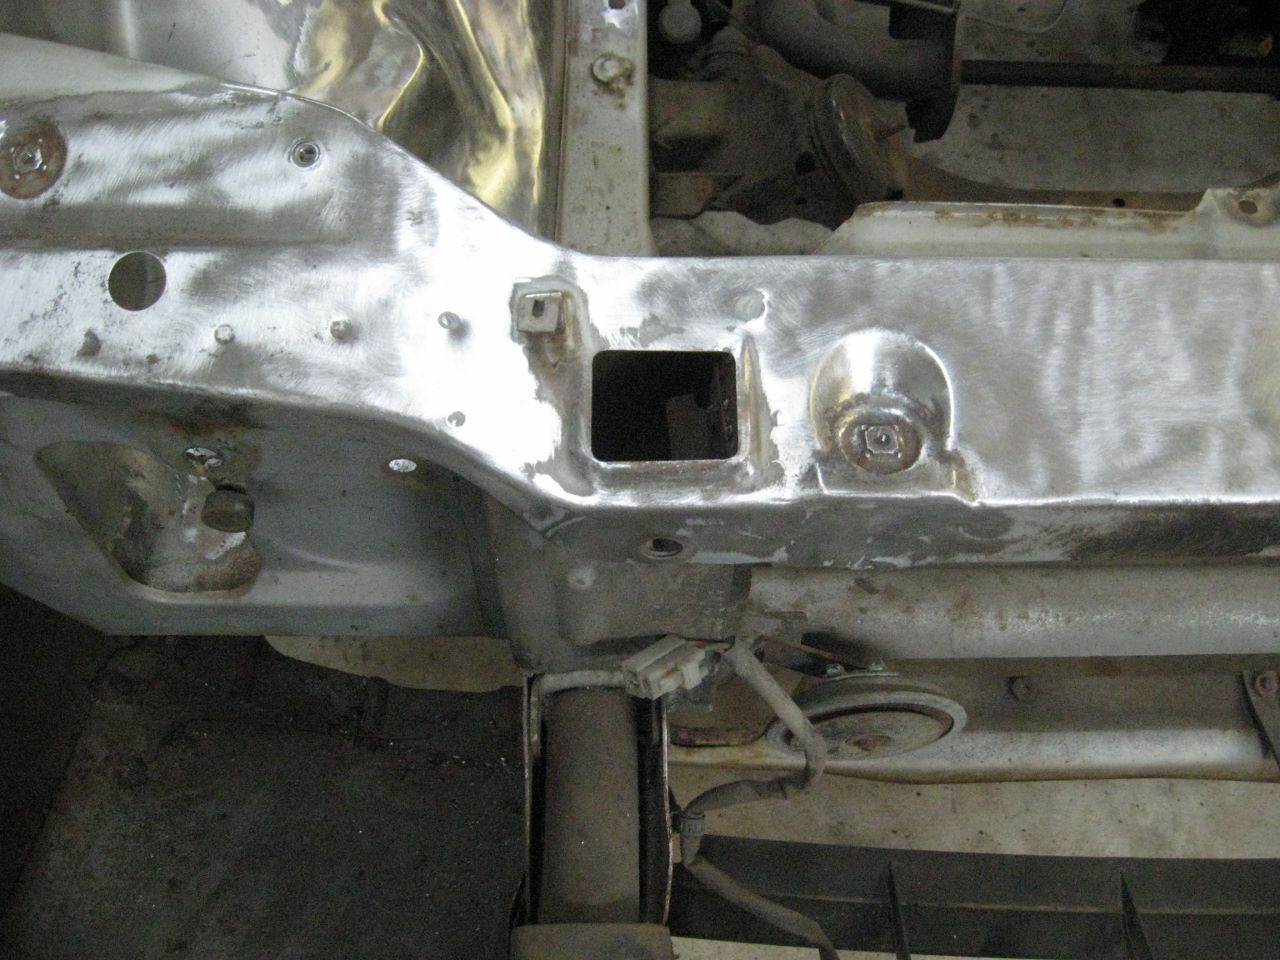
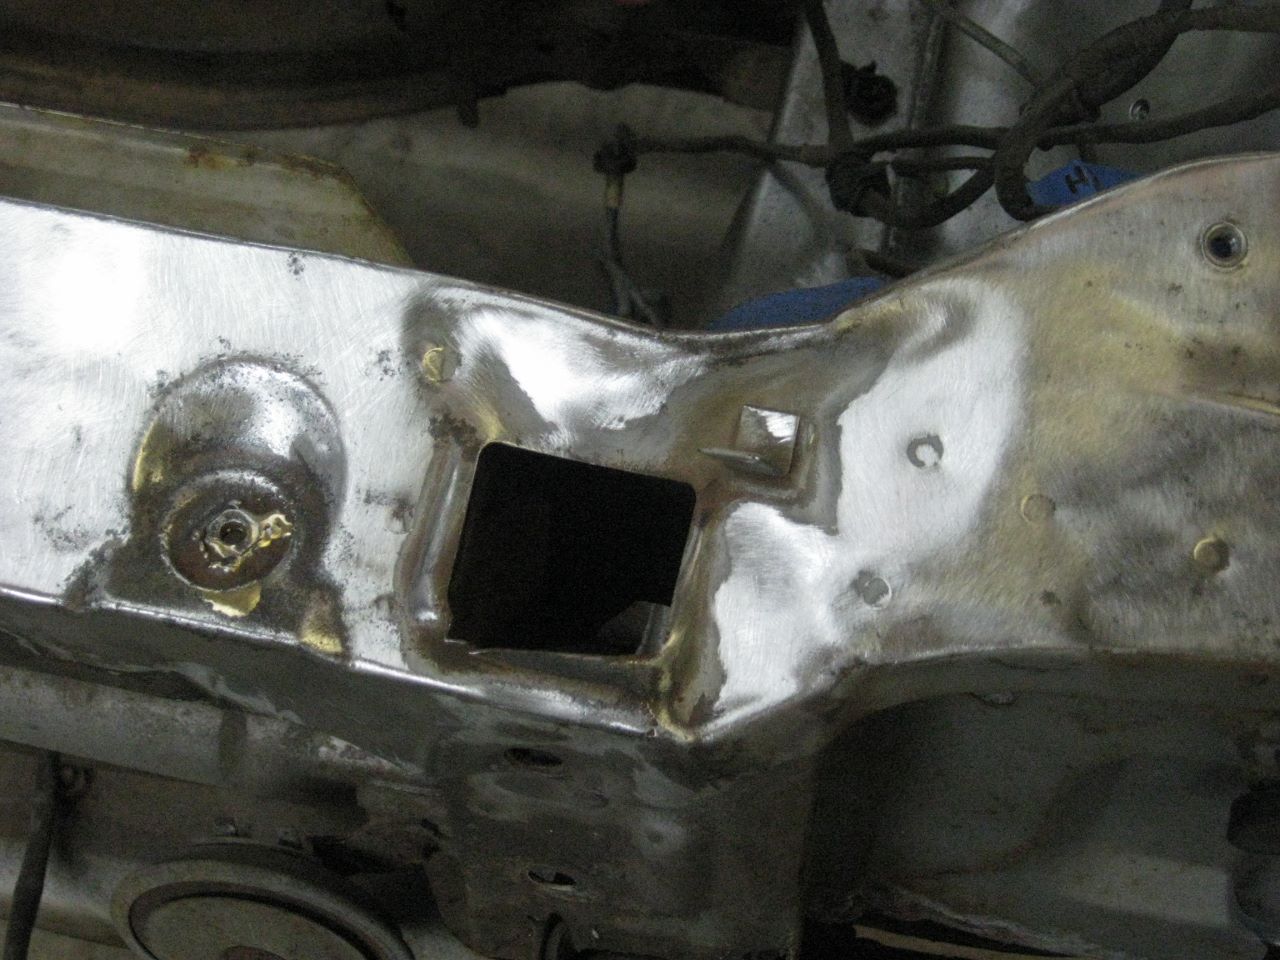
When I was fixing up the rusty battery tray area I found evidence of an accident in this car's history. Today I got to do a little more restoration/rust stripping. Take a look at the hole where the hood prop goes in on the drivers side. All bent up!


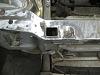
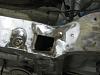
When I was fixing up the rusty battery tray area I found evidence of an accident in this car's history. Today I got to do a little more restoration/rust stripping. Take a look at the hole where the hood prop goes in on the drivers side. All bent up!

I'm a little late to the party but can see you have been very busy. Congrauts on all the work accomplished so far! I'll subscribe just to see how it continues and if you need any help I might be able to provide.
Thanks!
Thanks Bonzai! I def am a beginner and with the warm months coming can hopefully start painting some engine parts and get the engine bay painted.
Anyone know what kind of dremel attachment I can use to get into those tiny nooks and small spaces? I've tried stainless brushes, carbon steel brushes, brass brushes and they all fall apart after about 5 minutes, even with light pressure. Those bristles fly out of there and I look like pinhead from that movie Hellraiser. Yes, they actually stick into my face from time to time. Safety glasses are a MUST.
I have the stones, but they're too hard and do more grinding than I want. I saw DD's post about a course sponge which I've used so far on the larger spaces with my drill, but I can't find anything like that for the dremel.
Of course, sand paper and elbow grease work, but was hoping for something I could use with my dremel. Anyone have any ideas?
It takes a long time with sand paper to get in the nooks. 
If its grime and grit a gasoline bath helps. Followed by a brillo pad or scotchbrite.
^^ After getting all the junks out then you follow up with sandpaper and mothers mag/al polish.
EDIT: I used this engine paint... I guess its not so bad I'm just used to un-finished polished Al. (which looks better) BUT in an engine bay that isn't cleaned as frequently as the outside of the car it doesn't matter as much.
I can also STRONGLY recomend using Mother's brand polish. I don't like Meguires.
Also, I bake any part that I paint in my oven at 400deg F after I paint it. I don't think the engine that only gets up to about 190 around the exhuast can cure the 500 degree paint.
Last edited by Qingdao; Mar 24, 2013 at 08:49 PM.
Have you been to an automotive paint and supply store or searched under 3M products? They make course scotch brite disks that mount to an arbor. The small crevis's are where you may just have to work it by hand unless you have access to any blast equipment.
I've heard of people I know using Aircraft aluminum stripper, but I've got no personal experince with it. Also, I don't know if the chrome innerds would agree with it (I don't imagine they would mind).
I also borrowed a small sandblast unit. I'll have to set up / create the tent in my garage like Aaron Cake did in his video. I'll post up pics and share the progress. Since it's small I'll use the discs to get at the stuff that I can reach with the drill and leave the crevices and angles for the blaster. It's small, like 1 quart small, but it will work for the small amount of area I need. That's the plan anyway. Never done that sort of thing, but then again most all of this is new to me!
As I said awhile back, this rust chasing expedition is like opening Pandora's box. I knocked the springs down to gain free access to the top of the shock towers, and looked underneath real good with a flashlight and did some probing and found (drum roll please) more RUST!! I did unbolt the fenders and looked beneath them and luckily there isn't any rust under them. One of the junkyard cars I saw last fall had a TON of rust hidden under the almost pristine looking fenders so I was a bit worried.
So now I'm thinking of dropping the front suspension altoghter and blasting the underside of the frame, wheel wells, and everything else on the front of the car, and the suspension parts and motor mounts, etc... Glad I don't have a deadline!!

As for the aircraft stripper Qingdao, I'll try it. It definitely can't hurt and may make removing stuff like undercoating and paint easier and quicker than grinding! I'm getting anxious to finish this part of the resto now that I can kinda visualize what it'll look like. Hoping for warmer weather, but that doesn't necessarily mean more time to spend on the car - it mainly means more games/practices for three kids at the same time!!
Last edited by woodmv; Mar 25, 2013 at 08:56 PM.
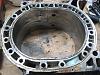
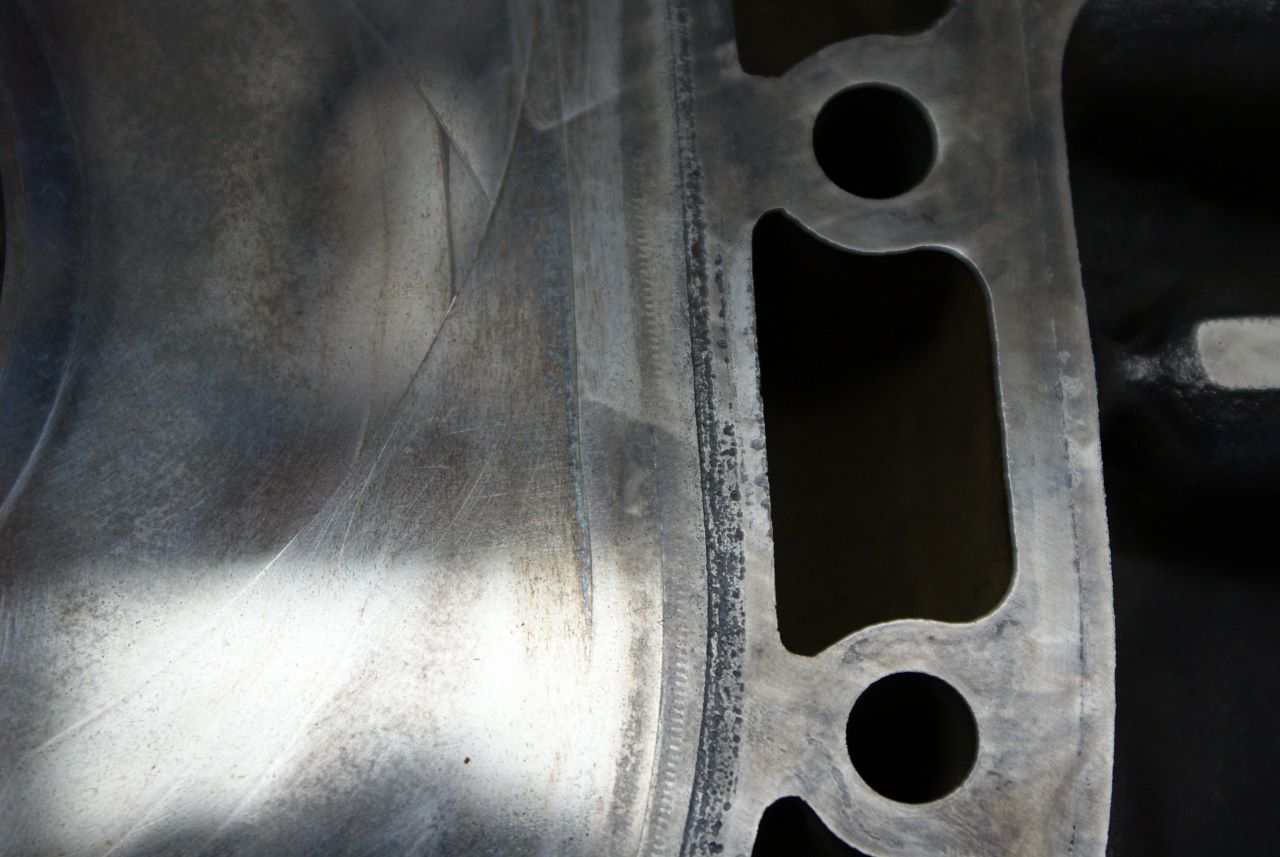
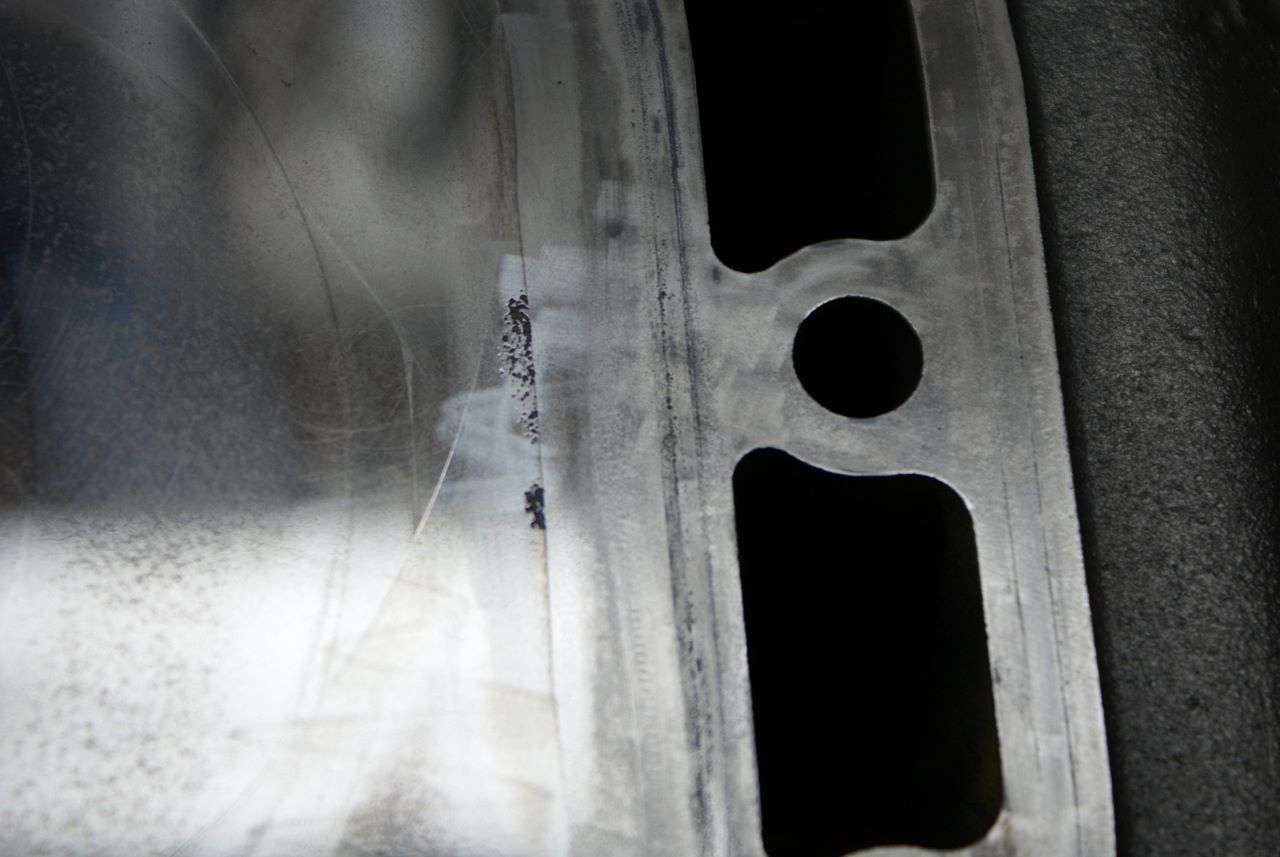
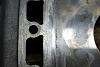
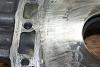
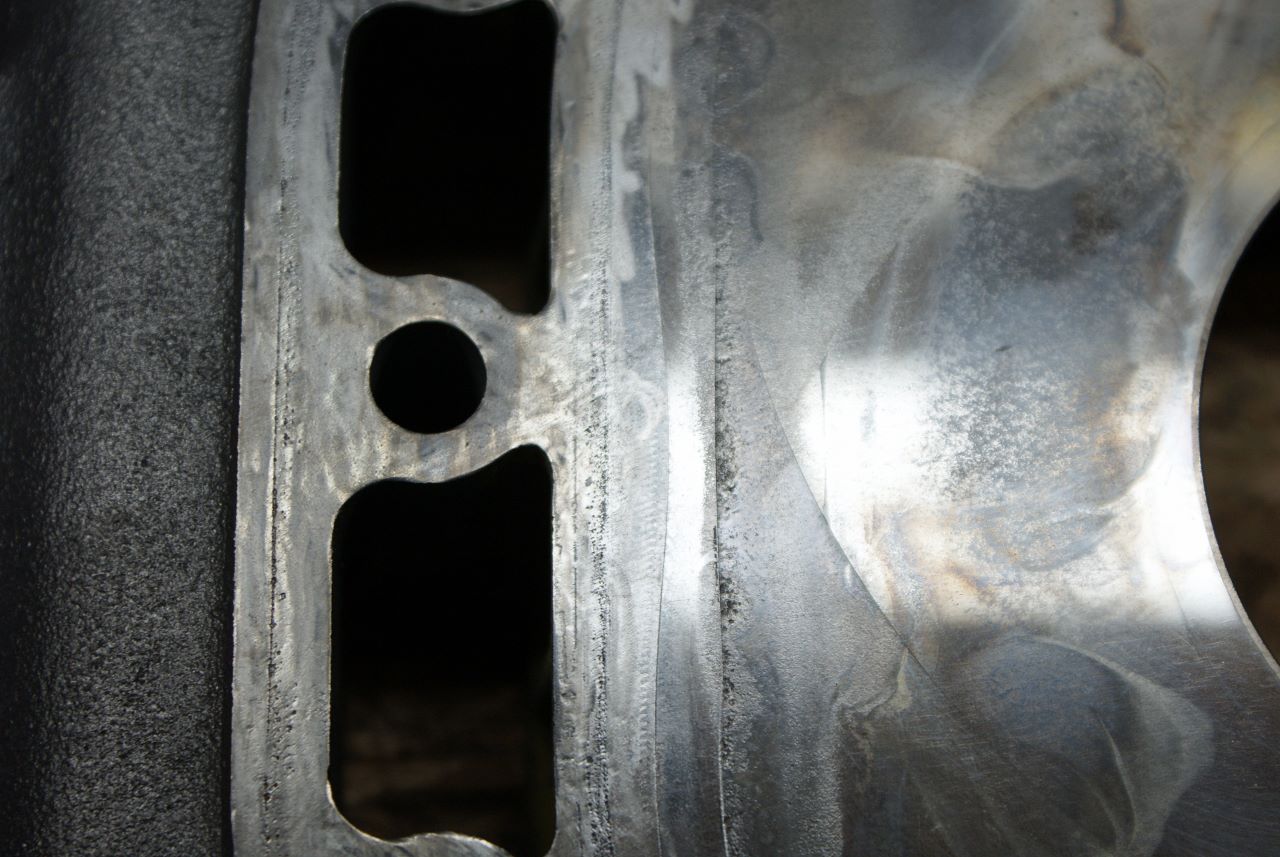
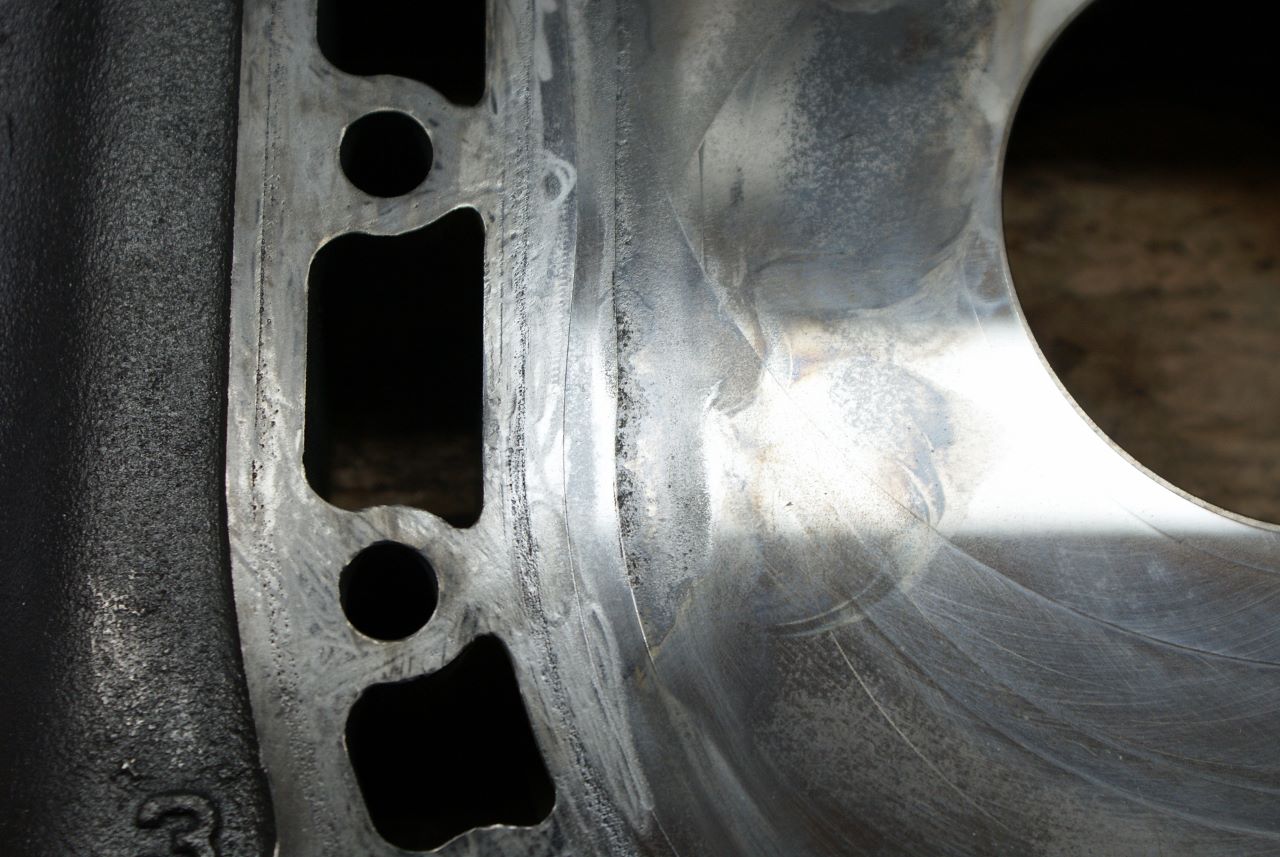
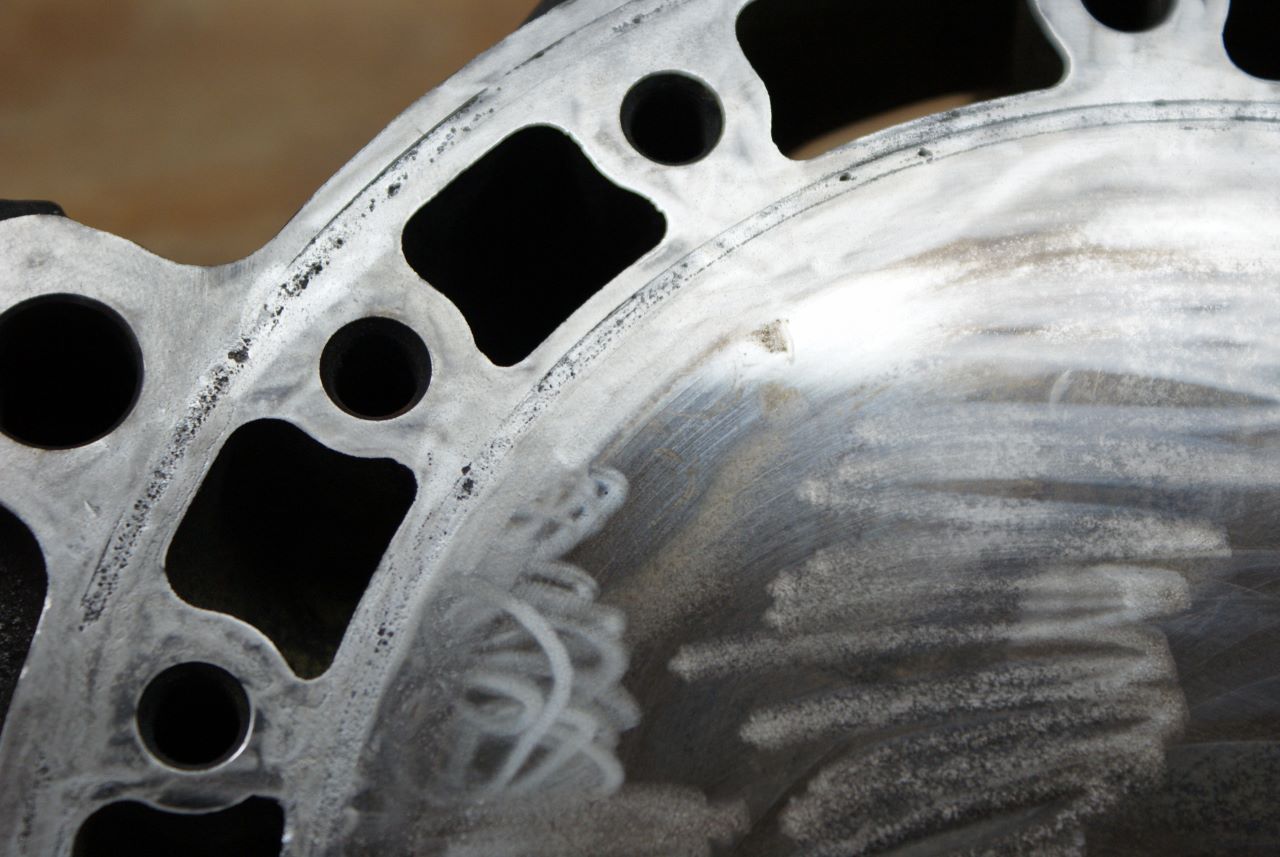
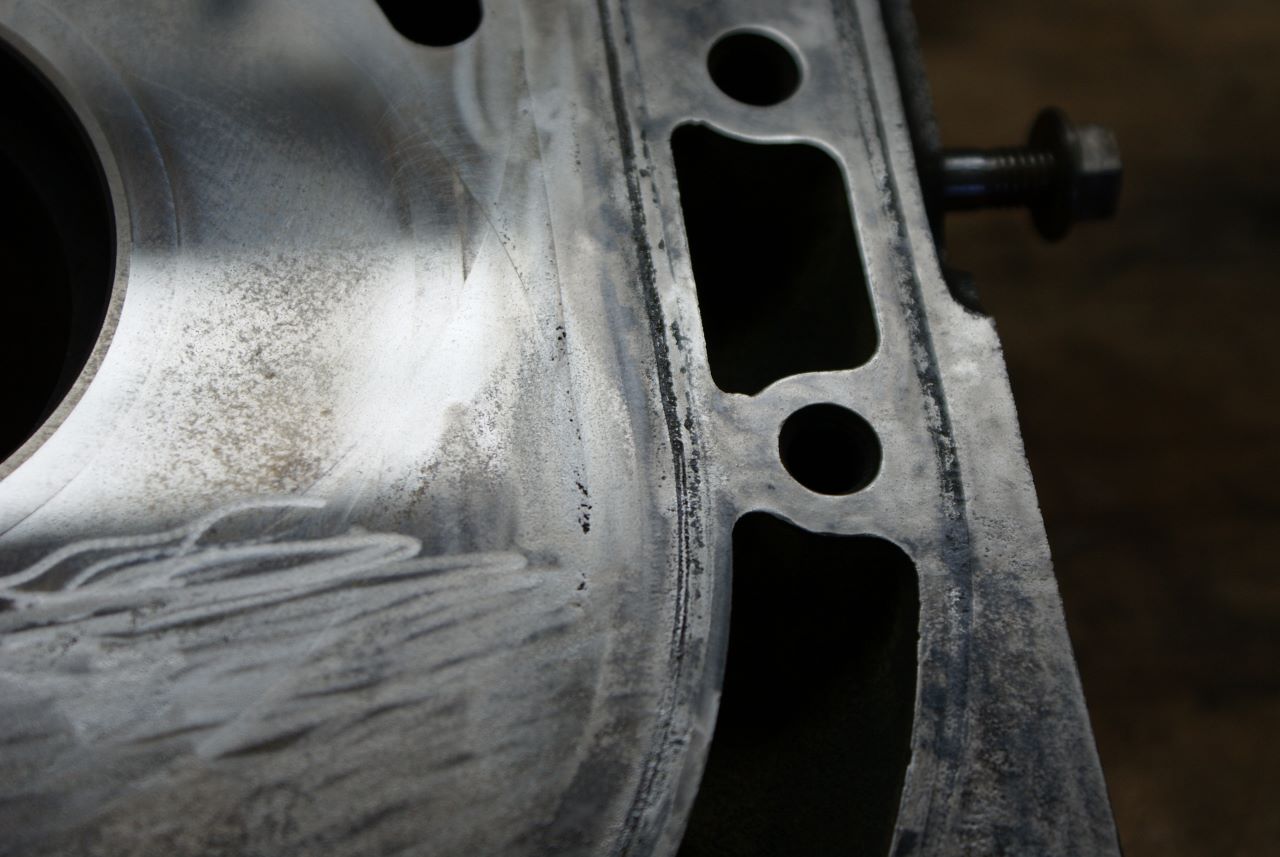
Is this bad?? Looking for opinions please!
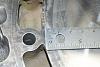
Finally got around to taking a good hard look at the irons from the 79 engine and measured some wear. I think the rear iron is out of tolerance for pitting along the water jacket o-ring seal into the combustion area. It extends into the combustion chamber by almost 2 mm, so I think that means the rear iron is shot, right?


Pitting on o-ring seal seating surfaces - HELP!!
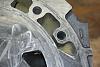
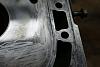
OMG. Look at the pitting all over these irons. These came out of my 79, and I'm not sure if it's normal to see pitting on the seating surfaces where the o-rings for the water seal seat. It looks pretty bad to me. Not sure how to measure it. I have a dial guage, but nothing that will probe the depths of the pitting.

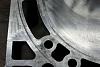
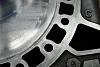
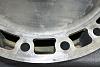
Opinions please! I have searched and searched and cannot find anything on measuring pitting on the irons. Haven't seen anyone's irons on here this bad either so does anyone know if the pitting makes these irons no good anymore?
I'm beginning to think this 79 engine is kaput...

Opinions please! I have searched and searched and cannot find anything on measuring pitting on the irons. Haven't seen anyone's irons on here this bad either so does anyone know if the pitting makes these irons no good anymore?
I'm beginning to think this 79 engine is kaput...
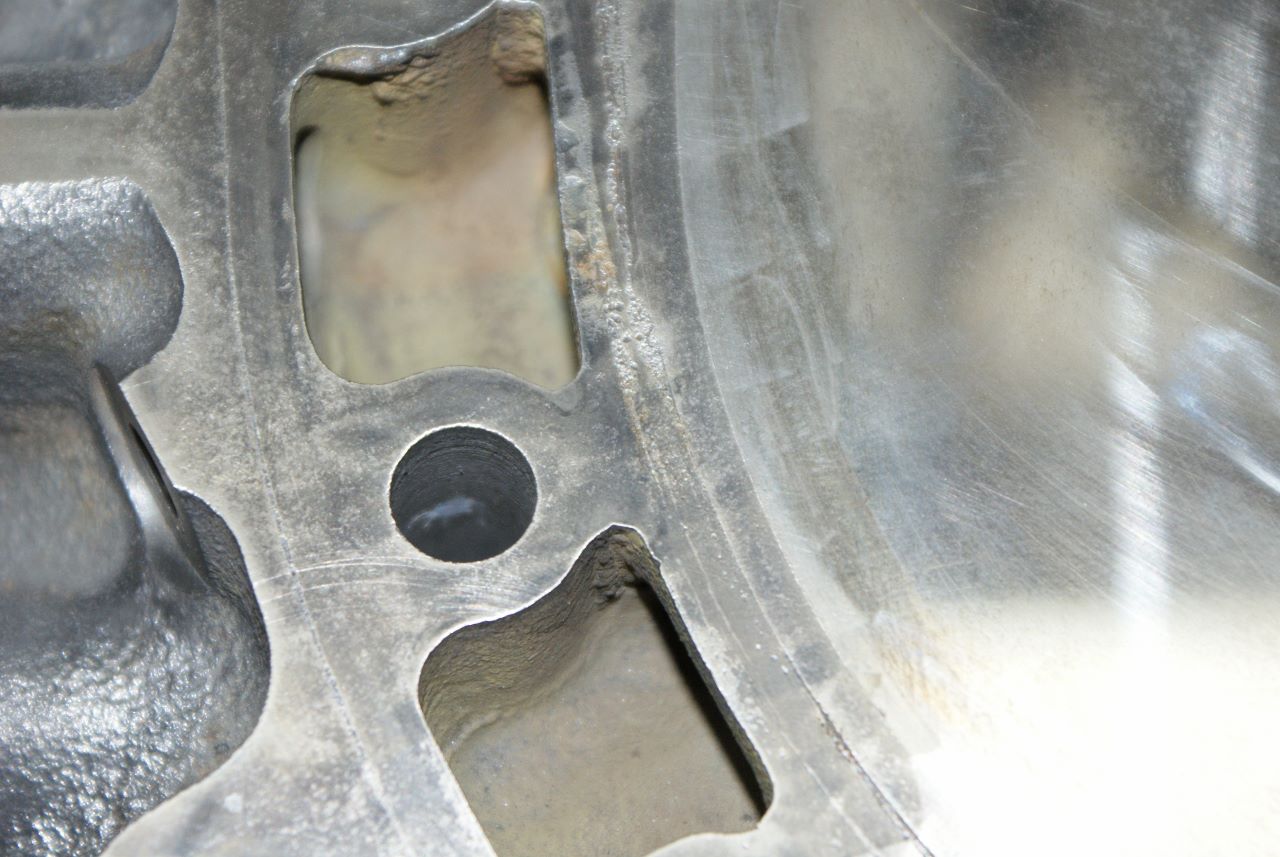
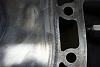
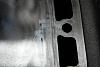
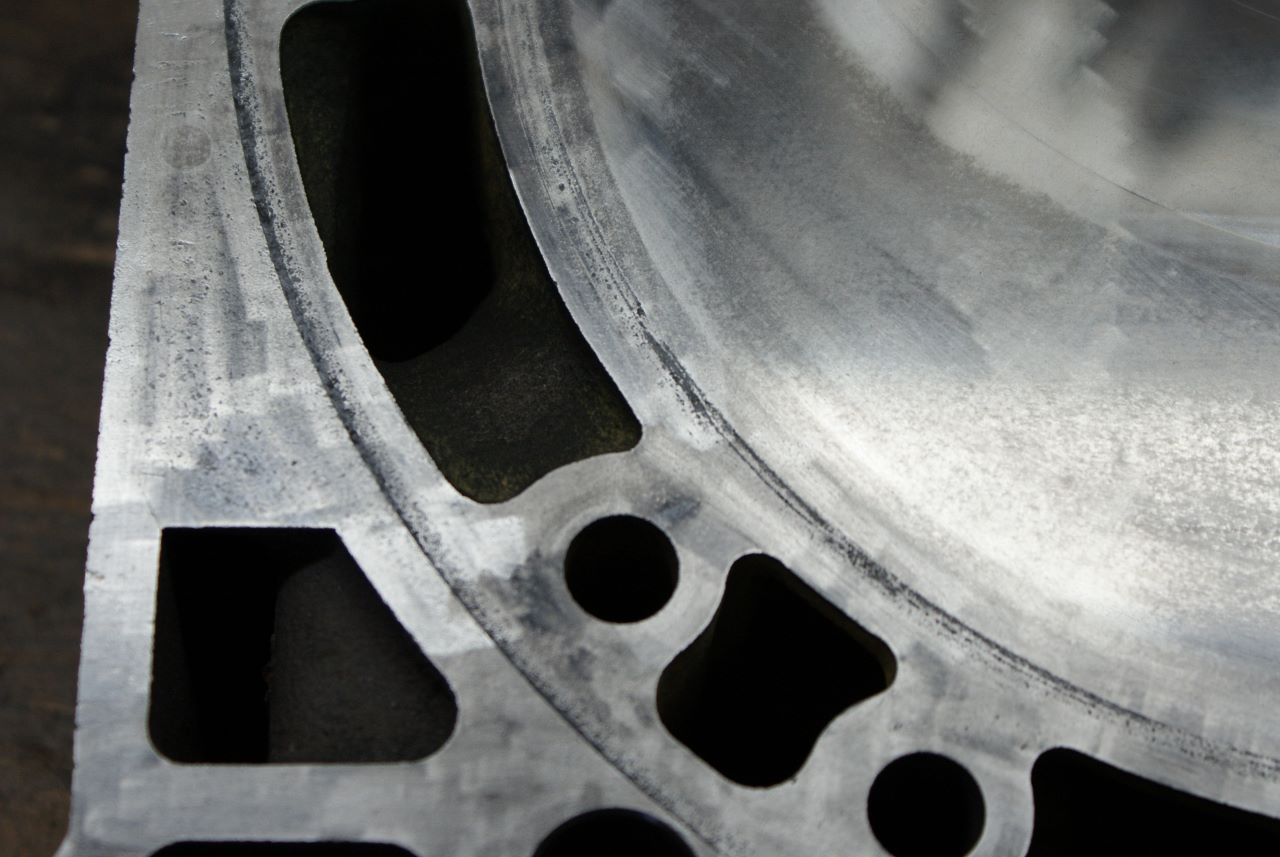
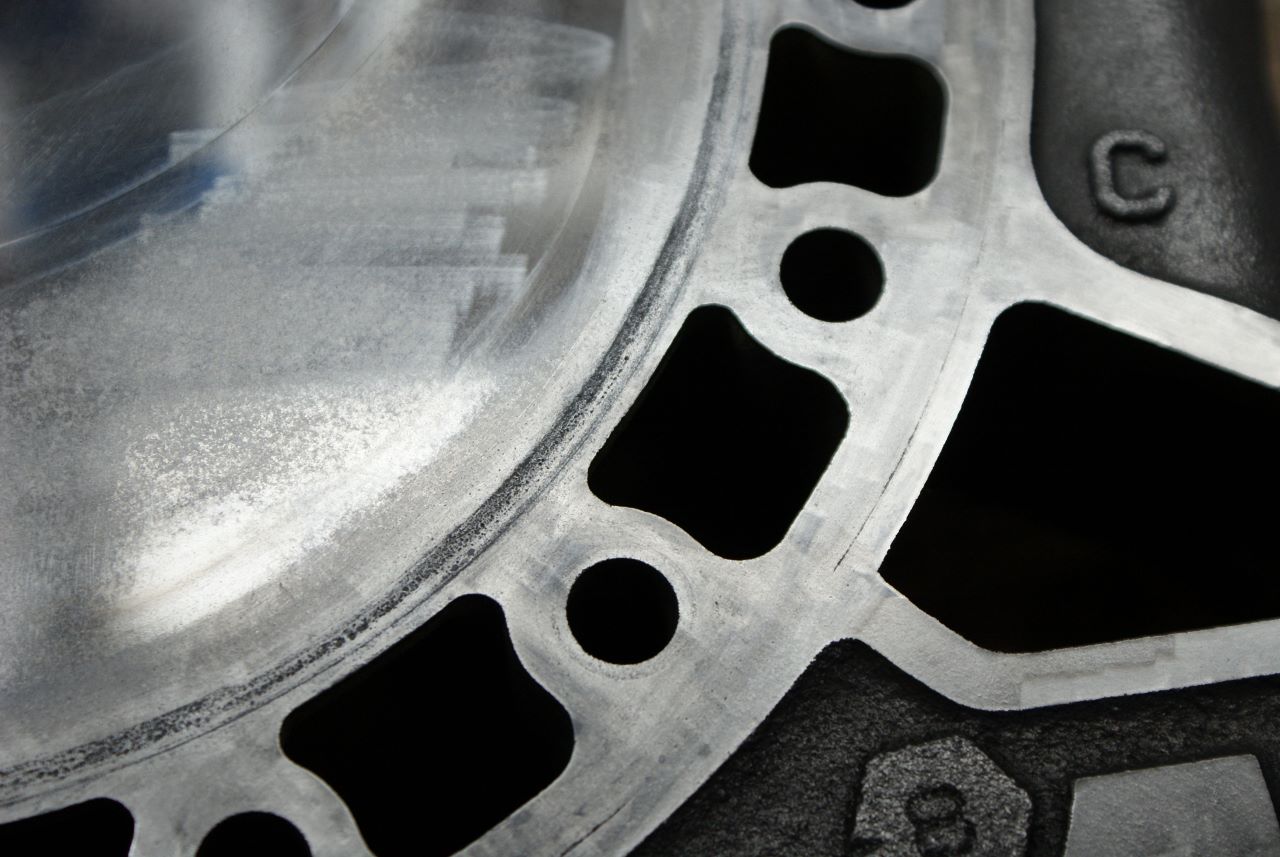
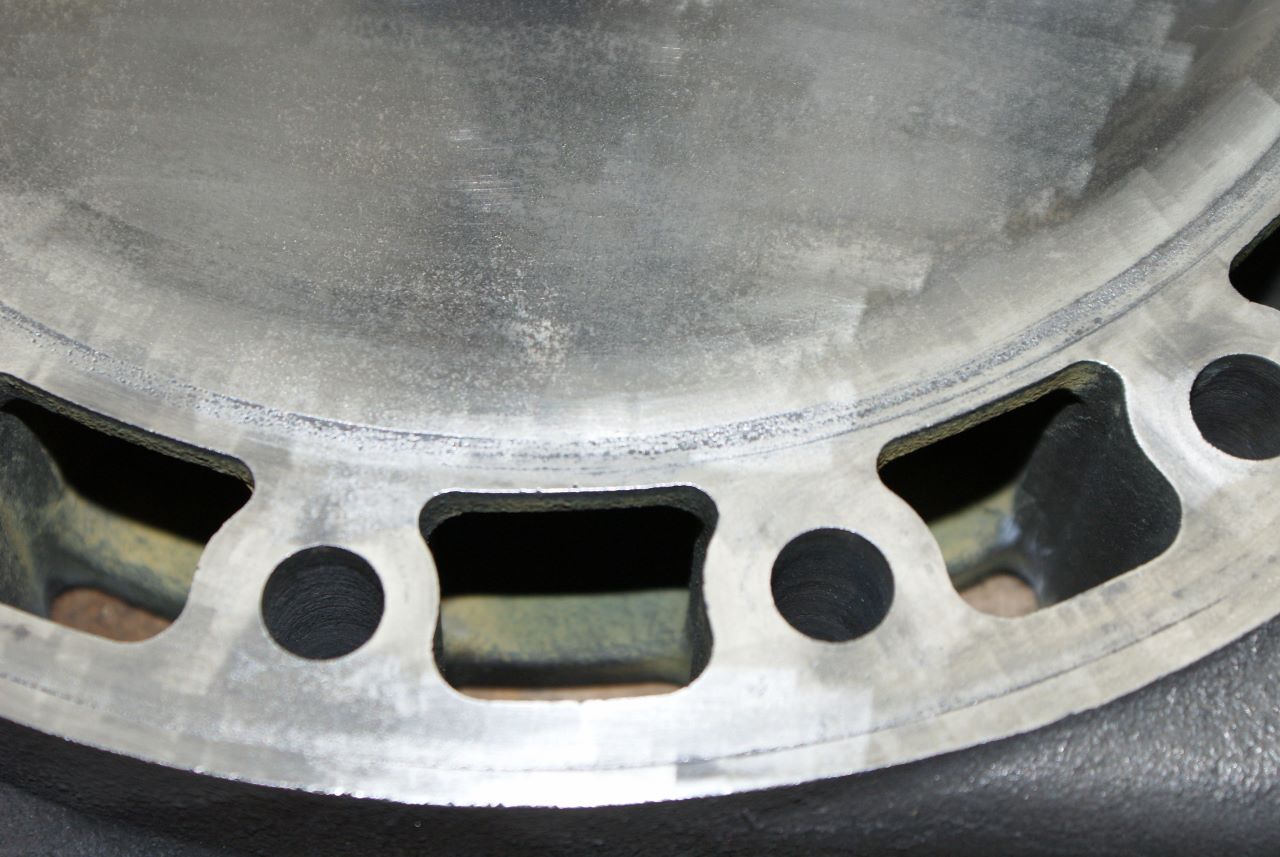
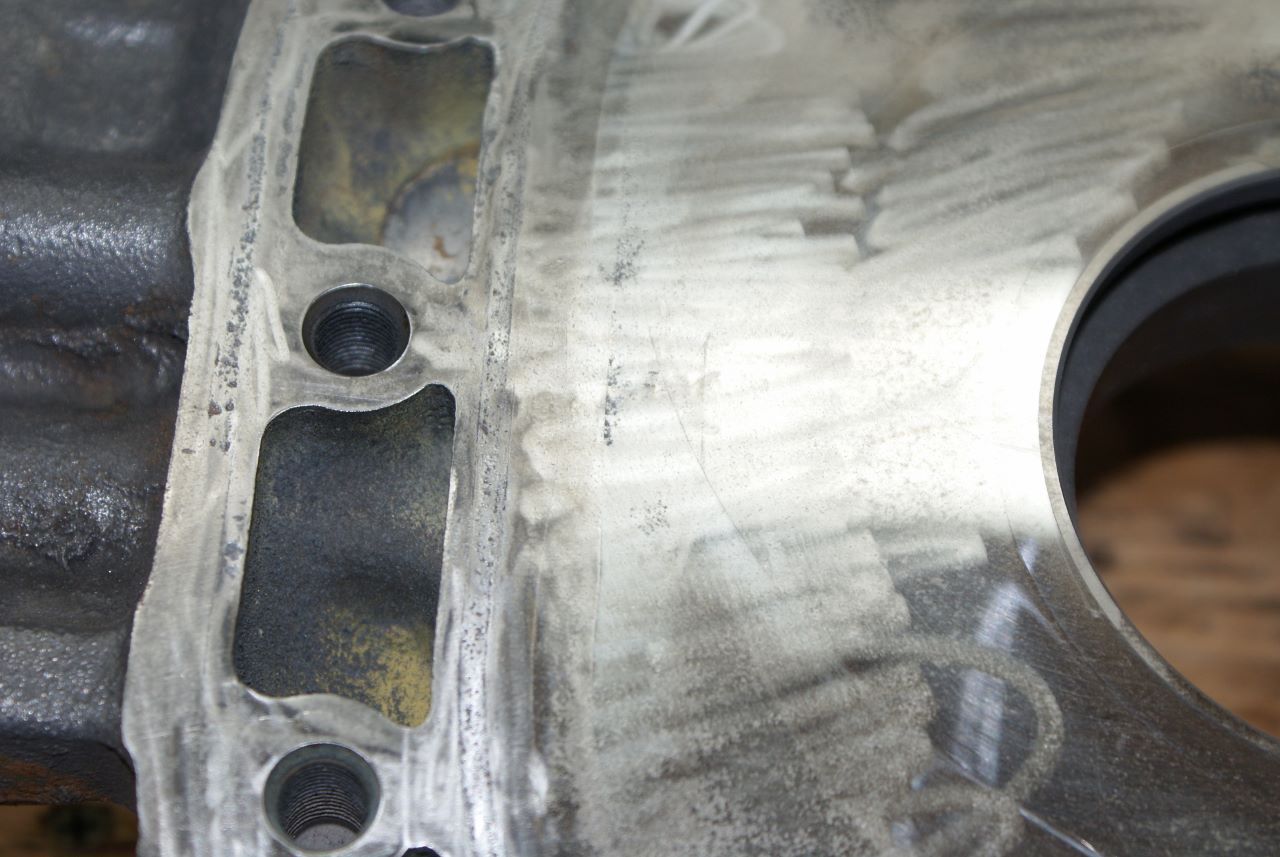
More pitting...
Here's a few more shots. I found some pitting adjacent to the water seal seating areas in the combustion area. Not sure if that's normal or not?
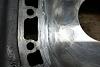

Again, all opinions welcome!

Again, all opinions welcome!
I had a major water leak with pitting like that. We rebuilt the engine thinking it was not an issue. After the rebuild water was pouring out the exhaust. I won't use those irons. If you can find 81-85 irons you could get away from the thermal reactor. Irons are cheap.
I had a major water leak with pitting like that. We rebuilt the engine thinking it was not an issue. After the rebuild water was pouring out the exhaust. I won't use those irons. If you can find 81-85 irons you could get away from the thermal reactor. Irons are cheap.

This might be a crackpot idea, but shouldn't the pits be spherical in shape?
Couldn't you get a rough idea as to their depth if you messured their diameter? Then you can figure out if you can turn the irons flat.
At least your coolent groves are in the housings!
Looks like you can get away with turning them.
Couldn't you get a rough idea as to their depth if you messured their diameter? Then you can figure out if you can turn the irons flat.
At least your coolent groves are in the housings!
Looks like you can get away with turning them.
Last edited by Qingdao; Apr 1, 2013 at 11:46 PM.
The best way I know to measure pitting is to get some putty or clay and press it over the worst looking area then gently lift it off, taking care not to distort it. You then have a reverse mold of the pit as a small mound. From there, an optical comparitor (an inspection measurement device) works good to measure the height (depth) of the pit. I realize you probably don't have access to a comparitor, but with a good eye and careful technique, you'd be surprised how close you can measure with a 6" precision machinist scale. I used to be able to measure to between .005 /.010 (five to ten thousands of an inch) just by eye and the 64th side of my scale.
Just a thought, has anyone ever tried filling in a deep pit with Devcon or liquid steel or something? This isn't a surface under load or wear, it just for sealing purposes.
Just a thought, has anyone ever tried filling in a deep pit with Devcon or liquid steel or something? This isn't a surface under load or wear, it just for sealing purposes.
This might be a crackpot idea, but shouldn't the pits be spherical in shape?
Couldn't you get a rough idea as to their depth if you messured their diameter? Then you can figure out if you can turn the irons flat.
At least your coolent groves are in the housings!
Looks like you can get away with turning them.
Couldn't you get a rough idea as to their depth if you messured their diameter? Then you can figure out if you can turn the irons flat.
At least your coolent groves are in the housings!
Looks like you can get away with turning them.
The best way I know to measure pitting is to get some putty or clay and press it over the worst looking area then gently lift it off, taking care not to distort it. You then have a reverse mold of the pit as a small mound. From there, an optical comparitor (an inspection measurement device) works good to measure the height (depth) of the pit. I realize you probably don't have access to a comparitor, but with a good eye and careful technique, you'd be surprised how close you can measure with a 6" precision machinist scale. I used to be able to measure to between .005 /.010 (five to ten thousands of an inch) just by eye and the 64th side of my scale.
Just a thought, has anyone ever tried filling in a deep pit with Devcon or liquid steel or something? This isn't a surface under load or wear, it just for sealing purposes.
Just a thought, has anyone ever tried filling in a deep pit with Devcon or liquid steel or something? This isn't a surface under load or wear, it just for sealing purposes.