
FrankenRex Will Rise: stuffing a GSL-SE into a'79 SA

Thread Starter


Joined: Feb 2004
Posts: 1,202
Likes: 98
From: Euless, TX
Supplies for today's adventures:
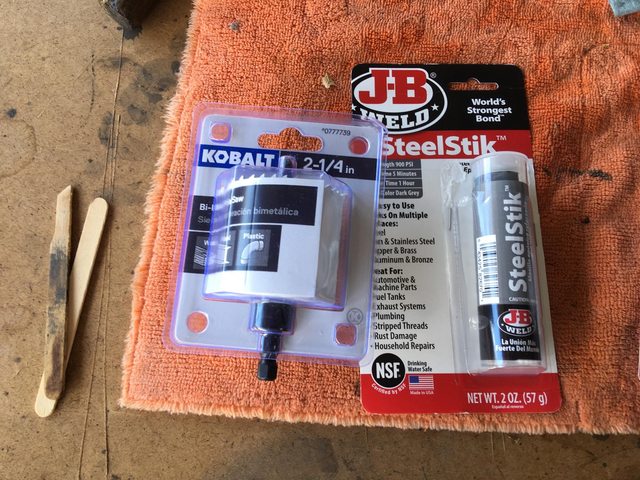
2-1/4" bi-metal hole saw. I didn't have *any* hole saws for metal, nor a 2-1/4". The actual hole I need is 2-1/2", but it's got an 1/8" lip that I need to account for, hence 2-1/4".
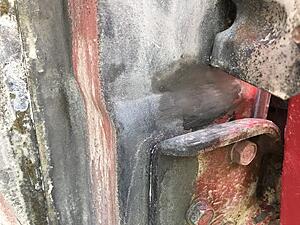
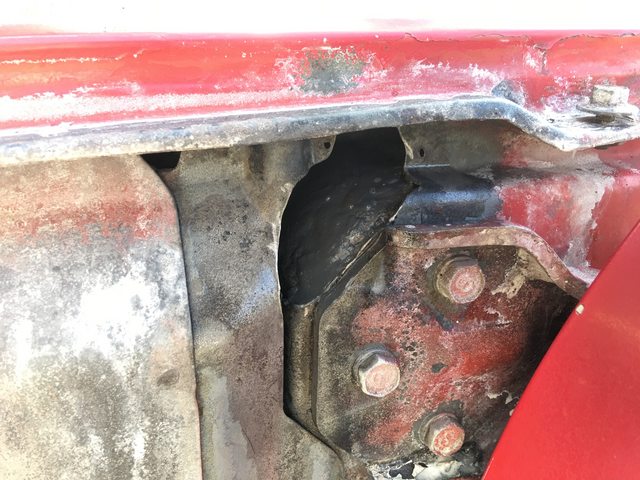
To start off on the cowl rust, I used a small grinding stone on the Dremel to get rid of the thin, jagged edges:
Then slathered it in the epoxy:

Terrible picture. I'm sorry.
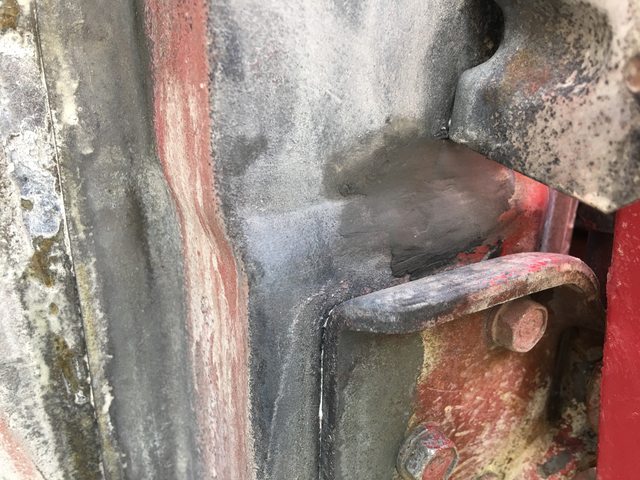
The rust over by the hinge:

After a little cleanup:

The cowl area will probably get POR-15, and probably a coat of seam sealer, and will get painted with the epoxy primer along with everything else.
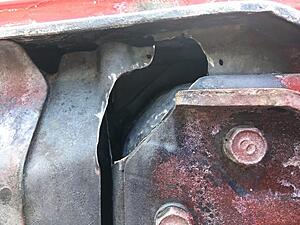
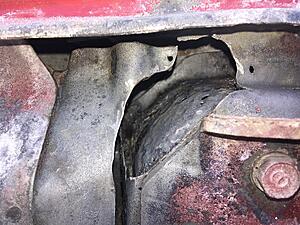
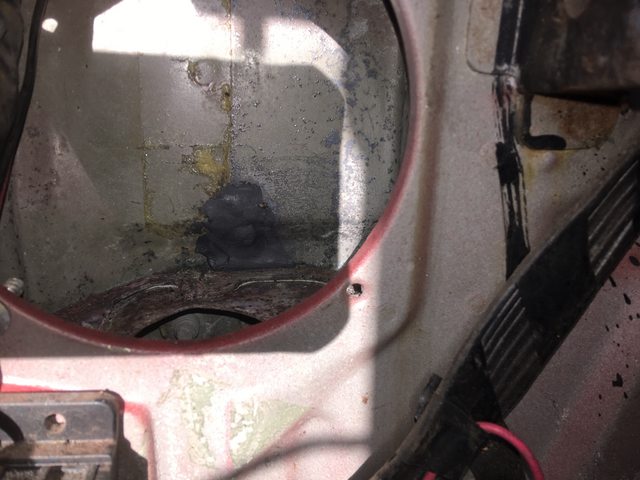
So, since there was rust on the driver's side, let's go have a look at the other side.
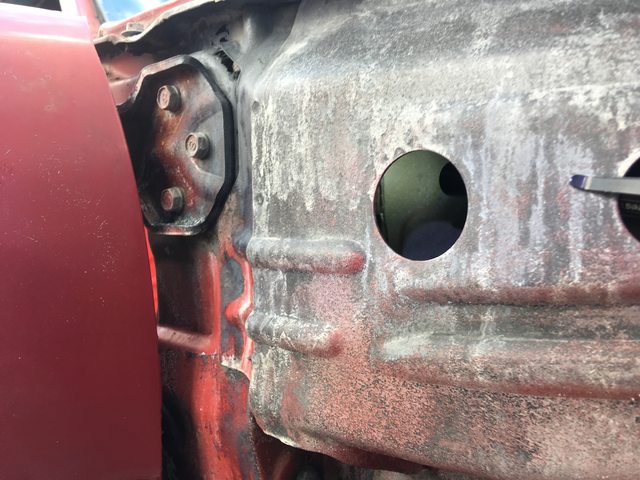
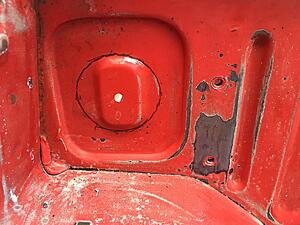
Wide angle was posted a few pics up. Didn't look too bad, but given what was in the other side, I was concerned. Can we get a look in here?:

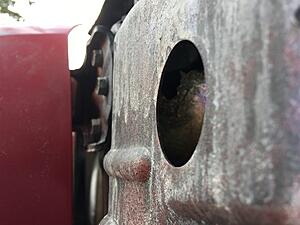
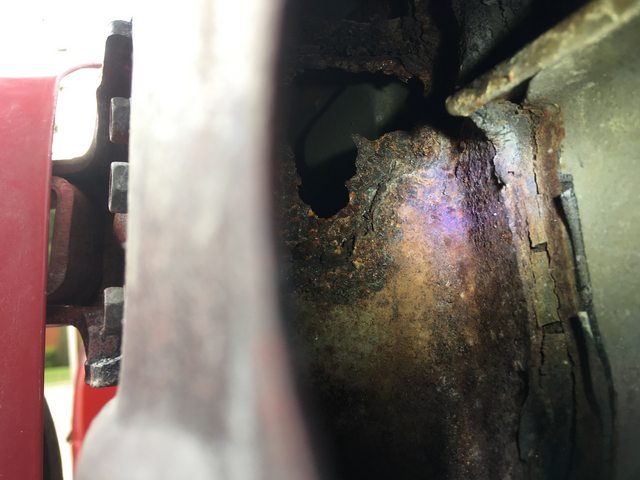
Uh oh
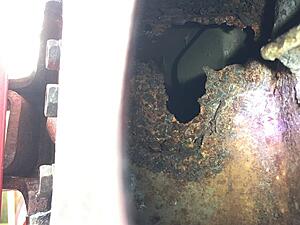
FFFFFFFFFFFFFFFFFFFFFFFFFFFFFFFFFFFFFFFFFFFFFFFFFF FFFFFFFFFFFFFFFFFFFFFFFFFFFFFFFFFFFFFFFFFF... dang.
2-1/4" bi-metal hole saw. I didn't have *any* hole saws for metal, nor a 2-1/4". The actual hole I need is 2-1/2", but it's got an 1/8" lip that I need to account for, hence 2-1/4".
To start off on the cowl rust, I used a small grinding stone on the Dremel to get rid of the thin, jagged edges:


Then slathered it in the epoxy:
Terrible picture. I'm sorry.
The rust over by the hinge:
After a little cleanup:
The cowl area will probably get POR-15, and probably a coat of seam sealer, and will get painted with the epoxy primer along with everything else.
So, since there was rust on the driver's side, let's go have a look at the other side.
Wide angle was posted a few pics up. Didn't look too bad, but given what was in the other side, I was concerned. Can we get a look in here?:

Uh oh


FFFFFFFFFFFFFFFFFFFFFFFFFFFFFFFFFFFFFFFFFFFFFFFFFF FFFFFFFFFFFFFFFFFFFFFFFFFFFFFFFFFFFFFFFFFF... dang.
Thread Starter
Joined: Feb 2004
Posts: 1,202
Likes: 98
From: Euless, TX
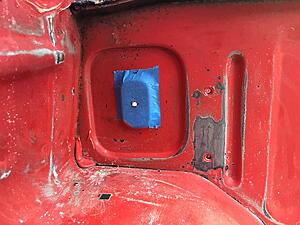
No access from the wiper area:
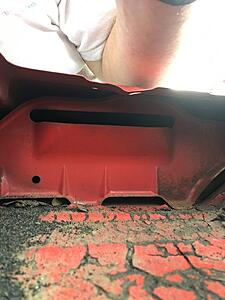
That's also where the HVAC picks up outside air.
On this one, I decided to punt and ignore it in favor of something I can actually do right now, while I mull over solutions. I did hit it with rust converter for the time being, as much as I could reach.
Really, I have two options: 1)ignore it (not going to happen. That's a direct hole from outside to inside the car, BTW, and my brain isn't going to *let* me ignore it...) and 2) cut or otherwise remove that reinforcing piece to allow access. It's a bunch of spot welds, some of which may be difficult to get to, so may have to cut as well. That means I'm going to need to get gas for my MIG if I want to have any hope of putting it back together decently. Fluxcore is a pain with sheet metal. As far as the rust repair, fiberglass would work fine, since it's non-structural, but I have a MIG welder.
I'll figure that out. On to making a
big hole in the firewall.
If I needed to make several flanged holes, I'd probably ask my dad to turn up a flanging die, but I only need the one. I came across the concept of a "bob stick" while researching flanging dies, used in the homebuilt aircraft arena. There, it's used to just put a roughly 15-20-degree flange on a hole for strength, same as you would with a dimple die. They get to use wood sticks, since they're working with light gauge aluminum.
Flanging Lightening Holes with the "Bob Stick" - Feature - EAA Video
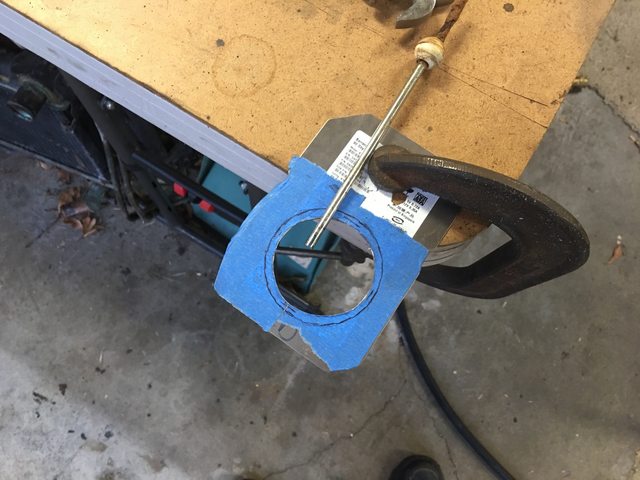
I'm working with steel, and just to add to the difficulty, I need a 90-degree flange, and it's only a 2-14" hole.
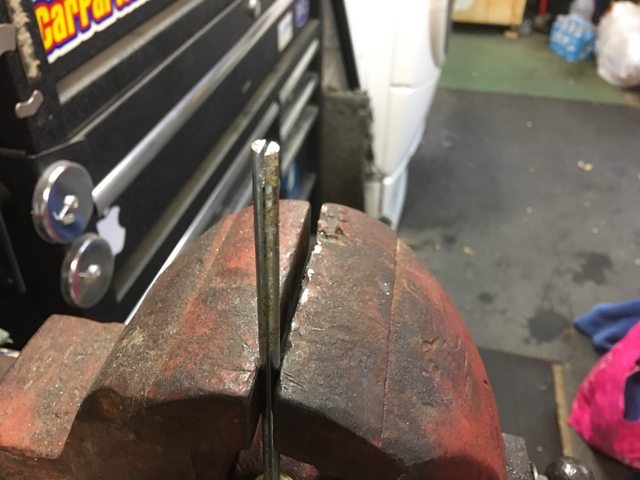
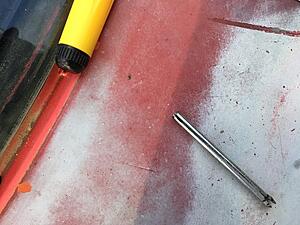
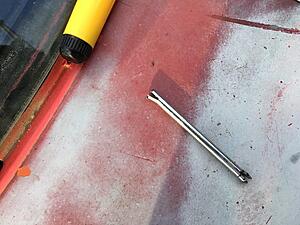
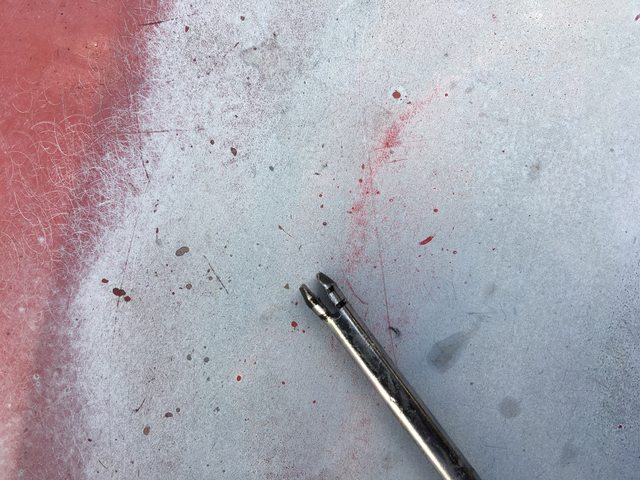
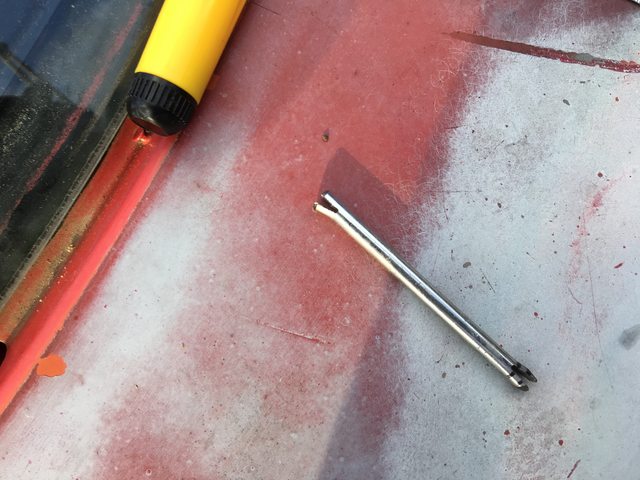
Start with a piece of steel rod that used to be the pivot lever for a sink drain, and cut a slot in it

I decided a practice run would be in order to refine technique.
Steel from the top cover of a hard drive, with 2-1/4" hole (since this was a test, the hole was made with my air nibbler, then finished out with a grindstone and sanding roll.) 2-1/2" circle was marked out beforehand as a guide.

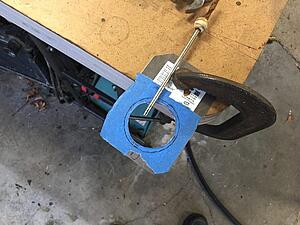
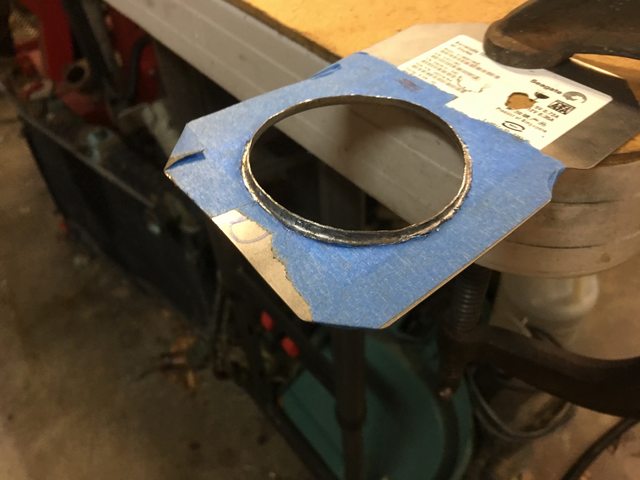
Test was successful:


The stick got it most of the way there, then a little work with a small ball-peen got the flange to 90 degrees. This time the hole ended up slightly less than 2-1/2" - I discovered that you need to have the end of the stick a bit past where you actually want the bend, to account for the radius of the bend. Also, on this sheet metal, the slot in the stick was a little loose, making it harder to bend when it started getting closer to 90. A taller flange would actually be easier to bend, since you'd have more material to grip.
Even though the hole was a bit small, the grommet fit with a little squeezing:


Now it's time for the real thing.

That's also where the HVAC picks up outside air.
On this one, I decided to punt and ignore it in favor of something I can actually do right now, while I mull over solutions. I did hit it with rust converter for the time being, as much as I could reach.
Really, I have two options: 1)ignore it (not going to happen. That's a direct hole from outside to inside the car, BTW, and my brain isn't going to *let* me ignore it...) and 2) cut or otherwise remove that reinforcing piece to allow access. It's a bunch of spot welds, some of which may be difficult to get to, so may have to cut as well. That means I'm going to need to get gas for my MIG if I want to have any hope of putting it back together decently. Fluxcore is a pain with sheet metal. As far as the rust repair, fiberglass would work fine, since it's non-structural, but I have a MIG welder.
I'll figure that out. On to making a
Spoiler
If I needed to make several flanged holes, I'd probably ask my dad to turn up a flanging die, but I only need the one. I came across the concept of a "bob stick" while researching flanging dies, used in the homebuilt aircraft arena. There, it's used to just put a roughly 15-20-degree flange on a hole for strength, same as you would with a dimple die. They get to use wood sticks, since they're working with light gauge aluminum.
Flanging Lightening Holes with the "Bob Stick" - Feature - EAA Video
I'm working with steel, and just to add to the difficulty, I need a 90-degree flange, and it's only a 2-14" hole.
Start with a piece of steel rod that used to be the pivot lever for a sink drain, and cut a slot in it
I decided a practice run would be in order to refine technique.
Steel from the top cover of a hard drive, with 2-1/4" hole (since this was a test, the hole was made with my air nibbler, then finished out with a grindstone and sanding roll.) 2-1/2" circle was marked out beforehand as a guide.

Test was successful:
The stick got it most of the way there, then a little work with a small ball-peen got the flange to 90 degrees. This time the hole ended up slightly less than 2-1/2" - I discovered that you need to have the end of the stick a bit past where you actually want the bend, to account for the radius of the bend. Also, on this sheet metal, the slot in the stick was a little loose, making it harder to bend when it started getting closer to 90. A taller flange would actually be easier to bend, since you'd have more material to grip.
Even though the hole was a bit small, the grommet fit with a little squeezing:


Now it's time for the real thing.
Thread Starter
Joined: Feb 2004
Posts: 1,202
Likes: 98
From: Euless, TX
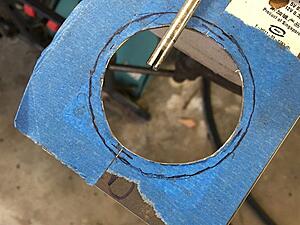
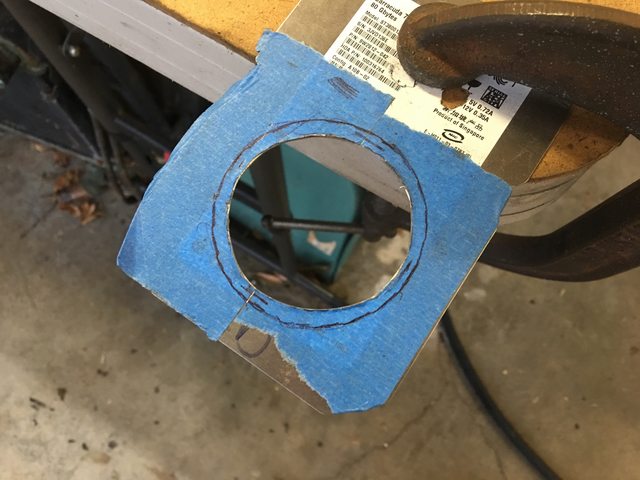
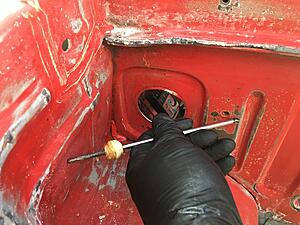
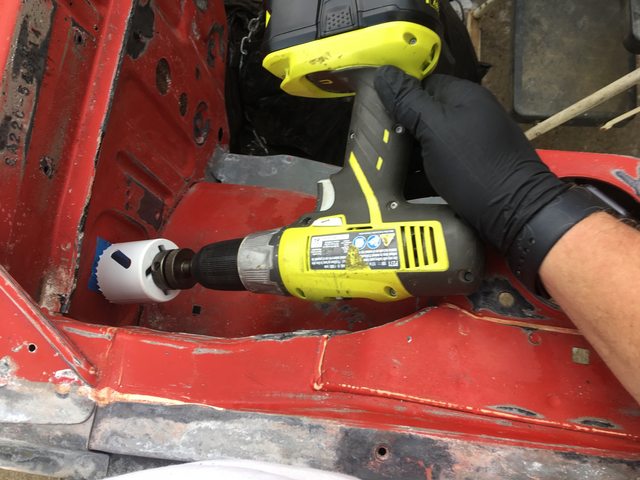
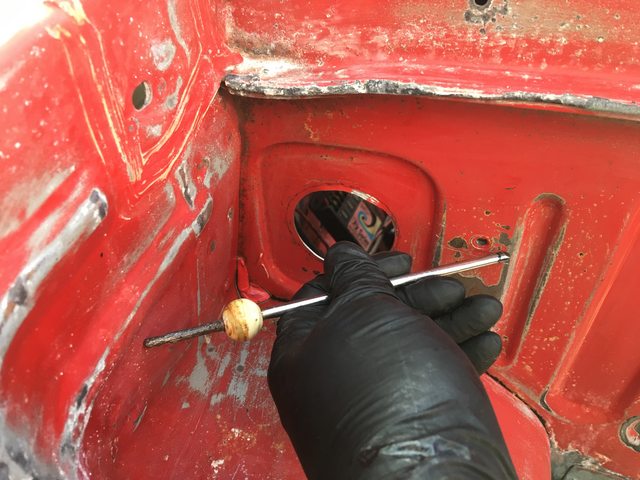
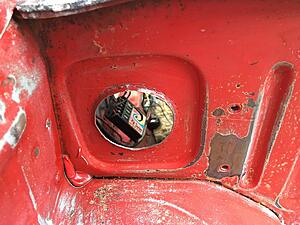
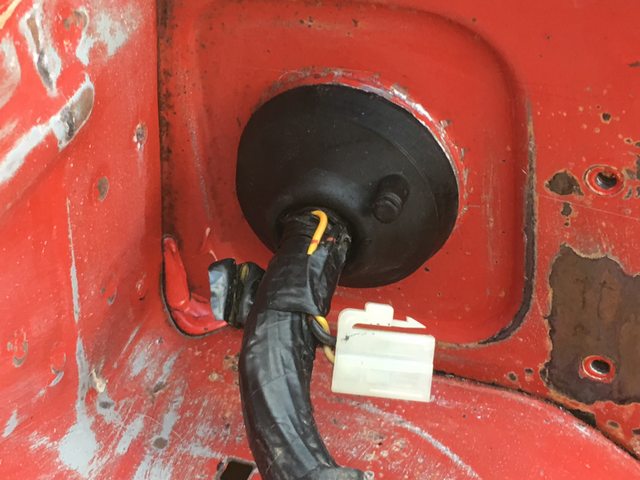
Marked and pilot hole drilled:
Using my 2-1/2" hole saw as a template to mark the outer edge:


...ah. The new hole saw is a bit tall. I could have made it slightly shorter by using the mandrel it came with, but probably still not short enough.
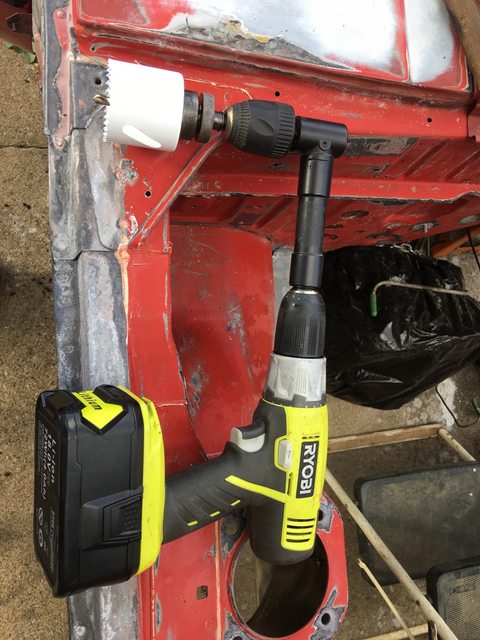
I don't have a 90-degree drill (yet), but I do have one of those adapters:

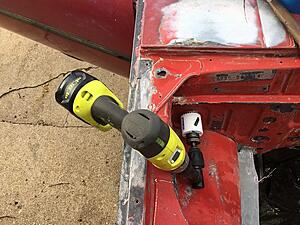
Here we go!
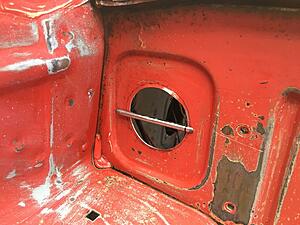
Hole.
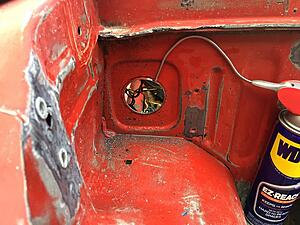
(the bendy straw on new WD-40 cans is pretty handy.)

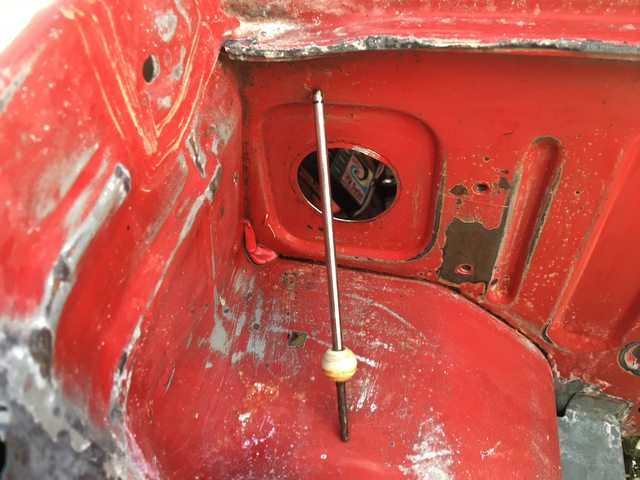
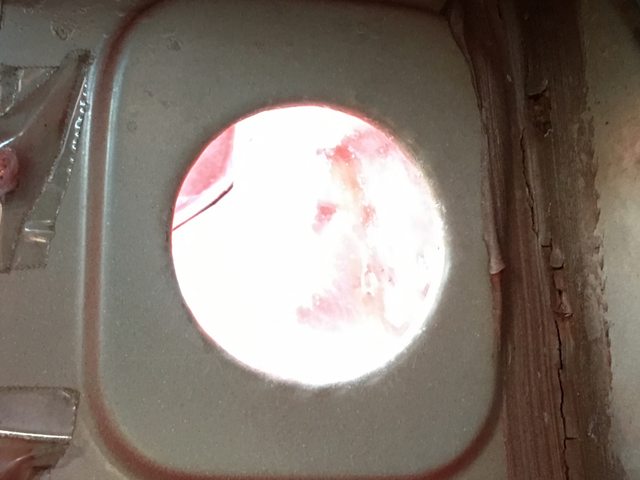
Let the light shine in
Now to get that flange bent up!

...ah.
Fine. Mr. Hacksaw would like to speak to you.
Using my 2-1/2" hole saw as a template to mark the outer edge:

...ah. The new hole saw is a bit tall. I could have made it slightly shorter by using the mandrel it came with, but probably still not short enough.
I don't have a 90-degree drill (yet), but I do have one of those adapters:

Here we go!
Hole.

(the bendy straw on new WD-40 cans is pretty handy.)
Let the light shine in
Now to get that flange bent up!
...ah.
Fine. Mr. Hacksaw would like to speak to you.
Thread Starter
Joined: Feb 2004
Posts: 1,202
Likes: 98
From: Euless, TX
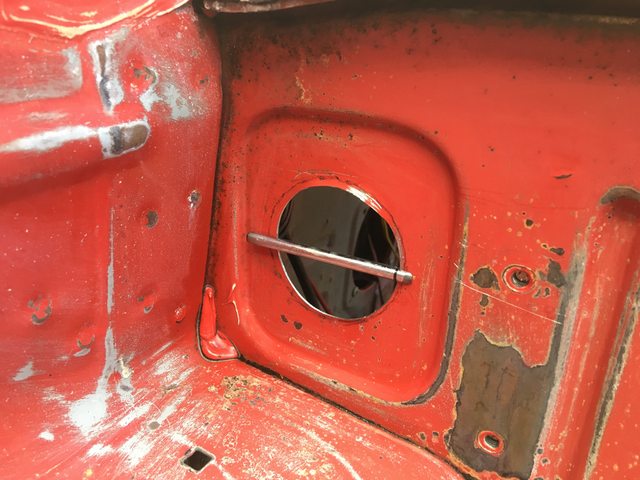
Bob stick worked pretty well up to about 80 degrees, then it became unhappy.

I cut a new slot in the other end, thinking that the first slot had fatigued after bending one hole and most of the second:
but:
Nope.
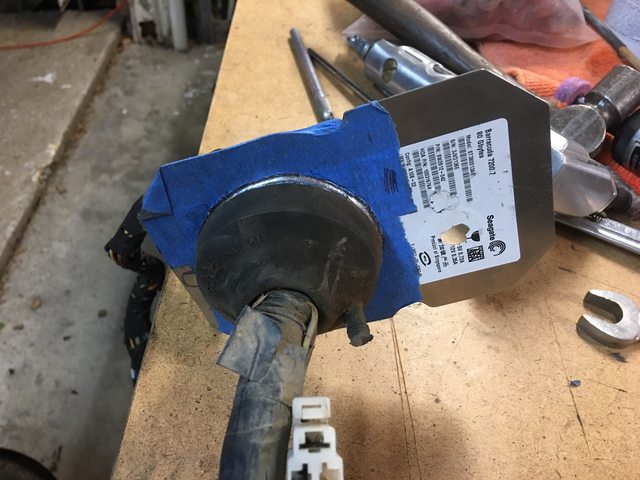
So I went after it with the ball-peen hammer. It needed a bit more work thean the first hole, and the close quarters presented a challend, but it worked:
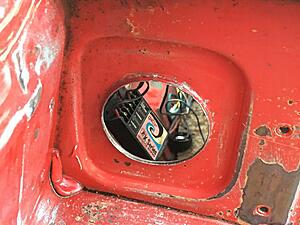

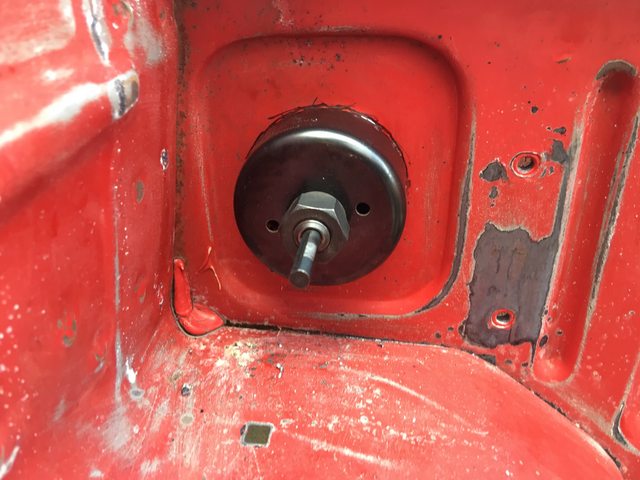
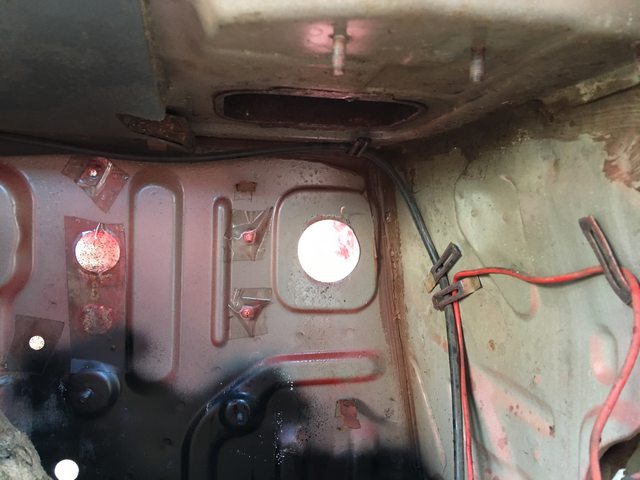
2-1/2":
Grommet fits and stays put:

I actually overshot just a bit, and went back and tightened it back down a hair by bending the flange back in a tad.
It will get sanded and made prettier for painting while prepping the rest of the engine bay. That's the next step: a whole lot of sanding.
Whee!
I'll need to make a decision on the passenger side rust. I should be able to work on that without damaging the engine bay paint if I don't do the repair first, but I would prefer to not take the chance. Nothing says I can't do the epoxy primer in several sections or steps, though, if necessary.
I cut a new slot in the other end, thinking that the first slot had fatigued after bending one hole and most of the second:

but:
Nope.
So I went after it with the ball-peen hammer. It needed a bit more work thean the first hole, and the close quarters presented a challend, but it worked:


2-1/2":
Grommet fits and stays put:
I actually overshot just a bit, and went back and tightened it back down a hair by bending the flange back in a tad.
It will get sanded and made prettier for painting while prepping the rest of the engine bay. That's the next step: a whole lot of sanding.
Whee!
I'll need to make a decision on the passenger side rust. I should be able to work on that without damaging the engine bay paint if I don't do the repair first, but I would prefer to not take the chance. Nothing says I can't do the epoxy primer in several sections or steps, though, if necessary.

Thread Starter
Joined: Feb 2004
Posts: 1,202
Likes: 98
From: Euless, TX
Thanks! I wish I had a shop where I could just blow this thing apart and do it the right way...
I *almost* have enough room to at least get it into the garage, since I sold the GSL-SE that was in there for almost 18 years a while back. Just need to clean up and/or get rid of some of the stuff that was in, on, and under the SE, and clear out a few other projects.
Hopefully I can swing a Max Jax soon-ish so I can at least get it a few feet up in the air (I don't have enough ceiling height for a full size lift. One day...)
In the short term, I need that C25 bottle for my MIG.
Thread Starter
Joined: Feb 2004
Posts: 1,202
Likes: 98
From: Euless, TX
So, it pretty much rained all weekend, and I had a few other things to do. It actually didn't rain on Sunday until about 5, but I didn't trust the weather enough to uncover the car and start on anything. Man, I need to clear out the garage so I can get this thing inside when needed.
Amusingly, it was mid-to-high 70s on Saturday and Sunday until the afternoon, then the cold front rolled in, and the rain. It was 42 this morning (all temperatures are in 'Mercan.) Yay Texas weather.
Anyhow, I wanted to try this electroplating stuff, so I did that. Results were encouraging.
Supplies:
1 gallon white vinegar
1 gallon distilled water (tap water probably would have been fine.)
1 gallon muriatic acid
Zinc anode
table salt
sugar
copper wire
4.8V 200 mA DC power supply
clip leads
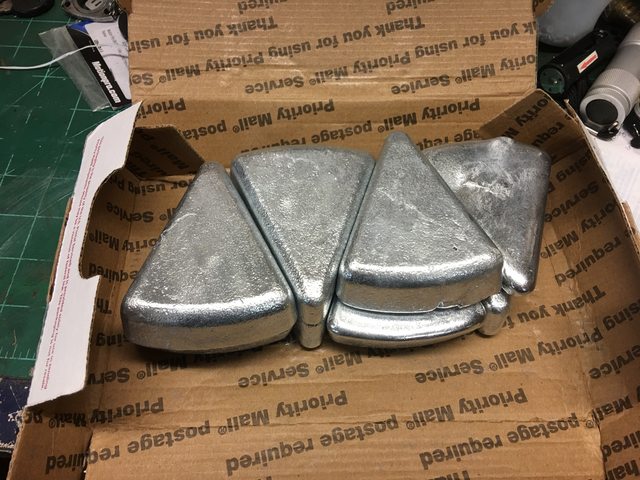
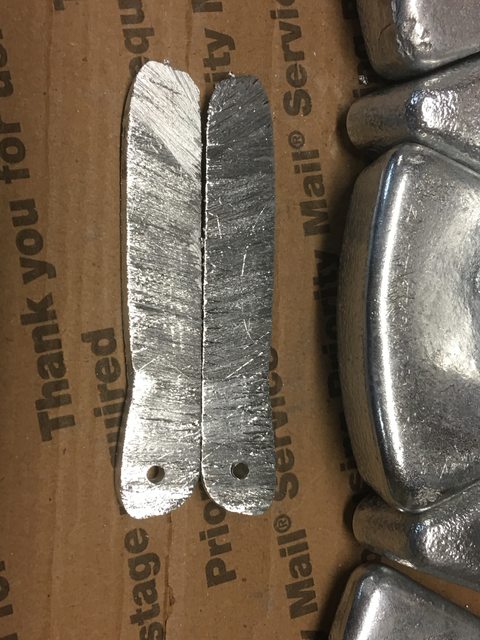
First step in my case was to get some more reasonably-sized anodes. You may recall that I bought 10 pounds of zinc - it was in convenient cornbread wedges:

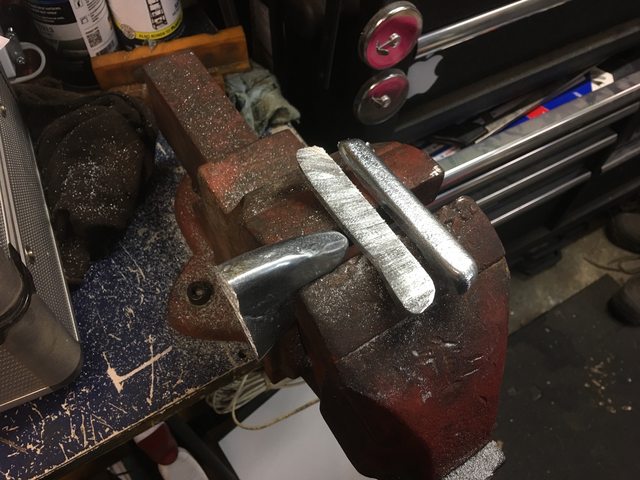
I took the thinner one on the far right and sawed off a couple of strips:

I really need to go retrieve my bandsaw. This took a bit with a hacksaw.
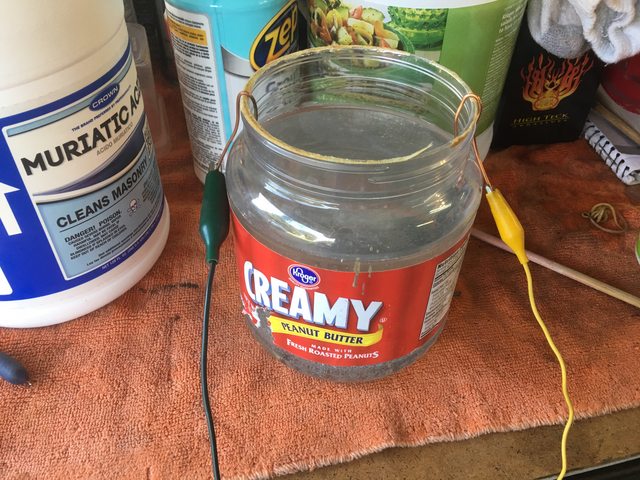
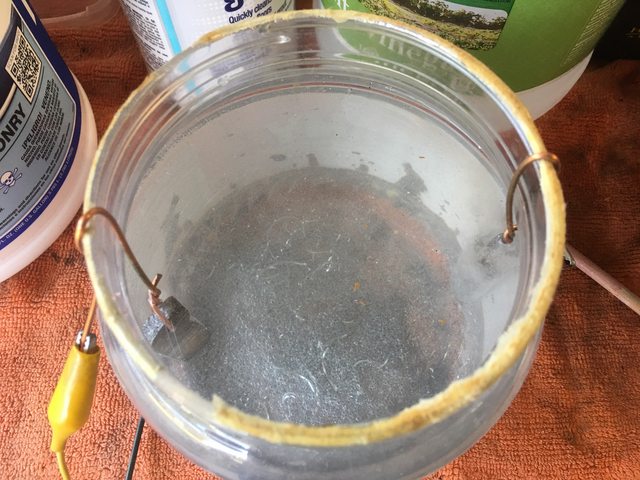
And drilled holes for wires:

I have a bunch of old Romex around, so the stripped wire from that proved handy. Vinegar plus a tablespoon of salt, and the two electrodes and we're makingpeanut butter zinc solution.
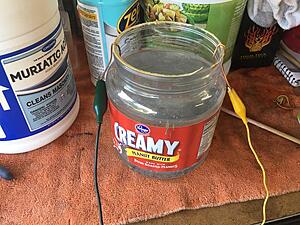
Never mind the shavings on the bottom. I thought it wouldn't hurt to collect the filings from sawing and throw them in to dissolve. It probably won't hurt, but probably doesn't help, either.
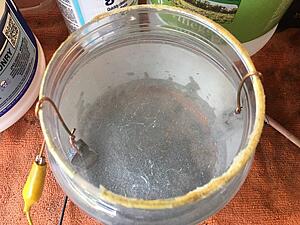
You wire one anode positive, and one negative (which actually makes it a cathode, of course) and let it run a couple hours to get zinc in solution. It can be done without doing so, but this jump starts the plating.
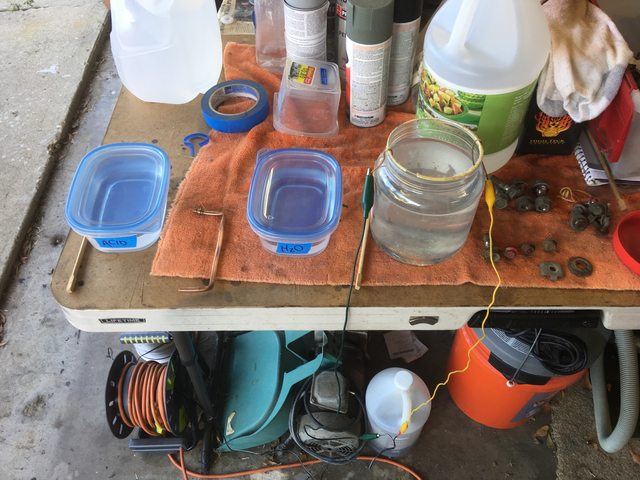
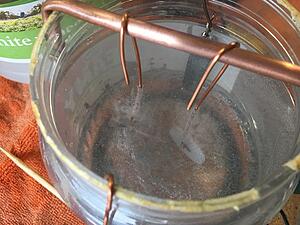
The complete setup:

"Acid" is mostly distilled water with a cup or two of muriatic acid, as a final clean and etch fro the hardware. Distilled water to rinse the acid off.
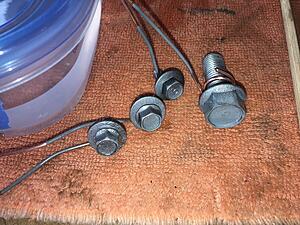
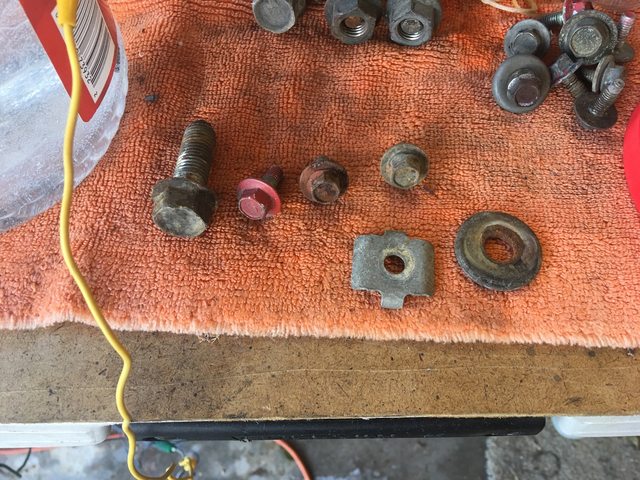
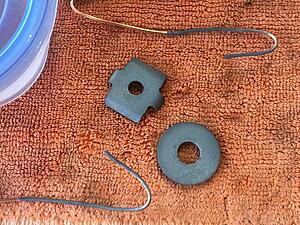
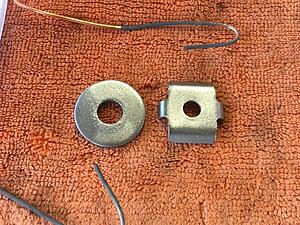
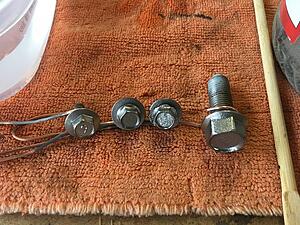
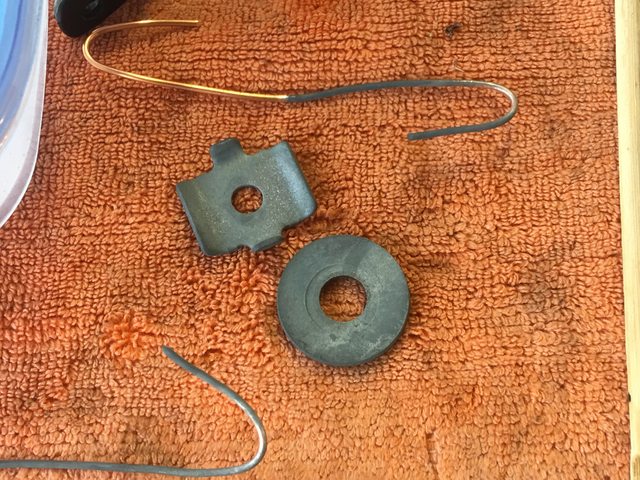
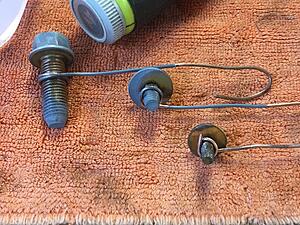
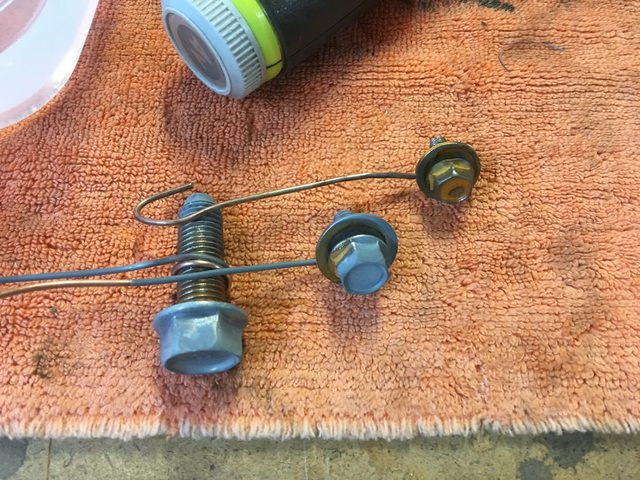
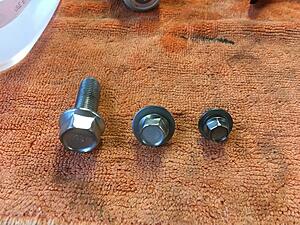
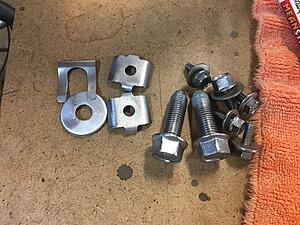
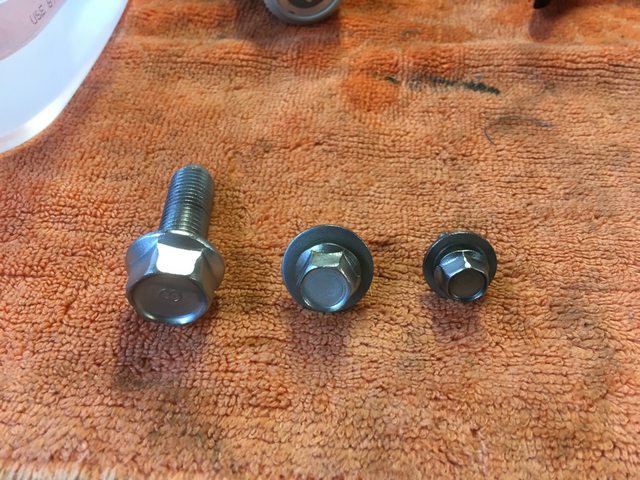
I selected some suitable hardware:

The sacrificial lambs.
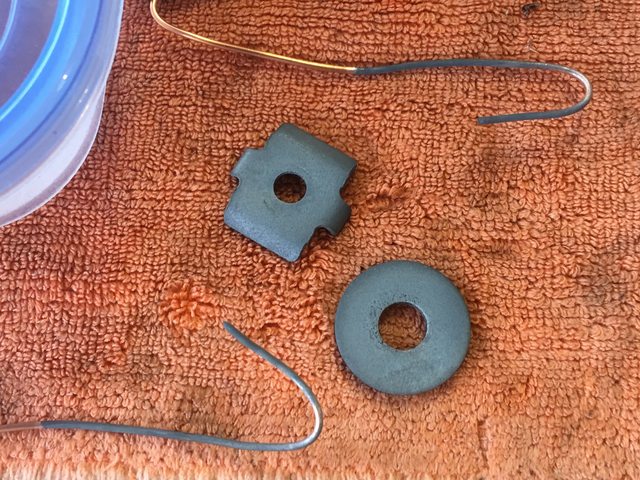
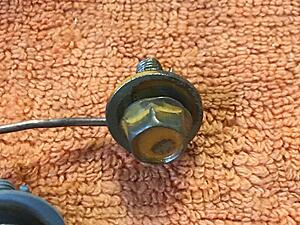
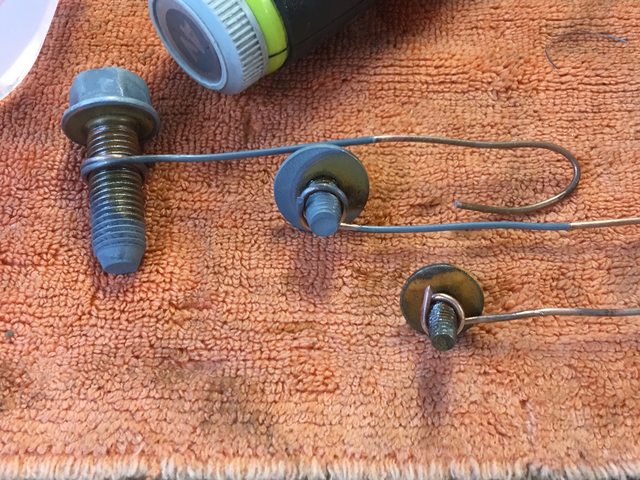
This is the hardware after media blasting:
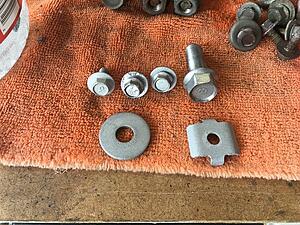
The three bolts on the right have been wire-wheeled after blasting, the one on the left and the flat hardware are as-blasted, just to show the difference. I wheeled the remaining bolt before plating, but left the washer and brake line retainer as they were, just to see how much it affected the final finish.
I should probably change out the media in my blaster for this - the "black beauty" (coal slag) is a bit too aggressive. Great for rust on cast iron, though, and leaves a hell of an etch.
Mount everything on copper wire, hang from my busbar tube, and apply power. Negative to part, and positive to the two anodes (the opposite of when using this kind of rig for electrolytic rust removal.)


She be chooching right proper!
I kept them in about 10 minutes. Rotated them 180 degrees at 3 minutes, and then shifted the bus tube about 45 degrees one way at the next 3 minutes, then the other after a couple minutes, to make sure coverage was decent.
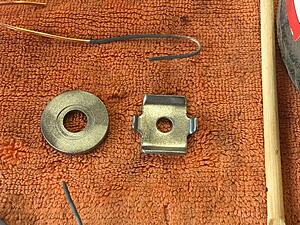
Parts right out of the solution:
Not bad. Sort of cast-iron grey, though it tends to go more primer grey when dried.
After a quick trip tot he wire wheel:

Brightened up nicely.
Amusingly, it was mid-to-high 70s on Saturday and Sunday until the afternoon, then the cold front rolled in, and the rain. It was 42 this morning (all temperatures are in 'Mercan.) Yay Texas weather.
Anyhow, I wanted to try this electroplating stuff, so I did that. Results were encouraging.
Supplies:
1 gallon white vinegar
1 gallon distilled water (tap water probably would have been fine.)
1 gallon muriatic acid
Zinc anode
table salt
sugar
copper wire
4.8V 200 mA DC power supply
clip leads
First step in my case was to get some more reasonably-sized anodes. You may recall that I bought 10 pounds of zinc - it was in convenient cornbread wedges:
I took the thinner one on the far right and sawed off a couple of strips:
I really need to go retrieve my bandsaw. This took a bit with a hacksaw.
And drilled holes for wires:
I have a bunch of old Romex around, so the stripped wire from that proved handy. Vinegar plus a tablespoon of salt, and the two electrodes and we're making
Never mind the shavings on the bottom. I thought it wouldn't hurt to collect the filings from sawing and throw them in to dissolve. It probably won't hurt, but probably doesn't help, either.
You wire one anode positive, and one negative (which actually makes it a cathode, of course) and let it run a couple hours to get zinc in solution. It can be done without doing so, but this jump starts the plating.
The complete setup:
"Acid" is mostly distilled water with a cup or two of muriatic acid, as a final clean and etch fro the hardware. Distilled water to rinse the acid off.
I selected some suitable hardware:
The sacrificial lambs.
This is the hardware after media blasting:
The three bolts on the right have been wire-wheeled after blasting, the one on the left and the flat hardware are as-blasted, just to show the difference. I wheeled the remaining bolt before plating, but left the washer and brake line retainer as they were, just to see how much it affected the final finish.
I should probably change out the media in my blaster for this - the "black beauty" (coal slag) is a bit too aggressive. Great for rust on cast iron, though, and leaves a hell of an etch.
Mount everything on copper wire, hang from my bus


She be chooching right proper!
I kept them in about 10 minutes. Rotated them 180 degrees at 3 minutes, and then shifted the bus tube about 45 degrees one way at the next 3 minutes, then the other after a couple minutes, to make sure coverage was decent.
Parts right out of the solution:
Not bad. Sort of cast-iron grey, though it tends to go more primer grey when dried.
After a quick trip tot he wire wheel:
Brightened up nicely.
Thread Starter
Joined: Feb 2004
Posts: 1,202
Likes: 98
From: Euless, TX
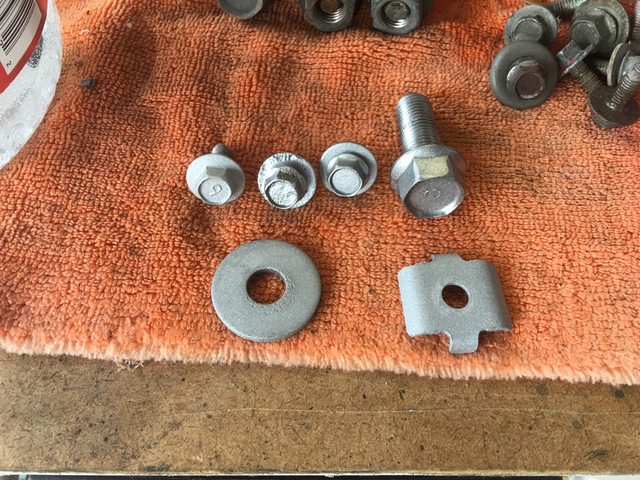
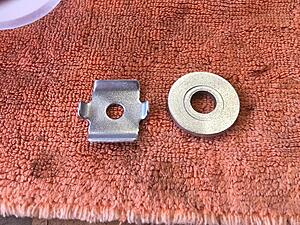
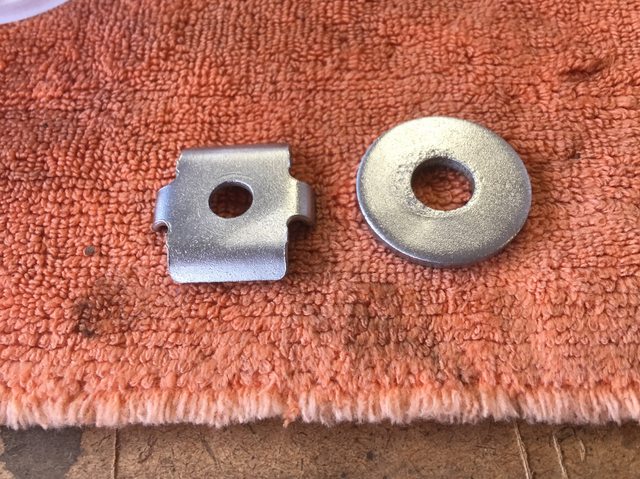
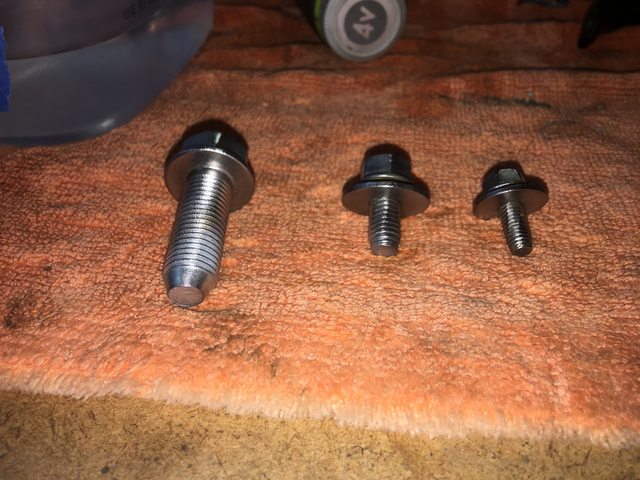
Next up, the flat stuff:
Out of the first plate:

Wire wheeled:
Note that whatever texture you have, you're going to get after plating. It's pretty thing, so won't fill pits or anything.
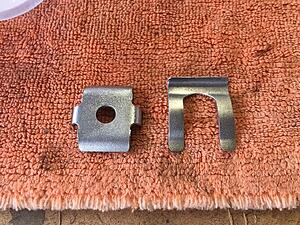
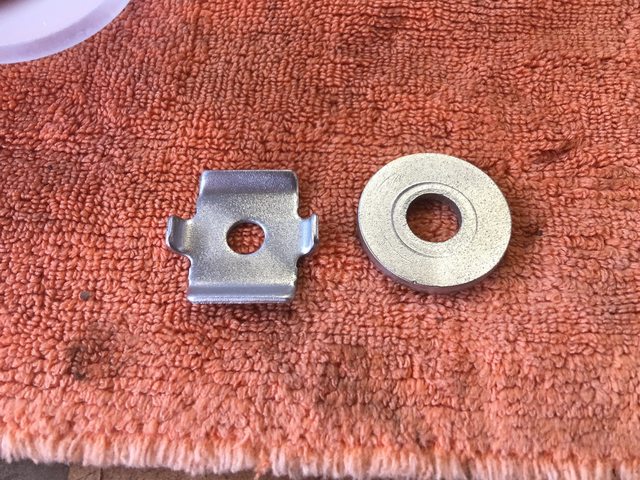
I did the bolts a second round. After wheeling:
Looking good.
And the flat stuff after a second go and wheeling:

OK, a different set of flat hardware. This time I added a tablespoon of sugar to the solution. Some sources claim that reduces crystallization and therefore increases brightness.
After media blasting AND wire wheeling:
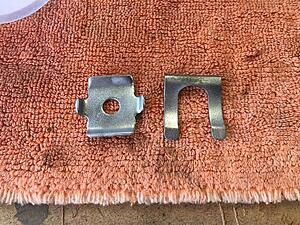

Out of the first plate:
Wire wheeled:


Note that whatever texture you have, you're going to get after plating. It's pretty thing, so won't fill pits or anything.
I did the bolts a second round. After wheeling:

Looking good.
And the flat stuff after a second go and wheeling:
OK, a different set of flat hardware. This time I added a tablespoon of sugar to the solution. Some sources claim that reduces crystallization and therefore increases brightness.
After media blasting AND wire wheeling:
Thread Starter
Joined: Feb 2004
Posts: 1,202
Likes: 98
From: Euless, TX
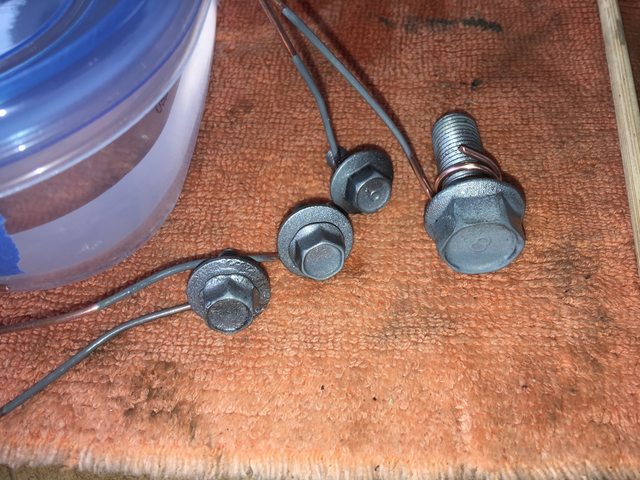
Fresh out of the bath:

After a trip to the wheel:
After bath #2:
After wheeling again:
Oh, yeah, I like it. Couldn't really see any difference re: the sugar, but the primer grey stuff wheels off easily regardless.
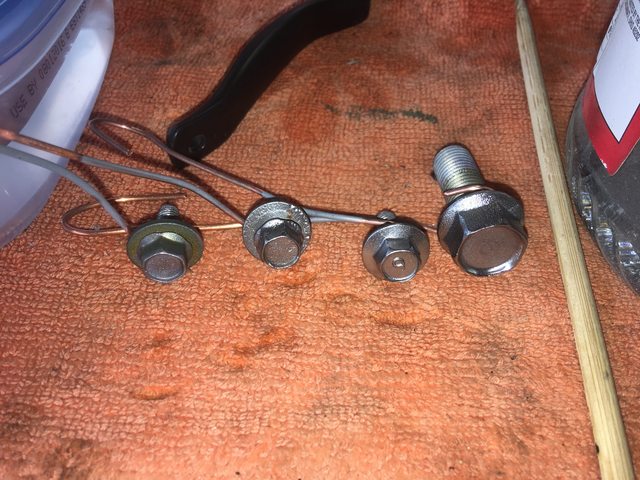
I did another set of bolts, and got an interesting result after rinsing them in the water:
After a trip to the wheel:

After bath #2:
After wheeling again:

Oh, yeah, I like it. Couldn't really see any difference re: the sugar, but the primer grey stuff wheels off easily regardless.
I did another set of bolts, and got an interesting result after rinsing them in the water:

Thread Starter
Joined: Feb 2004
Posts: 1,202
Likes: 98
From: Euless, TX
I think this may because of residual acid in the rinse. Probably should use a separate rinse for plated parts.
It wheeled off OK:
I've got them sitting out to see if they do it again. It's actively raining here, so there should be plenty of moisture in the air.
All the hardware I did on Sunday:
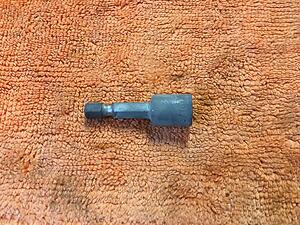
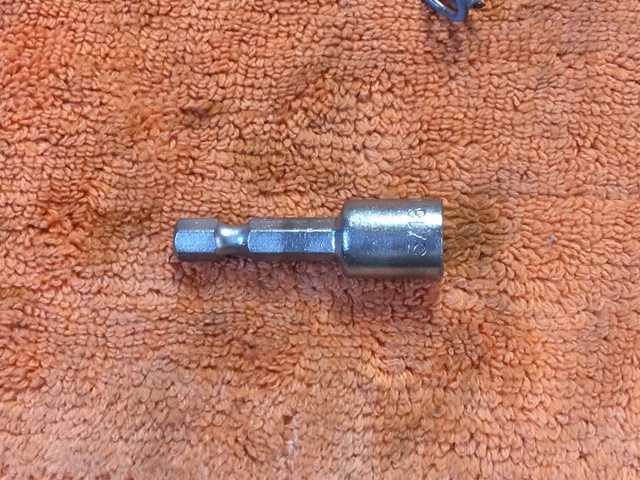
For something useful, I did a 5/16" driver bit that was looking a bit manky. I neglected to take a "before picture", but basically the black phosphate that was on it originally gave up years ago, and it was that patina that steel gets when it's not exactly rusty, but it's not clean or polished, plus a little actual surface rust. This one I just hit with the wire wheel, no media blasting.
Out of the first plate.
The dark band on the shaft is where the connecting wire/hanger was, and is therefore not plated. That's the color it comes out of the acid dip with.
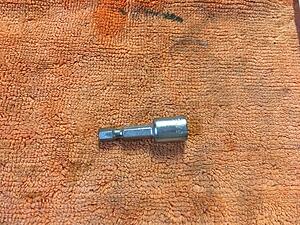
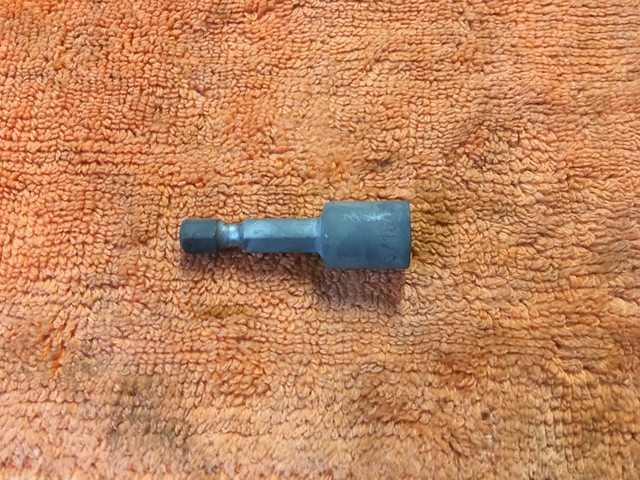
Wire wheeled:

Again, note the bad of non-plated steel.
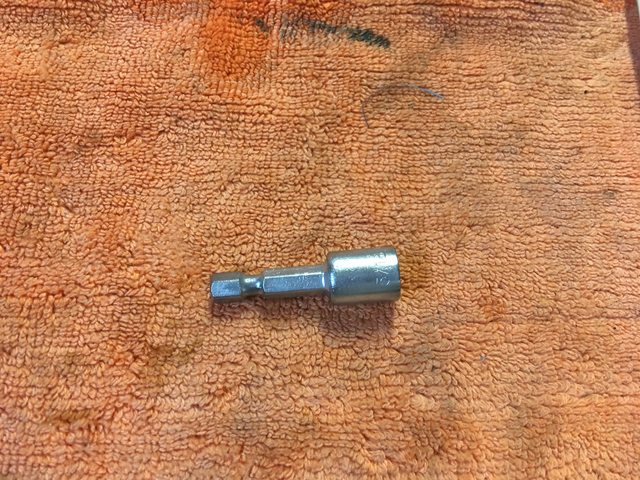
I shifted the hanger wire to the groove for the second dip. Fresh out of dip #2:
And brushed:
Yeah, I'm going to be plating everything I can get my hands on.
I'd like to pick up some nickel anodes so I can nickel plate stuff that needs to be really pretty. Interior hardware and such.
It wheeled off OK:
I've got them sitting out to see if they do it again. It's actively raining here, so there should be plenty of moisture in the air.
All the hardware I did on Sunday:

For something useful, I did a 5/16" driver bit that was looking a bit manky. I neglected to take a "before picture", but basically the black phosphate that was on it originally gave up years ago, and it was that patina that steel gets when it's not exactly rusty, but it's not clean or polished, plus a little actual surface rust. This one I just hit with the wire wheel, no media blasting.
Out of the first plate.

The dark band on the shaft is where the connecting wire/hanger was, and is therefore not plated. That's the color it comes out of the acid dip with.
Wire wheeled:
Again, note the bad of non-plated steel.
I shifted the hanger wire to the groove for the second dip. Fresh out of dip #2:
And brushed:
Yeah, I'm going to be plating everything I can get my hands on.
I'd like to pick up some nickel anodes so I can nickel plate stuff that needs to be really pretty. Interior hardware and such.

Thread Starter
Joined: Feb 2004
Posts: 1,202
Likes: 98
From: Euless, TX
I like using the correct hardware if I can. Nothing wrong with the Honda stuff, or honestly Most Japanese OEM hardware. I'm sure you know they tend to zinc plate everything, so it holds up well. Mines just sort of run out of zinc after 40 years, LOL.
This has opened up so much for me - I can plate anything steel. So much better than painting for rust and, especially, wear resistance from tools and such.
Now I need to scale up, and build a plating barrel for bulk plating fasteners and small items.
This has opened up so much for me - I can plate anything steel. So much better than painting for rust and, especially, wear resistance from tools and such.
Now I need to scale up, and build a plating barrel for bulk plating fasteners and small items.
Thread Starter
Joined: Feb 2004
Posts: 1,202
Likes: 98
From: Euless, TX
Small update. No new progress on the car itself. I've put a little effort into cleaning up my AE86 so I can sell it. The plan was always to sell that car to help pay for the '79. I traded my '90 GXL (with rear seat!) for the AE86 ('87 Corolla SR5 coupe) since I got no bites on the '90 when I tried to sell it outright. Figured the AE86 would be easier to sell pretty much no matter what condition it's in.
I also noticed on some of the bolts I plated, that the more pitted ones did not plate into the actual pits, it seems. Probably those areas were "in shadow" with respect to the current. The ones in better shape are holding up OK just sitting around in the garage. I think I will build a plating drum to tumble them while plating. Should mitigate that somewhat, and allow mass plating with less setup. Also need a viratory tumbler to clean the hardware before painting.
I also noticed on some of the bolts I plated, that the more pitted ones did not plate into the actual pits, it seems. Probably those areas were "in shadow" with respect to the current. The ones in better shape are holding up OK just sitting around in the garage. I think I will build a plating drum to tumble them while plating. Should mitigate that somewhat, and allow mass plating with less setup. Also need a viratory tumbler to clean the hardware before painting.
Thread Starter
Joined: Feb 2004
Posts: 1,202
Likes: 98
From: Euless, TX
For the 2 or 3 of you subscribed (I'm an optimist!), I'm still alive. It's just, you know, winter, and even in Texas that means crappy weather, and I still don't have room in the garage yet. Not a dang thing has been accomplished on the '7, I'm afraid.
Anyone reading this happen to have an FC big brake adapter kit they want to sell? Looks like there's a vendor on eBay now. No idea on quality.
I keep waffling between just the FC brakes, or the wholesale FC subframe.
I do have a set f Tokico Illuminas for my '84 struts, at least. I should probably investigate springs or a coilover conversion before I put it all back together, not that the struts are difficult on our cars.
Thread Starter
Joined: Feb 2004
Posts: 1,202
Likes: 98
From: Euless, TX
No new update on the SA per se, but I've been refining and improving my plating rig. I had to bump up to a bigger (3A) wall wart in order to get some large bumper bolts for my AE86 project done - the little 300 mA supply just couldn't get it done. I've got a real power supply now, a fish tank bubbler, and a heater, all of which should improve plating consistency and quality, and bought some chromating solutions from Caswell Plating.

I've done the black chromate, and it worked pretty well. I need to find the hardware I plated for the RX-7 previously and try the gold and silver-blue chromates on them. I seem to have hidden that hardware from myself somewhere. I've also gathered up the parts to make a small-scale plating barrel so I can plate a bunch of stuff at once, without having to hang everything on wires.
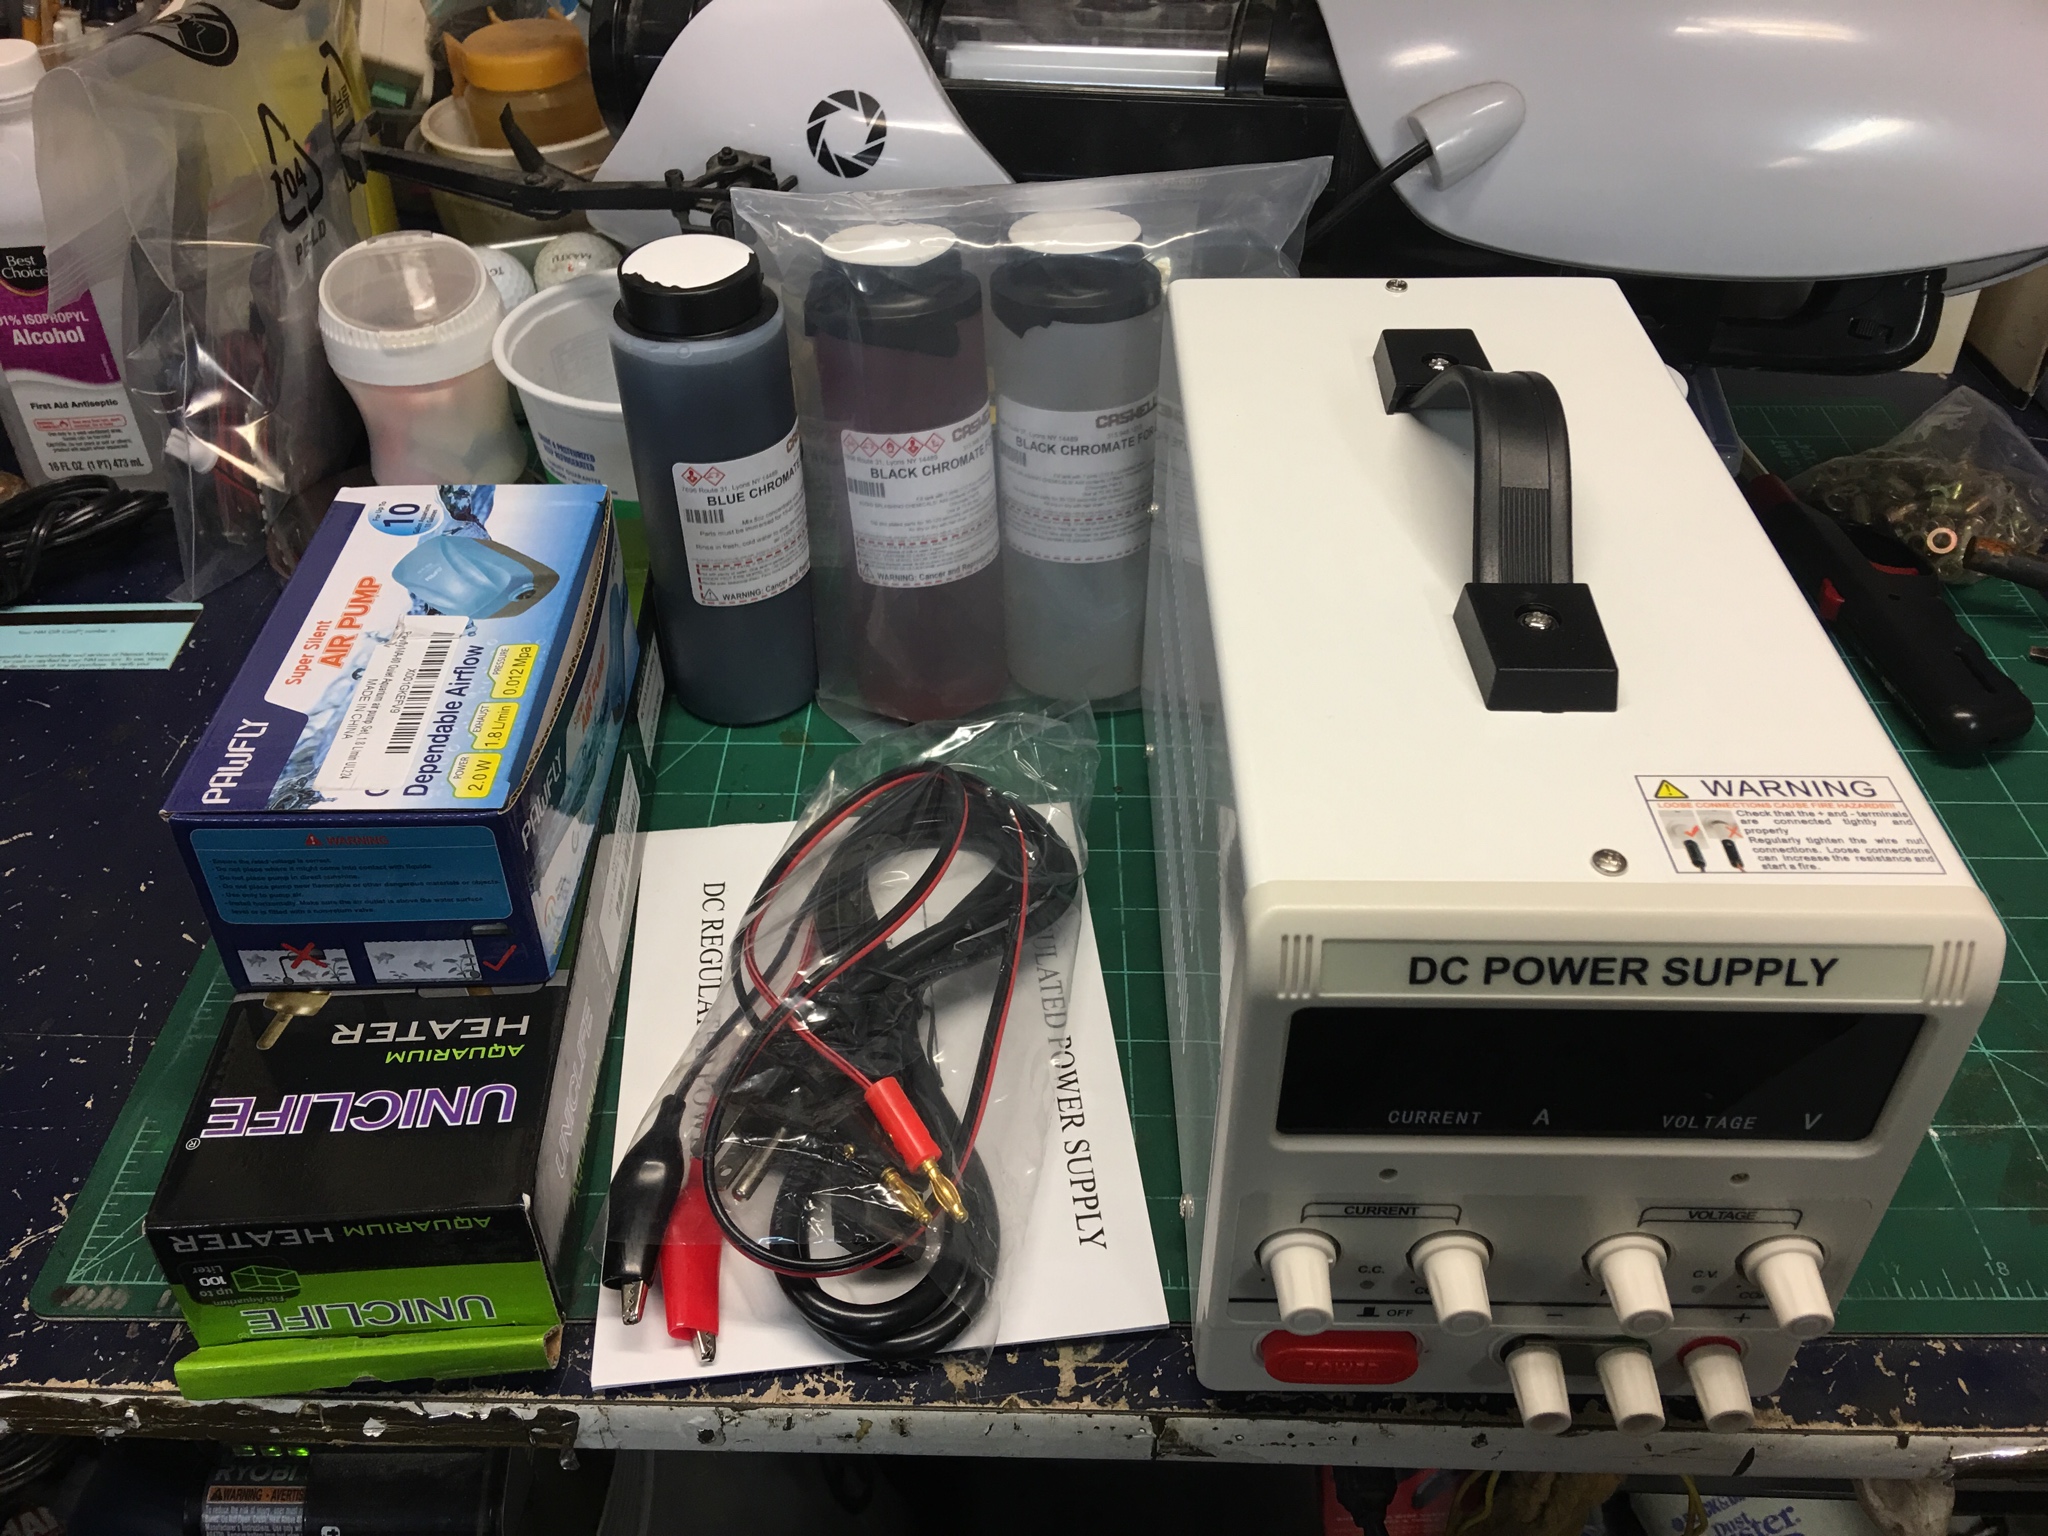
I've done the black chromate, and it worked pretty well. I need to find the hardware I plated for the RX-7 previously and try the gold and silver-blue chromates on them. I seem to have hidden that hardware from myself somewhere. I've also gathered up the parts to make a small-scale plating barrel so I can plate a bunch of stuff at once, without having to hang everything on wires.
Thread Starter
Joined: Feb 2004
Posts: 1,202
Likes: 98
From: Euless, TX
Anti-archive post.
It's finally getting warm enough to work on this thing outdoors again, consistently. Now if it will stop raining every weekend...
Plating barrel is almost complete, so I can bulk plate everything.
It's finally getting warm enough to work on this thing outdoors again, consistently. Now if it will stop raining every weekend...
Plating barrel is almost complete, so I can bulk plate everything.

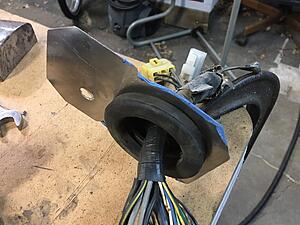
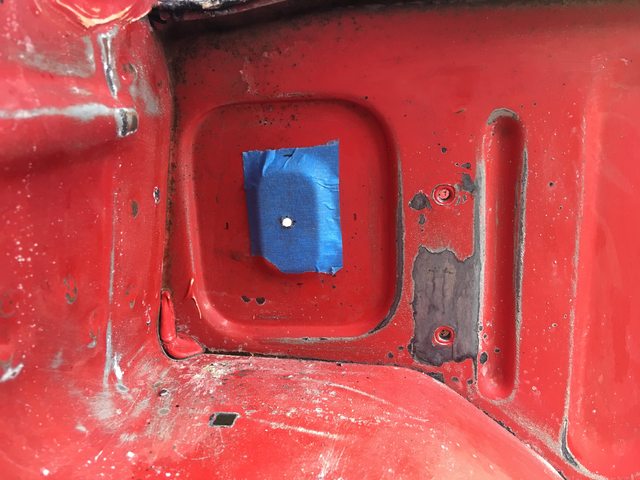
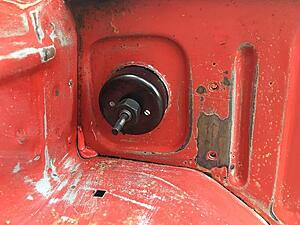
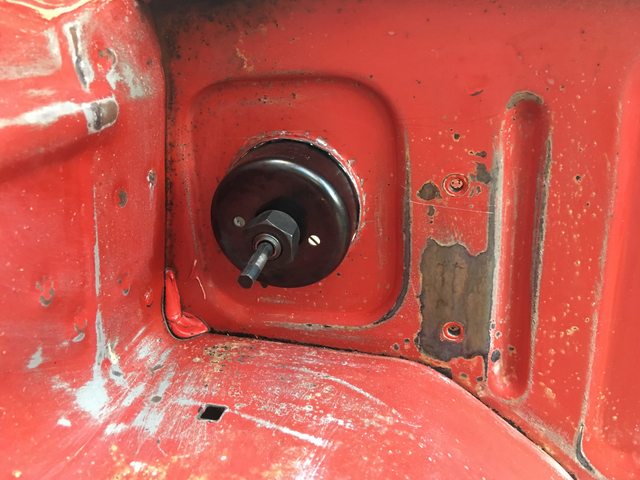
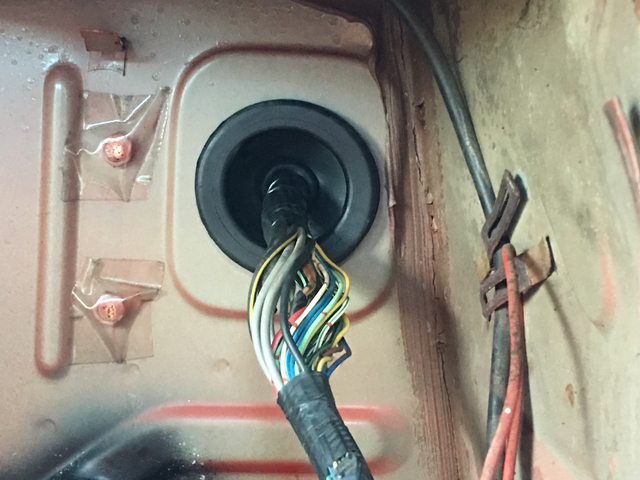
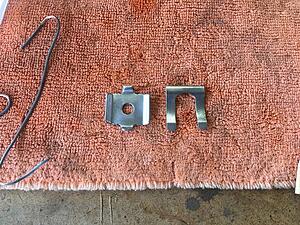
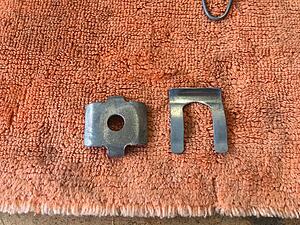
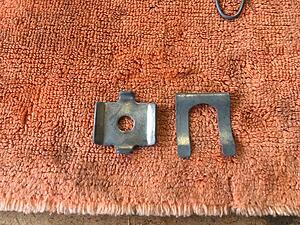
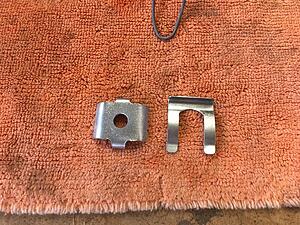
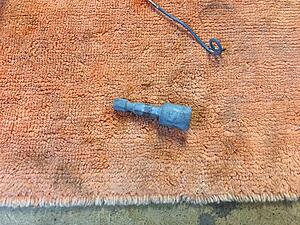
Just read through your thread, looking forward to seeing all these plated parts on the chassis. Quick question, with the harness firewall grommet, did you find a new grommet or was that off the parts car? It looked clean, couldn't tell.
Thread Starter
Joined: Feb 2004
Posts: 1,202
Likes: 98
From: Euless, TX
That's the original from the parts car. I think I cleaned it up a little before messing with it. I hate putting dirty stuff back on the car...
Thread Starter
Joined: Feb 2004
Posts: 1,202
Likes: 98
From: Euless, TX
Last weekend I put the front crossmember and suspension back on it so I could move it out of the driveway. Had roofers coming, and they needed the driveway for their waste trailer.
Start:

Add 3.5 hours:
then winch and push to curb parking:
It's now back in position in front of the garage, where all its missing parts currently live. Hopefully will have some time to work on it some more, soon, now that it's warm enough.
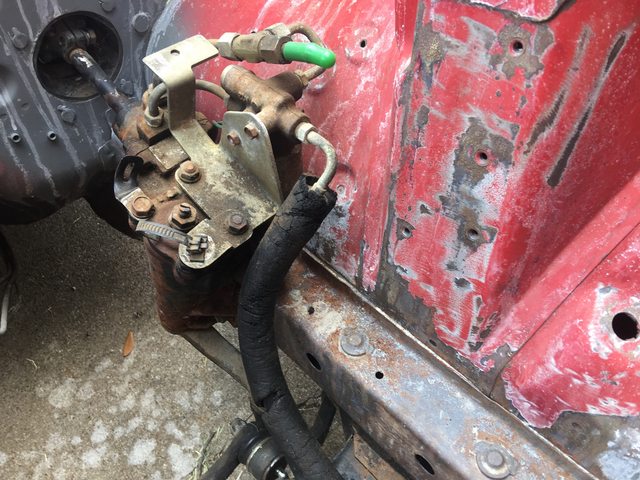
That was also the first time all the GSL-SE steering gear - column, mounts, and box - were installed, and it all went in perfectly, which was a relief. I have gas for my MIG, excuse me, GMAW welder, so I should be able to fix that rust inside the passenger upper chassis member. Just need to get in there with a spot weld cutter and go to town for access.
Start:
Add 3.5 hours:

then winch and push to curb parking:
It's now back in position in front of the garage, where all its missing parts currently live. Hopefully will have some time to work on it some more, soon, now that it's warm enough.
That was also the first time all the GSL-SE steering gear - column, mounts, and box - were installed, and it all went in perfectly, which was a relief. I have gas for my MIG, excuse me, GMAW welder, so I should be able to fix that rust inside the passenger upper chassis member. Just need to get in there with a spot weld cutter and go to town for access.
Thread Starter
Joined: Feb 2004
Posts: 1,202
Likes: 98
From: Euless, TX
I'll get back on this soon, I promise. The AE86 is about done as I care to make it, and ready to sell, then I can focus on the '7, home and daily driver projects allowing.

Thread Starter
Joined: Feb 2004
Posts: 1,202
Likes: 98
From: Euless, TX
So, actual progress on the RX-7, as tentatively promised!
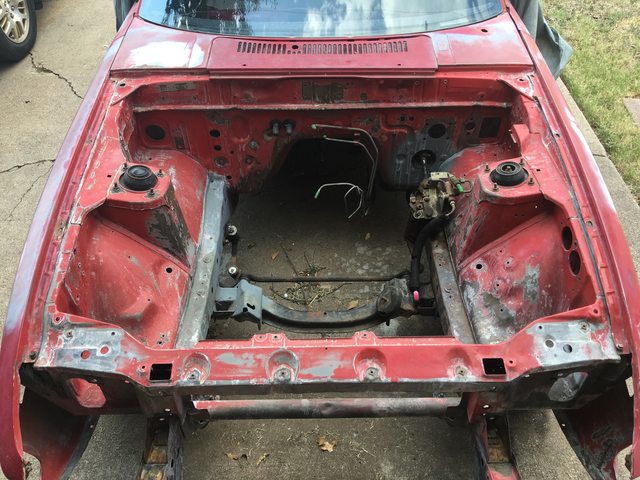
Got here uncovered, and took a look at how the engine bay weathered the months:
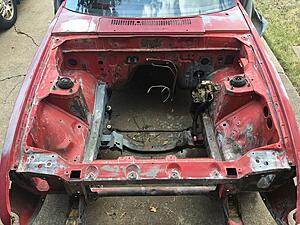
Not terrible. Most of the phosphate held up.
A few areas where I must have gotten it on too thin.
The front suspension is back in because I had to move the car so the roofers could use the driveway a few months ago.
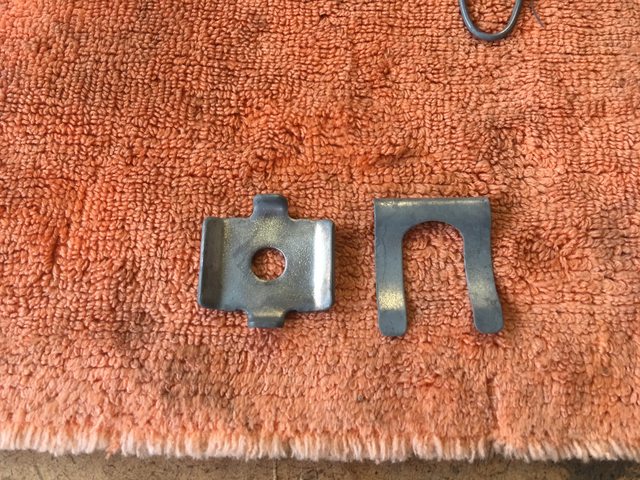
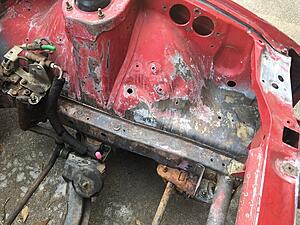
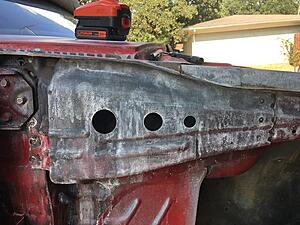
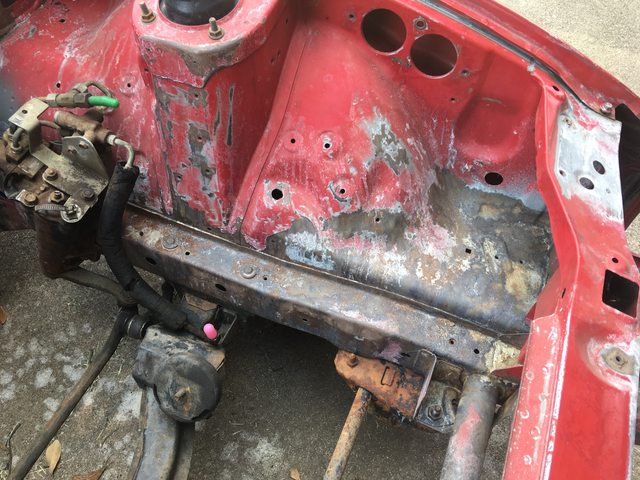
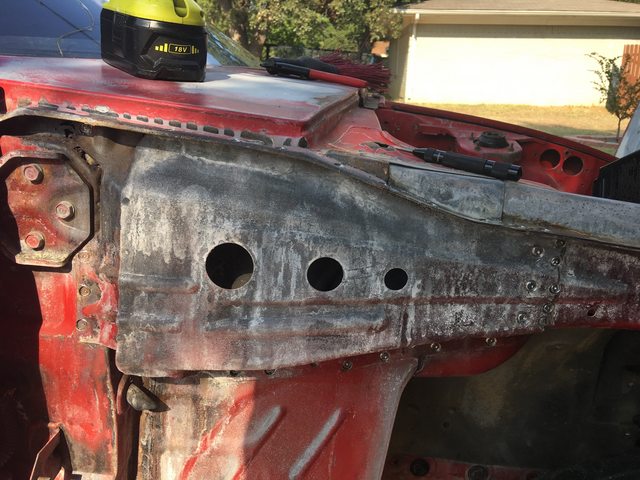
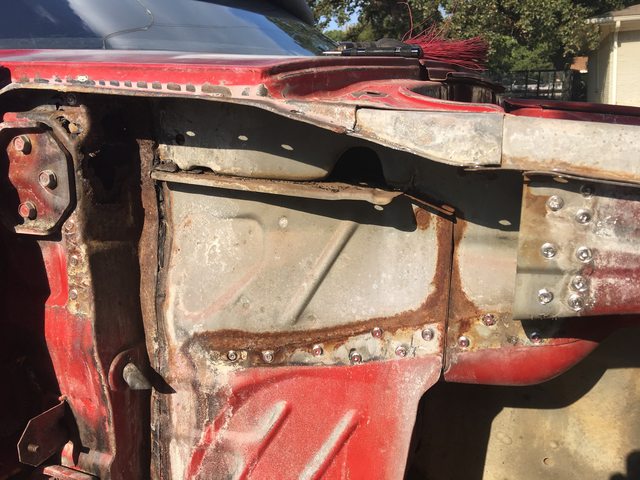
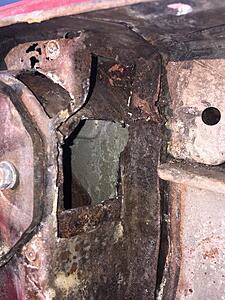
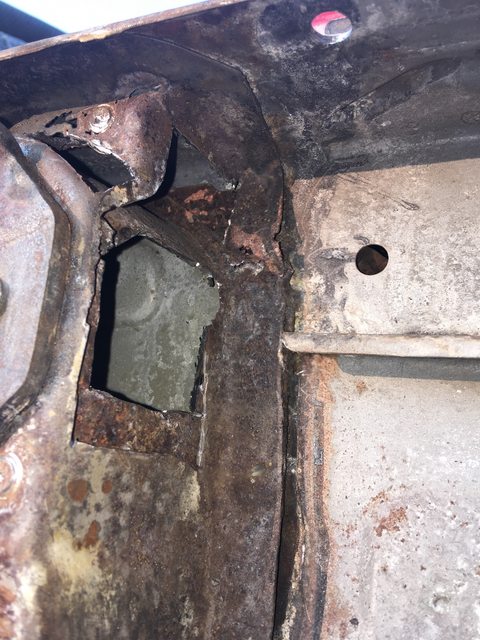
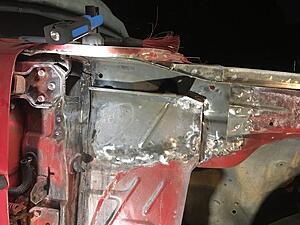
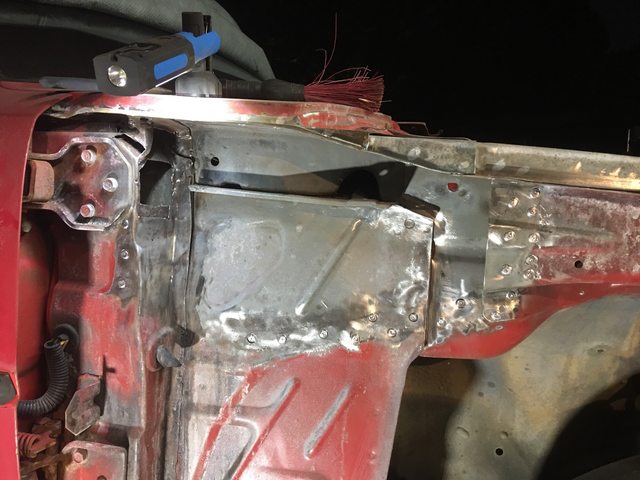
Today, we will be focusing here:
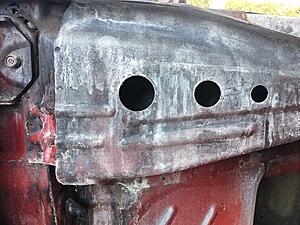
And here's a hint of why:
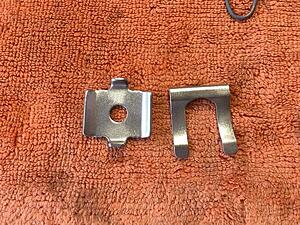
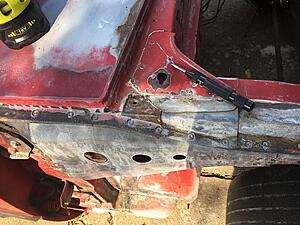
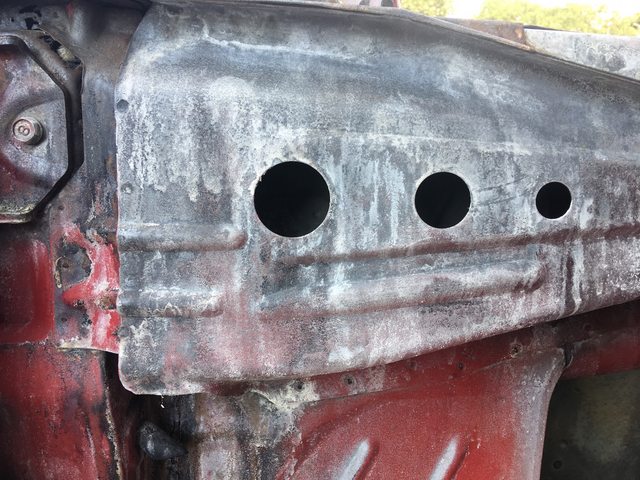
Spot welds center punched and hit with a small drill to help keep the cutter centered, and a couple already cut there on the left.
Whoops, got a little too aggressive and went all the way through

I've got the plug that came out, and will hold that there with a magnet when I start welding everything back in.
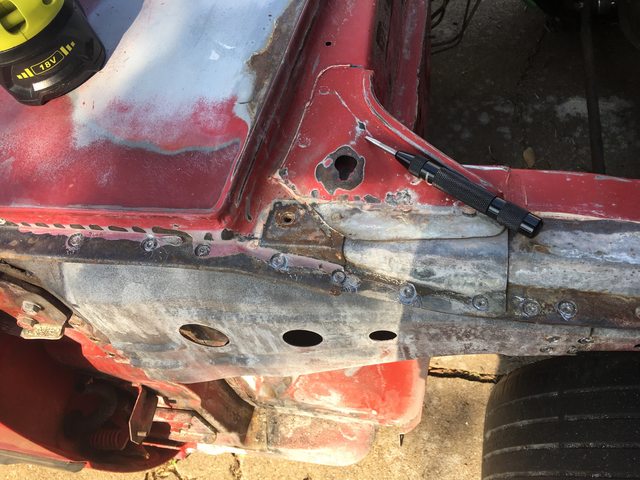
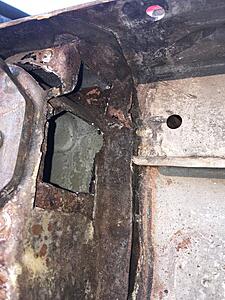
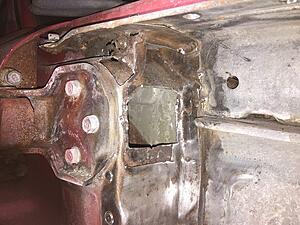
Almost ready to go. Had to get the upper ones from the top, because the shape of the stamping occluded access from the bottom.

That was annoying, because there are several spots along there where layers overlap, and it was difficult to judge the cut.
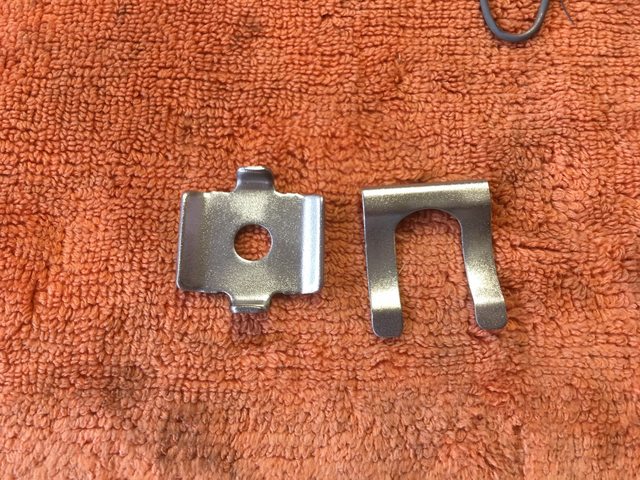
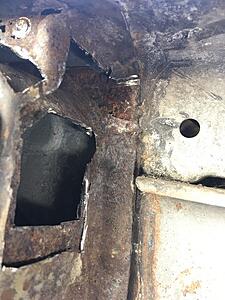
A few touch ups to the cuts and a bit off wiggling, though, and out it came:


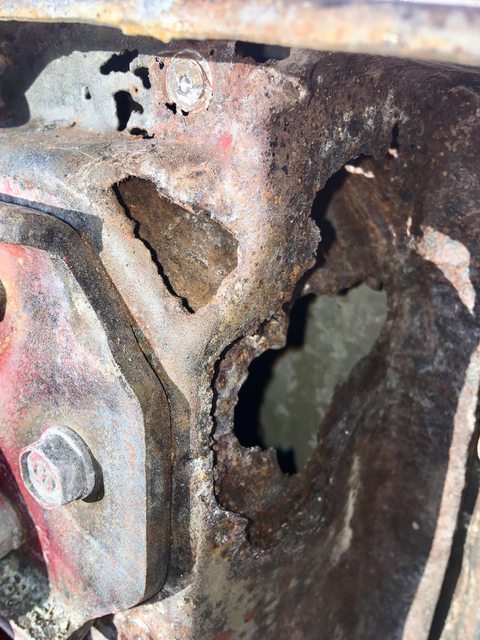
uh, oh. Do you see what I see?
Got here uncovered, and took a look at how the engine bay weathered the months:
Not terrible. Most of the phosphate held up.
A few areas where I must have gotten it on too thin.

The front suspension is back in because I had to move the car so the roofers could use the driveway a few months ago.
Today, we will be focusing here:
And here's a hint of why:
Spot welds center punched and hit with a small drill to help keep the cutter centered, and a couple already cut there on the left.

Whoops, got a little too aggressive and went all the way through
I've got the plug that came out, and will hold that there with a magnet when I start welding everything back in.
Almost ready to go. Had to get the upper ones from the top, because the shape of the stamping occluded access from the bottom.
That was annoying, because there are several spots along there where layers overlap, and it was difficult to judge the cut.
A few touch ups to the cuts and a bit off wiggling, though, and out it came:
uh, oh. Do you see what I see?
Thread Starter
Joined: Feb 2004
Posts: 1,202
Likes: 98
From: Euless, TX
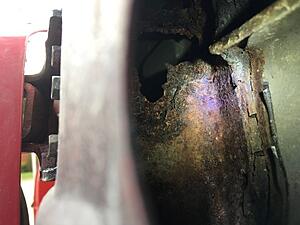
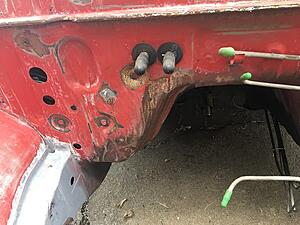
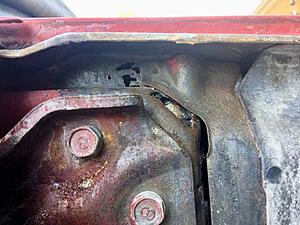
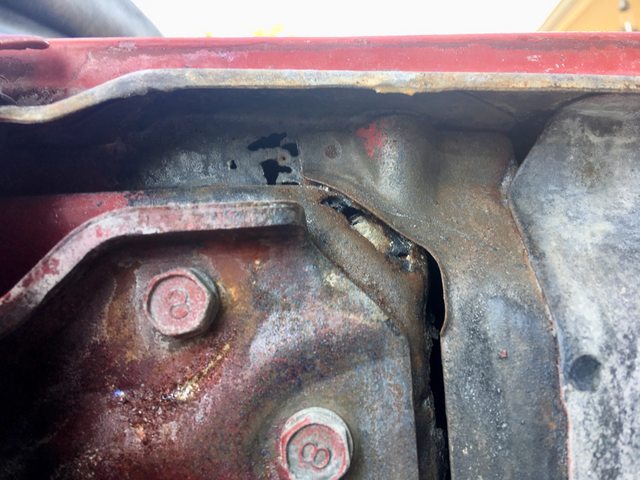
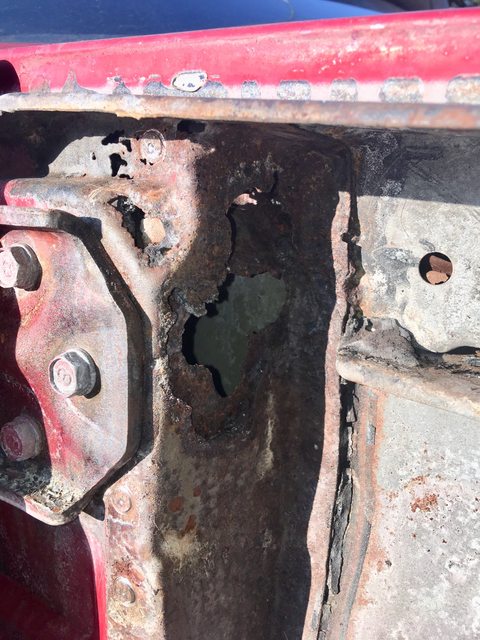
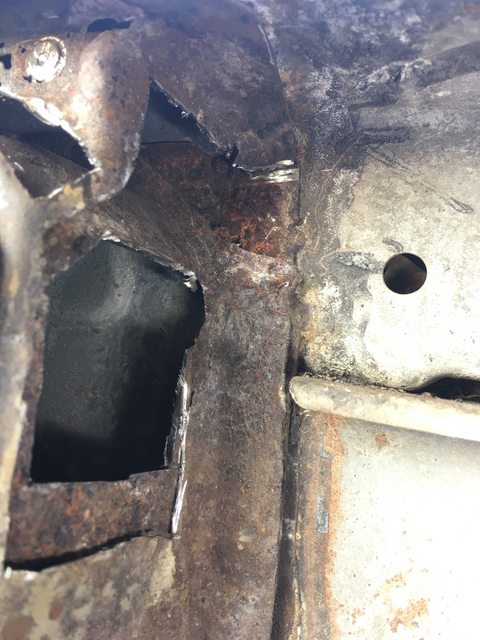
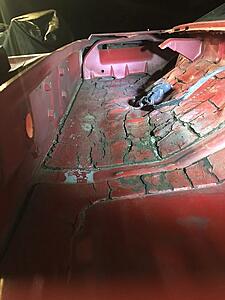
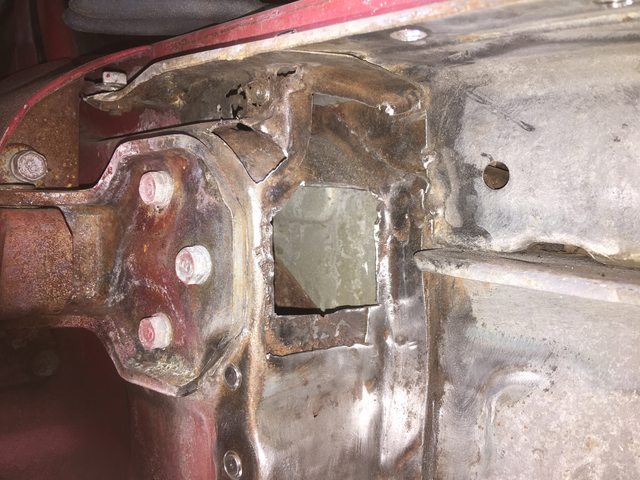
Yep. That's why this had to come off.

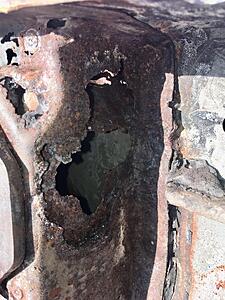
There was no way I could live with myself knowing that was there unrepaired.
How about a nice, close, well-lit shot (automotive gore warning):
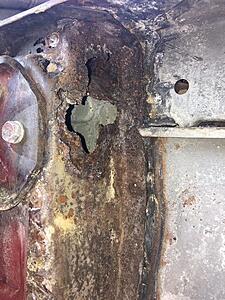
Yes, I know it's nothing by northeast/Canuckistan standards, but this is TEXAS!
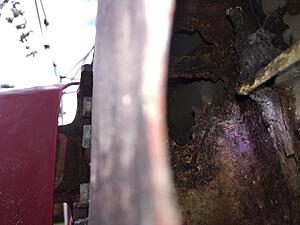
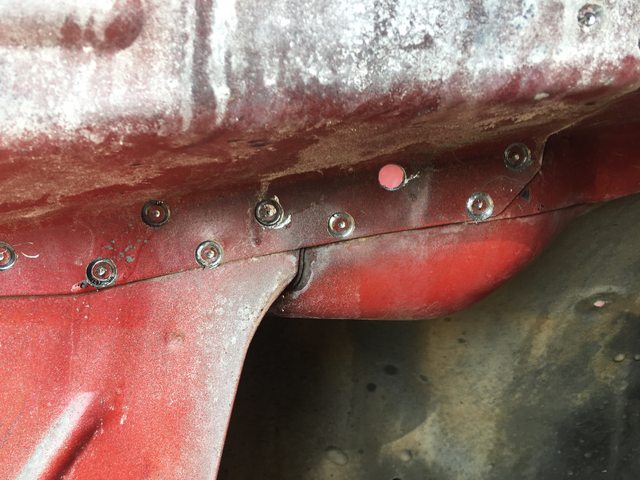
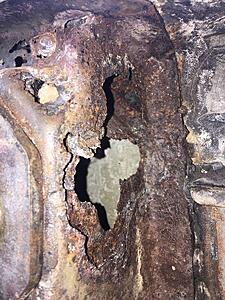
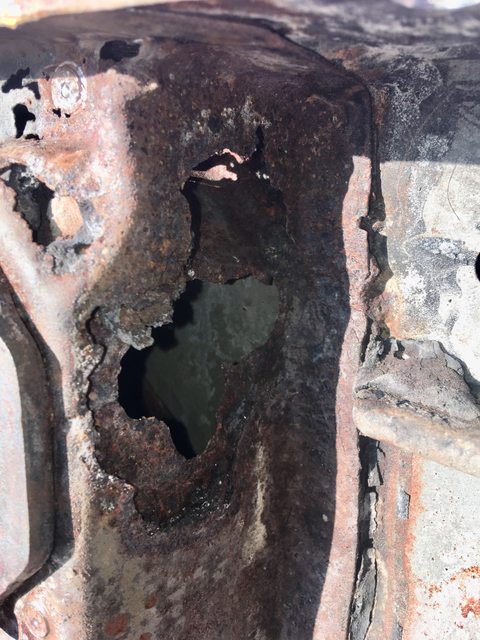
A little poking and prodding, and this chunk of sealer came out, opening up the smaller hole a bit:


Beginning cancer removal:
One more little ***** up there at the top right:
And I'm done. The smaller group of pinholes up and towards the door I'll back with brass and weld to fill. Or maybe just epoxy. Nah, I have a welder!
There was no way I could live with myself knowing that was there unrepaired.
How about a nice, close, well-lit shot (automotive gore warning):


Yes, I know it's nothing by northeast/Canuckistan standards, but this is TEXAS!
A little poking and prodding, and this chunk of sealer came out, opening up the smaller hole a bit:
Beginning cancer removal:

One more little ***** up there at the top right:
And I'm done. The smaller group of pinholes up and towards the door I'll back with brass and weld to fill. Or maybe just epoxy. Nah, I have a welder!
Thread Starter
Joined: Feb 2004
Posts: 1,202
Likes: 98
From: Euless, TX
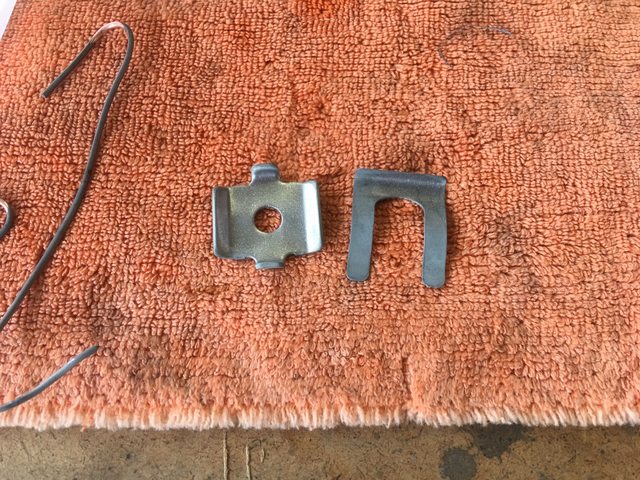
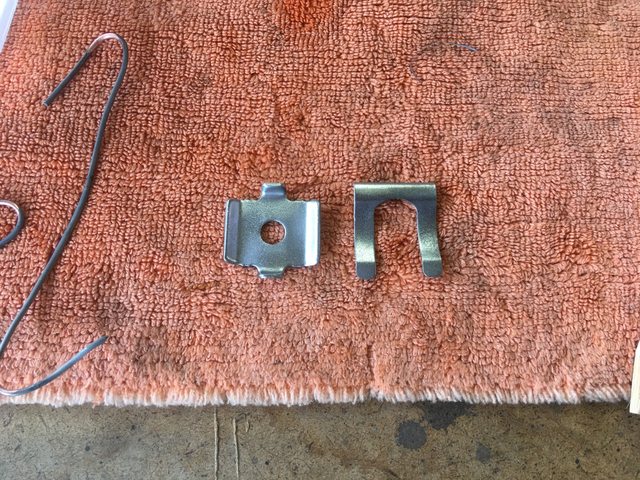
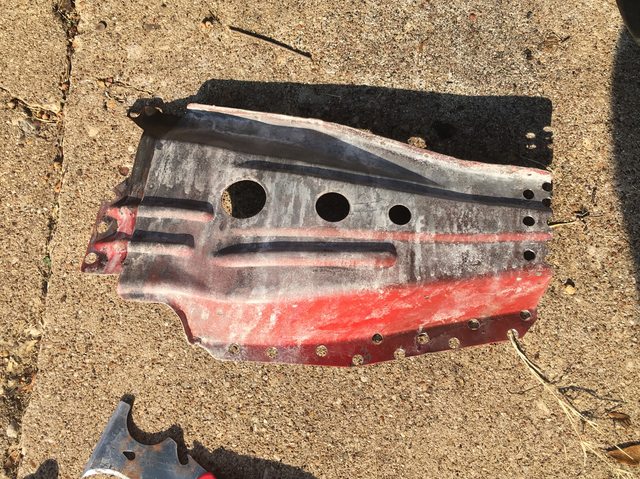
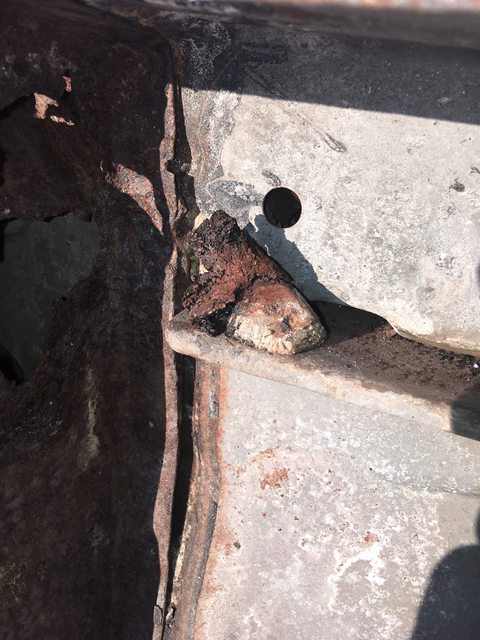
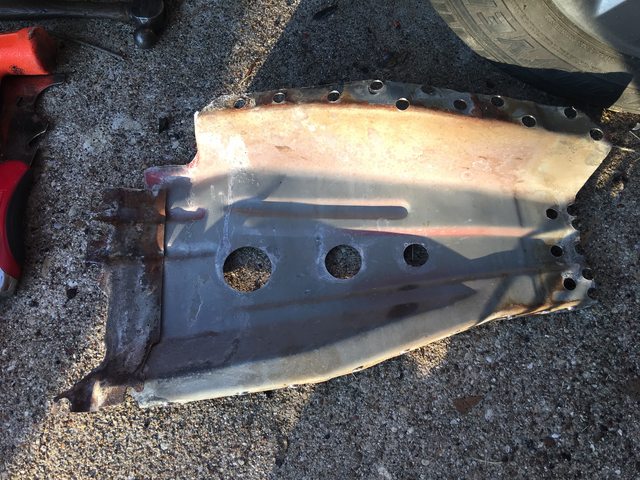
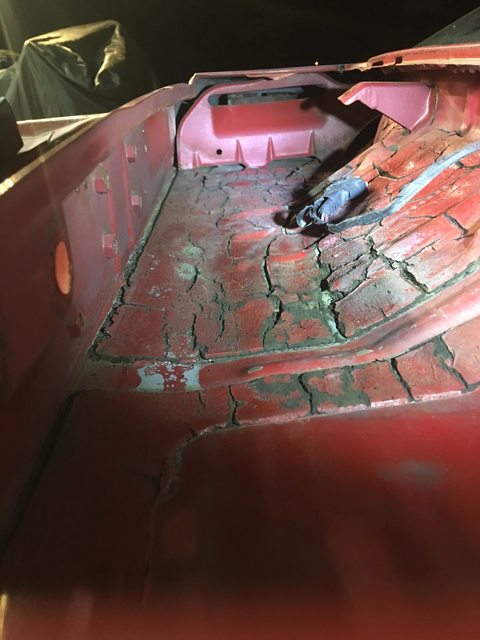
A wee bit of rust on the inside of the removed panel. Not terrible:
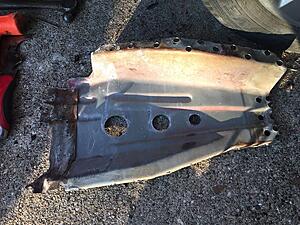
Chucked the panel into the media blaster for a quick run:

Man, I love that blaster.
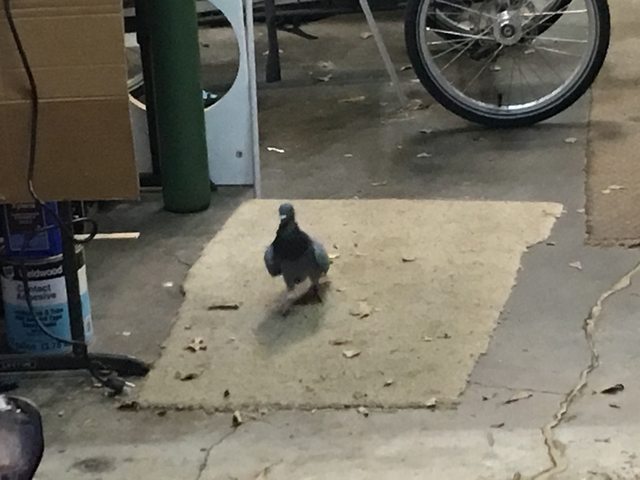
I had a visitation.

No idea. It just wandered into the garage, then back out.
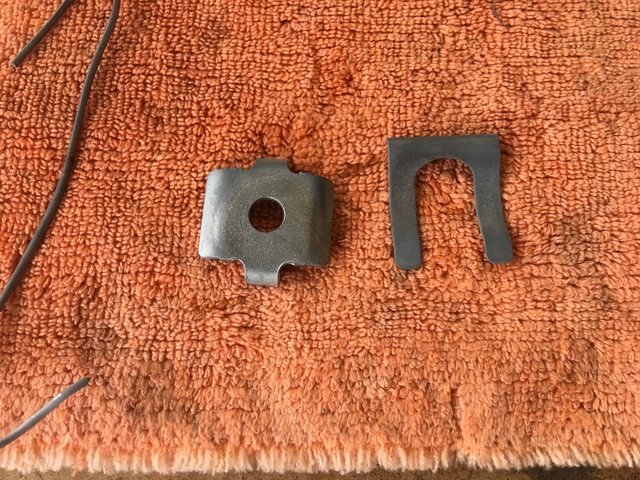
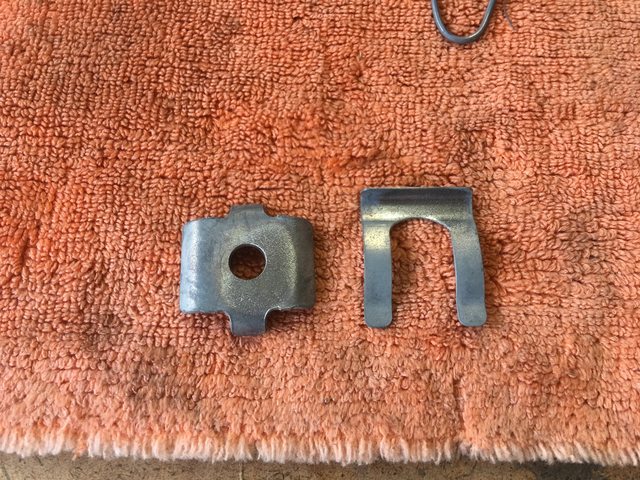
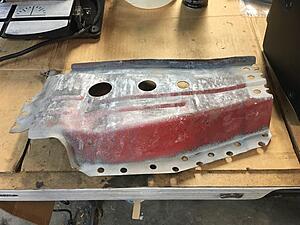
A combination of wire brushes/wheels, Scotchbrite wheels, and rust remover wheels got me to here:
Before I started spraying, I blew out the cowl area adjacent to the repair and got all this:

The area right next to where I'm working is largely inaccessible. It's the pick-up for the HVAC, and mostly blocked to try to prevent that crap from getting into the car:
That all came from the other side of the vertical panel with the slot.
Chucked the panel into the media blaster for a quick run:


Man, I love that blaster.
I had a visitation.
No idea. It just wandered into the garage, then back out.
A combination of wire brushes/wheels, Scotchbrite wheels, and rust remover wheels got me to here:
Before I started spraying, I blew out the cowl area adjacent to the repair and got all this:

The area right next to where I'm working is largely inaccessible. It's the pick-up for the HVAC, and mostly blocked to try to prevent that crap from getting into the car:
That all came from the other side of the vertical panel with the slot.