Bringing it back to life
 02-01-12, 10:55 PM
#126
Senior Member
Thread Starter
iTrader: (1)

Join Date: Aug 2010
Location: Southern Minnesota and Southern California
Posts: 340
Likes: 0
Received 0 Likes
on
0 Posts
Sweet! I did not have an internal leak! There must have just been done leftover somewhere in the system.
I started her up again and ran her for a few minutes. I almost broke my arm patting myself on my back when my friend pointed out that I didn't fill up the coolant correctly. Full the reservoir to the "full" mark, not the "low"mark. Lol. Oh well my head shrunk and can fit back in my hats.
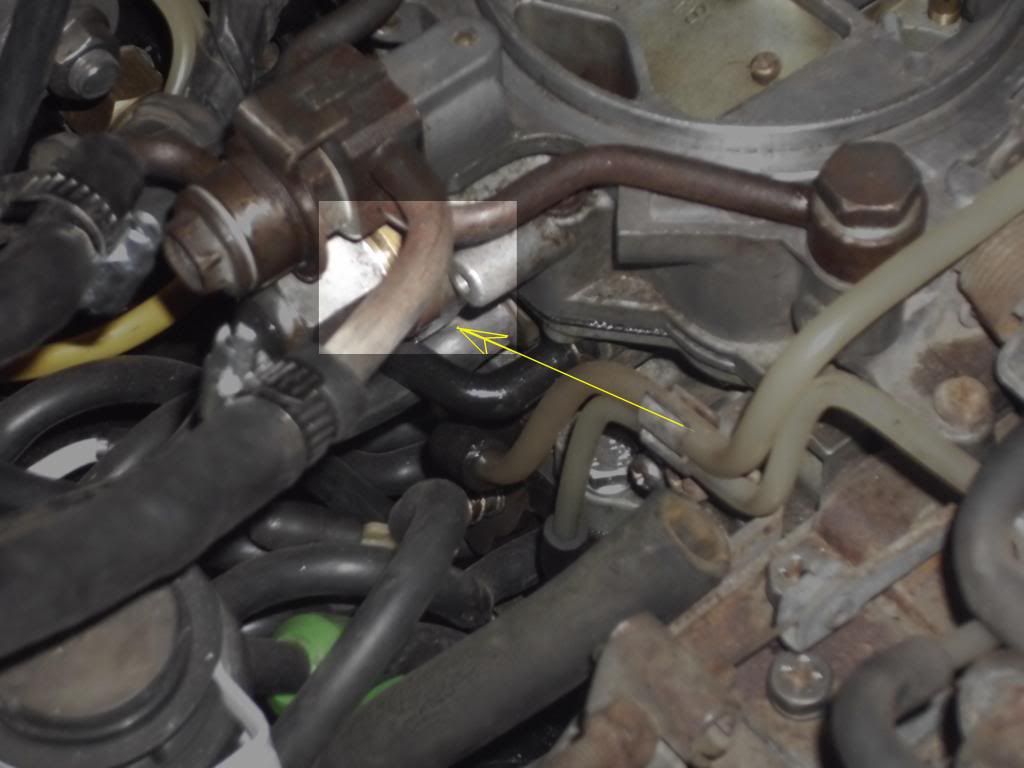
We also noticed a leak coming from below the fuel inlet line on the carburetor.
on my list of things to fix.
I made a rough adjustment to the idle. Its down to about 1200 RPM's. Guessing a vacuum leak. Still some work to do there too.
I removed the last two tires. They are being replaced with some wonderful Negotiators. At least I won't have to reinflate them every other week.
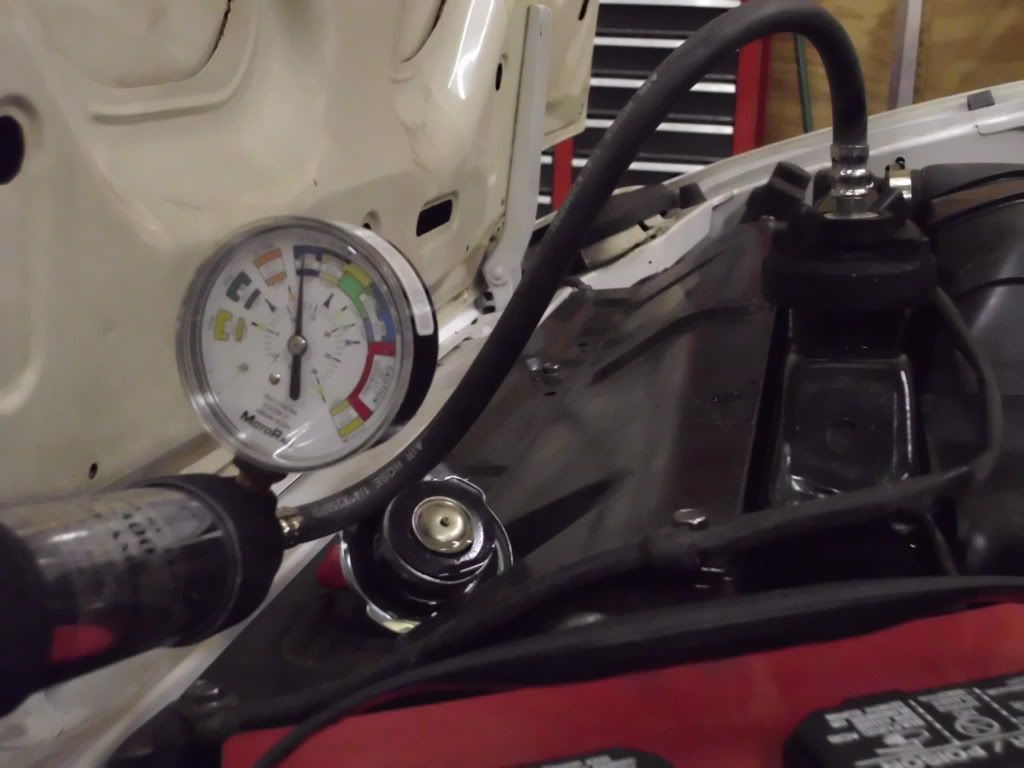
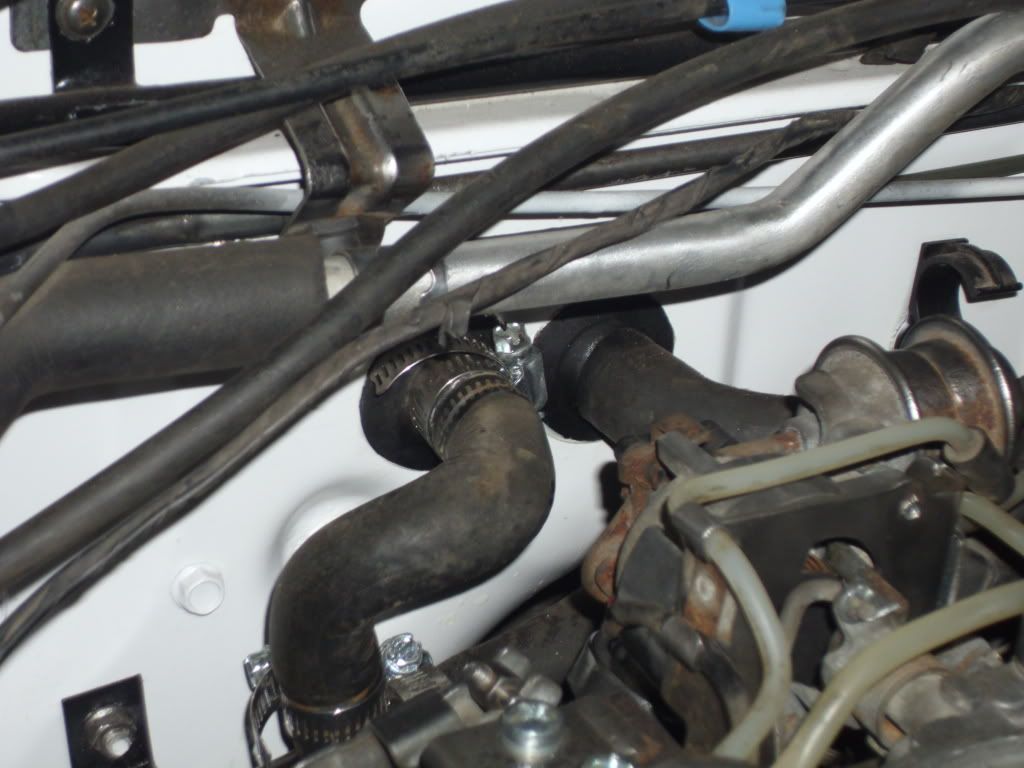
I picked up a pressure tester for the coolant system. Its a good thing I did. I found three leaks. One on the upper radiator hose, and two on the hoses that, I believe, connect to the heater core.
[IMG]http://i1191.photobucket.com/albums/z469/clykins77/
DSCI0397.jpg[/IMG]
I also dropped off the brake lines at a local shop to have the flares done professionally. The tool I have doesn't seem to be working.
I started her up again and ran her for a few minutes. I almost broke my arm patting myself on my back when my friend pointed out that I didn't fill up the coolant correctly. Full the reservoir to the "full" mark, not the "low"mark. Lol. Oh well my head shrunk and can fit back in my hats.
We also noticed a leak coming from below the fuel inlet line on the carburetor.
on my list of things to fix.
I made a rough adjustment to the idle. Its down to about 1200 RPM's. Guessing a vacuum leak. Still some work to do there too.
I removed the last two tires. They are being replaced with some wonderful Negotiators. At least I won't have to reinflate them every other week.
I picked up a pressure tester for the coolant system. Its a good thing I did. I found three leaks. One on the upper radiator hose, and two on the hoses that, I believe, connect to the heater core.
[IMG]http://i1191.photobucket.com/albums/z469/clykins77/
DSCI0397.jpg[/IMG]
I also dropped off the brake lines at a local shop to have the flares done professionally. The tool I have doesn't seem to be working.

 02-05-12, 07:08 PM
#128
Senior Member
Thread Starter
iTrader: (1)
Join Date: Aug 2010
Location: Southern Minnesota and Southern California
Posts: 340
Likes: 0
Received 0 Likes
on
0 Posts
I feel that I got a lot done yesterday... well at least a lot started.
I am still waiting on my brake lines and on my two new tires, so I thought I'd work on the parking brake. I got the parking brake adjusted, I think, although I'm not 100% certain it is correct. There seems to be a fine line between having it too loose that it won't be able to hold the weight of the car on a hill or having it too tight that it won't be able to release enough for driving. Unless someone here has some pearl of wisdom that I couldn't find in my manuals, I think I'll take it into a mechanic when I'm done to for peace of mind. Brakes are kinda important, I think.
Alright you guys will probably think a little less of me for this, but its kinda funny. When I got done adjusting the parking brake, I started tweeking the parking brake sensor. No matter how I adjusted it though, I couldn't get the "Brake" light to go out when I released the parking brake. After about twenty minutes I pulled out the electrical diagram and saw "Brake Fluid Level Sensor" attached to the indicator as well. Duh! The brake reservoir is empty since I pulled the brake lines... I know, lol. Tonight I've lost the little respect I might have gained on the boards.
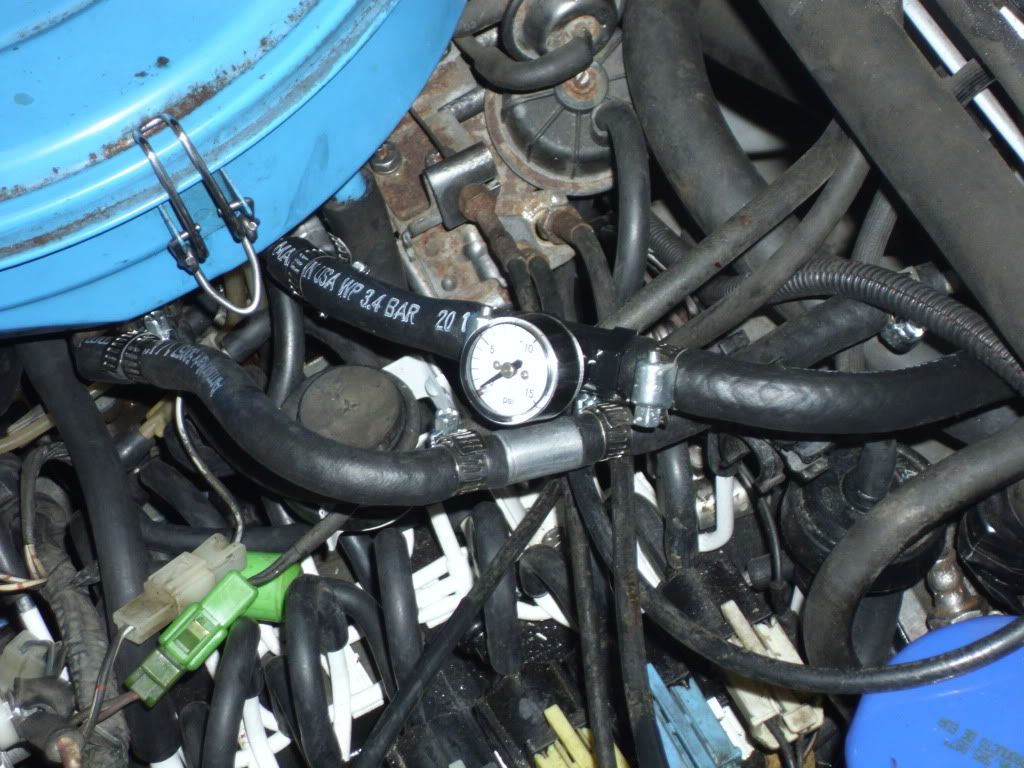
I also installed an in-line fuel pressure gauge that I purchased from Autozone for about ten dollars. According to the FSM, I should be reading about 2.84 - 3.55psi. My little gauge is reading about 1.5 psi (and no, the gauge is not mounted on the fuel return line, lol)
I understand that when you increase the size of the hose, you will decrease psi, however the 1/4" fuel line I was using fit well on the fuel return, but I could not get it to fit the fuel feed line from the firewall hardline or the carburetor, so I picked up some 5/16" fuel line. Yeah, the fuel pressure dropped to about 1 - 1.5 psi like I thought it would. Didn't solve my psi problem, but it did fit a lot better! I am thinking that I have some gunk in the hard line that is killing my psi. I think I'll test the psi at the fuel pump. If that is good, then I'll replace the hardlines. (Maybe run some Seafoam through?)
I also picked up a cheap timing light from Autozone and adjusted the lead timing. I tried to adjust the trailing timing, however no amount of adjustment would affect the timing light's indication on the escentric shaft pulley. The other bigger problem is that I can't find the "red mark" on the pulley any more. I guess I'll need to figure out the location on the pulley and remark it after I figure out why the vacuum advance diaphragm isn't working. Got some more tests to run. Wow did she purr a lot better when the timing was adjusted!
I also tried to do some work with tuning the carburetor. (Thanks Sterling for your posts on an earlier thread on how to do this). I had some luck. I can get her to idle fairly well at about 1200 RPMs. Some searching on the board seems to suggest a vacuum leak. I'm not too worried about it quite yet. I need to hook up the exhaust first. I'm guessing that will have an effect on the quality of the idle.
I spent the remainder of the evening chasing electrical gremlins, mainly the lights. The bright lights work if I hold the selector, but not otherwise. I have to find a replacement connector for the driver's rear side lamp, I believe its called. And the 2nd filament in the front left park/turn lamp will not illuminate when the hazards are selected on. But hey! Considering she sat for 16 years I am amazed any of them work. Oh yeah and the "Vent" selector switch light is burnt out as well. Need to do some searching on where to get these bulbs.
Well hopefully I should be able to pick up the tires and the brake lines tomorrow and get those installed and the brakes completed.
I am still waiting on my brake lines and on my two new tires, so I thought I'd work on the parking brake. I got the parking brake adjusted, I think, although I'm not 100% certain it is correct. There seems to be a fine line between having it too loose that it won't be able to hold the weight of the car on a hill or having it too tight that it won't be able to release enough for driving. Unless someone here has some pearl of wisdom that I couldn't find in my manuals, I think I'll take it into a mechanic when I'm done to for peace of mind. Brakes are kinda important, I think.
Alright you guys will probably think a little less of me for this, but its kinda funny. When I got done adjusting the parking brake, I started tweeking the parking brake sensor. No matter how I adjusted it though, I couldn't get the "Brake" light to go out when I released the parking brake. After about twenty minutes I pulled out the electrical diagram and saw "Brake Fluid Level Sensor" attached to the indicator as well. Duh! The brake reservoir is empty since I pulled the brake lines... I know, lol. Tonight I've lost the little respect I might have gained on the boards.
I also installed an in-line fuel pressure gauge that I purchased from Autozone for about ten dollars. According to the FSM, I should be reading about 2.84 - 3.55psi. My little gauge is reading about 1.5 psi (and no, the gauge is not mounted on the fuel return line, lol)
I understand that when you increase the size of the hose, you will decrease psi, however the 1/4" fuel line I was using fit well on the fuel return, but I could not get it to fit the fuel feed line from the firewall hardline or the carburetor, so I picked up some 5/16" fuel line. Yeah, the fuel pressure dropped to about 1 - 1.5 psi like I thought it would. Didn't solve my psi problem, but it did fit a lot better! I am thinking that I have some gunk in the hard line that is killing my psi. I think I'll test the psi at the fuel pump. If that is good, then I'll replace the hardlines. (Maybe run some Seafoam through?)
I also picked up a cheap timing light from Autozone and adjusted the lead timing. I tried to adjust the trailing timing, however no amount of adjustment would affect the timing light's indication on the escentric shaft pulley. The other bigger problem is that I can't find the "red mark" on the pulley any more. I guess I'll need to figure out the location on the pulley and remark it after I figure out why the vacuum advance diaphragm isn't working. Got some more tests to run. Wow did she purr a lot better when the timing was adjusted!
I also tried to do some work with tuning the carburetor. (Thanks Sterling for your posts on an earlier thread on how to do this). I had some luck. I can get her to idle fairly well at about 1200 RPMs. Some searching on the board seems to suggest a vacuum leak. I'm not too worried about it quite yet. I need to hook up the exhaust first. I'm guessing that will have an effect on the quality of the idle.
I spent the remainder of the evening chasing electrical gremlins, mainly the lights. The bright lights work if I hold the selector, but not otherwise. I have to find a replacement connector for the driver's rear side lamp, I believe its called. And the 2nd filament in the front left park/turn lamp will not illuminate when the hazards are selected on. But hey! Considering she sat for 16 years I am amazed any of them work. Oh yeah and the "Vent" selector switch light is burnt out as well. Need to do some searching on where to get these bulbs.
Well hopefully I should be able to pick up the tires and the brake lines tomorrow and get those installed and the brakes completed.
Last edited by clykins; 02-05-12 at 07:14 PM.
02-05-12, 07:17 PM
#129
Senior Member
Thread Starter
iTrader: (1)
Join Date: Aug 2010
Location: Southern Minnesota and Southern California
Posts: 340
Likes: 0
Received 0 Likes
on
0 Posts
I feel that I got a lot done yesterday... well at least a lot started.
I am still waiting on my brake lines and on my two new tires, so I thought I'd work on the parking brake. I got the parking brake adjusted, I think, although I'm not 100% certain it is correct. There seems to be a fine line between having it too loose that it won't be able to hold the weight of the car on a hill or having it too tight that it won't be able to release enough for driving. Unless someone here has some pearl of wisdom that I couldn't find in my manuals, I think I'll take it into a mechanic when I'm done to for peace of mind. Brakes are kinda important, I think.
Alright you guys will probably think a little less of me for this, but its kinda funny. When I got done adjusting the parking brake, I started tweeking the parking brake sensor. No matter how I adjusted it though, I couldn't get the "Brake" light to go out when I released the parking brake. After about twenty minutes I pulled out the electrical diagram and saw "Brake Fluid Level Sensor" attached to the indicator as well. Duh! The brake reservoir since I pulled the brake lines... I know, lol. Tonight I've lost the little respect I might have gained on the boards.
I also installed an in-line fuel pressure gauge that I purchased from Autozone for about ten dollars. According to the FSM, I should be reading about 2.84 - 3.85psi. My little gauge is reading about 1.5 psi (and no, the gauge is not mounted on the fuel return line, lol)
I understand that when you increase the size of the hose, you will decrease psi, however the 1/4" fuel line I was using fit well on the fuel return, but I could not get it to fit the fuel feed line from the firewall hardline or the carburetor, so I picked up some 5/16" fuel line. Yeah, the fuel pressure dropped to about 1 - 1.5 psi like I thought it would. Didn't solve my psi problem, but it did fit a lot better! I am thinking that I have some gunk in the hard line that is killing my psi. I think I'll test the psi at the fuel pump. If that is good, then I'll replace the hardlines. (Maybe run some Seafoam through?)
I also picked up a cheap timing light from Autozone and adjusted the lead timing. I tried to adjust the trailing timing, however no amount of adjustment would affect the timing light's indication on the escentric shaft pulley. The other bigger problem is that I can't find the "red mark" on the pulley any more. I guess I'll need to figure out the location on the pulley and remark it after I figure out why the vacuum diaphram isn't working. Got some more tests to run. Wow did she purr a lot better when the timing was adjusted!
I also tried to do some work with tuning the carburetor. (Thanks Sterling for your posts on an earlier thread on how to do this). I had some luck. I can get her to idle fairly well at about 1200 RPMs. Some searching on the board seems to suggest a vacuum leak. I'm not too worried about it quite yet. I need to hook up the exhaust first. I'm guessing that will have an effect on the quality of the idle.
I spent the remainder of the evening chasing electrical gremlins, mainly the lights. The bright lights work if I hold the selector, but not otherwise. I have to find a replacement connector for the driver's rear side lamp, I believe its called. And the 2nd filament in the front left park/turn lamp will not illuminate when the hazards are selected on. But hey! Considering she sat for 16 years I am amazed any of them work. Oh yeah and the "Vent" selector switch light is burnt out as well. Need to do some searching on where to get these bulbs.
Well hopefully I should be able to pick up the tires and the brake lines tomorrow and get those installed and the brakes completed.
02-07-12, 07:31 PM
#130
Senior Member
Thread Starter
iTrader: (1)
Join Date: Aug 2010
Location: Southern Minnesota and Southern California
Posts: 340
Likes: 0
Received 0 Likes
on
0 Posts
Small progress
OOoops! Sorry about the double post (no it wasn't deja vu)
I got my brake lines back from the shop. I got them installed and bled - what a pain to do by yourself even with a one-person brake bleeding tool. Multiple leaks sprung up, but I was able to seal them all off by cranking down on the nut. Thought I'd bust at least one, but they are in and bled.
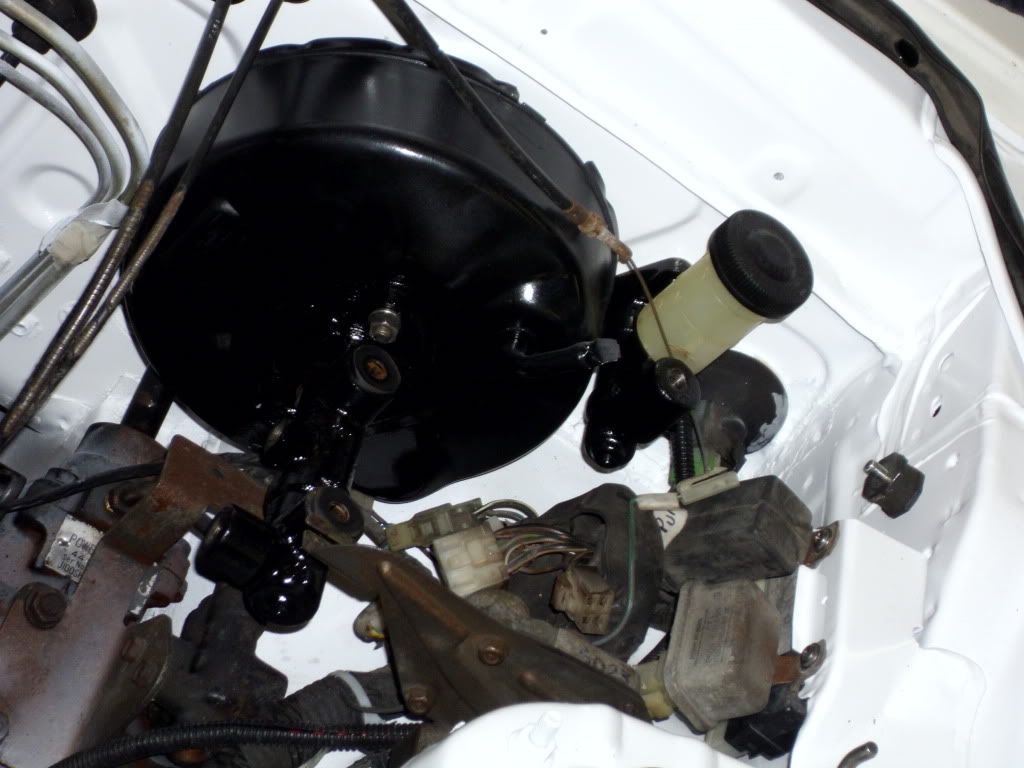
I've got some more work to do on the brake system, however. The brakes still won't hold pressure and stepping on the brake when the car is idling causes a noticable change in RPM. I believe there is a problem with the brake boost diaphragm. I also don't think I bled the brake master when I had it out. It looks like I might need to pull it and bleed it. The Haynes manual says there is a bleed valve on it, but I can't see one.
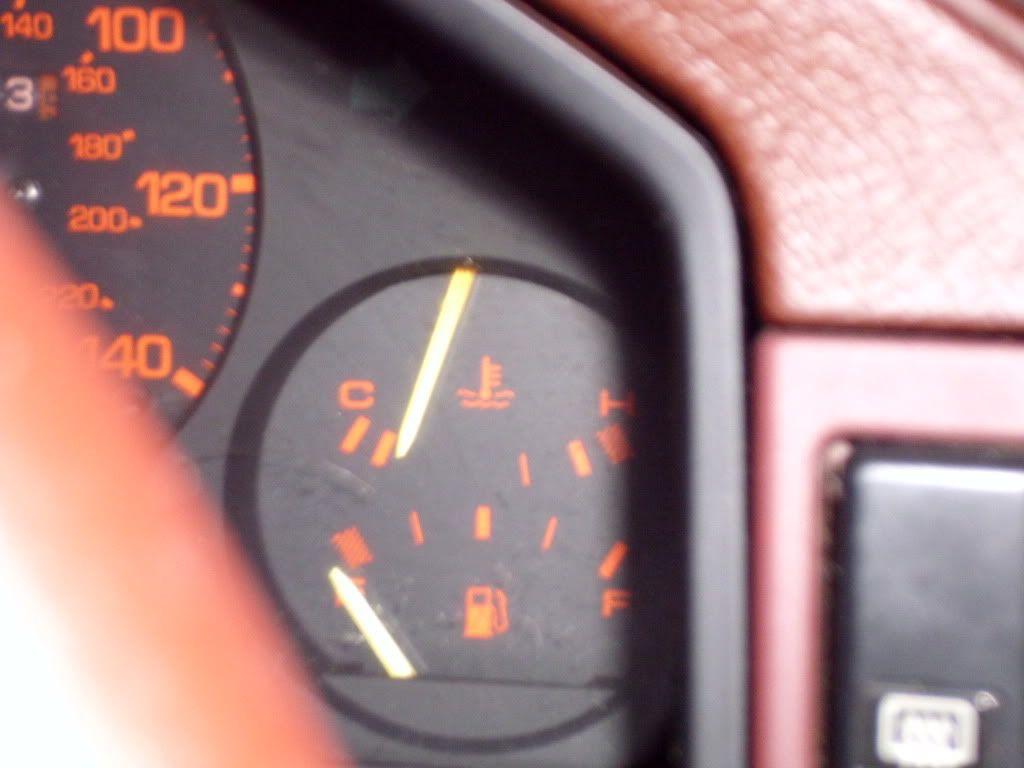
Another small item - I got the engine temperature gauge hooked up. The engine seems to warm up to a good temp.
I got the two new rear tires in and on. She is now sitting on four good wheels. I won't have to continually air up the tires to keep her off her rims.
I have a new air cleaner cover on the way from ebay. Its has to be better than the one I have right now.
Just a few small things to tinker on while I'm trying to get the money together for the last two main items - fuel tank and exhaust. She should be back on the road soon!!!! I've been anxious for that moment for the past 17 years.
I got my brake lines back from the shop. I got them installed and bled - what a pain to do by yourself even with a one-person brake bleeding tool. Multiple leaks sprung up, but I was able to seal them all off by cranking down on the nut. Thought I'd bust at least one, but they are in and bled.
I've got some more work to do on the brake system, however. The brakes still won't hold pressure and stepping on the brake when the car is idling causes a noticable change in RPM. I believe there is a problem with the brake boost diaphragm. I also don't think I bled the brake master when I had it out. It looks like I might need to pull it and bleed it. The Haynes manual says there is a bleed valve on it, but I can't see one.
Another small item - I got the engine temperature gauge hooked up. The engine seems to warm up to a good temp.
I got the two new rear tires in and on. She is now sitting on four good wheels. I won't have to continually air up the tires to keep her off her rims.
I have a new air cleaner cover on the way from ebay. Its has to be better than the one I have right now.
Just a few small things to tinker on while I'm trying to get the money together for the last two main items - fuel tank and exhaust. She should be back on the road soon!!!! I've been anxious for that moment for the past 17 years.
02-10-12, 09:15 AM
#134
Senior Member
Thread Starter
iTrader: (1)
Join Date: Aug 2010
Location: Southern Minnesota and Southern California
Posts: 340
Likes: 0
Received 0 Likes
on
0 Posts
Thanks guys for the encouragement. 
Just about ready to head out and start working on her this morning. I got in last night and found a package waiting for me - my new (used) air cleaner cover. A little bit of cleaning up and vua la. For your comparasion;
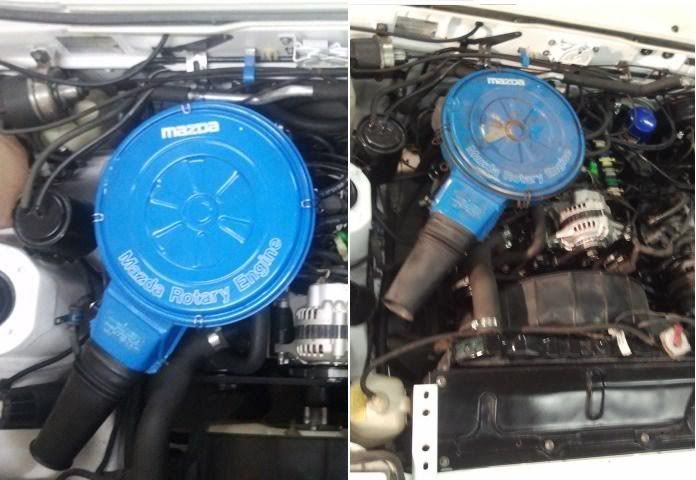
Well off to the garage. Wish me luck. Need to find out why I have no vacuum.
Just about ready to head out and start working on her this morning. I got in last night and found a package waiting for me - my new (used) air cleaner cover. A little bit of cleaning up and vua la. For your comparasion;
Well off to the garage. Wish me luck. Need to find out why I have no vacuum.
02-14-12, 10:29 AM
#139
Senior Member
Thread Starter
iTrader: (1)
Join Date: Aug 2010
Location: Southern Minnesota and Southern California
Posts: 340
Likes: 0
Received 0 Likes
on
0 Posts
Just about. I just need to put in a fuel tank and I need one more cat and a muffler and she will be ready again for the open road!
02-19-12, 03:41 PM
#140
Senior Member
Thread Starter
iTrader: (1)
Join Date: Aug 2010
Location: Southern Minnesota and Southern California
Posts: 340
Likes: 0
Received 0 Likes
on
0 Posts
Well I had two days to tinker on her. There seems to be a leak of oil or brake fluid coming from either the brake booster area or under the oil cooler. Didn't have much time to get into that yet. I'm leaning towards the oil cooler. We'll see.
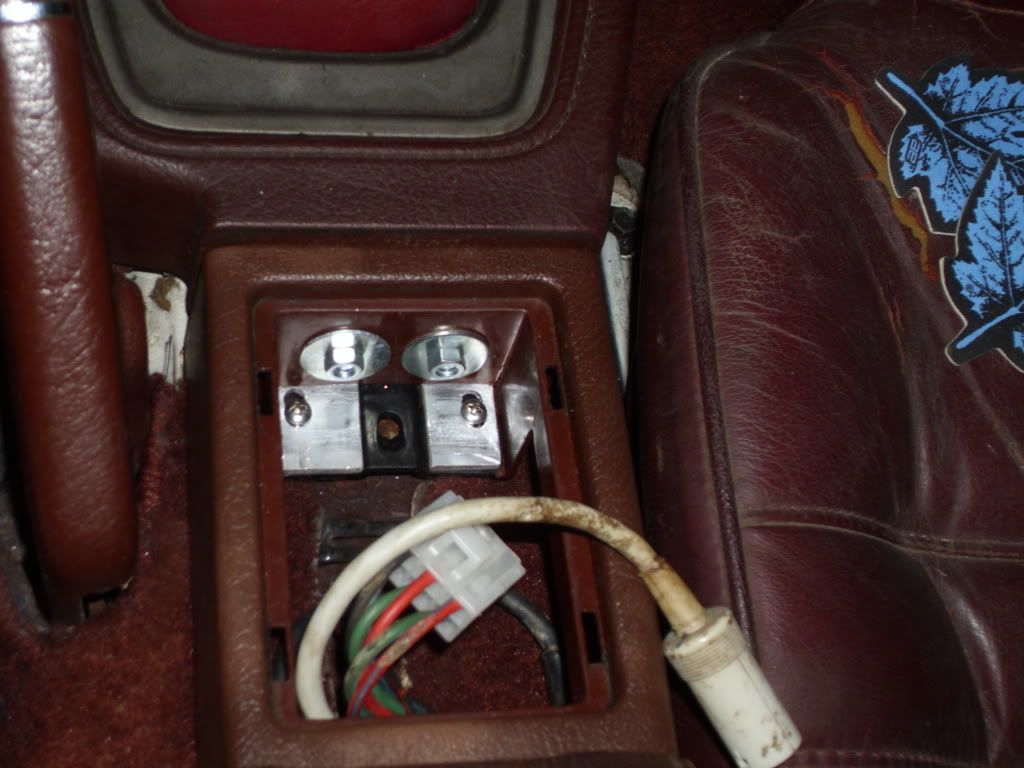
I spent a good deal of time working on a new front bracket to reattach the arm rest beneath the power window switches. The flimsy plastic had broken years ago. I cut another chunk of the aluminum angle metal I had used to make the fuel cut valve mounting bracket. This is what I came up with. It works quite well, although it sits back about an extra 1/8th inch. Oh well.
I also pulled the wiper motor and the frame and linkage. I tested the motor. Its shot. Need to get a new one of those eventually. I also cleaned up the frame and linkage. Of course I'll paint it, but still trying to descide on white or black. Descisions, descisions.
Got the new fuel tank on order from Mazdatrix. It should be in next week. After its in I've got a guy in town I would like to take her to to get an estimate on fixing up the exhaust. I need to replace the forward cat, a new muffler, and the return lines. Before he gets to that, I need to redrill and tap some of the heat shield mounting brackets and get those reinstalled. I think I should have her rolling down the drive way under her own power by the end of March. There will be plenty of little problems to work on (for the rest of my life) once these last two major projects are done. I can't wait!
Last edited by clykins; 02-19-12 at 03:45 PM.
02-26-12, 07:23 PM
#141
Senior Member
Thread Starter
iTrader: (1)
Join Date: Aug 2010
Location: Southern Minnesota and Southern California
Posts: 340
Likes: 0
Received 0 Likes
on
0 Posts
I got the new fuel tank in from Mazdatrix. My wonderful wife bought it for me for Valentines Day. I got a keeper
I installed the fuel pickup and threw some paint on it to keep off the rust as long as possible. I also threw the old busted fuel level sensor in to plug that hole until I get a new one.
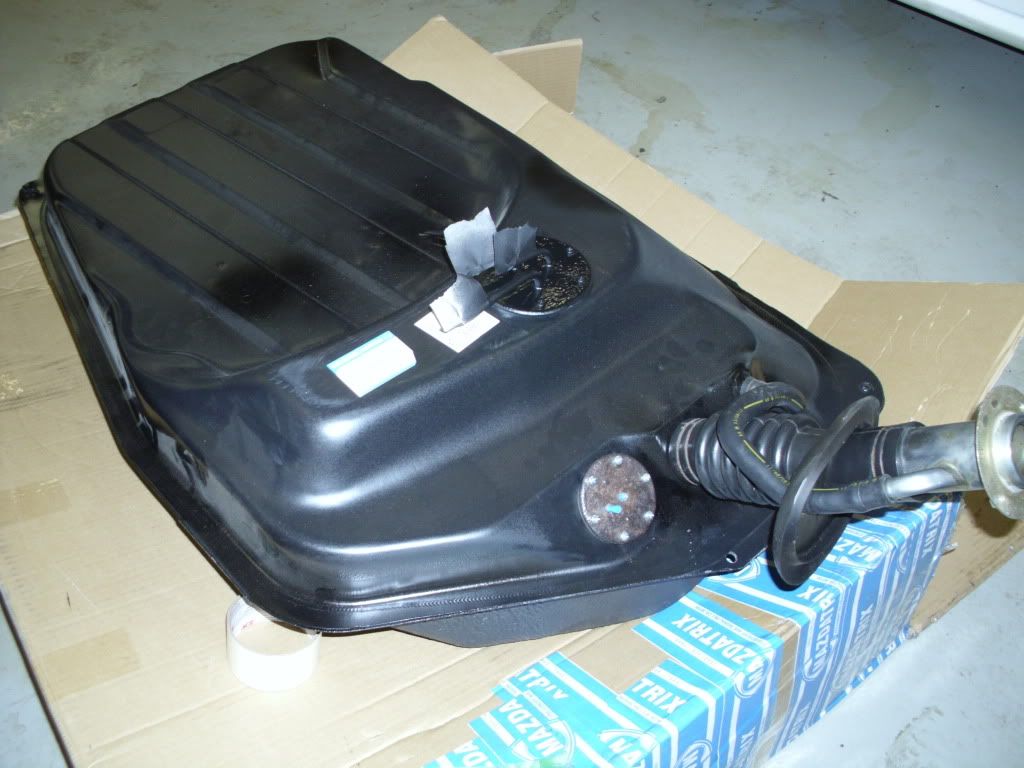
The tank slid into place pretty easily. Damn it looks sexy, lol
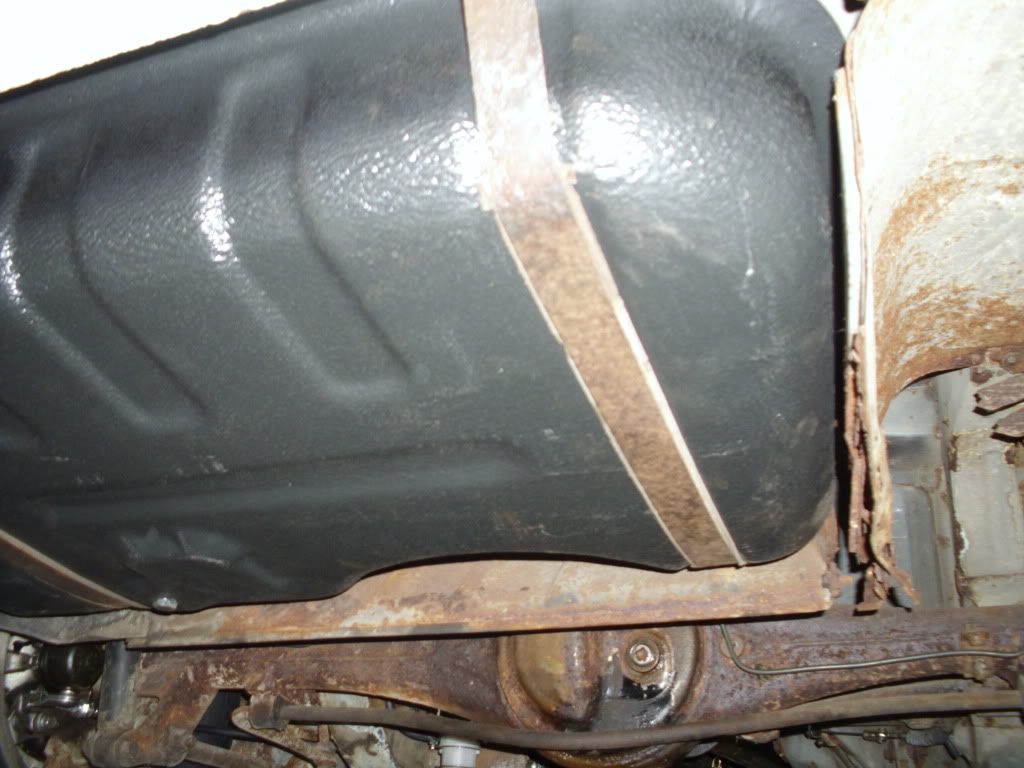
I emptied my gas can into the tank and started her up. As I thought, she starved to death. I have replaced the filter, hoses, fuel pump, and cleaned up the fuel cut valve, but I haven't touched the rusty-as-hell
hardlines. Guess what's next - replacing the rusty-as-hell fuel hardlines. Lol, unfortunately that will probably mean I need to drop the tank again since I will have to drill out the mounting bracket screw holes I'm sure.
I had the last two days to do this, unfortunately I was lazy and didn't feel up to working on it. Perhaps Tuesday evening.
Incidentally, I am trying to get rid of the other replacement fuel tank I'd purchased a couple months ago. If no one wants it I am just going to throw it. $30 plus shipping and its yours. It has a small pin hole leak and tge tank has rust inside, but it should still be good with a trip to a radiator shop.
Anyways, that's it for now. Going to be looking into getting the exhaust done perhaps in March.
I installed the fuel pickup and threw some paint on it to keep off the rust as long as possible. I also threw the old busted fuel level sensor in to plug that hole until I get a new one.
The tank slid into place pretty easily. Damn it looks sexy, lol
I emptied my gas can into the tank and started her up. As I thought, she starved to death. I have replaced the filter, hoses, fuel pump, and cleaned up the fuel cut valve, but I haven't touched the rusty-as-hell
hardlines. Guess what's next - replacing the rusty-as-hell fuel hardlines. Lol, unfortunately that will probably mean I need to drop the tank again since I will have to drill out the mounting bracket screw holes I'm sure.
I had the last two days to do this, unfortunately I was lazy and didn't feel up to working on it. Perhaps Tuesday evening.
Incidentally, I am trying to get rid of the other replacement fuel tank I'd purchased a couple months ago. If no one wants it I am just going to throw it. $30 plus shipping and its yours. It has a small pin hole leak and tge tank has rust inside, but it should still be good with a trip to a radiator shop.
Anyways, that's it for now. Going to be looking into getting the exhaust done perhaps in March.
03-01-12, 03:22 PM
#142
Senior Member
Thread Starter
iTrader: (1)
Join Date: Aug 2010
Location: Southern Minnesota and Southern California
Posts: 340
Likes: 0
Received 0 Likes
on
0 Posts
After 17 years she has finally moved again under her own power! Yesterday I drove her out of the garage... and right back in. (No insurance, registration, no exhaust and my neighbor is a police officer, lol)
She still has a ways to go before she is completed, but she is a lot closer than she way a year and a half ago when I started!
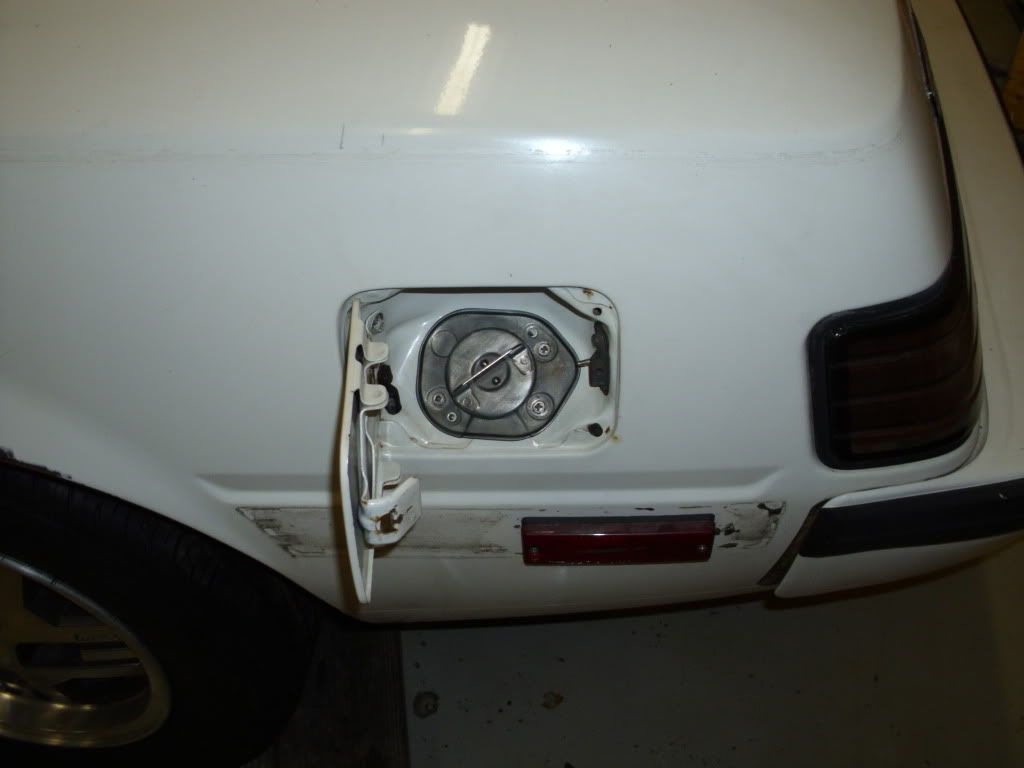
I pulled the fuel tank and found at least one of the hardline had a few holes in it. It was probably sucking in air instead of fuel, hense the fuel starvation. I've run a temporary hose from the tank to the fuel filter until I can replace the hardline.
The brakes are still a far cry from done. I've replaced pretty much everything, or rebuilt it, but I am getting a leak somewhere. Still some more work to do there. Maybe I will be able to take her out this summer after 17 years of sitting in the weeds! That will be quite a trip down memory lane... I wonder if I can still find a tape of Metallica...
She still has a ways to go before she is completed, but she is a lot closer than she way a year and a half ago when I started!
I pulled the fuel tank and found at least one of the hardline had a few holes in it. It was probably sucking in air instead of fuel, hense the fuel starvation. I've run a temporary hose from the tank to the fuel filter until I can replace the hardline.
The brakes are still a far cry from done. I've replaced pretty much everything, or rebuilt it, but I am getting a leak somewhere. Still some more work to do there. Maybe I will be able to take her out this summer after 17 years of sitting in the weeds! That will be quite a trip down memory lane... I wonder if I can still find a tape of Metallica...
03-02-12, 12:04 AM
#144
35r 13b first gen
iTrader: (3)
Join Date: Apr 2002
Location: Richland Center WI
Posts: 1,290
Likes: 0
Received 0 Likes
on
0 Posts
need any stock first gen brake parts... i think i have all 4 calipers with about 3000 miles on them... might have some used hoses as well... i upgraded to 2nd gen
03-02-12, 05:09 AM
#145
Senior Member
Thread Starter
iTrader: (1)
Join Date: Aug 2010
Location: Southern Minnesota and Southern California
Posts: 340
Likes: 0
Received 0 Likes
on
0 Posts
Thanks Zaridar. I will keep you in mind. All of my calipers are brand new. I hope I don't need to replace them... Calipers that only last 100 feet, that would be bad, lol.
03-18-12, 08:48 PM
#146
Senior Member
Thread Starter
iTrader: (1)
Join Date: Aug 2010
Location: Southern Minnesota and Southern California
Posts: 340
Likes: 0
Received 0 Likes
on
0 Posts
Just a couple of quick fixes this week. I fixed the last of the exterior lights. The only one left was a reverse light that was giving me trouble.
I removed the non working windshield wiper motor. I disassembled it, cleaned it, and redid a bad solder and wa la she started working again. Sweet! That saved me a hundred dollars :-)
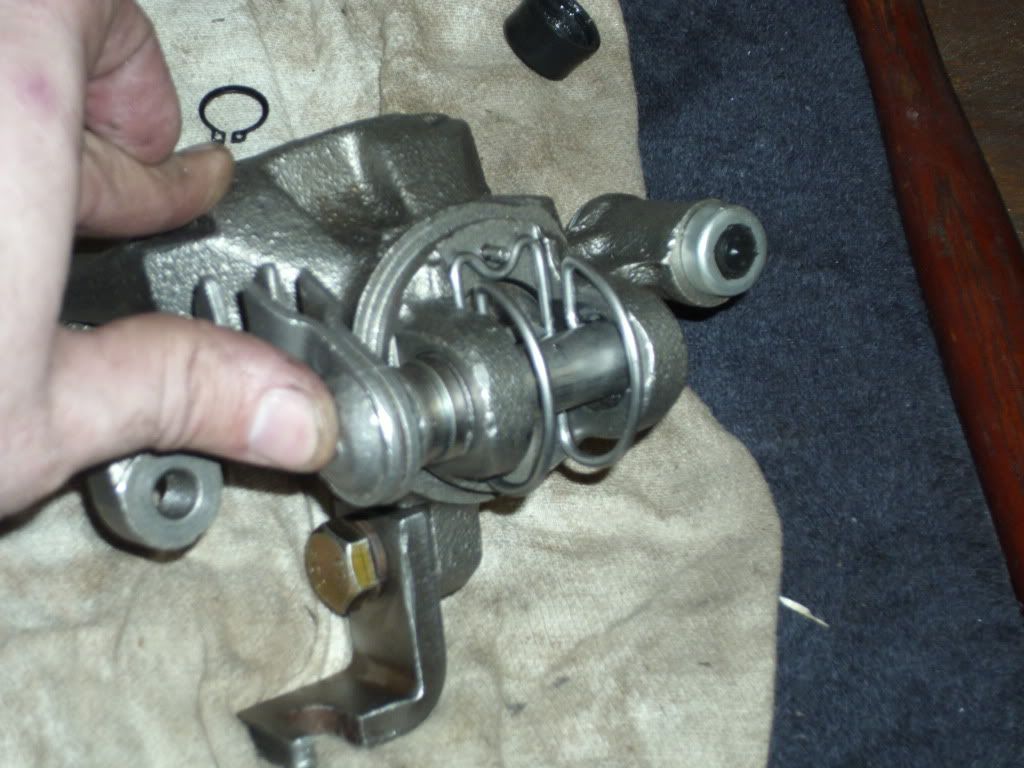
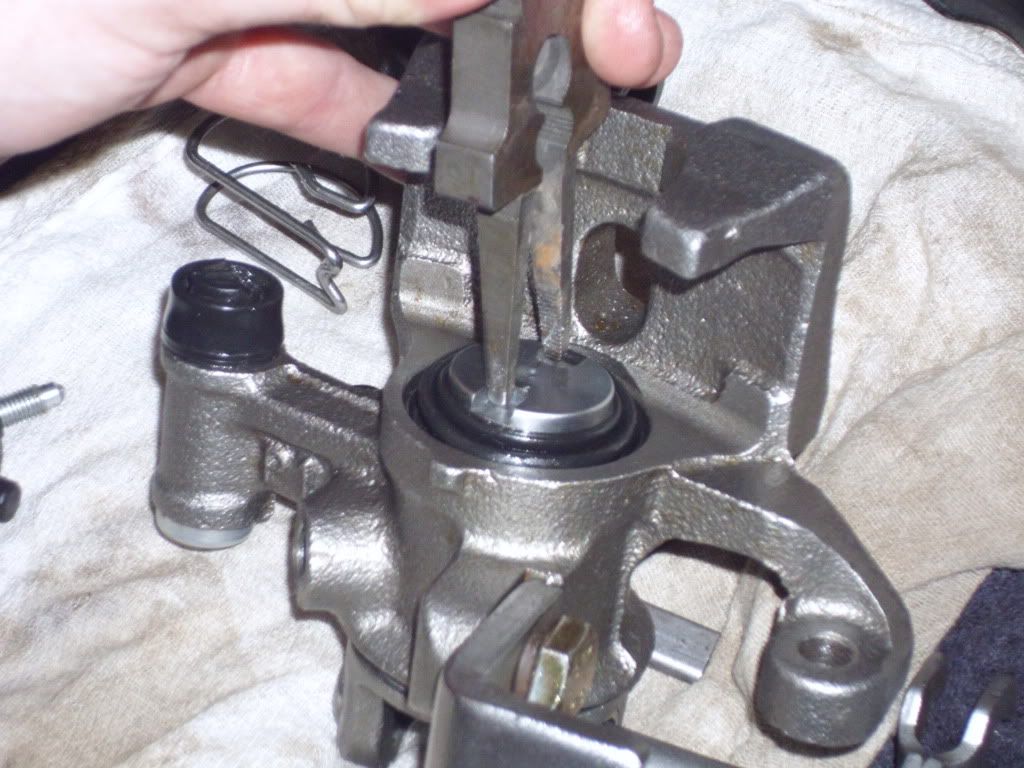
The last item was a rear brake caliper that was leaking from the boot covering the parking break components.
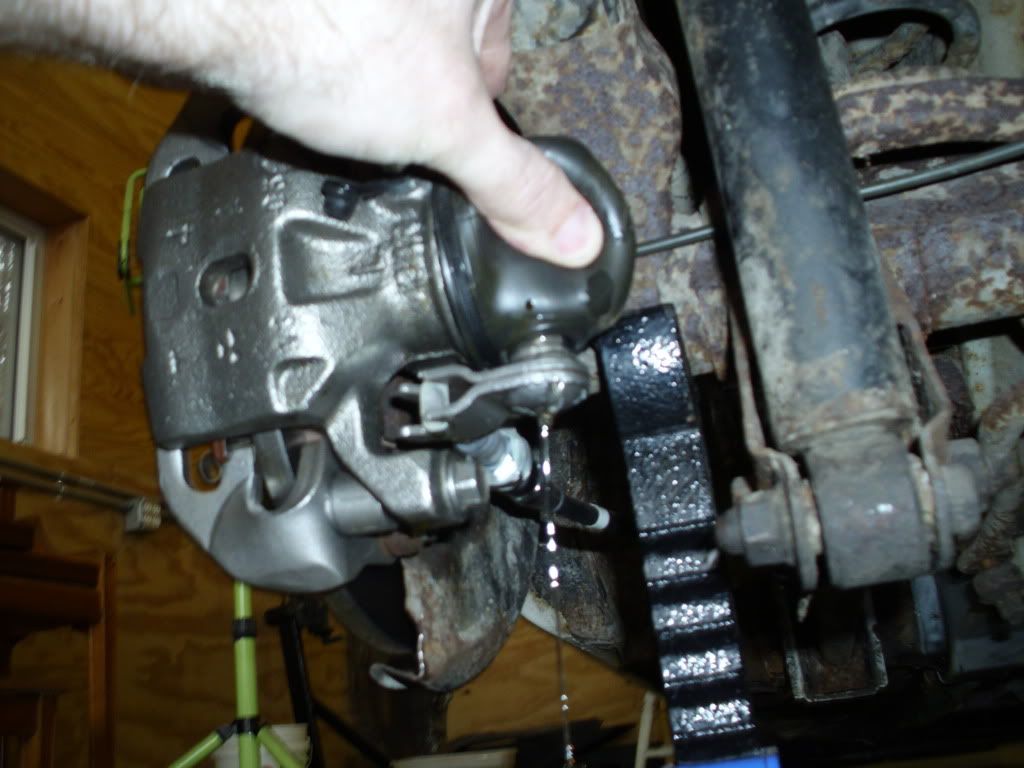
This caliper is brand new! I had a rebuild kit from earlier when I was thinking of rebuilding the old calipers, so I tore it apart. I also really wanted to know how it works. Here is what I ended up with.
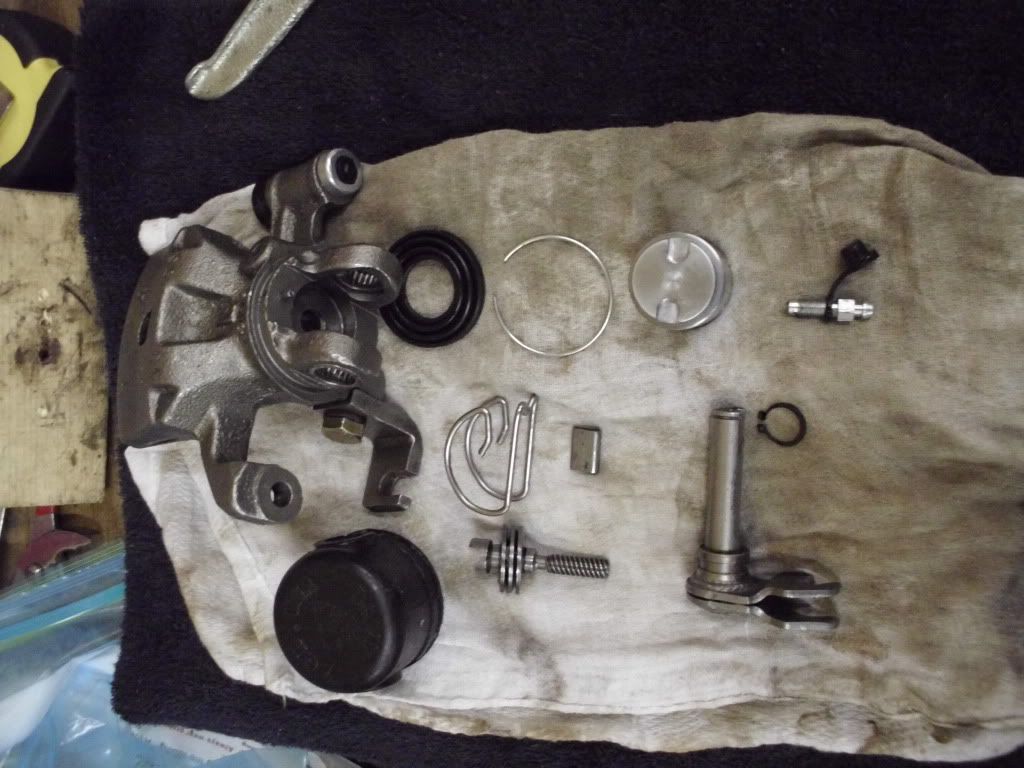
I couldn't find anything that would be causing the leak, but I replaced all of the rubber parts in the kit and the o-ring on the adjusting bolt. I didn't have the valve spring lifter arm, spring compressor or the removing plate that the FSM recommends, but I evidentially got it. Probably turned a thirty minute job into a two hour job, but oh well.
I reinstalled the caliper, hooked up the parking brake cable and rebled the system. No leak...so far. The brakes are still not as firm as I would like, but they are getting there.
I am anxious to get her back on the road. I have been driving it in my driveway like I did when I was sixteen, lol. Almost done!
I removed the non working windshield wiper motor. I disassembled it, cleaned it, and redid a bad solder and wa la she started working again. Sweet! That saved me a hundred dollars :-)
The last item was a rear brake caliper that was leaking from the boot covering the parking break components.
This caliper is brand new! I had a rebuild kit from earlier when I was thinking of rebuilding the old calipers, so I tore it apart. I also really wanted to know how it works. Here is what I ended up with.
I couldn't find anything that would be causing the leak, but I replaced all of the rubber parts in the kit and the o-ring on the adjusting bolt. I didn't have the valve spring lifter arm, spring compressor or the removing plate that the FSM recommends, but I evidentially got it. Probably turned a thirty minute job into a two hour job, but oh well.
I reinstalled the caliper, hooked up the parking brake cable and rebled the system. No leak...so far. The brakes are still not as firm as I would like, but they are getting there.
I am anxious to get her back on the road. I have been driving it in my driveway like I did when I was sixteen, lol. Almost done!
Last edited by clykins; 03-18-12 at 08:50 PM.
04-01-12, 10:30 AM
#148
Senior Member
Thread Starter
iTrader: (1)
Join Date: Aug 2010
Location: Southern Minnesota and Southern California
Posts: 340
Likes: 0
Received 0 Likes
on
0 Posts
They are working good so far. I rebuilt the one that was leaking and haven't had a problem since. I called the company and they said I could exchange them if I had any defects for up to one year from purchase. I would recommend them.
04-26-12, 10:05 AM
#149
Senior Member
Thread Starter
iTrader: (1)
Join Date: Aug 2010
Location: Southern Minnesota and Southern California
Posts: 340
Likes: 0
Received 0 Likes
on
0 Posts
Well so much for April, lol. Unfortunately not much progress. I have been dealing with some touch-up painting and rust removal. I wish I could say I was using some good quality paint, but no. I am just using rattle can. I would like to eventually give her a good thorough paint job, but my wife and I are trying to buy our first house and I would find my eye brows missing in the morning if I forked out $1,000 for a paint job, lol.
I still have a problem with overall brake pressure. Someone mentioned to check the proportioning valve, so I pulled it off and soaked it in parts cleaner. A thirty minute job has taken most of the month to complete.
In May I will hopefully be putting on a new exhaust. Again nothing fancy. Just going for functional for now. If I drive it out to California I will have to replace some exhaust parts to make her pass the visual smog check that everyone
loves.
So close! :-)
04-26-12, 06:42 PM
#150
Full Member

Join Date: Jun 2011
Location: High Point, North Carolina
Posts: 72
Likes: 0
Received 0 Likes
on
0 Posts
Just curious if you ever got her running right? I've rebuilt my carb and I had some vacuum leaks but think i've got them eliminated. Car still surges and you have to work the gas pedal to get it to go like it should. Also started backfiring really bad. Any suggestions? BTW, great job you're doing on your's.