When you click on links to various merchants on this site and make a purchase, this can result in this site earning a commission. Affiliate programs and affiliations include, but are not limited to, the eBay Partner Network.
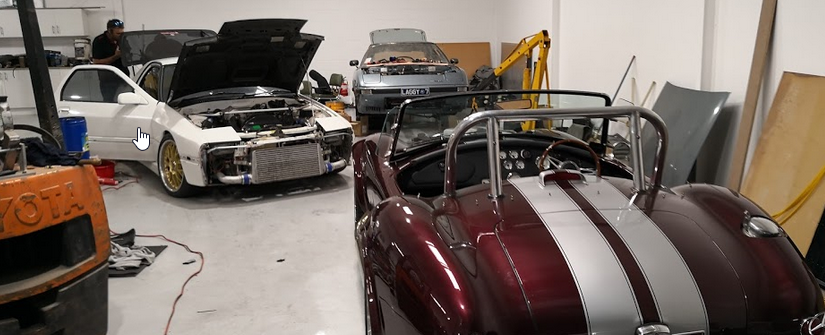
After much deliberation ive decided to put up a post on my car with the current ongoing work im currently undertaking; a few new things we are trying should net some good results from the research ive seen. namely link ecu/e85/efr turbo/yee olde 12at engine
Started out putting this on Ausrotary unfortunately most of those guys have moved onto facebook, and i find myself doing more and more research on 'the motherforum' here
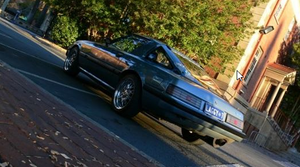
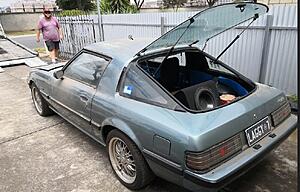
The car in question would be known to some here in adelaide; for the last 10 yrs (almost to the date) she has been sitting in the shed cover on with a custom sticker supplied by south australia's finest. At that stage of my life it was probably a good thing defected for too loud and now looking at all the things i did when i was in my twenties that looked cool and took some short cuts to keep the car on the road. Gave up cars for a while and got into another hobby of a wireless network engineer/rigging
here is the car back when i was a key member of SA Rotors (a local rotory car club)
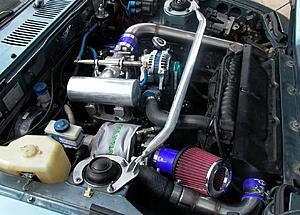
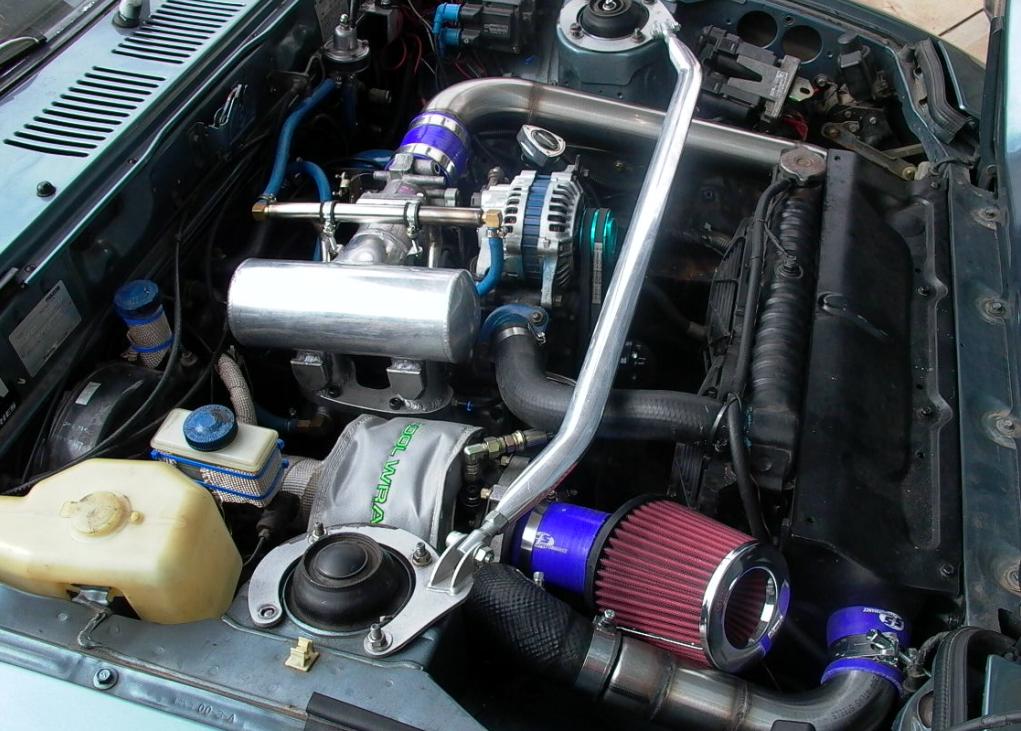
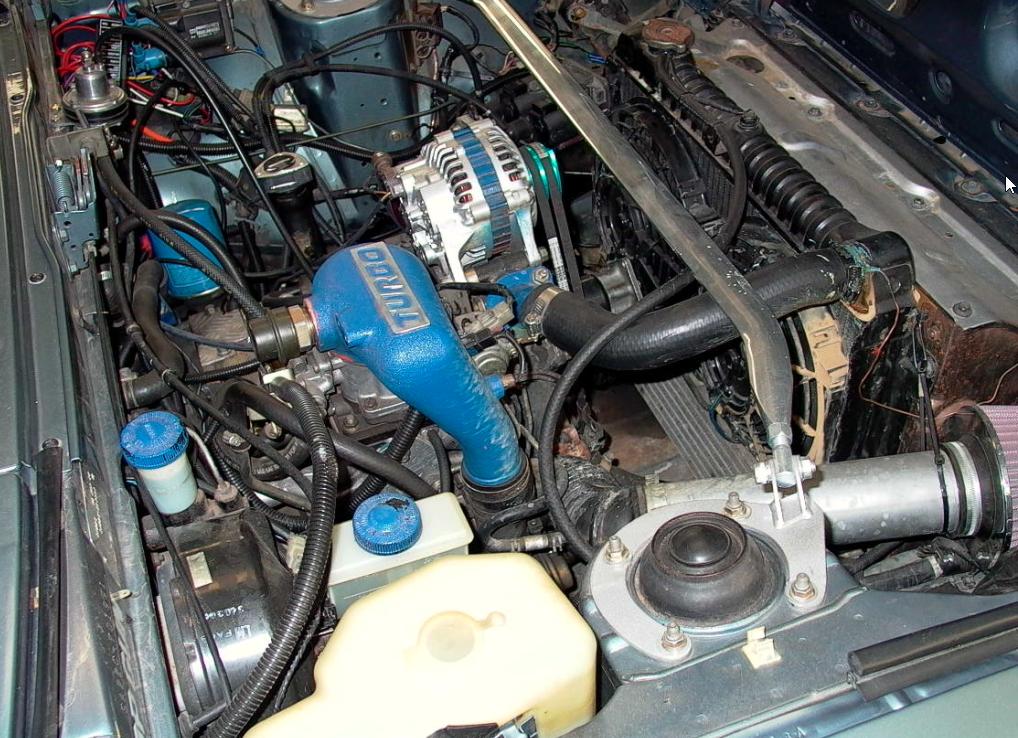
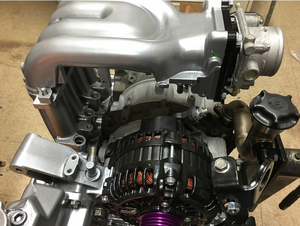
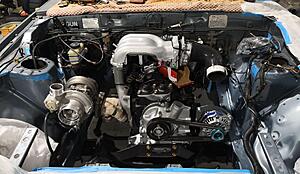
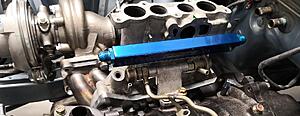
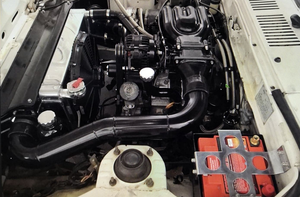
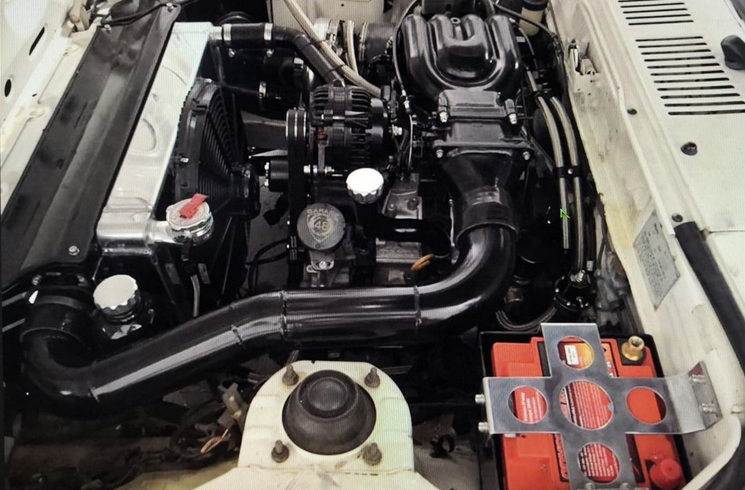
finished work and running with plenum
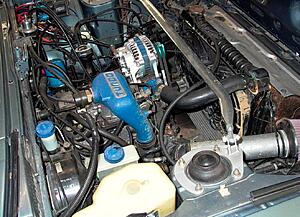
Car was bought stock in '01 with 105k on the clock; im am second owner just after the car had had a respray. I drove the little 12a for around 2 yrs before even putting a muffler on it followed by sound system and rims. Feeling the bite i invested in a early cosmo 12AT engine with 85k drove it for a while and then upgrade to a t04b (some lousy truck type turbo) on a budget i bought everything second hand and most of the time i was chasing my tail to make things fit and work.
more pics of the initial build up:
The rebirth was started in november; by rolling the car out and sending it to my mechanic/tuner where im doing all the work on it with his guidance and funded by my local minister of war and finance.
--- Plans ---
-- suspension --
purpose made coil over kit from garage48 front and rear
wilwood front brake upgrade to suit (retaining standard stud pattern)
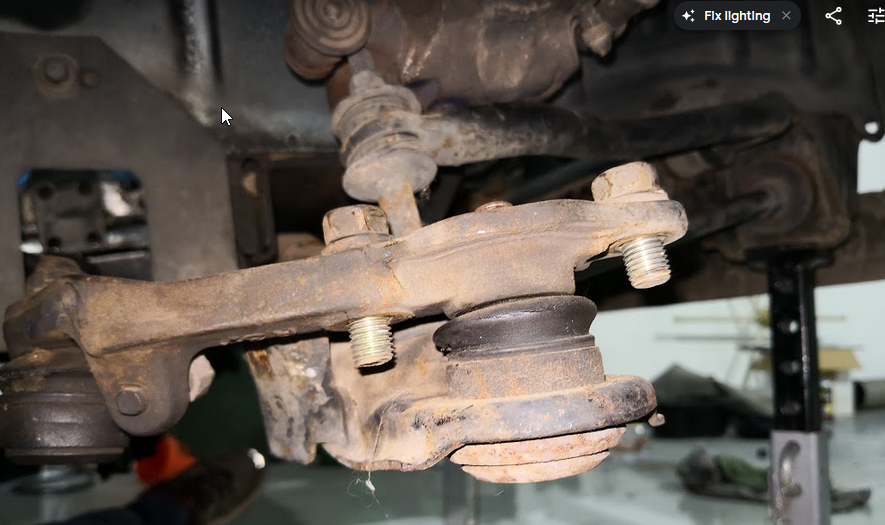
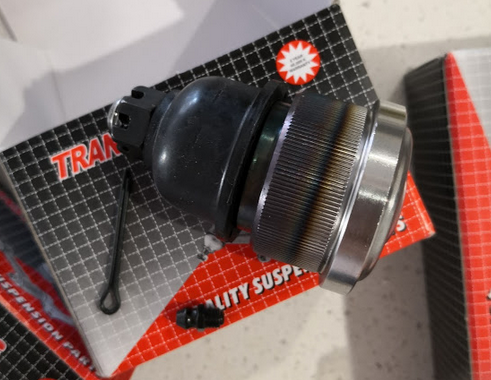
front ball joint replace
all steering arms to be replaced
-- fuel system --
removal of current pumps and lines to suit flex and majority run straight e85
aeroflow upgraded feed lines -6 or -8
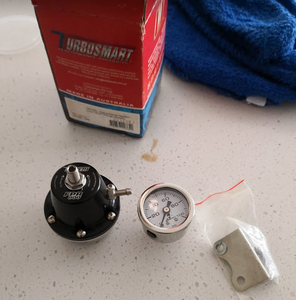
feed line as return (at this stage) FPR800 fuel pressure reg
still deciding on injectors, top feed secondary rail
further research needed on premix (been told to go with klotz brand)
-- ecu/ign --
replace microtech lt8 for Link G4+ Fury (with yaris or similar type coils)
-- block --
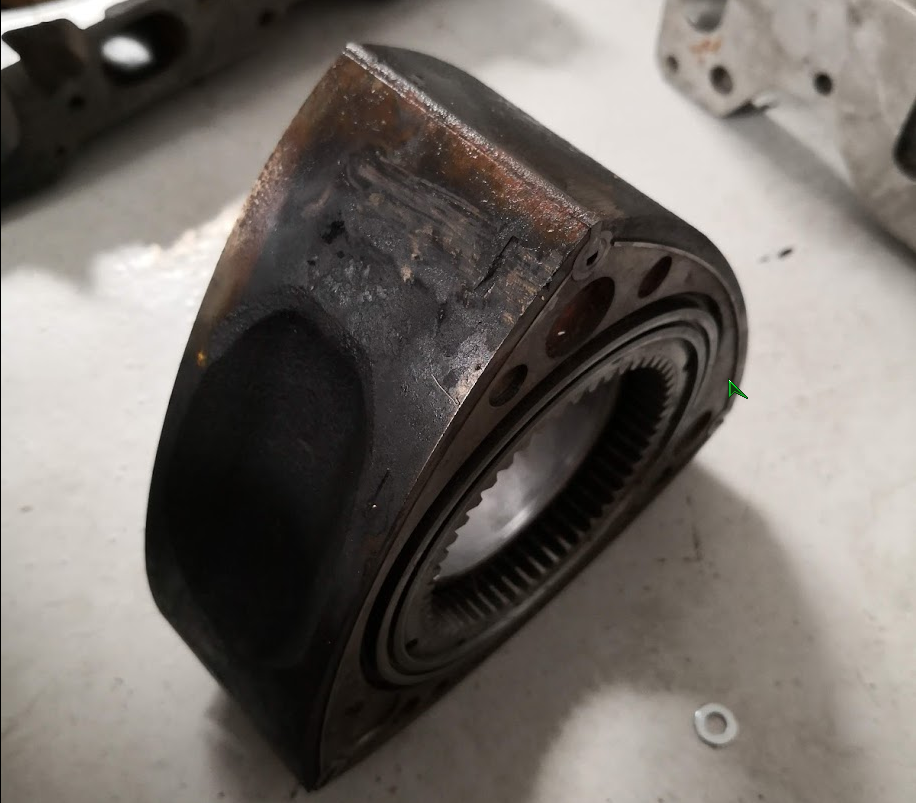
rebuild with cut down 13b housings
mild/street ported for drivability
still yet to pick an engine builder
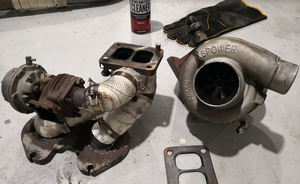
-- turbo --
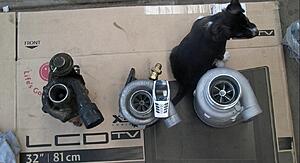
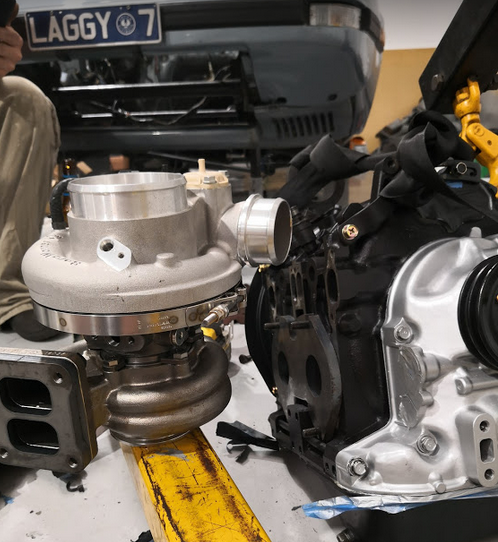
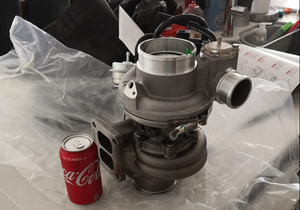
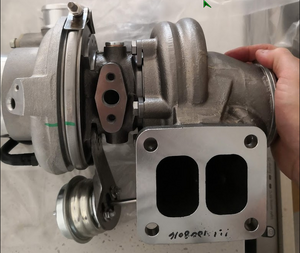
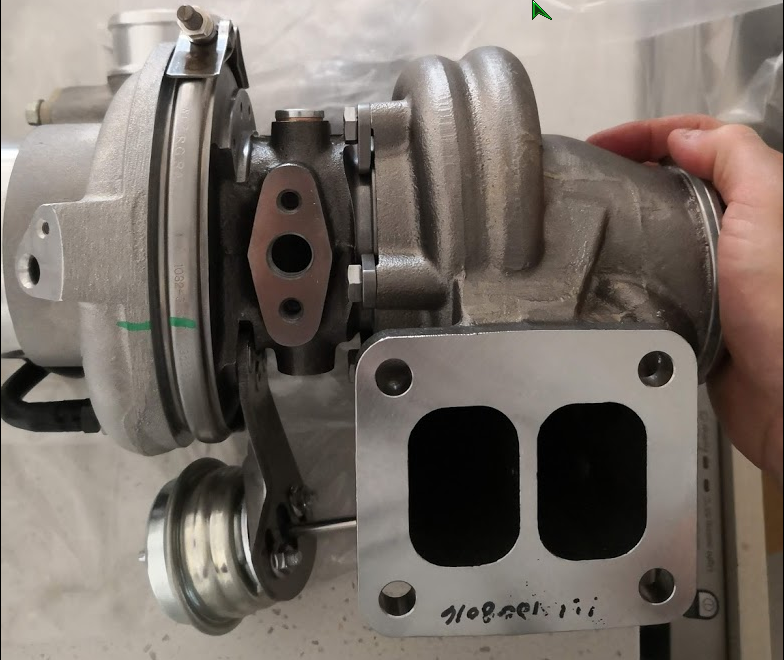
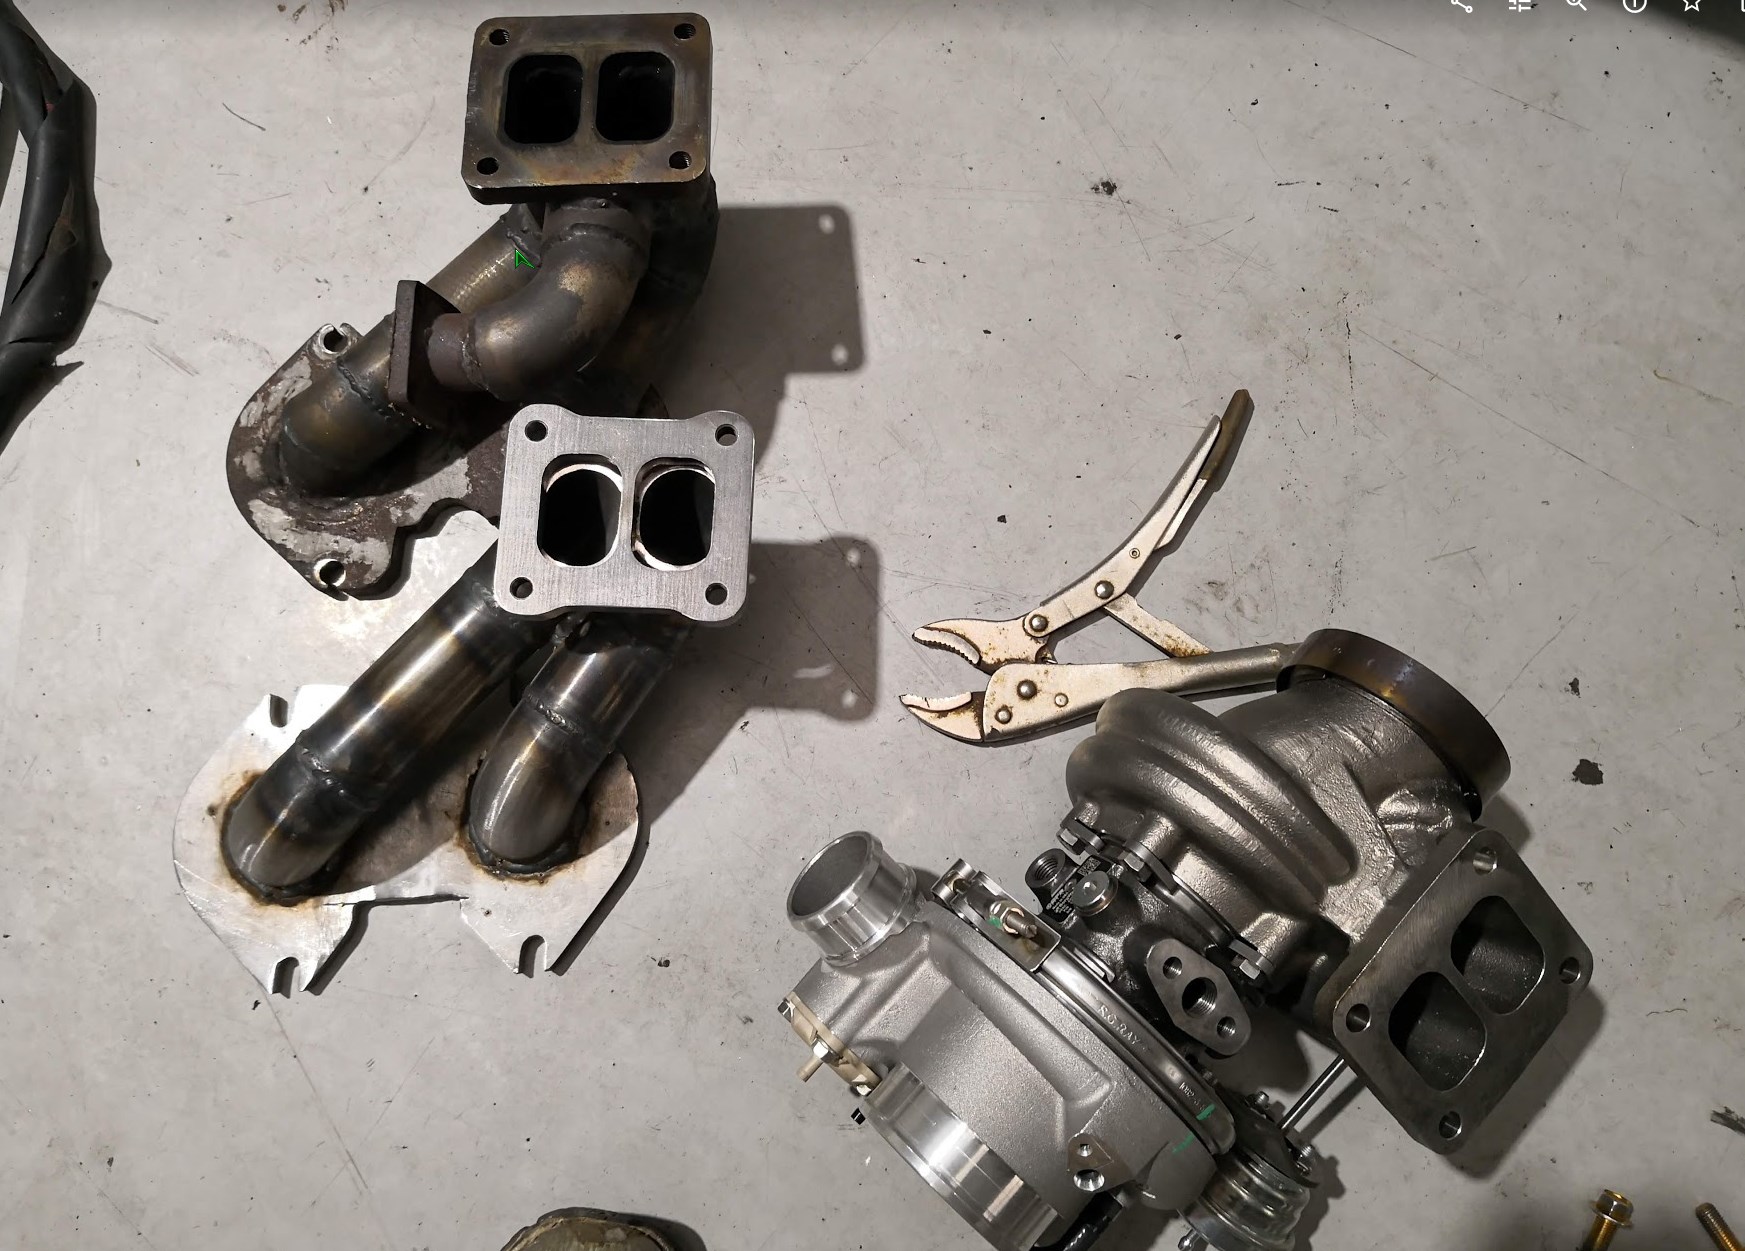
was considering sx200/sx300 as due to internals very much the same as an borgy efr, ended up finding a deal on an EFR 7670 IWG (with internal wastegate)
new manifold to suit
new dump pipe to suit
ceramic coatings etc..
-- inlet --
13brew inlet from an FD
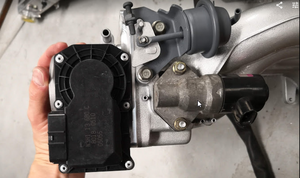
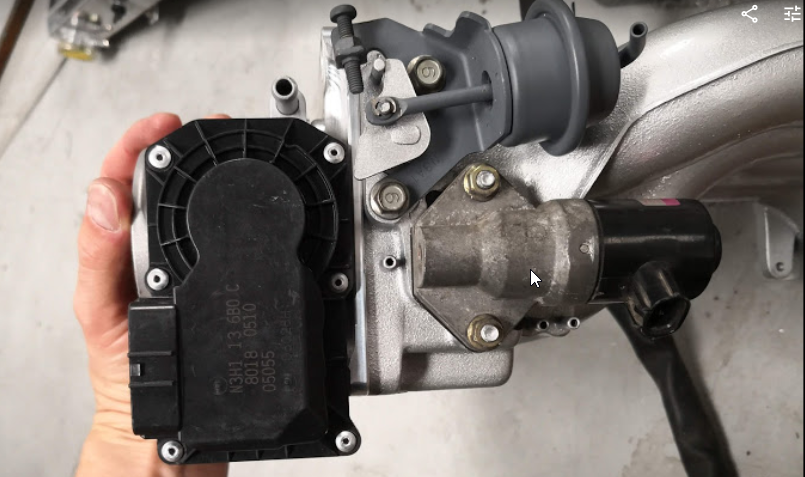
electronic throttle from rx8
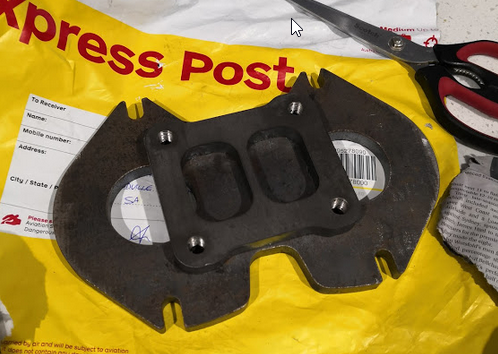
13brew to 12at adapter plate in florida from JDL
-- engine bay --
scrub and clean
paint where needed
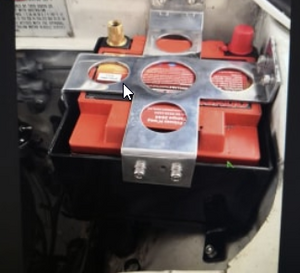
battery to be moved from rear seats to back to firewall/suspension tower
nos clips for the headlights
painted block
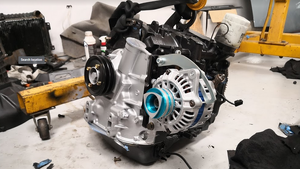
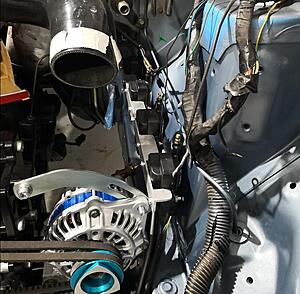
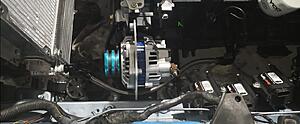
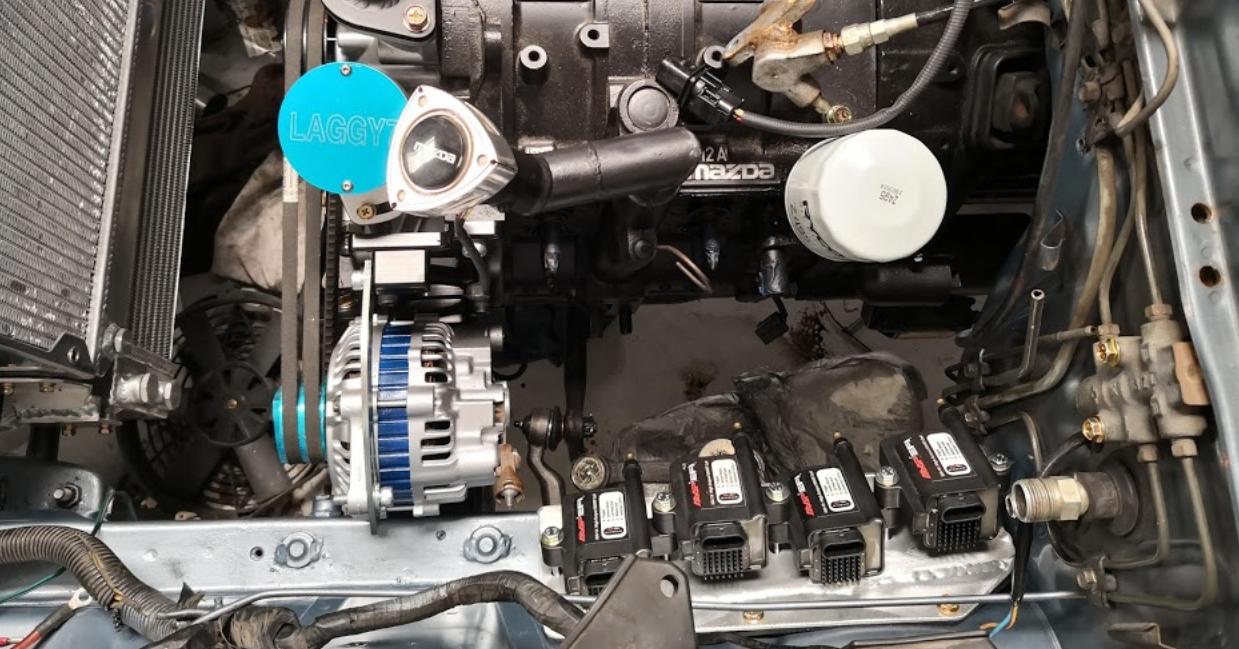
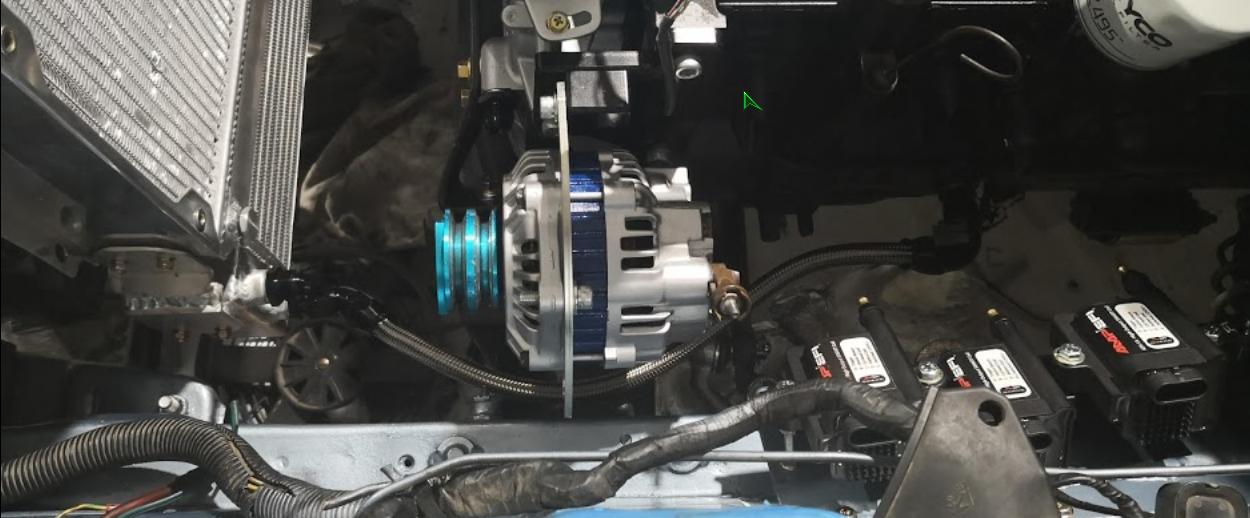
side mount alternator kit
electric water pump
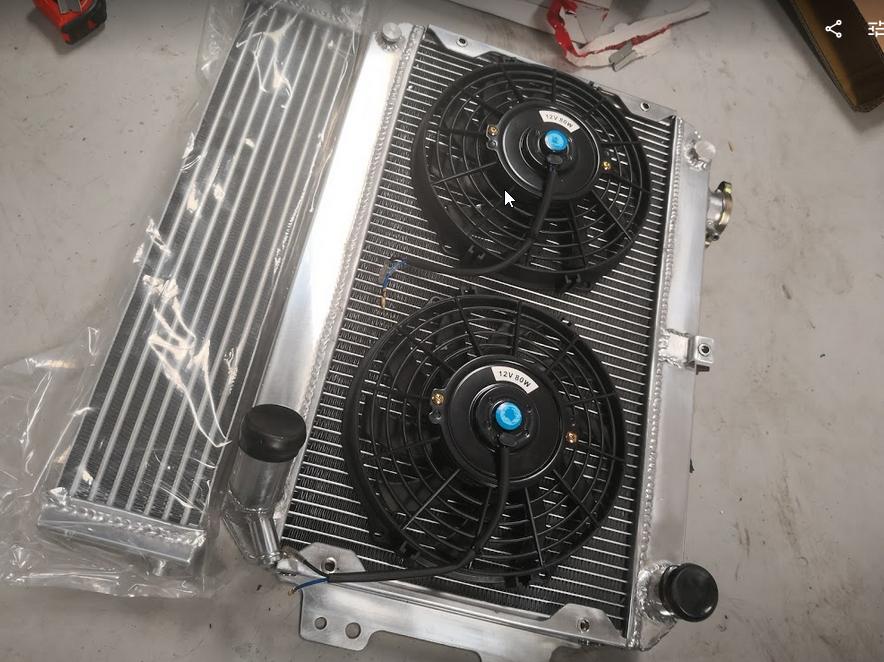
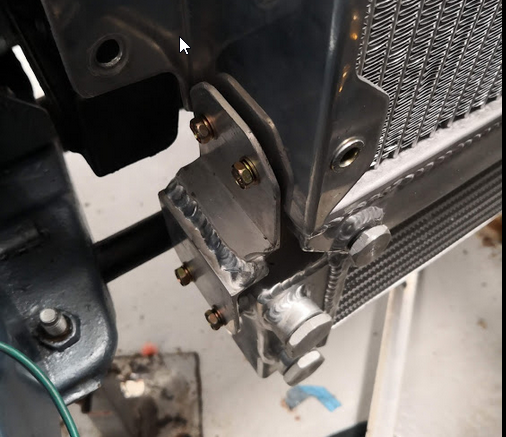
replacement new radiator + oil cooler
twin thermo fans
-- interior --
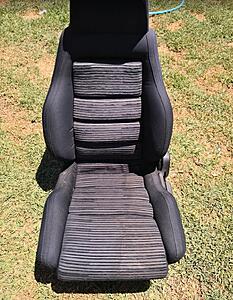
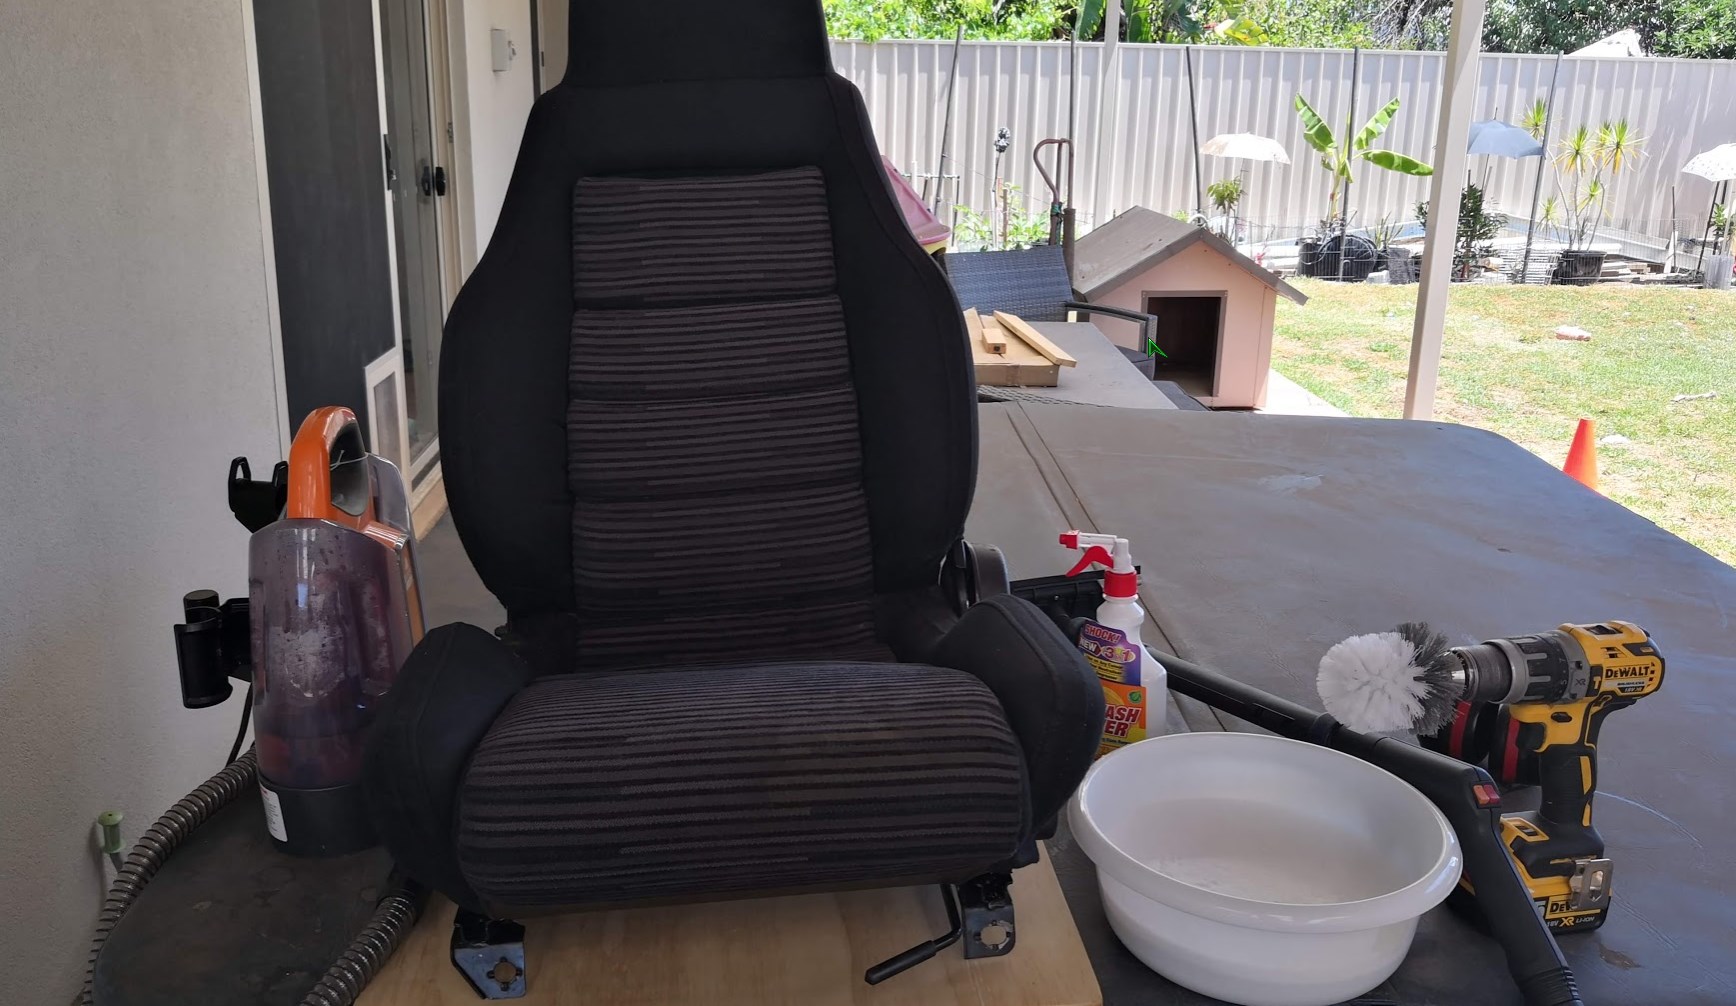
seats retrim
dash flocked
side panels need attention
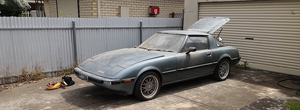
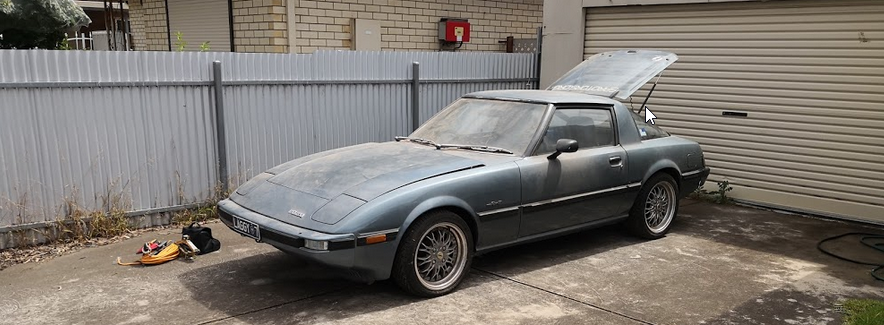
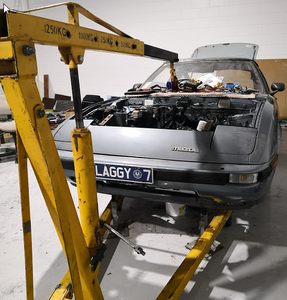
November and on the trailer finally after all these years, car cover took off some paint on the roof.. so much dust!
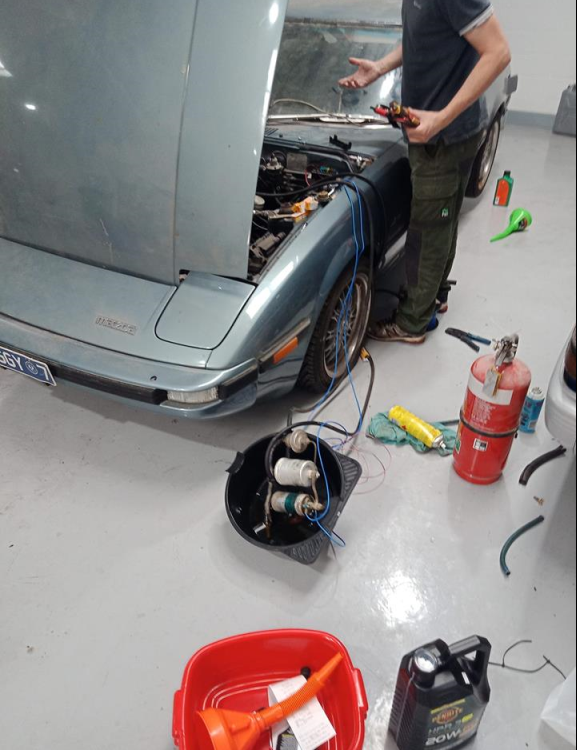
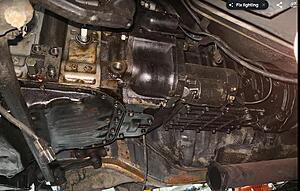
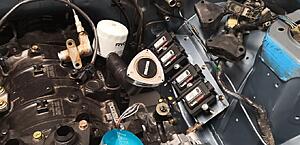
arrived at the shoppe, lets see what we have to work with; lets see if she starts. no good; fuel system is completely dead, not to mention all the lines are kaput. tank is looking good no signs of rust etc..
-new plugs
-fresh oil
-dropped coolant
-one whole can of lanox + start ya bastard
-borrowed battery
-by passed fuel pumps and lines - all shot
-improvised merc fuel system
lots of hand cranking, triple check nothing can catch fire... and spits and coughs and running.... on the front rotor, looks like the rear injectors are clogged but its worth saving!
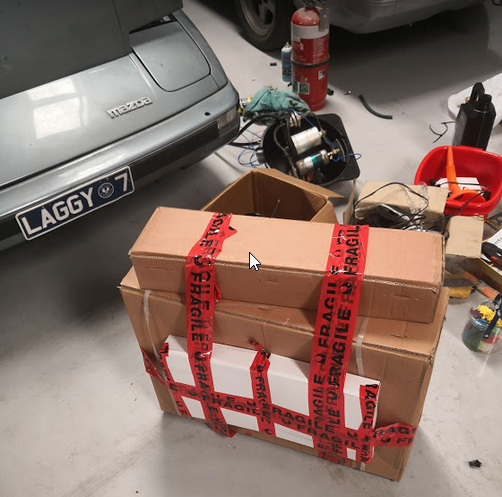
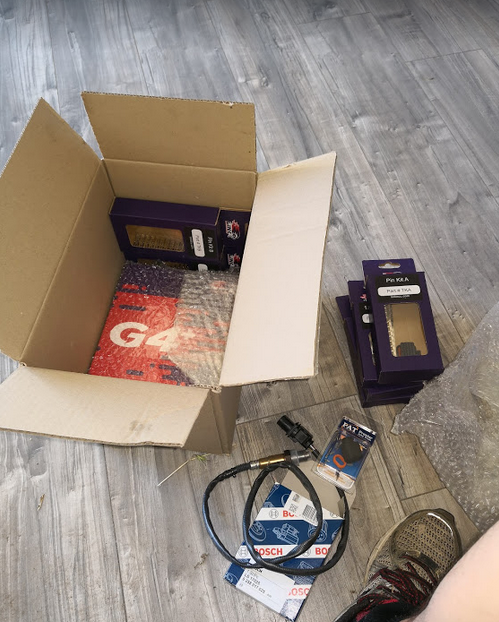
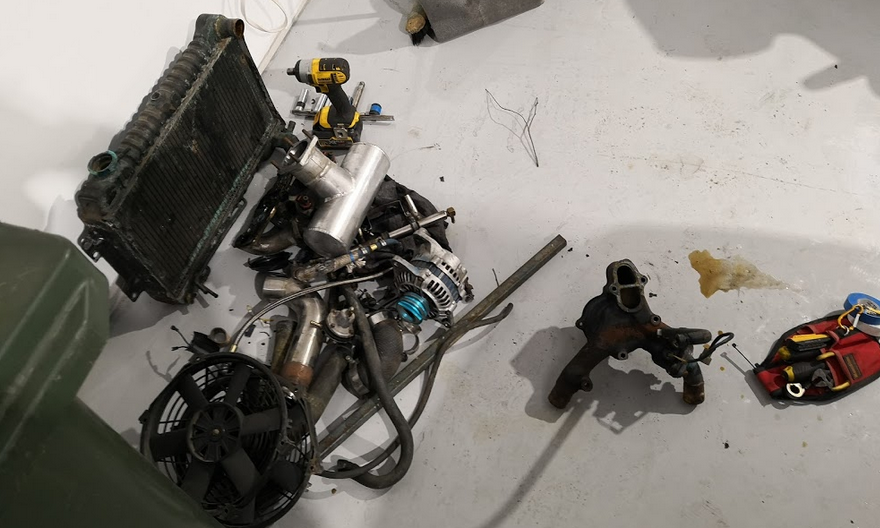
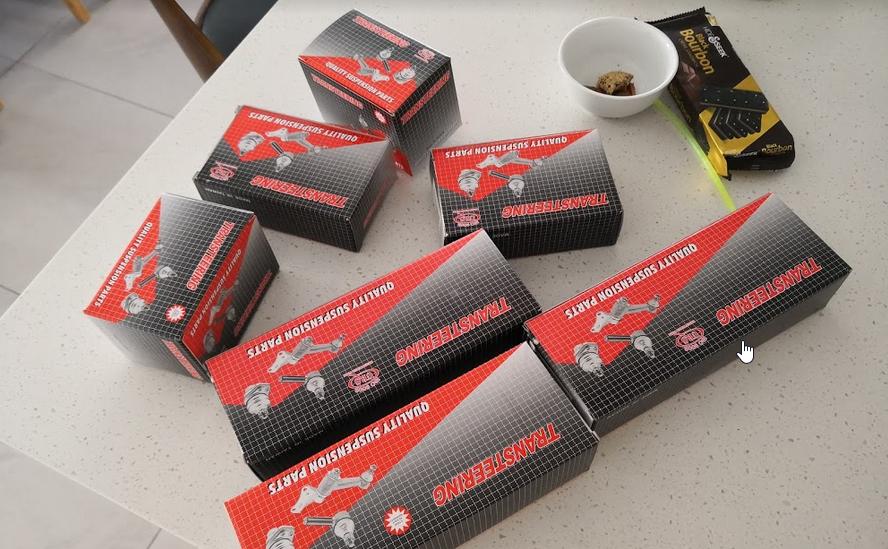
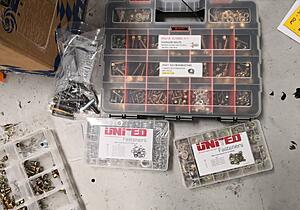
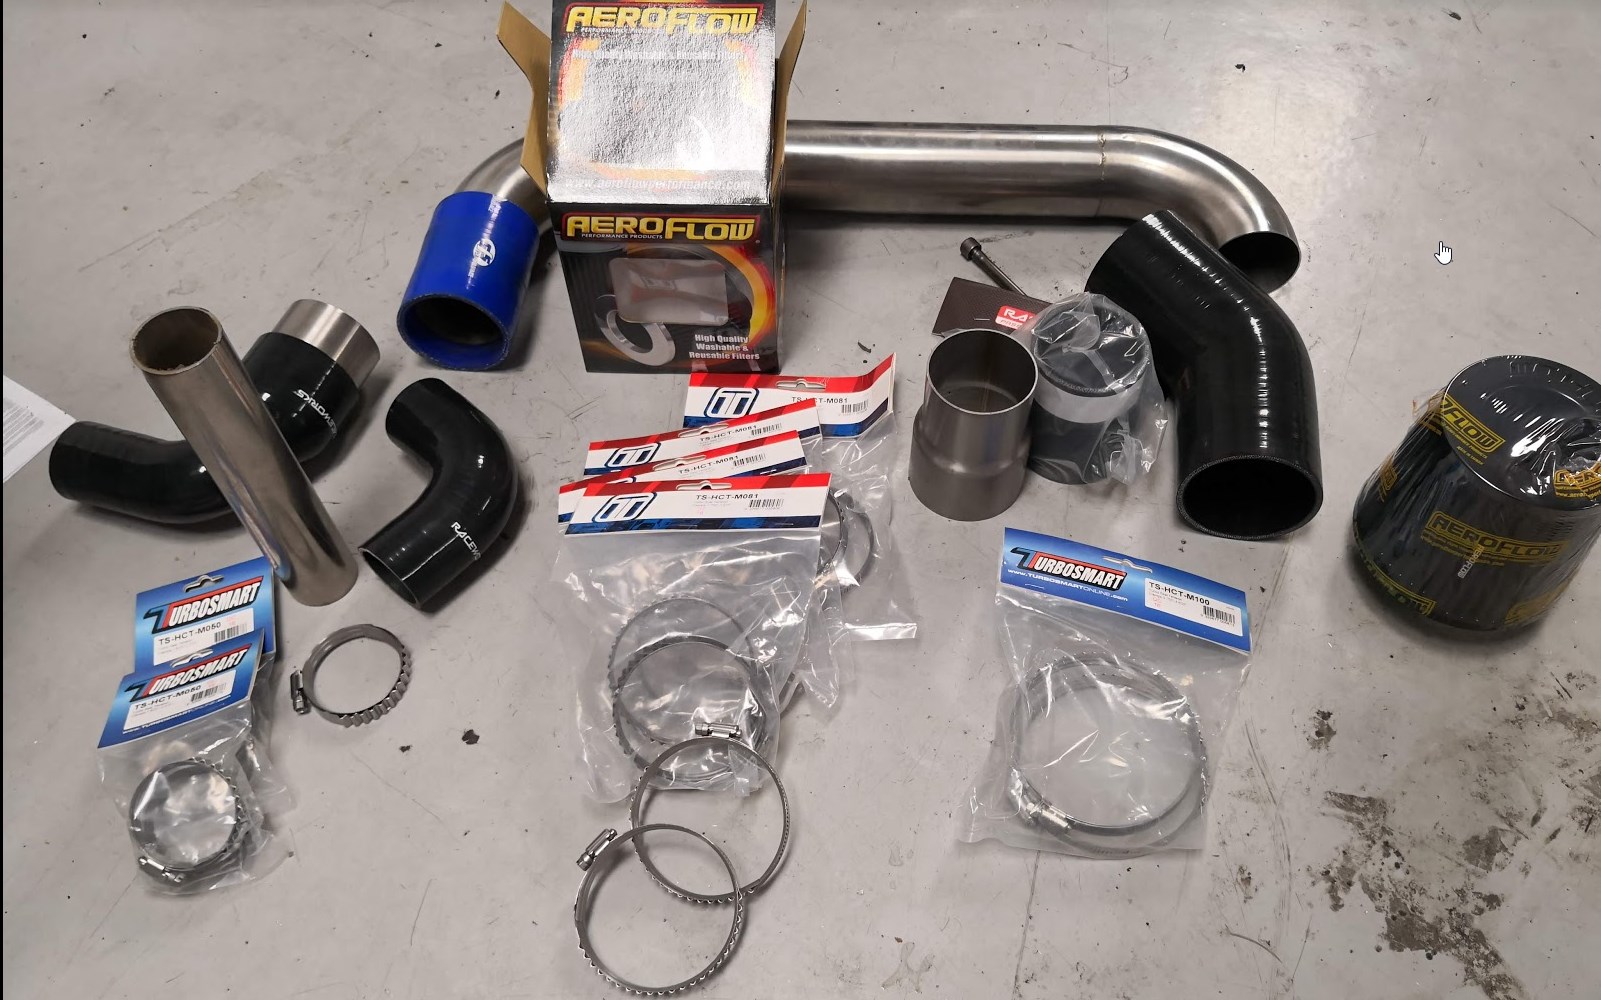
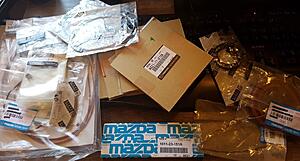
first of many boxes arrived all to keep the rotorvation up
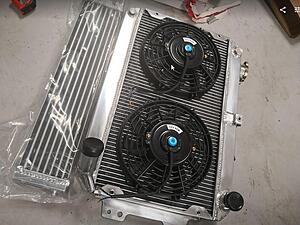
new radiator and oil cooler, the included 10" fans ill swap for my 12"s
next up overnight parts from... new zealand
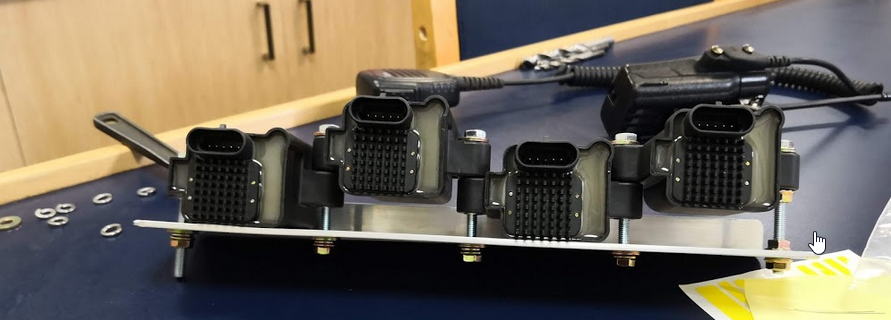
link g4+ and a whole bunch of sensors
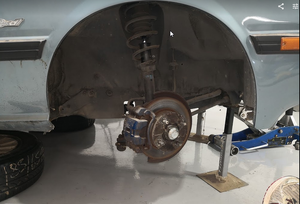
strut removal for brake upgrade from garage48; with the 16x7 ROH Chicanes, we are unsure if the brake kit will clear correctly so im sending over the rim too
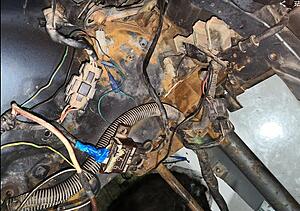
front steering boots are all worn and cracked, ball joints look like they are older than 35yr, rubbers in good condition however ill order a full set while im here.
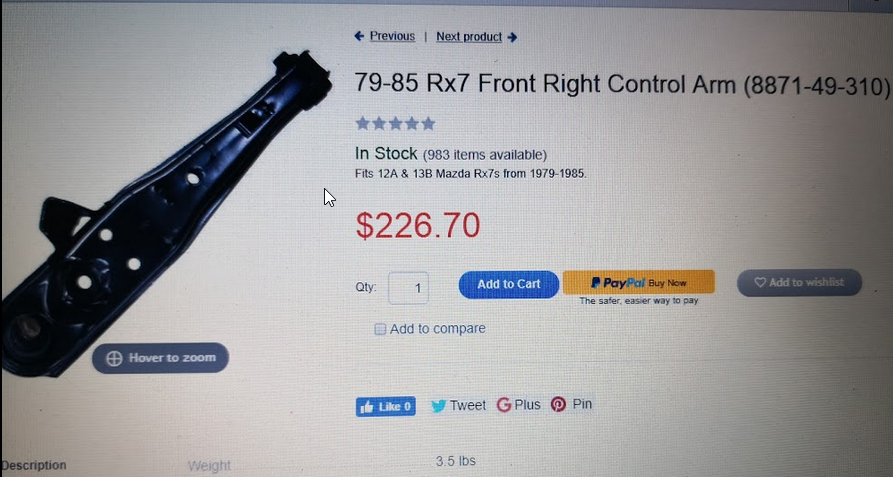
I ordered this steering and ball joint kit note it doesn't come with a replacement idler arm if you need one.
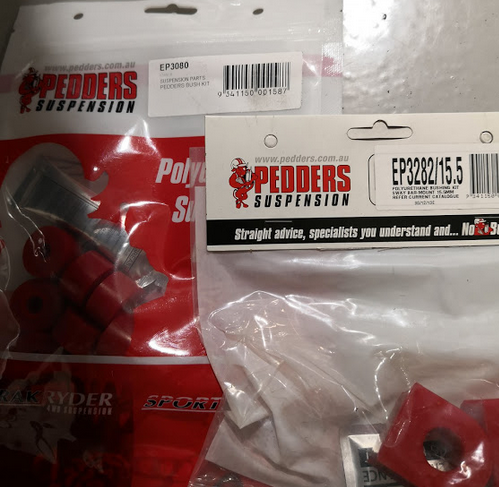
superpro bushes kit: here
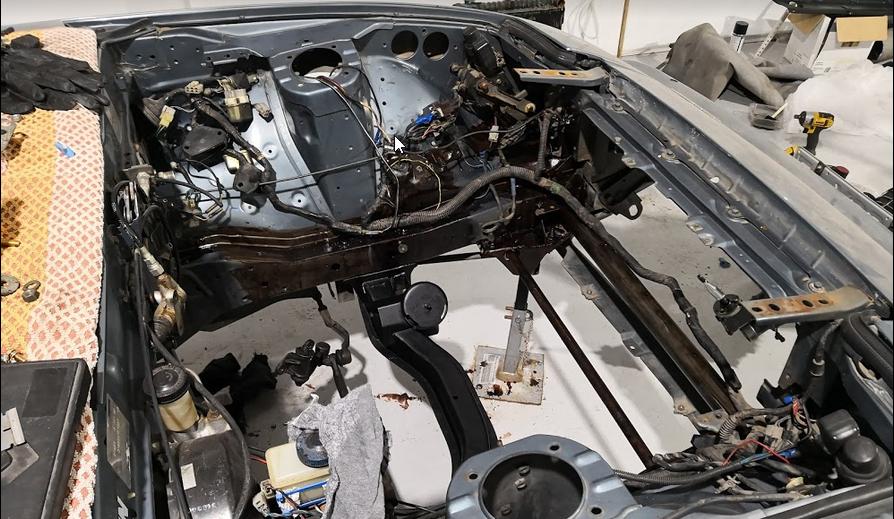
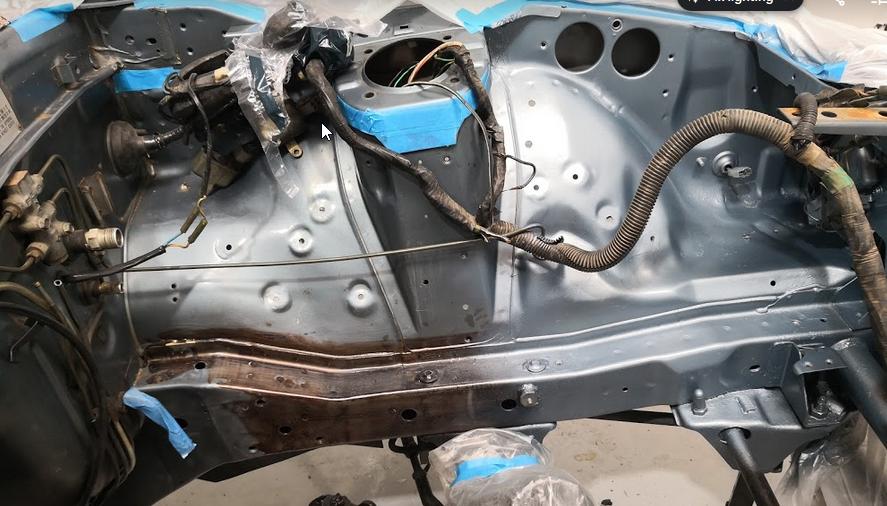
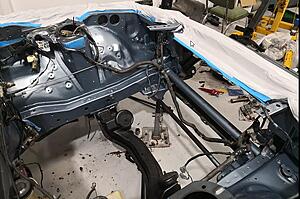
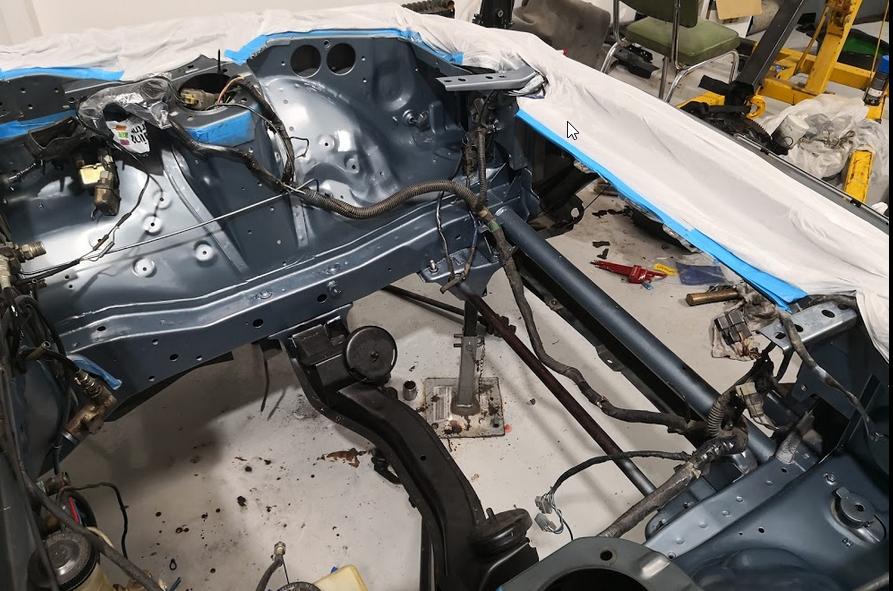
would love to know what to do with all this rat's nest; wish i could just consolidate it a bit
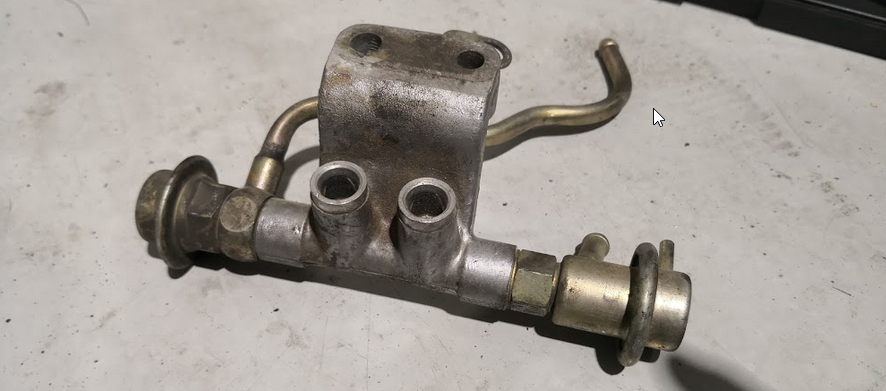
further removal - finding battery acid mess all to be looked at, underneath brake master as well. kypero would be grinding his teeth over this
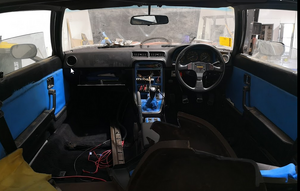
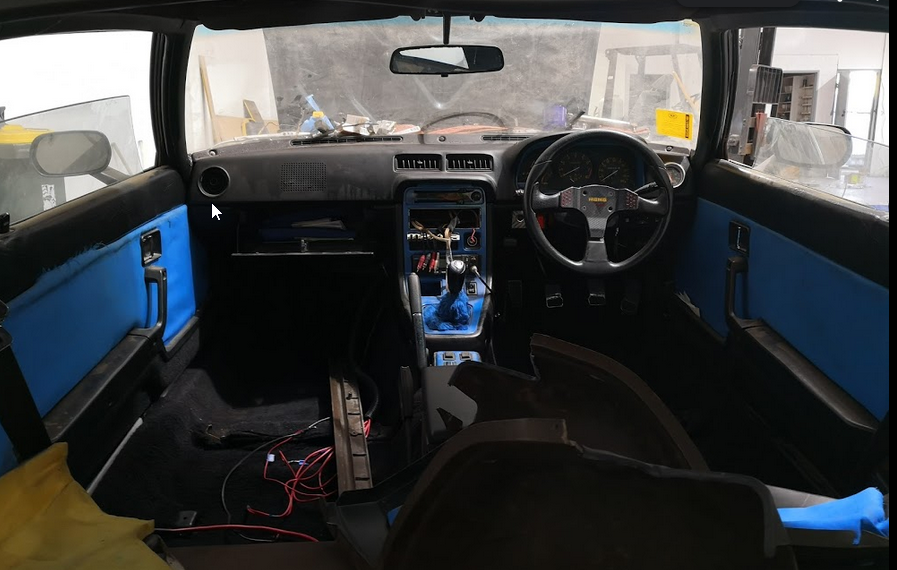
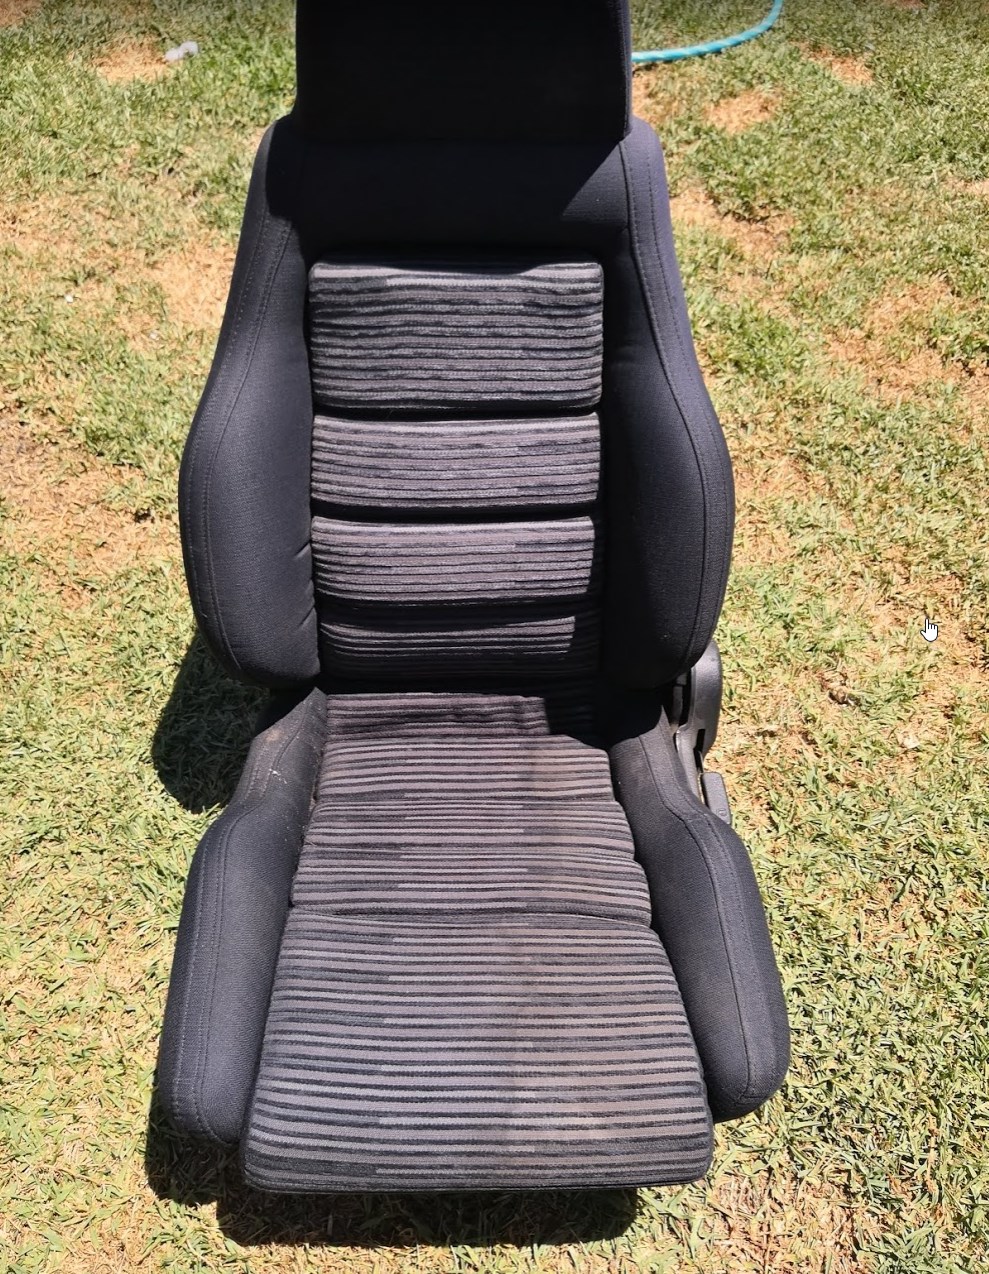
interior seats removed, getting some prices on retrimming; trying not to take on too much but this list is getting longer everytime i come to the shoppe
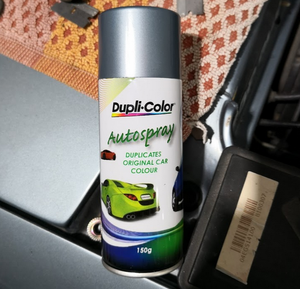
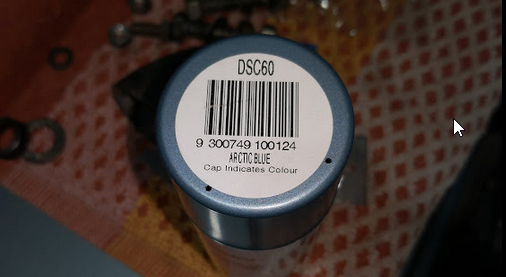
testing some paint i bought at autobarn; this is NOT the right colour! sydney blue must be the s2 blue
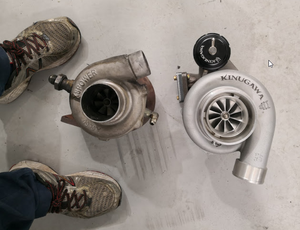
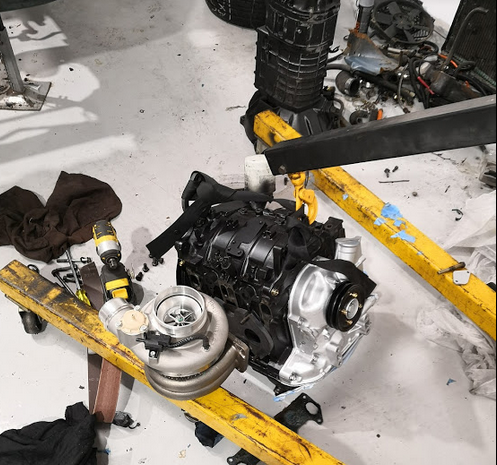
running into middle december and overcoming the sheer task and money required my mate perks me up with some more rotorvation; brings over his 8374 EFR to size up - man these turbos are HUGE!
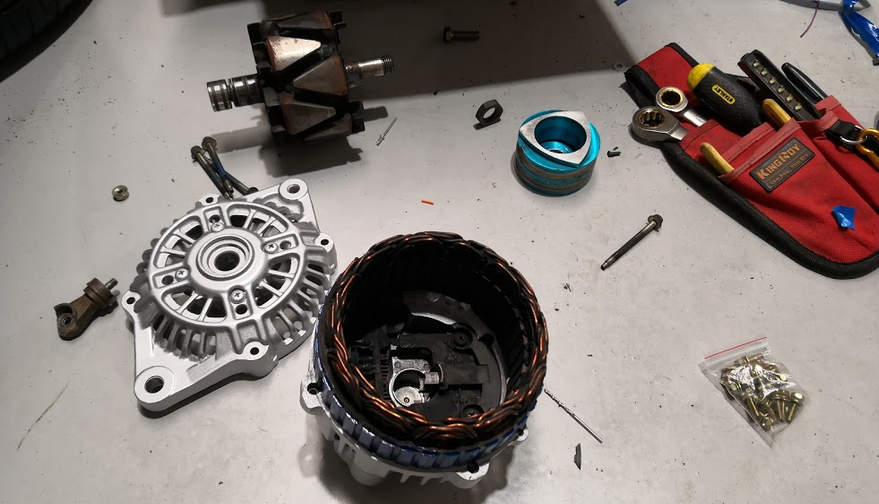
alternator tear down for painting and inspection
first coats of paint make such a difference
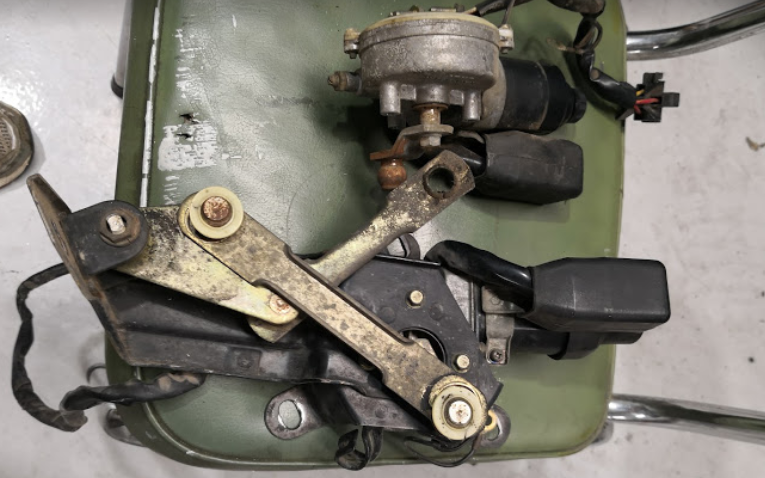
removal of the front headlight motors for the linkage replace
thanks philsrotaries
side mount alternator bracket arrived - very similar to the franklin eng one
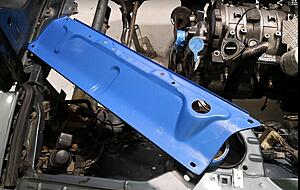
clear coat gone on, very happy with the result. yes i could of trucked the car to a panel beating shop being this close to xmas + new years there is nothing open nor interested in doing such a small job
xmas pressies arriving all round still waiting on parts which is what i would prefer - like a nice turbo and brake kit!!!
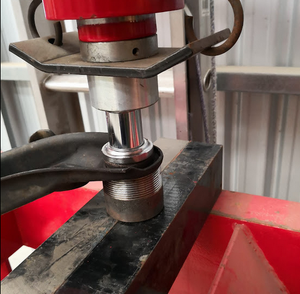
pressed ball joints in, gave up on the rest and just took them to pedders for the suspension nolathane; was 200$ all up
mate was like, why dont you just buy the arms with the new ball joints already pressed in :roll: -USD PRICE!!!
superpro kit wasn't quite complete, i needed these bushes to finish it off for the rear sway bar
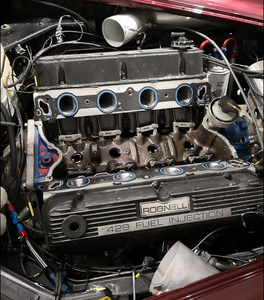
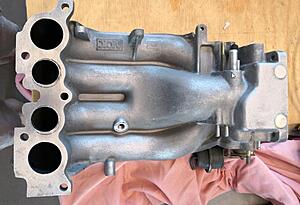
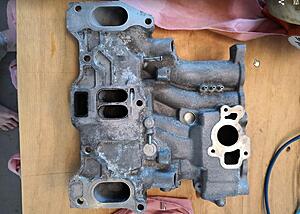
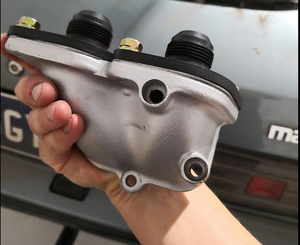
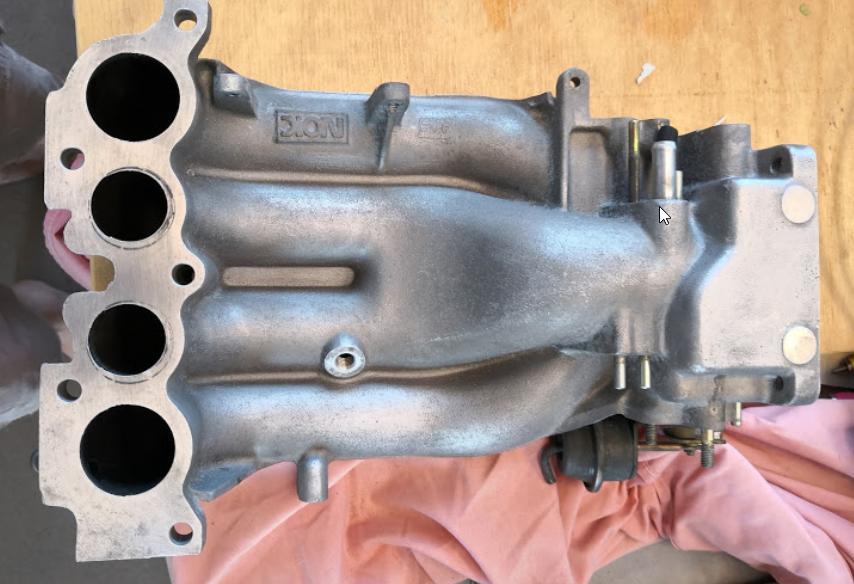
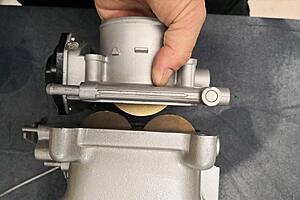
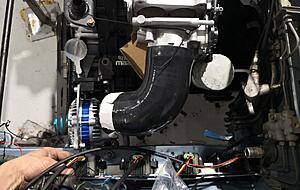
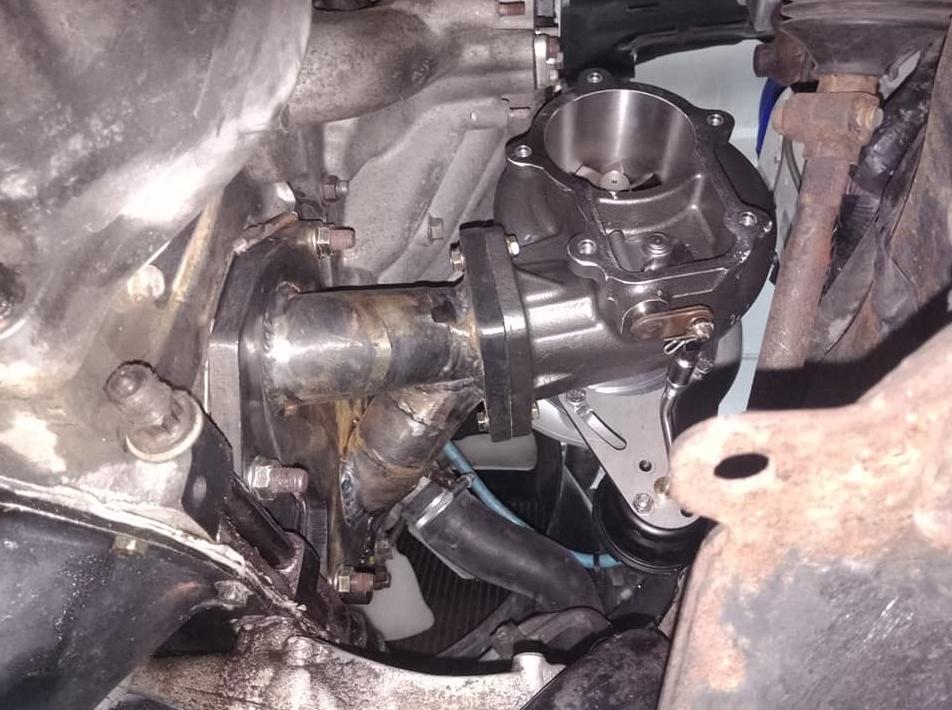
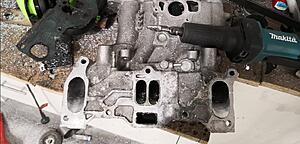
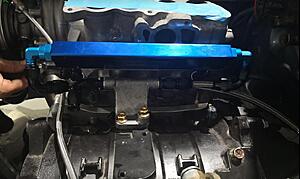
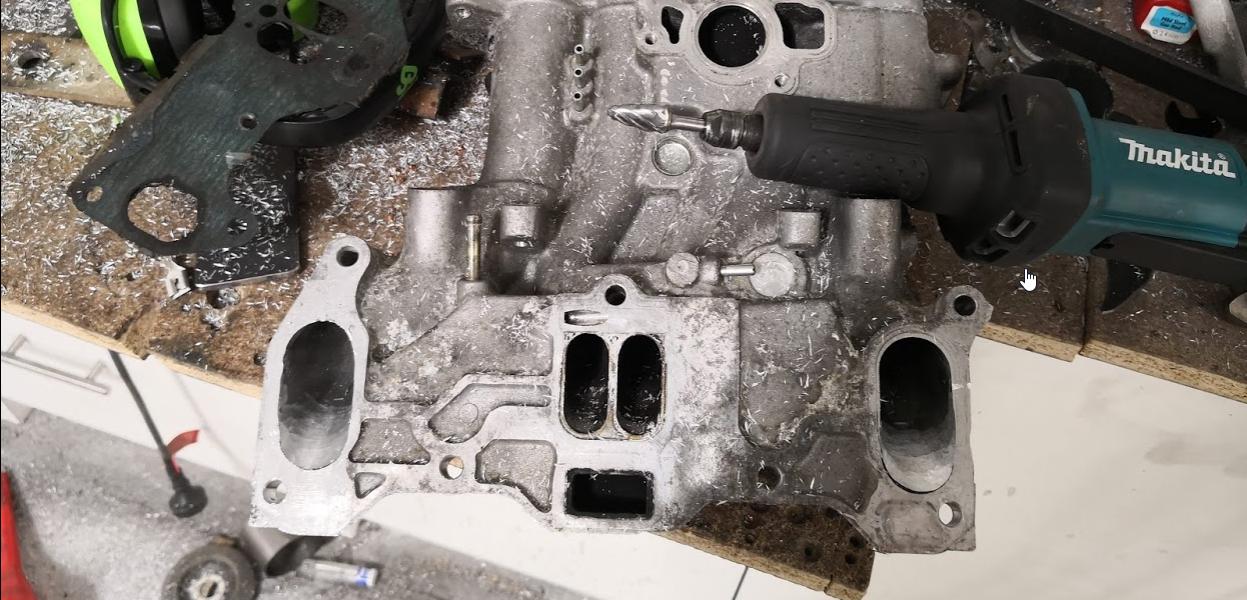
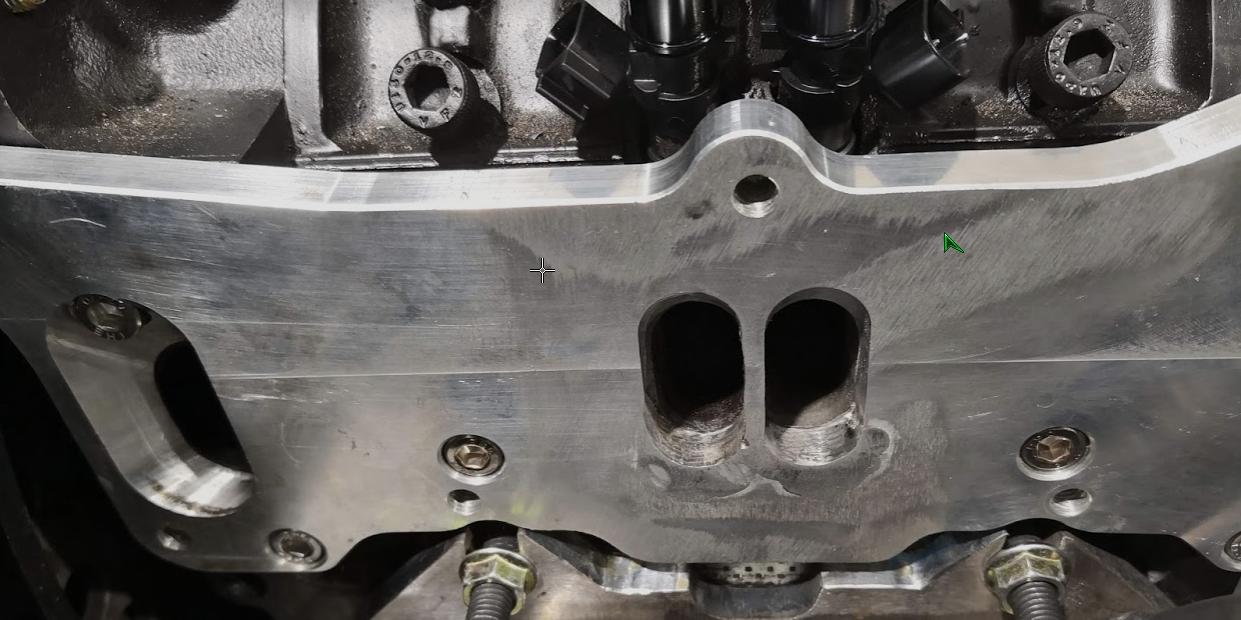
finally finally the s6 inlet has arrived, was in quite poor condition and extremely dirty before i cleaned it up
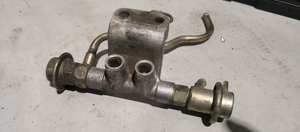
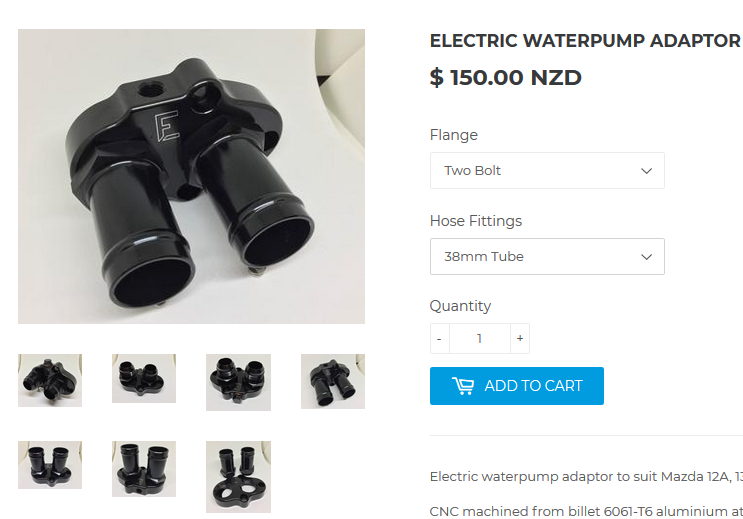
prepping the water adapter, came with these huge fittings, but we are planning to run the lines back around the engine, as i haven't seen a setup that looks tidy yet
into the new year, and figured i better get this thread done to give me more rotorvation
raided my old 12at parts bin and found the original primary injector rail, can re use this with -6/8 fittings ftw
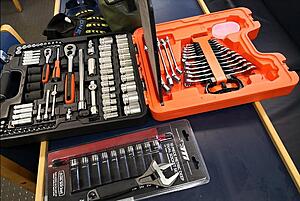
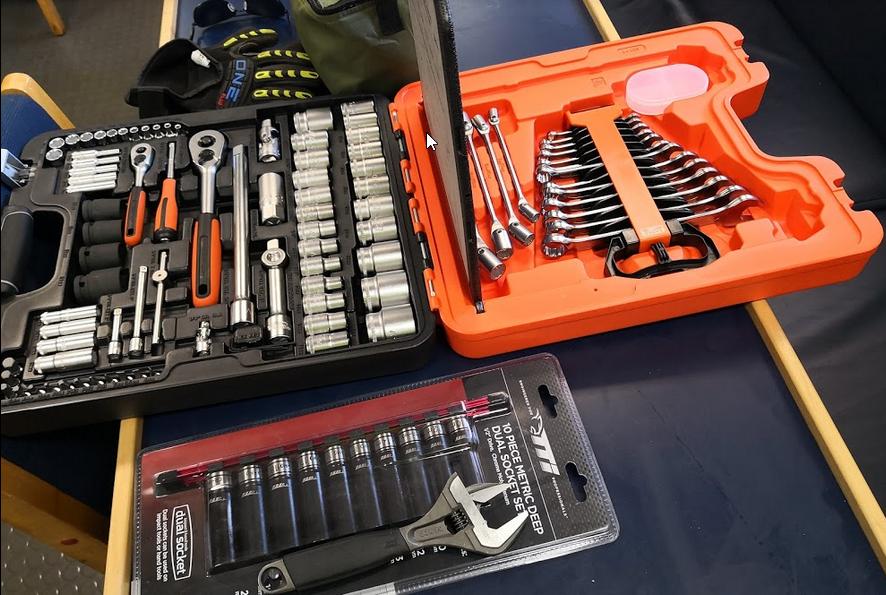
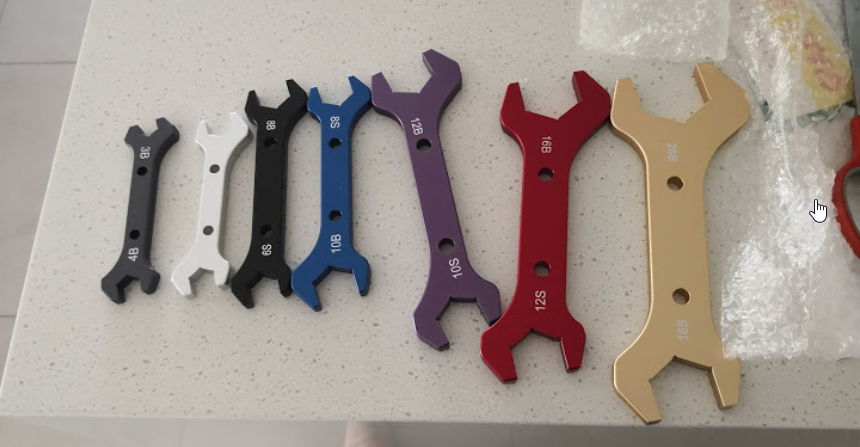
lashed out and bought a nice new bahco tool kit; was after something mostly metric that i could put in the back of the car for a drive day etc.. really handy set, as its 1/4 + 1/2 drive and spanners. Just took to it with the hot knife to fit the shifter
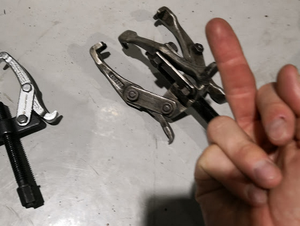
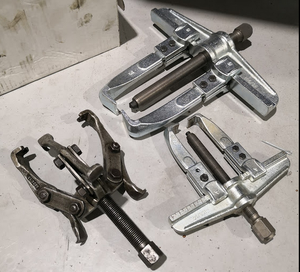
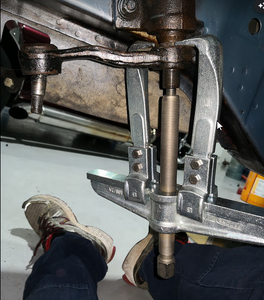
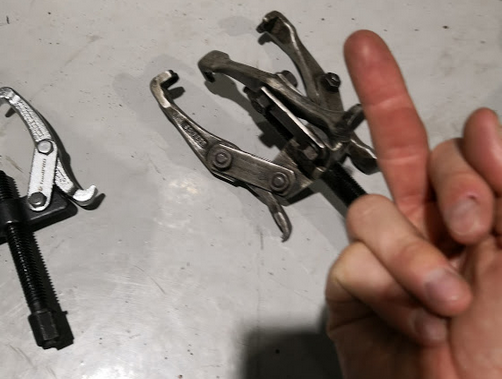
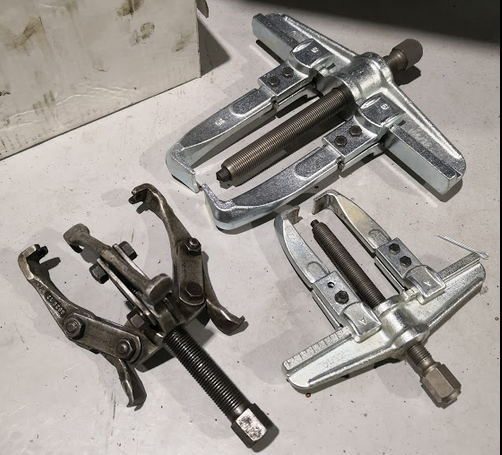
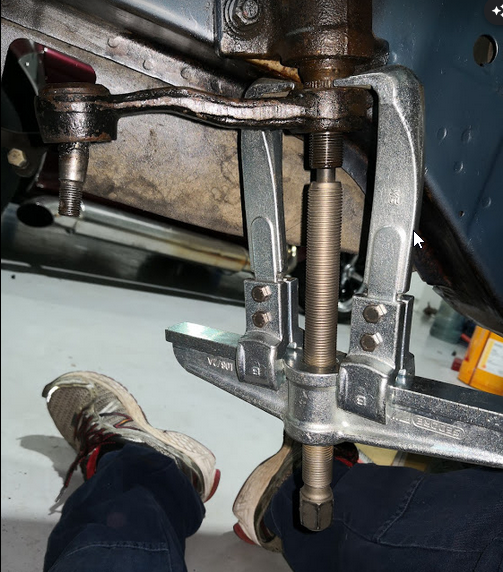
the last piece of the steering gear to come out was the main steering arm, and boy was a pita. i drenched it in so much penetrine the floor was stained; wacked the crap out of it. used so many pullers - only to have them slide off and try to take out my legs
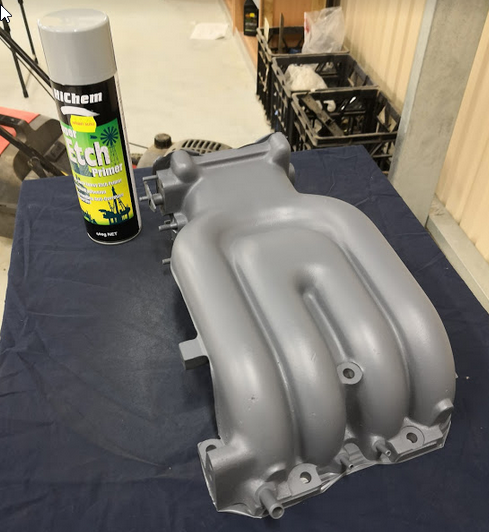
hopefully brake kit + coil overs arrive soon so i can get the car rolling again; still waiting on adapter plate and currently getting the lower inlet plenum dropped off at the coaters. Turbo should be here early feb - fingers crossed
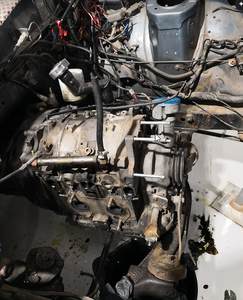
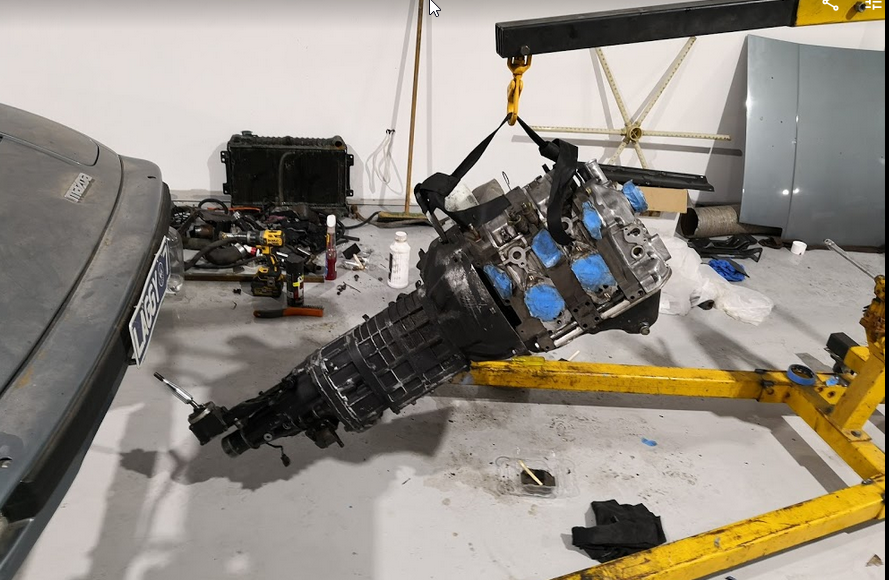
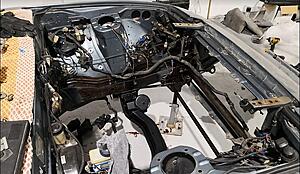
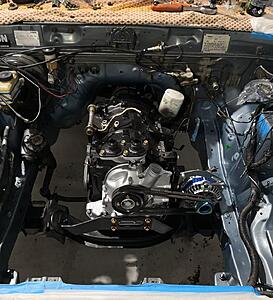
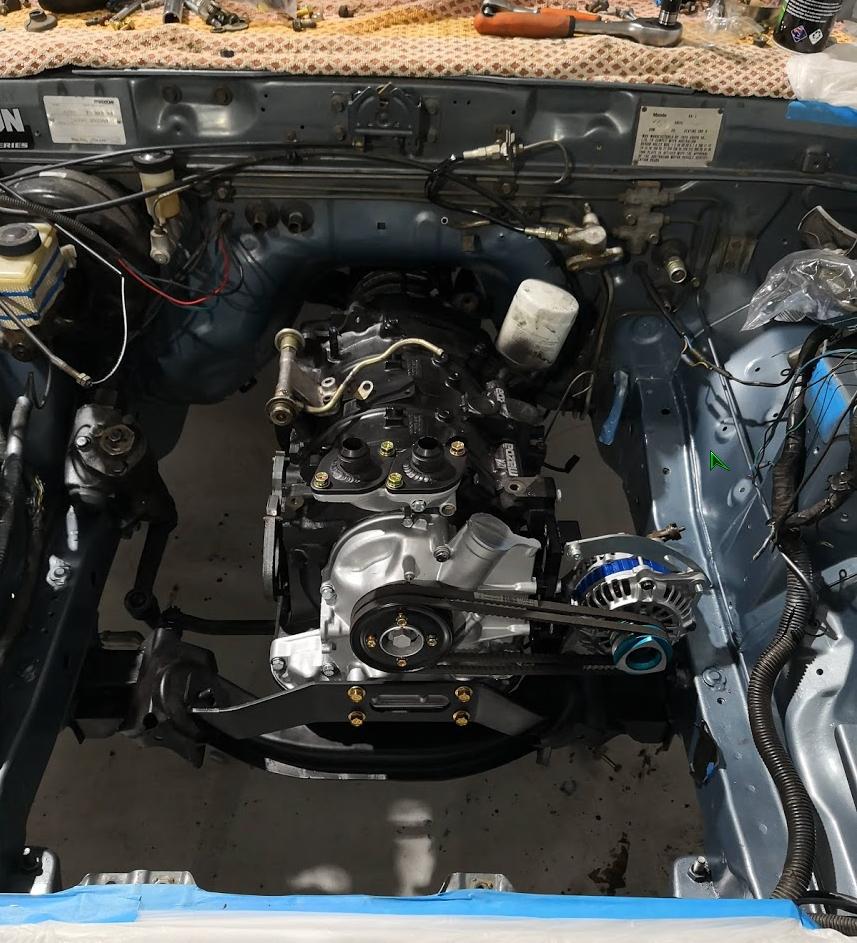
Been a busy few days; loaded up on some bolts finished the steering arms and last bushes in the rear - watts link was a pain!. Engine has gone back in and began to start dummy fitting with cable ties. Should be next week for the FD adapter plate to arrive all the way from Florida. Drivers seat dropped off to get re-bolstered and trimmed
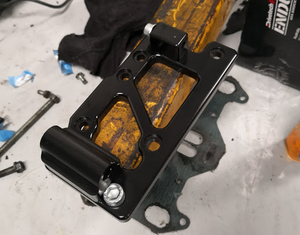
Started playing around with the coil bracket, i think im going to buy a cnc cut one to suit an LS, and fit it down the side of the wheel arch to the firewall. Mercury Marine IGN-1A Coil
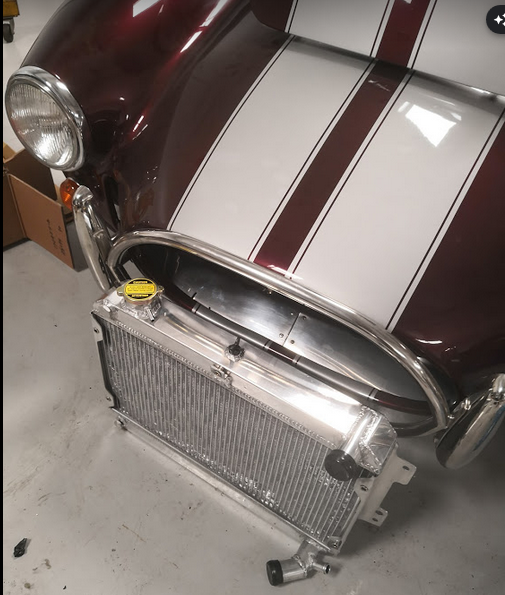
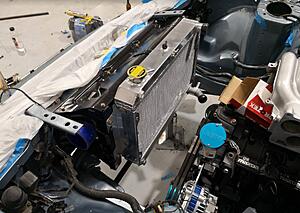
Looks like my chinese radiator has all the bolts lining up, will need to make up a new bracket to hold the intercooler and oil cooler
hope to get started on the turbo manifold this week; and get the dash out (which im very much looking forward to :punch: )
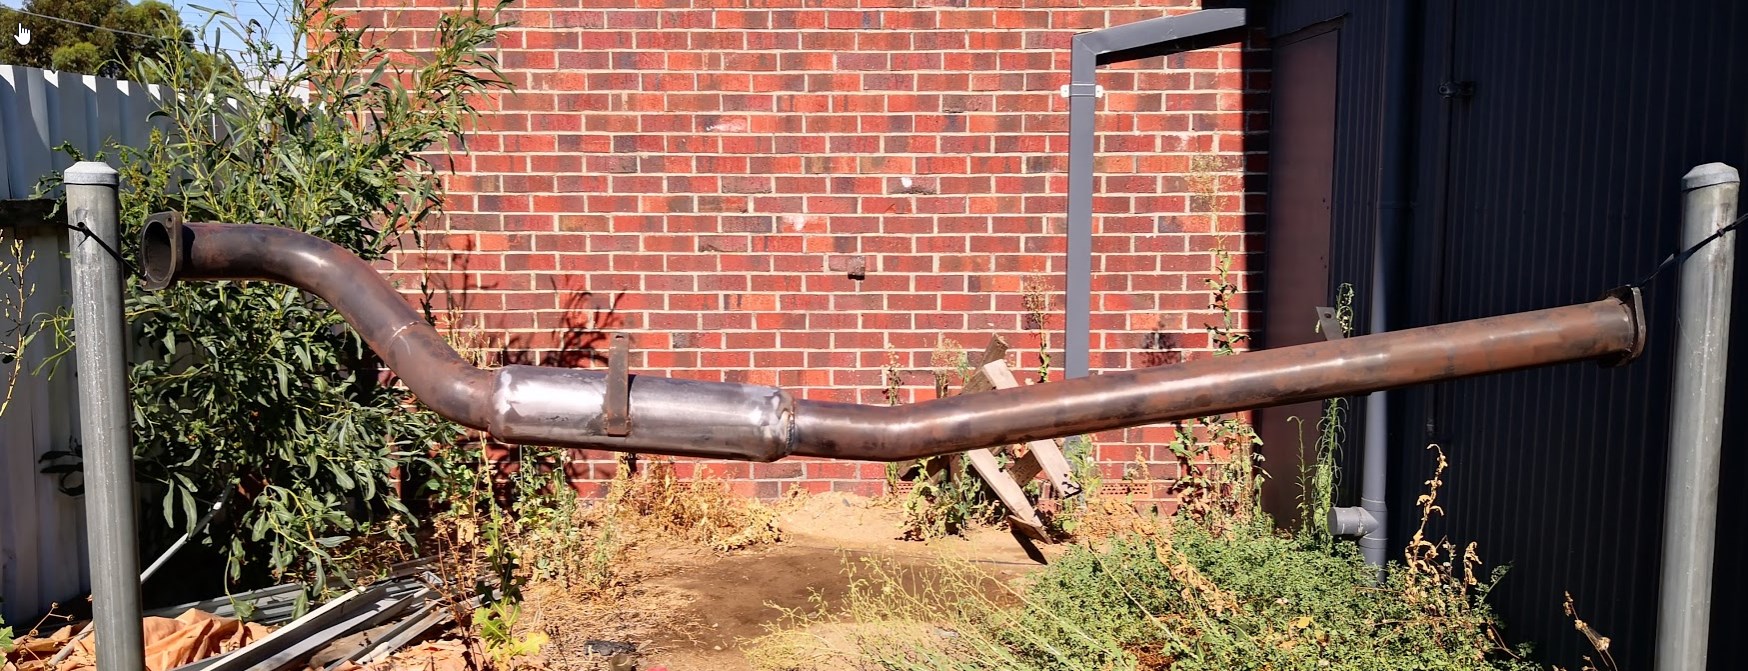
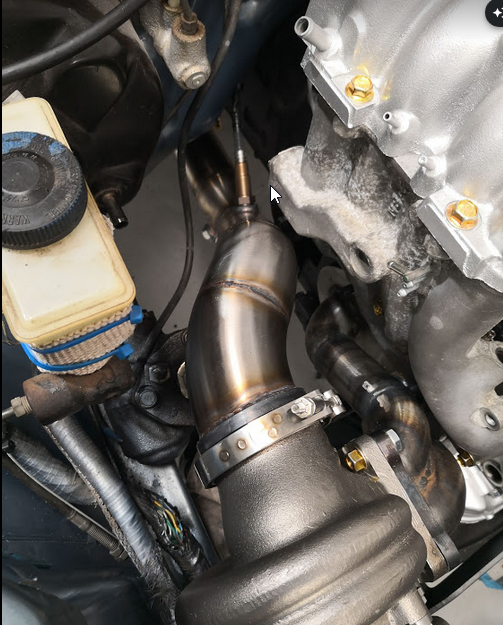
Exhaust + rotoflow all been cleaned and repainted, ceramic can paint makes it look like new again. Im going to need to change it all later down the track - the e85 is going to eat it alive since its not stainless.
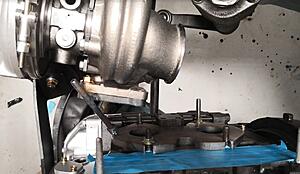
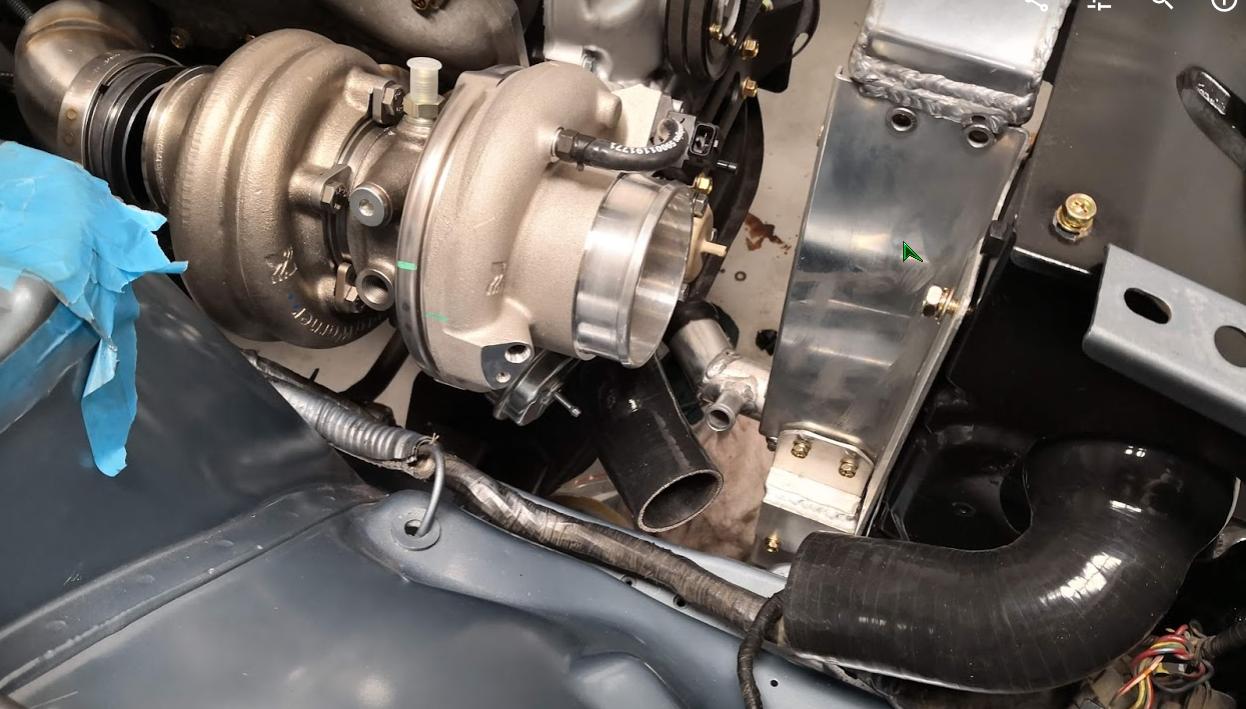
Work started on the turbo manifold, lots of french and faffing around with this wonderful 42 degree heat. As always its a battle between: steering box, brake booster, inlet plenum and the one we forgot.....the radiator ](*,)
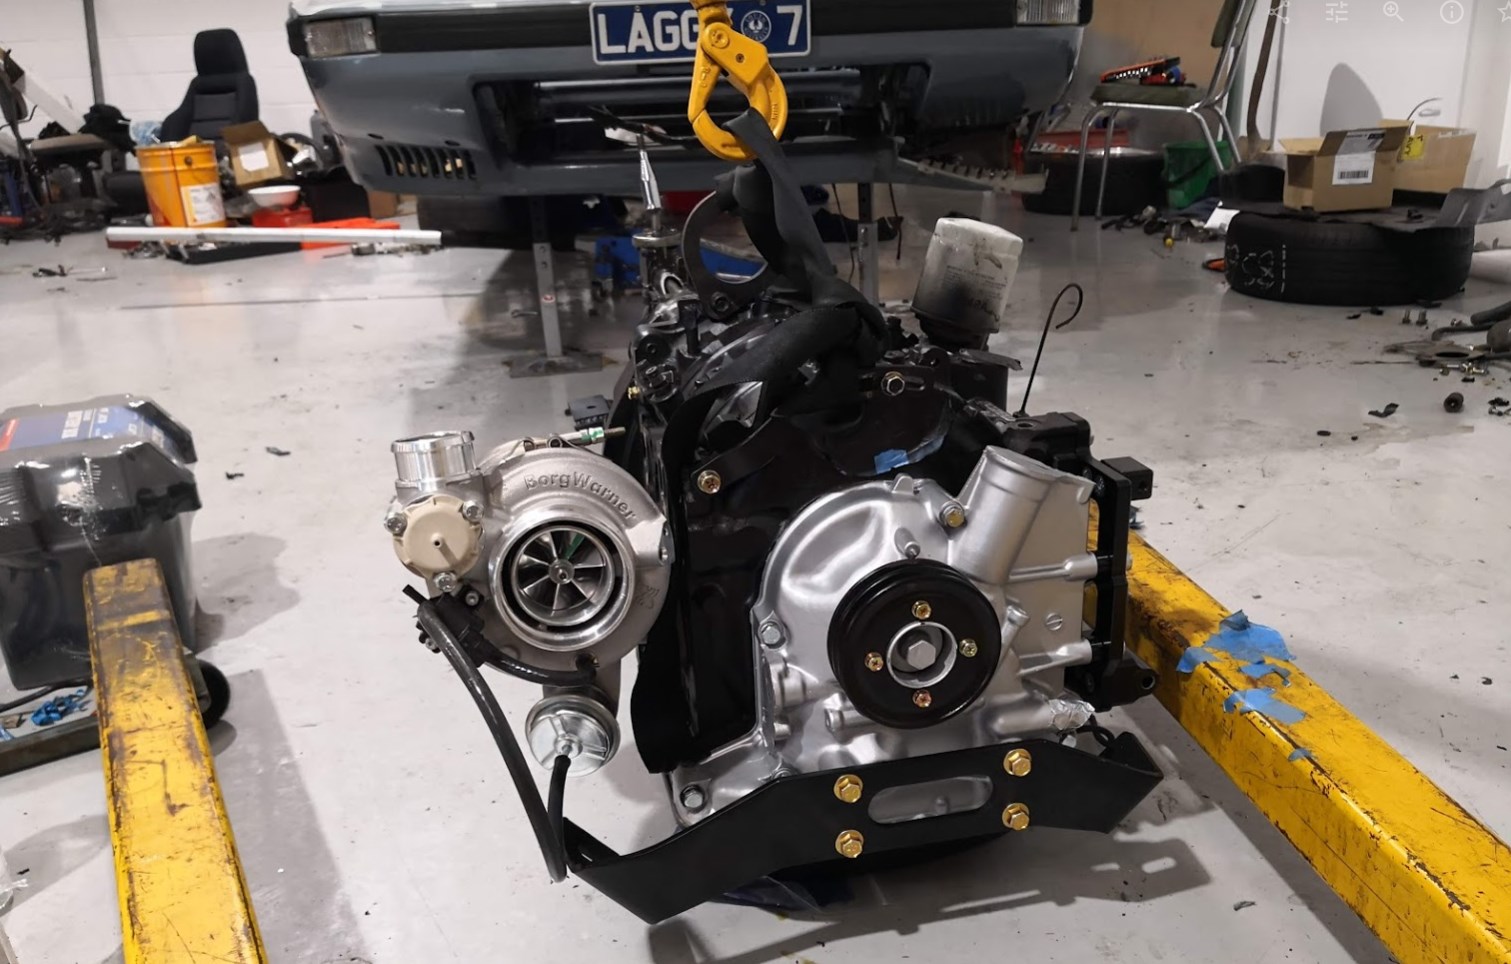
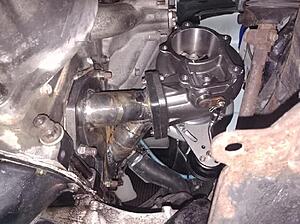
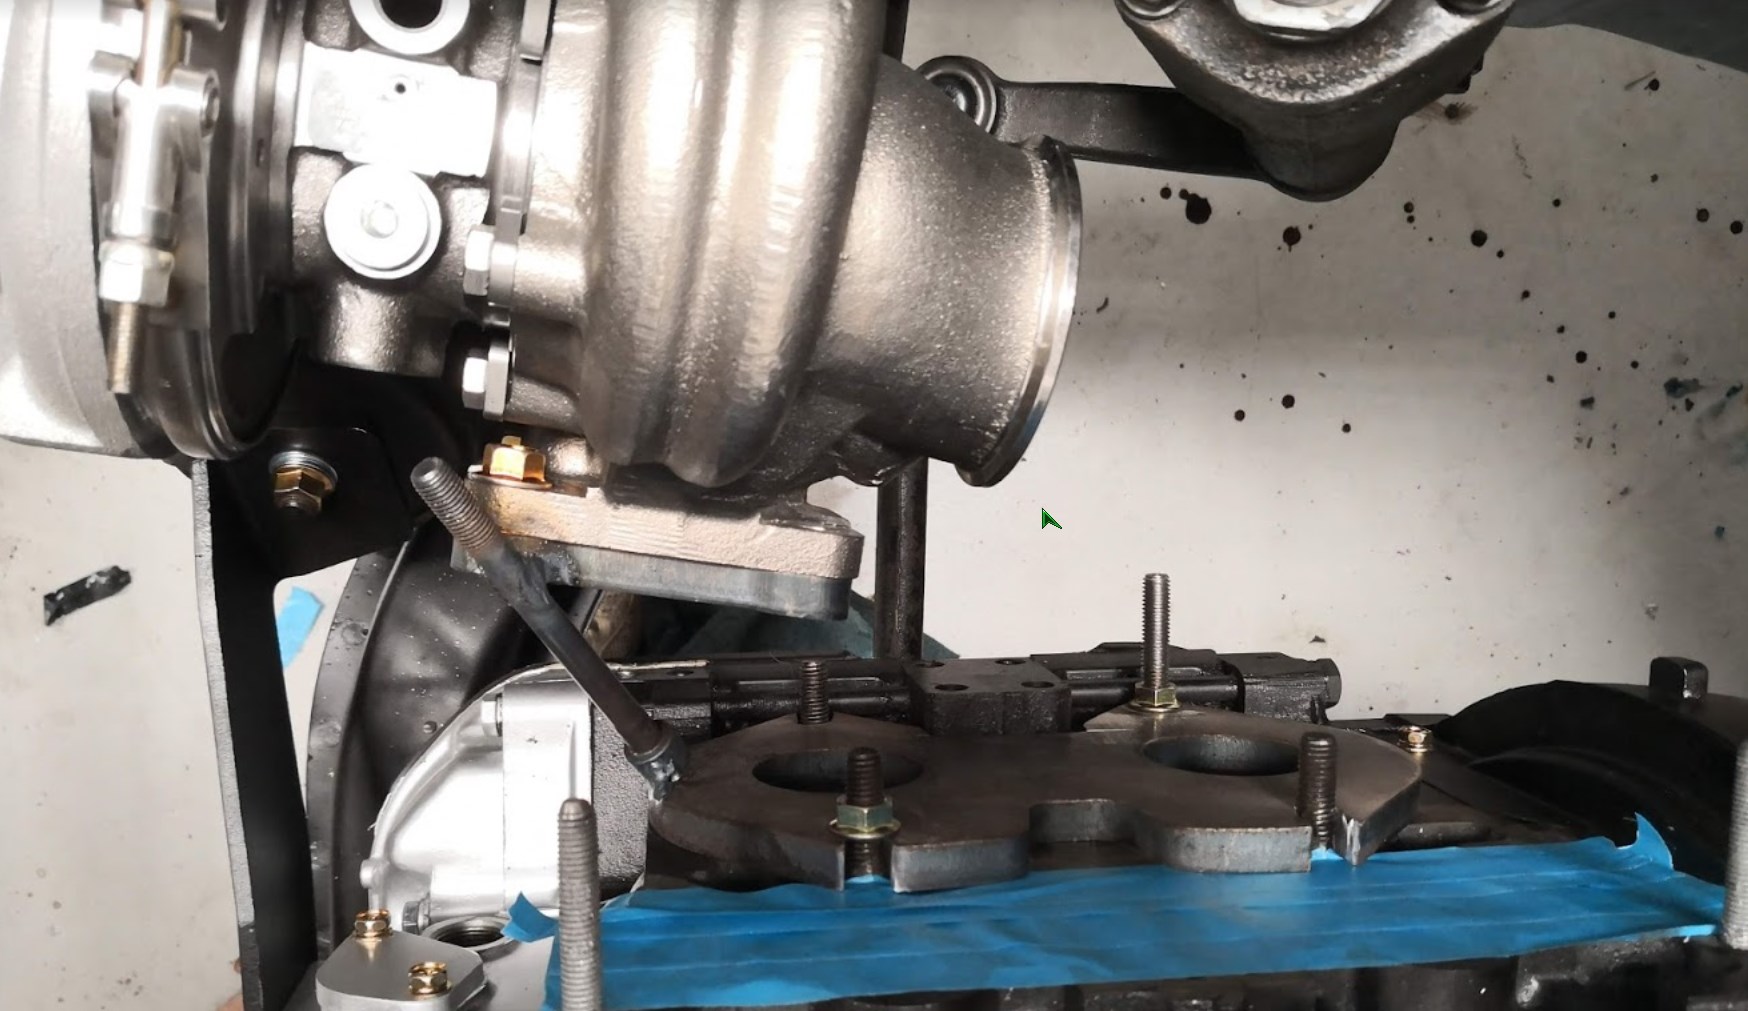
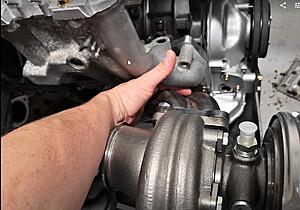
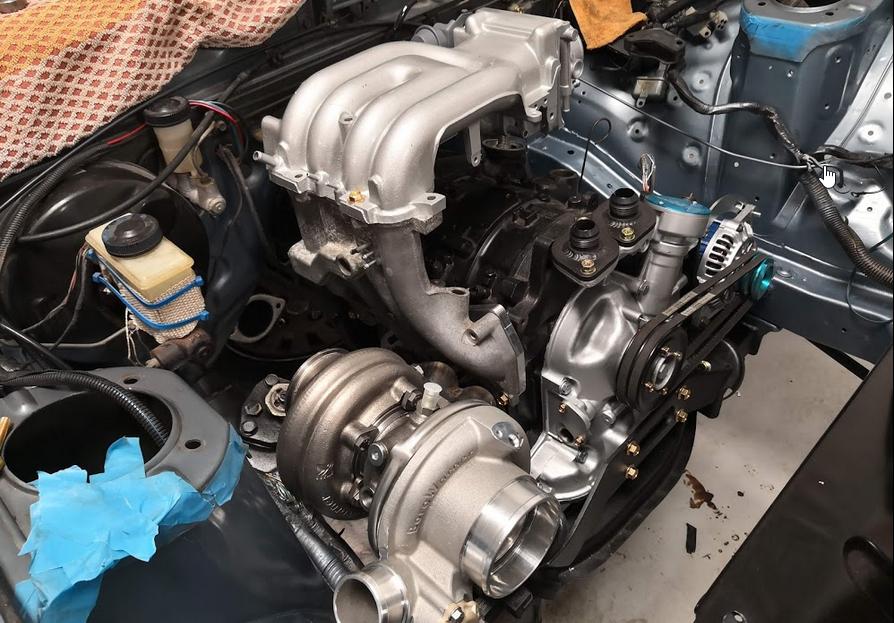
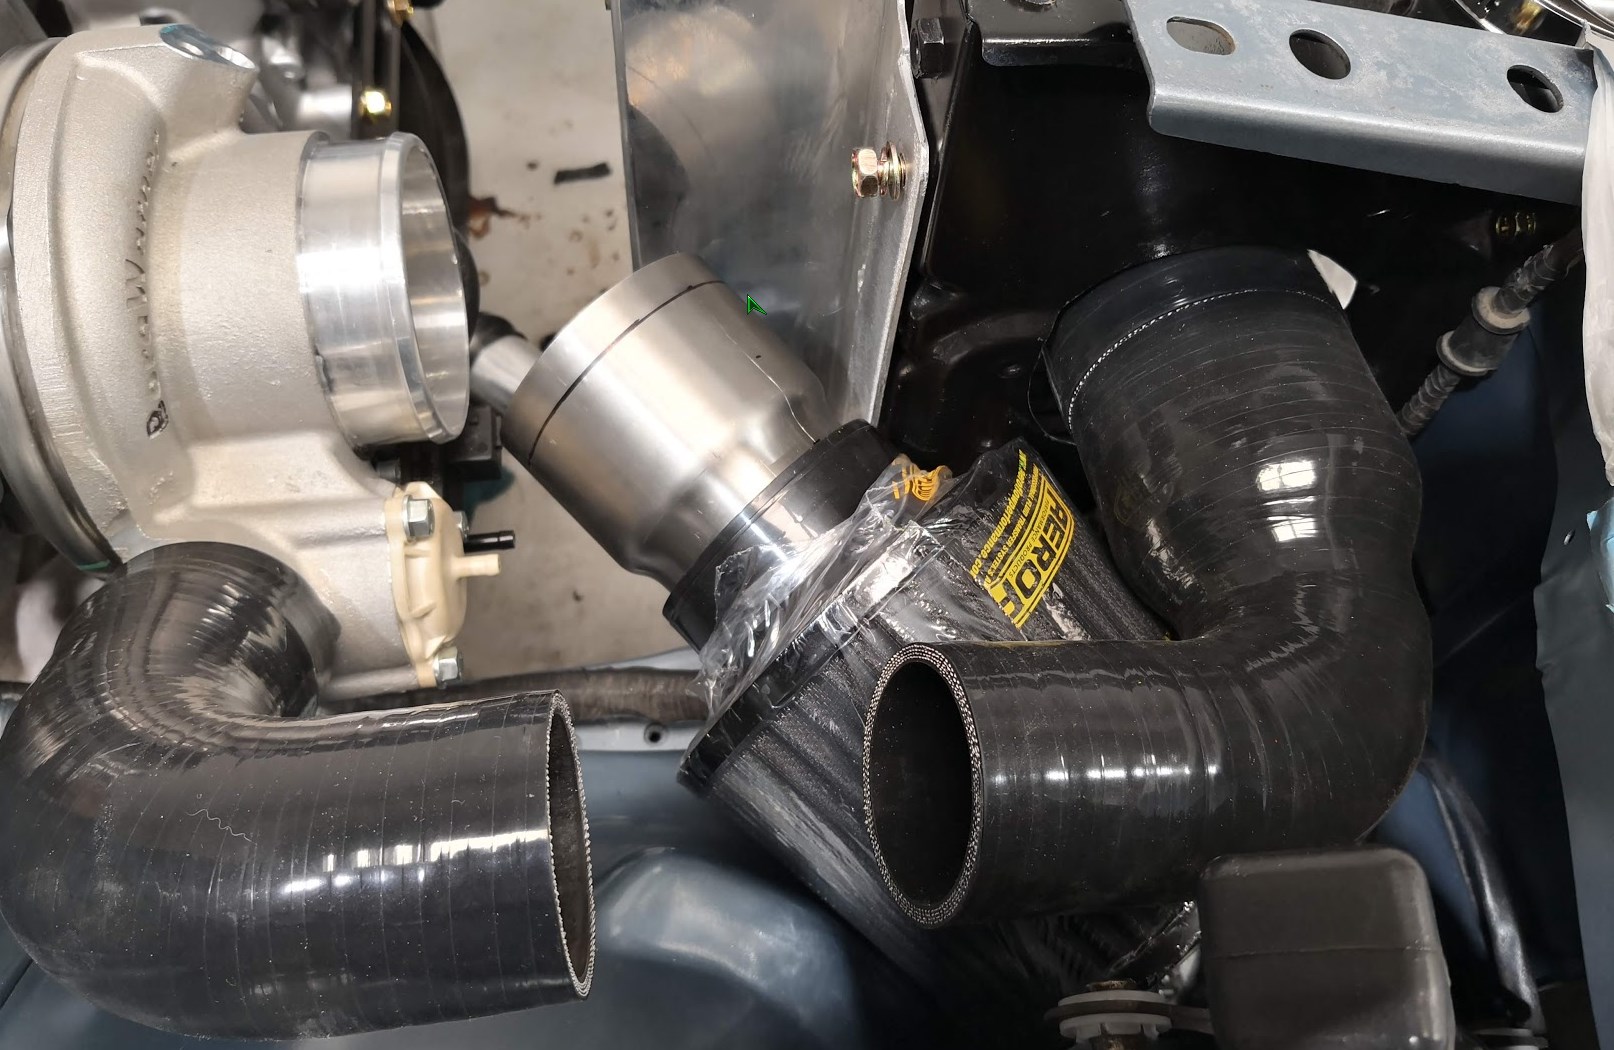
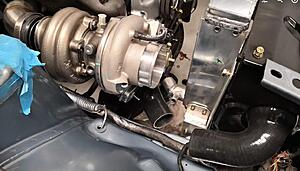
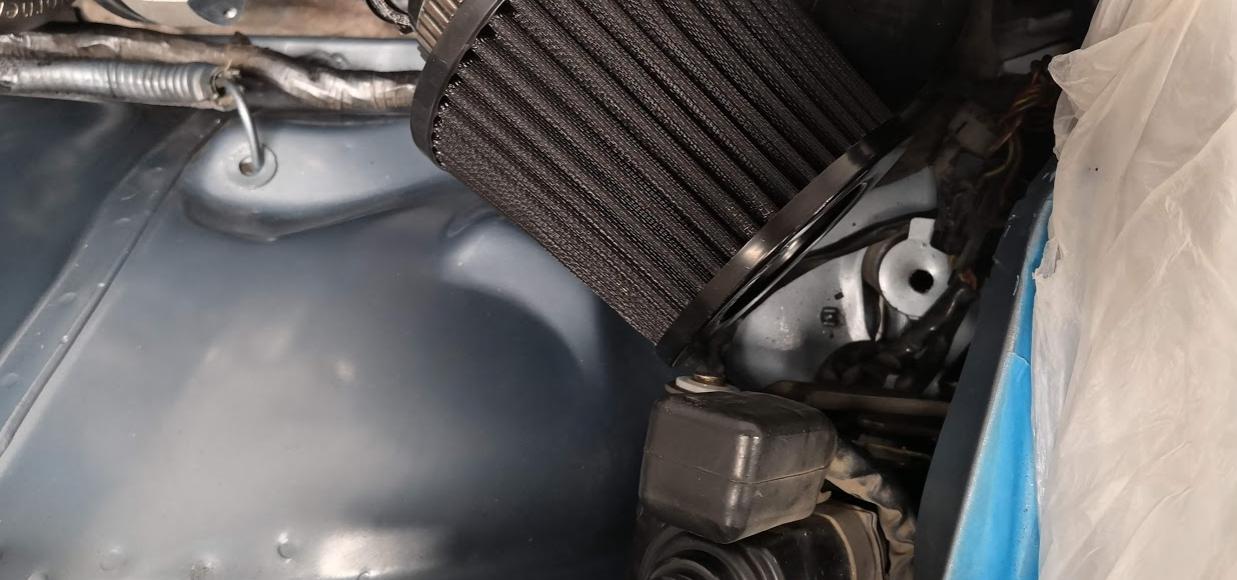
The EFR 7670 .92 IWG is much taller than the T04B, so it ended up in a similar spot; also this turbo needs coolant feed/drain so it had to come forward a bit more; and not triple checking it we've gotten too close to the radiator. I'm on the hunt for a stumpy pod filter to suit however we might slide the radiator over to get a cold air intake implemented as well.
Clocked the turbo around and should clear with space for access
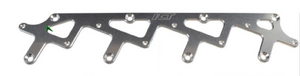
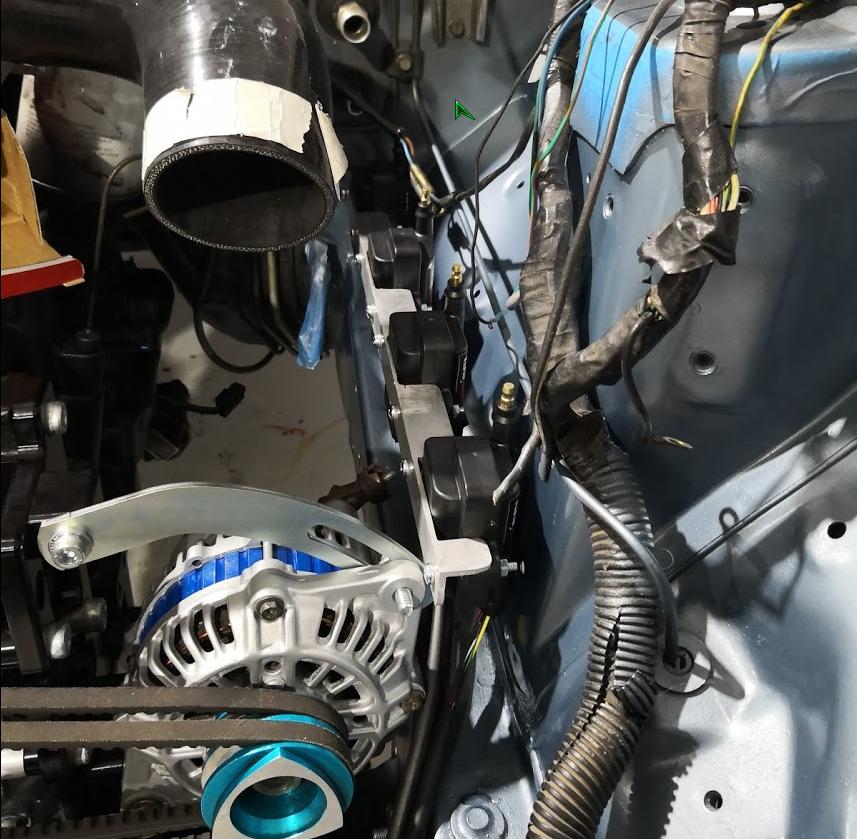
My plans for the coil packs have fouled up as well, the plates i posted up wont fit due to the side mount alternator.... cant go vertical as they foul with the intercooler piping, im working around it but sitting them above the idler arm; hopefully it will clear and most importantly - not look ****
Made the brackets for the oil cooler mount, it now sits in the standard spot it would be on a S2. Have been getting some prices on proflow/aeroflow and to my surprise im going to need to add another thousand :evil:
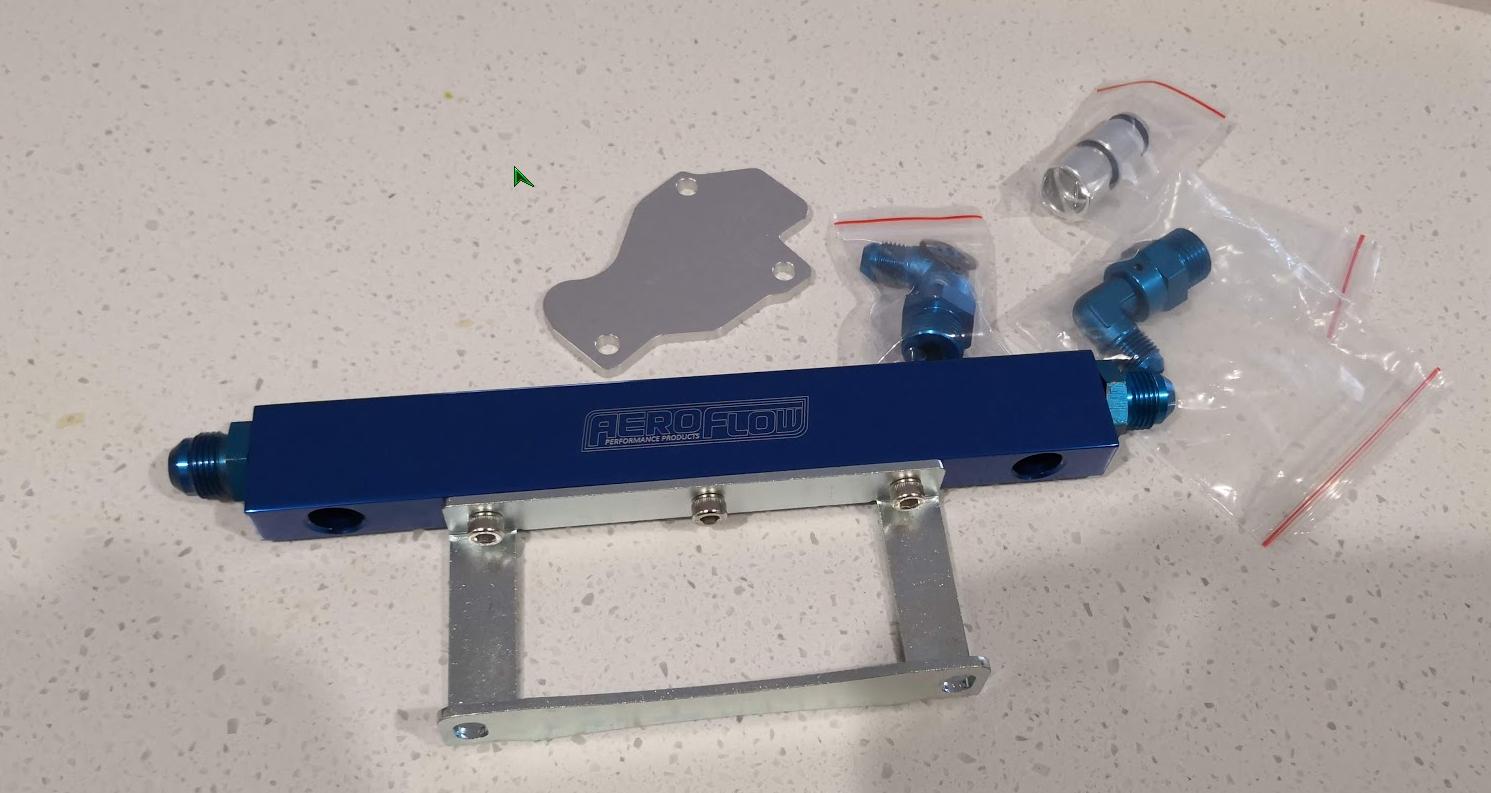
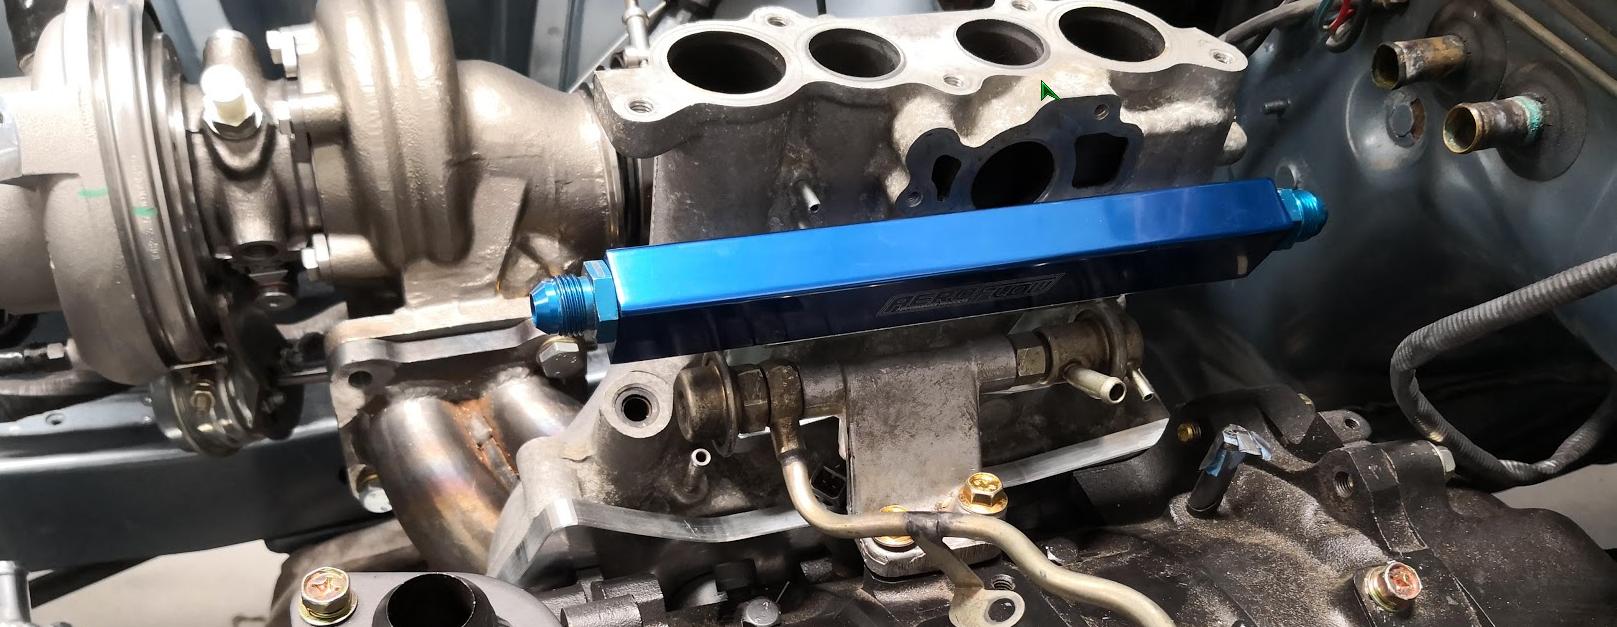
Aftermarket secondary fuel rail is on order; should arrive next week then we can order the injectors to suit. At this stage i think we will go 1000cc primary/ 1700cc secondary; need to spent another couple of nights researching - should be enough fuel.
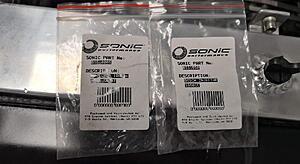
Adapter plates have left Miami, should be here this week
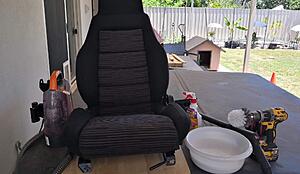
Was on the fence about replacing my existing s5 seats for slightly newer s6 seats, however the only ones i could find locally had some cigarette burns plus ive always liked the way the s5 bolstered; so the drivers seat is off to get repaired. Ended up going with this method of cleaning my passenger seat.
Few days on site this week netted some good progress, all the fitment issues to deal with which it to be expected.
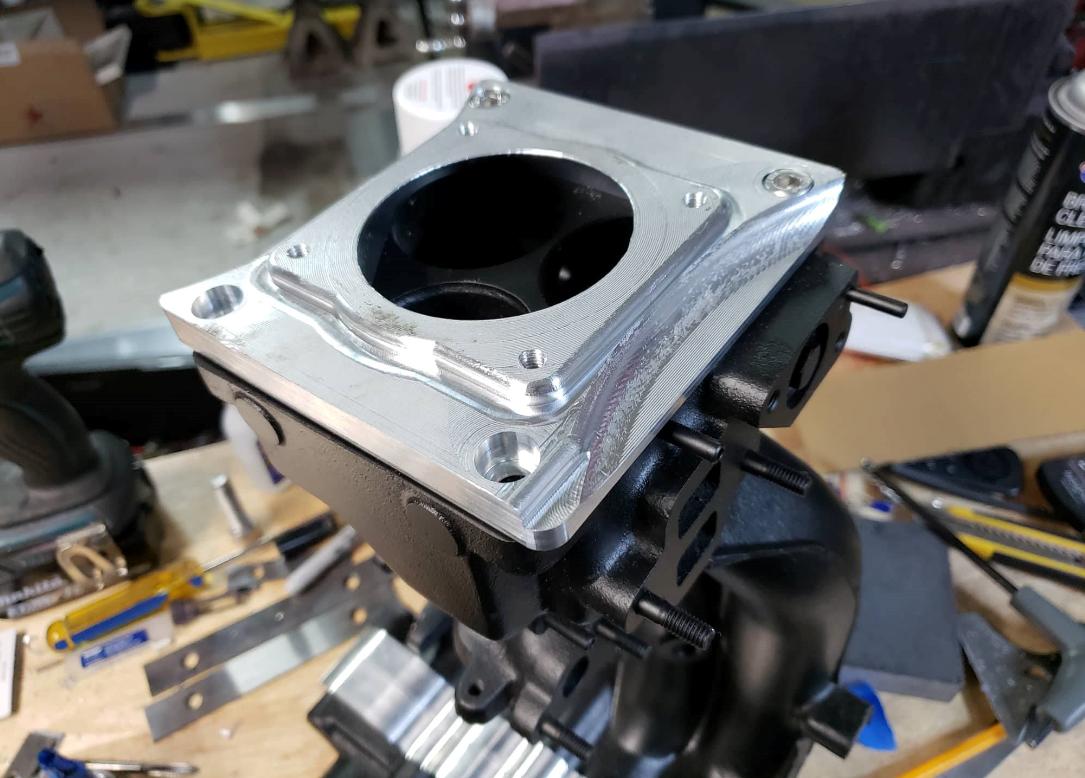
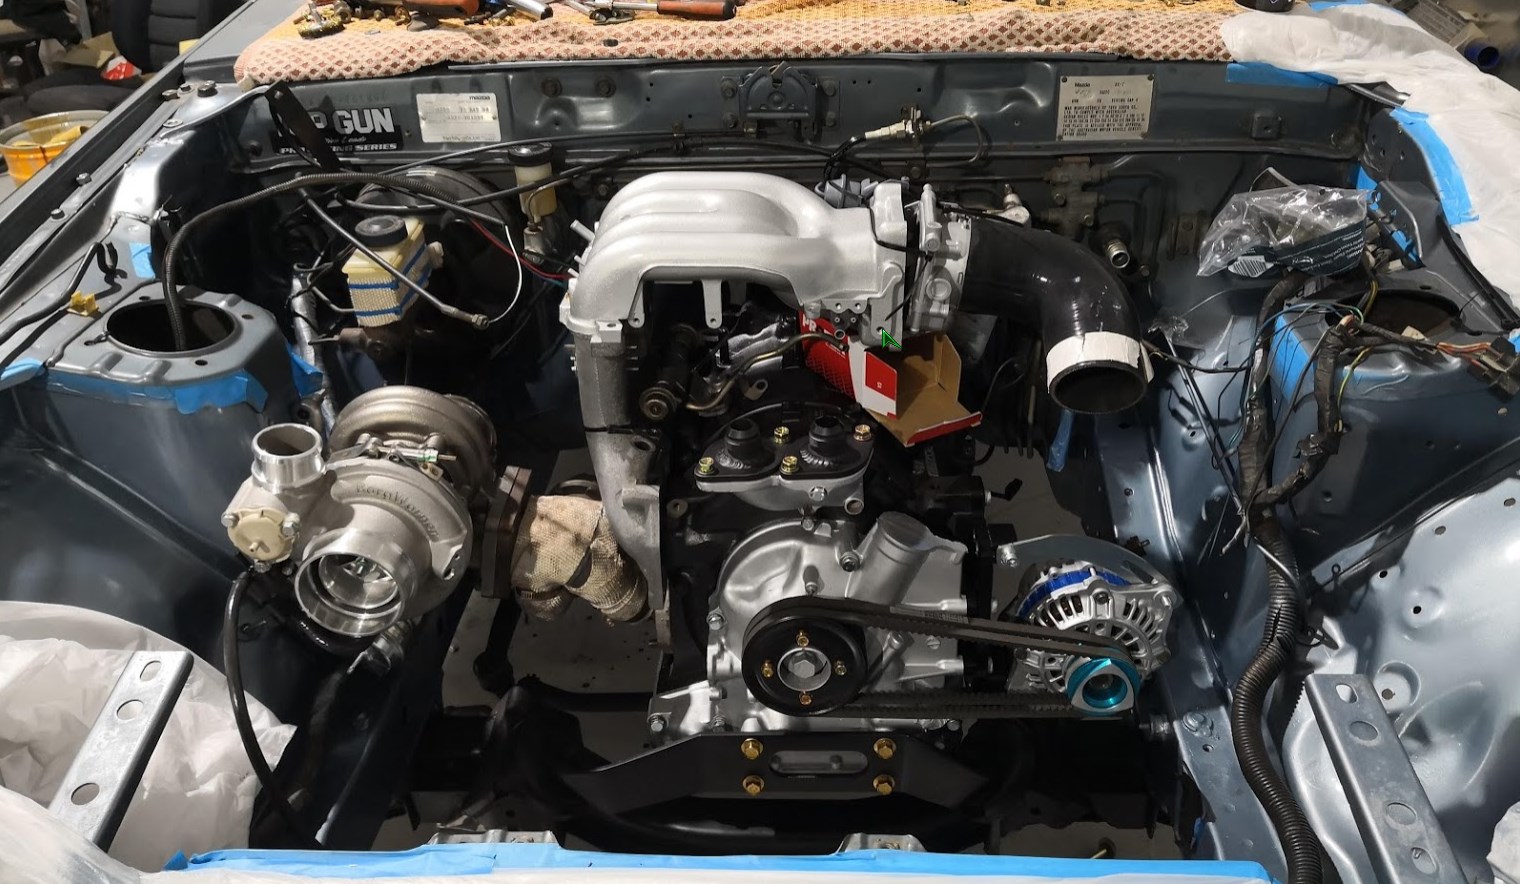
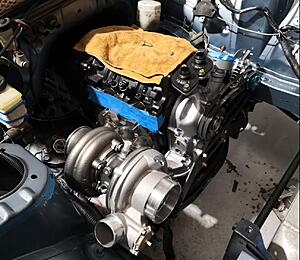
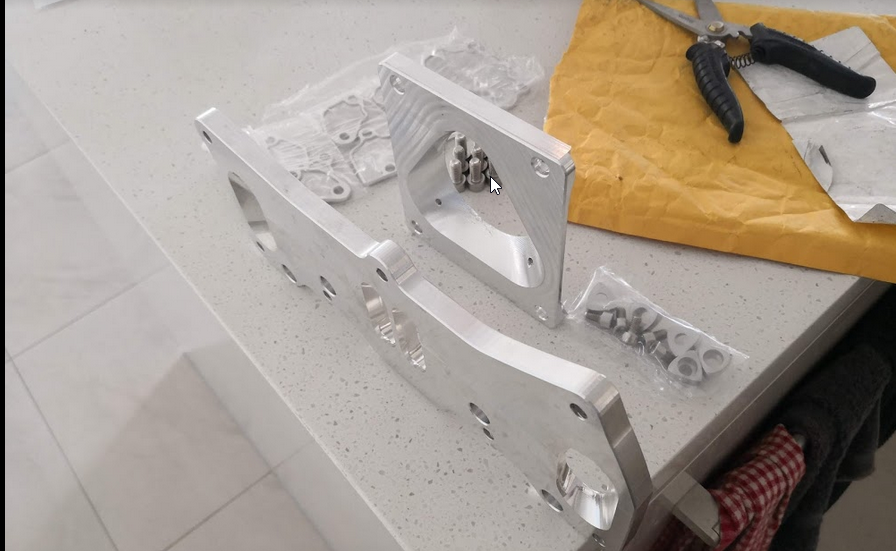
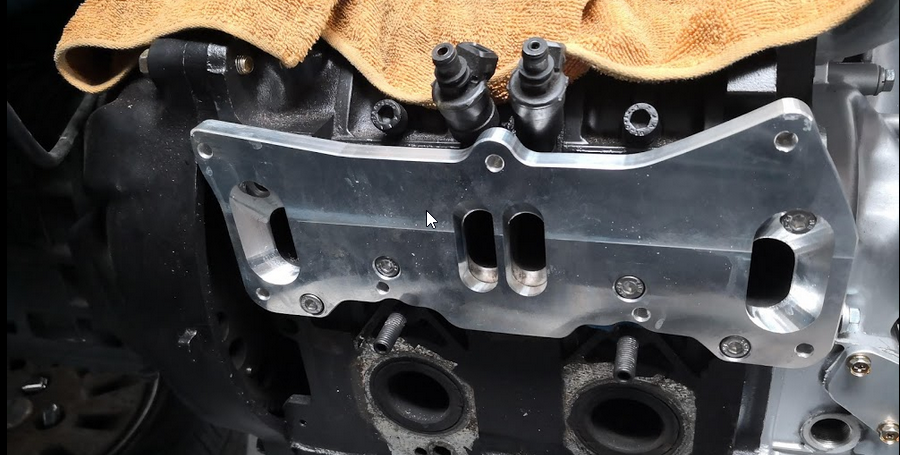
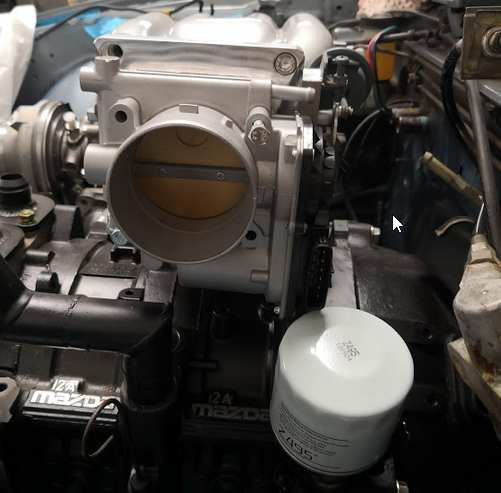
Inlet manifold adapter plate, rx8 throttle and block off plates have arrived from JDL in florida; very well priced considering. Postage wasn't as much as i thought took around 10 days to get here.
the inlet manifold plate, fit very snug and gave enough clearance for the turbo manifold, the port sizes are huge in comparison!
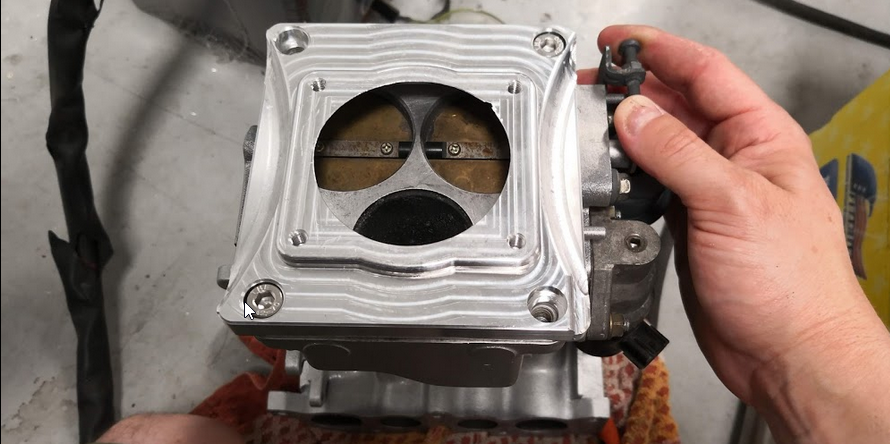
Also had to replace the standard oil filter as it fouls on the throttle body, ended up choosing a a subaru short stumpy one to fit [Z495]
There should be just enough room to get the heatshield in, all the pipes and inlet are getting the full ceramic coatings treatment, but every bit counts on those inlet temps.
Mounts for oil cooler in situ
Still playing around with the coil mount, again fitment is the issue and location is still pending
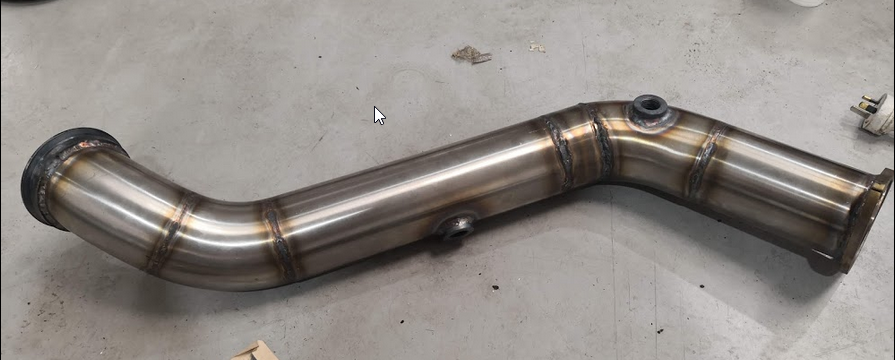
Dump pipe has been completed, was again much like the turbo manifold, trying to find the right balance for brake master, steering box clearance, intake manifold. Welded with 316 stainless with two bungs for o2 sensors. Makes a bit easier for dynotuning when you can use both widebands at the same time. Its quite a shame all this will be hidden under ceramic and lagging - stainless just looks the part once its been cooked and golden!
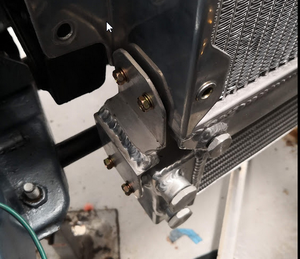
Welding up the mounts for the intercooler, we used the original air condenser brackets to hold it in place. Radiator has been shifted 20mm over to the passenger side to allow the 3.5" turbo inlet
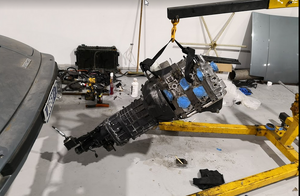
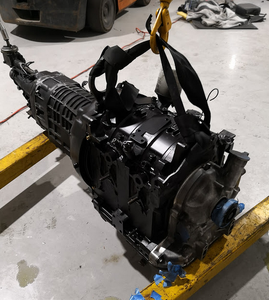
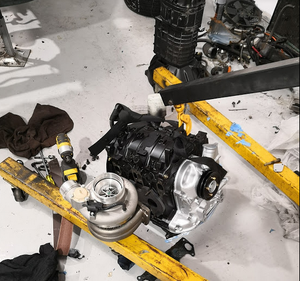
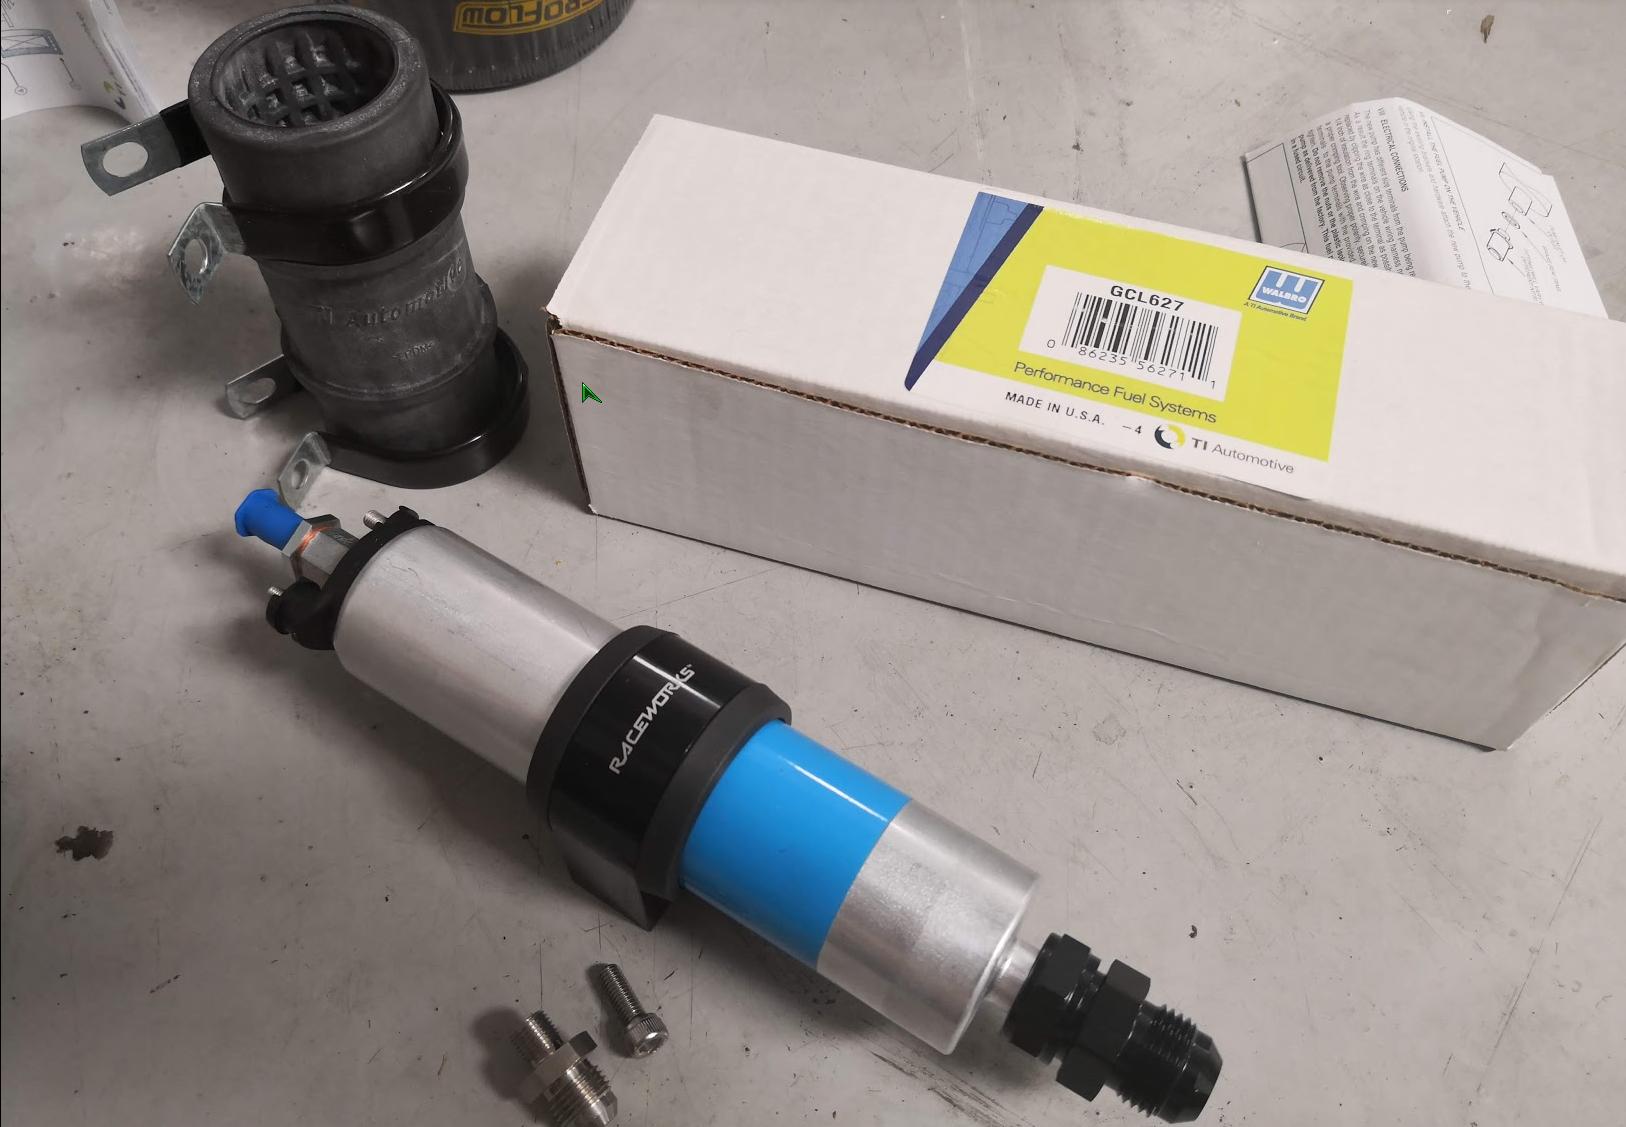
Last few weeks have netted a few big buys, fuel rail, fuel pump, injectors, inter-cooler stuff and a complete engine!
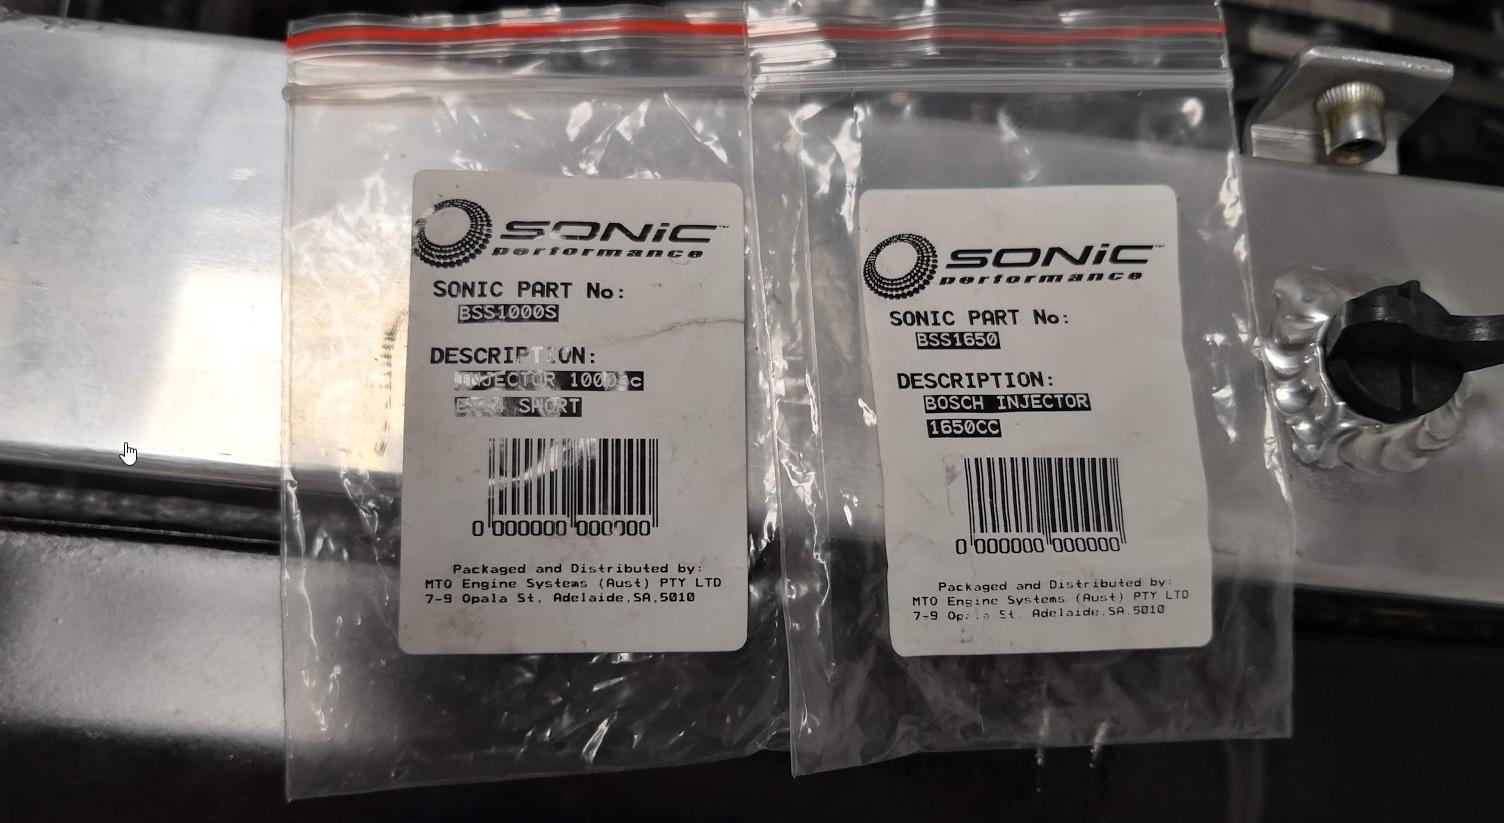
after what seamed to be days of research ive got with 1000cc primaries (with factory 12at rail) and 1650cc secondaries (aeroflow s6 top feed fuel rail) from MrRota both sets needed extenders and modified o ring fittings to fit properly. Should be ample fuel for the power im chasing with e85
[1000cc - BSS1000s] [1650cc - BSS1650]
fuel pump is not the regular noisy 044, its basically off an AMG Merc; these things are silent and rated up to 650hp. They also come with a rubber cover to protect it and keep the noise down. https://aftermarket.tiautomotive.com...fuel-pump-kit/
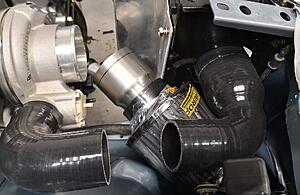
Bag of turbosmart clamps (some constant tension ones) and silicon hoses to suit, still having fitment issues with the pod filter, its gone back twice and i still cant make it work with clearance
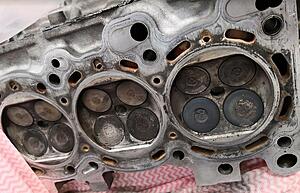
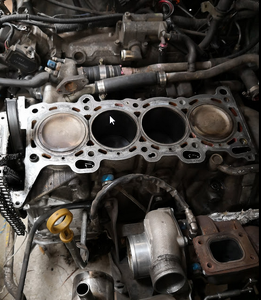
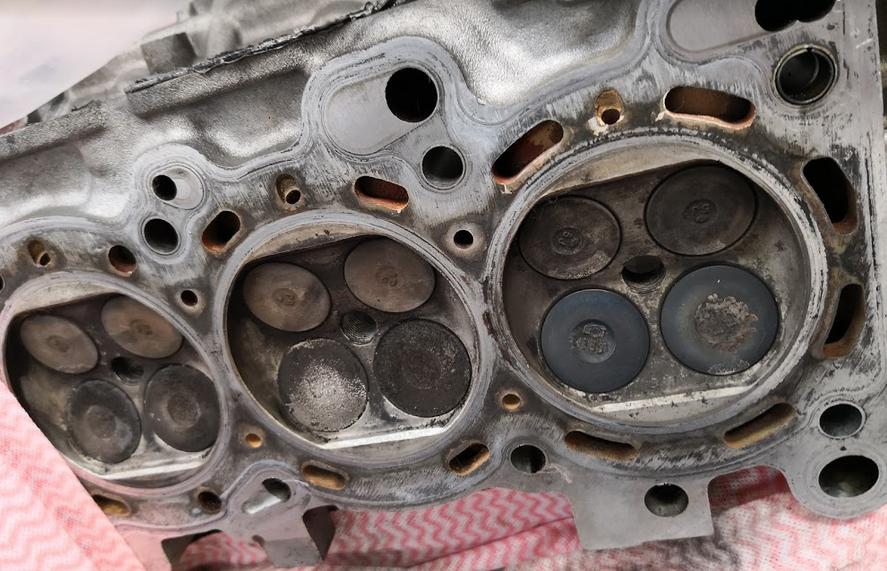
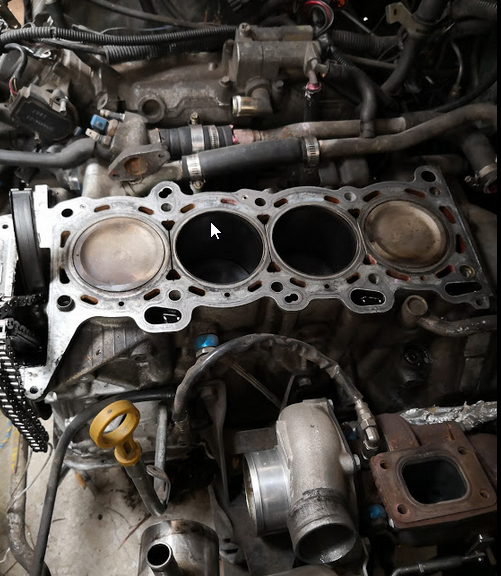
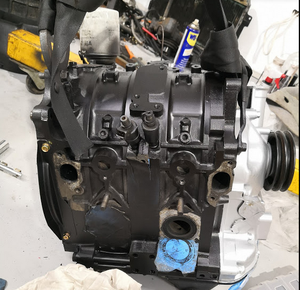
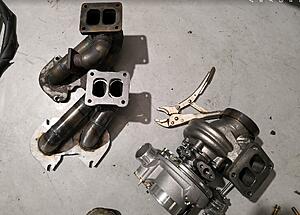
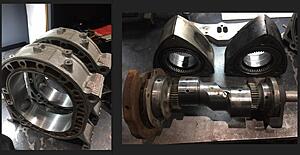
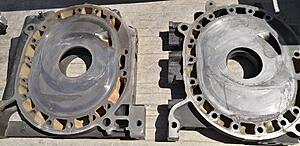
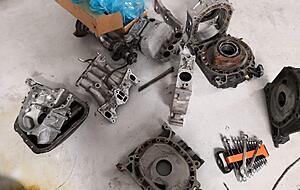
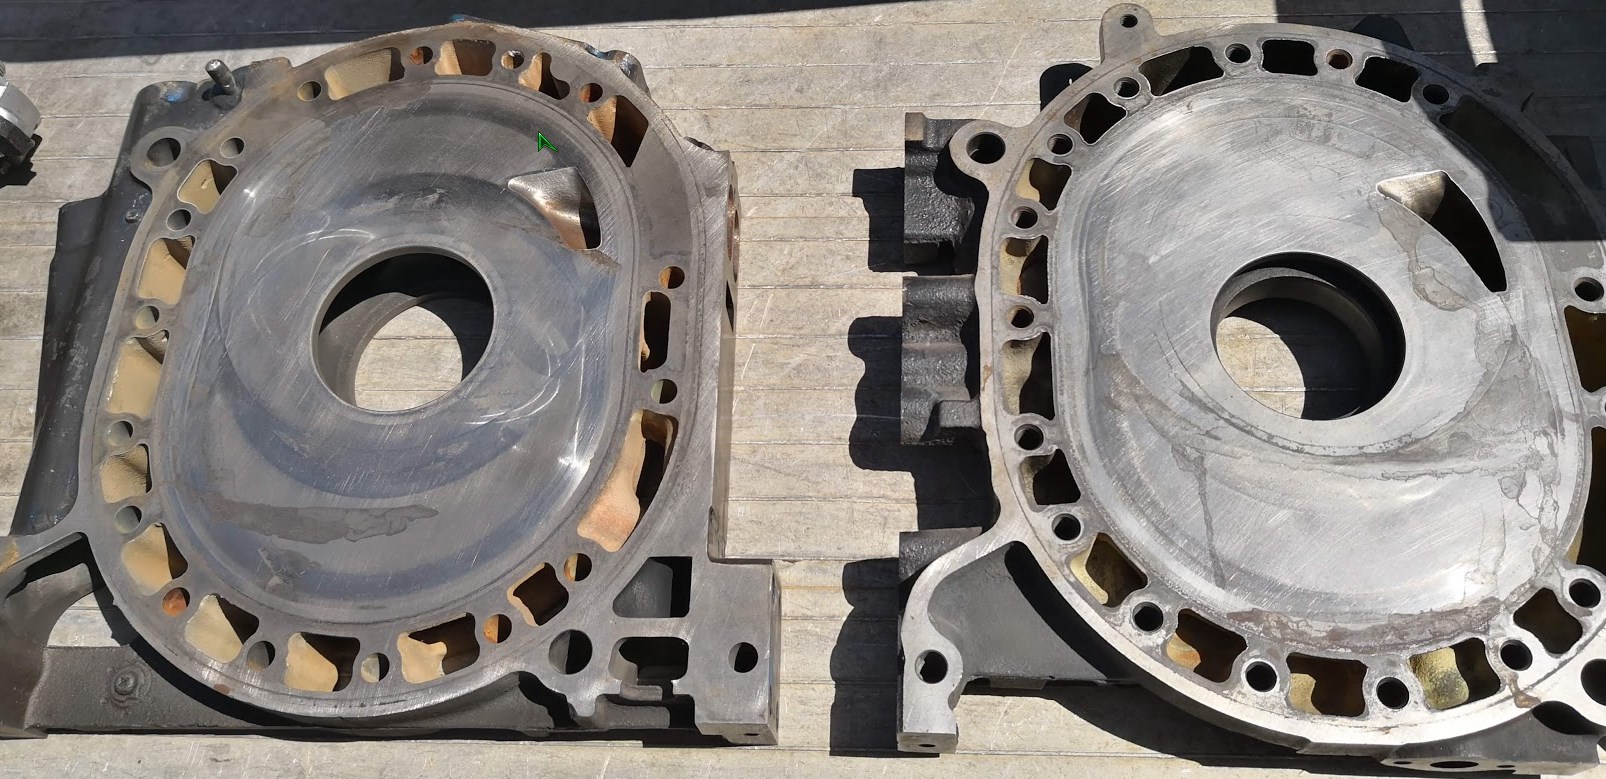
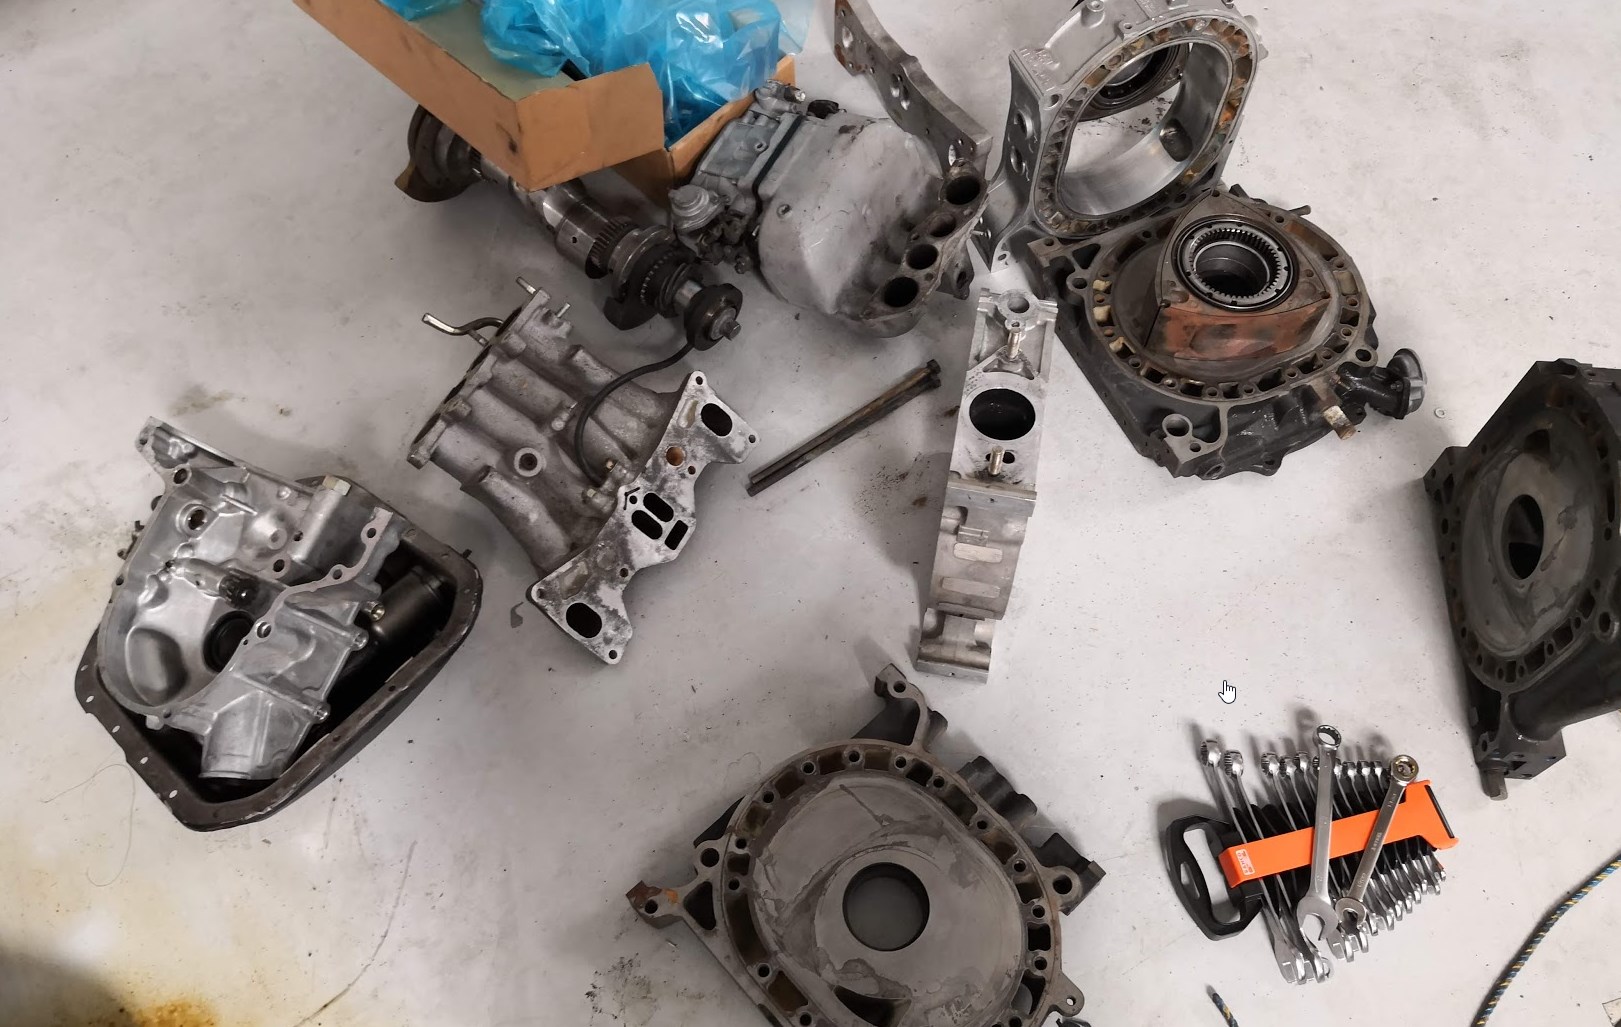
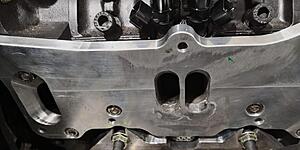
Wasn't my plan to buy yet another engine, however with these 12a's becoming hard to find i figured it was a good idea to have one ready to change out, or even pull my stock one out for shelving. On initial inspection it looks like we have everything but the housings are usable, there is some small cracks where the spark plugs are, and as always some chrome missing. (will be looking to sell these as they are still ok for a short term project) Plates are Extend ported to the xtreme rotor template with a complete stud kit to go with it. With the s6 plate up next to it the portsize difference is huge; the engine builder is pretty confident he can clean these up and re-nitrite the plates.
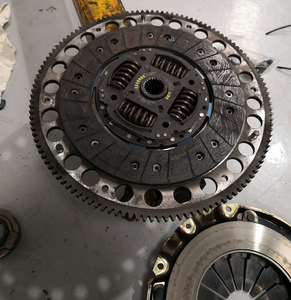
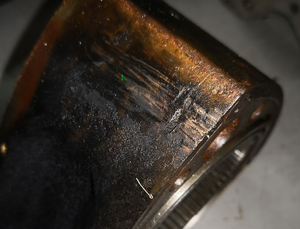
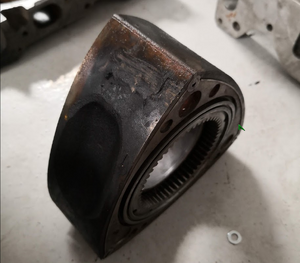
Rotors are in good condition except for a notch out of one of the rotors, and one of the seals was stuck in good and proper.
Been on the fence all week about what seals to us, we have decided to go with Power seals for longevity in case any boost creep or issues down the track.
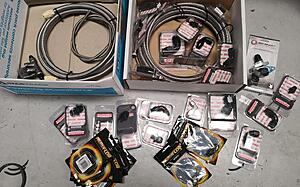
More shopping this week as ive loaded up some bowdens, penrite, coil packs, another ewp adapter, another battery and the one that sent me broke hoses and fittings!
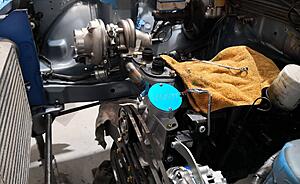
after much faffing around i have managed to get the pod filter to fit; ended up clocking the turbo around and had the 2" connection go under the pod and ive ordered some funky bend from the turbo to line up with the intercooler in. As you can see the drivers side arm for the headlight is ***** close, however it should not foul even with a bit of movement.
going to be a bit of fun getting the heater hose into position - more fitment issues
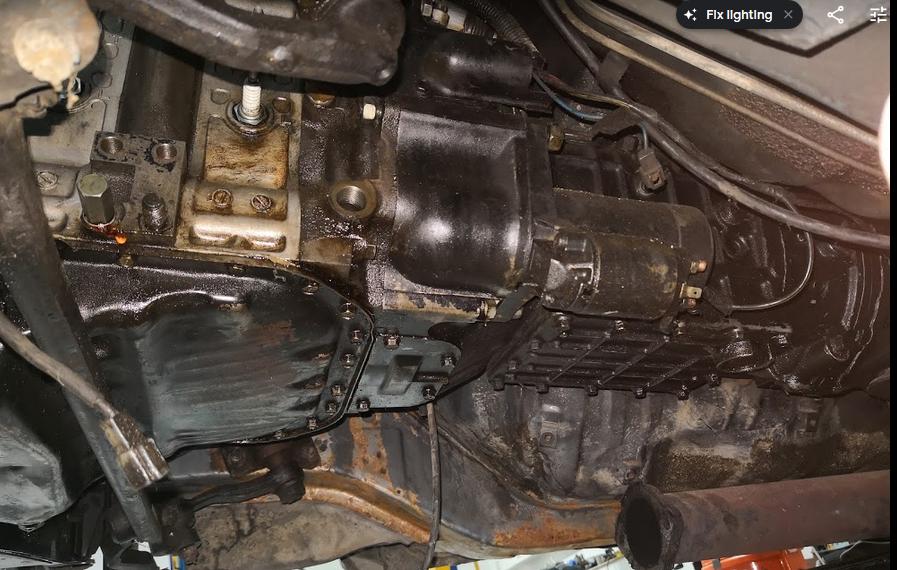
need to spend some time researching what oil to put in the gearbox again, penrite suggests 75w-90 but i remember all those years back i complained like sook when i had to buy the oil for it - i think it was redline?
85w-140 (LSD) is what i used to run in the diff
Did some further port matching on the intake and plate as they needed some love to line up correctly. The plate was made for a 12a tallport so at risk of making a step and causing lots of turbulence we got it welded up and faced all the surfaces, The turbo manifold needed the most work but now its flatter than my floor
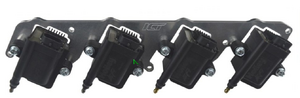
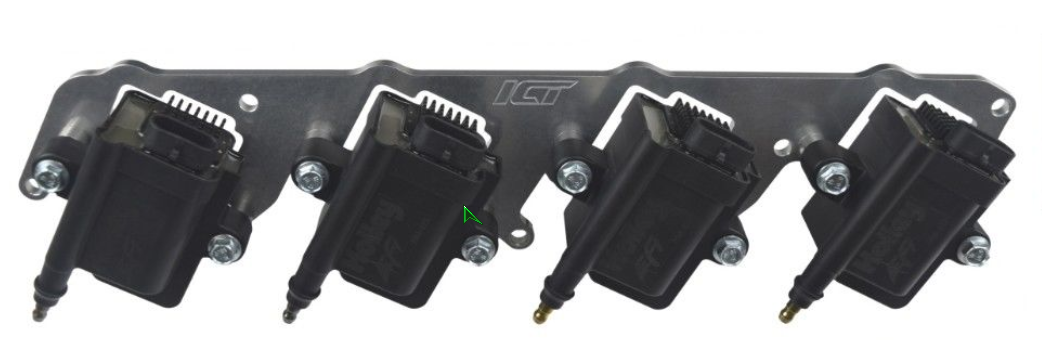
Coil packs have been sorted and mounted, leads and plugs on order. Could of possibly used something off the shelf but im getting at the stage where it has to look neat and tidy! Used some rubber in between the mount and body
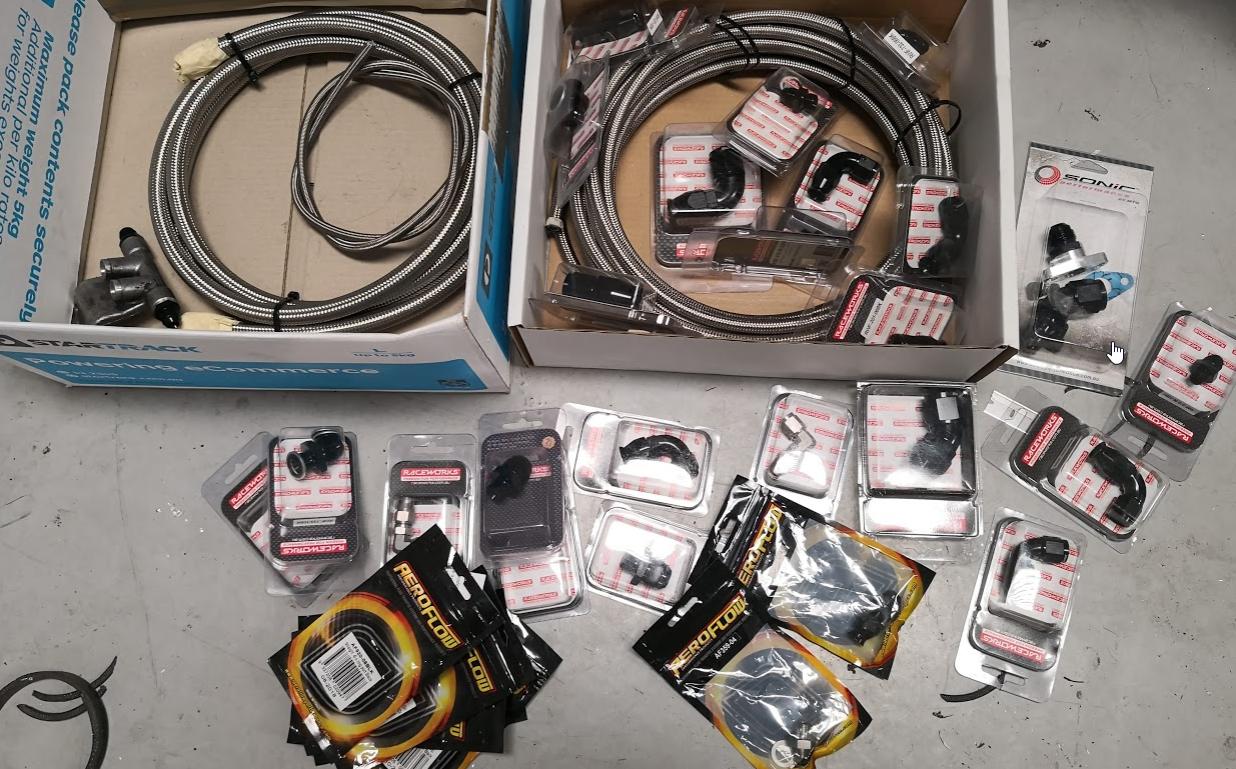
That moment when they bin the bag and start filling up a box with each package costing on average $35 it starts sinking in where its all going! gone -10 for oil cooler, -6 for fuel lines, -4 for turbo feed all in 200 series. Still working out how we are going to make the coolant lines work and what to order to suit. This is basically the engine side of gear. For reference youll need a M22 1.5 for the turbo drain into the front cover. Ill add up the rest when i get the list together. There's still alot of "should use a 30deg here" [when youve ordered a 45] makes it quite a stressful task when your going back and forward to the dealer.
dont let it hit the body! it will eat a hole in it
Had a nice week off during this miserable hot weather we have currently, took the time to yet load up more on the piggy bank and went and ordered a bunch more stuff.
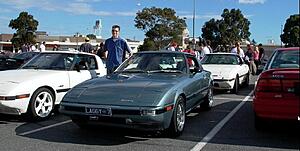
We had a local killer japan car show recently and here's a few of the stand out stunners! pretty much my dream garage!
So the idea for the battery box worked out well in the end, we made up an aluminum brace to hole the fuel reg and secure the battery near enough to the standard spot, it was previously in the cabin in the rear seat and i was never really happy with it there. Here's my trusty PC925 that survived 8yrs of use; replaced it with a HC28 from full river (pretty much the same thing for half the price)
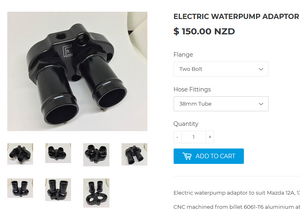
EWP adapter to replace the 3 bolt one has arrived, and it was defiantly worth the wait all tidy with sensor hole and cnc love
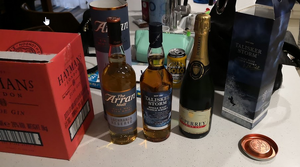
Redline shockproof arrived, they call it smurfs blood and it cost about the same as well! we get smashed over here for the price of it
Tanks been removed in prep for E85 and add a lift pump inside for the surge tank fill, fortunatly no rust just smoo that should come out, went with a regular walbro 255 pump
Had 'another' $600 box of fittings and lines to buy but we look to have 2/3 of what it needed, anything important is getting the 200 series treatment. Leads arrived as well, thought id go red to give the bay a bit of flashy
lastly found a really good cleaner for the rims, came up so good it makes me want to fix all the gutter rashes, cant get over how well this is going together
Up to date as of end of February, always keen for feedback and advice. Lots of unknowns im still working through, and everyone of them involve $$$!
Thanks for the comments guys, its really hard to find the yellow dyed bolts they come in certain sizes but nothing longer unfortunately. alot of guys here like to just change everything to stainless so yeah wanted something slightly different.
Intake was a search and half, to try and find someone willing to give it a go; its not often done to put a s6/cosmo inlet on a 12A so i was very thankful for Jorge to fab that for me!
Cleaned out the fuel tank with a fresh dose of E85 and it looked like there was paint flakes on the bottom of the tank! so a quick blast with the high pressure hose and another two doses of E85 its all healthy and clean. We used installed a pump in the standard tank and modded the cover with some AN fittings. Went for AN -6 as it was much easier to make it fit under the rear boot area; Didn't require much hammering in the end. (as the an fittings add quite a bit of height to the tank lid) simple math showed us that we shouldn't need -8 for the 300rwkw it would be max. Also replaced the filler overflow as it was cracked and leaking, pretty good considering its 35yr old. (sorry i didnt get more photos of the in tank pump, was covered in fuel by this time!
Fuel fittings are touching the luggage area, so we took to it with a hammer. If you used anything bigger: 8/10 you'd need to install a plate over the top to gain access and make him fit.
Been having a play with the location of the EWP, everywhere it goes its in the way. either too near the turbo, or really ugly in the bay.. (will update once we make a decision) haven't found many builds that looks tidy as yet. Given the cost of this exercise and relocating the alternator, buying all the hoses, i don't suggest anyone try this unless you have a circuit race car; or really care about the heat on your engine/turbo - from the research i've seen it would be lucky to net some actual power gains. I on the otherhand wanted to try something different, and i like the idea of the coolant flowing around while the car is off.
My Klotz KL-200 arrived, so i had to do the mix test; the premix appears to stick to the bolt as you swirl it around. however it does mix well and doesn't appear to be 'suspended' nor separated like
Surge tank has been reduced in size due to the mounting options near the diff area, AN fittings have been welded on to keep it all the same too. Turbo drain is complete, and we are working on heater lines - might just go with regular rubber to simplify
off to the shop for yet more fittings! its endless i tell ya