
92 Camry SE restoration

Thread Starter


Joined: Oct 2003
Posts: 22,595
Likes: 1,276
From: Ohio
92 Camry SE restoration
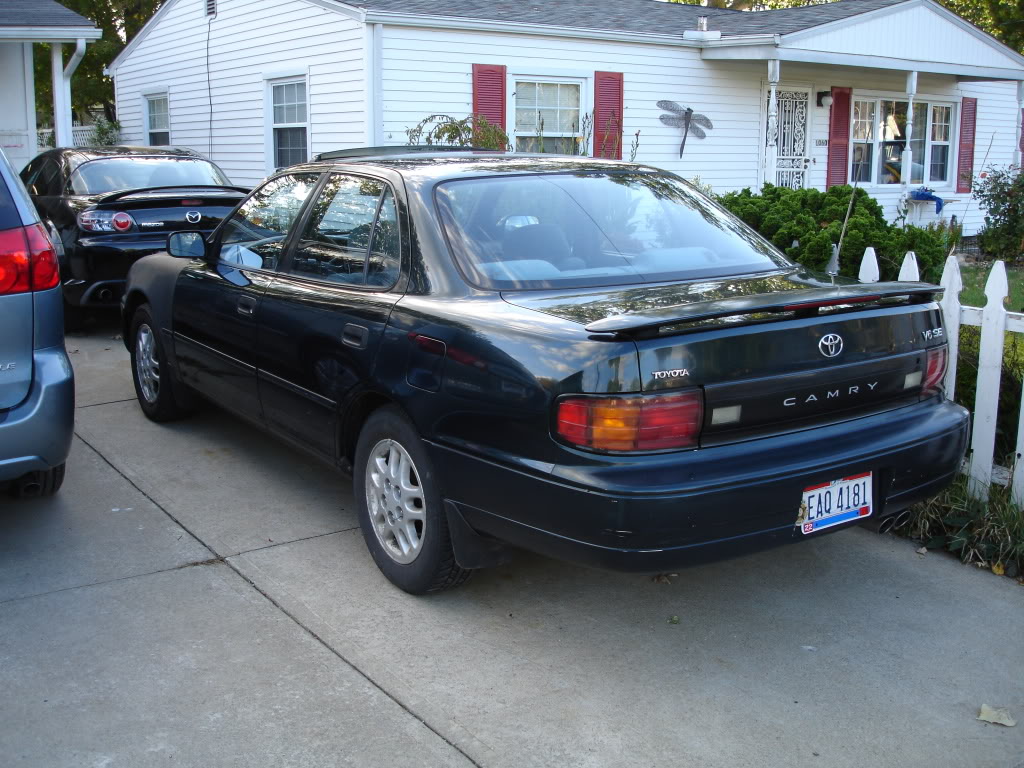
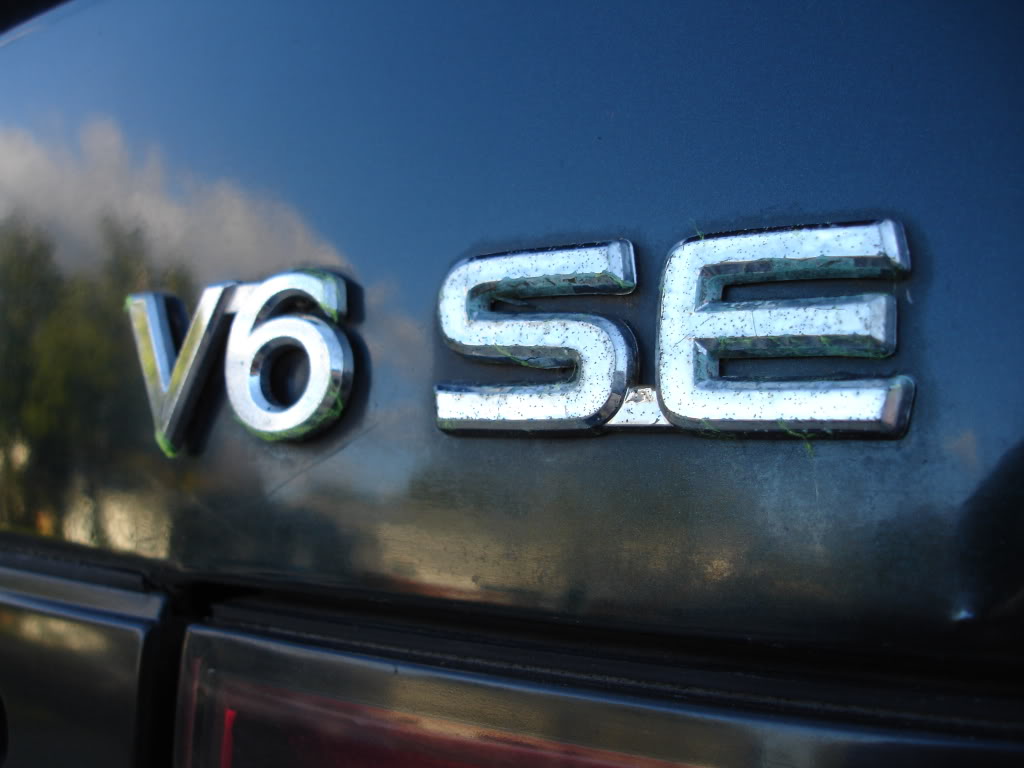
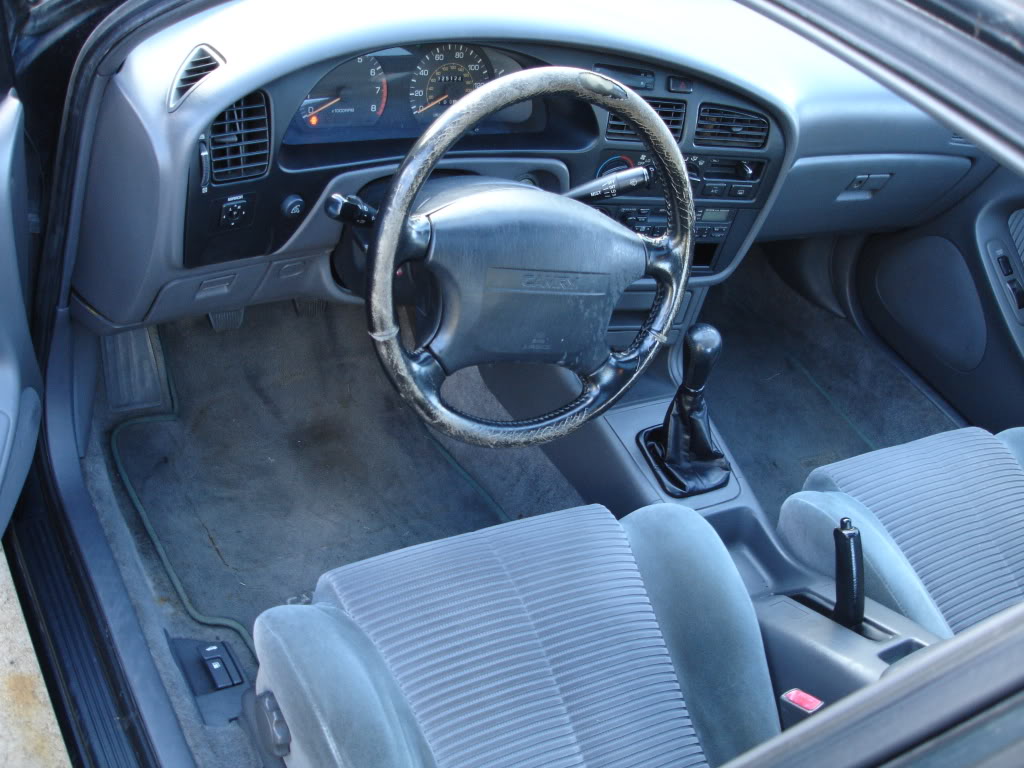
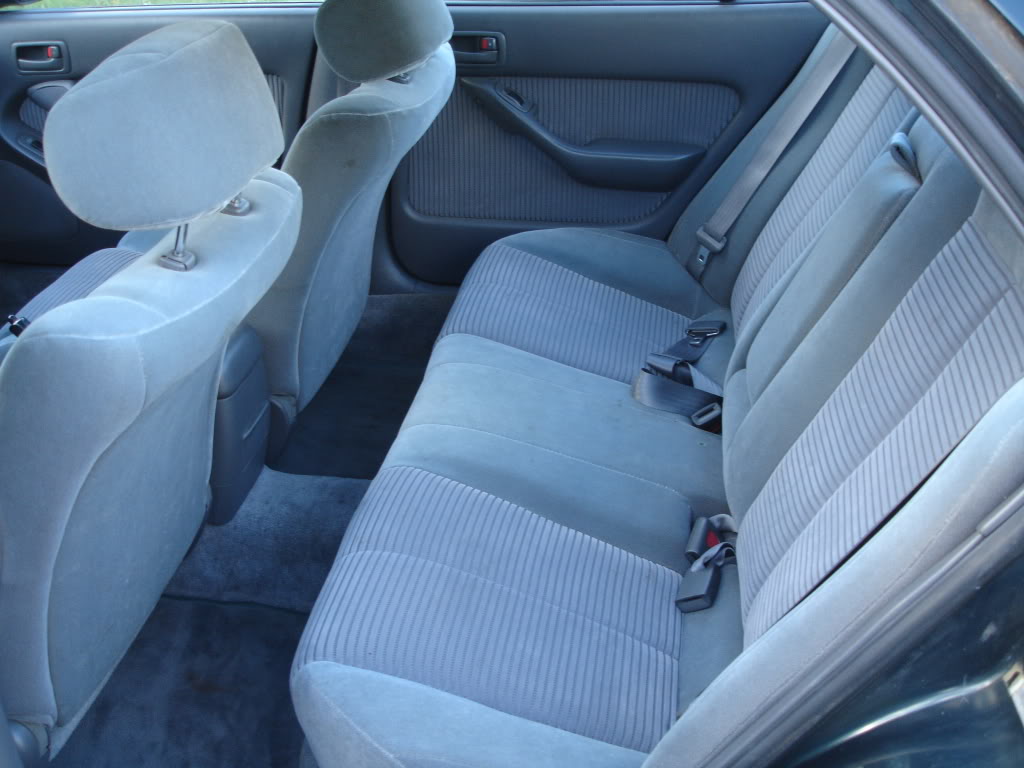
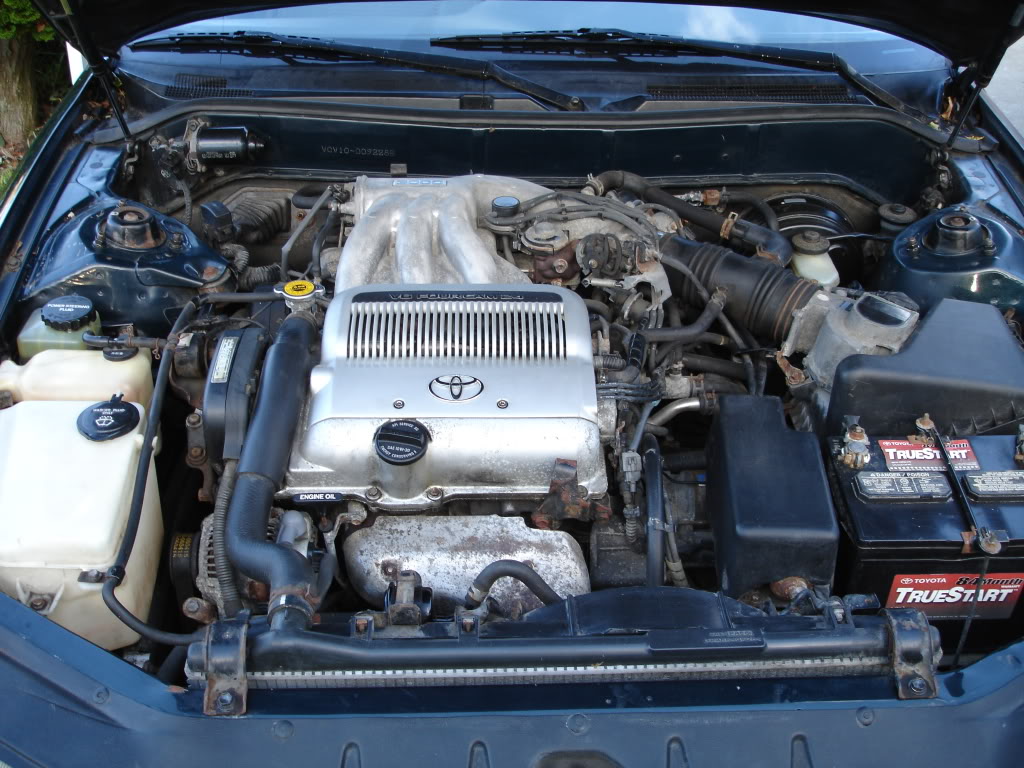
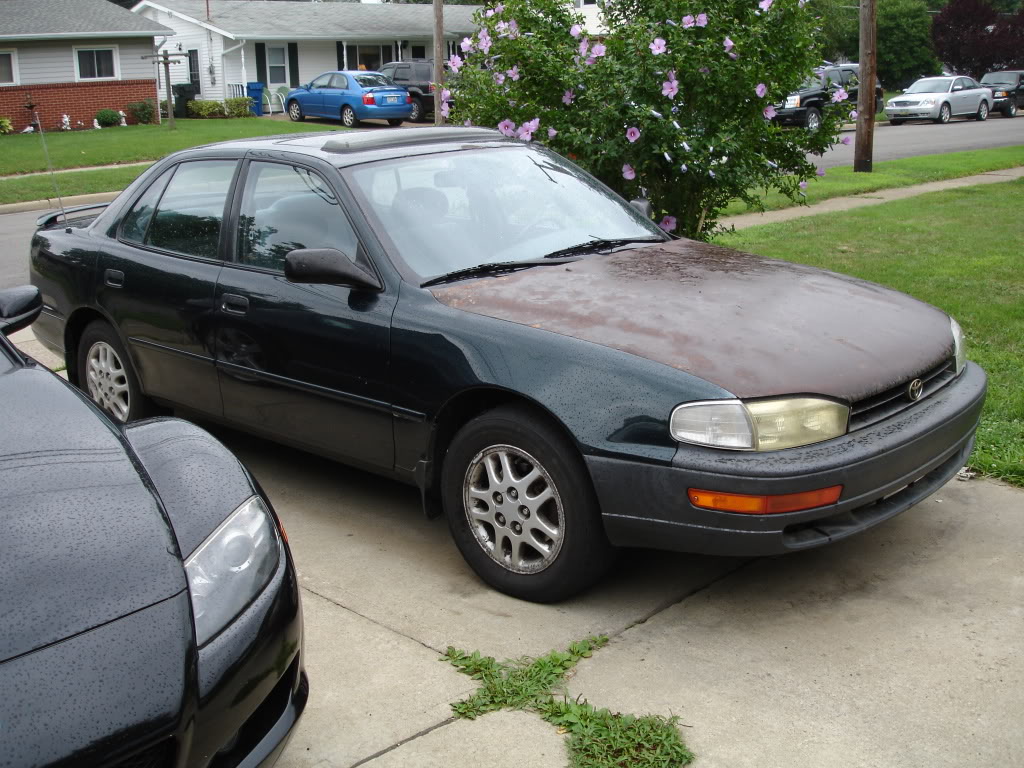
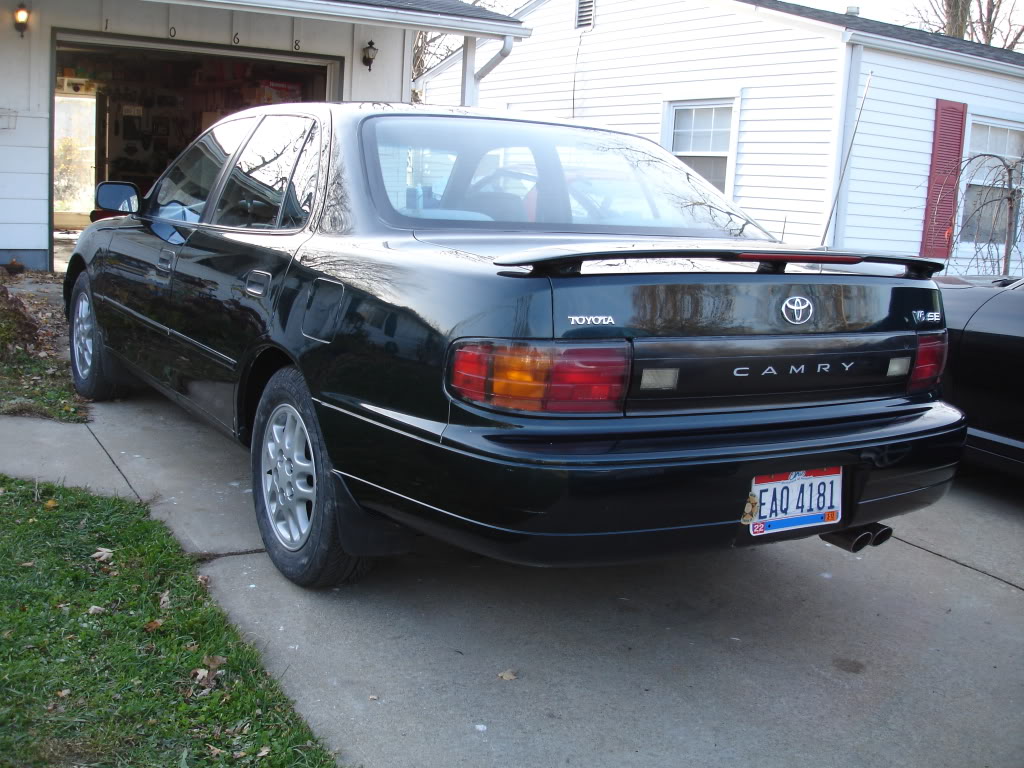
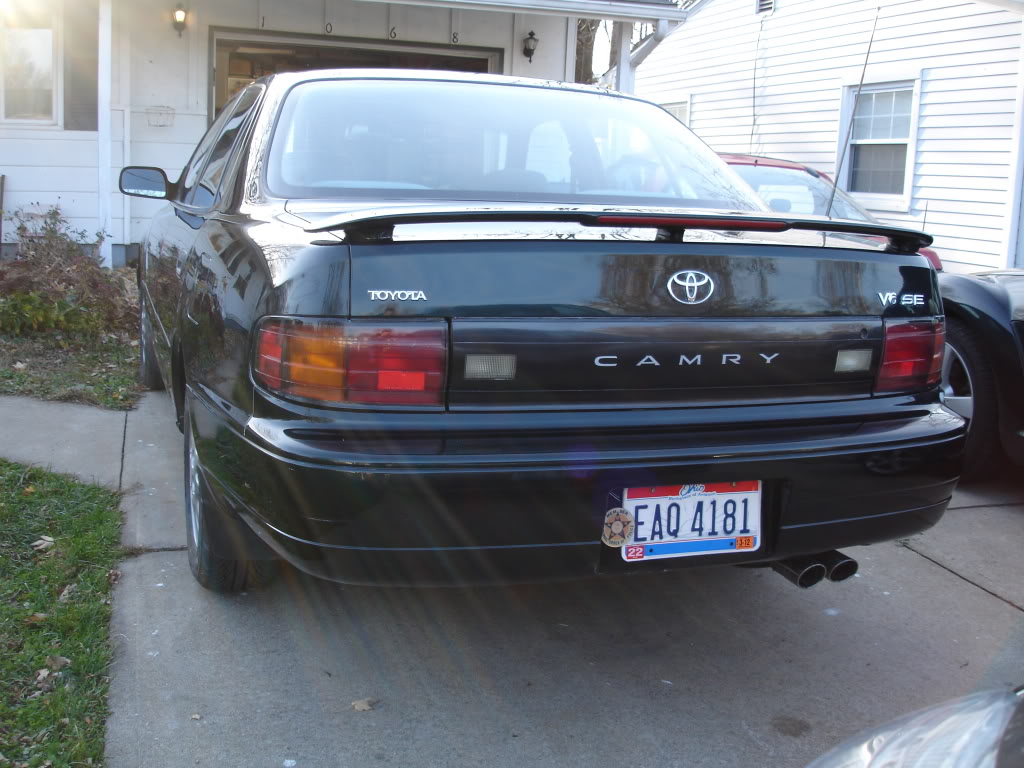
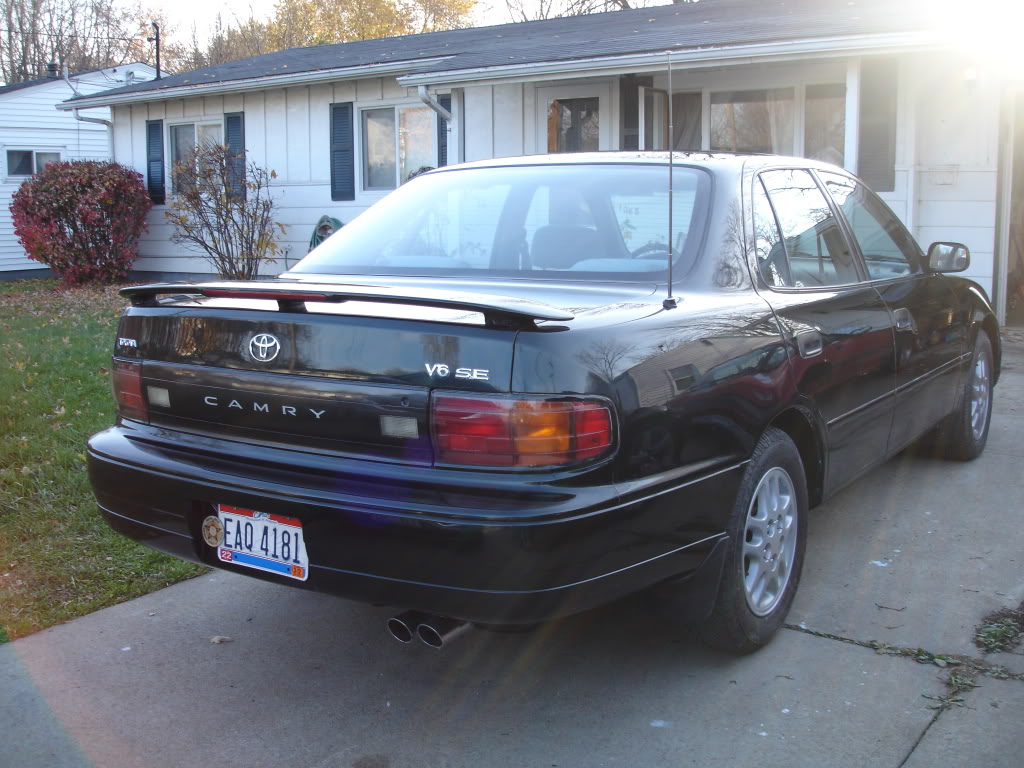
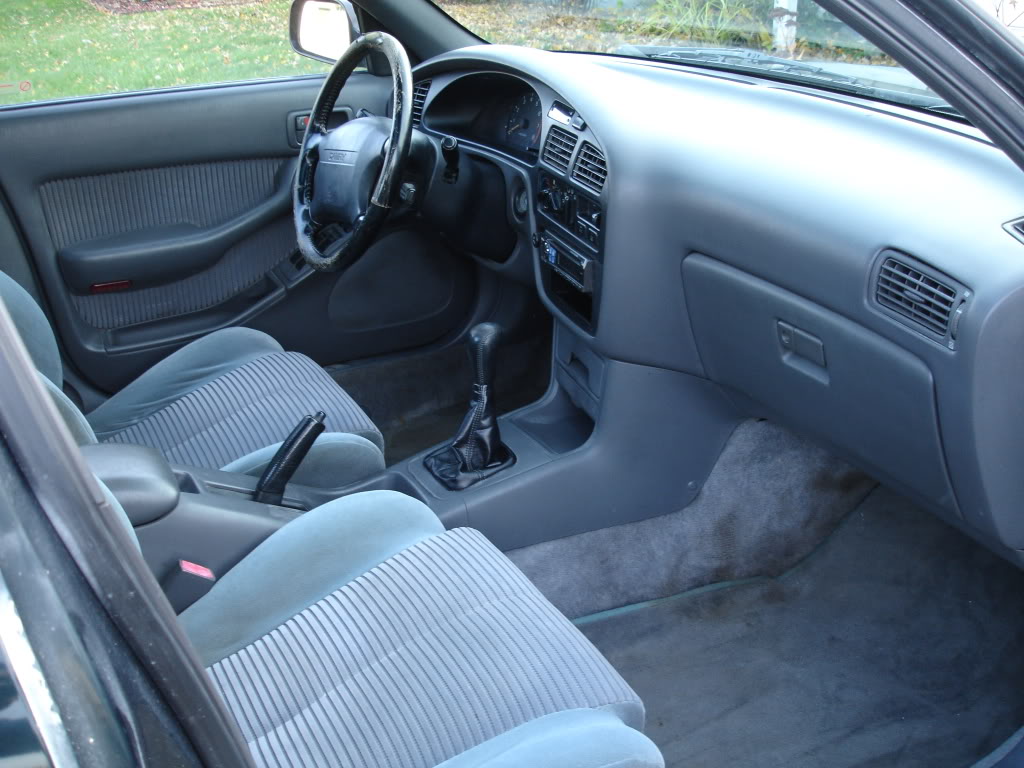
while not an RX-7, the Camry SE that i have is an ultra rare sports sedan that was built to compete with the BMW M3. they were made only two model years, 92 and 93. what the SE had over your standard run of the mill Camry was a tuned suspension, special stiffer body mounts and suspension bushings, an E153 5spd manual trans, special 15" alloy wheels, leather covered steering wheel and parking brake handle, and a steering ratio that was tuned to be a shade quicker. the 5spd was teamed with Toyota's 185hp 3VZ-FE V6 engine. the SE accelerated from 0-60 in 7.2 secs and had a top speed of 136mph. not bad for a Camry. at any rate, i bought the car wrecked in 2005. i have replaced countless parts and its restoration, while rolling is near complete. here is my story, in pictures and words, starting in 2005 when i brought the car home:
i bought the car last year from a salvage company. it had been front ended and posessed a salvage title. the car was rough.

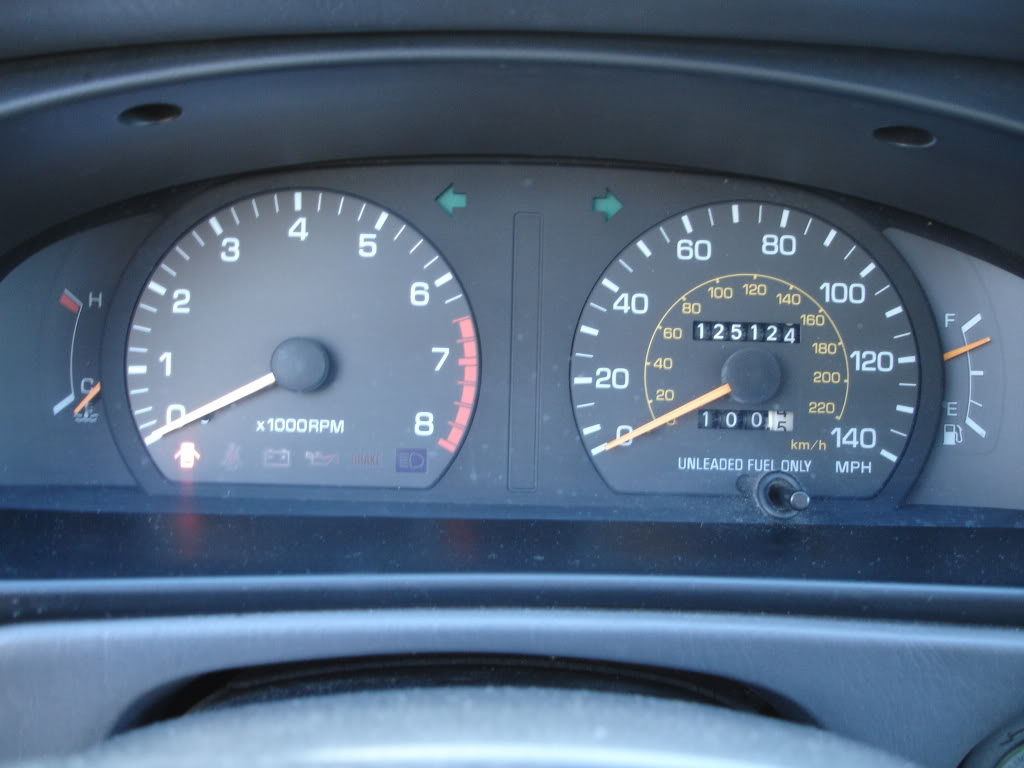
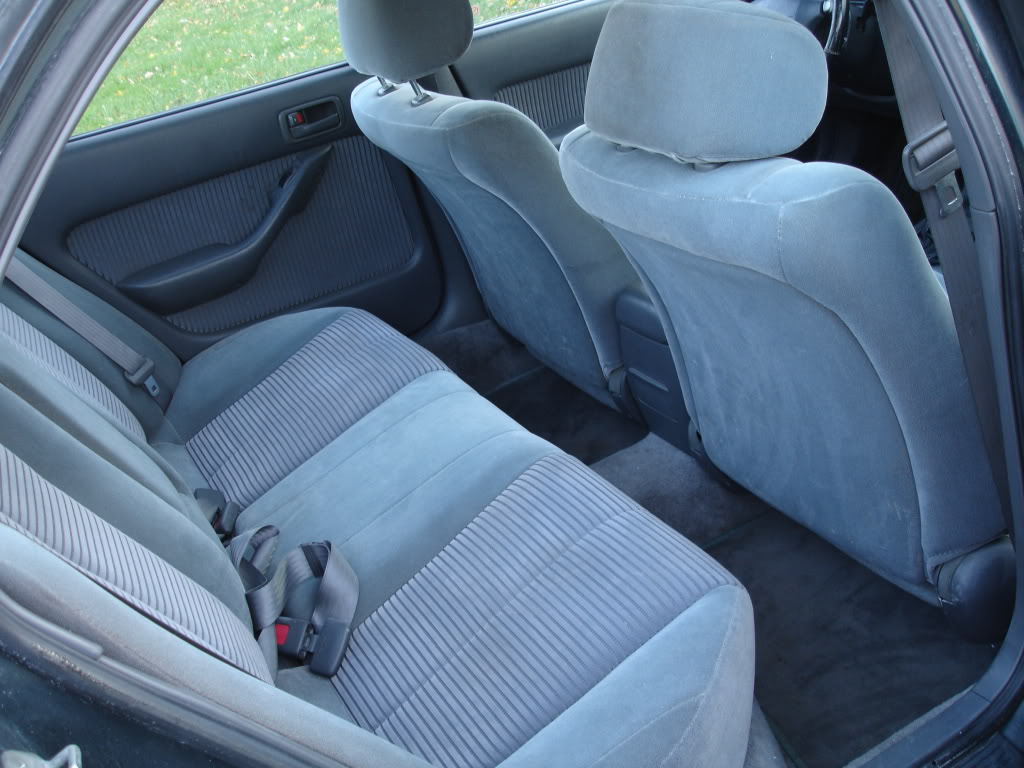
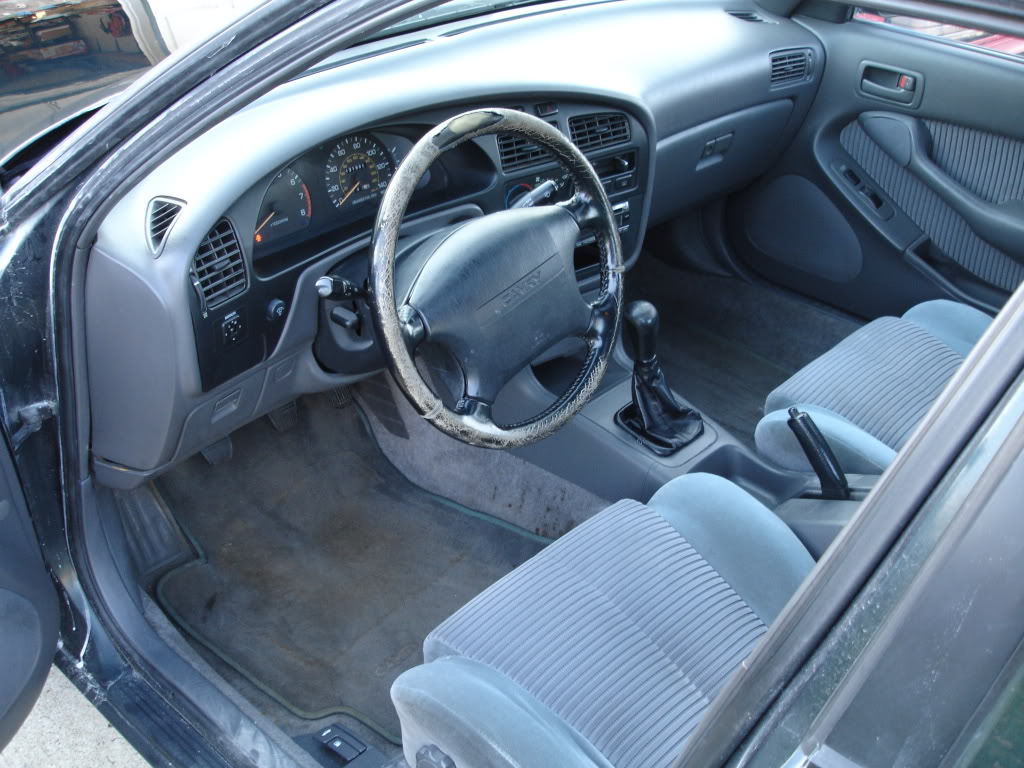
i managed to get it home and only to discover more problems. upon taking the car for a quick jog, i noticed that the clutch was bad. it was slipping like a bull on ice. every 5spd Camry owner's nightmare. the power steering pump was whining like a dog in heat, the front brakes had seen better days, the valve cover gaskets were leaking, the plugs were worn like a old catcher's mitt(oddly the wires were in great shape), and basic maitenance was over due to say the least. i took my new beauty under my wing and started away. i got deployed with the national guard weeks after i bought the car and sgt. jones was on his way to lake charles louisiana for hurricaine katrina relief. i got back and decided that the Camry would have to wait until the spring to be finished. fast foward to june 06!! the trans came out, the flywheel was surfaced, the clutch was replaced, the power steering pump was replaced, as were all items mentioned above as well as all matienance items such as belts fuel filter, etc. the car was cleaned intensively, the body was fixed by myself and an appointemnt was made with the state of ohio to have the car inspected and converted from a salvage title to a rebuilt title. the inspcetion was done and i drive the beautiful 6M1 SE every day. i couldnt be happier. o its not perfect but i love the car:


i bought the car last year from a salvage company. it had been front ended and posessed a salvage title. the car was rough.
i managed to get it home and only to discover more problems. upon taking the car for a quick jog, i noticed that the clutch was bad. it was slipping like a bull on ice. every 5spd Camry owner's nightmare. the power steering pump was whining like a dog in heat, the front brakes had seen better days, the valve cover gaskets were leaking, the plugs were worn like a old catcher's mitt(oddly the wires were in great shape), and basic maitenance was over due to say the least. i took my new beauty under my wing and started away. i got deployed with the national guard weeks after i bought the car and sgt. jones was on his way to lake charles louisiana for hurricaine katrina relief. i got back and decided that the Camry would have to wait until the spring to be finished. fast foward to june 06!! the trans came out, the flywheel was surfaced, the clutch was replaced, the power steering pump was replaced, as were all items mentioned above as well as all matienance items such as belts fuel filter, etc. the car was cleaned intensively, the body was fixed by myself and an appointemnt was made with the state of ohio to have the car inspected and converted from a salvage title to a rebuilt title. the inspcetion was done and i drive the beautiful 6M1 SE every day. i couldnt be happier. o its not perfect but i love the car:
Thread Starter
Joined: Oct 2003
Posts: 22,595
Likes: 1,276
From: Ohio
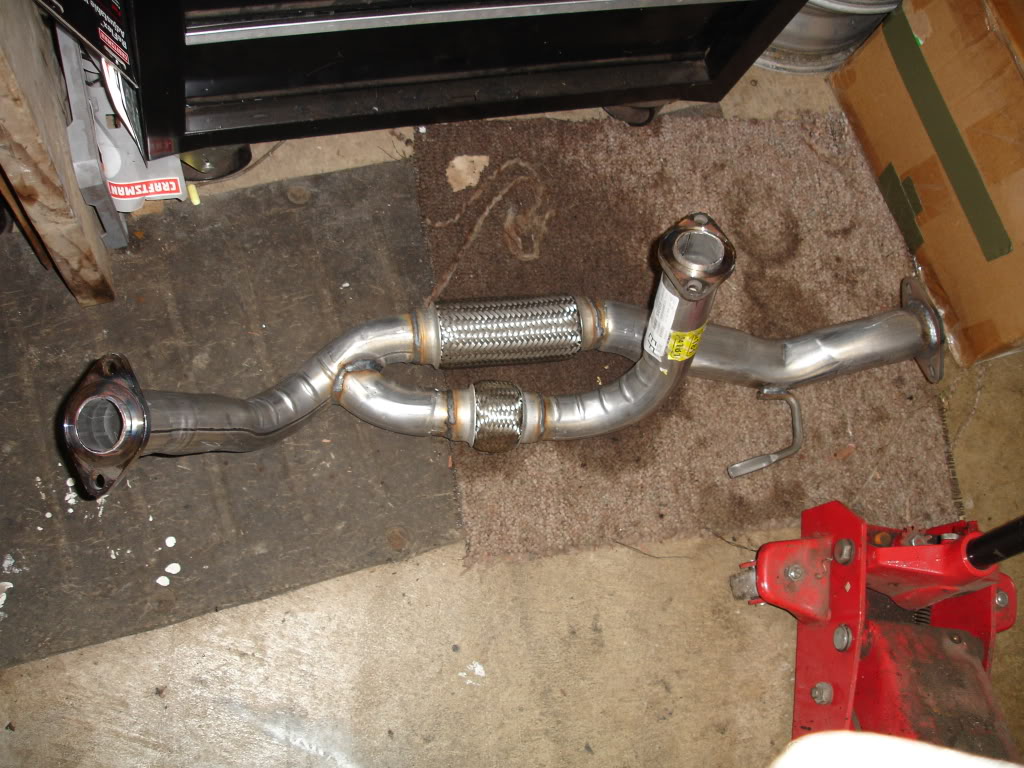
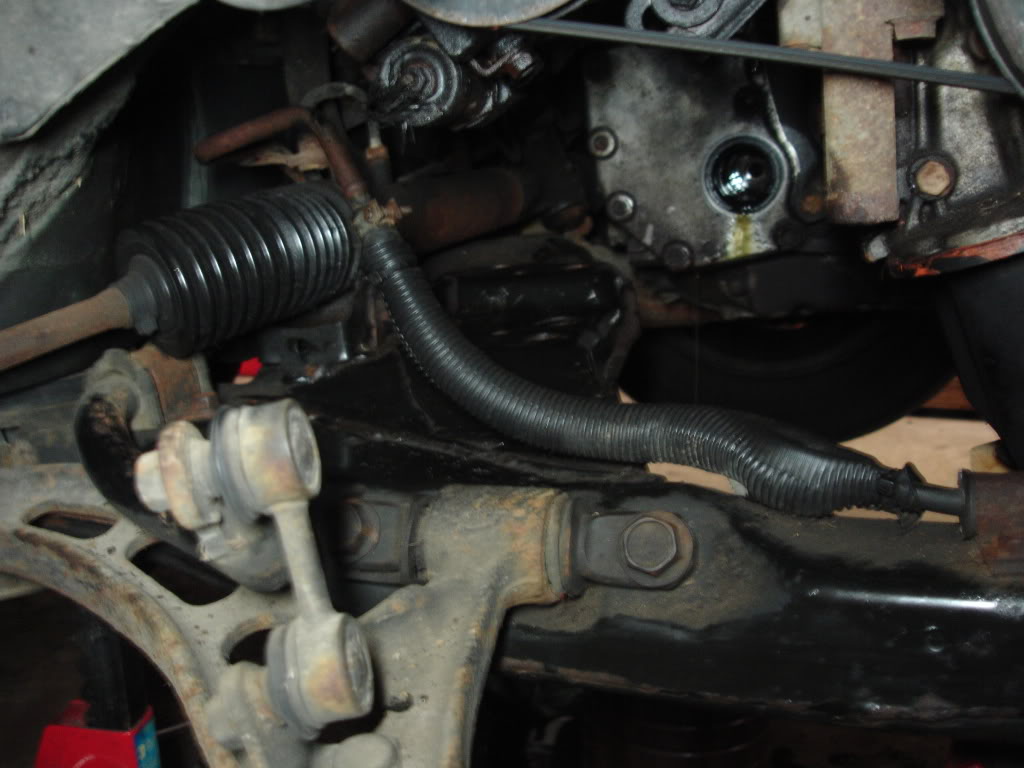
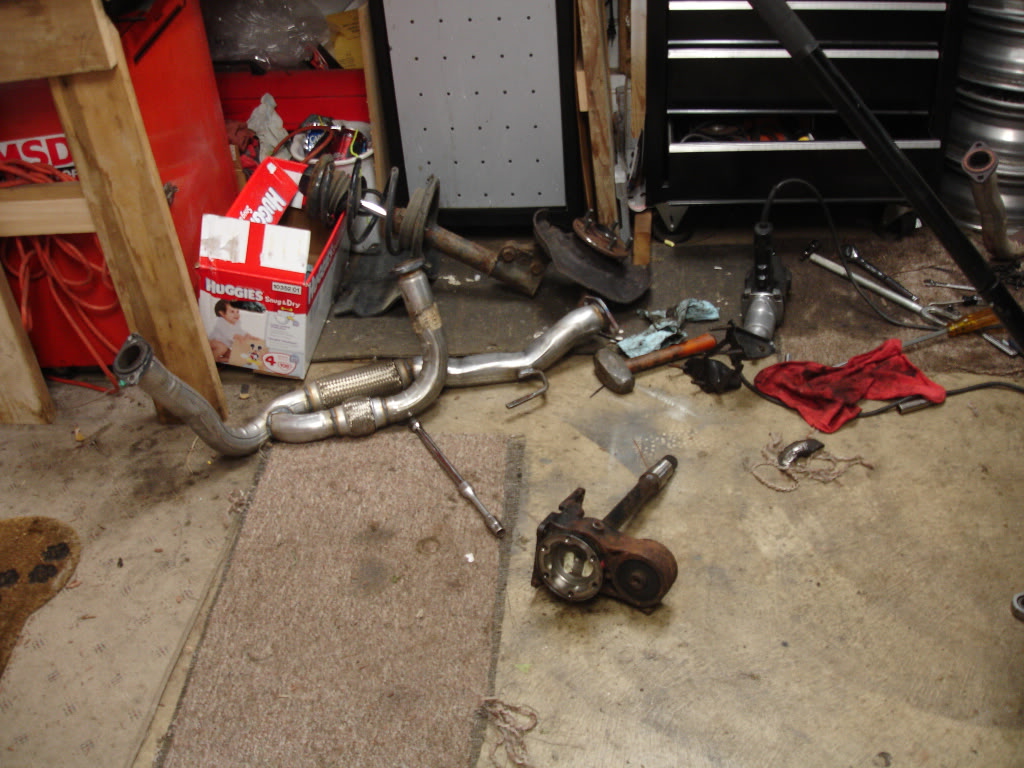
the exhaust's y-pipe had rotted out by the time i got the car out of storage this summer and many items needed attention. i picked up the new y-pipe and installed it without too much hassle.. the good news is that the car is back to being whisper quiet but the bad news is that when i returned from the test drive i noticed a rusted brake line that is starting to drip. didn't see it because its shielded by the black cover.
old y-pipe:
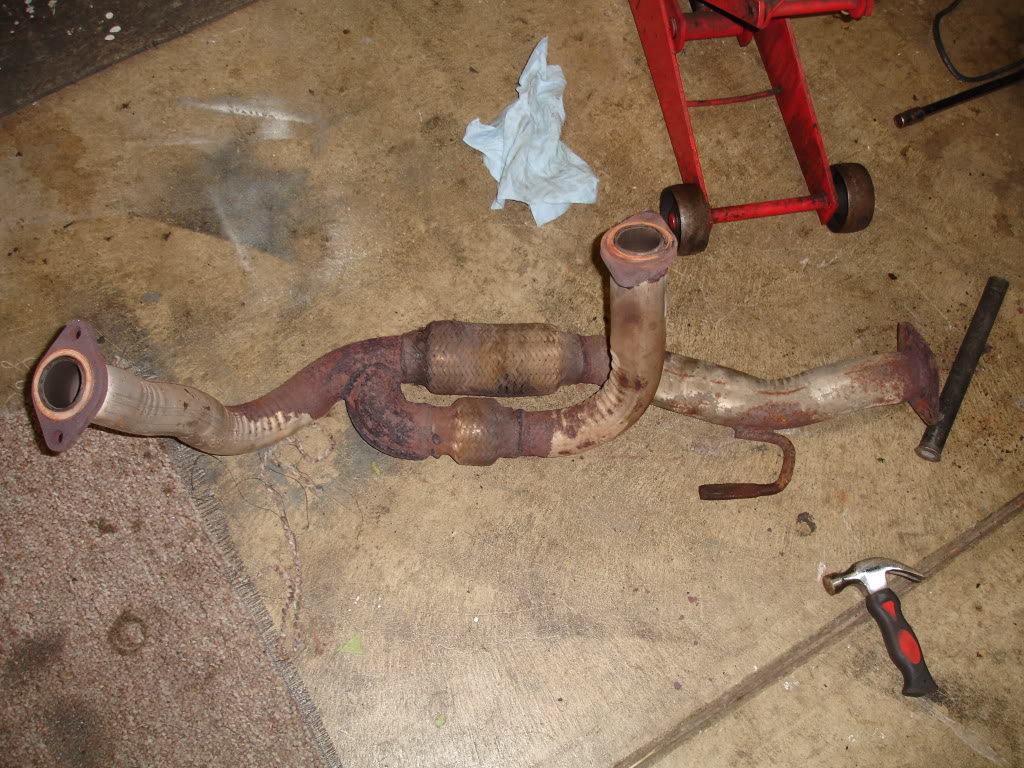
new y-pipe:
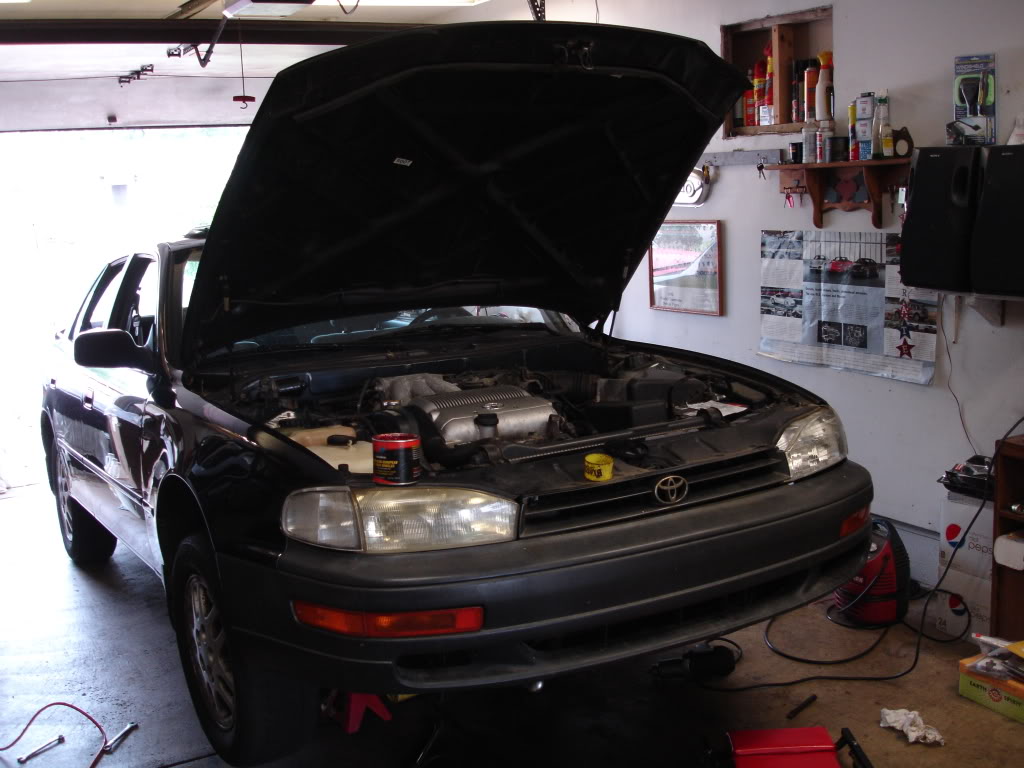
car in the air during the exhaust replacement:
old y-pipe:
new y-pipe:
car in the air during the exhaust replacement:
Thread Starter
Joined: Oct 2003
Posts: 22,595
Likes: 1,276
From: Ohio
after the exhaust was fixed, i had found something else...a leaking brake line..things were looking dismal and i was sickened by the laundry list of small things that needed done..
here's my brake line leak that i discovered. that plastic shield hides the lines and keeps the mind at ease..until something starts leaking. i would've like to have taken care of this before it developed a leak but the car has been in storage for almost a year:
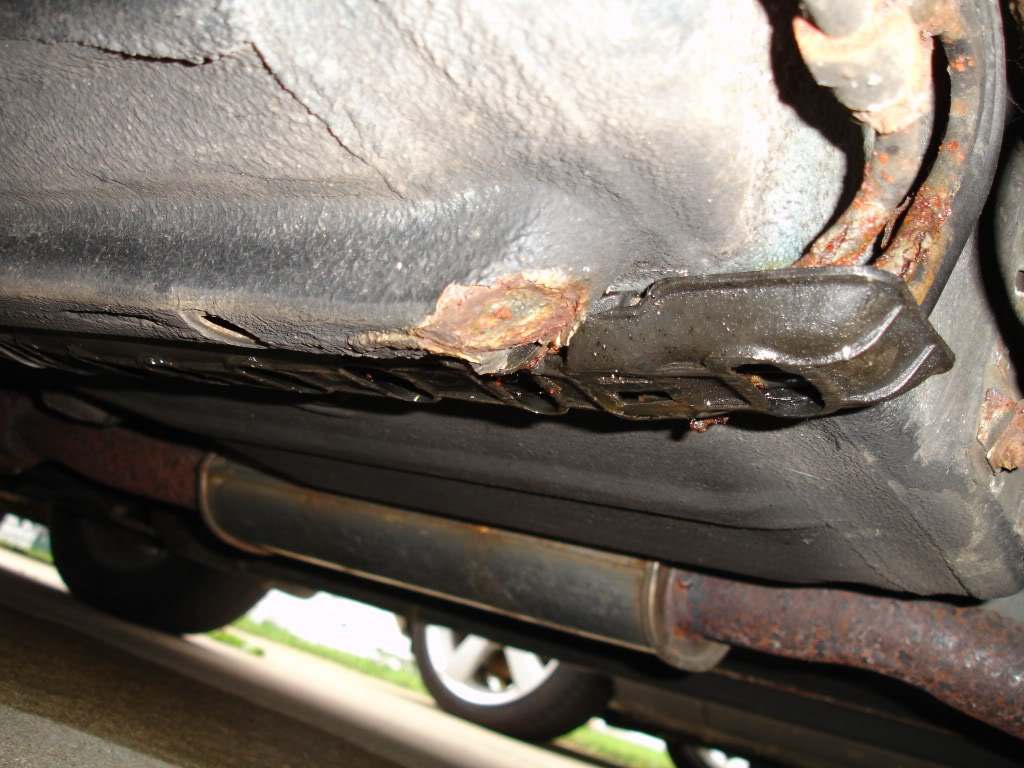
here's my brake line leak that i discovered. that plastic shield hides the lines and keeps the mind at ease..until something starts leaking. i would've like to have taken care of this before it developed a leak but the car has been in storage for almost a year:
Thread Starter
Joined: Oct 2003
Posts: 22,595
Likes: 1,276
From: Ohio
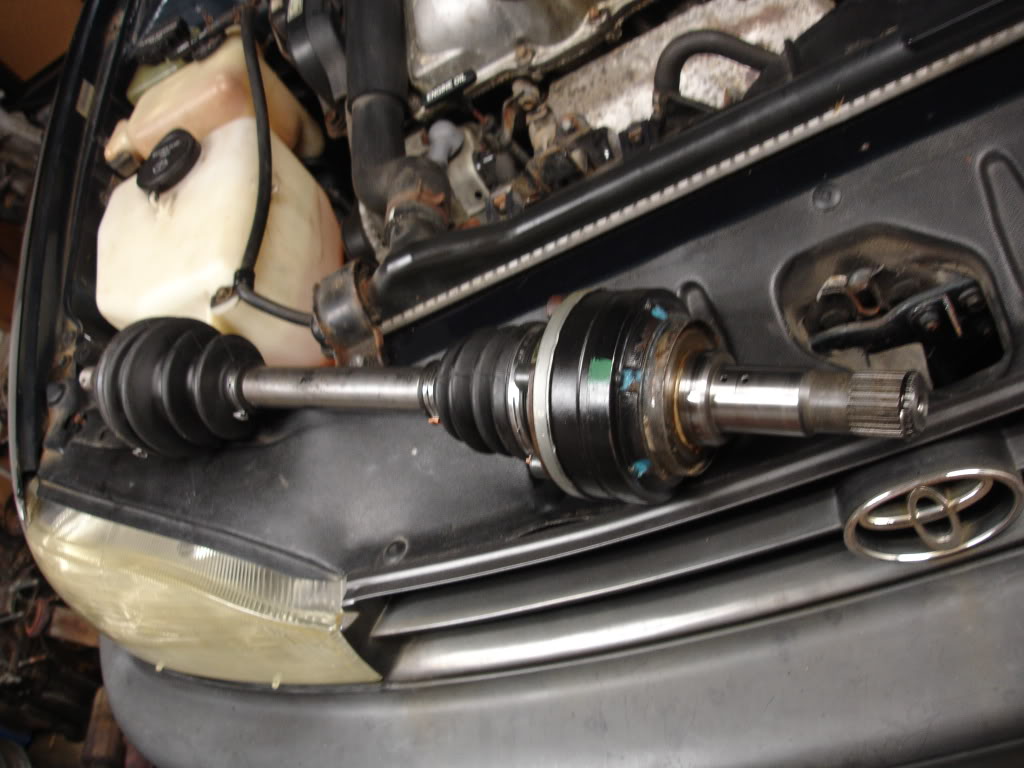
i ended up fixing the faulty brake line and decided to move to the cv shaft's intermediate bearing which had failed and which i had found had seized into the carrier..
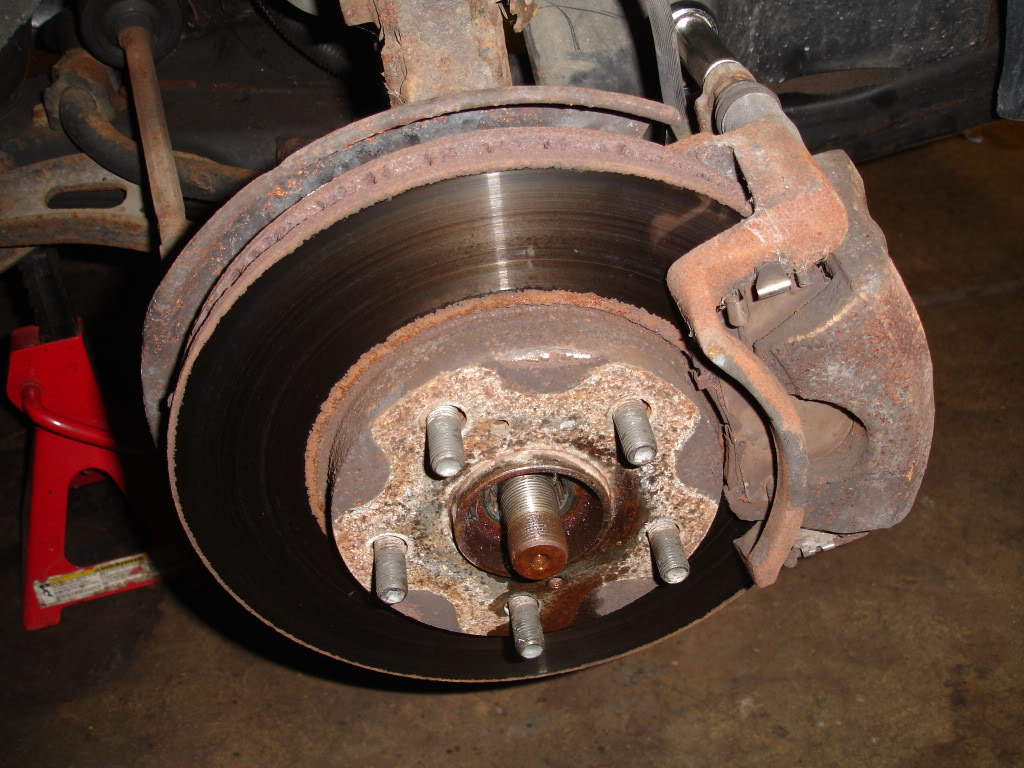
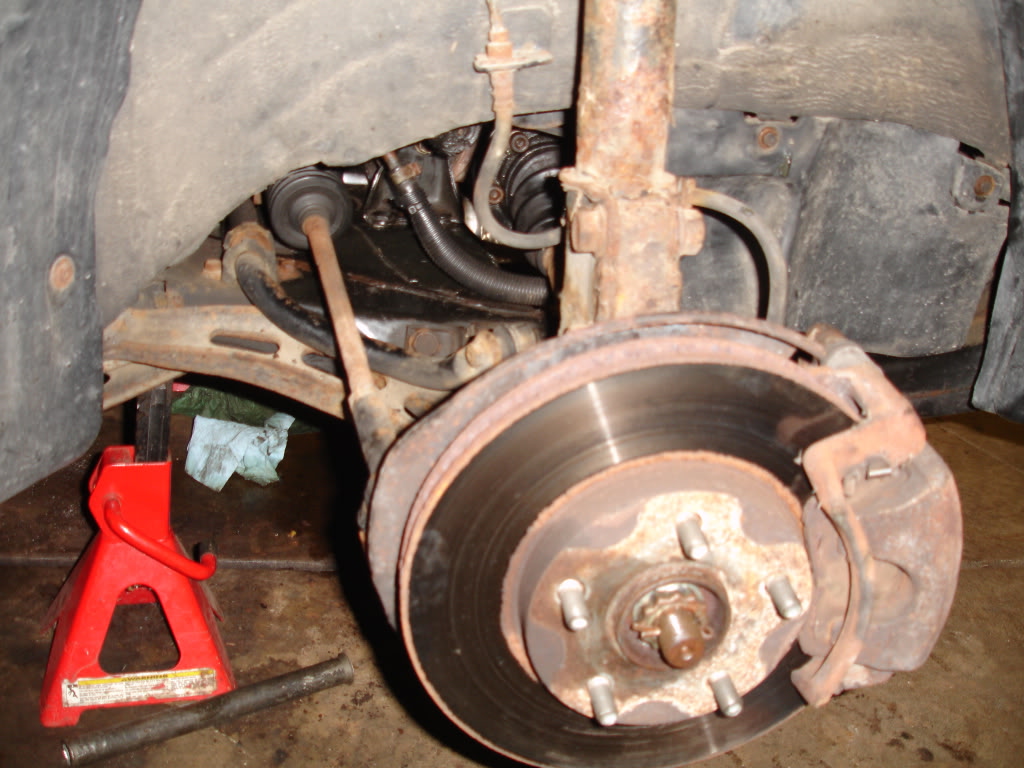
removed the caliper, caliper bracket, rotor, and cv shaft cotter pin, bock washer, and retaining nut:
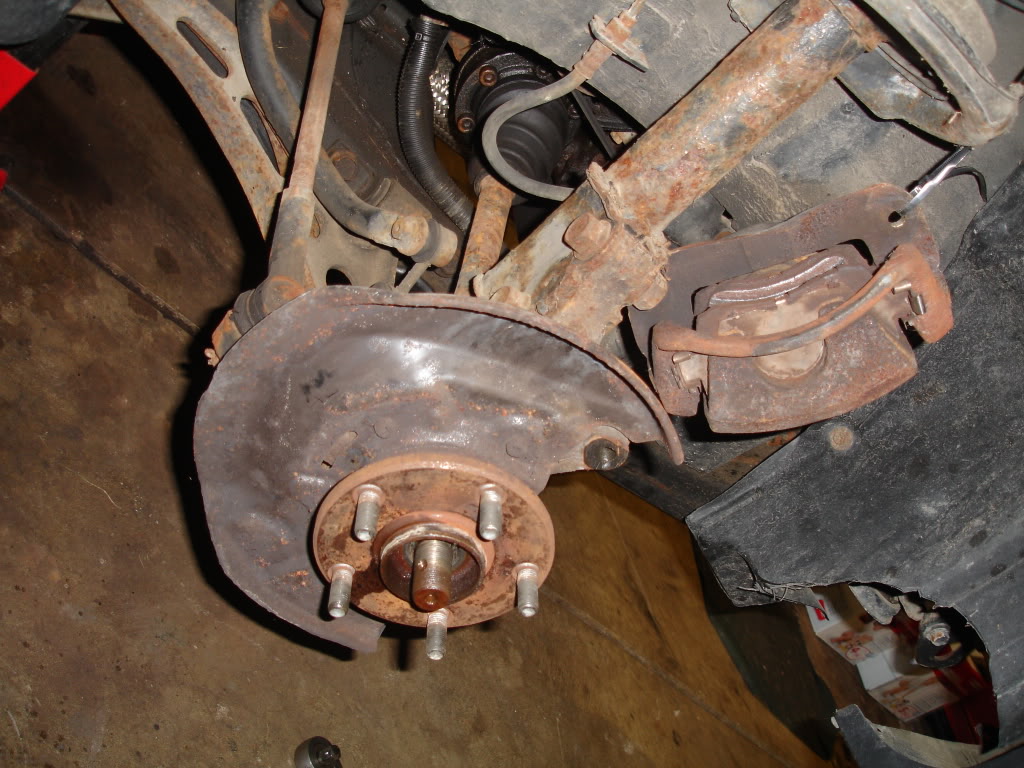
remove the outer tie rod end:
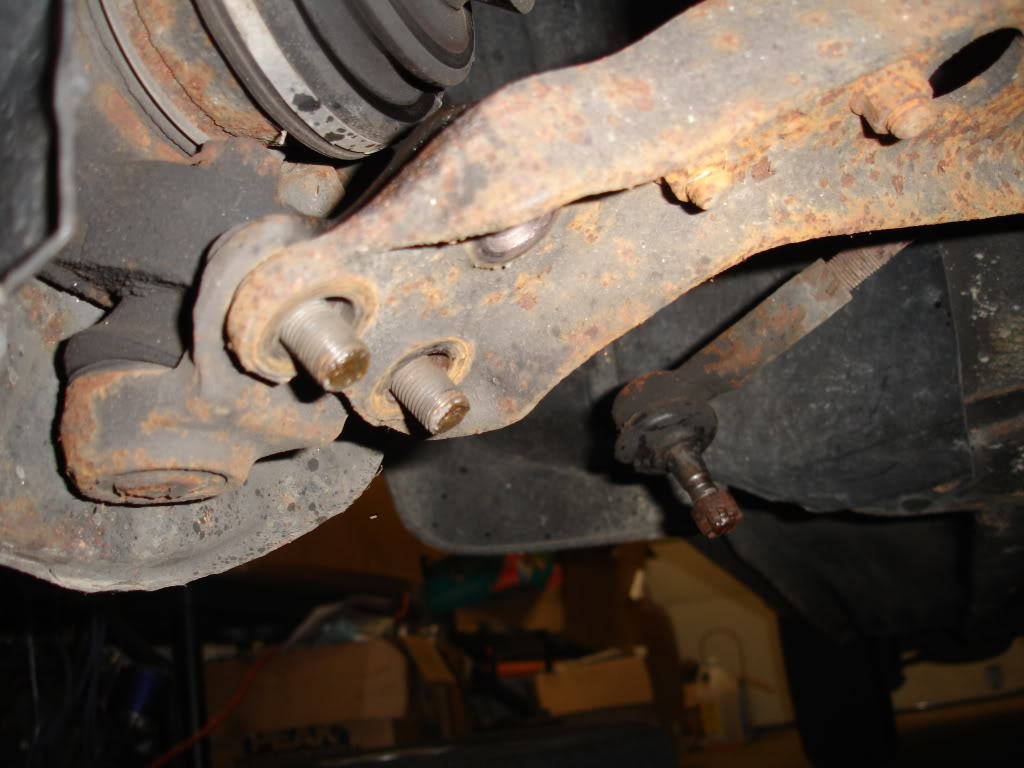
remove the two nuts and one bolt and separate the lower balljoint from the control arm:
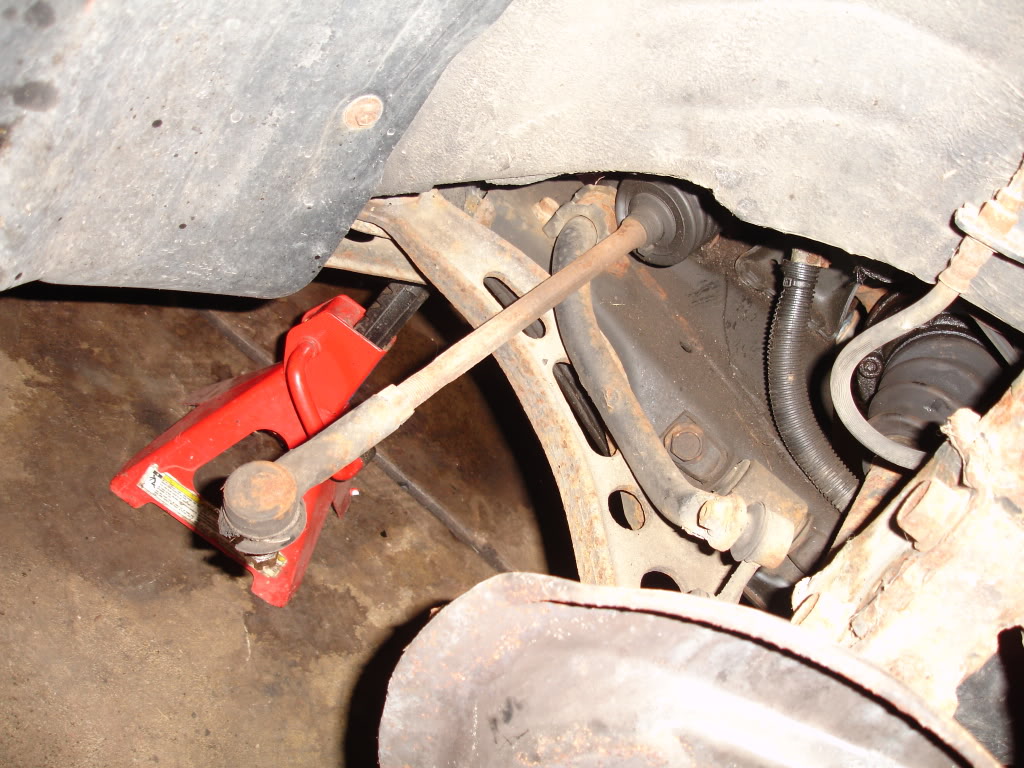
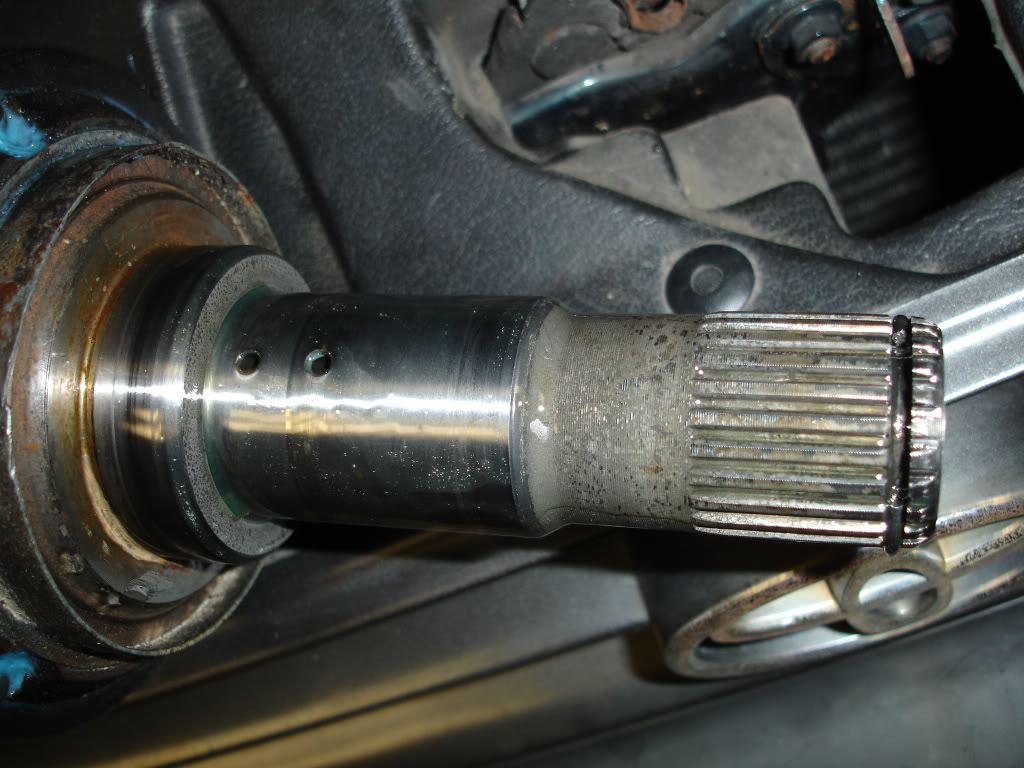
removed the pinch bolt from the inner shaft's carrier bearing:
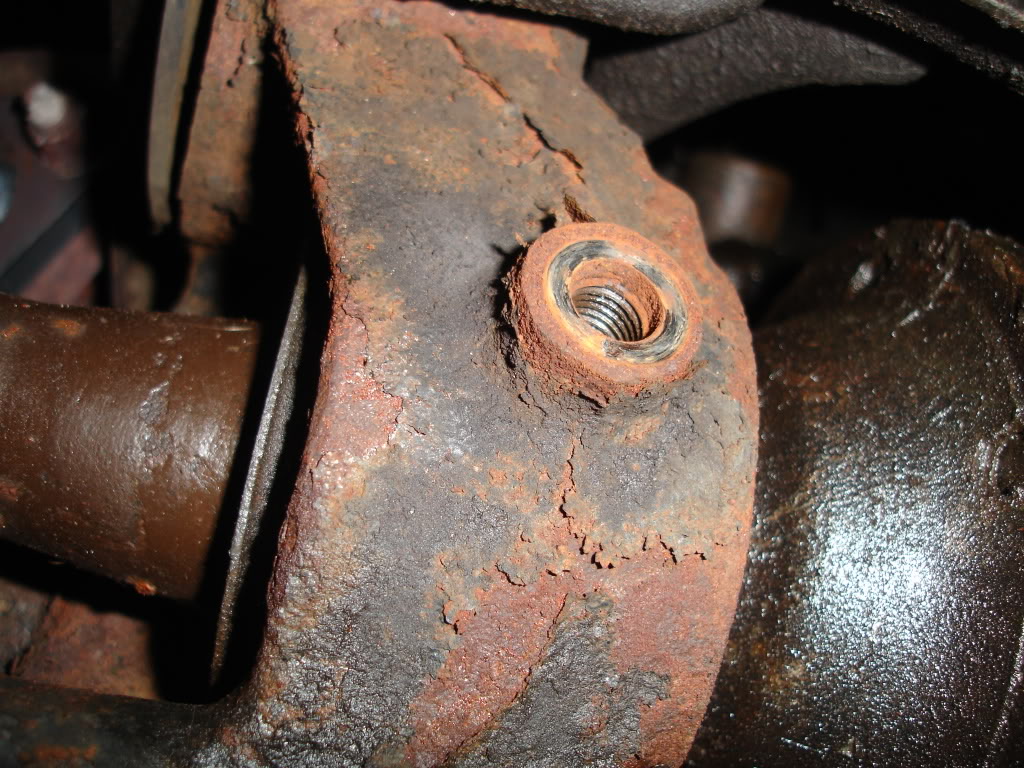
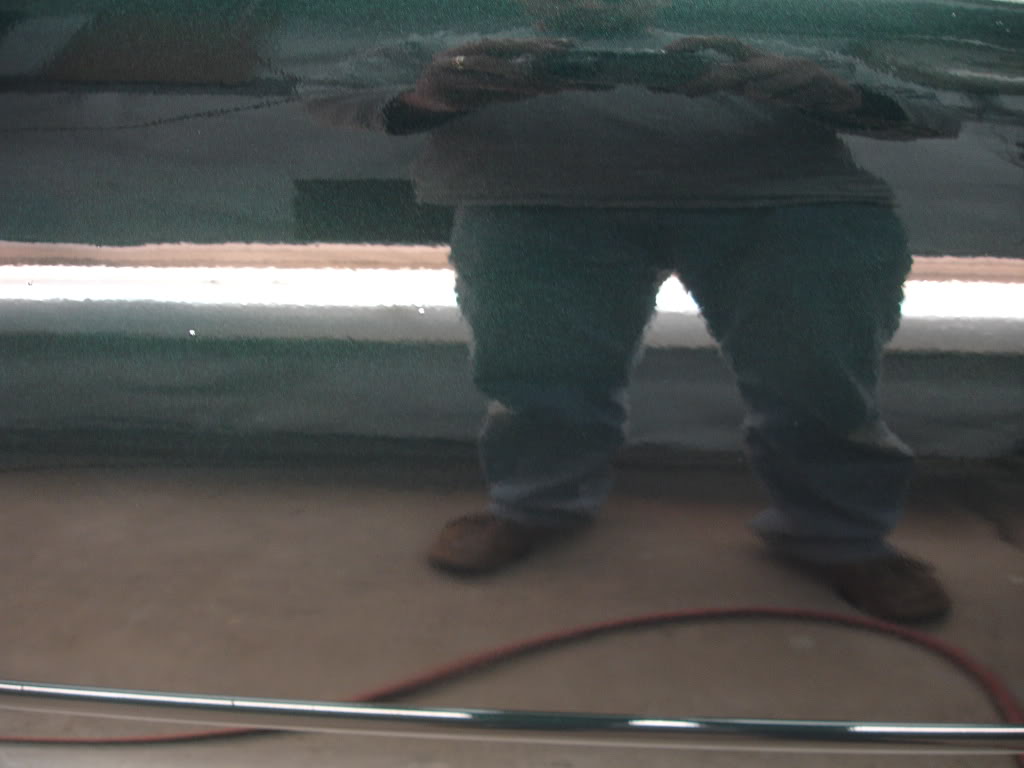
here's where it got tricky. after this step there are six bolts that hold the outer cv shaft against the inner shaft. you would remove those, remove the outer shaft and then slide the inner shaft out, through the center bearing. my inner shaft was frozen to my center bearing's race. i removed the entire strut, knuckle, and wheel bearing assembly. i then removed the exhaust, and engine mount and removed the assembly complete:
the FSM was of no help:
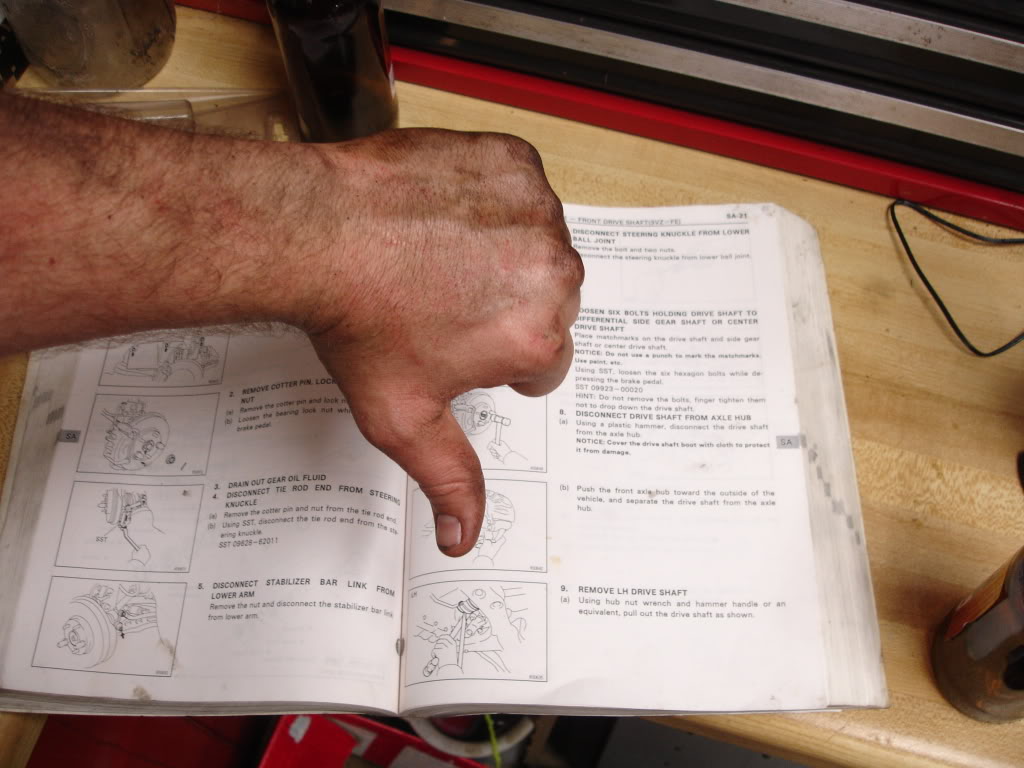
so..i did it my way:
removed the caliper, caliper bracket, rotor, and cv shaft cotter pin, bock washer, and retaining nut:
remove the outer tie rod end:
remove the two nuts and one bolt and separate the lower balljoint from the control arm:
removed the pinch bolt from the inner shaft's carrier bearing:
here's where it got tricky. after this step there are six bolts that hold the outer cv shaft against the inner shaft. you would remove those, remove the outer shaft and then slide the inner shaft out, through the center bearing. my inner shaft was frozen to my center bearing's race. i removed the entire strut, knuckle, and wheel bearing assembly. i then removed the exhaust, and engine mount and removed the assembly complete:
the FSM was of no help:
so..i did it my way:
Thread Starter
Joined: Oct 2003
Posts: 22,595
Likes: 1,276
From: Ohio
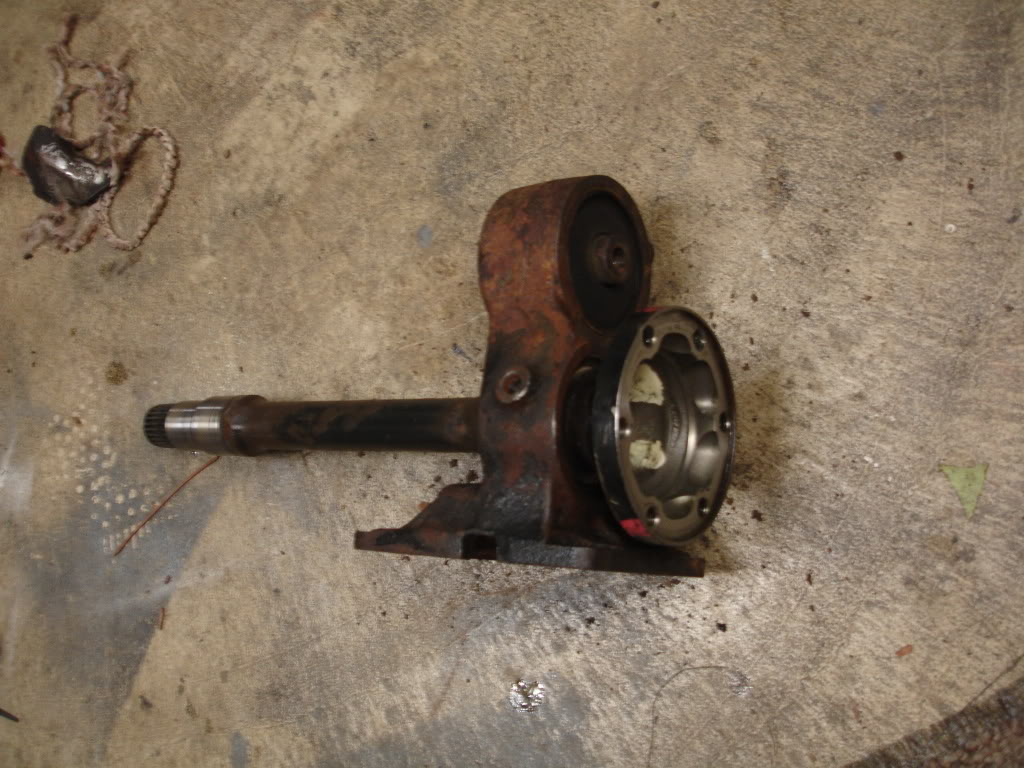
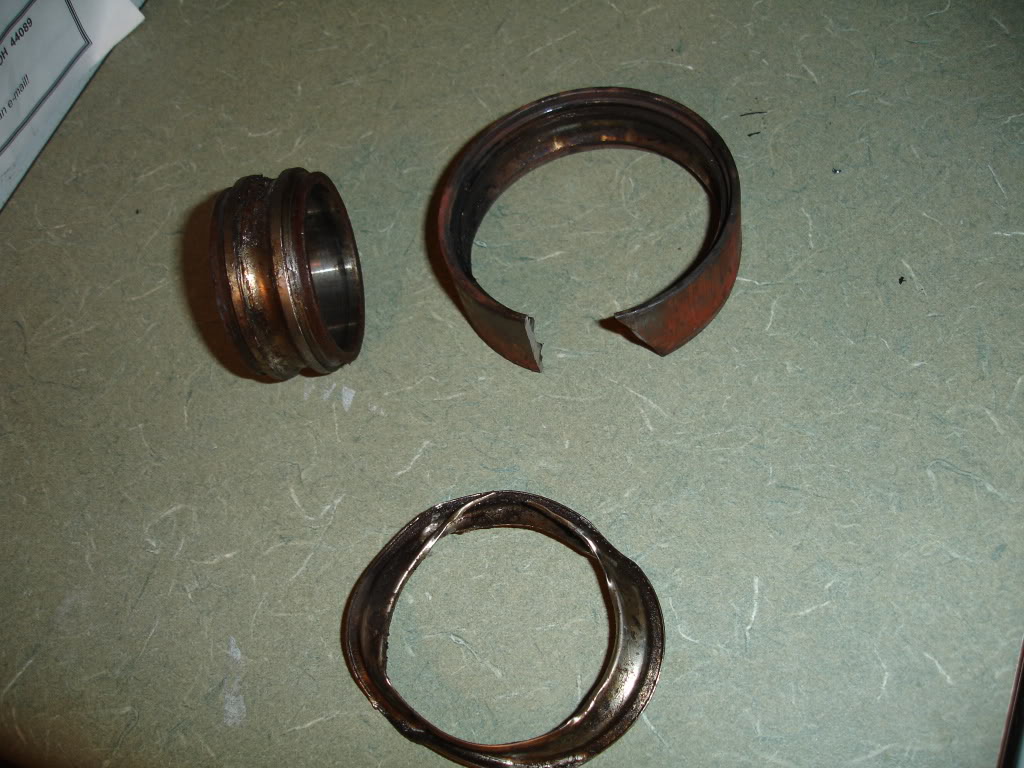
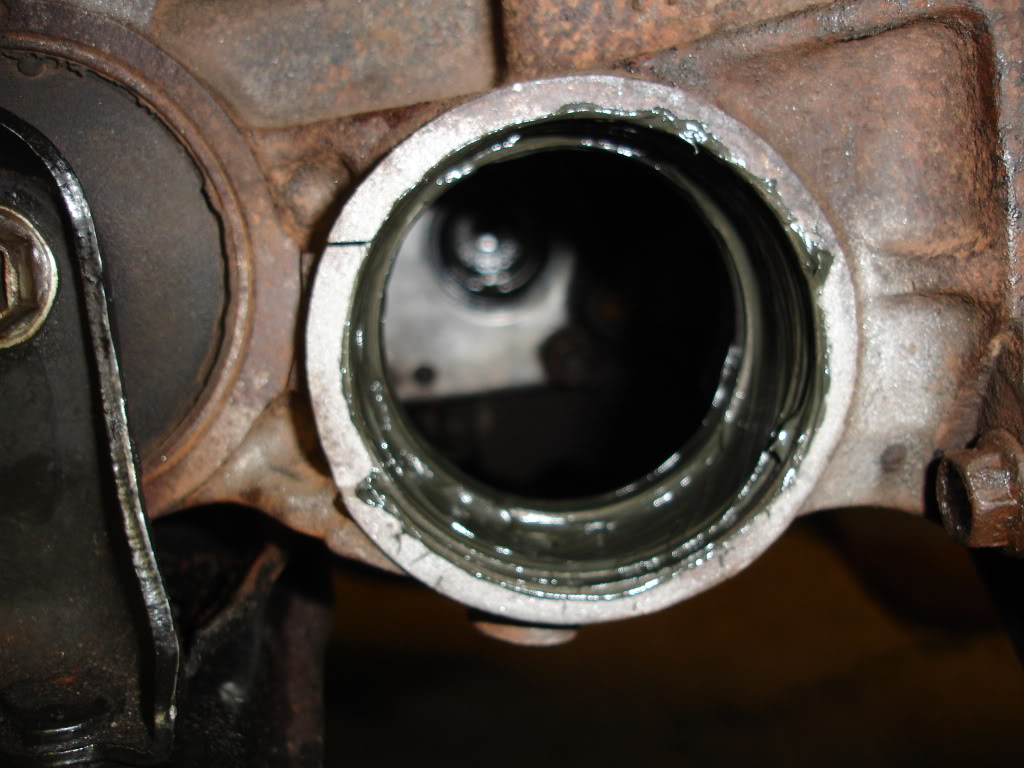
whats left of the bearing after it literally exploded and puked its guts out. the ball bearings are who knows where and their retainer i forgot to grab from below the press. here are some of the main components to include outer race, inner race, and dust shield:
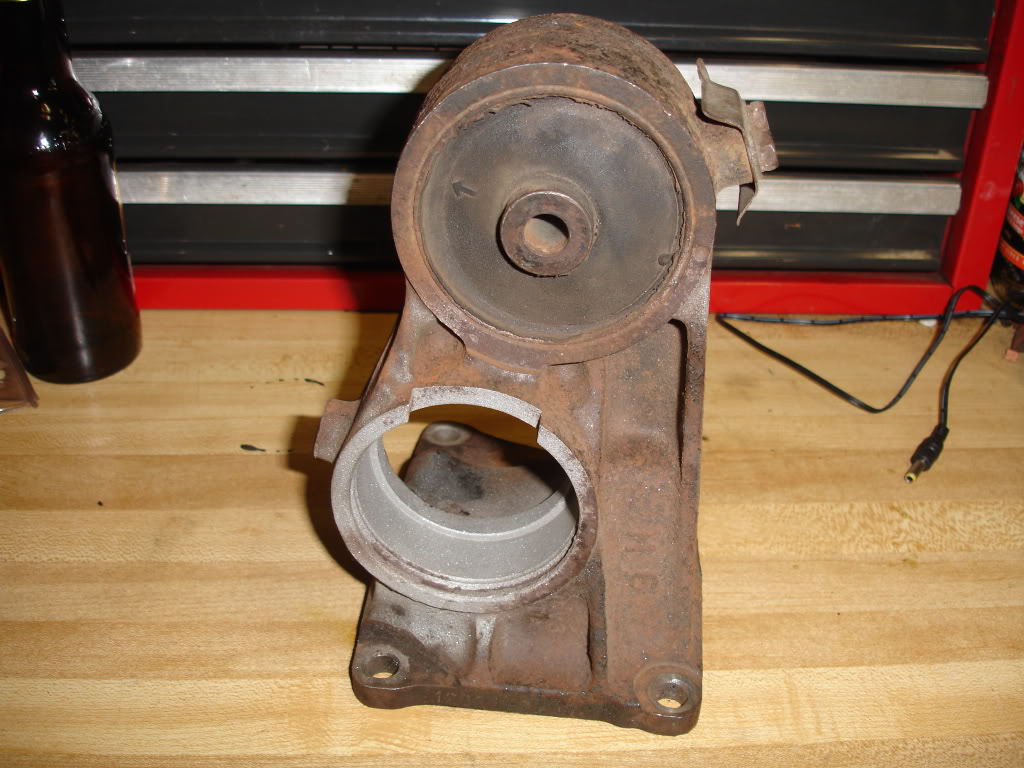
engine mount/carrier assembly sans shaft and bearing with blasted center:
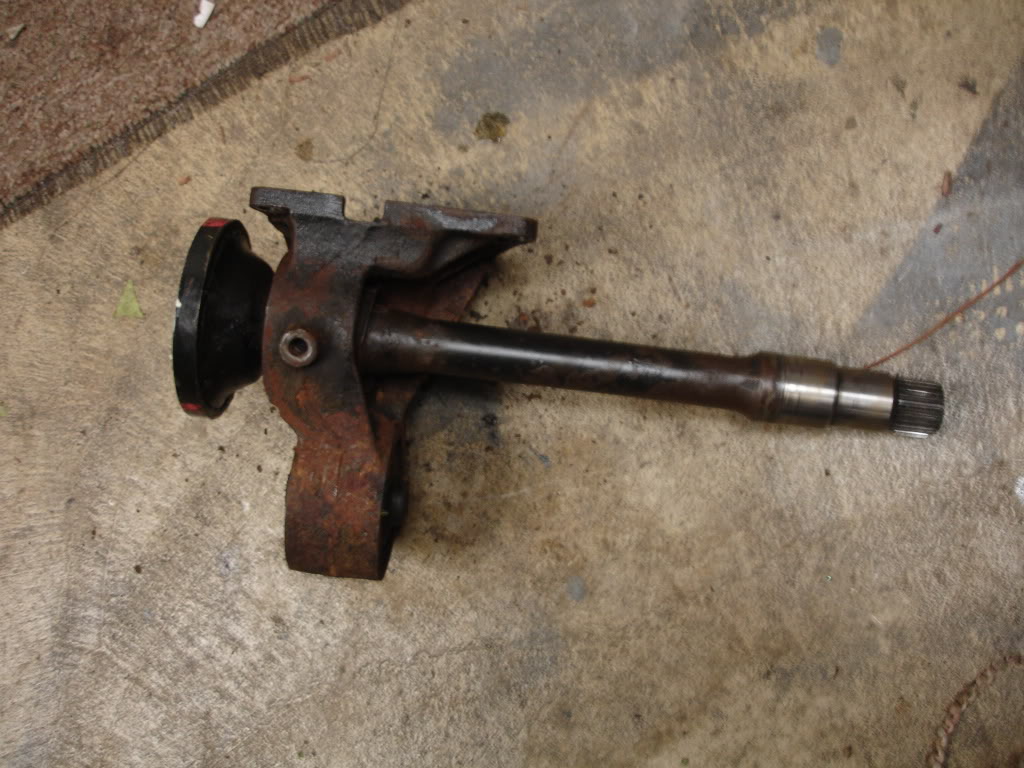
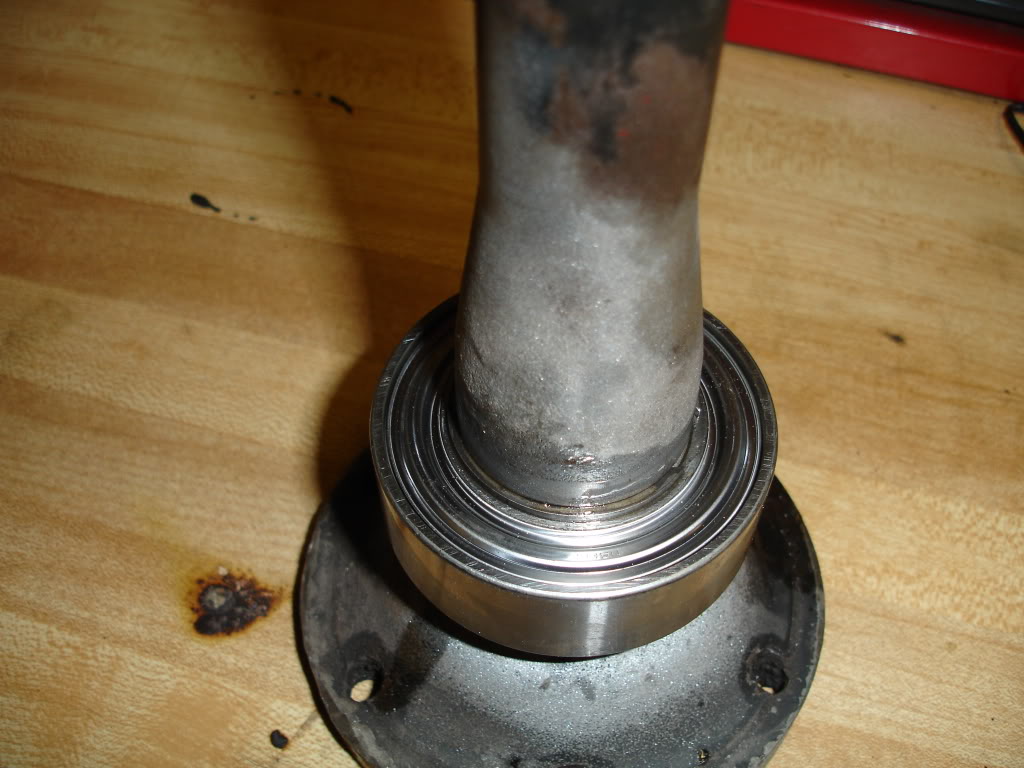
new bearing and snap ring installed on the inner shaft:
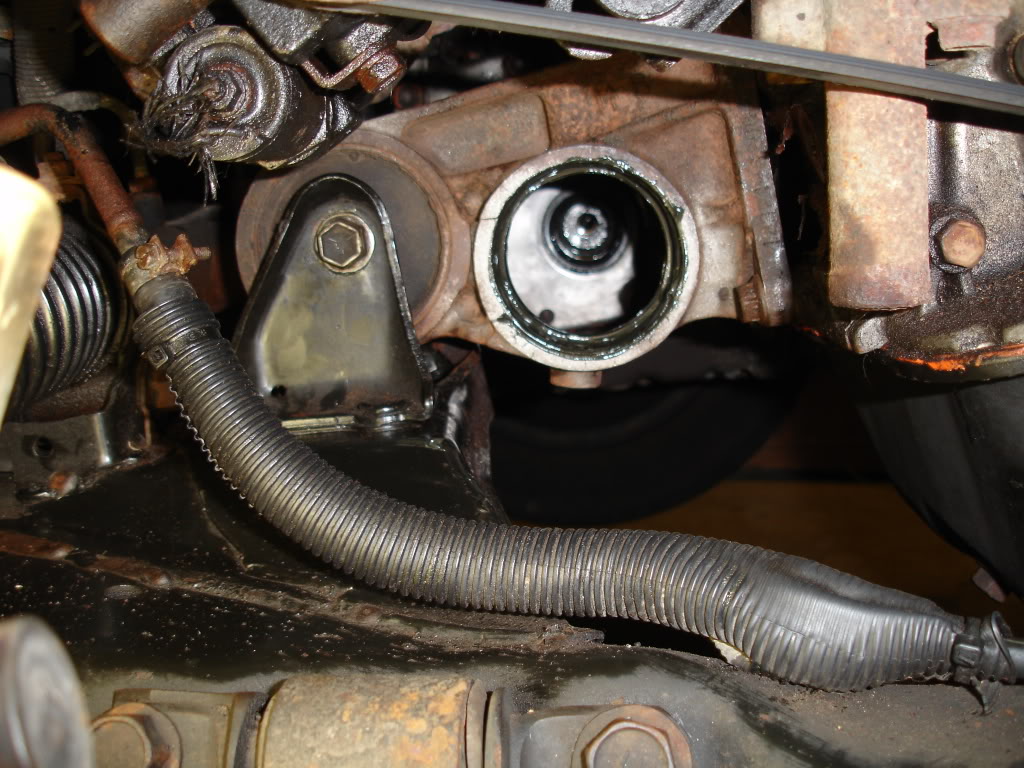
engine mount back on the car:

engine mount/carrier assembly sans shaft and bearing with blasted center:
new bearing and snap ring installed on the inner shaft:
engine mount back on the car:
Thread Starter
Joined: Oct 2003
Posts: 22,595
Likes: 1,276
From: Ohio
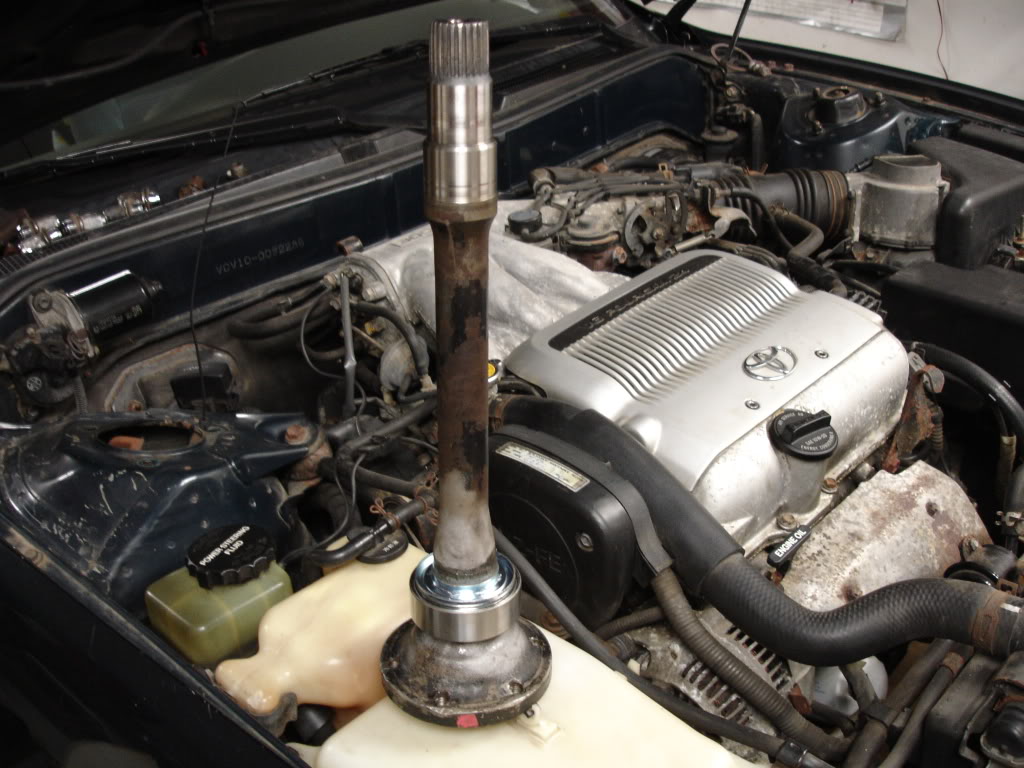
mount installed and bearing area greased and ready to go:
shaft with bearing ready to be installed:
new snap ring:
inner shaft installed and joint end repacked with grease:
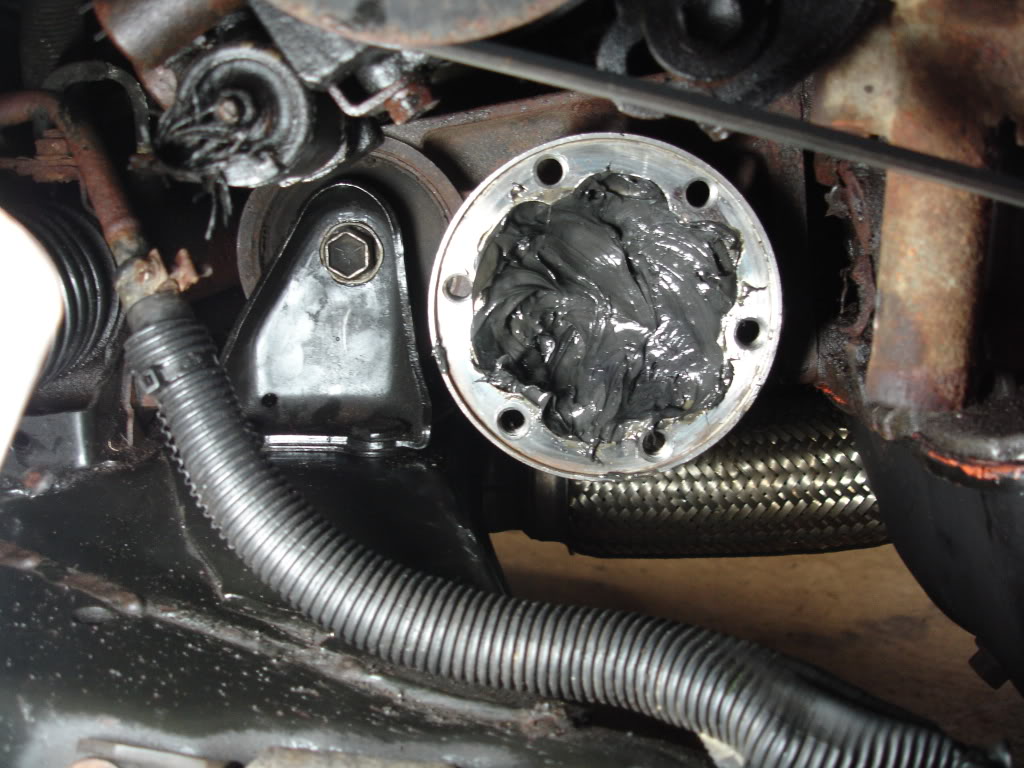
cv repacked as well:
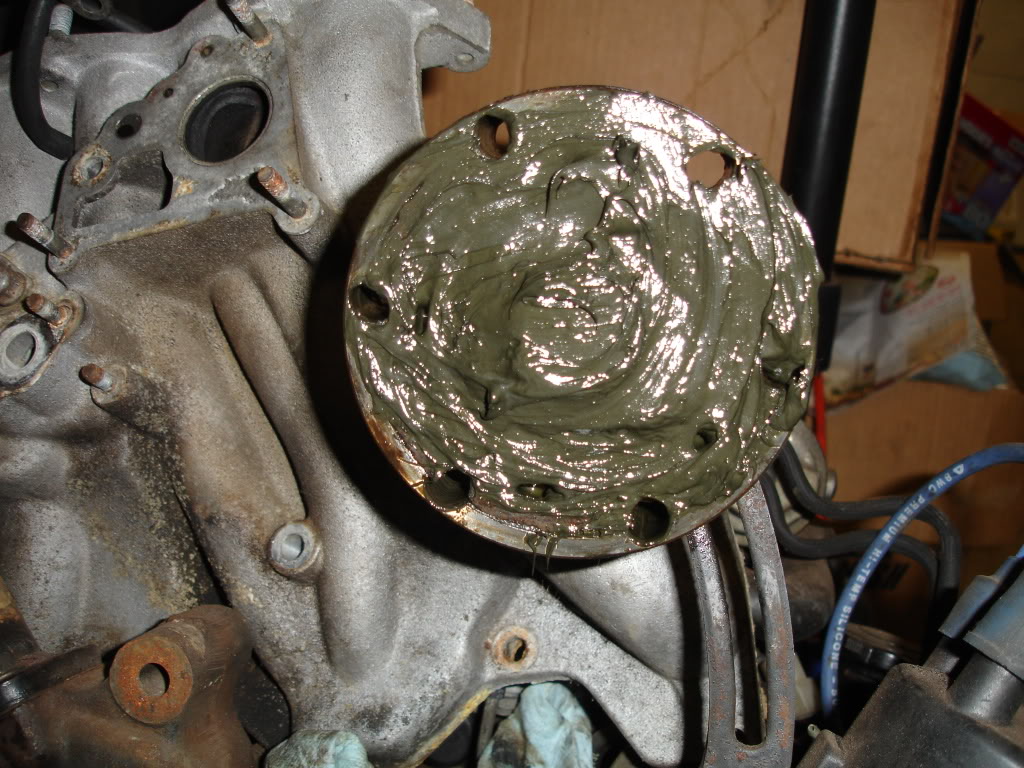
all back together:
shaft with bearing ready to be installed:
new snap ring:
inner shaft installed and joint end repacked with grease:
cv repacked as well:
all back together:
Trending Topics
Thread Starter
Joined: Oct 2003
Posts: 22,595
Likes: 1,276
From: Ohio
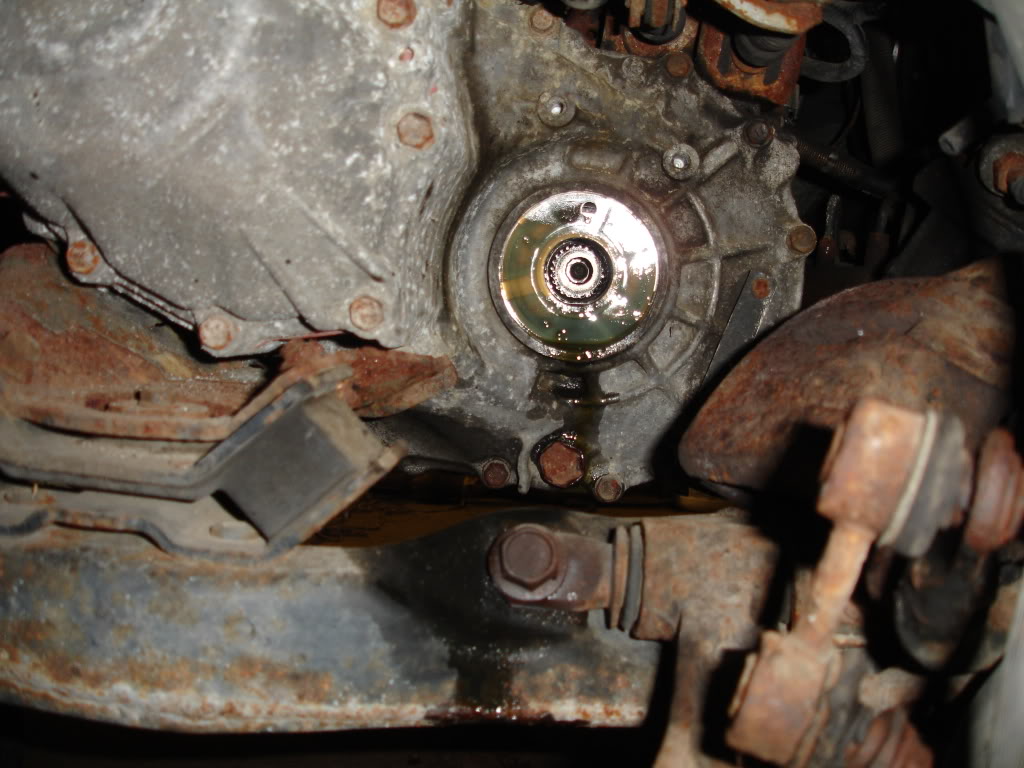
decided to replace the output shaft seal on the left side. removed the seal with a seal puller:
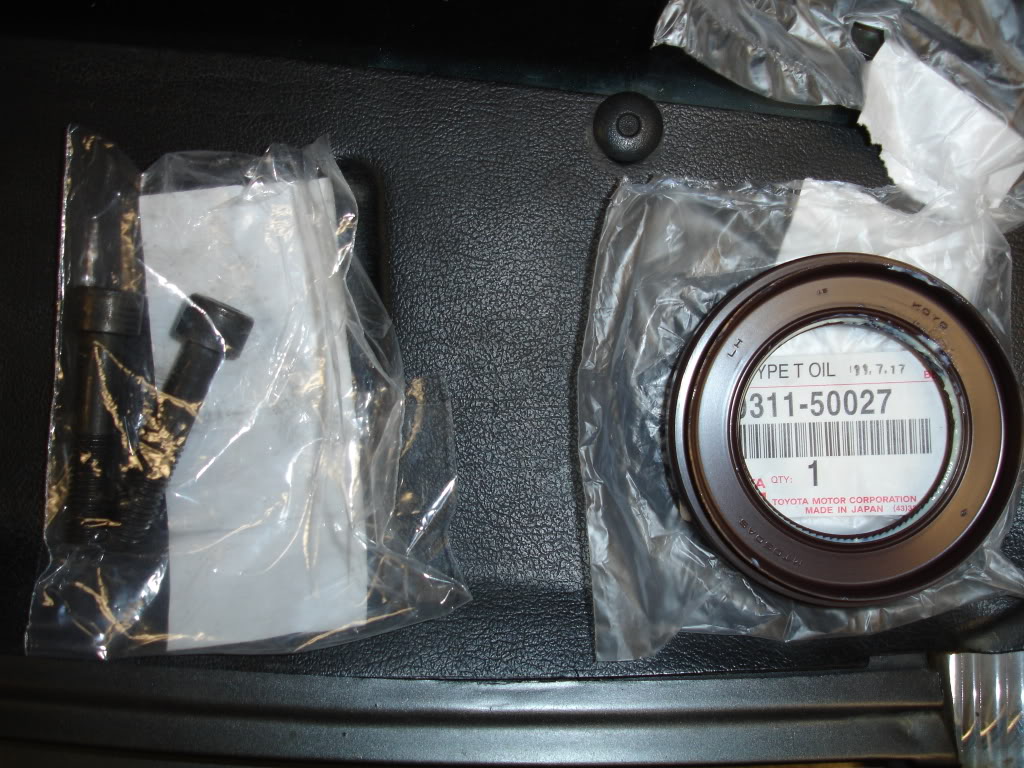
ordered a new seal and two new cv bolts from Toyota:
the seal was not lacking in the quality department! it was pre-greased on the inner sealing ring and was constructed with quality:
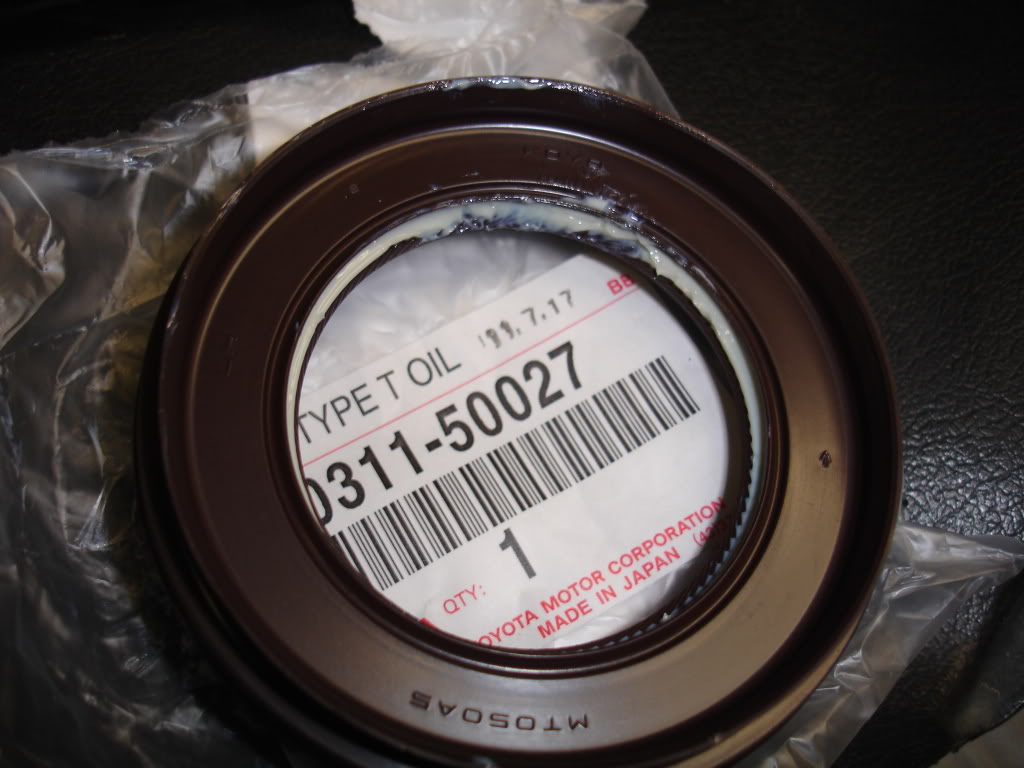
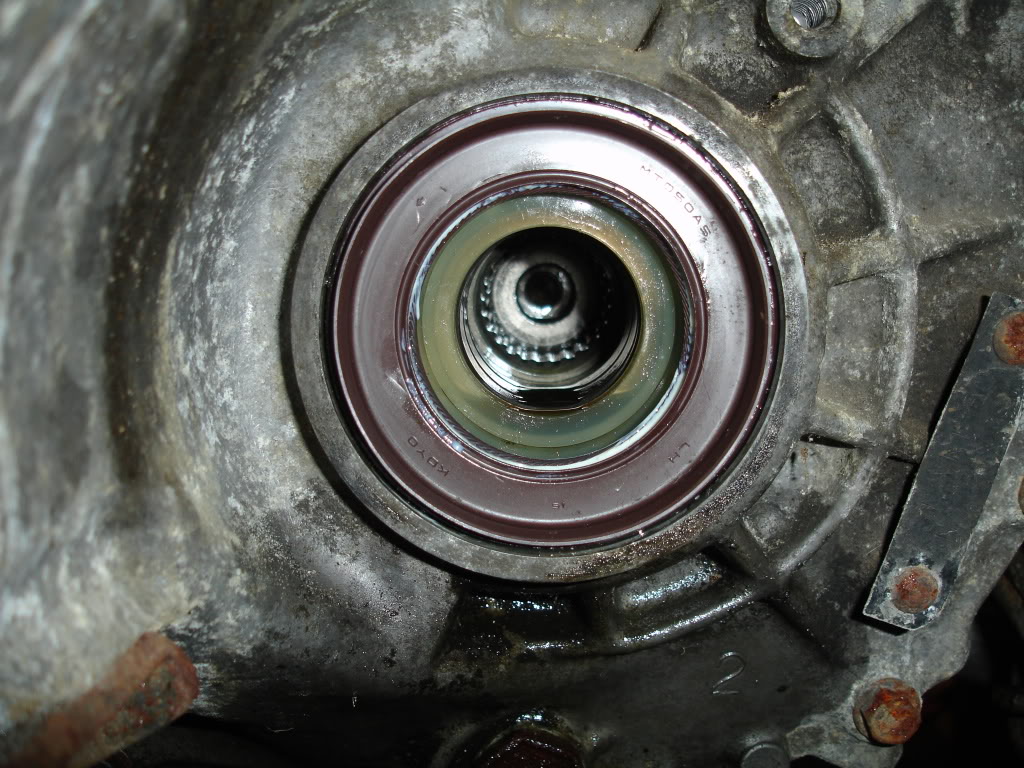
got the new seal installed in the trans:
i removed all of the grease from the stub axle, cleaned it with brake cleaner, and re-tapped the threads. the cleaning was required as the new axle needed to packed with grease. no sense in contaminating new grease with old worn grease.:

i packed the stub axle with grease:
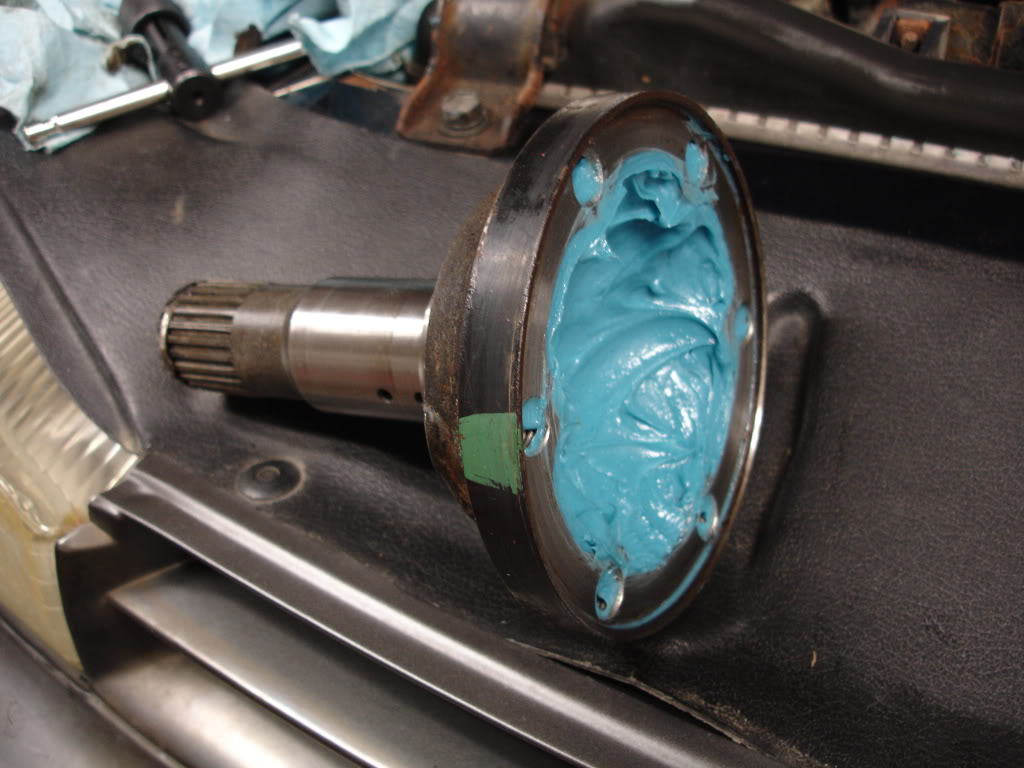
and then i packed the new cv with the grease supplied in the kit:
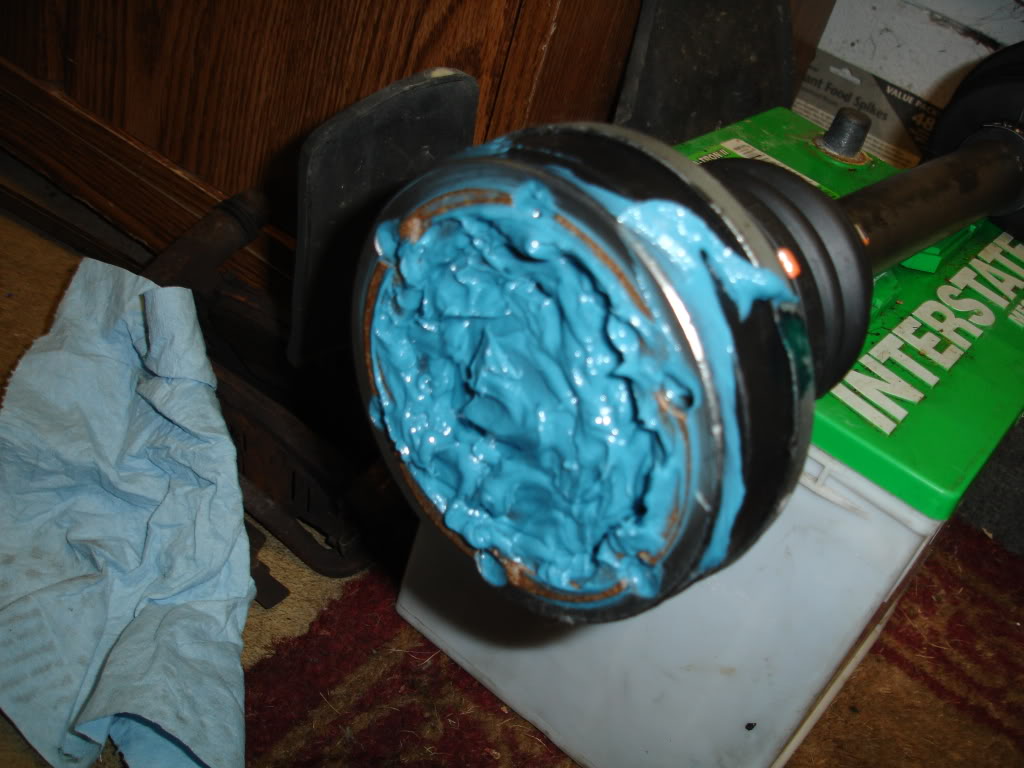
the stub axle and the cv shaft were bolted together and torqued to spec:
the final step before installing the cv shaft was the coating of gear oil on the splines on the stub axle. this aids installation a shade and prevents metal to metal contact before gear oil can reach this area when driven:
the rest went back together just as the other side had and i'm more than plesaed with the new ride.
ordered a new seal and two new cv bolts from Toyota:
the seal was not lacking in the quality department! it was pre-greased on the inner sealing ring and was constructed with quality:
got the new seal installed in the trans:
i removed all of the grease from the stub axle, cleaned it with brake cleaner, and re-tapped the threads. the cleaning was required as the new axle needed to packed with grease. no sense in contaminating new grease with old worn grease.:
i packed the stub axle with grease:
and then i packed the new cv with the grease supplied in the kit:
the stub axle and the cv shaft were bolted together and torqued to spec:
the final step before installing the cv shaft was the coating of gear oil on the splines on the stub axle. this aids installation a shade and prevents metal to metal contact before gear oil can reach this area when driven:
the rest went back together just as the other side had and i'm more than plesaed with the new ride.
Thread Starter
Joined: Oct 2003
Posts: 22,595
Likes: 1,276
From: Ohio
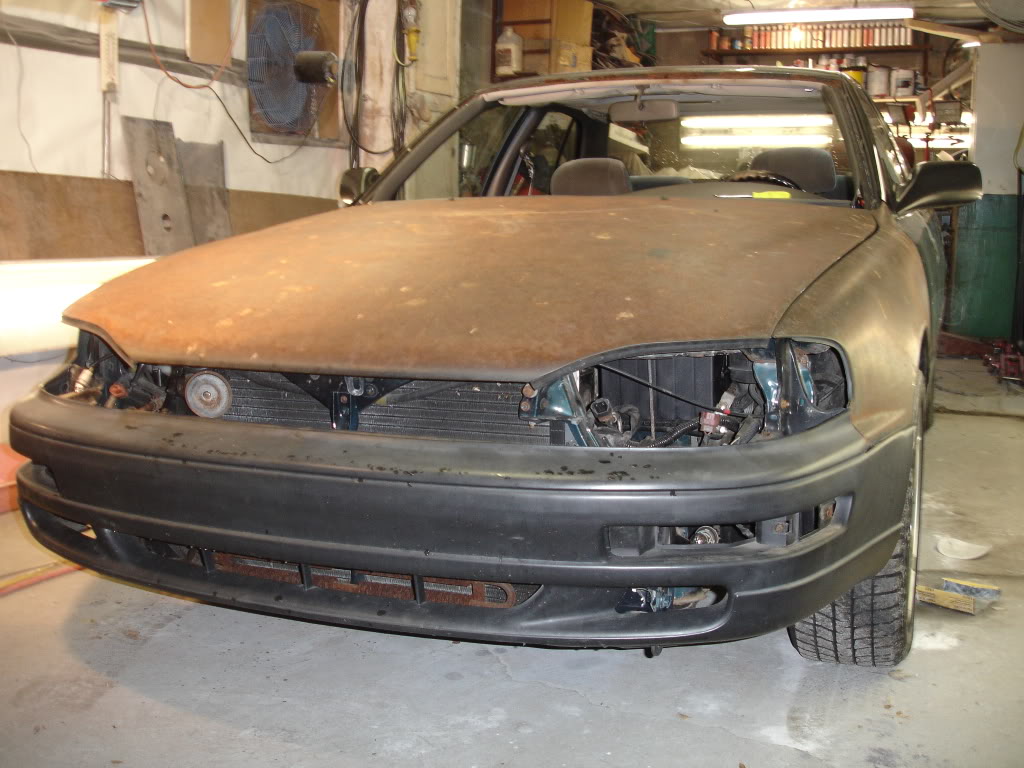
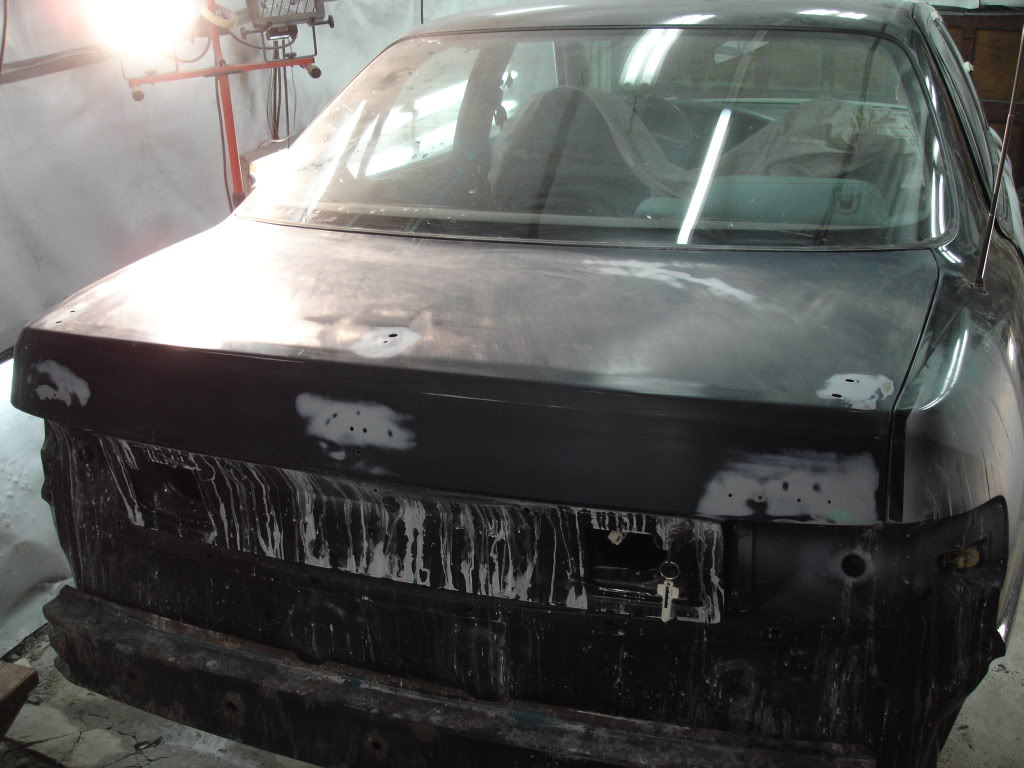
now came time to paint the car and replace the windshield
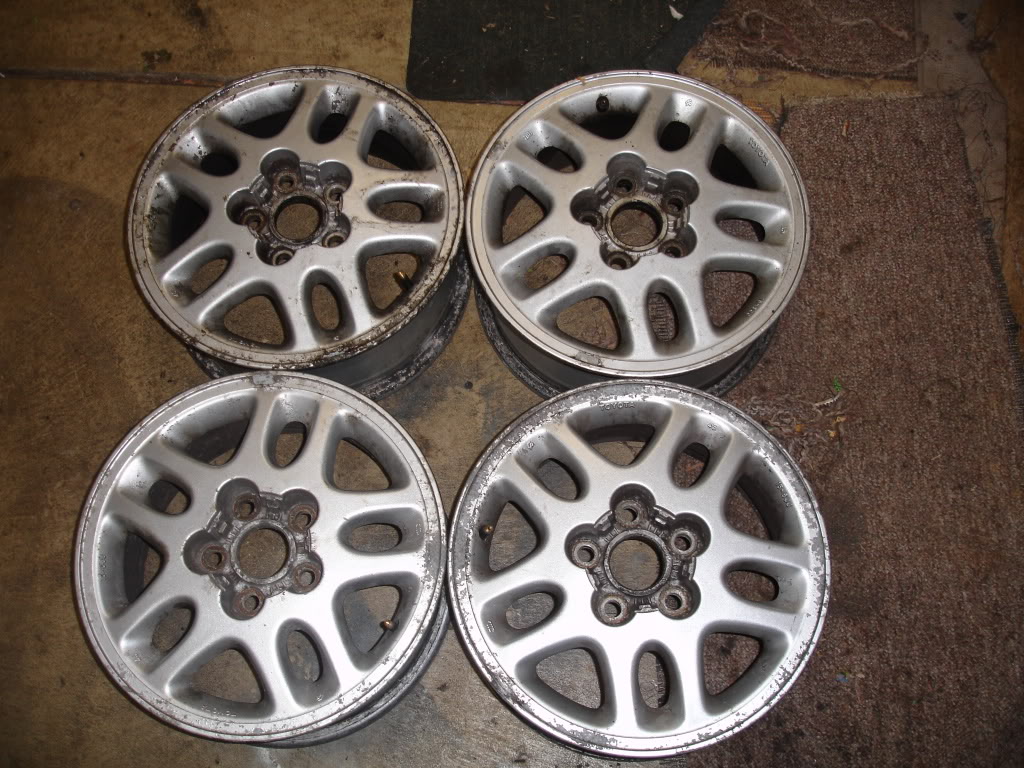
first off was the wheels. they are painted silver from the factory and over the years, the paint has flaked away and the aluminum underneath had oxidized and was corroding. i decided to burn them in an engine oven to remove the oils and paint, shot blast them, and powdercoat them to as close to original color as possible. here's how they looked before cleaning and powdercoating:
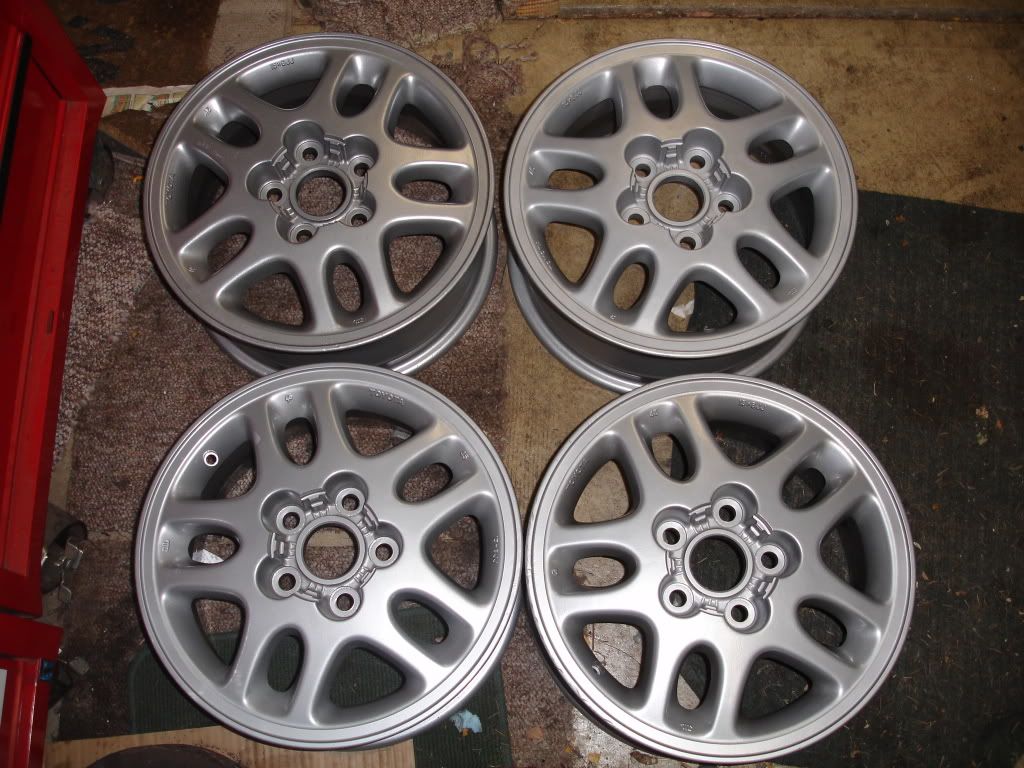
after a friend powdercoated them for me, this is how they turned out:
the new tires go on tomorrow and i'm going to drive the car to my dad's body shop for paint.
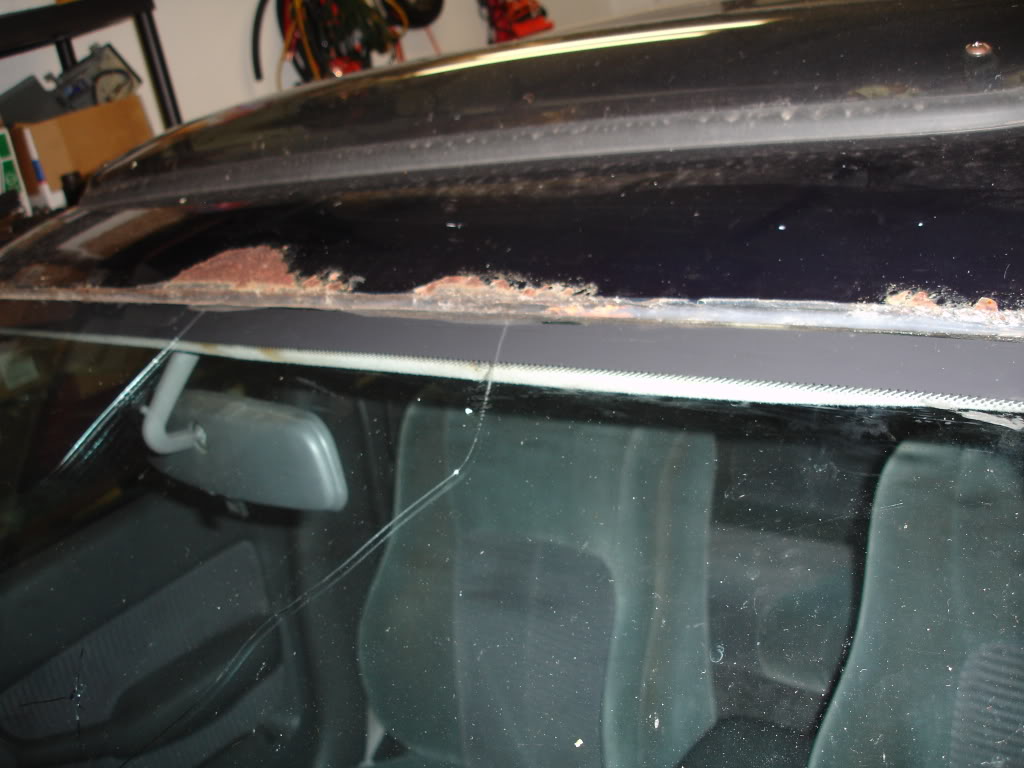
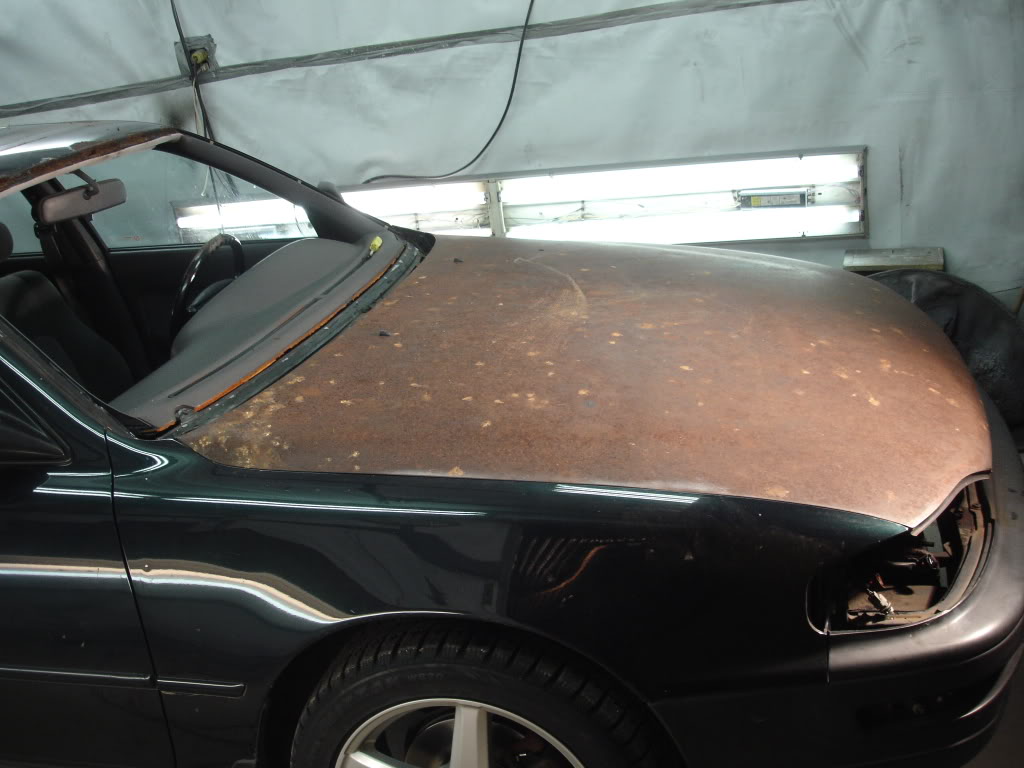
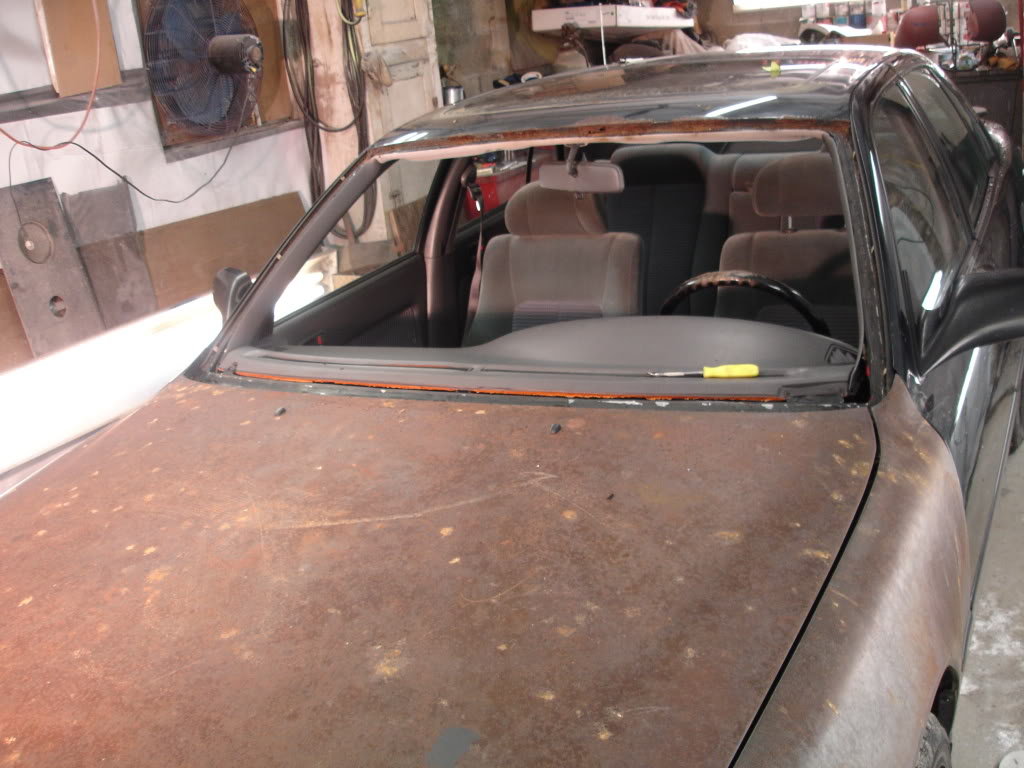
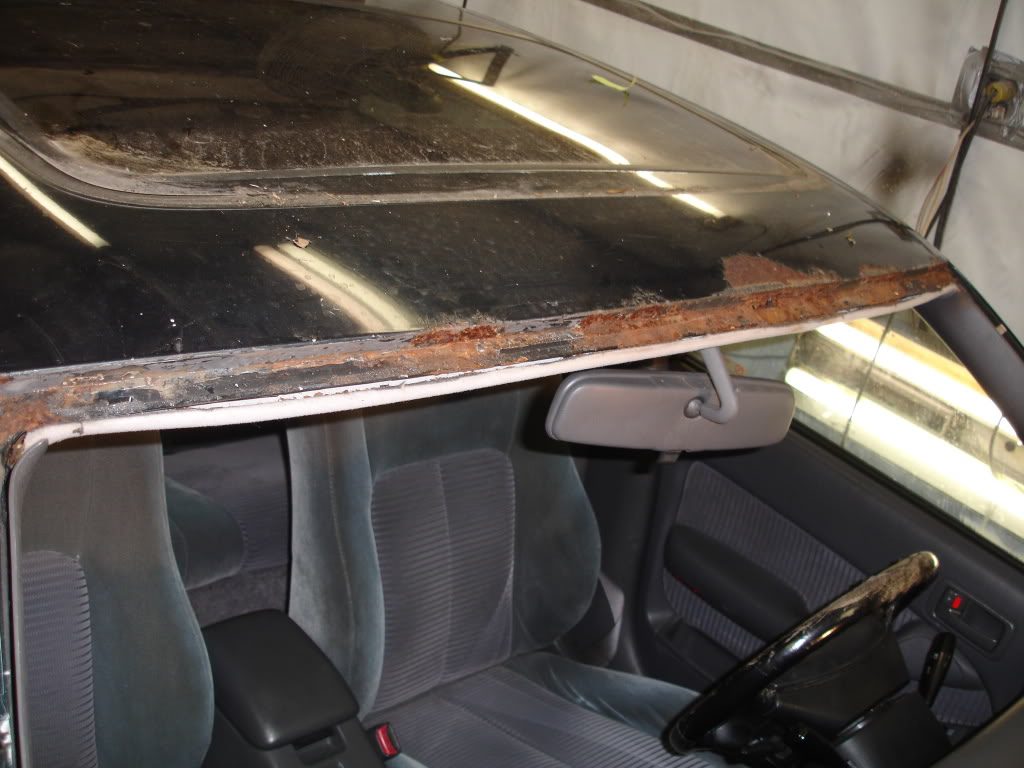
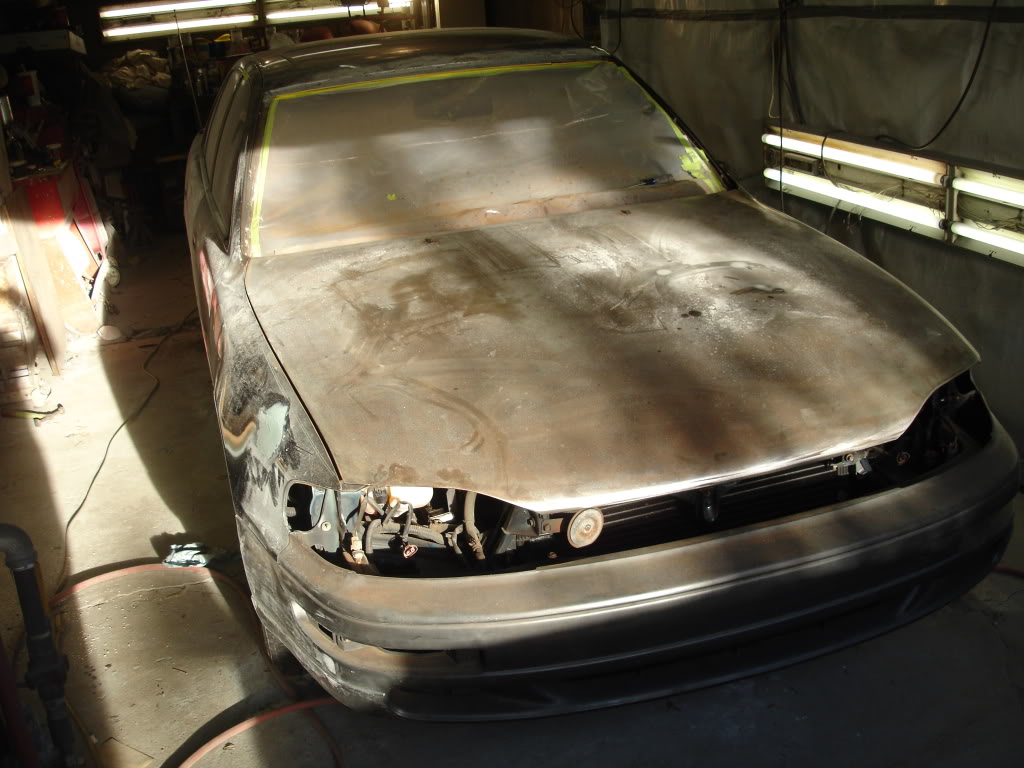
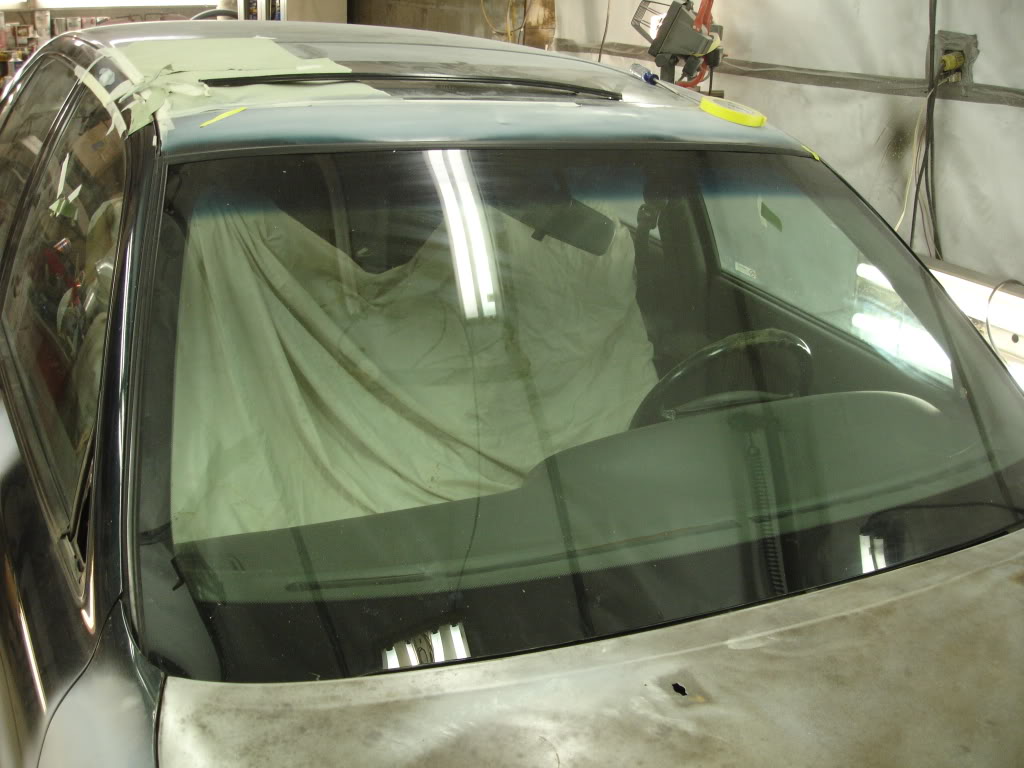
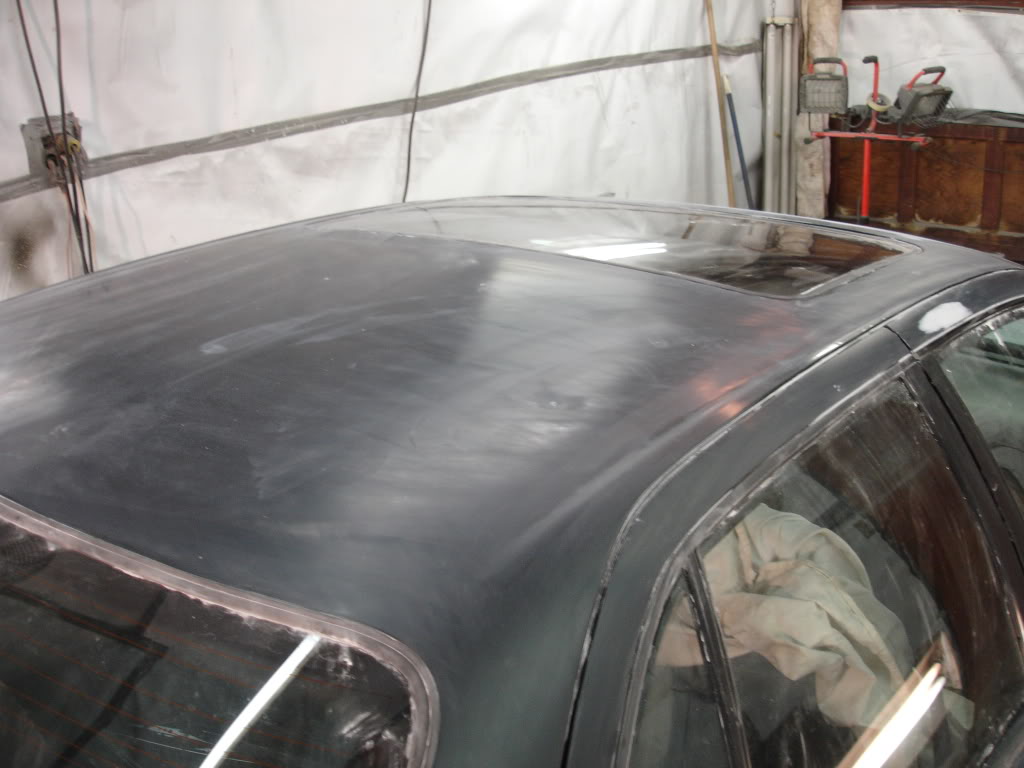
the worst of the rust is on the roof and since the windshield is coming out anyways, i plan to fix the roof rust and anything i find under the windshield:
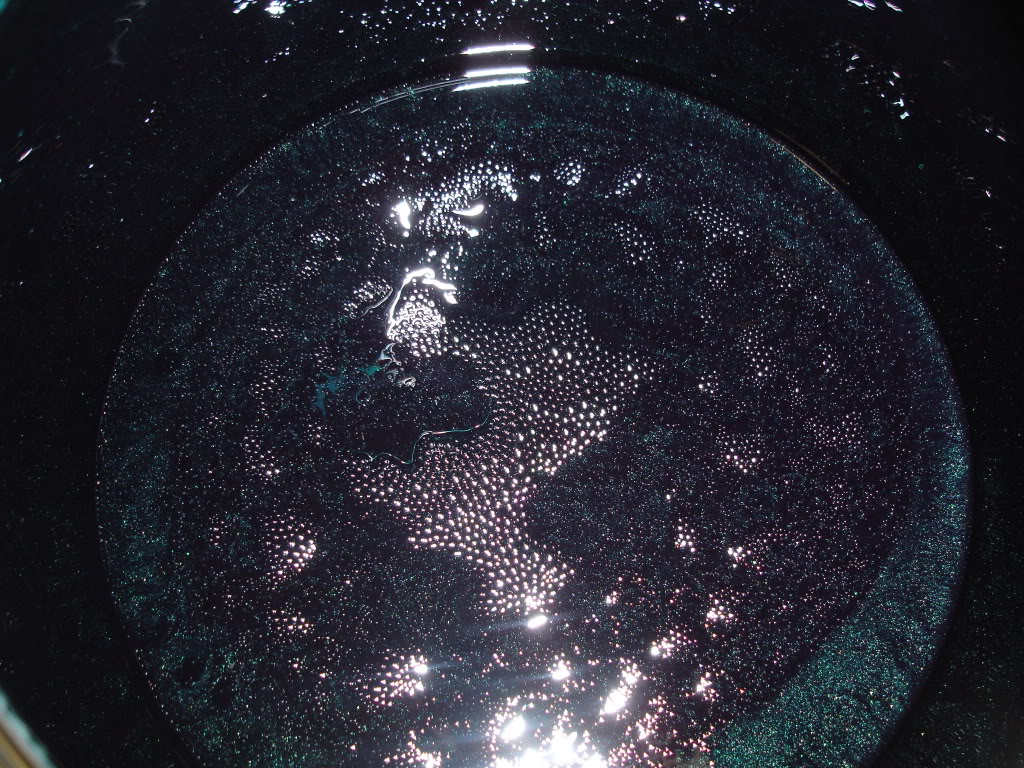
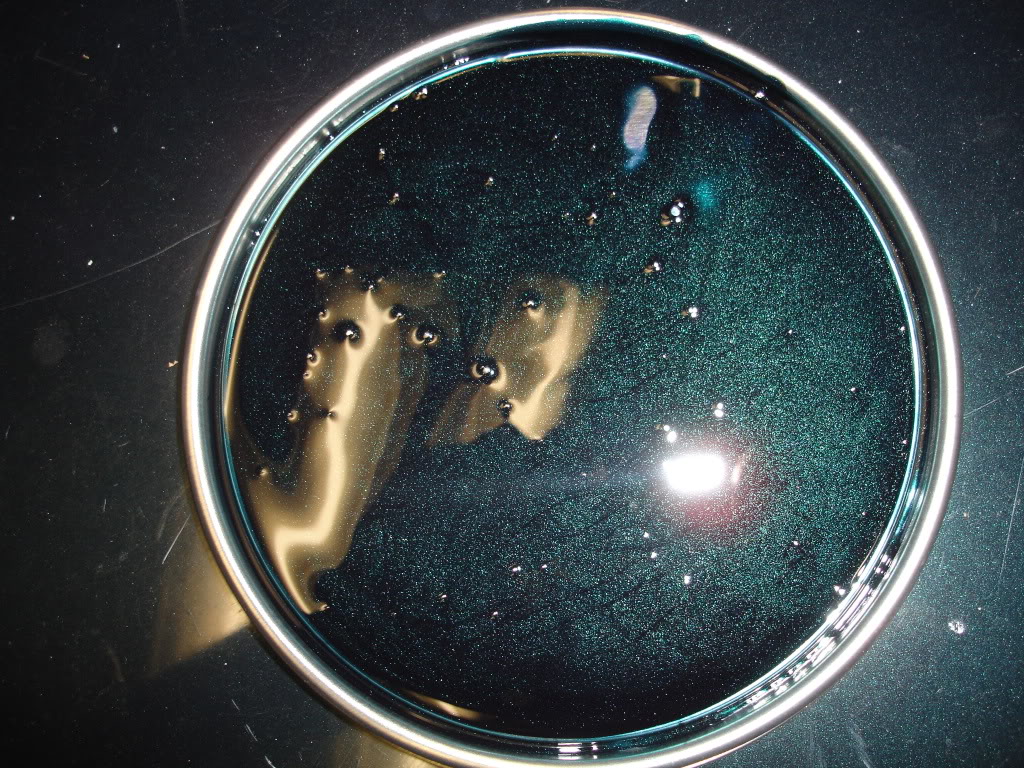
here is the paint that i had purchased for the car. dark emerald mica by martin senior. should look nice once finished.
i'll continue updating this thread with pictures this weekend of the paint process.
first off was the wheels. they are painted silver from the factory and over the years, the paint has flaked away and the aluminum underneath had oxidized and was corroding. i decided to burn them in an engine oven to remove the oils and paint, shot blast them, and powdercoat them to as close to original color as possible. here's how they looked before cleaning and powdercoating:
after a friend powdercoated them for me, this is how they turned out:
the new tires go on tomorrow and i'm going to drive the car to my dad's body shop for paint.
the worst of the rust is on the roof and since the windshield is coming out anyways, i plan to fix the roof rust and anything i find under the windshield:
here is the paint that i had purchased for the car. dark emerald mica by martin senior. should look nice once finished.
i'll continue updating this thread with pictures this weekend of the paint process.
Thread Starter
Joined: Oct 2003
Posts: 22,595
Likes: 1,276
From: Ohio
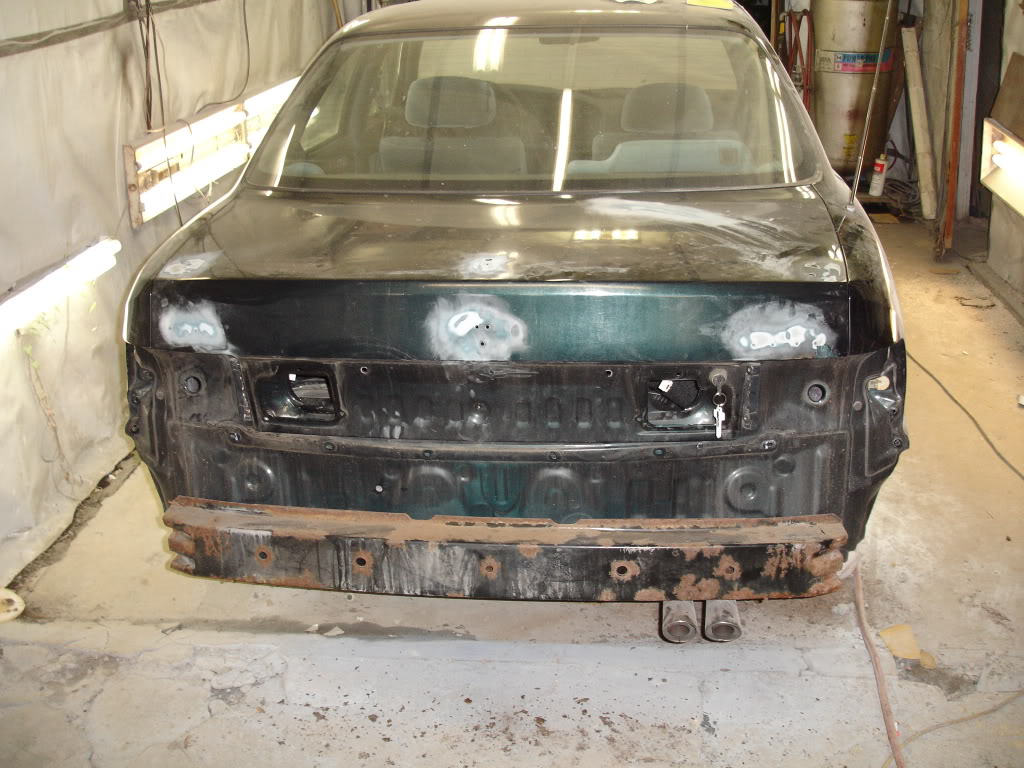
here are the pics. the rust under the windshield is completely exposed and will be fixed before the new windshield goes in. the only change from these pics are the removal of the mirrors and the masking of the windshield area to prevent debris from entering the interior.
Thread Starter
Joined: Oct 2003
Posts: 22,595
Likes: 1,276
From: Ohio
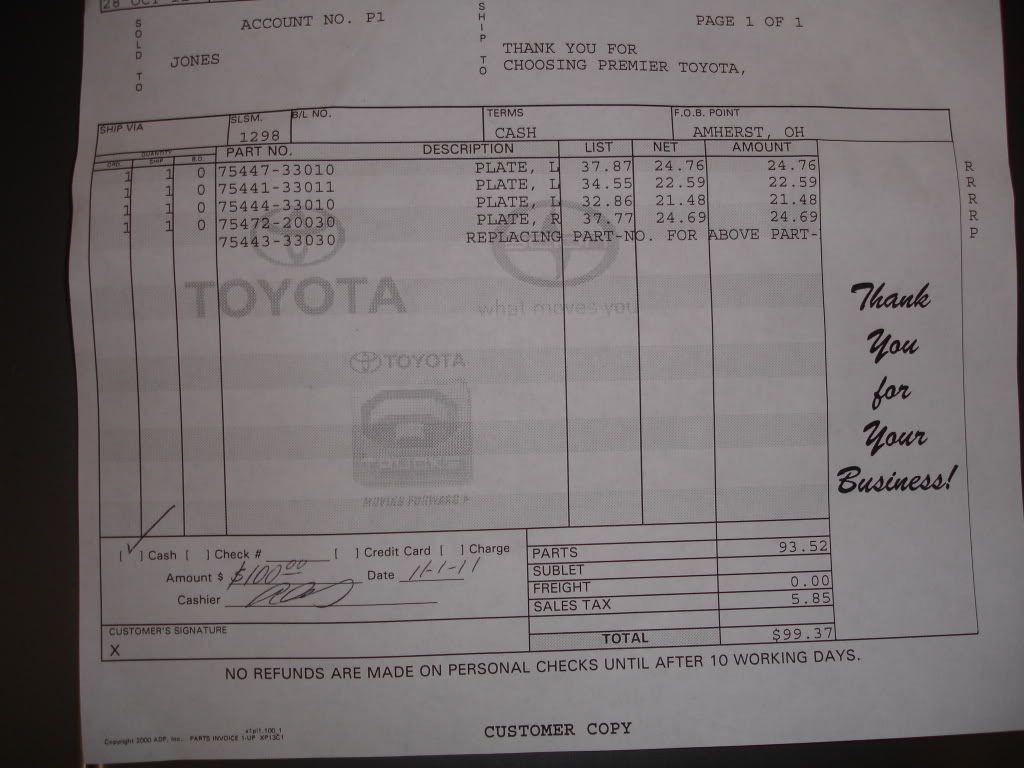
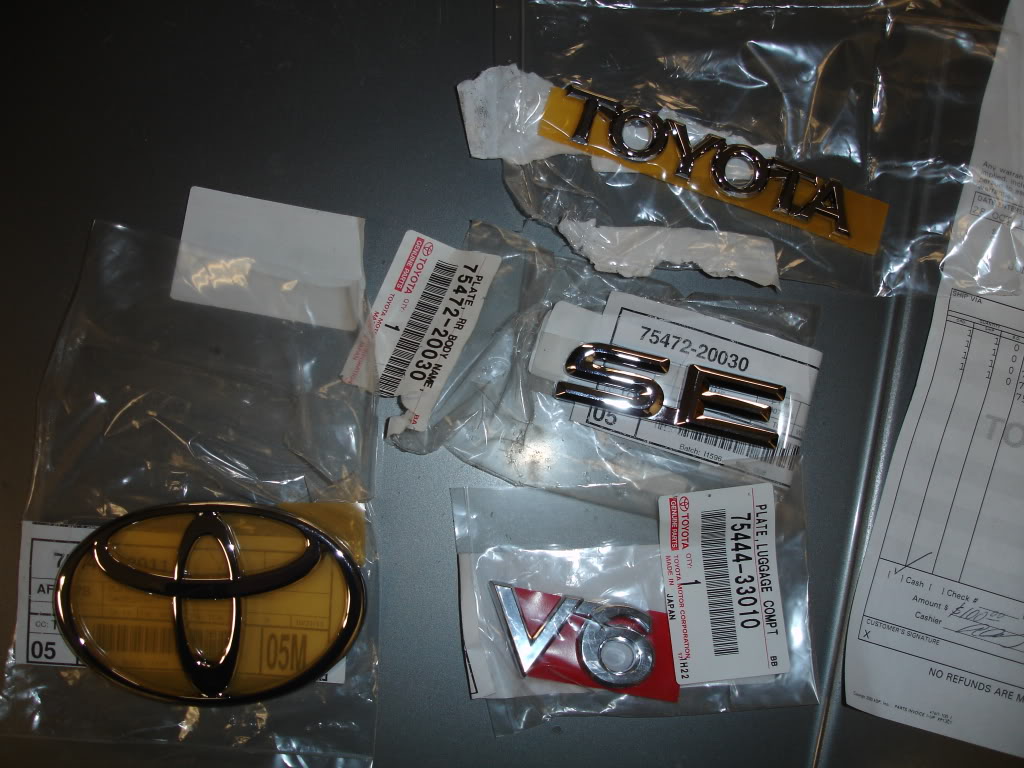
i picked up the new emblems from the dealer. the SE emblem is different and had been superceeded to a new part number. i don't much care for it but i don't think i have a choice. i don't know where i can get a plastic emblem re-chromed. here's what i got:
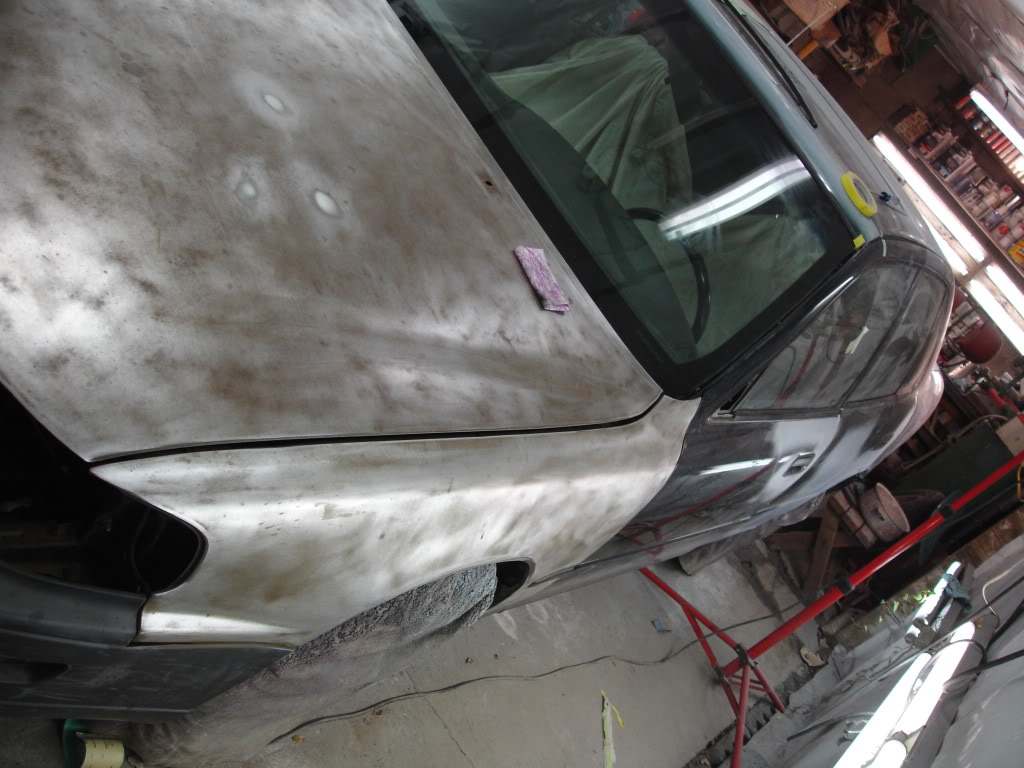
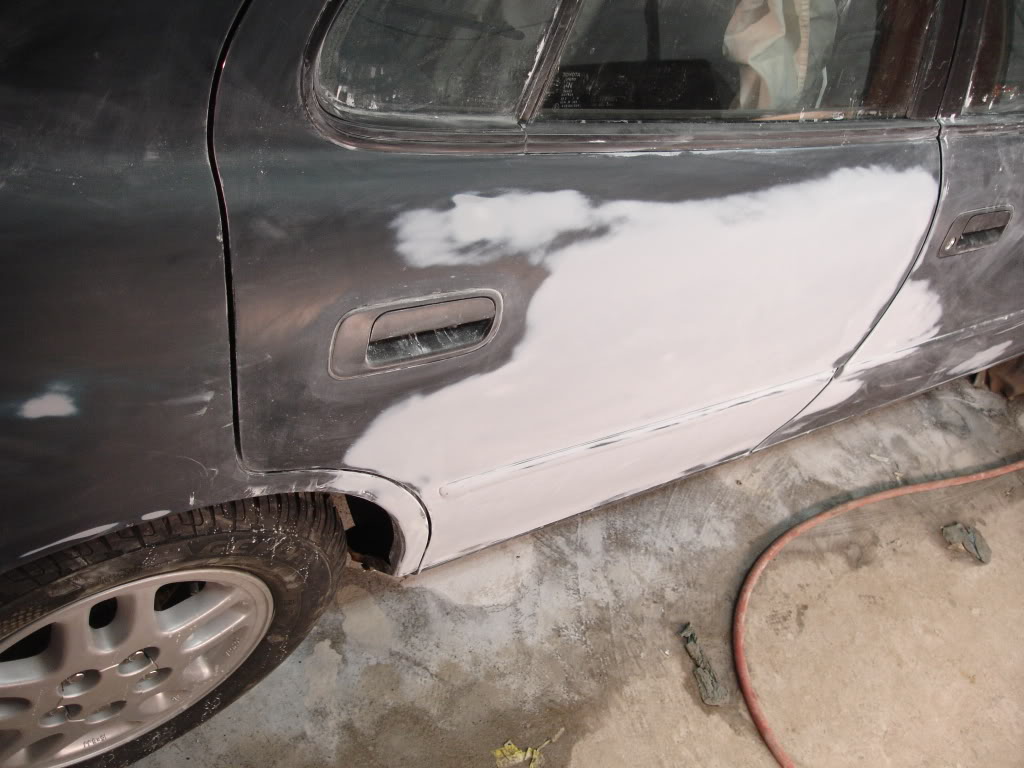
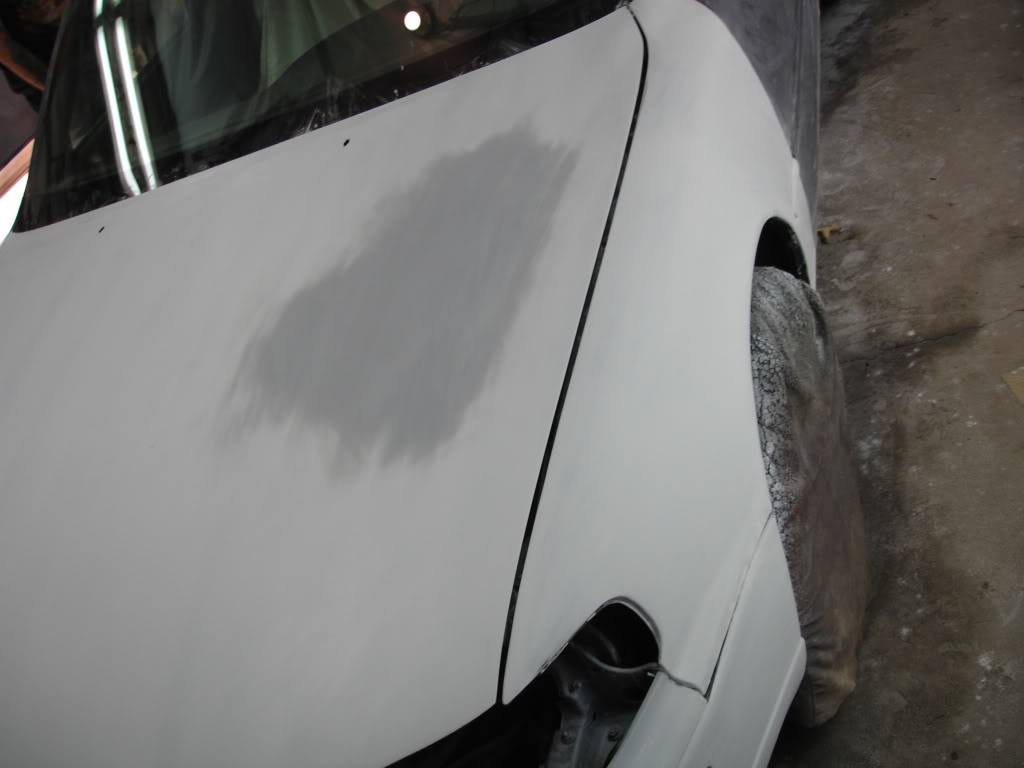
got the dents fixed and the window channel reformed. its coming along slowly but it'll be well worth the wait once i bring the car back home! here are the pics of today's progress:
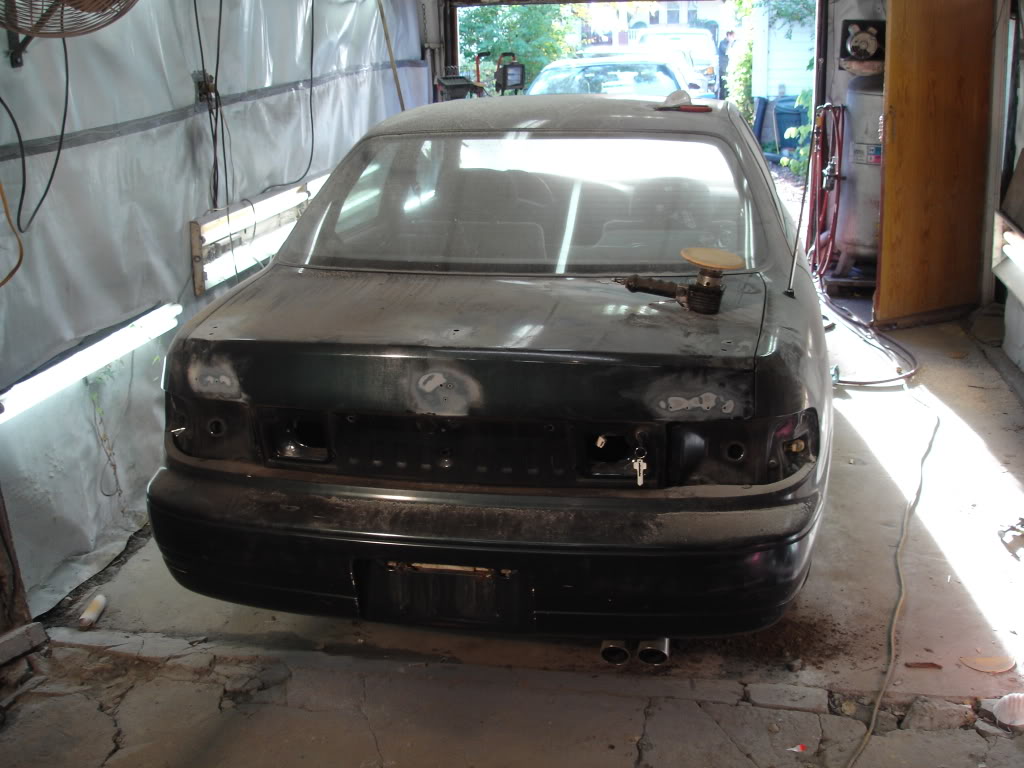
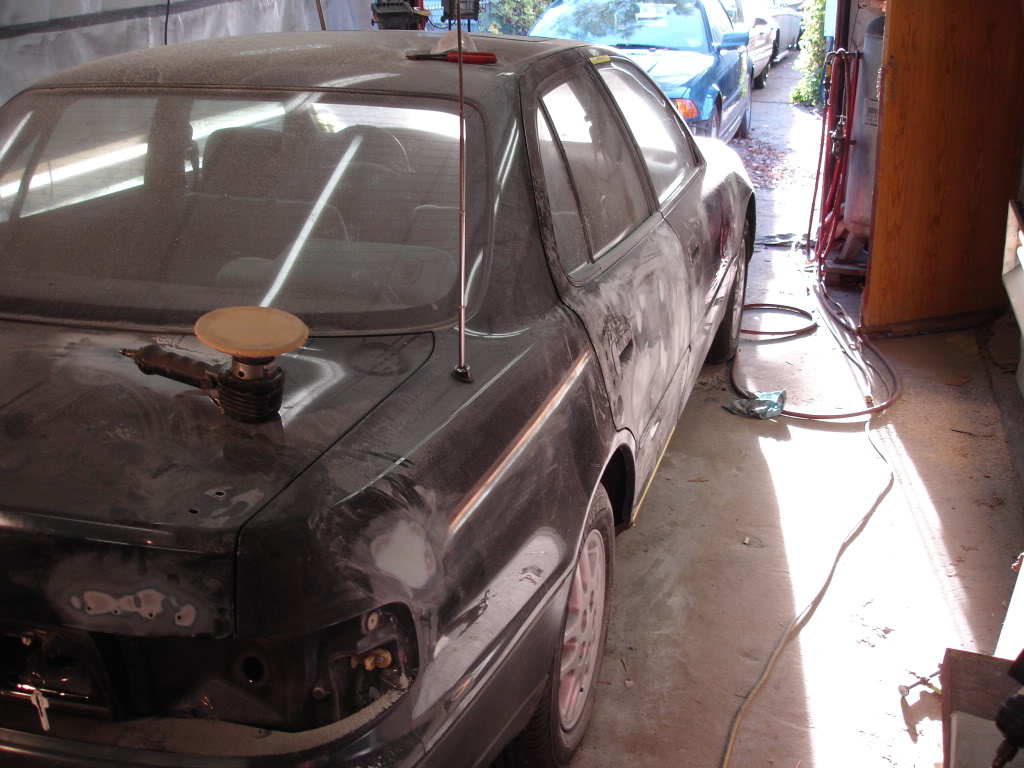
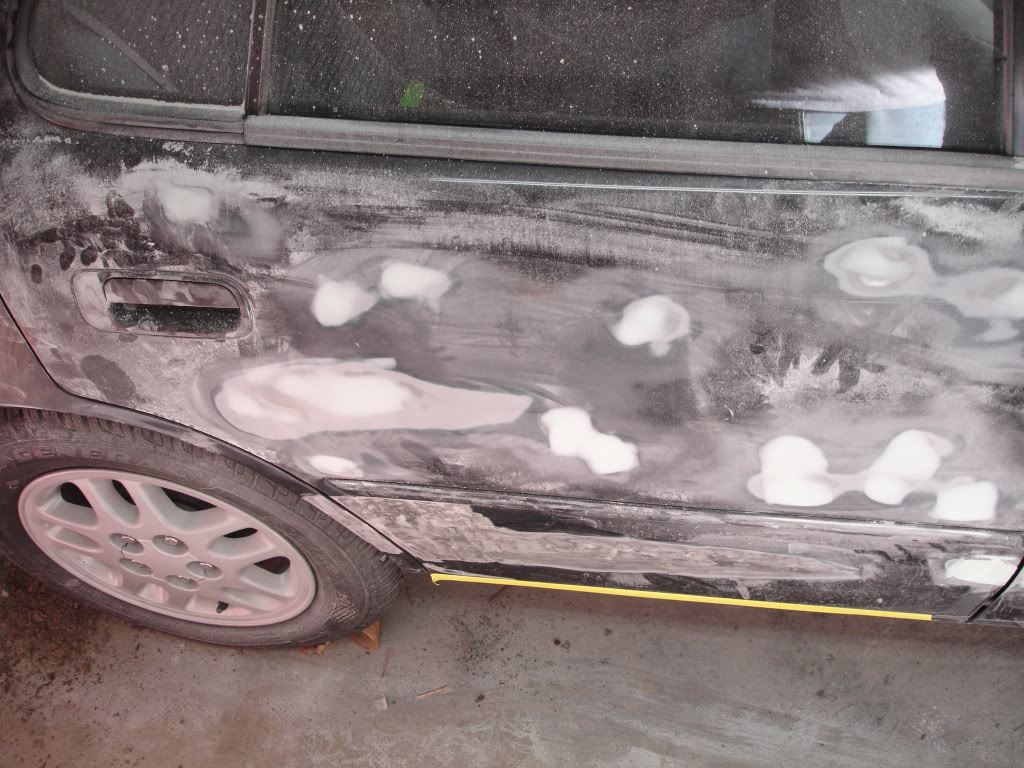
got the dents fixed and the window channel reformed. its coming along slowly but it'll be well worth the wait once i bring the car back home! here are the pics of today's progress:


Thread Starter
Joined: Oct 2003
Posts: 22,595
Likes: 1,276
From: Ohio
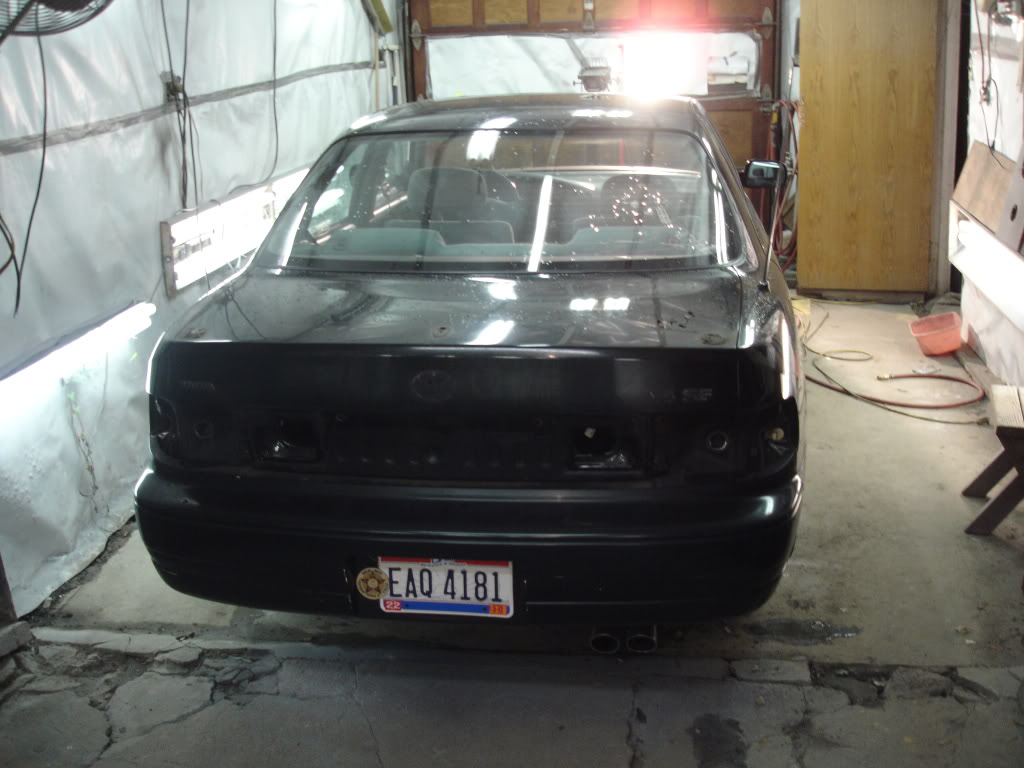
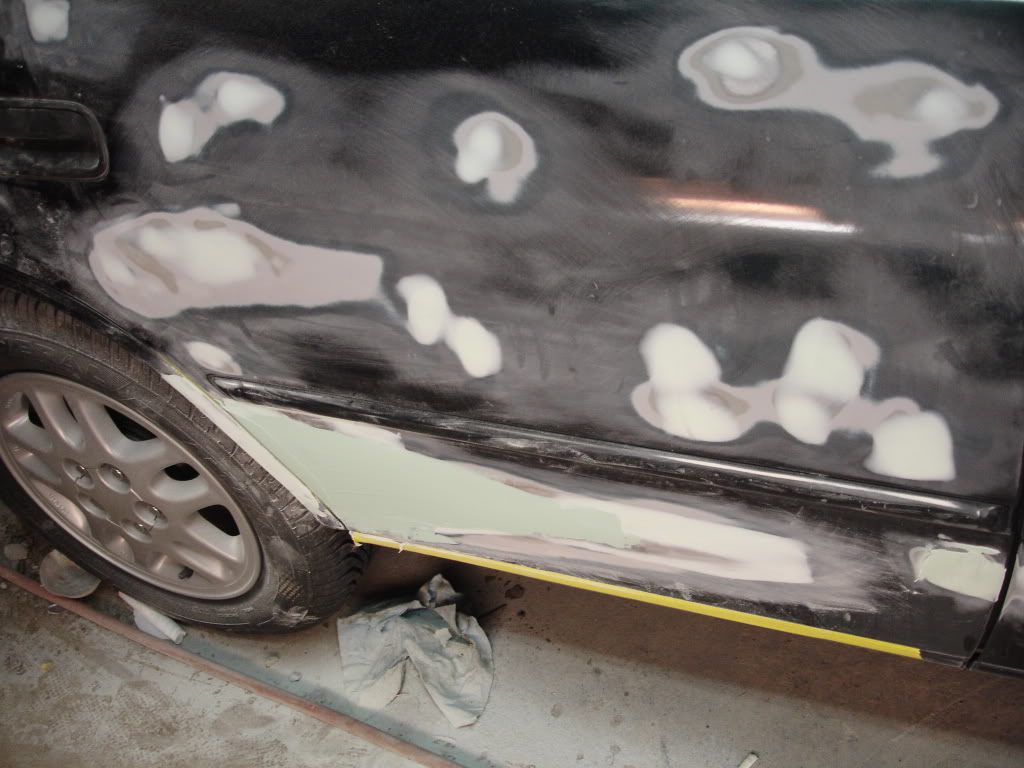
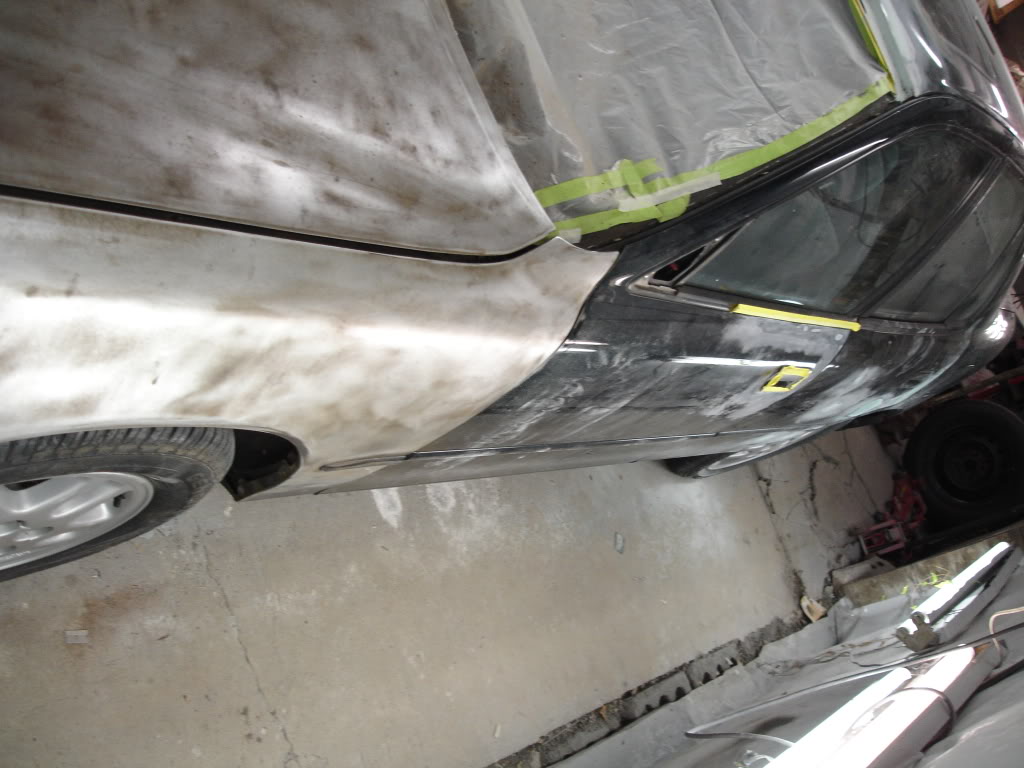
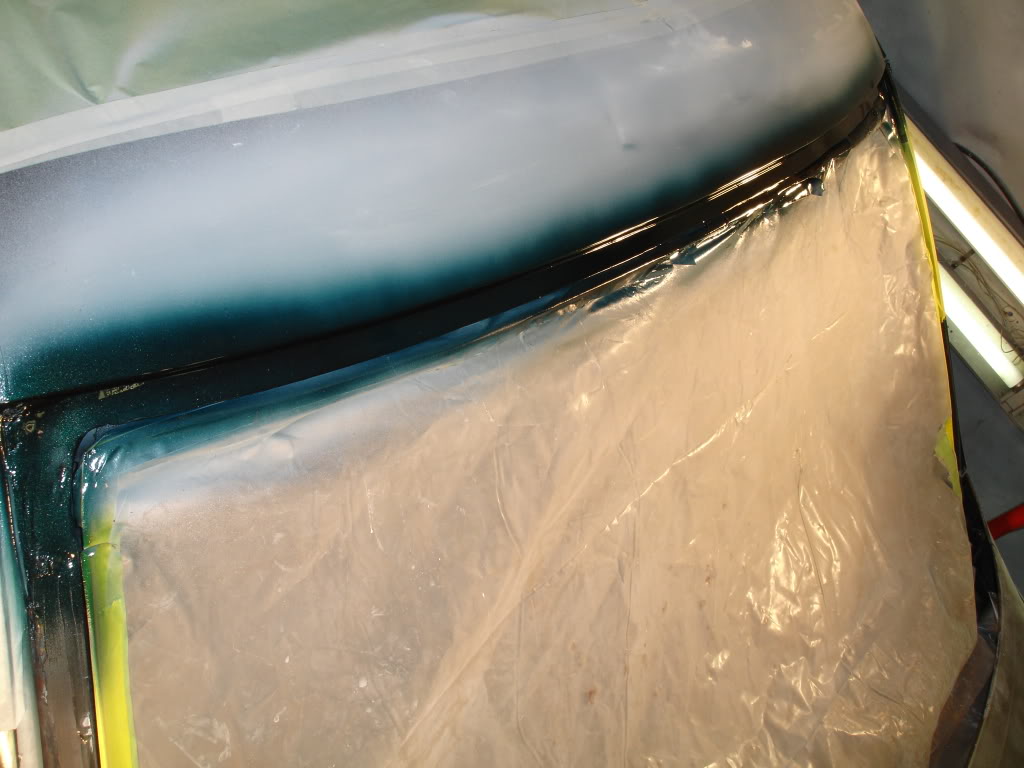
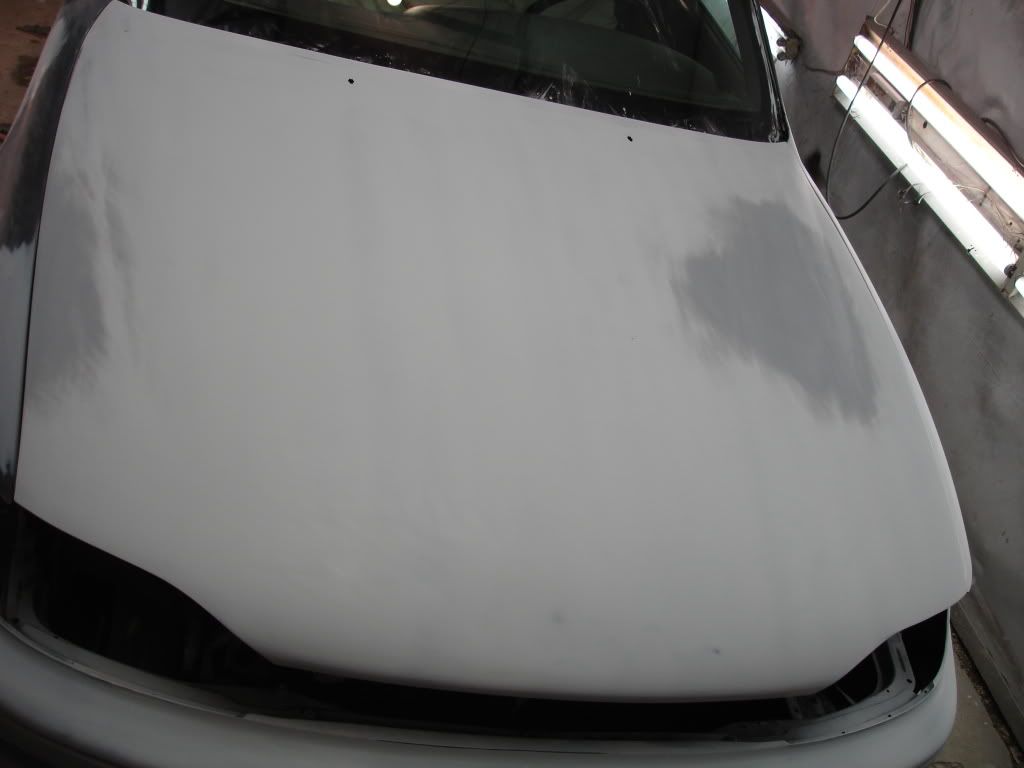
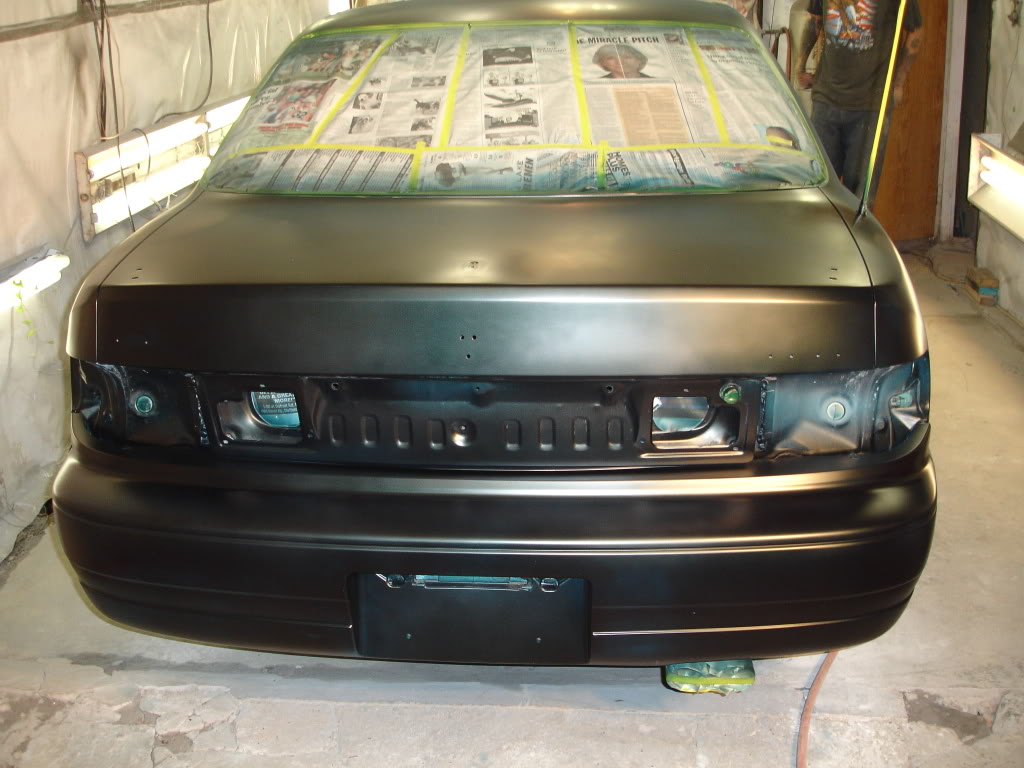
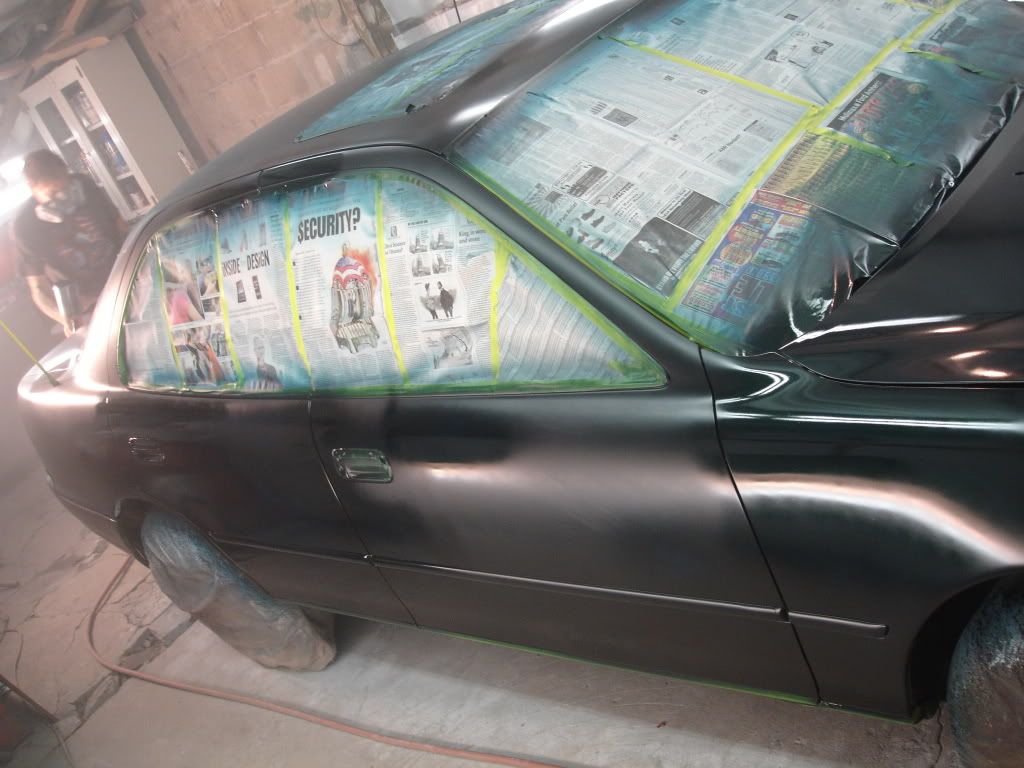
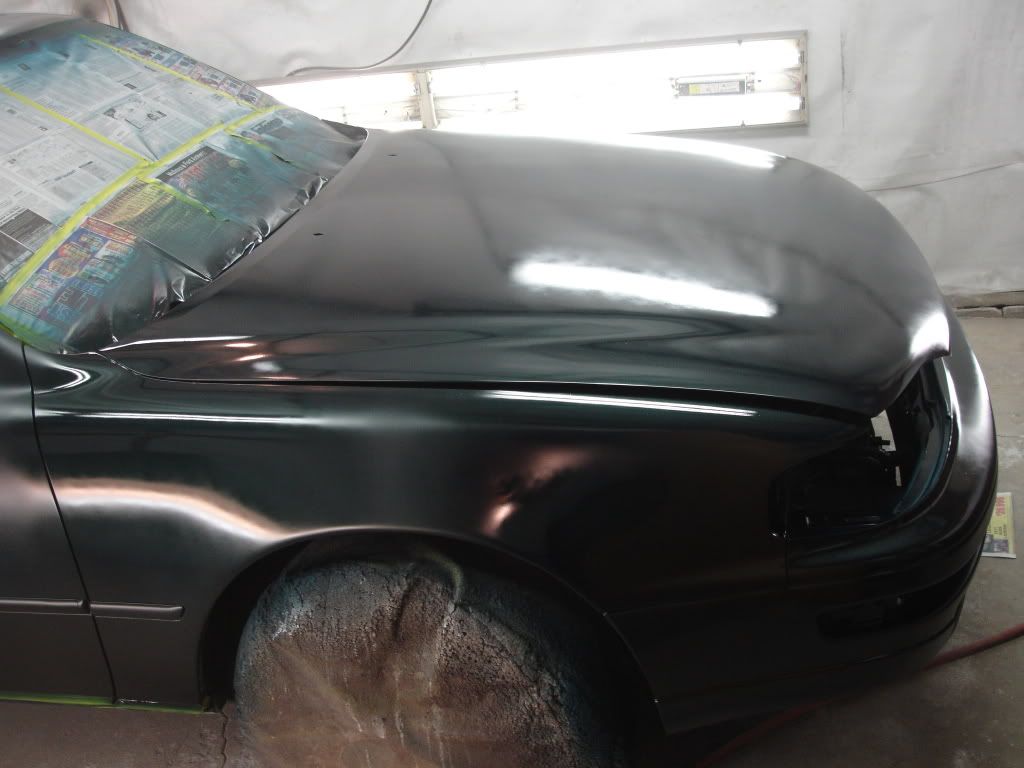
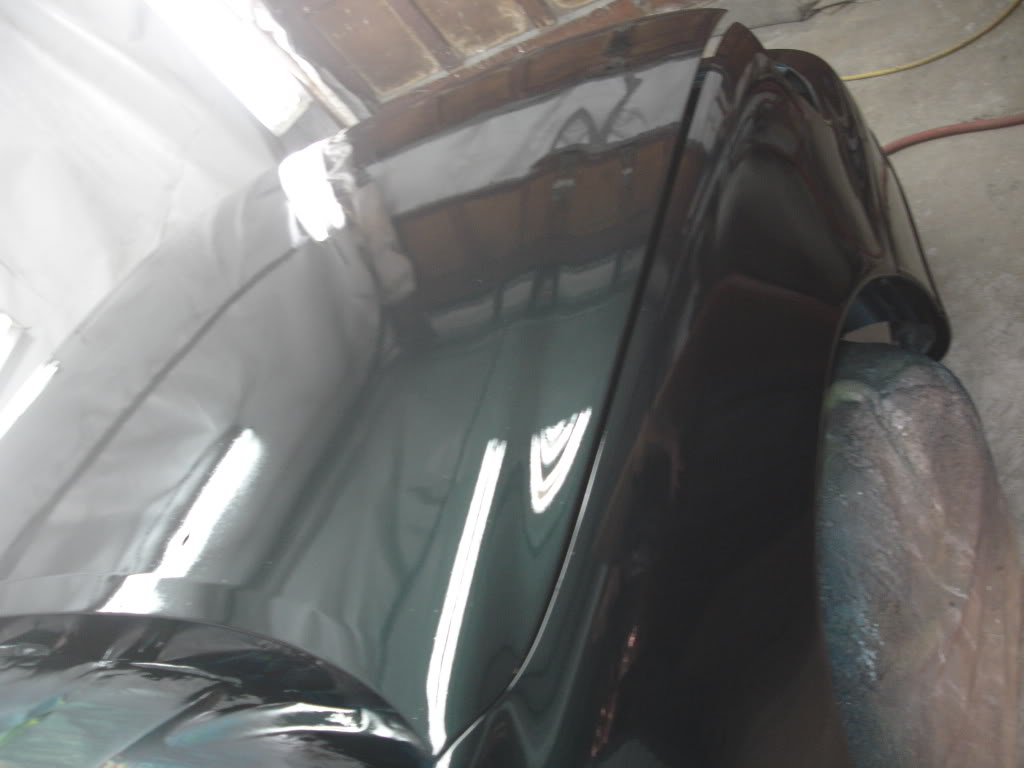
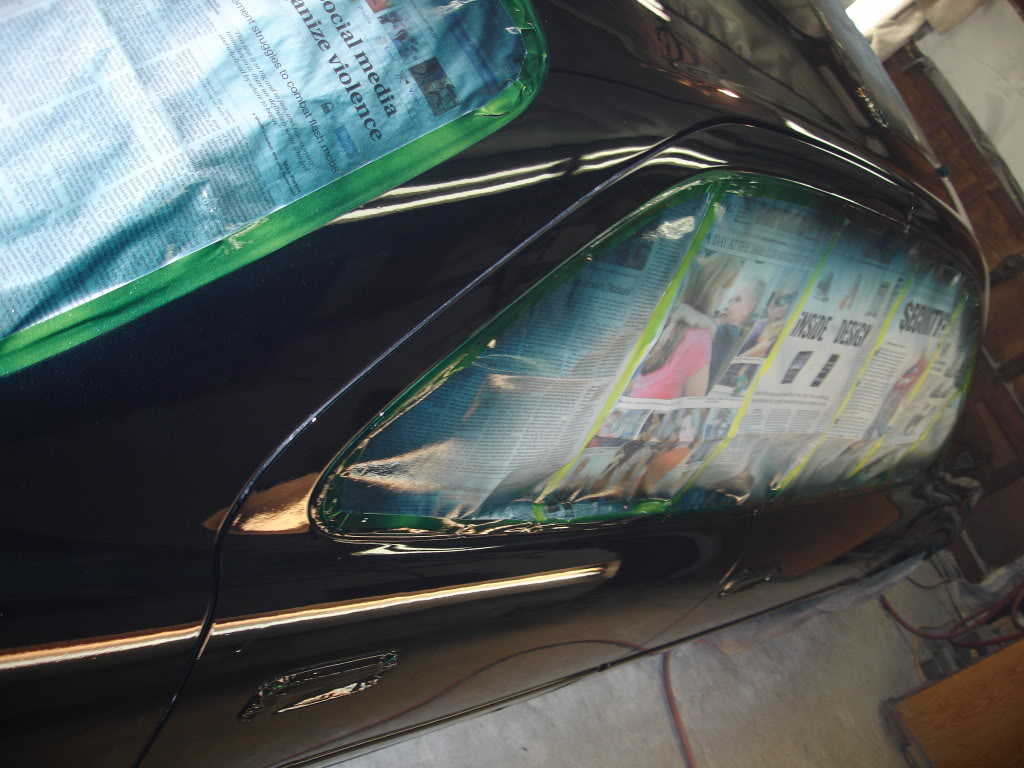
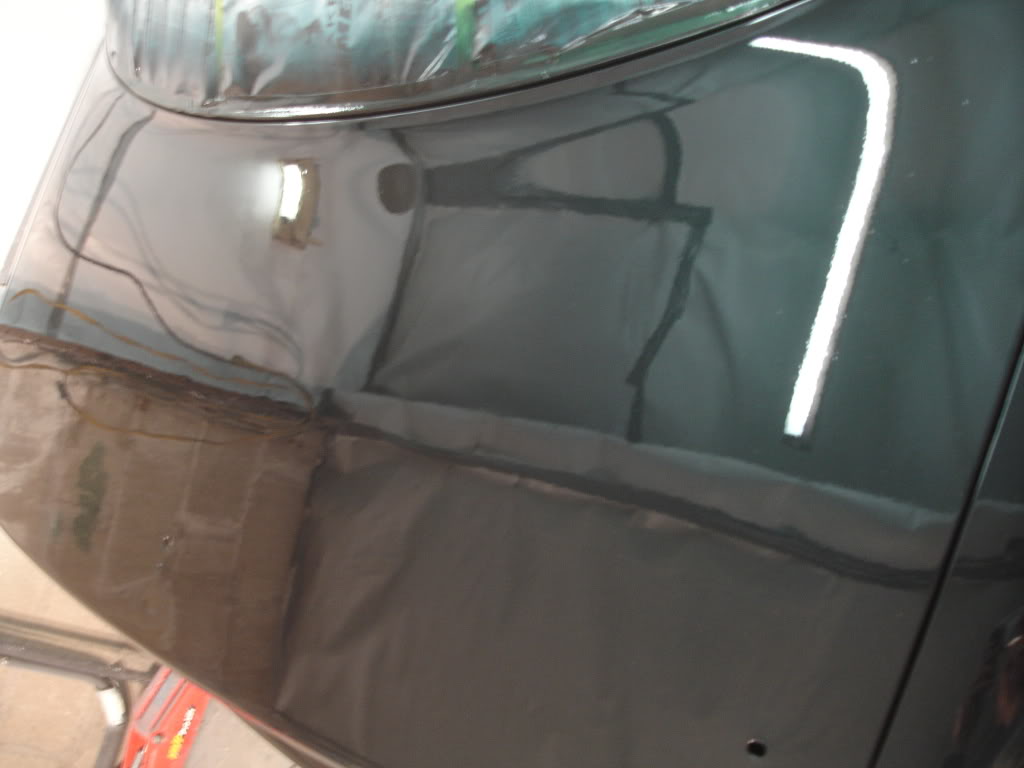
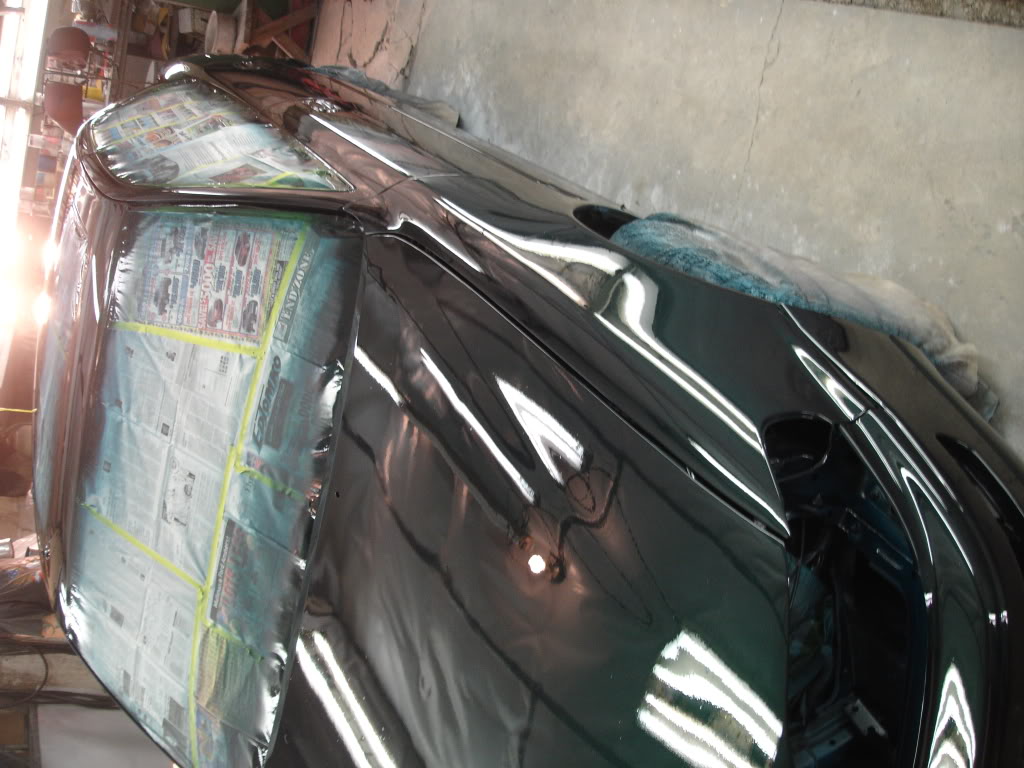
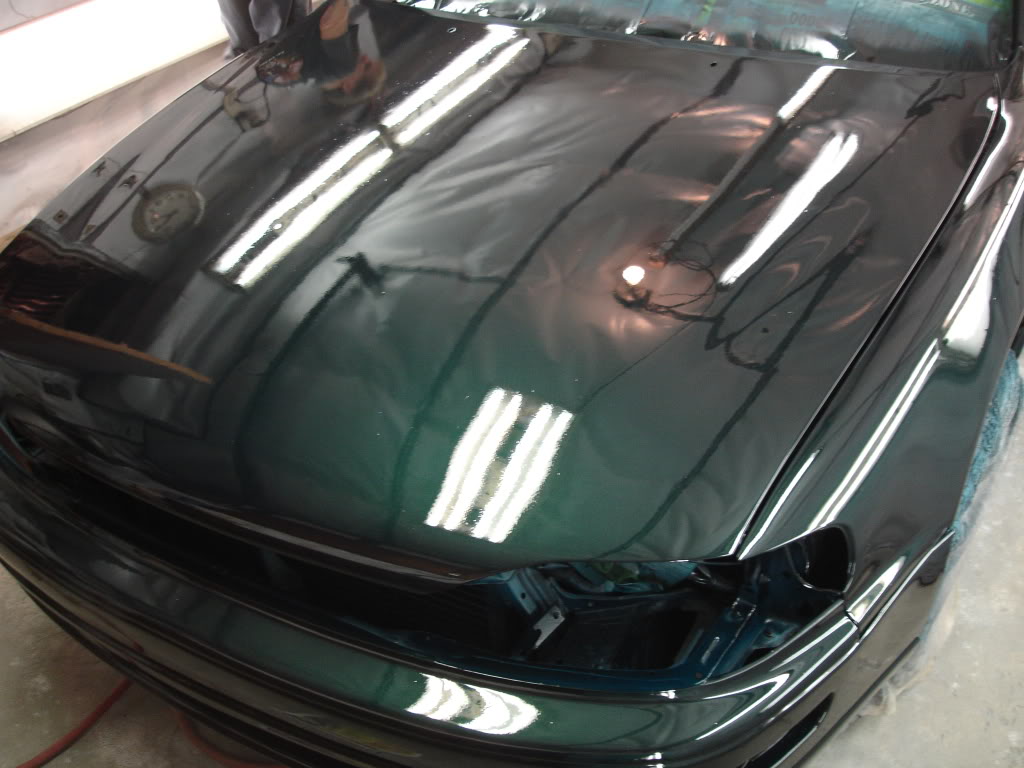
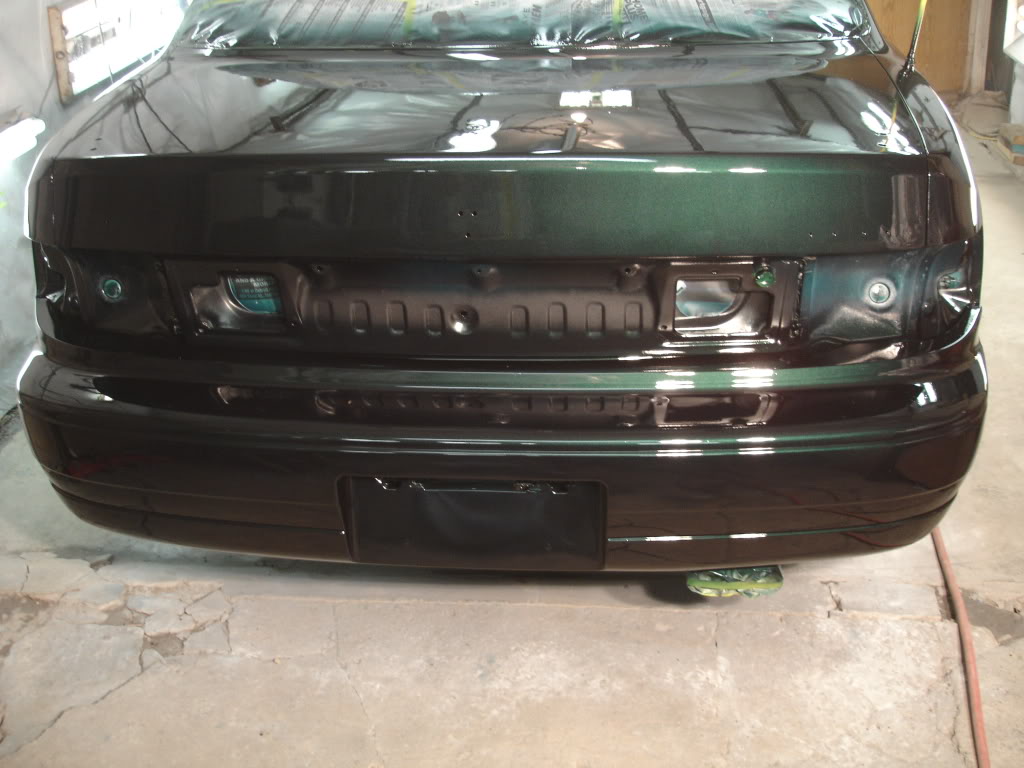
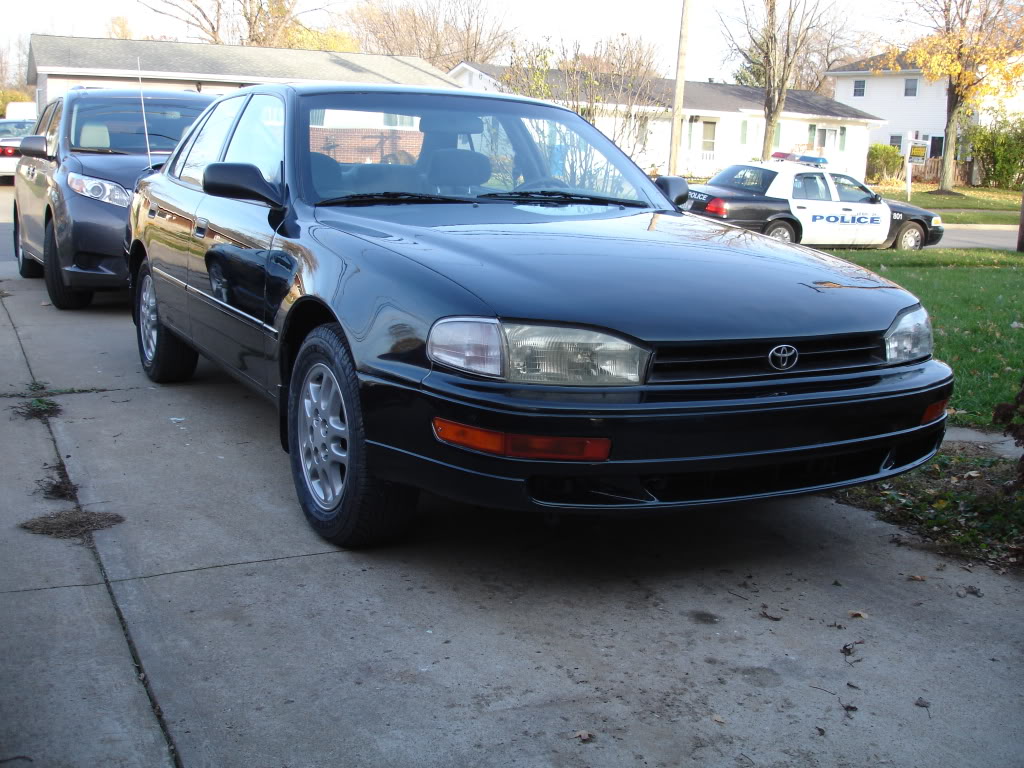
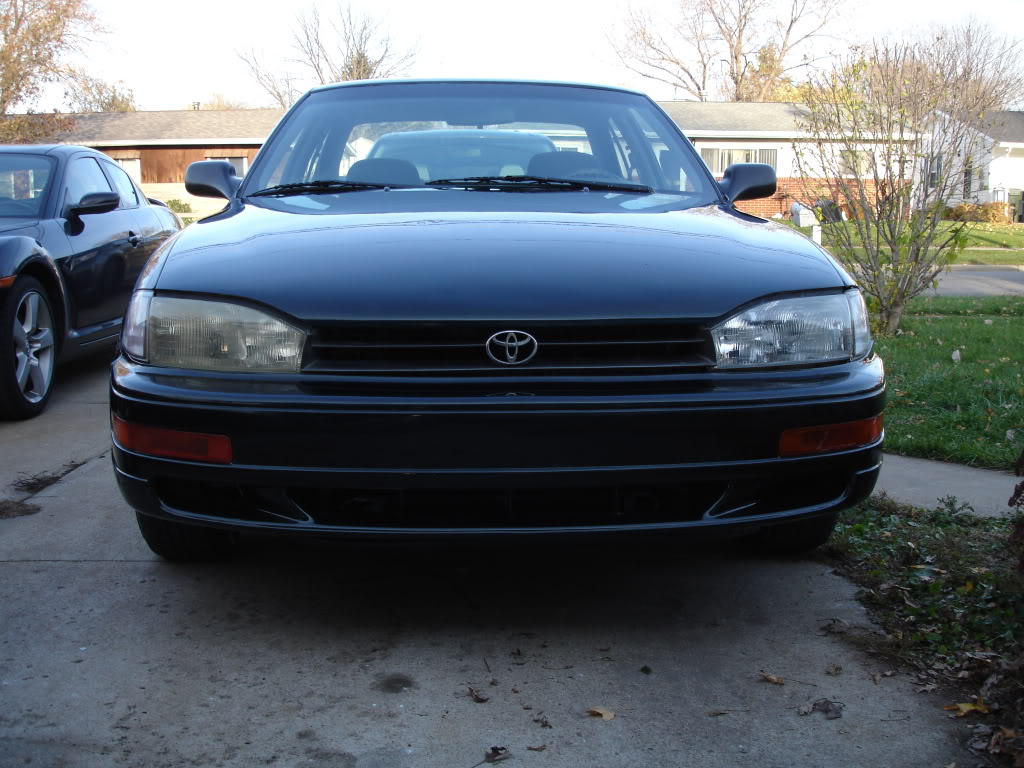
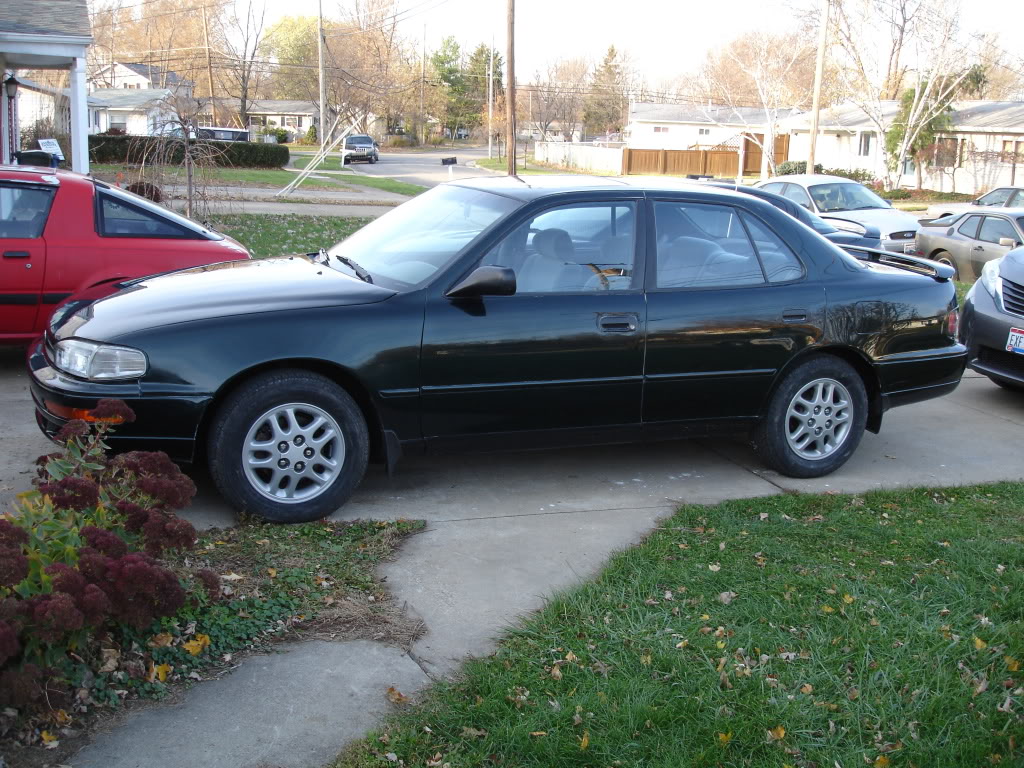
the SE is painted and is home in the garage. i still need to clean the door sills and the edges of some of the panels due to the the rubbing compound slinging in there. here are some pics from today:

and one more that i took the other evening of a cool sky:
and one more that i took the other evening of a cool sky:

i never knew this. though it sort of makes sense, i guess. you did a great job with this car. i've always had a thing for the coupes and wagons from this generation Camry, to me the sedans were ... blah. however, i didn't dislike them and i certainly think yours is pretty sweet.
