
82 GSL Build


Thread Starter
Full Member
Joined: May 2016
Posts: 226
Likes: 0
From: Denver
Glad to see my thread is fostering some discussion!
Anyway, I took the mechanical secondary linkage off my spare Nikki, and put it on my installed one. Now the secondaries work! It's not that impressive, and I'm not into them until around 5.5k. When they open it sorta burbles and then goes. Interestingly the AFR's drop to around 10! Then climb back towards 11. I'm off the throttle by 6k, as I'm still nervous about high rpm. I would have thought it would have gone lean but no, it's going rich?
That makes sense that if you only cut the spring, the spring constant would increase, you need to stretch it to lower that constant, right? I may try that as I'm not terrible impressed currently with the mechanical setup.
As a side note, when driving the Civic, I shift at 4k (around the same point as the 7). Still got wasted by an old dude driving a Santa Fe...people must be redlining their cars more than I'd think? I'm only mentioning this as I want to gauge my performance, in the real world, if that makes sense. There's a dyno nearby and when I have some $ I'd like to get a baseline.
Oh I got some col electrical goodies in the mail today:
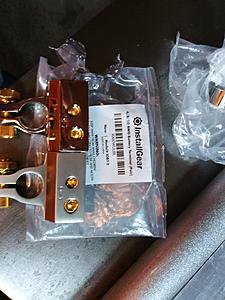
A Before Pic:
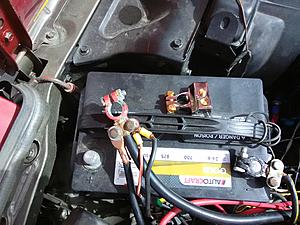
Job so far, cleaner wiring all around. Still can't figure a clean setup for the ignitors...

Anyway, I took the mechanical secondary linkage off my spare Nikki, and put it on my installed one. Now the secondaries work! It's not that impressive, and I'm not into them until around 5.5k. When they open it sorta burbles and then goes. Interestingly the AFR's drop to around 10! Then climb back towards 11. I'm off the throttle by 6k, as I'm still nervous about high rpm. I would have thought it would have gone lean but no, it's going rich?
That makes sense that if you only cut the spring, the spring constant would increase, you need to stretch it to lower that constant, right? I may try that as I'm not terrible impressed currently with the mechanical setup.
As a side note, when driving the Civic, I shift at 4k (around the same point as the 7). Still got wasted by an old dude driving a Santa Fe...people must be redlining their cars more than I'd think? I'm only mentioning this as I want to gauge my performance, in the real world, if that makes sense. There's a dyno nearby and when I have some $ I'd like to get a baseline.
Oh I got some col electrical goodies in the mail today:

A Before Pic:
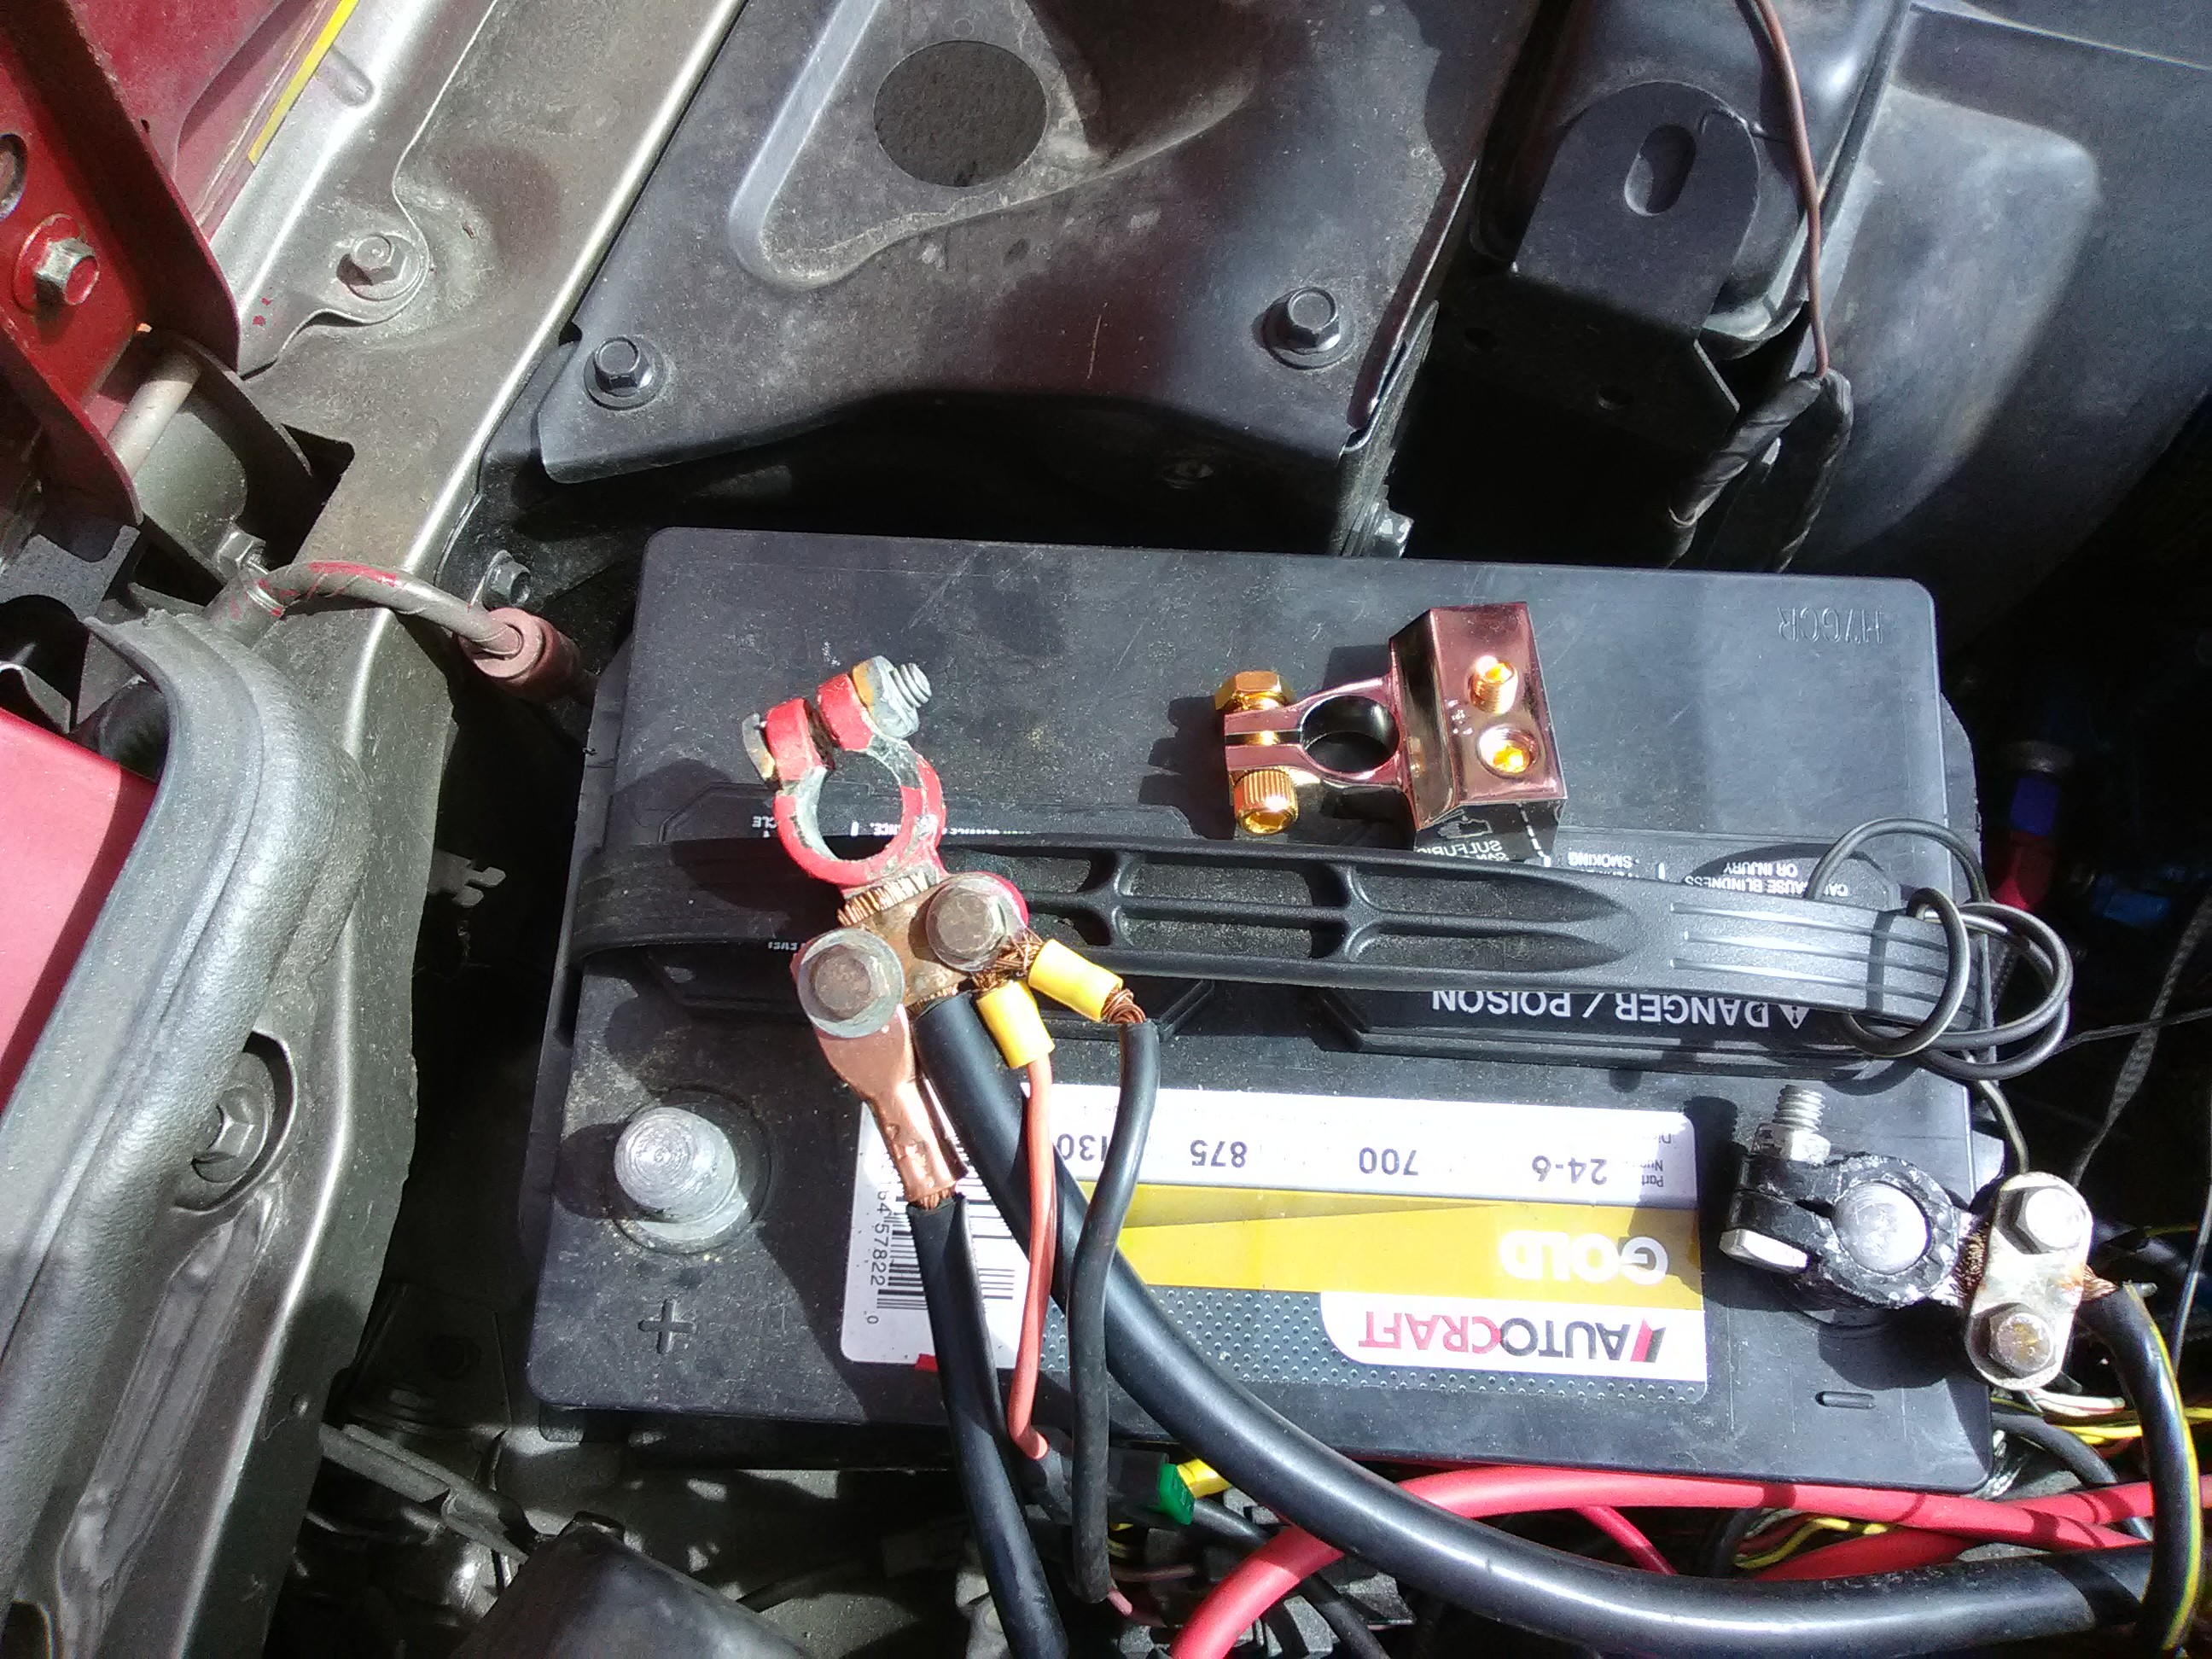
Job so far, cleaner wiring all around. Still can't figure a clean setup for the ignitors...

Re: spring cutting
I agree, cutting the spring, whether it's the one I the vacuum actuator or secondary throttle shaft is only going to make it more difficult to open the secondaries under vacuum. You would have to wind your own spring for the secondary shaft or find a way to grind some material off the coils to weaken it.
Re: shifting
Why do you have a rotary if you are shifting at 4K? That's about where i shift when I'm behind slow moving traffic. At wide open throttle, ring it out to redline. A redline a day keeps the carbon away.
Re: battery terminals
I do not approve of set-screw style terminals. What you had before was fine. Thick gauge crimp on terminals that require a hammer to crimp provide a much better contact surface that won't wiggle free from vibration.
Thread Starter
Full Member
Joined: May 2016
Posts: 226
Likes: 0
From: Denver
I'm going to leave the spring alone for now.
Loc-tite on the terminals should provide insurance, no?
I guess that's where I was used to shifting? Also, this thing is loud, may need more muffling, especially when there's 2 cops behind you lmao.
I think I had a fuel clog happen today. After a few high RPM sprints, I had a super lean ratio and the car pretty much died. I pulled over, and it's fine. Went to check my fuel pressure gauge and it says '0'! I shut it off, turned it on, fuel pressure's fine, and the pump sounds ok. I don't remember seeing a sock on the fuel inlet tube when I pulled the sending unit apparatus, so I don't think that's a problem. May pull the fuel filter, cut it open and replace it.
Something I still don't understand, is that as I go up in the RPM range, I get richer!? Shouldn't a ported motor tend to run lean as compared to a factory one? Opening the secondaries is ultra rich. Should I drop my secondary fuel jets down a few sizes? I haven't touched the secondary air bleeds either.


One of the issues with battery terminal like those is that the screw only has a single small area of clumping and it deforms the wire in that area. The more it's tightened, the worse the clamping can be because it spreads out the strands. Either use a premade cable, one that you solder, or a true clamped one that uses a clamping tool. I like using the pre-made battery cables from Tractor Supply.
Thread Starter
Full Member
Joined: May 2016
Posts: 226
Likes: 0
From: Denver
Nice tool, thanks for the link Chuyler. Will look into it. Might shove some copper into the holes, so that the set-screw has something to press against more evenly.
I swapped the 75-90 Valvoline gear lube for Lucas 75-90 stuff, and wow, what a difference, the trans is much quieter, and shifts very smoothly.
I also replaced the crappy gas cap with a proper one, that fits right and seals. Now I don't leak fuel on hard turns lol, and oddly my fuel pump is noticeably quieter!?
Managed to inspect my secondary linkage and realized whoever had done it before, had basically done it wrong. Now the secondaries move in unison with the primaries, rather than just starting to move after the primaries are 80% open. It's just wire-tied this way so I can reverse it. Also swapped the 160 secondary fuel jets for some spare 120's for a start. I'm at 5280, so I need to be ~10% lean from sealevel jetting.
Although this car wasn't as fast as I'd hoped (so far) the handling is spectacular! It reminds me very much of my old BB6 Prelude, if not better.
Thread Starter
Full Member
Joined: May 2016
Posts: 226
Likes: 0
From: Denver
Holy *&$%! This car is amazing now! I finally understand what you all were talking about secondaries and 'transcendent experience'. It's basically a normal car under light throttle, and around 3k it turns into a race car. Absolute night and day difference between what I had before and now. If I could figure a way to take a video I would. I'm so happy to finally have a rotary that feels like a rotary! If I had to guess I'm hitting 60 in about 6 seconds shifting at about 6500. No longer does this car have any trouble keeping up with traffic lmao. It has now officially made my civic feel slow.
As a quick recap, I've got 24mm over bored primaries and stock size secondaries with profiled entry. Primary fuel jets are 110s with 120 air bleeds. Secondary air bleeds are stock and fuel is 120's. There's a tiny hiccup when the secondaries open but it's very transitory. Under acceleration afr's are in the low 12's high 11's. Cruise is in the mid 13's.
As a quick recap, I've got 24mm over bored primaries and stock size secondaries with profiled entry. Primary fuel jets are 110s with 120 air bleeds. Secondary air bleeds are stock and fuel is 120's. There's a tiny hiccup when the secondaries open but it's very transitory. Under acceleration afr's are in the low 12's high 11's. Cruise is in the mid 13's.
Nice! You're in fat Nikki territory right now.
Though if I could interject my opinion and critique your setup, the reason the secondaries are such a transcendent experience, is because your primaries aren't quite pulling their weight. Let that sink in for a moment. It means there is still potential locked up inside your carb waiting for you to unlock it, but the Nikki does not give up its secrets easily. But that is for another day and time. For now, enjoy the experience!
Once your primaries are powerful enough that the secondaries no longer feel like a transcendent experience, and would need to be enlarged themselves in order to get it back, I could welcome you to the monster Nikki family.
Thread Starter
Full Member
Joined: May 2016
Posts: 226
Likes: 0
From: Denver
Thanks Jeff20B! I found out why there was a such a dramatic difference...the primaries were only 1/4 of the way open before the secondaries were 1/2 way open! I was basically running on the secondaries.
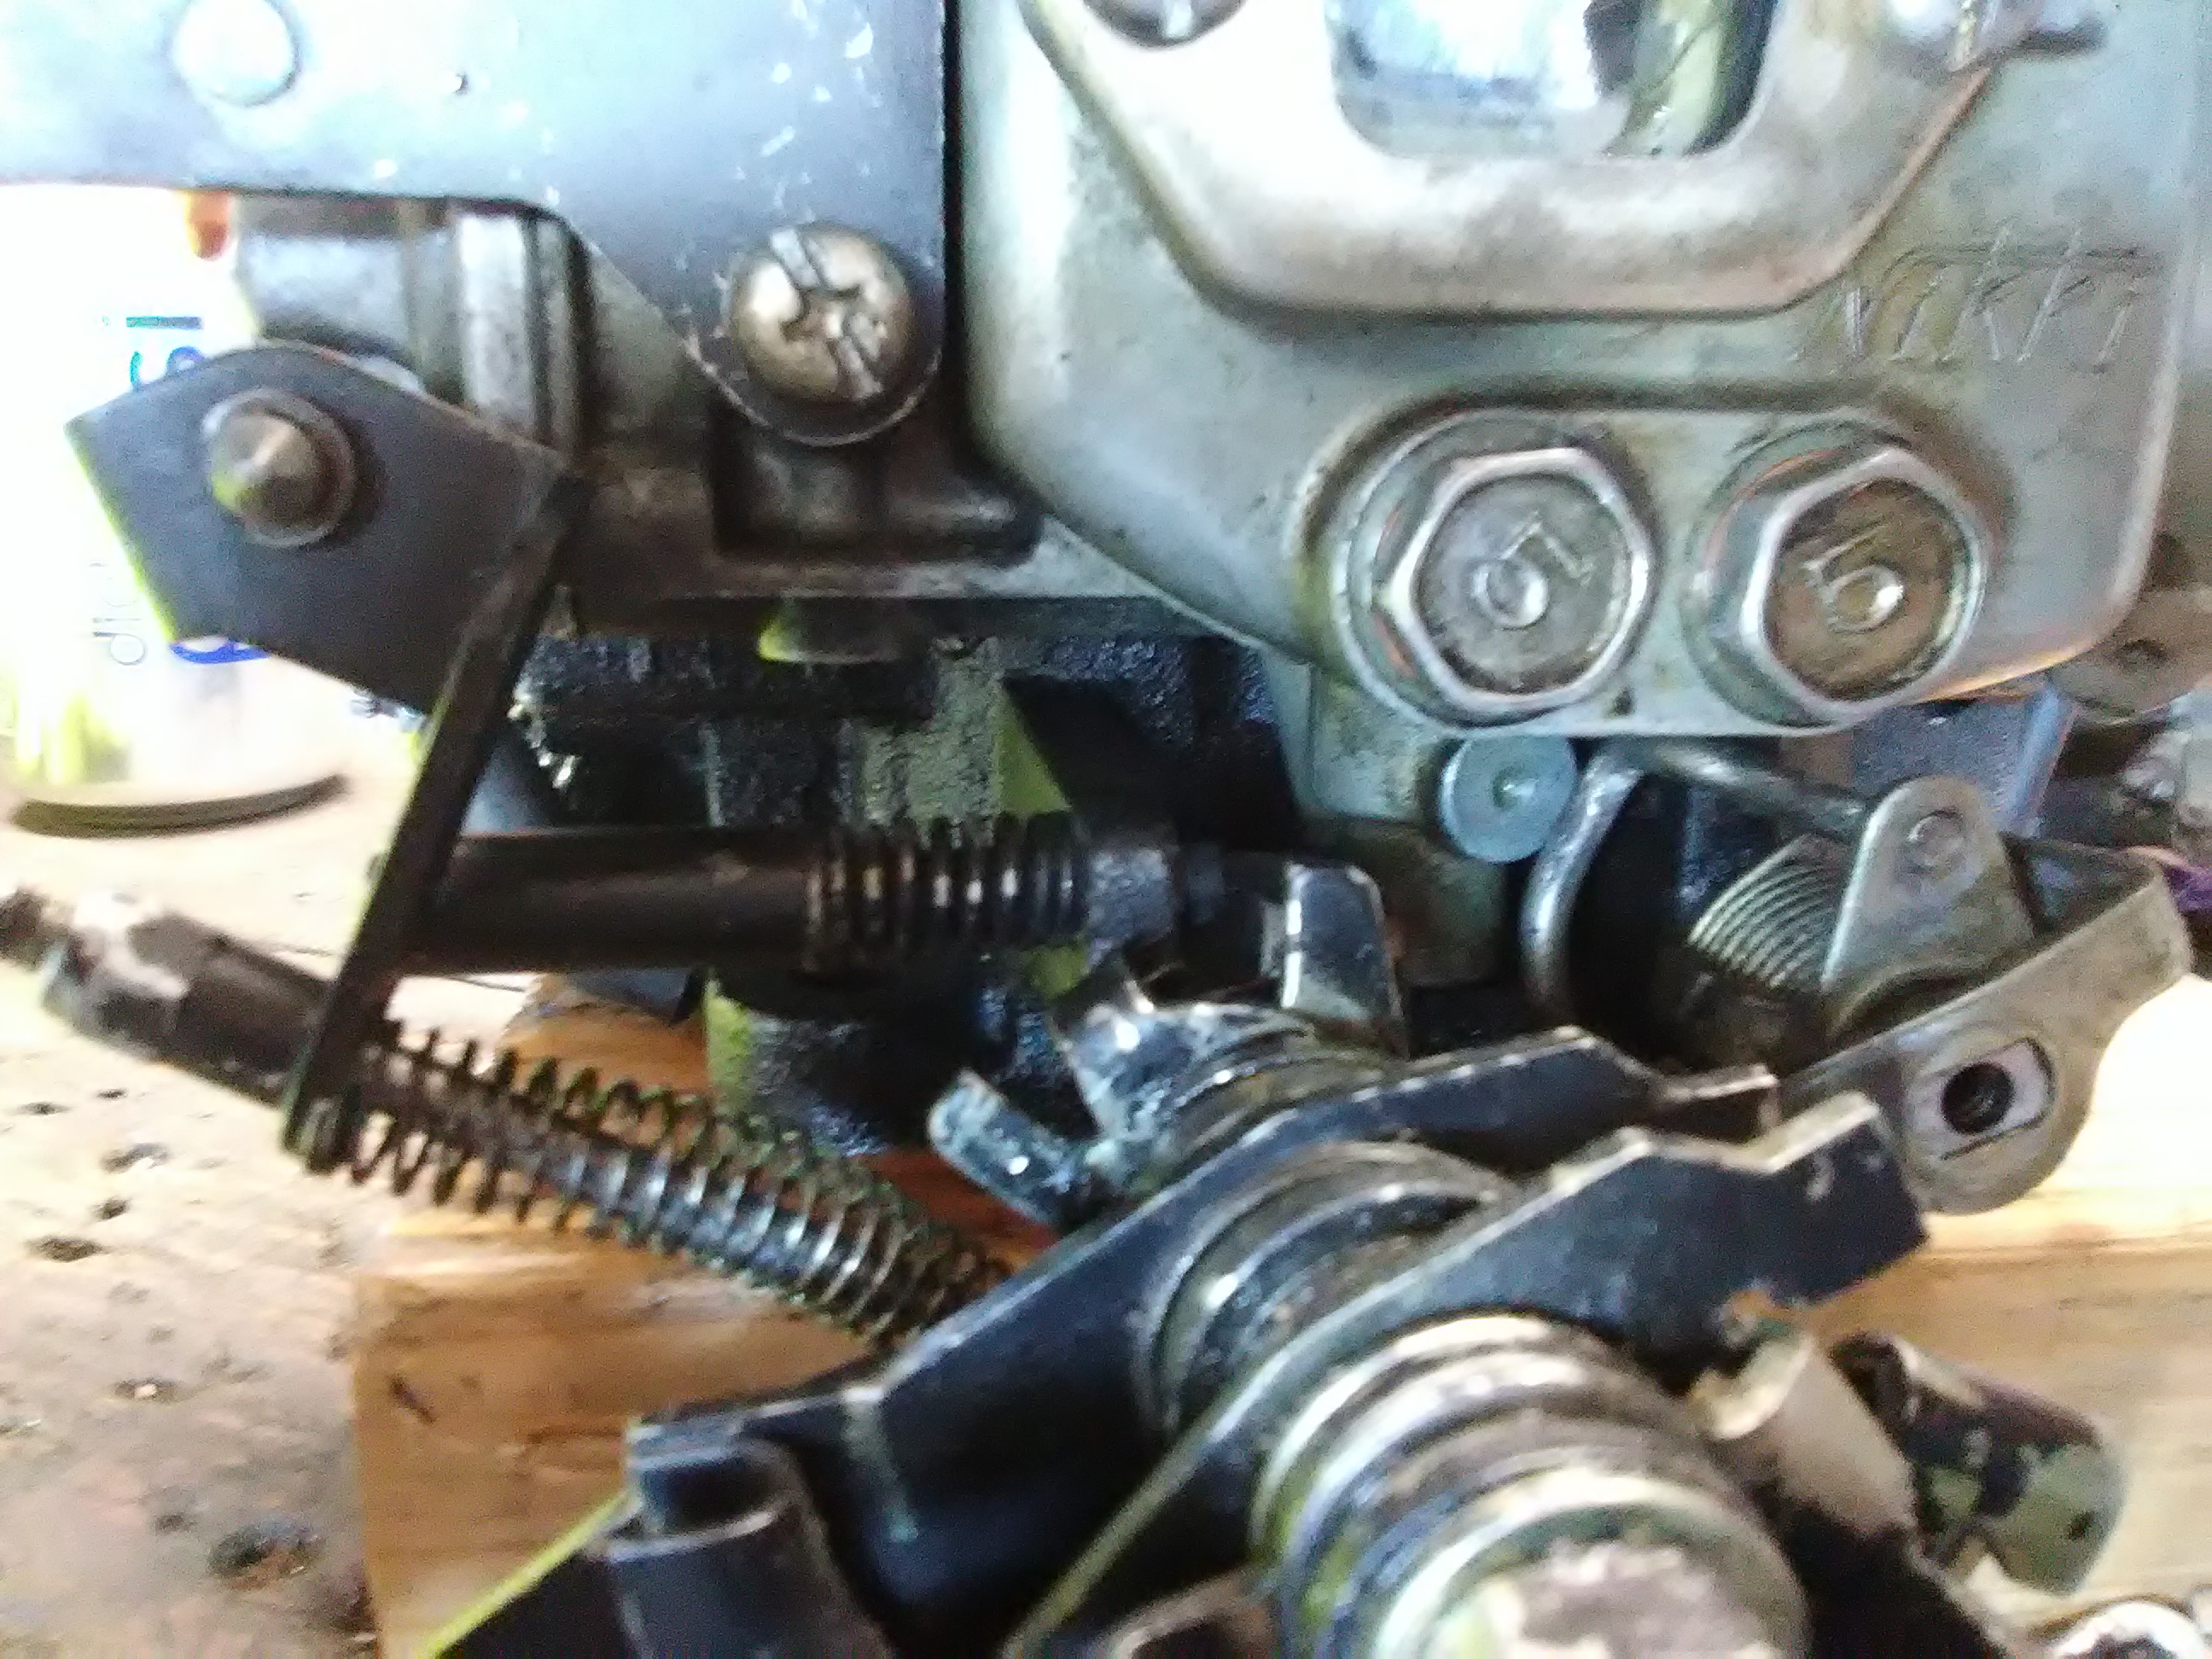
So back to square 1, sorta. I think the trick is to get the secondaries to open when I want them to open, right? I figured ~50% primary open is when I wan the secondaries to start opening. But how to do this? Ah, the linkage rod, it's bendable! If I move the two ends of the rod closer together that effectively shortens it, and makes the secondaries engage earlier relative to the primary travel! The factory linkage is roughly 29mm center to center, of the rod ends. With some care bending mine is now about 24mm center to center. I don't think you can go any closer than this as you start to hit the secondary spring and other linkage bits if the bend is too radical.
Here's what the new linkage position looks like:
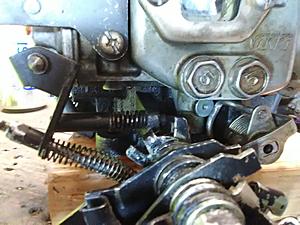
As you can see, compared to the stock linkage, the little tab that moves the rod that opens the secondaries, is much closer to the part that engages it on the primaries. Normally it's all the way to the right of the space, and here it's about 1/2 way in between. I don't know the exact words for these parts, otherwise I'd use them, but use your imagination if you have to.
As it's set up now, the secondaries start to move at about 50% to 60% open of the primaries, and fully open at the same time as the primaries. You still get a little bit of a kick, but the car idles smoother, and has better low end and is easier to start!
Also managed to do the first oil change since the rebuild. Plenty dirty, but no sparkles so I think I'm good.
So back to square 1, sorta. I think the trick is to get the secondaries to open when I want them to open, right? I figured ~50% primary open is when I wan the secondaries to start opening. But how to do this? Ah, the linkage rod, it's bendable! If I move the two ends of the rod closer together that effectively shortens it, and makes the secondaries engage earlier relative to the primary travel! The factory linkage is roughly 29mm center to center, of the rod ends. With some care bending mine is now about 24mm center to center. I don't think you can go any closer than this as you start to hit the secondary spring and other linkage bits if the bend is too radical.
Here's what the new linkage position looks like:
As you can see, compared to the stock linkage, the little tab that moves the rod that opens the secondaries, is much closer to the part that engages it on the primaries. Normally it's all the way to the right of the space, and here it's about 1/2 way in between. I don't know the exact words for these parts, otherwise I'd use them, but use your imagination if you have to.
As it's set up now, the secondaries start to move at about 50% to 60% open of the primaries, and fully open at the same time as the primaries. You still get a little bit of a kick, but the car idles smoother, and has better low end and is easier to start!
Also managed to do the first oil change since the rebuild. Plenty dirty, but no sparkles so I think I'm good.
Thread Starter
Full Member
Joined: May 2016
Posts: 226
Likes: 0
From: Denver
Good news and bad news.
Good
The Federal SS 595's seem to do just fine in the wet and rain! I'm really surprised, as I expected a nightmare, but even when trying to break the rears loose a little, I had no noticible loss of traction. As lon as you drive like a sane human being, they're ok in the wet.
I've finally got the carb right about where I want it. I'm idling around 1k, and 14.5:1. It doesn't overheat. Under load, towards red line I'm in the 12's. highway cruise in the 13's. I could probably go leaner, but I like a safety margin. Gas mileage is for civics.
Bad
The trans is whining louder now. It's pretty much constant with the clutch engaged. Louder when decelerating. It sounds like a ball bearing rolling around a steel drum. Goes away when clutch depressed or in neutral. Assumed bearings are bad in trans...crap. Looking at doing a rebuild?
Before you drop the transmission for a rebuild, at least try some fresh fluid. That was one of the first things I had to do to my car because once that old fluid warmed up shifting got real sticky. I too have a bit of noise decelerating, but I just chalked that up to being an old car.
Thread Starter
Full Member
Joined: May 2016
Posts: 226
Likes: 0
From: Denver
Hmm, that was the first thing I did, went from Valvoline 75-90 wt, to Lucas MTF (can't remember the weight atm). It made shifting much smoother (yay) but the noise is still there and now worse.
This car is Loud, and I can still hear the trans noise which means it's really loud. Something is definitely mechanically wrong. If I'm going to rebuild this thing, I need to find out what version I have and I assume I won't know until I drop the trans and measure some stuff?
This car is Loud, and I can still hear the trans noise which means it's really loud. Something is definitely mechanically wrong. If I'm going to rebuild this thing, I need to find out what version I have and I assume I won't know until I drop the trans and measure some stuff?
Thread Starter
Full Member
Joined: May 2016
Posts: 226
Likes: 0
From: Denver

Mainshaft extended out

Mainshaft compressed

Cluster on the bench
So the trans is out! I got it all pulled apart down to the cluster. Not as easy as I hoped but not terrible either.
So I read that there's different rebuild kits, but how do I go about determining which one I need?
I noticed that in certain gears the trans sounds 'unhappy', vs other gears it sounds smooth. But I don't see anything obvious like damaged teeth when I'm turning it.
Also noticed on tear down that I don't have any shims under the cover that's inside of the bellhousing?! Shouldn't they be there to prevent the mainshaft from moving?

Nice!
Did you use a special puller to get it apart? I couldn't get the bell houseing off mine so I used a rubber mallet to persuade it loose and then separated enough to get sealant on the housing joints... I didn't need to open mine up for any specific reason other than to reseal the housing sections. The transmission manual referenced a specific puller and some other specific tools I don't have. Was wondeirng if there is another way to pull it all apart without them?
Did you use a special puller to get it apart? I couldn't get the bell houseing off mine so I used a rubber mallet to persuade it loose and then separated enough to get sealant on the housing joints... I didn't need to open mine up for any specific reason other than to reseal the housing sections. The transmission manual referenced a specific puller and some other specific tools I don't have. Was wondeirng if there is another way to pull it all apart without them?
Thread Starter
Full Member
Joined: May 2016
Posts: 226
Likes: 0
From: Denver
I didn't use anything special to get it apart. The silicon was pretty much shot (1993 rebuild date) between the bell housing and the intermediate plate thing. Just a little persuasion with a block of wood and little hammer. Then some light prying with a thin metal blade. The side I had been into, the tailshaft, required me to kick it...gently.
Yeah I'll have to build a puller from some all-thread and 1/8th plate. Not sure about the socket yet. I wonder why a wrench wouldn't work?
I noticed the input shaft flops around, is it supposed to do that? Do you have a link to a good factory manual for the trans?
Still not finding much about the shims, as mine are missing, and no one seems to have them.
Yes, there is a manual. I found mine online and bought it on eBay. There's one listed now, but it's kinda expensive... I didn't pay that much. Here's what it looks like:

It says this about the shims under the front cover:

I don't know where you can find those shims; however, the part numbers are in the picture above. Maybe someone on here knows if they are the same for other model years (fb, fc, etc.)? Some Mazda dealers still sell parts for early FCs that still fit, like Jim Ellis Mazda in ATL. Their website for parts is pretty good for searching, if you have a part number, or a description of the part. They load up exploded view diagrams of assemblies that show the part numbers and parts. You might get lucky...
As for the input shaft, the manual calls that the control rod which the gearshift lever engages, yes it is supposed to be a bit loose, until you install it into the tailshaft and then install the tailshaft onto the transmission It has a foot on the end of it that engages the shift rod ends on the gear shafts, kinda like this:


Hope that helps!
Last edited by woodmv; May 4, 2018 at 07:31 AM. Reason: Clarify response is for SA
Thread Starter
Full Member
Joined: May 2016
Posts: 226
Likes: 0
From: Denver
Hey guys, sorry for the long radio silence, I've just been busy!
My daily got hit, while picking up a spare trans for the 7. See I dropped off the trans at a shop and they're saying the hardness on the input shaft is flaking away and the shaft is likely to fail. I'm no expert on this stuff, but on the plus side, the whole trans was disassembled, and I could see the tiny fractures. The shop wanted $300+ to continue, and with a messed up daily, I couldn't afford it so I grabbed the parts and went home. I apologized to the shop, but what else could I do?
Damn cell phones...they'll be the death of our society...Guy who hit me was doing 50 when he hit 2 cars behind me and messed up my civic. Sigh...now I'm putting the low mile trans I picked up into the 7 without a proper rebuild. I know that's asking for trouble, but I need a car I can drive while I get the civic fixed. Oh and I miss that Rotary sound!
SO I've got the car up on stands, and I'm having a heck of a time trying to lift the trans while on my belly. I assume a jack would make this a helluva lot easier, but I'm also going to have to recruit some help to operate the jack while trying to get the input shaft lined up. If I get it back together I'll let you guys know.
Oh and on the plus side, I go the Starion to fire up!
SO I've got the car up on stands, and I'm having a heck of a time trying to lift the trans while on my belly. I assume a jack would make this a helluva lot easier, but I'm also going to have to recruit some help to operate the jack while trying to get the input shaft lined up. If I get it back together I'll let you guys know.!
Thread Starter
Full Member
Joined: May 2016
Posts: 226
Likes: 0
From: Denver
The car moves again! Yay! I missed that rotary sound so damn much (no offense to my erstwhile EG).
Just took getting the engine level, relative to the car, and the trans slid right in.
Oh and a word of advise, ALWAYS remove the drain and fill plugs when you have the trans out. My fill plug was installed by the Hulk, and took removing the starter again and about an hour of cursing and hammering to get loose. Oh and if you have the time (I didn't) pull the bellhousing, and tailshaft and apply new sealant to the case while you're at it.
Of course the body of the case is leaking now...which as you can guess means I need to pull it, but that can wait for another day. Would one of those stop-leak sorts of products help?
The trans is smooth, and for the first time I took the car up to the 7k redline and it was awesome! The car gets lots of looks and almost everyone wants to race, yes even that guy in the Pontiac Vibe...
Ah, one more thing, ever notice how most of these cars have the lower shift boot thing ripped/destroyed? Well I bit of fiberglass insulation jammed in there does wonders for sound and heat. I'm going to put some insulation around the trans tunnel tomorrow, something called Reflexctix.
I also realized the car is not really live-able in CO summers with the 90+ days we have. So I'm busy refurbishing my AC. My condenser is shot, so I think I'll go with a generic: https://www.ebay.com/p/A-C-Condenser...3234307&chn=ps It looks like it will fit, despite being larger than the old one. Anyone have good experience with condenser replacement?
Last edited by Repuguy; May 27, 2018 at 08:58 PM.
The oe condenser is a pretty snug fit, but for $60 it might be worth a shot. They don't have one a bit smaller?
Line lock crimp tools are expensive, but the best way to do the job; rather than going back and forth between home and the line makers shop.
Line lock crimp tools are expensive, but the best way to do the job; rather than going back and forth between home and the line makers shop.
Thread Starter
Full Member
Joined: May 2016
Posts: 226
Likes: 0
From: Denver
I measured the size of the Condenser in mine, plus the width of the brackets. The new one is just about the same size. I happen to have the Sanden US version, not JDM sort of compressor. It has standard style fittings. I'm also thinking that since these are flare fittings, couldn't I just use an adapter, worst come to worst? I still have all the lines off my old setup, I only had the condenser fail. That being said, if I do have to have lines made I know a good shop, local Pirtek, who can make just about anything I might need. I think mocking up line with heater hose or the like and then having pieces made would make sense.
Of course I can't seem to locate the 'relay' that's supposed to be connected to the Yellow and Blue wires mentioned in the dealer installation manual from foxed.ca
I'll know better what's up once I start hooking things up.
Of course I can't seem to locate the 'relay' that's supposed to be connected to the Yellow and Blue wires mentioned in the dealer installation manual from foxed.ca
I'll know better what's up once I start hooking things up.
Thread Starter
Full Member
Joined: May 2016
Posts: 226
Likes: 0
From: Denver

Relay Spaghetti

3.8 on top, 3.0 lower
Aha, progress! I went after a Ford Taurus Electric fan. It's almost perfect size for the Smaller 82-earlier radiator. The whole thing cost me $17.
Why do I have an electric fan? Because I want to run AC, get rid of the ugly/noisy mechanical one, and hopefully free up some HP.
Here's a pic comparing the 3.0 to the 3.8 fan. The 3.8 is the leftmost one. Interestingly the 3.0 is a replacement, and has circuit breakers.
I've got a temperature sensing relay thingy, but it's only rated at 30 amps. Not nearly enough for this fan from what I read. So I'm going to use the temp-relay's main output to run a secondary relay rated at 40 amps, on the fan's low speed. Then the AC trigger for the temp relay to turn on the secondary relay, 75 amps, to trigger the High speed setting on the Taurus fan. I know 75 amps is overkill, but it was a free relay.
I know it all looks like spaghetti now, but it's all getting soldered together and will be wrapped up.
Does anyone know if I'm running both relays (Fan speeds) at once, if that would burn up the fan's windings?
The AC condenser is bigger than I thought! It'll need to be mounted similar to how the grill would be, tilted forward, but should provide impressive cooling. That's this weekend's project, along with oil change and tefloning the block's oil feed to the cooler.