
8.8 swap attempt

Thread Starter
Rotary Enthusiast
Joined: Aug 2006
Posts: 1,216
Likes: 10
From: Melbourne FL/San Antonio TX/Okinawa Japan
8.8 swap attempt
Starting my 8.8 rearend out of a 96 Explorer. 3.73 gear with LSD. Door code was D4.
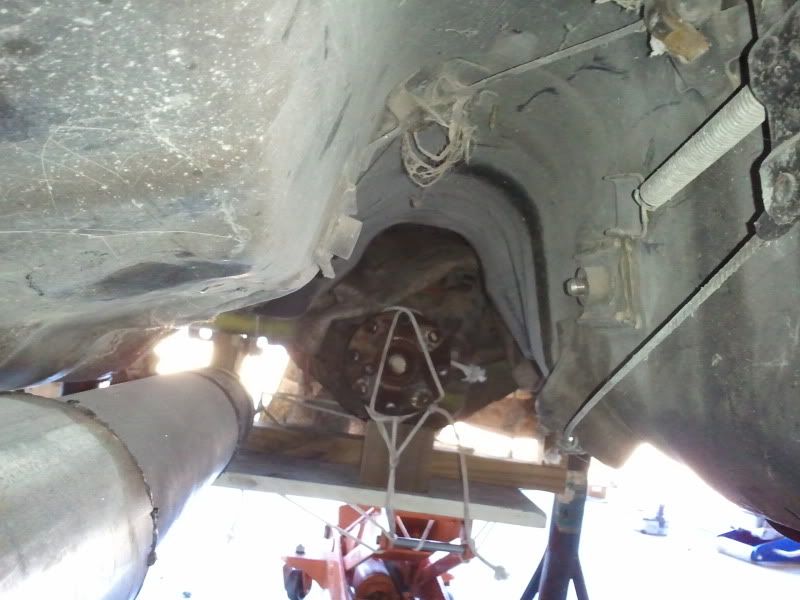
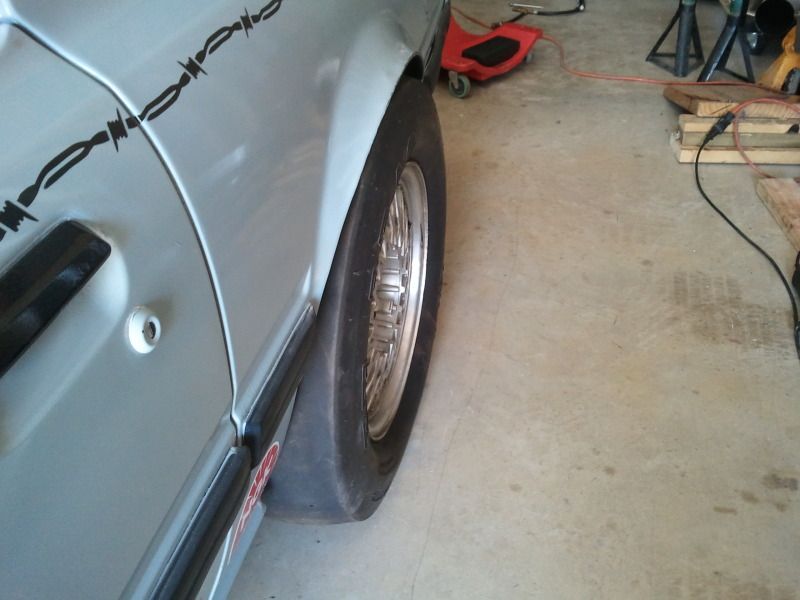
Test fitted the rearend under the car with 5 lug mustang wheels. Looks like the mounting section of the wheel will have to be shaved 3/8 of a inch for the wheel/tire to fit under the stock fenders. Tires are 26/10.5/16 ET streets.
With the Explorer axle it looks like the pinion is offset to far to the right side of the tunnel. Narrowing the left axle two inches would center the pinion in the tunnel perfect. This would also allow for less offset wheels. ( curent wheels are 5.5 offset but need to be 6" ) Staying with the stock axle length and making adjustment with the wheel offset. It does look like the tunnel will have to be modified on the passenger side for the drive shaft. BFH adjustment.
Staying with the 3.73 gear with 26" tires for now. Have run 4.10 gear with 28" tall tires with good performance.
Will try to post progress photos as the project continues.
Thread Starter
Rotary Enthusiast
Joined: Aug 2006
Posts: 1,216
Likes: 10
From: Melbourne FL/San Antonio TX/Okinawa Japan
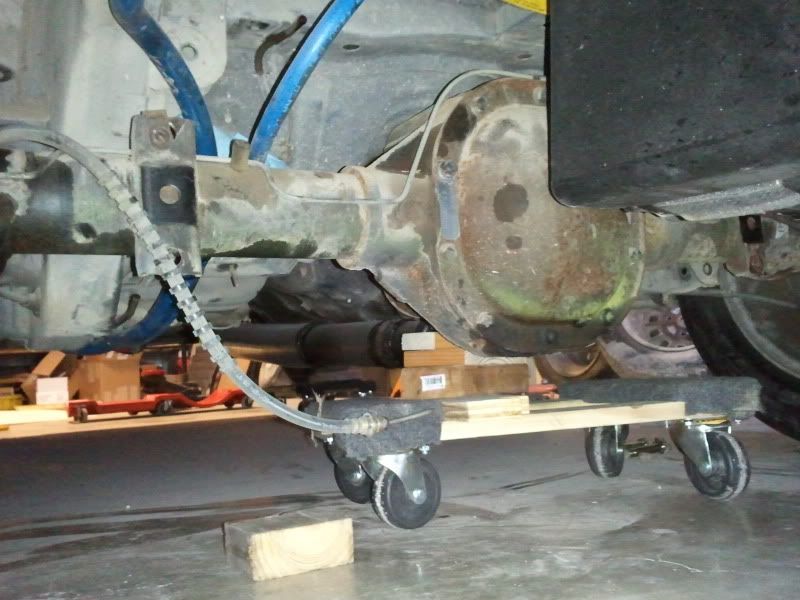
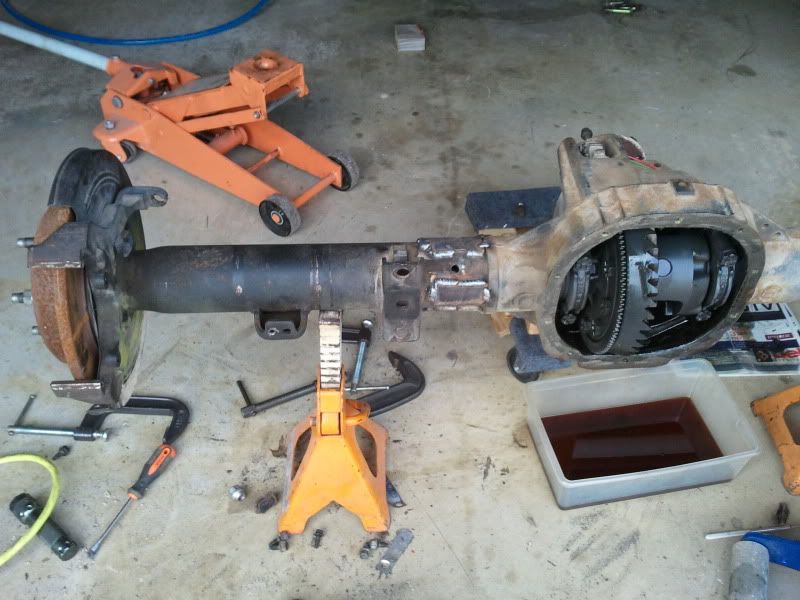
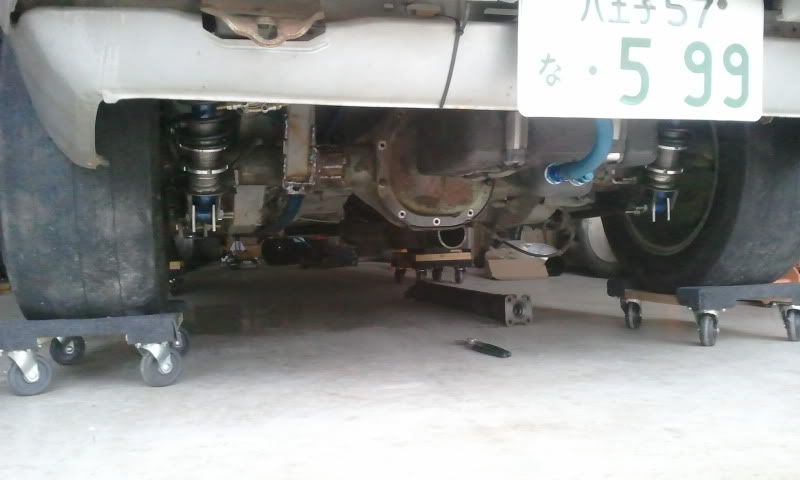
Ended up narrowing the drivers side axle tube to accept a stock passenger side axle. Total 3 inches shorter.
Now the pinion sets perfect in the trans tunnel.
Now the pinion sets perfect in the trans tunnel.
Thread Starter
Rotary Enthusiast
Joined: Aug 2006
Posts: 1,216
Likes: 10
From: Melbourne FL/San Antonio TX/Okinawa Japan
Drivers side axle tube is 20 inches long
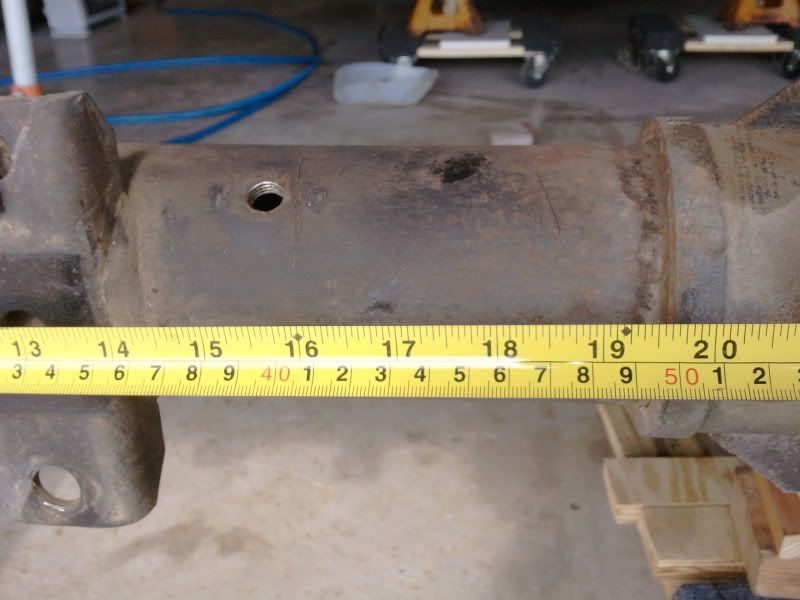
Passenger side axle tube is 17 inches long

I used a large pipe cutter to make sure the cut was strait. Yes it was allot of work but was more confident making a strait cut with the pipe cutter then my chop saw.
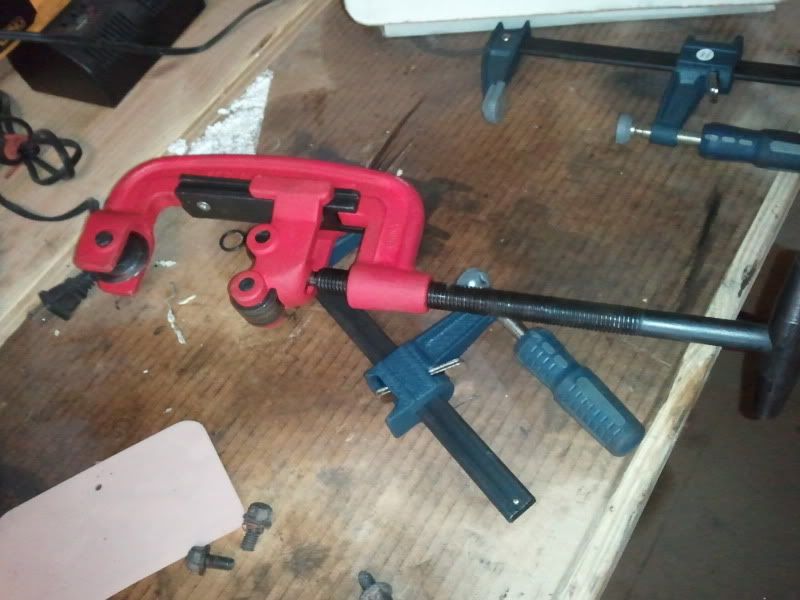
Three inches was removed from the drivers side axle tube. To help with alignment, the removed section of tube was cut in section and clamped over the axle tube. A axle was installed to also help with alignment.
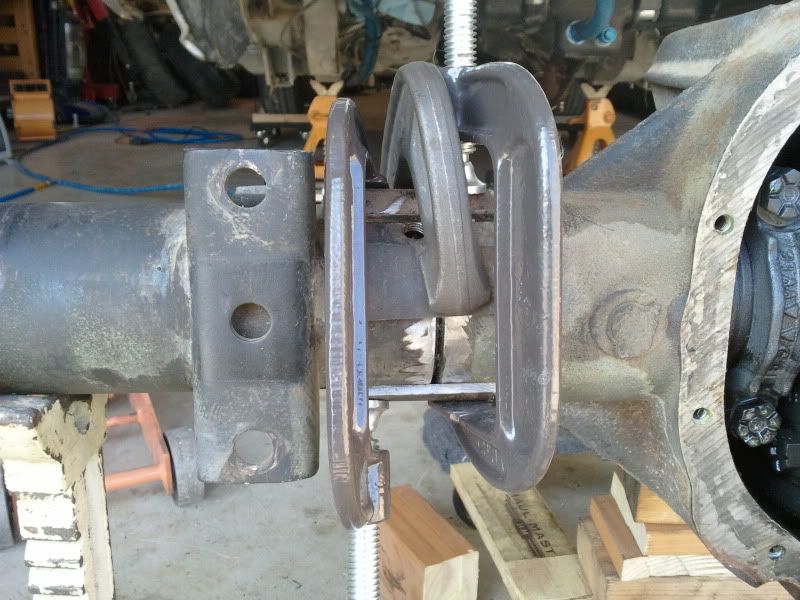
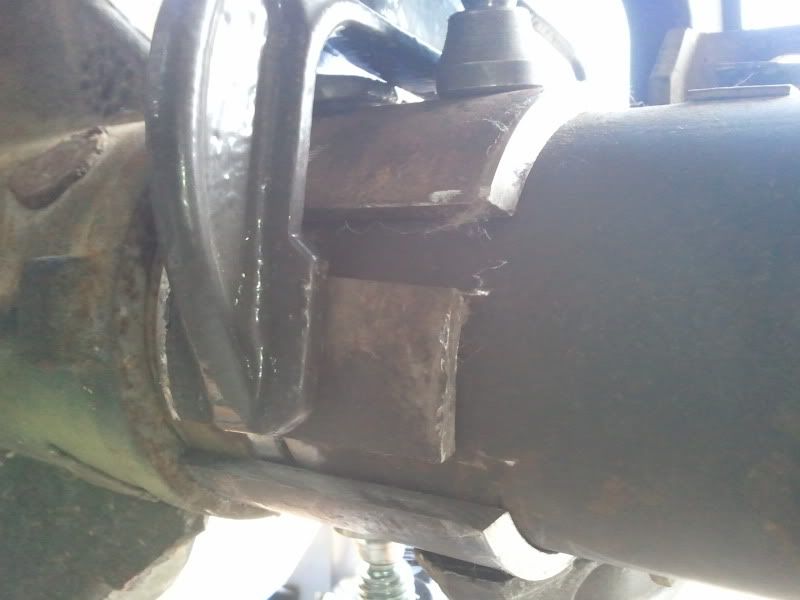
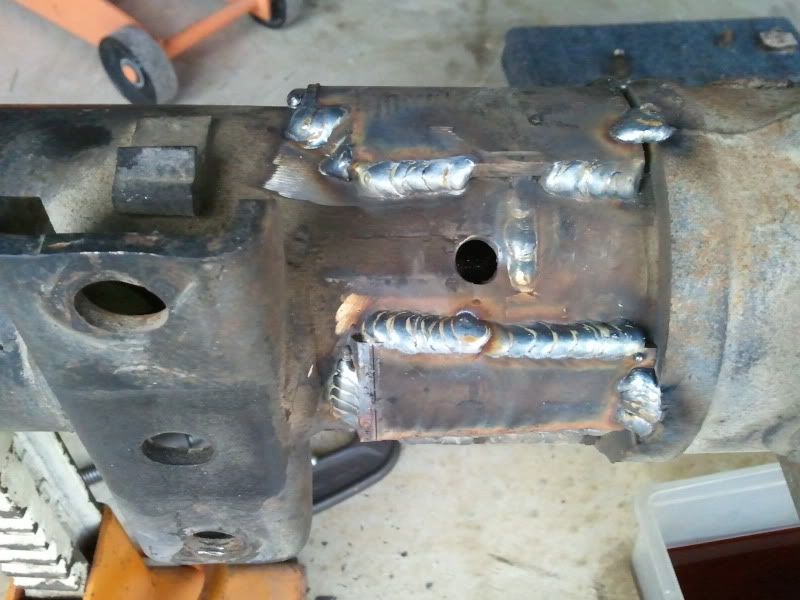
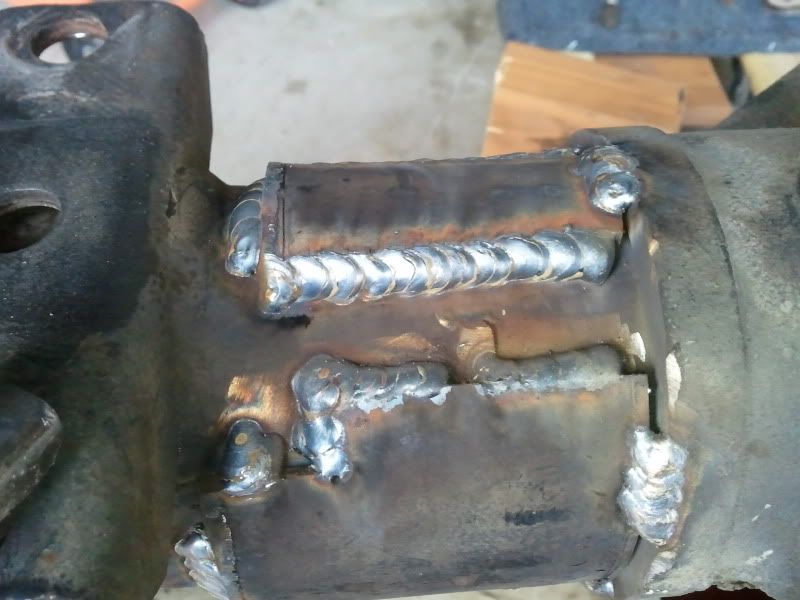
Weld the tubes to together then use the "alignment tools" and weld them on to help strengthen the axle.
Pic of the difference between 28 and 31 spine axles.
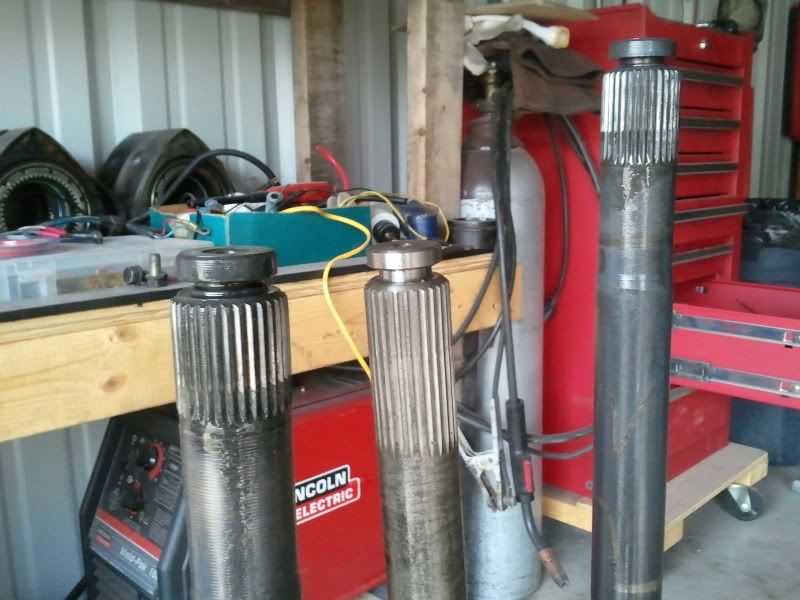
This is my first time trying this and know there are other better ways of doing this to ensure the axle is strait in the rear end housing.
Welded with a 110 Lincoln mig welder
Passenger side axle tube is 17 inches long
I used a large pipe cutter to make sure the cut was strait. Yes it was allot of work but was more confident making a strait cut with the pipe cutter then my chop saw.
Three inches was removed from the drivers side axle tube. To help with alignment, the removed section of tube was cut in section and clamped over the axle tube. A axle was installed to also help with alignment.
Weld the tubes to together then use the "alignment tools" and weld them on to help strengthen the axle.
Pic of the difference between 28 and 31 spine axles.
This is my first time trying this and know there are other better ways of doing this to ensure the axle is strait in the rear end housing.
Welded with a 110 Lincoln mig welder
Thread Starter
Rotary Enthusiast
Joined: Aug 2006
Posts: 1,216
Likes: 10
From: Melbourne FL/San Antonio TX/Okinawa Japan
If doing it over or again= I would cut as close to the outer bearing as possible. If the axle alignment is off, it would not be as bad closer to the end of the axle tube. The cut was made close to the diff cause I was planning to use the stock mounting tabs. It turns out the stock mounting tabs are not going to be used.
Trending Topics
Thread Starter
Rotary Enthusiast
Joined: Aug 2006
Posts: 1,216
Likes: 10
From: Melbourne FL/San Antonio TX/Okinawa Japan
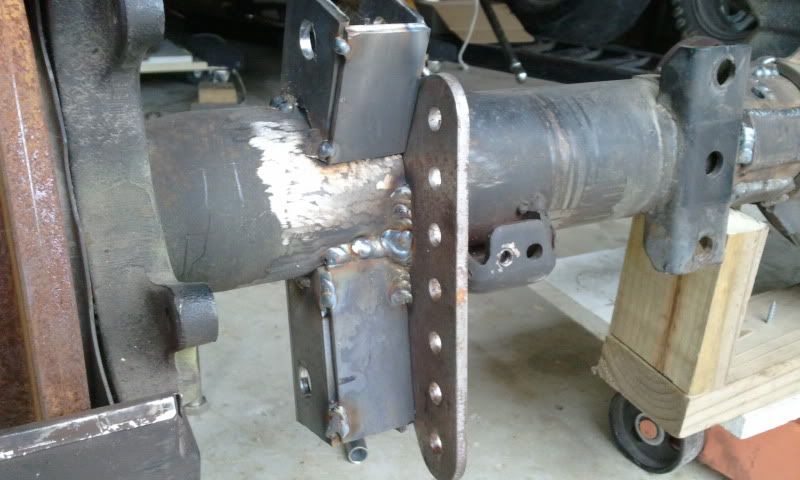
Goto finish welding and rounding off the corners for a better look.
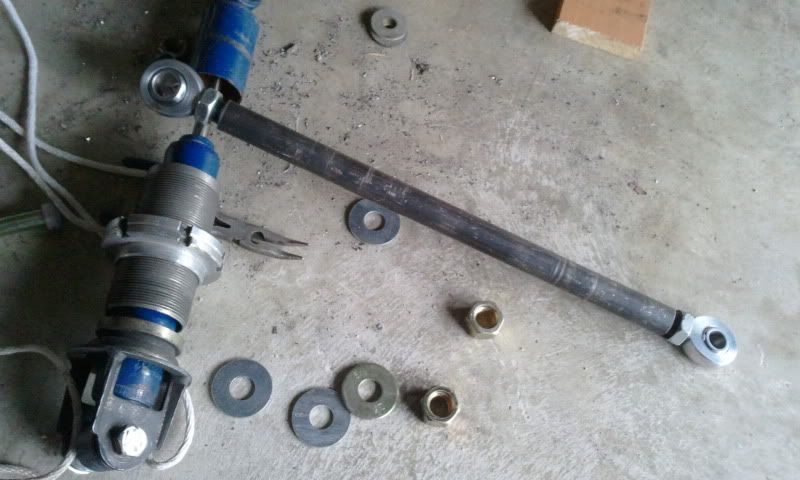
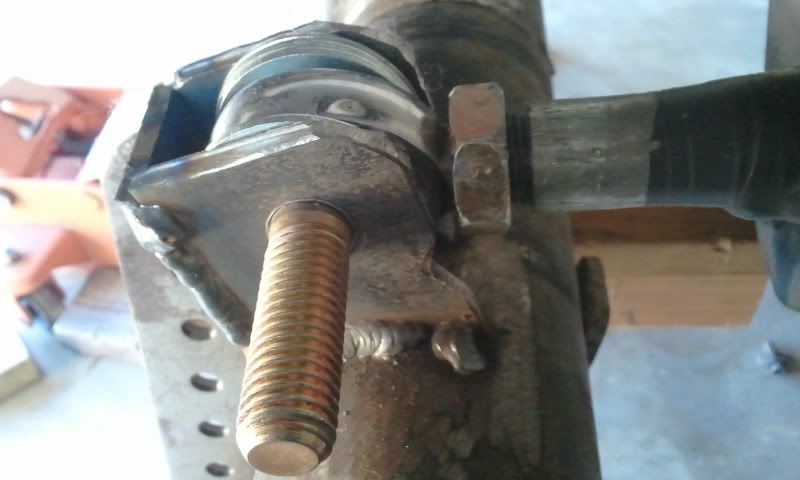
Using the stock mounting points on the chassis. Enlarged the hole to 3/4. Axle tube holes are 5/8. Heim joints. Making my own rods from 1 inch OD and 3/4 ID heavy wall tubing. post pics later today.
Thread Starter
Rotary Enthusiast
Joined: Aug 2006
Posts: 1,216
Likes: 10
From: Melbourne FL/San Antonio TX/Okinawa Japan
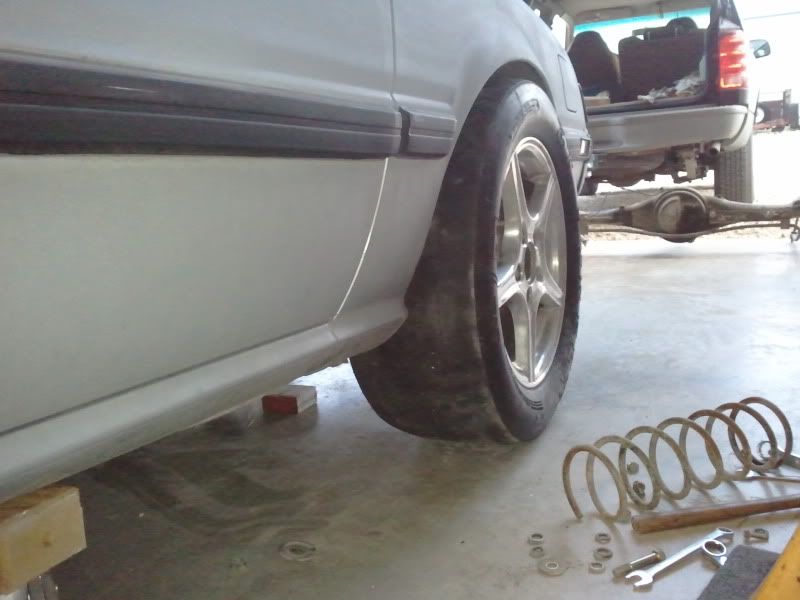
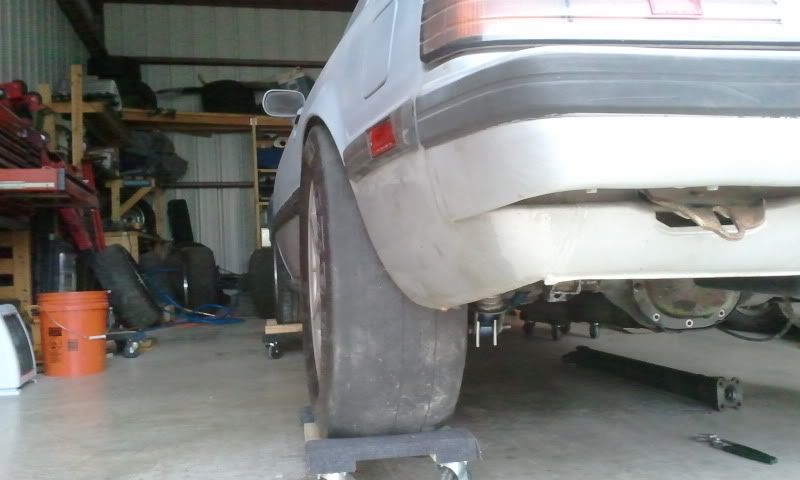
Almost done. With 3 inches cut out of the drivers side and one inch wheel spacers added to both ends the tires fit perfect. 16x8x5.5 backspace with 26x10.5x16 ETstreets.
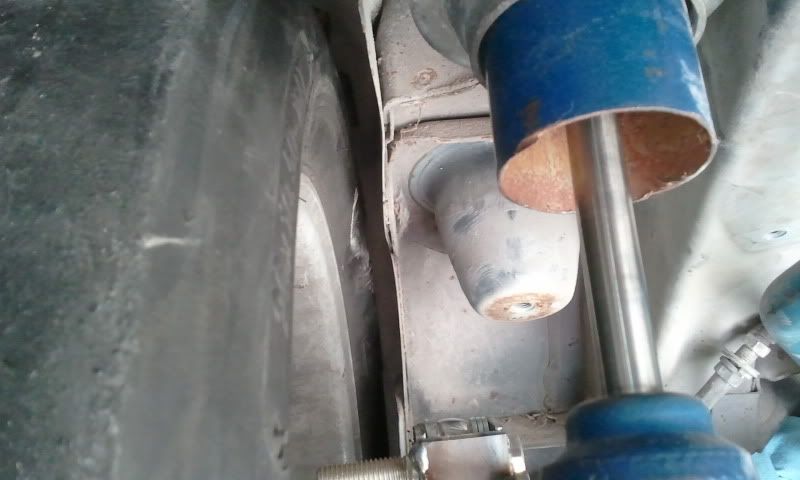
Mounted the upper pan hard bar bracket to the passenger side frame rail.
Springs are from a FC cut and modified to fit. The coilover adjusters are from a honda civic. Shocks are monroe's
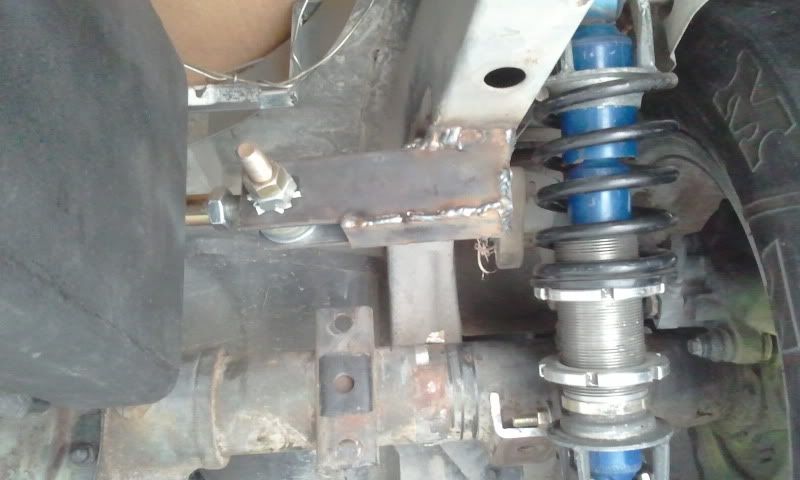
Mounted the upper pan hard bar bracket to the passenger side frame rail.
Springs are from a FC cut and modified to fit. The coilover adjusters are from a honda civic. Shocks are monroe's
Nice work. Some good innovation going on here. How did you meausre the left to right and front to back placement of the rear? Or did you just eye ball it all with the tires installed?
What was the over all length from brake rotor face to face?
What was the over all length from brake rotor face to face?
Thread Starter
Rotary Enthusiast
Joined: Aug 2006
Posts: 1,216
Likes: 10
From: Melbourne FL/San Antonio TX/Okinawa Japan
56.5 from end to end. Measured where the wheel mounts to the brake rotor.
Allot of eyeballing and measuring with the tires/wheels on. Made sure the tires where centered in the wheel well then after everything was done, measured from center of rear axle to center of front hub. And the pan hard bar centered it from left to right.
The hardest part was trying to get the lower bar level with the ground. Trying to measure/make the lower link tab took the longest. If off the self brackets were bought things would have went allot easier but my cheap butt has to try and make his own.
Also trying to get the upper link to point toward the middle of the car was kinda hard. Upper link is kinda short but the axle does move up and down easy and smooth. Pinion angle does not change while moving the rear end up and down.
SEEMS good but will see very soon. Have a few other things to do then it off to the track.
Thread Starter
Rotary Enthusiast
Joined: Aug 2006
Posts: 1,216
Likes: 10
From: Melbourne FL/San Antonio TX/Okinawa Japan
Spacers to run 5.5 backspace wheels.
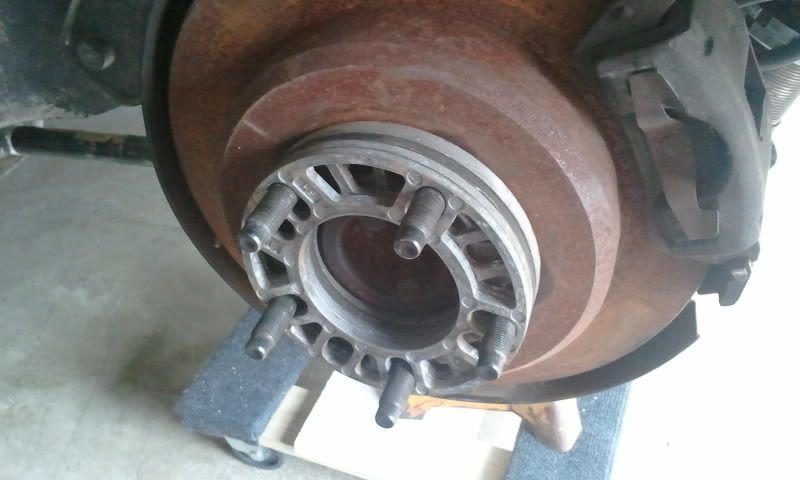
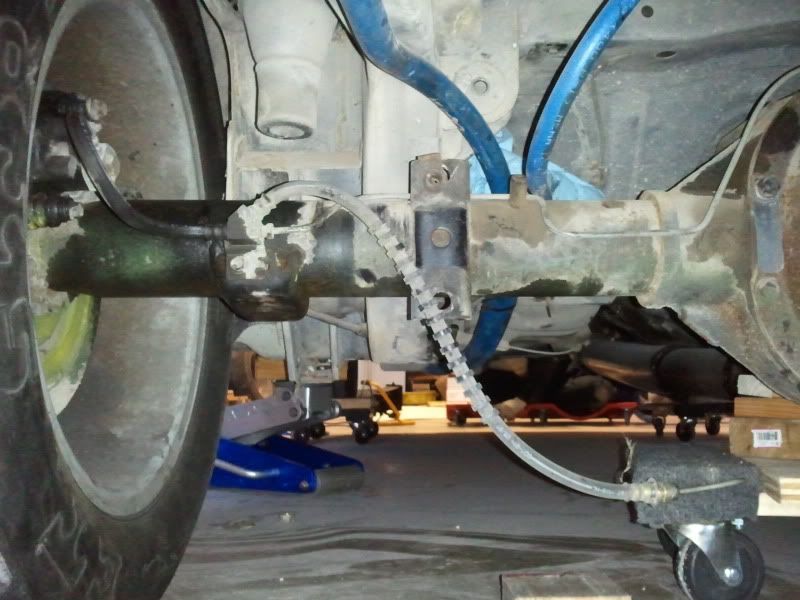
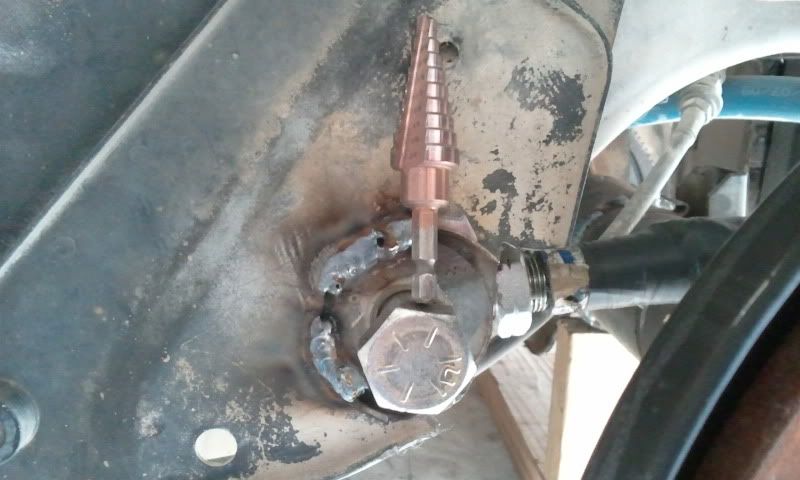
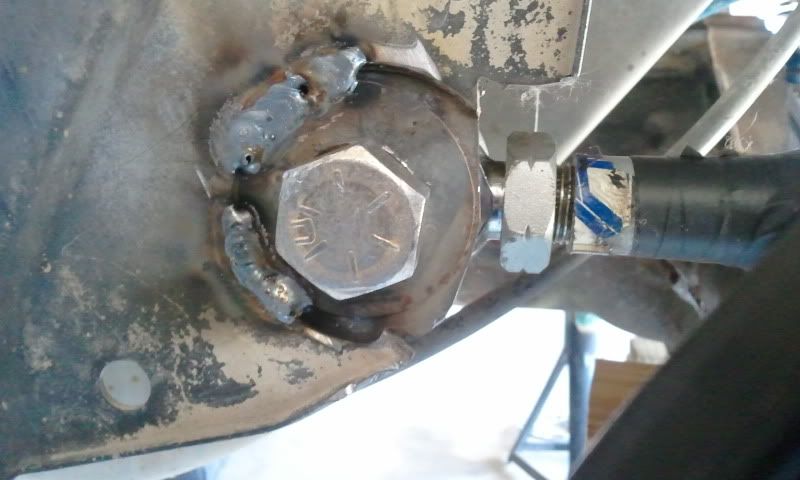
Using the stock side break cable. Used some wire to check fitment. Works good. Not to figure something more solid.
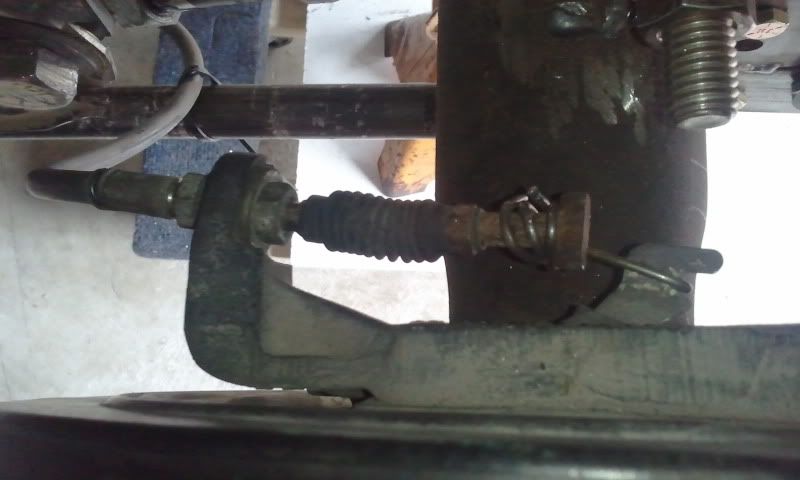
Side brake cable had to be tied to the lower arm. Kinda sharp turn but workable.
Using the stock side break cable. Used some wire to check fitment. Works good. Not to figure something more solid.
Side brake cable had to be tied to the lower arm. Kinda sharp turn but workable.


Thread Starter
Rotary Enthusiast
Joined: Aug 2006
Posts: 1,216
Likes: 10
From: Melbourne FL/San Antonio TX/Okinawa Japan
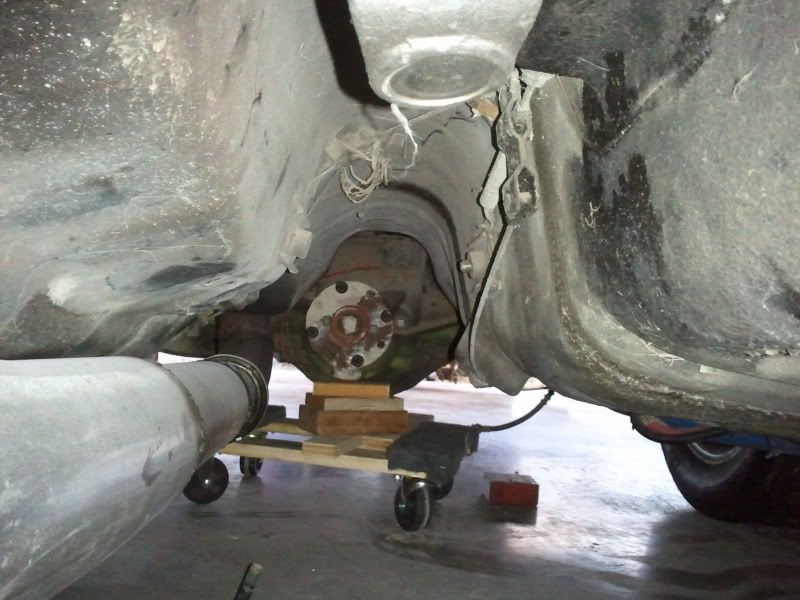
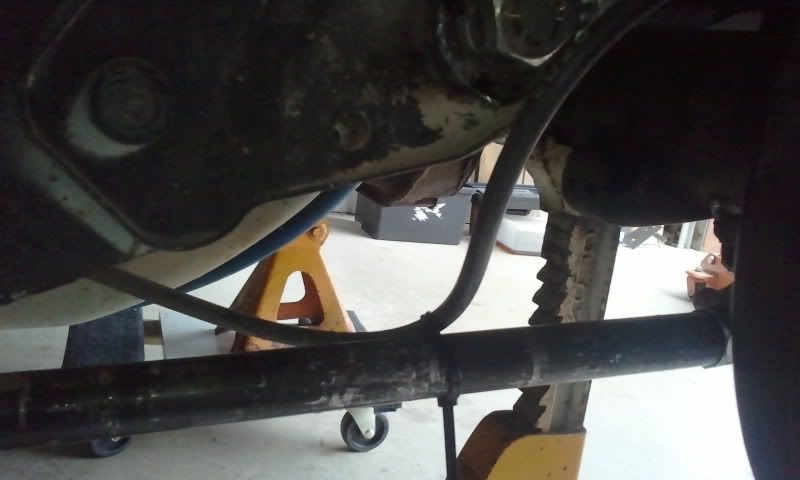
Exhaust under the rear end. 4 inch turbo back to the rear end then 3 inch under.
Will be changing to full 4 inch as soon as a 4 inch muffler is found.
Had a chance to take the car to the track just for a few test passes. 111mph with no issues. Nice a strait. Hoping to hit it hard in a few weeks.
Will be changing to full 4 inch as soon as a 4 inch muffler is found.
Had a chance to take the car to the track just for a few test passes. 111mph with no issues. Nice a strait. Hoping to hit it hard in a few weeks.

Thread Starter
Rotary Enthusiast
Joined: Aug 2006
Posts: 1,216
Likes: 10
From: Melbourne FL/San Antonio TX/Okinawa Japan
Rear end 200$, narrowed it myself
Another short axle was 20$
Driveshaft was 350$
Made my own axle brackets. 1/4 flat steel from home depot. around 30$
Hiem joints 3/4 hole and 3/4 thread. Chrome molly. Five right and five left handed thread and jam nuts. price them through Jegs http://www.jegs.com/i/Competition-En...oductId=963687
I used 1"OD 3/4" ID round tubing for the bars. 20$ from the local steel store.
Had to buy a left and a right 3/4 x 20 tap. 50$ for both if I remember right.
Shock hangers on the axle were 20/30$ from jegs. http://www.jegs.com/i/Competition-En...oductId=752128
Long wheel studs from Jegs. 25$ http://www.jegs.com/i/JEGS-Performan...ductId=1224592
Shocks are 22$ each.
Springs, had them laying around.
Spring adjusters, had them. honda civic fronts.
Junky welding was done by myself.
No wheel spacer required if 4.5" Back space wheels were used. My wheels are 5.5" BS so I ended up using 1" wheel spacers.
Thread Starter
Rotary Enthusiast
Joined: Aug 2006
Posts: 1,216
Likes: 10
From: Melbourne FL/San Antonio TX/Okinawa Japan
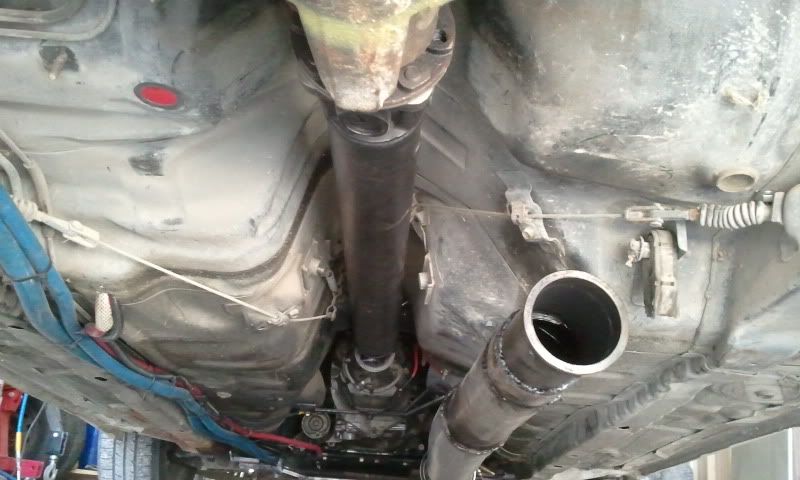
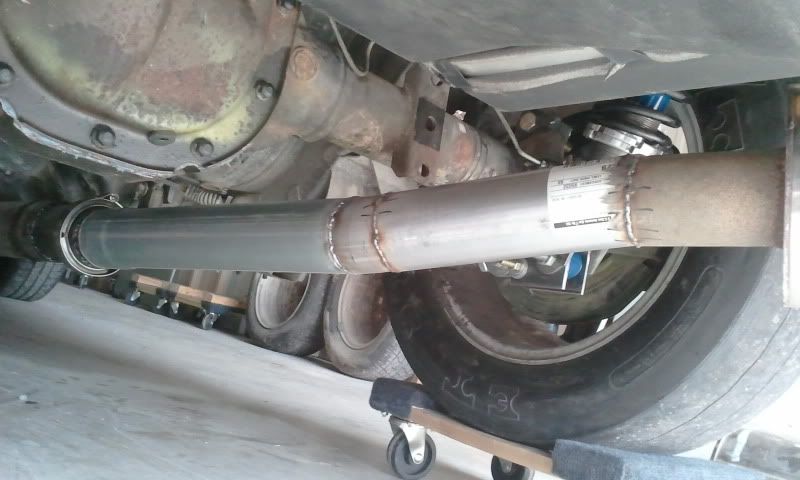
Driveshaft
I had one made to fit but to keep the cost down I should have bought one from the junk yard and had a driveshaft place shorted it and replace the front yoke with a turboII one. Probably save half the cost or more. Also the stock explorer driveshaft is aluminum.
Thread Starter
Rotary Enthusiast
Joined: Aug 2006
Posts: 1,216
Likes: 10
From: Melbourne FL/San Antonio TX/Okinawa Japan
Managed to get a 26/10/15 ET slick under the car. Wheel is a 9inch with 5.5 offset.
Required lots of fender bending.
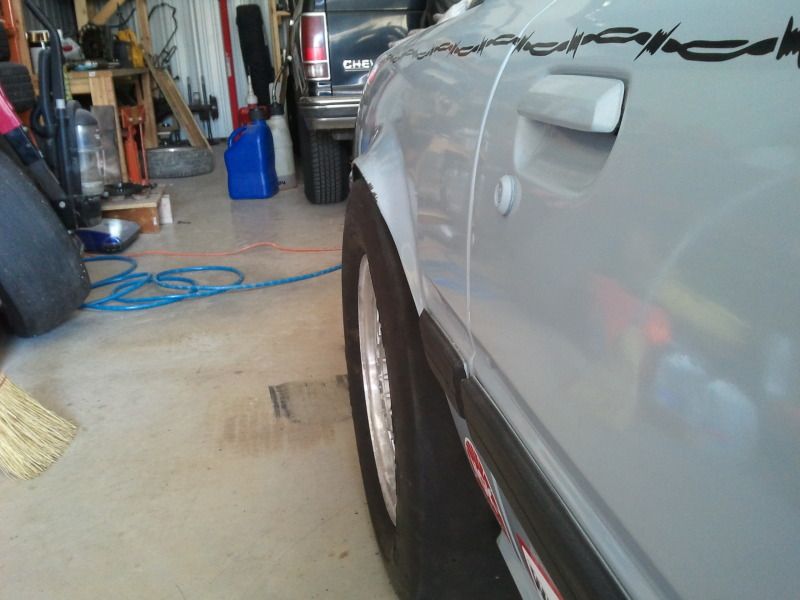
Also replaced the 373 rear gears with some 410s. Not much of a difference but the motor feels like it pulls through the gears faster.
So far car has run high 11s at 129mph spinning the very old ET streets, 1st through 3rd gear. Hoping the new ET slicks will put the power down with out drifting the 1/4 mile.
Required lots of fender bending.
Also replaced the 373 rear gears with some 410s. Not much of a difference but the motor feels like it pulls through the gears faster.
So far car has run high 11s at 129mph spinning the very old ET streets, 1st through 3rd gear. Hoping the new ET slicks will put the power down with out drifting the 1/4 mile.