2012 to Current project log for my T2 83 S

Thread Starter
Joined: Feb 2002
Posts: 8,389
Likes: 120
From: North Jersey
2012 to Current project log for my T2 83 S
Hey guys, I've been wanting to make a build log type thread for a while, but figured I'd wait until I have something to actually show. For those unfamiliar, I'll give a quick background on the car. It's an 83 S, that my dad purchased from the original owner, completely stock, in 2000. I bought it from him in 2001, did the usual bolt ons (GSL rear, shocks/springs, RB exhaust etc) in 2003 and continued daily driving it until 2006. 2006 is when I finished my other FB (the 83 GS, "pandafb") which was a total teardown and rebuild that I used to learn metal work, welding, paint and bodywork. Once the GS was on the road I decided to teardown and restore the S. It had a ton of rust and was just generally getting worn out. I have an old thread (https://www.rx7club.com/1st-generation-specific-1979-1985-18/project-83-s-restoration-t2-swap-update-624258/) about the build that has some pics of the rust damage and the repairs I did, as well as some info about the T2 swap and other stuff.
Much of what I did in that thread has since been changed so I figured making a new thread would be a good idea. I still have the T2 in there which has been running very well, but the front suspension is now a FC subframe, the rear no longer has the pandhard bar or tri link, and it's now using a Racing Beat muffler. There have been numerous other changes over the past few years, but those are the big ones. The car was back on the road in 2008 and I have been driving it quite a bit since (I've put about 12,000 miles on it).
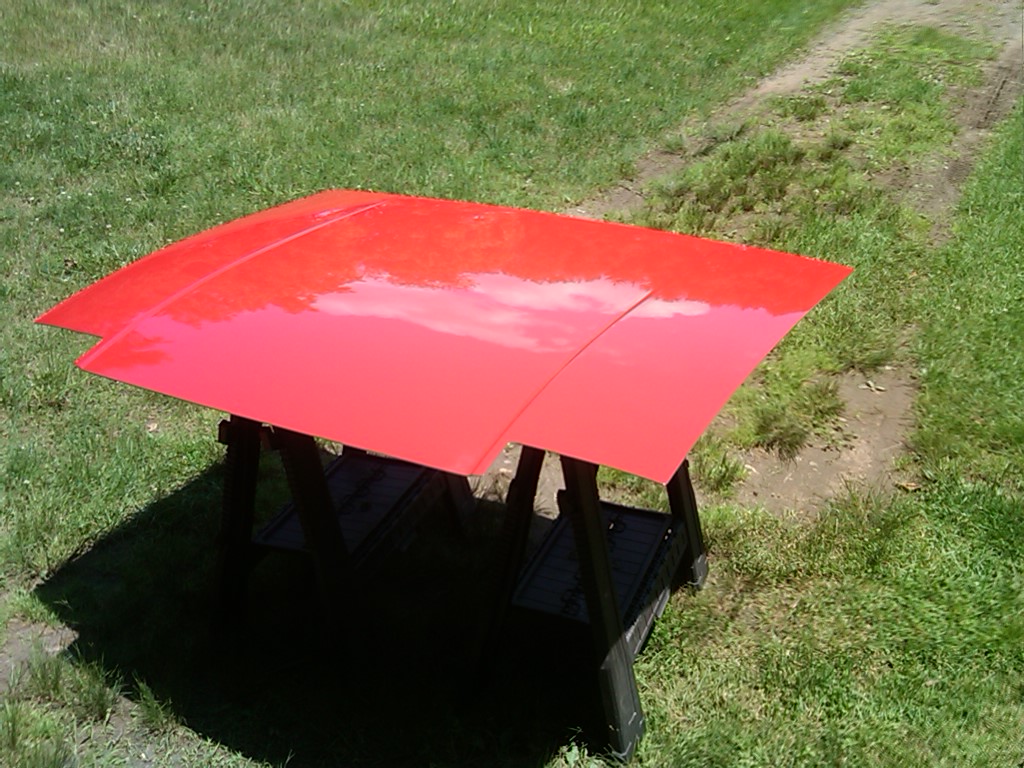
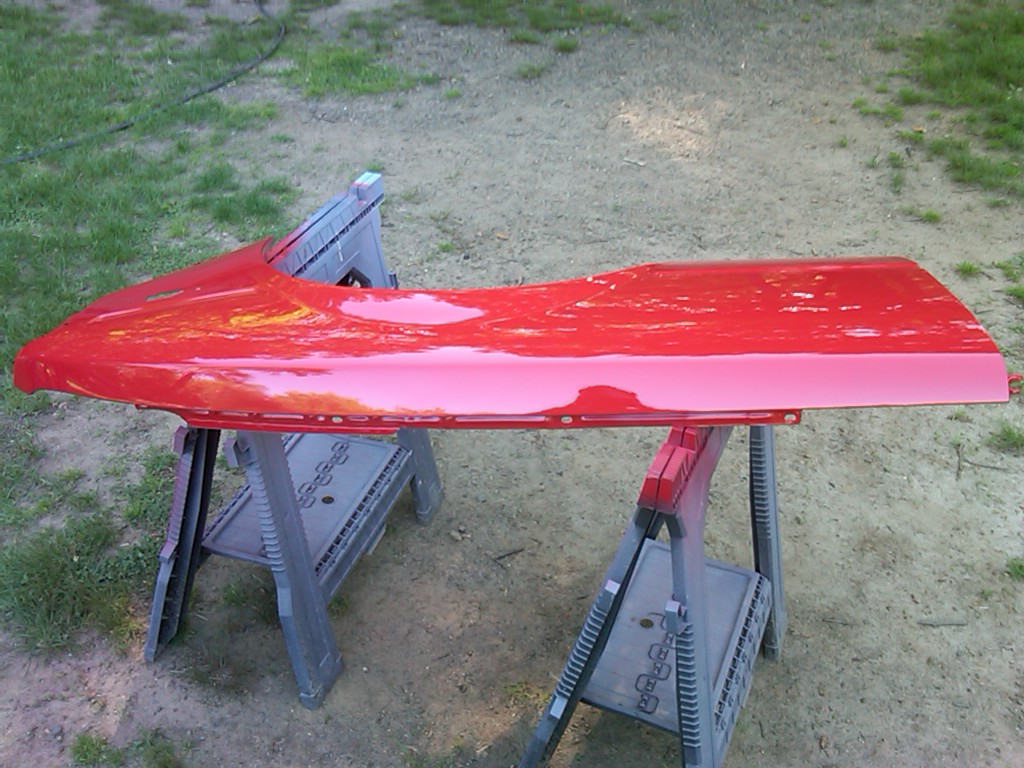
Almost since I got it back on the road in 2008 I wished I had kept it red so I decided a few months ago it was about time to return it to it's former glory. I had a bunch of spare body panels from various parts cars etc and decided I would use some of them for the repaint - this would allow me to be doing body work on the car, while still being able to drive it . The doors, cowl plate, header panel, and bumpers that were on the car weren't in the best of shape, and I had decent spares so I figured why not make use of them. So far my plan has worked out well and the car has only be in pieces for a few days. If all goes well I should have the shell painted, and reassembled in a few weeks.
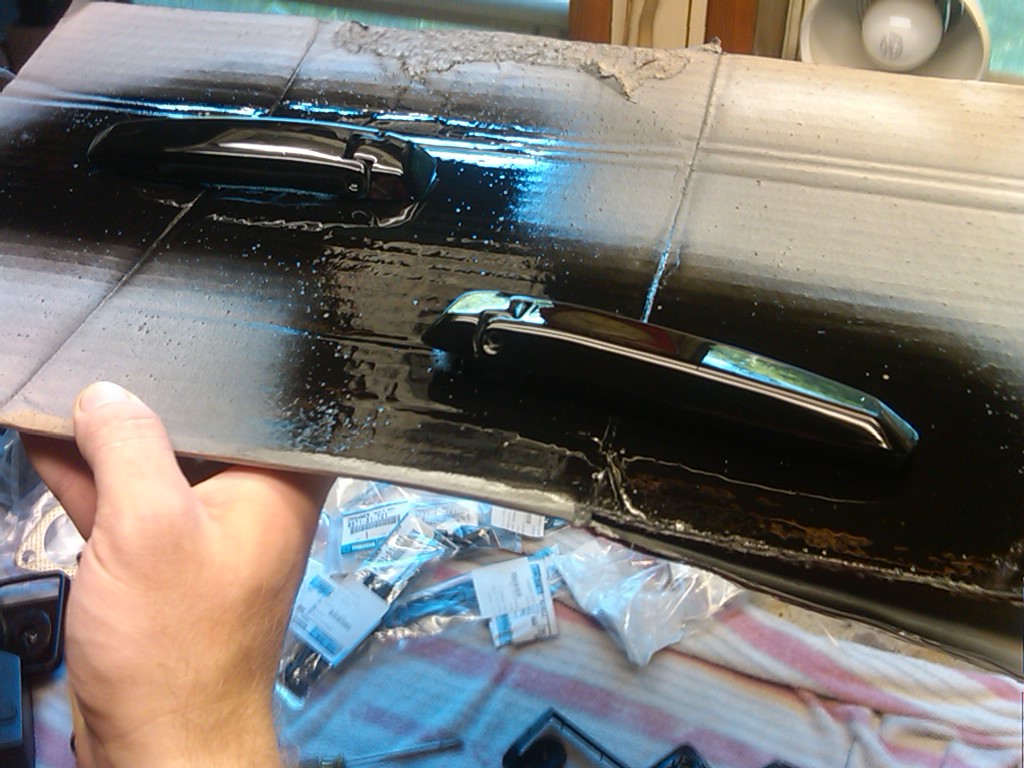
I'll try not to ramble on, but for those who are interested in body work here are some details. I'm using a PPG single stage paint and it's the original Sunrise Red paintcode. I am only using spare panels if they are as good as or better than the ones on the car, and again it's to save some downtime. The doors I'm using weren't too rusty, but I opened up the lower seam (made a tool out of some old cutters to pry the seam back) so I could sandblast all surfaces, then reseal them. I used chemical stripper to get rid of the old paint, sealed the metal with Eastwood's epoxy primer, then topped that with some Evercoat Durabuild - 2 or 3 coats with a good wetsanding (400 grit) in between primer coats, then wetsanded with 600 grit prior to painting. There is very little orange peel, and as the paint cures it tends to shrink and tighten up, most of the orange peel should be gone. The little that is left will get some 2000 grit and rubbing compound. The bumpers were just sanded with 220 and then 400 (wet) to get most of the older paint off, then they got Durabuild primer topped with paint, both paint and primer were mixed with Bulldog adhesion promoter/flex additive to keep them from cracking and chipping. It's amazing how flexible that stuff makes the paint.
I'll post pics of the shell itself soon, but the weather has gone downhill so it'll be a few days before I can do much with it. More to come soon, thanks for looking!
-Sean
Much of what I did in that thread has since been changed so I figured making a new thread would be a good idea. I still have the T2 in there which has been running very well, but the front suspension is now a FC subframe, the rear no longer has the pandhard bar or tri link, and it's now using a Racing Beat muffler. There have been numerous other changes over the past few years, but those are the big ones. The car was back on the road in 2008 and I have been driving it quite a bit since (I've put about 12,000 miles on it).
Almost since I got it back on the road in 2008 I wished I had kept it red so I decided a few months ago it was about time to return it to it's former glory. I had a bunch of spare body panels from various parts cars etc and decided I would use some of them for the repaint - this would allow me to be doing body work on the car, while still being able to drive it
. The doors, cowl plate, header panel, and bumpers that were on the car weren't in the best of shape, and I had decent spares so I figured why not make use of them. So far my plan has worked out well and the car has only be in pieces for a few days. If all goes well I should have the shell painted, and reassembled in a few weeks.I'll try not to ramble on, but for those who are interested in body work here are some details. I'm using a PPG single stage paint and it's the original Sunrise Red paintcode. I am only using spare panels if they are as good as or better than the ones on the car, and again it's to save some downtime. The doors I'm using weren't too rusty, but I opened up the lower seam (made a tool out of some old cutters to pry the seam back) so I could sandblast all surfaces, then reseal them. I used chemical stripper to get rid of the old paint, sealed the metal with Eastwood's epoxy primer, then topped that with some Evercoat Durabuild - 2 or 3 coats with a good wetsanding (400 grit) in between primer coats, then wetsanded with 600 grit prior to painting. There is very little orange peel, and as the paint cures it tends to shrink and tighten up, most of the orange peel should be gone. The little that is left will get some 2000 grit and rubbing compound. The bumpers were just sanded with 220 and then 400 (wet) to get most of the older paint off, then they got Durabuild primer topped with paint, both paint and primer were mixed with Bulldog adhesion promoter/flex additive to keep them from cracking and chipping. It's amazing how flexible that stuff makes the paint.
I'll post pics of the shell itself soon, but the weather has gone downhill so it'll be a few days before I can do much with it. More to come soon, thanks for looking!
-Sean
Thread Starter
Joined: Feb 2002
Posts: 8,389
Likes: 120
From: North Jersey
Ah I should have mentioned that. I won't be using the side moldings, they haven't been on the car in years and I like the look of it better without them. I think it would look weird to have the strips on the bumpers black if the rest of the moldings aren't there so I've painted the bumper all red. The car has an IMSA style air dam so the front shouldn't be noticeable, and I think the rear will look fine as well.
Worst case, I can always scuff the molding strip portion of the bumper and shoot some black paint over it if need be.
Worst case, I can always scuff the molding strip portion of the bumper and shoot some black paint over it if need be.
Thread Starter
Joined: Feb 2002
Posts: 8,389
Likes: 120
From: North Jersey
Not much to update as the weather has dropped into the 50's (for high's) this week, so too cold to paint much, although I did spend time last night sanding down the cowl area and doing some minor dent repair. If I can get a few warm days I should have the rest of the sanding done and a good coat of primer over the whole shell...
Thread Starter
Joined: Feb 2002
Posts: 8,389
Likes: 120
From: North Jersey
Trending Topics
Thread Starter
Joined: Feb 2002
Posts: 8,389
Likes: 120
From: North Jersey
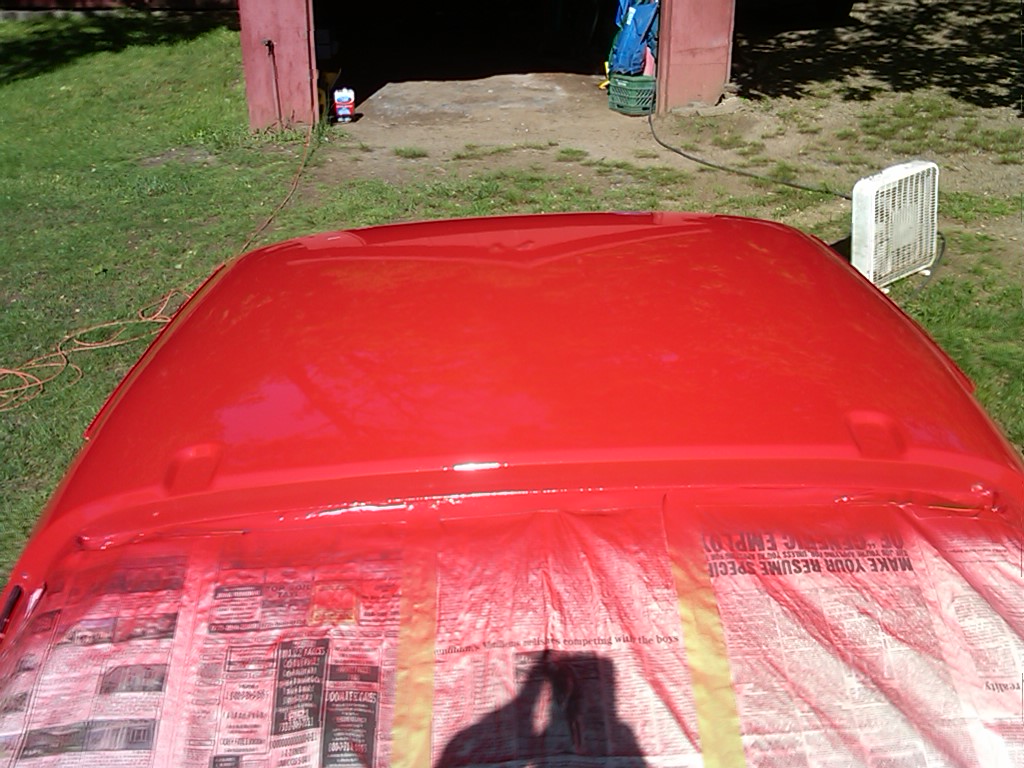
After hours and hours (and more hours) of sanding all the nooks and crannies around the tail lights, door jams, windshield frame etc etc I finally got the point where I could get the whole car in a good coat of primer. There are a few areas that need some more sanding and minor spot putty, but overall the body is coming out great. Some wet sanding and a few more coats of primer and block sanding and it'll be ready for paint. I'm hoping to be able to paint it next week.
Not much in the way of pics, but I have one to show. More soon I hope
Not much in the way of pics, but I have one to show. More soon I hope
Thread Starter
Joined: Feb 2002
Posts: 8,389
Likes: 120
From: North Jersey
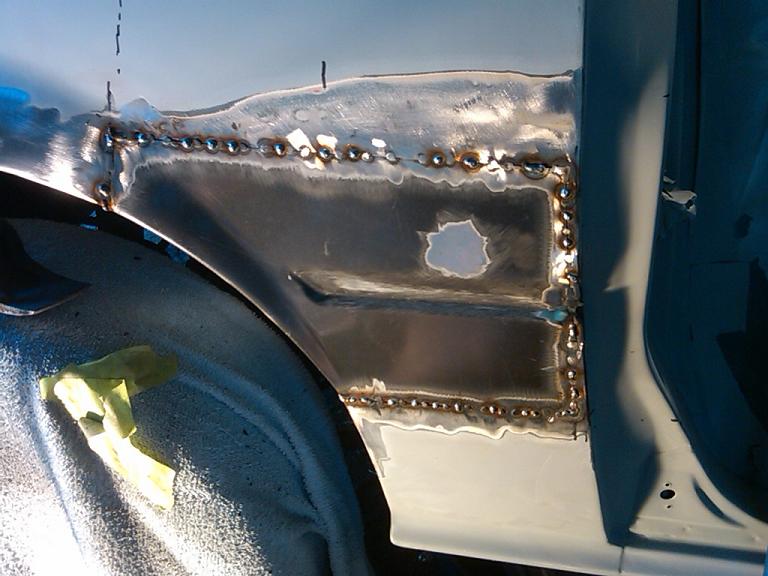
Made some good progress over the last few days, although it was definitely a case of one step forward, two steps back. I'll give a quick back story. In 2001 I was hit in a parking lot, it was nothing too terrible, but the passenger door and quarter panel got a pretty good dent. I didn't know much about body work at the time, so I had a body shop repair it. I was told (lies) that the dent was pulled out and only a light skim of bondo was needed to smooth it out. The repair looked decent and I didn't think much of it at the time. Fast forward to last week when I was sanding in prep for the primer you see in the last pic and I got into some of the bondo in that area. I got a little too aggressive with the DA and dulled the edges of the body line. It was at this point that I realized there was a tad more than a "skim of bondo" on there... I figured now was as good a time as any to see what was really under there so after a few minutes with the paint stripping wheel on my angle grinder and blasting through half an inch (!!! I'm not kidding, it was half an inch in some spots...) of bondo I had this:
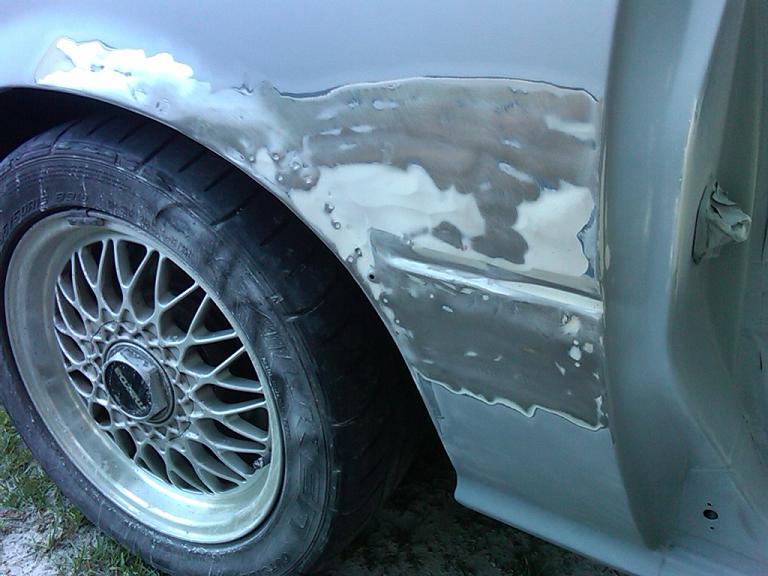
It might not look terrible in the pic, but that area was badly caved in, and that stupid drill a hole and pull on a screw style dent puller that was used is useless and did more damage than good. There was significant damage to the inner fender from that thing and it just generally made it worse. You can see the body line is basically non-existent and warped to hell. If anyone reading this is doing bodywork like this please stop seriously... (/end rant lol)
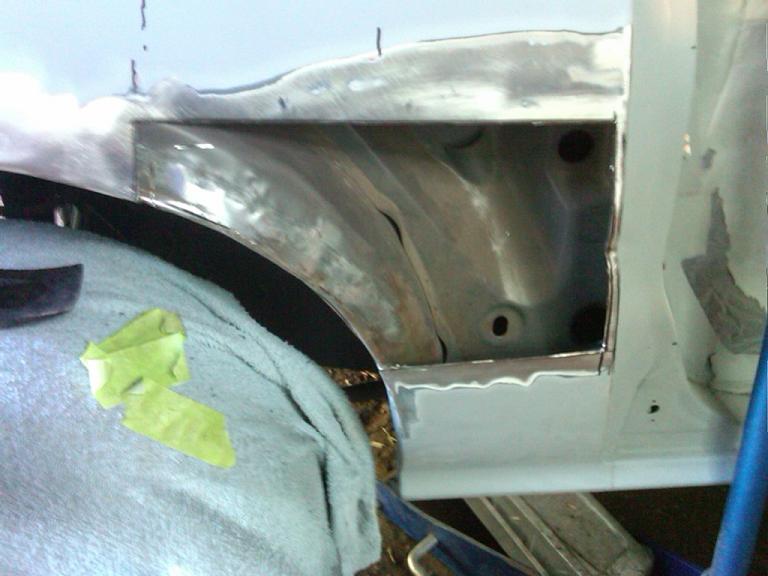
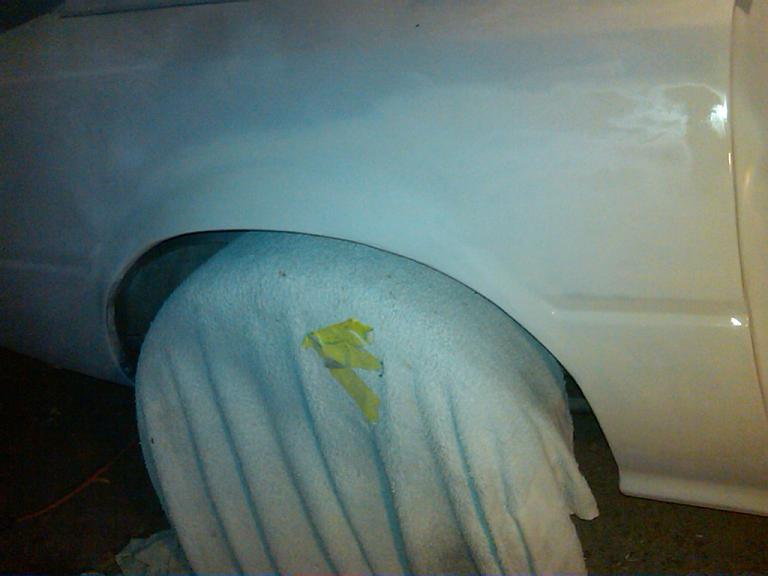
Anyway, I wasn't going to bother repainting a car that had damage like that, so out came a spare fender to cannibalize for a patch. I cut out the junk metal, welded in a new piece and smoothed out the welds. Topped that with a skim (yes, a skim this time, 1/16" thick at most) of bondo and some primer and off we go. All total I worked from 4-11 pm straight through on it Friday night (which is why the primer pic is dark, and still wet) and a hour or two Saturday smoothing out a few rough edges I'd left.
Here's a few pics of that process. Overall it came out really well and there was almost no heat warpage. It's not 100% perfect, but I'm very happy with it and at least it's my own work now
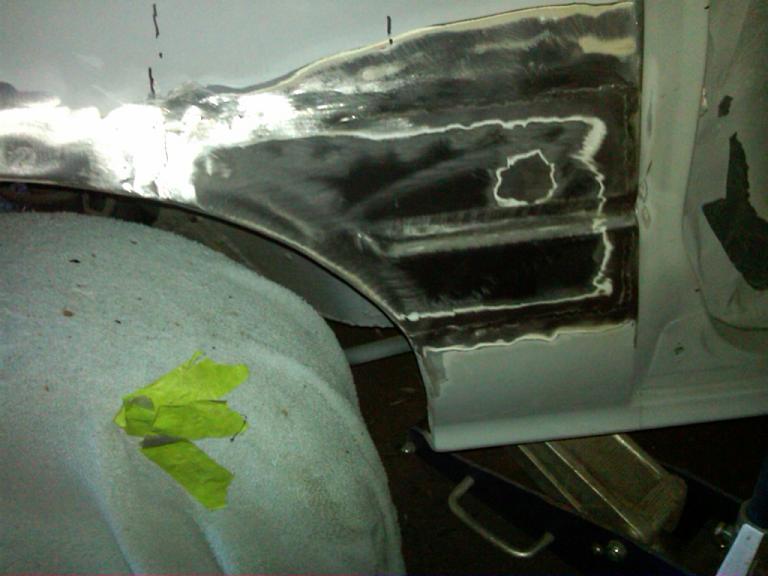
Also, not pictured, I got both fenders sanded down and primed yesterday. I should be ready to paint later in the week weather permitting.
It might not look terrible in the pic, but that area was badly caved in, and that stupid drill a hole and pull on a screw style dent puller that was used is useless and did more damage than good. There was significant damage to the inner fender from that thing and it just generally made it worse. You can see the body line is basically non-existent and warped to hell. If anyone reading this is doing bodywork like this please stop seriously... (/end rant lol)
Anyway, I wasn't going to bother repainting a car that had damage like that, so out came a spare fender to cannibalize for a patch. I cut out the junk metal, welded in a new piece and smoothed out the welds. Topped that with a skim (yes, a skim this time, 1/16" thick at most) of bondo and some primer and off we go. All total I worked from 4-11 pm straight through on it Friday night (which is why the primer pic is dark, and still wet) and a hour or two Saturday smoothing out a few rough edges I'd left.
Here's a few pics of that process. Overall it came out really well and there was almost no heat warpage. It's not 100% perfect, but I'm very happy with it and at least it's my own work now
Also, not pictured, I got both fenders sanded down and primed yesterday. I should be ready to paint later in the week weather permitting.
Thread Starter
Joined: Feb 2002
Posts: 8,389
Likes: 120
From: North Jersey
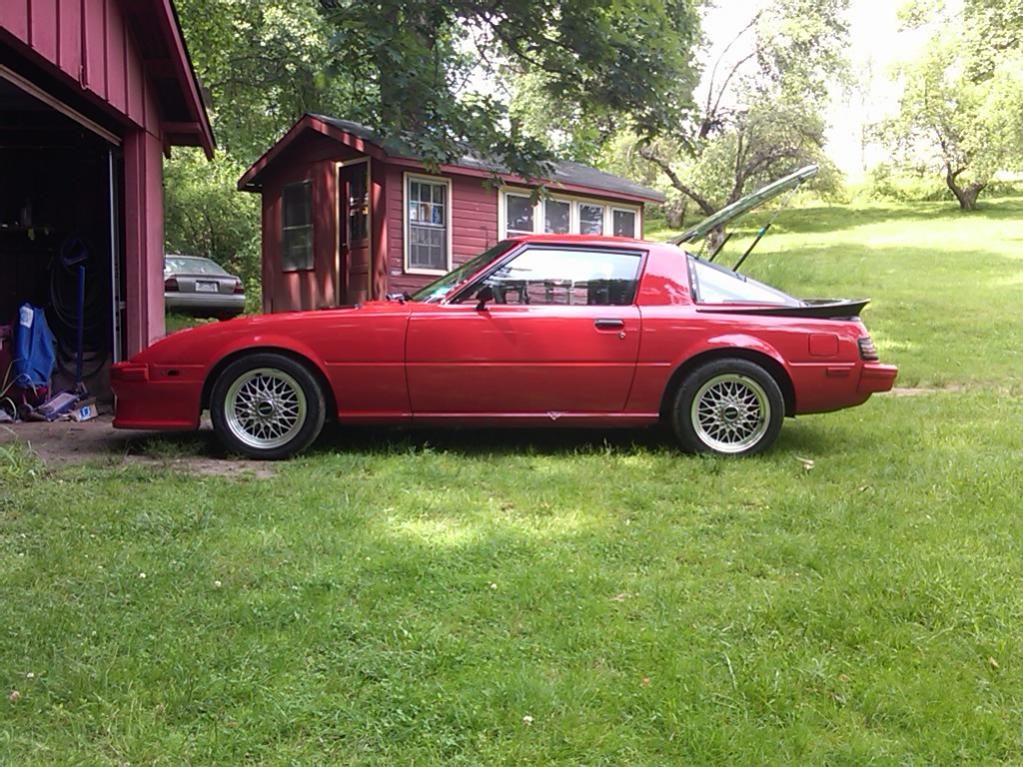
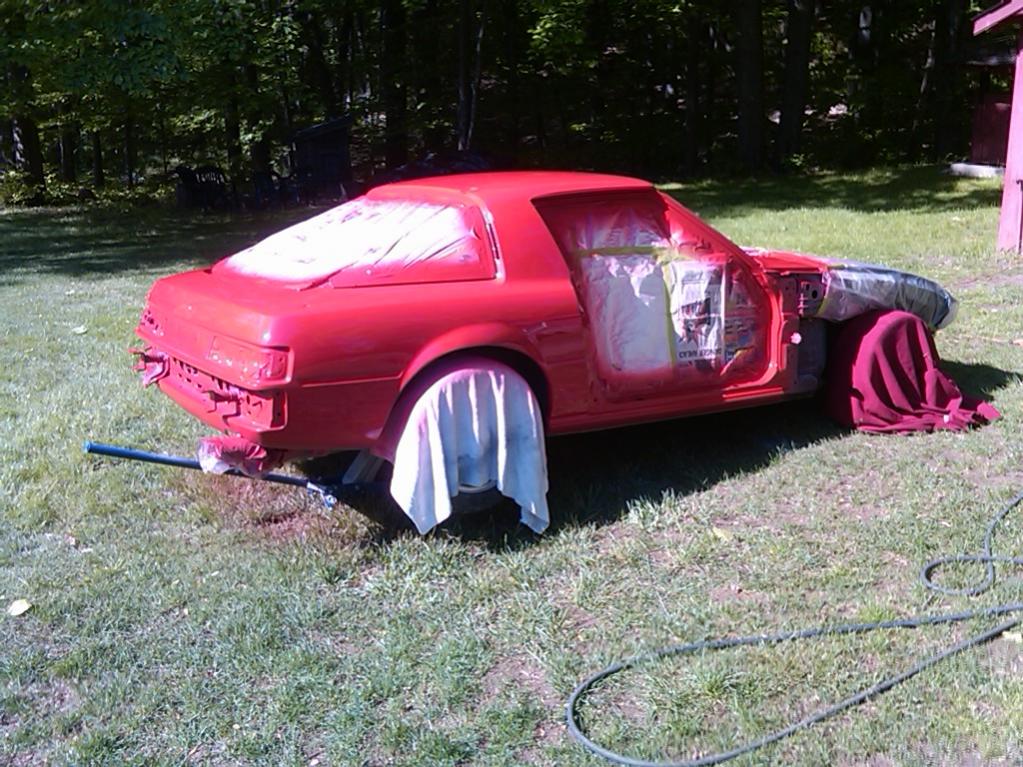
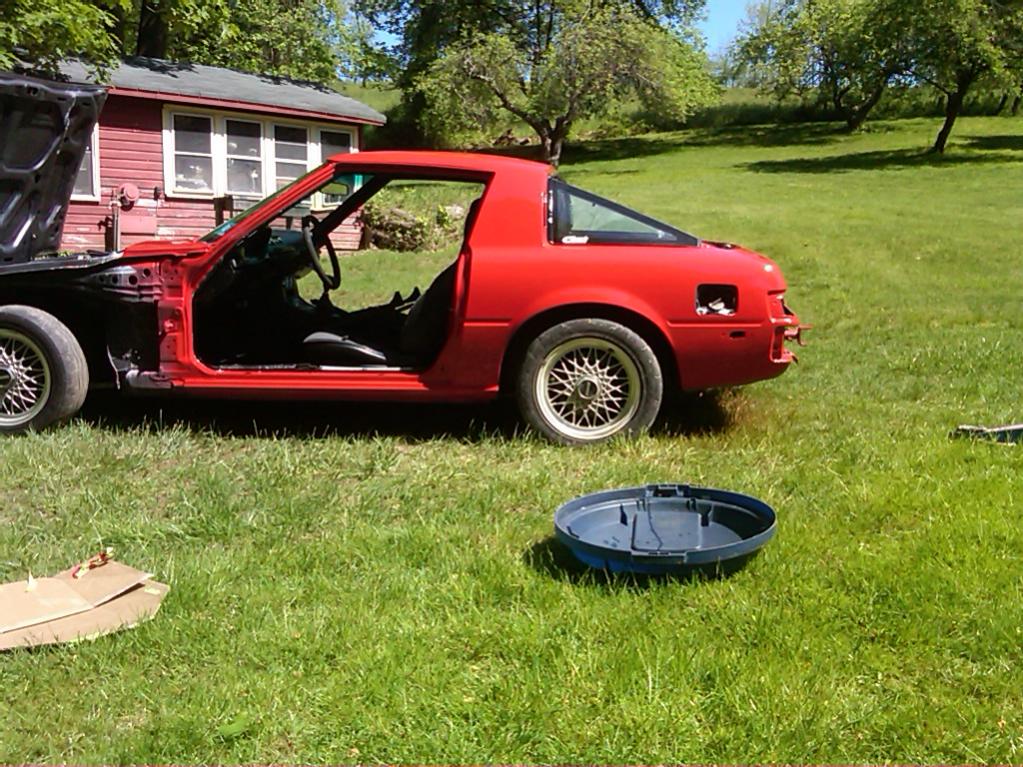
Big update, it's painted! Well most of it anyway, I still have the hood and fenders, but I got some time to paint it this weekend and I couldn't be happier with the result.
I spent much of Friday laying down the final coat of primer, wetsanding it down and remasking the whole car. Got up nice and early on Saturday and shot 2 good coats of the red on there just in time for the sun to come out from behind the trees and bake the paint on there nicely.
Spent much of the rest of the weekend doing other things, but did get some time yesterday afternoon to put the doors and some other stuff back on the car. It's nice to have something that looks like a car again sitting there lol.
If the weather cooperates this week I can get some of the smaller parts like the hatch hinges, windshield trim etc painted and reinstalled, and then get the fenders and hood done next weekend.
Sorry for the low quality pics (they're from my phone obviously) but I hope you guys enjoy it as much as I do!
Thread Starter
Joined: Feb 2002
Posts: 8,389
Likes: 120
From: North Jersey
Got quite a bit done this weekend. Stripped the hood to bare metal, sealed it with epoxy primer, did some body work on it, topped with filler primer and then painted it. Unfortunately by that time in the day I was pretty tired and was getting sloppy. I put the paint on a bit too dry and got a bunch of orange peel. I'll scuff it during the week and re-shoot it next weekend. The rest of the paint has come out so good, the hood would really let the whole car down as it sits.
Also I got the fenders painted, and those came out great! Stripped the hatch hinges and shot them with some black I have left over from my Trans Am, they came out really good too (although the pic kinda sucks sorry lol)
A few more nice days and it should be all done. Supposed to rain all week again so we'll see how that goes lol.

Thread Starter
Joined: Feb 2002
Posts: 8,389
Likes: 120
From: North Jersey
Thanks, nothing too special really, just a nice clean set of FC Vert wheels
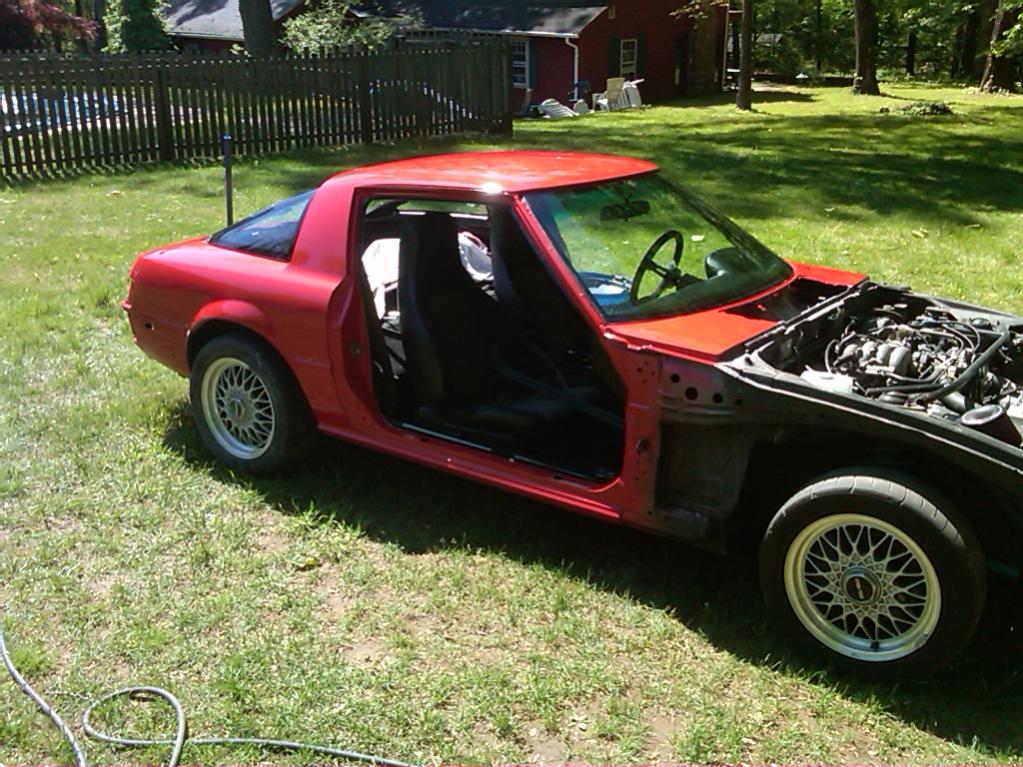
Quick update: the car is basically assembled at this point, just need to put a few bolts on the fenders, and attach the front bumper and it's almost there. I still need to paint the air dam, the windshield trim and repaint the hood but otherwise it looks like a car again lol.
Hopefully I can get some pics to upload soon.
Thread Starter
Joined: Feb 2002
Posts: 8,389
Likes: 120
From: North Jersey
Thanks! It's set back in the woods with plenty of space, I love it here. I got a few small bugs and specs of dust etc in the paint, but overall very little got in there. That PPG single stage flashes off pretty quick on a hot day which really helps.
Once the paint has cured for a few weeks I'll go over the whole car with rubbing compound, and where needed, 2000 grit so 95% of the flaws will be gone. In the end it's a driver not a show car, so a few things here and there don't bother me
I got some minor orange peel above the tail lights which I already started colorsanding and it's looking great so far. The roof, quarter panels, doors and fenders came out darn good, I probably won't even colorsand those.
Thread Starter
Joined: Feb 2002
Posts: 8,389
Likes: 120
From: North Jersey
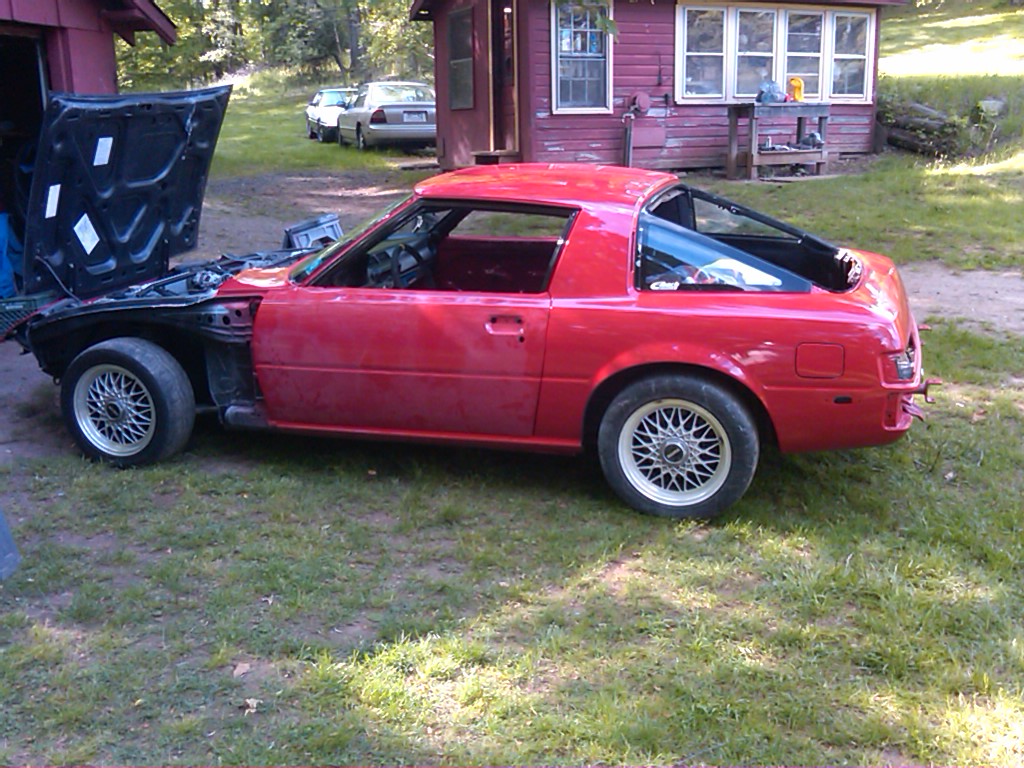
Made a ton of progress this weekend. I got the windshield trim painted, air dam panted and also had enough time to redo the hood. It had a bunch of orange peel and I missed a few dings. A few hours of sanding/priming/repainting and it's looking great. Was able to get most of the car reassembled too. Just a few things left (got new oem badges and that kinda stuff) and I can go over the car with some compound and call it done! Then onto the next projects lol