
1984 5-letter / S5 "Selene"


Senior Member


Joined: Jul 2007
Posts: 363
Likes: 7
From: Worcester, UK. Ex-NZ
Thanks for that post, ioTus! I've been researching this stuff lately for when I upgrade to an FD alt and relocate my battery to the hatch.
Nice work on the car man! So clean aye haha. Always look forward to seeing more updates from you
Nice work on the car man! So clean aye haha. Always look forward to seeing more updates from you
Thread Starter
Joined: Jul 2002
Posts: 3,219
Likes: 8
From: Washington State
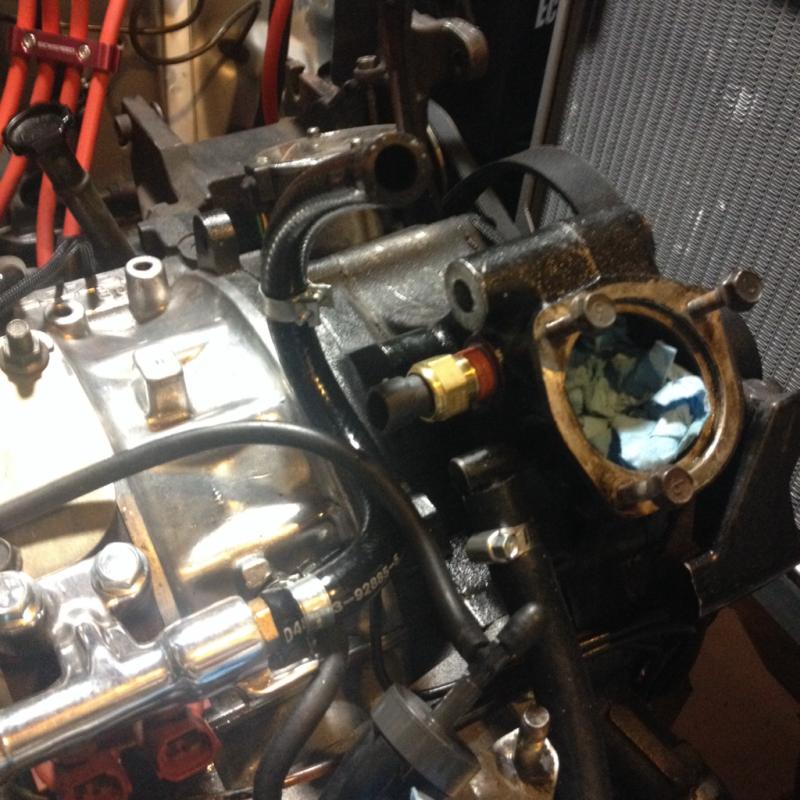
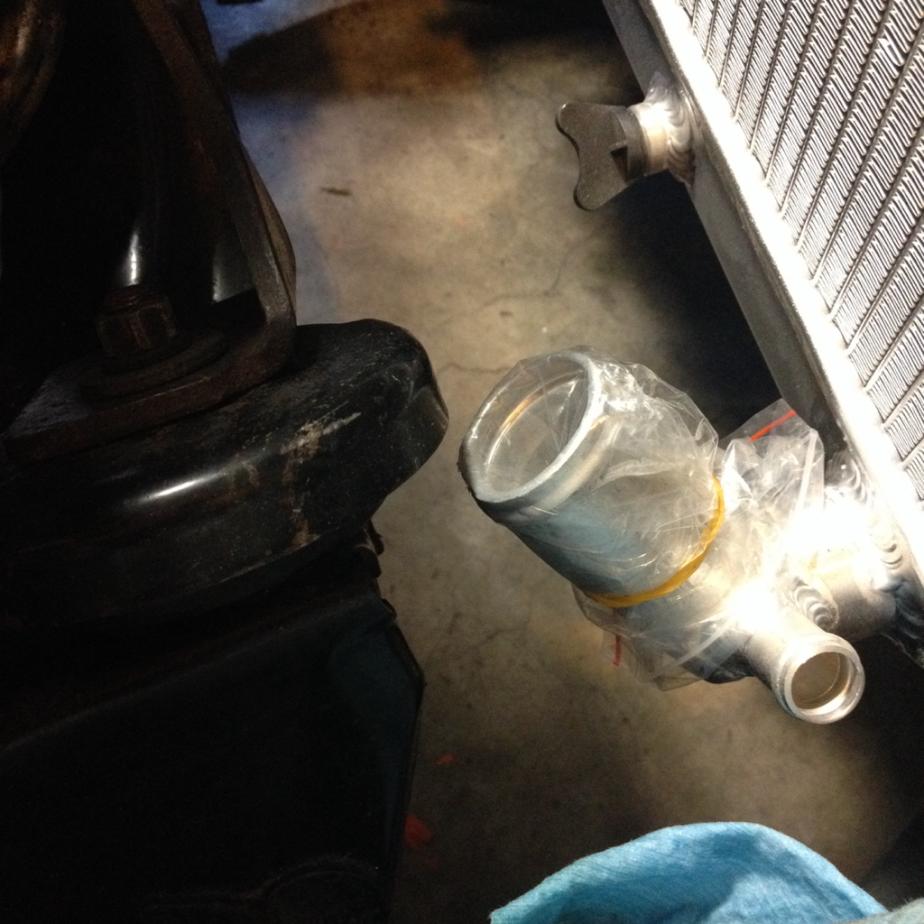
Man I really don't know what to do about this damn radiator. The bung for the sensor is just ever so slightly too large, like 1-2mm. I haven't been able to come up with anything in terms of how to get the OEM to fit without cutting in and getting debris inside.
At this point I'm planning on putting my leaky, broken, rusted OEM radiator back on and waiting till I have more funds to buy a proper radiator.
its supposed to do that
Joined: Jan 2003
Posts: 1,352
Likes: 2
From: PNW
Some of the level sensors I have are just a plastic blob around the sensor itself. Perhaps a razor knife to remove the plastic and leave just the metal sensor tip, then epoxy that into the appropriately sized fitting. For the moment you could just ground the sensor lead to turn the light off in the dash while you contemplate.
Isaac
Isaac
Thread Starter
Joined: Jul 2002
Posts: 3,219
Likes: 8
From: Washington State
Some of the level sensors I have are just a plastic blob around the sensor itself. Perhaps a razor knife to remove the plastic and leave just the metal sensor tip, then epoxy that into the appropriately sized fitting. For the moment you could just ground the sensor lead to turn the light off in the dash while you contemplate. Isaac
The thing that gets me is it's such a basic sensor, yet they want $50 for them at O'Reiley's !!!
Thread Starter
Joined: Jul 2002
Posts: 3,219
Likes: 8
From: Washington State
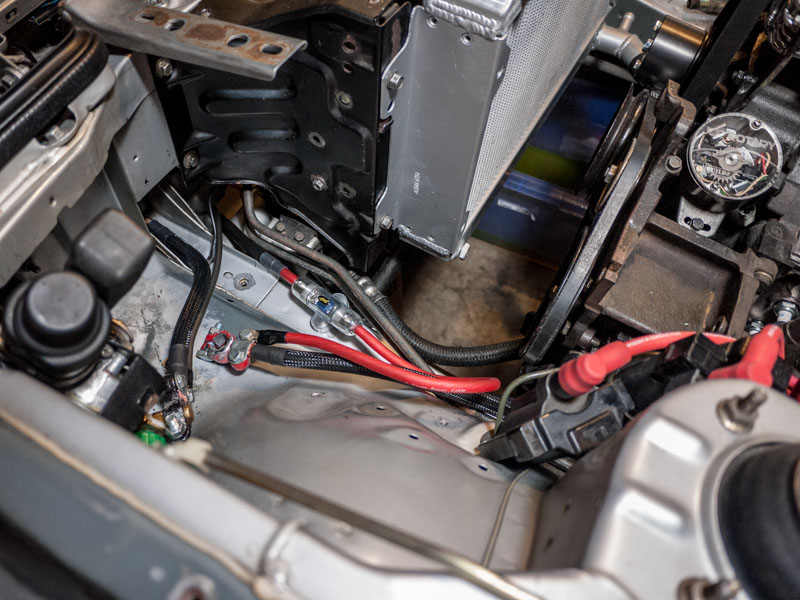
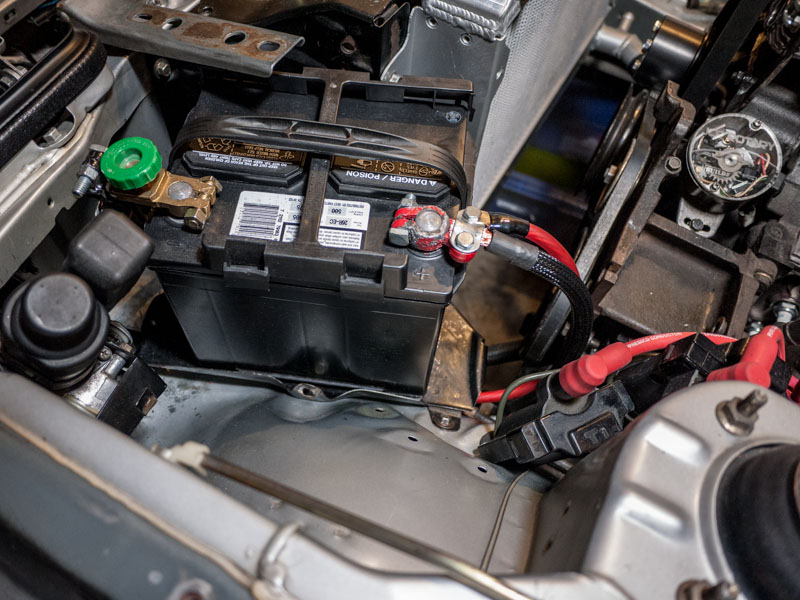
Battery installed
Today I tidied up the loom for the wire tuck, got some more lengths wrapped in tape. Sheathed the amp cable up to the fuse, which will live under the battery tray.
Installed
Installed
Thread Starter
Joined: Jul 2002
Posts: 3,219
Likes: 8
From: Washington State
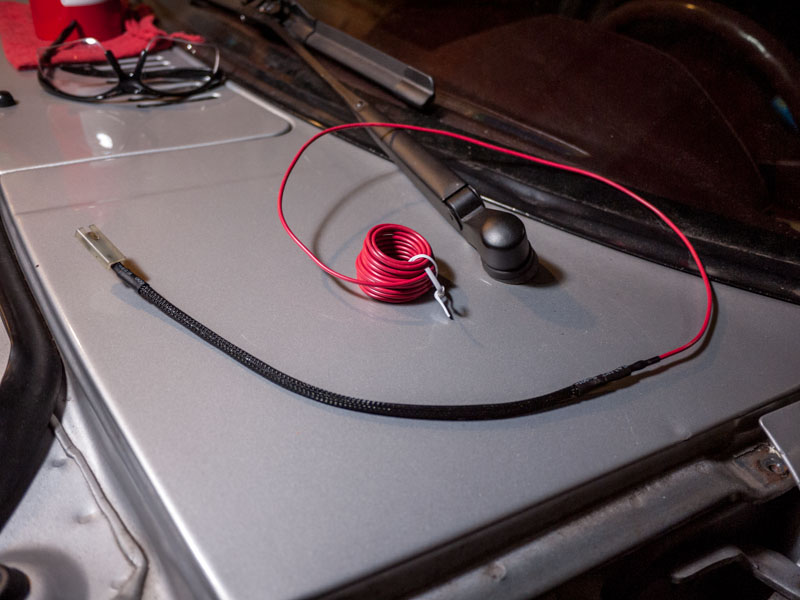
Headlight wire tuck
Here's how I incorporated the Black Dragon headlight relay harness into the wire tuck.
The headlight bucket actually has a wire tie-down that runs down the side, as if it were made for the harness to drop down through the light instead of back over the body frame into the engine bay:

In my first install of the harness I grounded it to the side fender bolt, however the lights started coming up slowly after a while, and not turning on immediately. This means bad ground. I pulled the fender bolt and sure enough it had already rusted over after just a few months.
So here is my solution - ground it to the bolt that fastens the weather seal to the frame, which is then covered by the weather seal itself.

I then sprayed the ground wire silver to help minimize the visible wire. You can now only see this single wire for the headlights when all body panels are back on.

Sheathed the wire where it passes through the bottom of the light bucket, the only spot where the wire really moves. There's enough extra wire to allow for plenty of range of motion.

The headlight bucket actually has a wire tie-down that runs down the side, as if it were made for the harness to drop down through the light instead of back over the body frame into the engine bay:
In my first install of the harness I grounded it to the side fender bolt, however the lights started coming up slowly after a while, and not turning on immediately. This means bad ground. I pulled the fender bolt and sure enough it had already rusted over after just a few months.
So here is my solution - ground it to the bolt that fastens the weather seal to the frame, which is then covered by the weather seal itself.
I then sprayed the ground wire silver to help minimize the visible wire. You can now only see this single wire for the headlights when all body panels are back on.
Sheathed the wire where it passes through the bottom of the light bucket, the only spot where the wire really moves. There's enough extra wire to allow for plenty of range of motion.
Thread Starter
Joined: Jul 2002
Posts: 3,219
Likes: 8
From: Washington State
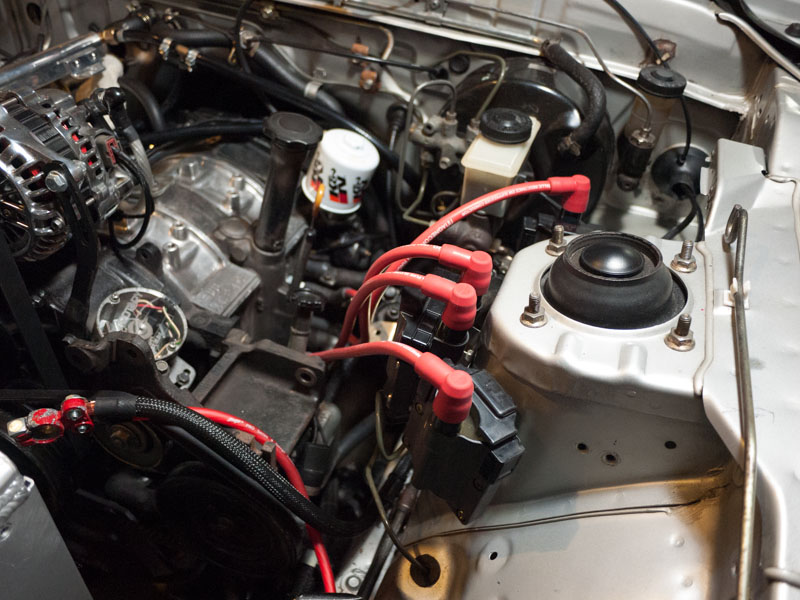
ignition coil brackets
Today i built some ignition coil brackets and fitted them up.
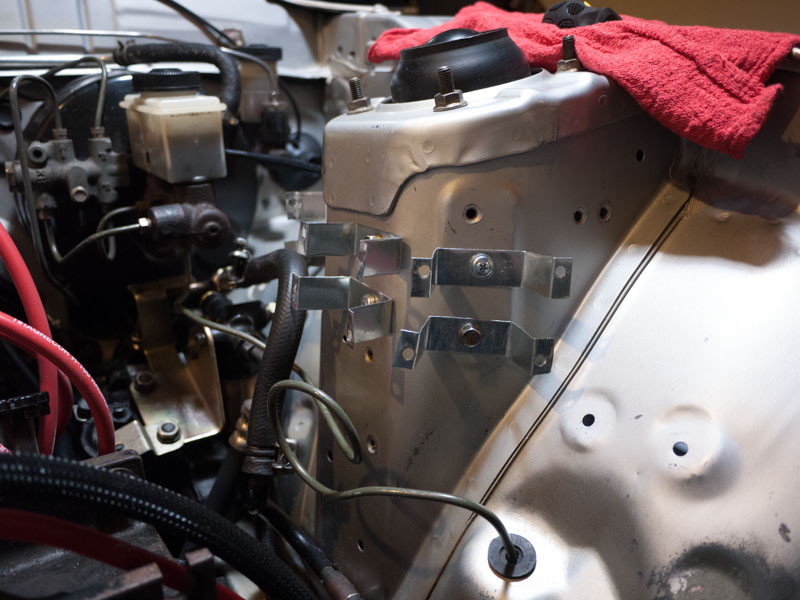
The bracket material is too thin and they wobble - absolutely will not suffice. They are also a little higher than I had wanted, and are stretching the wires a bit taught. For a test fit not bad, gives me a good idea, and I have some basic props to take to a fabricator and explain what I need.

The bracket material is too thin and they wobble - absolutely will not suffice. They are also a little higher than I had wanted, and are stretching the wires a bit taught. For a test fit not bad, gives me a good idea, and I have some basic props to take to a fabricator and explain what I need.
Thread Starter
Joined: Jul 2002
Posts: 3,219
Likes: 8
From: Washington State
Back in the game
Had to take a break for a minute, finances, work, life. It's frustrating leaving a project like this in a 2/3's done state!
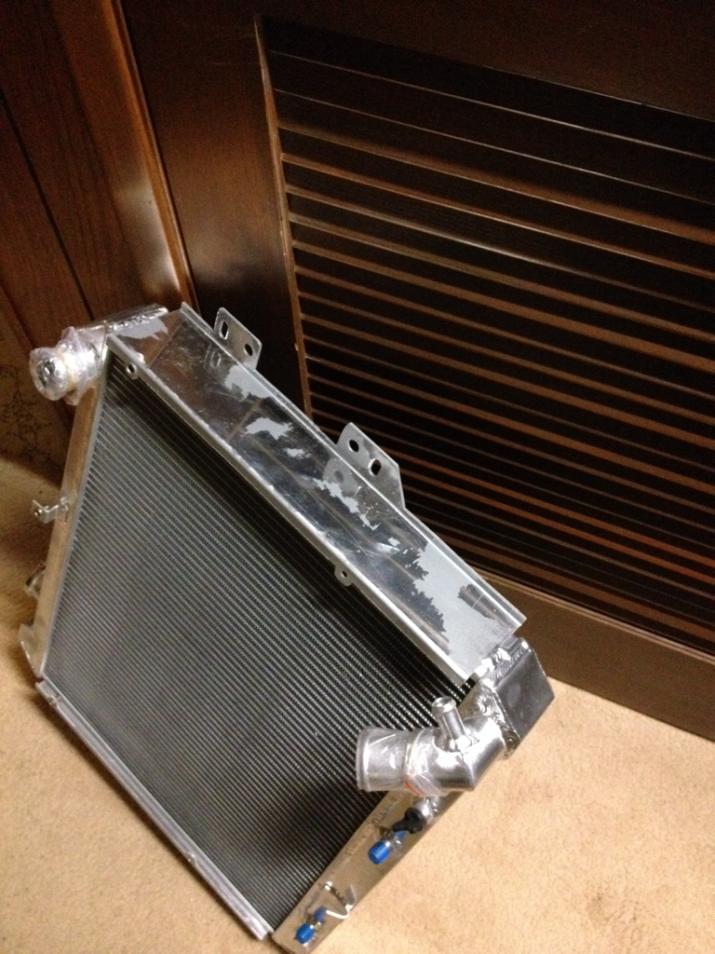
Yesterday I got my new ebay special radiator in - this one actually is the right size! wow! I was getting ready to do some custom paint on it before bolting it in, and when I was masking it in, the masking tape pulled off the chintzy spray that they put on from the factory. Its like chrome polished aluminum underneath - why the hell would they cover it up with a crappy rattle can job!? So, I've got some cleaning to do before that goes in.
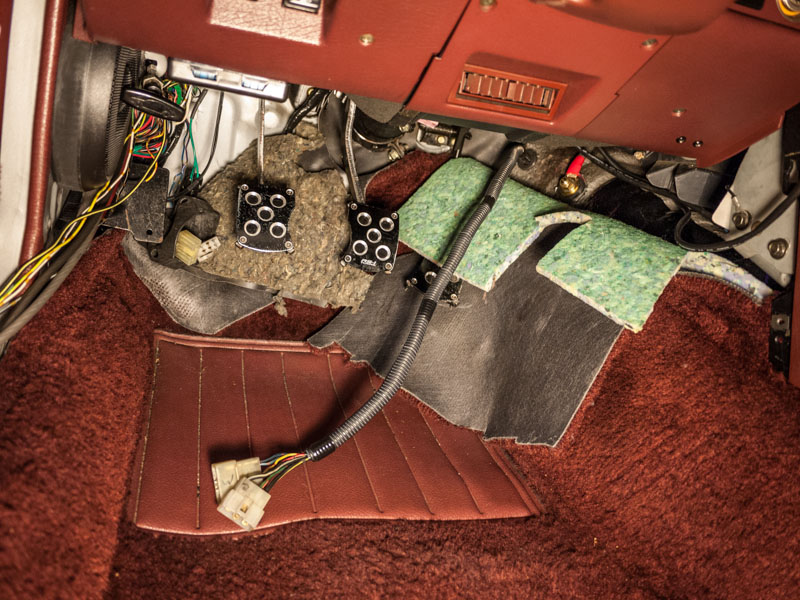
Only 2 more cuts before the entirety of the wire tuck is done! Last night I finished up the driver's side tuck down to the transmission tunnel harness. This includes factory water temp gauge, oil pressure gauge, starter motor stuff, and transmission stuff.
The only wires I ended up having to extend for this tuck was the water temp sensor and oil pressure sensor wires.
1" hole for the harness. Here you can see the battery positive passthrough as well as fusible links attached to the steering column.
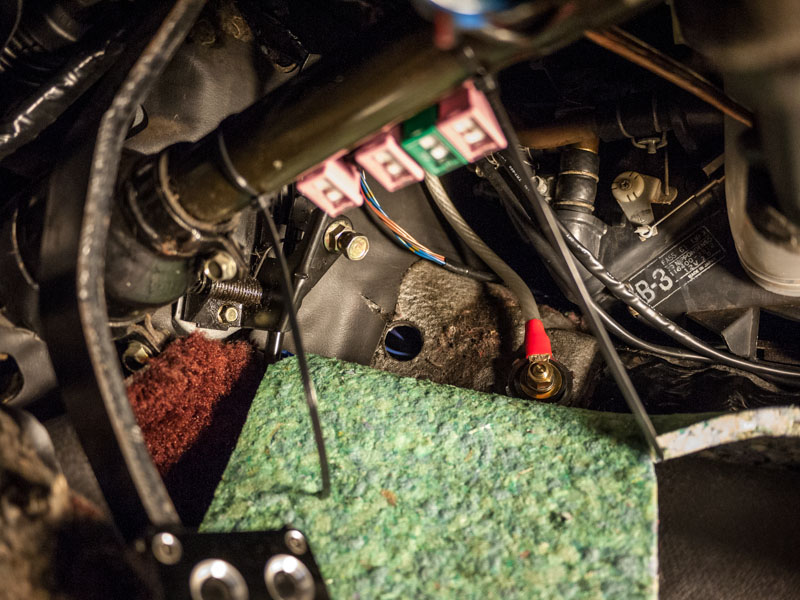
I de-pinned the two harness plugs and pulled the wires through, and as it turns out, the entire harness is long enough to route above the steering column and over to the rest of the tucked harness (visible above the clutch pedal).
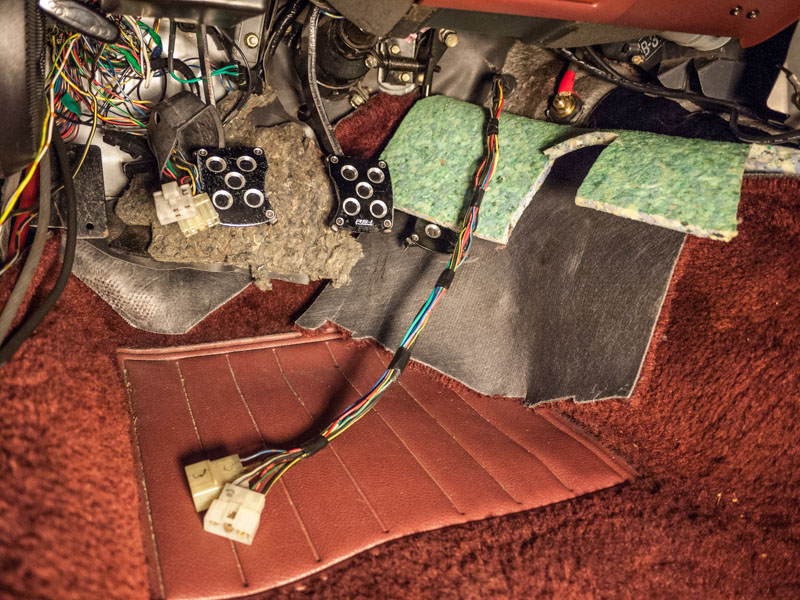
All tidied up and ready to route:
Yesterday I got my new ebay special radiator in - this one actually is the right size! wow! I was getting ready to do some custom paint on it before bolting it in, and when I was masking it in, the masking tape pulled off the chintzy spray that they put on from the factory. Its like chrome polished aluminum underneath - why the hell would they cover it up with a crappy rattle can job!? So, I've got some cleaning to do before that goes in.
Only 2 more cuts before the entirety of the wire tuck is done! Last night I finished up the driver's side tuck down to the transmission tunnel harness. This includes factory water temp gauge, oil pressure gauge, starter motor stuff, and transmission stuff.
The only wires I ended up having to extend for this tuck was the water temp sensor and oil pressure sensor wires.
1" hole for the harness. Here you can see the battery positive passthrough as well as fusible links attached to the steering column.
I de-pinned the two harness plugs and pulled the wires through, and as it turns out, the entire harness is long enough to route above the steering column and over to the rest of the tucked harness (visible above the clutch pedal).
All tidied up and ready to route:


Thread Starter
Joined: Jul 2002
Posts: 3,219
Likes: 8
From: Washington State
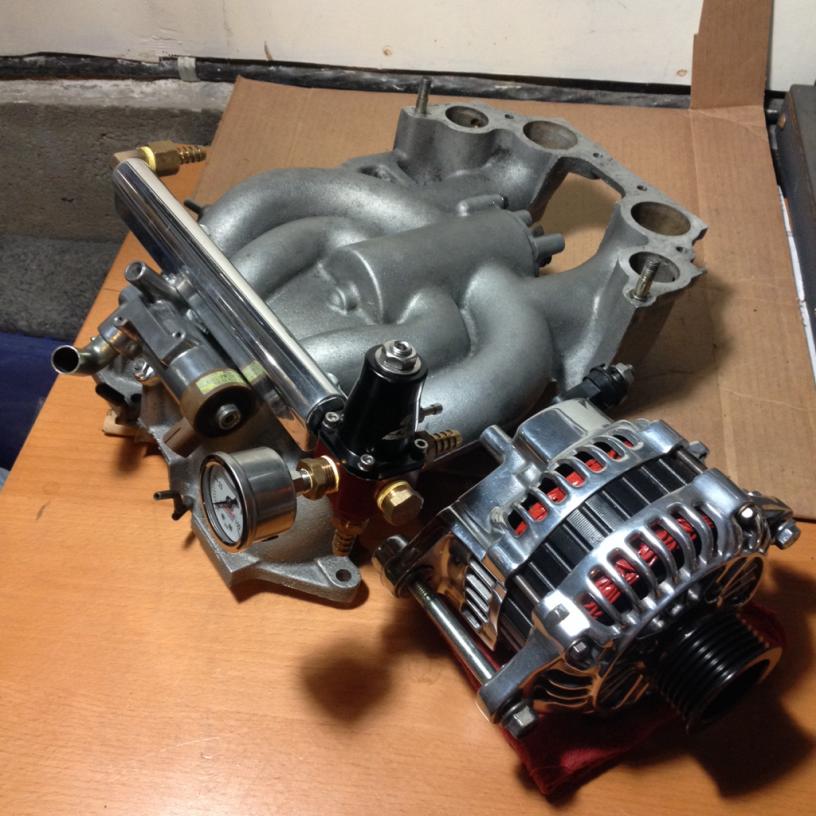
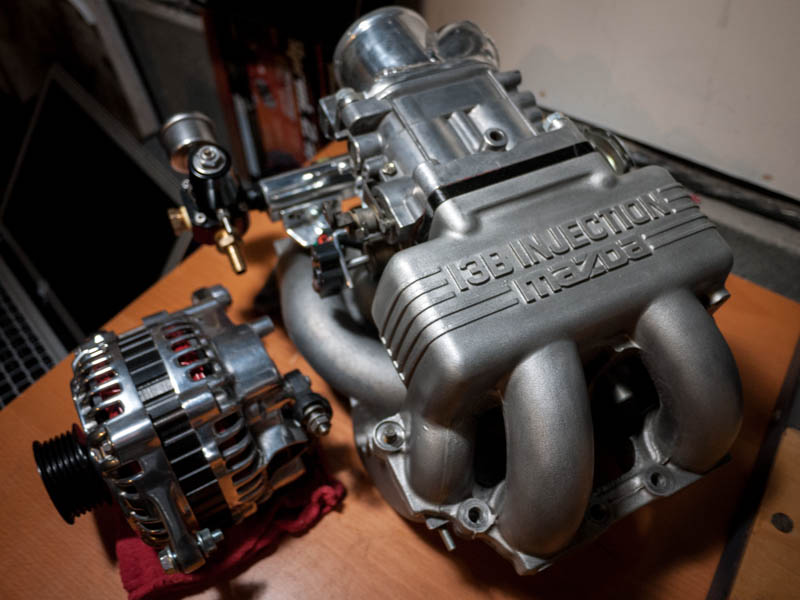
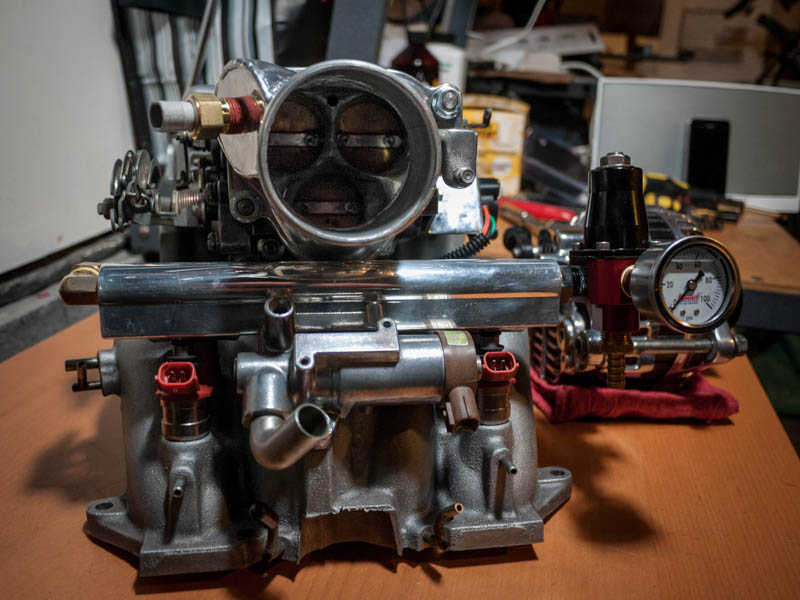
Intake manifold polished
Got the replacement intake manifold ready for wiring.
Brushed the dynamic chamber with brass brush and finished with WD-40. Totally knocked down the bright shiney effect of the stock casting, so now it matches the VDI and lower manifold much better. This was the exact effect I was going for, i'm so stoked!
I'm loving the raw aluminum look with the contrasting high polish.
Awesome! I just love it when old parts are made to look new again. I have to ask though, a light application of DW-40? I understand it will give it a nice protective layer, but wouldn't it be a magnet for dust? I wish there was a Teflon type coating we could put on our parts and simply wipe off any dirt/dust/grime that got on them...
Thread Starter
Joined: Jul 2002
Posts: 3,219
Likes: 8
From: Washington State
A slight magnet for dust, but the great thing about WD-40 is that by its nature (Water Dispersant formula 40) it doesn't let anything soak in. A quick spray and wipe with more WD and it's back to clean. At least that's the theory I read online.
Also, it will probably evaporate the instant I turn it on so maybe a moot point anyways!
Also, it will probably evaporate the instant I turn it on so maybe a moot point anyways!
Awesome! I just love it when old parts are made to look new again. I have to ask though, a light application of DW-40? I understand it will give it a nice protective layer, but wouldn't it be a magnet for dust? I wish there was a Teflon type coating we could put on our parts and simply wipe off any dirt/dust/grime that got on them...
Thread Starter
Joined: Jul 2002
Posts: 3,219
Likes: 8
From: Washington State
Progress and setbacks
Have made some good progress - got the silver water temp gauge installed and loom routed, got the megasquirt, relays, and fuse block mounted.
I've ordered 3 ebay aluminum specials. None have worked out.
1st one - they sent me a shorter 79-82 radiator - which i didnt mount right away and went way past the return deadline.
2nd one - waited a week and heard nothing from them, turned out they were out of stock and failed to let me know.
3rd one - "3 row GSL-SE radiator" came with shitty rattle can paint job that was peeling off, and worse off the lower hose tube points directly at the engine mount. No way you could possibly fit a hose on there.
As mentioned previously - I can't believe they get away with selling these as "direct-fit" or "replacements". In no way shape or form do these work! I've wasted months of my time and hundreds of dollars figuring this out - please dont make my mistakes over again!
I just ordered an OEM replacement Spectra Premium from RockAuto. I think I would prefer this anyways, as I'm going for the could-be-stock(kindaish) look.

Junior Member
Joined: May 2014
Posts: 36
Likes: 1
From: Georgia USA
We're looking into this one from Champion Radiators... You didn't by chance gone from them? They at one time had a ebay? Such a deal for the 3 row, and I've seen good review of Champion Cooling?
3 Row 83-85 FB RX-7 Radiator
3 Row 83-85 FB RX-7 Radiator
Thread Starter
Joined: Jul 2002
Posts: 3,219
Likes: 8
From: Washington State
We're looking into this one from Champion Radiators... You didn't by chance gone from them? They at one time had a ebay? Such a deal for the 3 row, and I've seen good review of Champion Cooling? 3 Row 83-85 FB RX-7 Radiator
They swapped it out for a two row radiator which worked fine
Thread Starter
Joined: Jul 2002
Posts: 3,219
Likes: 8
From: Washington State
So many updates! MS3x installed and street tuned, OEM radiator replaced, engine rebuilt with proper s5 internals, engine bay wire tucked shaved and repainted, new tires and coilover suspension installed, several car show trophies acquired
Transmission just started to go out so she's back in the garage for a few weeks.
Lots to catch up on, so I'll just post a few teaser pics of where she's at now
Transmission just started to go out so she's back in the garage for a few weeks.
Lots to catch up on, so I'll just post a few teaser pics of where she's at now